
Connecting Your External Calendar
Overview
Follow these steps to connect your external calendar to your CoachVantage account:
- Click Your Profile in the top-right corner of your account.
- Select My Settings.
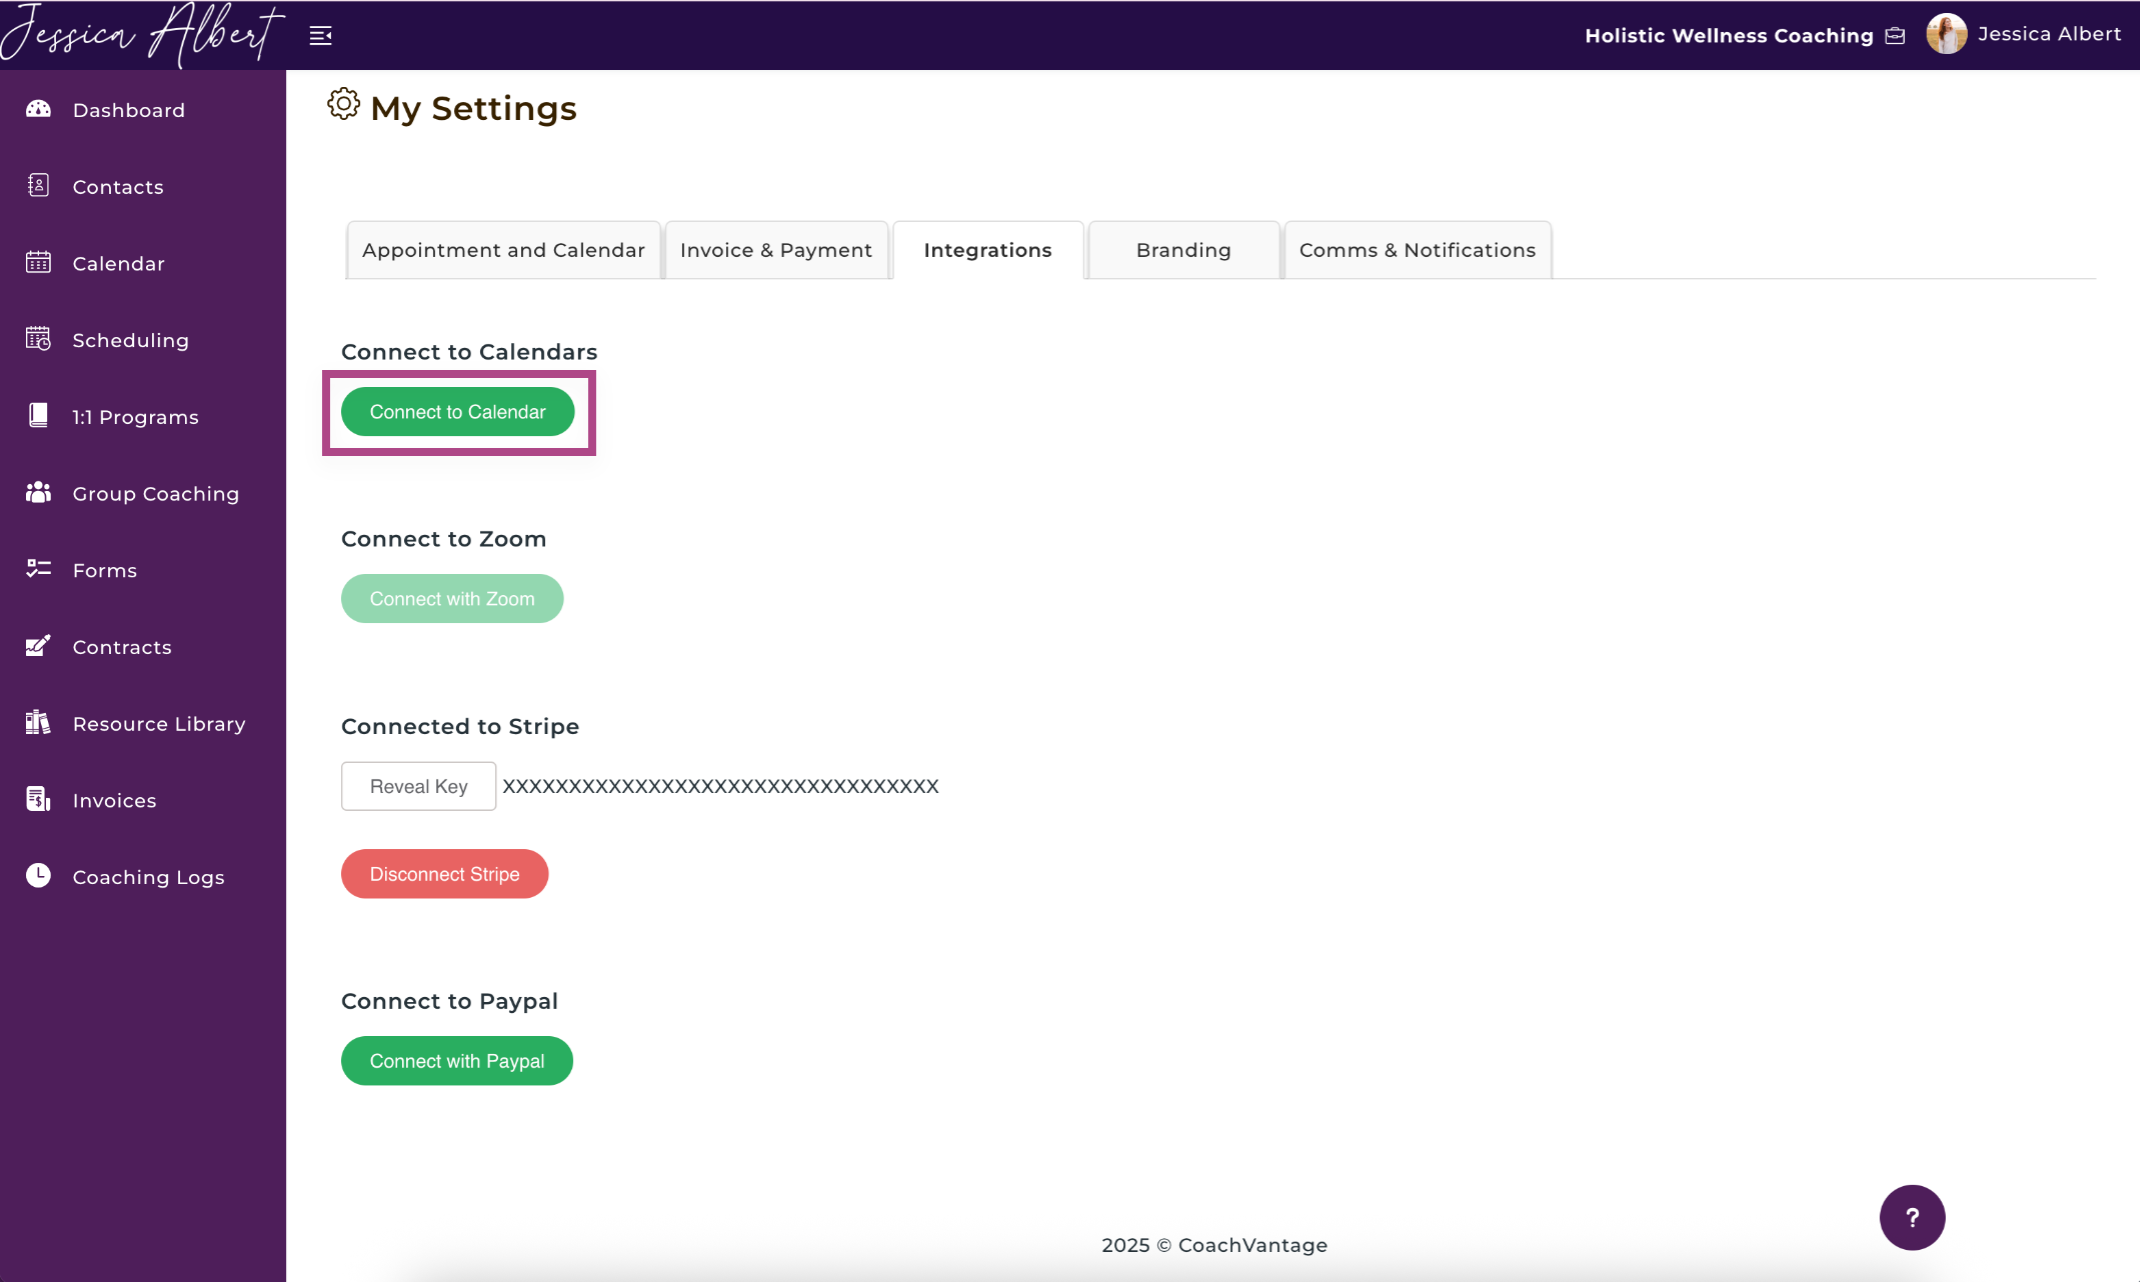
- Click the Integrations tab.
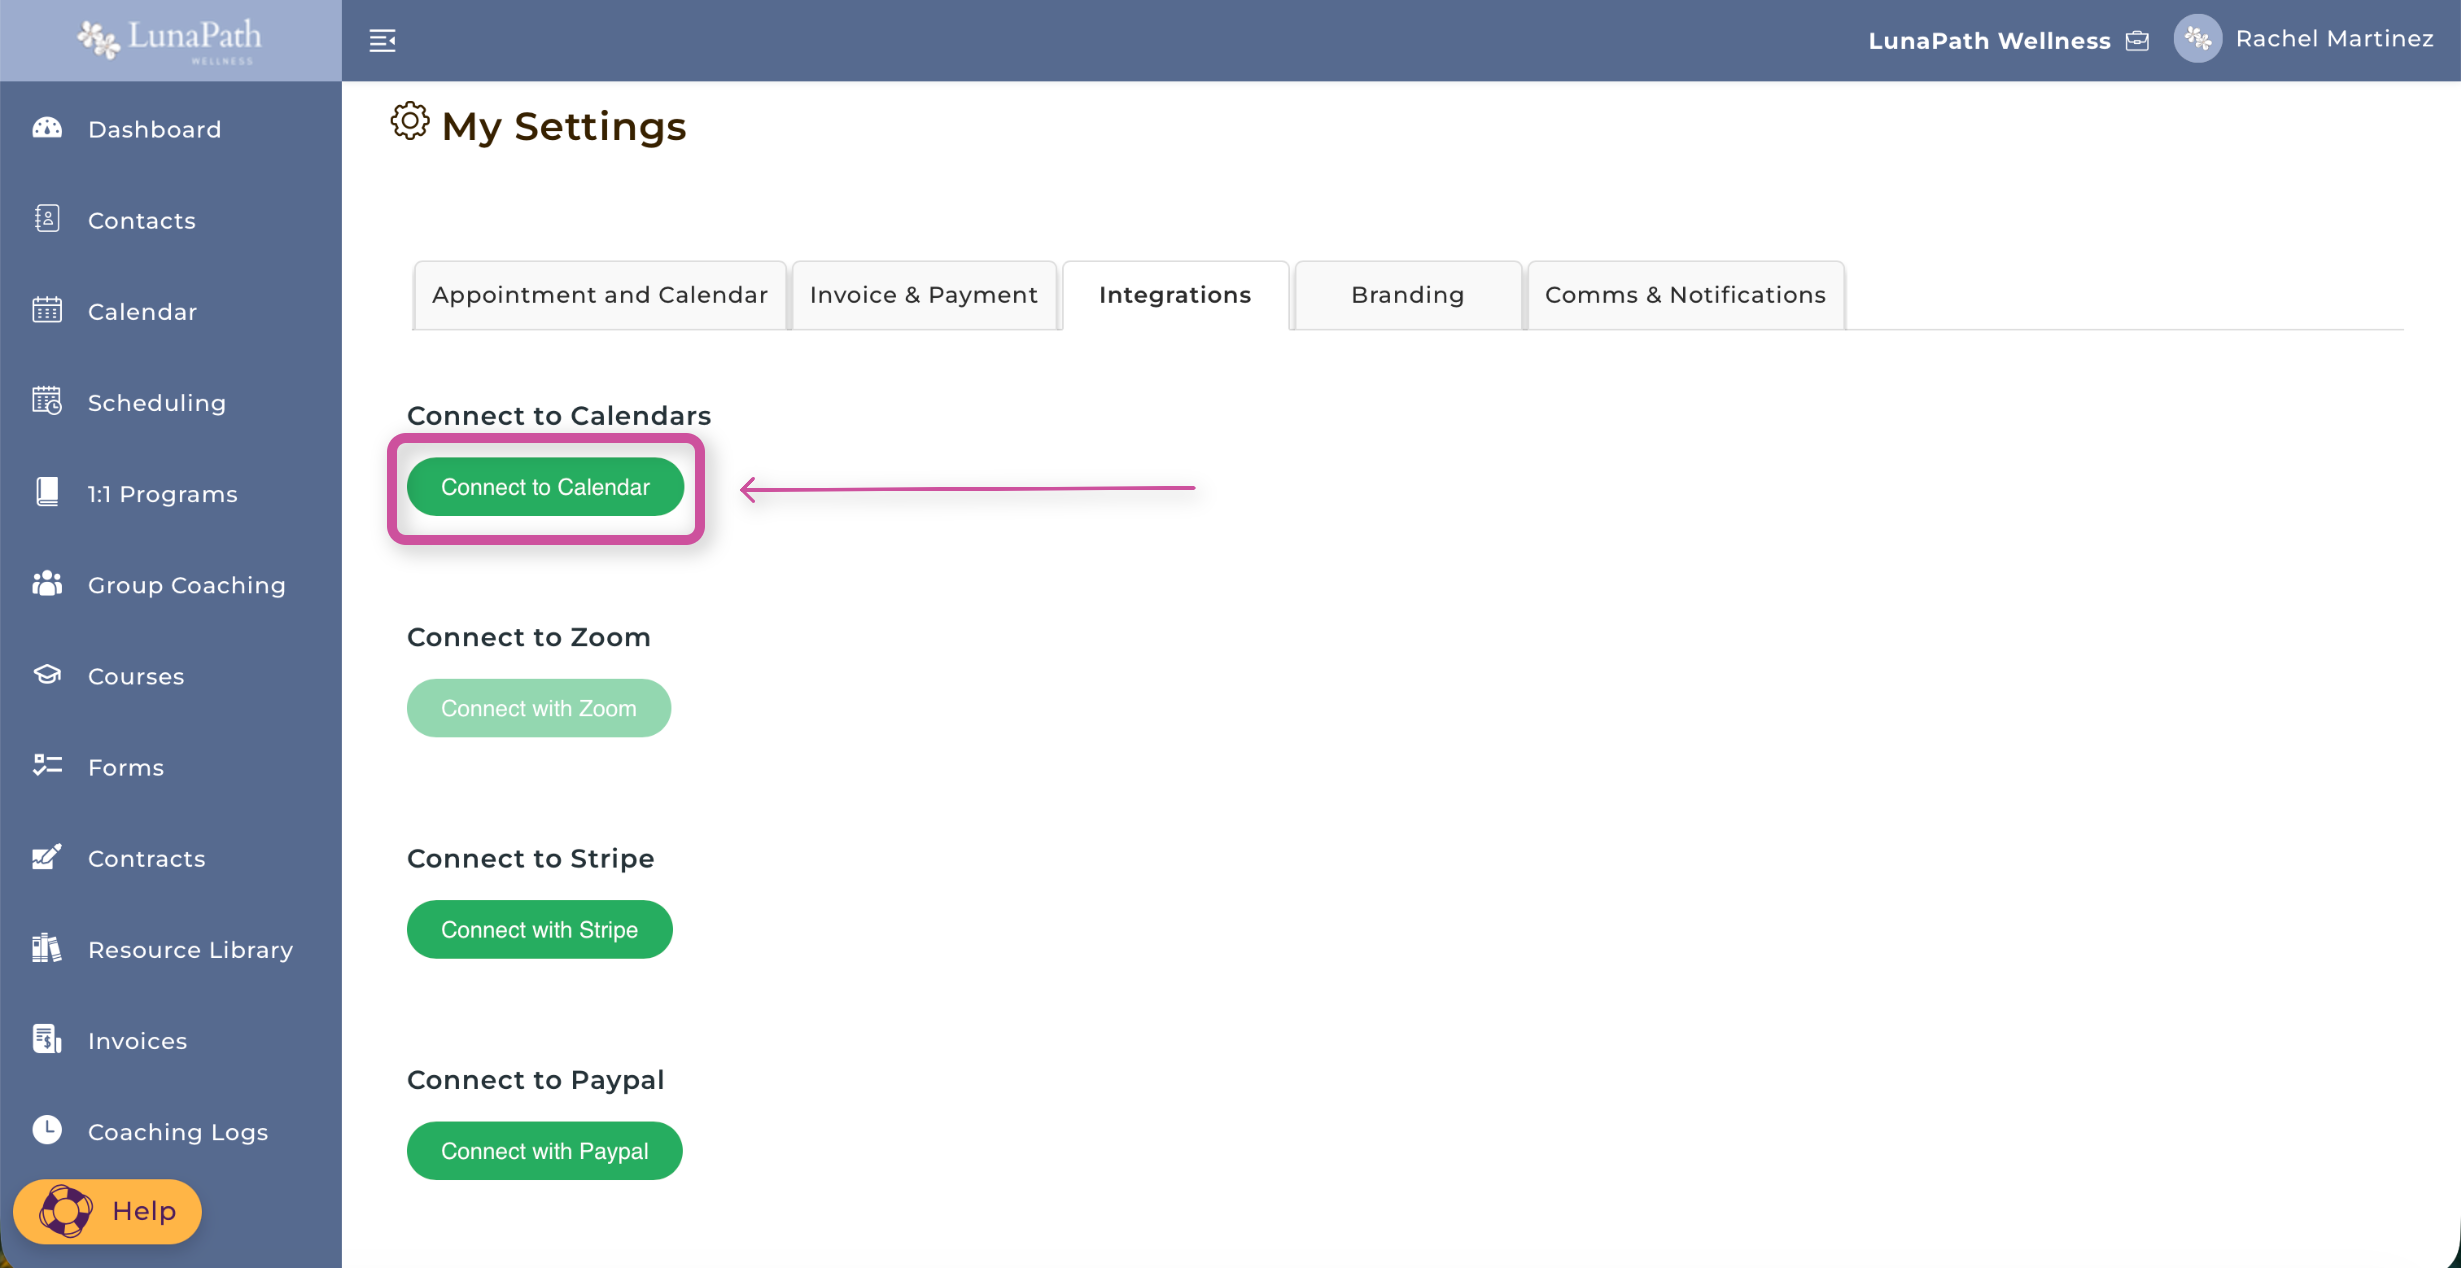
- Scroll to the Connect to Calendar section.
- Click Connect to Calendar and choose your external calendar provider.
Once connected:
- Appointments created in CoachVantage will sync to your external calendar.
- Appointments created in your external calendar will sync to CoachVantage.
- Existing external events will be pulled into CoachVantage to help prevent double-bookings.
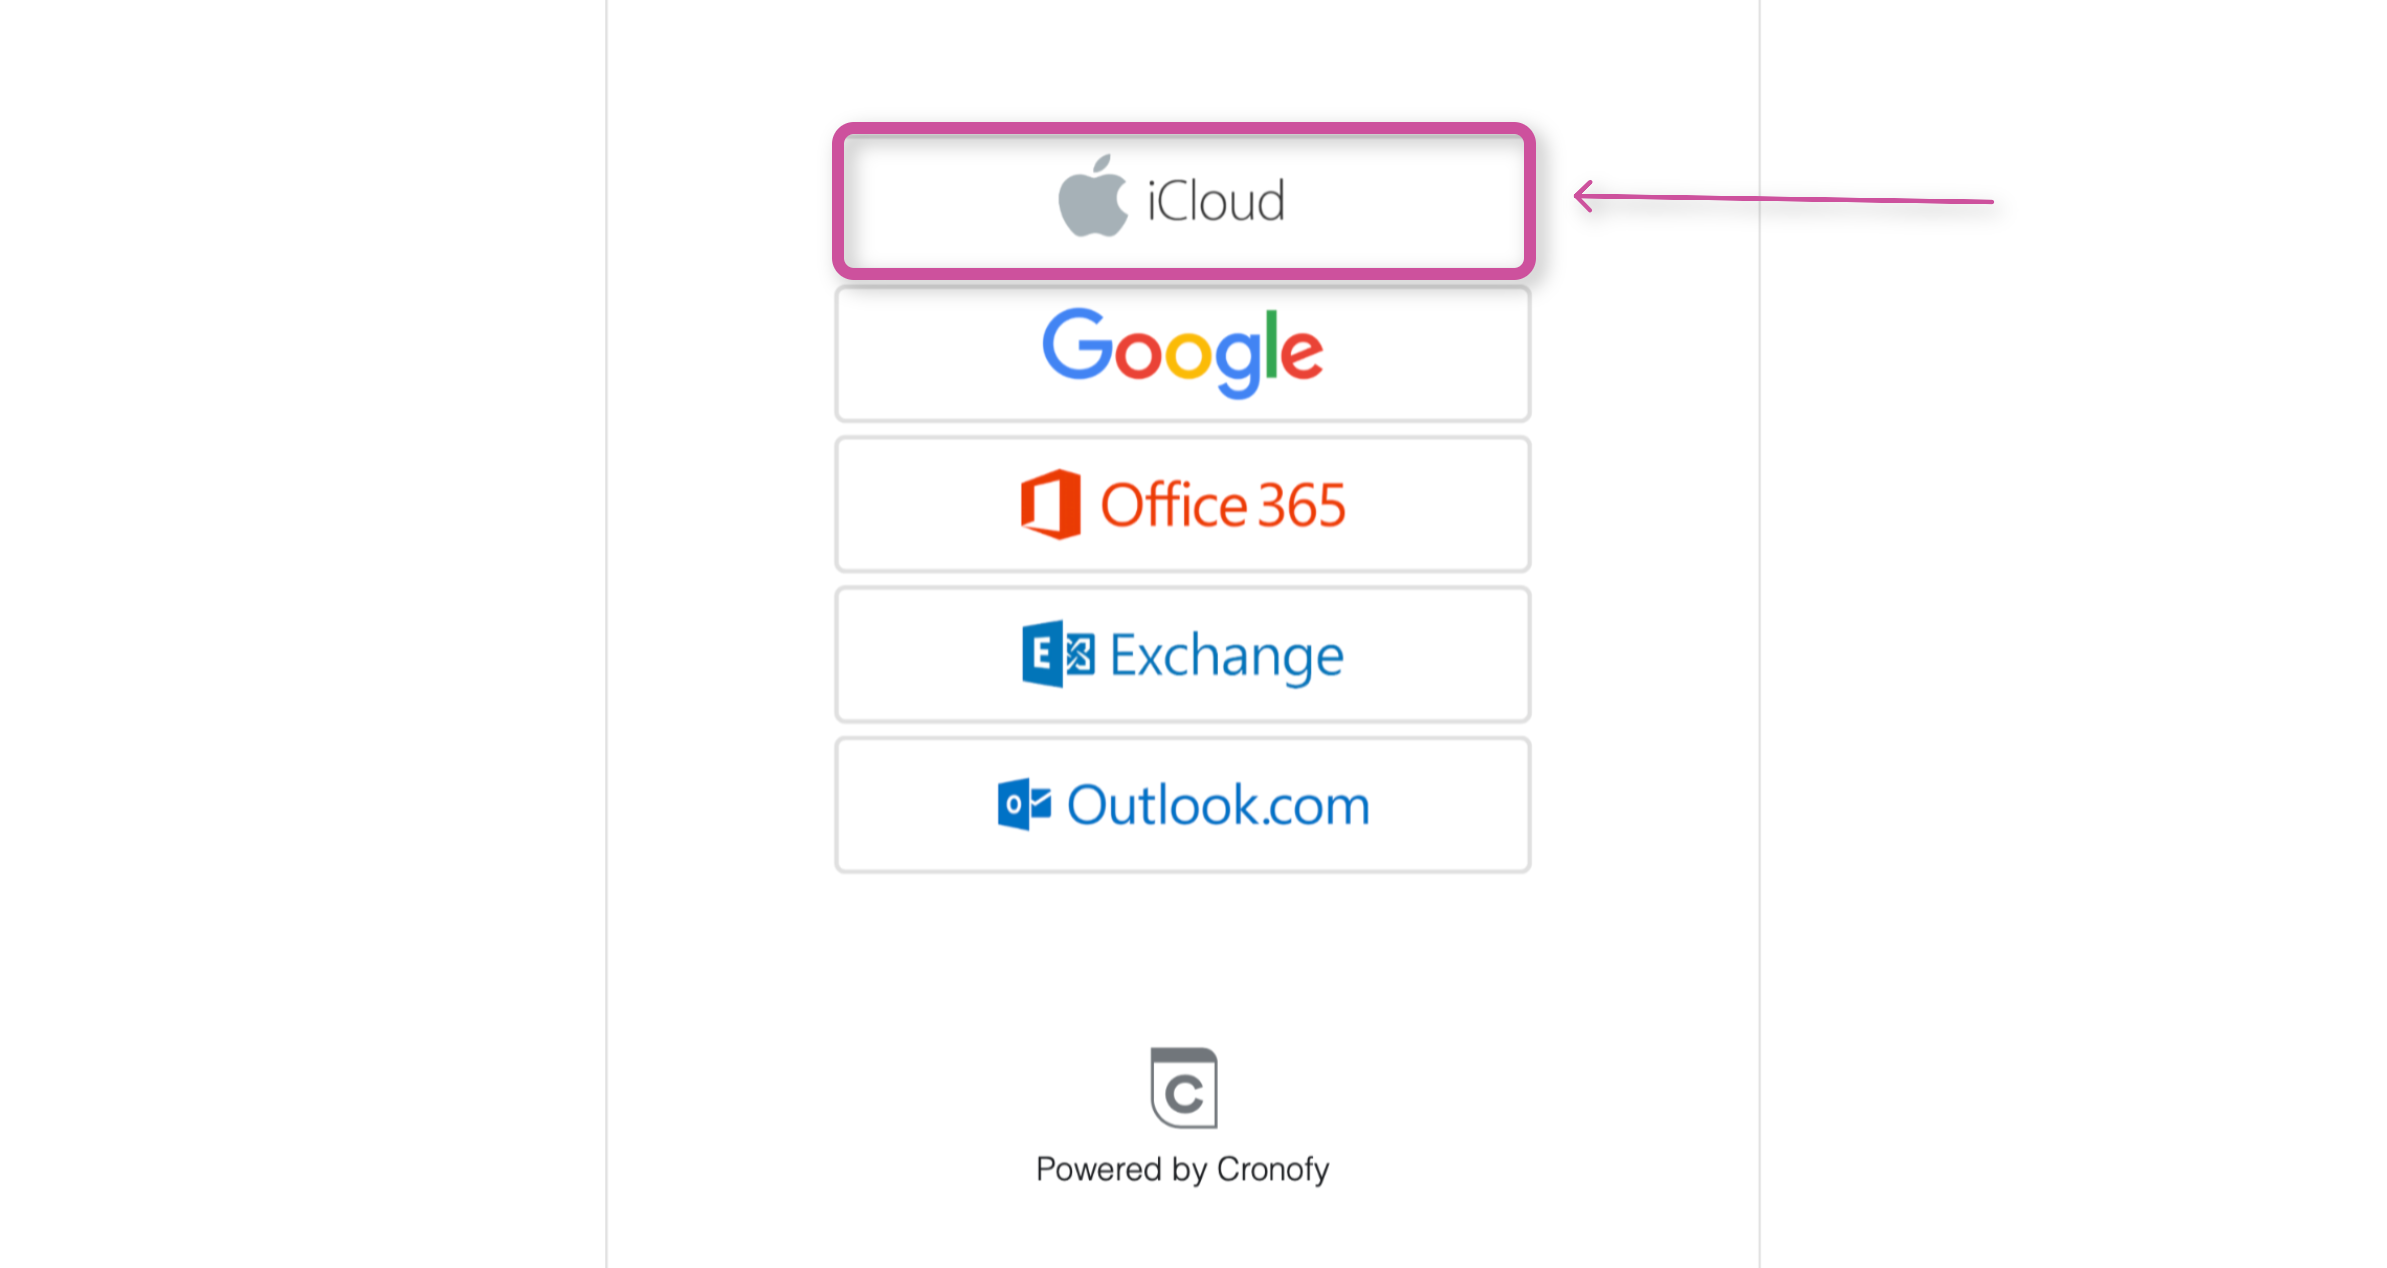
Supported calendars include:
- iCloud
- Google Calendar
- Office 365
- Microsoft Exchange
- Outlook.com
Note: To reschedule or cancel a CoachVantage appointment, make the change in CoachVantage. This cannot be done from your external calendar.
Steps to Sync Your Calendar 📅
1. Click the green Connect to Calendar button.
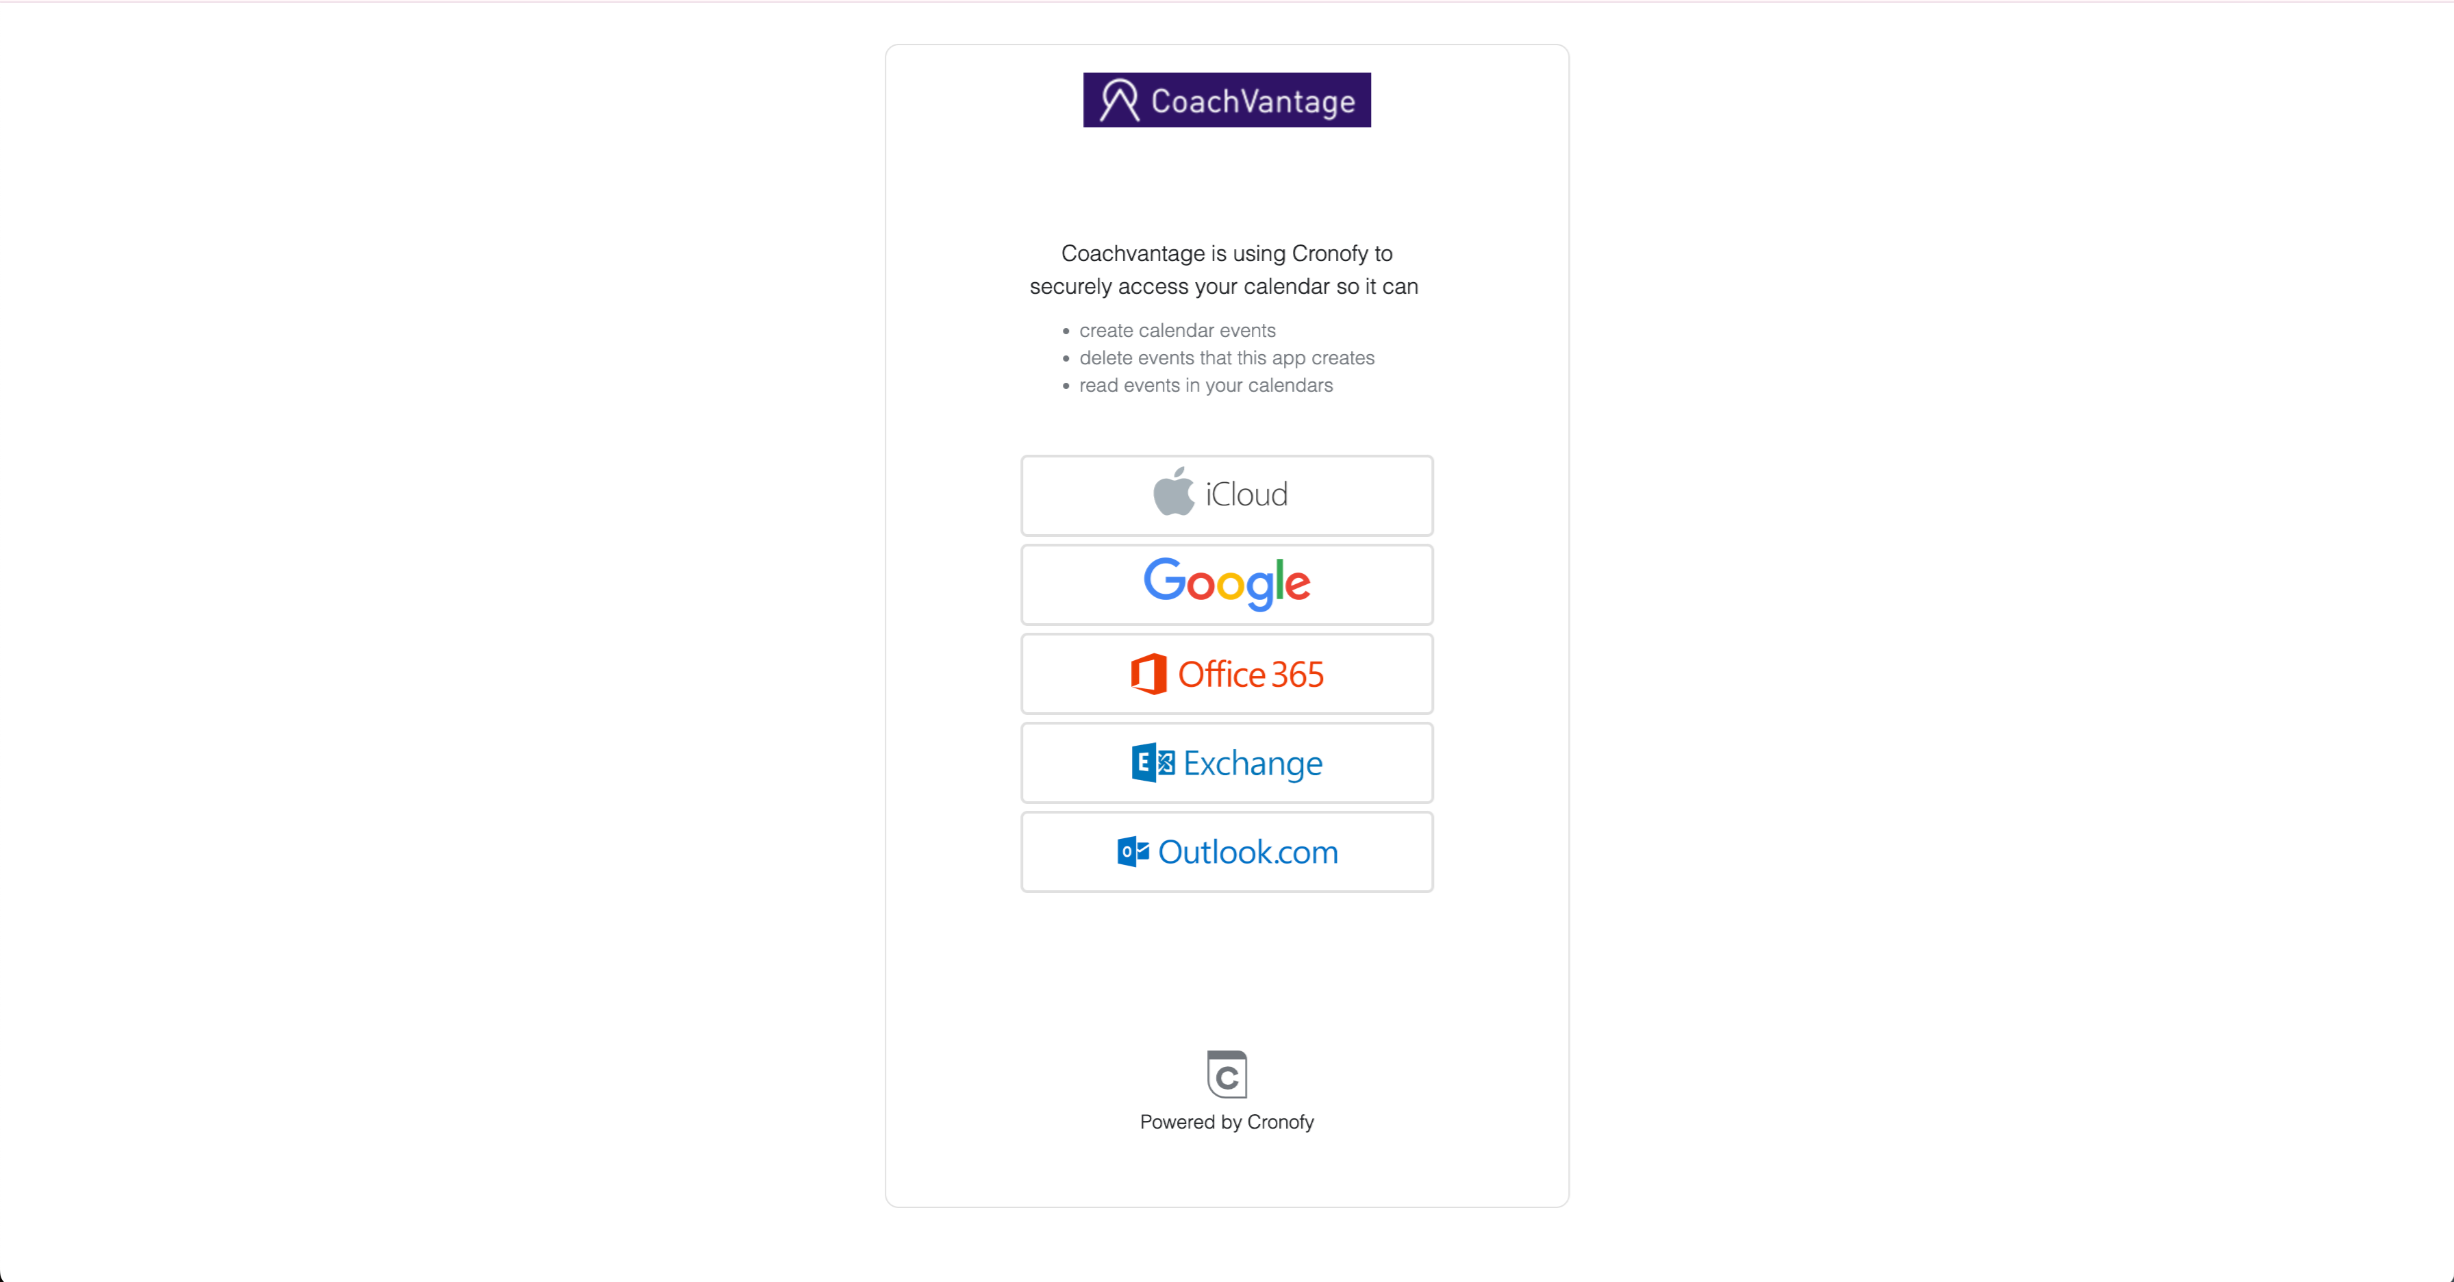
2. Select the external Calendar application that you would like to sync to. Supported calendars are iCloud, Google, Office 365, Exchange and Outlook.com.
Note: If you are using iCloud for your external calendar, please follow the steps outlined below.
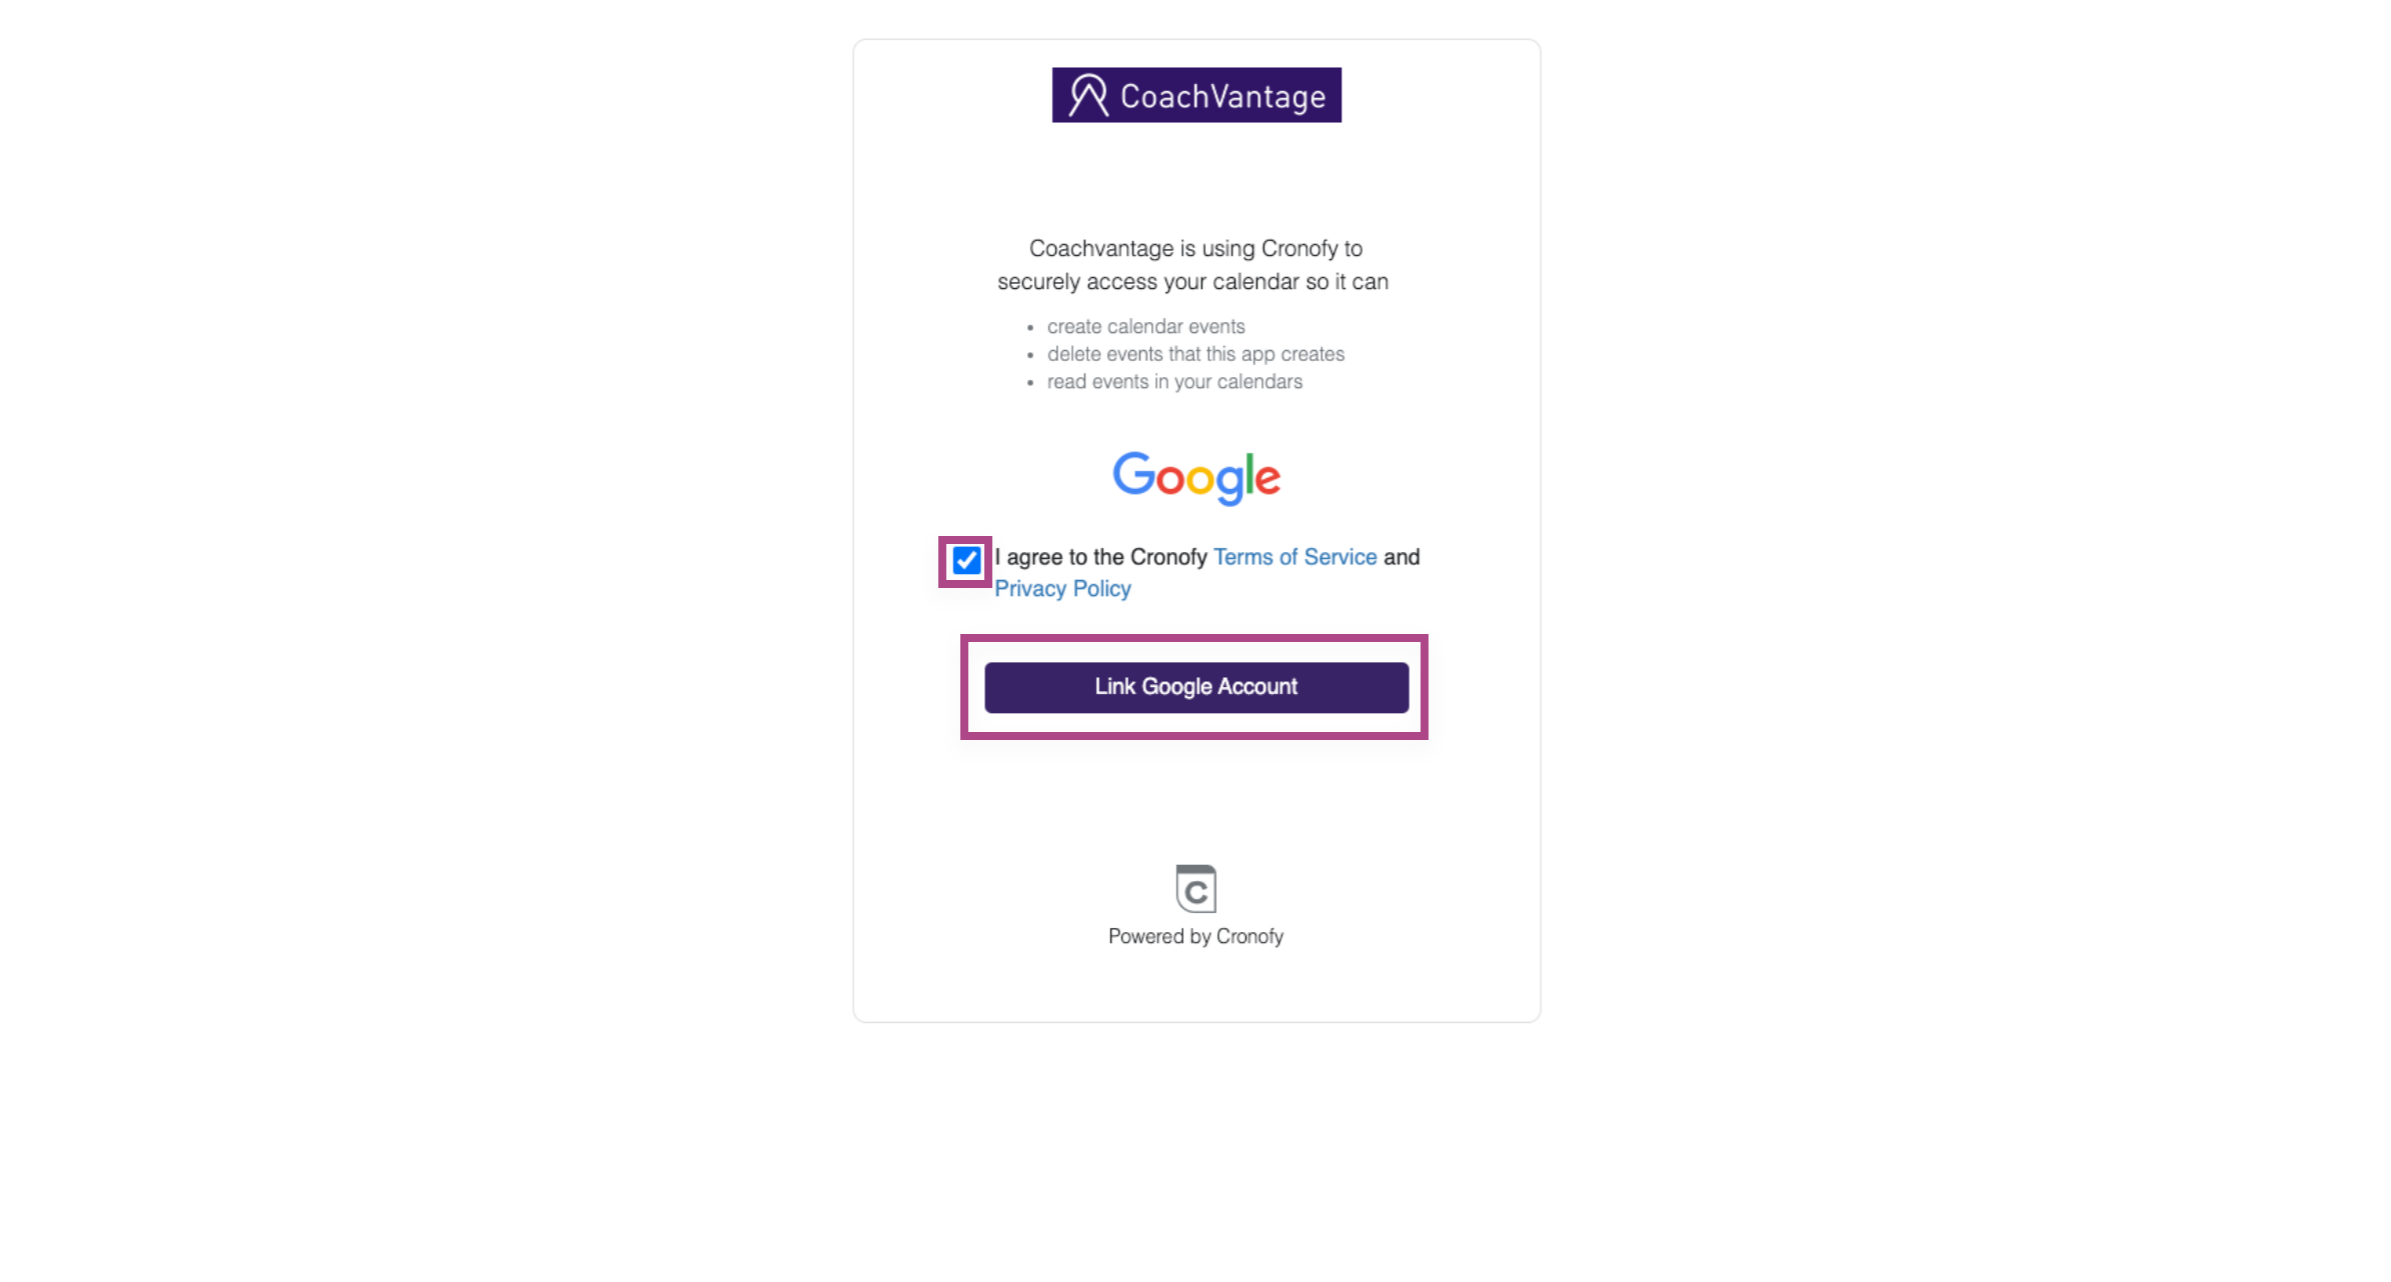
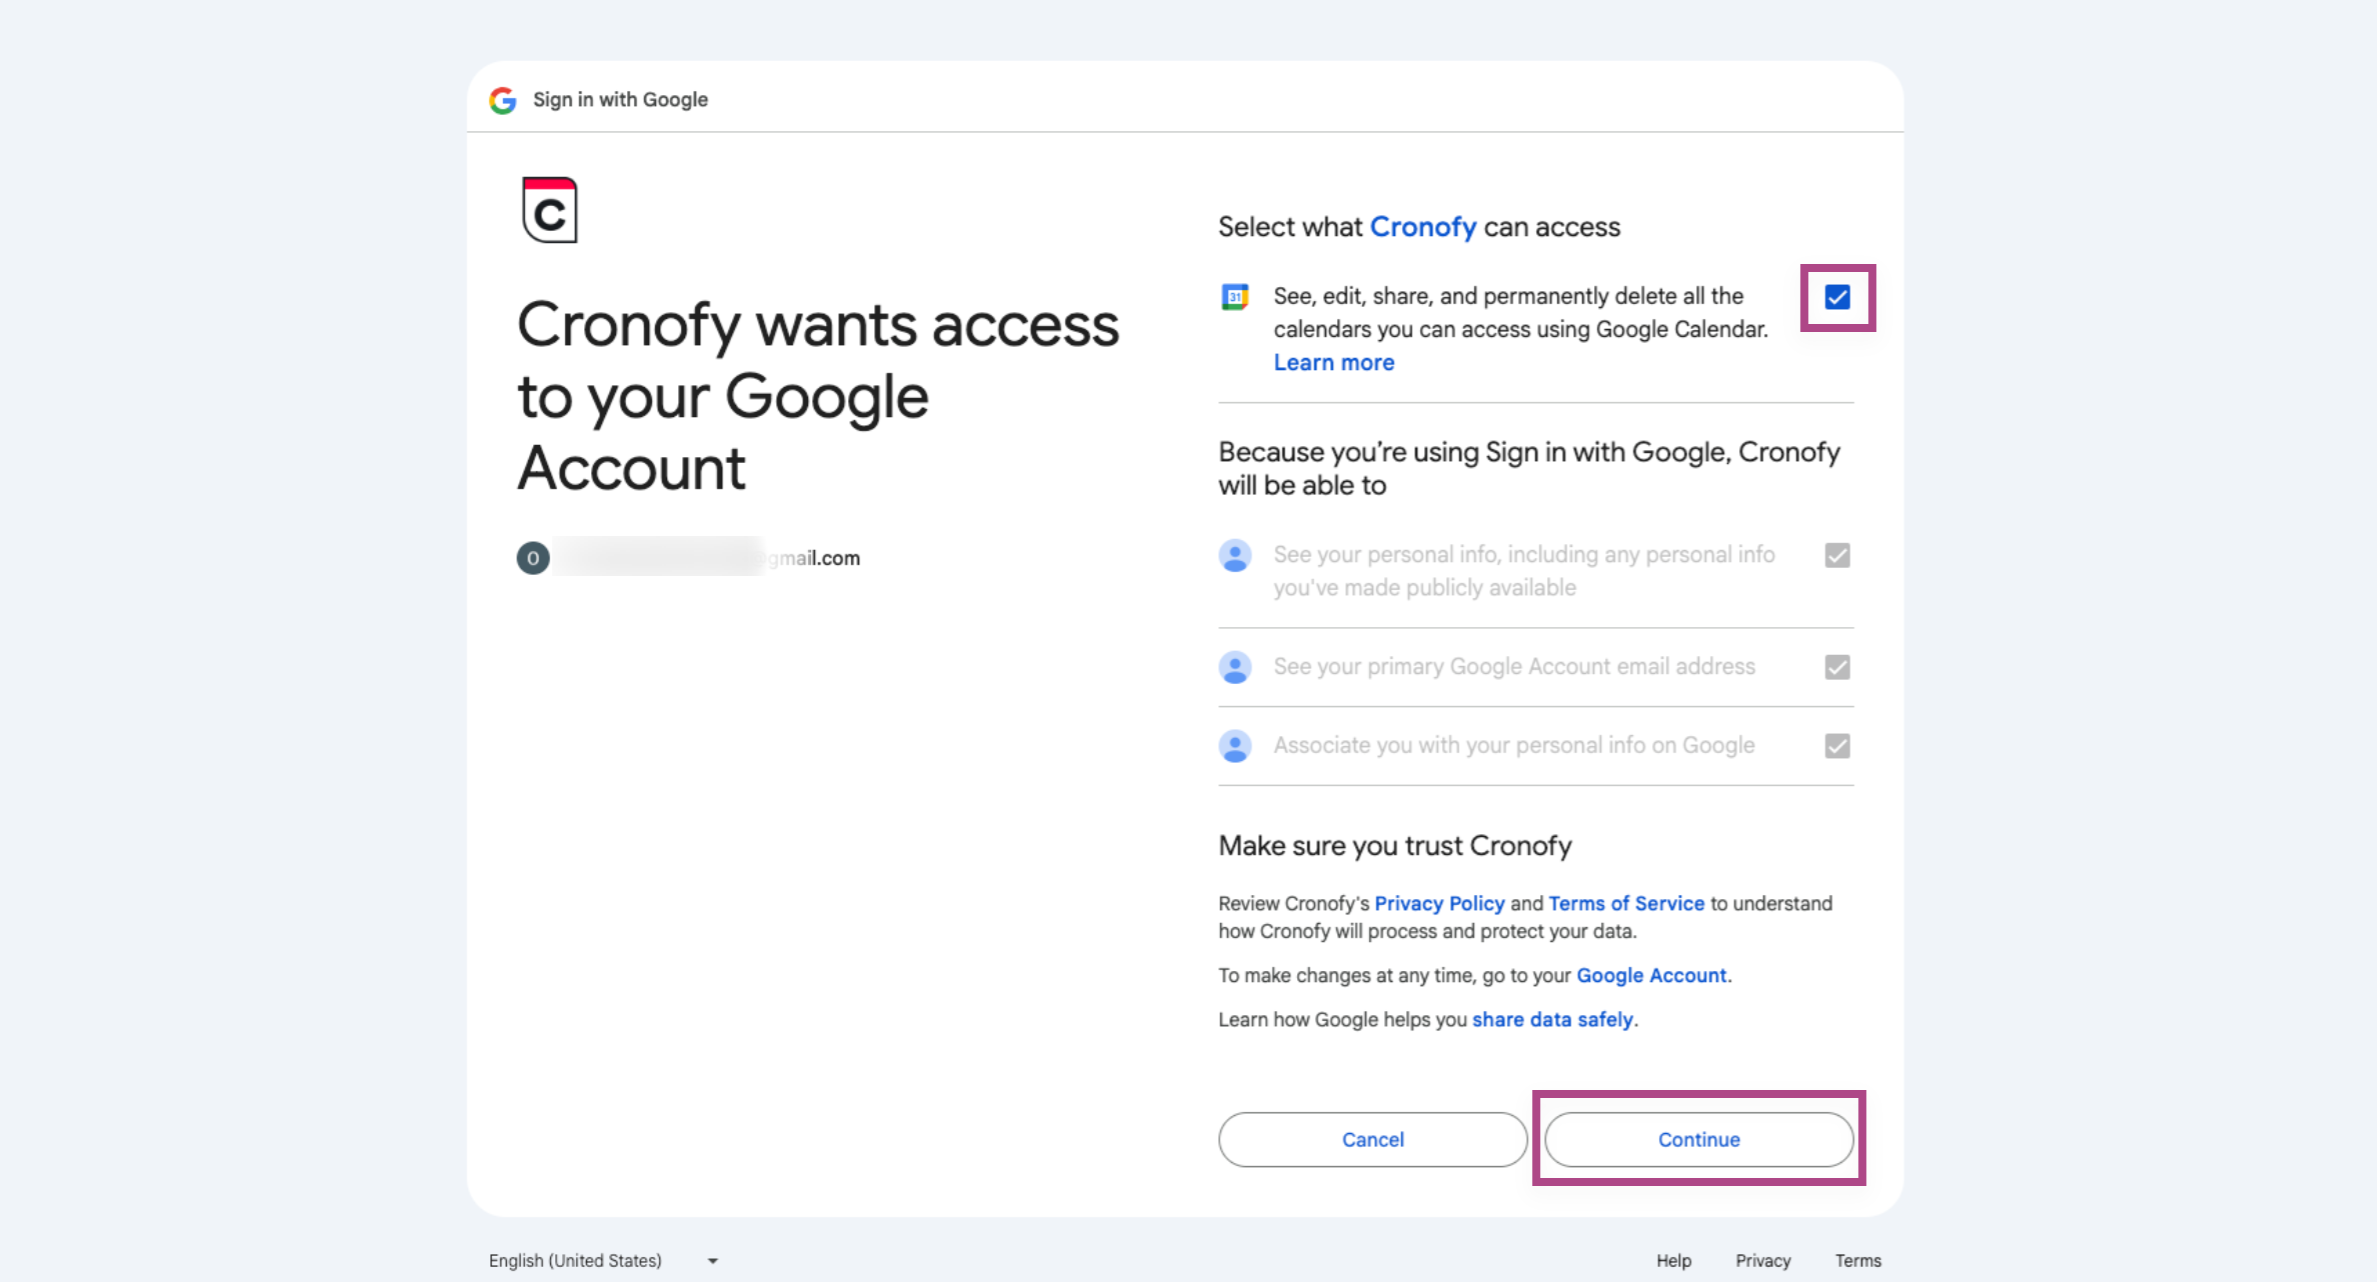
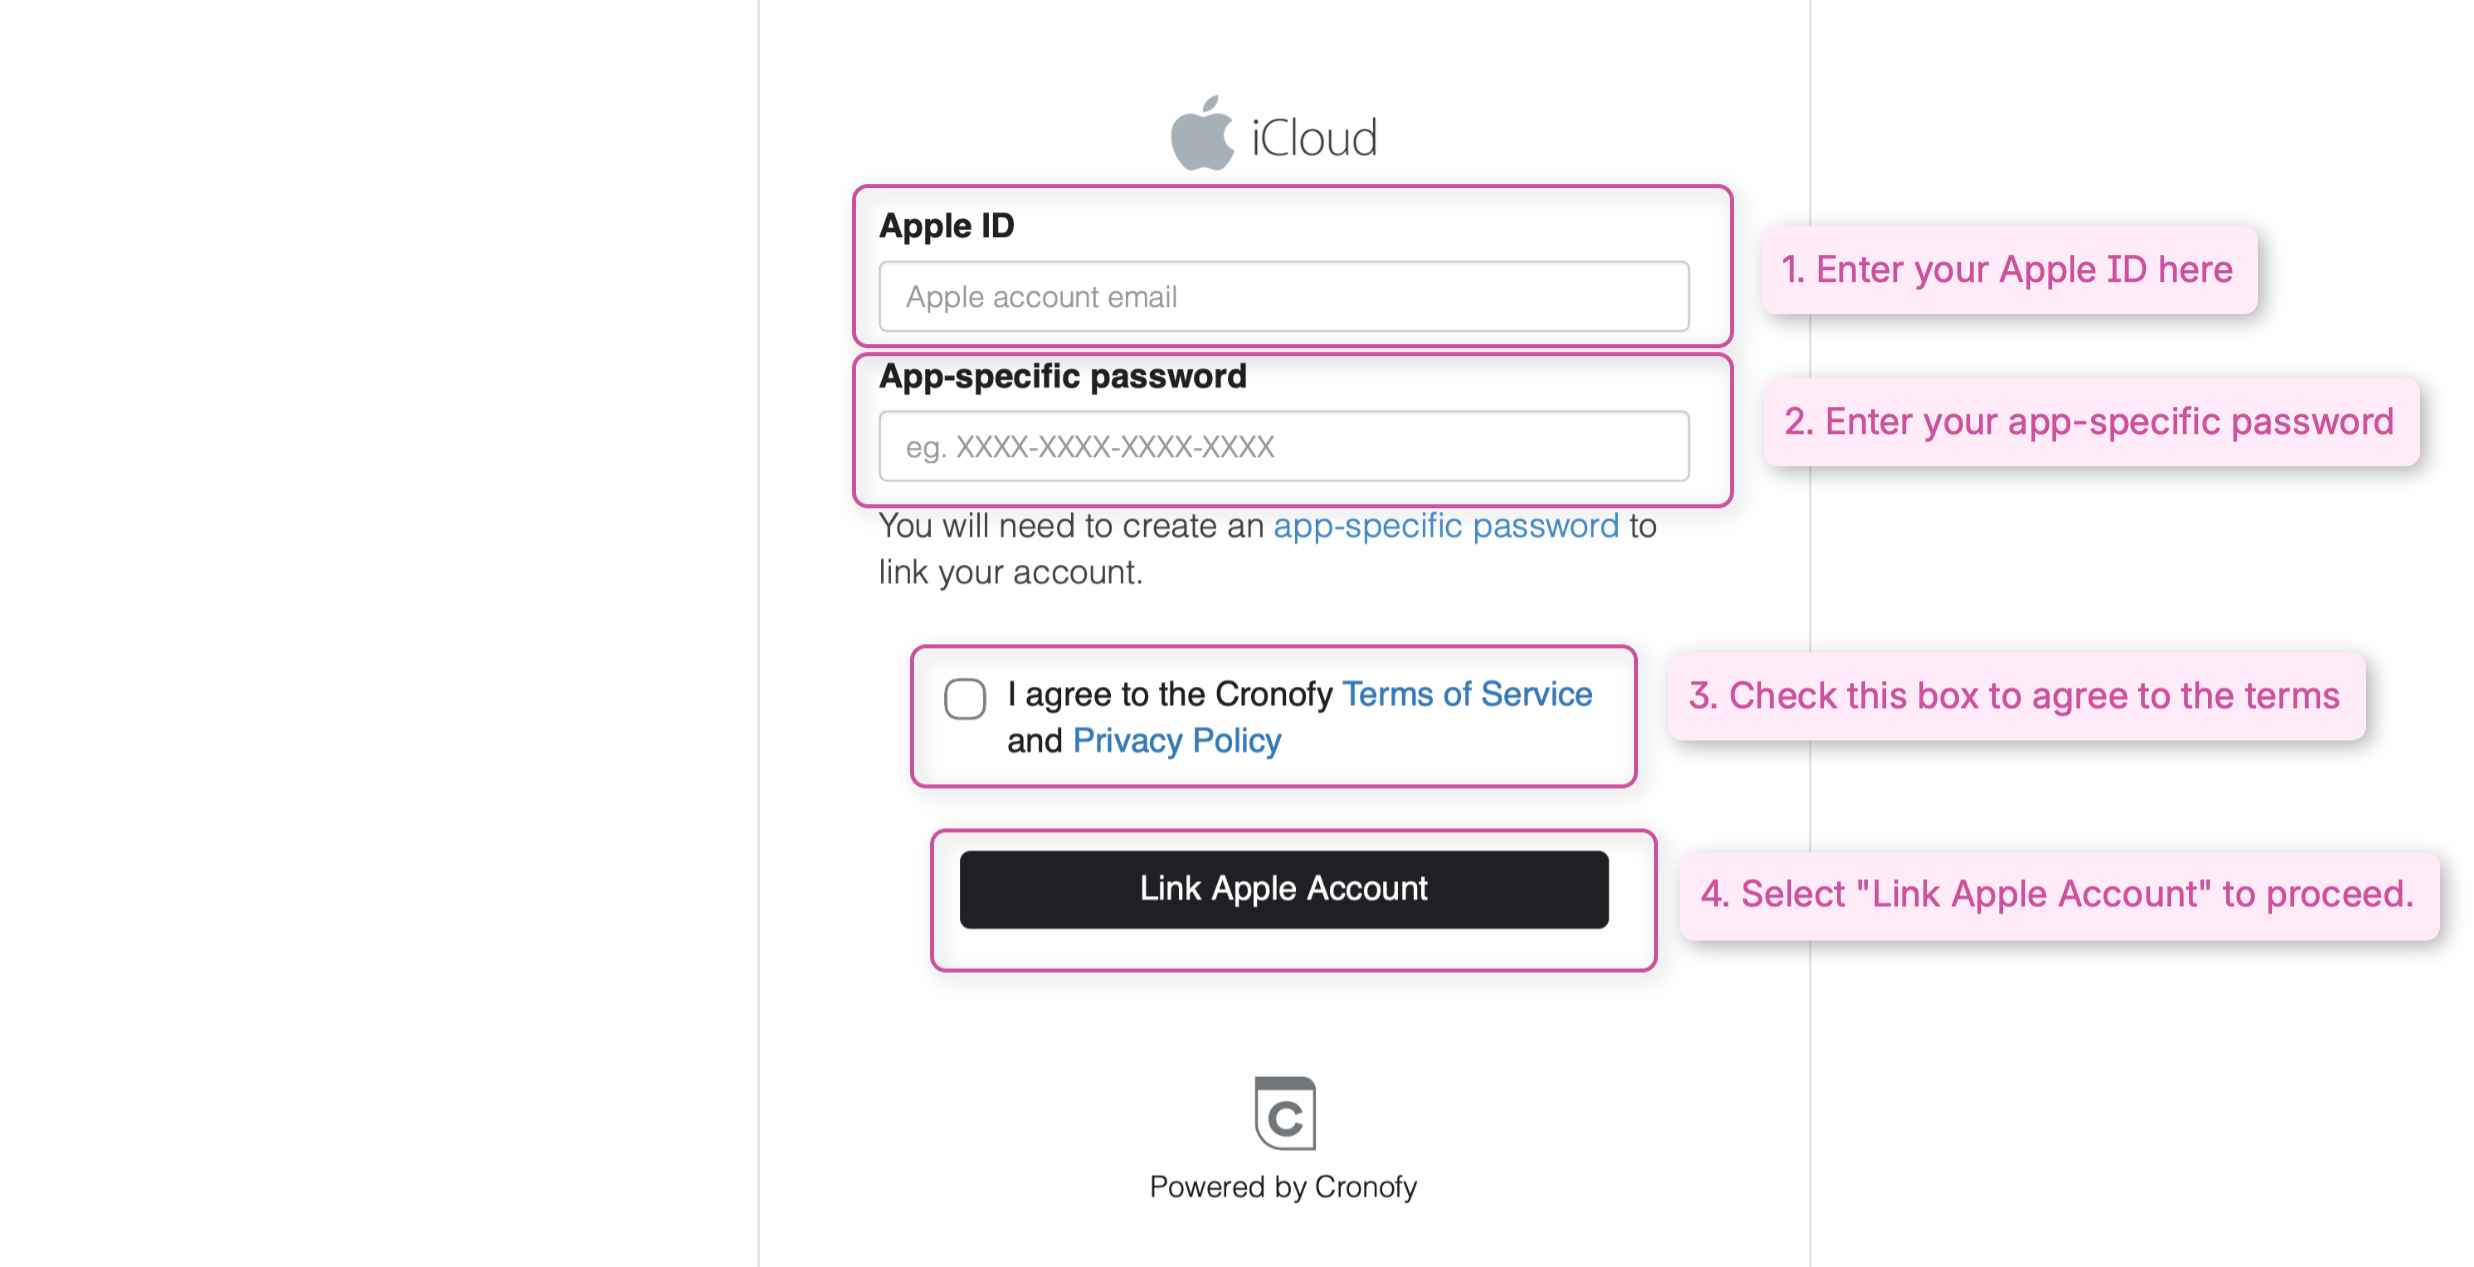
3. Enter your username and password for your external calendar.
4. Check the box: I agree to the Cronofy Terms of Service and Privacy Policy.
5. Choose which sub-calendars to connect with. You can select multiple sub-calendars to 'pull' events into your CoachVantage calendar. You can select only one calendar to 'push' events from your CoachVantage calendar to your external calendar.
Note: A sub-calendar is a calendar that has been set up in your primary calendar account. For example, you may have 'Family' or 'Work' sub-calendars that are nested in your primary calendar.
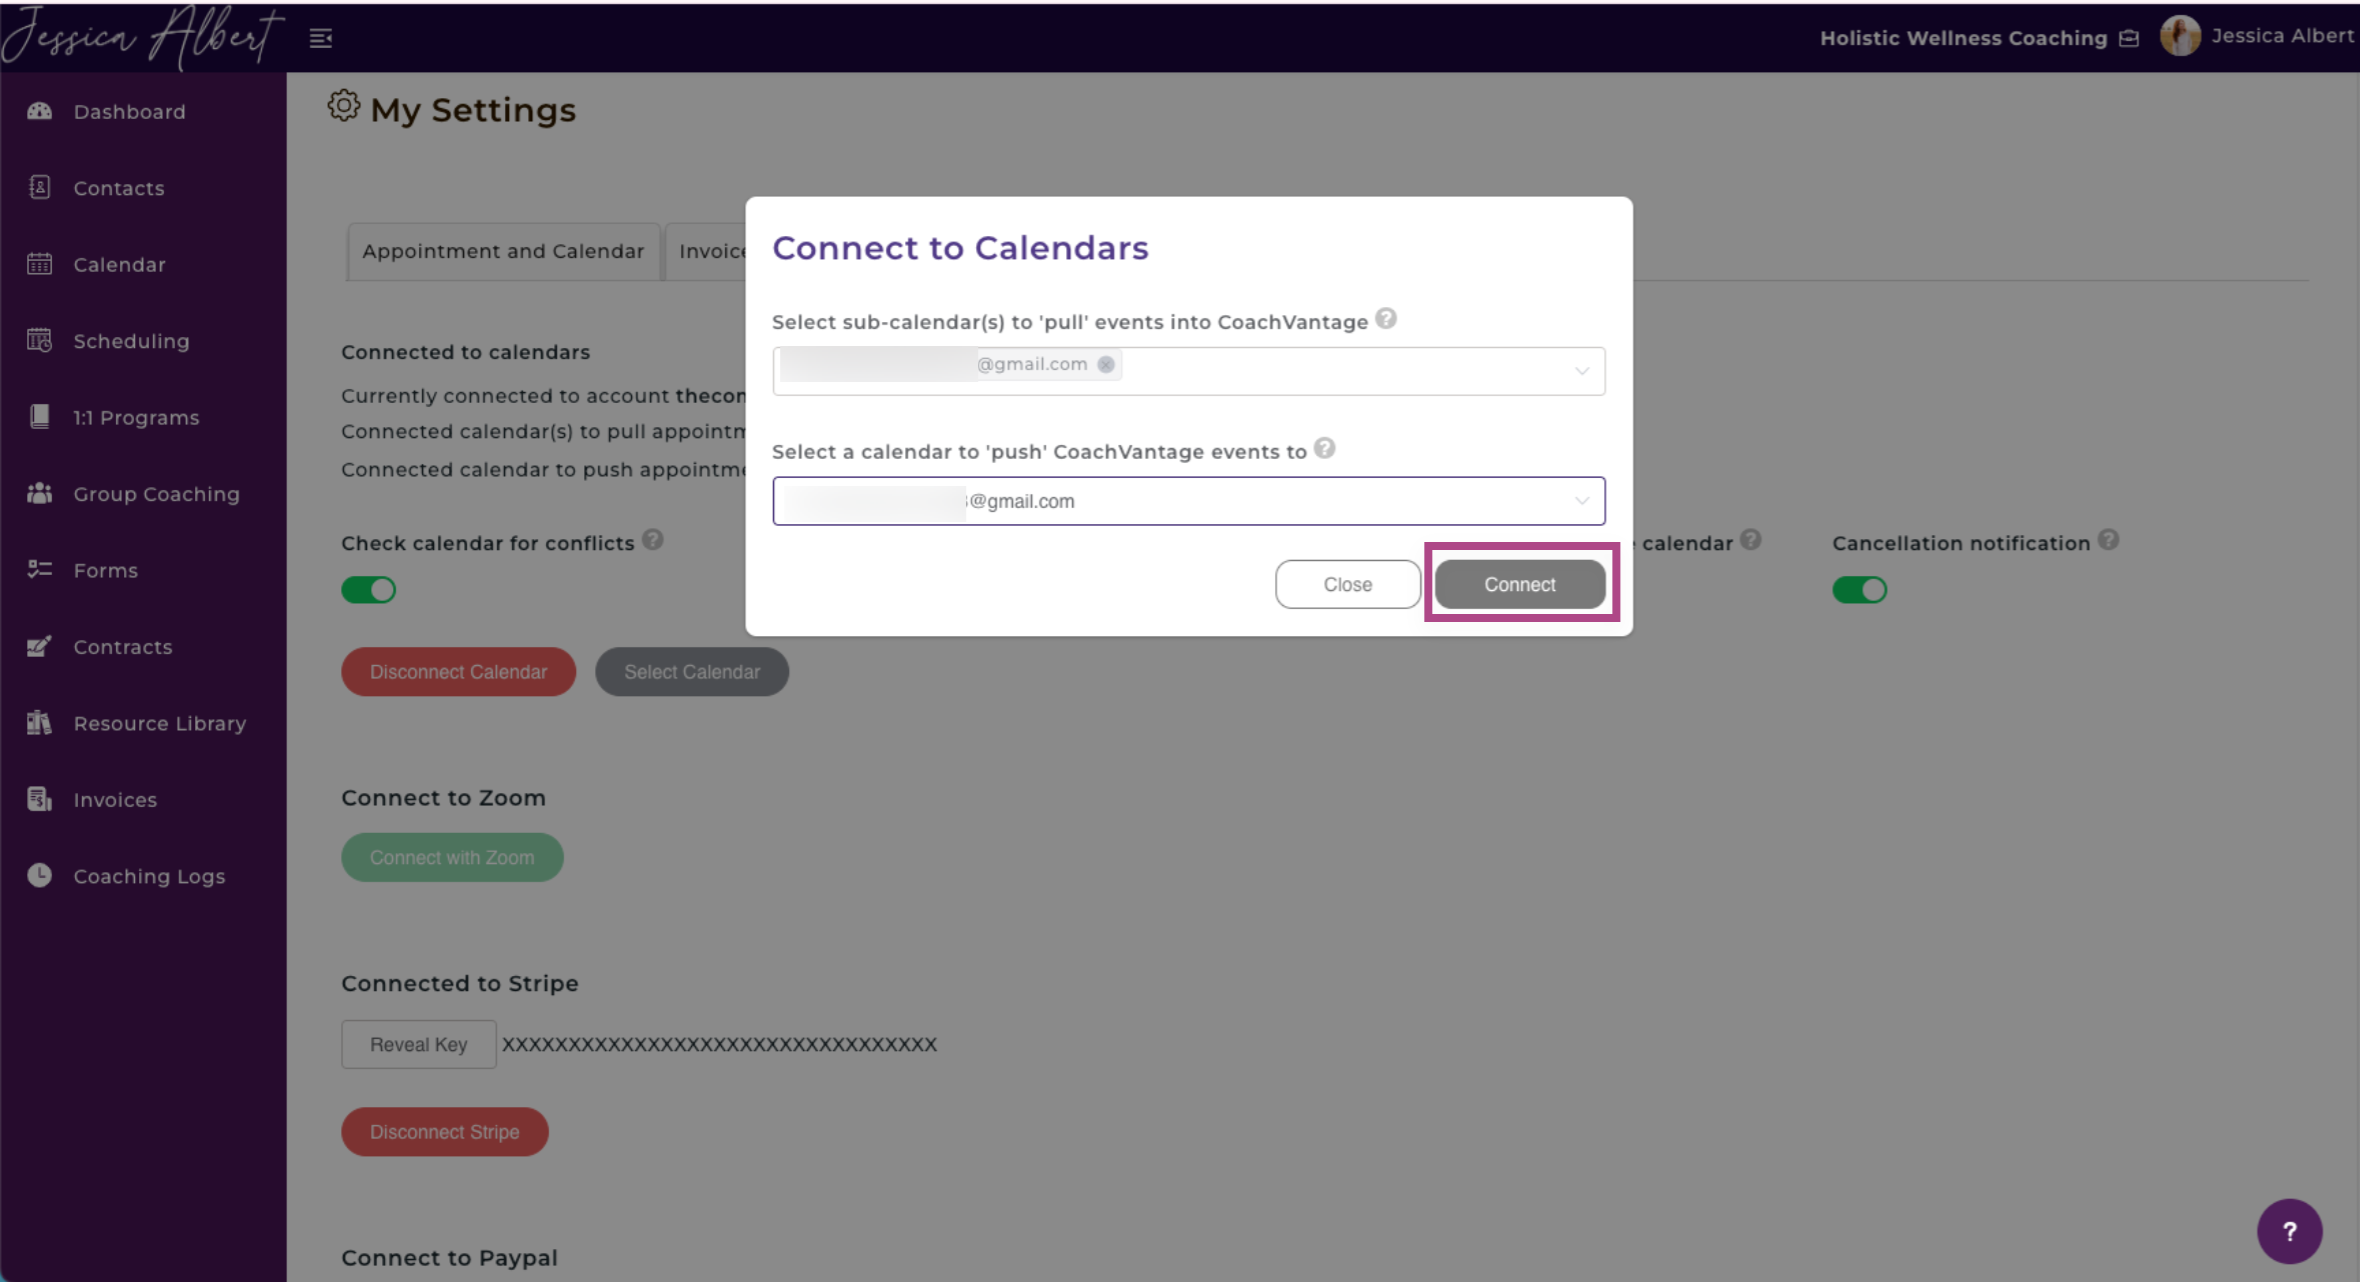
6. Click Connect.
Steps to Syncing to iCloud
Connecting your CoachVantage calendar to iCloud requires a few additional steps. Follow the instructions below to complete the sync successfully.
1. Click the green Connect to Calendar button.
2. Select iCloud.
3. You will need to create an app-specific password. Please note: This is NOT your iCloud password. This is a separate password only needed to connect your calendar to CoachVantage. You may click on "app-specific password" for more information or click this link or scroll down for further instructions.
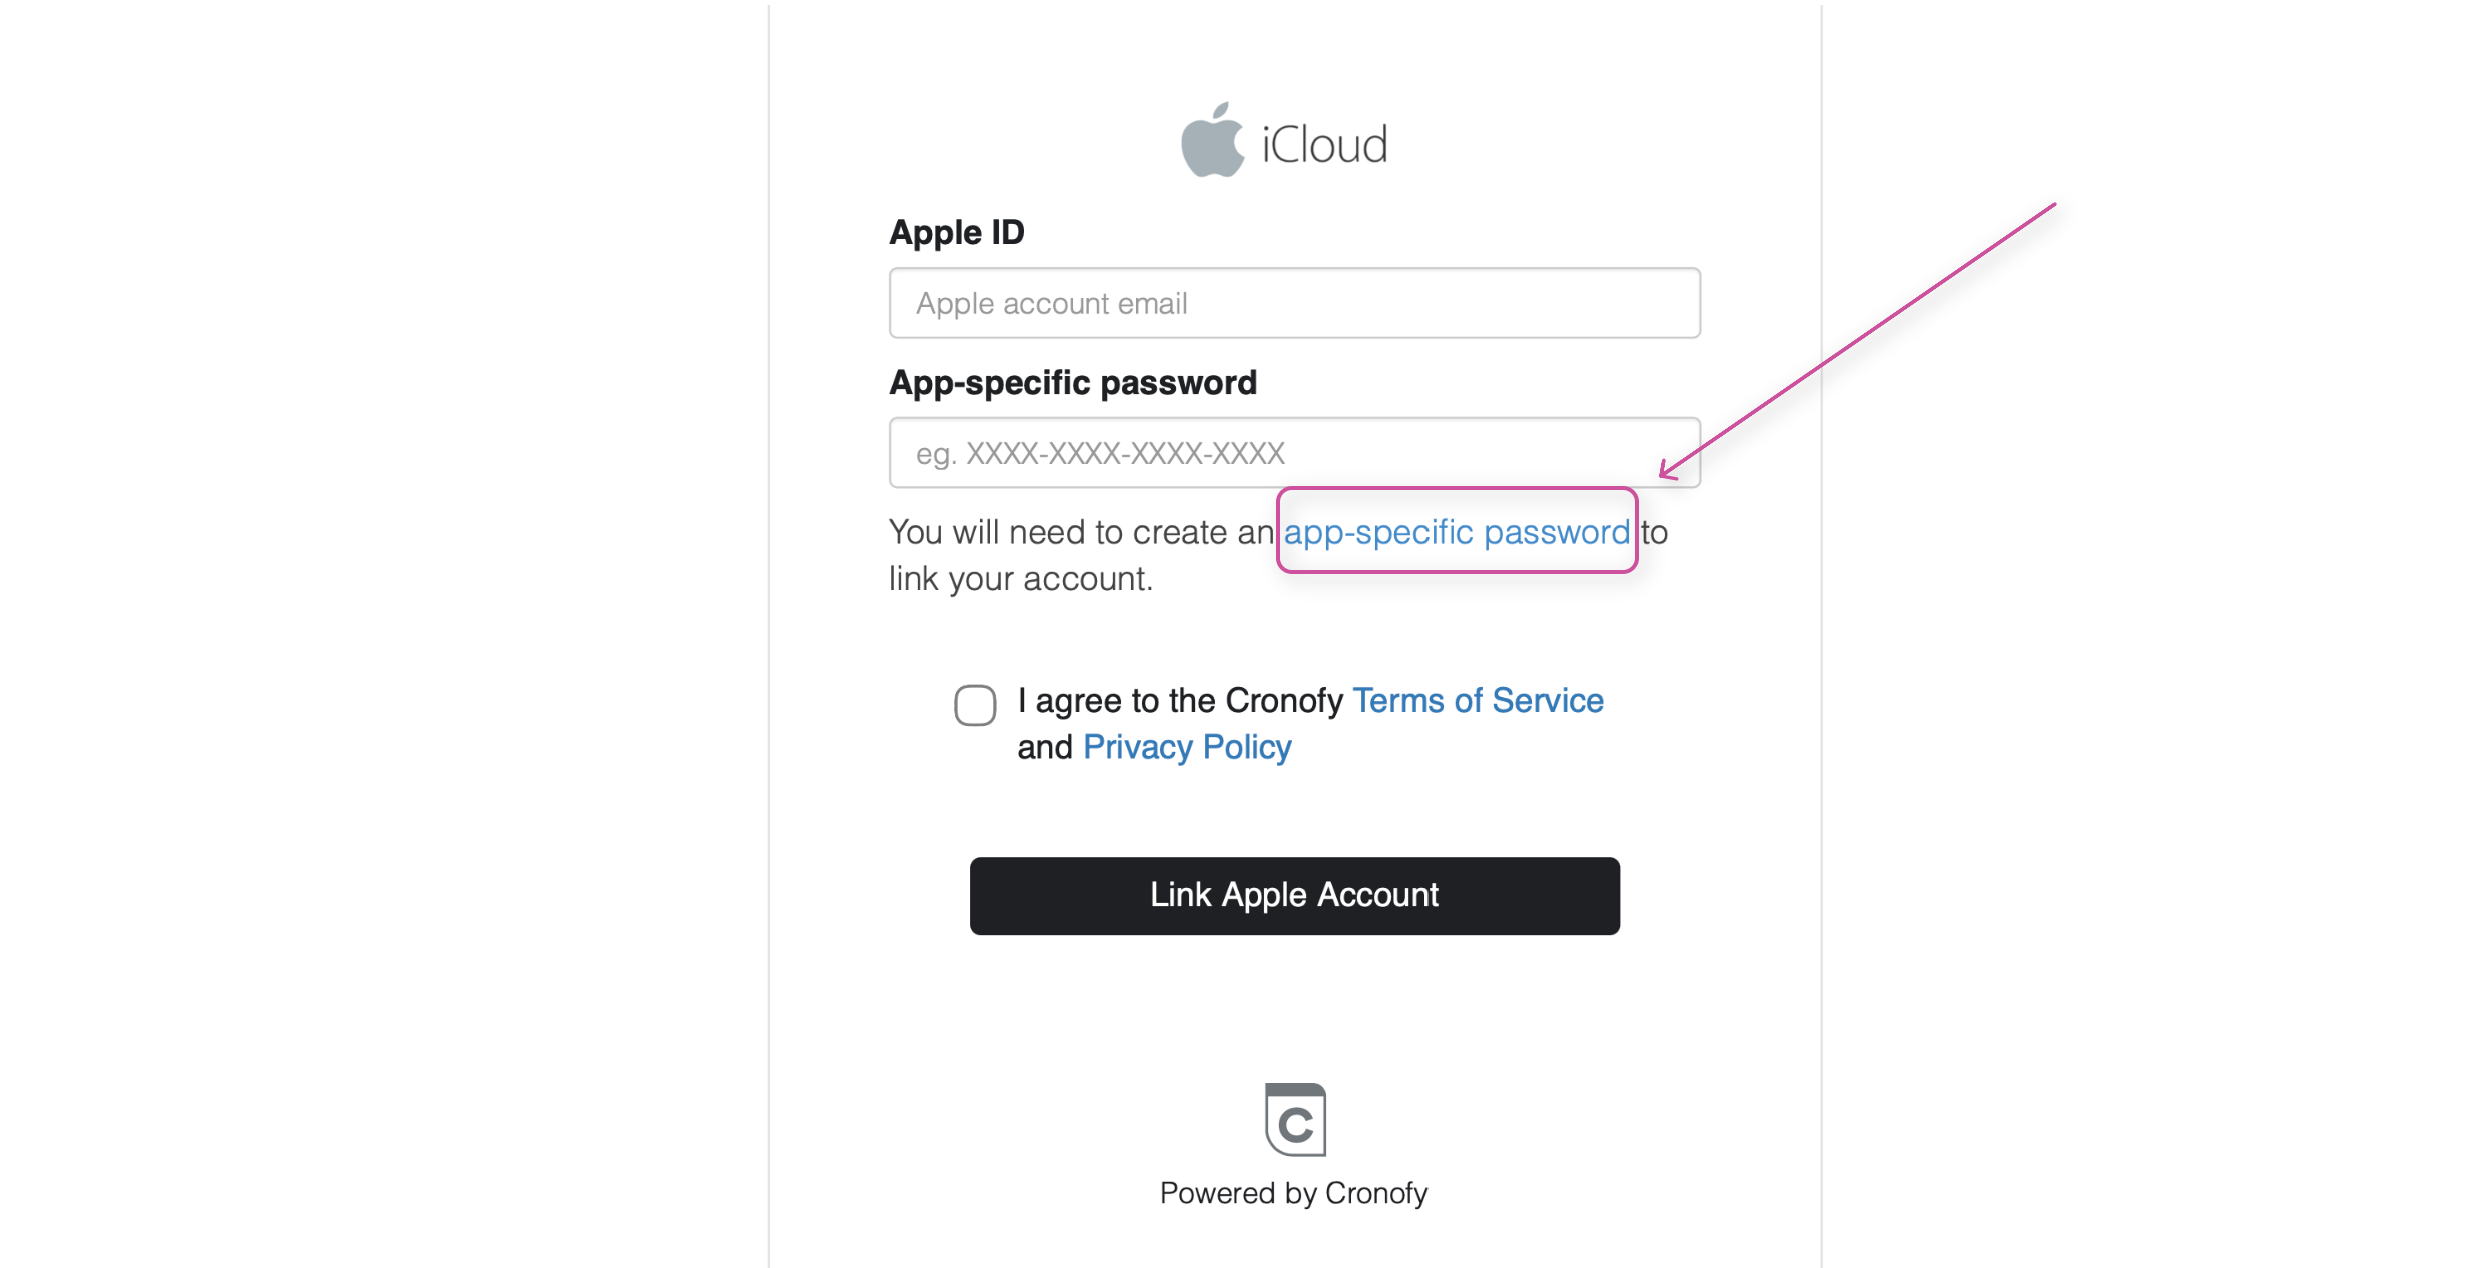
4. Generate your app-specific password by following these steps outlined below:
- Sign in to your Apple Account on account.apple.com.
- In the Sign-In and Security section, select App-Specific Passwords.
- Select Generate an app-specific password, then follow the steps on your screen.
- Enter or paste the app-specific password into the password field of the app when signing in to your Apple Account.
5. Once you've generated your app-specific password, go back and enter it on the page.
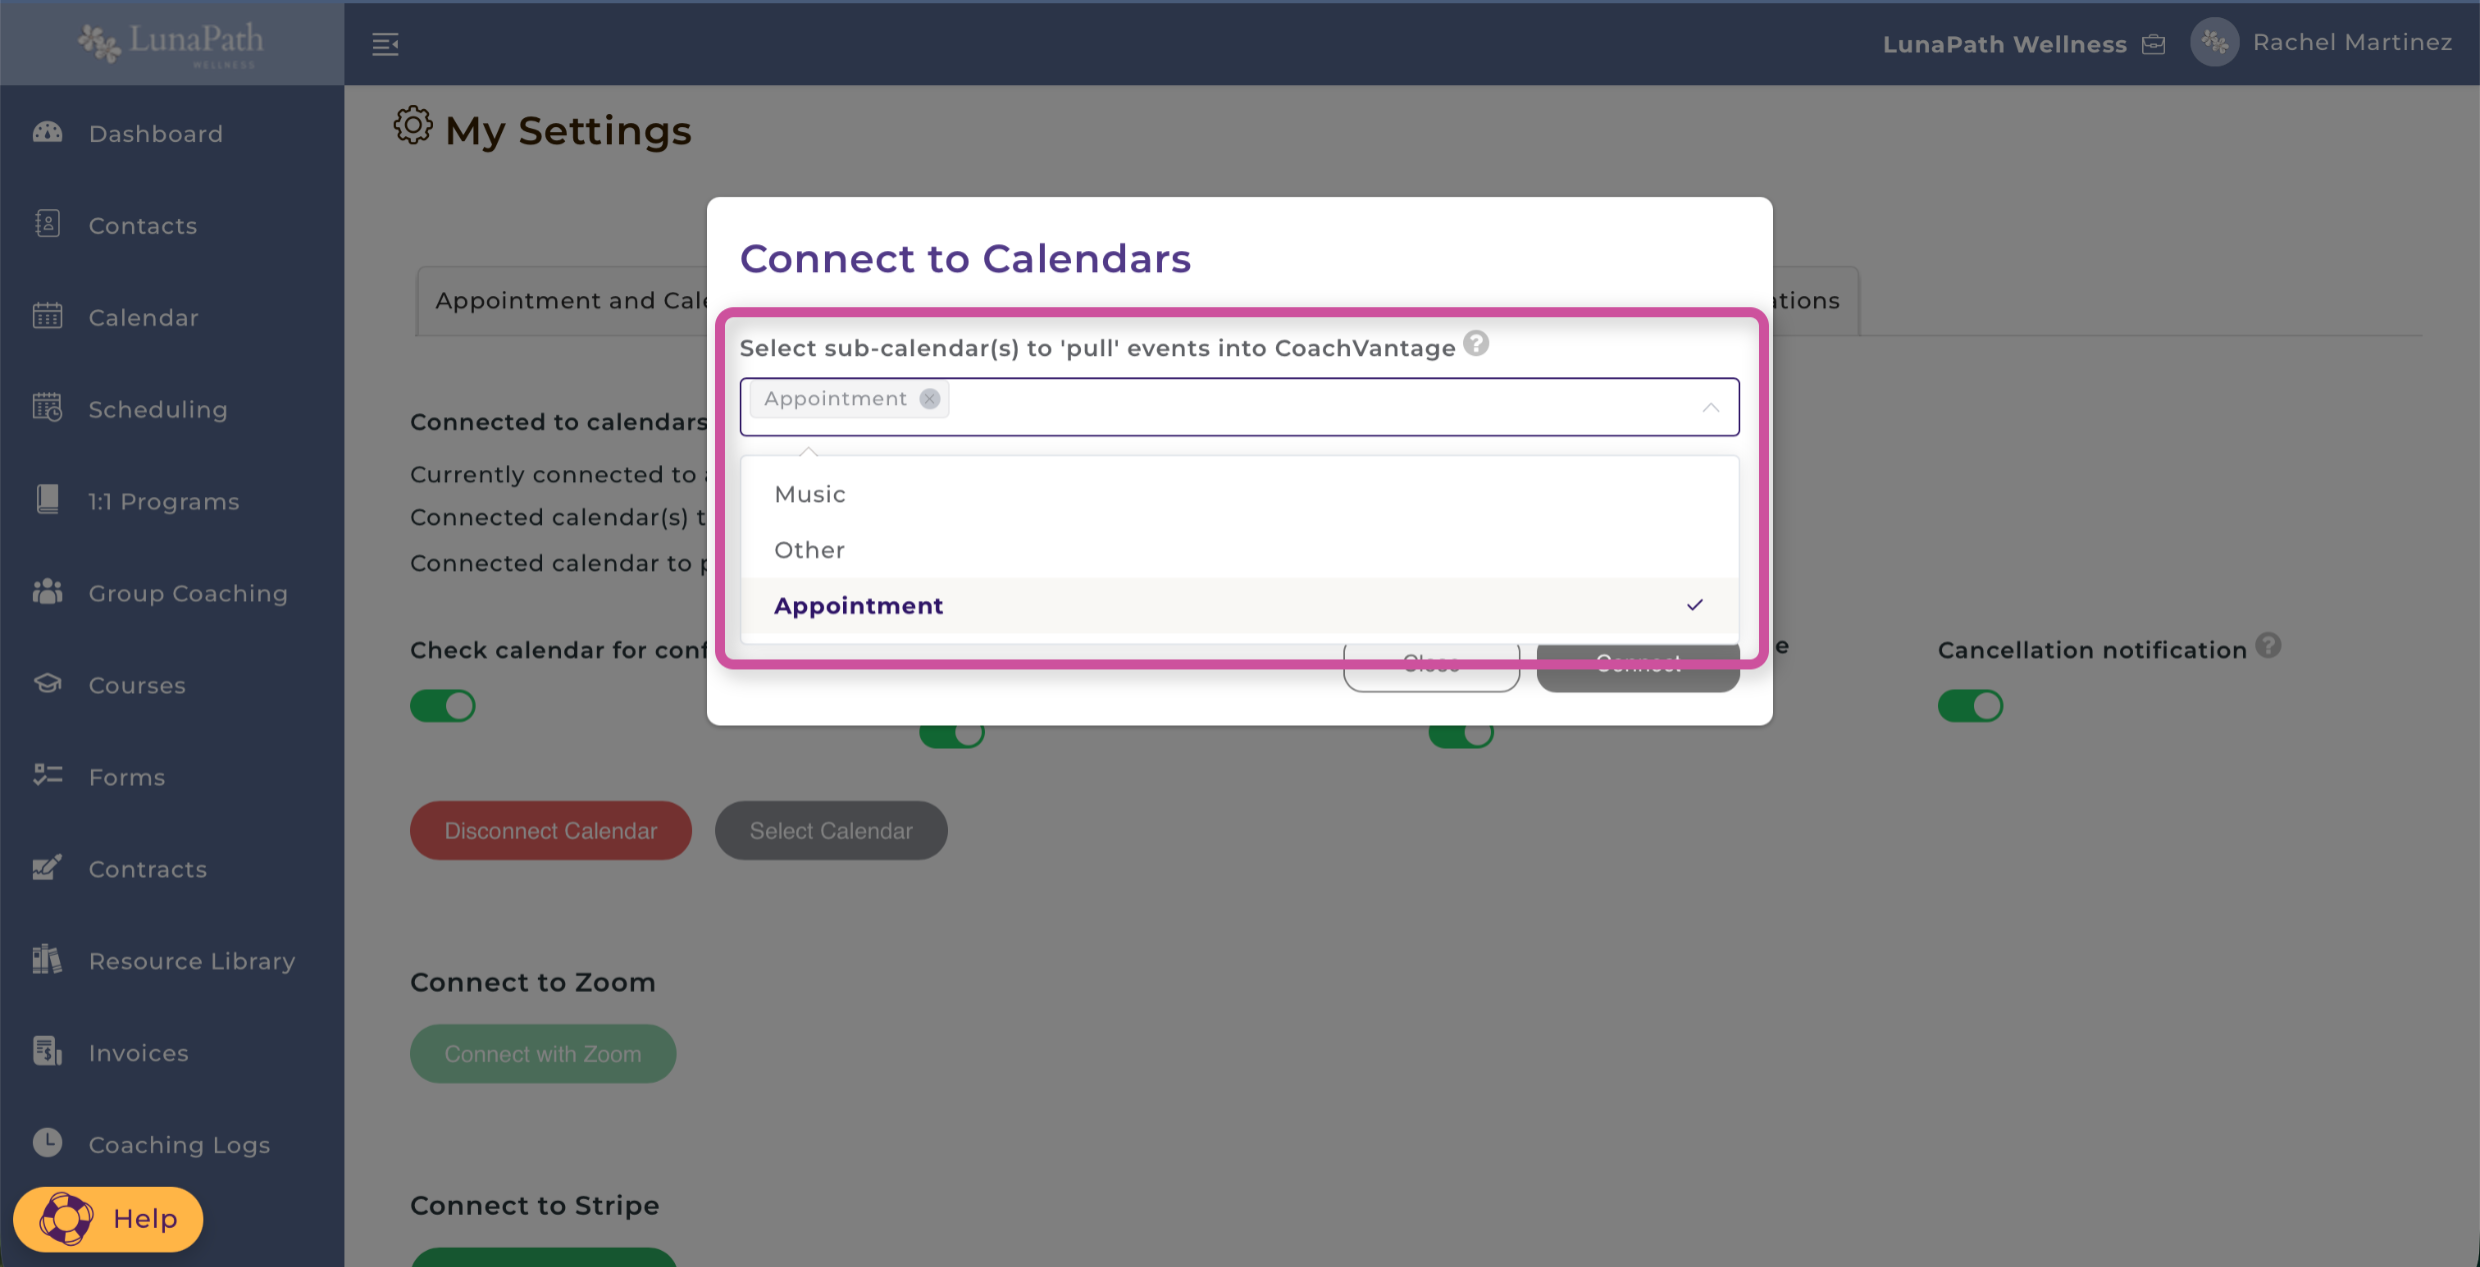
6. Now, select which sub-calendar(s) to 'pull' events into CoachVantage.
When turned on, this will pull appointments in your connected calendar(s) to CoachVantage calendar. External appointments are displayed as "Busy" or "Free" depending on how you've set them up in your external calendar.
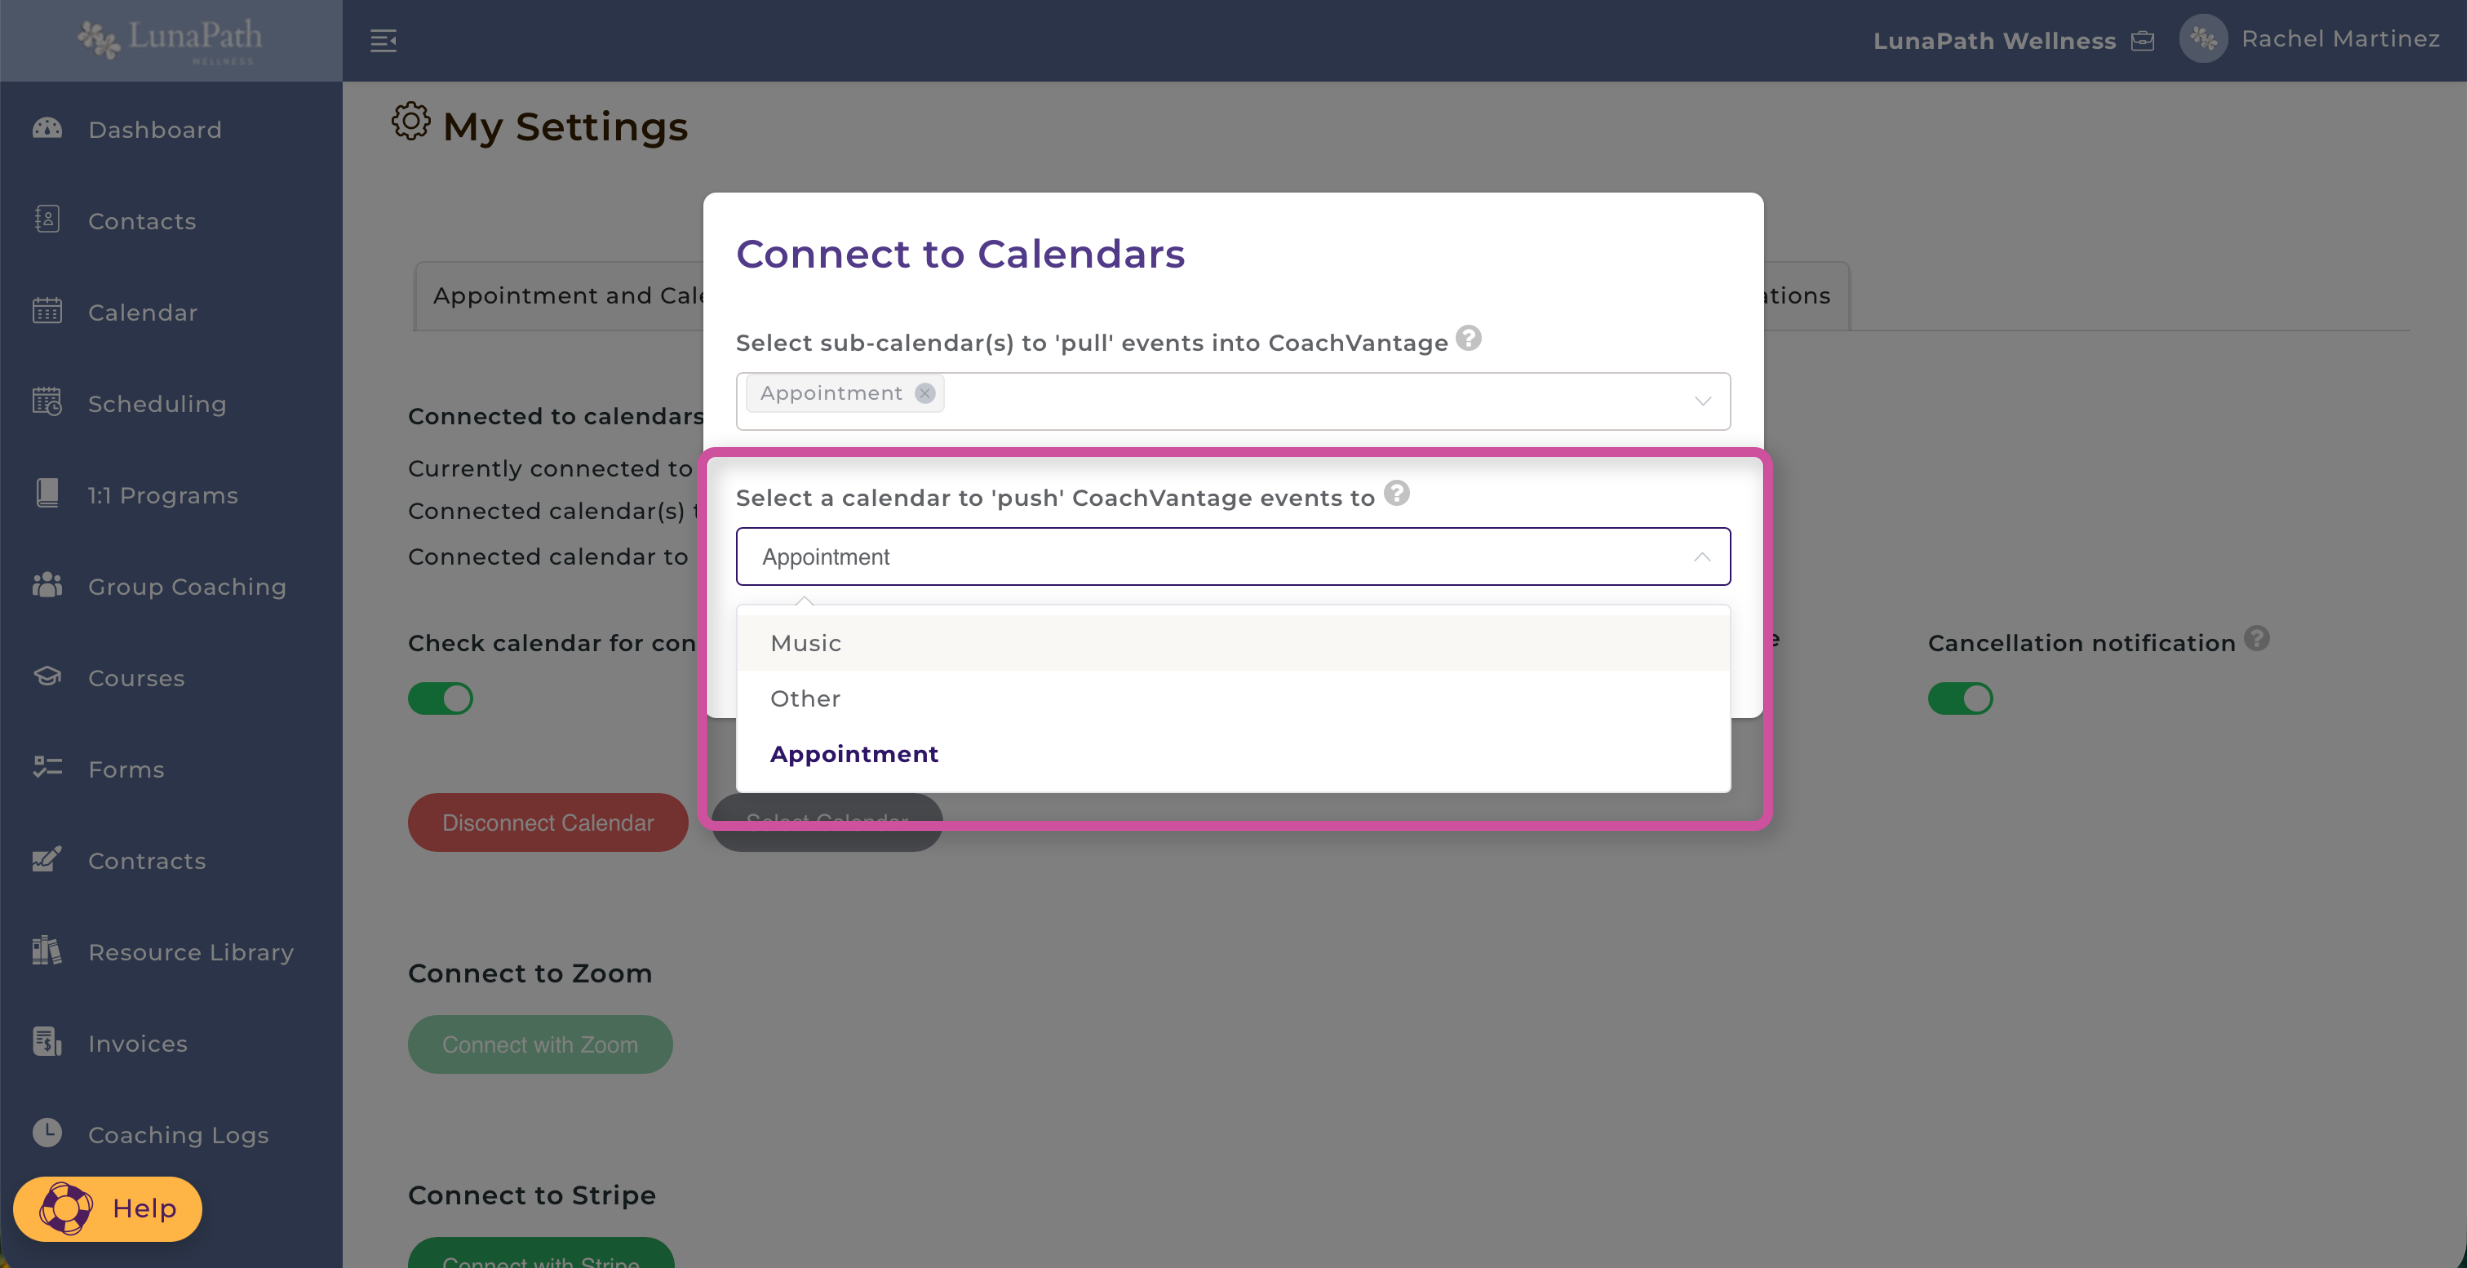
7. Select a calendar to 'push' CoachVantage events to.
When turned on, this will push appointments in your CoachVantage calendar to your connected calendar
8. Press Connect.
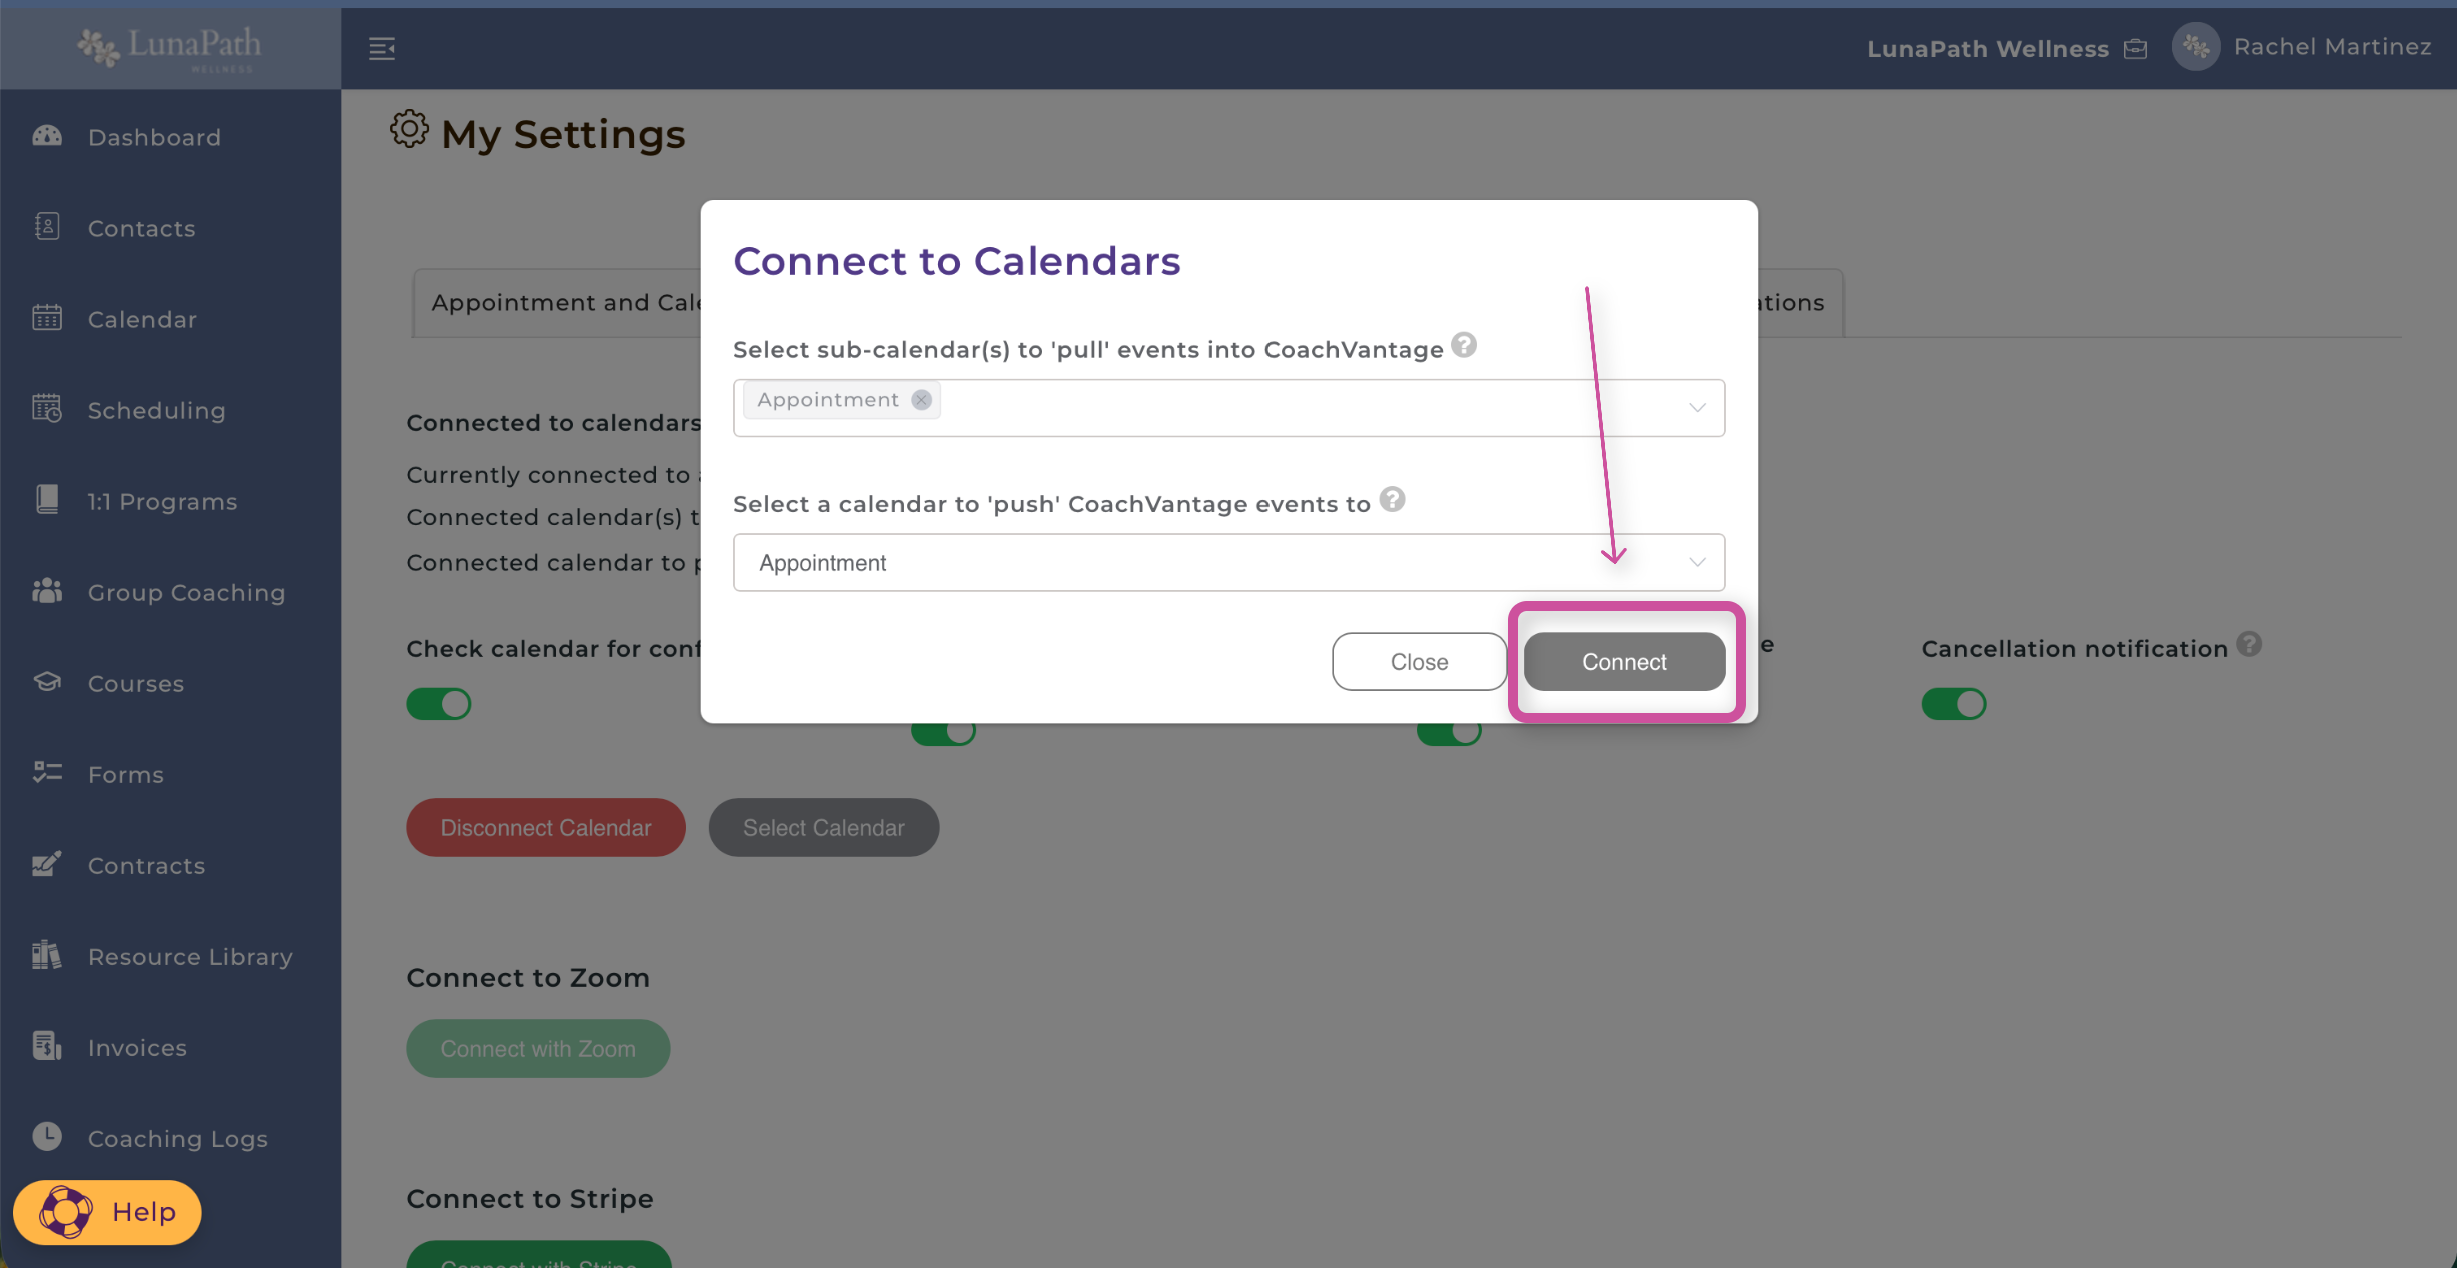
9. Success! Your iCloud calendar is now connected to CoachVantage. 🎉
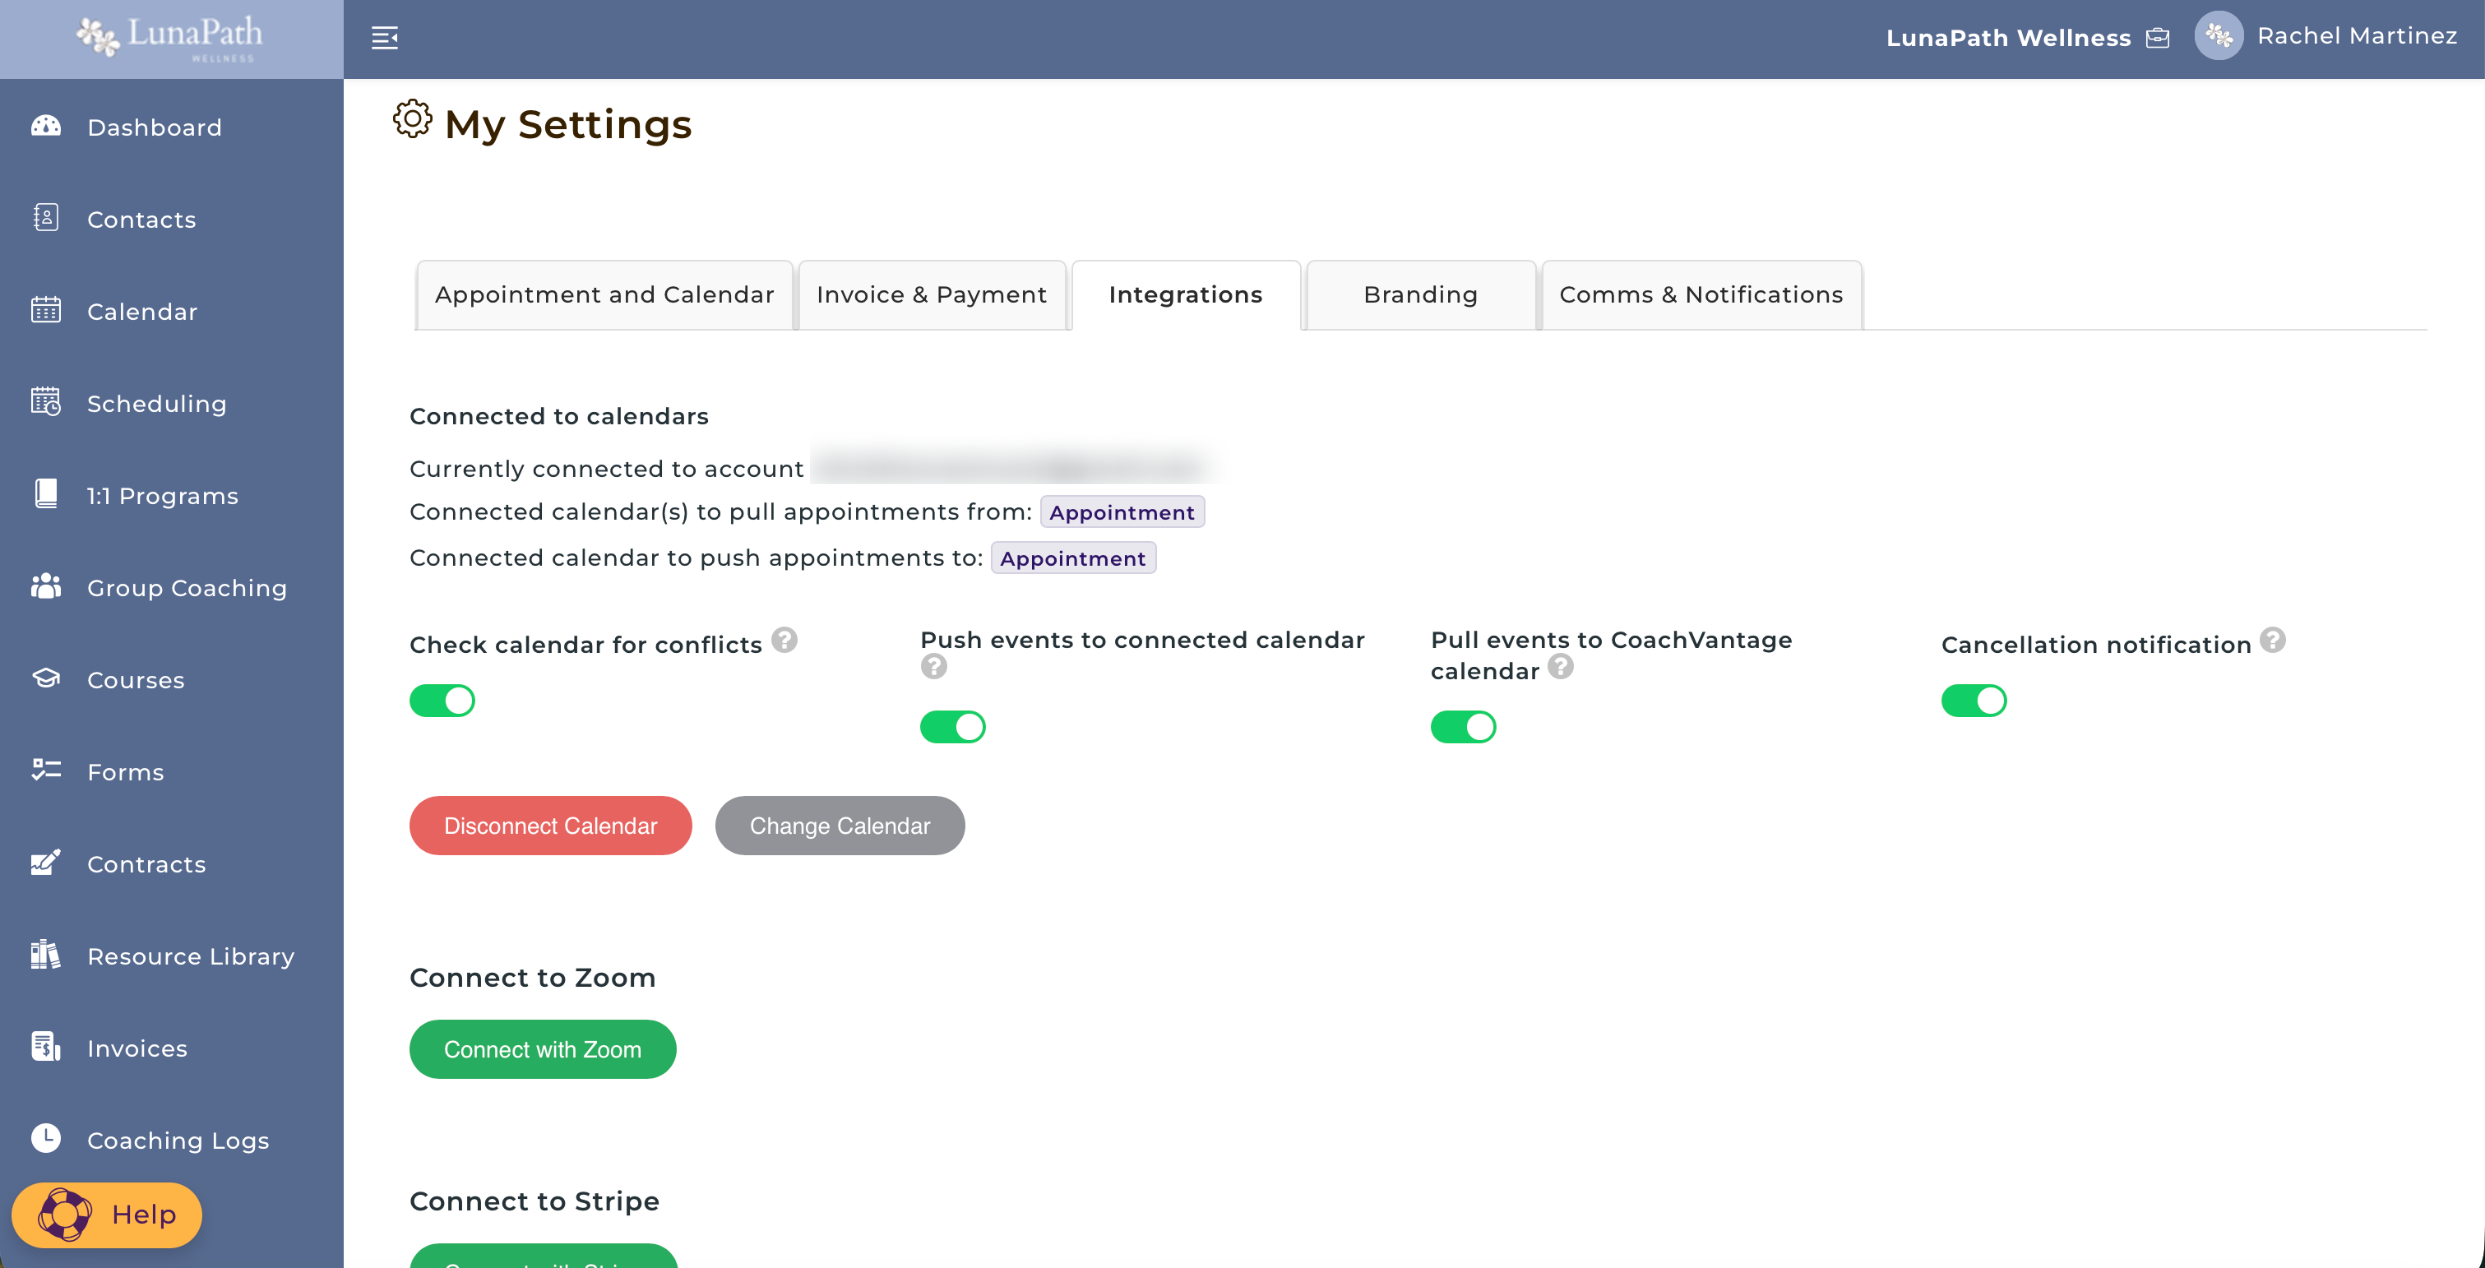
Manage Your Calendar Settings ⚙️
Once your calendar is connected, CoachVantage will display which calendar(s) you are connected to.
We highly recommend that you select options to Check Calendar for Conflicts, Push Events to Connected Calendar, Pull Events to CoachVantage Calendar, and Cancellation Notification.
This will ensure that you are not double-booked when setting up client appointments in CoachVantage as it will check your calendar for any external events that are marked as 'Busy' and warn you if there are conflicts. Your clients will also receive an email notification should you cancel an appointment from your external calendar.
Note: CoachVantage will ignore free events when checking for appointment conflicts.
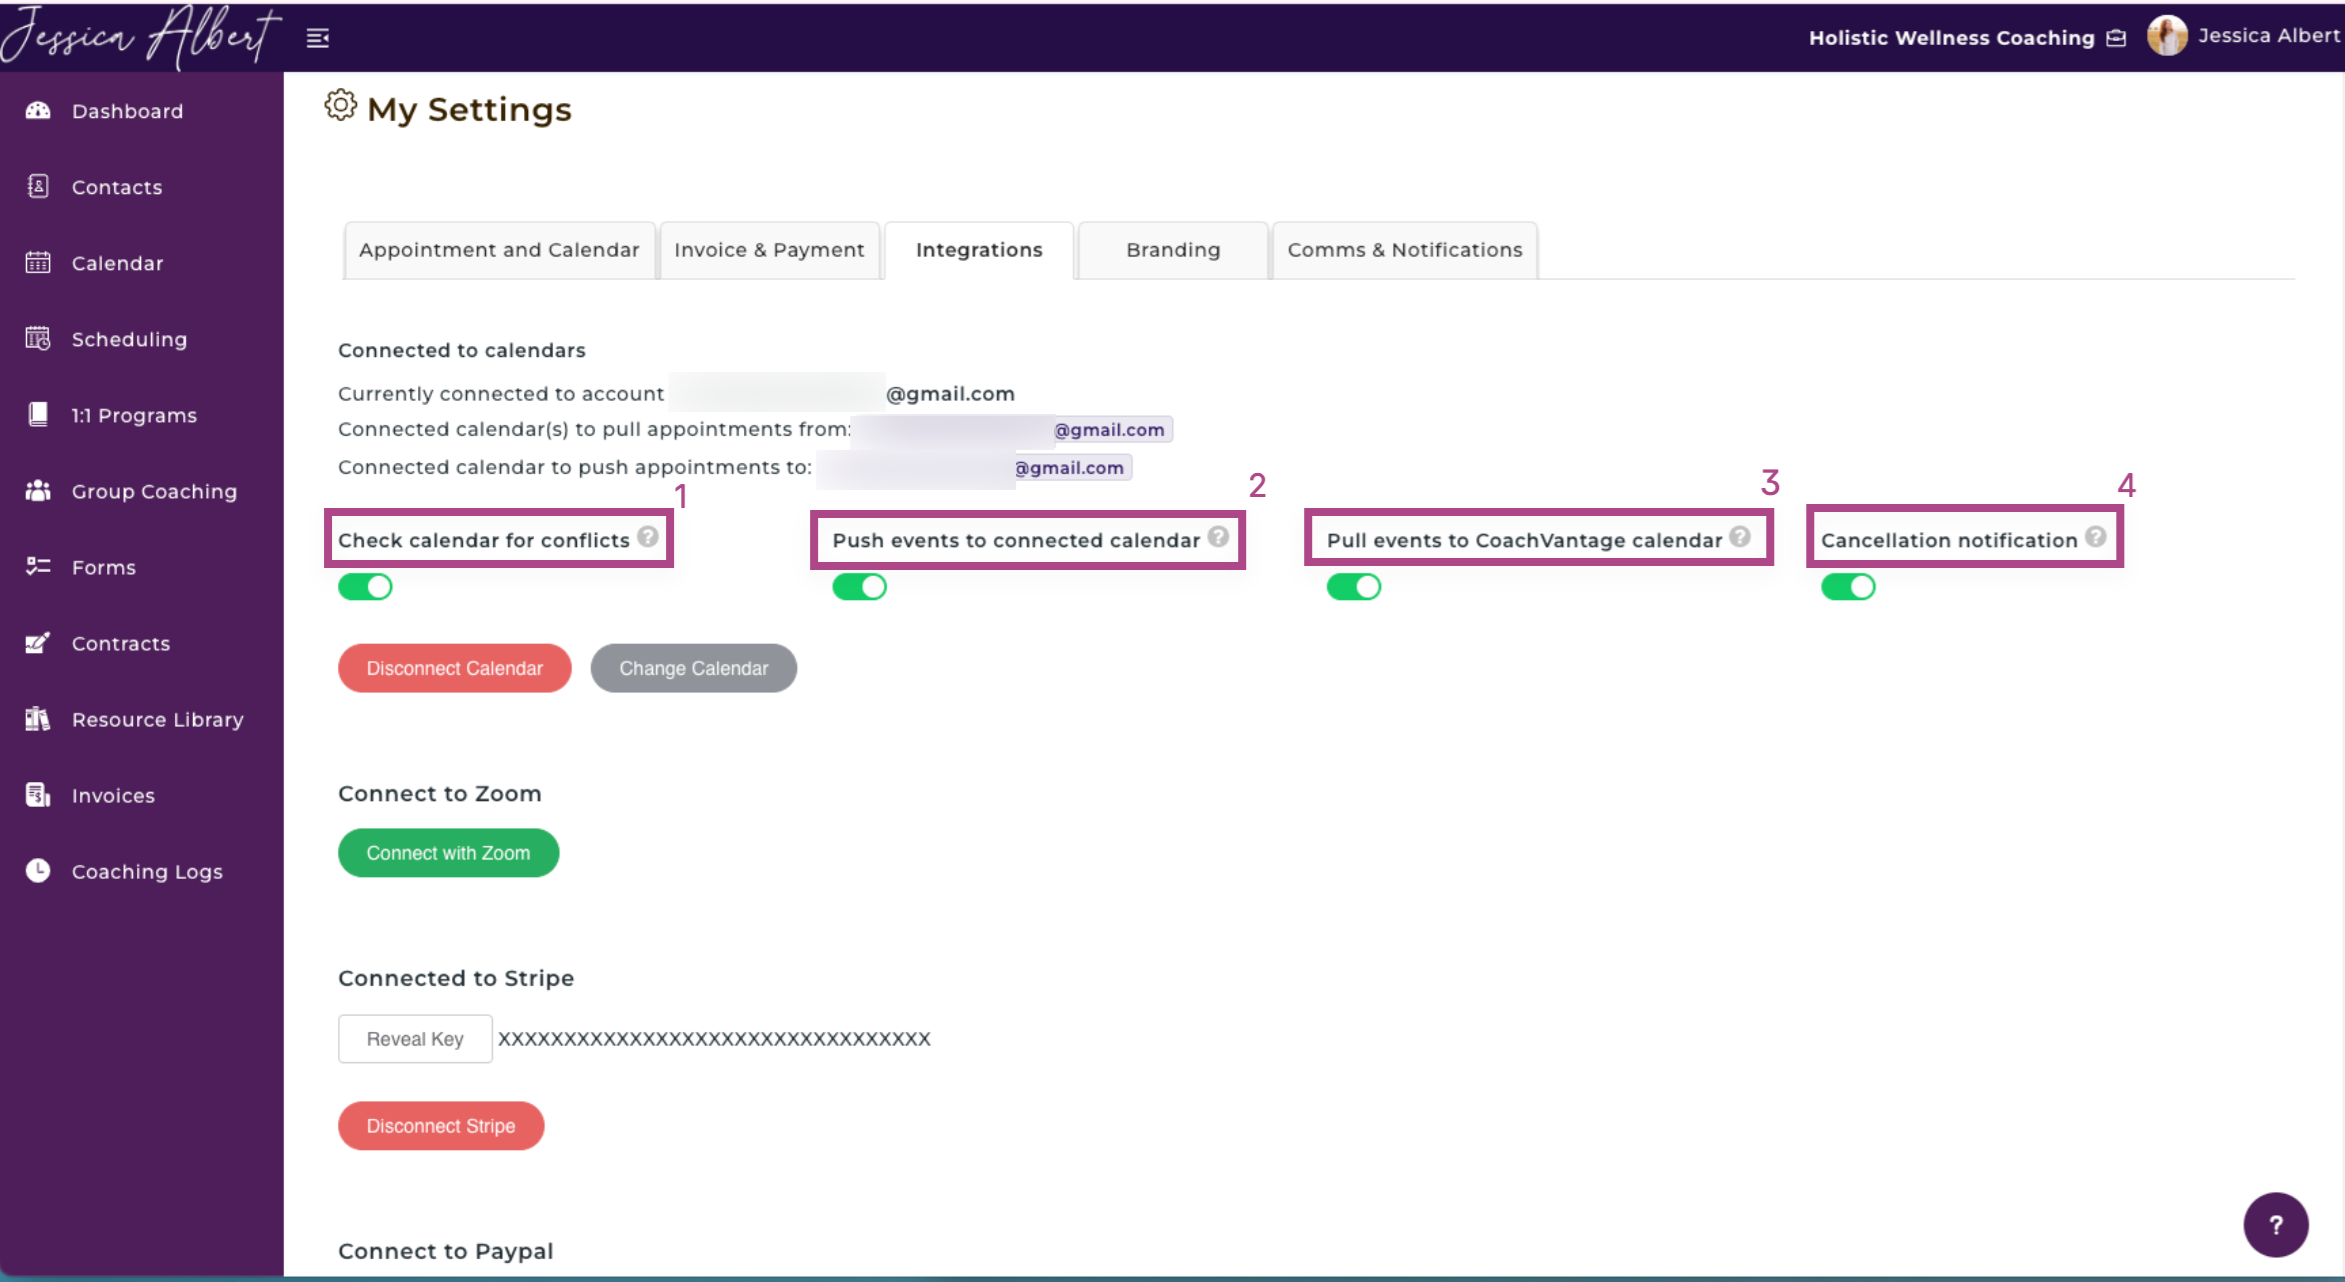
1. Check Calendar for Conflicts
This setting allows CoachVantage to check your external calendar for any 'busy' events in real time before offering invitees open time slots on your public-facing booking page.
CoachVantage will not display the time range that are marked as 'busy' events in your connected calendar on your public-facing booking page. This therefore prevents you from being double booked.
Note: Only events marked as 'busy' in your external calendar will be checked to prevent conflicts. Events marked as 'free' will not be checked for conflicts.
For example, if you have an event that's marked as 'free' in your external calendar on Nov 20, 8am - 10am, CoachVantage will still display that time range as available for people to book an appointment with you.
2. Push Events to Connected Calendar
When turned on, this will push appointments in your CoachVantage calendar to your connected calendar.
3. Pull Events to CoachVantage Calendar
When turned on, this will pull appointments in your connected calendar(s) to CoachVantage calendar.
External appointments are displayed as "Busy" or "Free" depending on how you've set them up in your external calendar.
4. Cancellation Notification
This feature allows CoachVantage to send a cancellation notification to clients if you delete an appointment in your connected calendar.
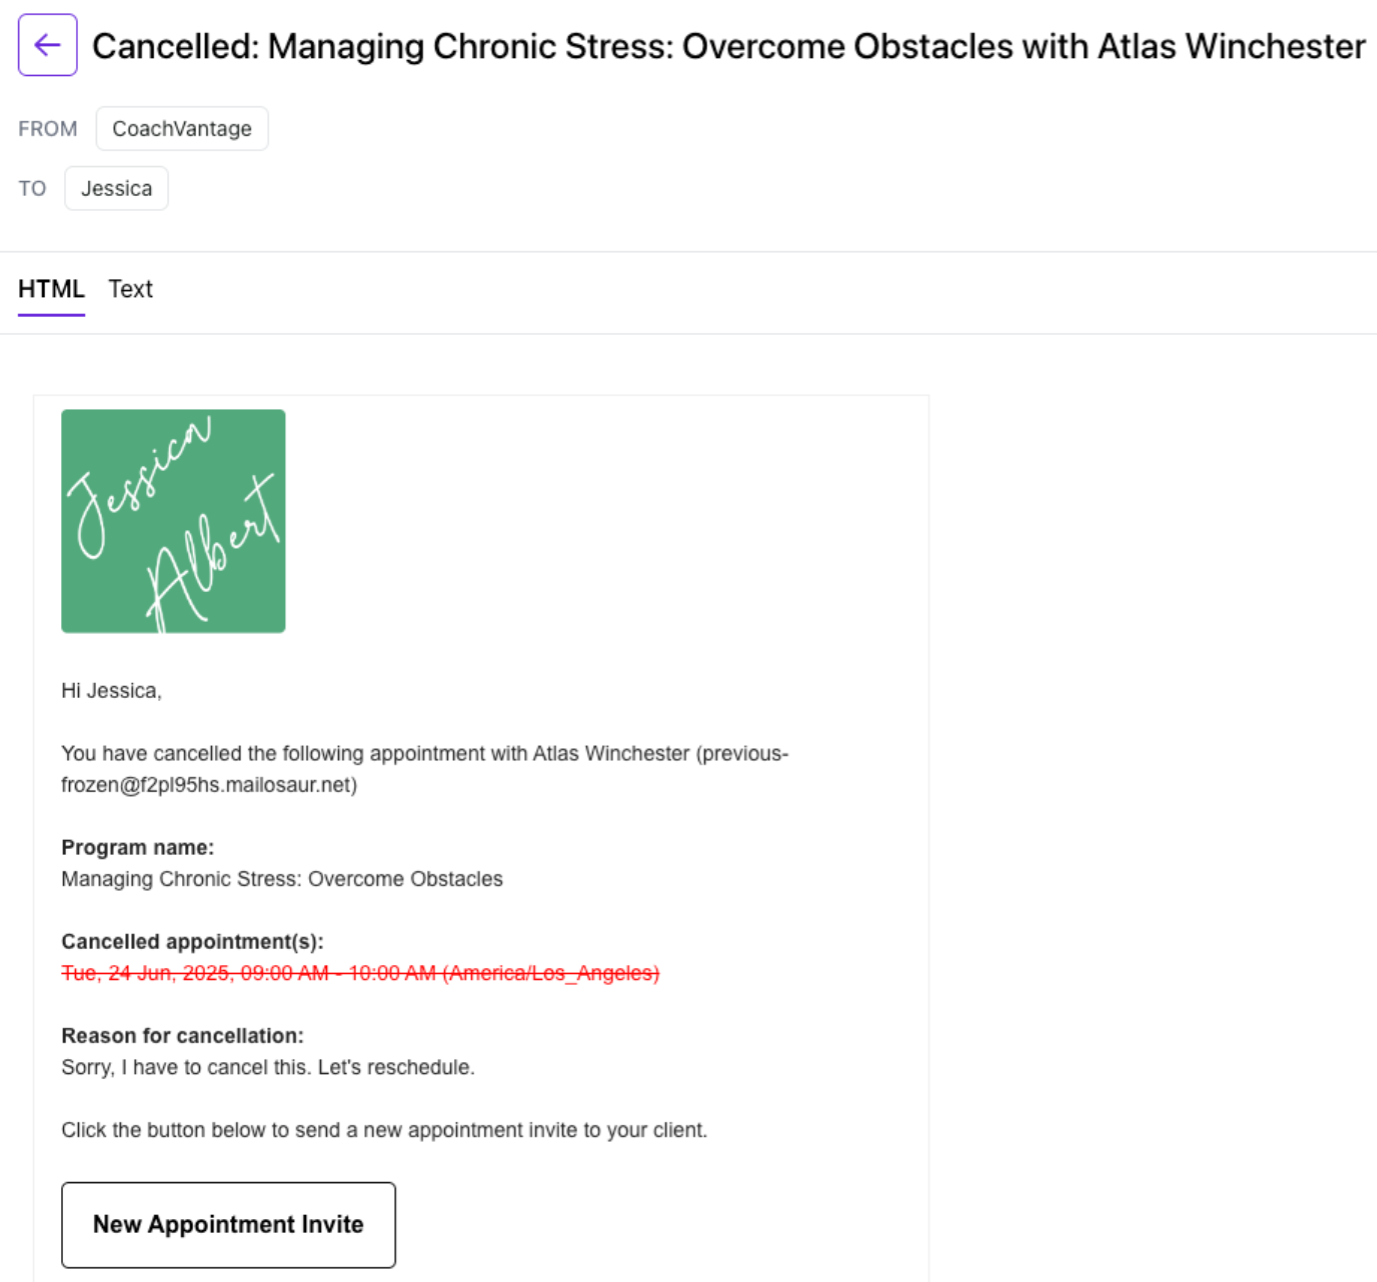
The appointment entry will also be automatically cancelled (removed) from your CoachVantage Calendar as well.
Note: To reschedule a CoachVantage appointment, make the change in CoachVantage. Rescheduling cannot be done from your external calendar.