
How to Access My Coaching Programs in the Client Portal
Overview
When you have enrolled in a Coaching Program, you'll be able to have access to any files, resources, notes, goals, assignments, forms, etc. that your Coach has shared with you as part of the program.
Article Contents:
1. To Access a Coaching Program
2. Notes
3. Forms
4. Goals
5. Create Milestones
6. Assignments
7. Resources
8. Sessions
9. Activity Log
10. Overview
1. To Access a Coaching Program:
1. Click on 1:1 Coaching on the left menu.
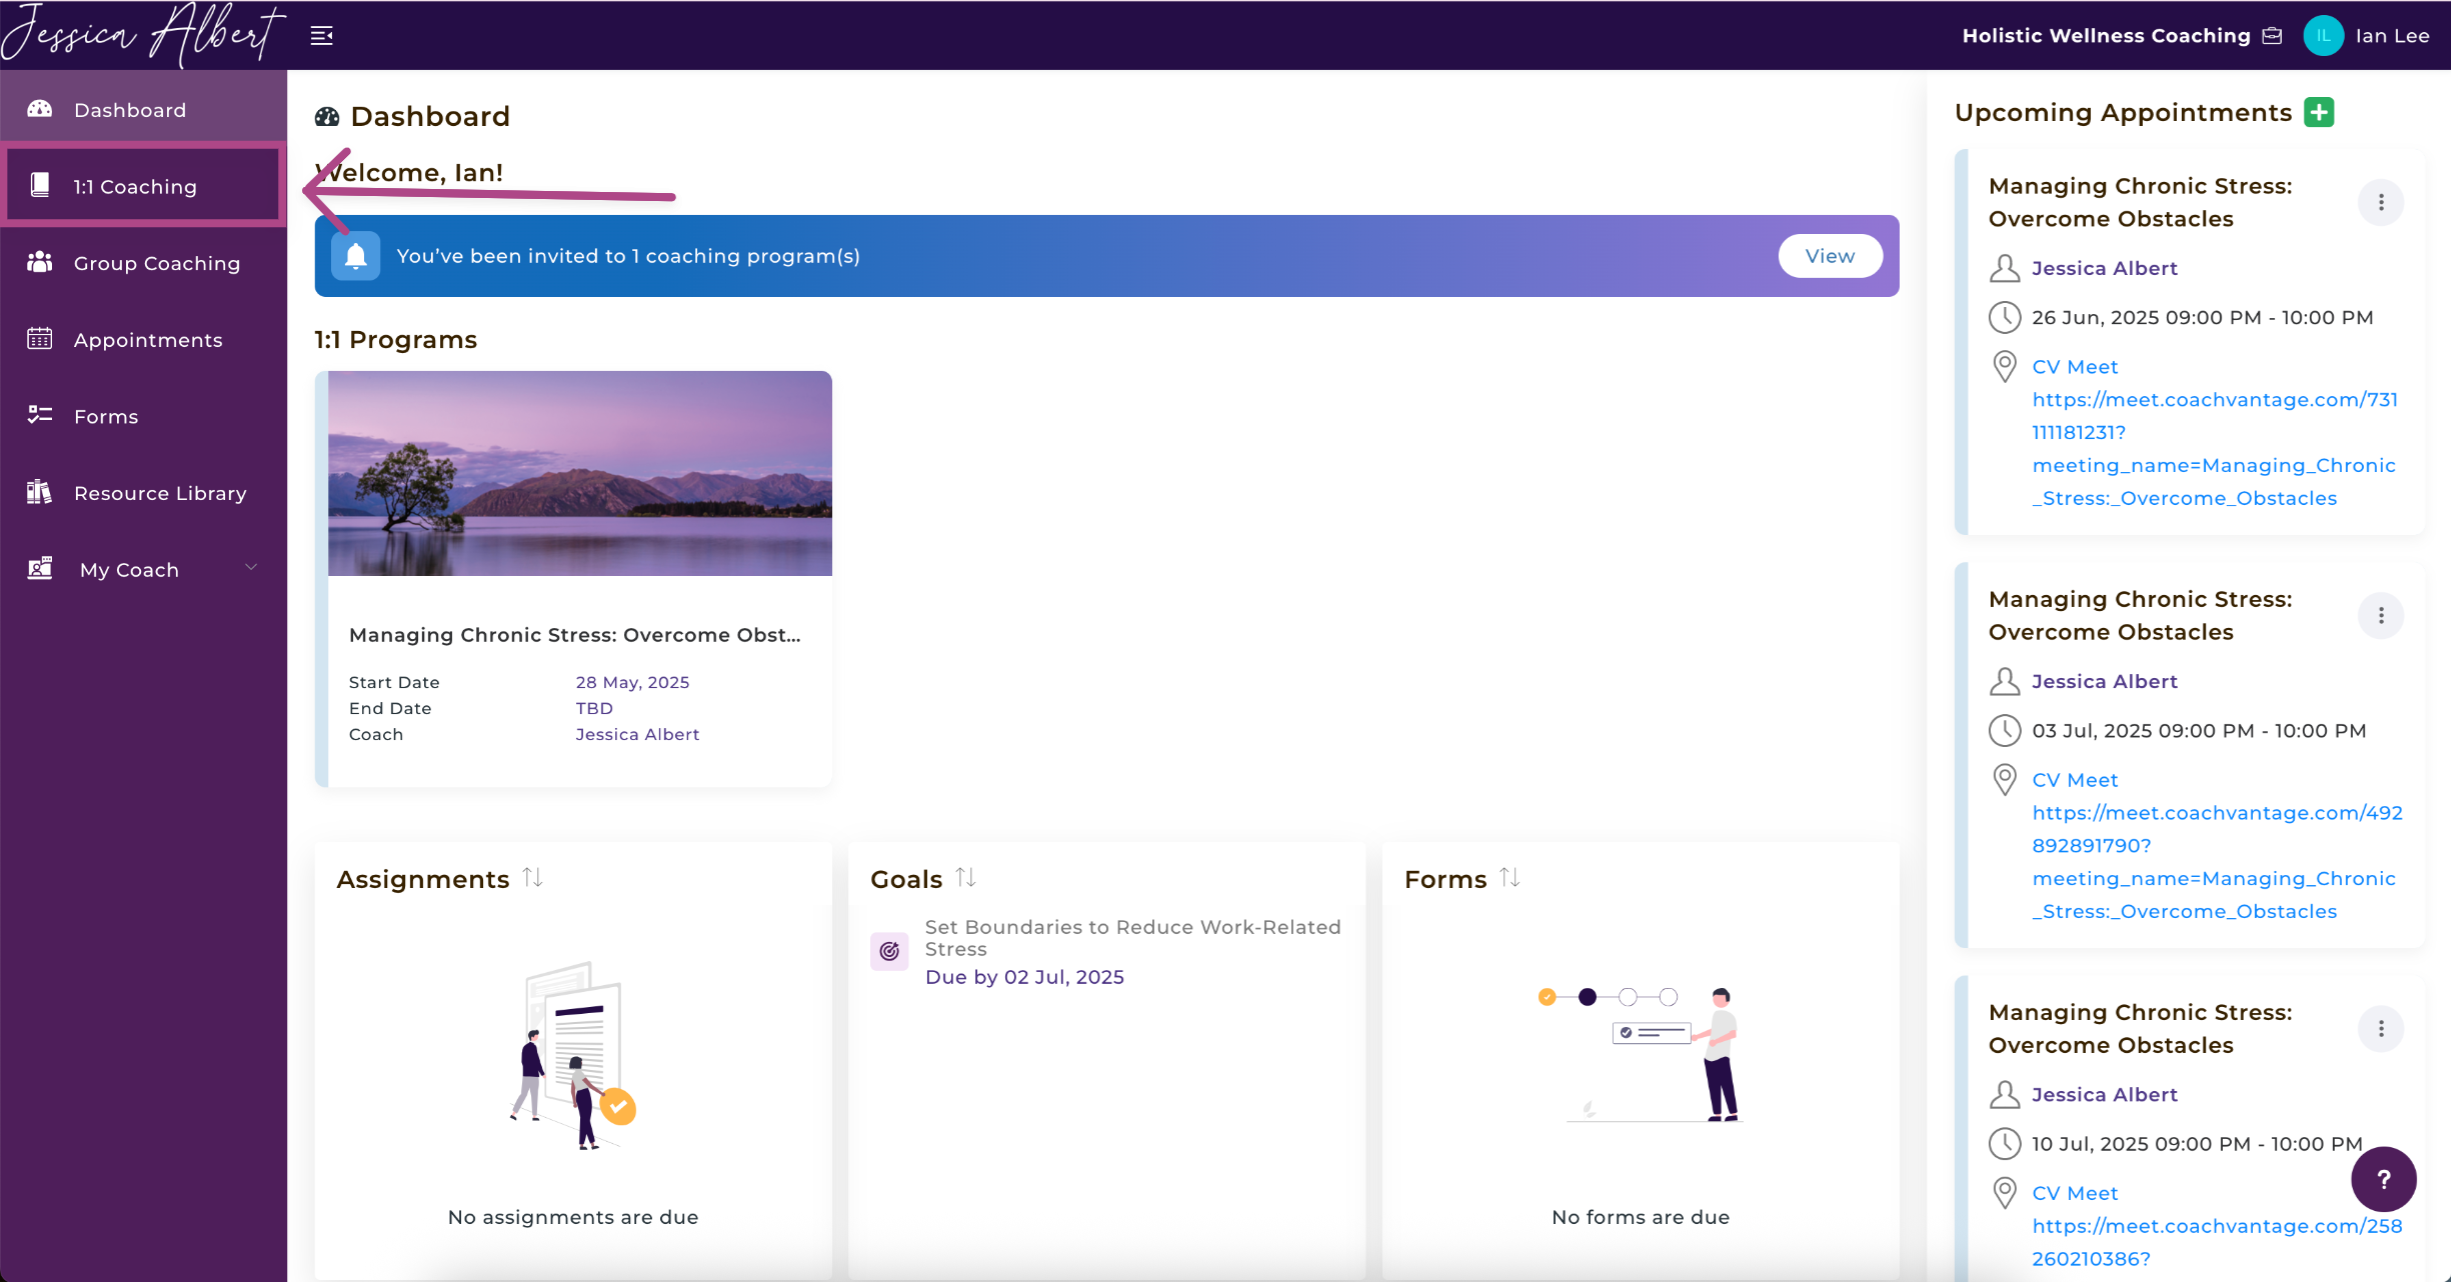
2. On the In Progress tab, click on the Program Card (see image below).
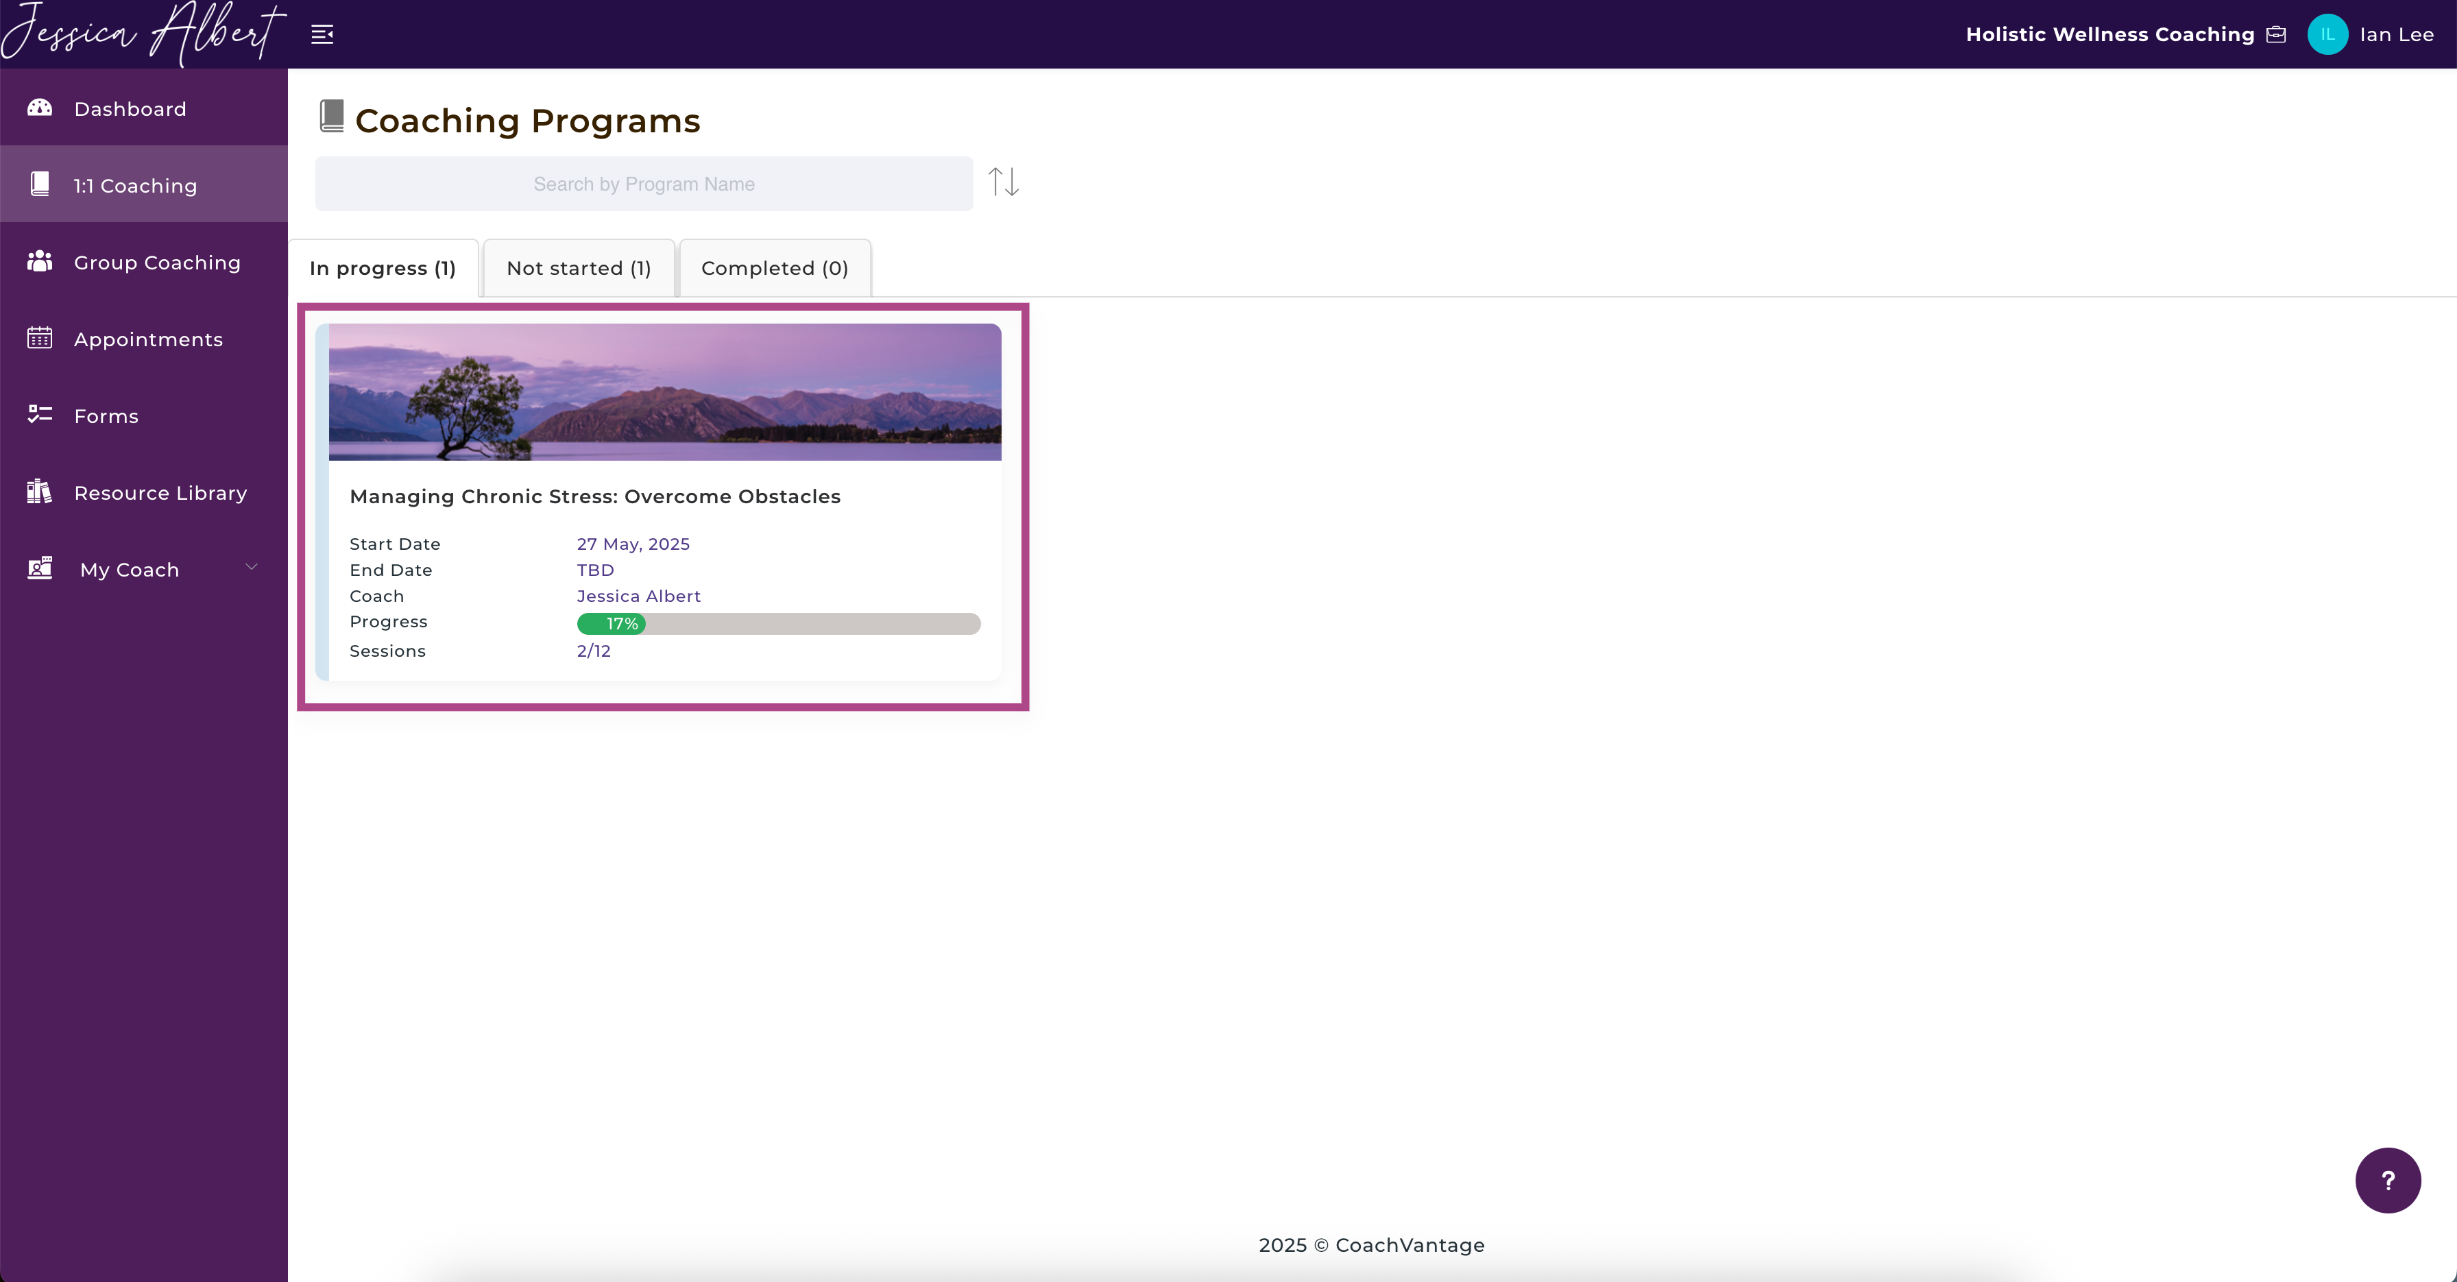
Note: If you are enrolled in more than one coaching program, you will see more than one program card. Click on the desired program card.
3. You will be taken to the Program Management Page.
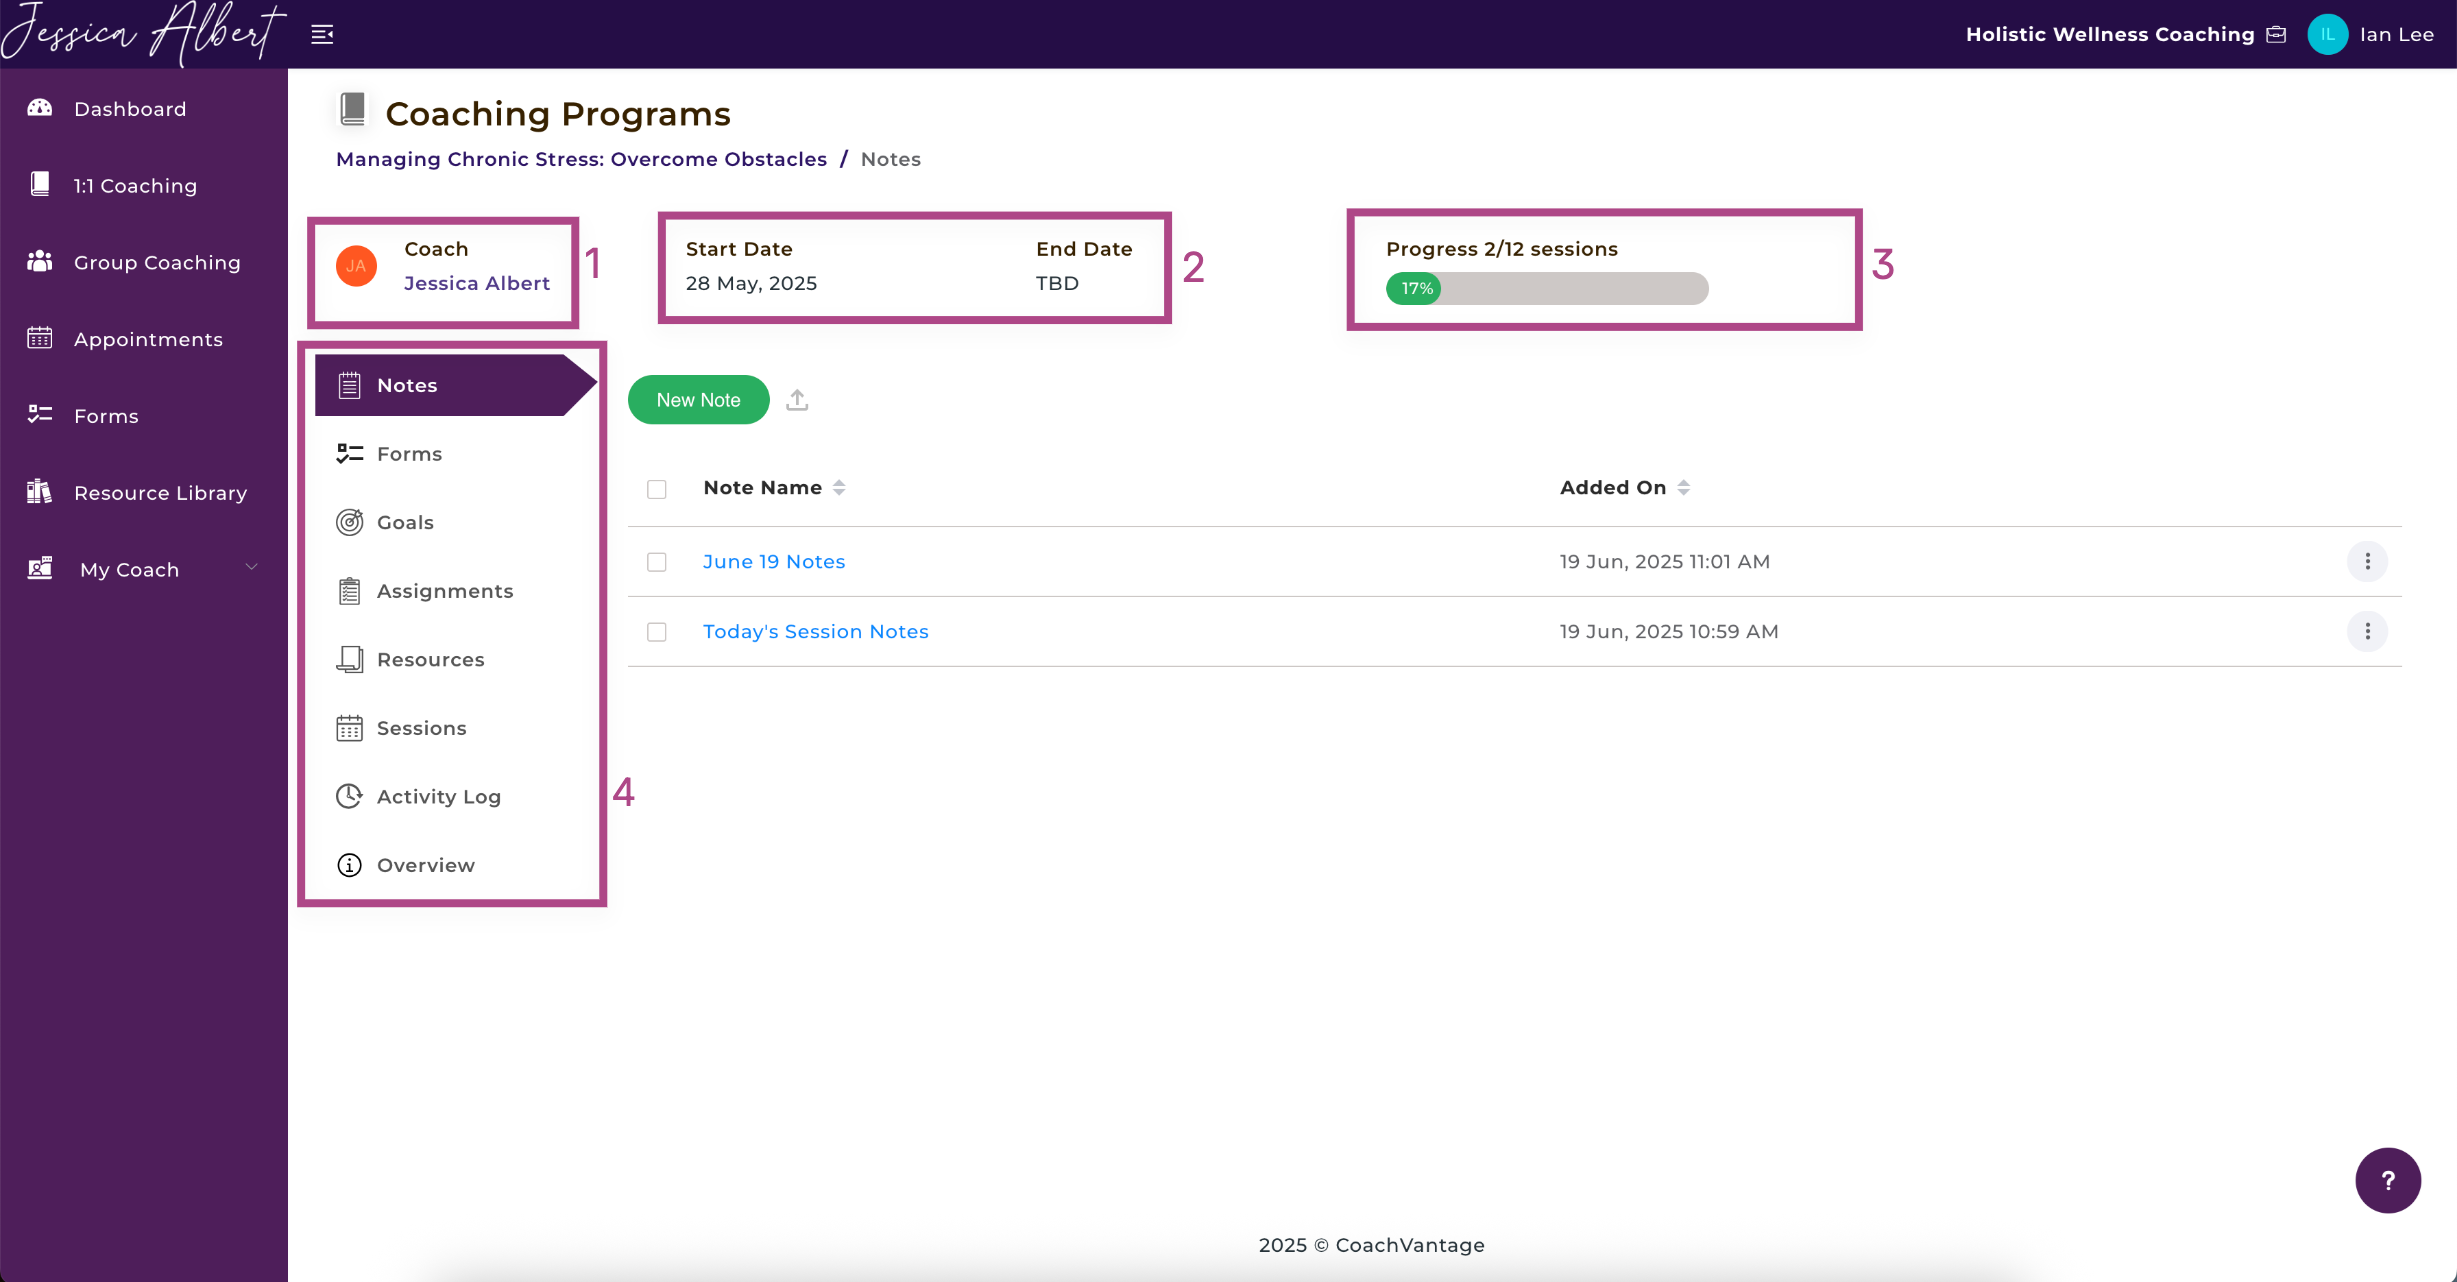
On the Program Management Page you can see:
1. Your Coach's name.
2. The Start Date and End Date of the program.
Note: If your Coach has not set a start date or end date for the program, you will TBD, which stands for To Be Determined.
3. The Progress Bar of the program in terms of the number of sessions (or hours) completed.
4. Your Notes, Forms, Goals, Assignments, Resources, Sessions, Activity Log, and Overview for the program. See the section below for more information about each of these items.
The Program Management Page
The program management page enables 2-way collaboration between Coach and Client.
It is dynamically updated whenever content is shared between Coach and Client.
Anything that is created or shared on the program management page will be instantaneously available in your coach's portal and vice versa.
The table below describes who has rights to create an item and who can take action for a particular item:
| Item | Can be created by | Remarks |
| Notes | Coach and Client | Coach and client can take their own private notes. Coach and client can share notes with each other. |
| Forms | Coach Only | Only Coach can send forms to client. Only Client can respond to forms. |
| Goals and Milestones | Coach and Client | Coach and client can create goals & milestones. Coach and client can mark goals & milestones as 'Not Started', 'In Progress', or 'Completed'. |
| Assignments | Coach Only | Only Coach can send assignments to client. Coach and client can mark assignments as 'Not Started', 'In Progress', or 'Completed'. |
| Resources | Coach and Client | Coach and client can add files/documents. Once added, the files/documents are immediately shared with the other party. |
| Sessions | Coach and Client (provided that Coach has granted rights to Client to self-book sessions) | Coach can send appointment notifications to client. Client can self-book sessions with Coach if Coach has granted these rights to the client. |
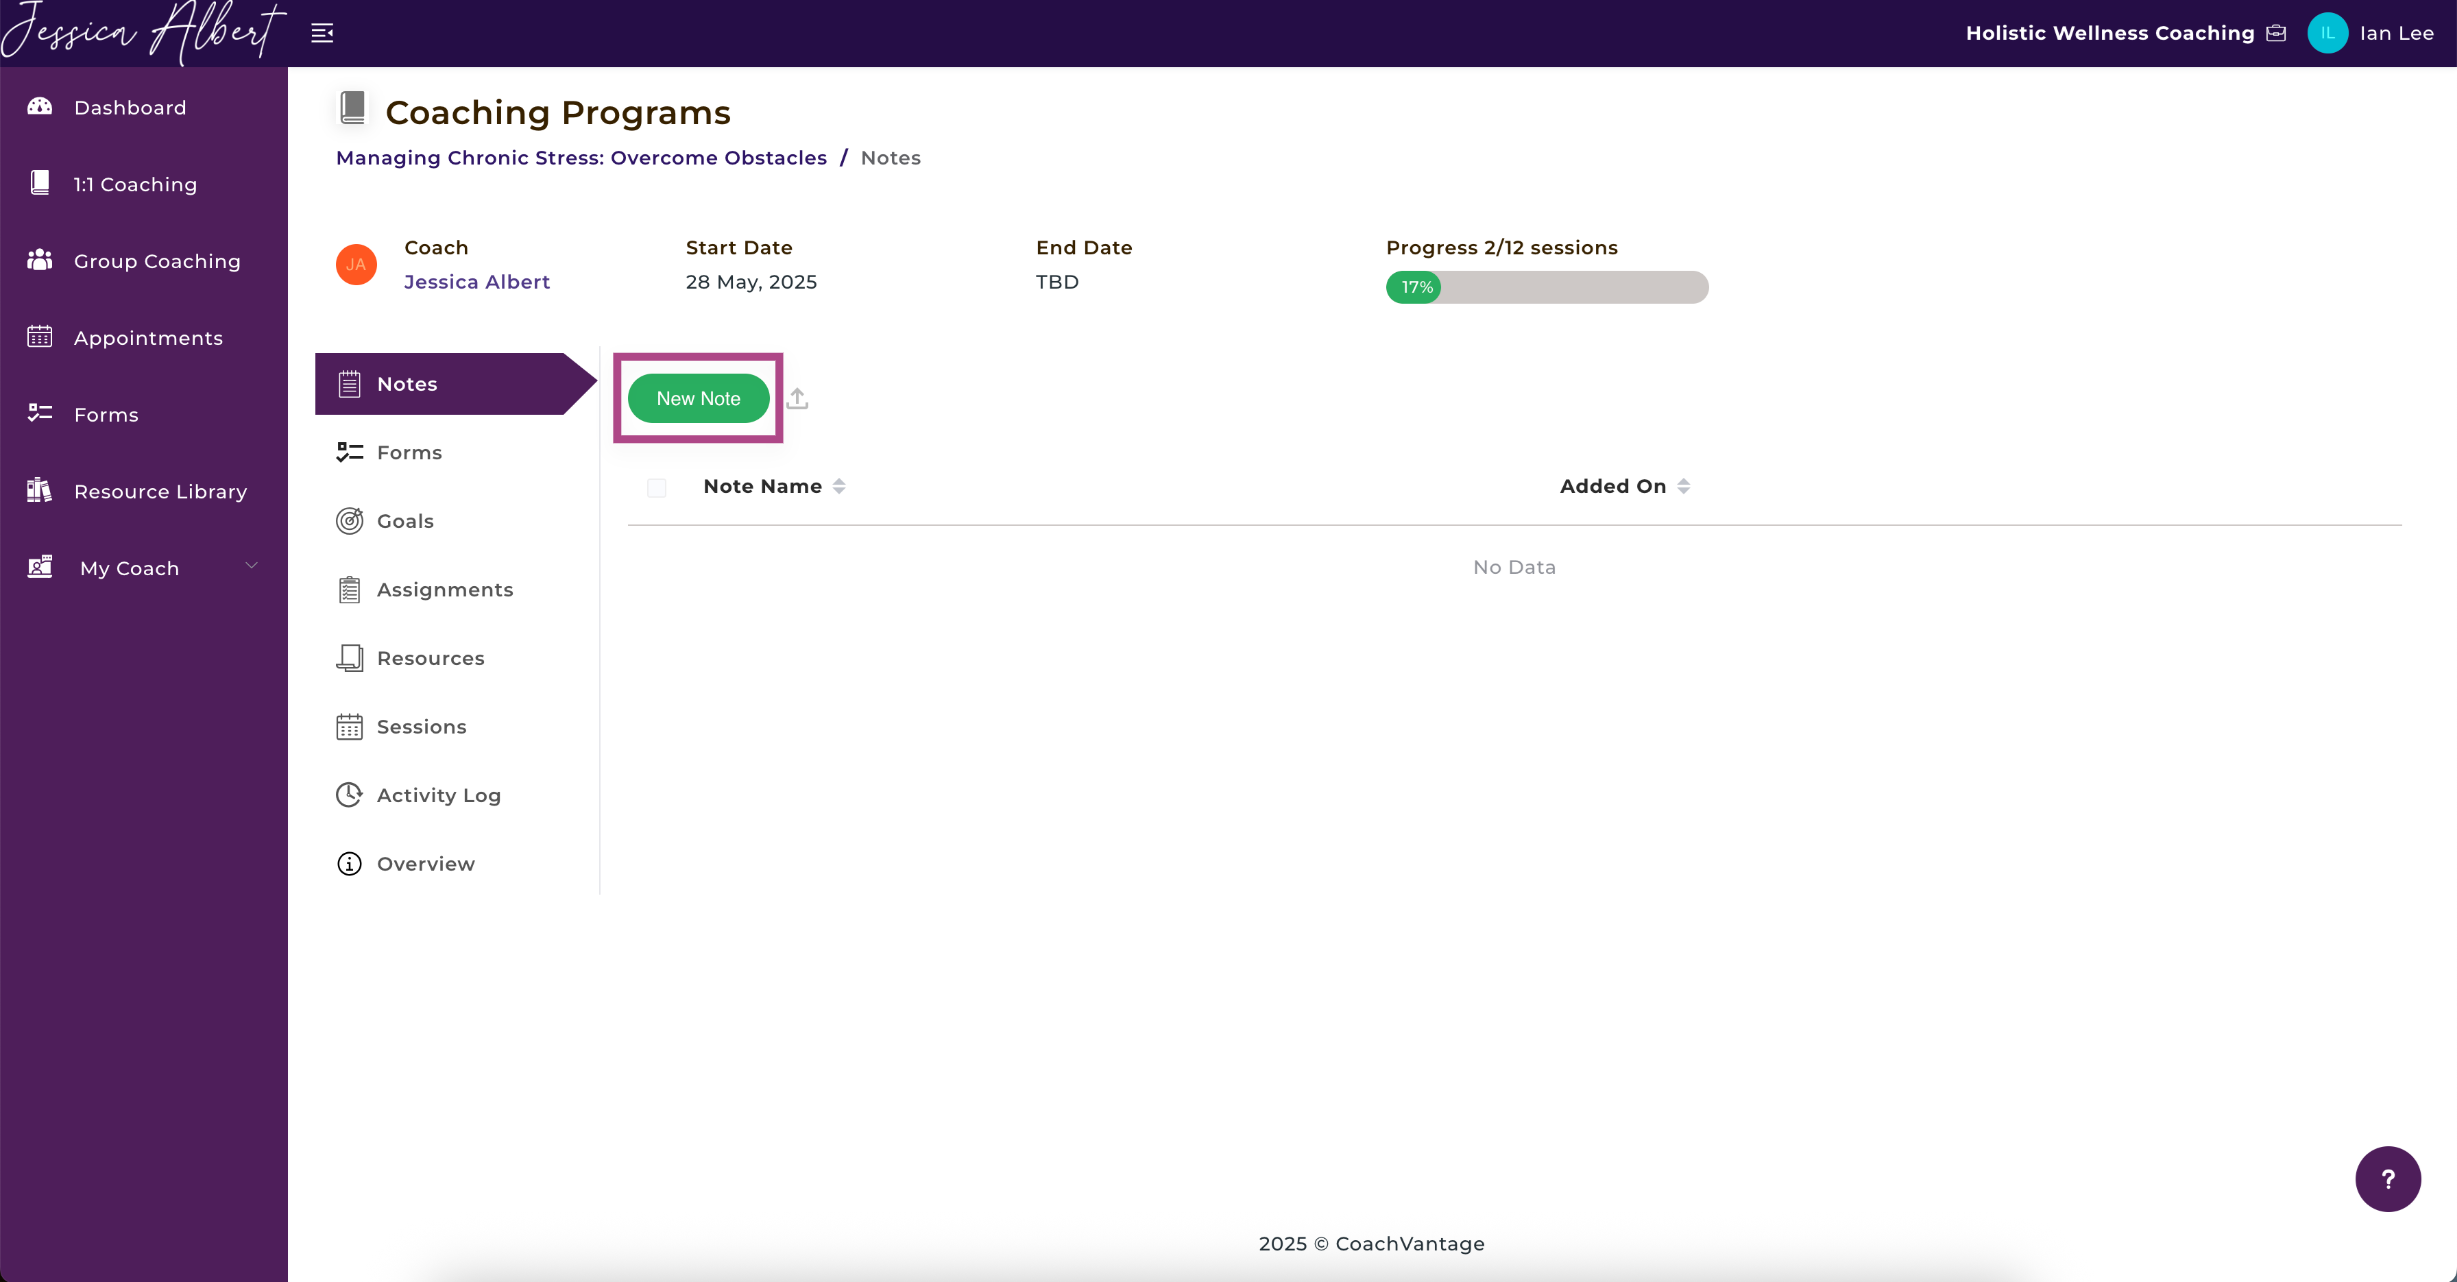
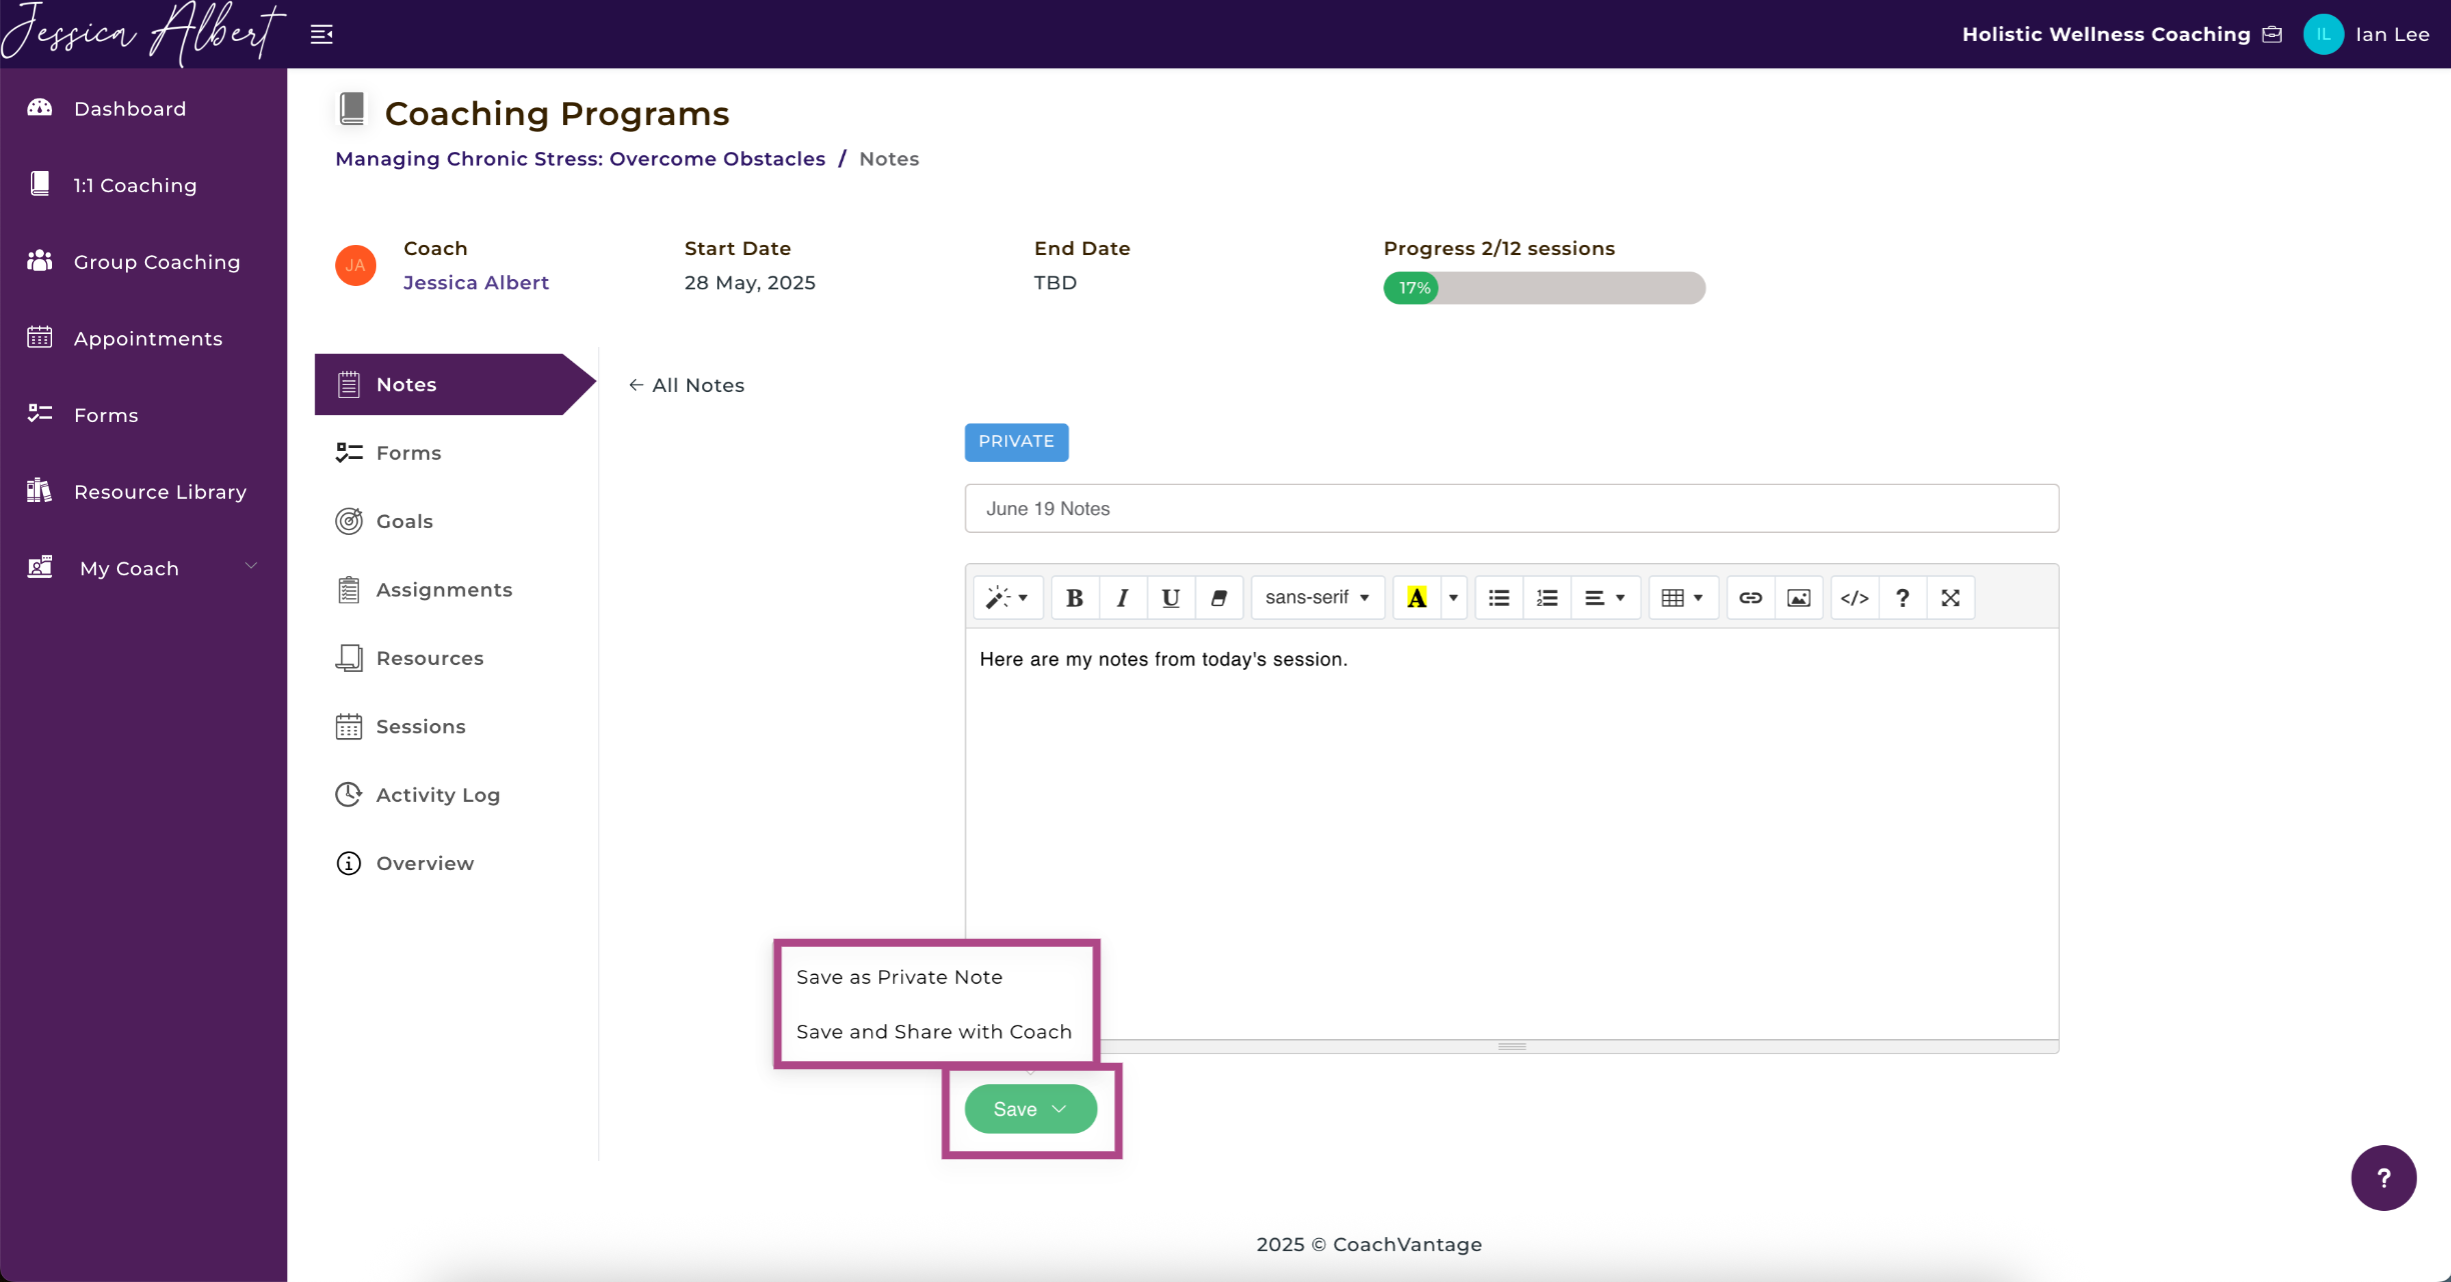
2. Notes 📝
You or your Coach can take notes. Notes can be Private Notes (these notes are not shared with your Coach), or Shared Notes (you have the option to share your notes with your Coach).
To Create A New Note:
- Click the New Note button.
- Type in your notes using the text editor.
- Click Save.
- Click the 3-dot button menu if you wish to Delete the note or Share the note with your Coach.
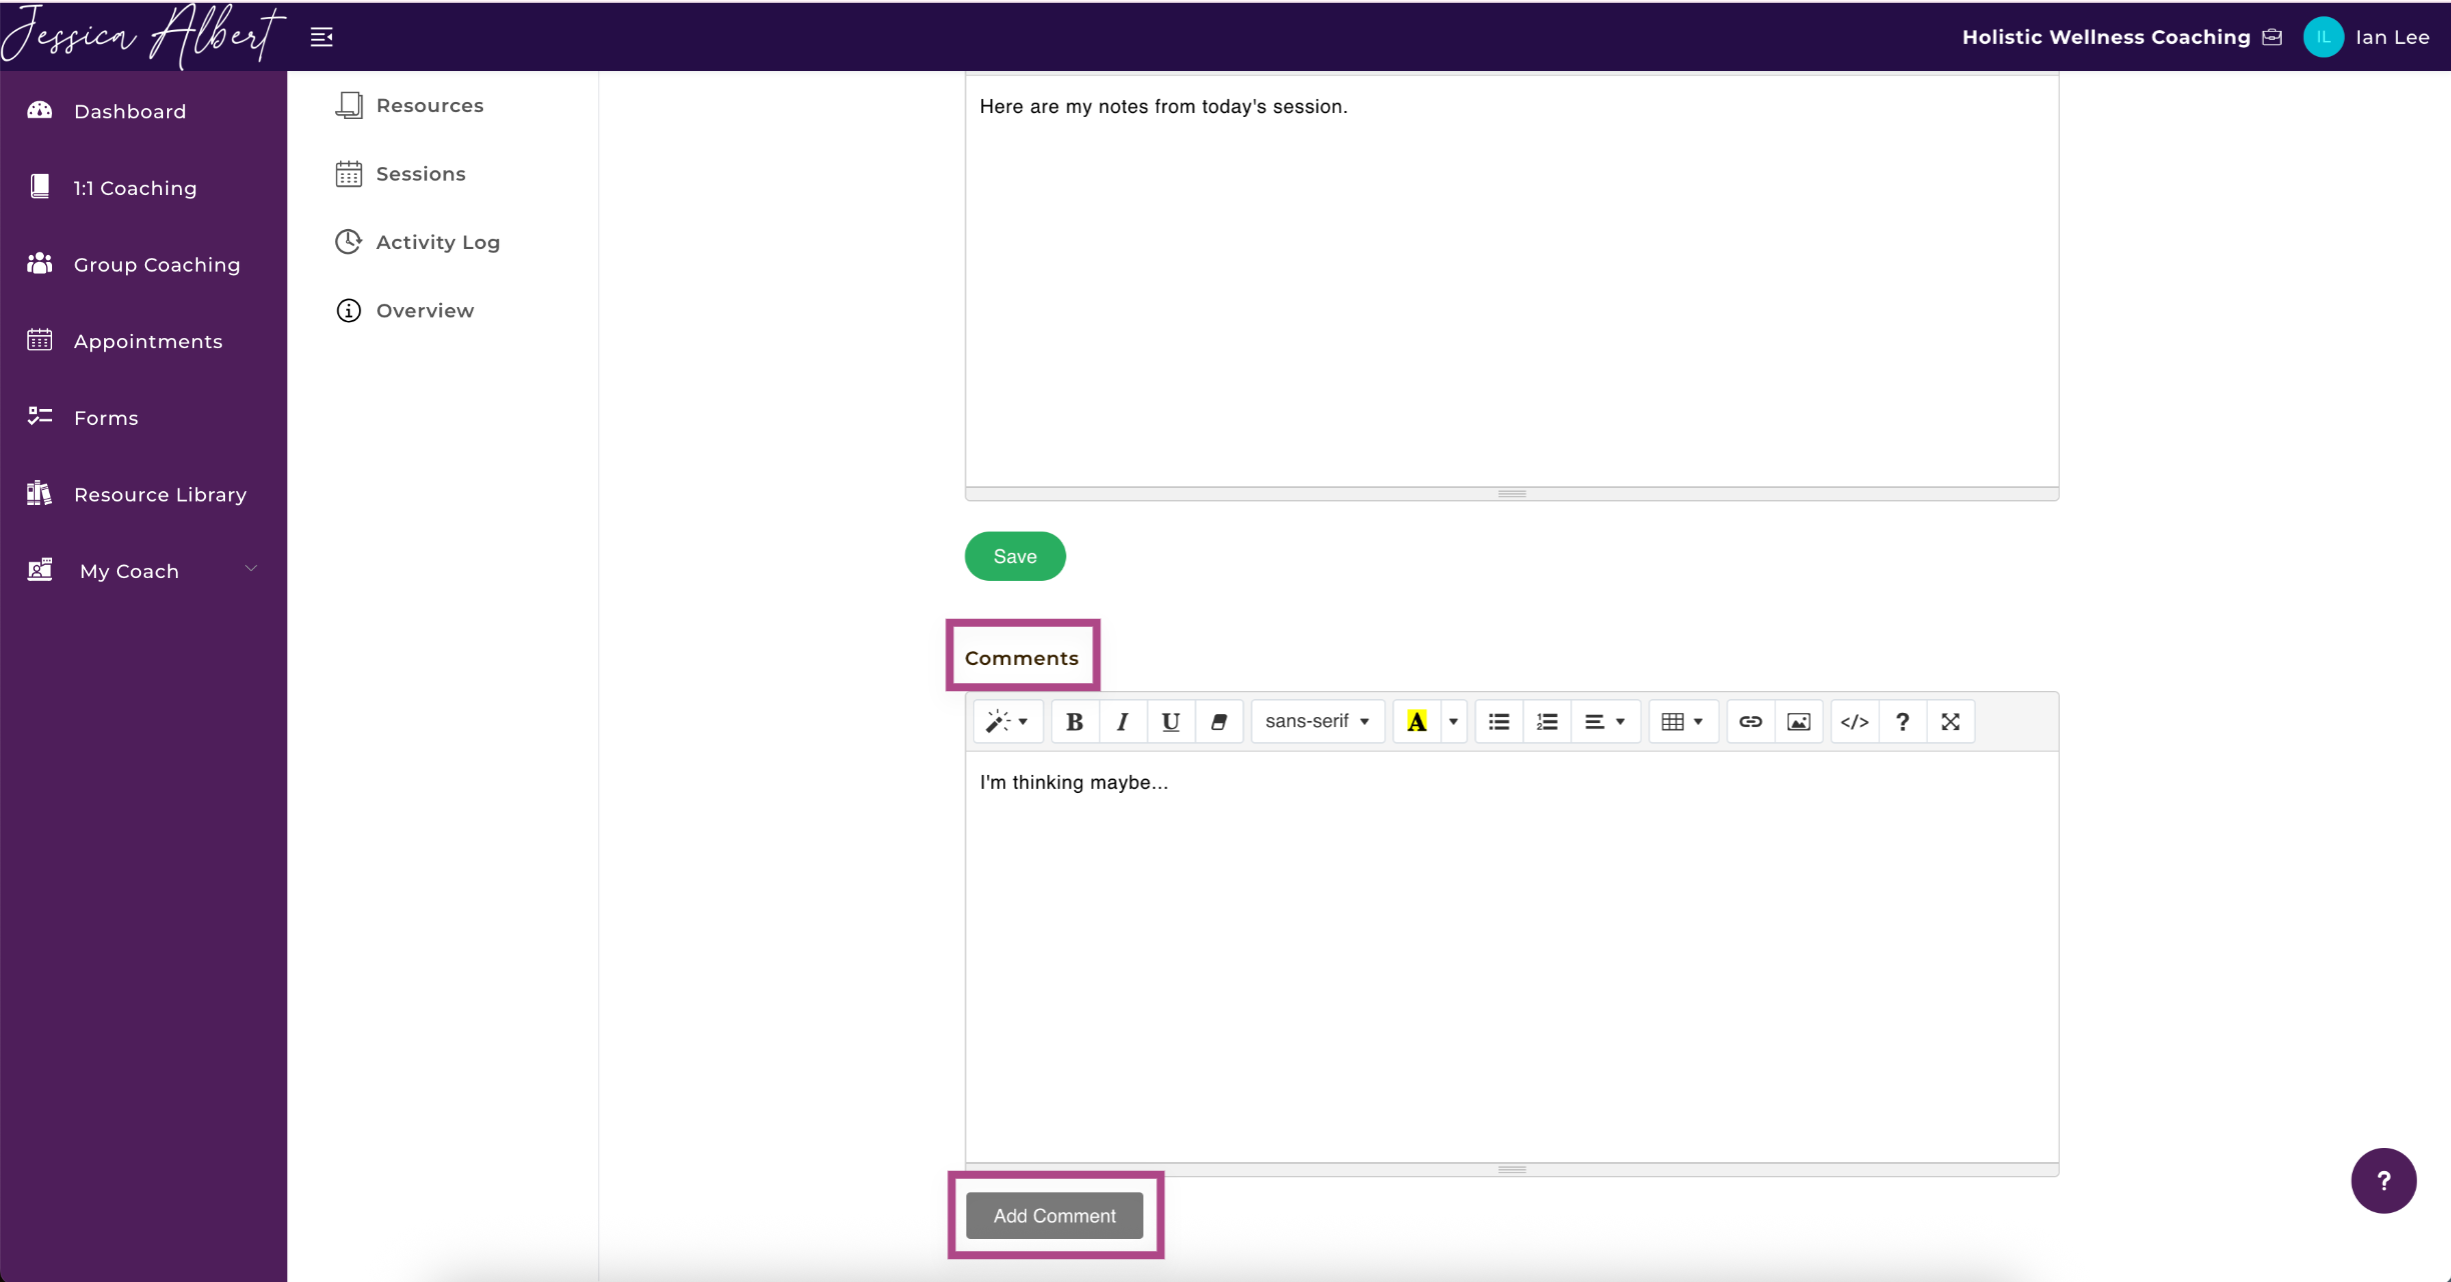
The Comments field can be used as further communication with your Coach, or if you wish to add your own comments / thoughts to the note.
3. Forms 📄
If your Coach has sent you a form to complete, it will appear in the Forms ribbon.
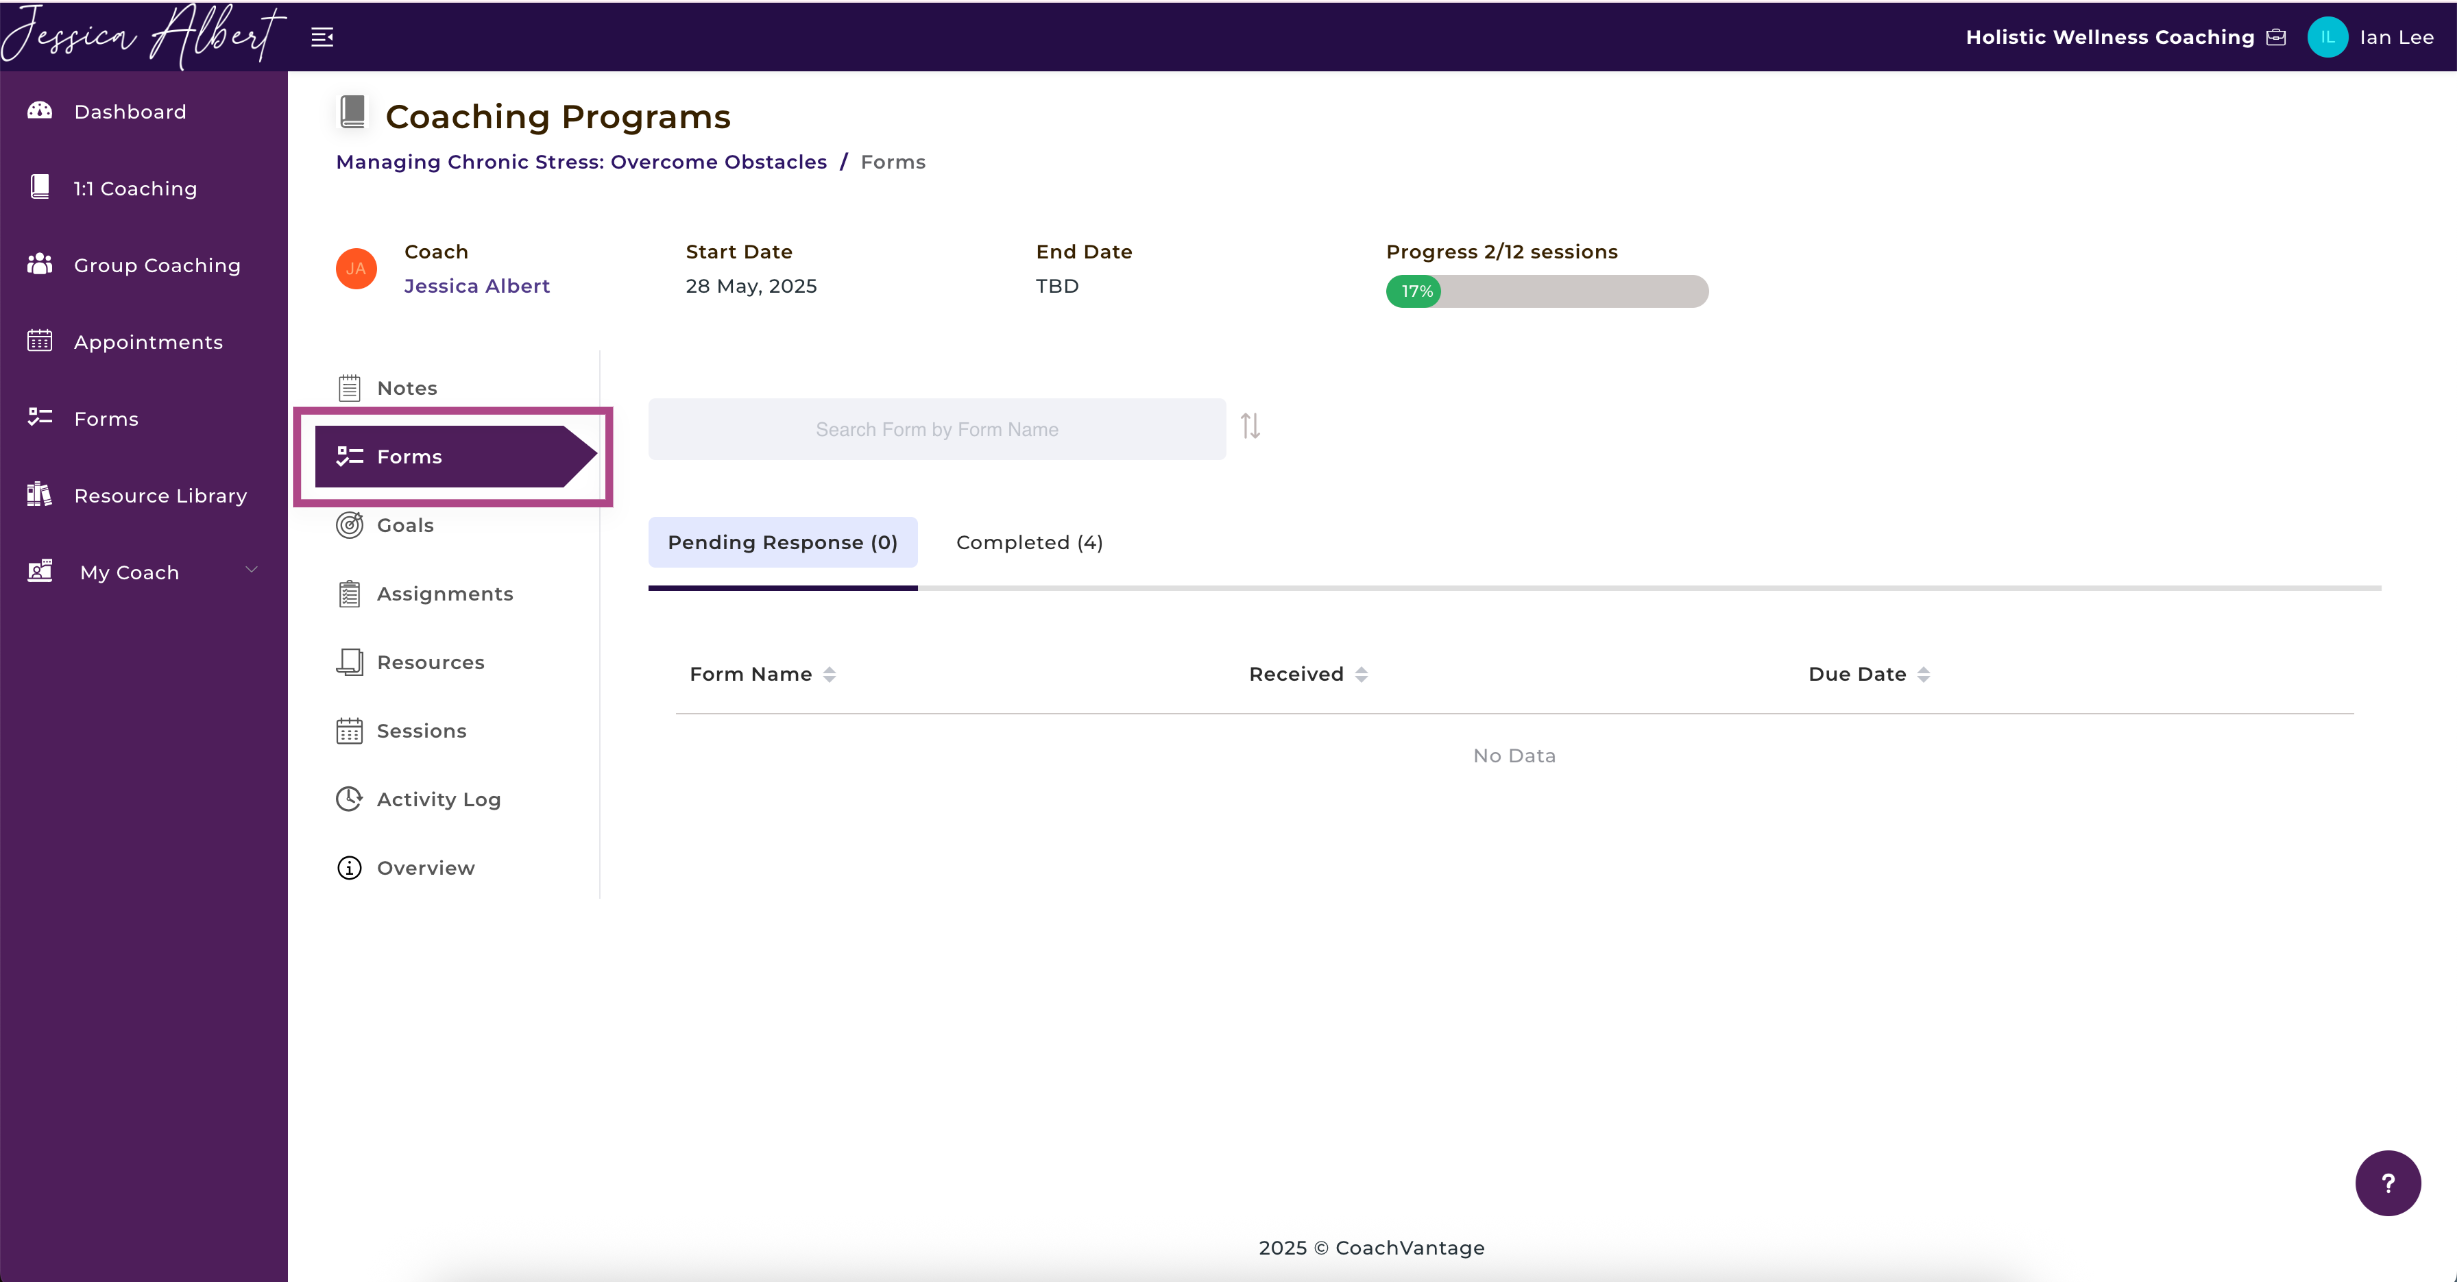
For more details on how to respond to Forms, refer to the article How to Respond to Forms.
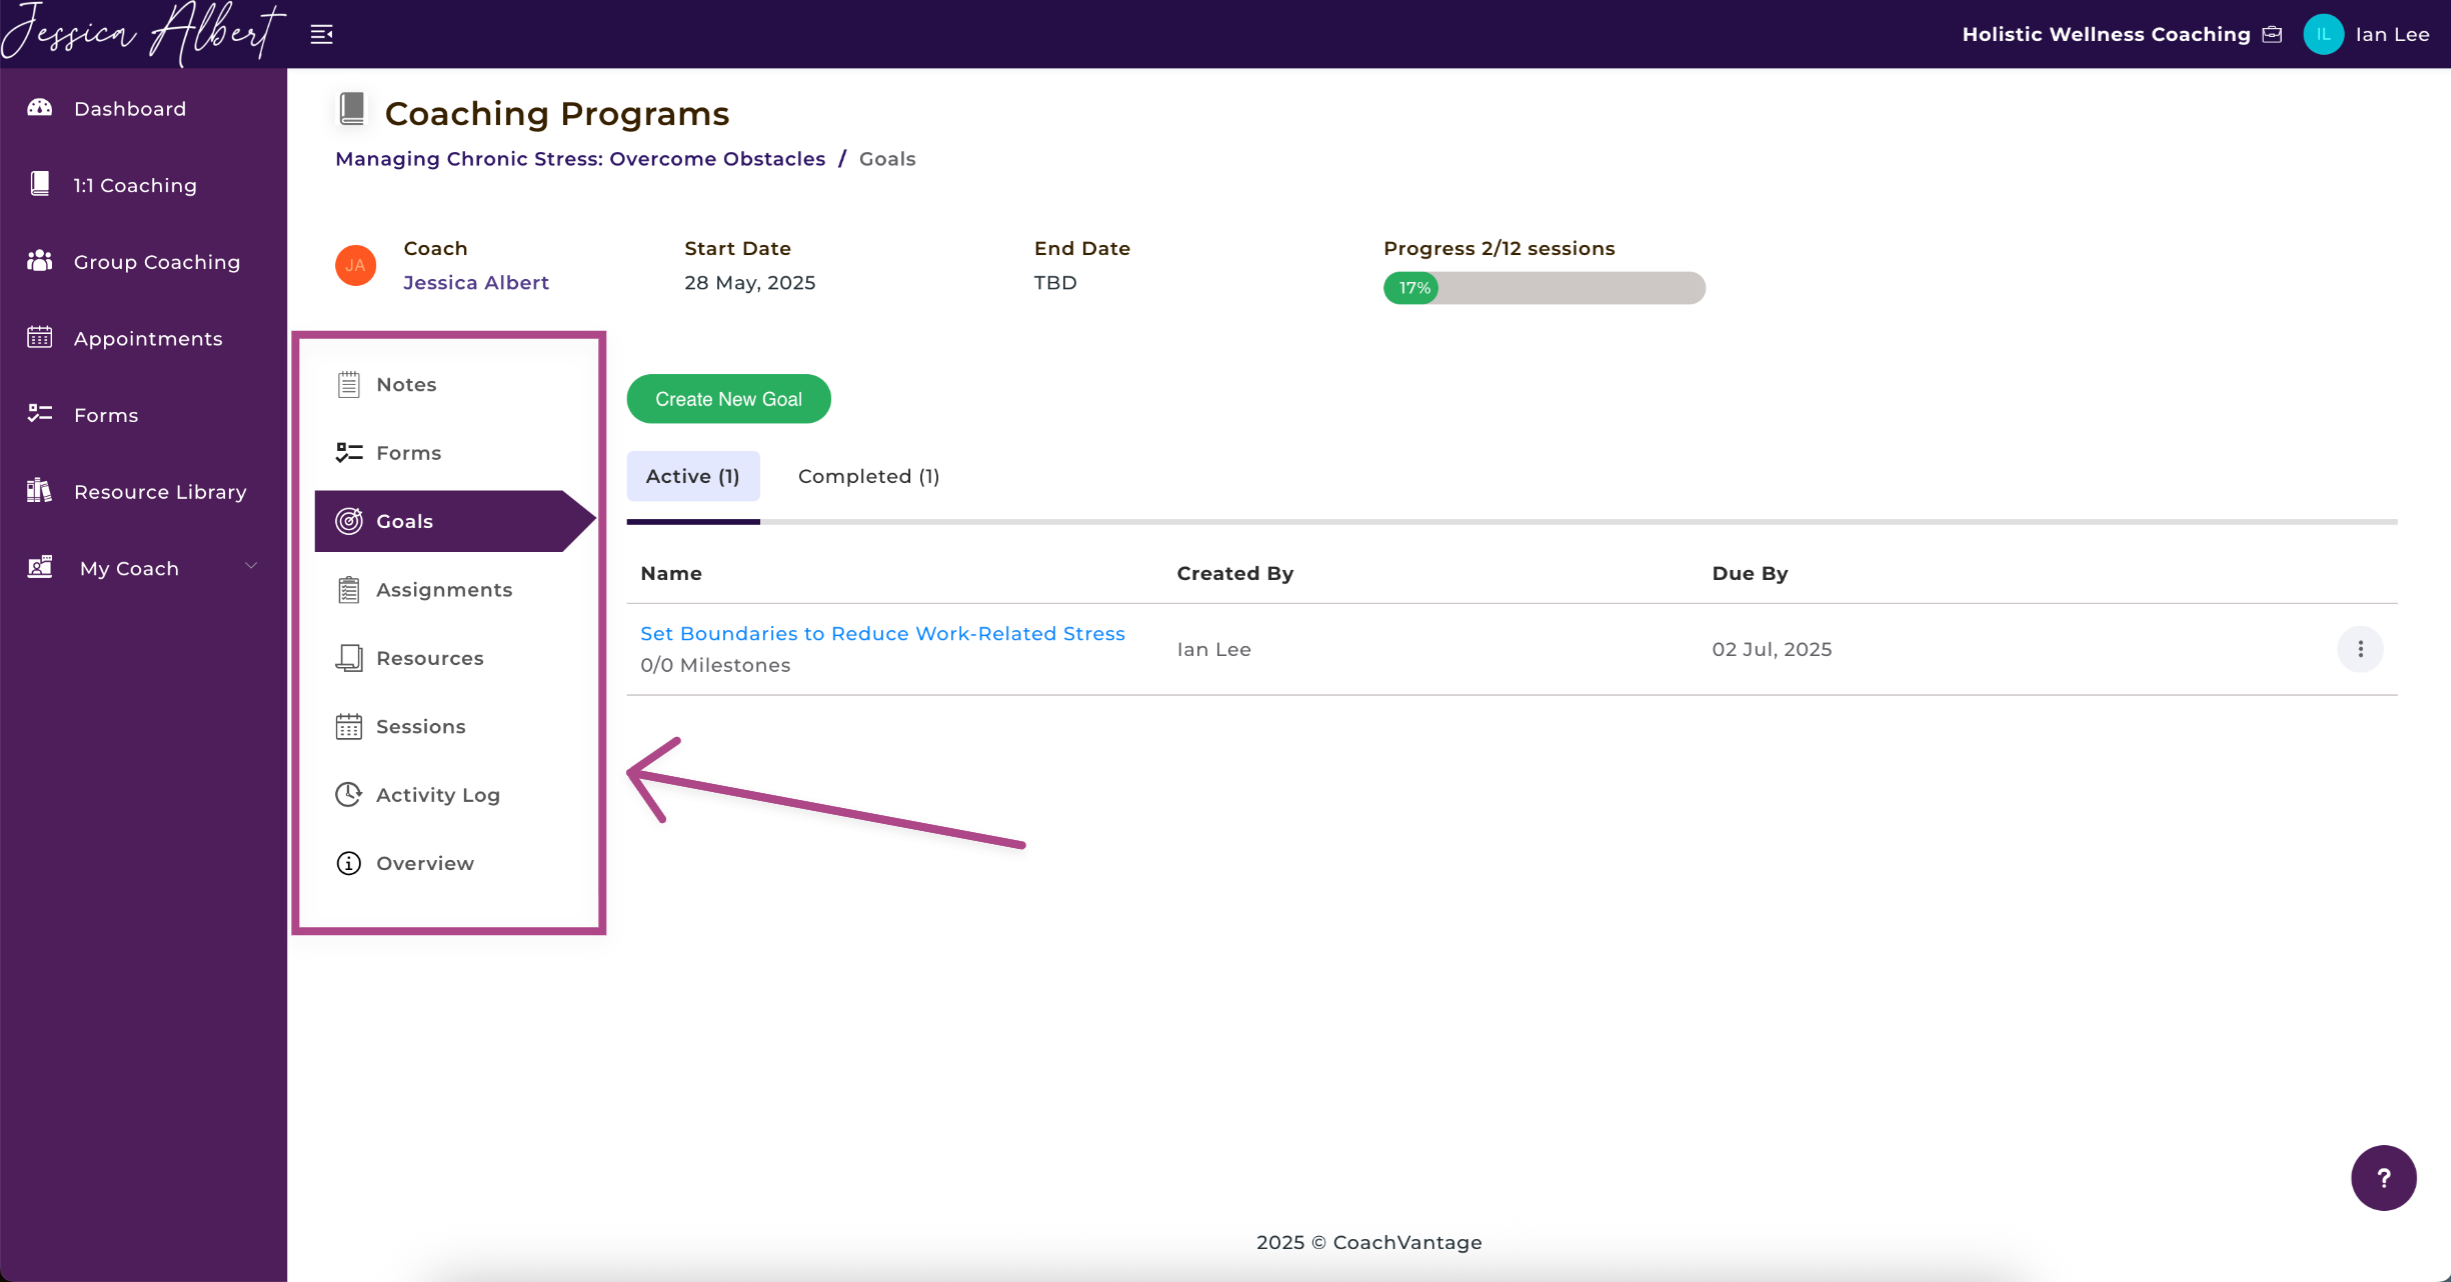
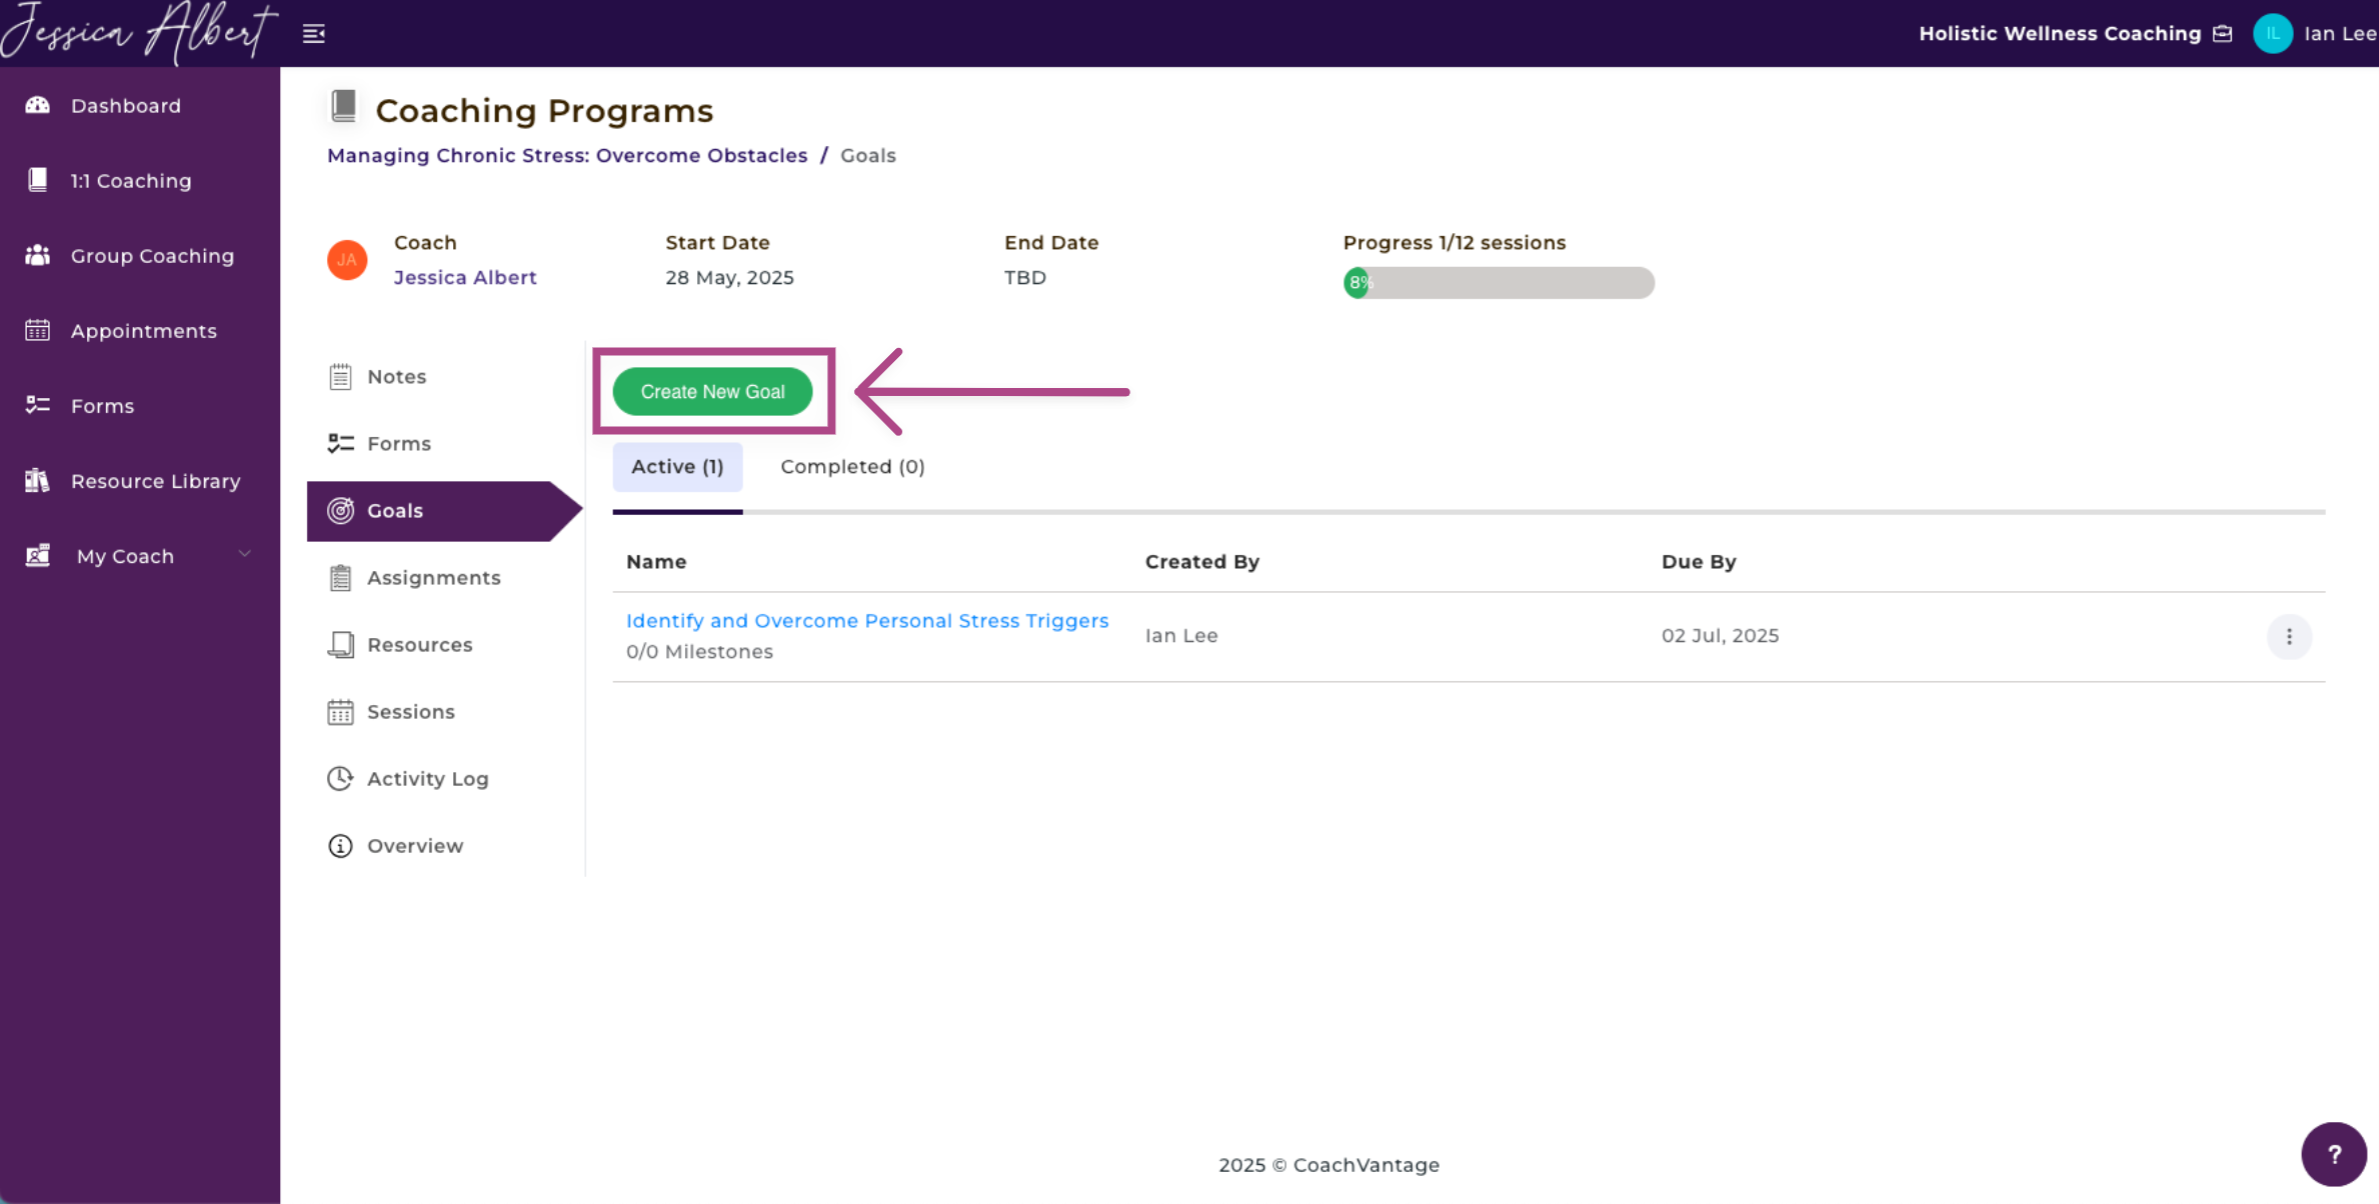
4. Goals 🥅
To create a goal:
- Click on the Goals ribbon in the sub-menu to open the Goals page.
- Click the Create New Goal button to set up a new goal for yourself.
- Enter Name, Description (optional) and Due Date (optional) of the goal.
- Click Save.
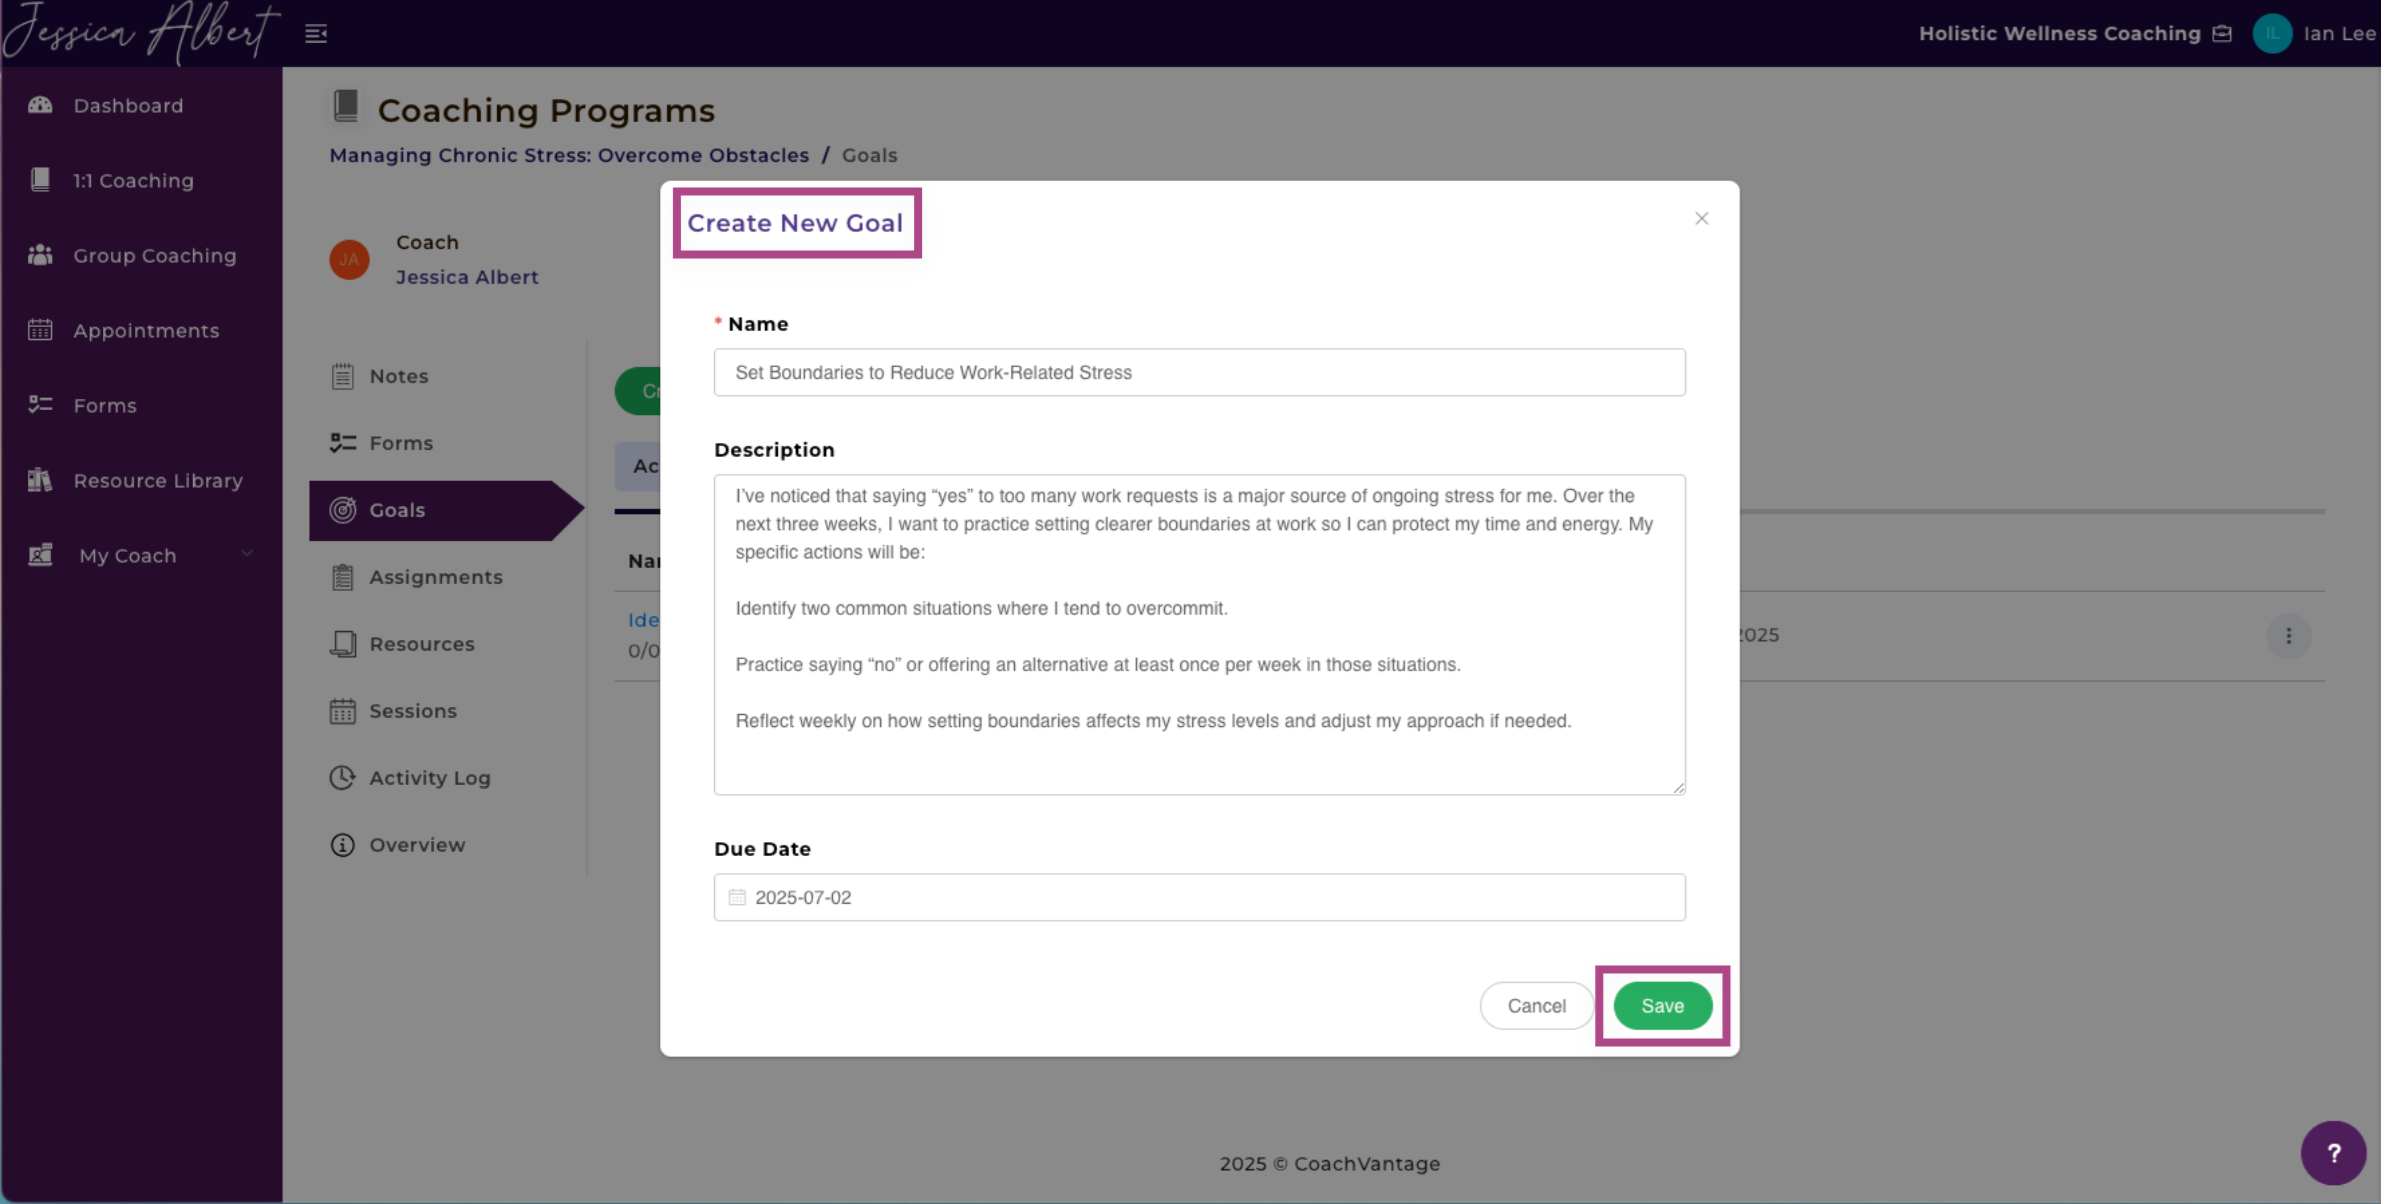
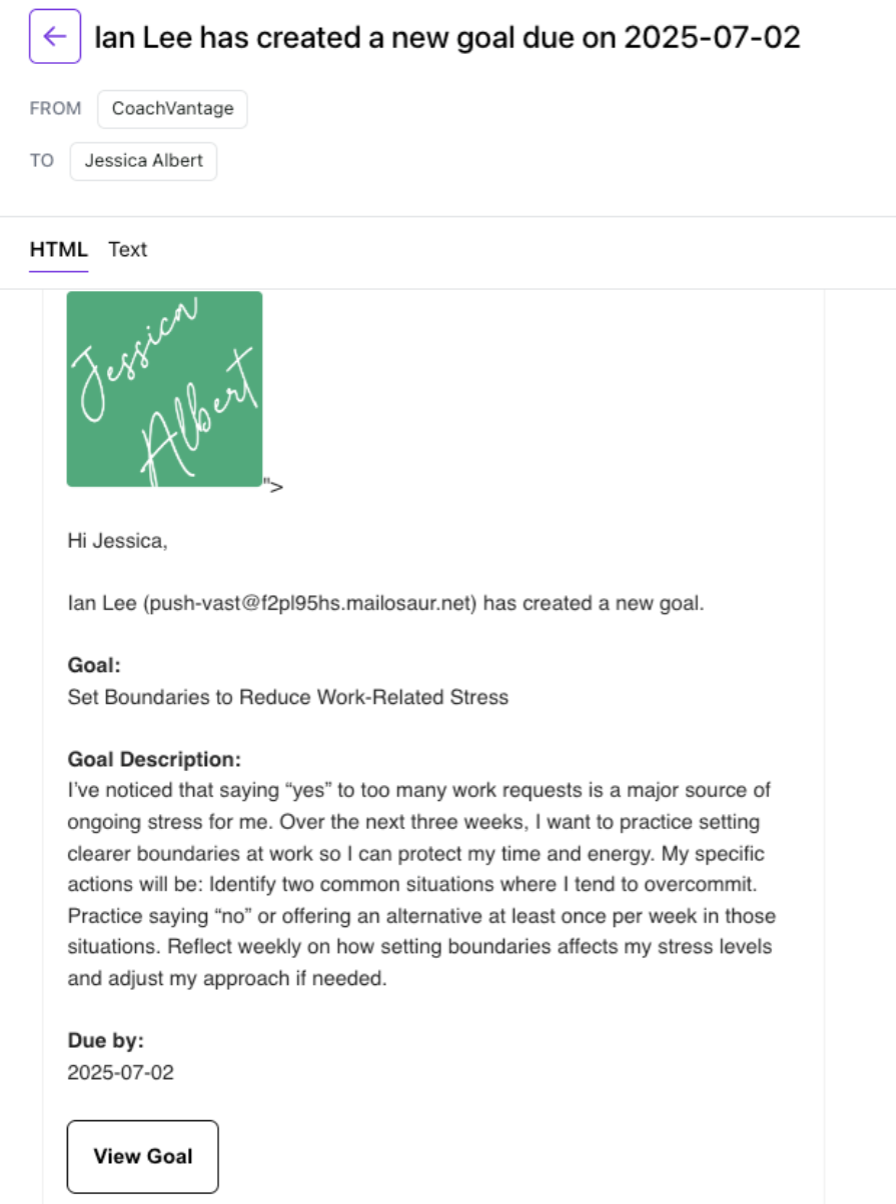
Once a Goal is created, it will be automatically displayed in both yours and your Coach’s program management page, on the Active Goals tab.
An email notification will be sent automatically to your Coach whenever you create/edit/make changes to a goal.
5. Create Milestones 🏆
You can optionally add Milestones to goals. This allows you to break down a high level goal into smaller steps (or milestones) that you need to complete before the high level goal itself is marked as 'completed'.
To Create Goal Milestones:
Click +Milestone. A pop-up window will open to add the Name and Due Date (optional) for the Milestone.
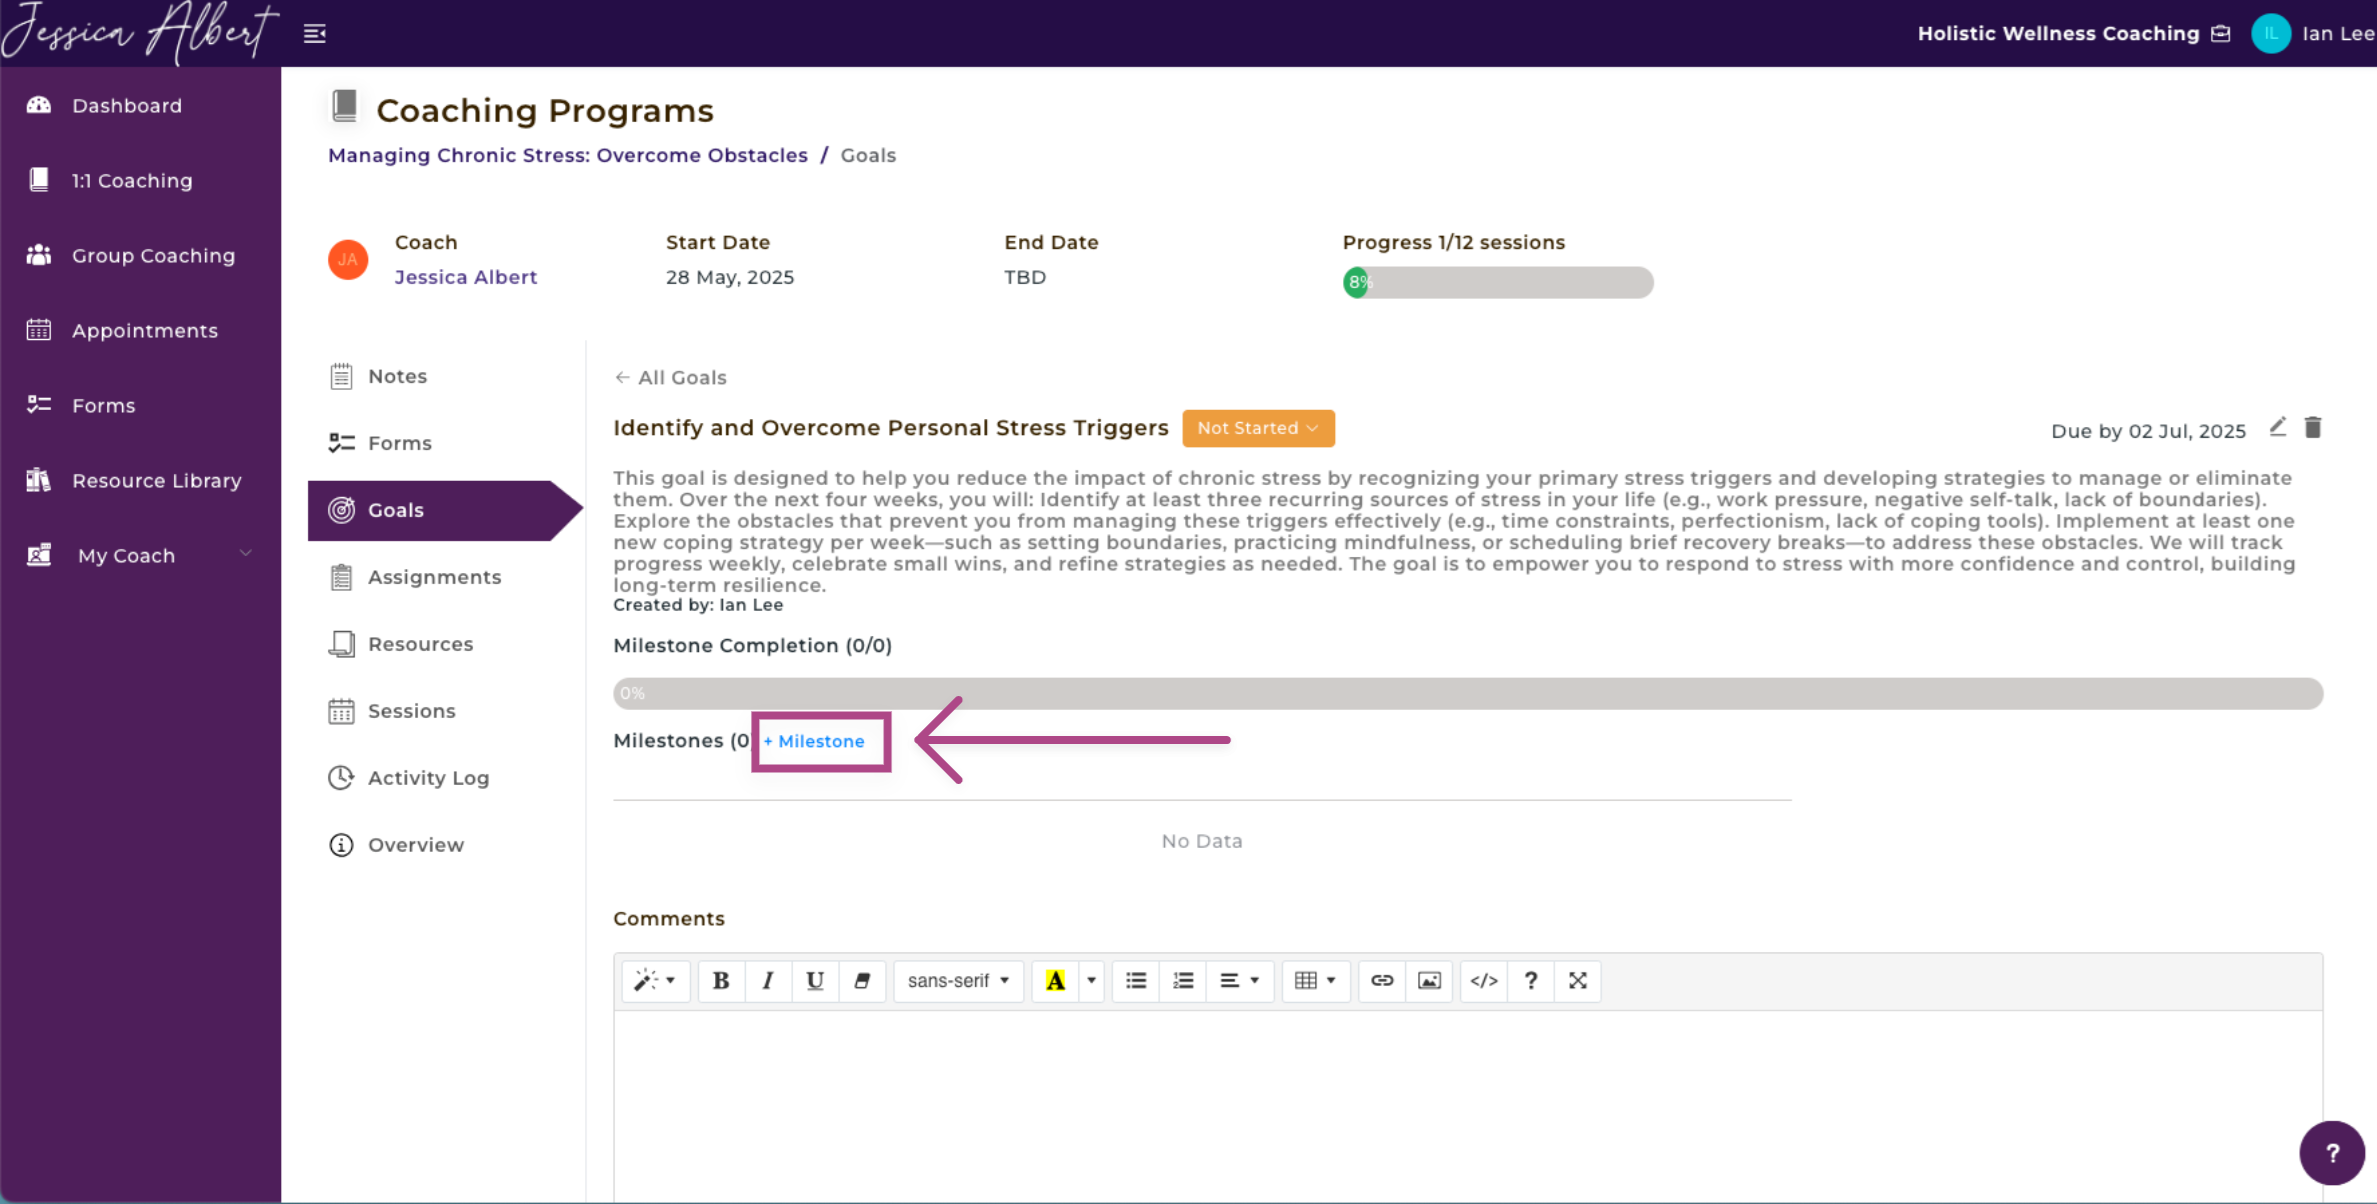
Select the Pencil icon to edit a milestone or click the Trashcan Icon to delete it.
To mark a Milestone as completed, simply check the checkbox on the left-side of the Milestone.
As milestones get checked off as Completed, the milestone completion bar progresses automatically and displays the percentage completion of all milestones.
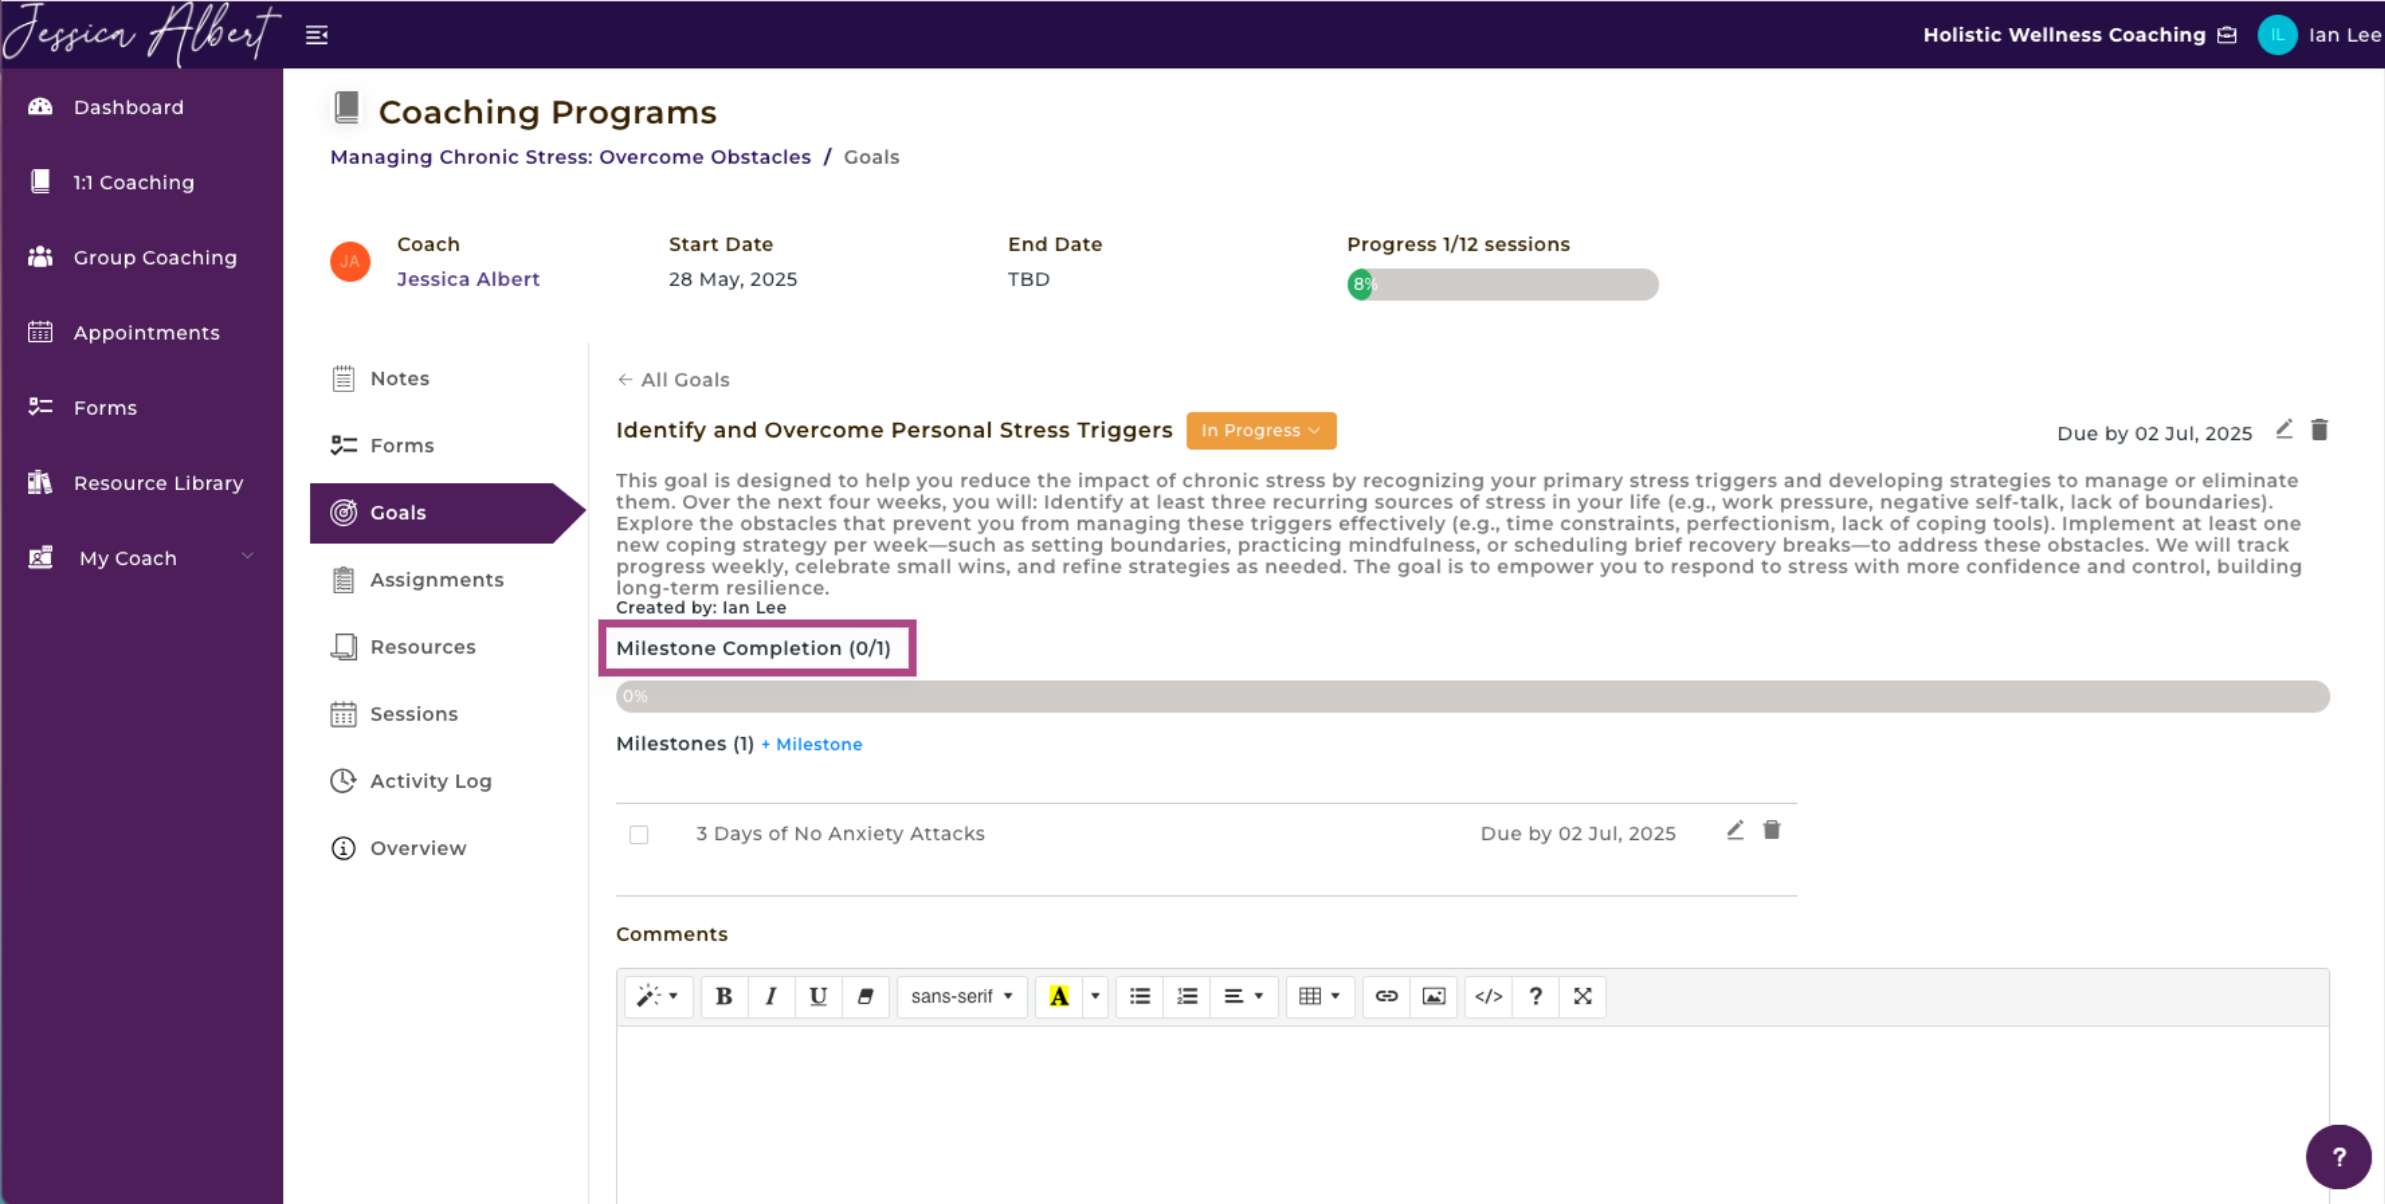
If you wish to mark a milestone as Not Completed, you can simply uncheck the checkbox by clicking on it again. This will move the milestone progress bar back to reflect the new percentage completion of all milestones.
To learn more about Goals on the program management page, refer to this article: How to Manage Coaching Goals.
6. Assignments 🖊️
To Manage An Assignment:
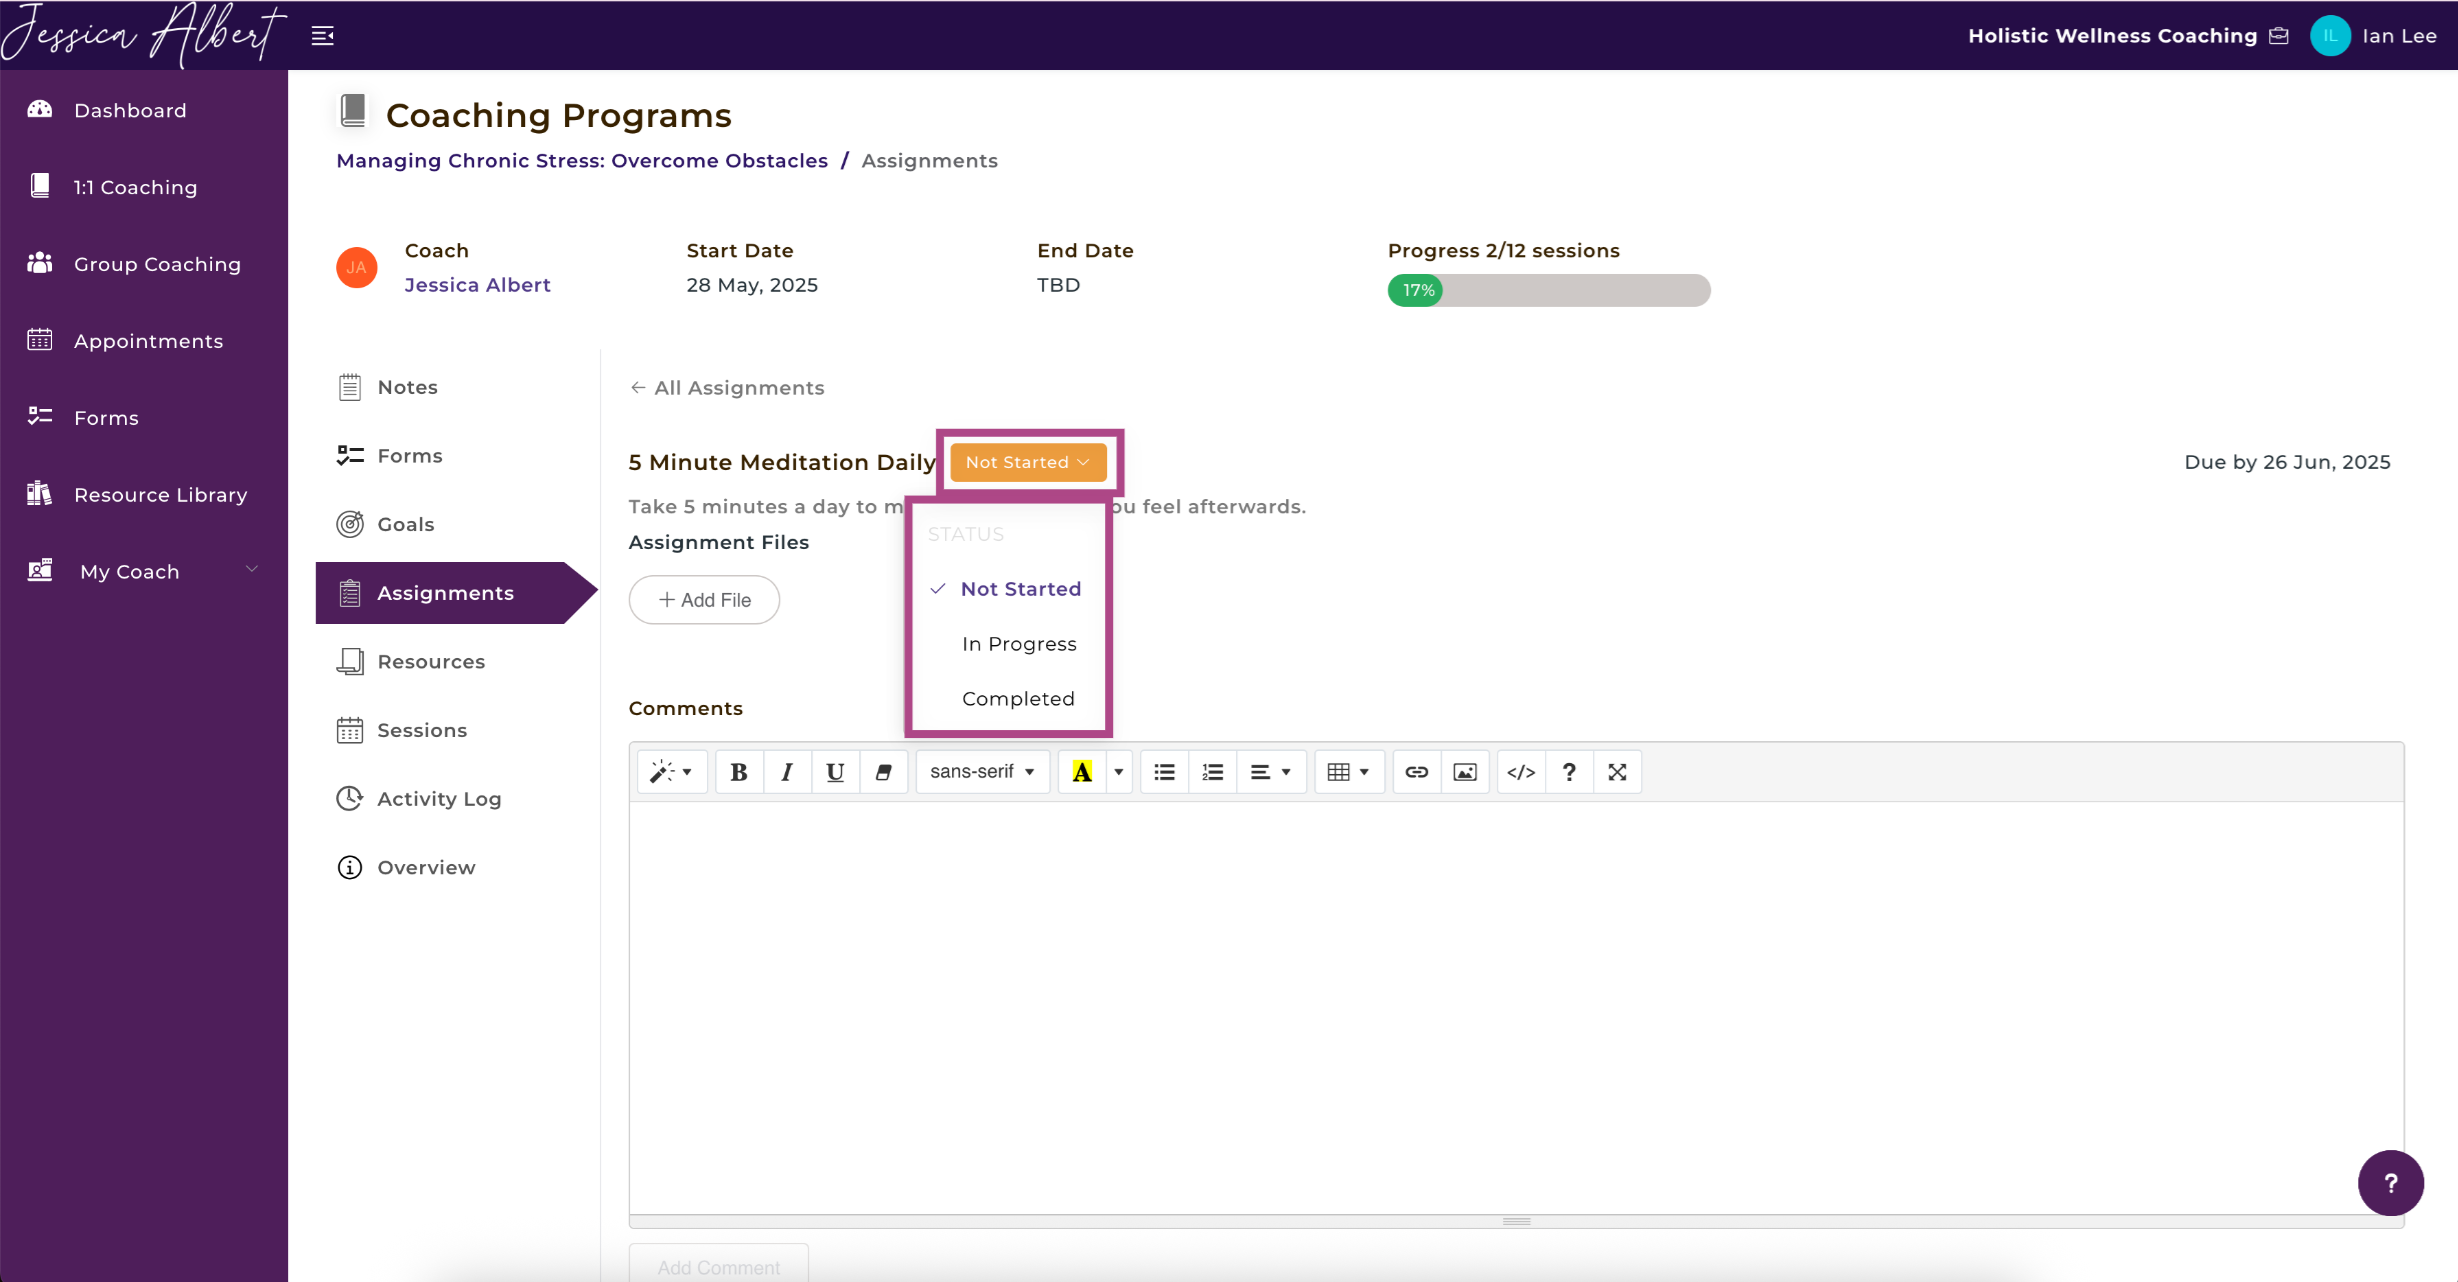
1. Assignment Status:
When you receive an assignment from your Coach, its default status will be Not Started. You or your Coach can easily change the status of an assignment to In Progress or Completed, as you progress through the assignment.
To Change the Status of an Assignment:
- Click on Assignments.
- Select the Assignment that you'd like to change the status of.
- You'll see in the center of your screen a Not Started button, click here to change the status of the assignment to In Progress or Completed.
2. Add Files
You can easily add files such as documents, worksheets, images, video links, etc to an assignment.
Documents can be added by selecting them from your Resource Library or from your local drive or other sources like Google Drive, Dropbox, Evernote, etc.
To Add a File to an Assignment:
- Click on the + Add File button.
- Type in a message (optional). A message could be a short description of what the file is about. The message will be displayed next to the file name.
- Select Files from either your Resource Library or your Local Drive.
- Click Save.

The file will be uploaded and saved to the assignment.
To know more about what you can do with assignments on the program management page refer to this article: How to Manage Coaching Assignments.
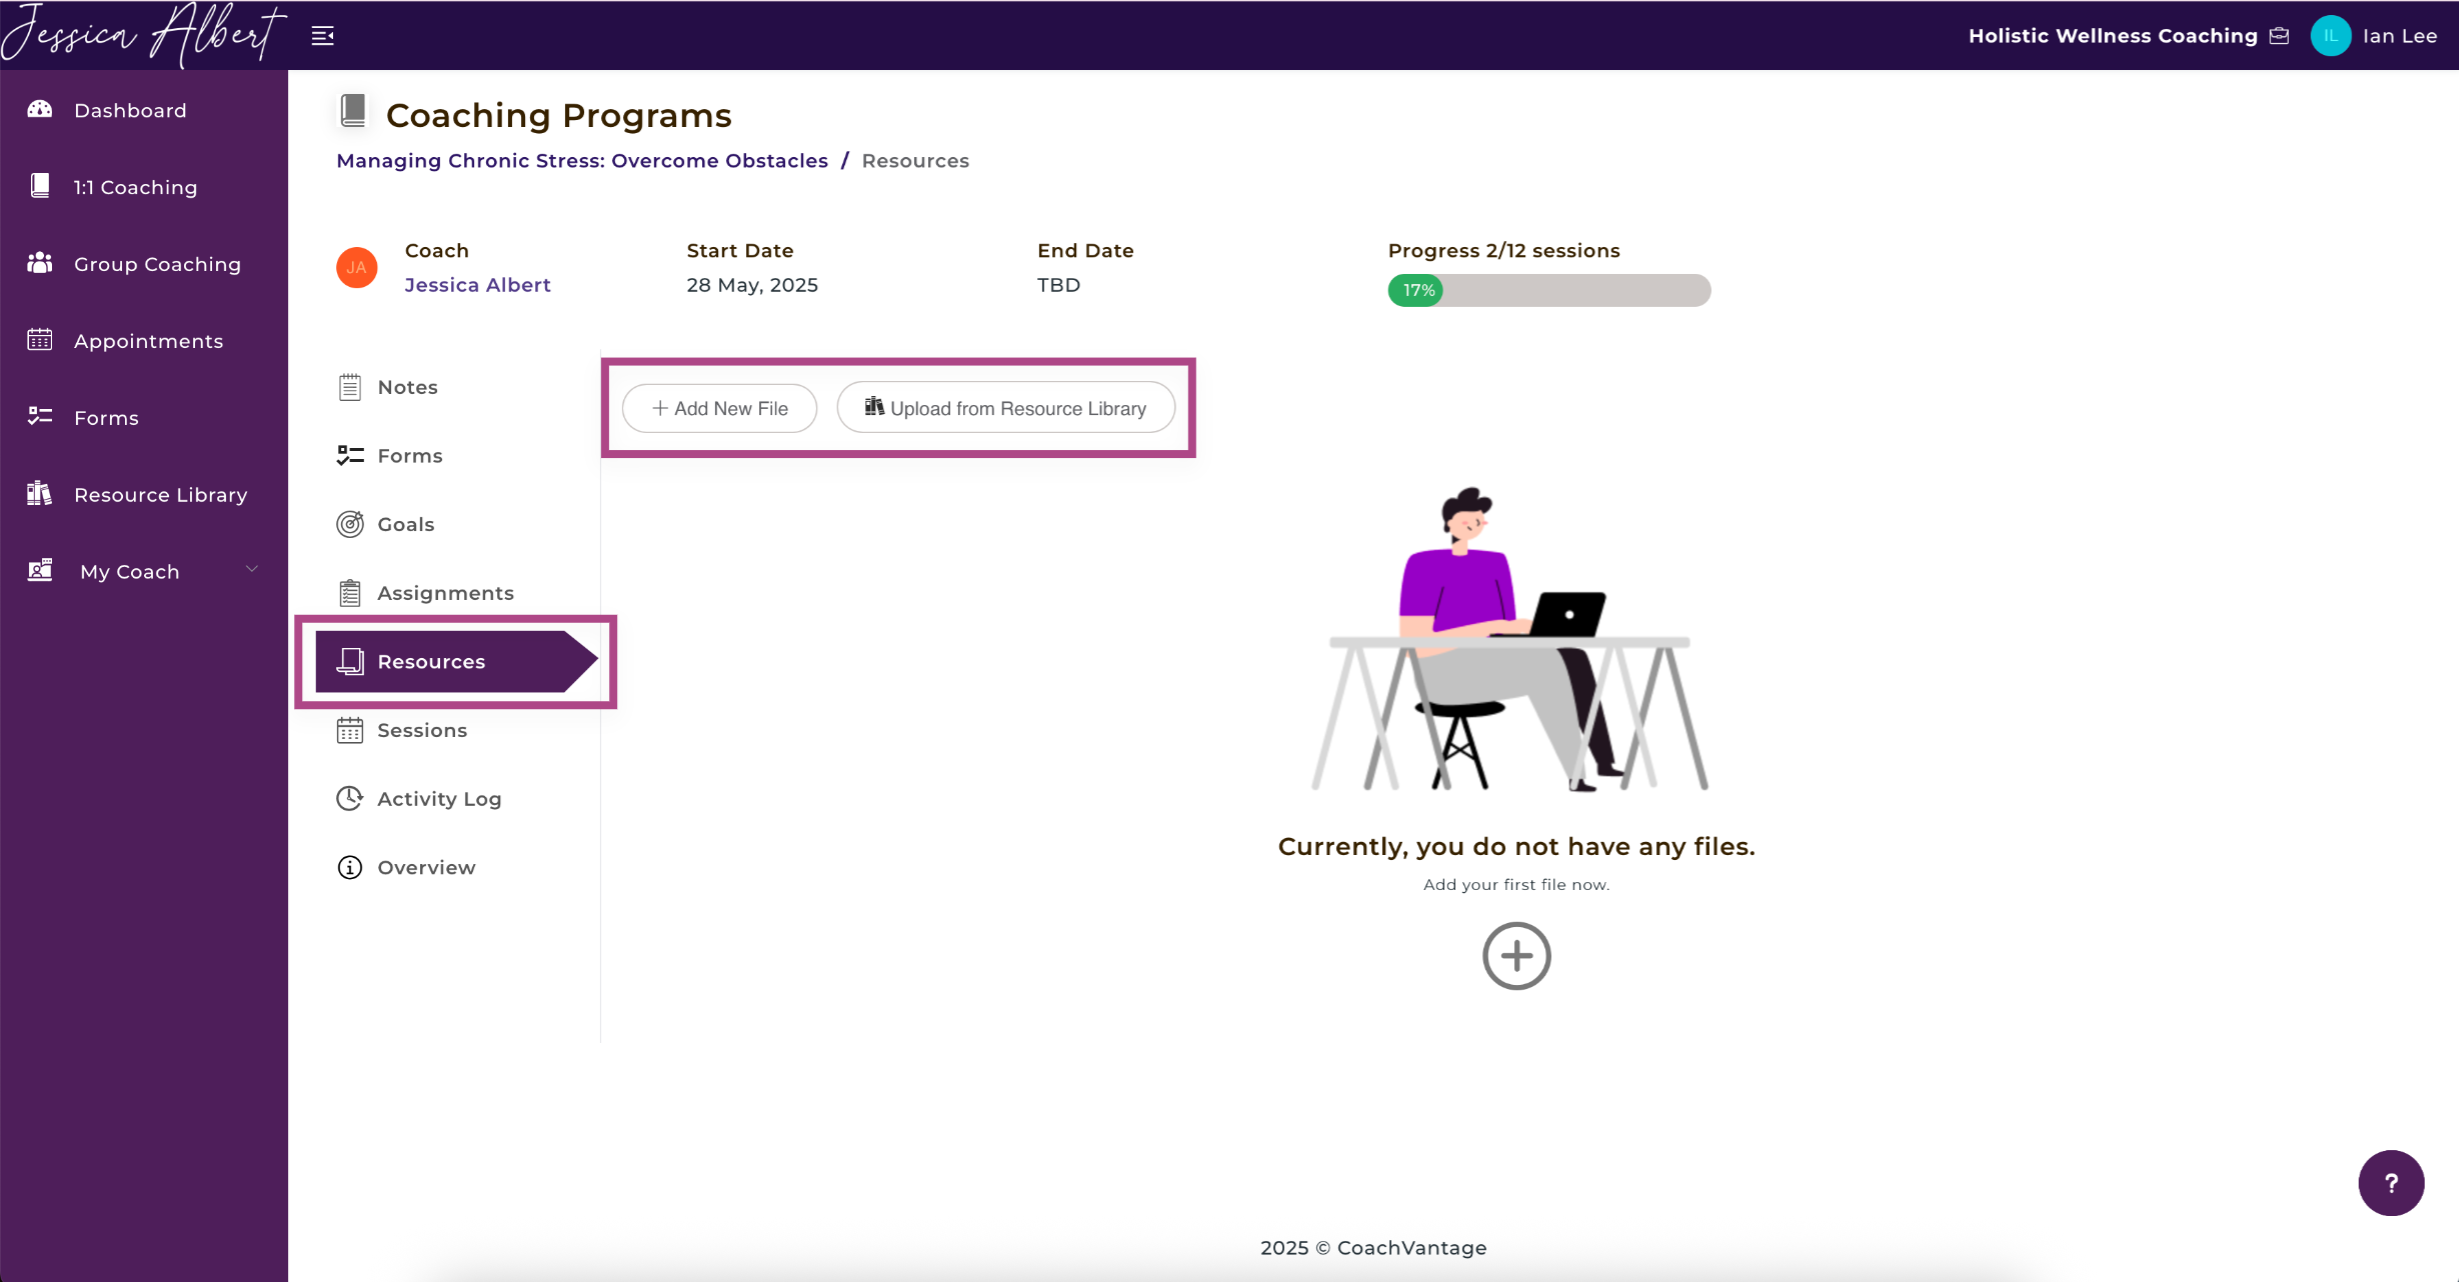
7. Resources 📙
On the Resources ribbon, you will be able to see the files that you and your coach have uploaded.
To Add A File:
- Click Add New File button.
- You can also upload existing files from the Resource Library into this program.
- Any files uploaded by you or your Coach throughout the coaching journey is shown here.
- Coaching Program Files is a section that lists any files that your Coach had made accessible when you first signed up to the program.
Note: There may or may not be any files shown here, depending on how your Coach had set up the coaching program.
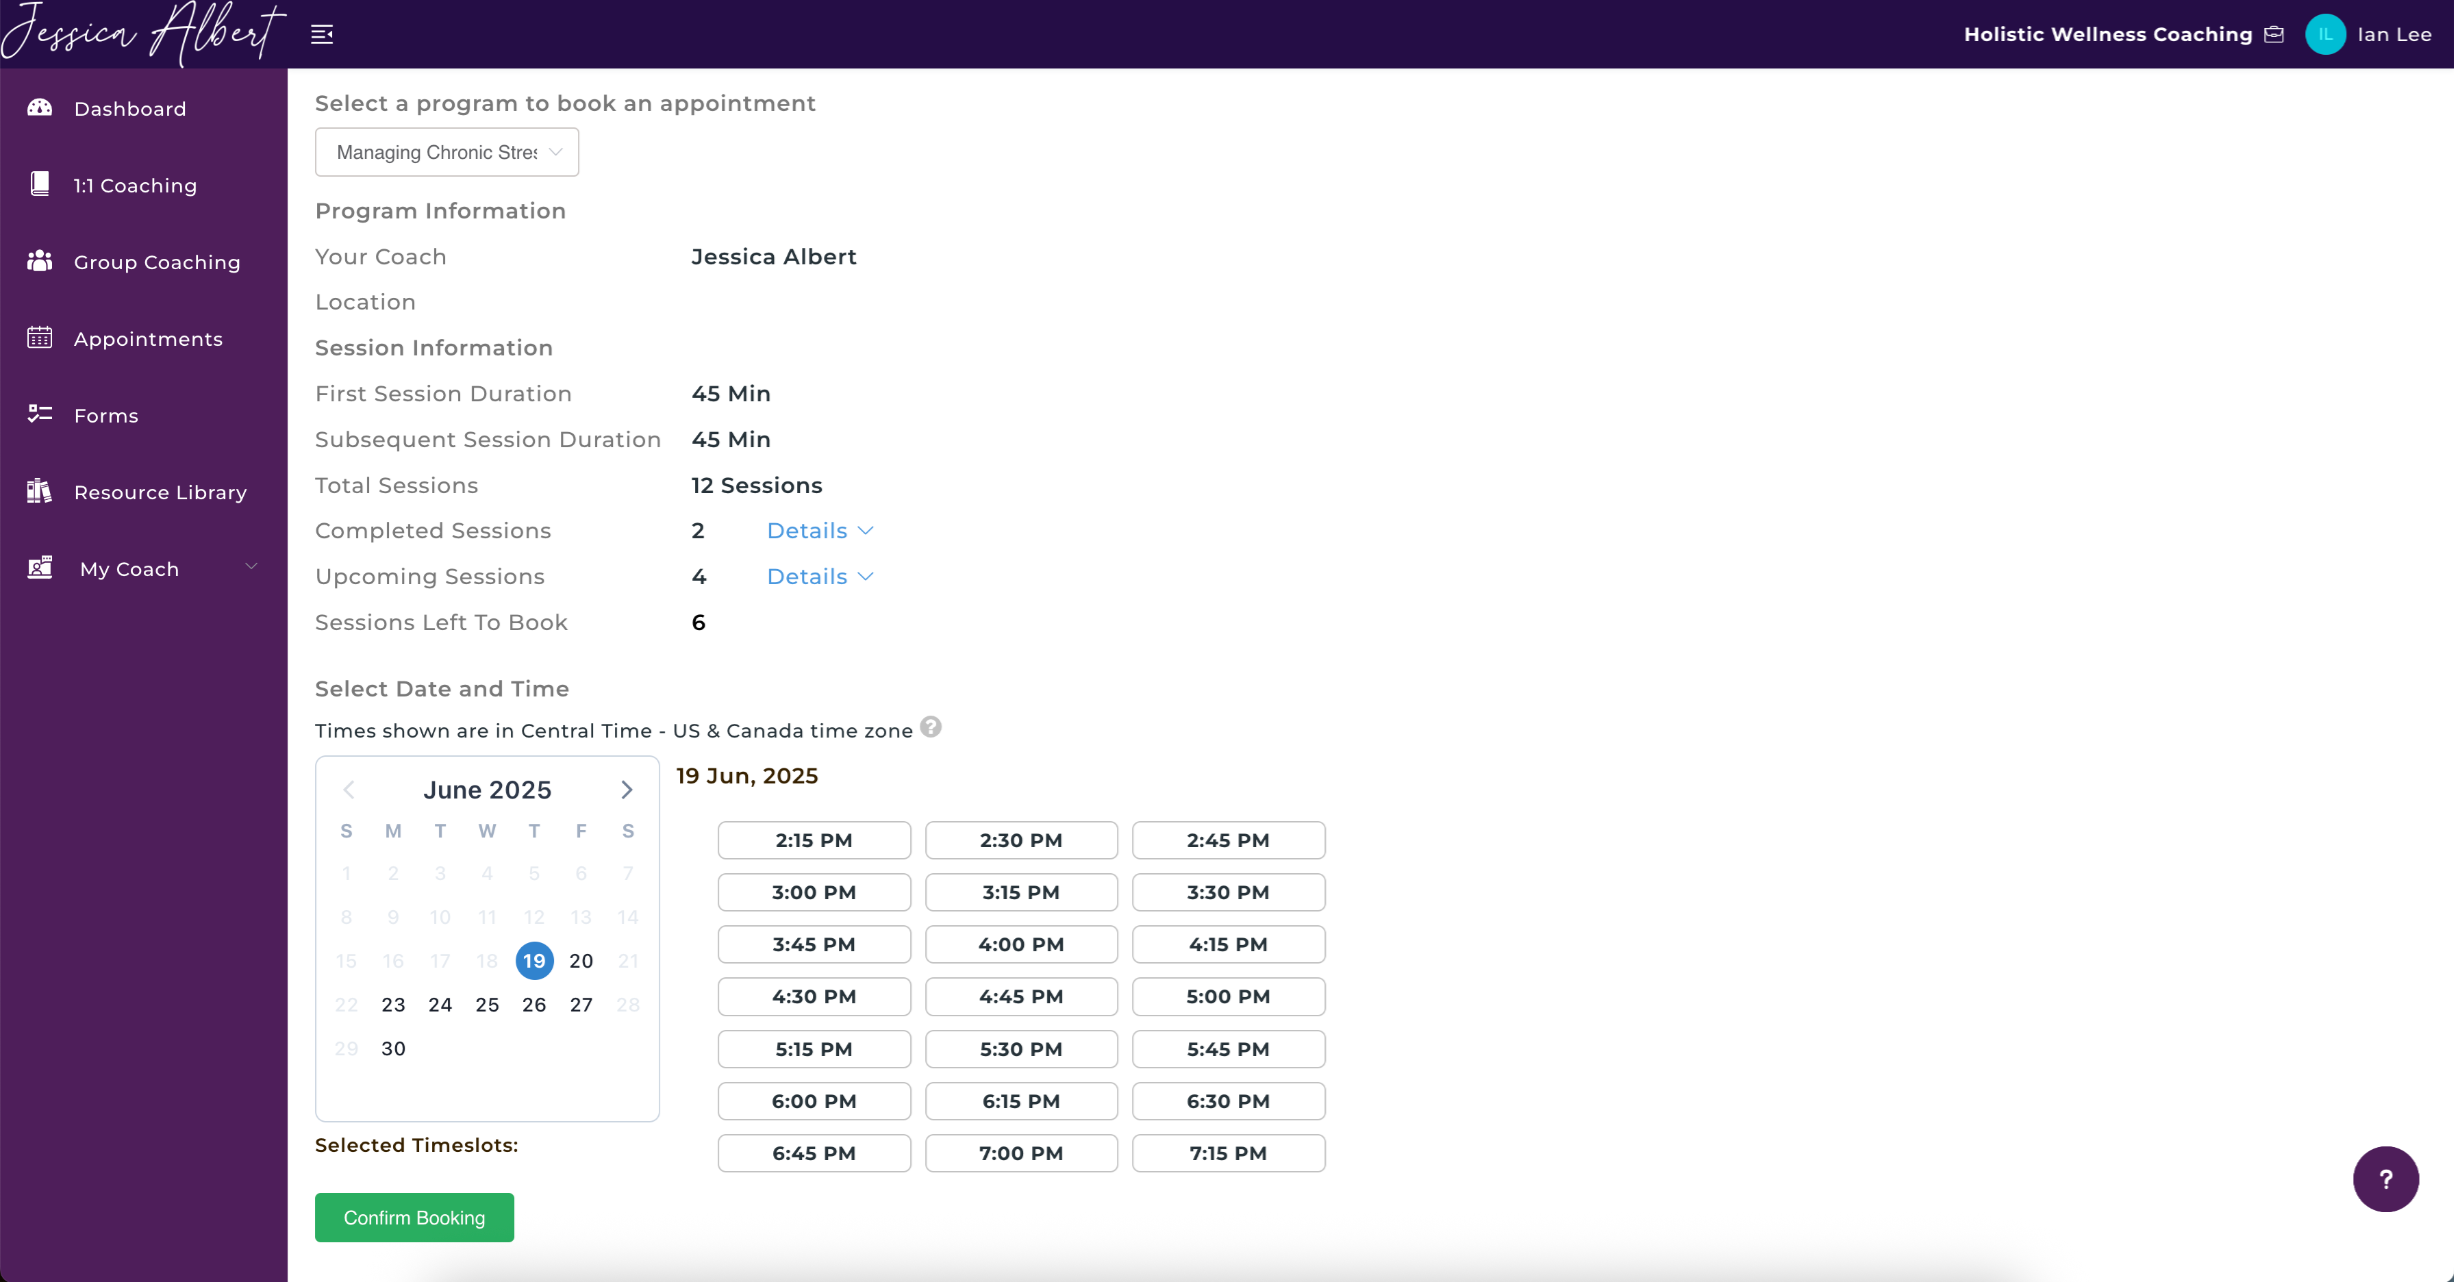
8. Sessions 📆
On the Sessions ribbon, you will be able to see the Upcoming Sessions and Past Sessions for this program.
You can also click on the Book an Appointment button to book a coaching session with your Coach (provided that your Coach has given you the permissions to do so).
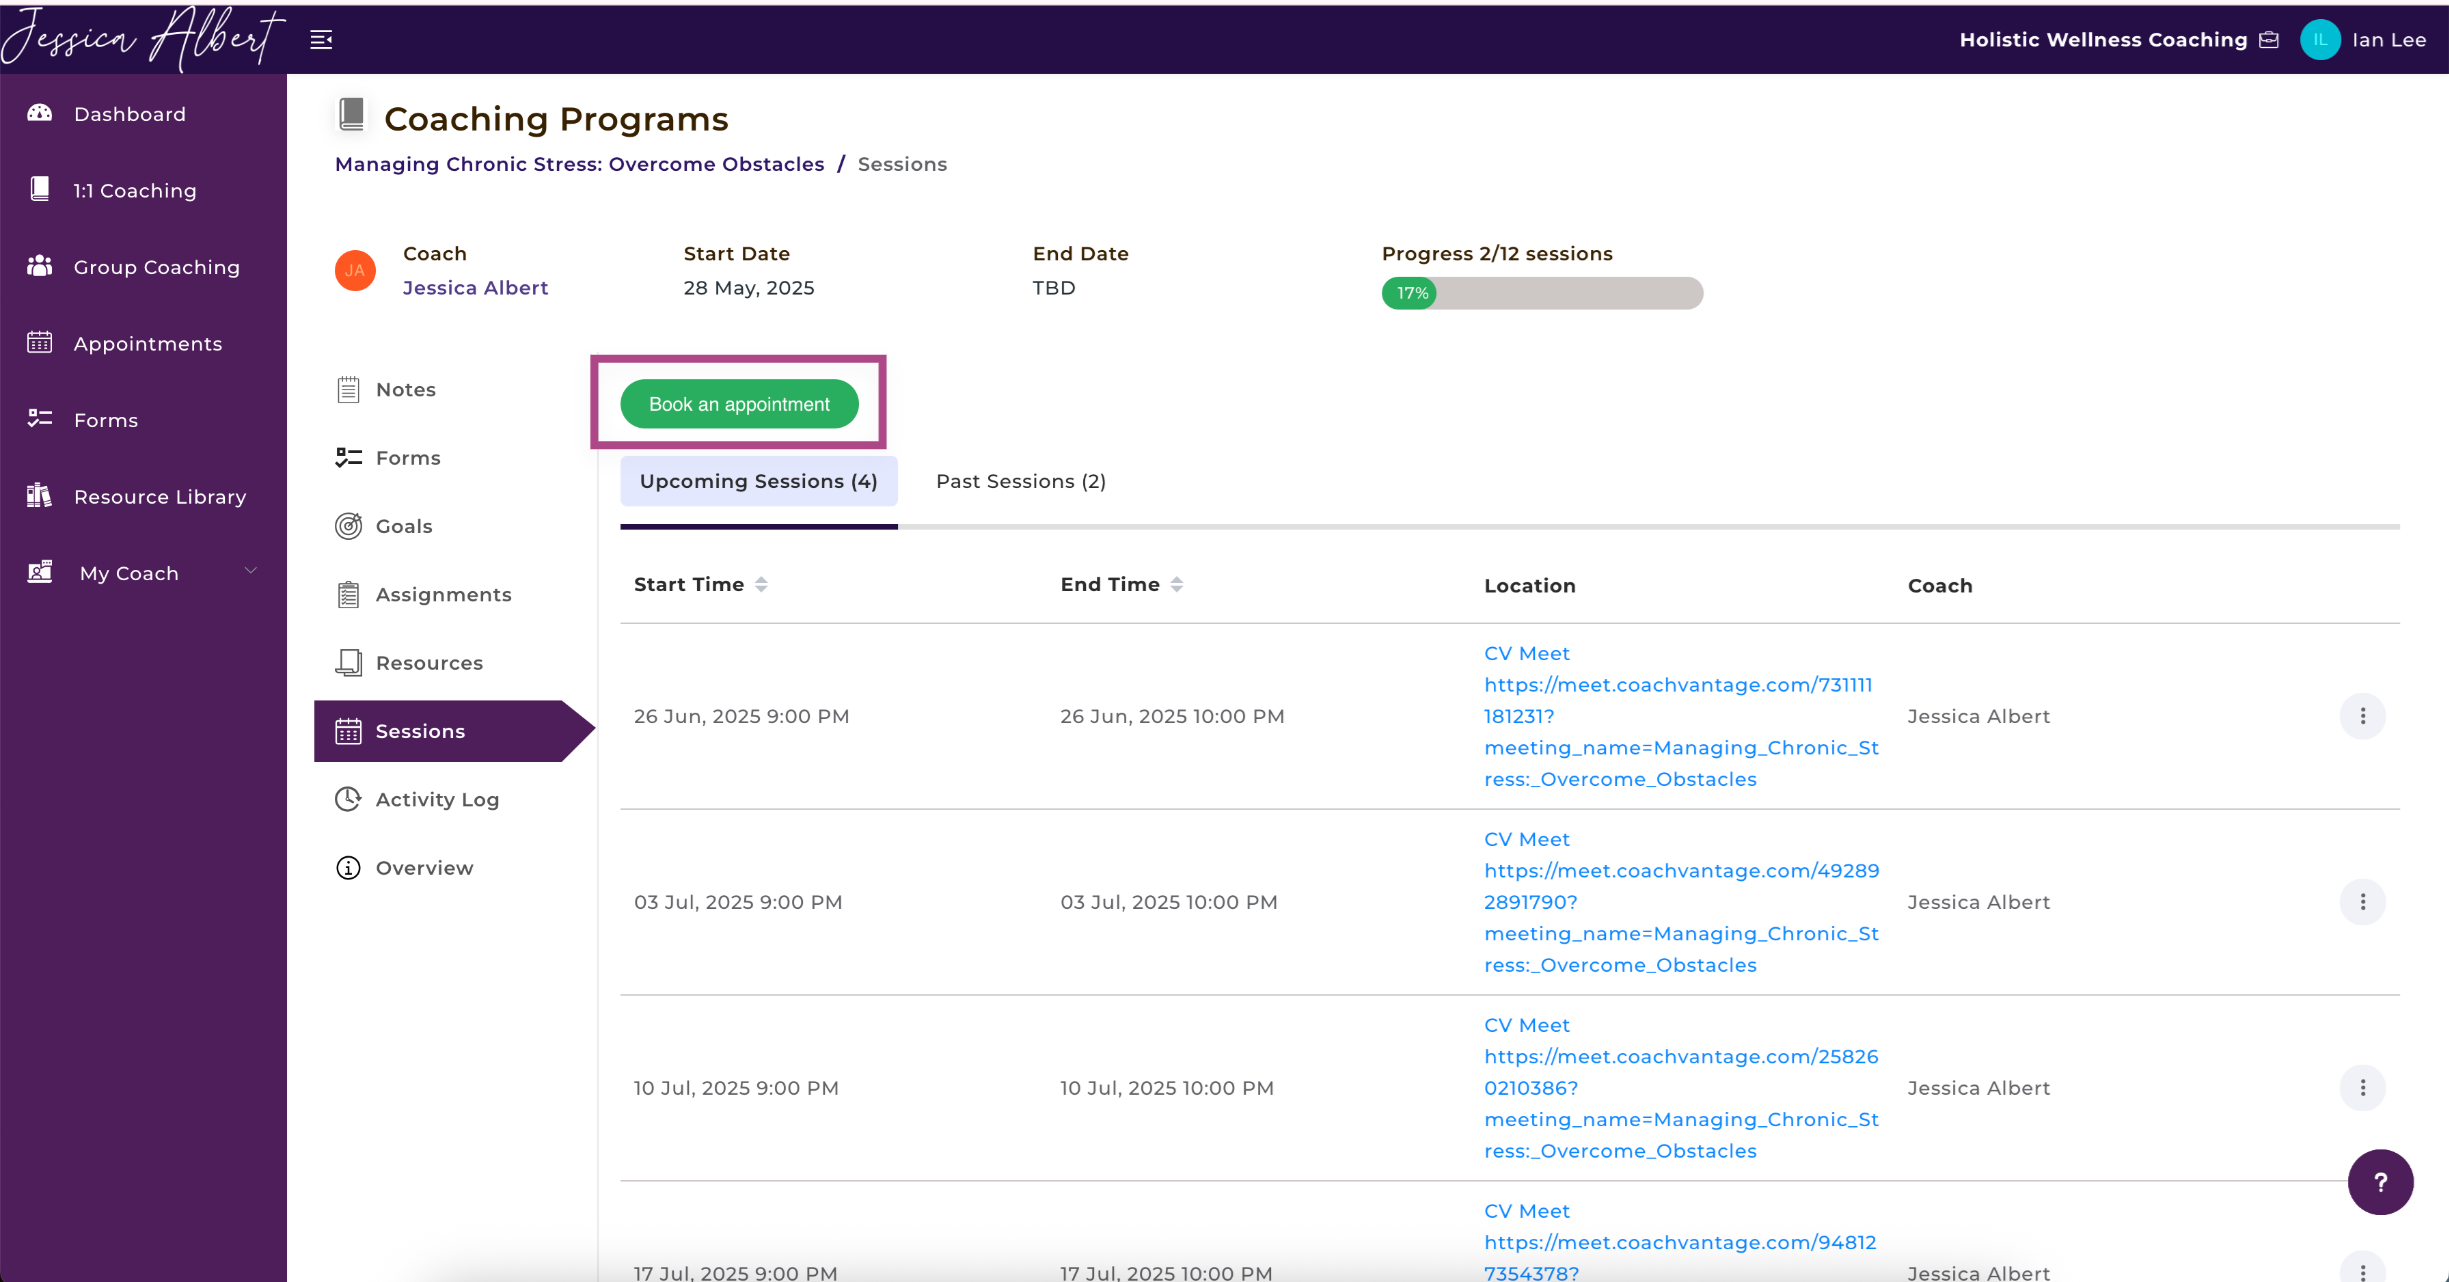
To Book An Appointment with Your Coach:
1. Click Book An Appointment button.
2. You will be taken to the Appointments page.
Refer to the article How to Book Sessions (Appointments) with Your Coach for more details.
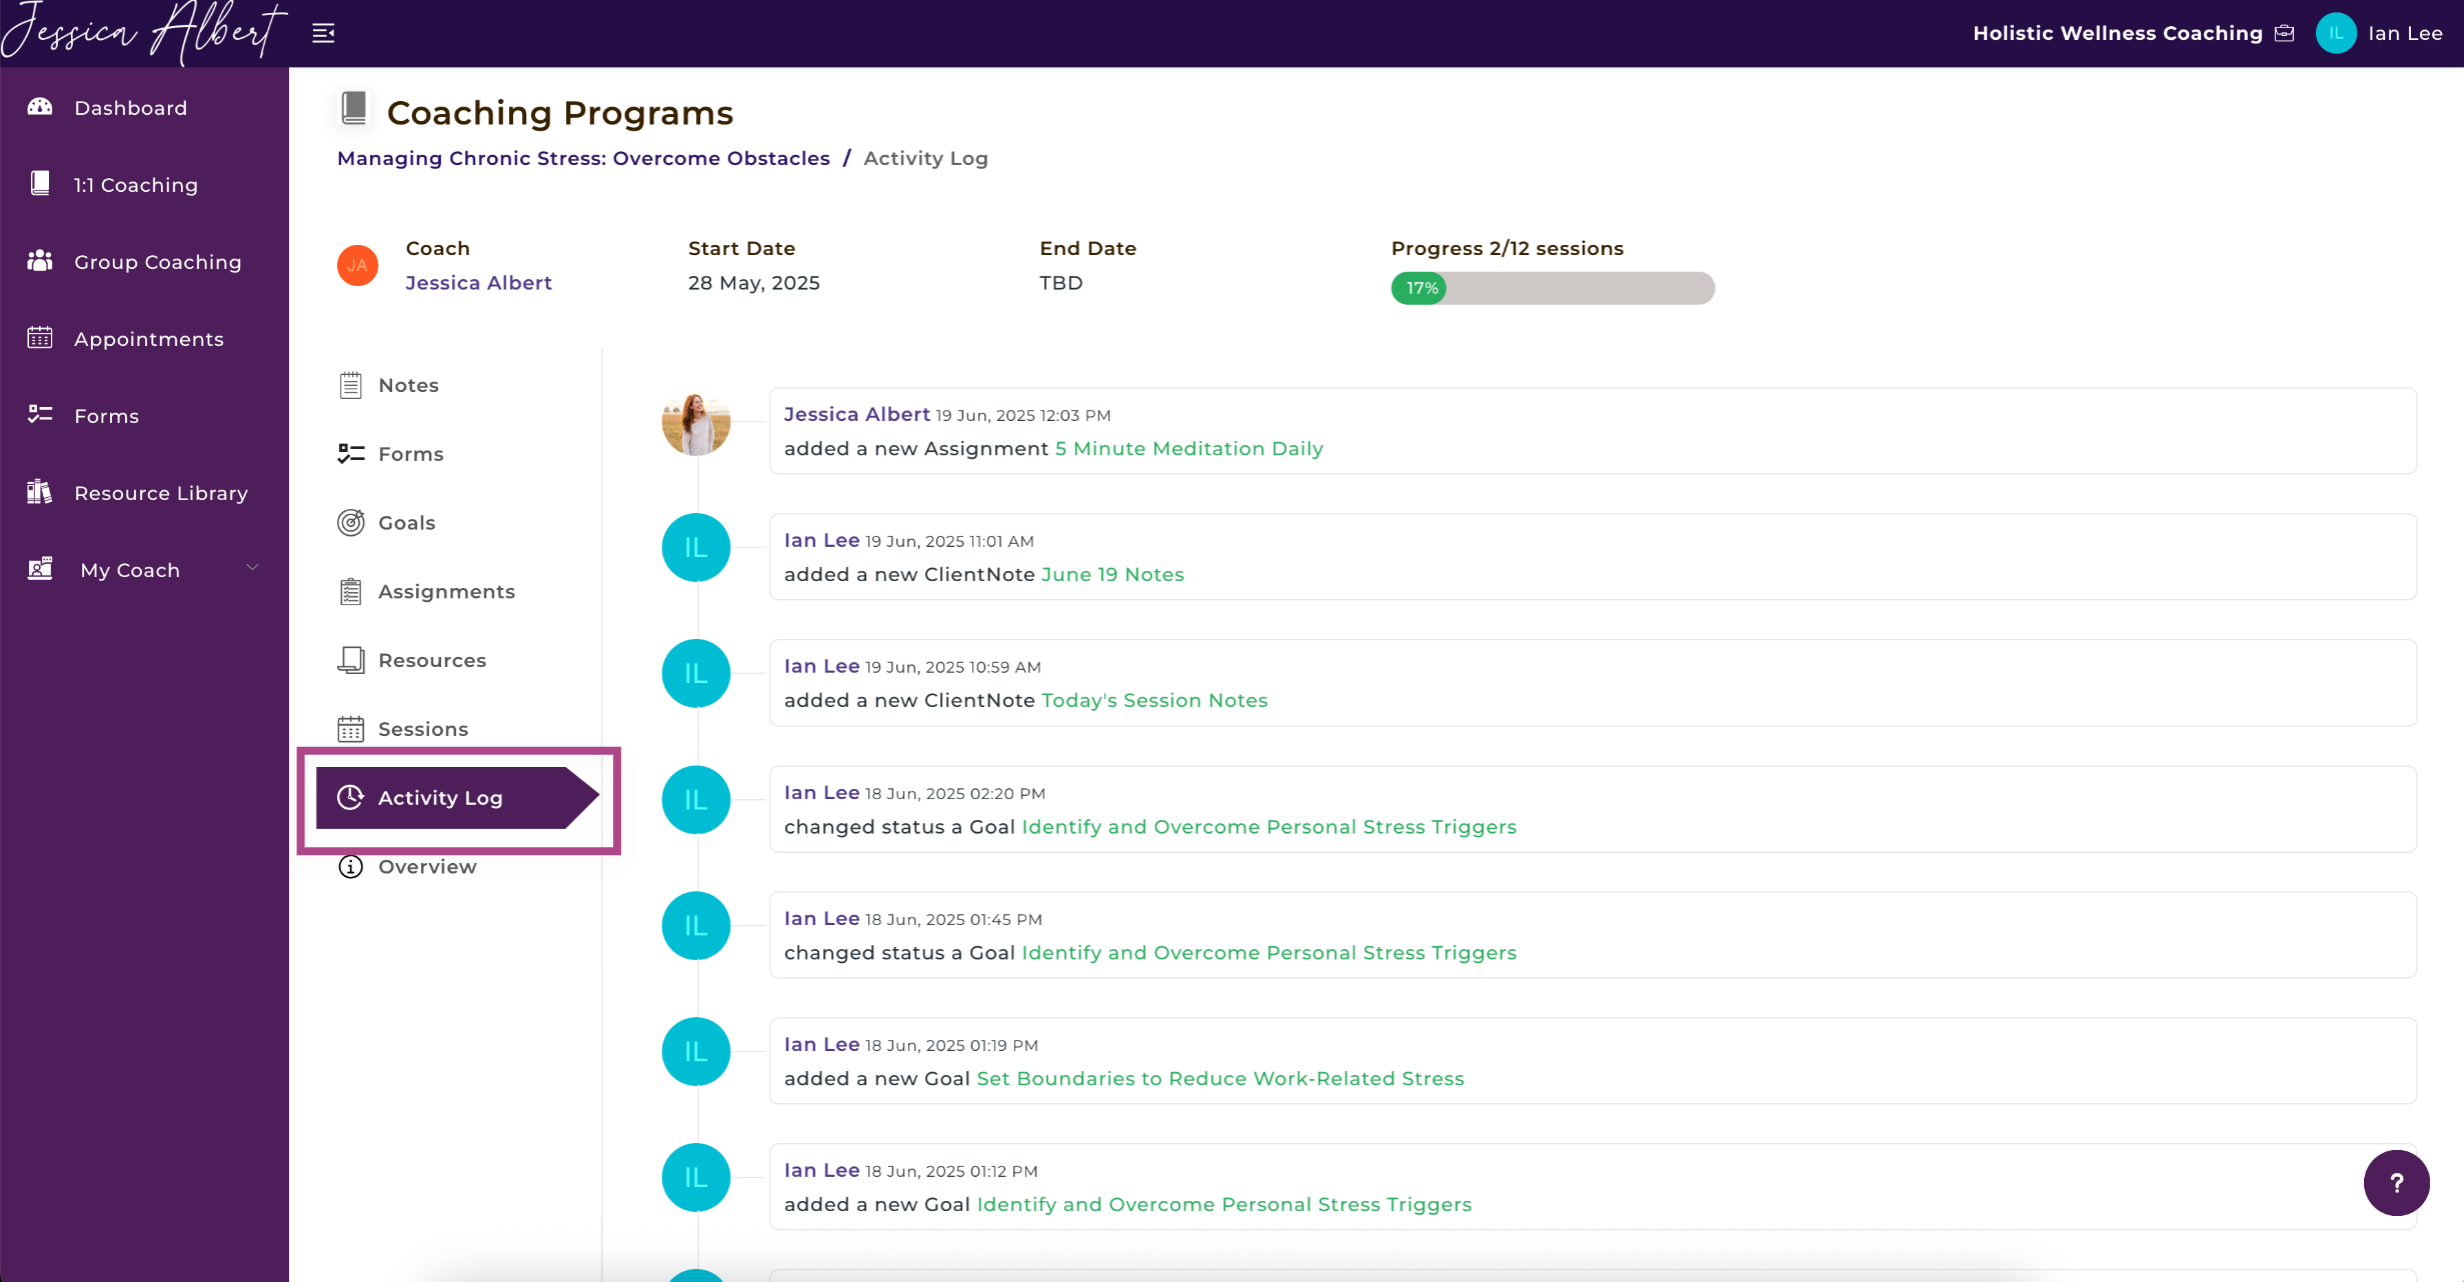
9. Activity Log ⌚️
The Activity Log displays a history of all actions/transactions that were performed by Coach and Coachee throughout the course of the program engagement.
It also displays the date and time that each action was taken.
Note: The green text in the Activity Log are clickable links and take you directly to that page where the action was performed.
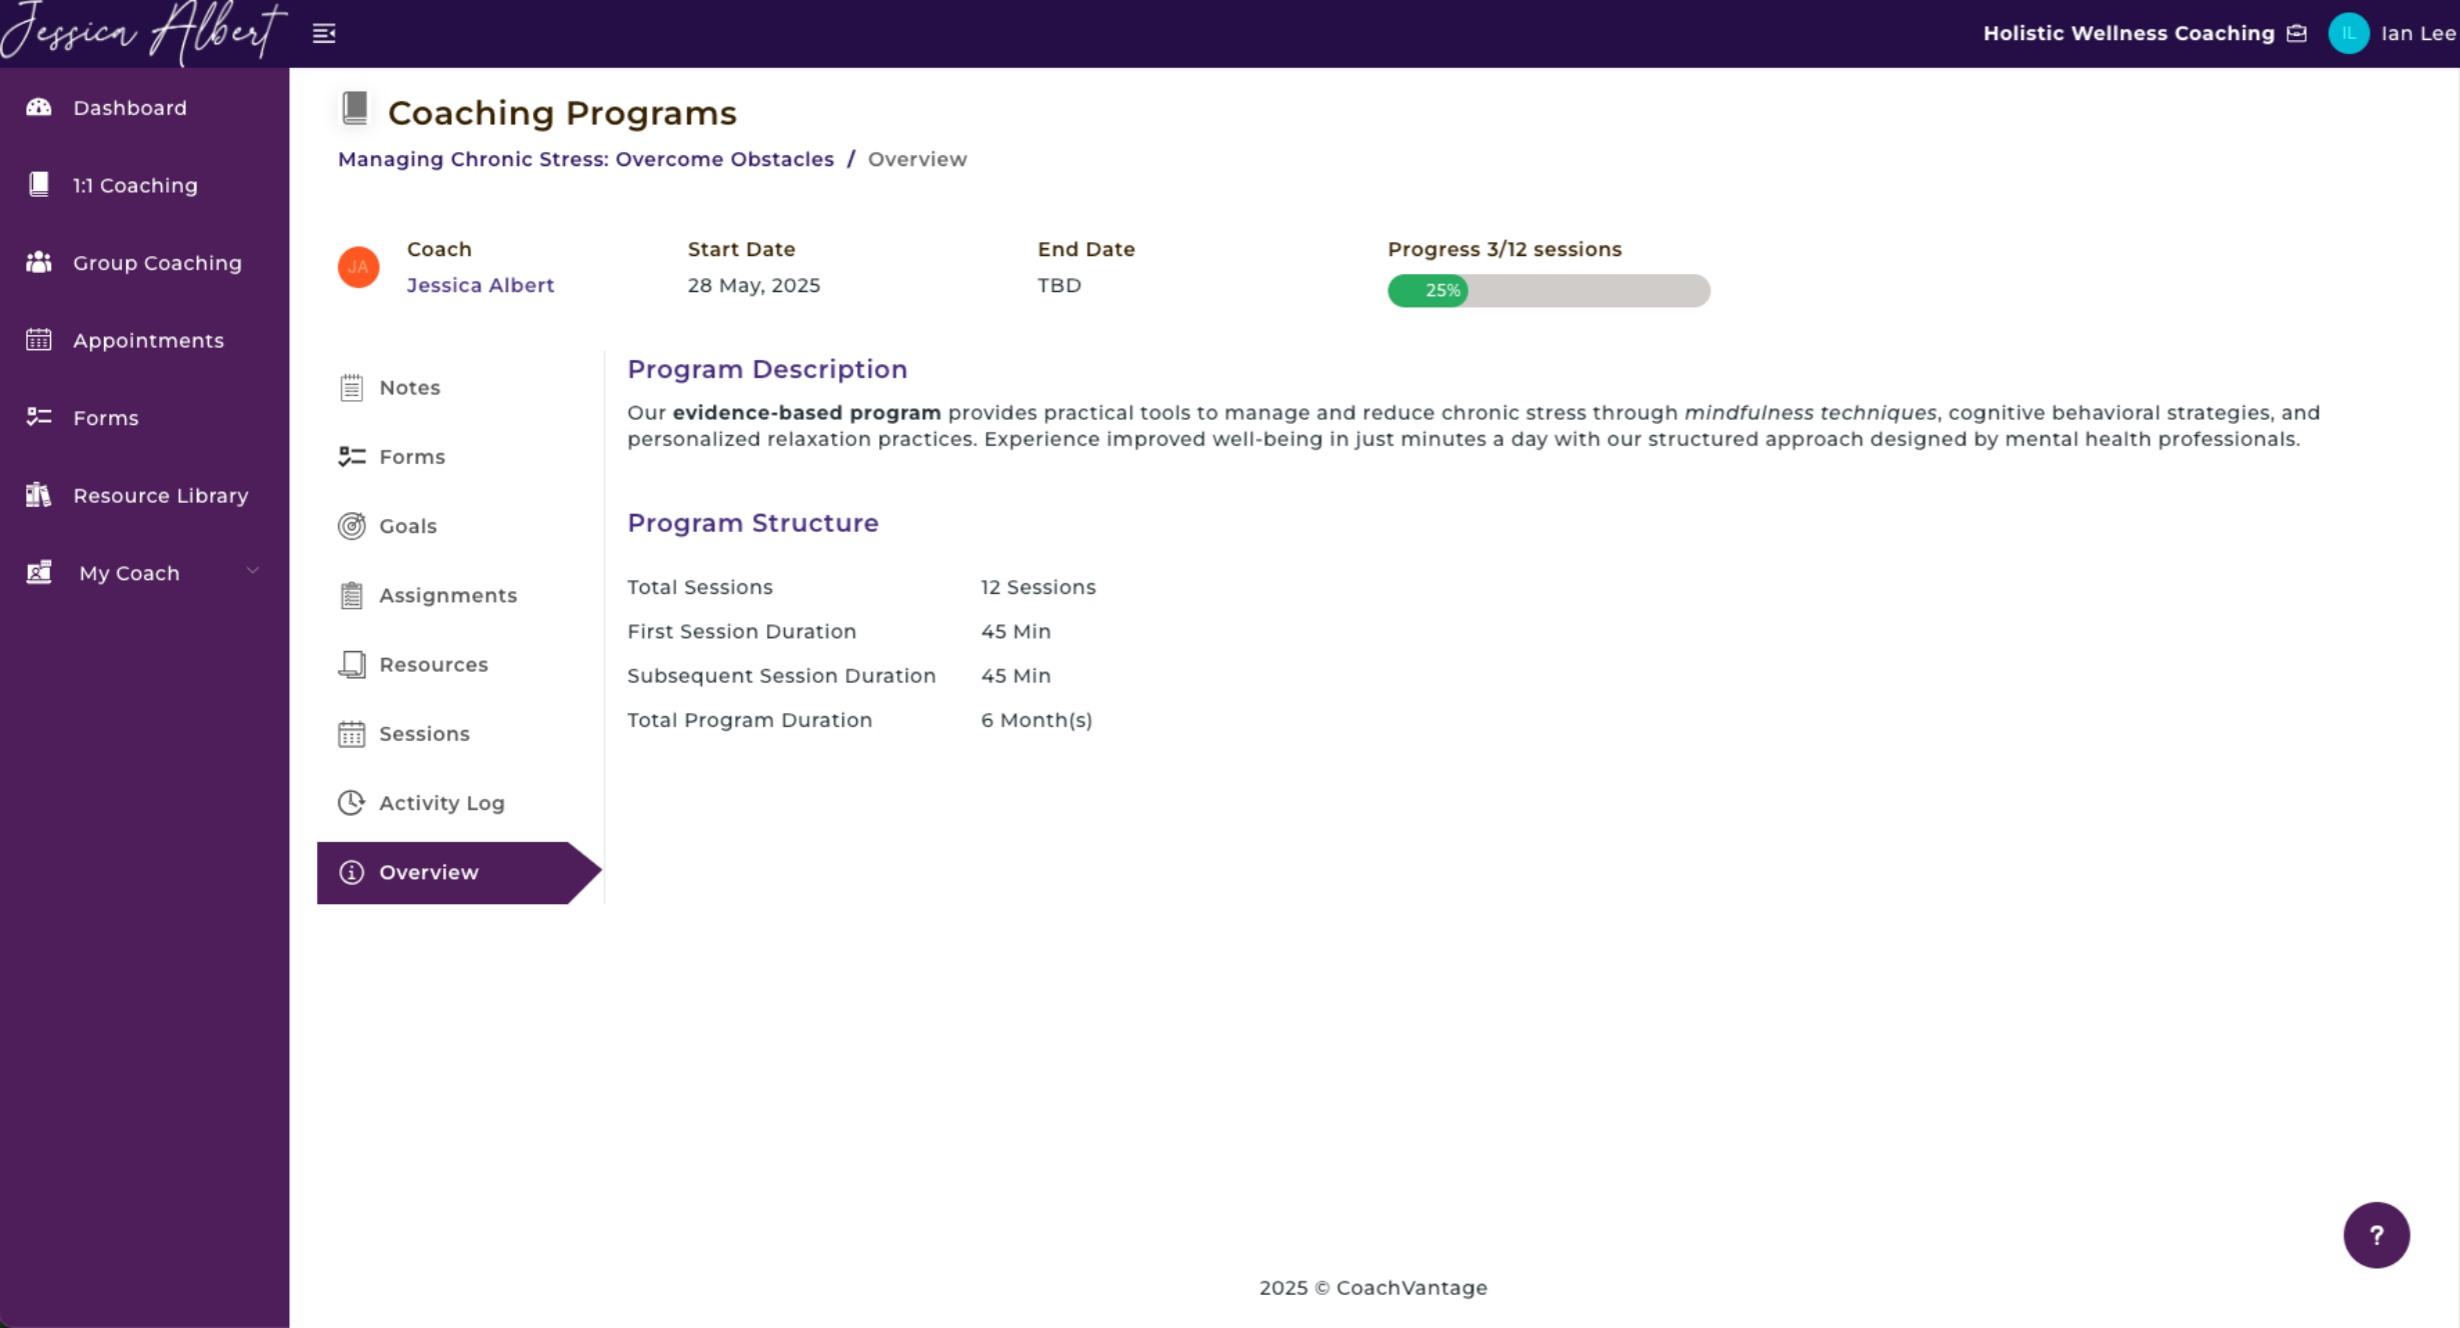
10. Overview
The Overview page displays the Program Description and Program Structure of your coaching program.
This includes the number of Total Sessions, First Session Duration, Subsequent Session Duration, and Total Program Duration.
Reference Articles