
How to Create a Group Coaching Program
Overview
CoachVantage makes it easy to create and publish your group coaching programs online, even if you don't have a website. All of your program information, fees and scheduling rules can be configured and set up easily.
When you create a group program, we will automatically generate and host an online landing page and enrollment form for the program. You can choose to create a landing page and enrollment form or just the enrollment form only in order to automate and streamline the client enrollment and onboarding process.
If you're on the Aha! Plan, you can create groups with cohorts or groups without cohorts. If you're on the Clarity Plan, you can only create groups without cohorts.
Read on to find out how to create a group program.
Article Contents:
- Creating a New Group Program
- Program Information Step (Mandatory)
- Fees Step (Optional)
- Landing Page (Optional)
- Enrollment Form (Mandatory)
- Group Settings (Mandatory)
1. Creating a New Group Program 💻
To create a new group coaching program:
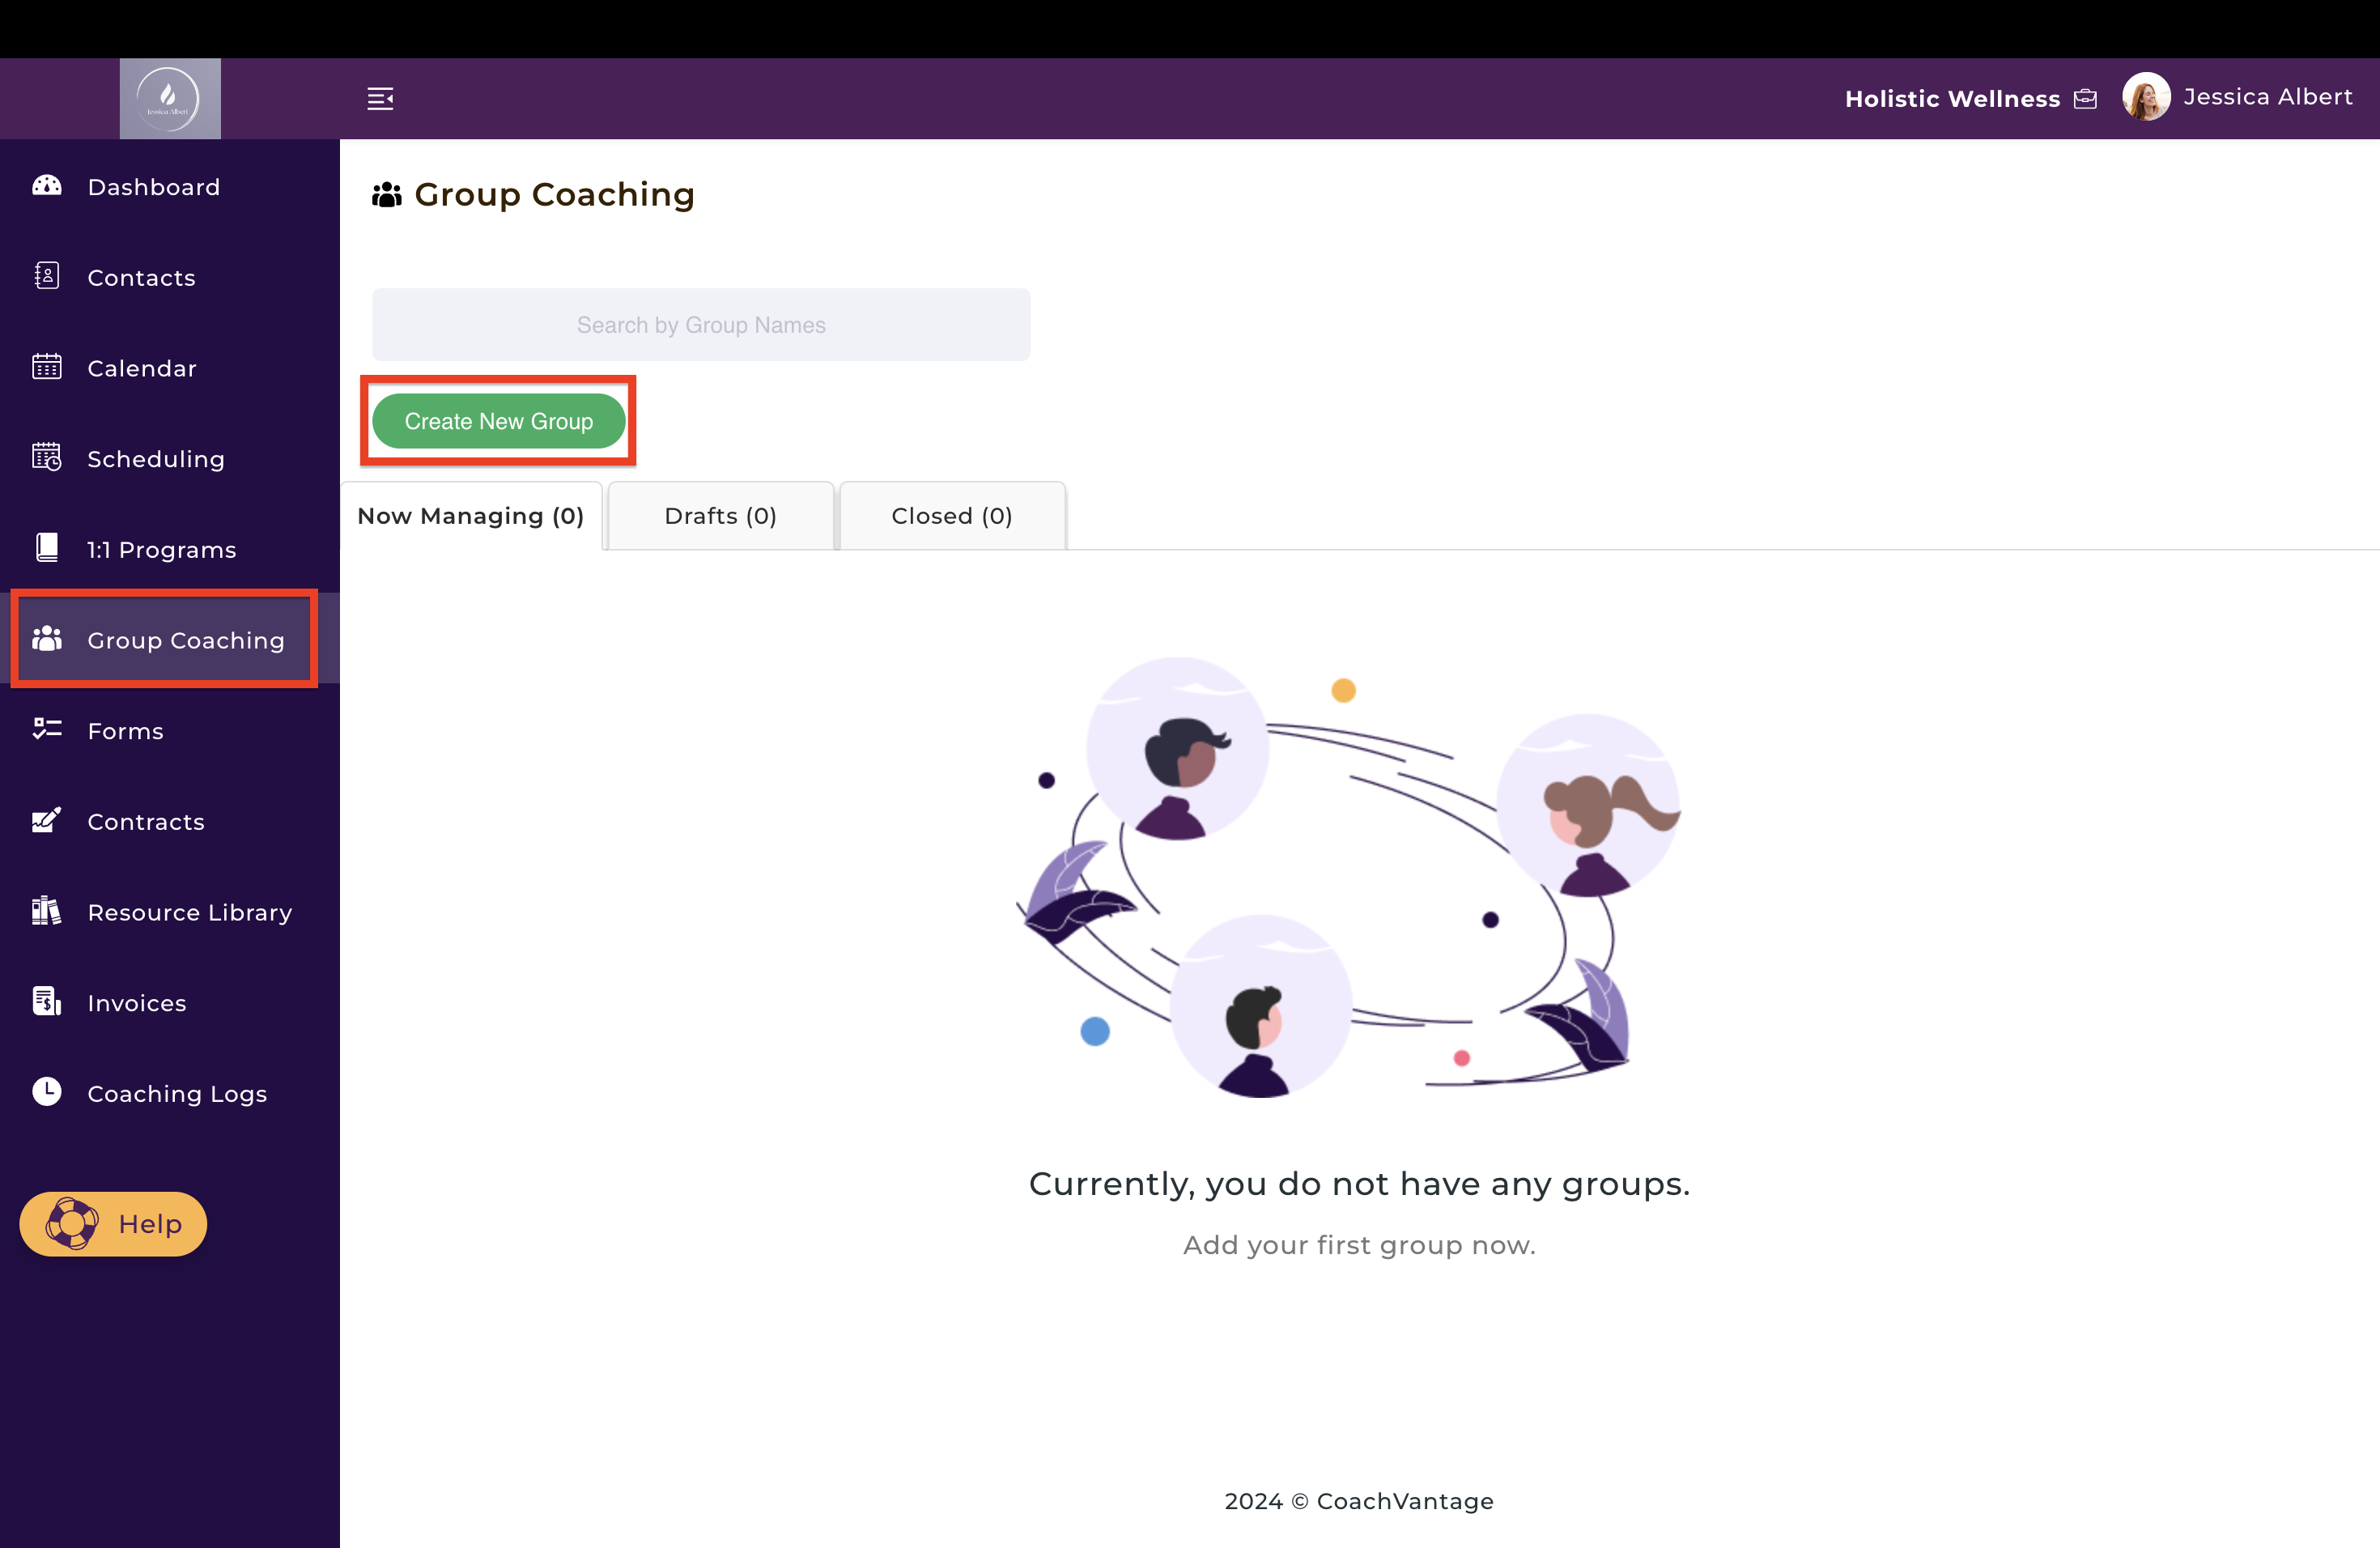
- Click Group Coaching on the left menu.
- Click on the Create New Group button.
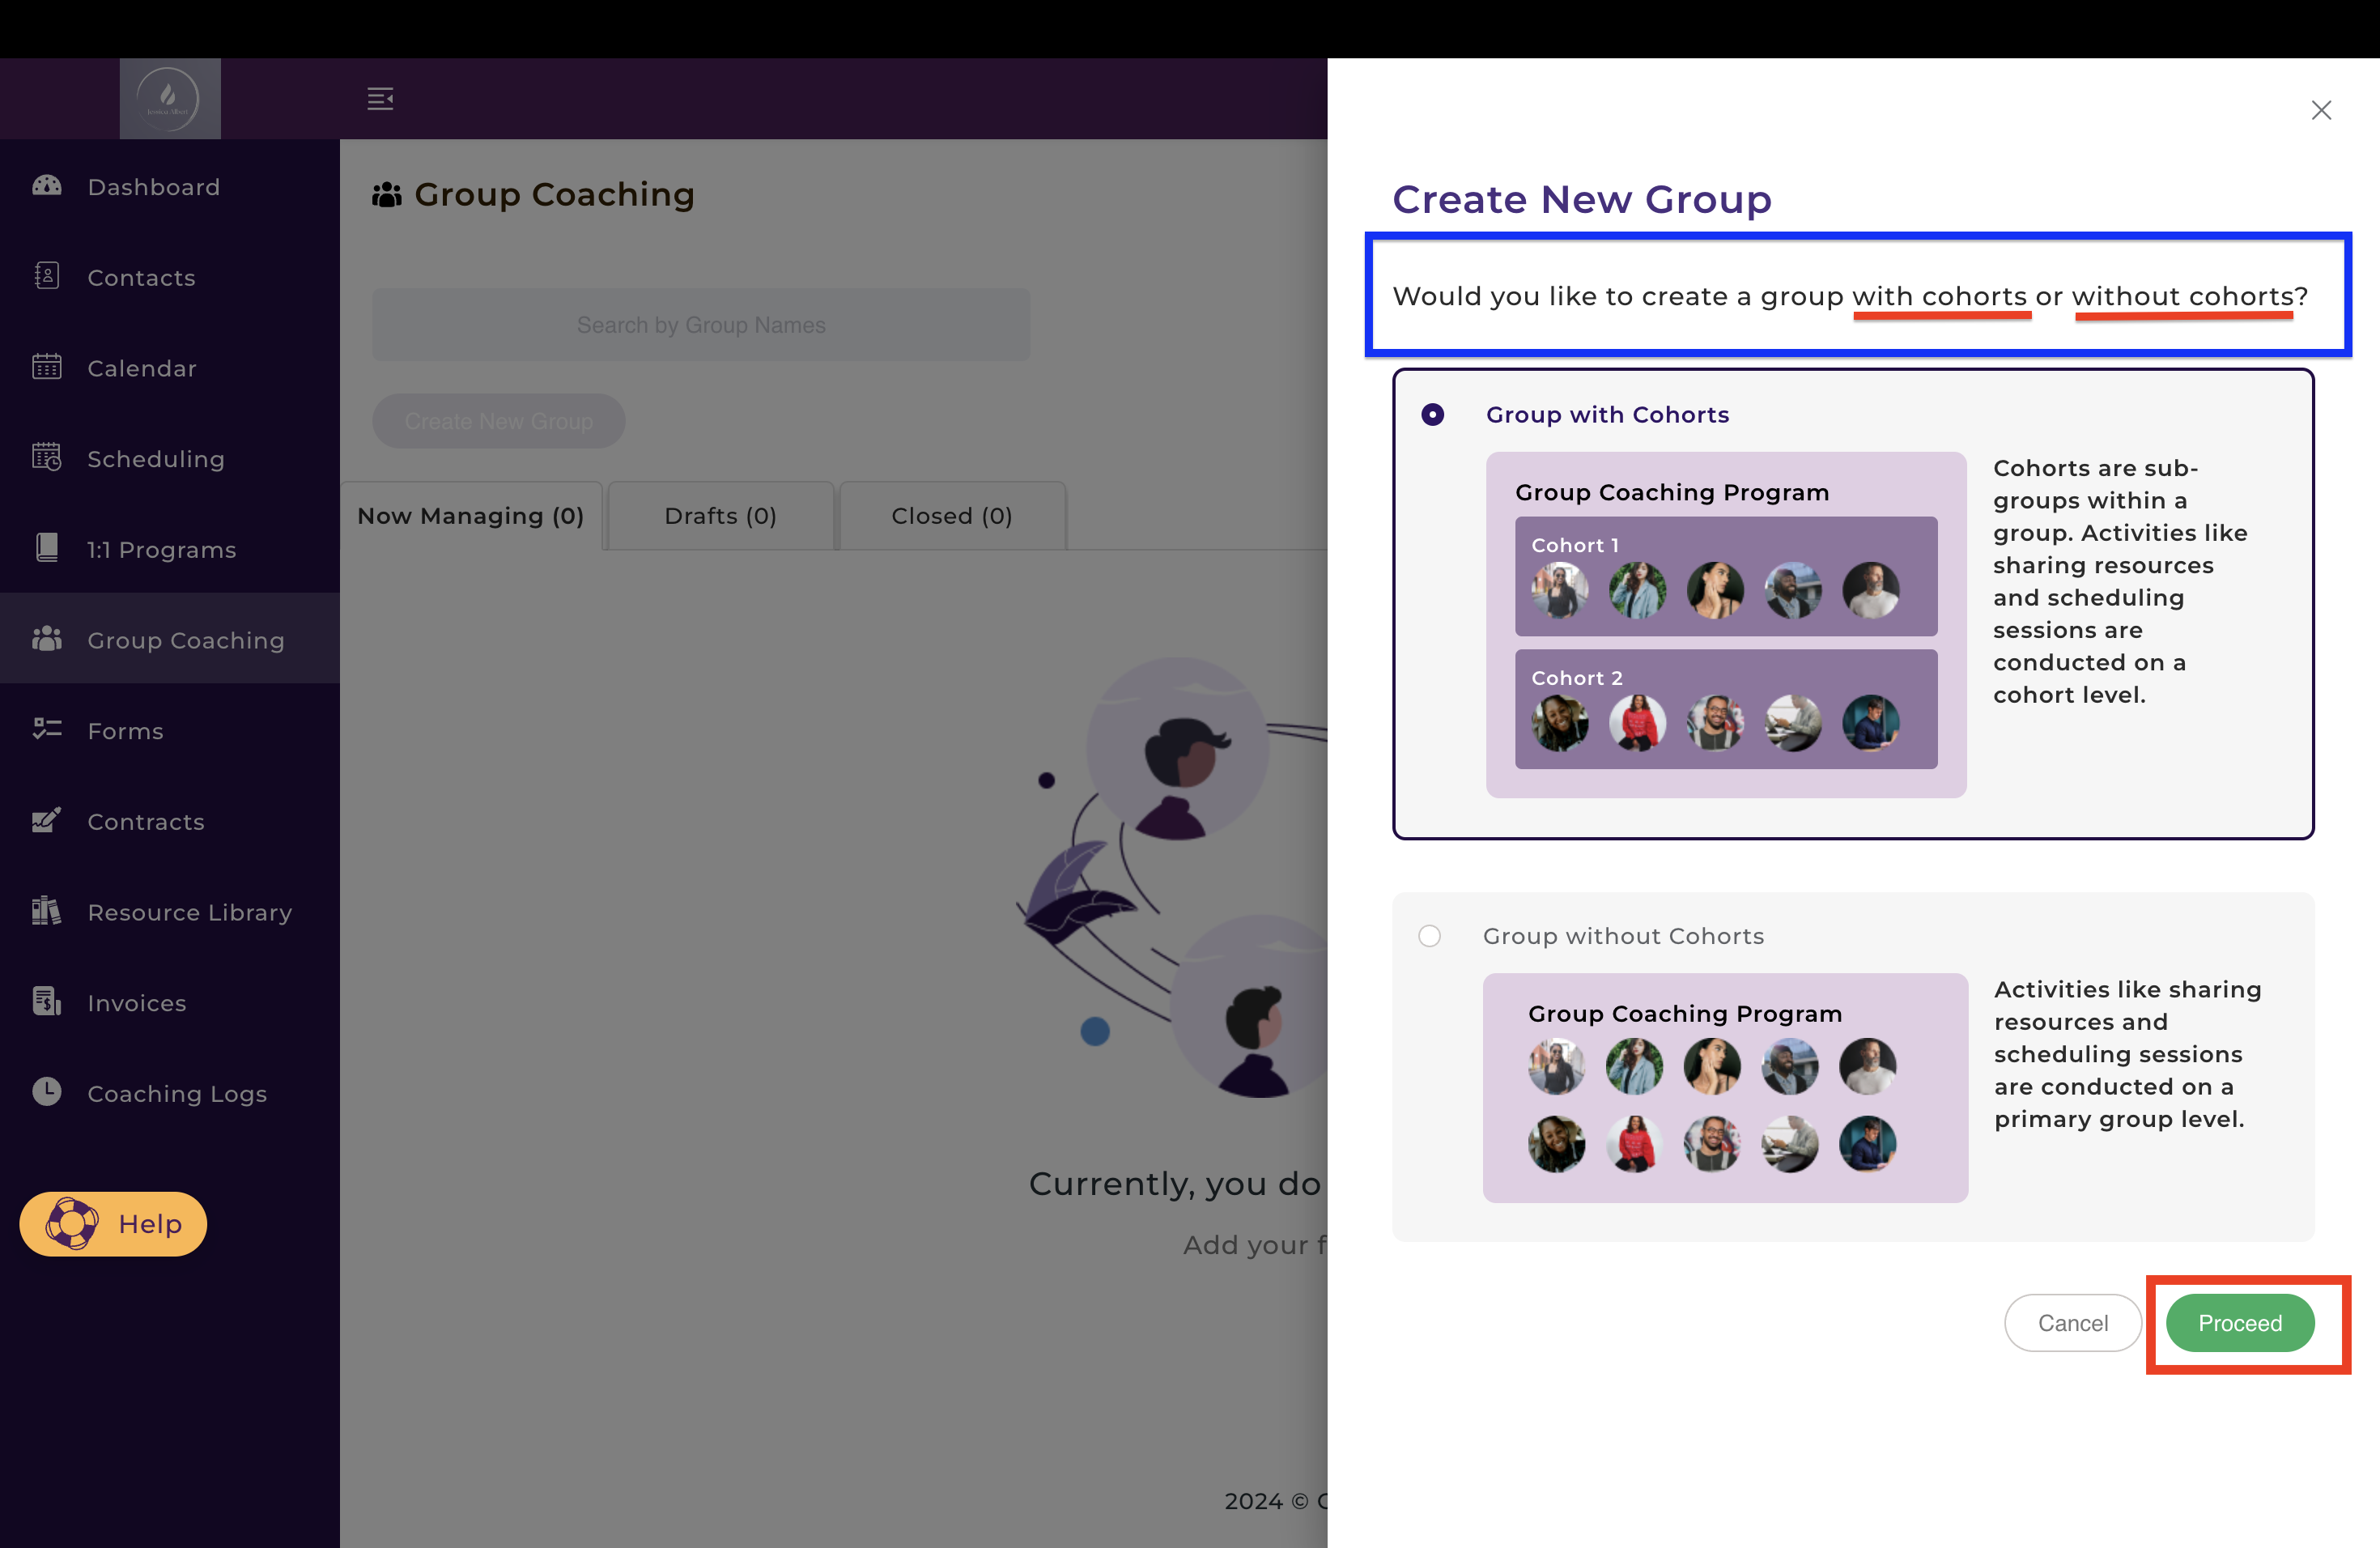
3. The Create New Group drawer will open as shown below. Select if you'd like to create a group with cohorts or without cohorts.
Note: If you're on the CoachVantage Clarity Plan, you can only create groups without cohorts; this means that members of your group are managed as one group and cannot be sub-divided into smaller groups, or cohorts.
4. After selecting, click the Proceed button.
1a) Group Program - Information (Mandatory) ℹ️
1. After clicking Proceed, the page below opens up for you to set up your new group program:
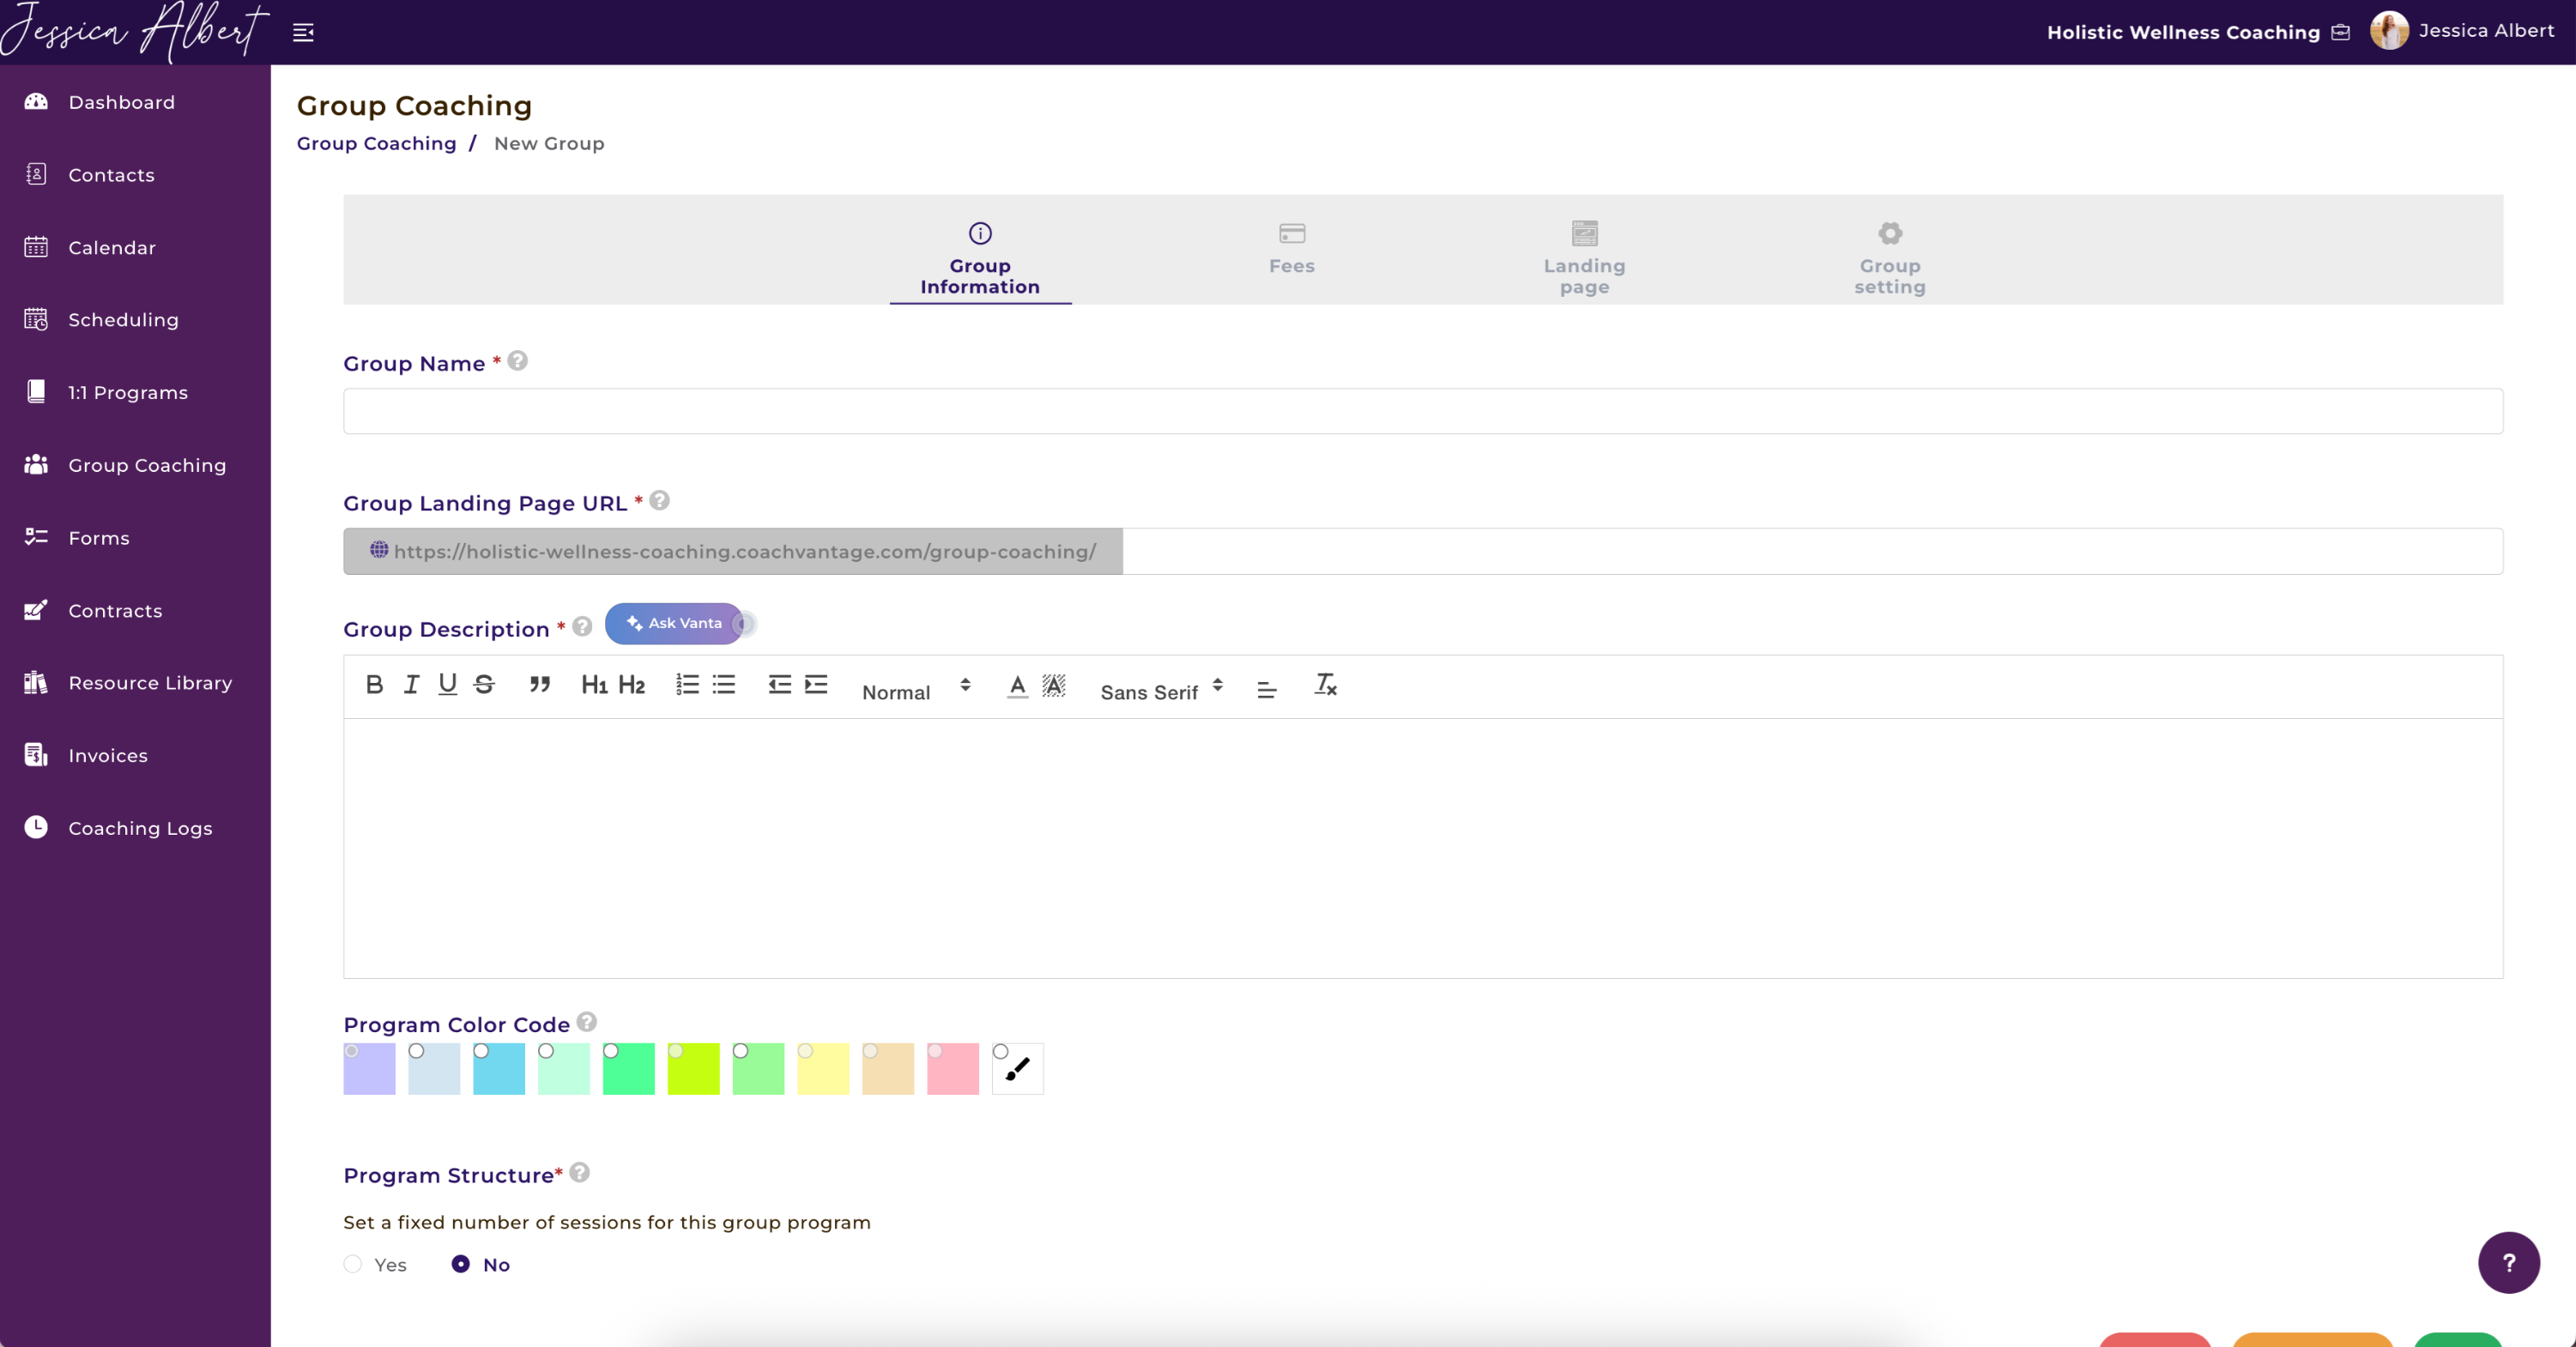
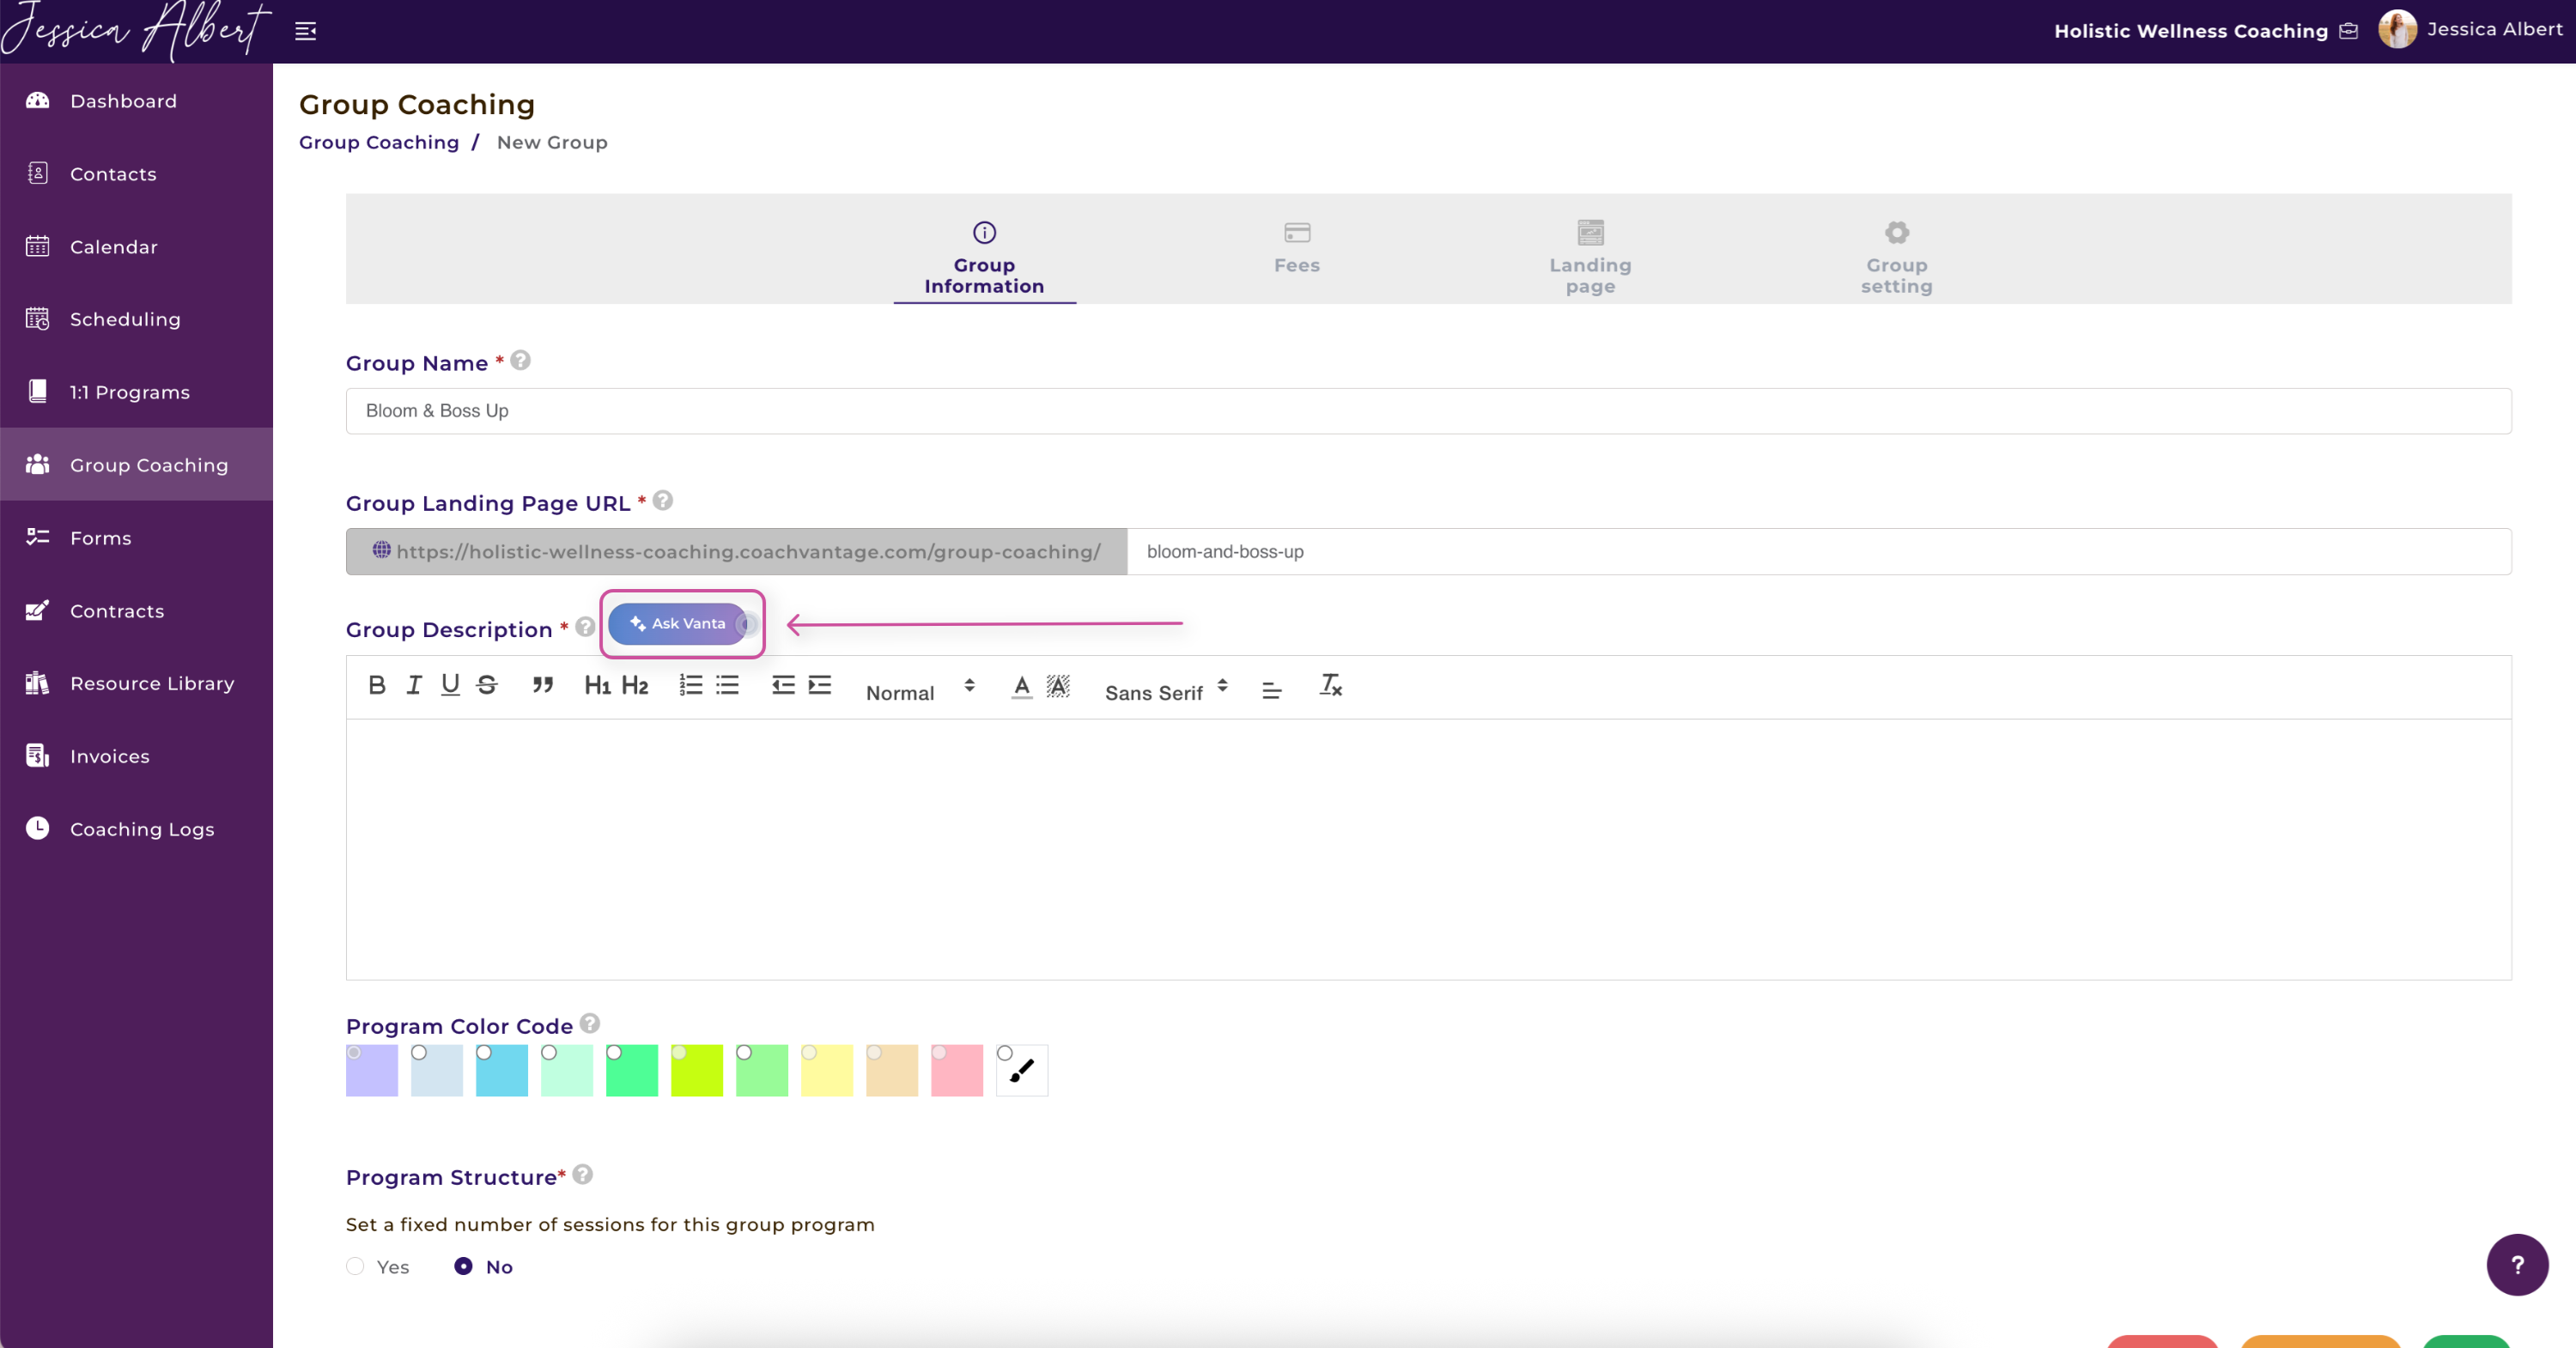
2. The first step that you'll need to complete is the Group Information, as shown below:
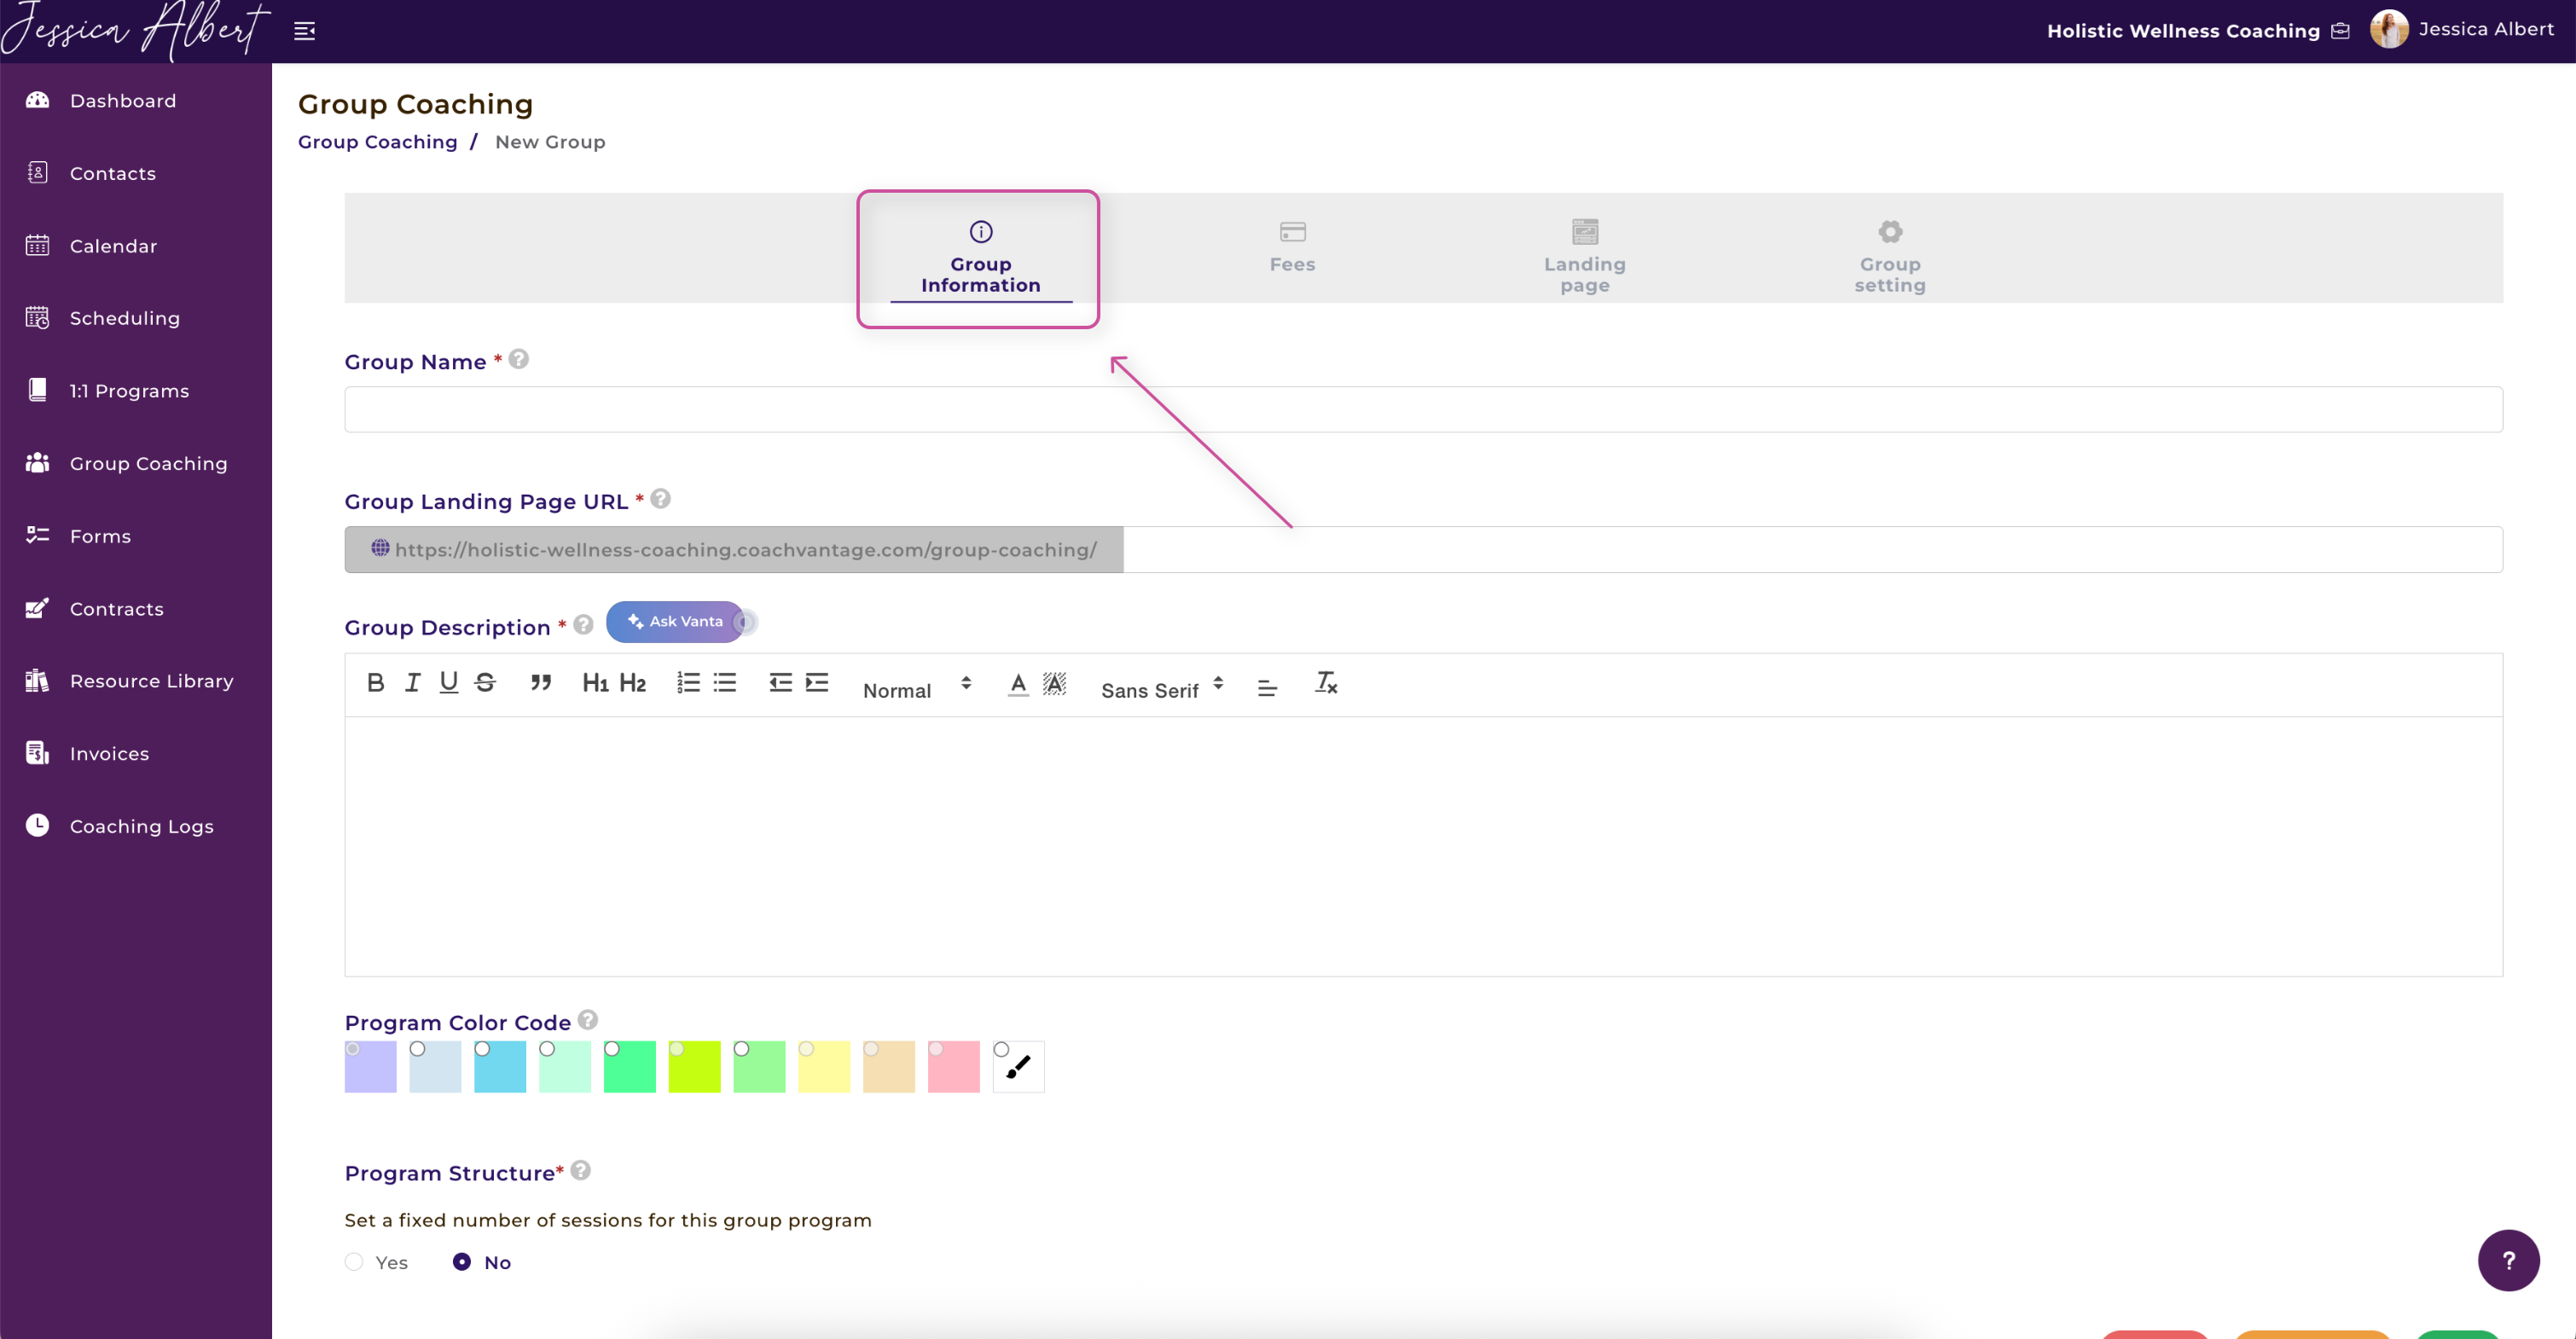
Group Name
Give your group a name. In the example shown above, we're setting up a group coaching program called "Bloom & Boss Up!" which is a group program that has the objective of helping women be successful small business owners.
Group Landing Page URL 🔗
- As you type in the name of your program, you will notice that the URL field gets populated automatically.
- You can choose to use the default URL description that we’ve populated or type in a description that you would prefer to use.
- Important: Do not use spaces or special characters (eg $ / @ > ) for the description. You can use hyphens (-) to separate words. You have to use a unique URL name for each program. If a URL is already in use, you will see a notification pop up.
Group Description
Here's where you can describe your program, such as who it's for, objectives of the program, structure of the program, when you will meet, etc.
You can make use of the text editor to customize your description. For example, you can add header text, highlight text, choose different font types, etc
Ask Vanta 🪄
Our new AI feature Ask Vanta is now live in CoachVantage!
Creating a group program description has never been easier. Simply click on Ask Vanta and within seconds, this AI enhancement will create a description for you.
When you select Ask Vanta, a pop-up window will appear. Here is where you can enter a prompt. Some prompt examples include:
- Create a group program description for a wellness course called, Managing Stress and Sleep.
- Write a group course description that relates to anxiety, health, and wellness. Be sure to include why this course is unique.
- Draft an overview of a group program course titled, Elevate & Energize – for those ready to level up their health and vitality.

Voila! Vanta creates a group program description for you right before your eyes. Then, you can choose to either click on the regenerate button (as depicted by the grey circular arrows) or select the green check button to use the program description.
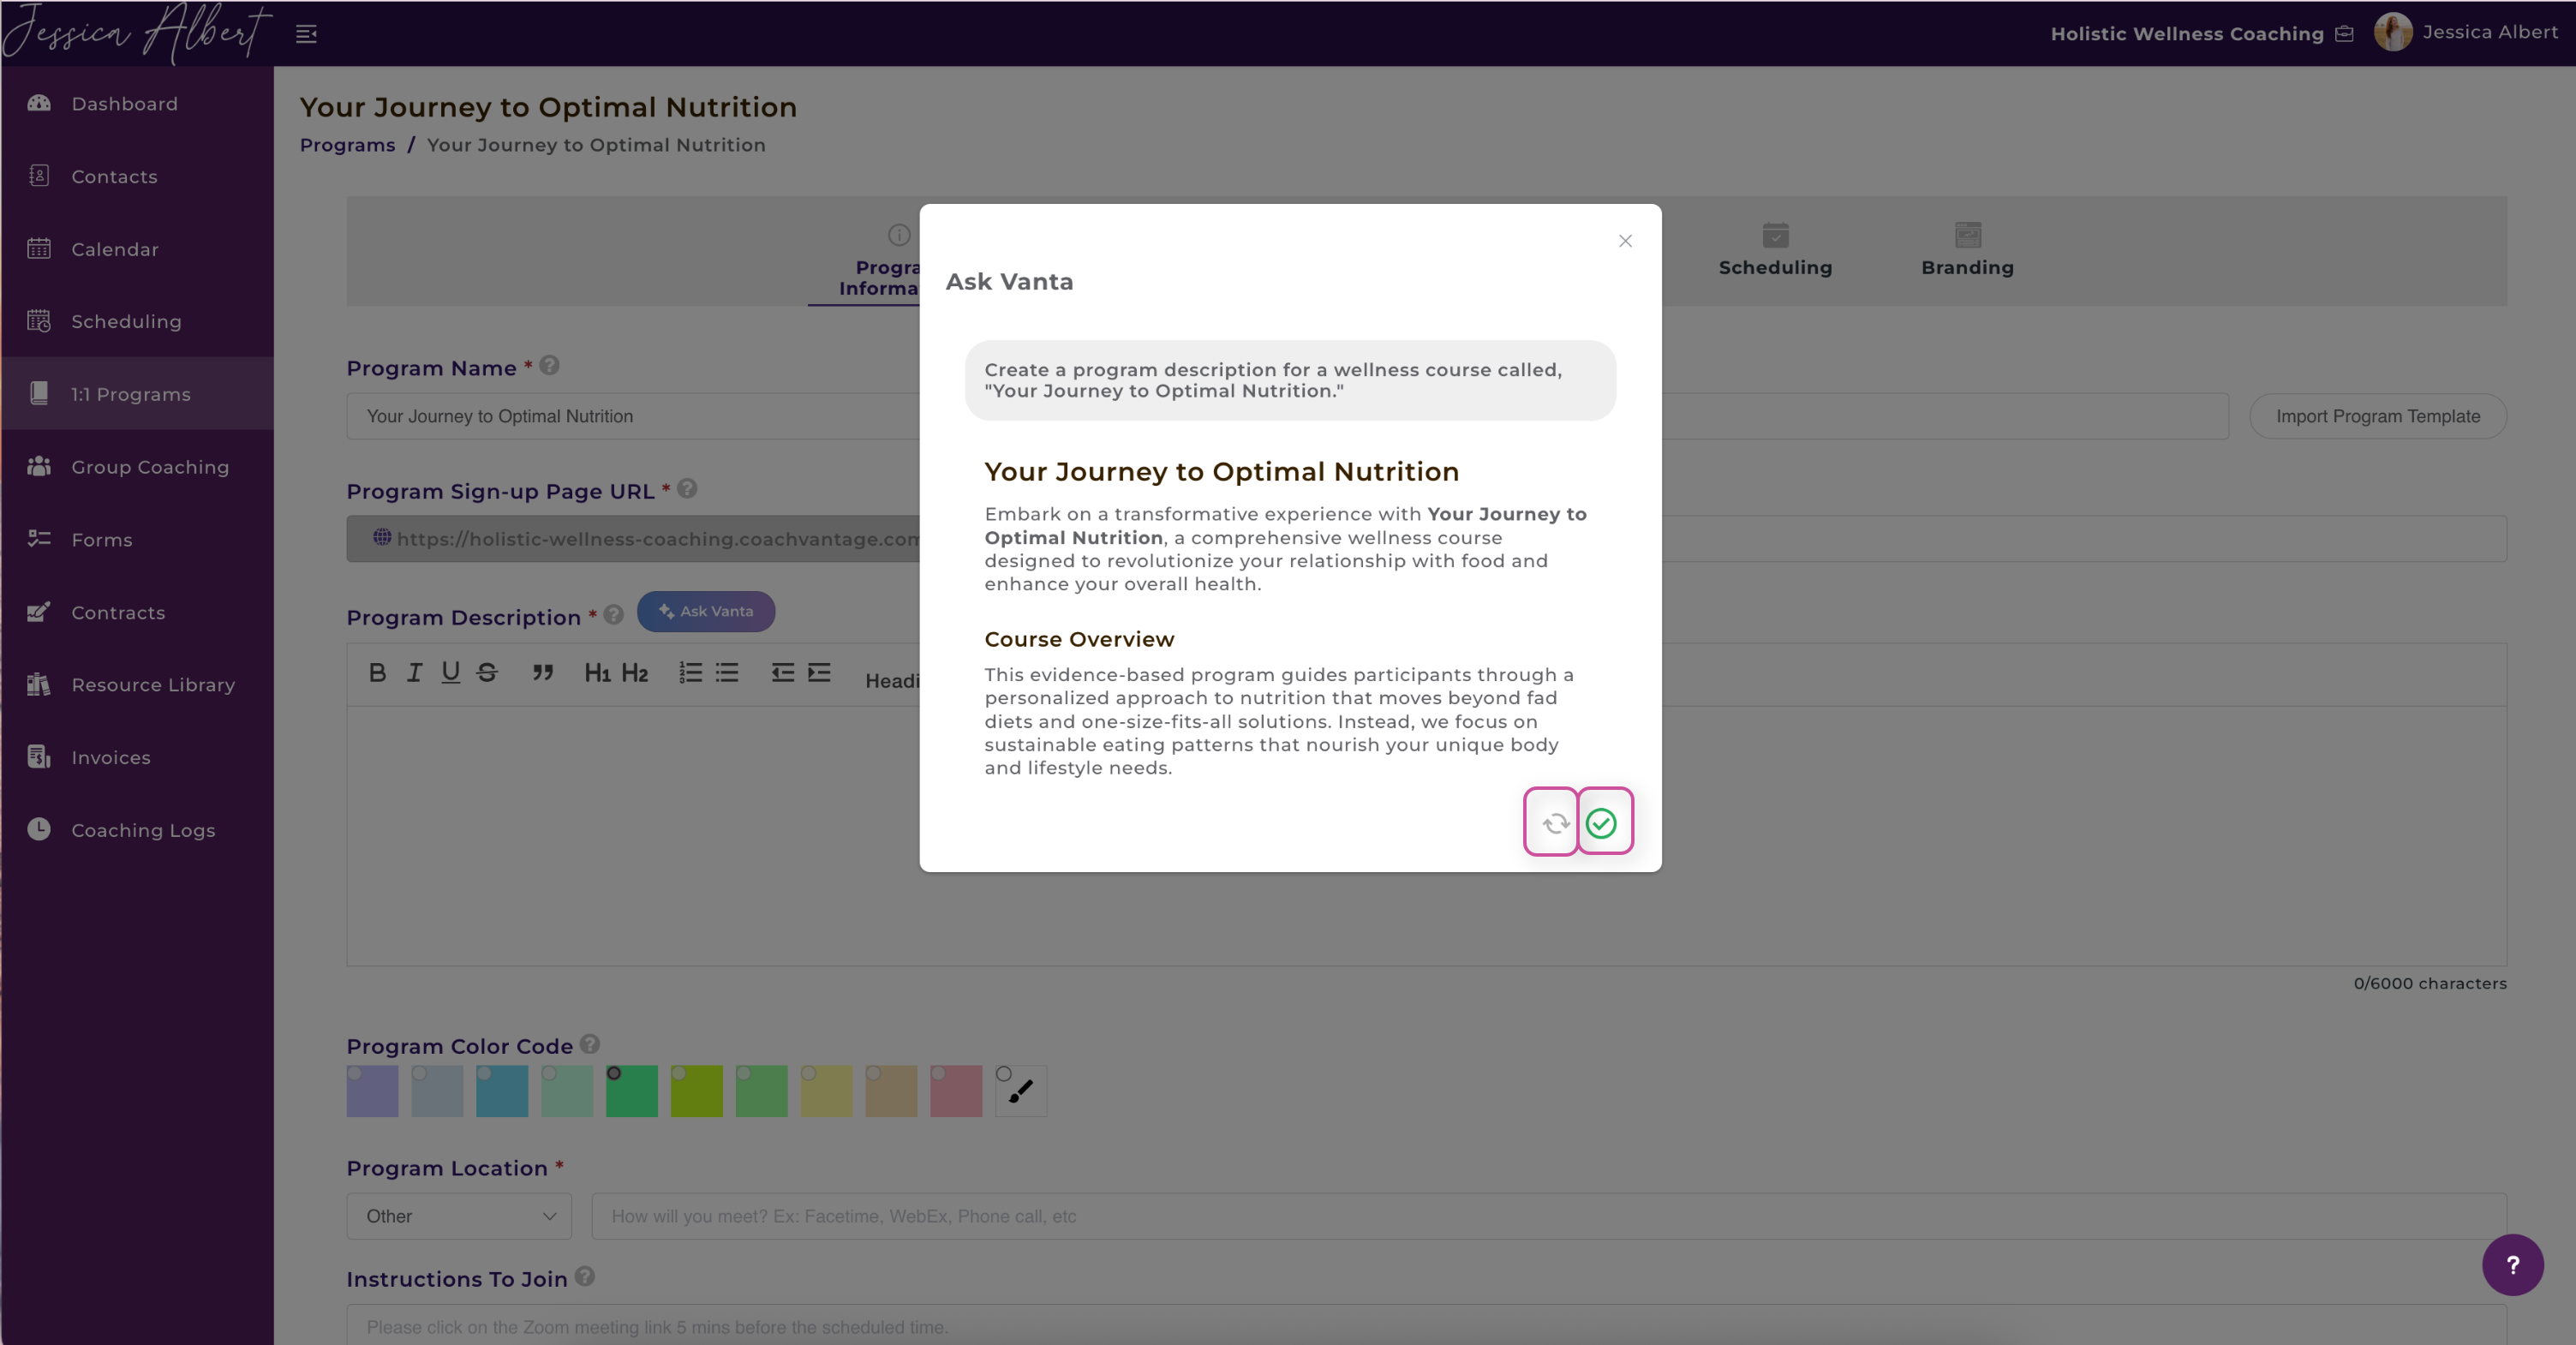
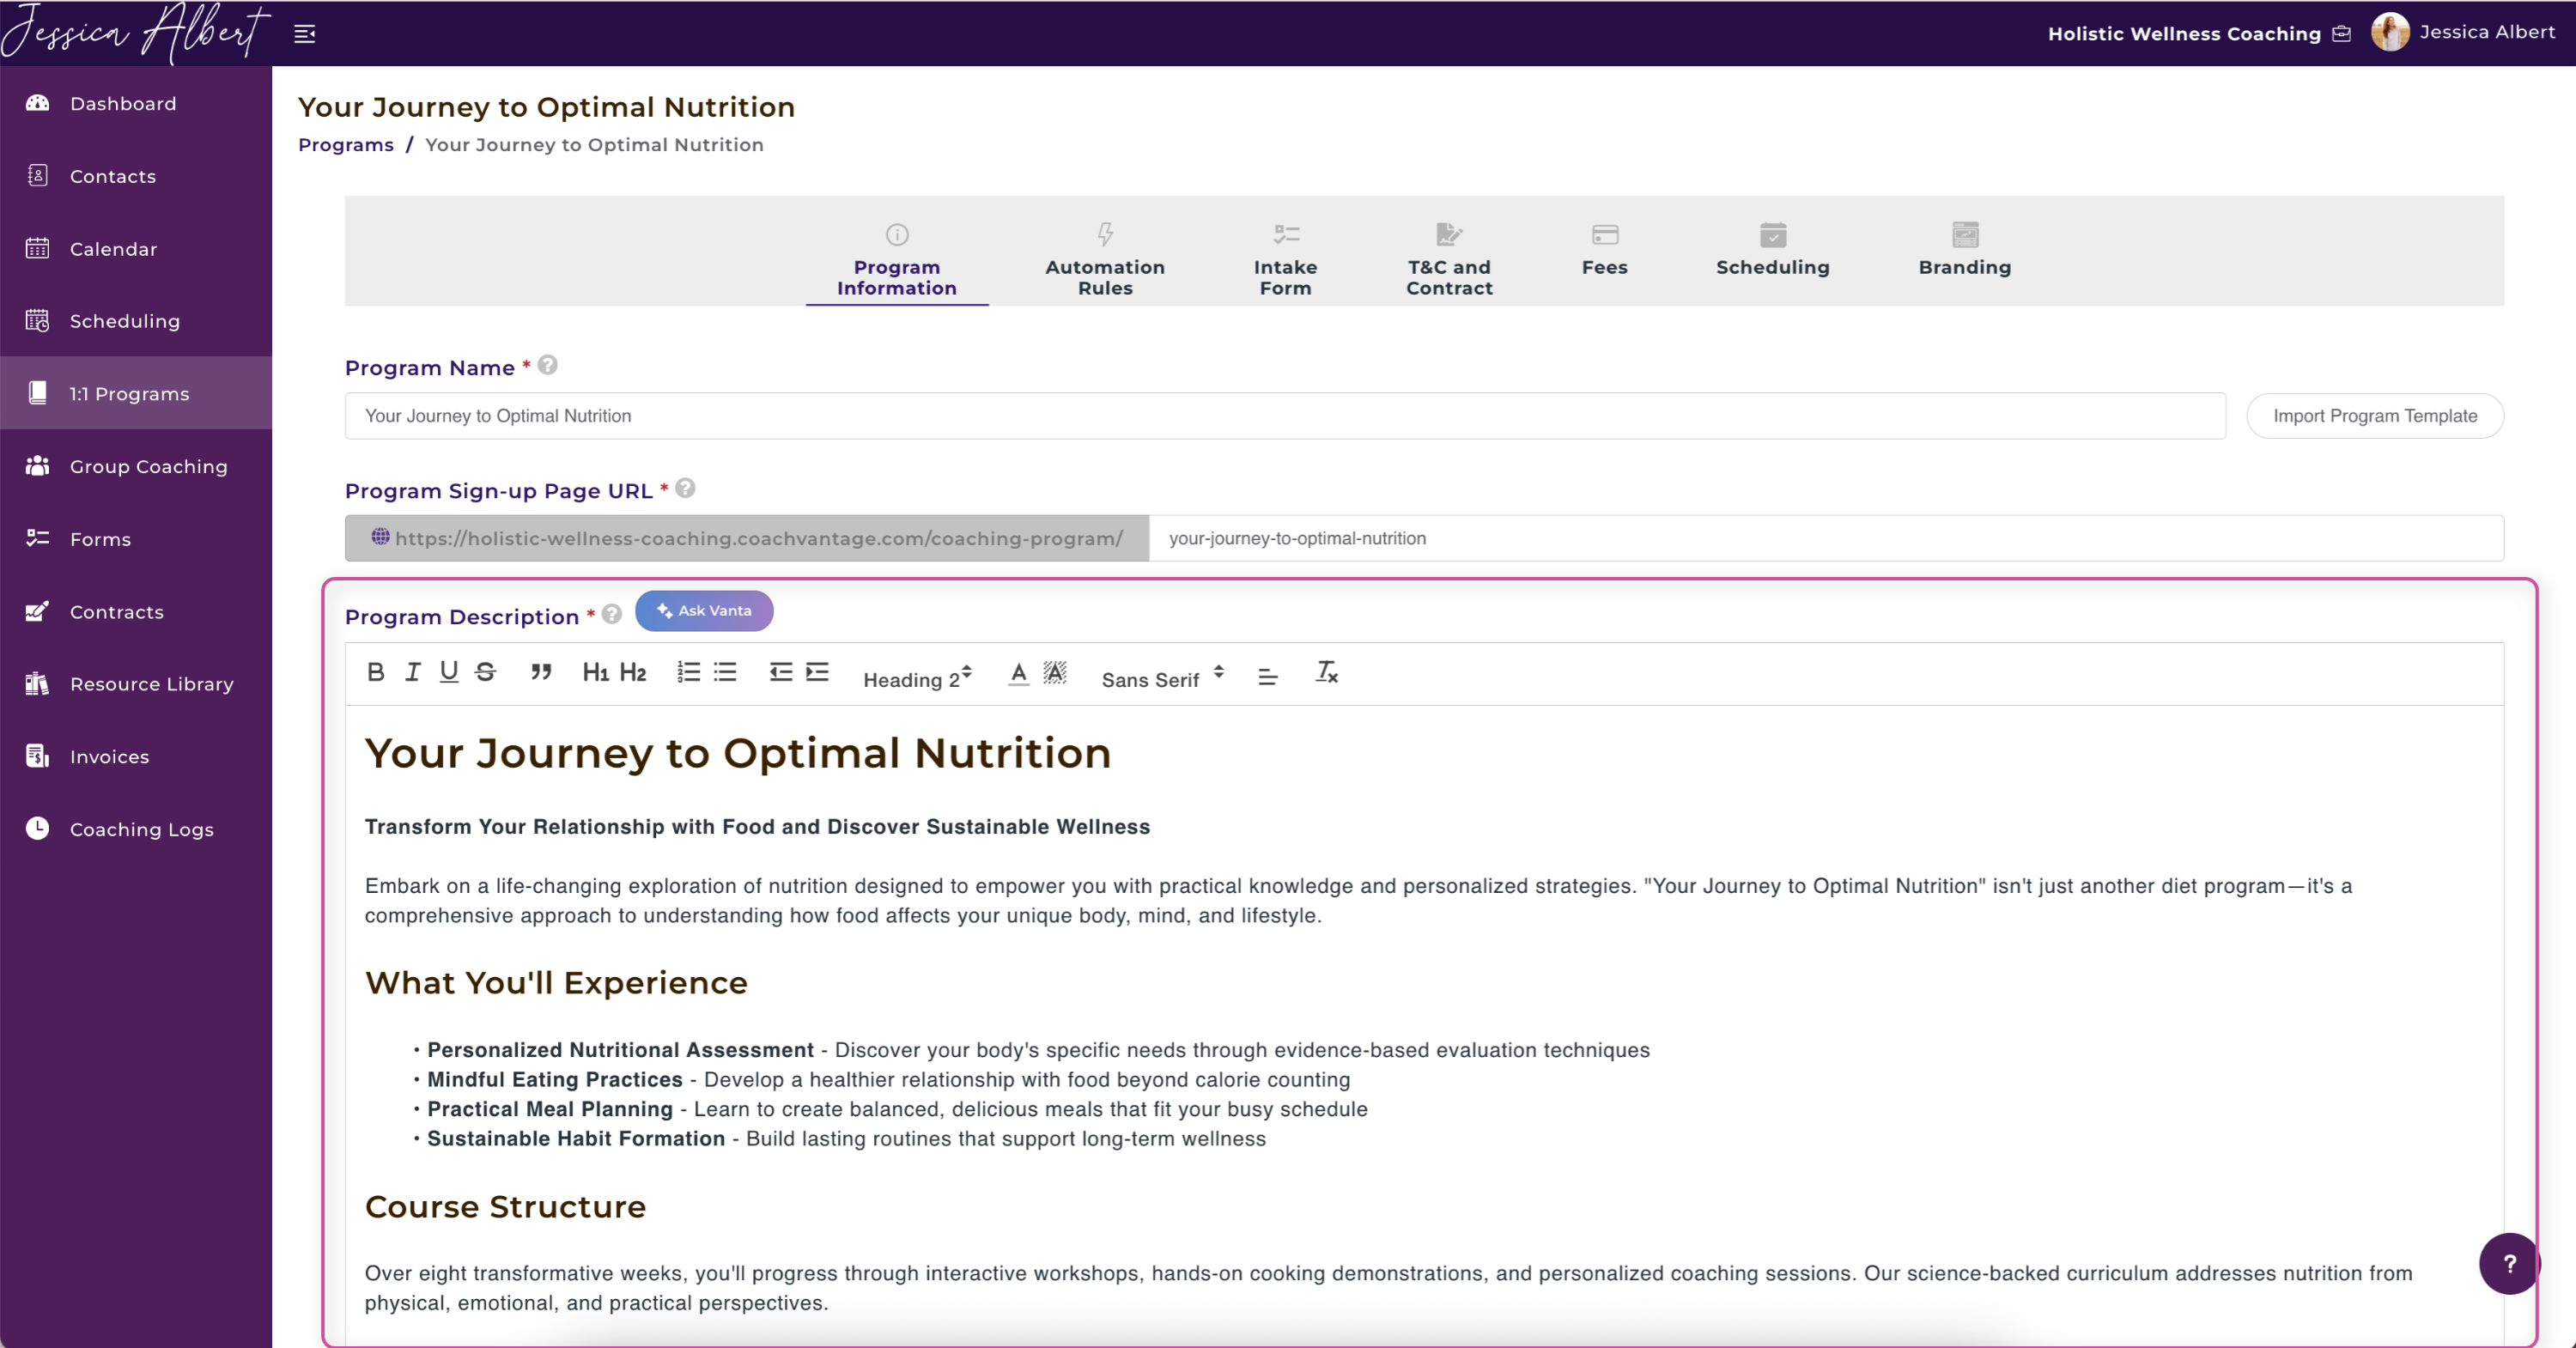
If you select the green check button, the generated text will be inserted in your program description. Feel free to edit accordingly!
Program Color Code: 🟣
- The color code is used as a visual cue on your Calendar for calendar entries associated with this program (i.e. client appointments related to this program).
- When a color is selected, it will not be available for selection for other programs. You will also be able to view the color code on your Group Program tile once you save the program.
Program Structure:
- You can select to have a fixed number of sessions for your group program or leave it open-ended, or evergreen.
- Select Yes to specify the number of sessions (ie the number of times that you will have group coaching sessions for this program).
- Tip: When you manage a group program with a fixed number of sessions, CoachVantage helps you keep track of how many sessions have been completed. You'll be able to see this on the group coaching management page.
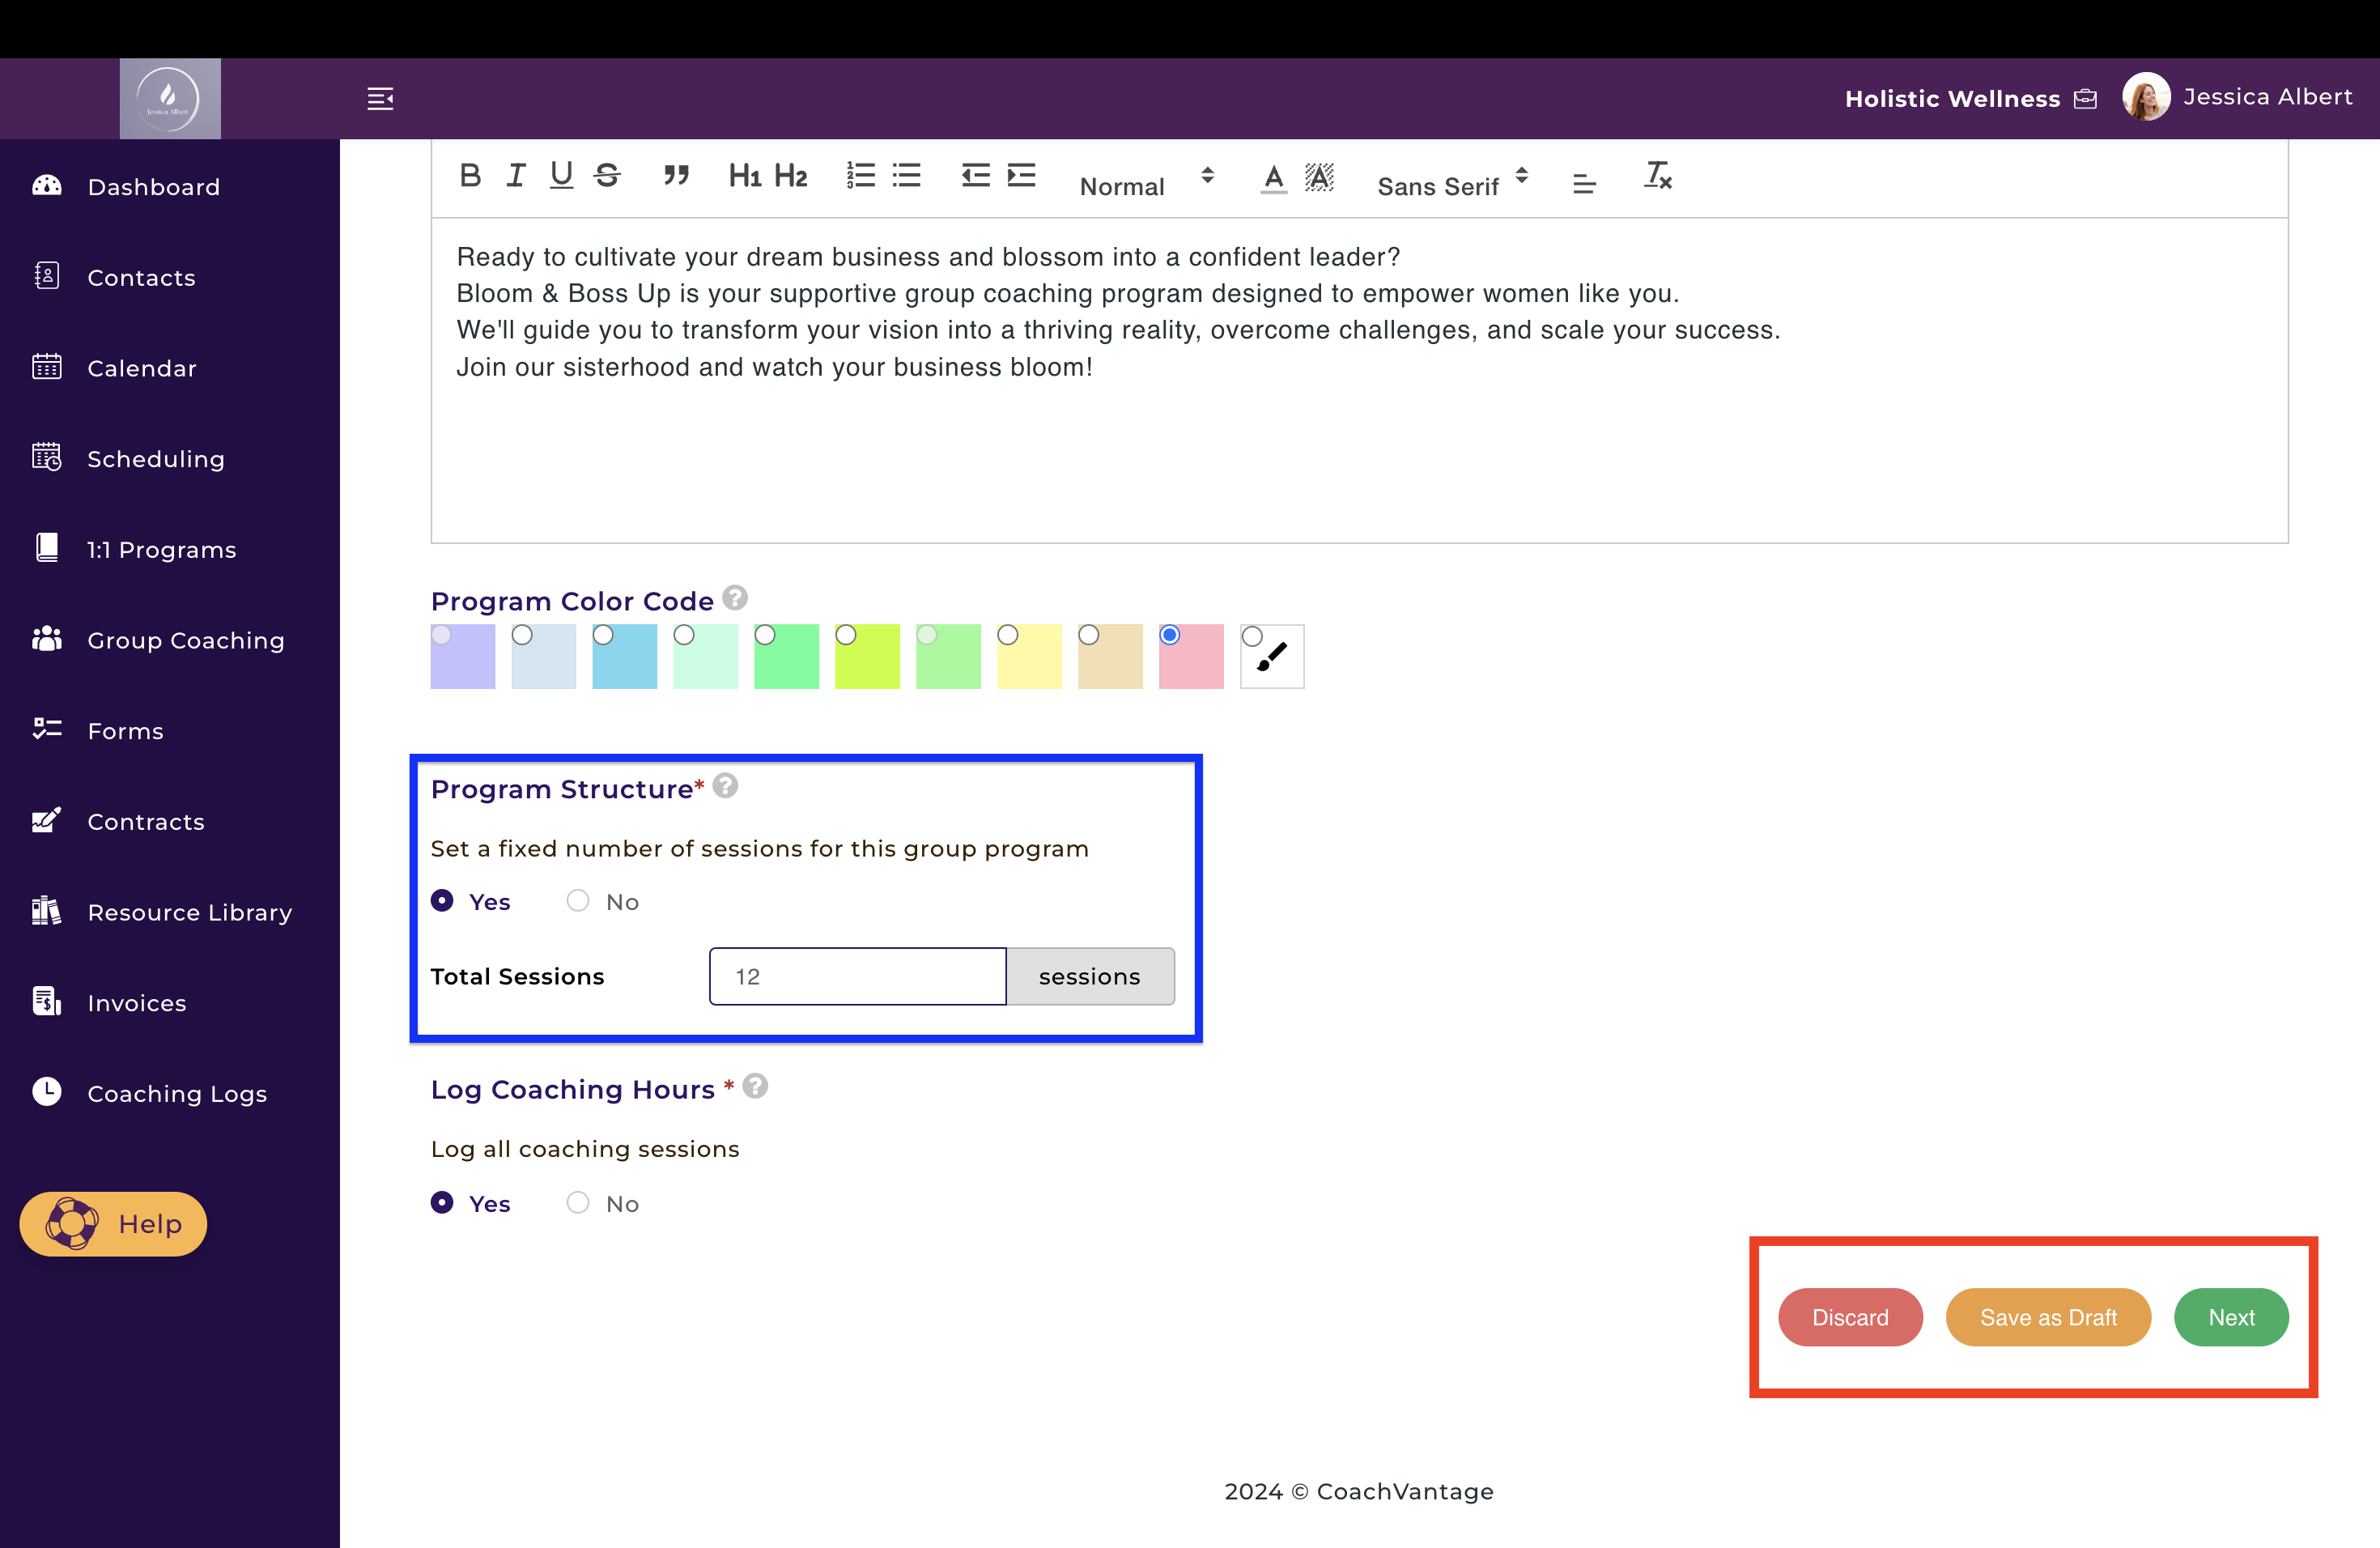
Log Coaching Hours 🕣
- Select Yes to log your coaching hours for this group program automatically in your coaching log.
- After each session is completed for this program, CoachVantage will automatically capture the coaching hours in your Coaching Log.
- Note: Since there are multiple clients in a group program, and in alignment with the International Coaching Federation's (ICF) guidance, only one group member's detail is required in the coaching log.
1b) Group Program - Fees (Optional) 💸
1. After clicking the Next, you will be taken to the Fees step, as shown below:
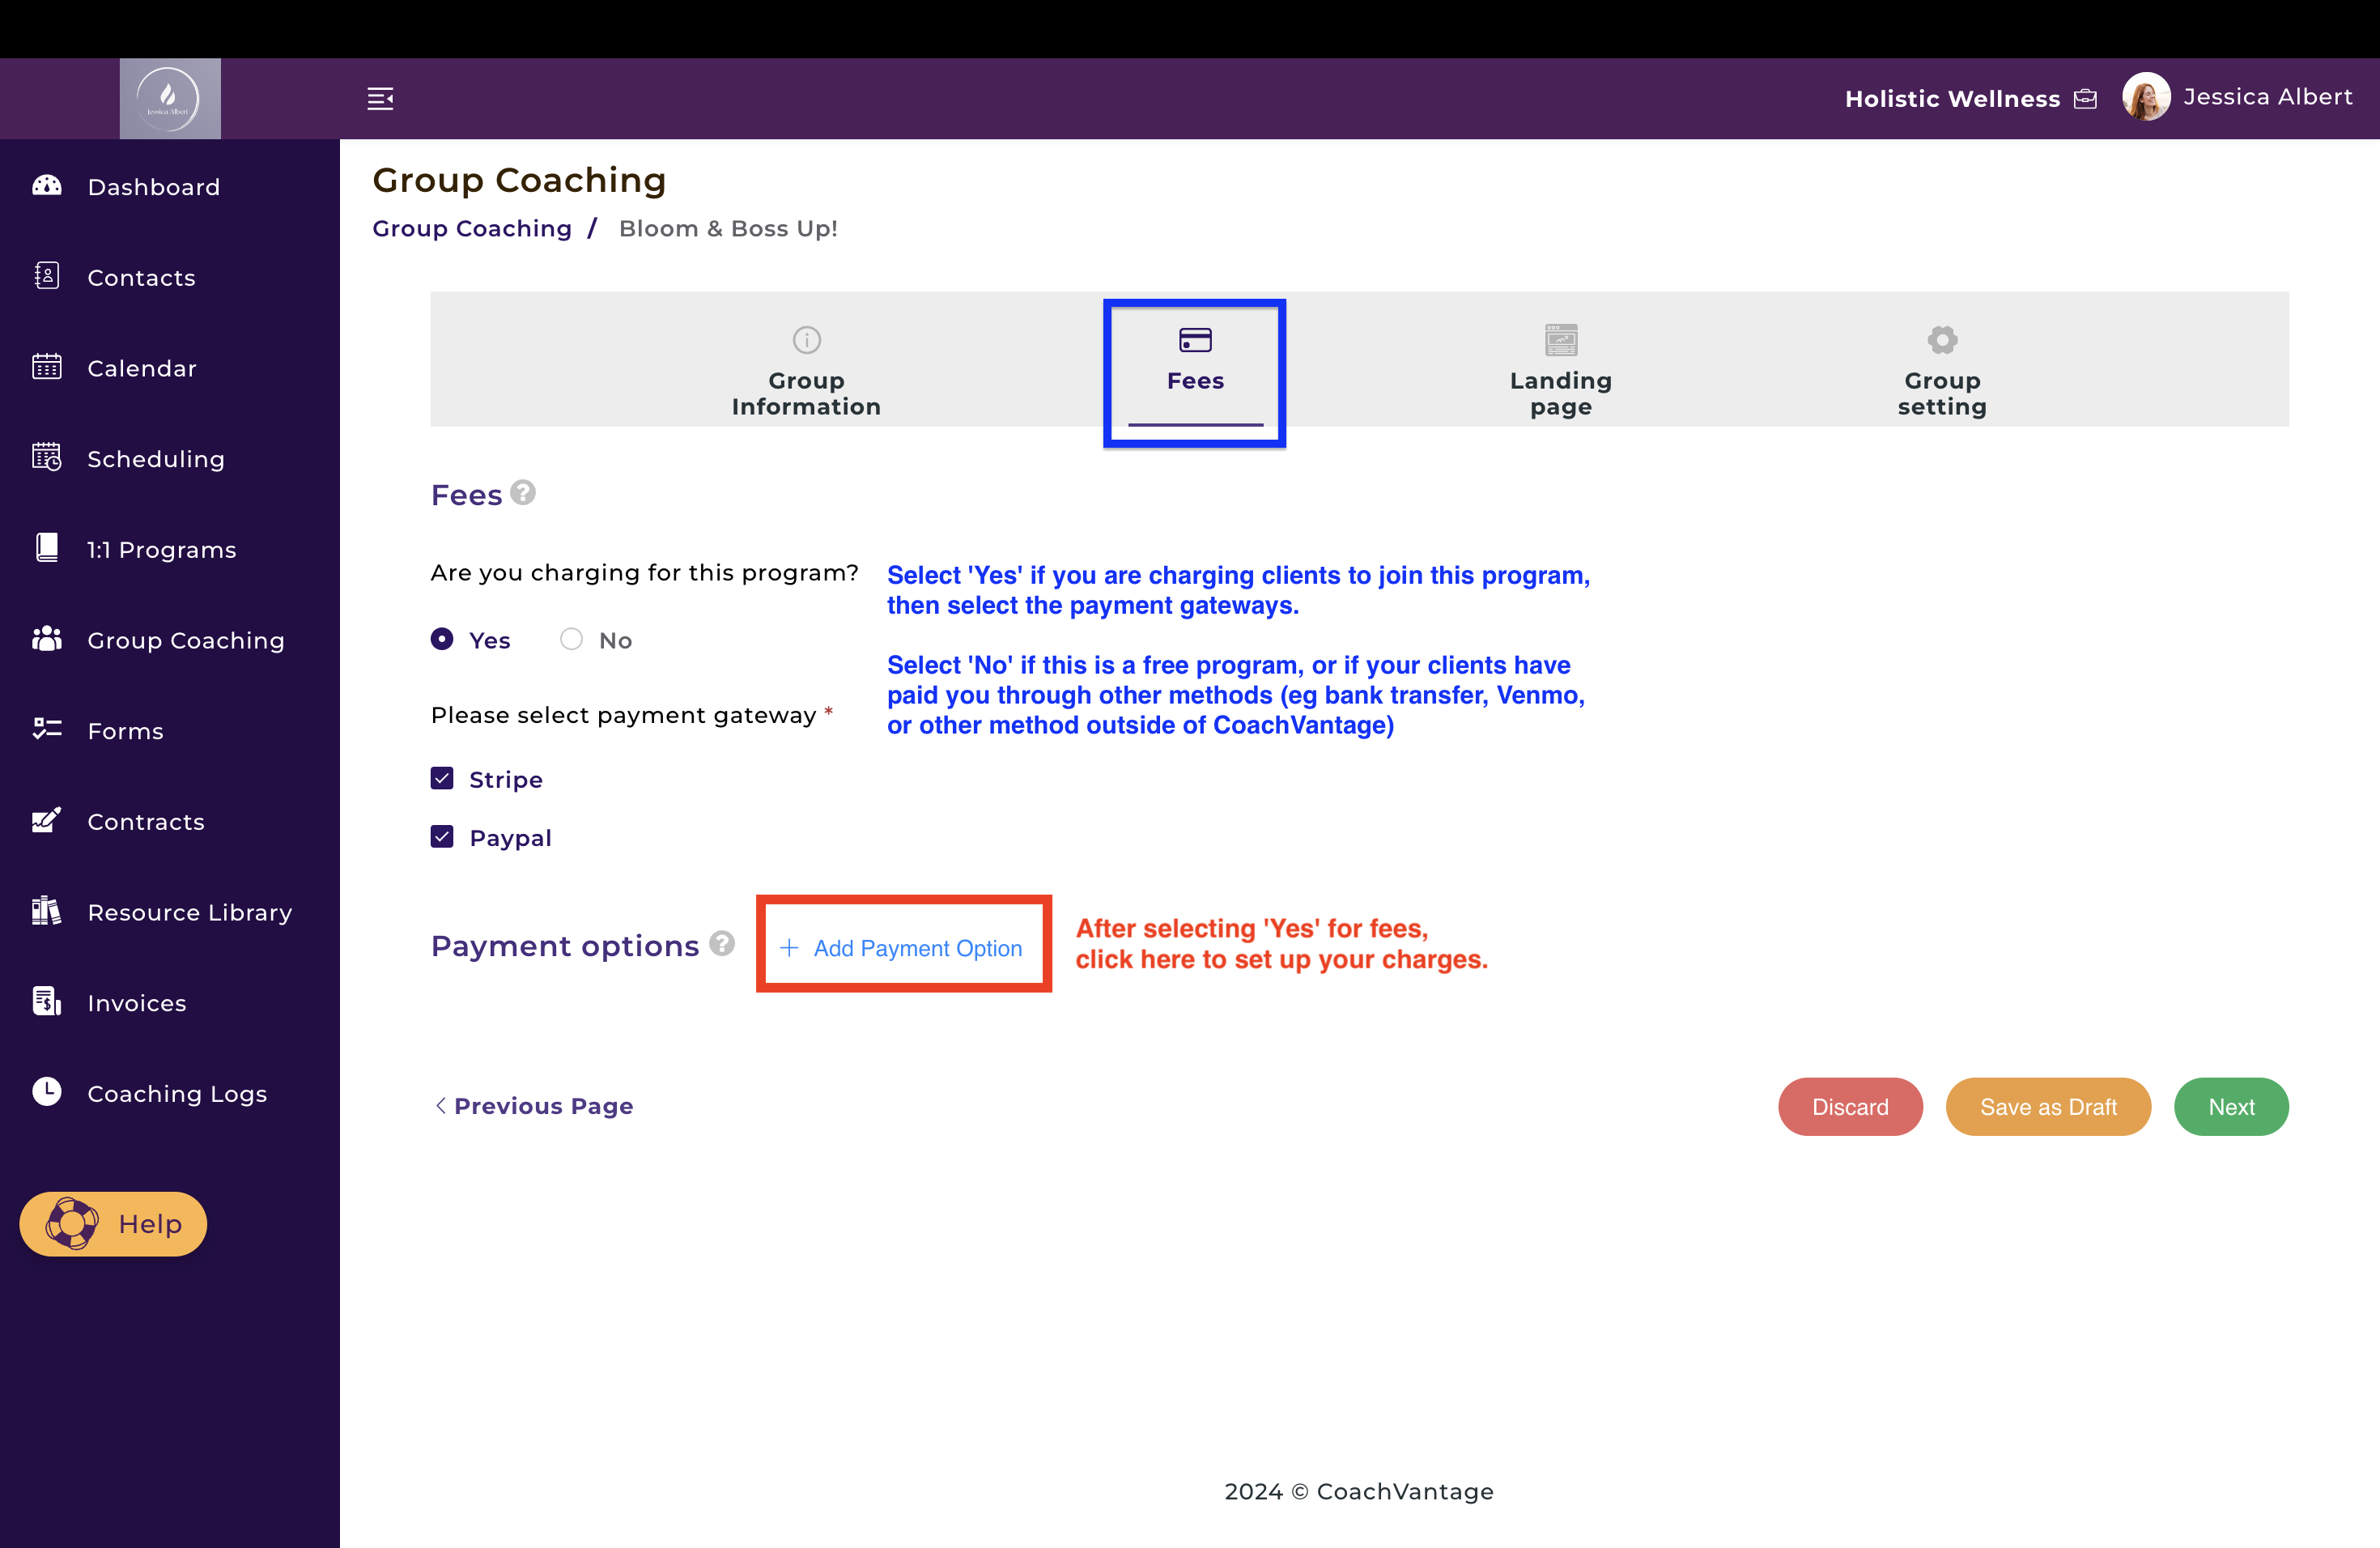
You can charge clients for your group program by specifying the fees.
- Select Yes to charge for the program.
- Check the payment gateway option, PayPal or Stripe. You may check both.
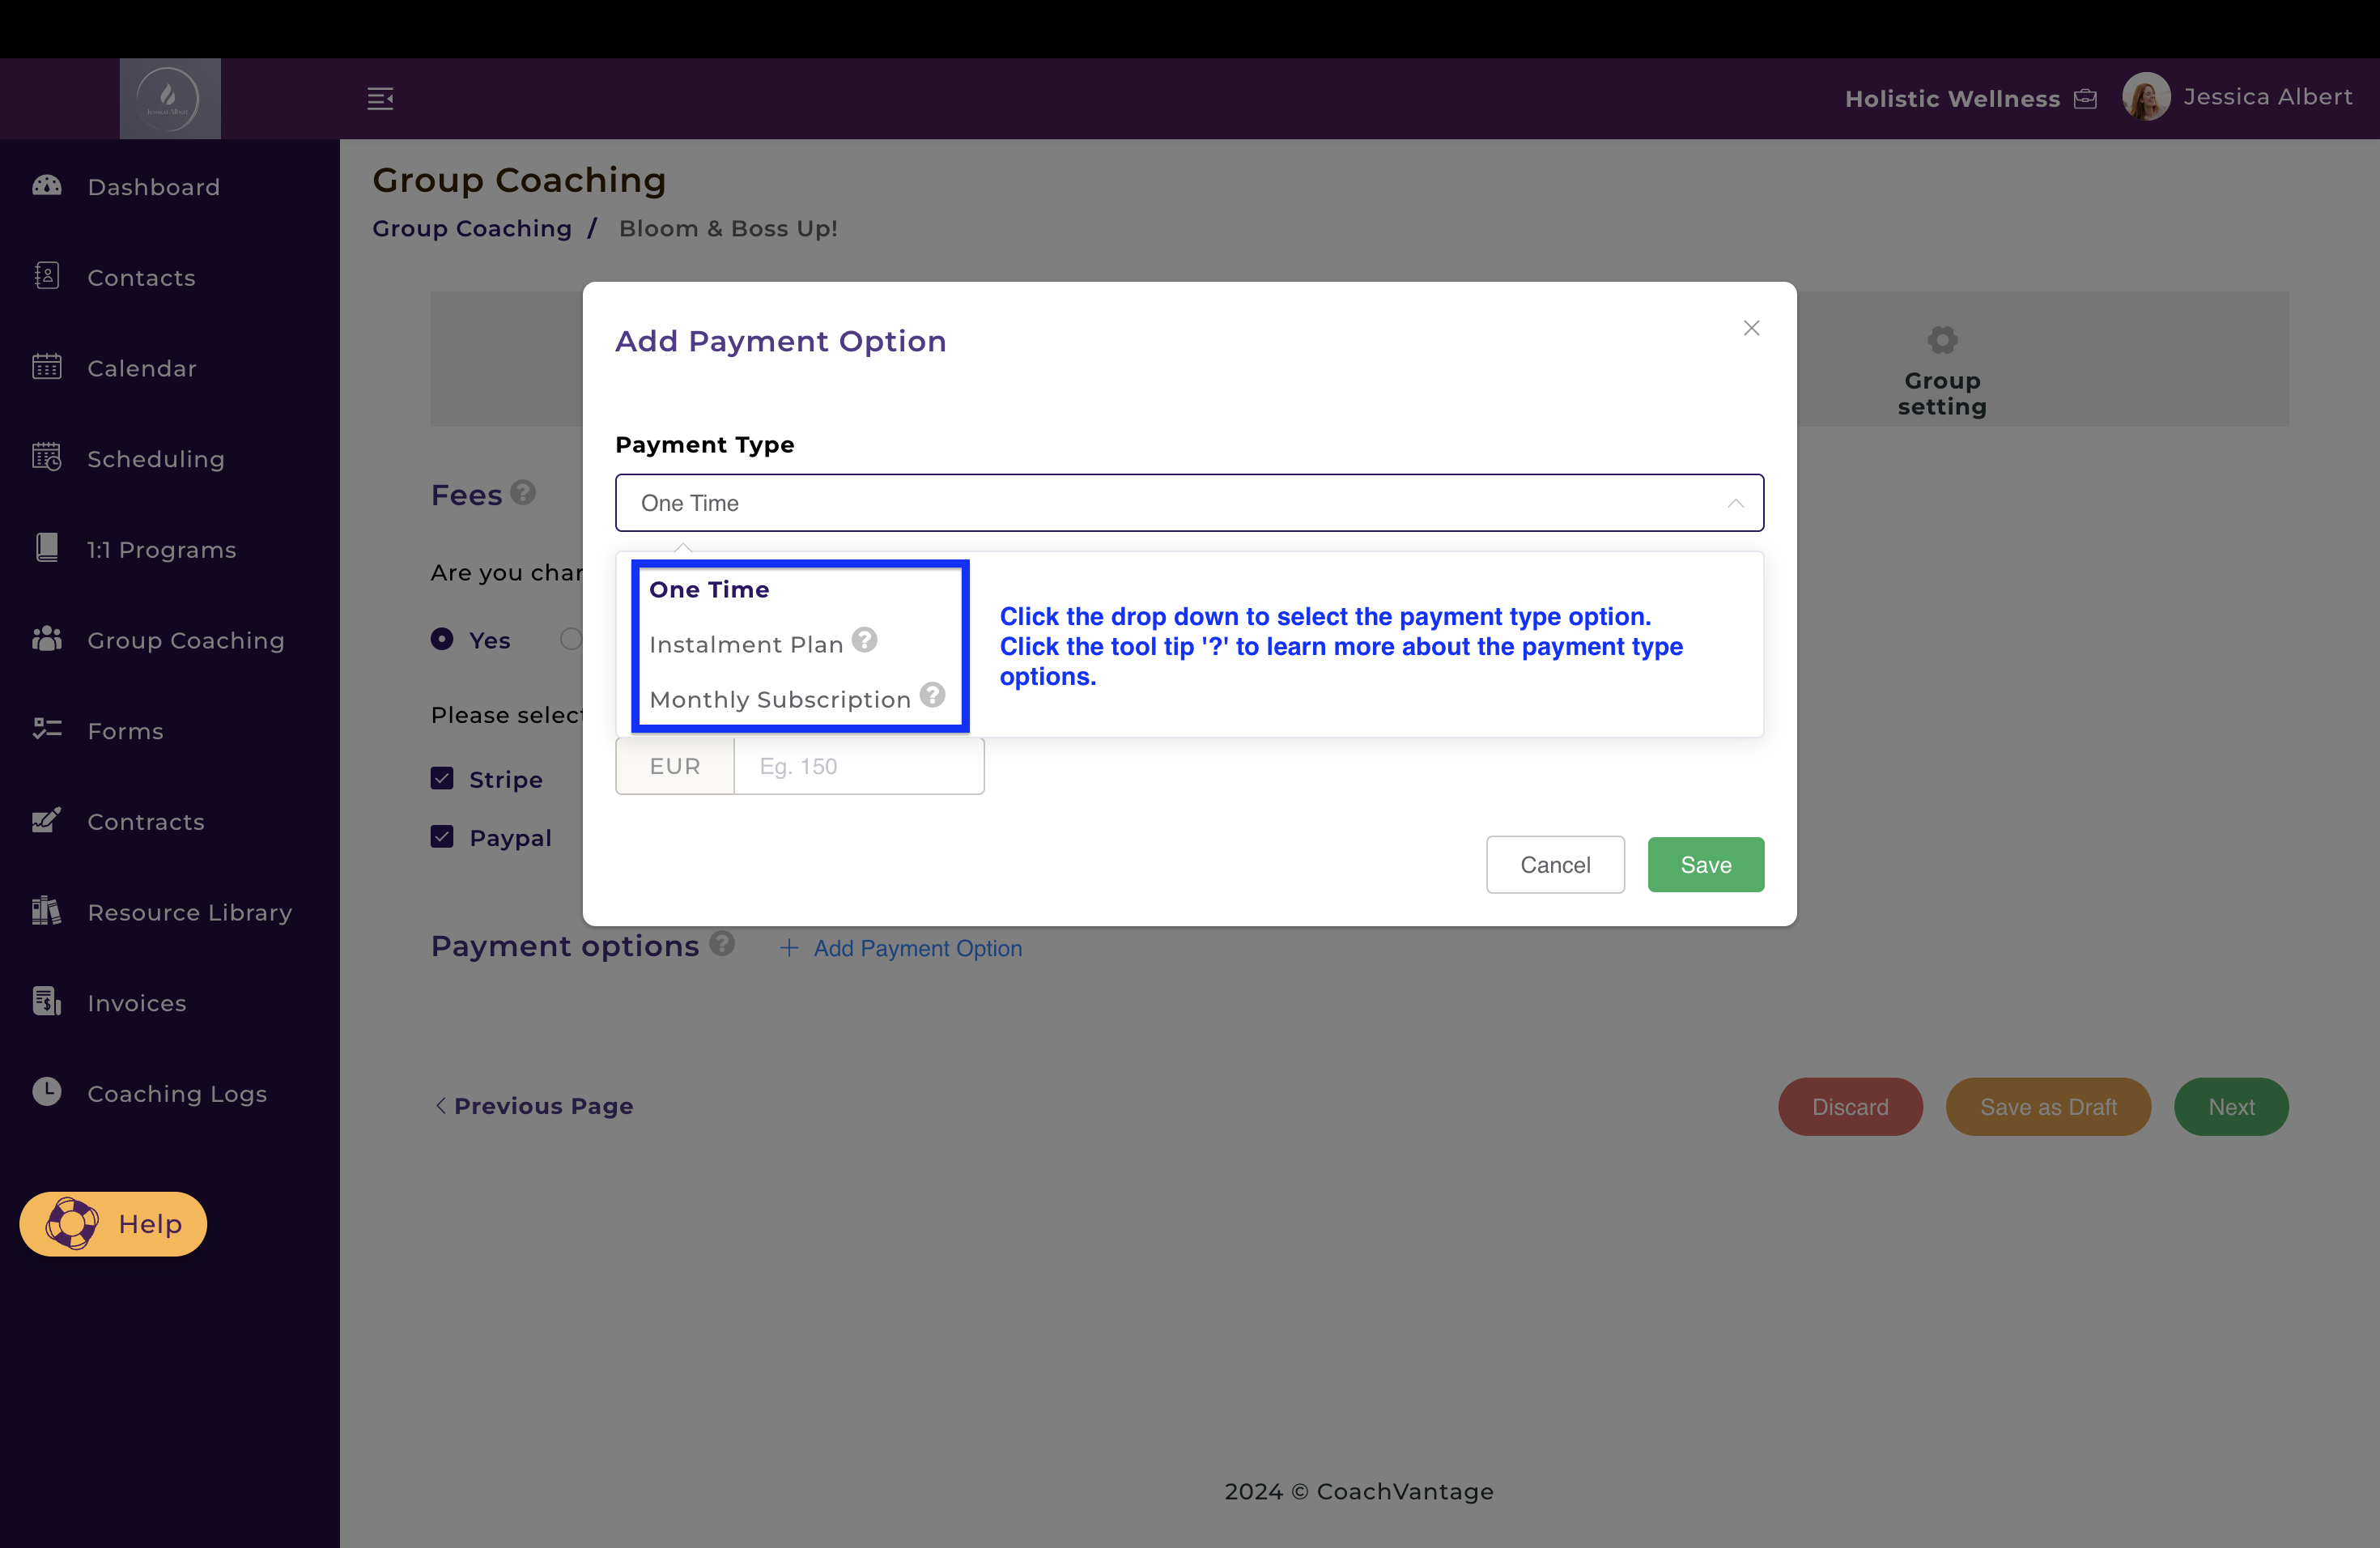
NOTE: You must first have connected your PayPal and/or Stripe account to CoachVantage before you can add a payment option. - Click on Add Payment Option to add fees. Use the dropdown selector to specify whether clients make one-time, installment plan, or monthly subscription payments. You can configure up to three (3) payment options for your program. For example, you may set up a One Time Upfront Payment of $1,000, 3-Month Installment Plan of USD400/month and Monthly Payments of $50.
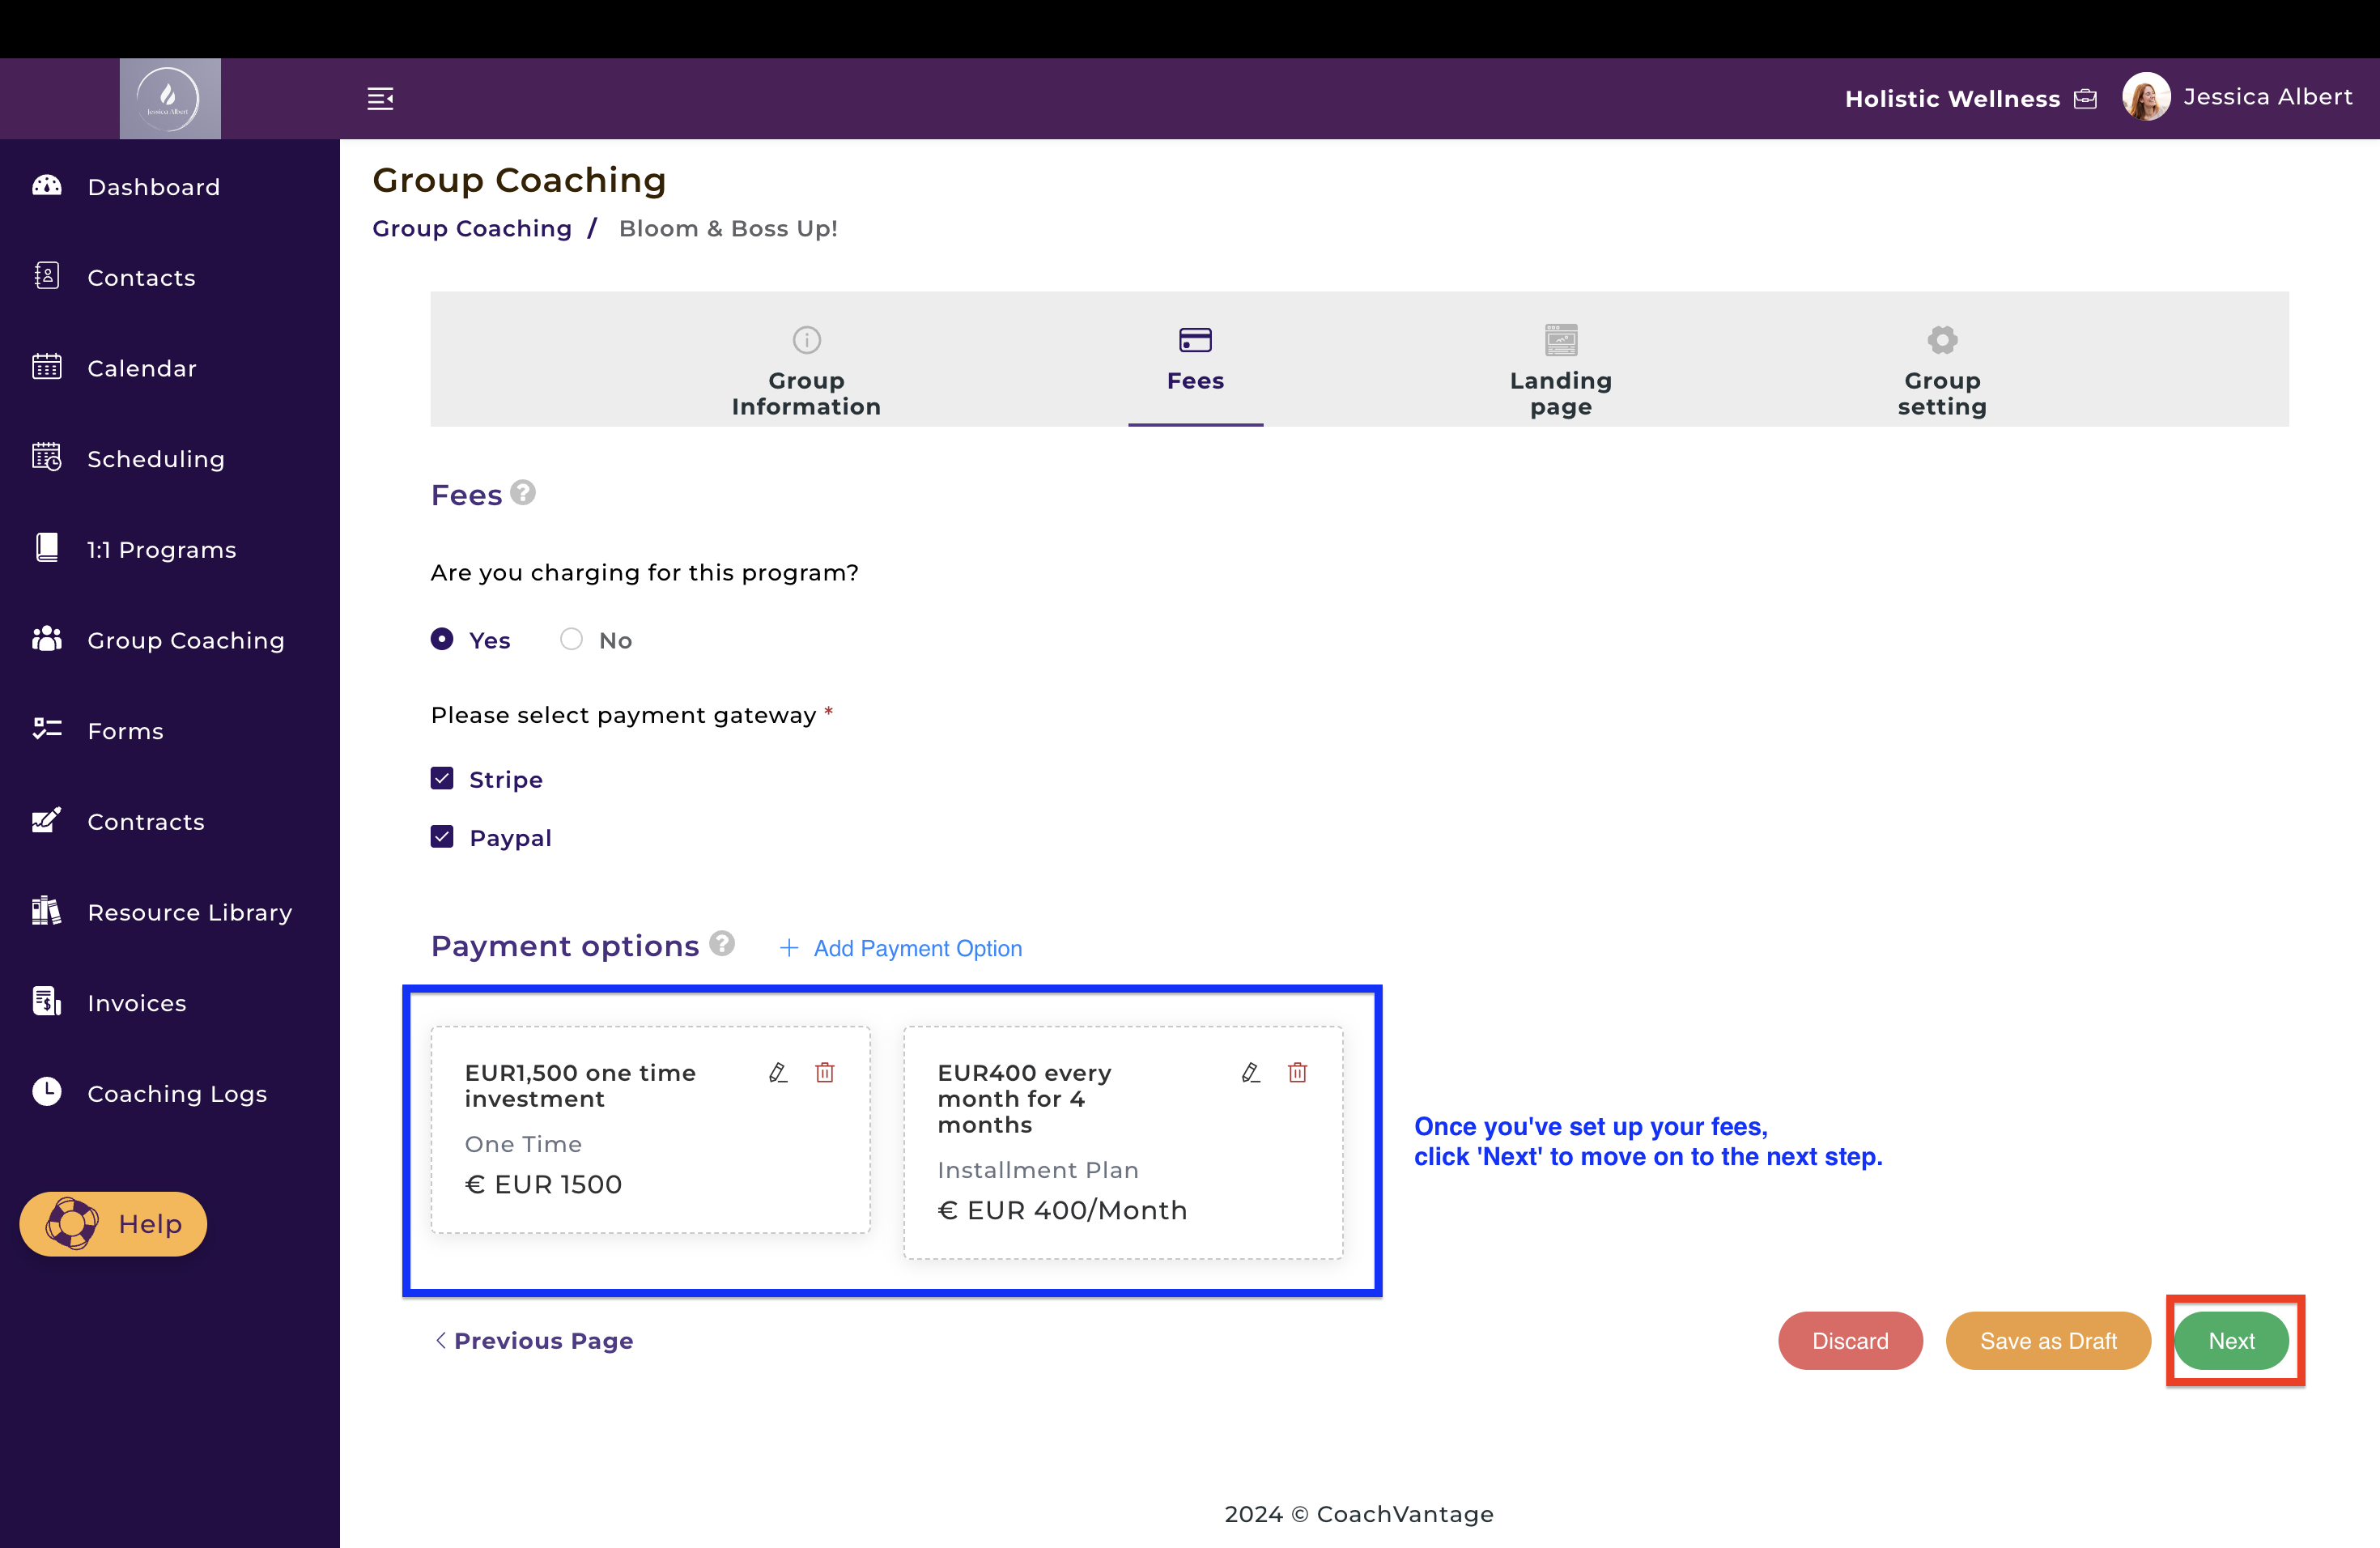
IMPORTANT:
When you set up fees for your program, clients will be redirected to the Stripe or PayPal checkout pages to make payment online. Upon successful payment completion, CoachVantage will automatically generate an invoice to the client with the status as Paid.
You will see this invoice in your CoachVantage account in the Contact record (in the Invoices tab).
1c) Group Program - Landing Page (Optional)
1. After clicking Next, you will be taken to the Landing Page step, as shown below:
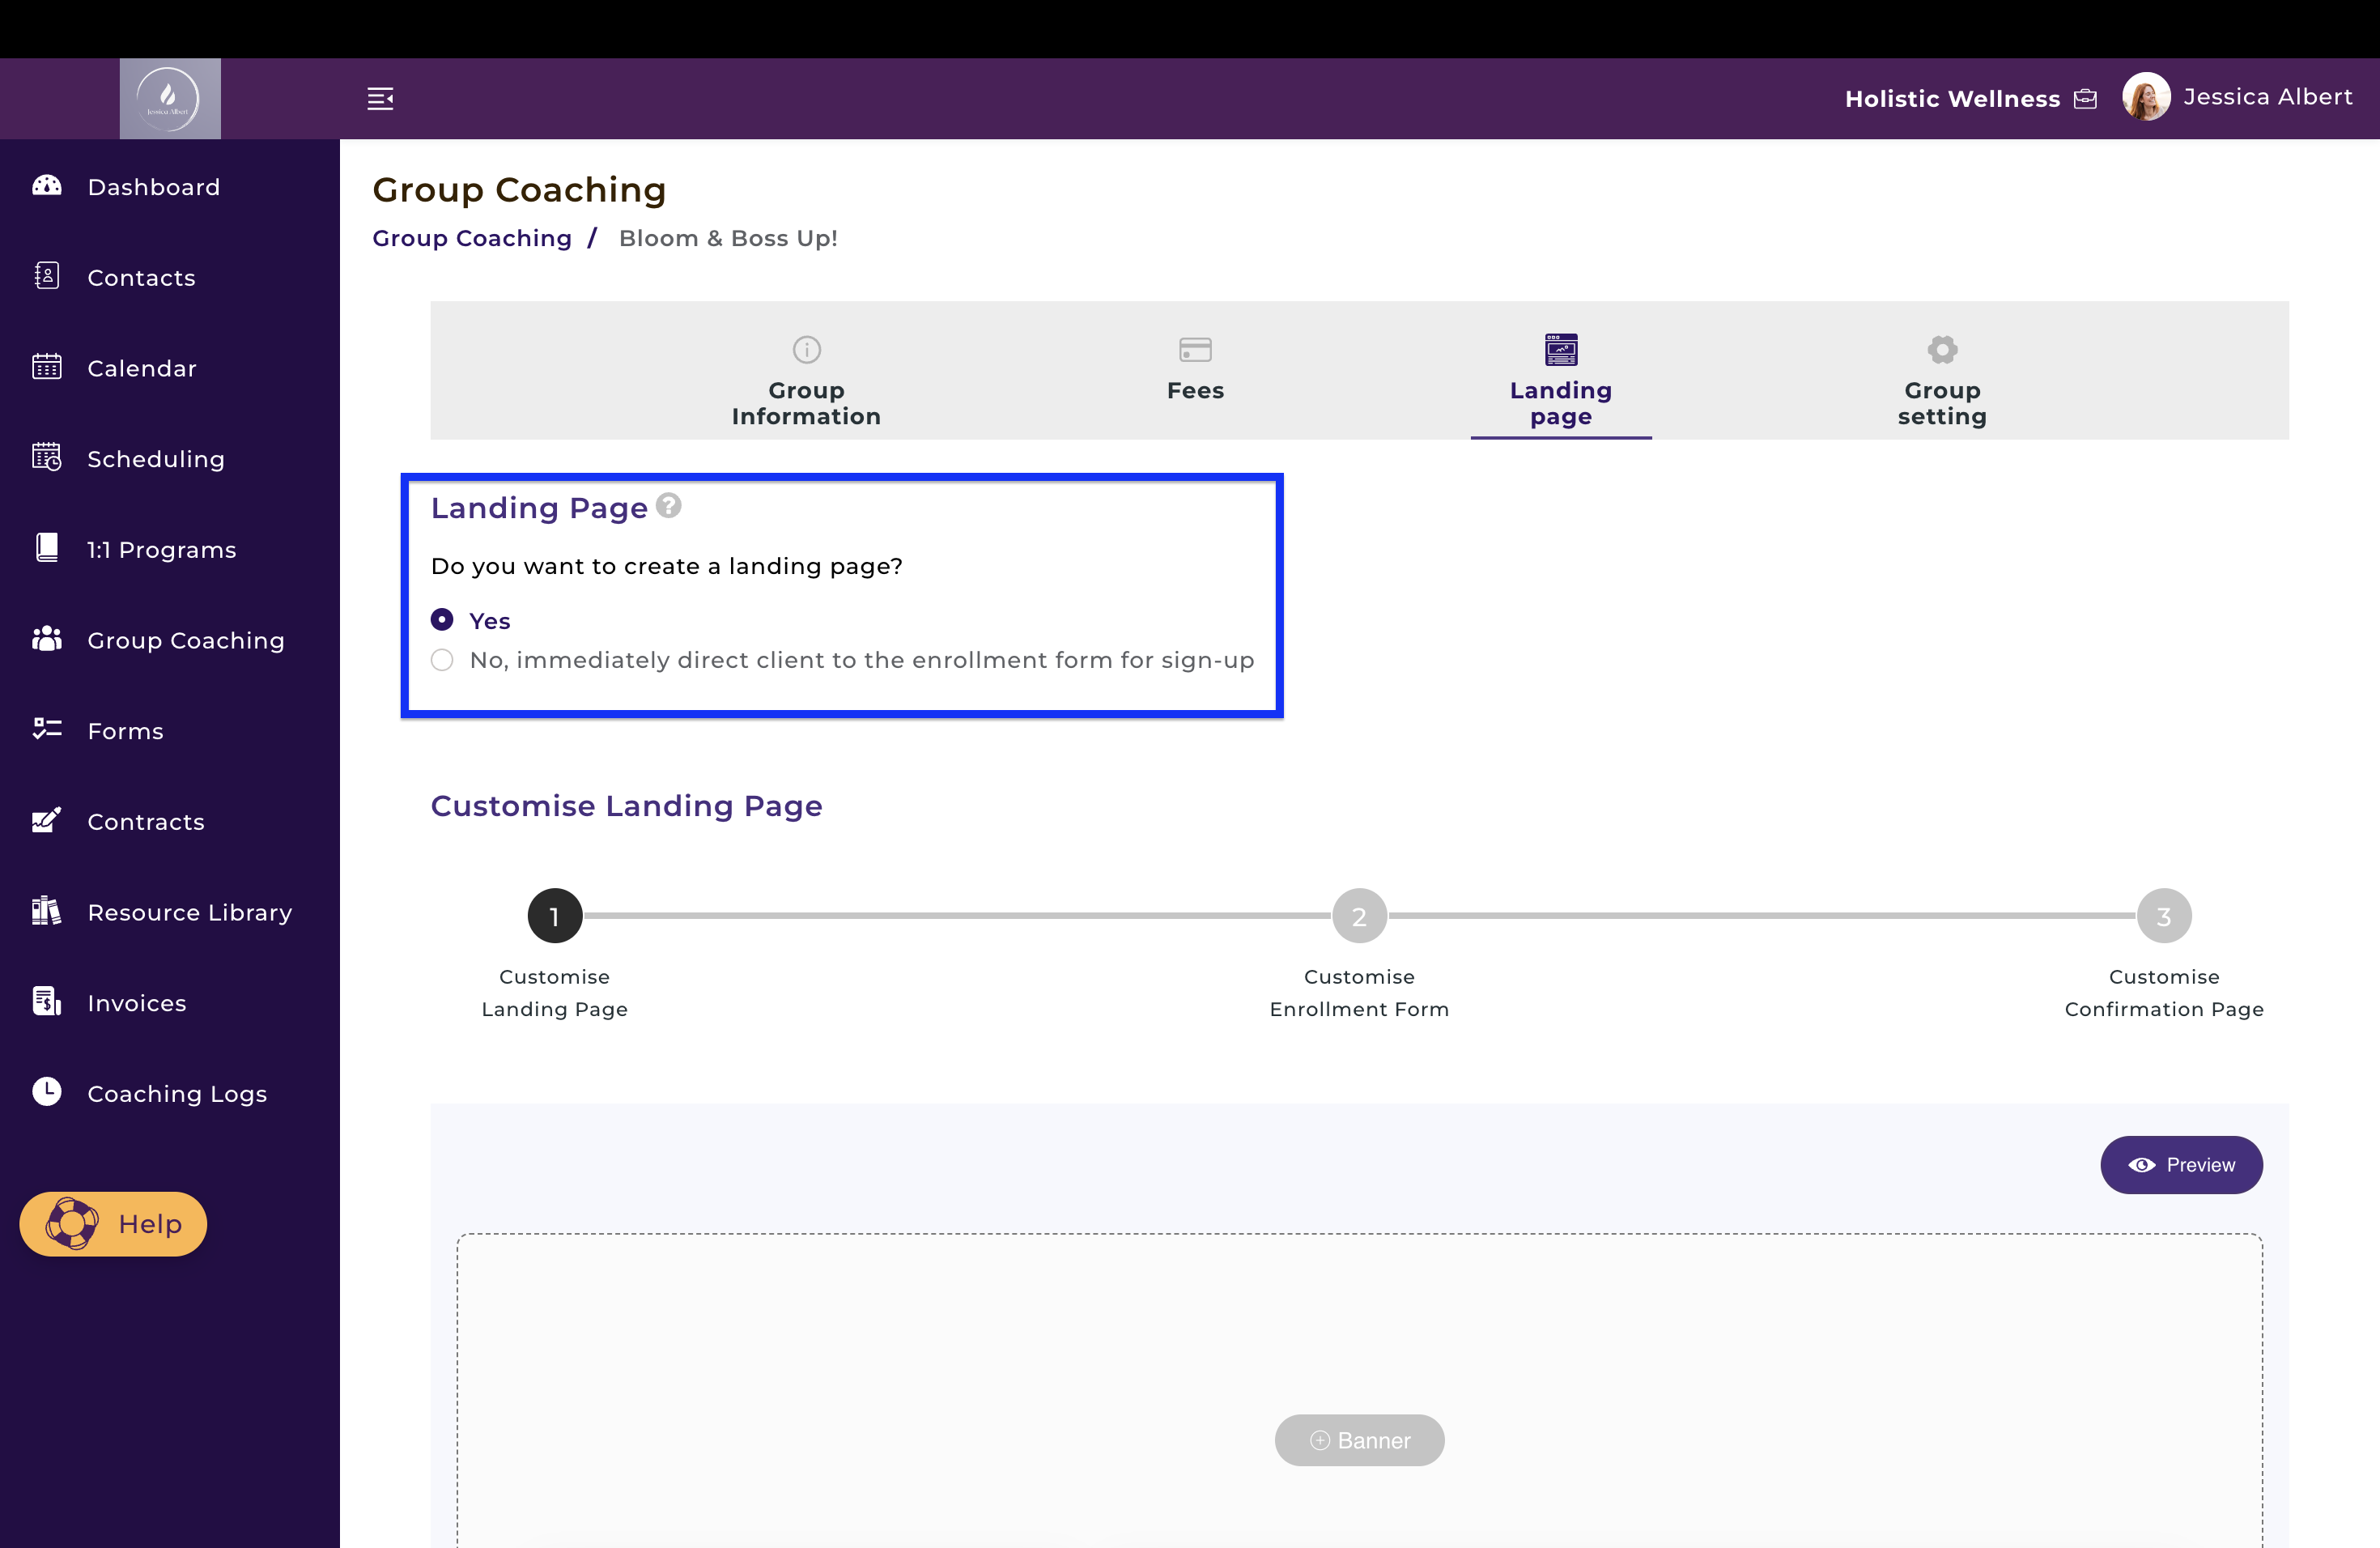
You will be asked if you would like to create a landing page, or an enrollment form, as shown in the image above.
A landing page is useful if you don't have a website to sell your group programs just yet. Alternatively, if you have a website, you can embed the landing page in your website. You can also use the URL link of the landing page and display that on your social pages like Facebook, LinkedIn, YouTube, etc or even paste the link in emails that you can send to clients.
Select Yes if you would like to create a full landing page that describes your program and allows you to add a banner image, a video where you can talk about your program, add client testimonials, etc. You will be then be able to Customise Landing Page as shown below:
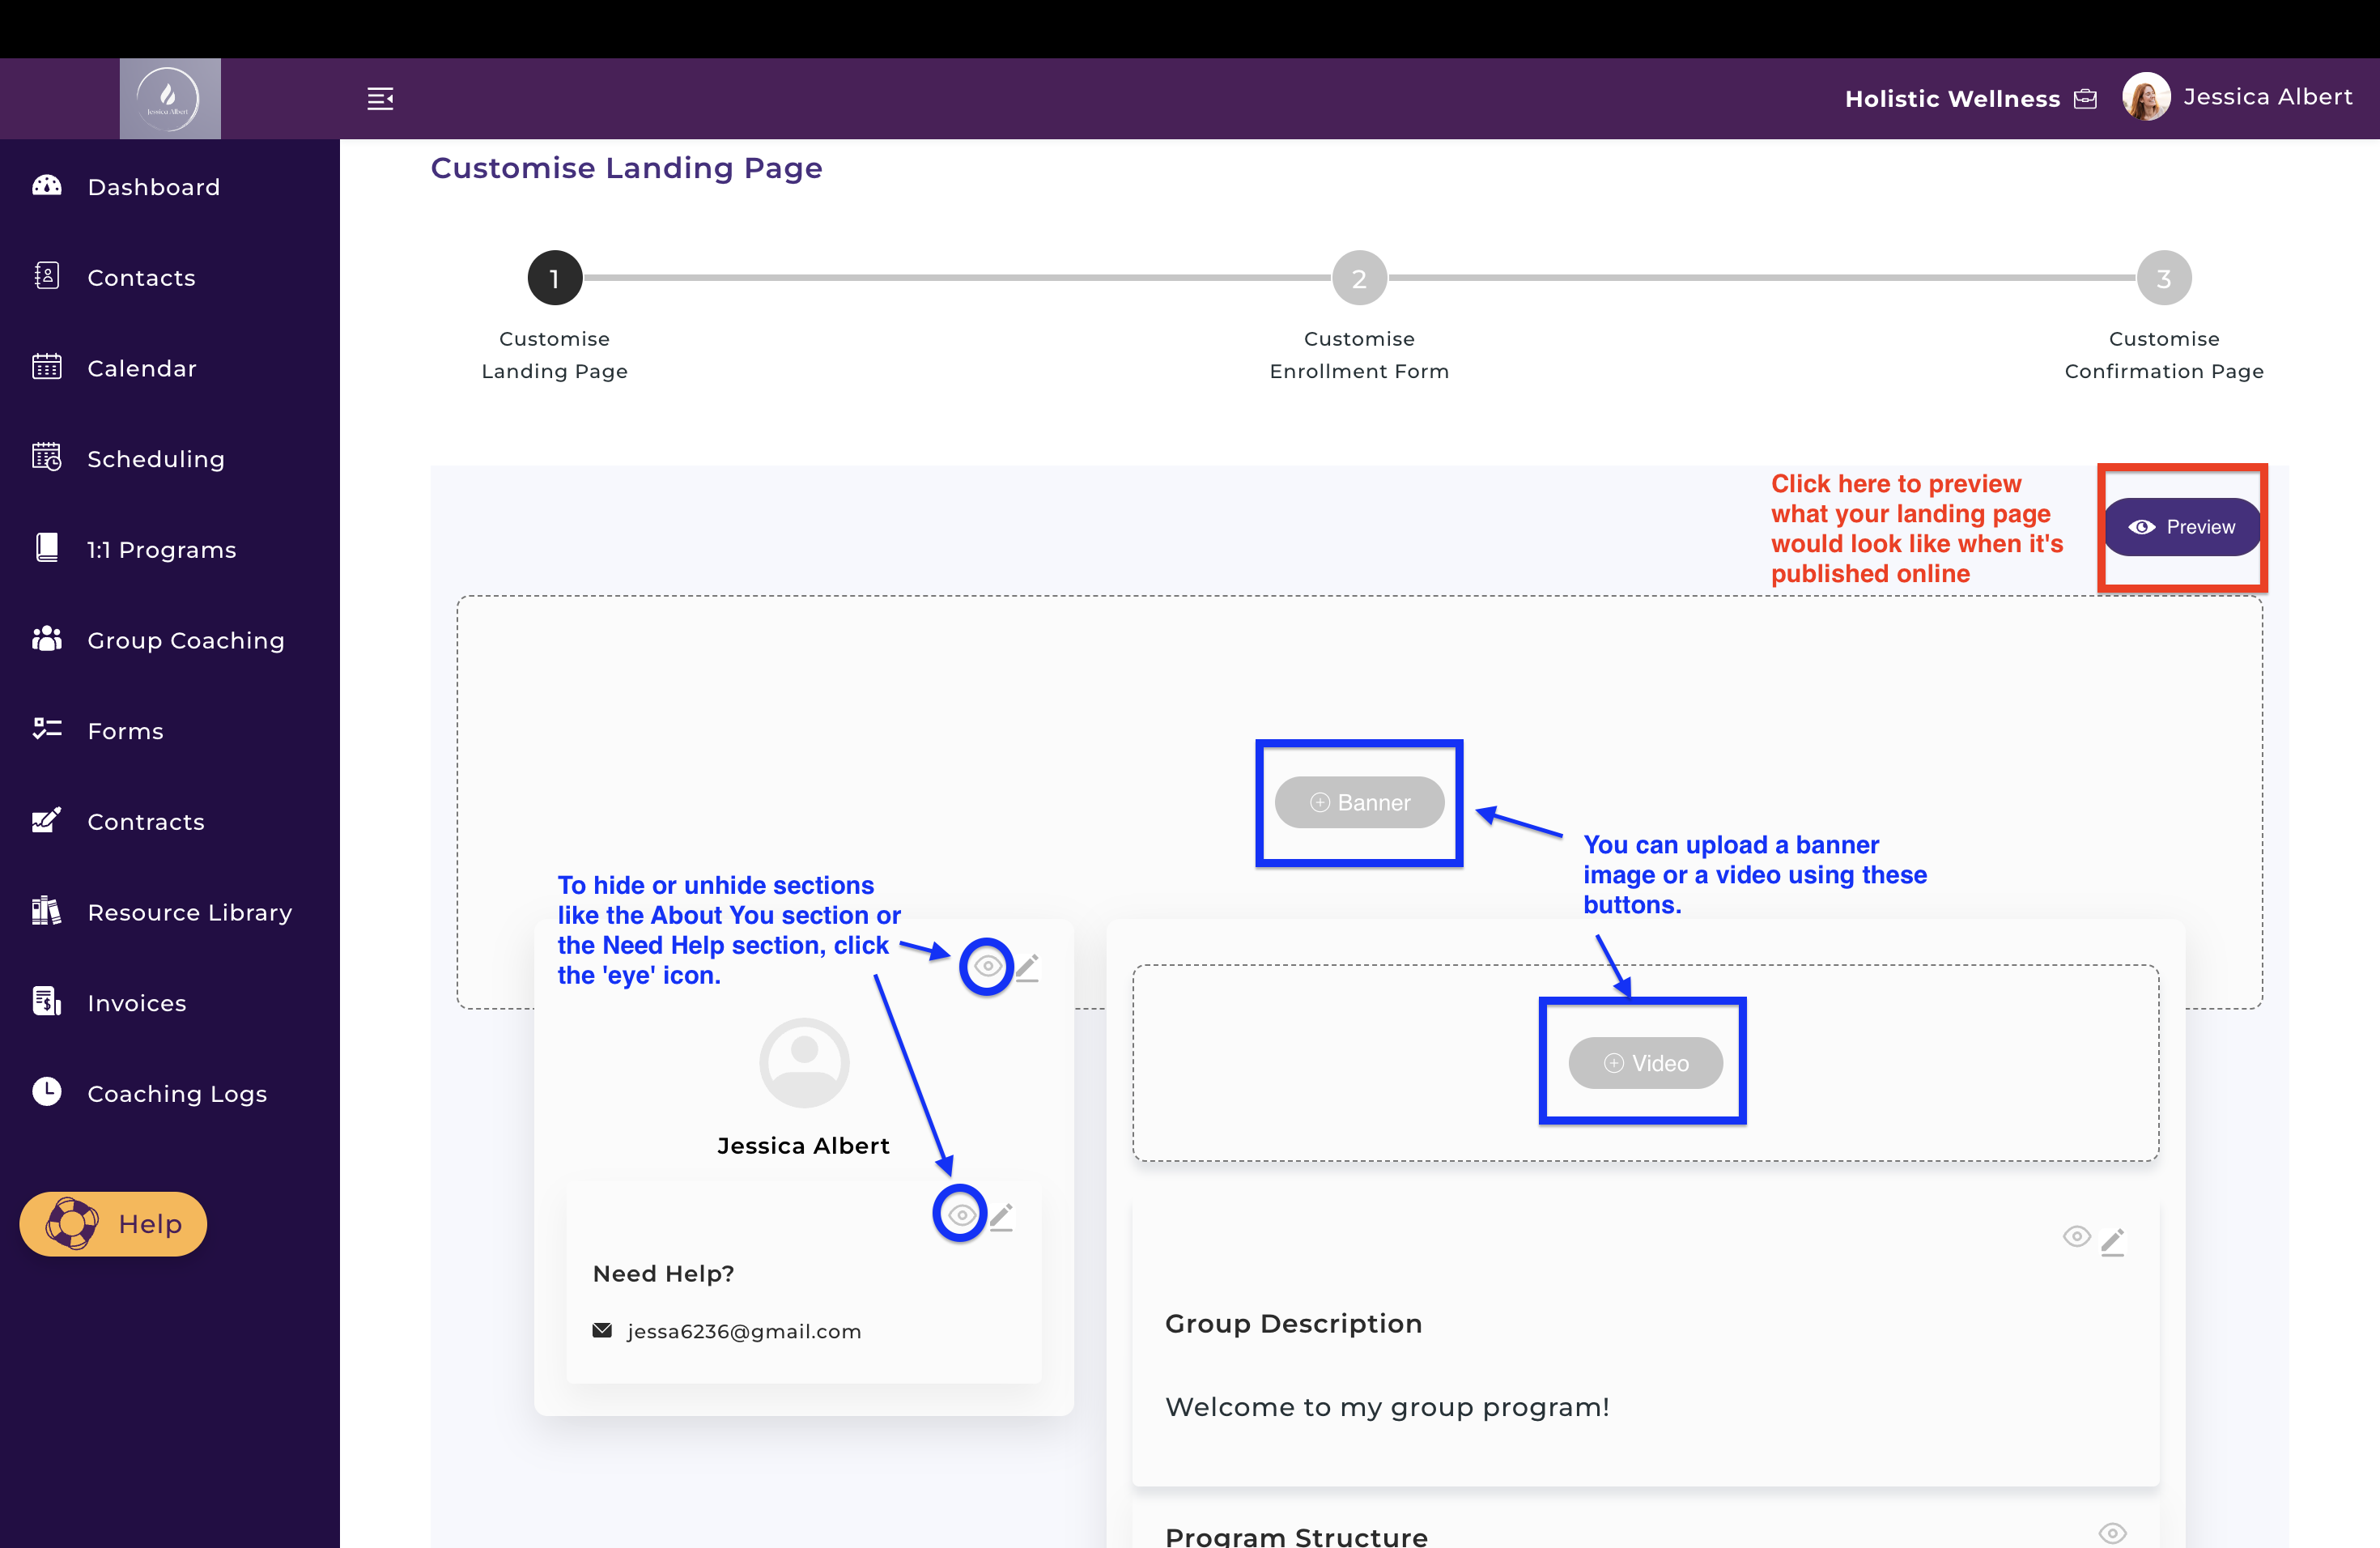
Here is where you can add things like your banner image, video, about you section, etc. It's a what-you-see-is-what-you-get (WYSIWYG) editor where any updates can be dynamically previewed. Use the Eye icon to hide or display the sections, as shown in the image above.
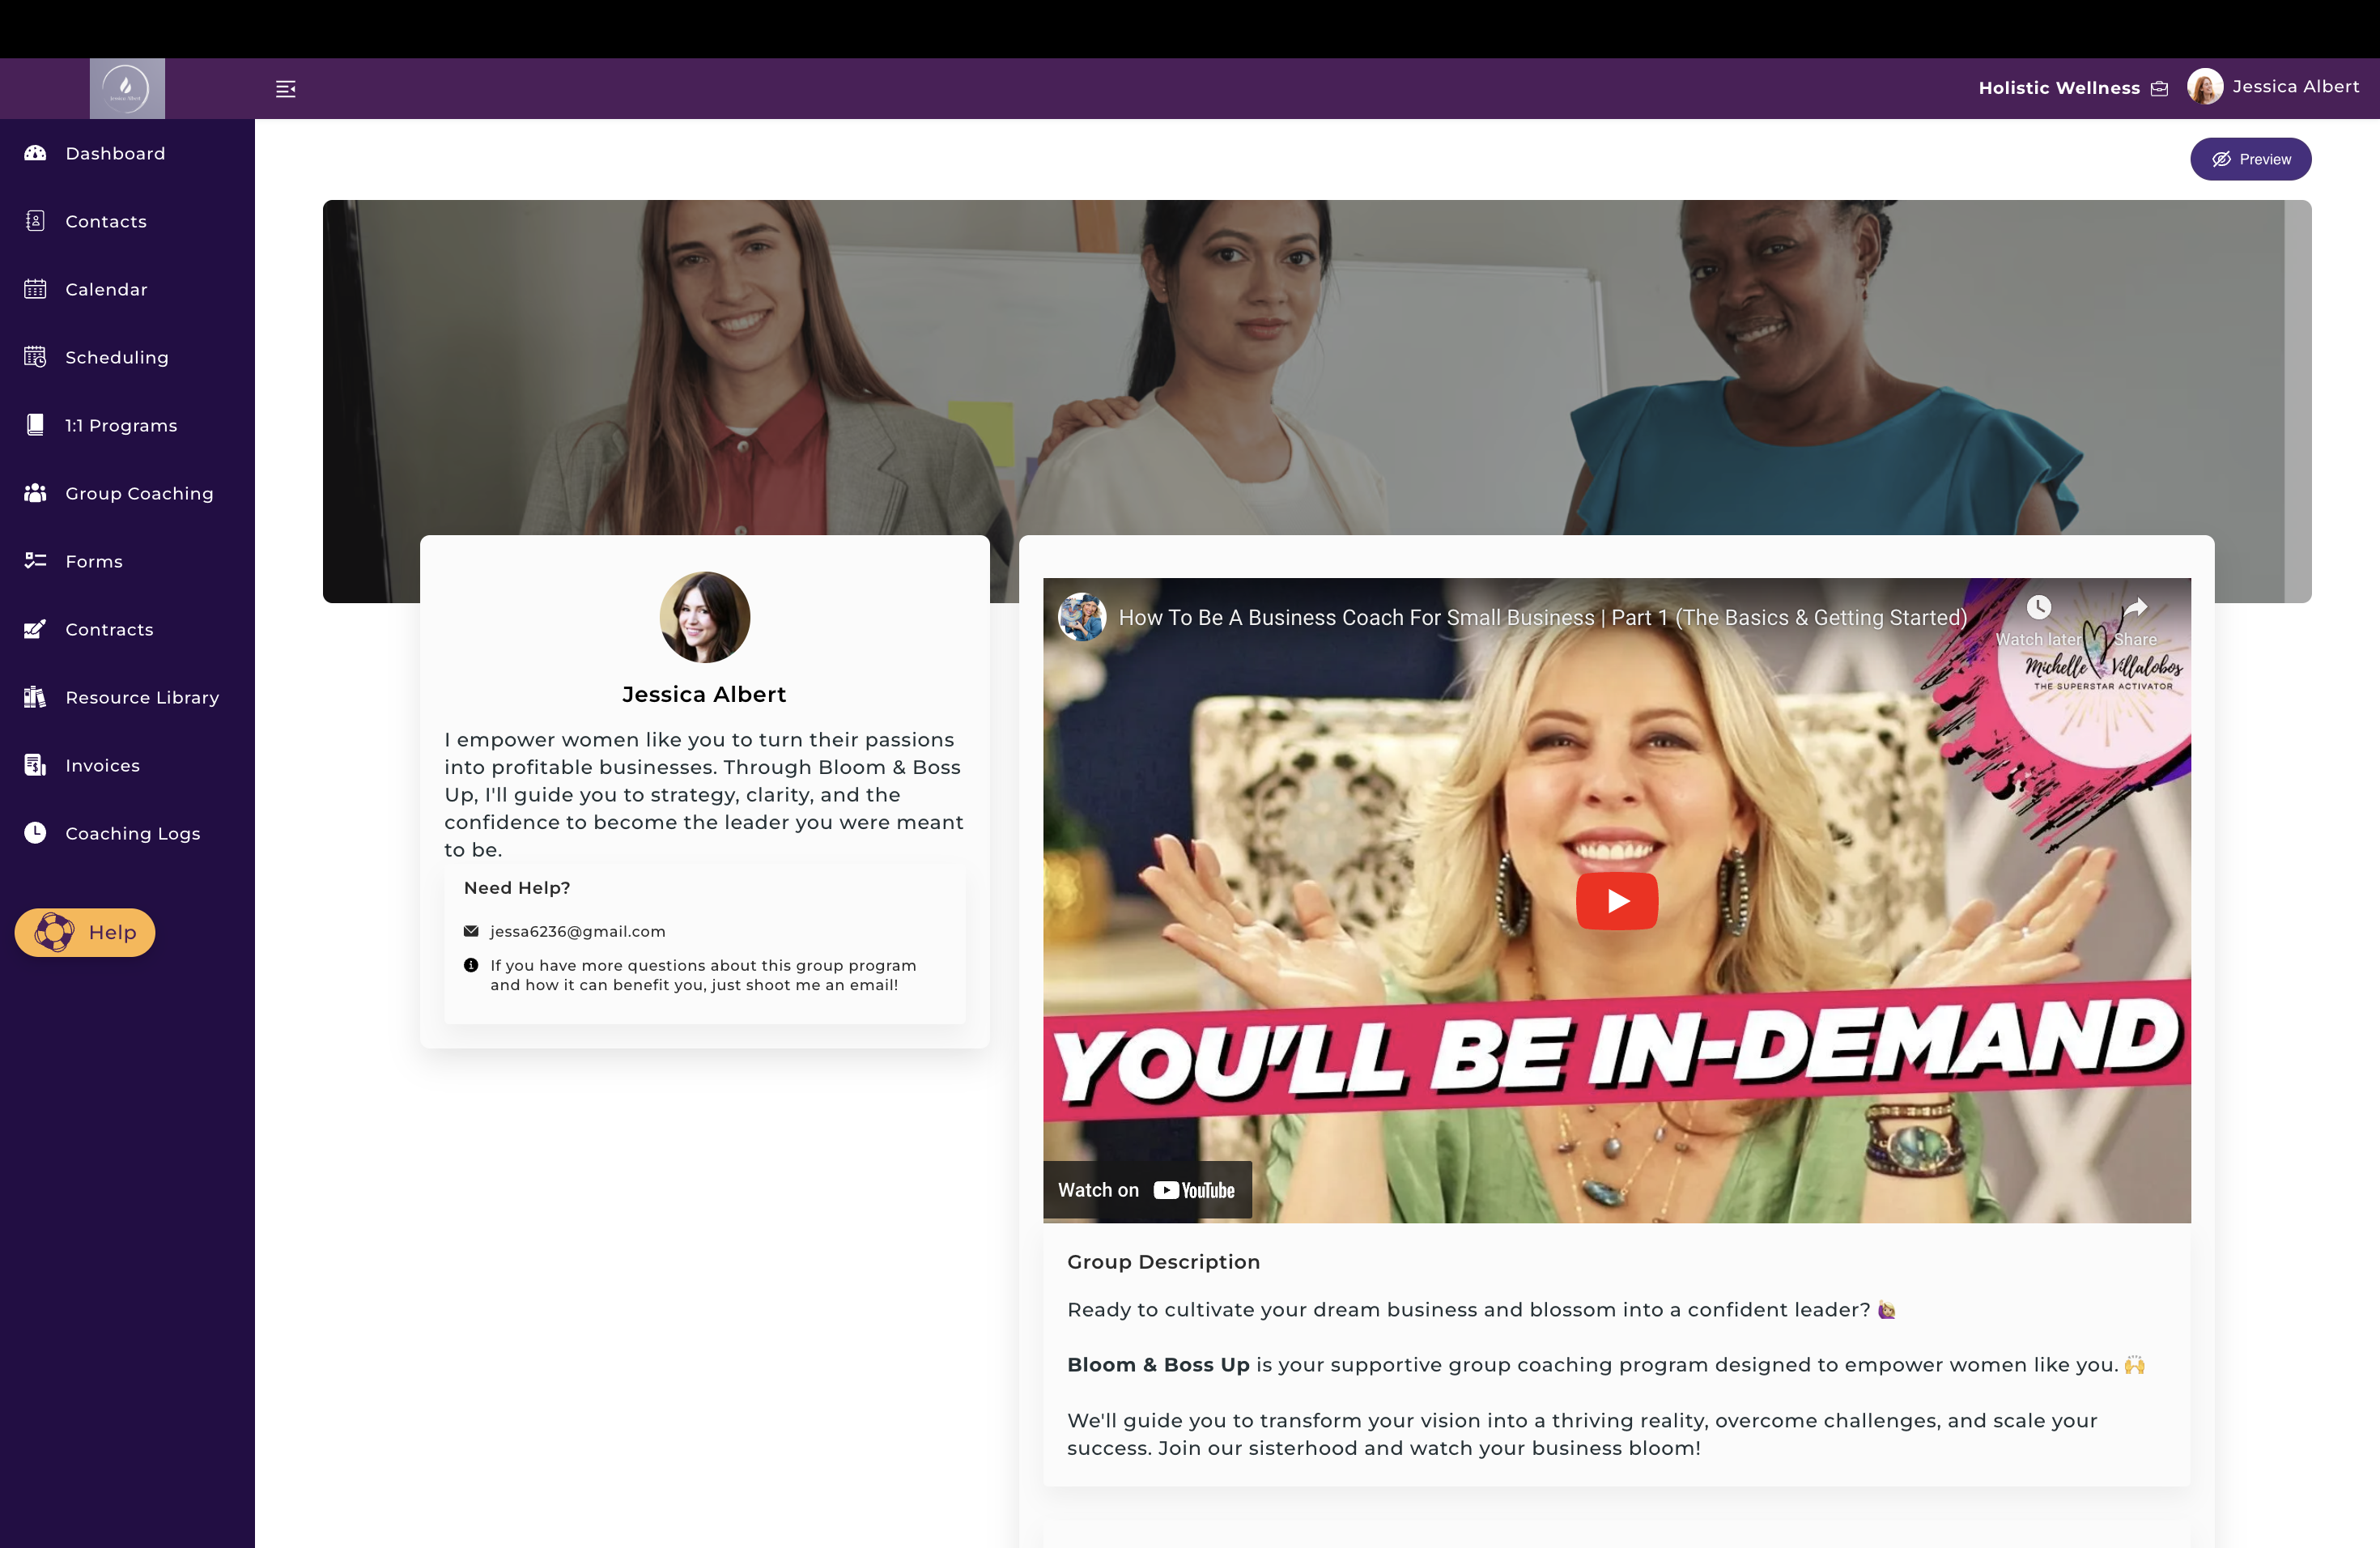
After updating the relevant sections of the landing page, this is an example of what it would look like when you Preview your landing page:
1d) Group Program - Enrollment Form (Mandatory) 🖋️
Once you're satisfied with the look and feel of your Landing Page, you can move on to the next step, Customise Enrollment Form, as shown below:
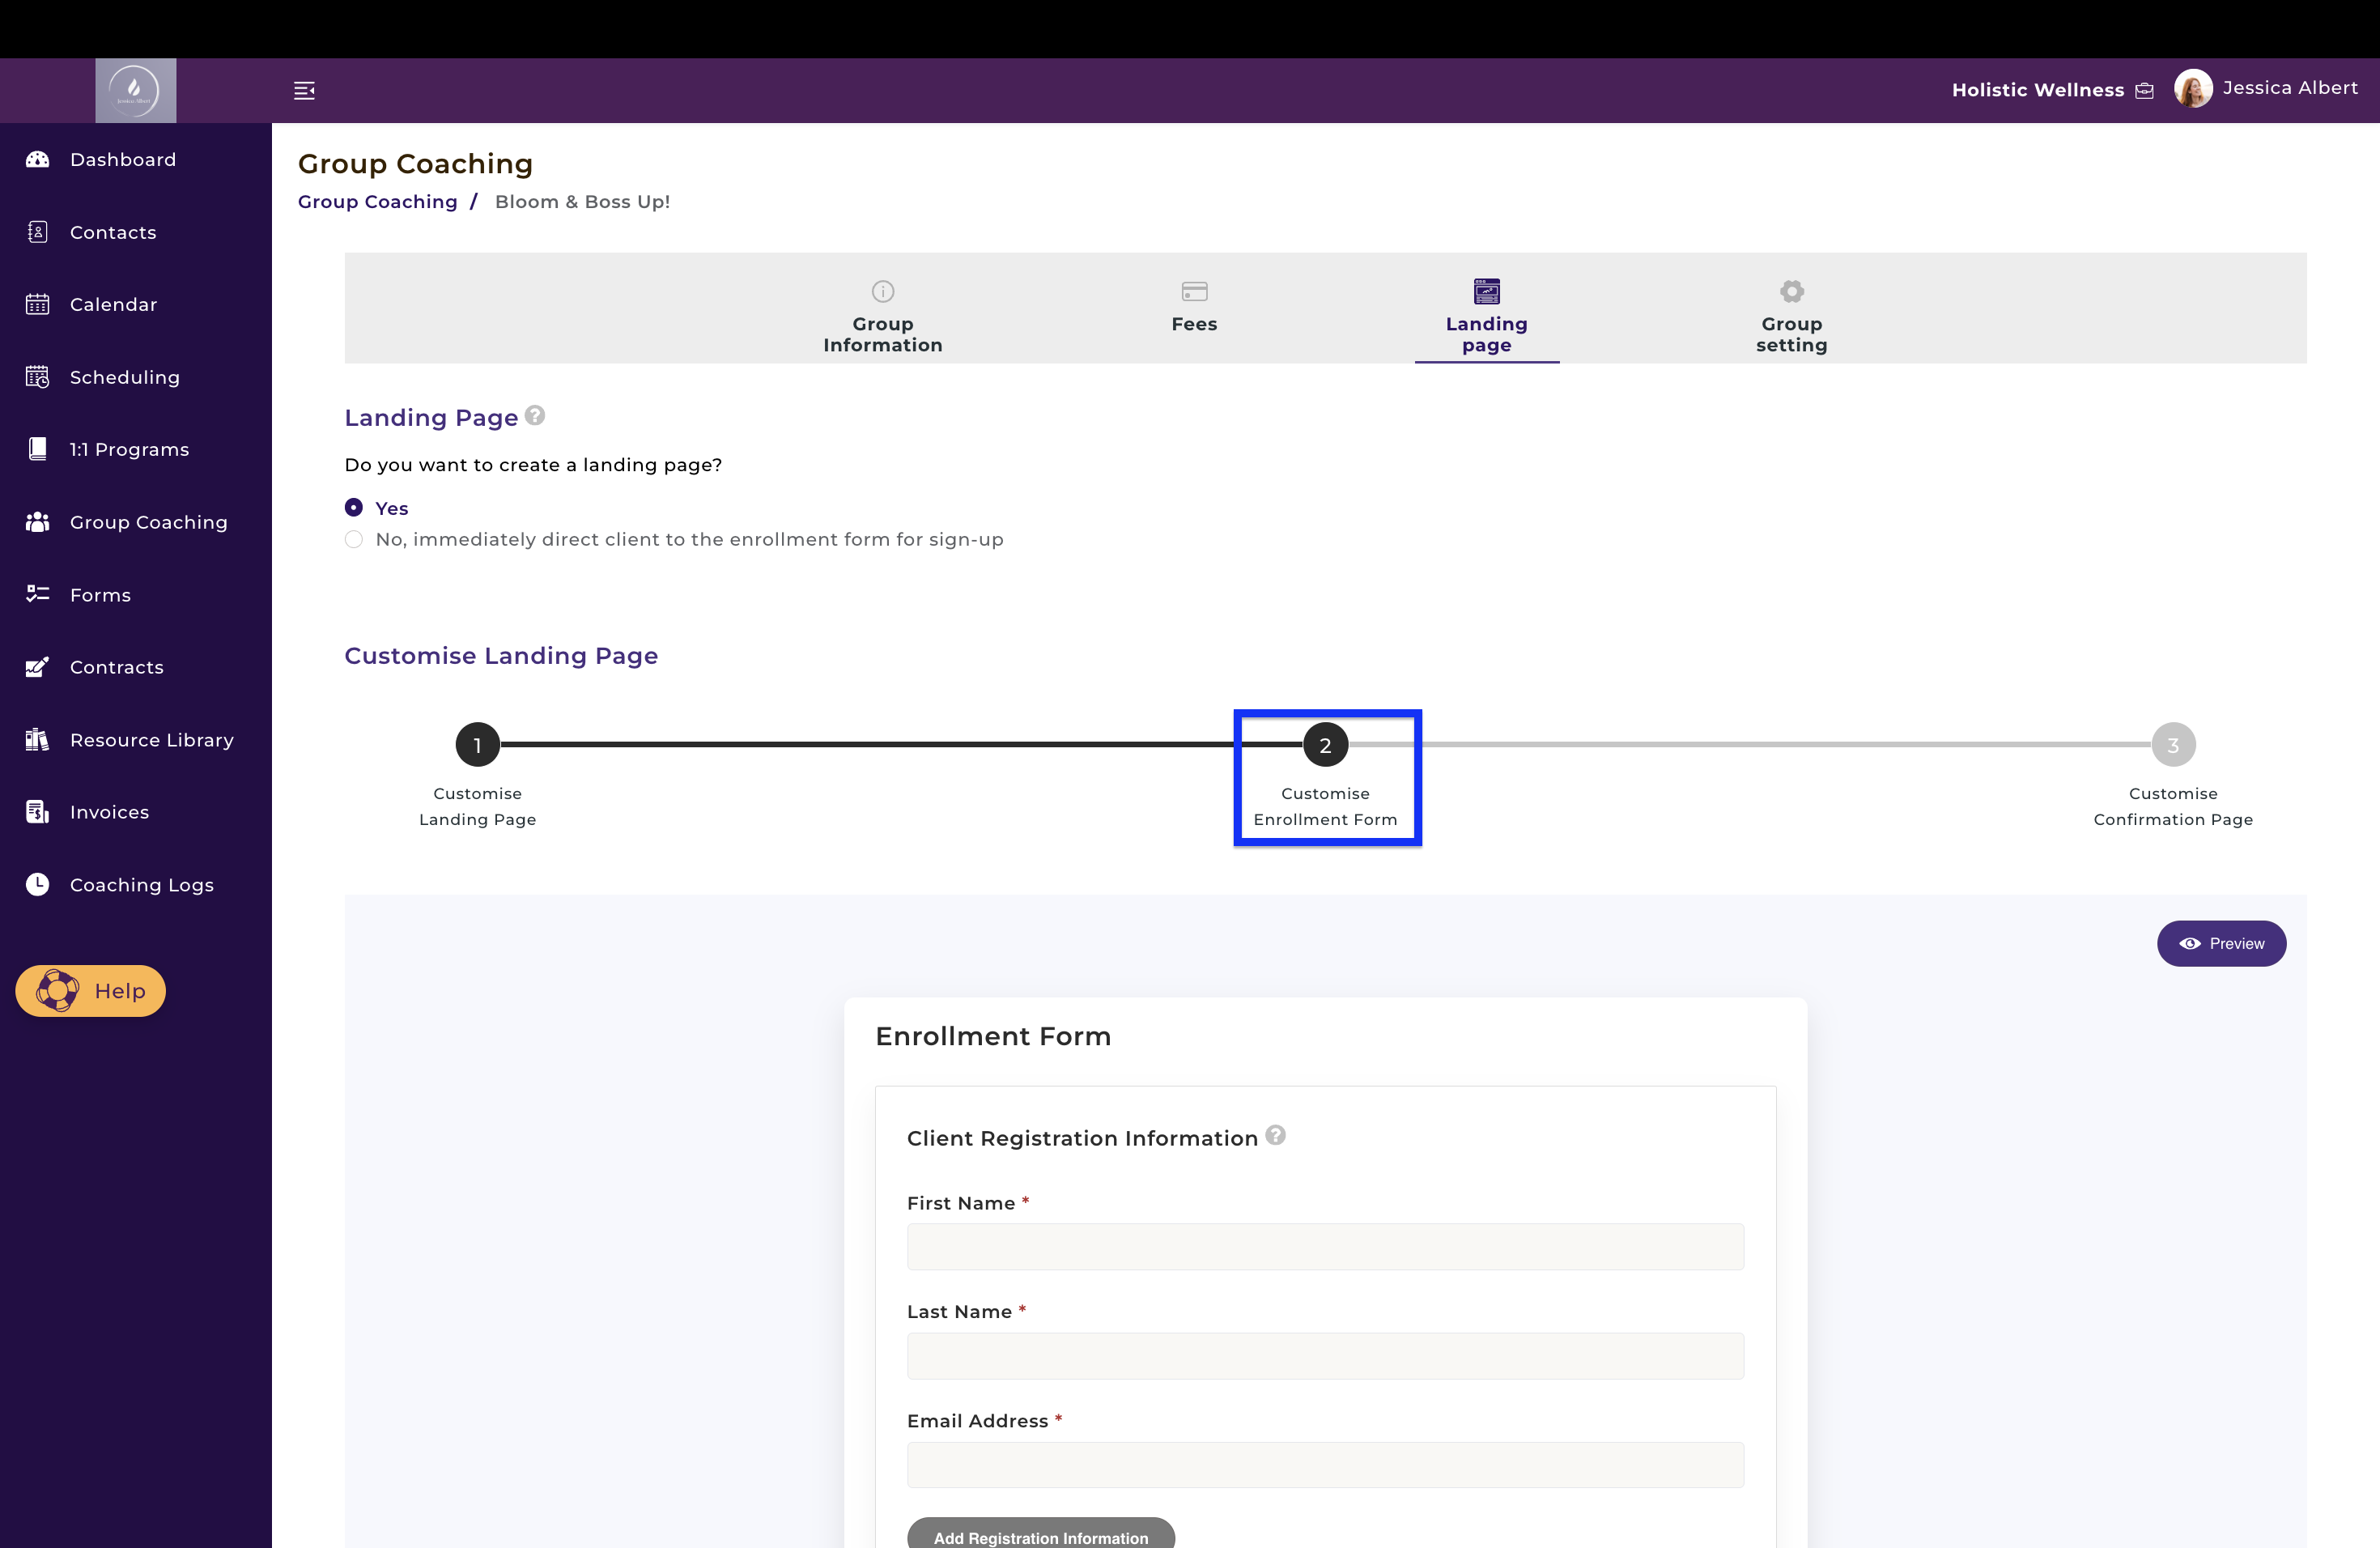
The Enrollment Form allows you to automate the client enrollment and onboarding process. The mandatory fields that will always be displayed on the form are: First Name, Last Name and Email Address.
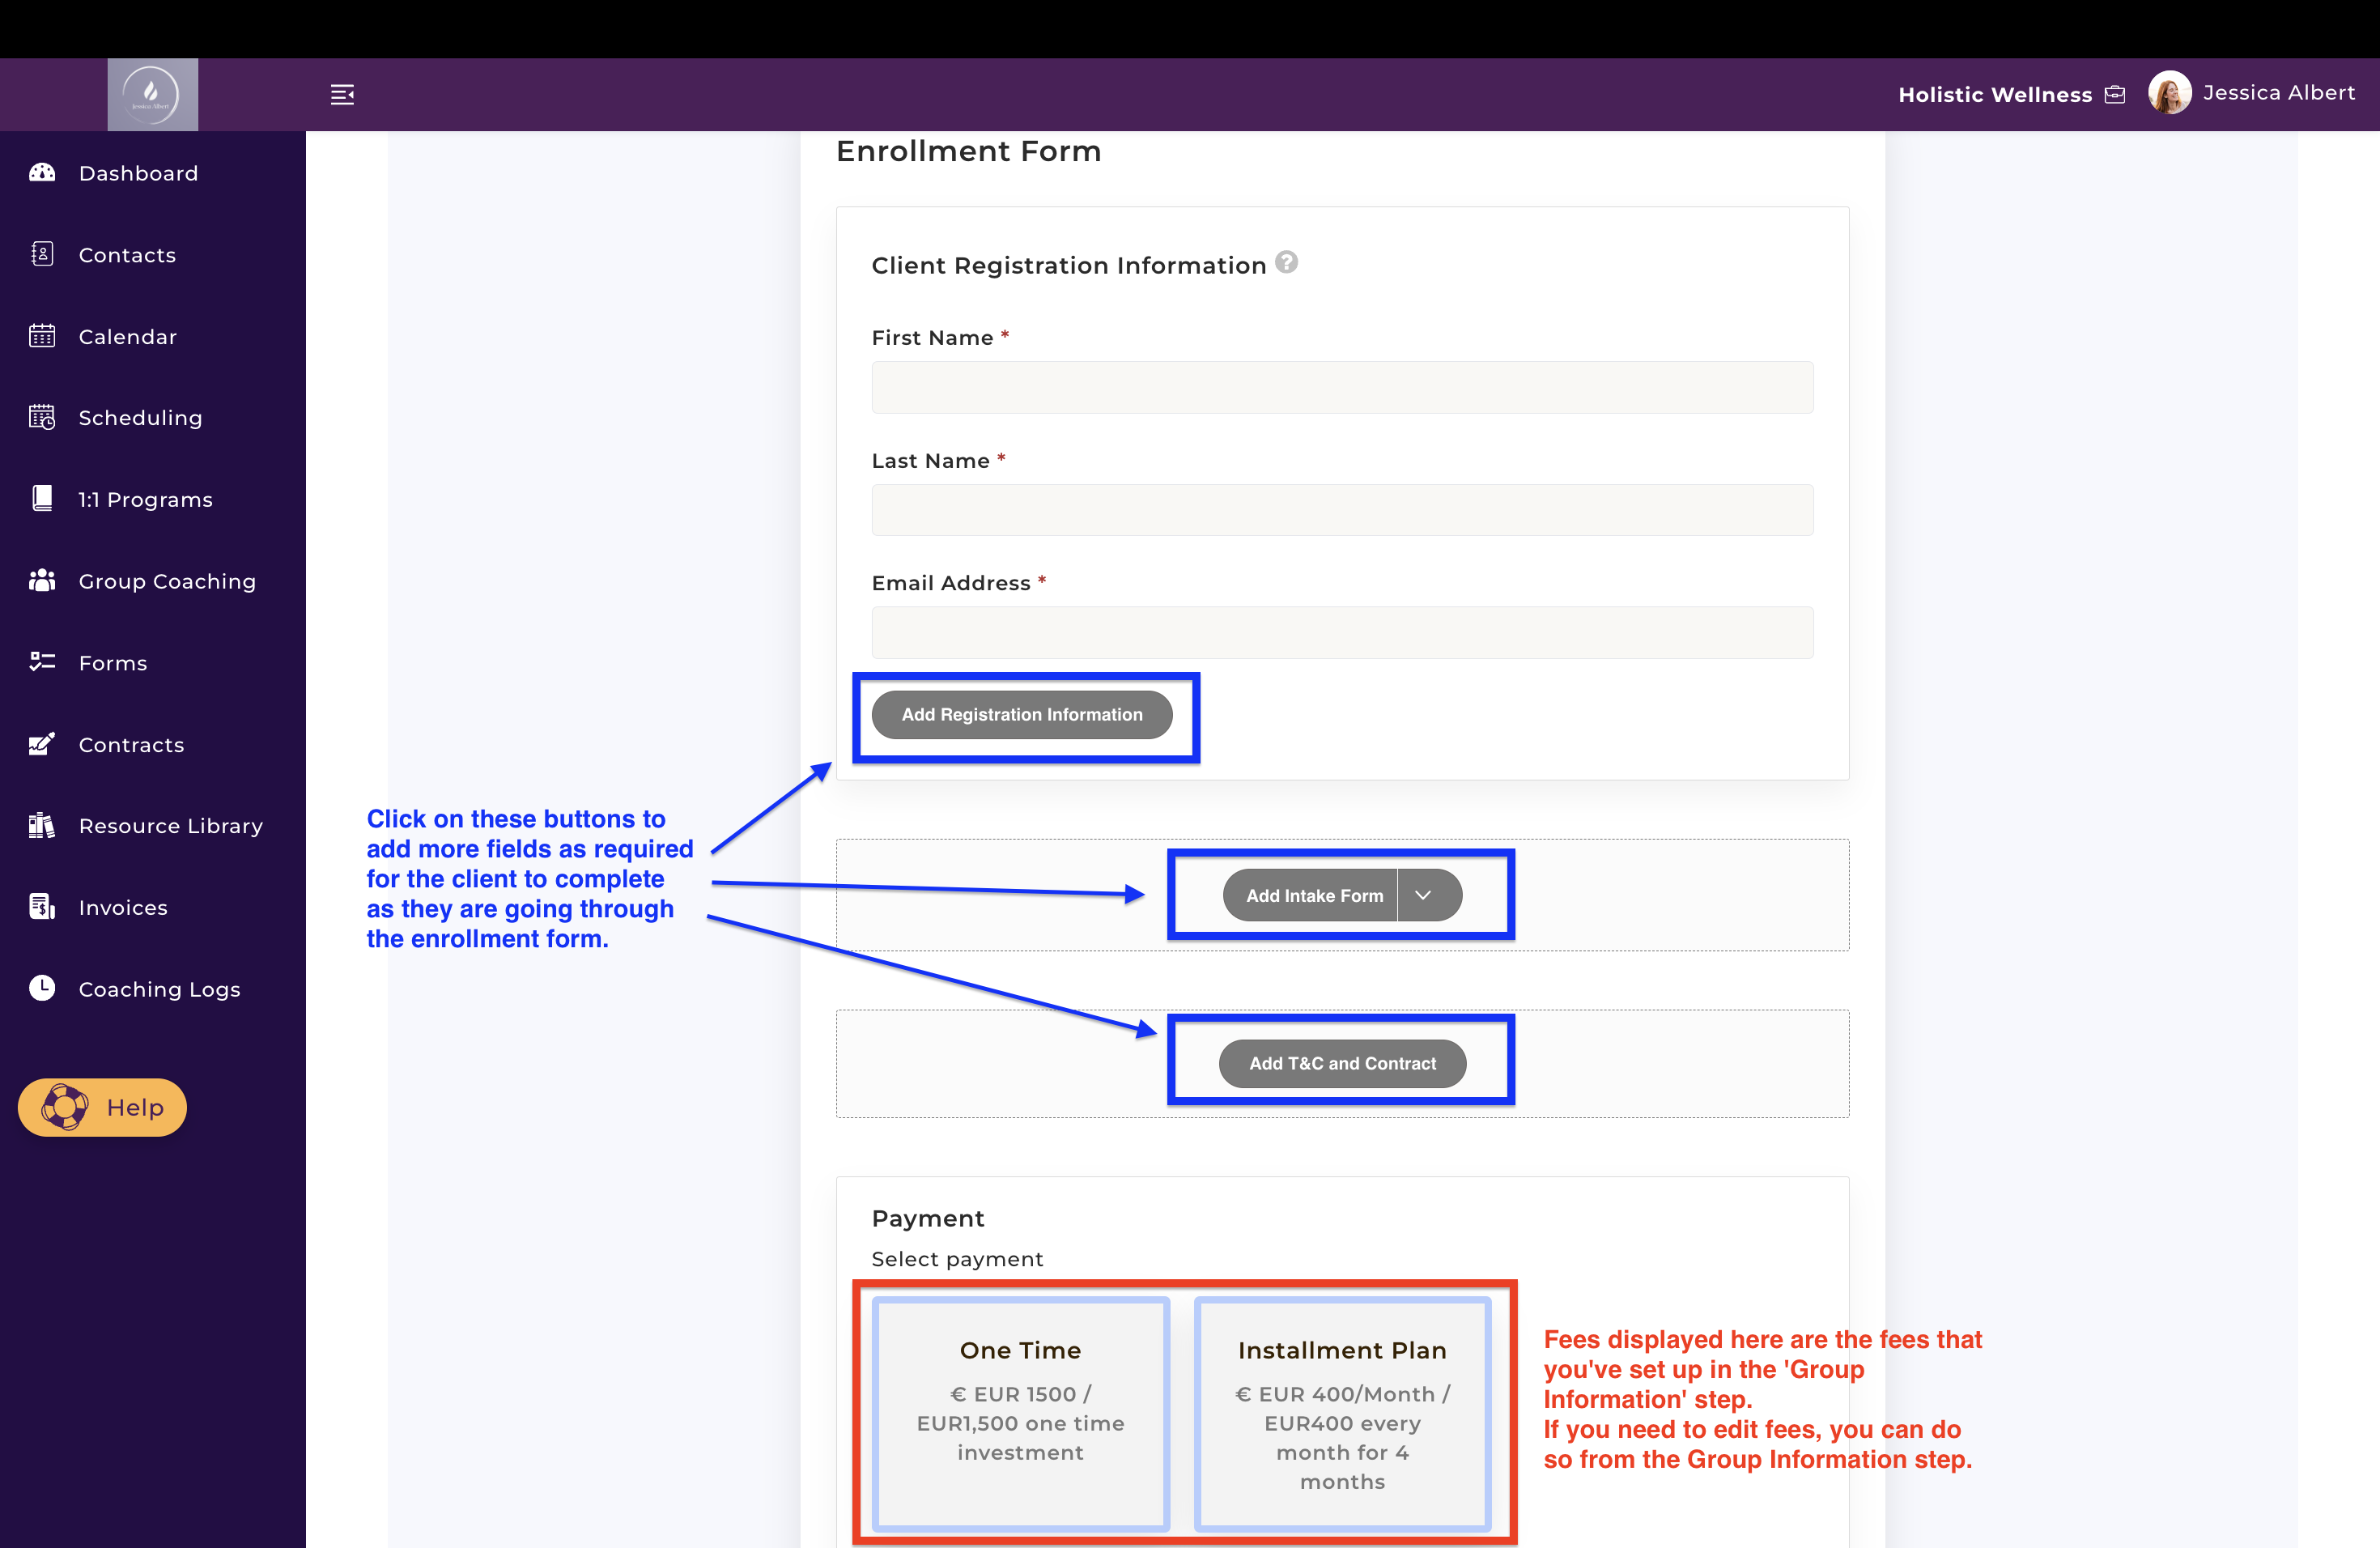
You can customize the Enrollment Form by adding specific information that you would like to collect from the client during the sign-up process. You can also embed an Intake Form and an E-contract for clients to complete, as shown below:
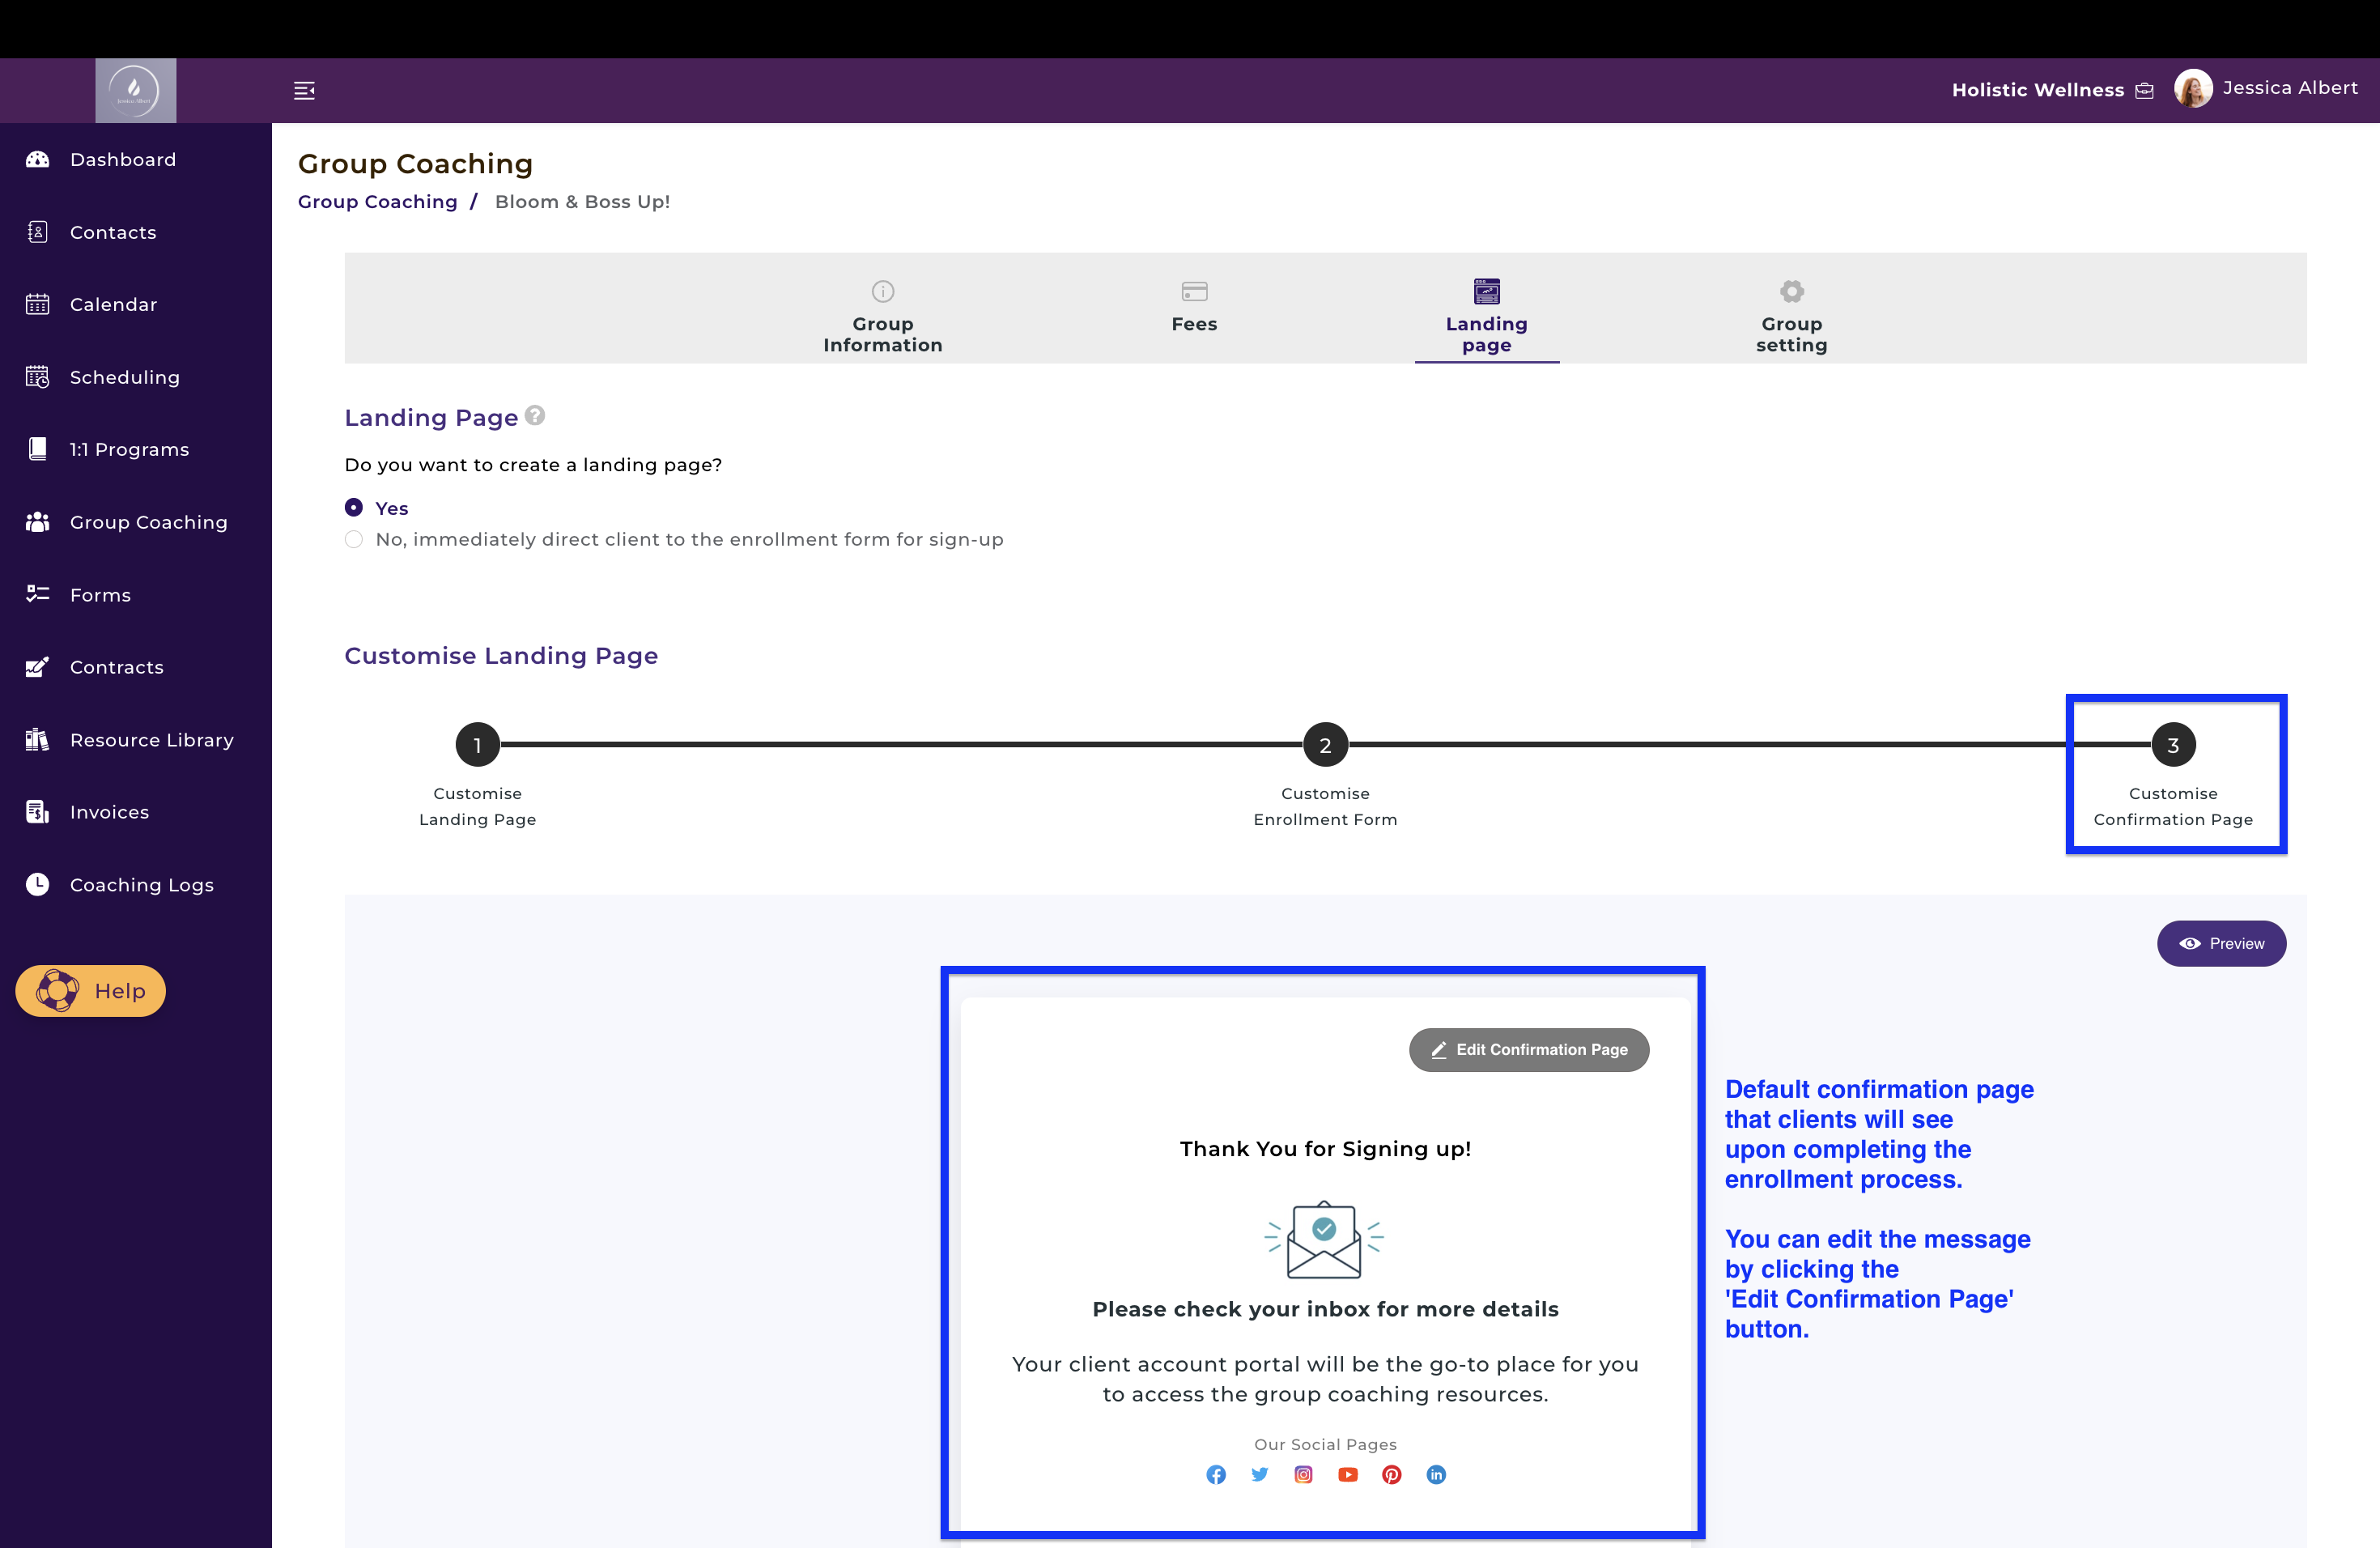
Finally, you can also customize the Confirmation Page that your clients will see once they have completed the Enrollment Form, as shown in the image below:
1e) Group Program - Group Settings (Mandatory) ⚙️
Once you have completed setting up the Landing Page and Enrollment Form, you will be taken to the final step, Group Settings, as shown below:
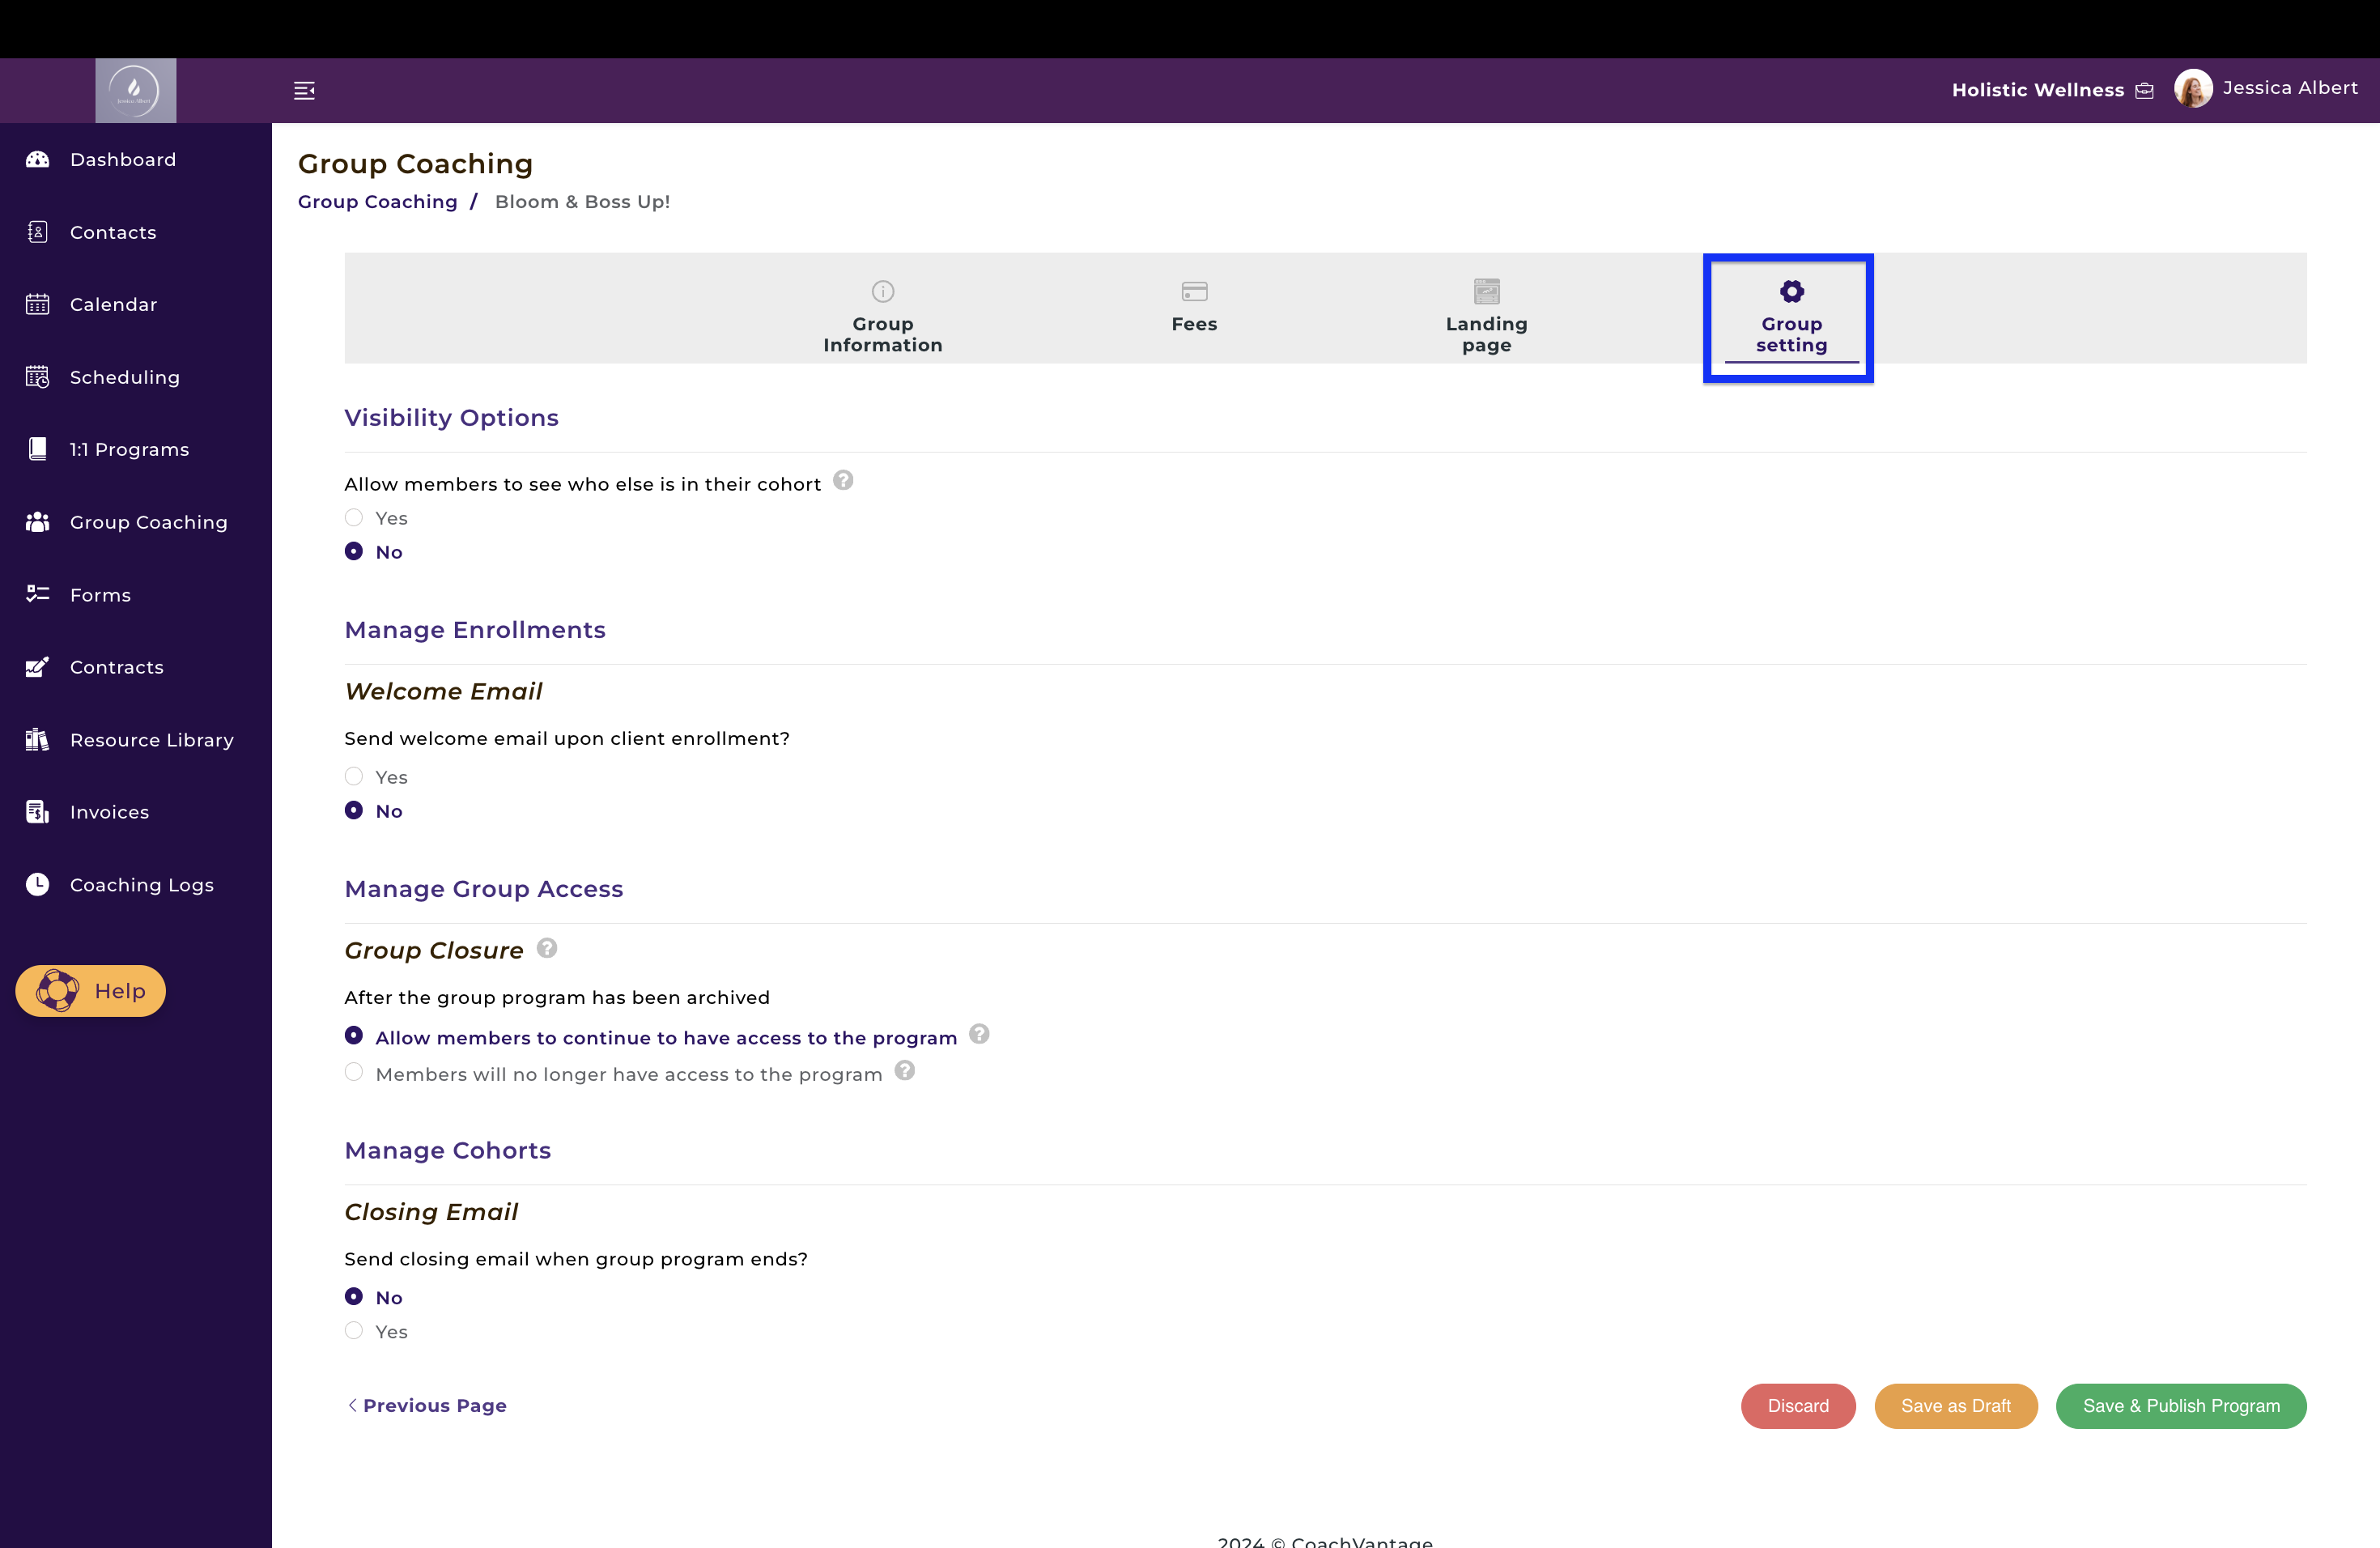
The Group Settings allows you to configure options such as:
- Visibility Options - How group members will see the names of other members in the group in the client portal.
- Welcome Email - You can customise a welcome email that will be sent to all clients who enroll into your group program.
- Group Closure - You can configure if members can continue to have access to your program resources once a group is closed.
- Closing Email - You can customize a closing email that will be sent to all group members when a group or cohort is closed out. You can also set up a time when the email will be triggered to the members, such as 2 days before a group/cohort close date.
- Once you have configured all of these Settings as you desire, you can click on Save and Publish Program to create your new group coaching program. Alternatively, you can Save As Draft and make future edits later.