Managing a Coaching Program with Your Client
Overview
Once a client is enrolled into a coaching program, you can then start the coaching engagement with them.
The program management page lets you easily manage everything about the coaching engagement from one place.
To get to the Programs Management Page:
- From your Dashboard, click Contacts on the left menu.
- Click on a specific contact to open their Individual Contact Record Page.
- Click on the Programs tab to view all the Coaching Programs which that client has been enrolled in.
- The Program Management Page will open.
Note: With CoachVantage, there is no limit to how many coaching engagements you can have with clients! We believe in helping you grow your business without worrying about increasing costs to you.
The Program Management Page is essentially the 'nerve center' where you can effectively manage the coaching journey with clients in a collaborative way.
In this article, we will cover:
1. Coach & Client Collaboration
2. Program Management Overview
4. Program Notes (or Session Notes)
8. Program Resources (Files / Documents)
10. Automations
11. Activity Log
12. Overview
1. Coach & Client Collaboration 🤝
The Program Management Page enables 2-way collaboration between Coach and Client. It is dynamically updated whenever content is shared between Coach and Client.
The client must have an Active Client Portal in order to have access to the program management page in the client portal.
Anything that is created or shared with the client from the Coach's program management page will be instantaneously available in the client portal, and vice versa.
The table below describes who has rights to create an item and who can take action for a particular item:
| Item | Can be created by | Remarks |
| Notes | Coach and client | Coach and client can take their own private notes. Coach and client can share notes with each other. |
| Forms | Coach only | Only Coach can send forms to client. Only Client can respond to forms. |
| Goals and Milestones | Coach and client | Coach and client can create goals & milestones. Coach and client can mark goals & milestones as 'Not Started', 'In Progress', or 'Completed'. |
| Assignments | Coach only | Only Coach can send assignments to client. Coach and client can mark assignments as 'Not Started', 'In Progress', or 'Completed'. |
| Resources | Coach and client | Coach and client can add files/documents. Once added, the files/documents are immediately shared. |
| Sessions | Coach and client (provided that Coach has granted rights to Client to self-book sessions) | Coach can send appointment notifications to client. Client can self-book sessions with Coach if Coach has granted these rights to the client. |
Each item is described in more detail in the sections that follow below.
2. Program Management Overview
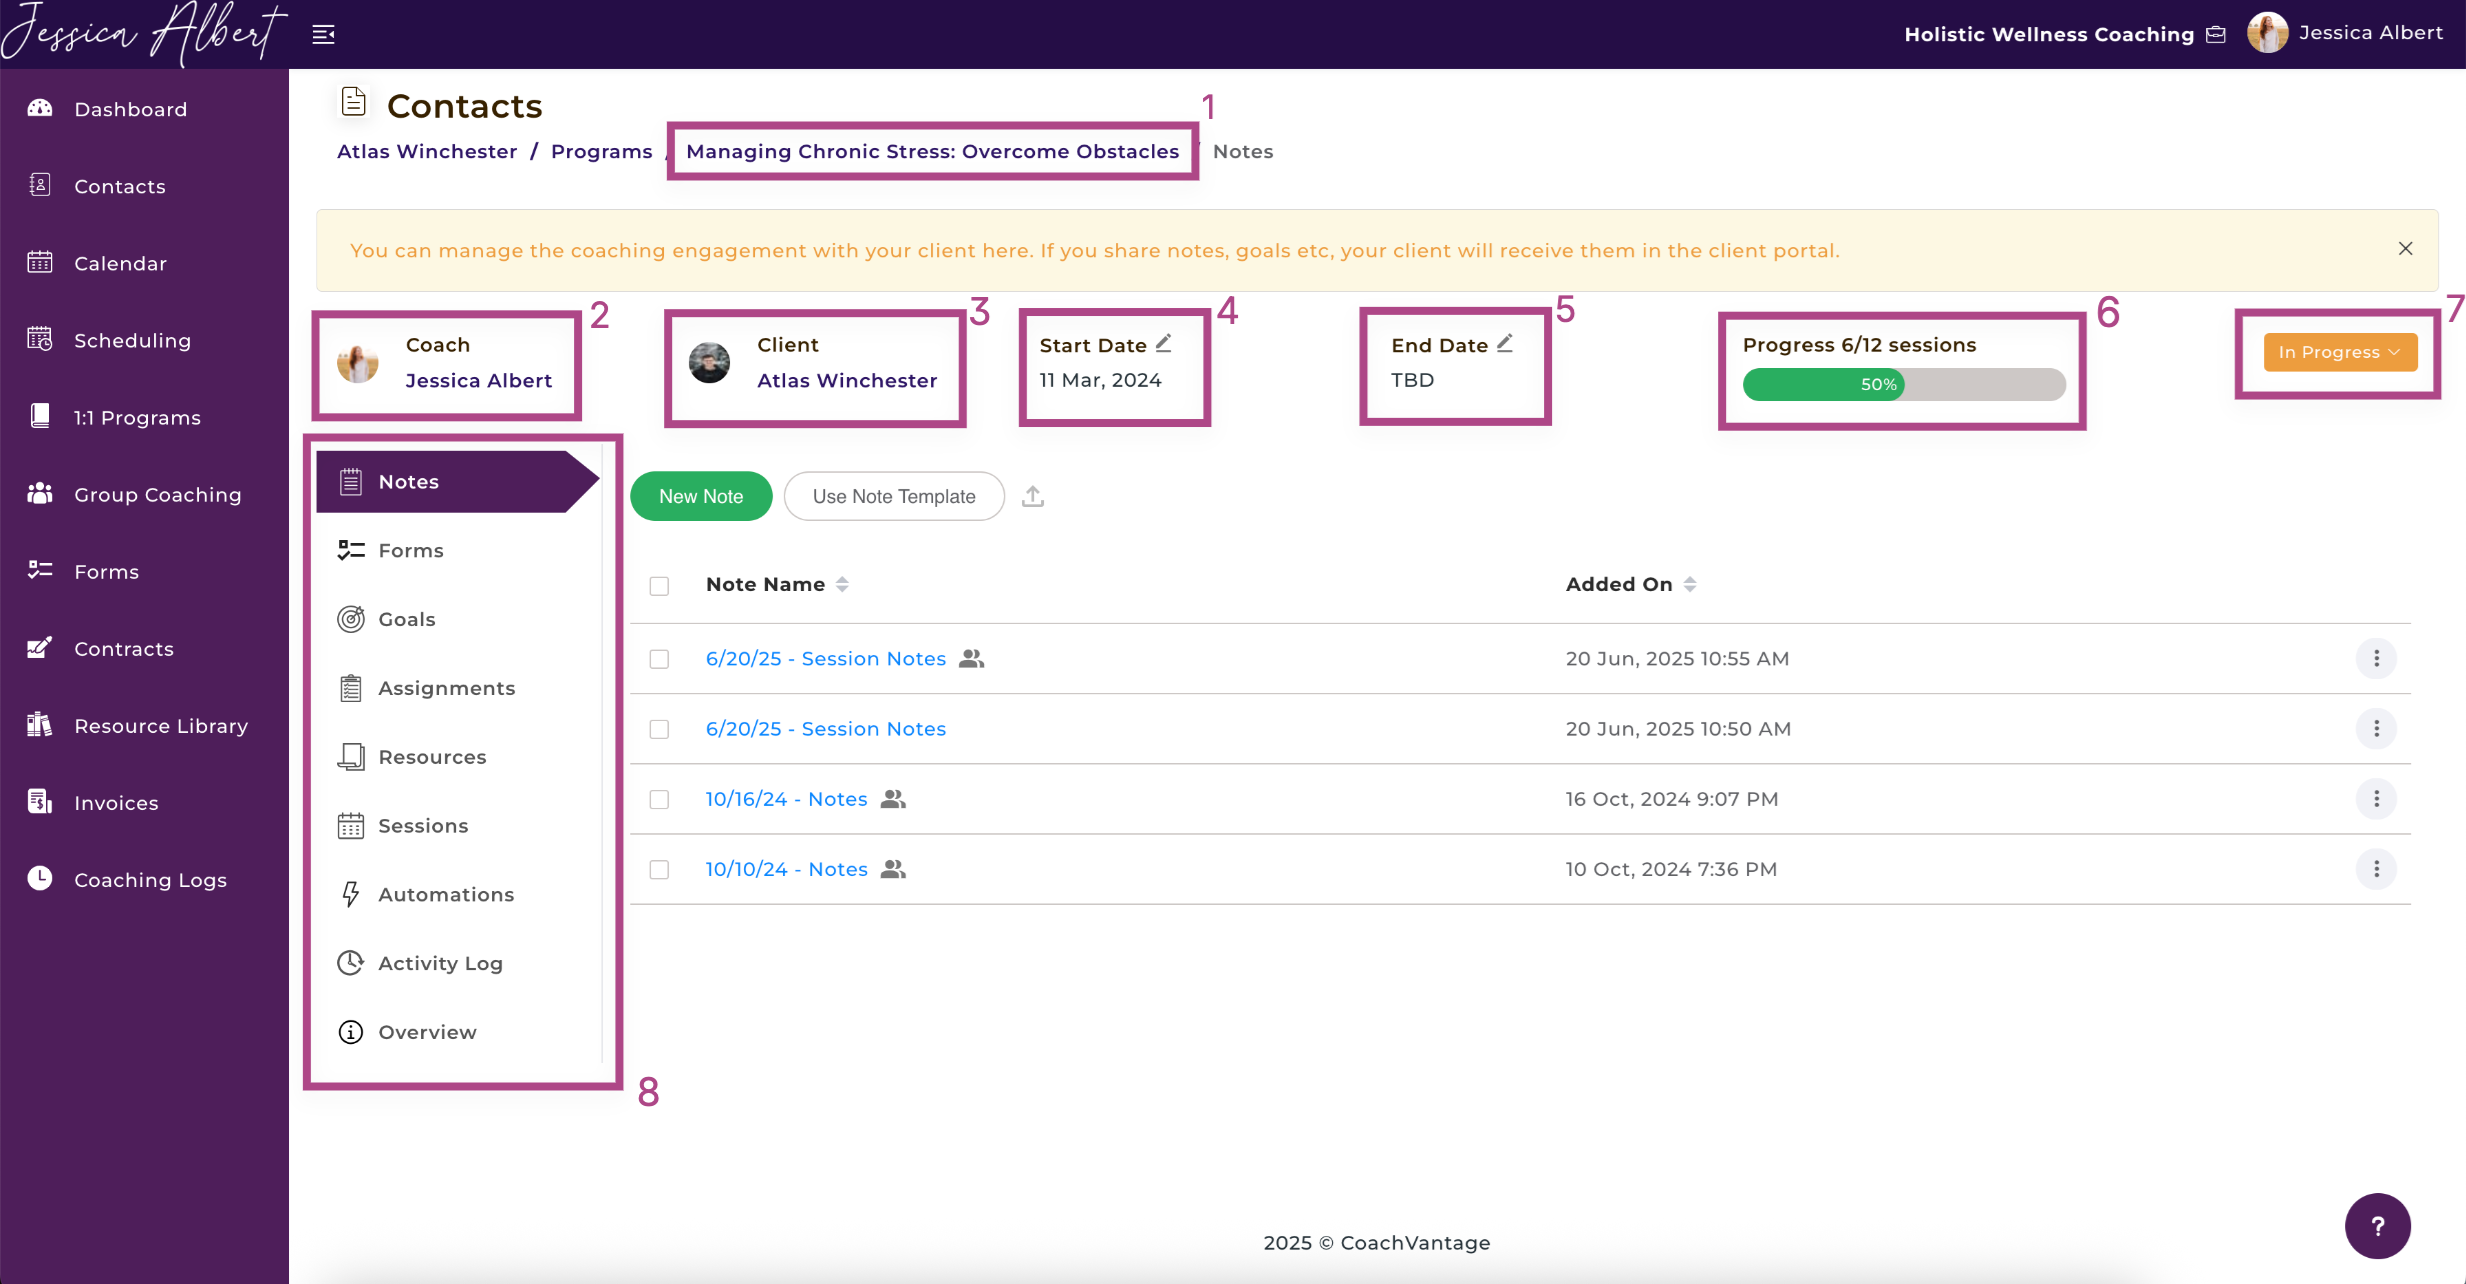
Once you are in the Program Management Page, you'll see the details of the program engagement.
These details include:
- Program Name
- Name of Coach
- Name of Client
- Start Date
- End Date
- Progress bar
- Status of the program
- The Sub Menu
The image below shows the Program Management Page:
Program Status 🚥
For the Program Status, after you or your client has booked the first session of the program, the program start date (displayed as no. 4) would automatically be updated with that date and the program status will move from Not Started to In Progress.
You can manually change the status by clicking on the drop down bar to select Mark As Completed to change the status from In progress to Completed and vice-versa.
Tip: This is useful if you wish to end the engagement even before all the sessions have completed, for example if the client has defaulted on payments or if you have terminated the coaching agreement for whatever reason.
Sub Menu
On the Sub Menu, you have all the necessary tools to manage your coaching engagement. This includes the ability to take Notes, send Forms, set Goals, create Assignments, manage Resources and book and manage Sessions.
IMPORTANT: In order for your client to receive anything that you share with them like notes, goals, assignments, resources, and for them to self-book sessions, they MUST have an ACTIVE client portal.
Refer to this article on Inviting Contacts To Create A Client Portal Account for more information.
3. Client Notifications 🔔
When clients have an active client portal, any note, goal, assignment or resource that you share with them will be automatically populated in that client's portal account.
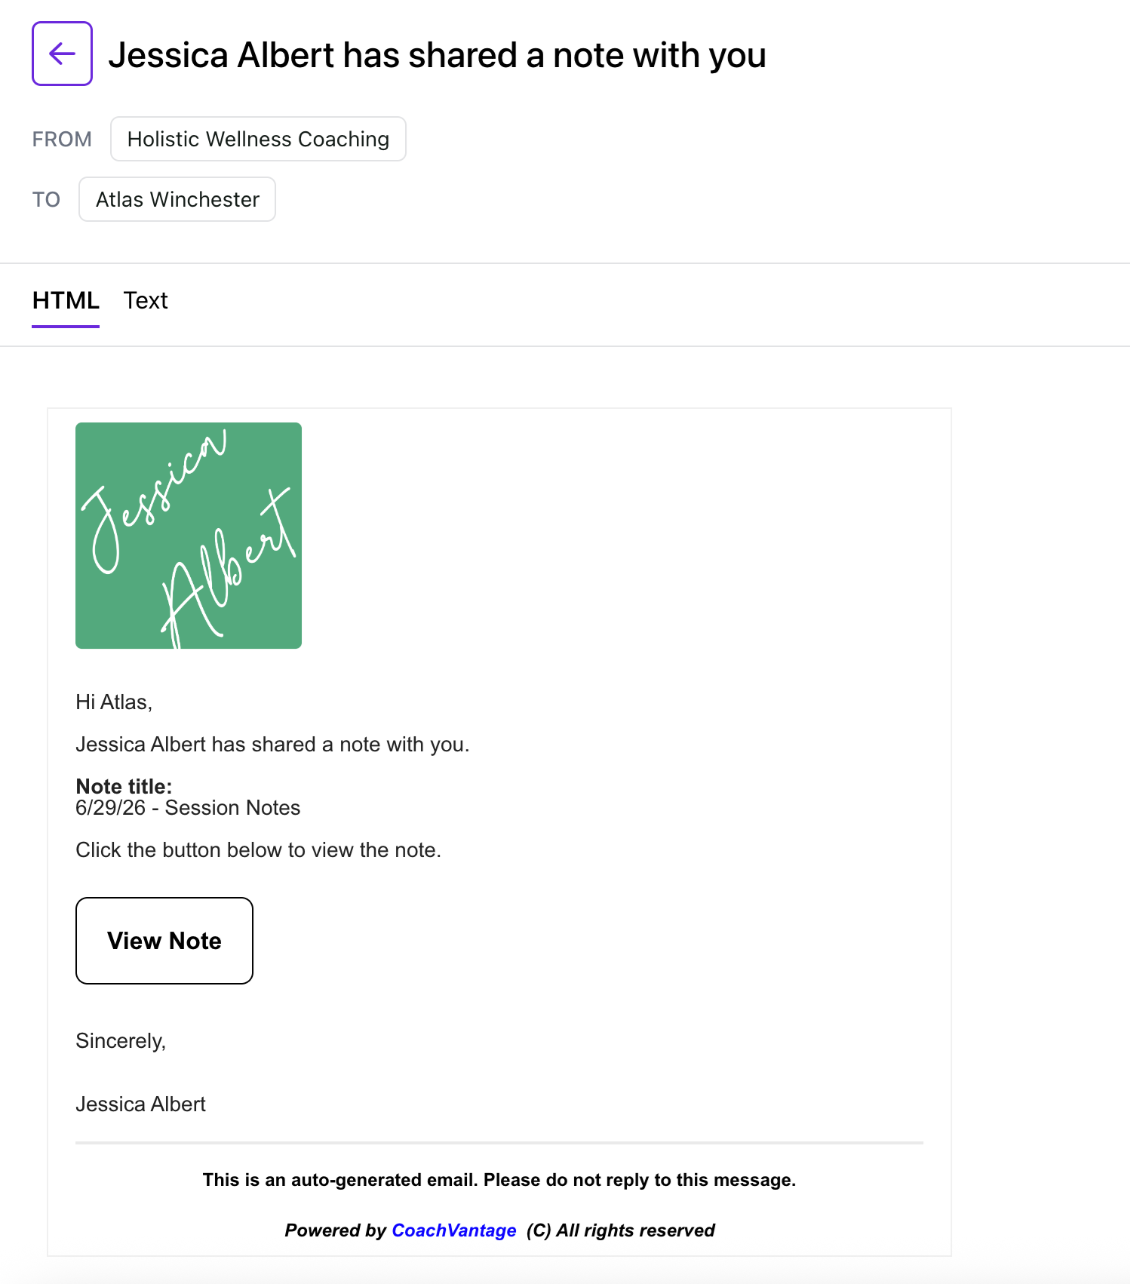
CoachVantage will automatically send email notifications to your client to inform them that you have shared something with them. (The email content is not customizable).
Note: The email contains a button for the client to log in to their client portal in order to view the details of what has been sent to them. In other words, the email content itself does not include the details of the note, goal, assignment, etc. Your client will need to log in to the client portal to view the details and take any required action
Here are some examples of the emails that your client will receive when you have shared something with them:
Shared a Note with Client:
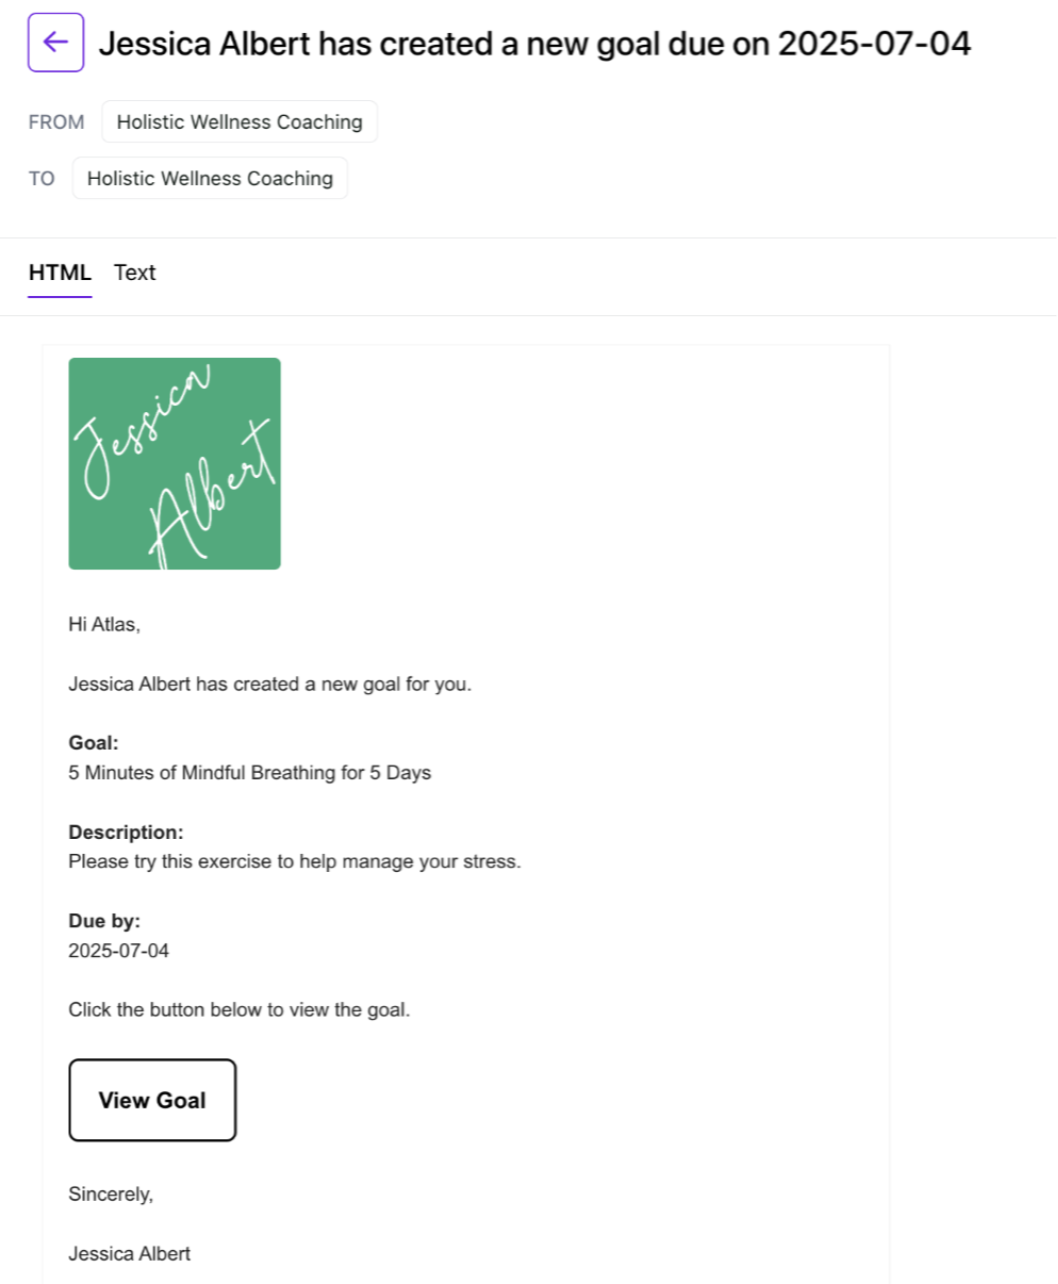
Created a Goal:
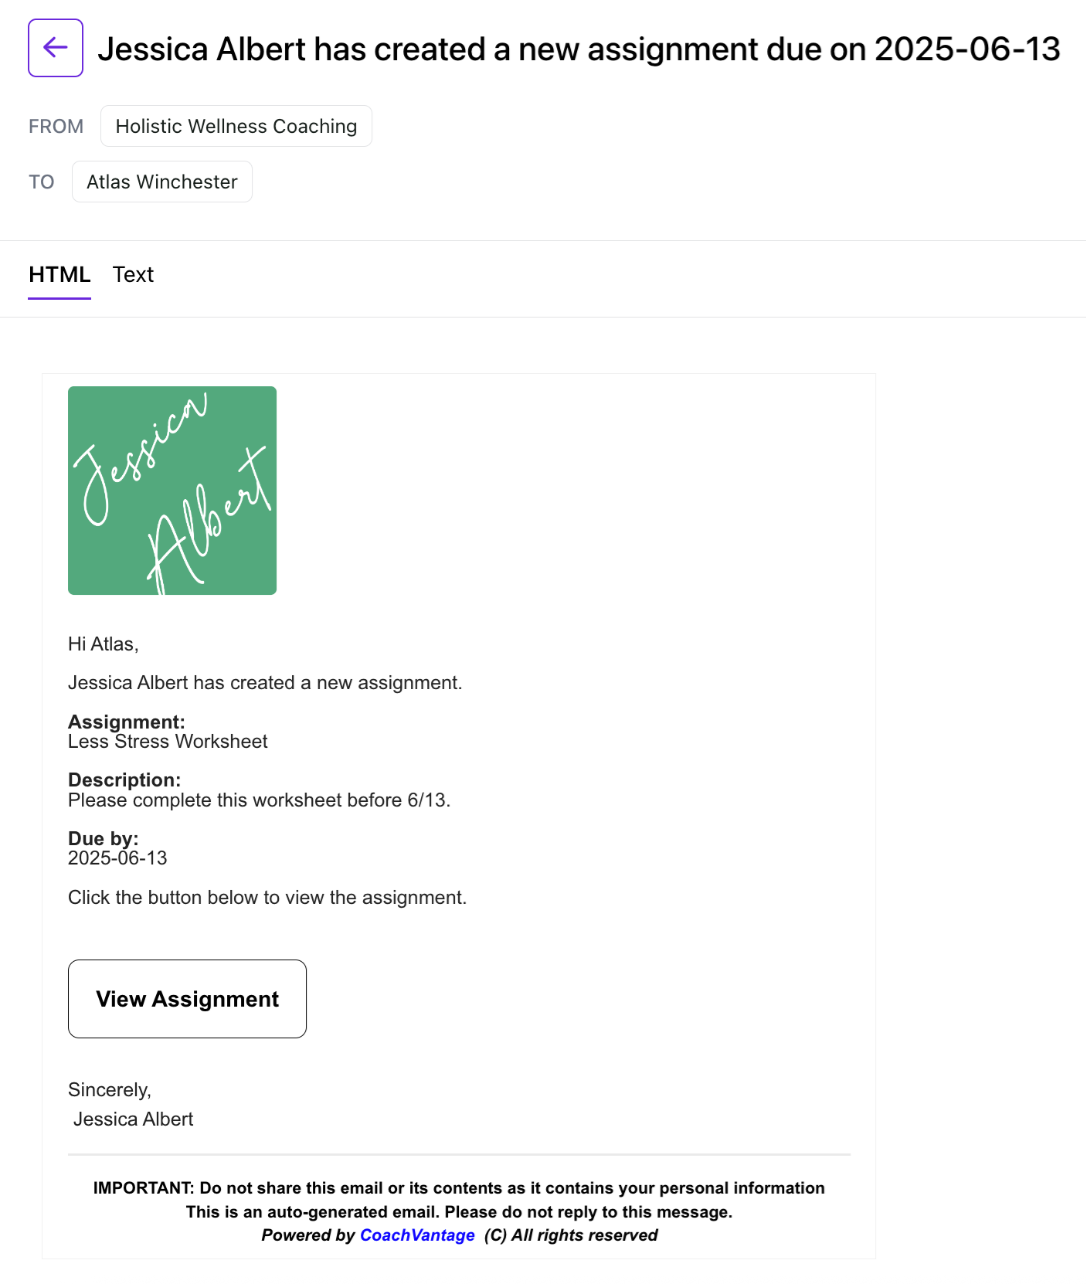
Created an Assignment:
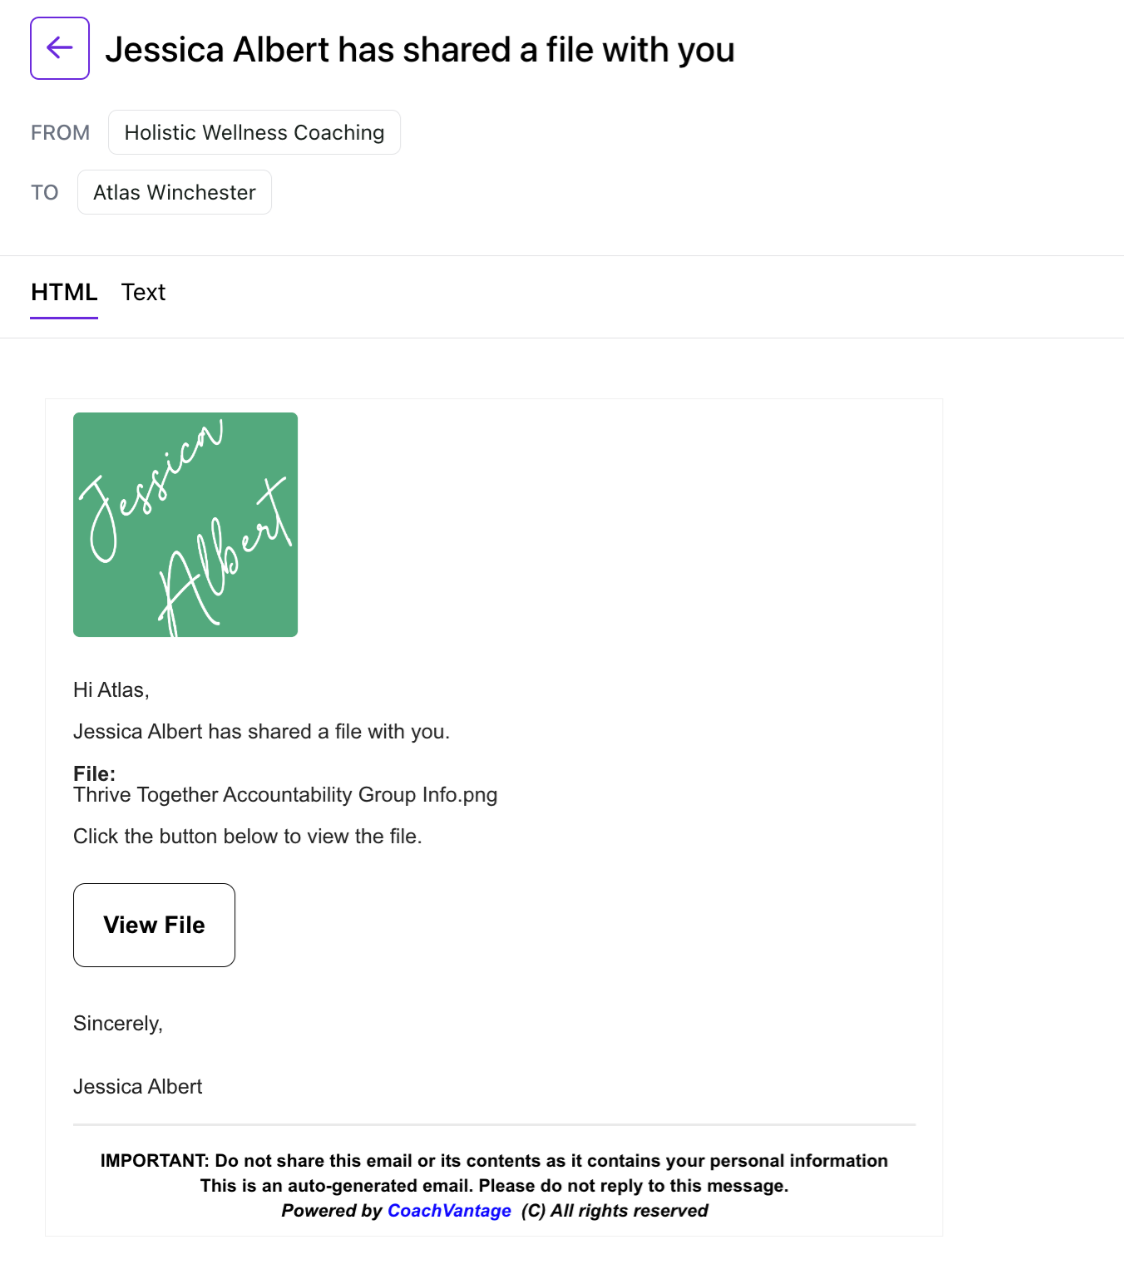
Shared a Resource:
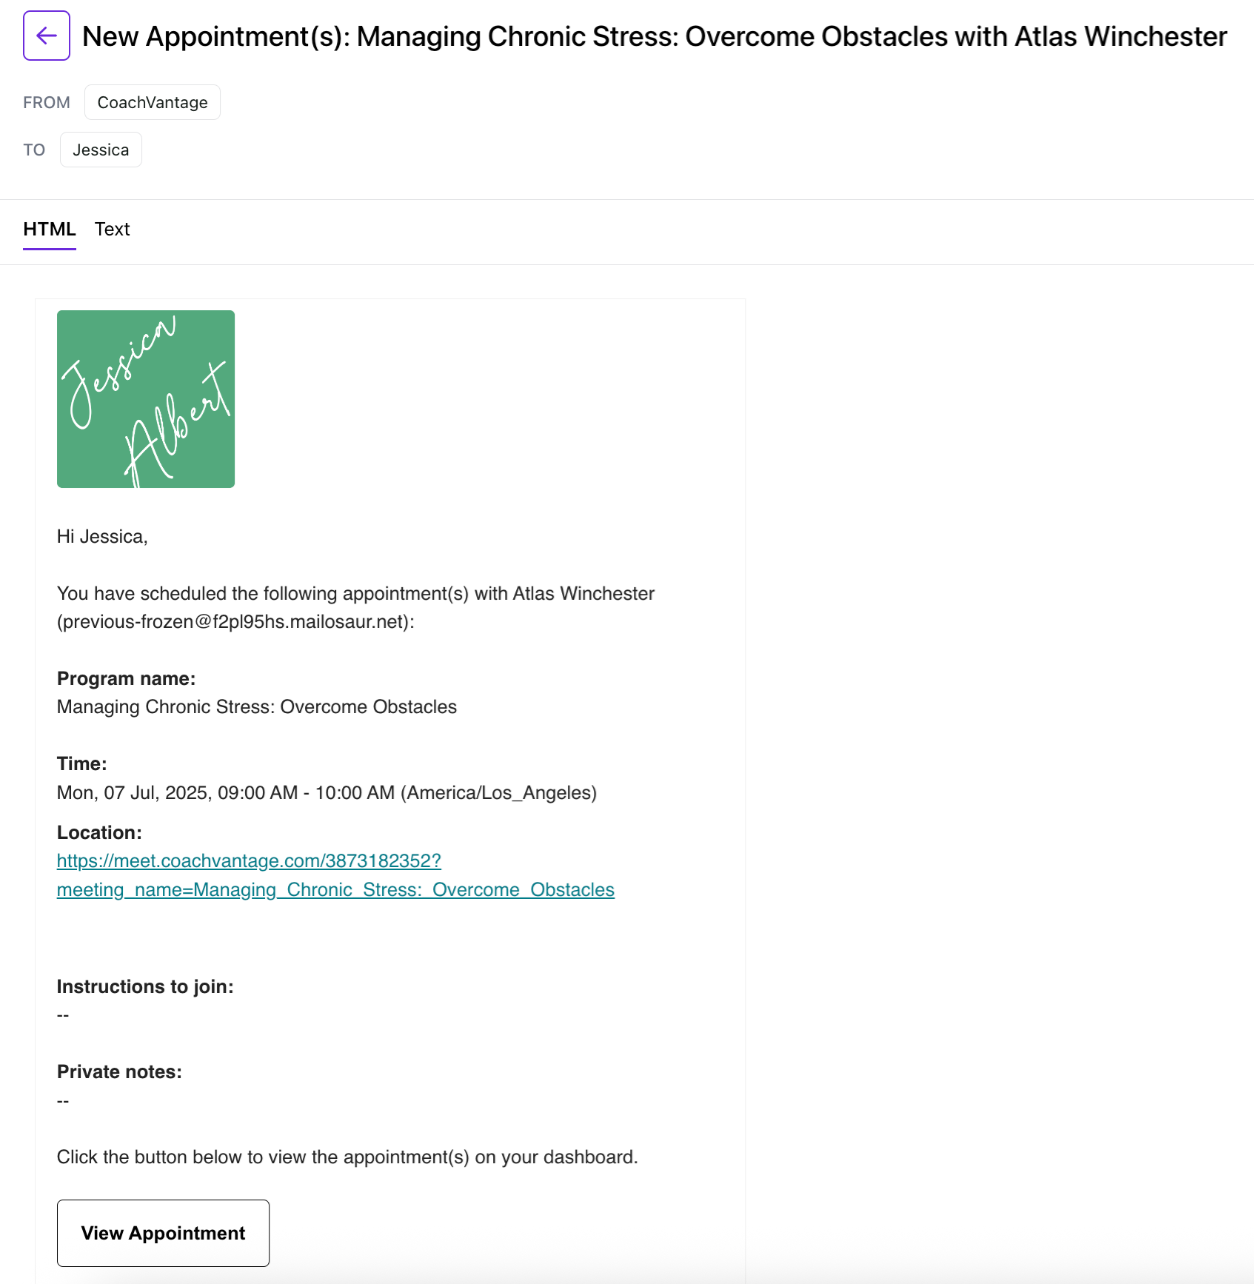
Scheduled an Appointment:
4. Program Notes (Session Notes) 📙
You can take program notes (or session notes) and keep them private (i.e. for your eyes only), or you can share notes with your client.
Click on the Notes ribbon in the sub-menu to view your saved notes or to create a new note.

You can take detailed coaching session notes using the rich text editor, or Notepad Widget. These notes will be saved and can be accessed at any time.
Refer to the Notepad Widget article to learn more about the different features of the Notepad.
Note: If you would like to view all your session notes for all programs for a specific client, go to your client's individual contact record page, and click on the Notes tab on the menu bar.
Refer to Notes on Individual Contact Record Page article to learn more.
Creating Notes 📝
Steps to Create a New Note:
- Click on the New Note button.
- This will open up the rich text editor, or Notepad Widget. You can now take notes in the notepad.
- Remember to click the Save button after you have completed the note.
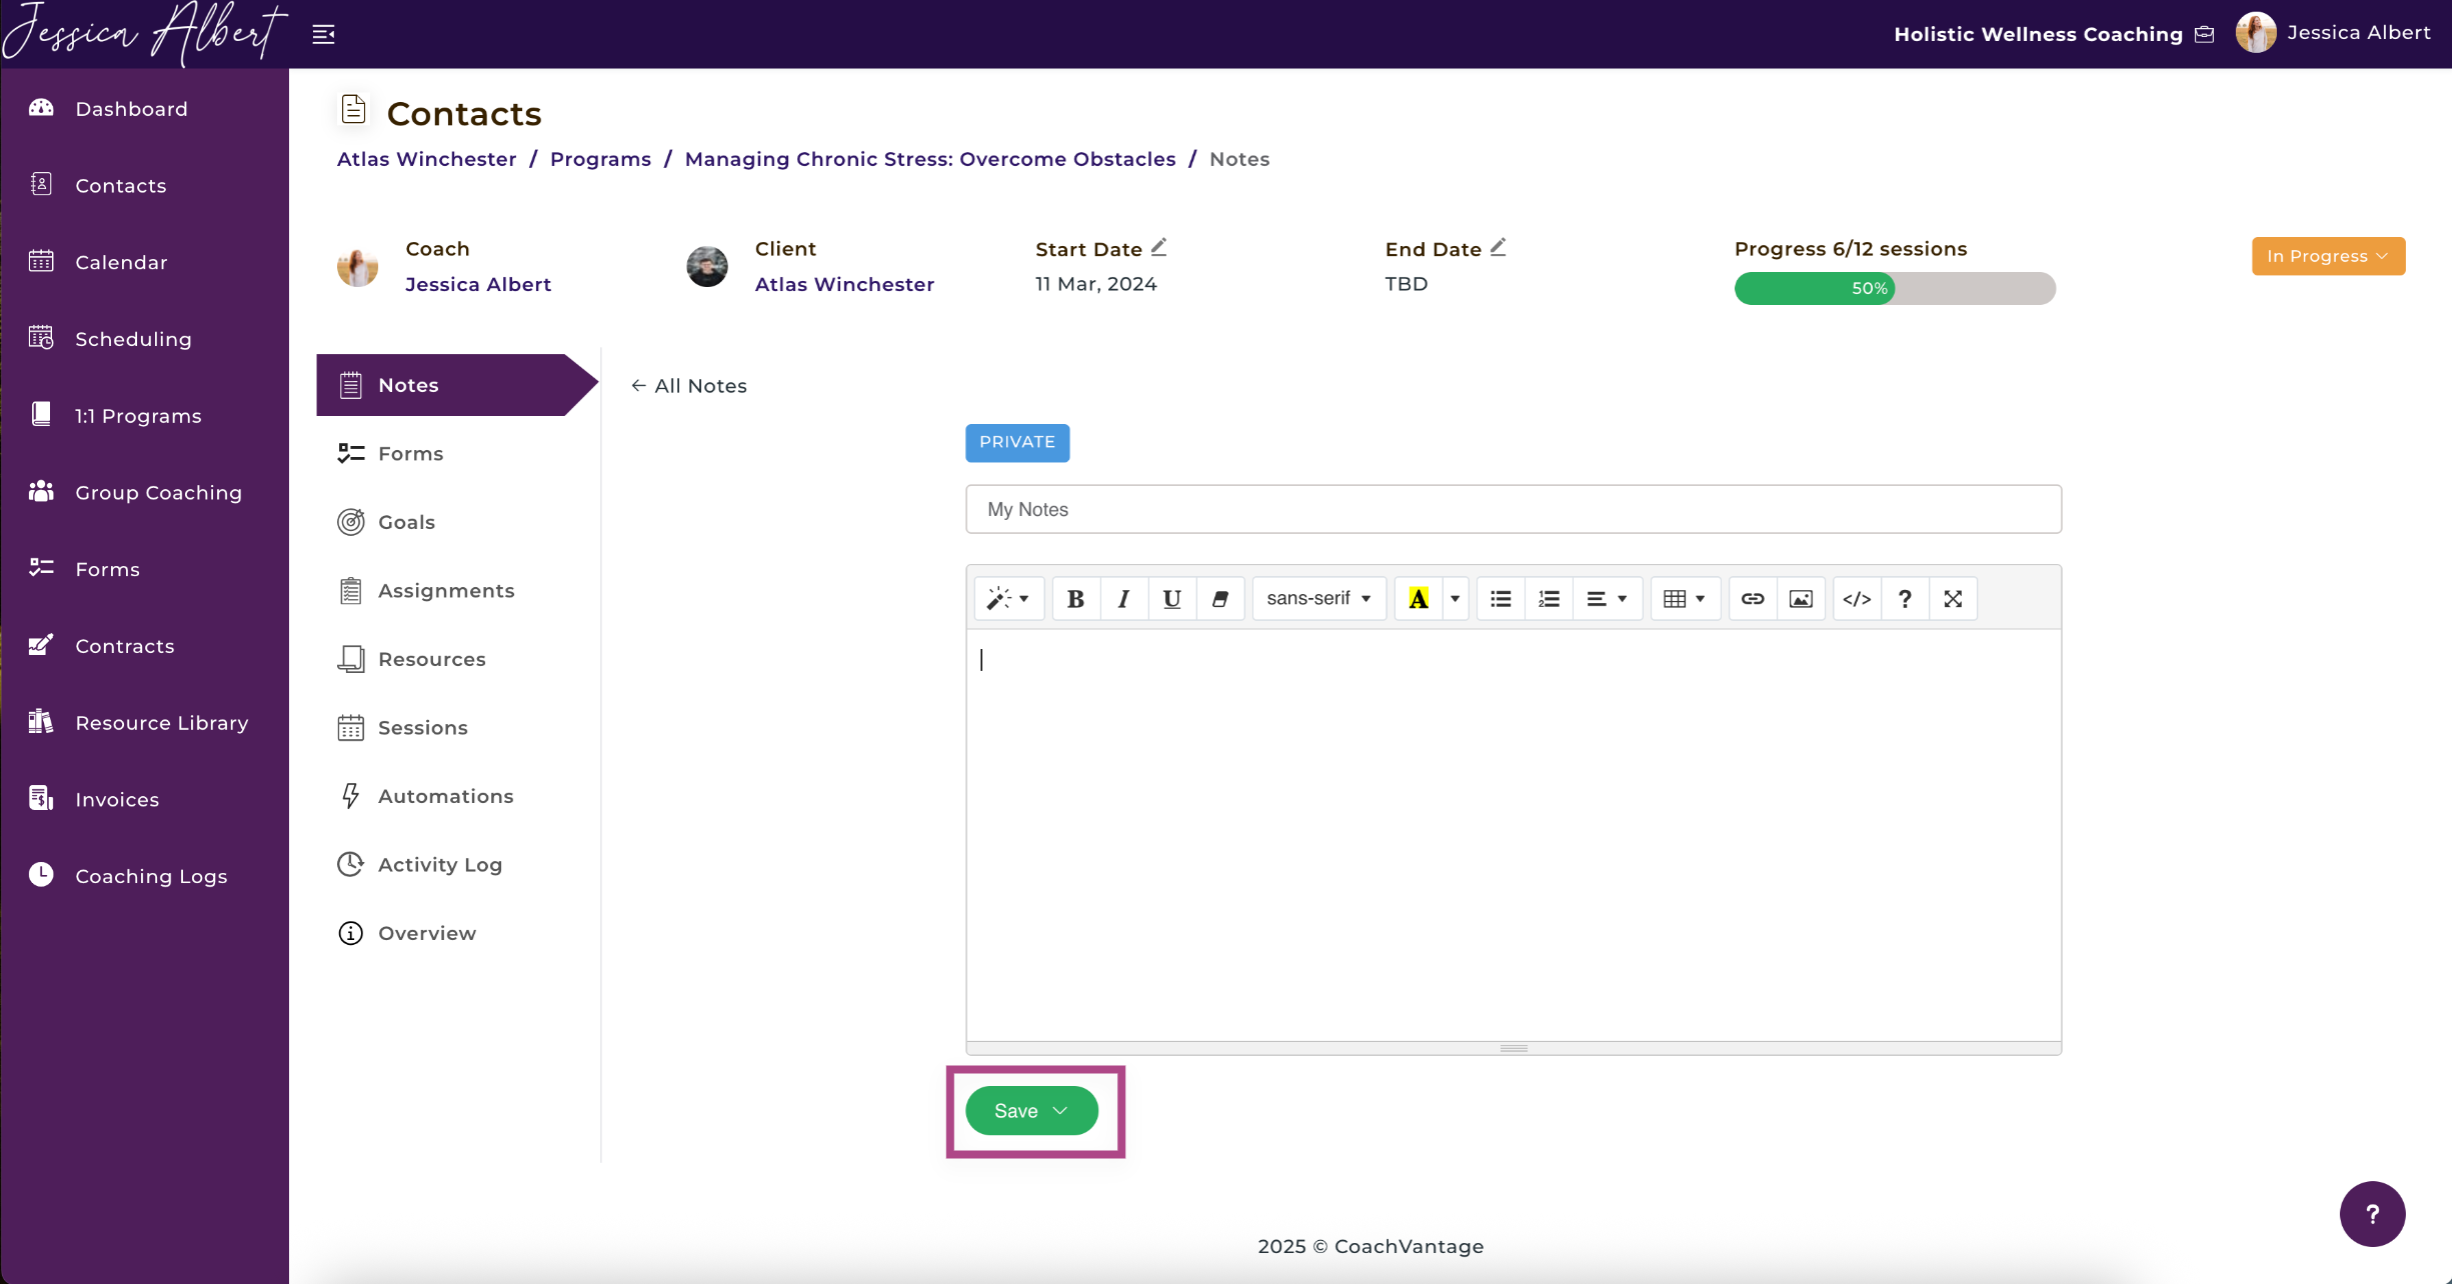
Taking Private Notes
By default, when you click on the New Note button, it will be a Private note, meaning that it is for your eyes only and is not shared with clients.
The Private label is displayed beneath the note title, indicating that it is a private note.
Private notes are saved to your (Coach) account only and will not be seen by your clients.
To take a private note, follow these steps:
- Click the New Note button or Use Note Template button.
- Enter the note title.
- Enter the details of your notes in the text editor.
- Click Save to save the note.
Sharing Notes with Clients
You can also share notes with your clients, as long as your clients have an Active Client Portal.
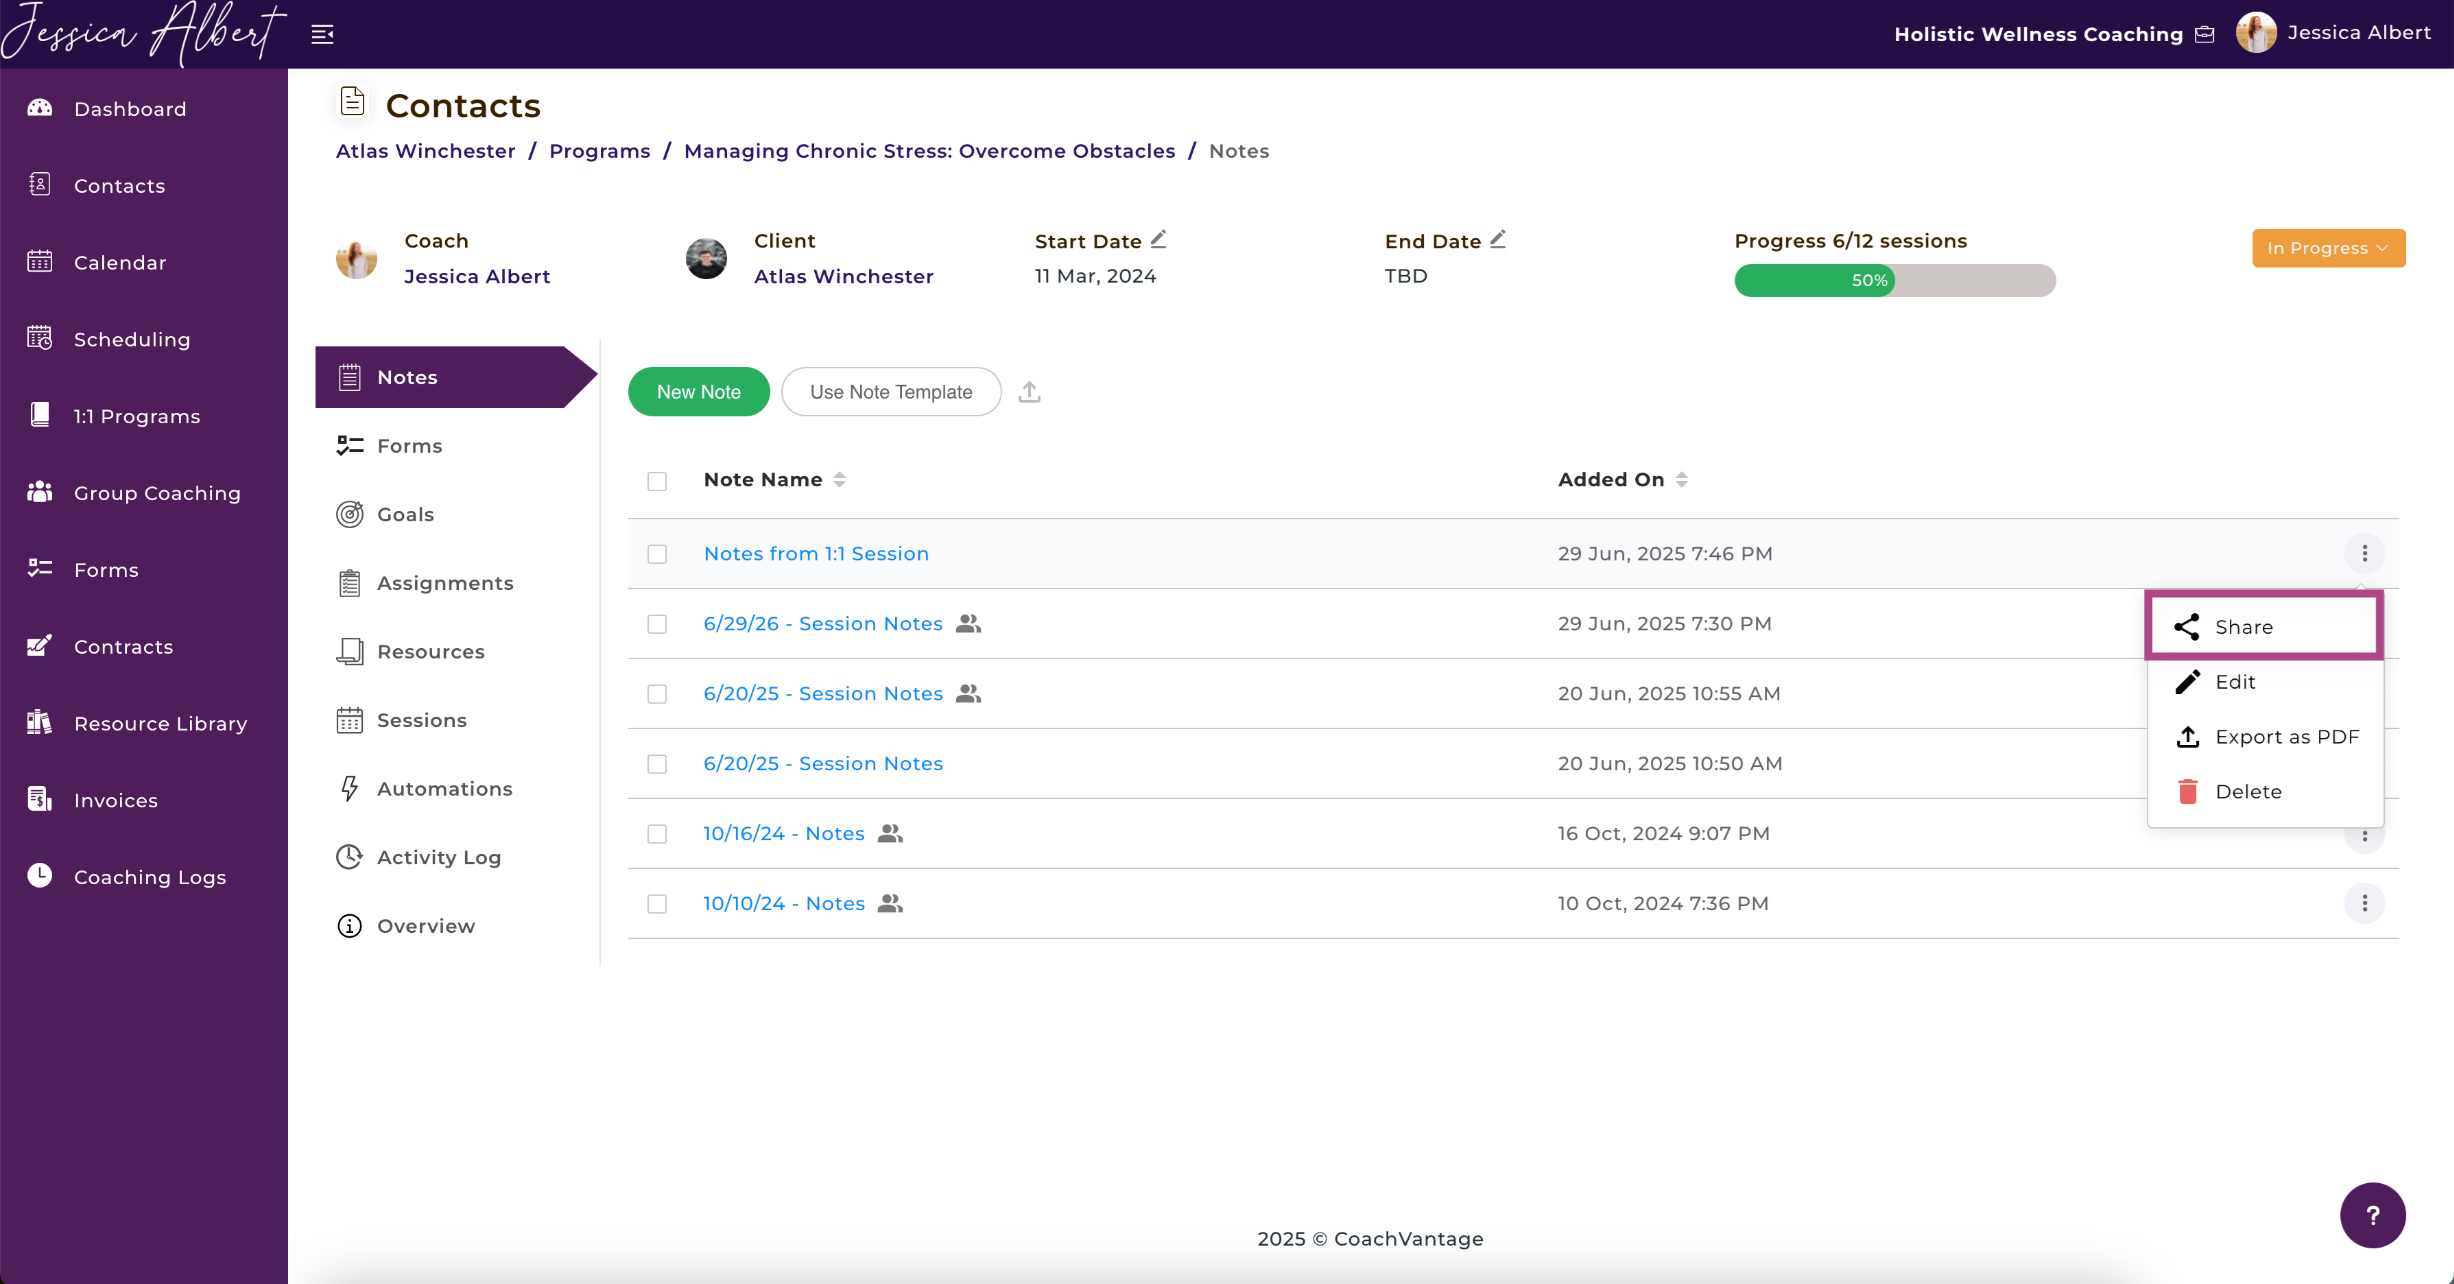
To share a note with your client, follow these steps:
- Click the New Note button or Use Note Template button.
- Enter the note Title.
- Enter the details of your notes in the text editor.
- Click Save to save the note.
- Click on the 3-dot button menu next to the note title and select Share with Client.
IMPORTANT:
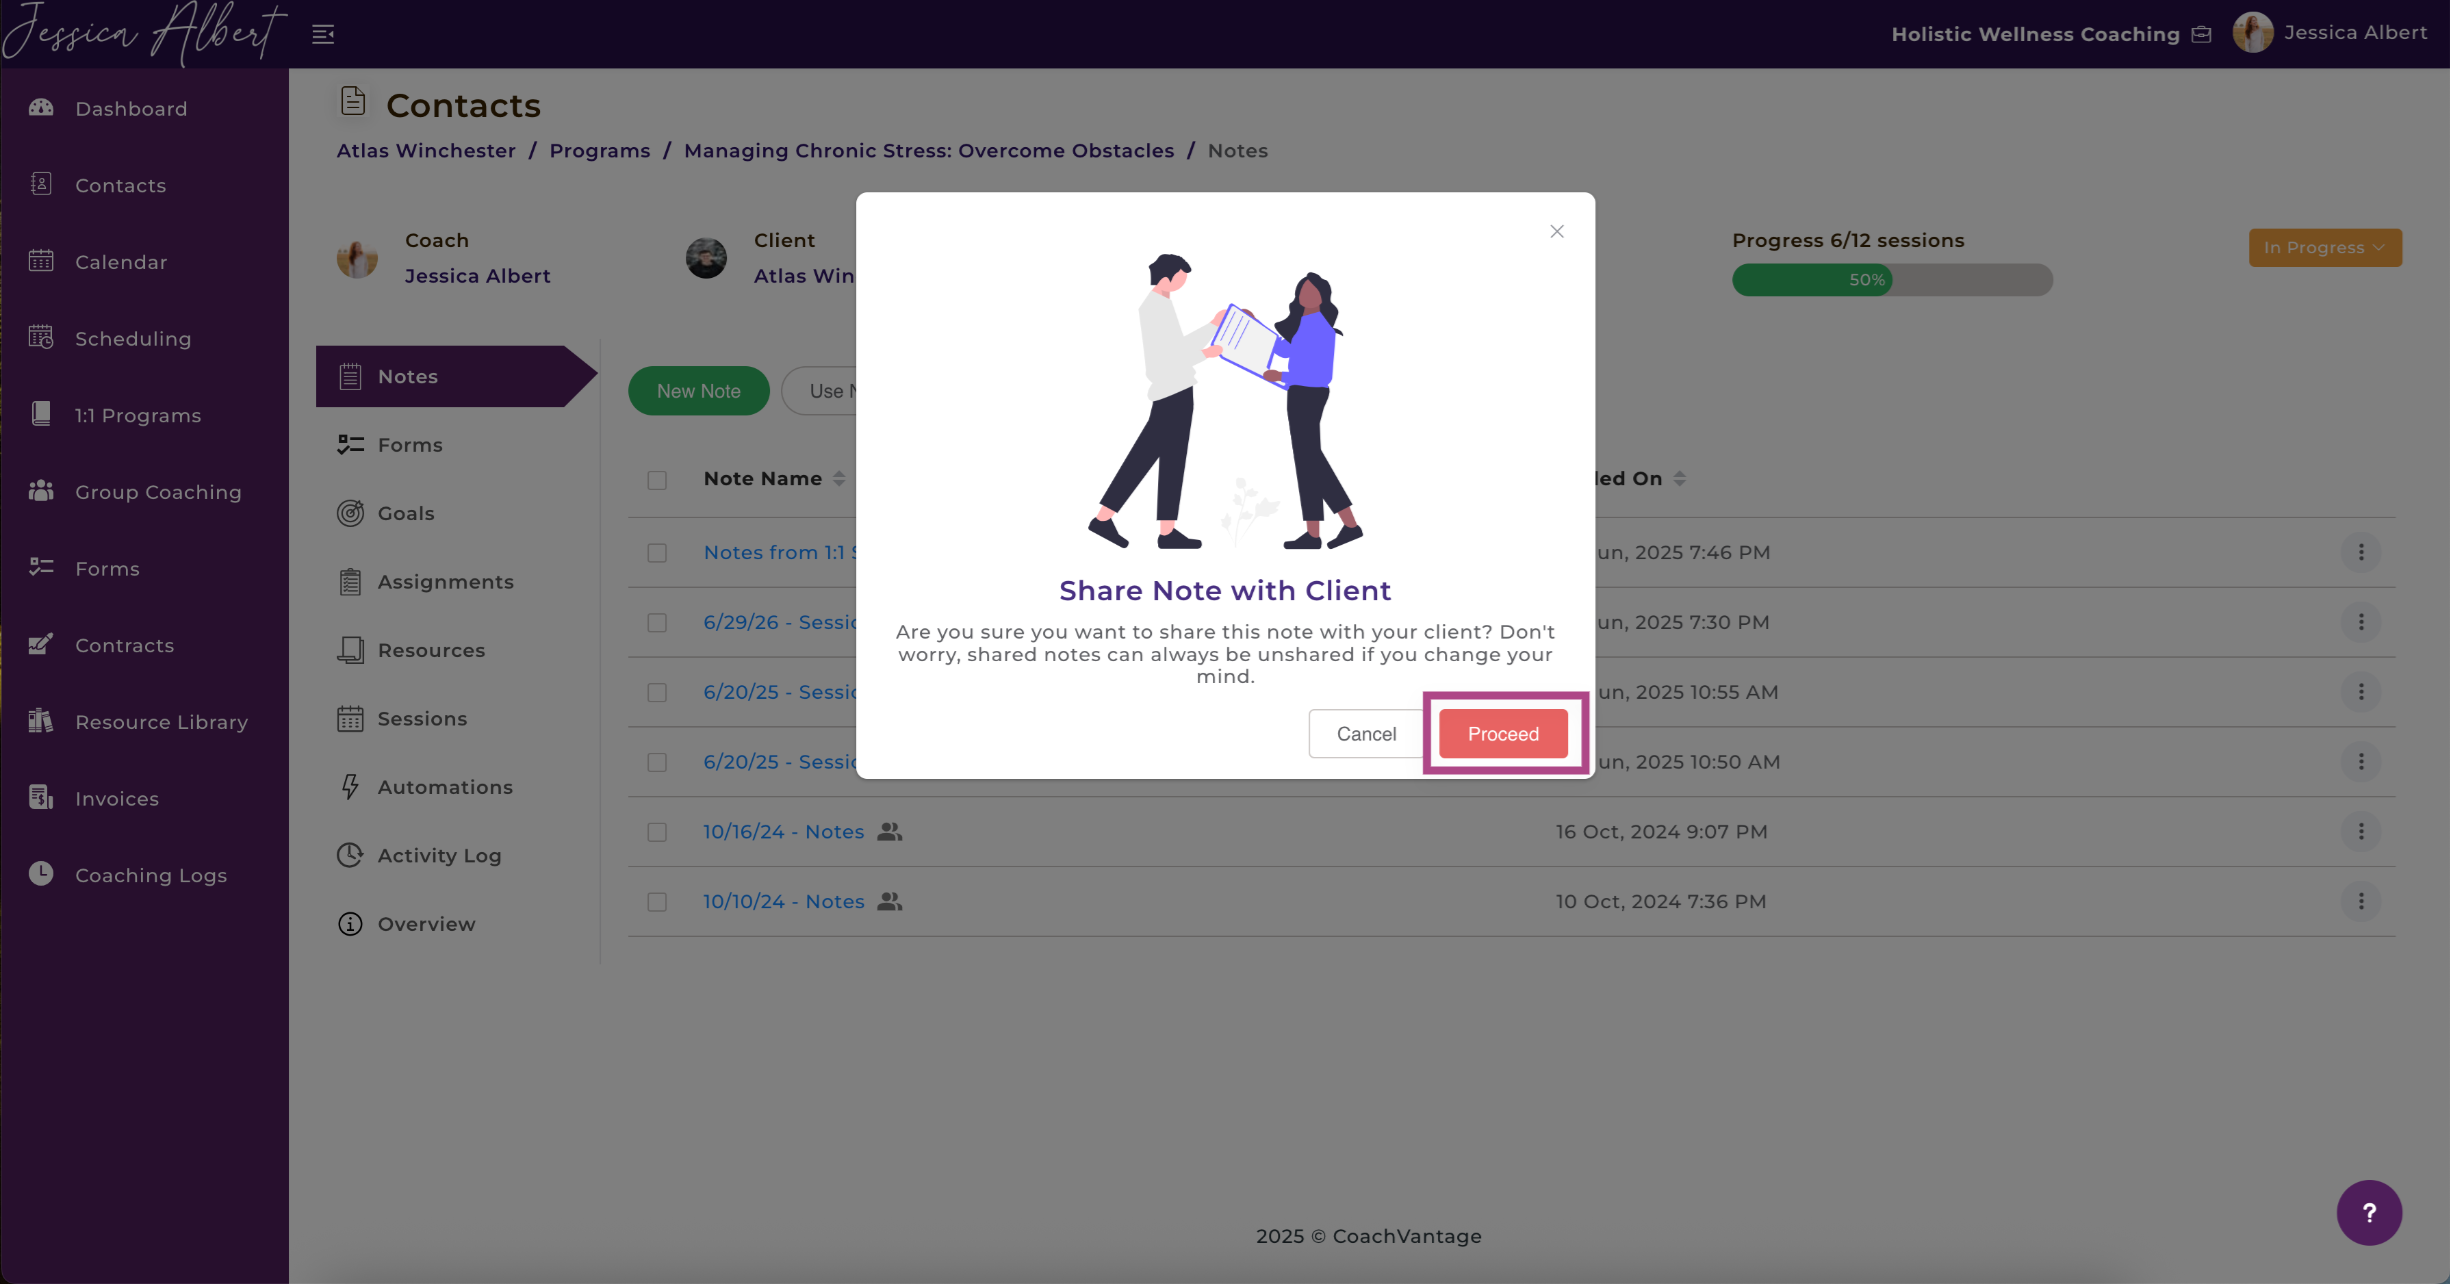
1. When you share a note, it will be shared instantly with your client. CoachVantage will make the note available in the client portal instantaneously. We will also trigger an automated email notification to let your client know that a note has been shared.
2. Clients cannot edit a note that you have shared with them. They will only be able to view the contents of your note. The same applies when clients share their notes with you - you can only view the note but not edit it.
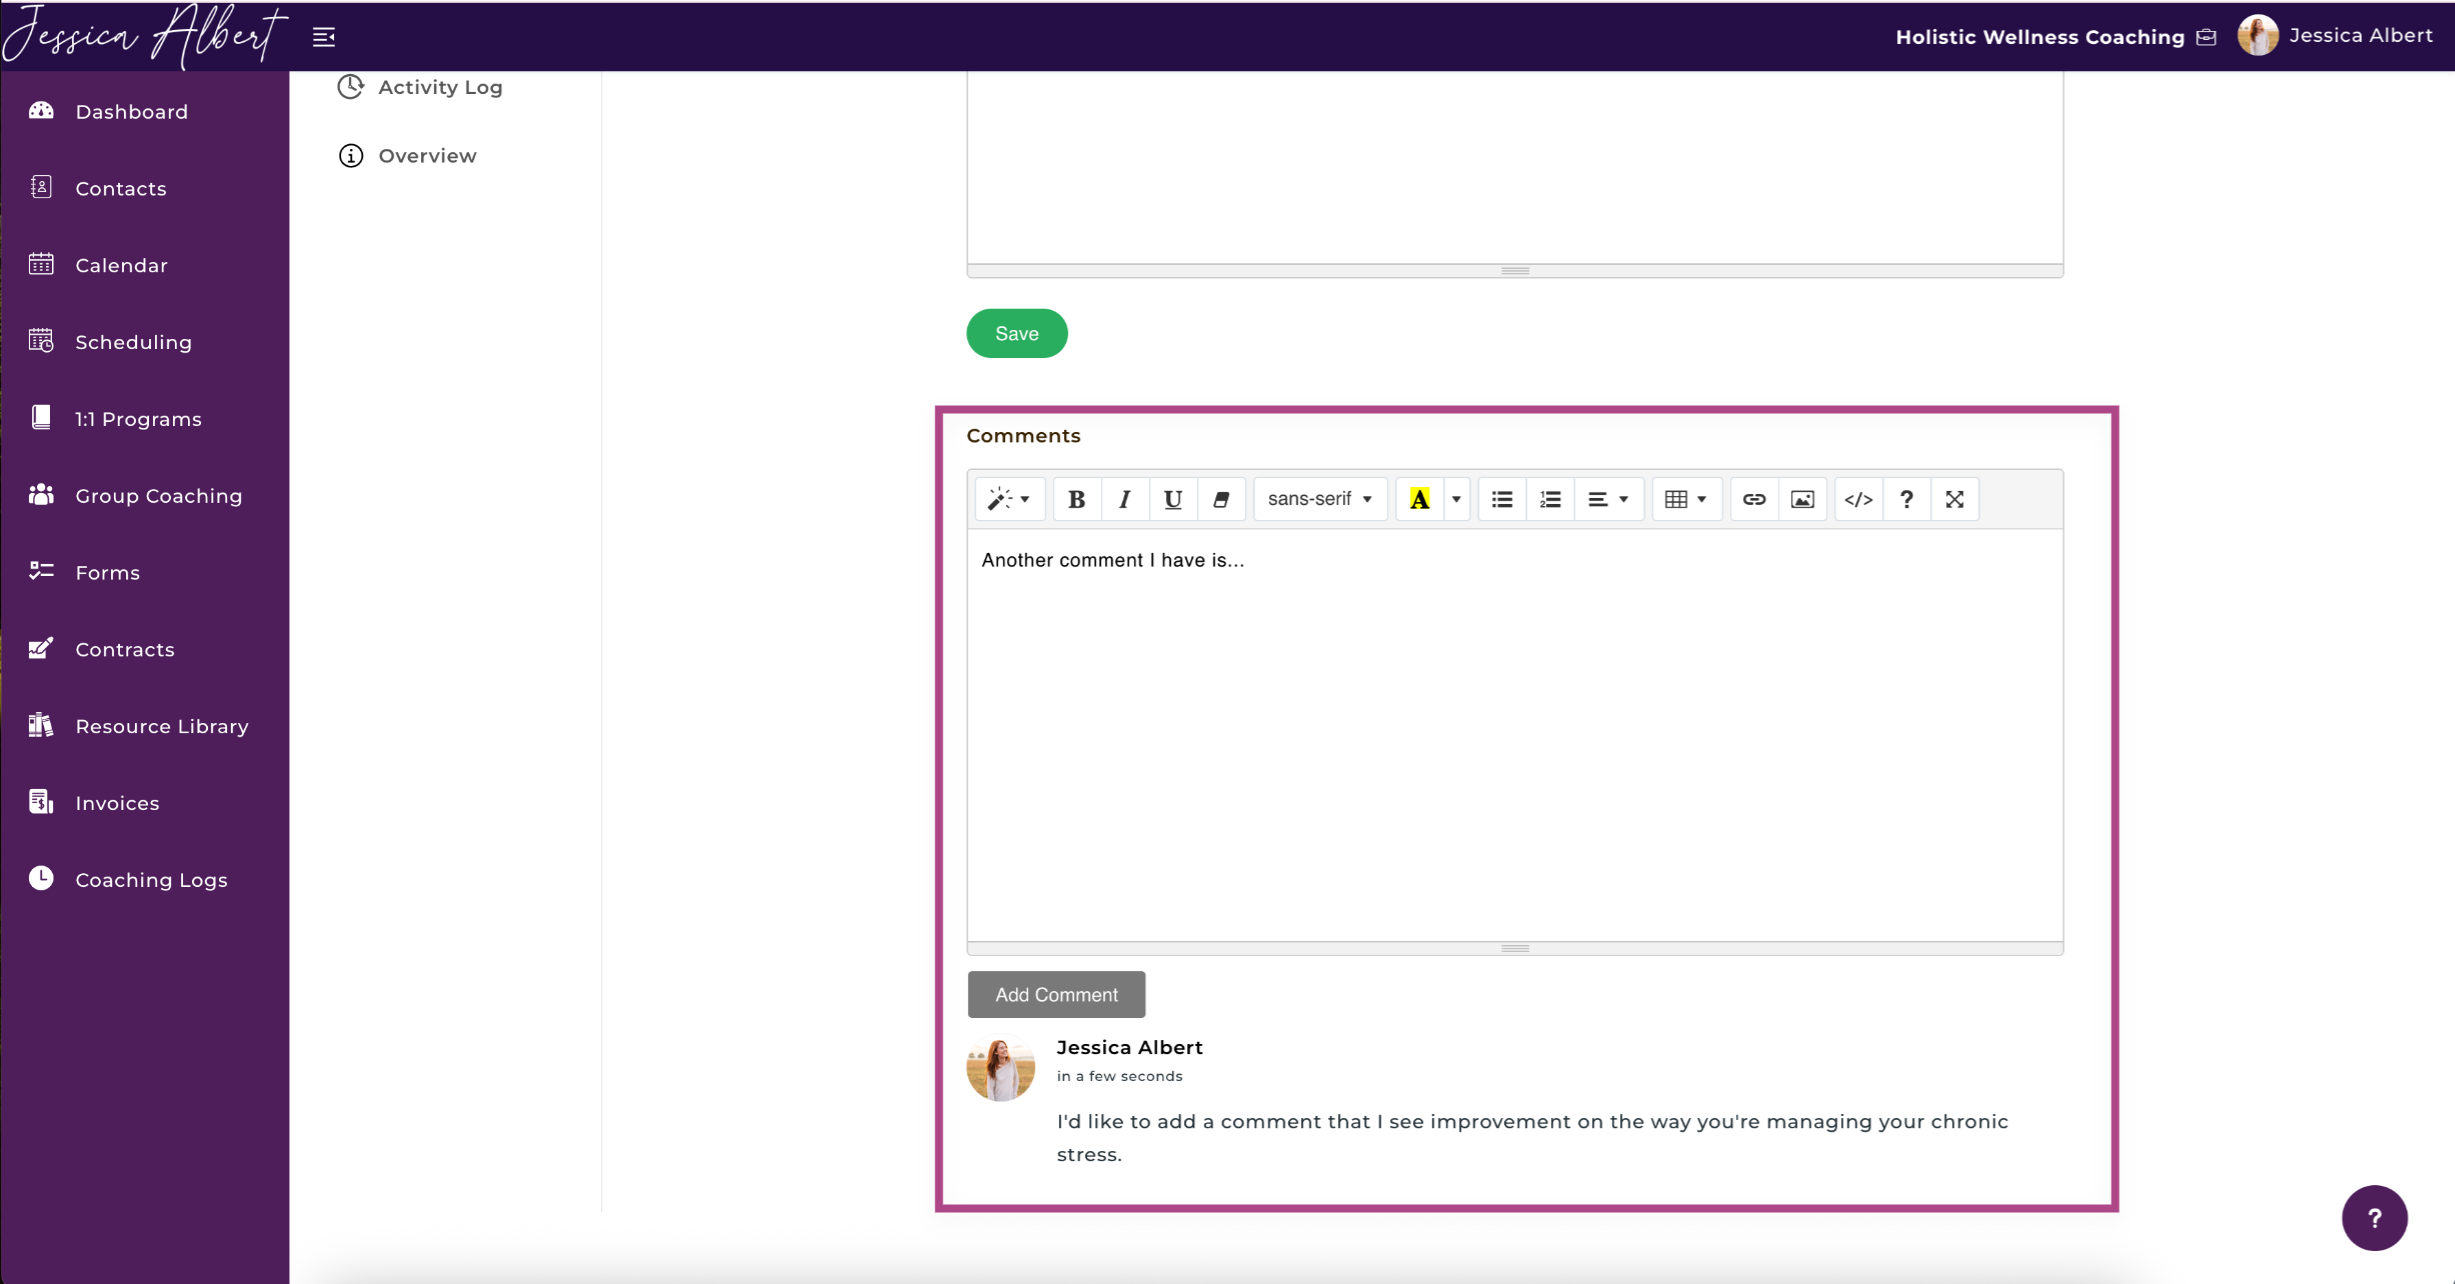
3. Upon sharing a note, the Comments section will immediately be displayed (see image below). The Comments section allows your client to add comments about a note. The comments will be automatically updated in your account. You can also add your own comments in the Comments section and these will also be automatically updated in the Client Portal. Automated email notifications will be sent to Coach and Client, respectively, when comments are added.
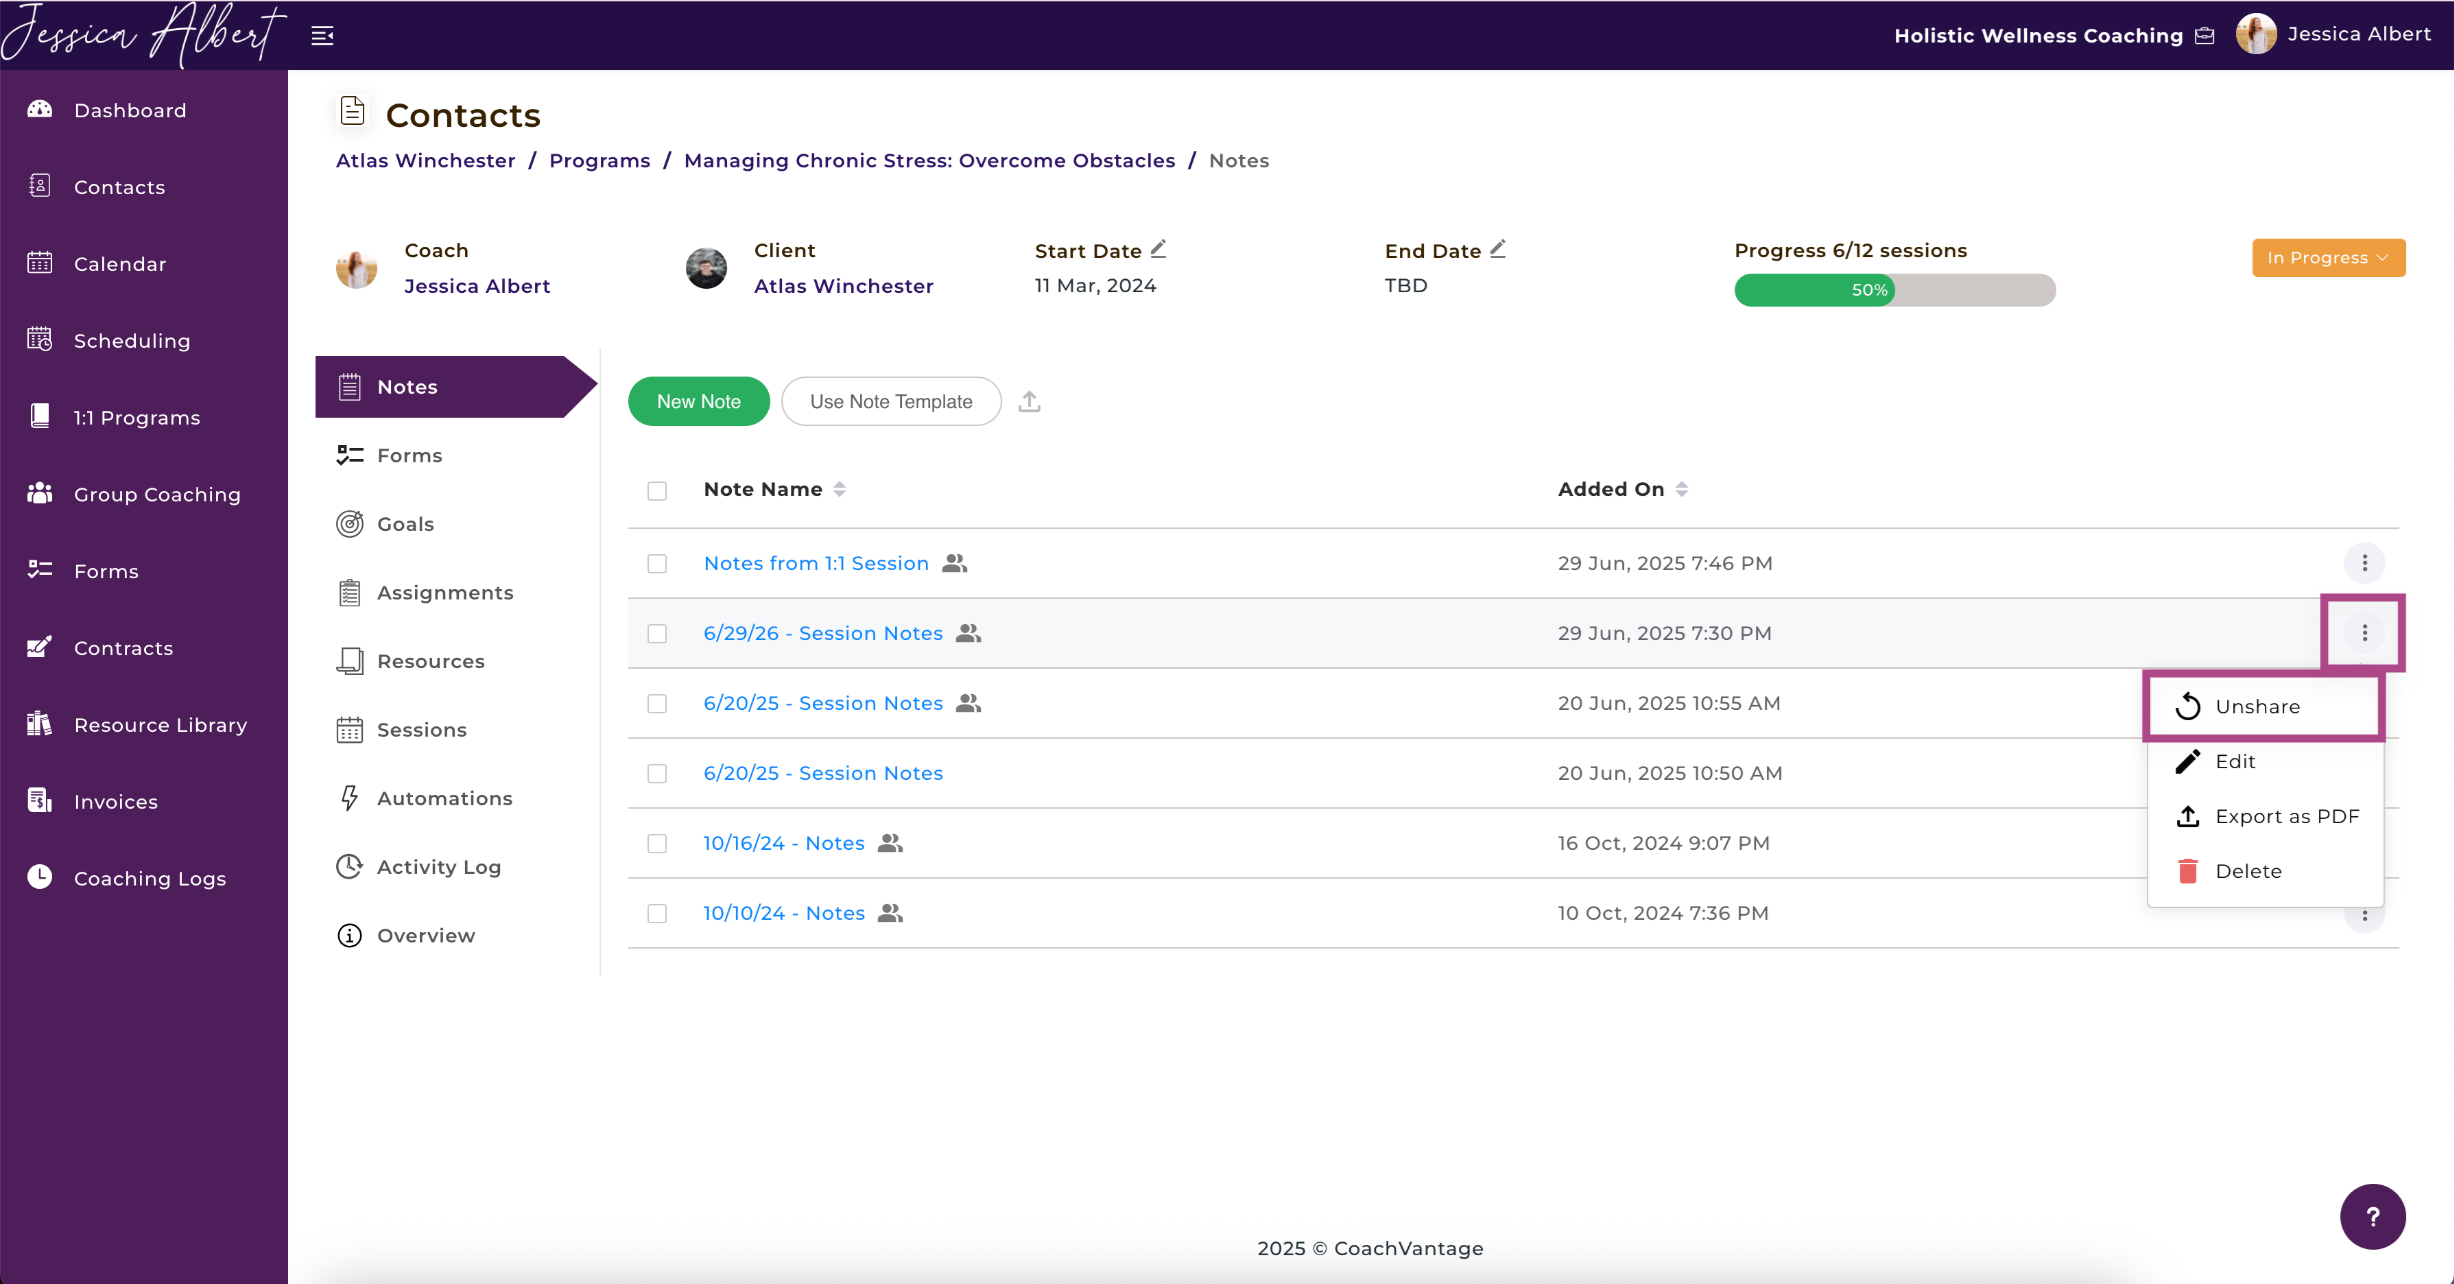
Unsharing Notes
To Unshare a note with your client, simply click on the 3-dot button menu and select the Unshare with Client option.
The previously shared note will be immediately removed from the client portal and your client will no longer have access to the note. The label will revert to Private.
The same applies when clients unshare notes with you.
Editing Notes 🖊️
To make edits to your notes, make the changes as you would when creating a note, then click Save when you're done. Your changes will be saved.
When you edit your note, the changes will also be reflected on the client portal.
The same applies when clients make edits to notes that they have shared with you.
Automated email notifications will be sent you and your client when edits are made to notes.
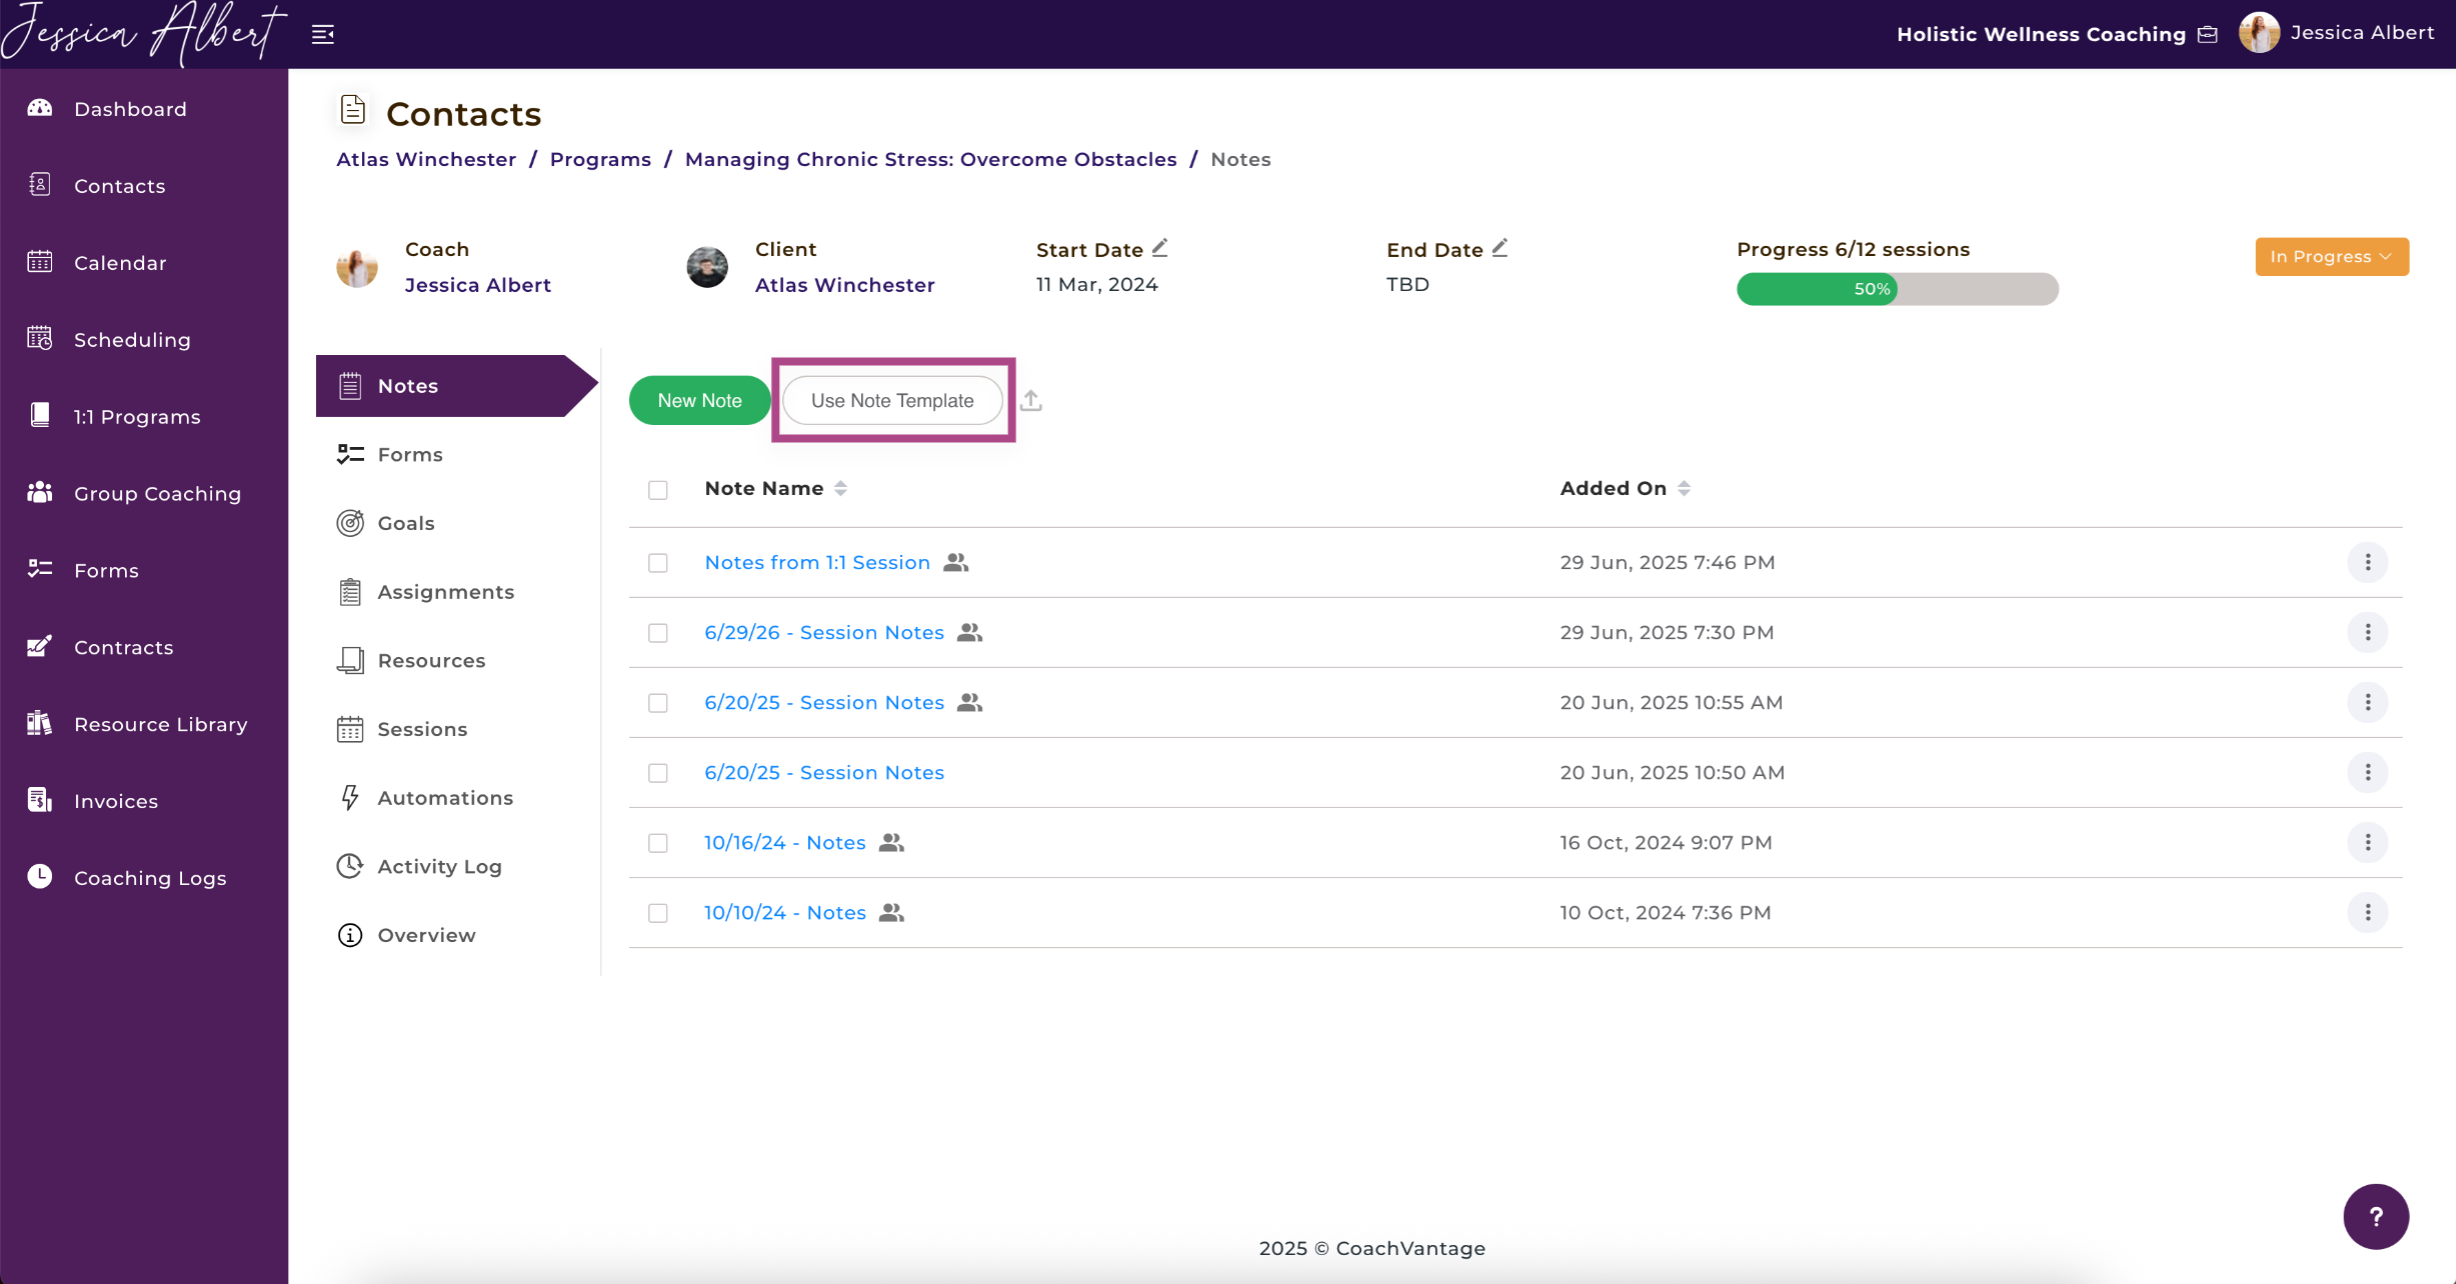
Using a Note Template
Note Templates are useful when you have a standard format for note taking (like tables, section headers, etc).
In this case, using a note template allows you to quickly type in the notes into the template so that you don't have to recreate the format of your note structure every time you take a new note. You can simply select the note template you wish to use, then input the data.
IMPORTANT: You should first create a Note Template in your Resource Library before you can use the note template feature. Refer to the Note Template Creation article to learn more.
To use a note template, click the Use Note Template button and select the template you would like to use from the drop-down bar.
Once you have selected a template, you should now see it populate automatically in the text editor.
Enter the relevant information into the template and click Save once you have completed the note.
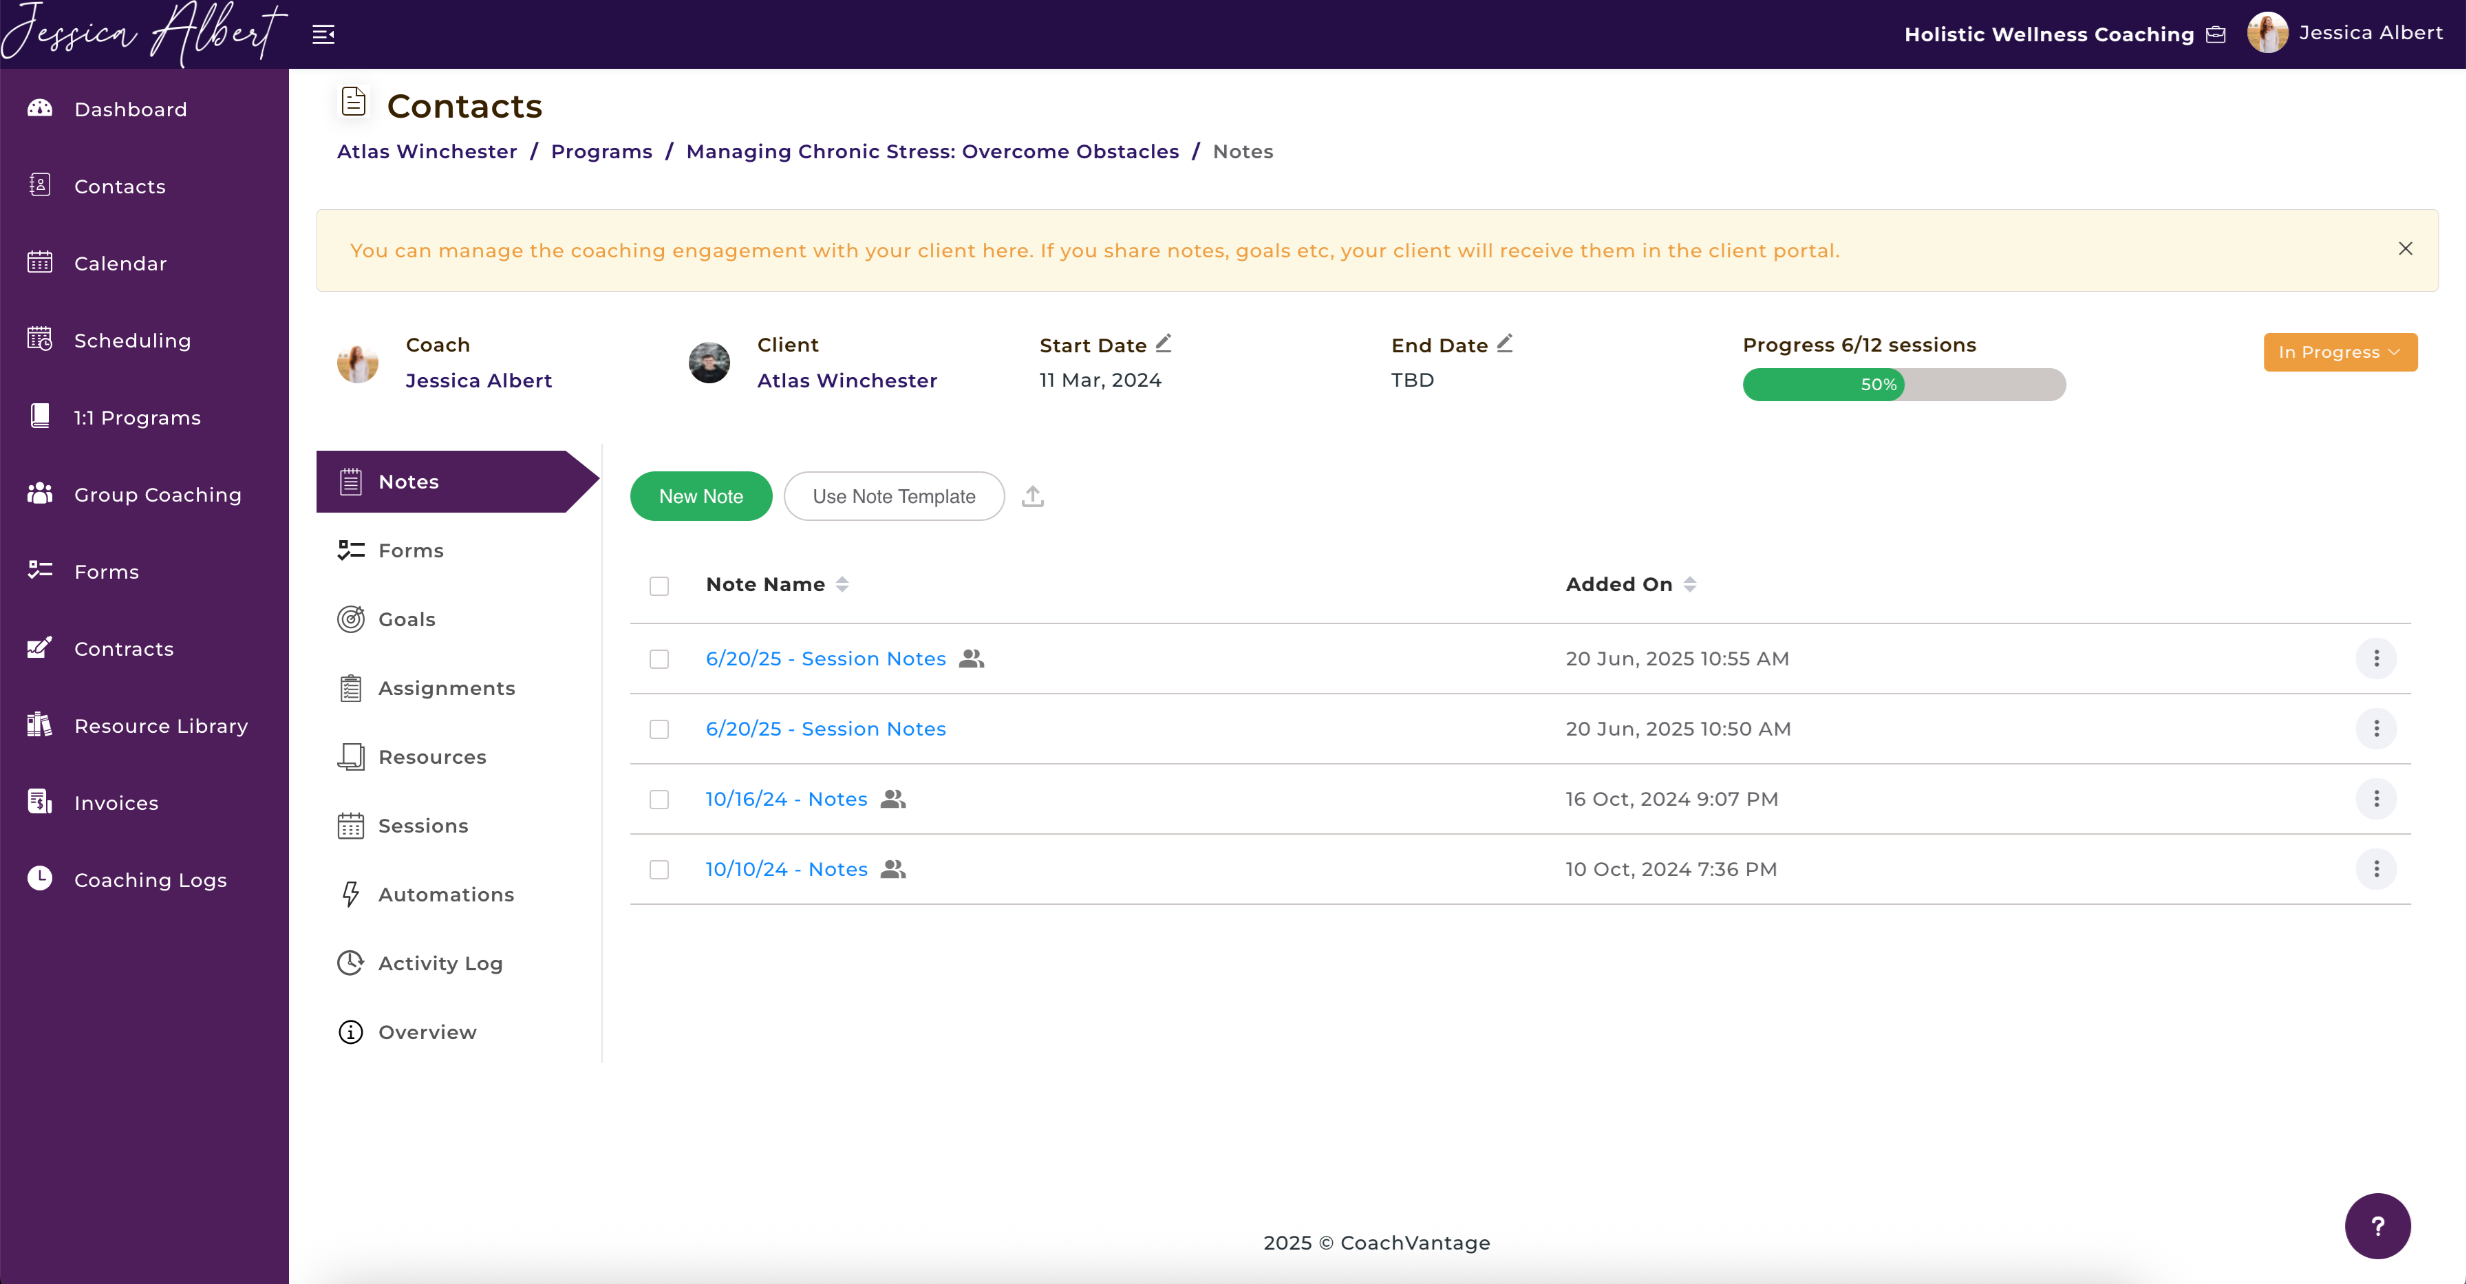
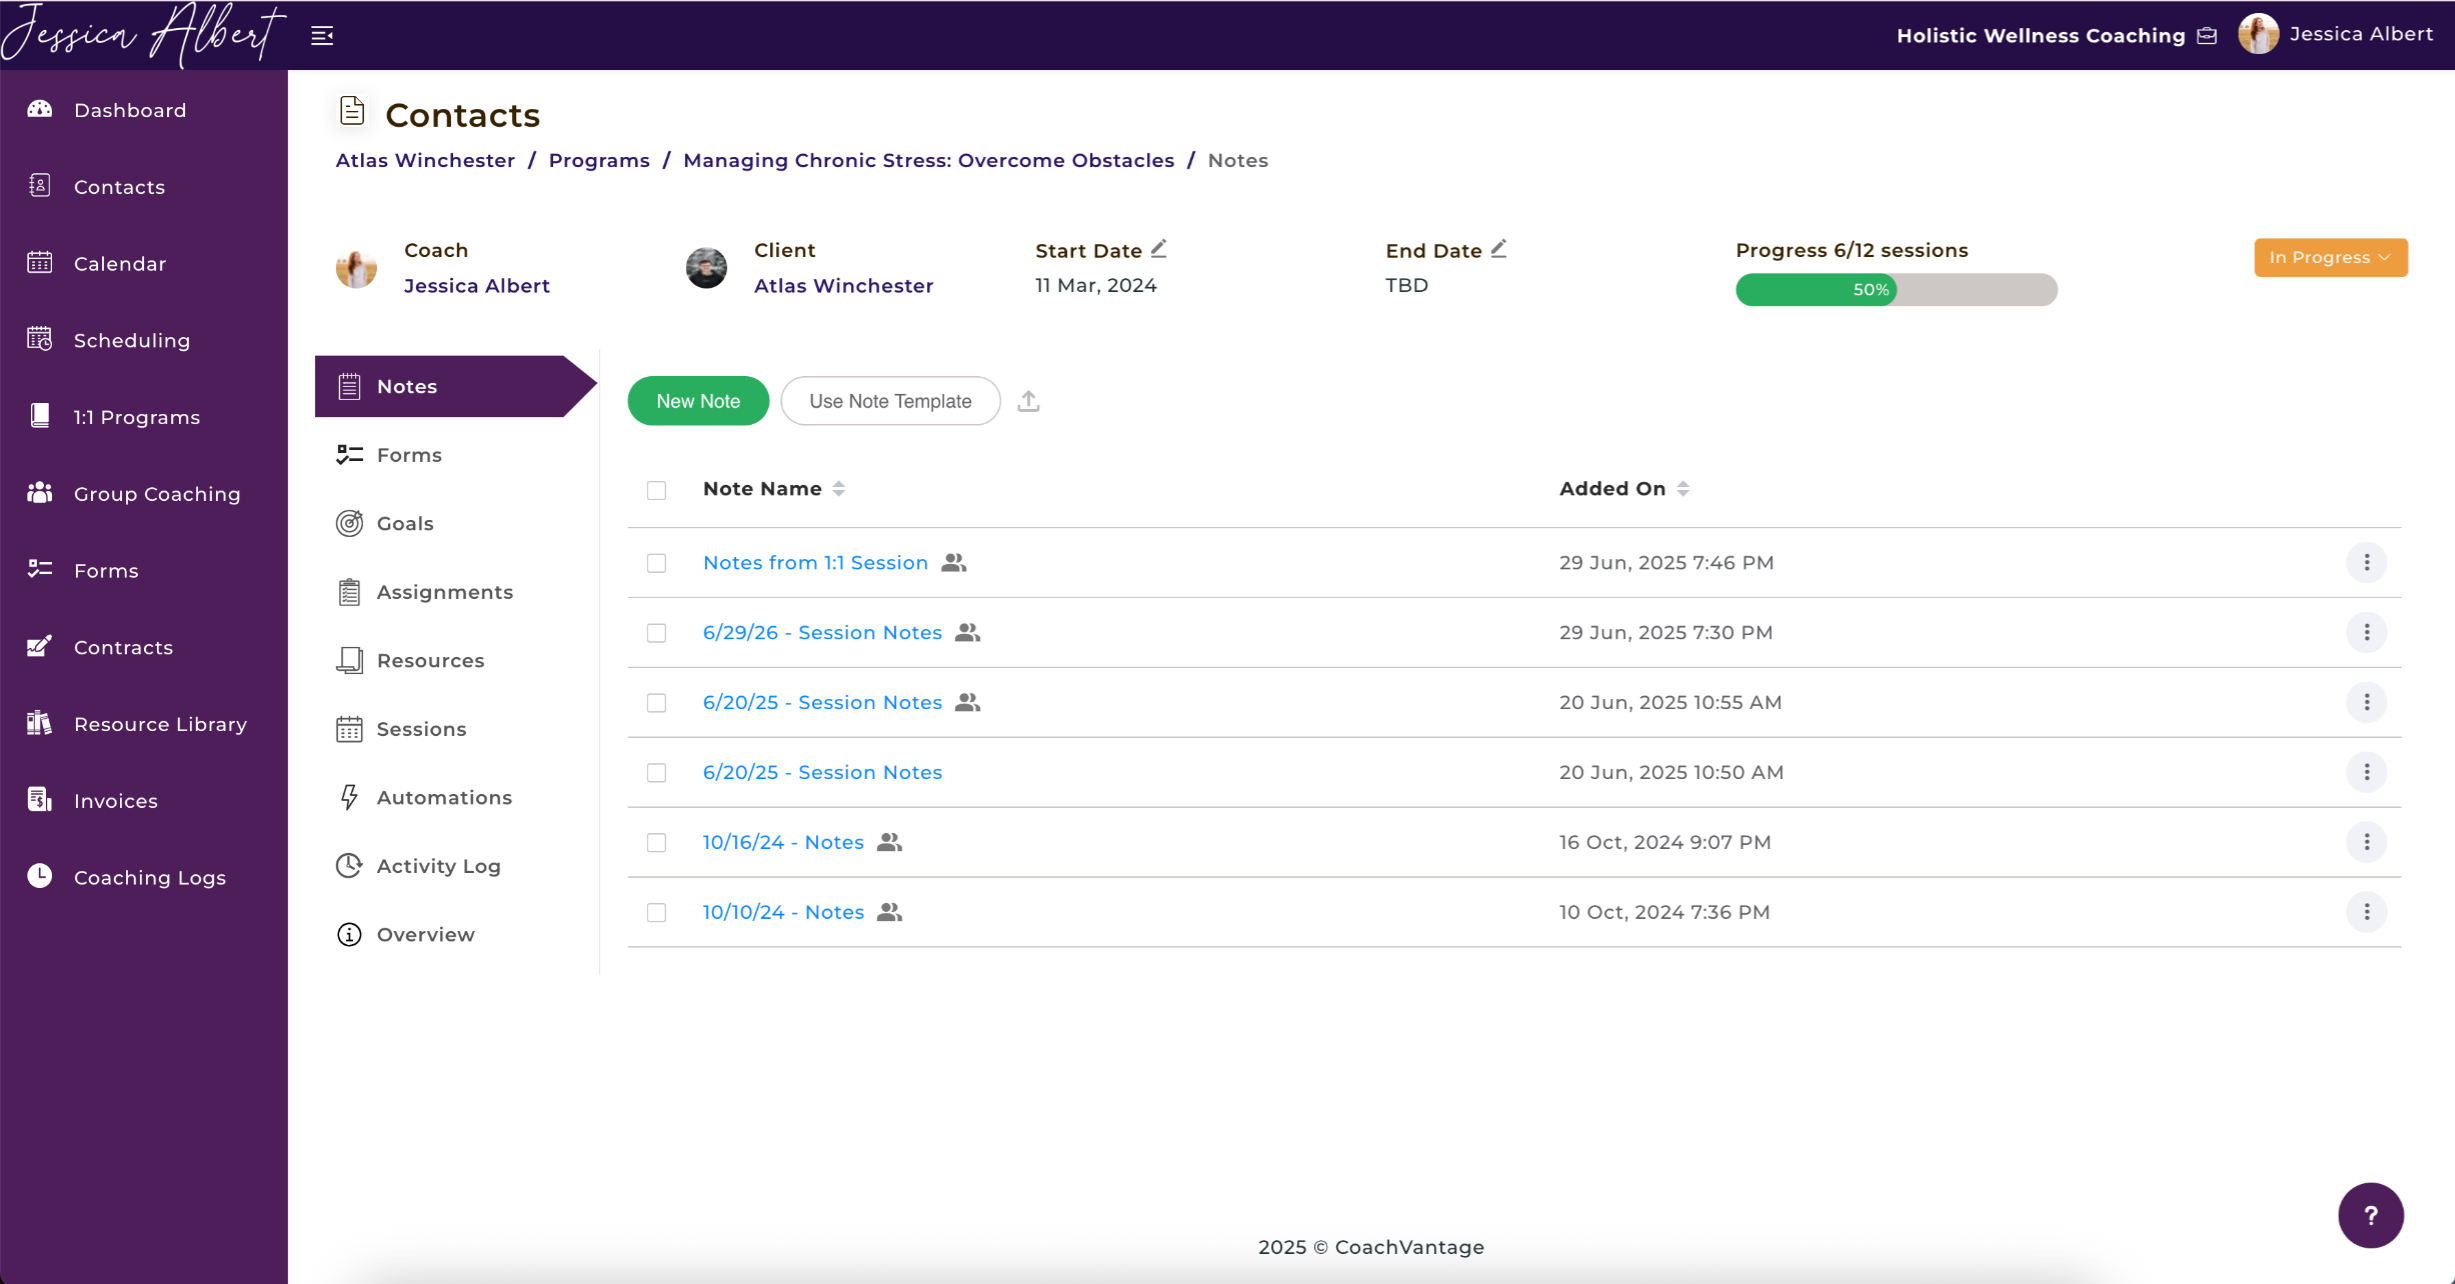
List of All Notes
After you have saved your notes, or when a client has shared notes with you, a list of all notes will be displayed. The date/time stamp is also reflected, indicating when a note was last saved or edited.
Notes are arranged in chronological order by default. Latest notes on top, and earlier notes at the bottom.
You can easily search for notes by typing a search query in the Search Bar. For example, you could search by keywords that are contained in your notes / title.
You'll be able to easily differentiate between shared notes and private notes as shared notes will have an a shared icon to the right of the note title (highlighted in red in the image below):
5. Program Forms 📋
On the Forms page you'll be able to view client's form responses and also send program forms to your client.
Click on Forms in the sub-menu to open the Forms page.
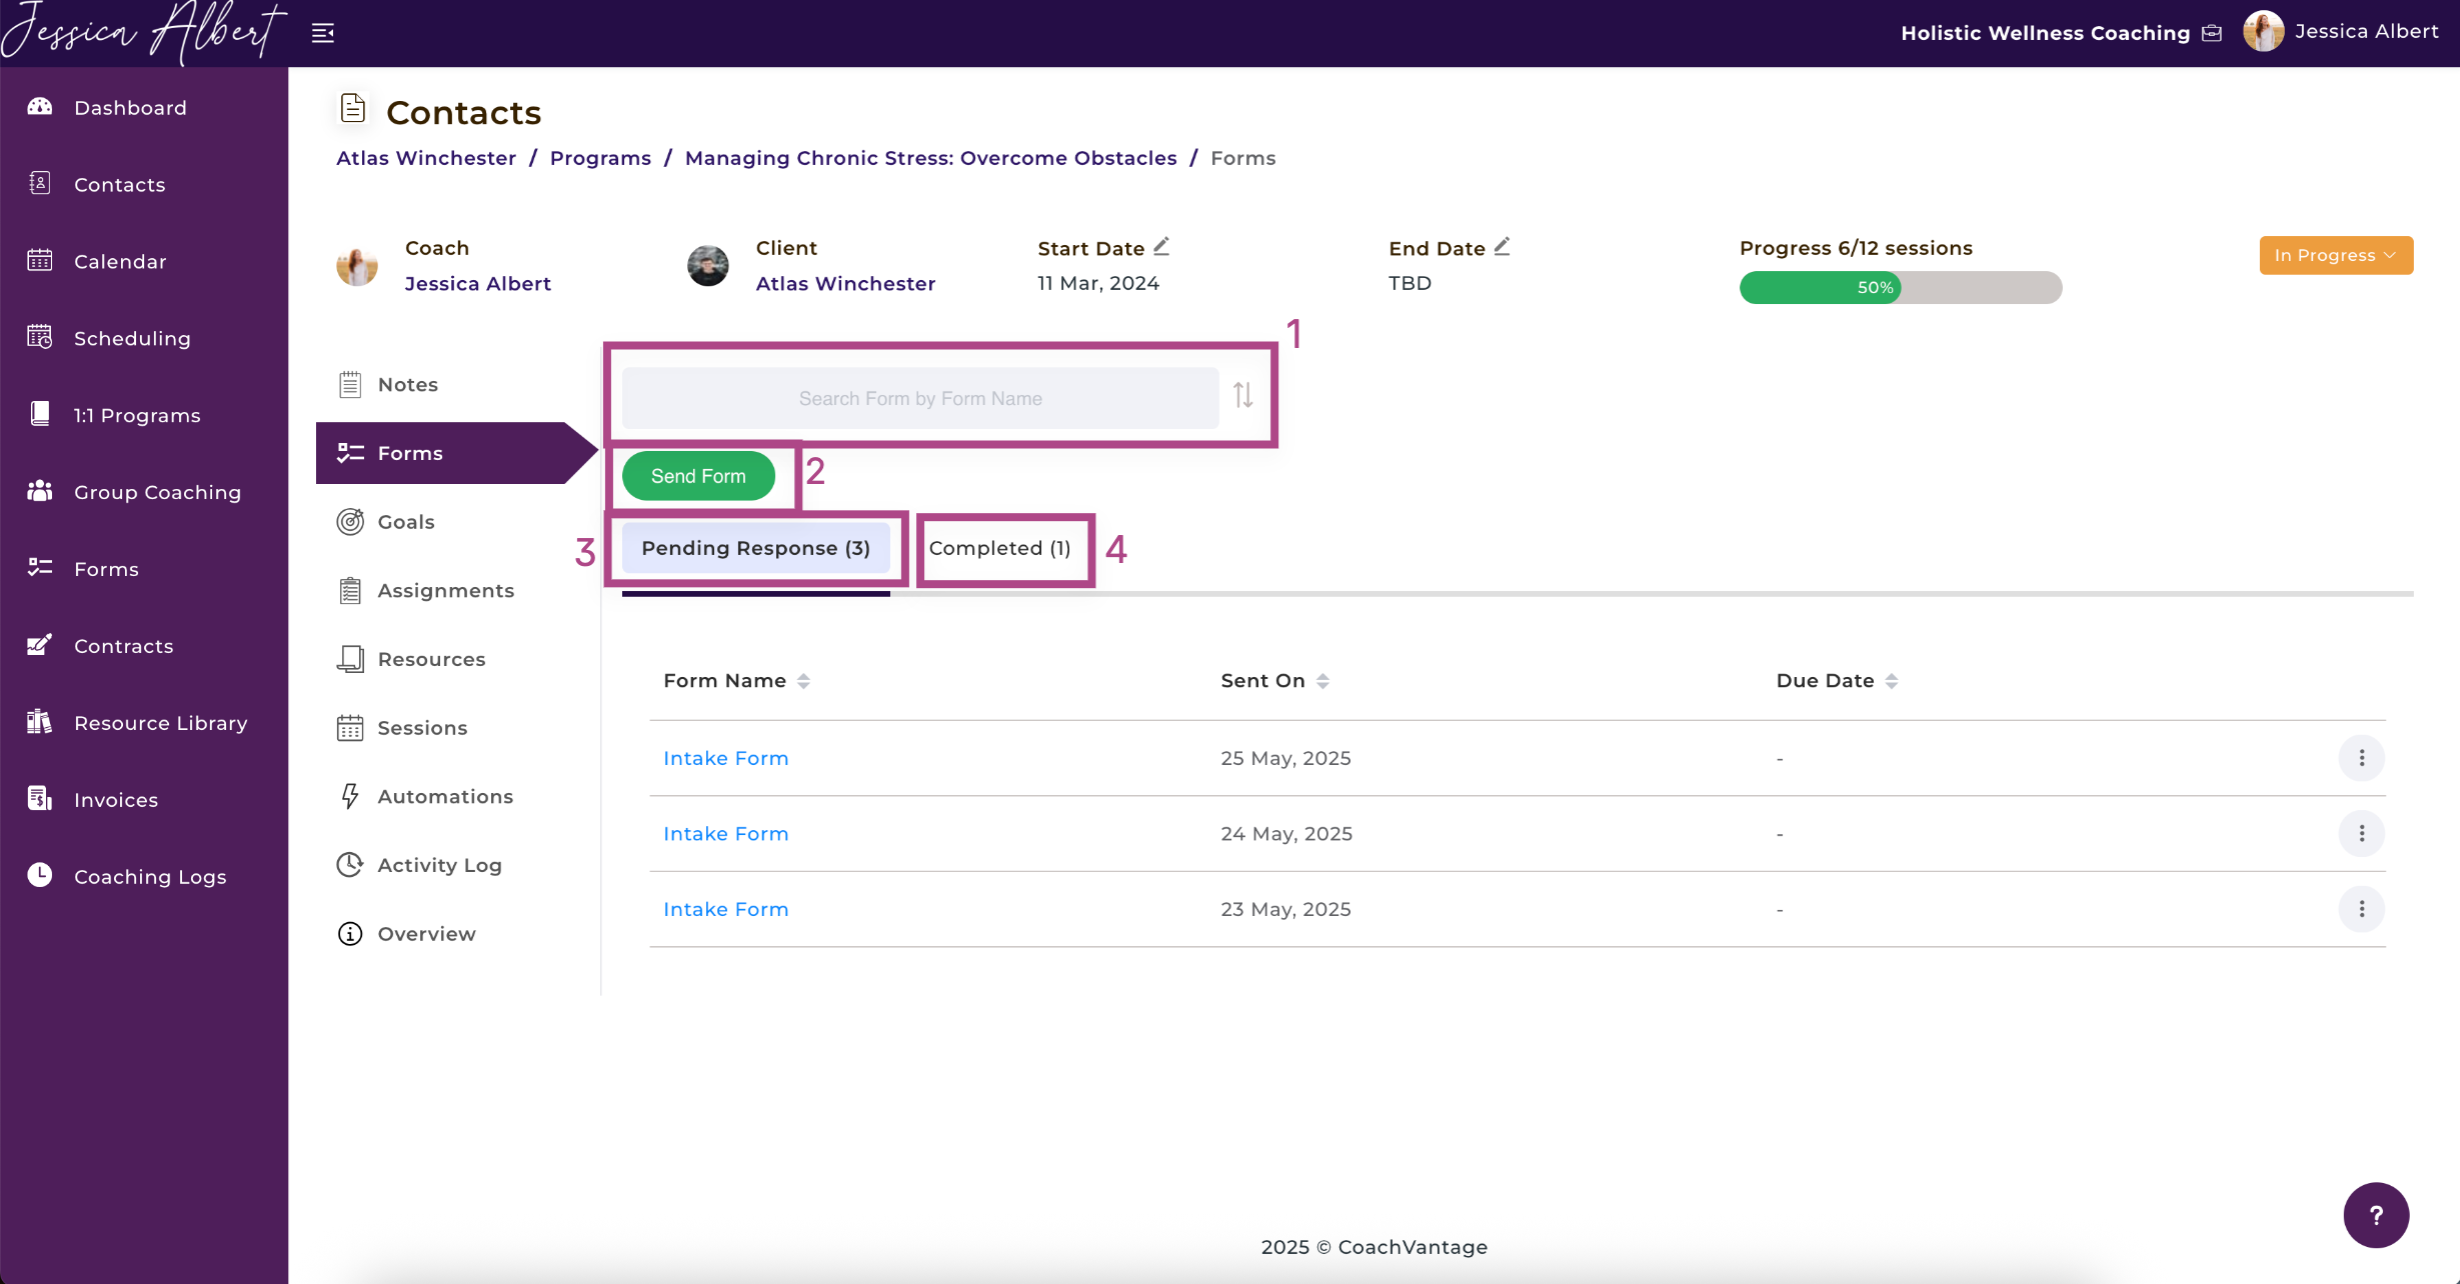
You'll see:
1. Search Bar & Sort Icon
If you have difficulties locating a specific form, use the search bar and type in the name of form you're looking for.
Alternatively, you can sort forms by alphabetical order or the recency of the forms.
2. Send Form Button
You can send forms to a client for this specific coaching program by clicking on the Send Form button.
Note: You should first create a Form before being able to send Forms to clients.
3. Pending Response Tab
This lists the forms that you've sent to the client and is pending responses from the client.
4. Completed Tab
This lists the forms that have been responded by your client.
You can refer to these articles to learn more about forms:
6. Setting Goals 🥅
Setting goals and tracking goal achievements is a good yard stick for measuring the progress that your client is making throughout the coaching journey. Setting short-term, mid-term and long-term goals for clients is right at your fingertips.
NOTE: Goals can only be shared with clients if they have an Active Client Portal.
Creating Goals
To create a Goal:
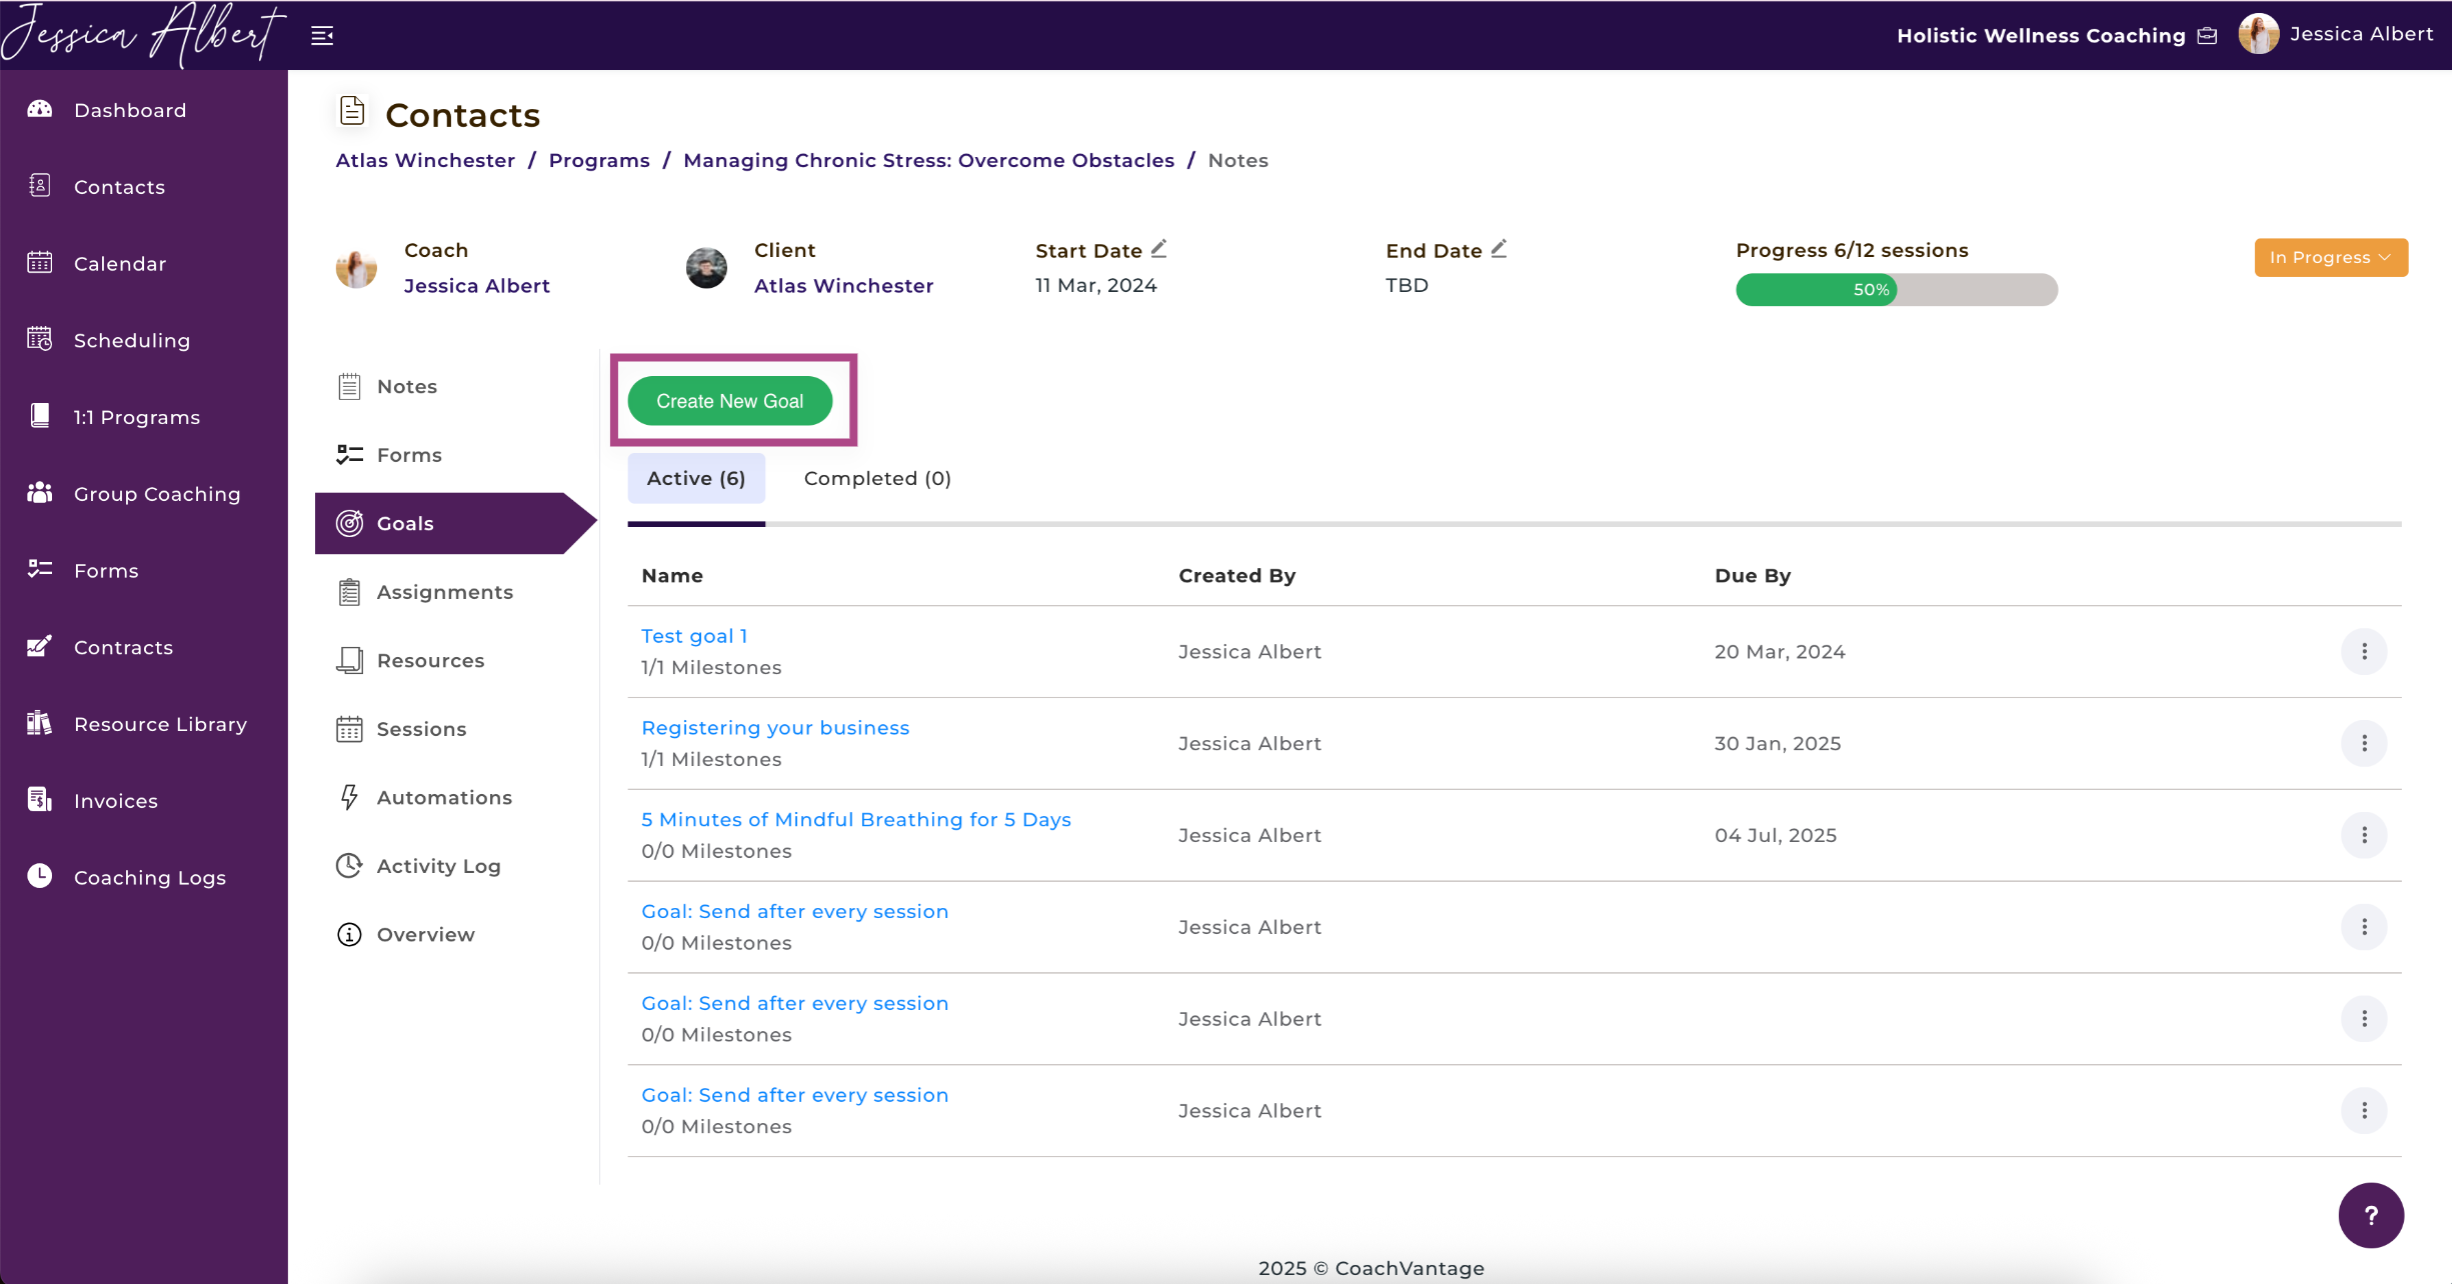
- Click on the Goals ribbon in the sub-menu to open the Goals page.
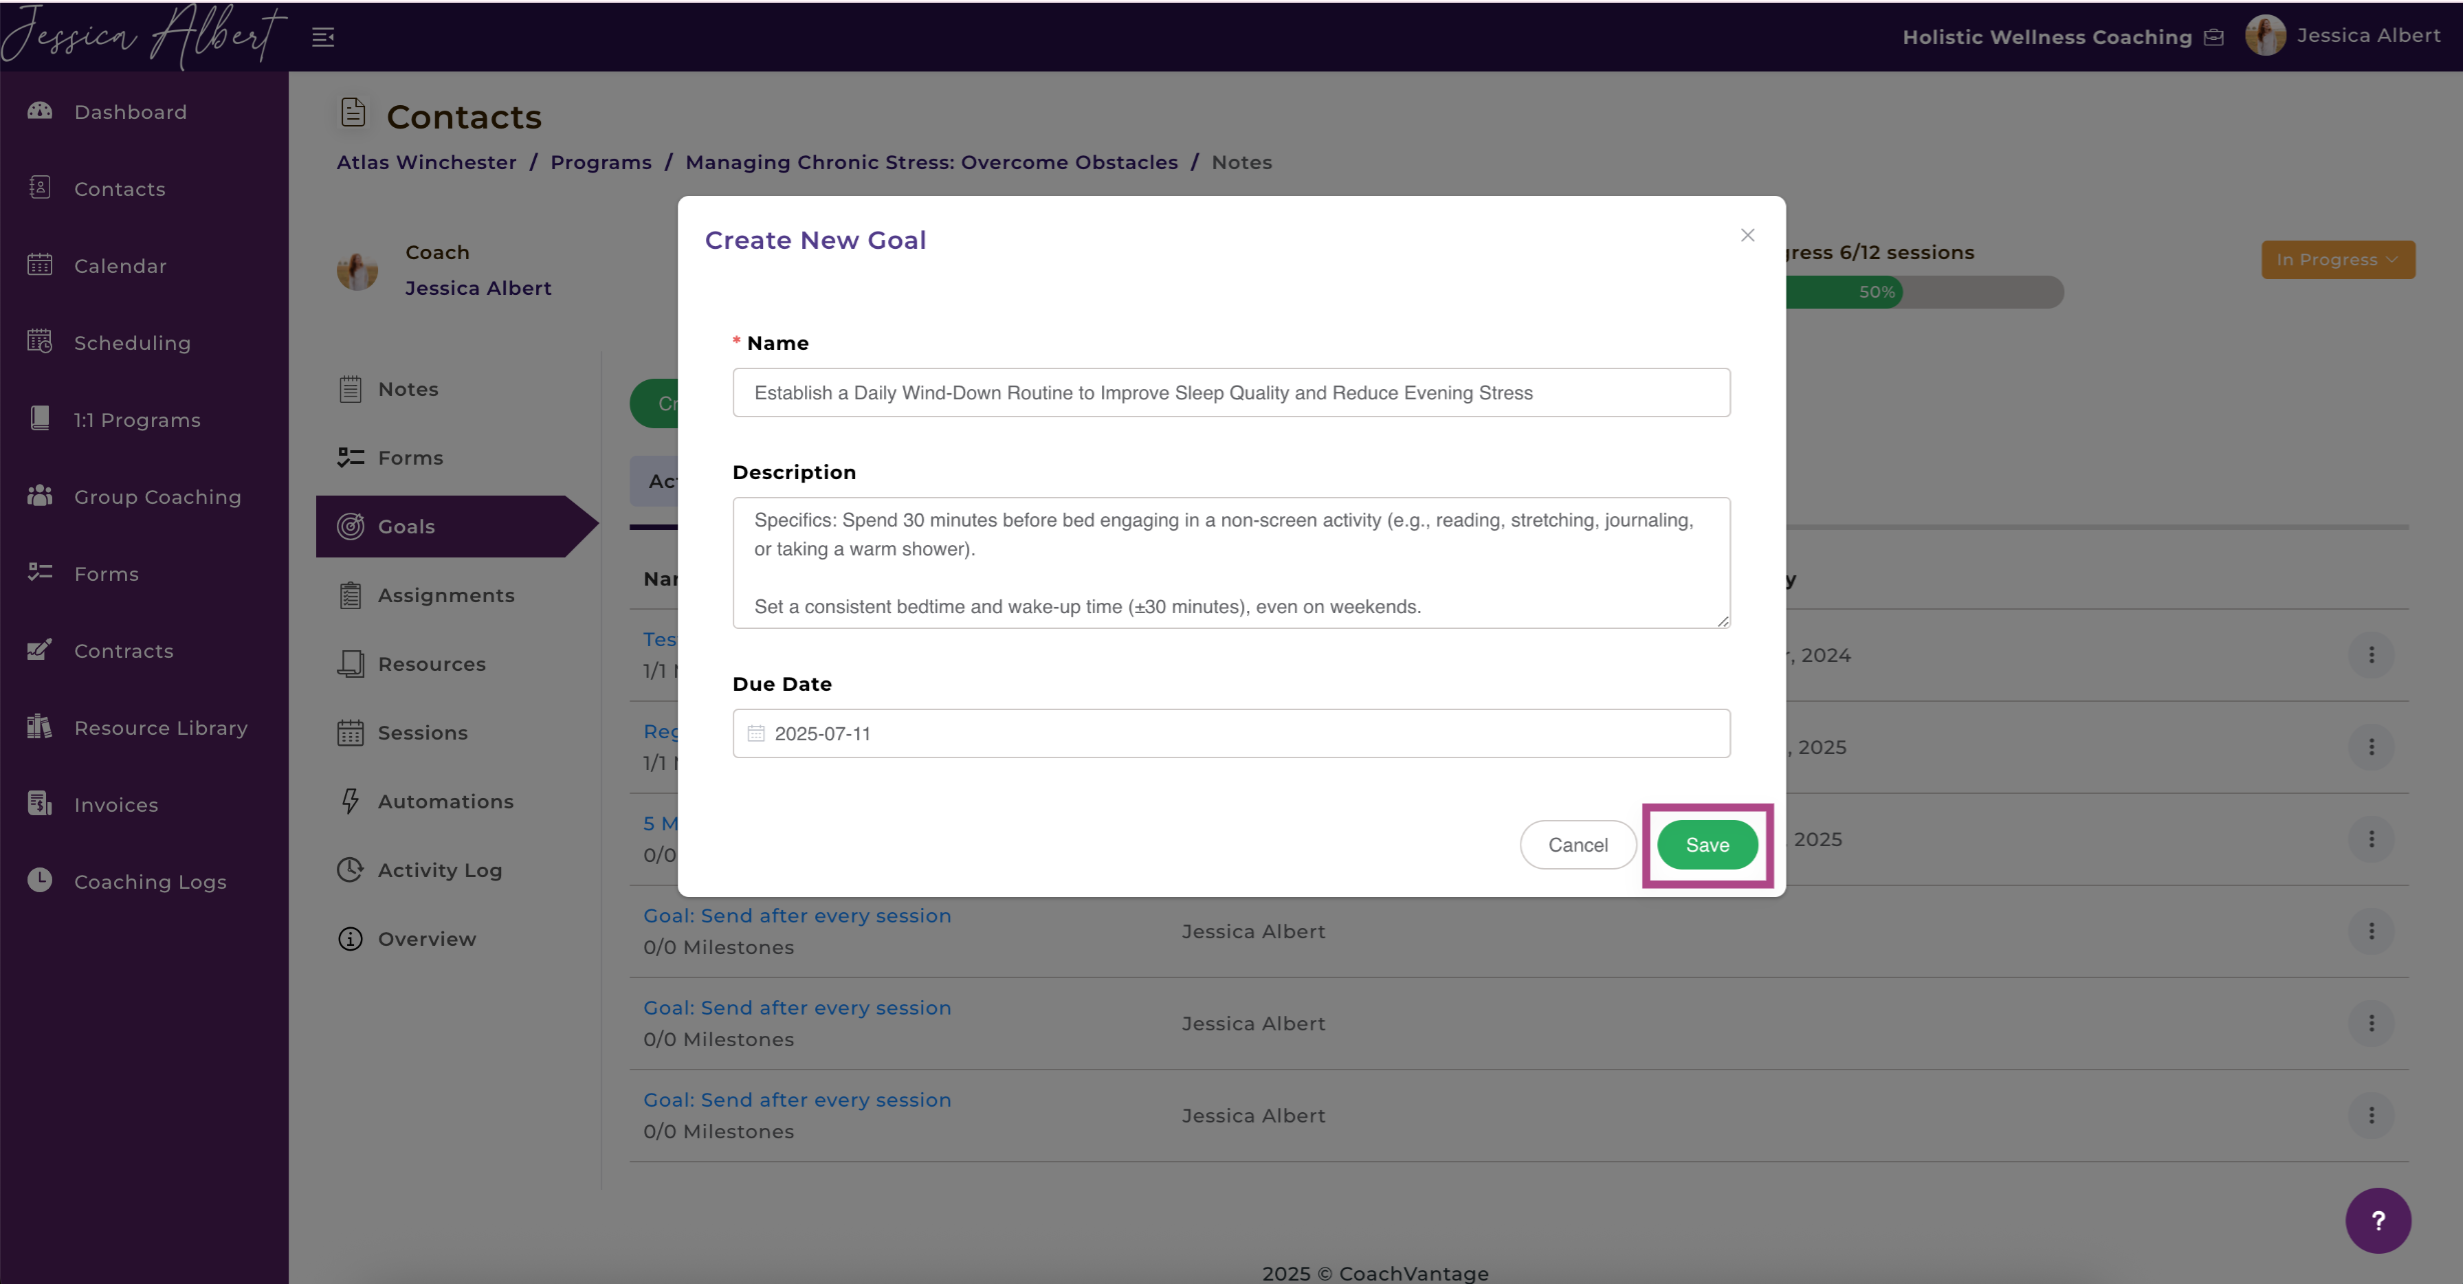
- Click the Create New Goal button to set up a new goal for the client.
- Enter Name, Description (optional) and Due Date (optional) of the goal.
- Click Save.
Once a Goal is created, it will be automatically displayed in both the client’s and coach’s program management page, on the Active Goals tab.
Your clients can also create their own goals in the Client Portal. The steps for them to create a Goal are the same as the instructions listed above.
Note: An Active Goal means that the goal has been created but has not yet started or is in progress and has not yet been marked as completed.
Tip: You can easily view all clients' pending goals on the Dashboard. Refer to the Dashboard article to learn more.
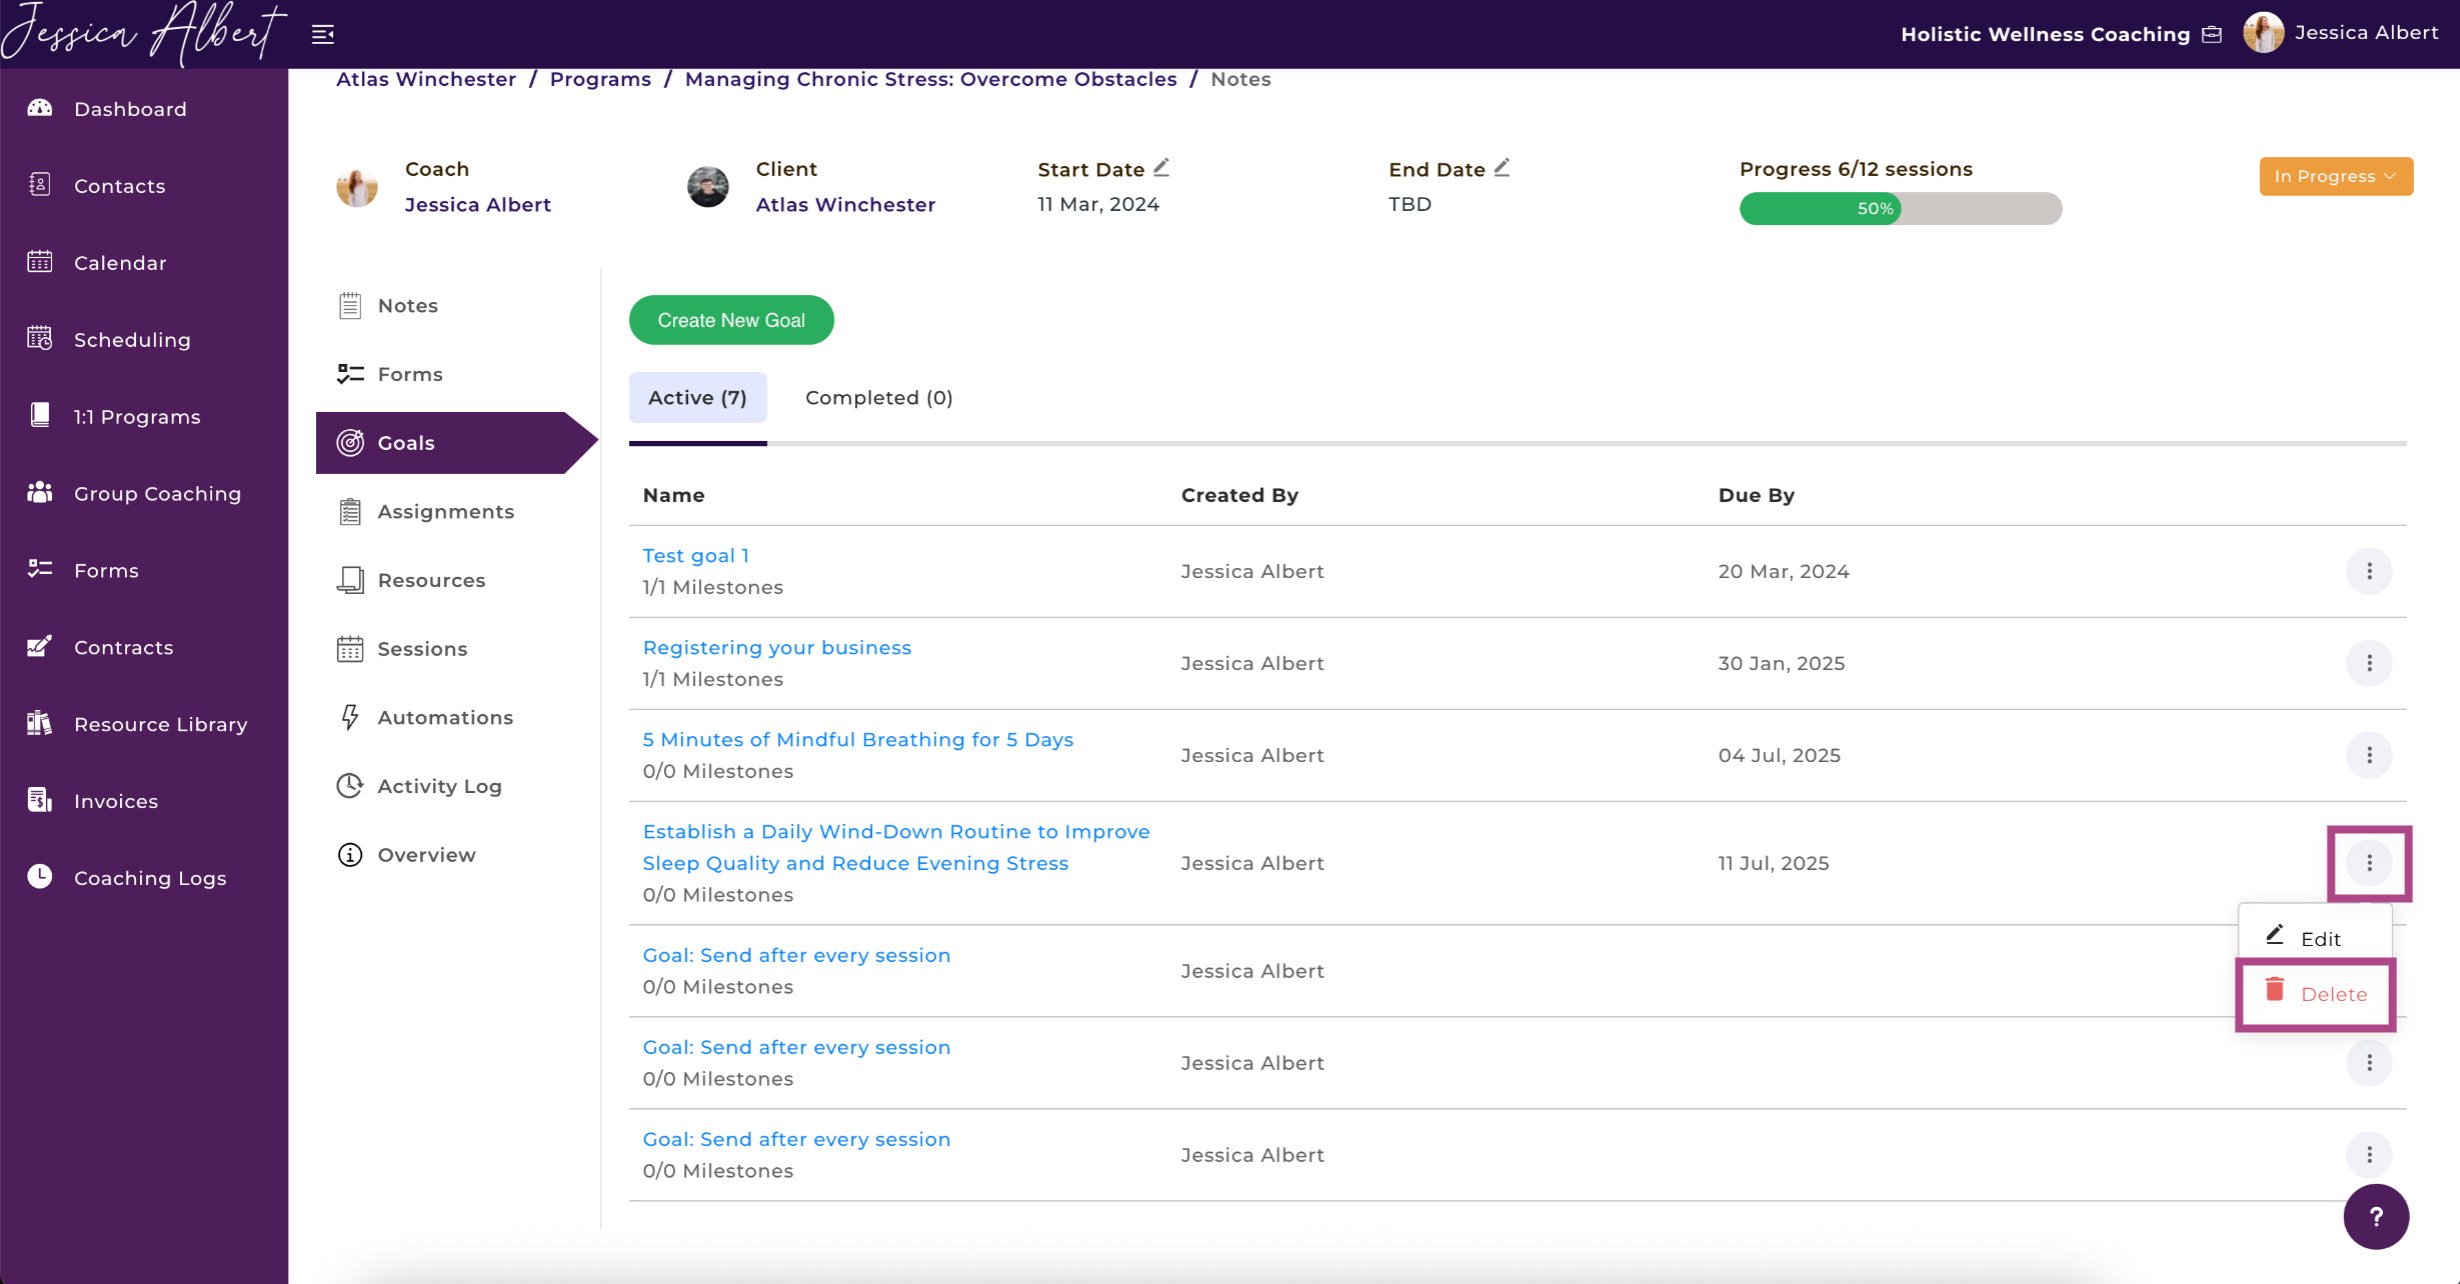
Editing & Deleting Goals
To edit or delete a goal:
- Click on the 3-dot button menu at the right hand side of the Goal and select Edit to open the Edit Goal window.
- You will be able to edit the Goal Name, Description, and Due Date of the goal.
- To delete a goal, click on the 3-dot button menu and select Delete.
When a goal is deleted, it will be automatically removed from the program management page of both coach and client.
When a goal is edited or deleted, automated email notifications will be sent to you and your client.
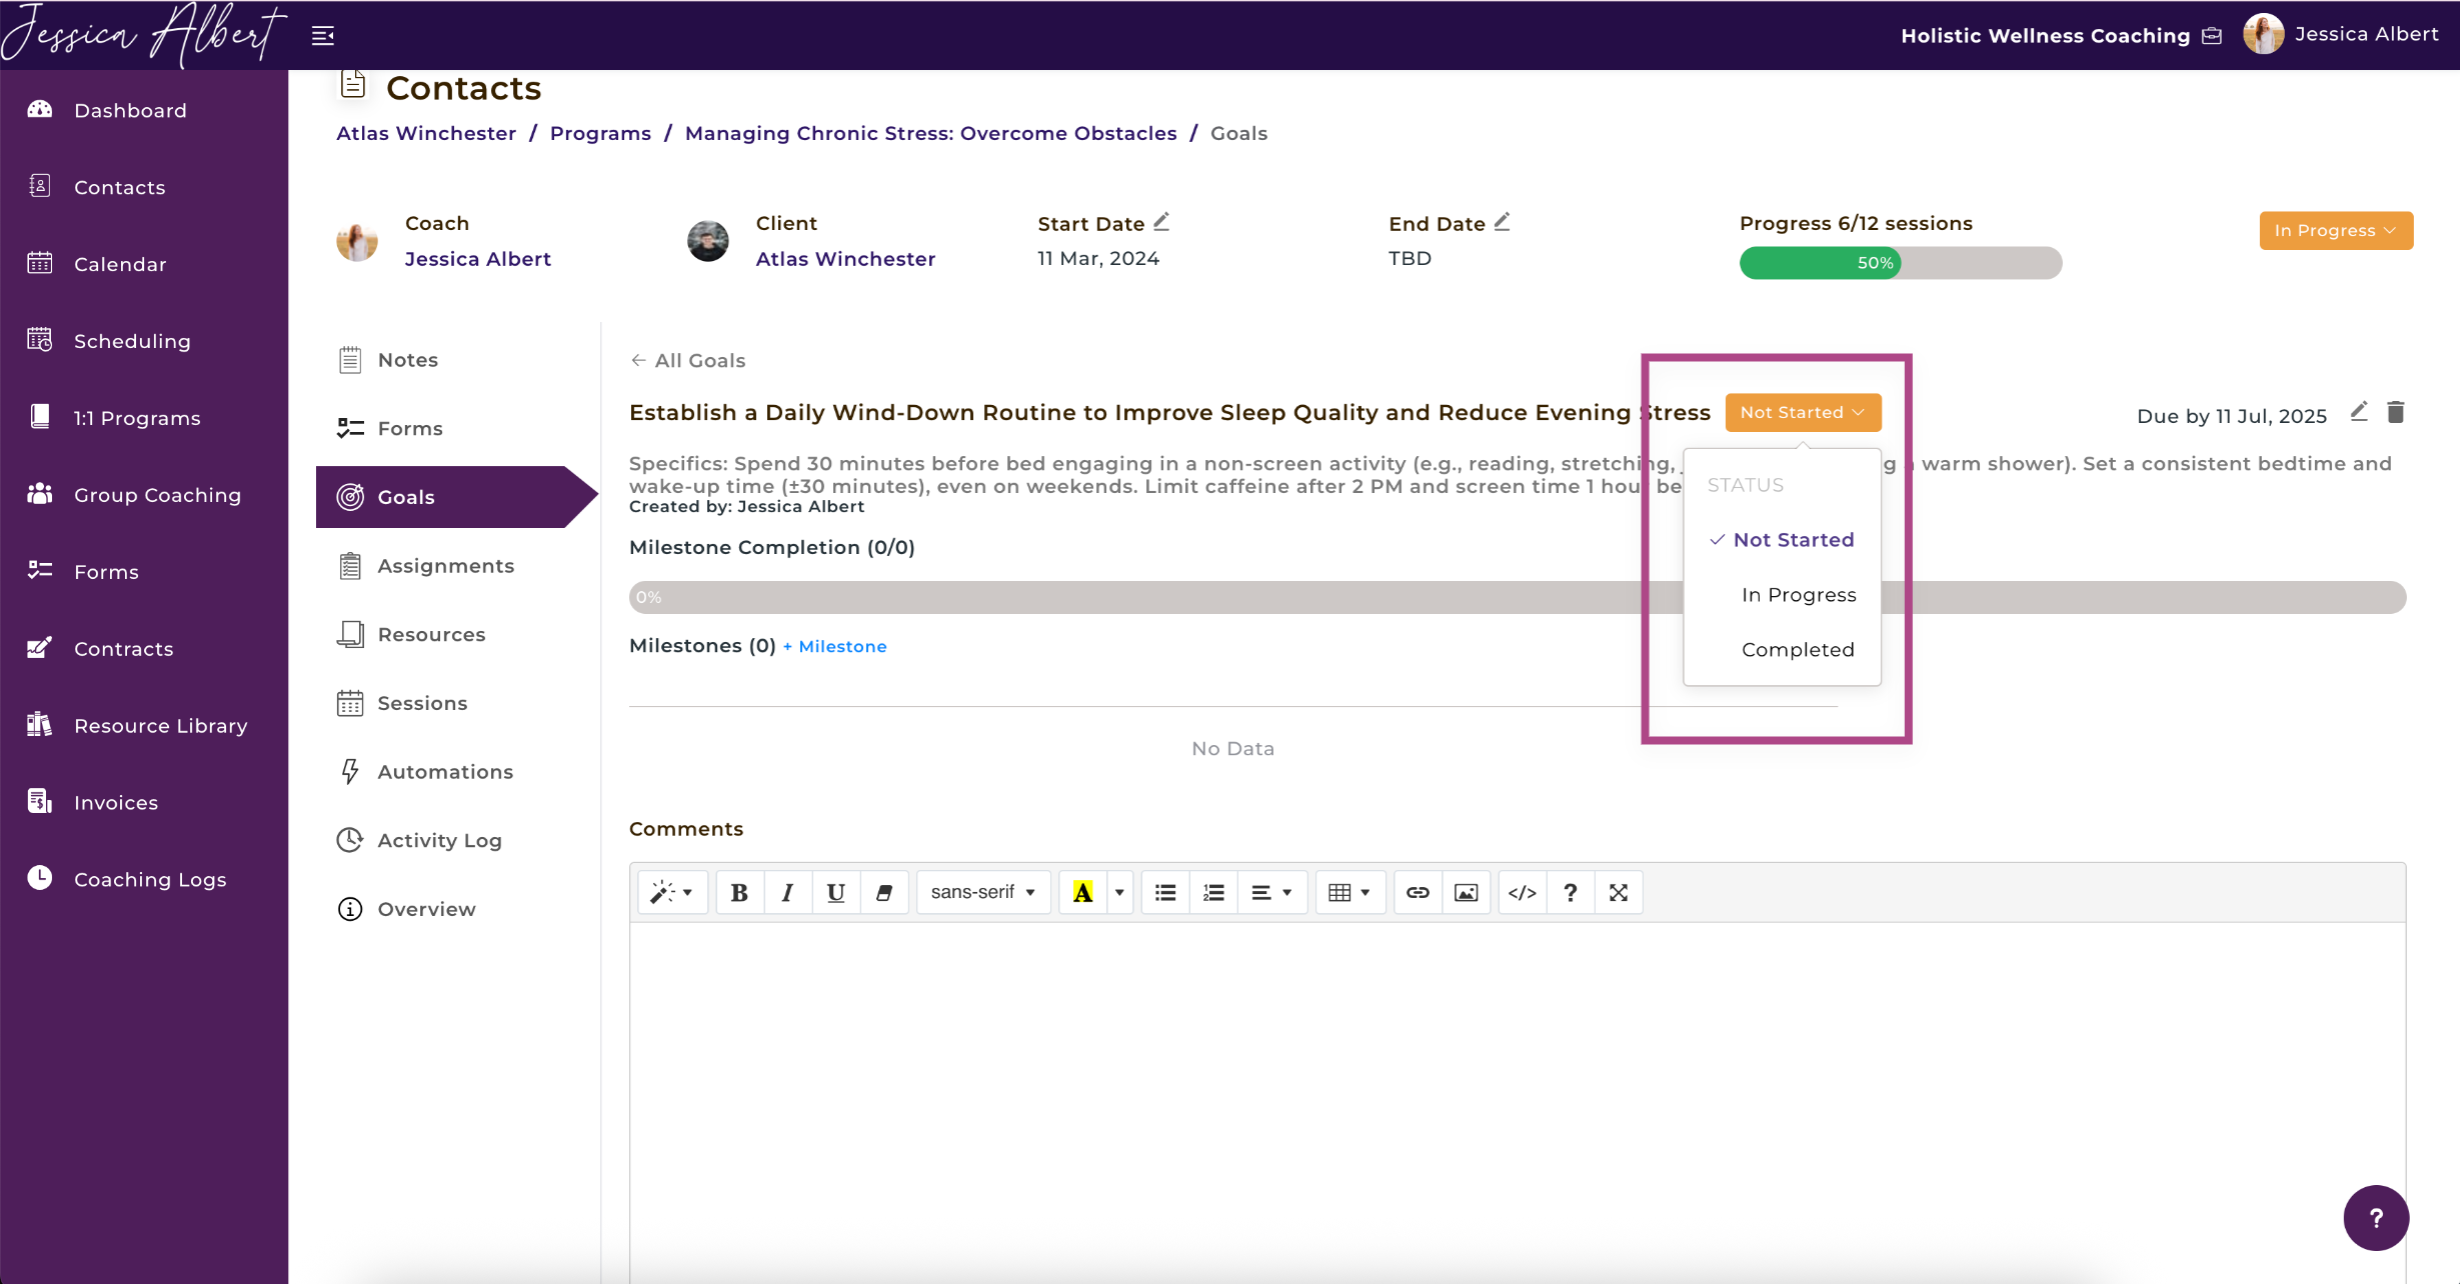
Changing Goal Status
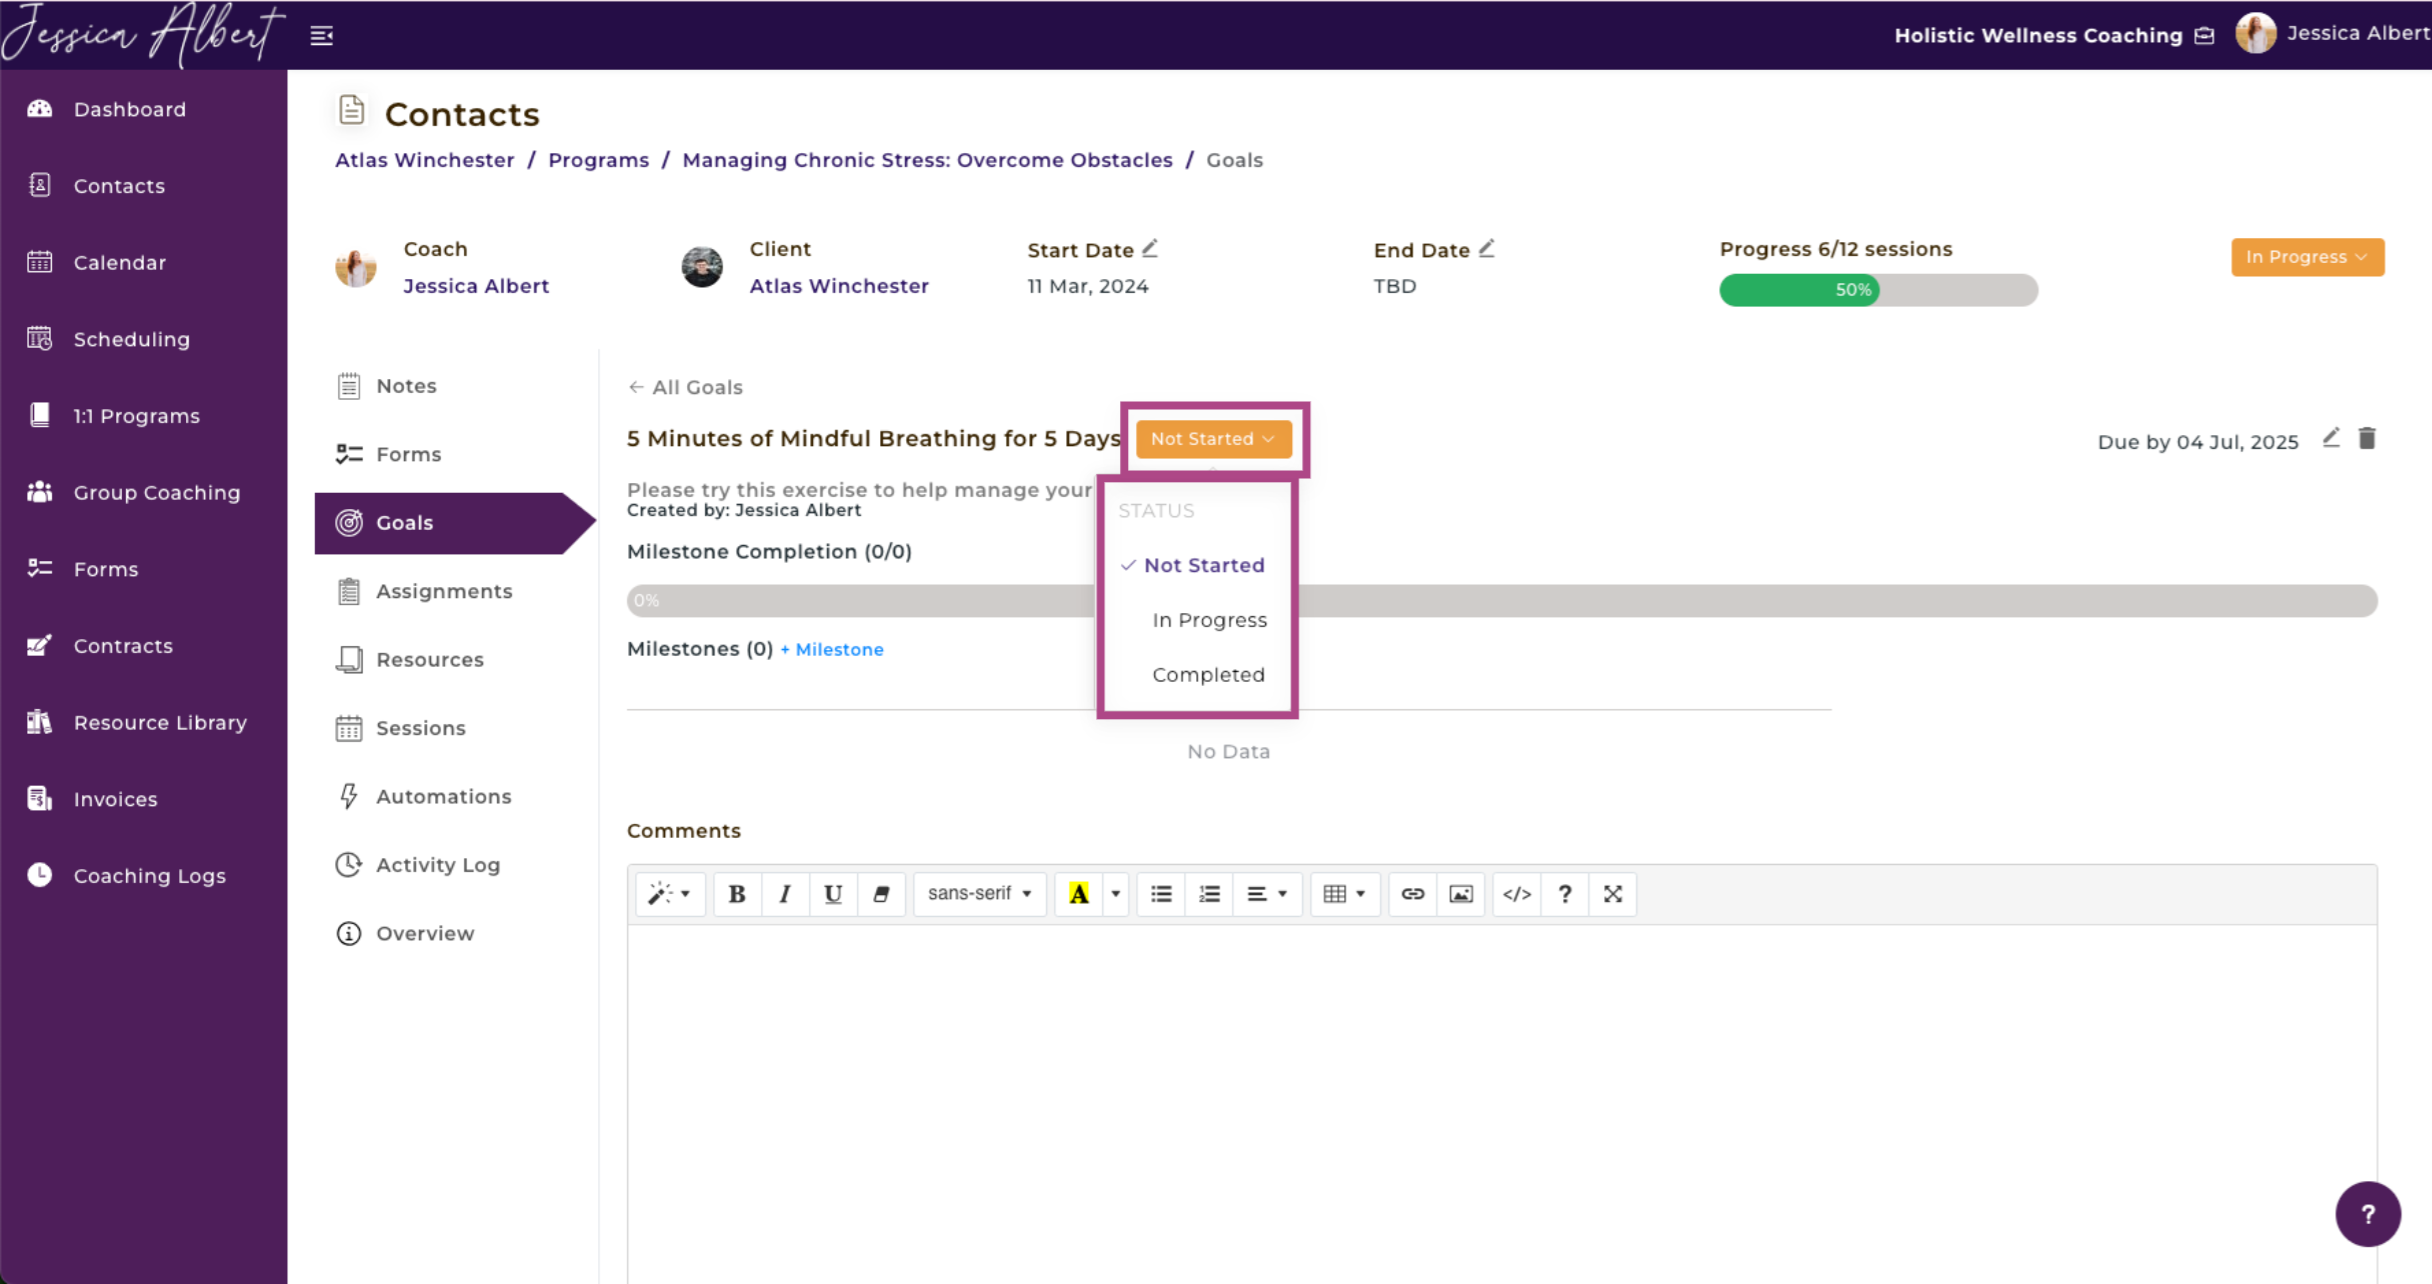
When a goal is first created, its default status will be Not Started. You or your client can easily change the status of a goal to In Progress or Completed, as the client progresses through the goal.
To change a goal status:
- Once a goal has been created, simply click on the Goal Name to view the goal details page.
- The Goal Status can be manually changed from the dropdown button by selecting one of these status options: Not Started, In Progress or Completed.
Automated email notifications will be sent to you and your clients whenever a goal status has been changed.
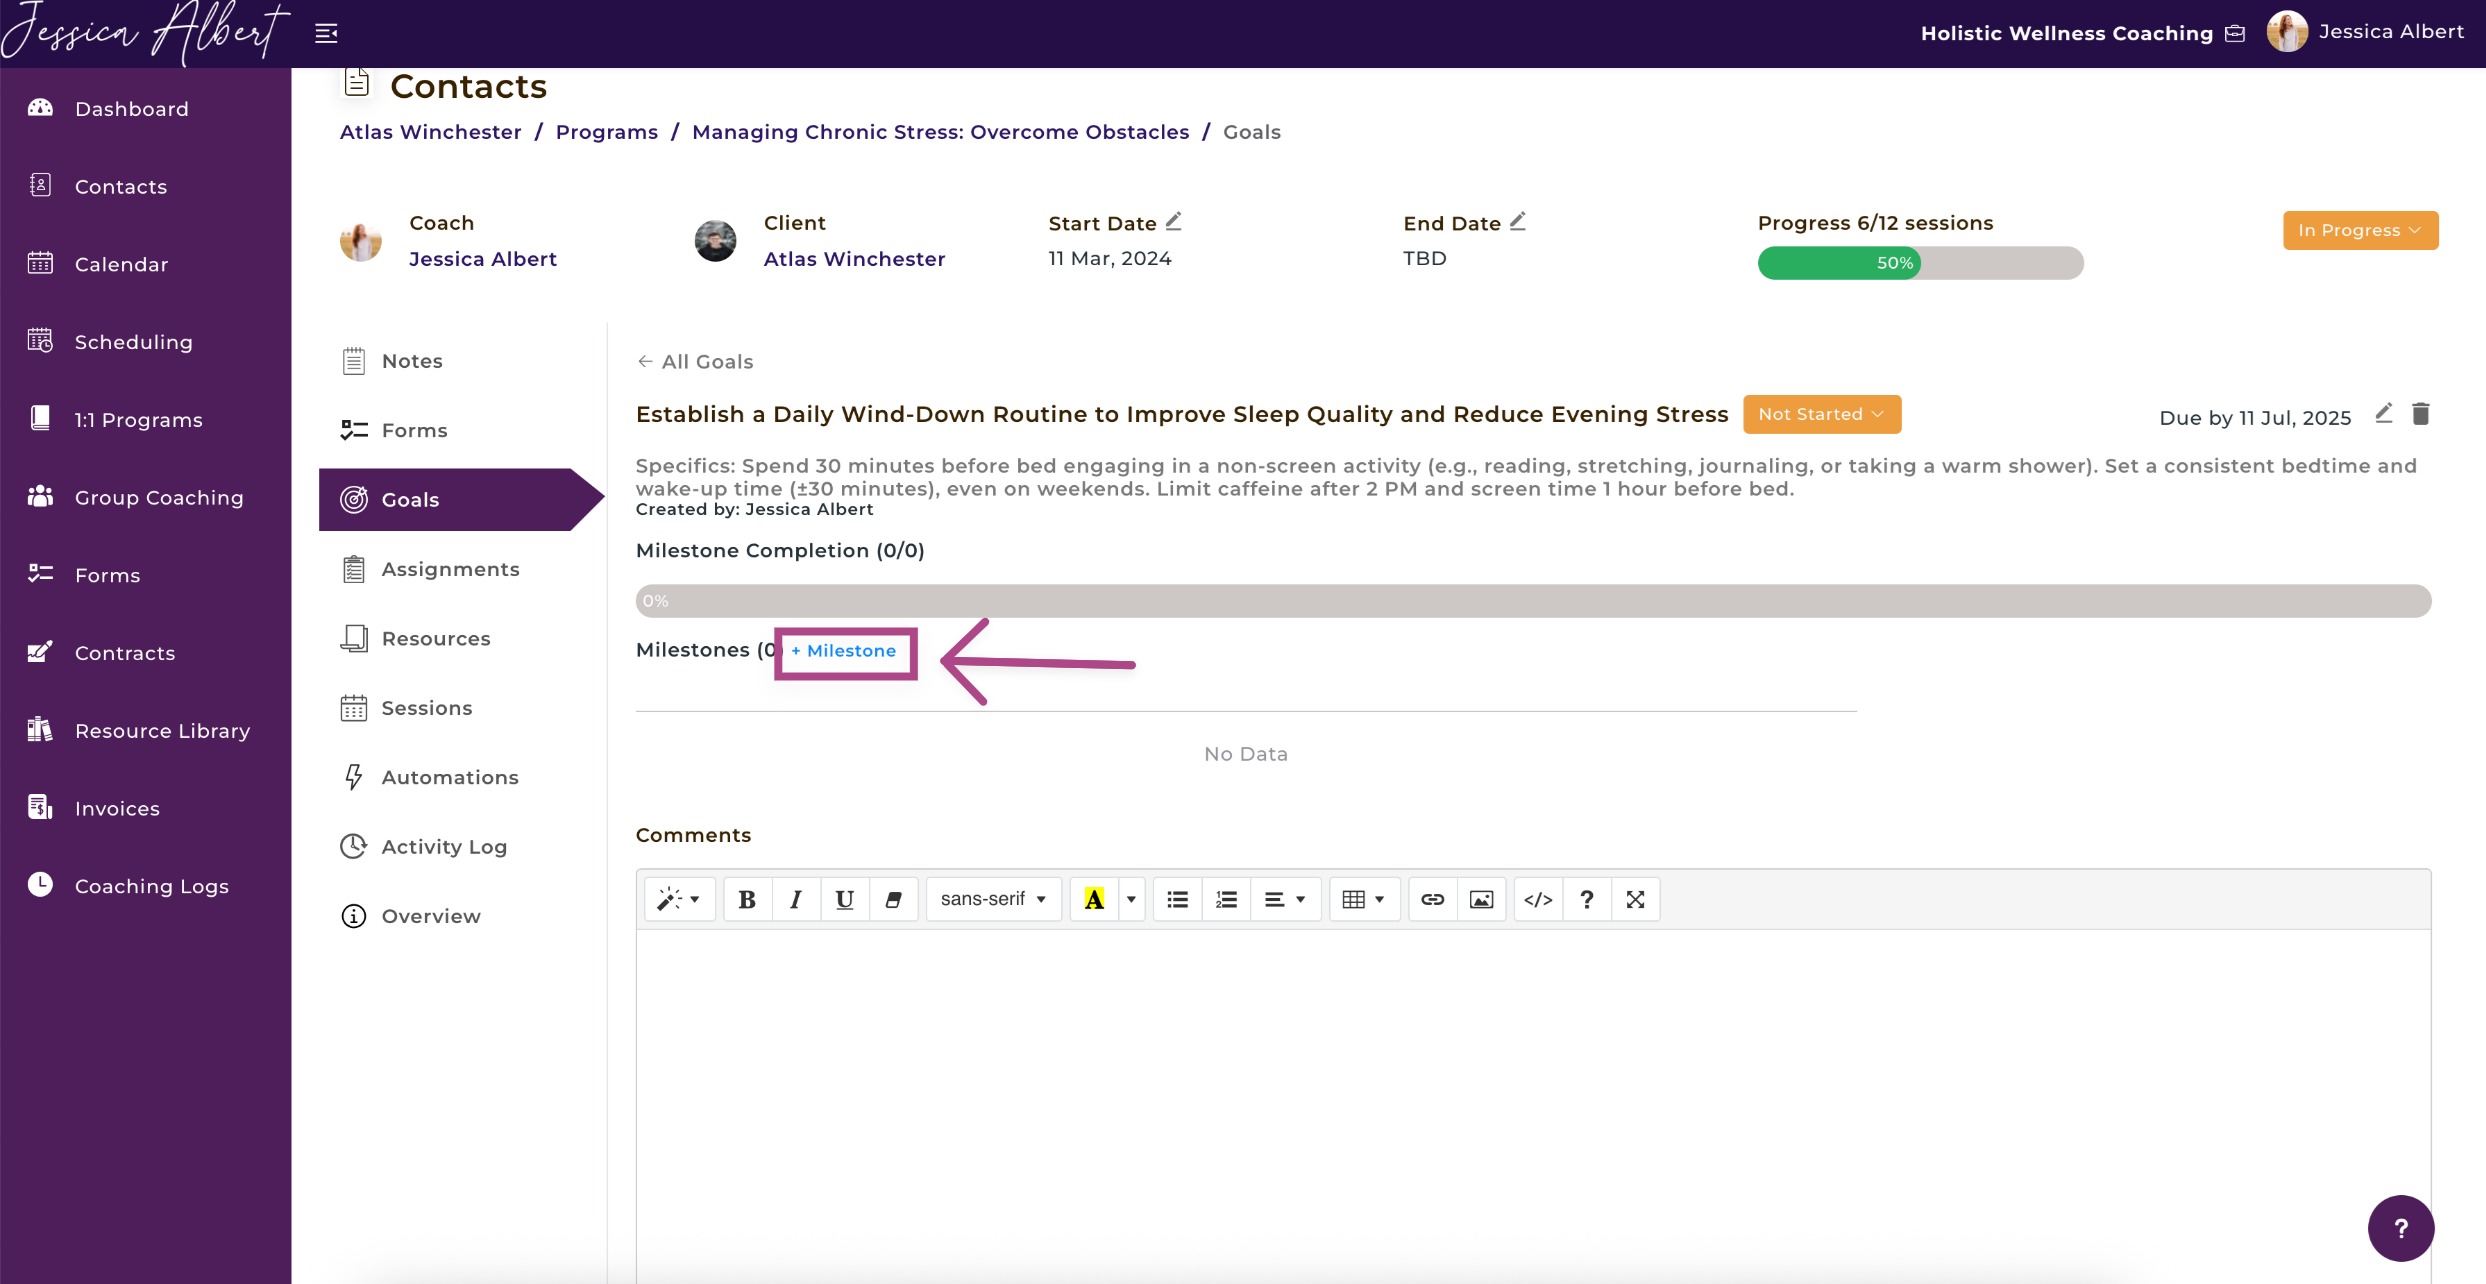
Adding Milestones 📍
You can optionally add milestones to goals. This allows you to break down a high level goal into smaller steps (or milestones) that the client needs to complete before the high level goal itself can be marked as 'Completed'.
Create a new Milestone by clicking +Milestone. A New Milestone window will open to add the Name and Due Date (optional) for the Milestone.
Select the pencil icon to edit a milestone or click the trashcan icon to delete it.
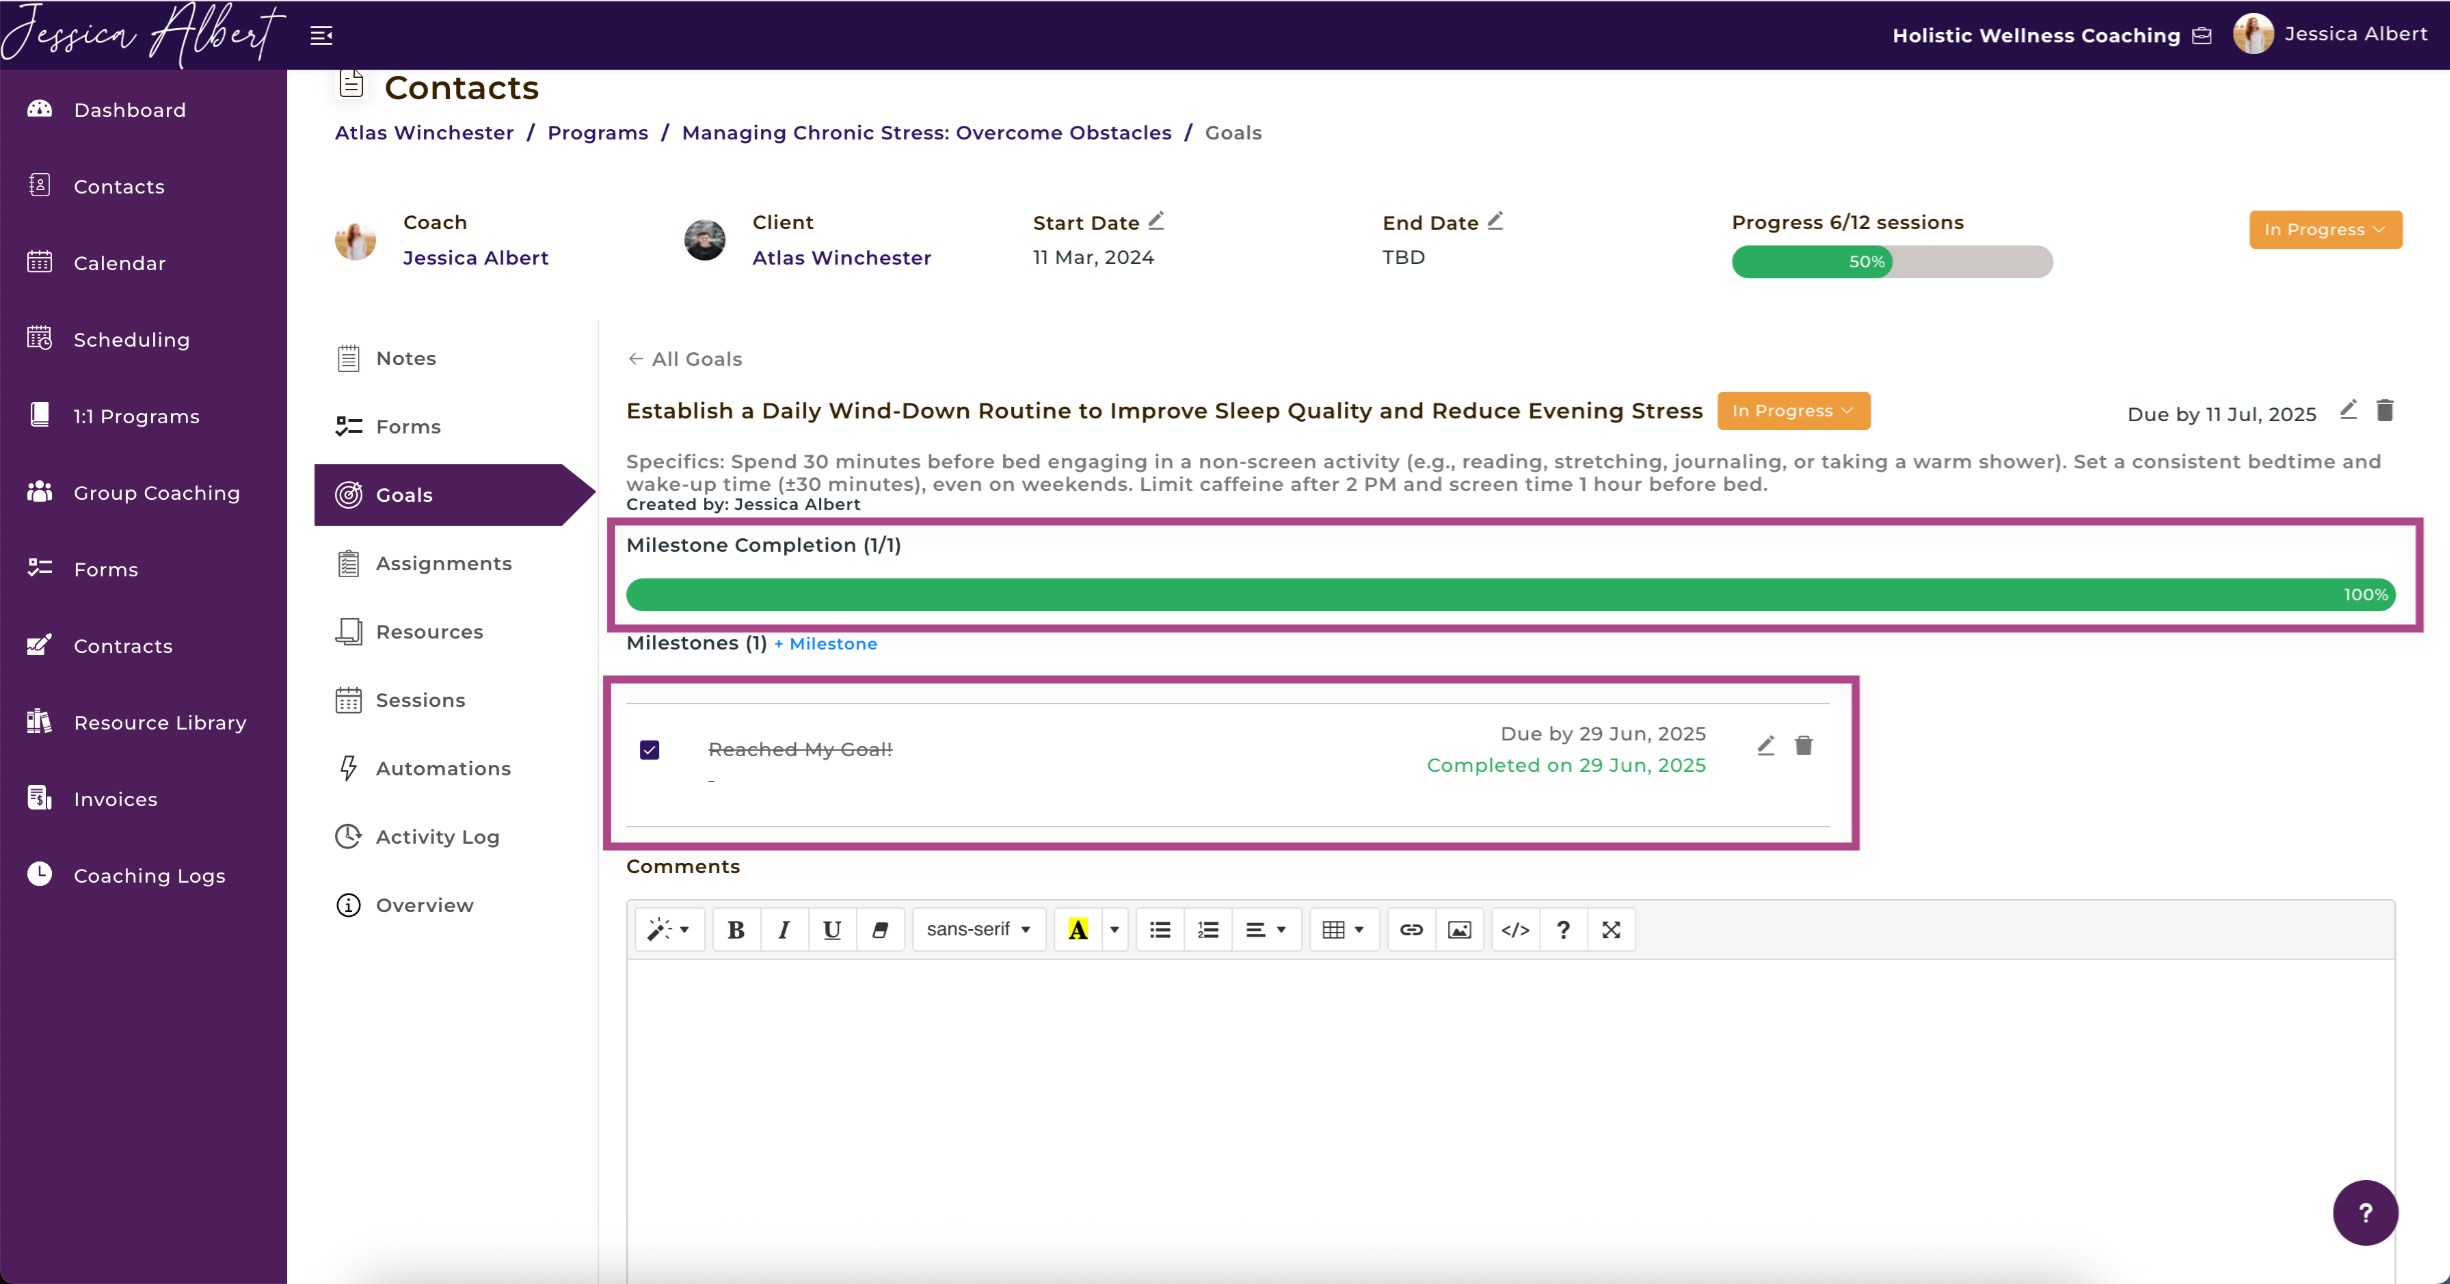
To mark a Milestone as completed, simply check the checkbox on the left-side of the Milestone.
As milestones get checked off as Completed, the milestone completion bar progresses automatically and displays the percentage completion of all milestones.
If you wish to mark a milestone as Not Completed, you can simply uncheck the checkbox by clicking on it again. This will move the milestone progress bar back to reflect the new percentage completion of all milestones.
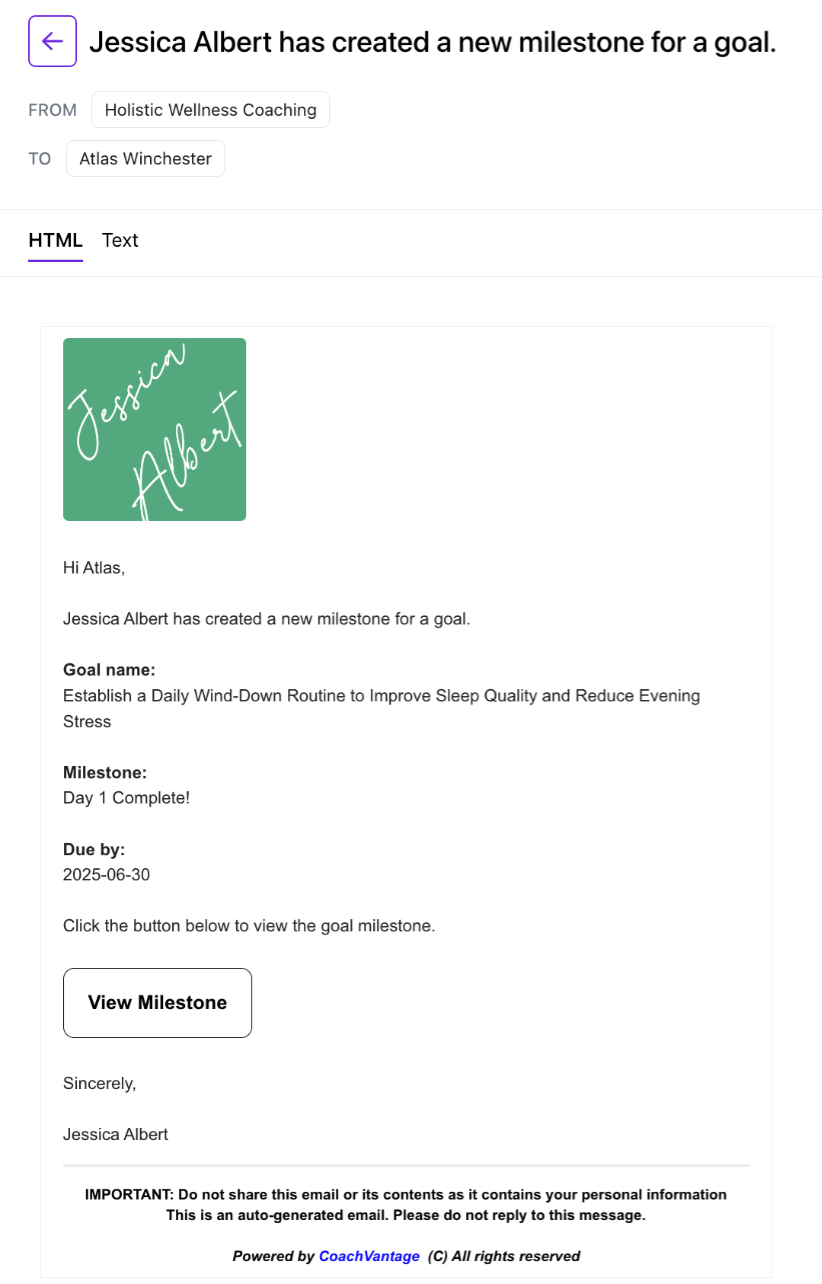
Your client will receive an automated email notification each time a new milestone is added. The image below depicts the email that they will receive.
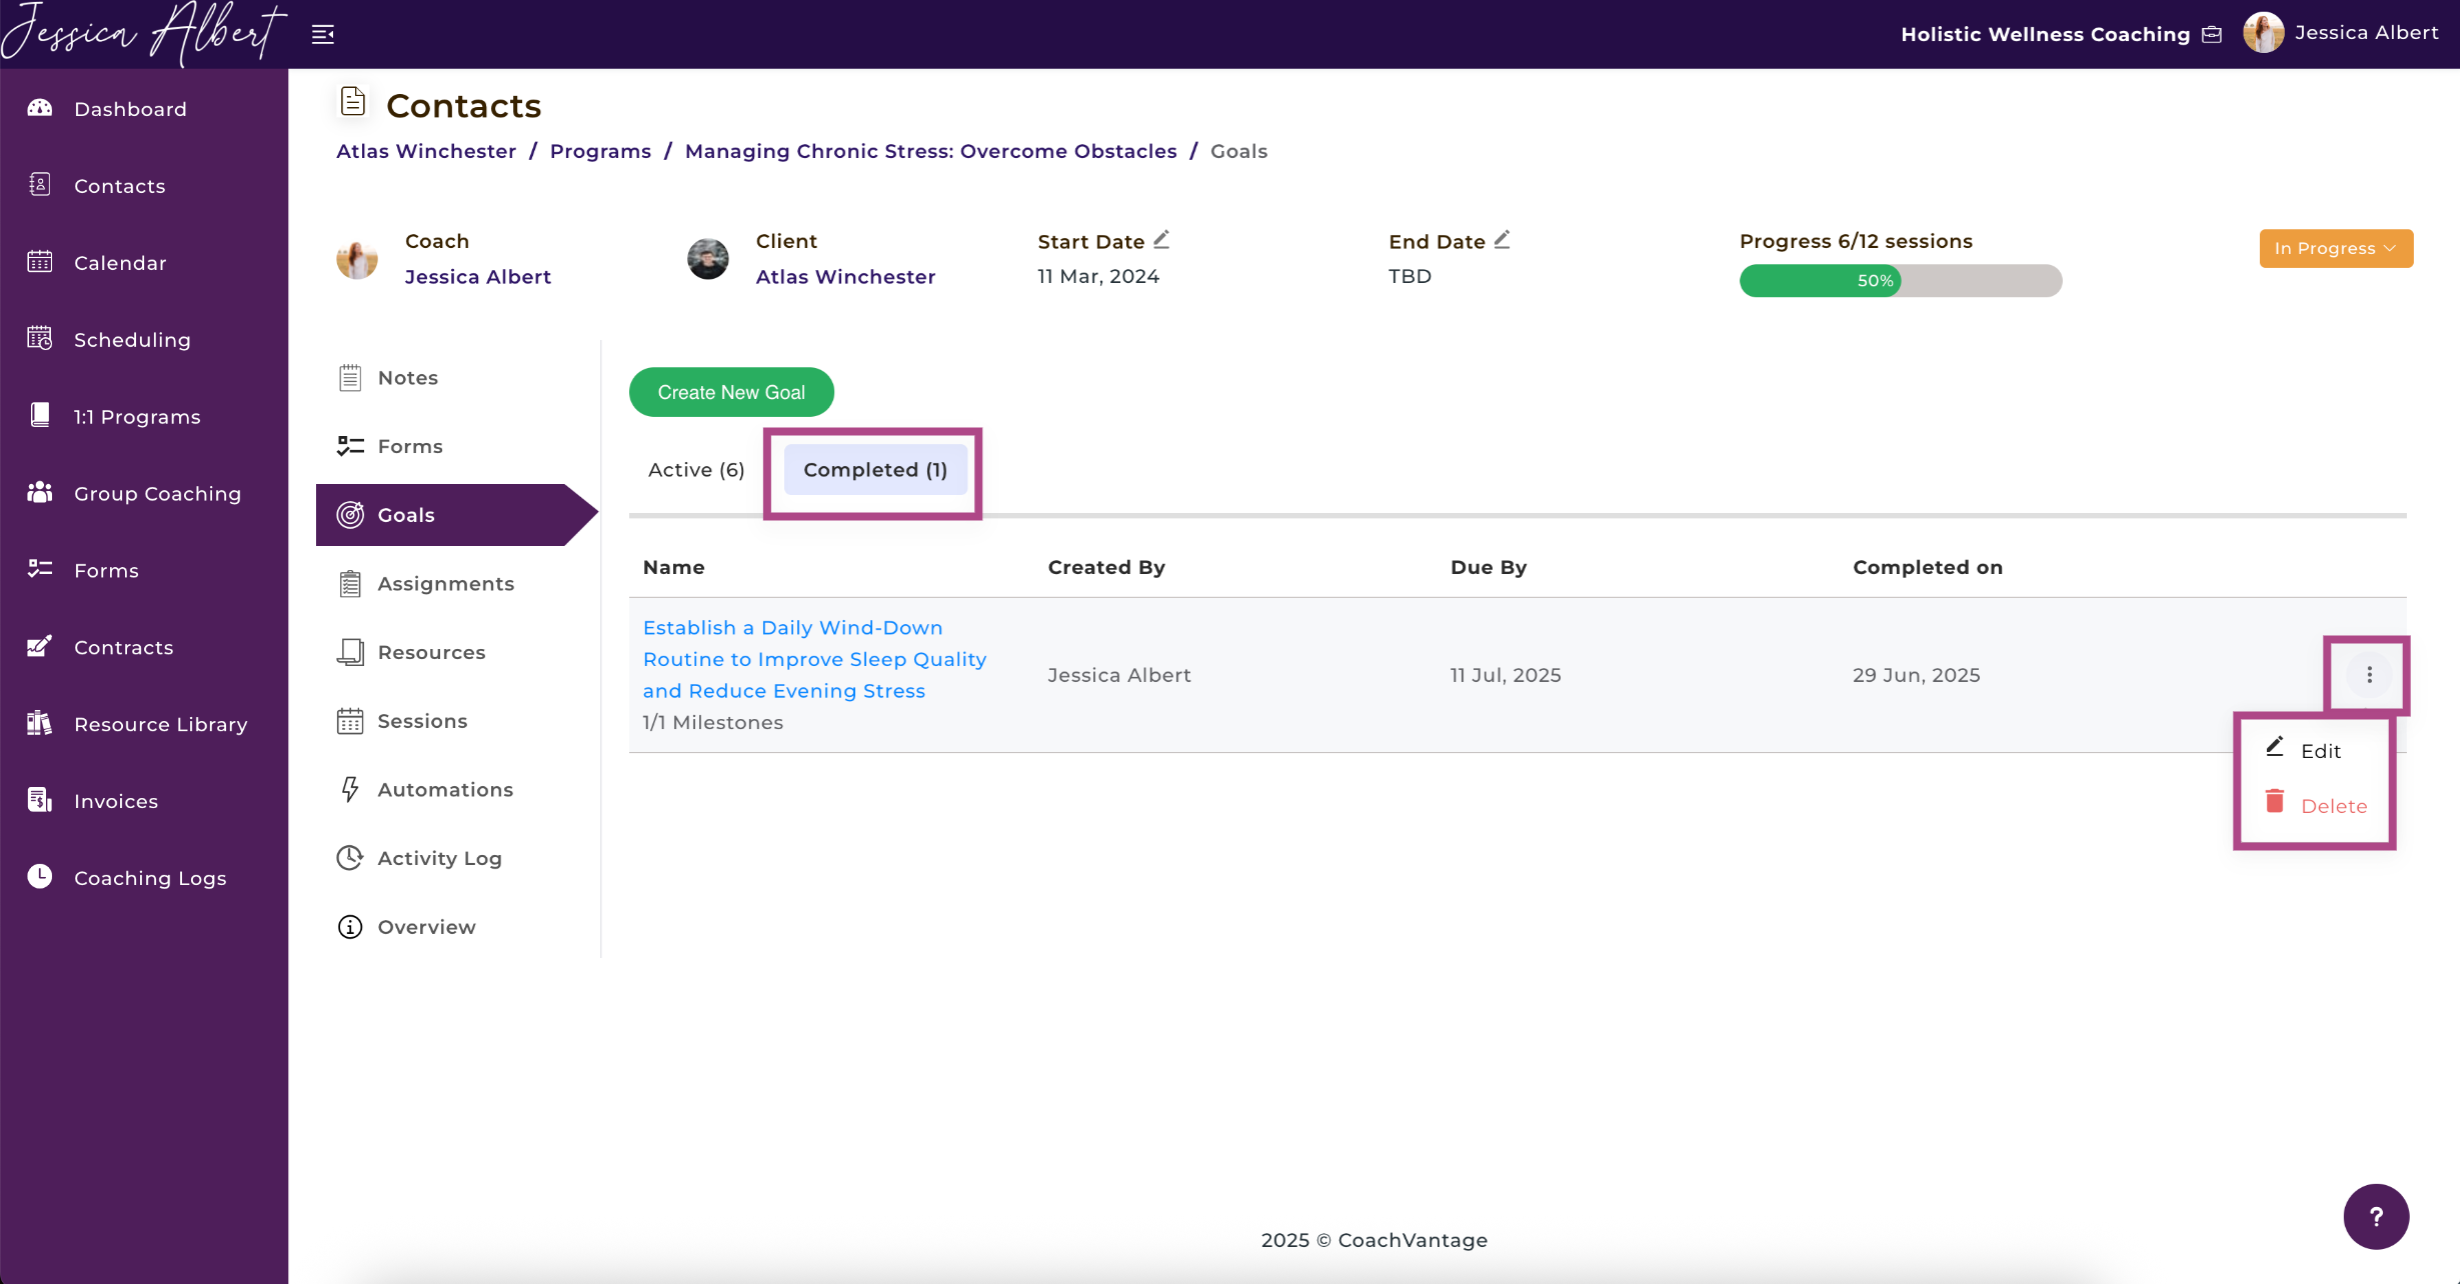
Completed Goals 🙌
When a goal is marked as completed by you or your client, it will be automatically moved to the Completed tab.
To view all completed goals, simply click on the Completed tab.
You have the ability to edit completed goals by clicking on the 3-dot button menu to edit or delete a completed goal.
7. Setting Assignments
At times, you may have coaching assignments for your clients that you wish for them to complete. For example, you may want them to watch a video, or reflect on a book extract or reading and provide their thoughts, etc.
An assignment is different from a goal in the following ways:
- Only the coach can create and send an assignment to the client and not vice versa.
- Files can be added to an assignment (unlike a goal where files cannot be attached when creating a goal).
NOTE: Assignments can only be sent to your clients if they have an Active Client Portal.
To Create an Assignment:
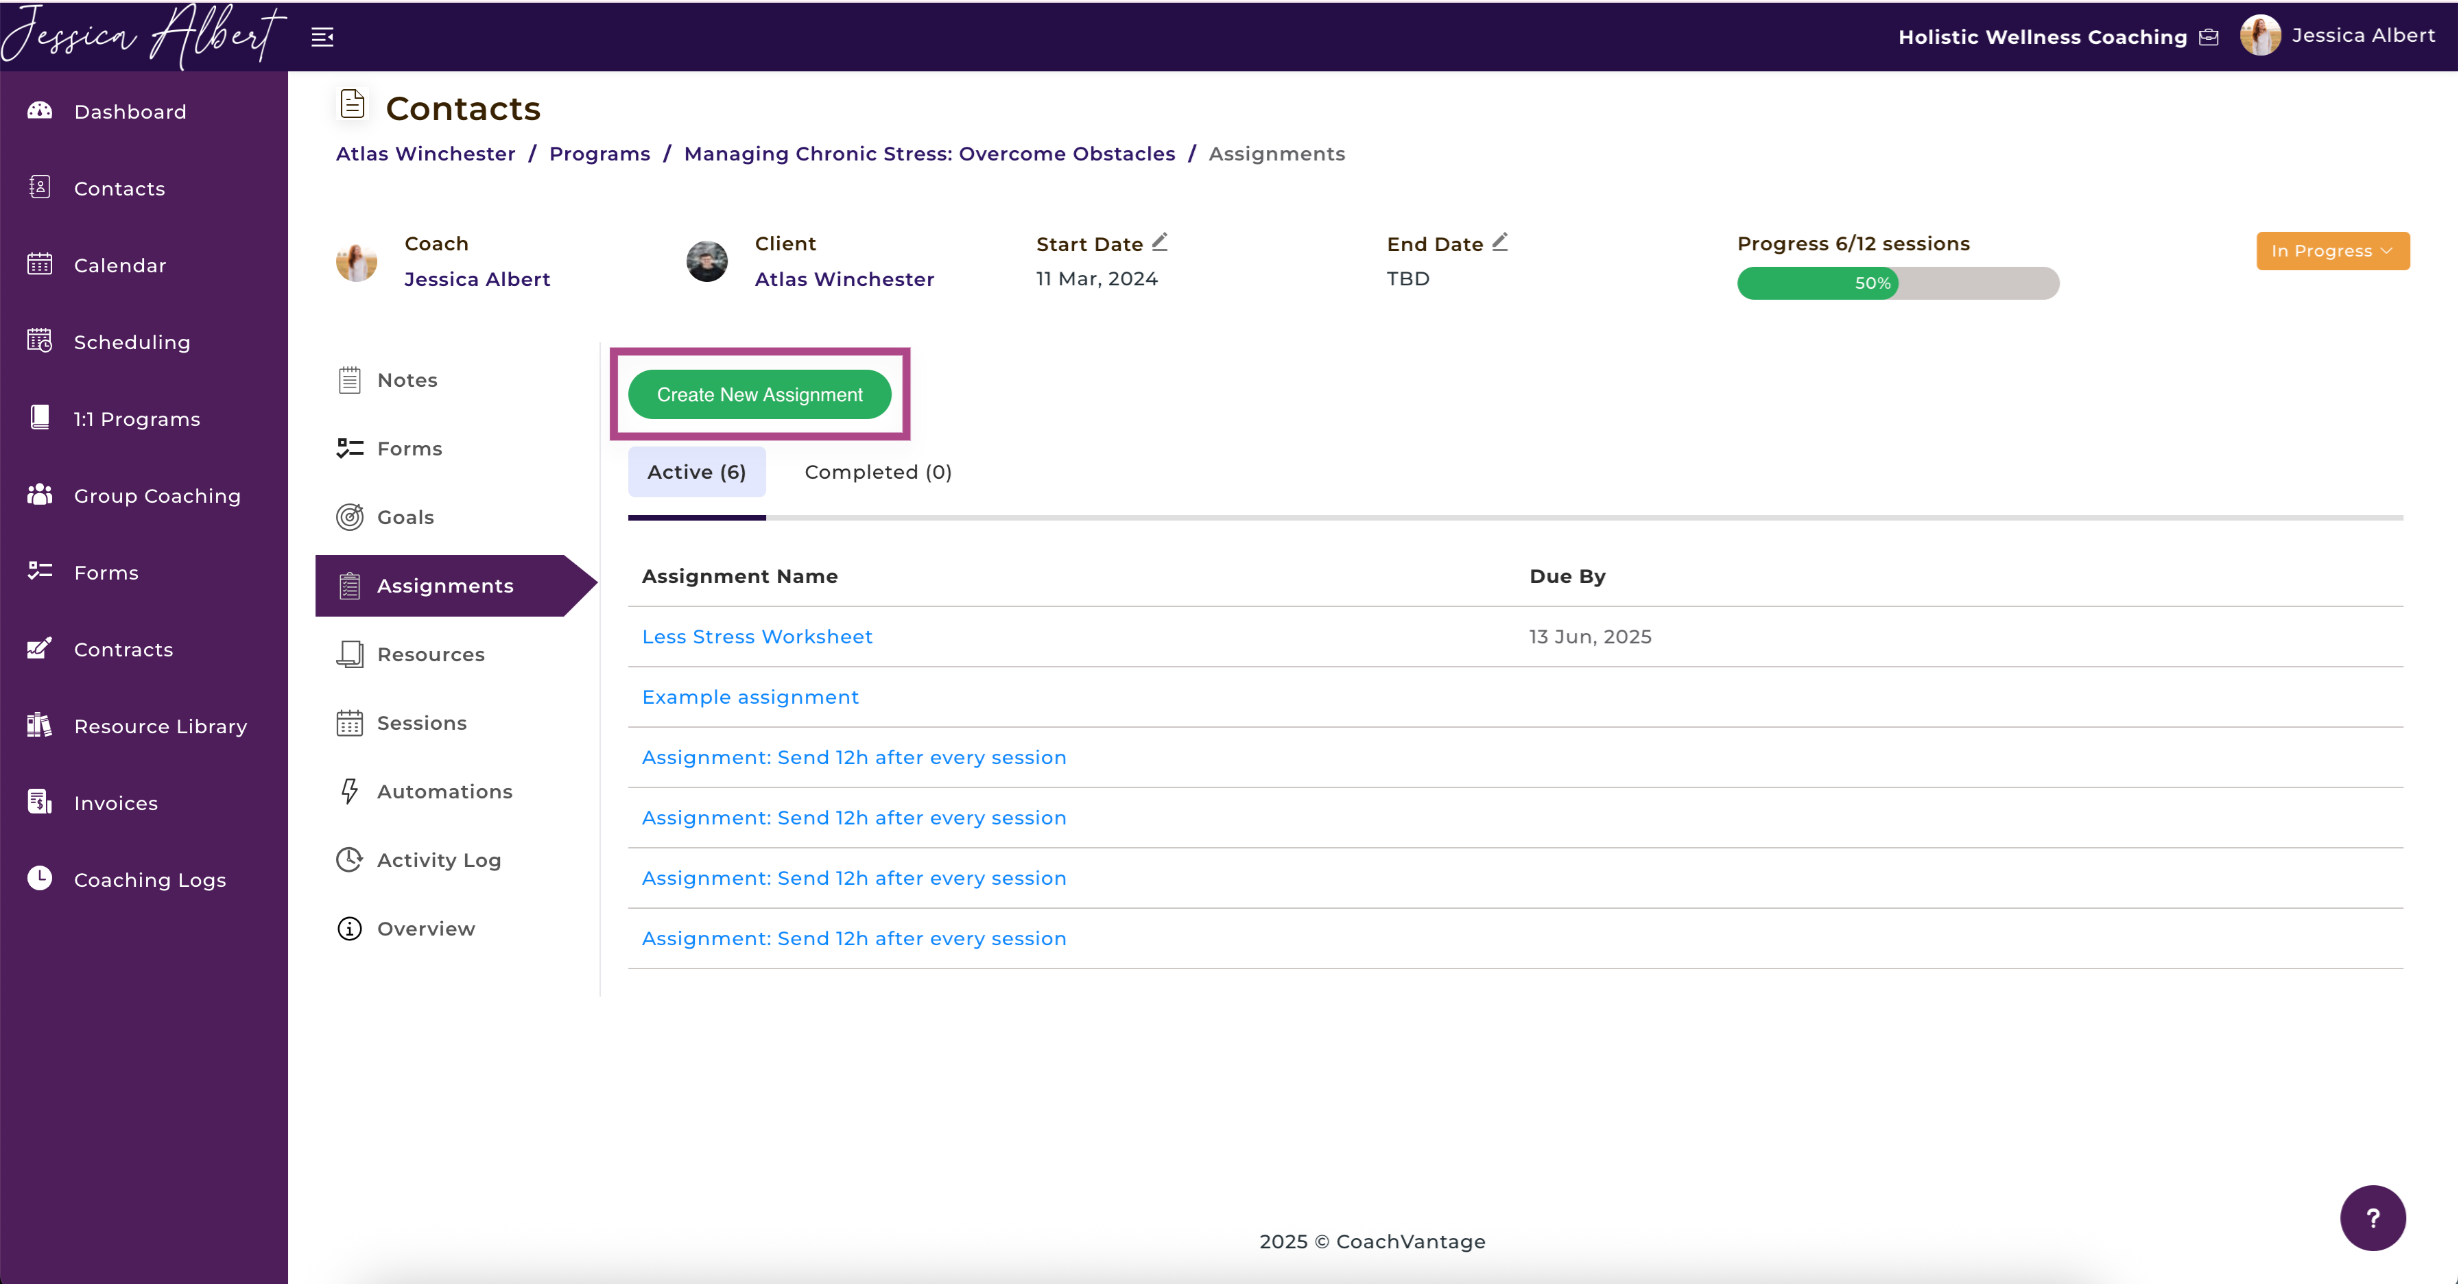
- Click on Assignments in the sub-menu to open the Assignment page.
- Click the Create New Assignment button to set up a new assignment for the client.
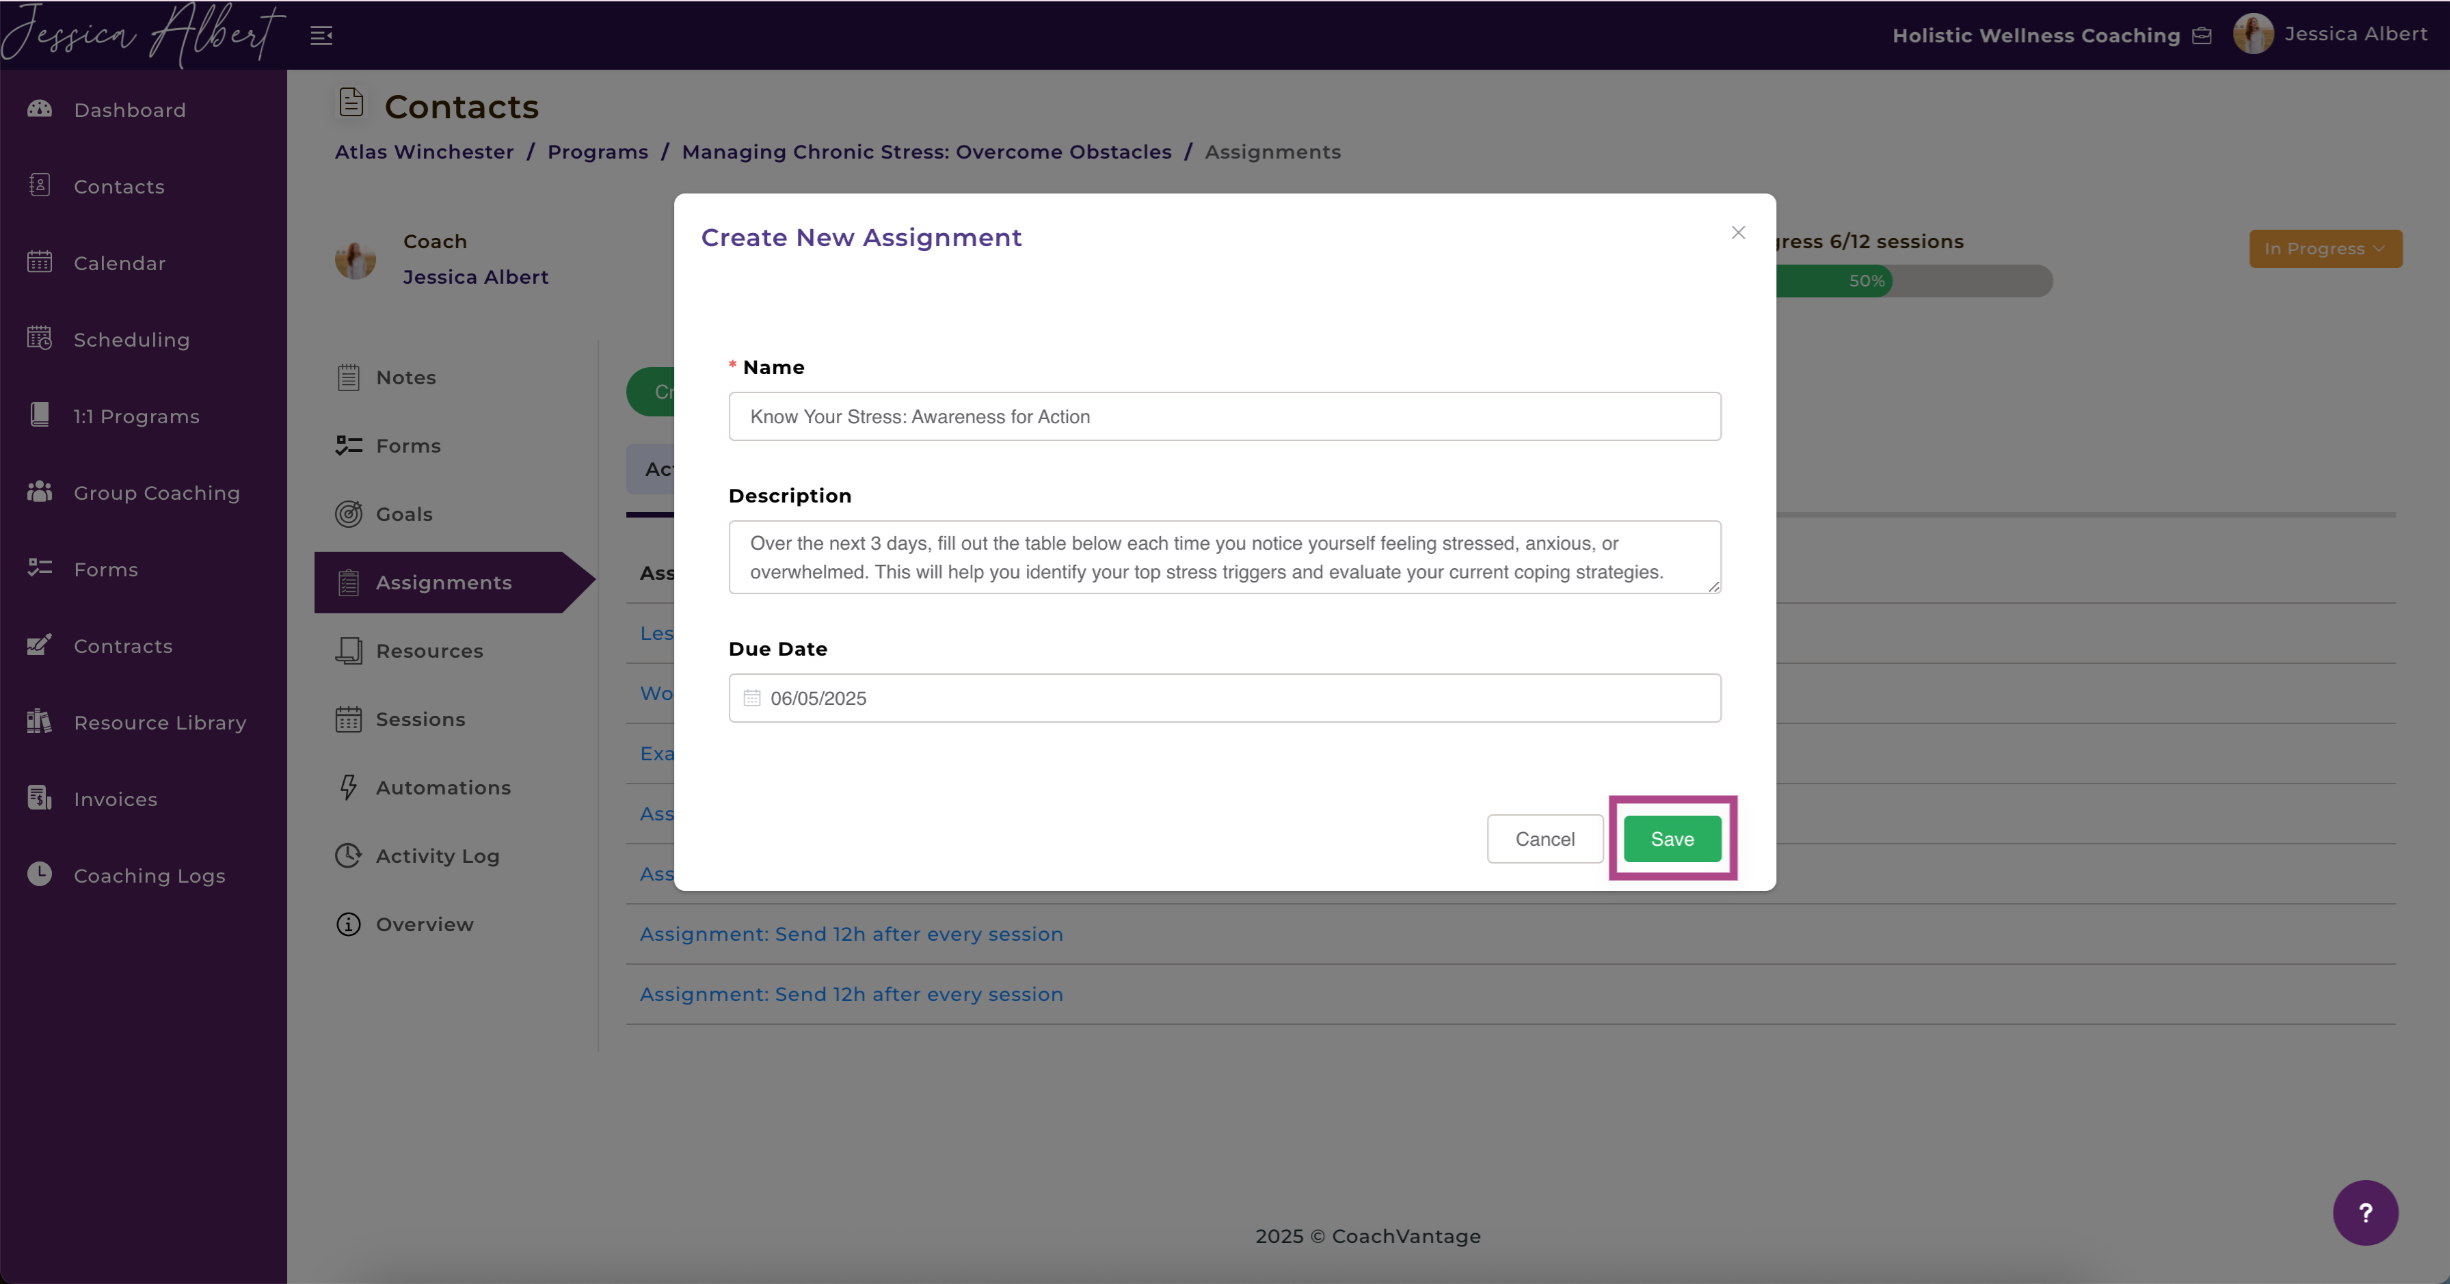
- Enter Name, Description and Due Date of the assignment.
- Click Save.
Once a New Assignment is created, it will be automatically displayed in both the client’s and coach’s program management page, on the Active Assignments tab.
Tip: You can view all clients' pending Assignments on the Dashboard. Refer to the Dashboard article to learn more.
Editing & Deleting Assignments
To edit or delete an assignment:
- Click on the 3-dot button menu at the right hand side of the Assignment and select Edit to open the Edit Assignment window.
- You will be able to edit the Assignment Name, Description, and Due Date
- To delete an assignment, click on the 3-dot button menu and select Delete.
When an assignment is deleted, it will be automatically removed from the program management page of both coach and client.
When an assignment is edited or deleted, we will send automated email notifications to notify you and your client.
Changing Assignment Status
When an assignment is first created, its default status will be Not Started. You or your client can easily change the status of an assignment to In Progress or Completed, as the client progresses through the assignment.
To change an assignment's status:
- Once an assignment has been created, simply click the orange Not Started button.
- A dropdown menu will appear and you can select one of these status options: Not Started, In Progress or Completed.
Automated email notifications will be sent to you and your clients whenever an assignment status has been changed.
Adding Files
You can easily add files such as documents, worksheets, images, video links, etc to an Assignment. This is useful if you want your client to complete a worksheet or read a book extract, for example, as part of their assignment homework.
Documents can be added by selecting them from your Resource Library or from your local drive or other outside sources like Google Drive, Dropbox, Evernote, etc.
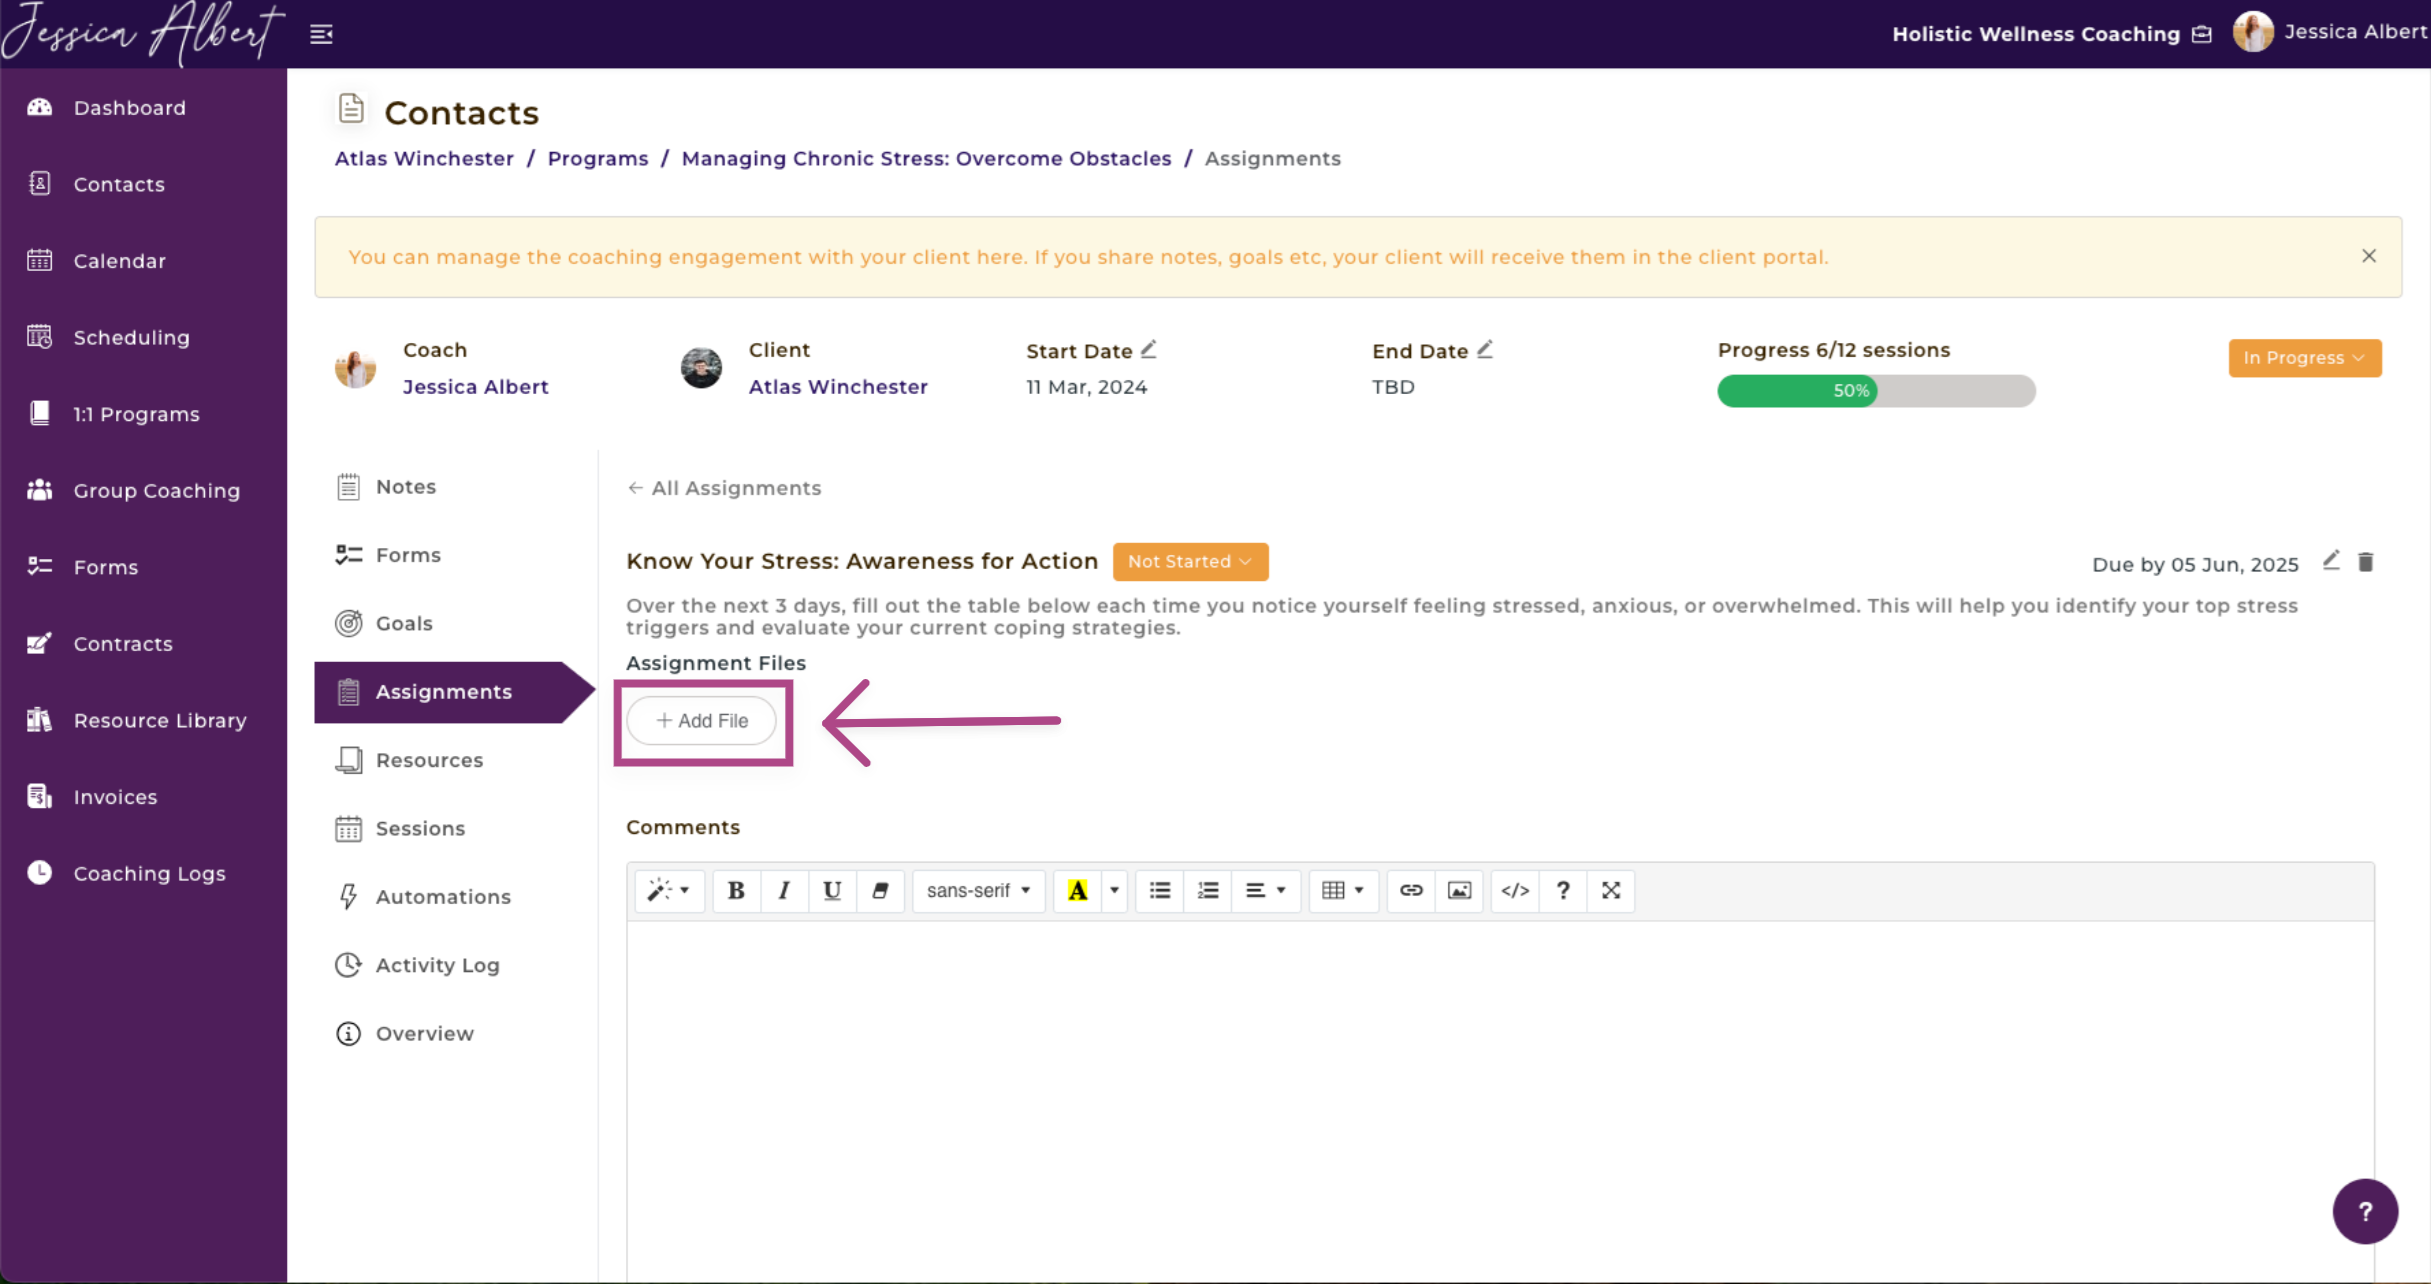
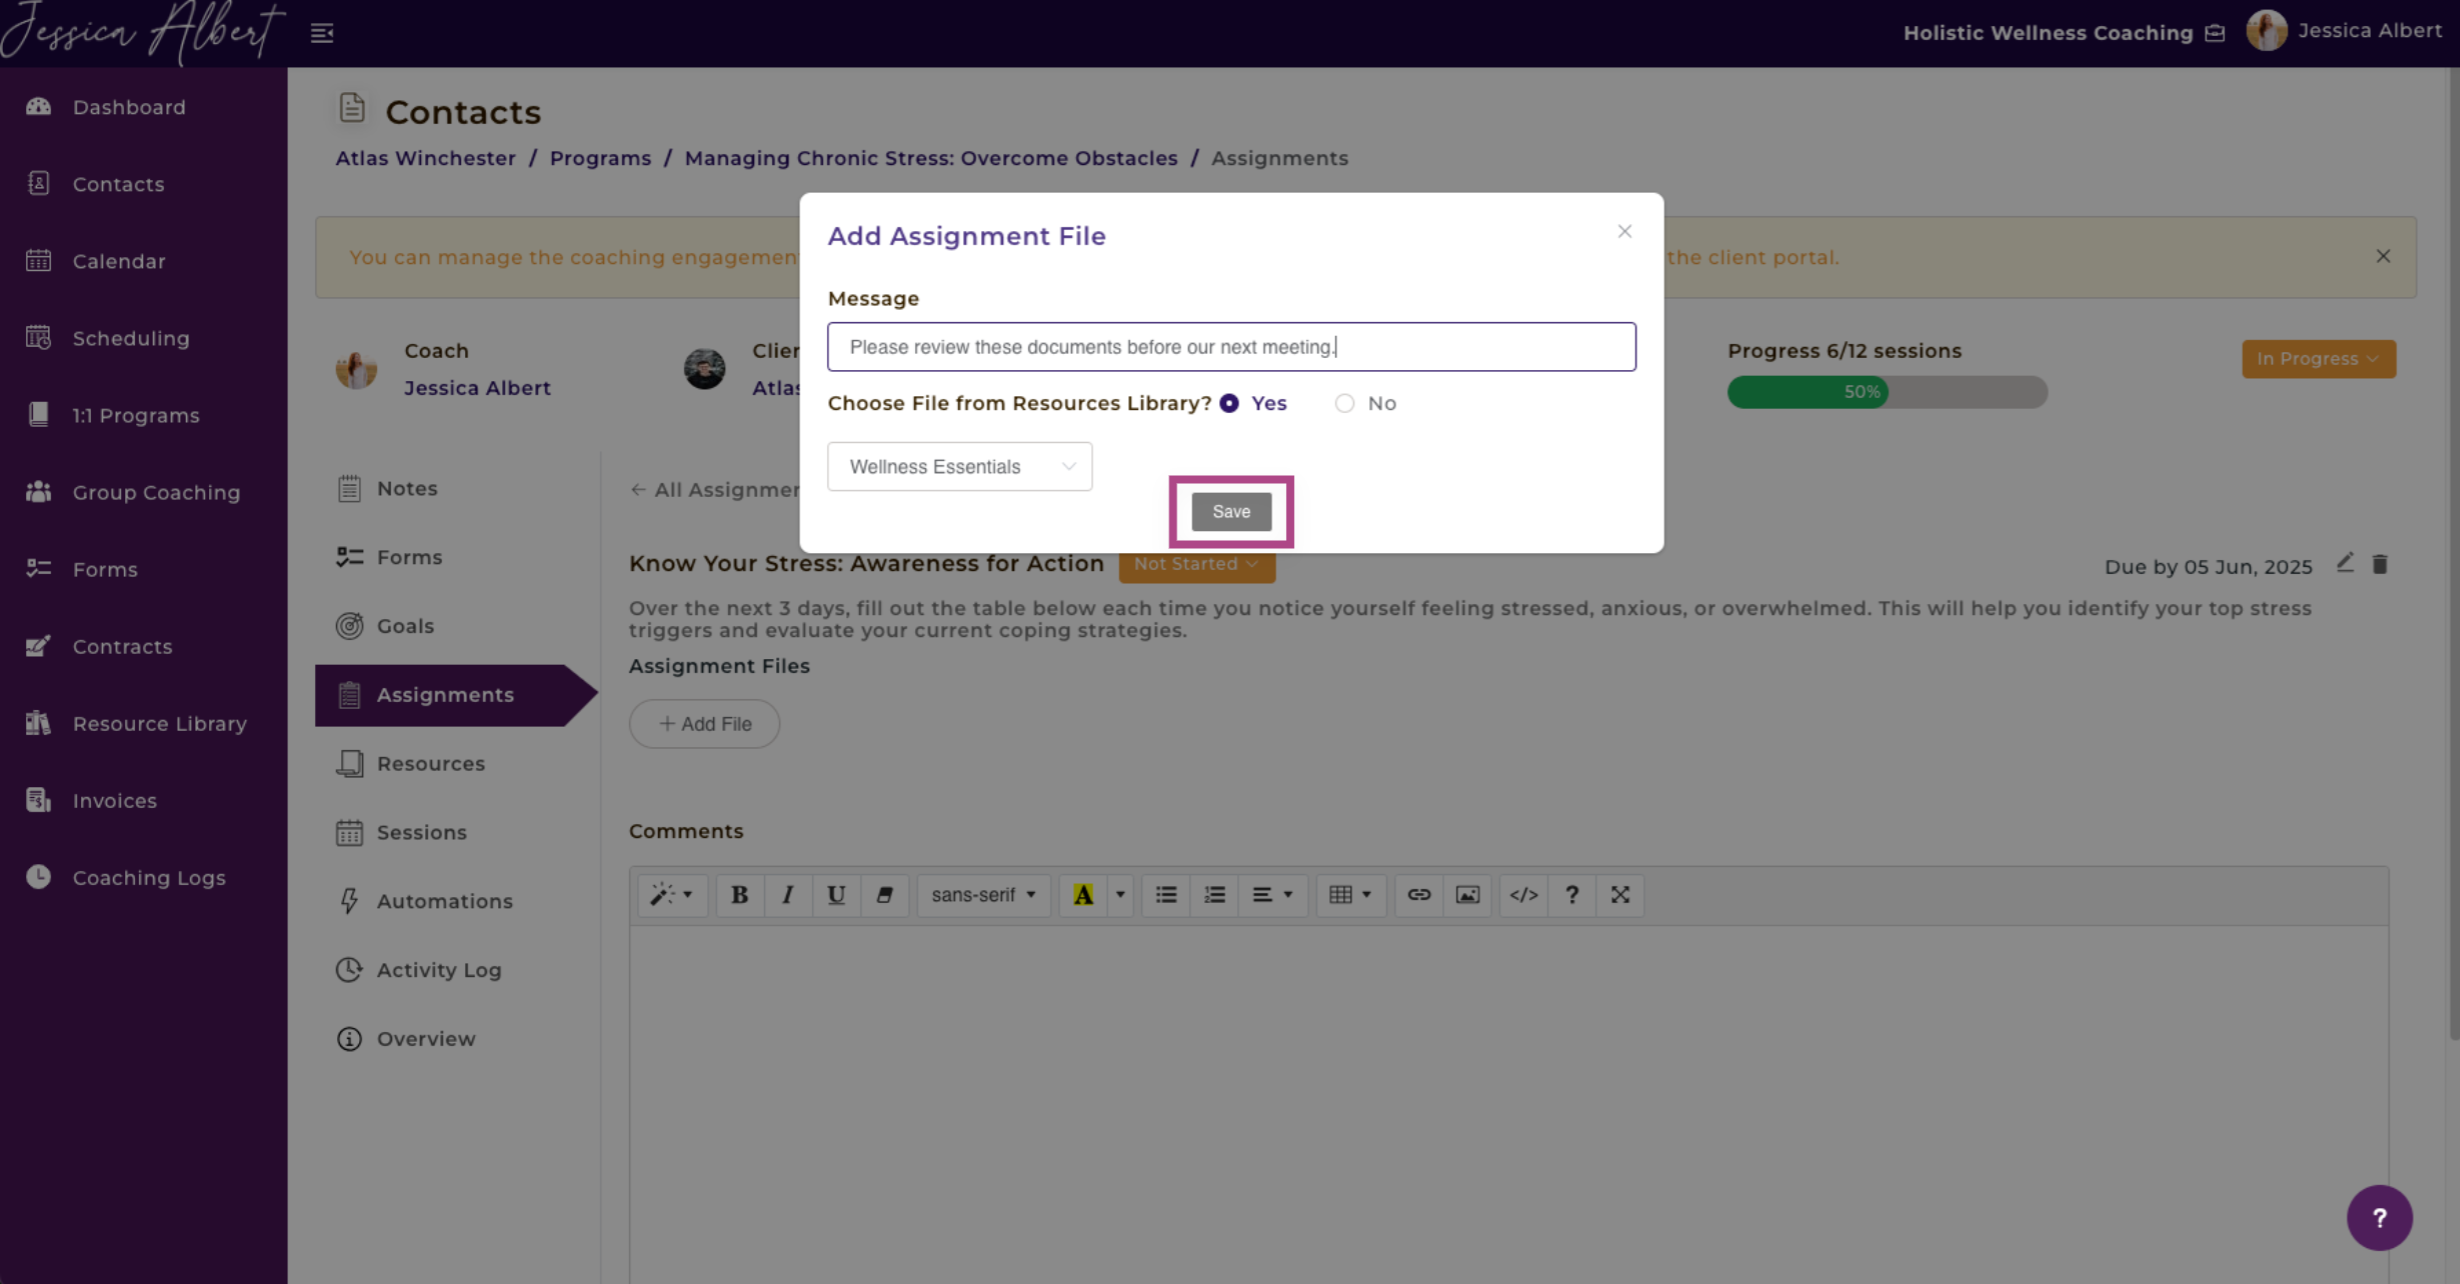
To add a file from within an assignment:
- Click on the + Add Files button.
- Insert Message (optional). Message could be used to deliver instructions for the assignment. The message will display in the Client Portal next to the file.
- Select Files from either your Resource Library or Upload Widget.
- Click Save.
Select the pencil icon to edit a milestone or click the trashcan icon to delete it.
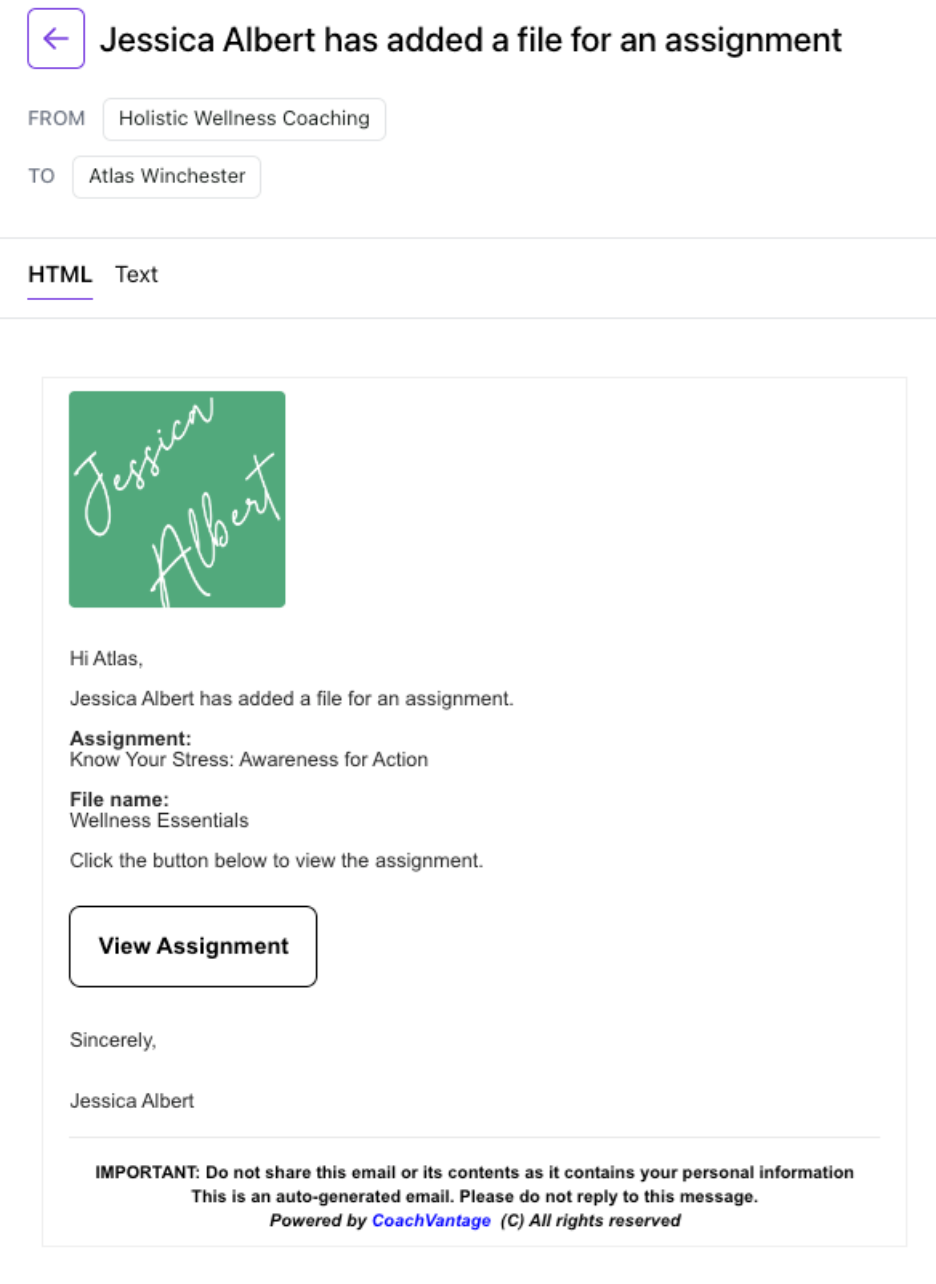
Your client would receive an email for every new file added. The image below depicts the email that they will receive.
Completed Assignments
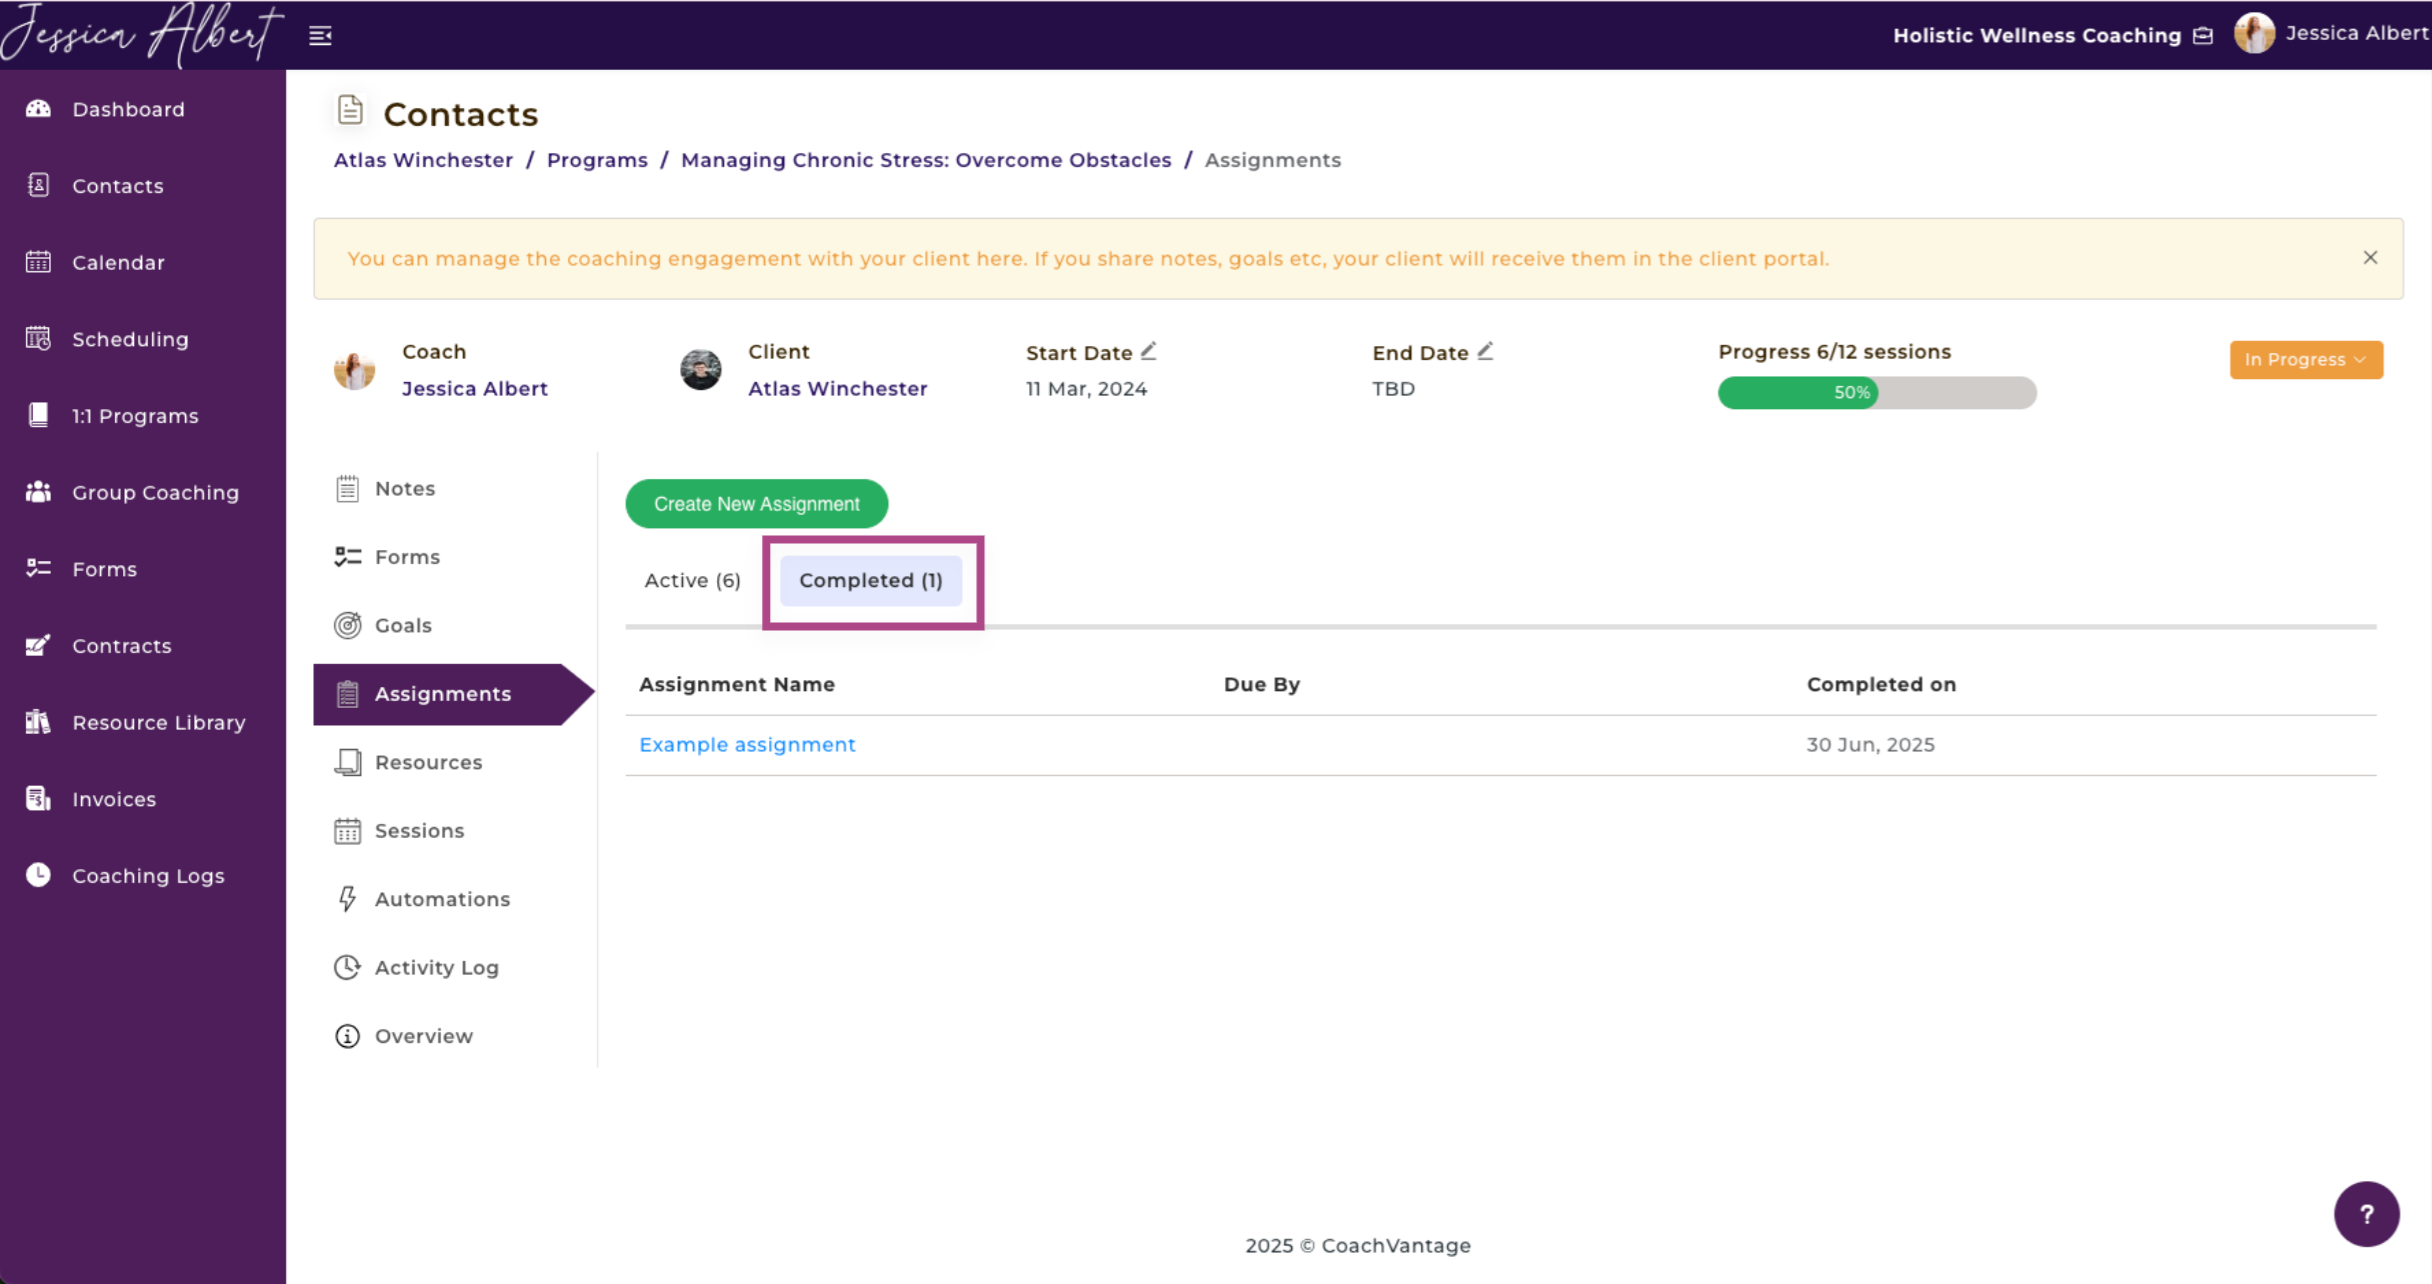
When an assignment is marked as completed by you or your client, it will be automatically moved to the Completed tab.
To view all completed assignments, simply click on the Completed tab.
You have the ability to edit completed Assignments by clicking on the 3-dot button menu to edit or delete a completed assignment.
8. Program Resources (Documents / Files)
You have the ability to share Resources with your clients, such as documents, files videos, PDFs, etc. The client can access shared resources from the Client Portal.
Note: Resources can only be shared with your clients if they have an Active Client Portal.
Click on Resources in the sub-menu to open the Resources page.
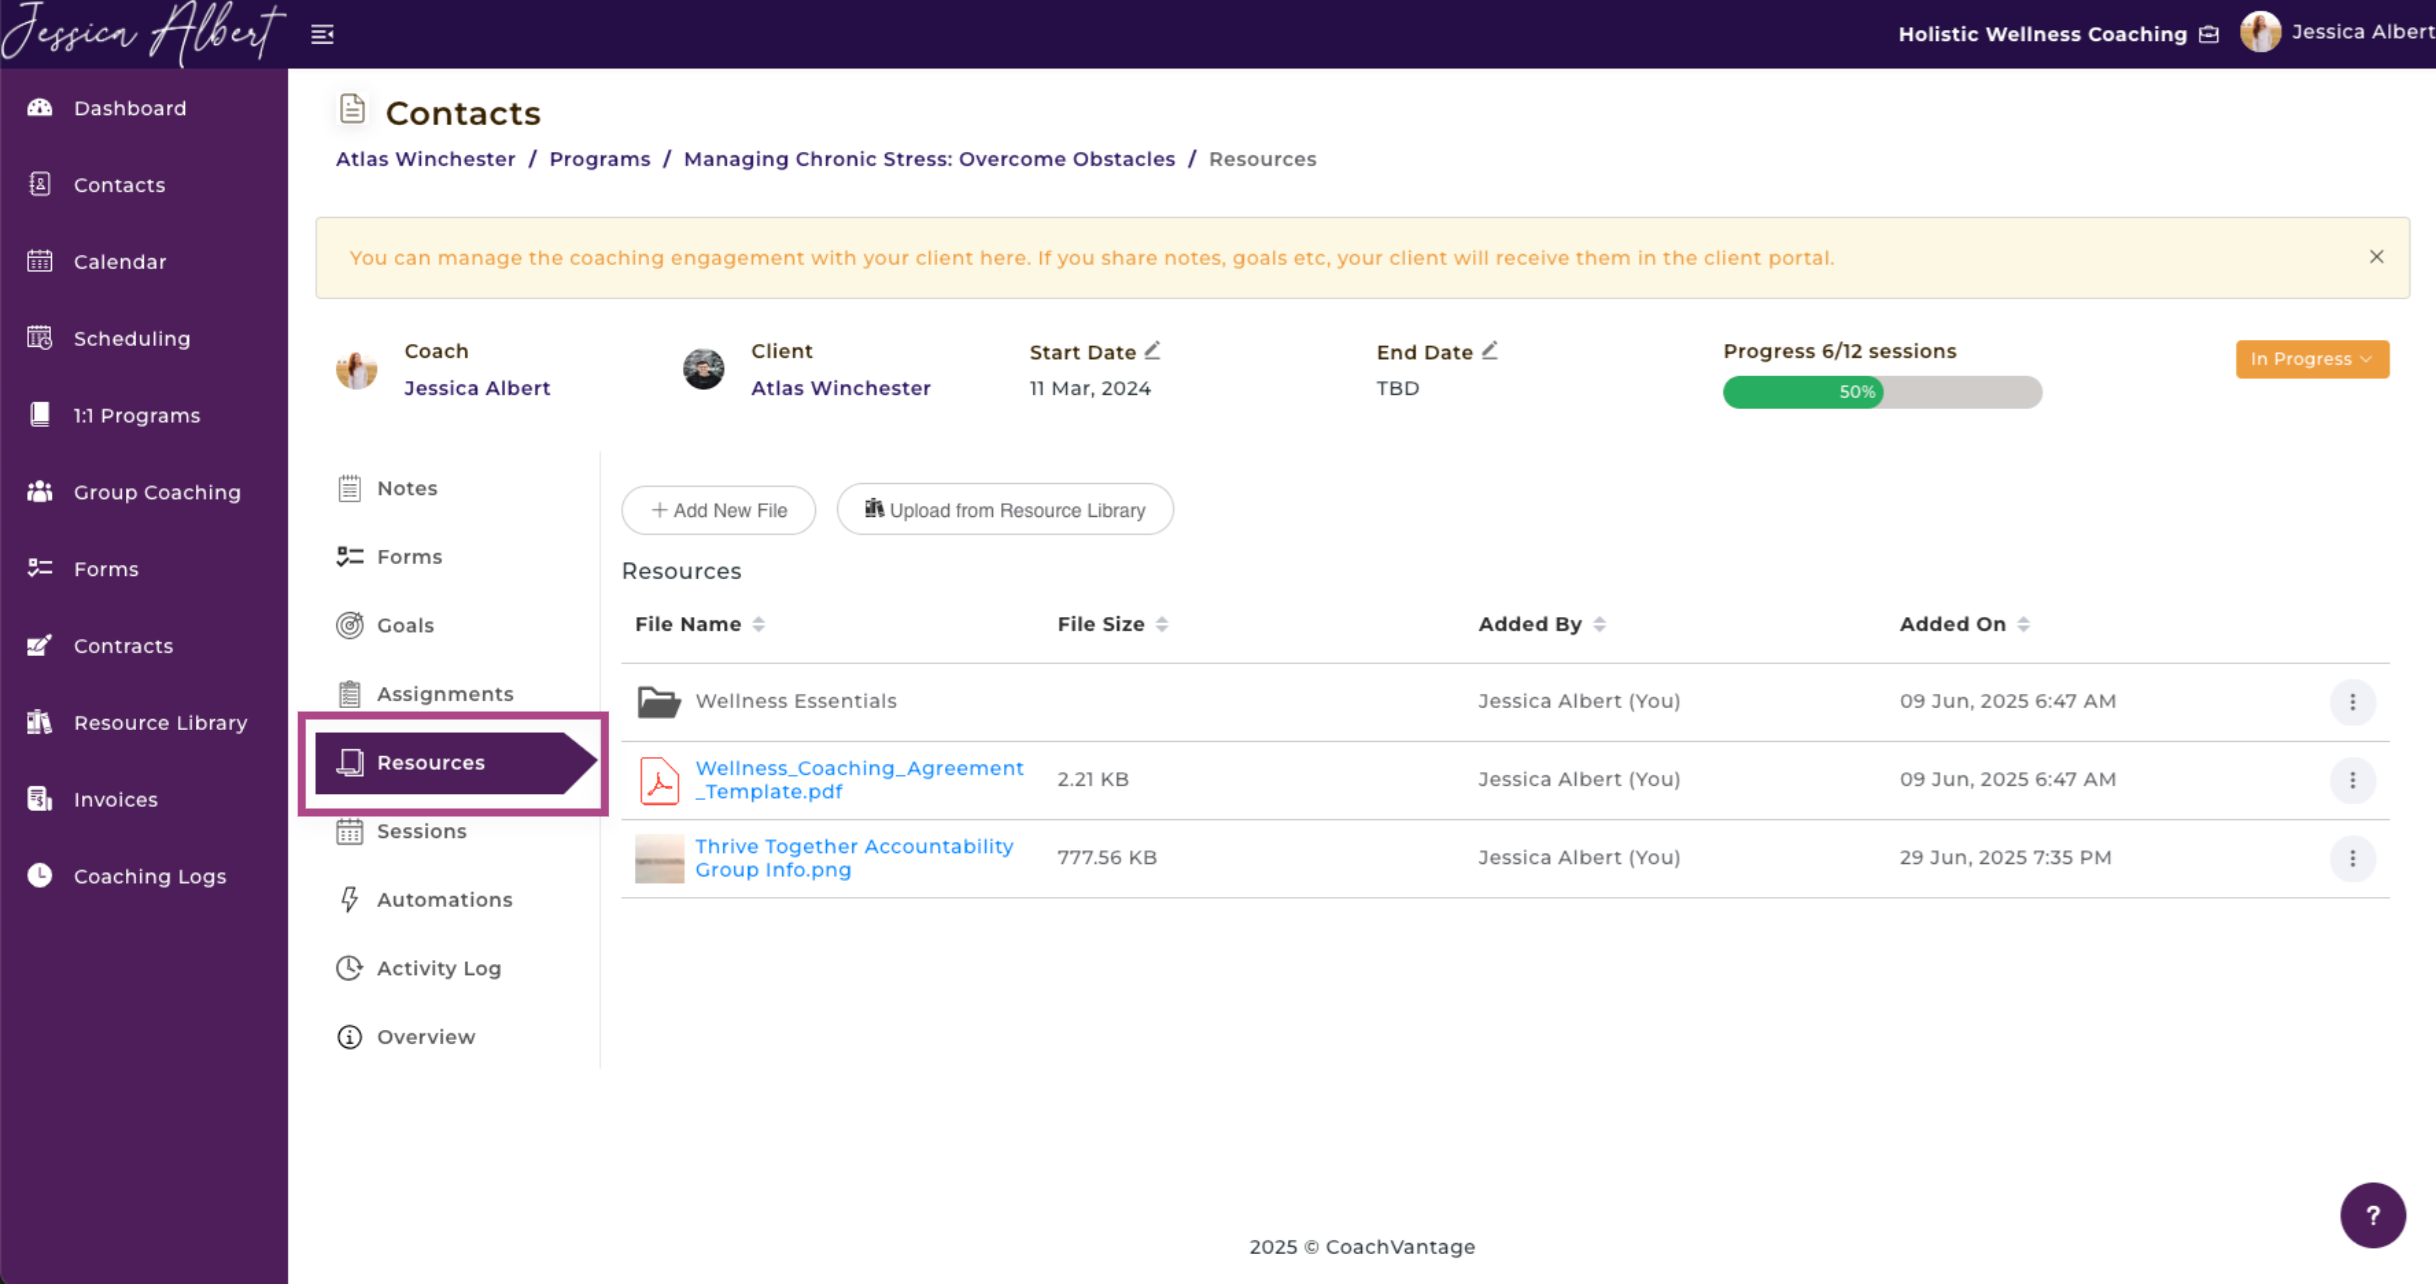
List of Shared Resources
On the Resources ribbon of the program management page, you will be able to view all files or documents that you added during the coaching engagement.
To manage shared files, click on the 3-dot button menu of the desired file to open a dropdown of these 3 functions as shown below:
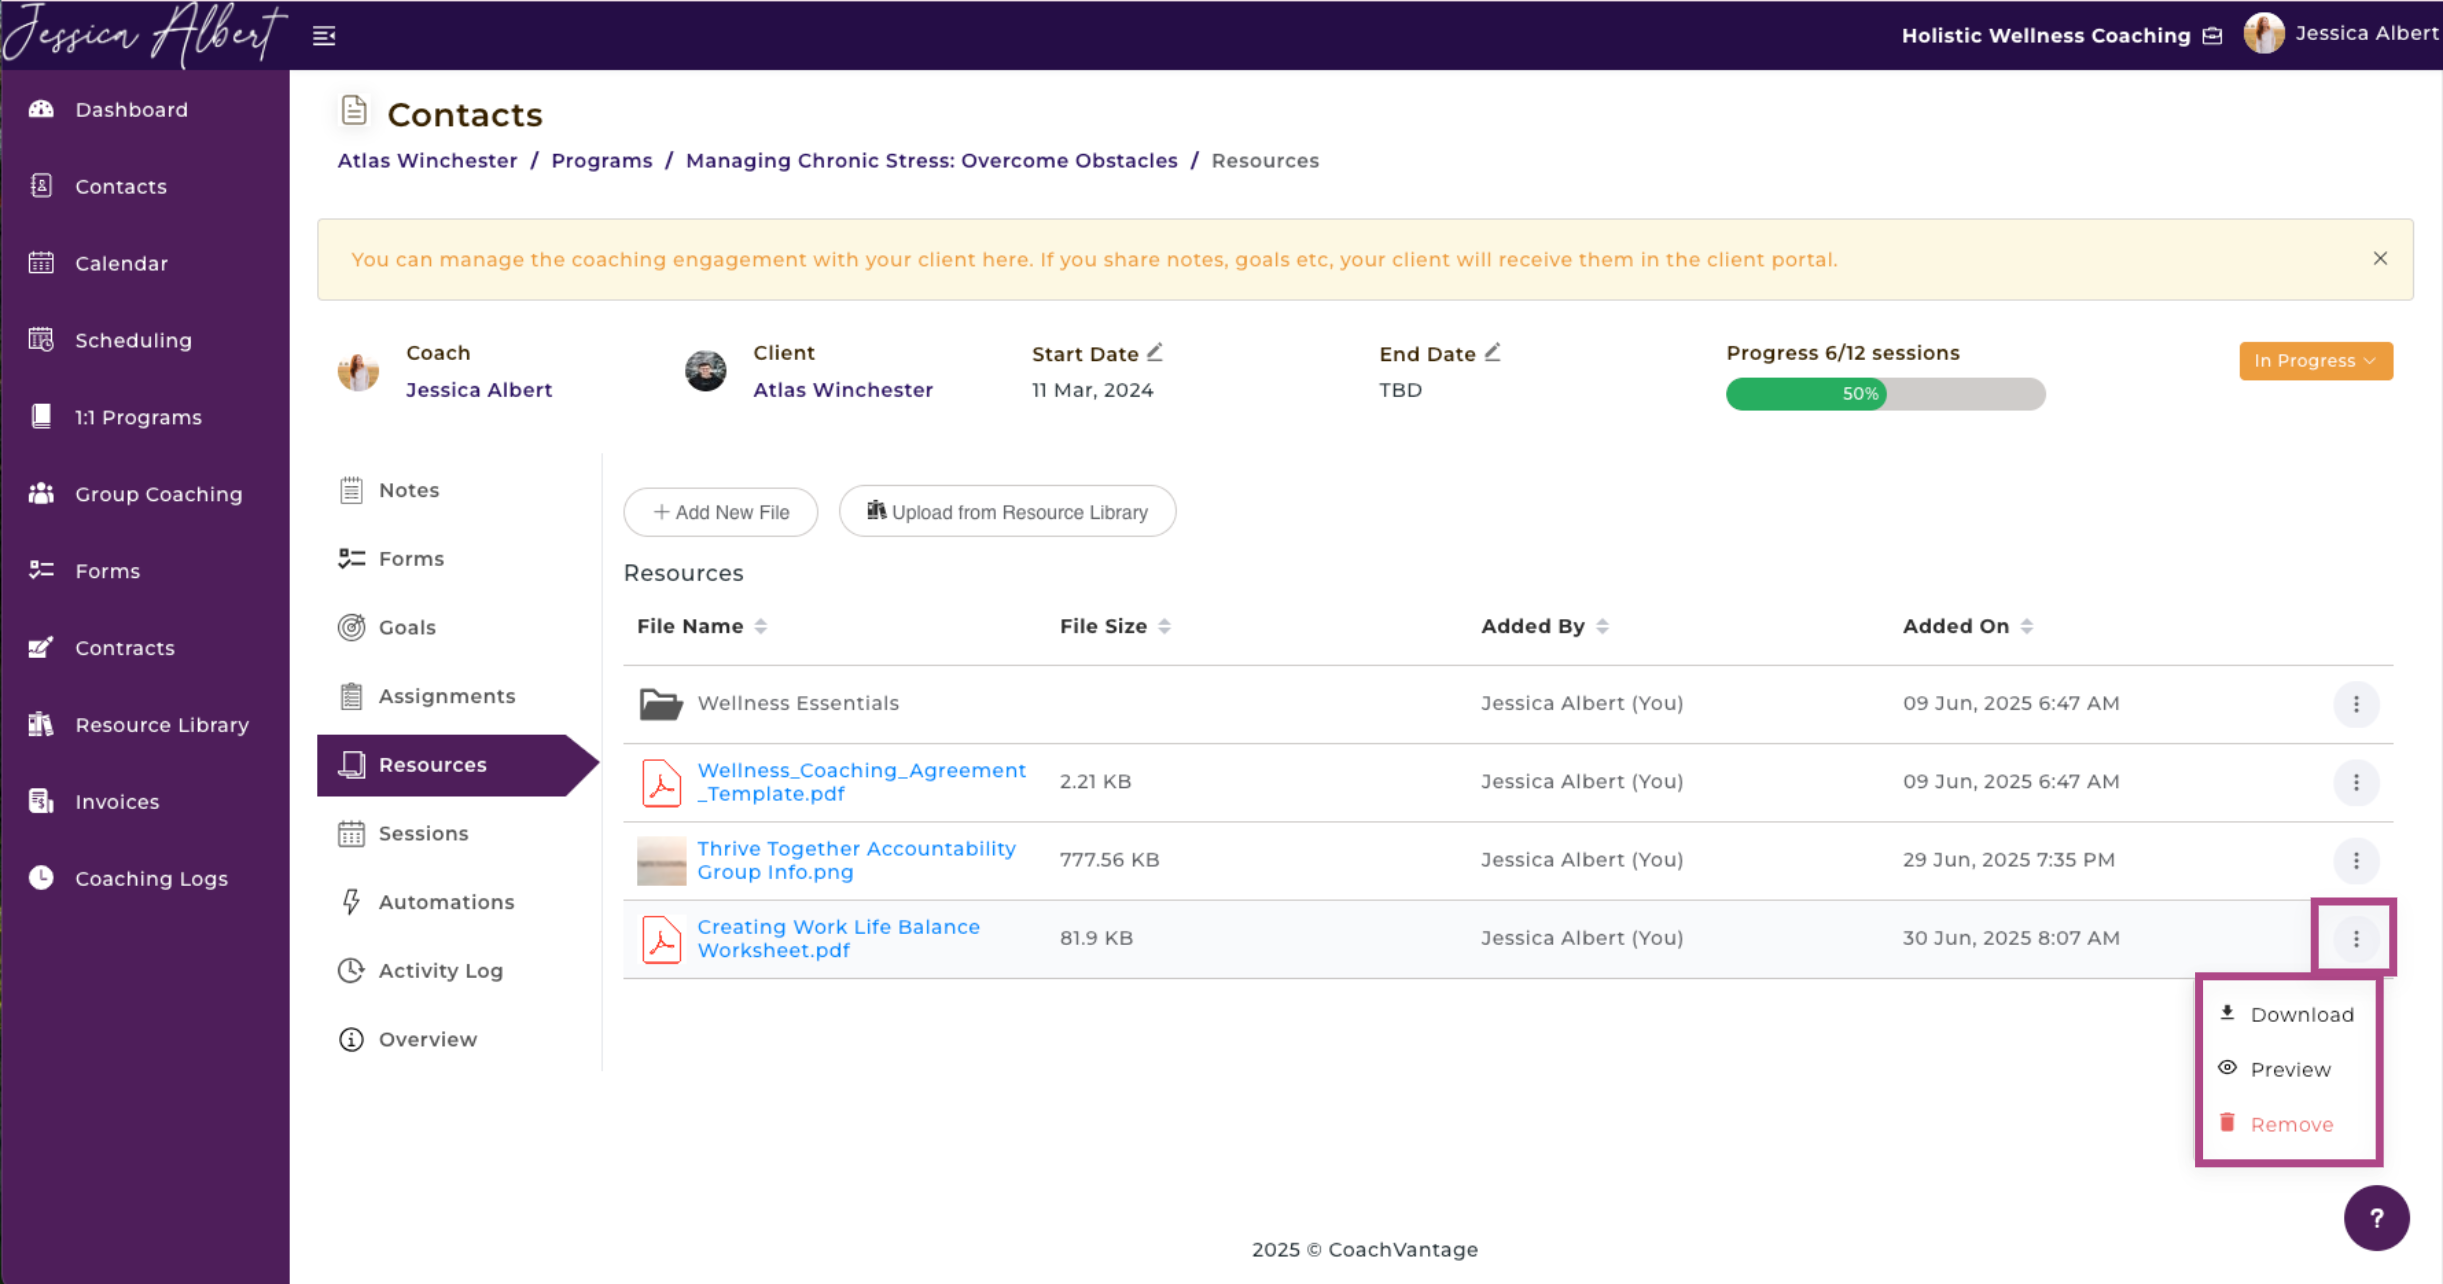
1. Download
You can download the file to your local drive or PC by selecting Download option. If you have trouble locating the files after your download has completed, check the download folders in your device.
2. Preview
You can view the contents of a file by selecting the Preview option. A new browser tab will be launched on your current web browser, displaying the preview of the file contents.
3. Remove
If a file is no longer relevant or if you wish to stop sharing the file with your client, select the Remove option. The file will be automatically removed from the client portal and your client will no longer have access to it.
Note: If a file was added to the program management page from your Resource Library, you will not see the Delete option in the 3-dot button menu. You will need to Delete the file from your Resource Library page. Refer to this article on how to delete files from your Resource Library.
Sharing Resources (Documents / Files) with Clients
You can share files that are located on your local device or PC, as well as files that may be residing on cloud services such as Google Drive, Dropbox, Evernote, etc.
You can also share files that you have already uploaded to your CoachVantage Resource Library (refer to the section below on how to share a file from your Resource Library).
Note: Your client can also share resources with you from the client portal, following the same steps as described below.
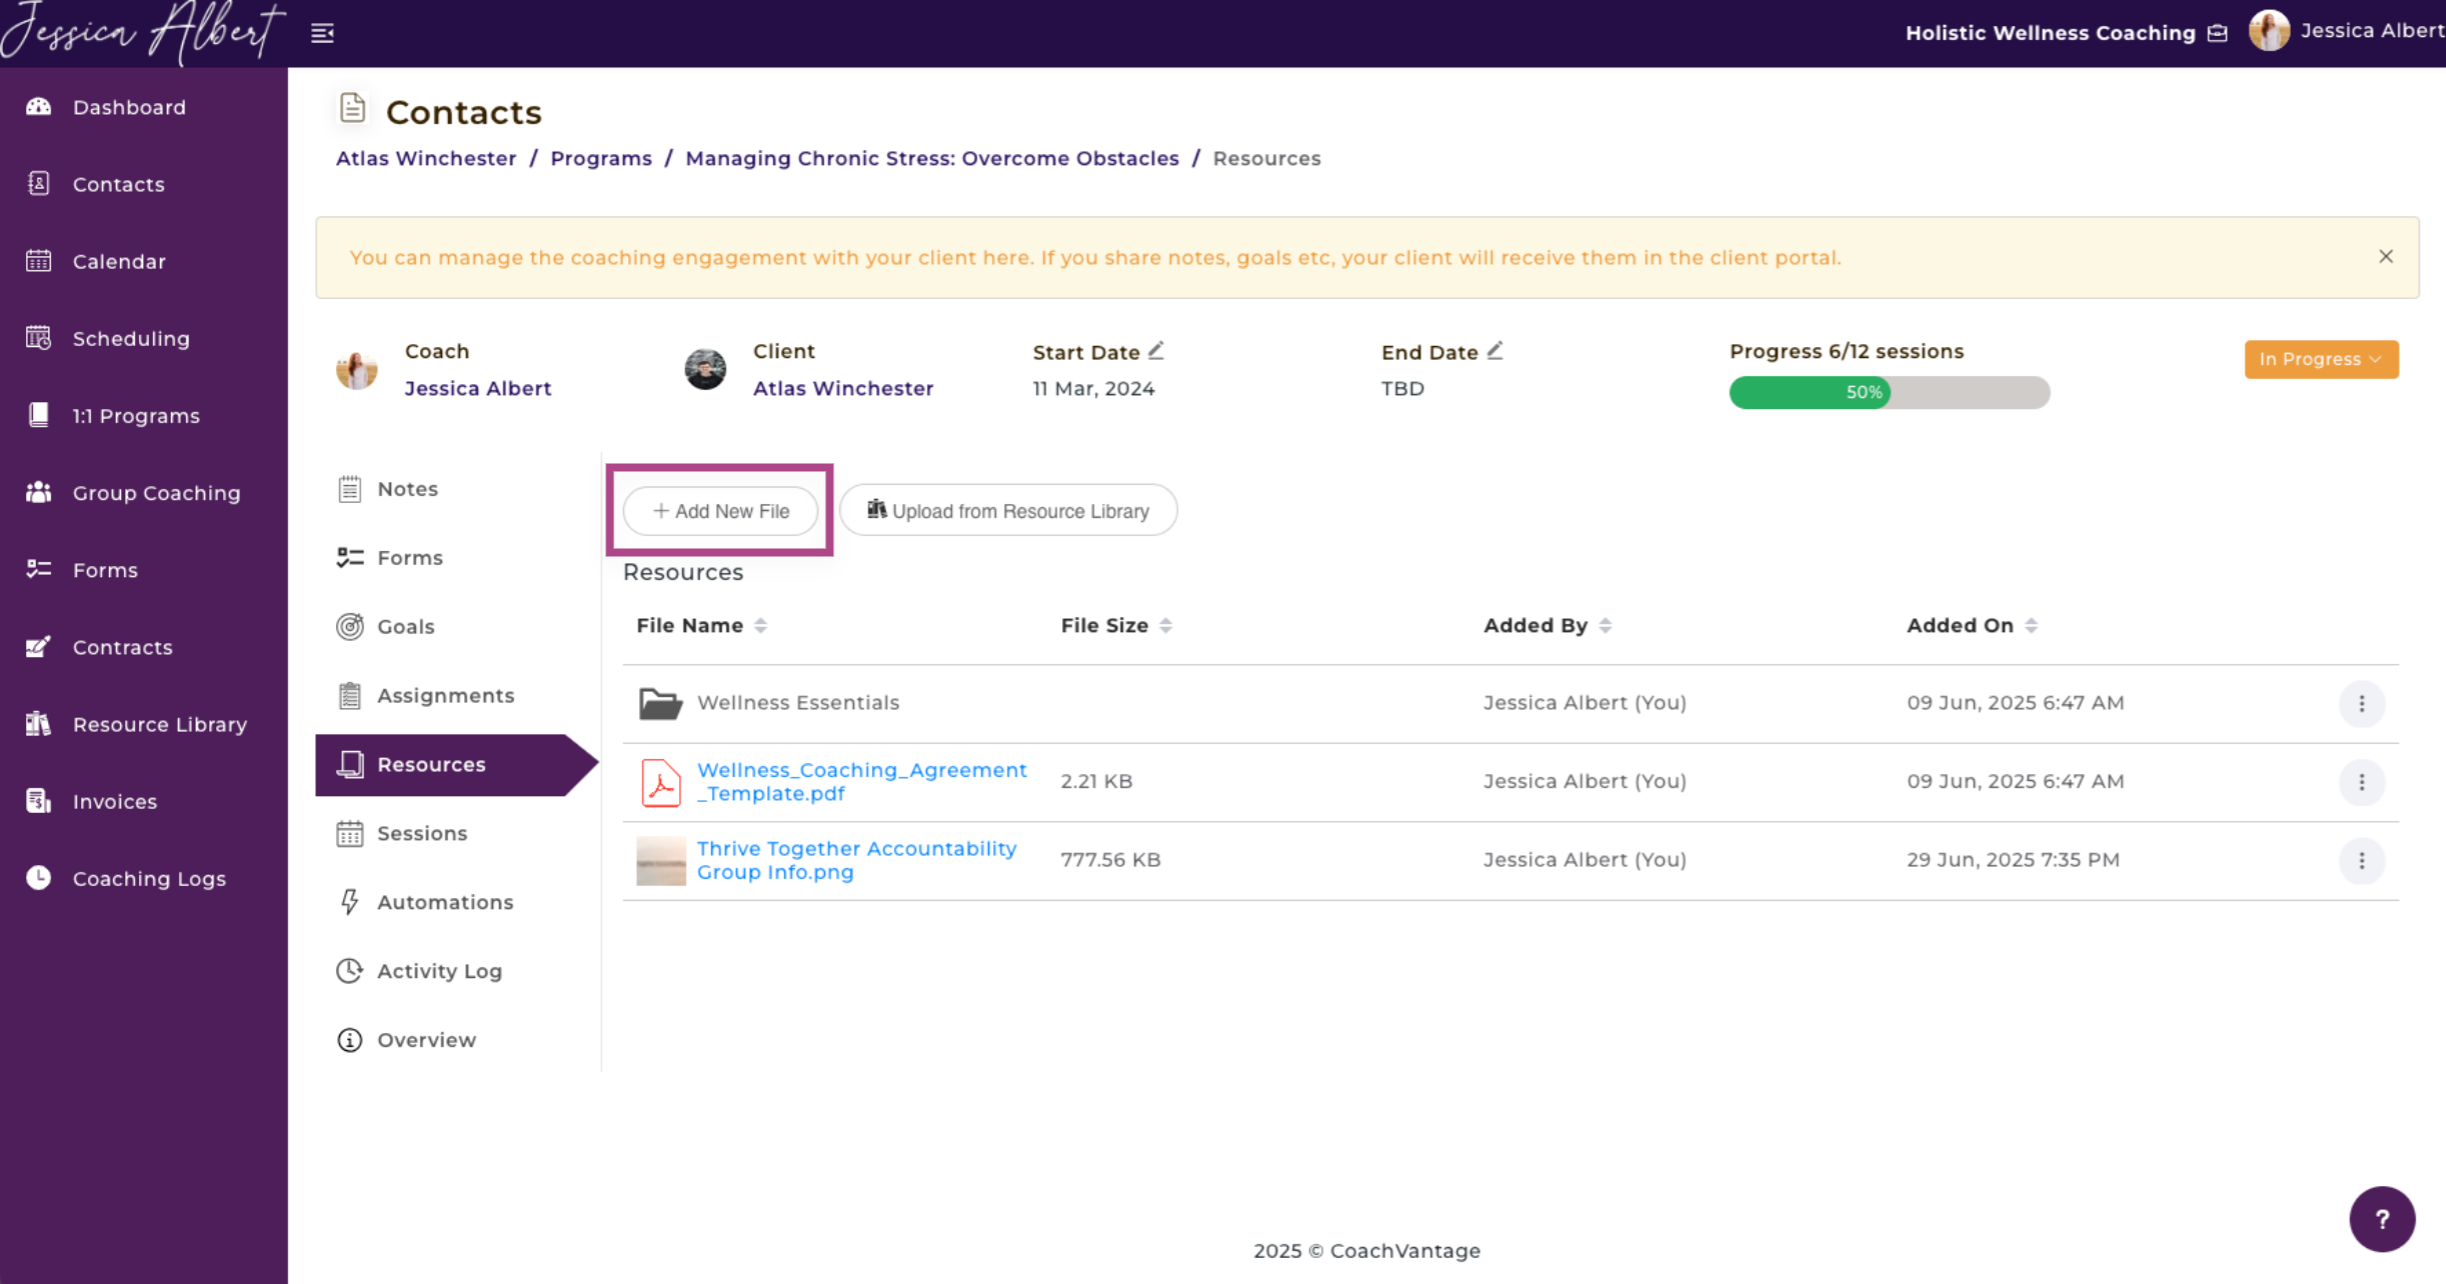
To share a local file:
- Click on the Add a New File button.
- The upload widget pops up.
- Click on the Choose a local file button in the widget to upload a file from your local device. Or, select from a source origin using the left menu of the upload widget. Wait for the file to be completely uploaded. If your file is large, this may take some time. When file upload is 100% completed, click on the Done button in the widget.
- The file is now successfully uploaded and shared with your client.

Upload Widget:
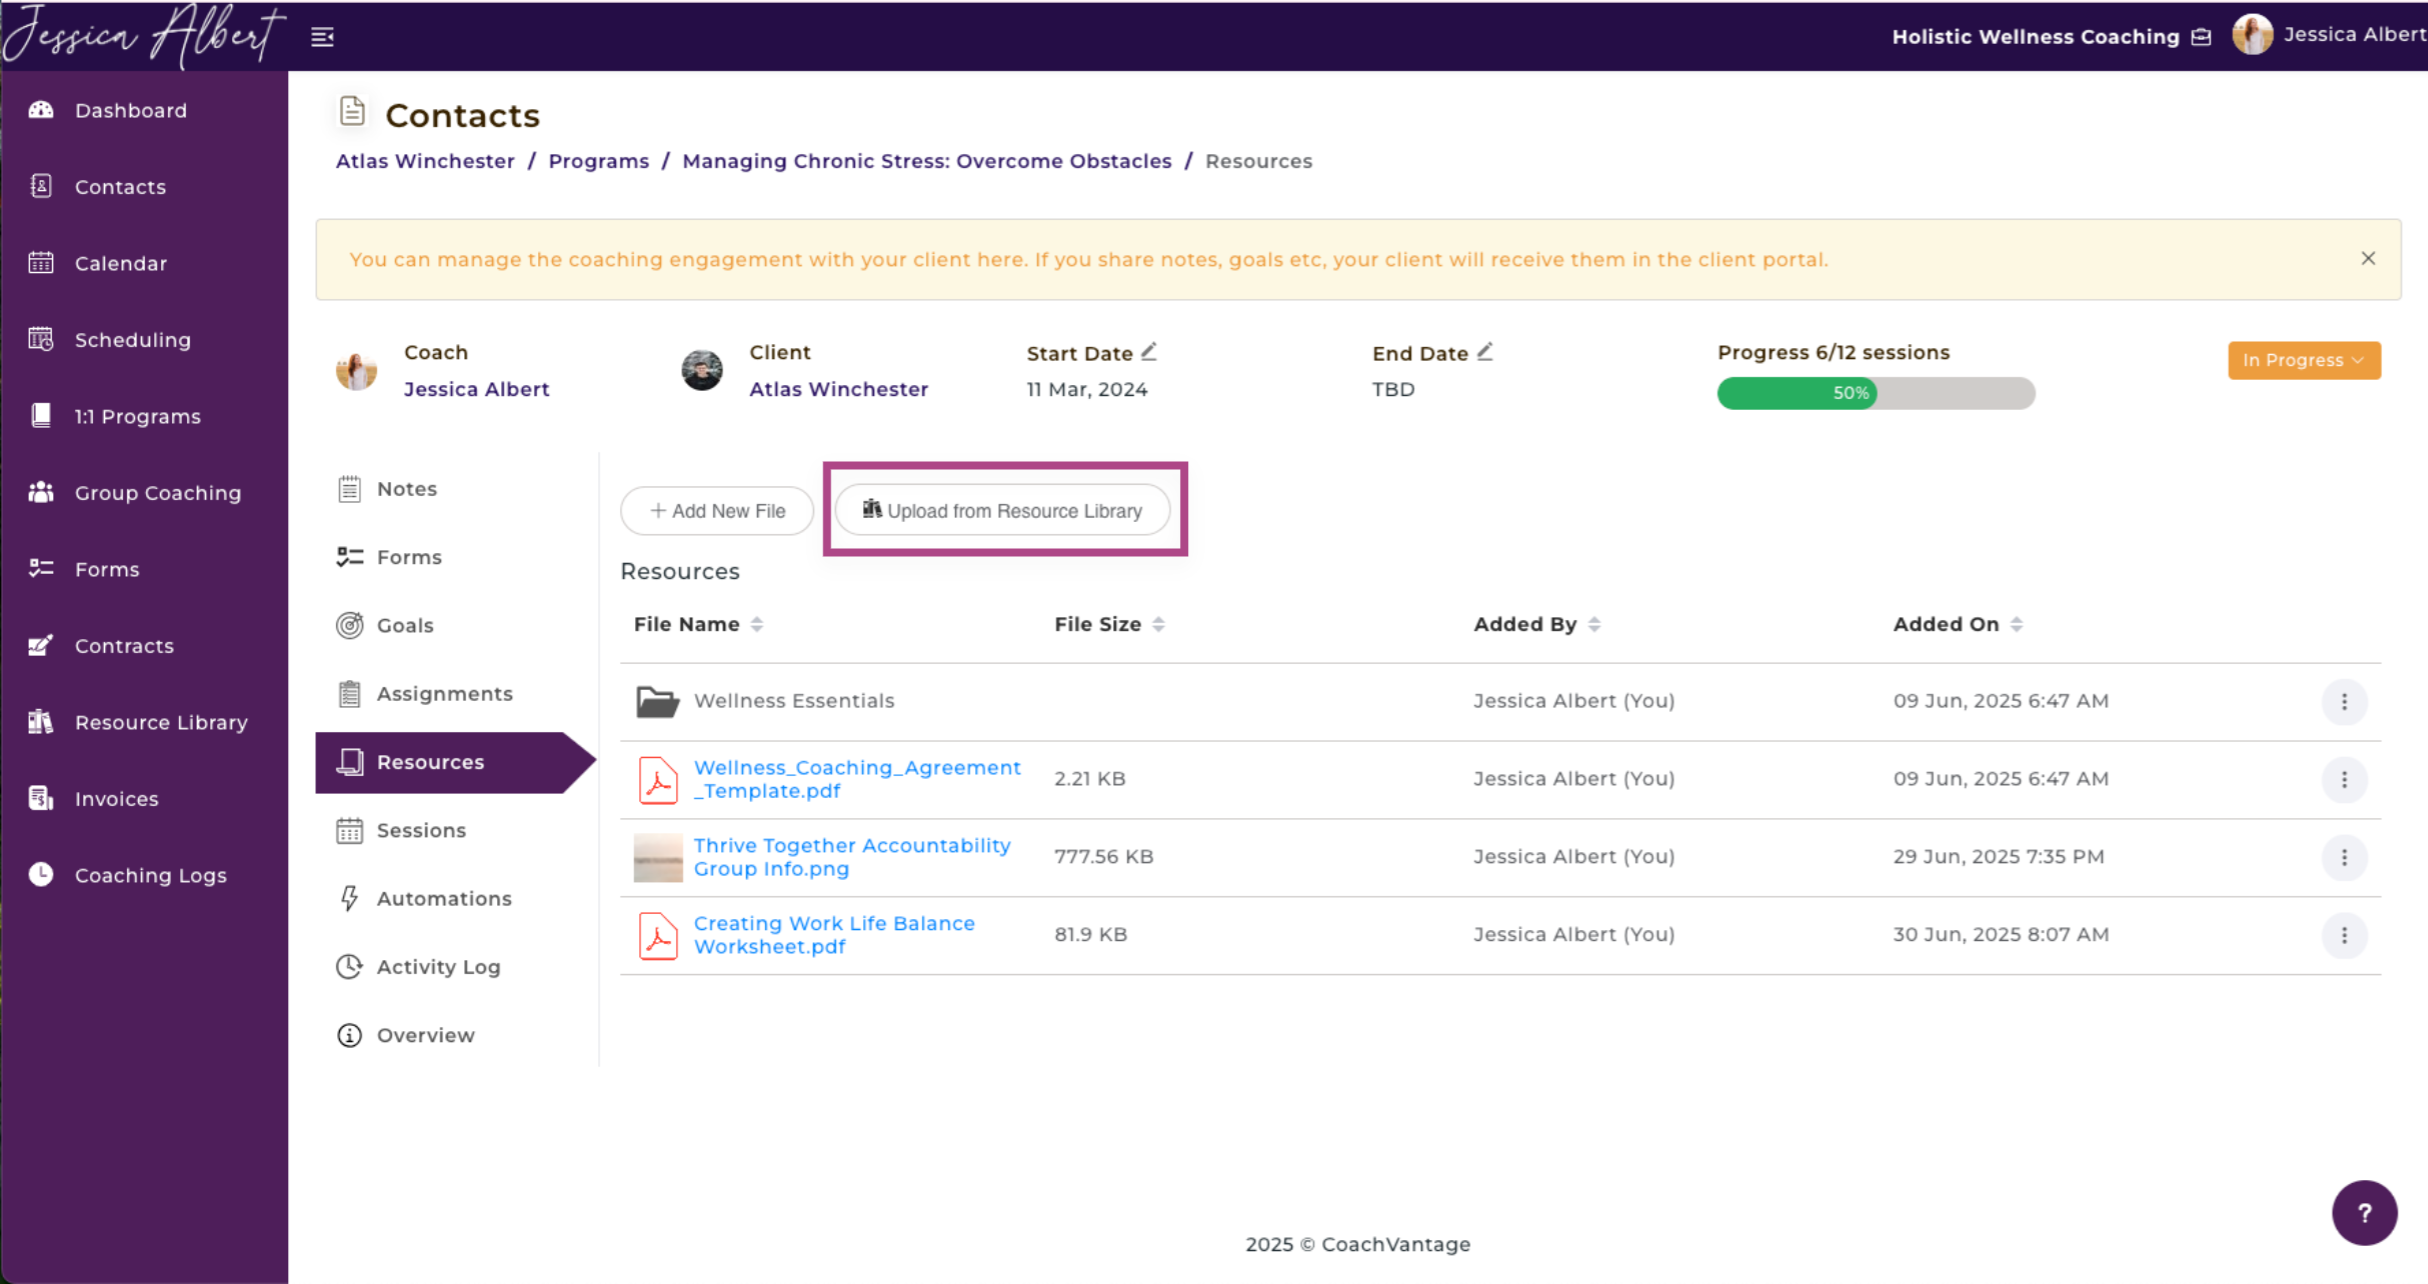
To share a file from your Resource Library:
You also have the option to share files from your Resource Library with your client. Refer to the Resource Library article for more details on how to use it.
- Click the Upload from Resource Library button.
- A window will open that lists all files and folders that you've added to your Resource Library. Use the checkbox to select the folders or files you wish to upload, then click Add. The file will be immediately shared with your client.
9. Program Sessions
Sessions provides all the information about upcoming and past sessions related to this specific coaching program.
Click on the Sessions ribbon in the sub-menu to open the session details. You will see the following:

- Add New Appointment button
- Scheduling Settings button
- Upcoming Sessions tab
- Past Sessions tab
Each of the these is described in more detail in the sections below.
Add New Appointment
As a Coach, you can set up an appointment (or coaching session) with your client by clicking on the Add New Appointment button.
IMPORTANT: When you set up an appointment in this way, the appointment gets created as a confirmed session immediately. In other words, your client does not have the option to accept or decline the appointment.
CoachVantage will automatically send an email notification to your client with the appointment details. The appointment will be created automatically in your CoachVantage Calendar and will be displayed as an Upcoming Session.
Tip: Setting up an appointment in this way is useful if you and your client have already agreed upon a date for your next coaching session. For example, some coaches discuss the date of the next coaching session at the end of a preceding coaching session. This feature is therefore useful for such instances.
To create a new appointment:
- Click the Add New Appointment button.
- The Add New Appointment window pops up.
Refer to this article for more details on how to create a new appointment.
Scheduling Settings
With CoachVantage, you also have the ability to let your clients self-book sessions with you, based on your availability rules.
To manage the scheduling settings for a coaching program, click on the Scheduling Settings button (refer to the number (2) in the image above). You will then be able to edit the scheduling settings for the program.
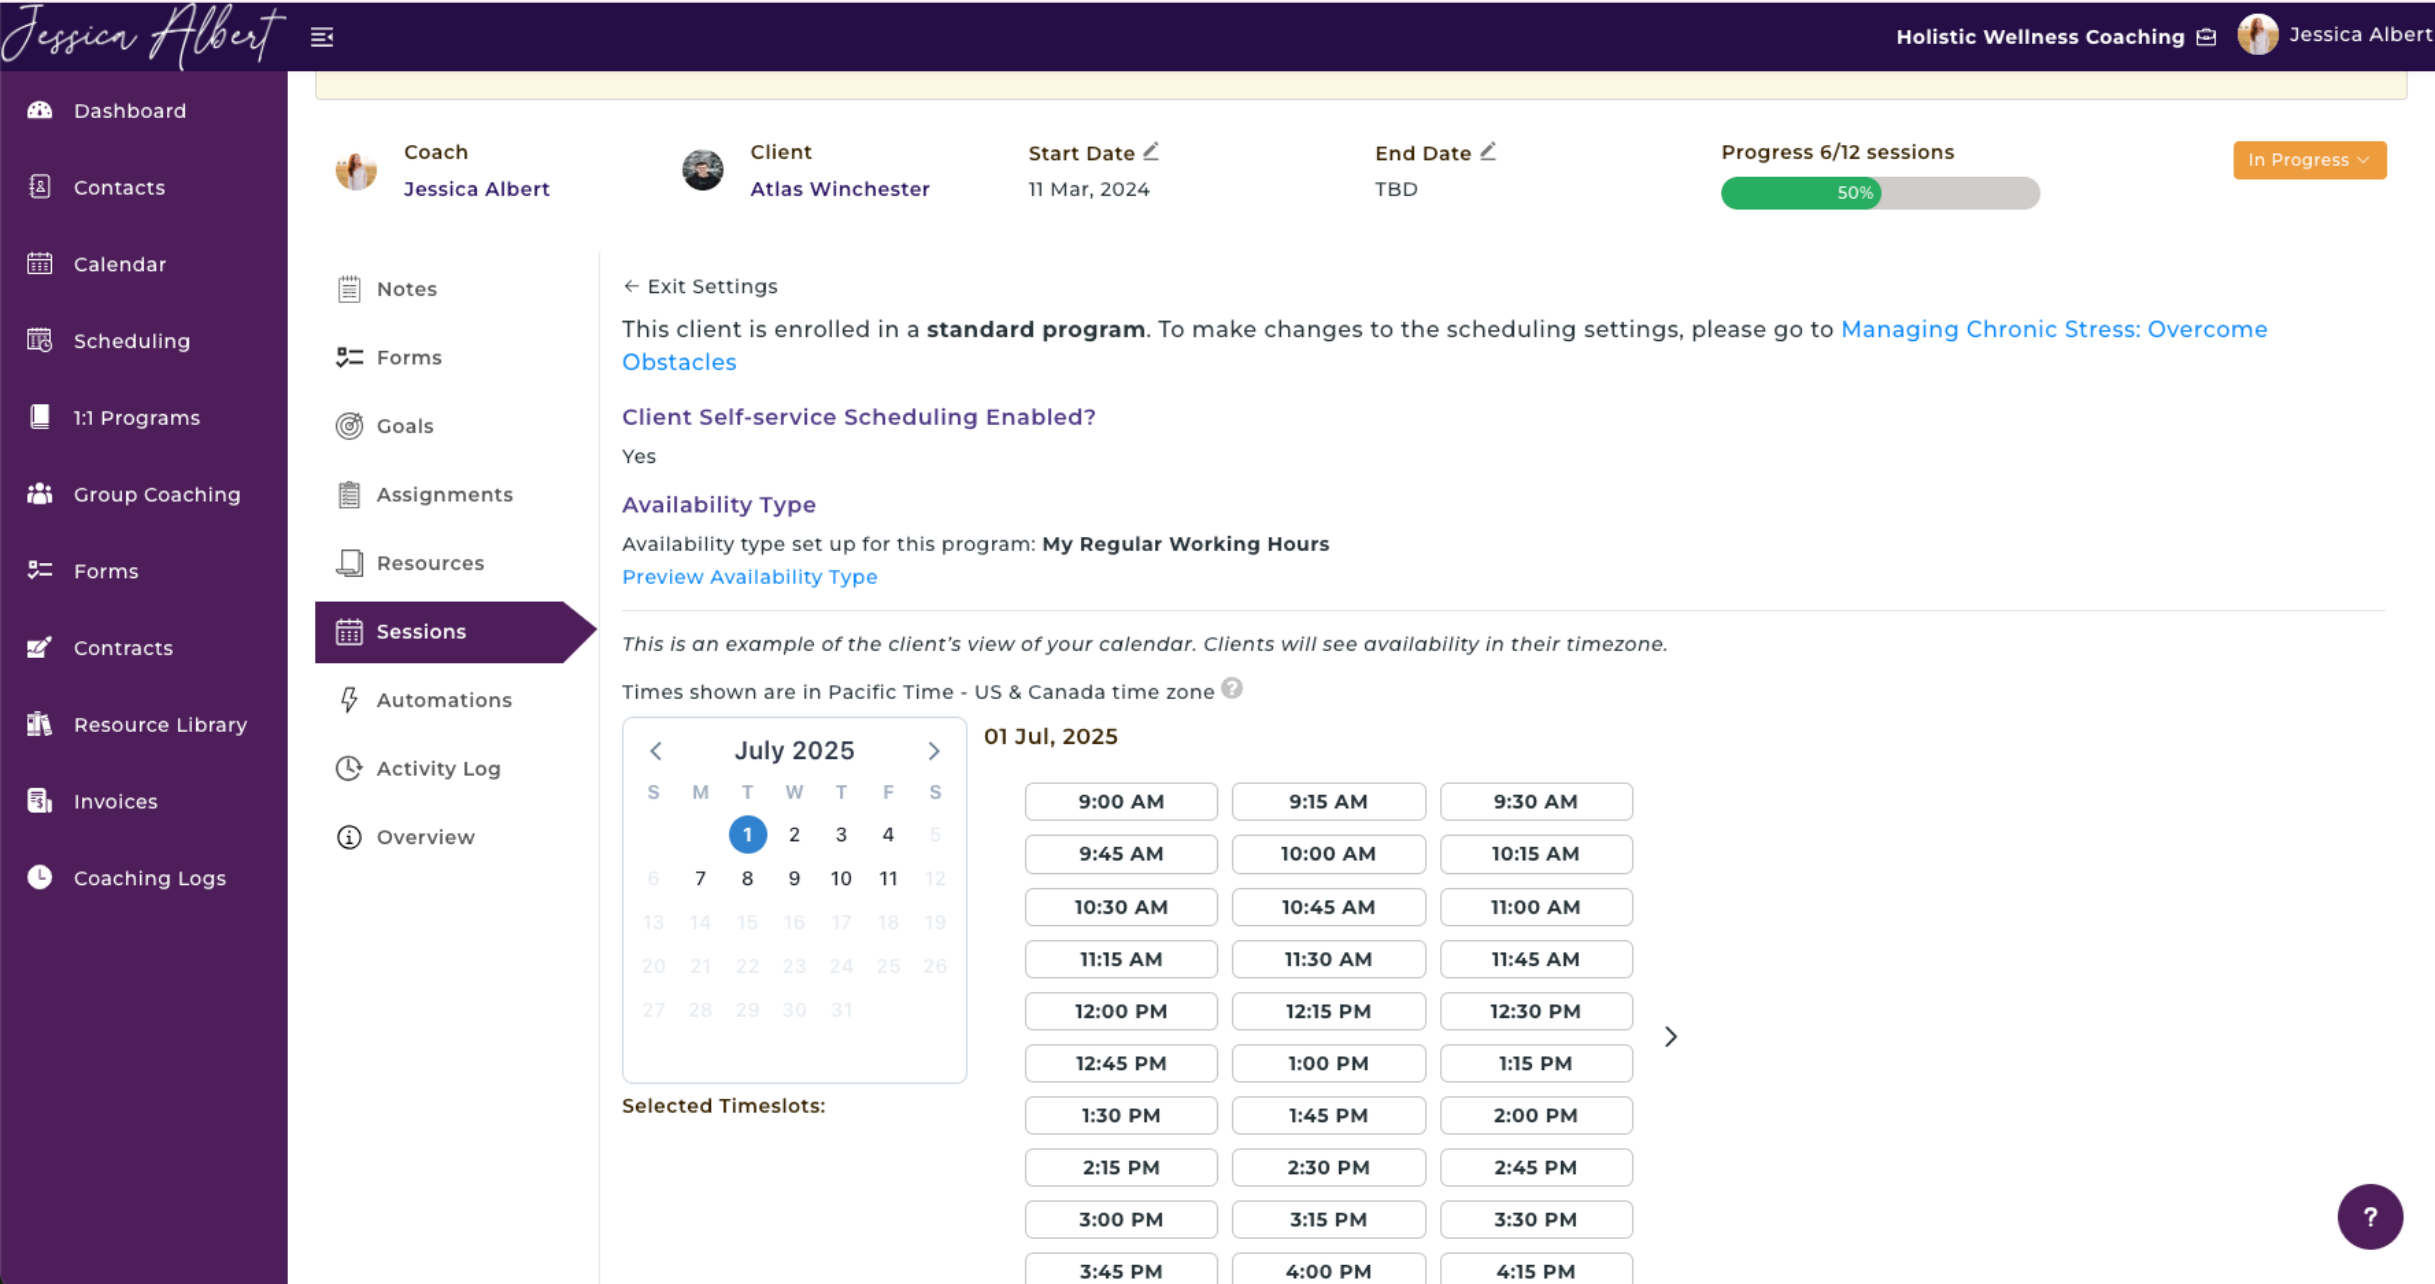
IMPORTANT:
1. If your client is enrolled in a Standard Program, the Scheduling Settings page will notify you accordingly. You will need to edit the Scheduling Settings from the Standard Program settings page. (Changes you make to the scheduling settings of a Standard Program will be applied to all clients who enroll into that program subsequently as well).
Scheduling settings page for Standard Program:
2. If your client is enrolled in a Custom Program or Quick Start Program, the Scheduling Settings page will allow you to make changes which will then be applied for that specific client only. Follow the instructions on the scheduling settings page to make the desired changes to the self-scheduling rules for your client.
Scheduling settings page for Custom Program and Quick Start Program:

Upcoming Sessions
The Upcoming Sessions tab displays the upcoming sessions for the program with this specific client.
You will see the Start Time, End Time, Location and Coach details of an upcoming session.
Tip: If the location is Zoom, the Zoom flag is clickable. When you click the flag, it will prompt you to open the Zoom application so you can start your video call.
To view / edit an upcoming session:
- Click on the 3-dot button menu on the right.
- You will see the following options: View Details, Reschedule and Cancel.
View Details
- Select View Details to view more details about the session.
- A window appears that will show more details such as the appointment location, any private notes or instructions to client that you had specified when creating the appointment.

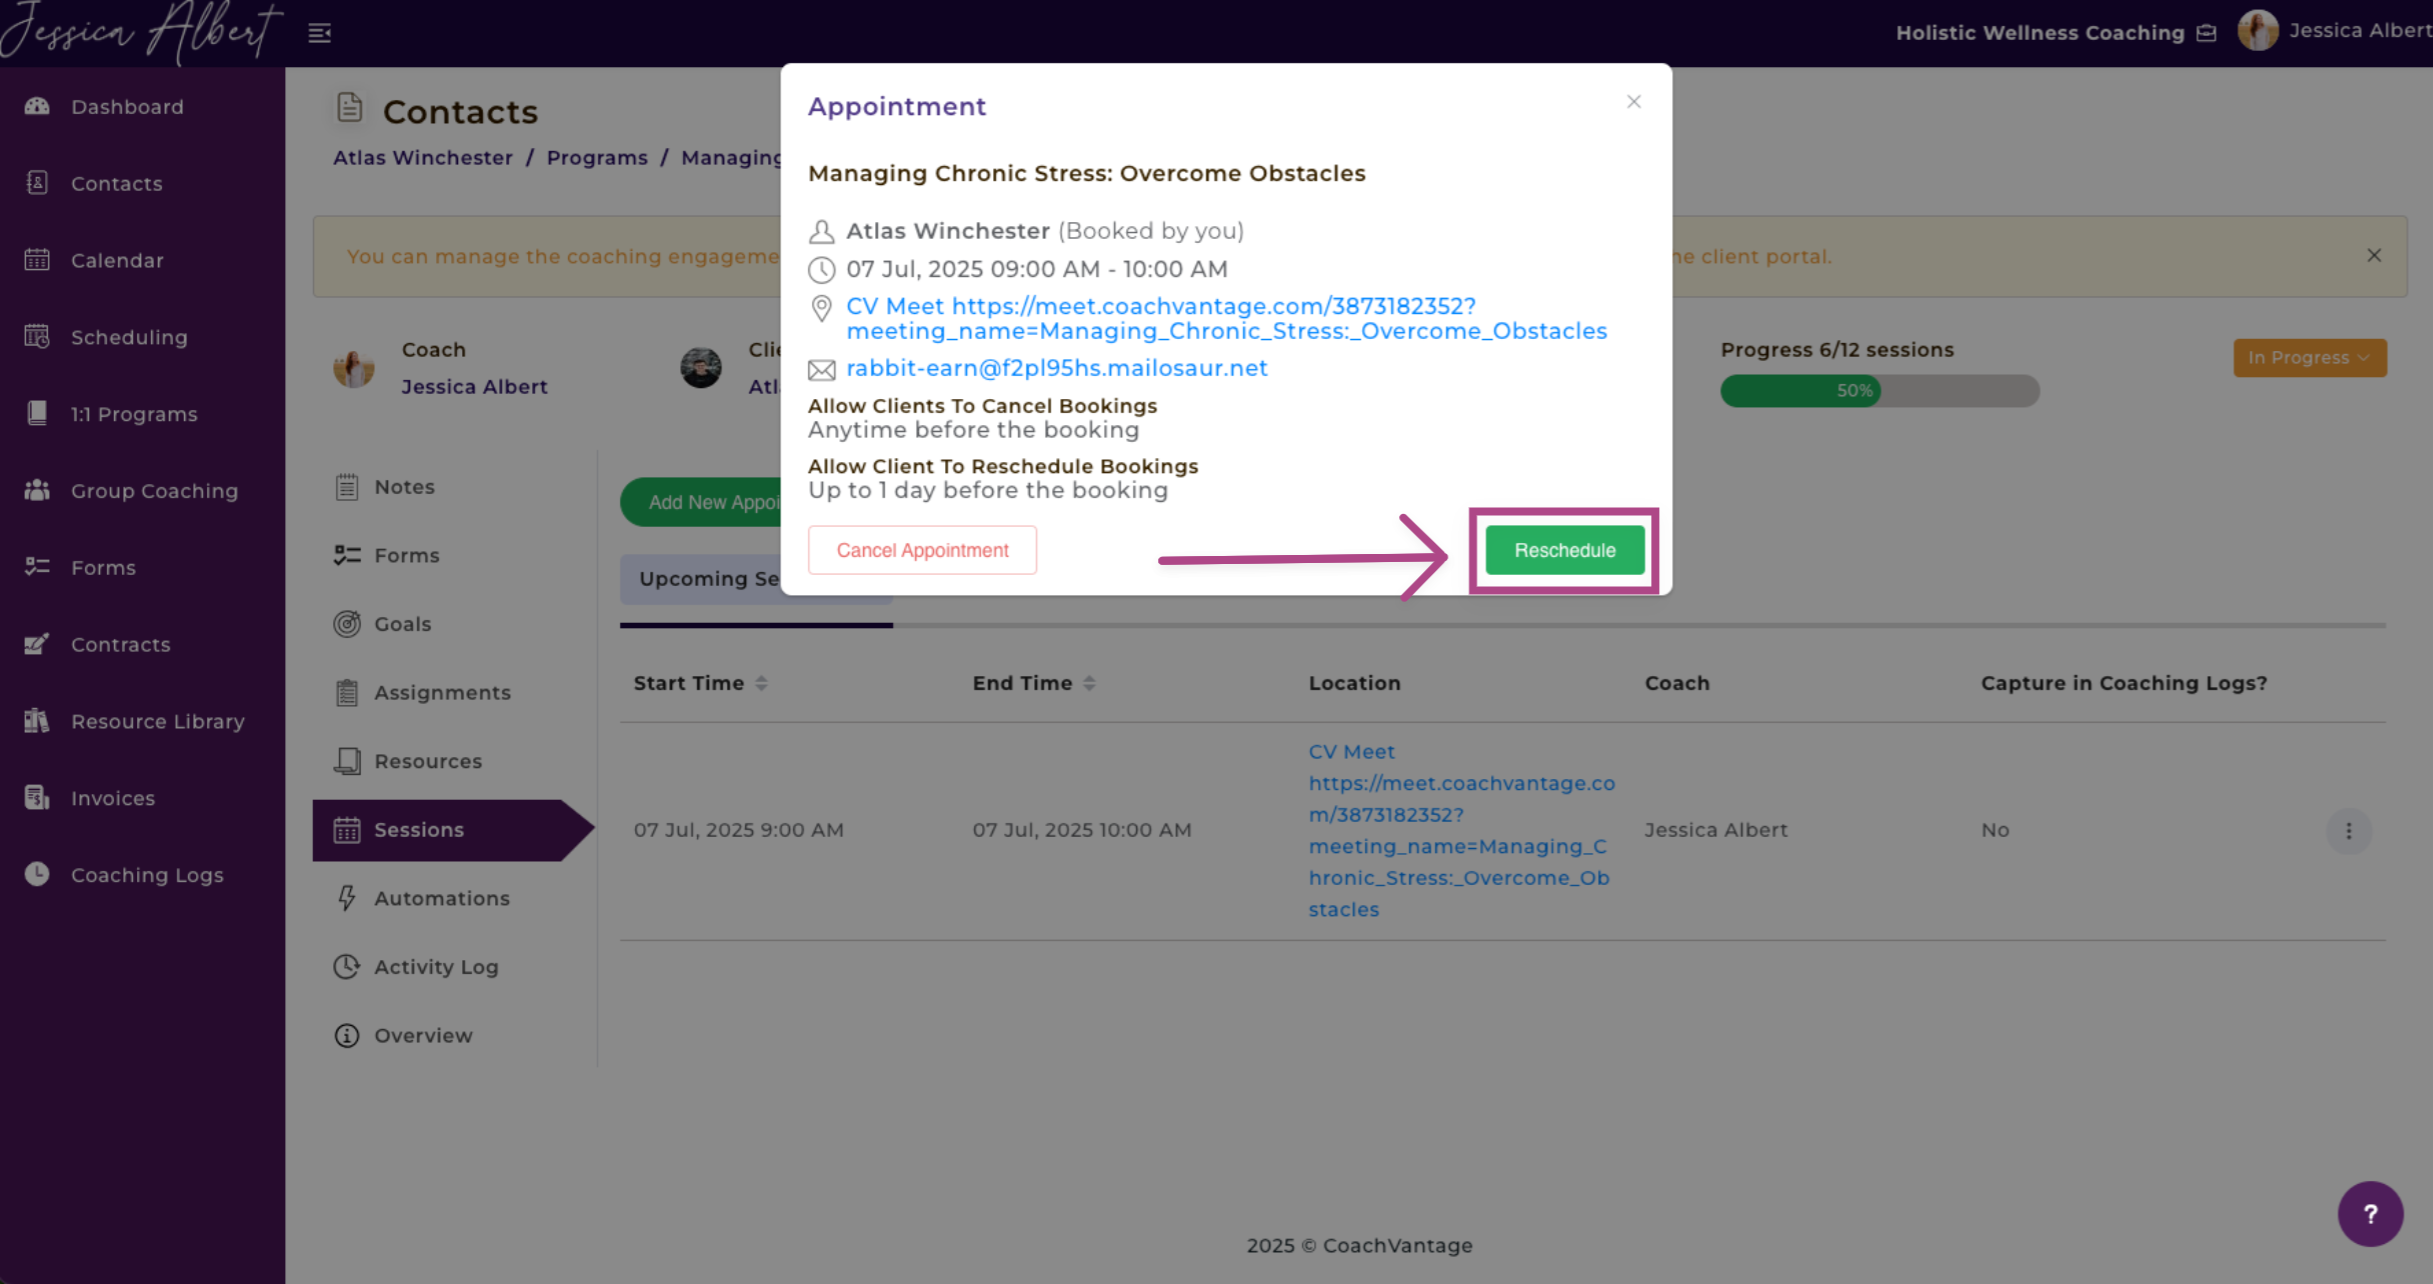
Reschedule
- If your coach has made it an option for the client, select Reschedule to reschedule an appointment.
- A window appears that will allow you to edit the appointment details, change the appointment date, time, etc.
- Be sure to click Save to save your changes.
If you have checked the Send Appointment Notification checkbox, we will send an automated email notification to inform your client of the changes.
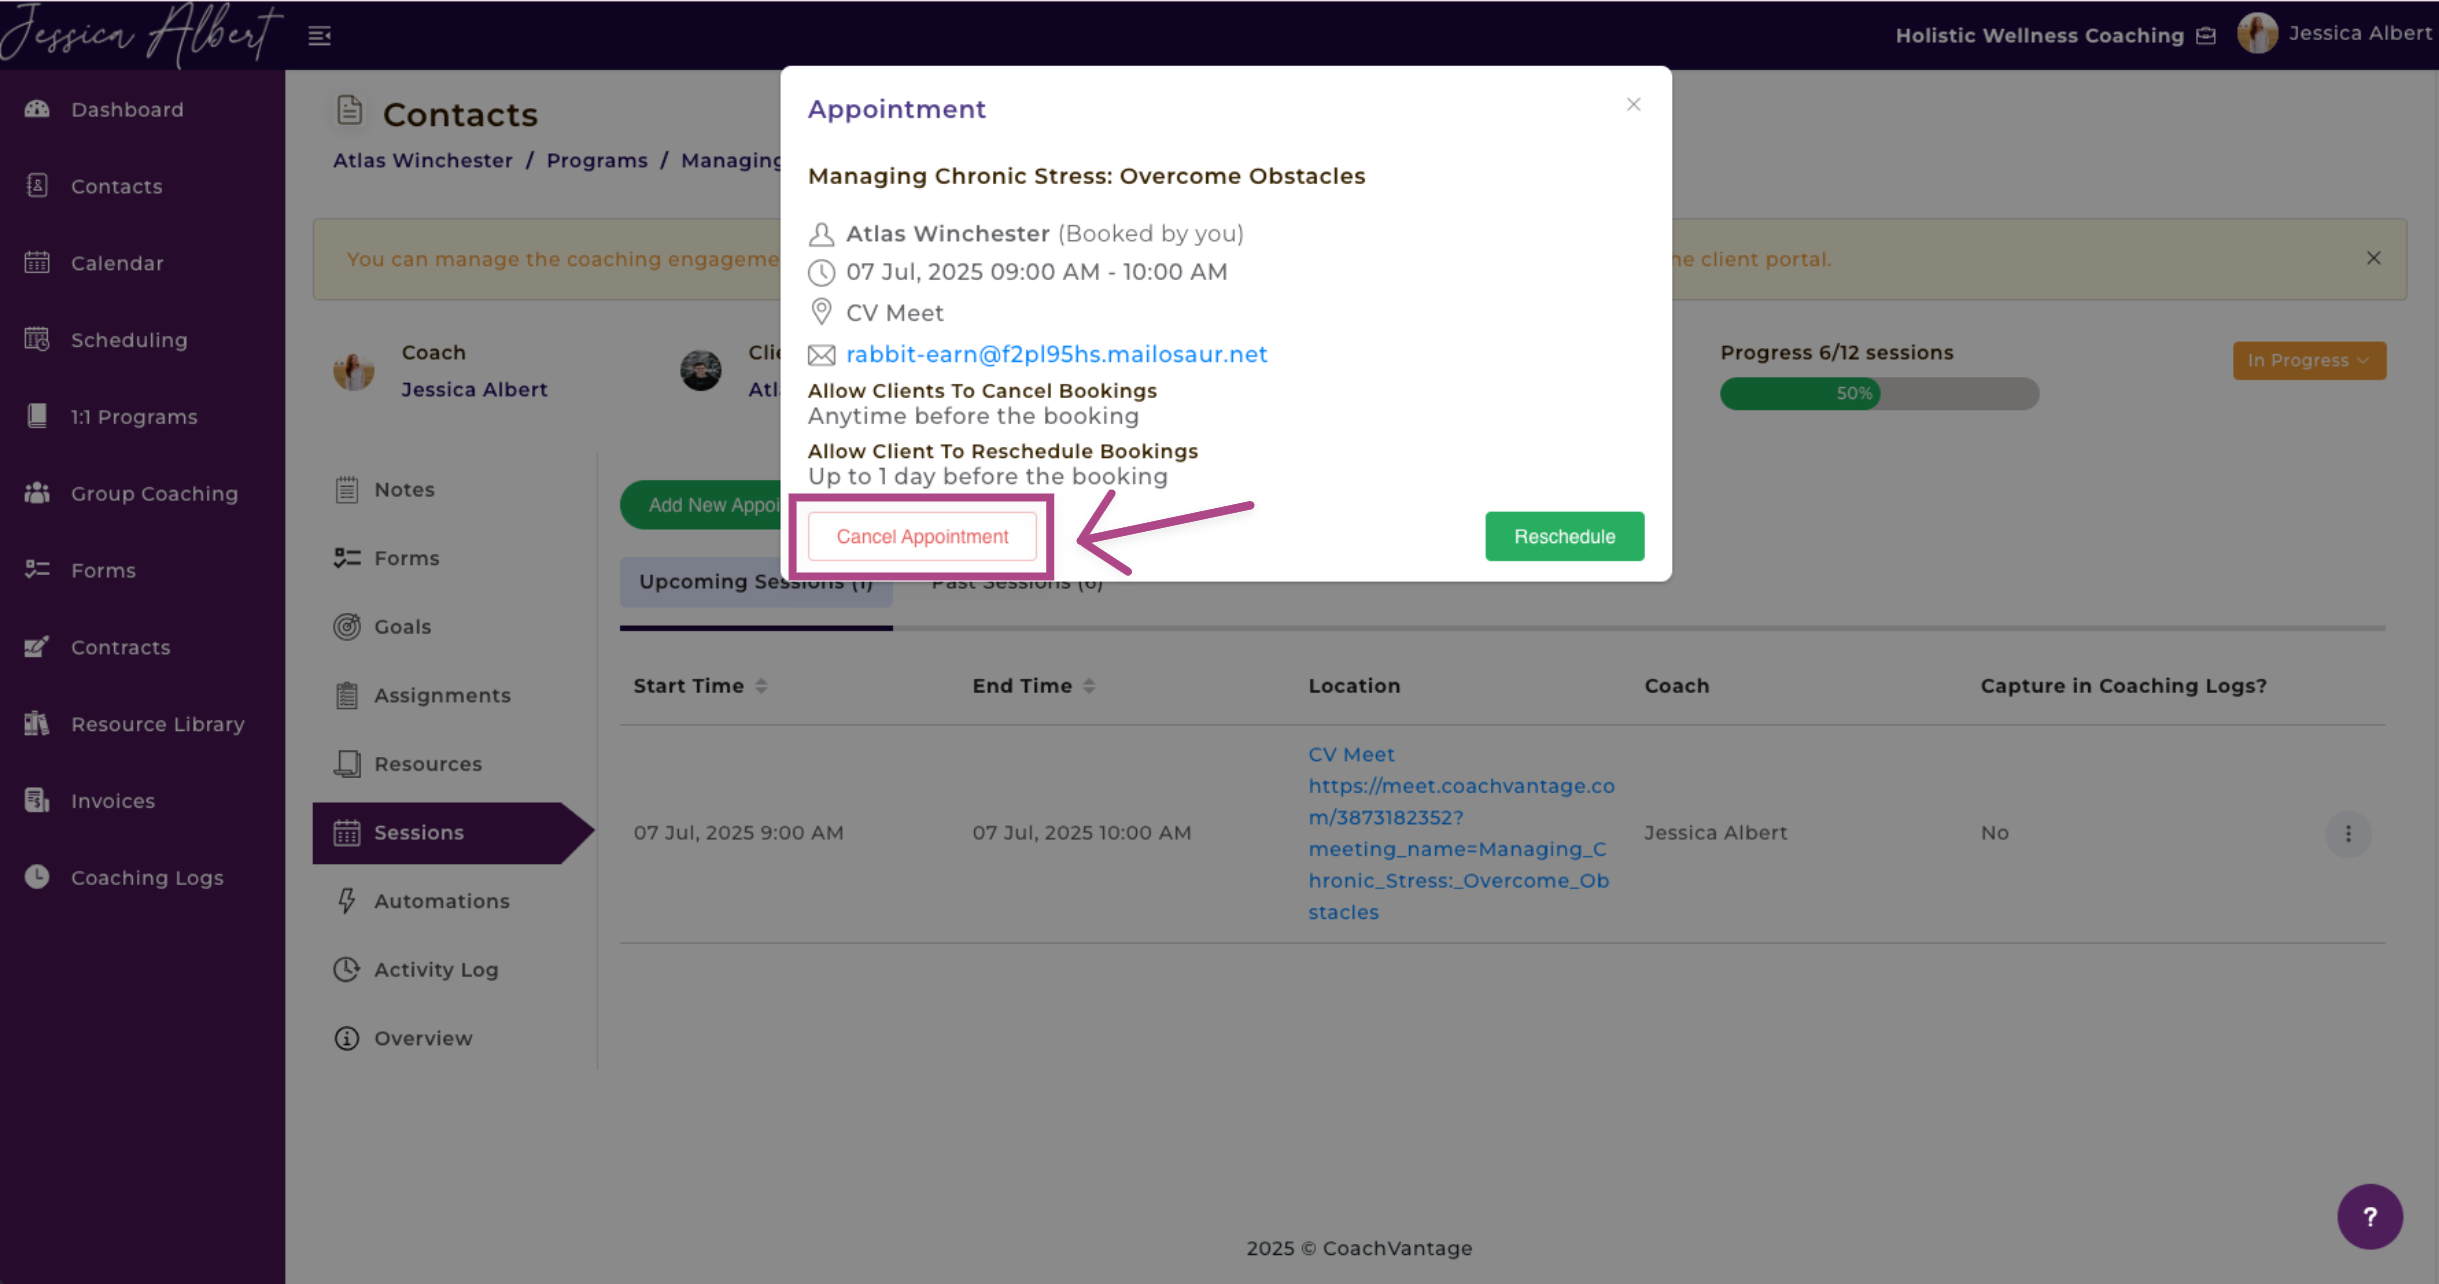
Cancel
- Select Cancel to cancel an appointment.
- A window appears that will allow you to cancel the appointment.
- You have the option to provide a reason for cancellation.
The cancellation reason will be visible to your client in the email notification that will be sent to your client, notifying of the appointment cancellation.
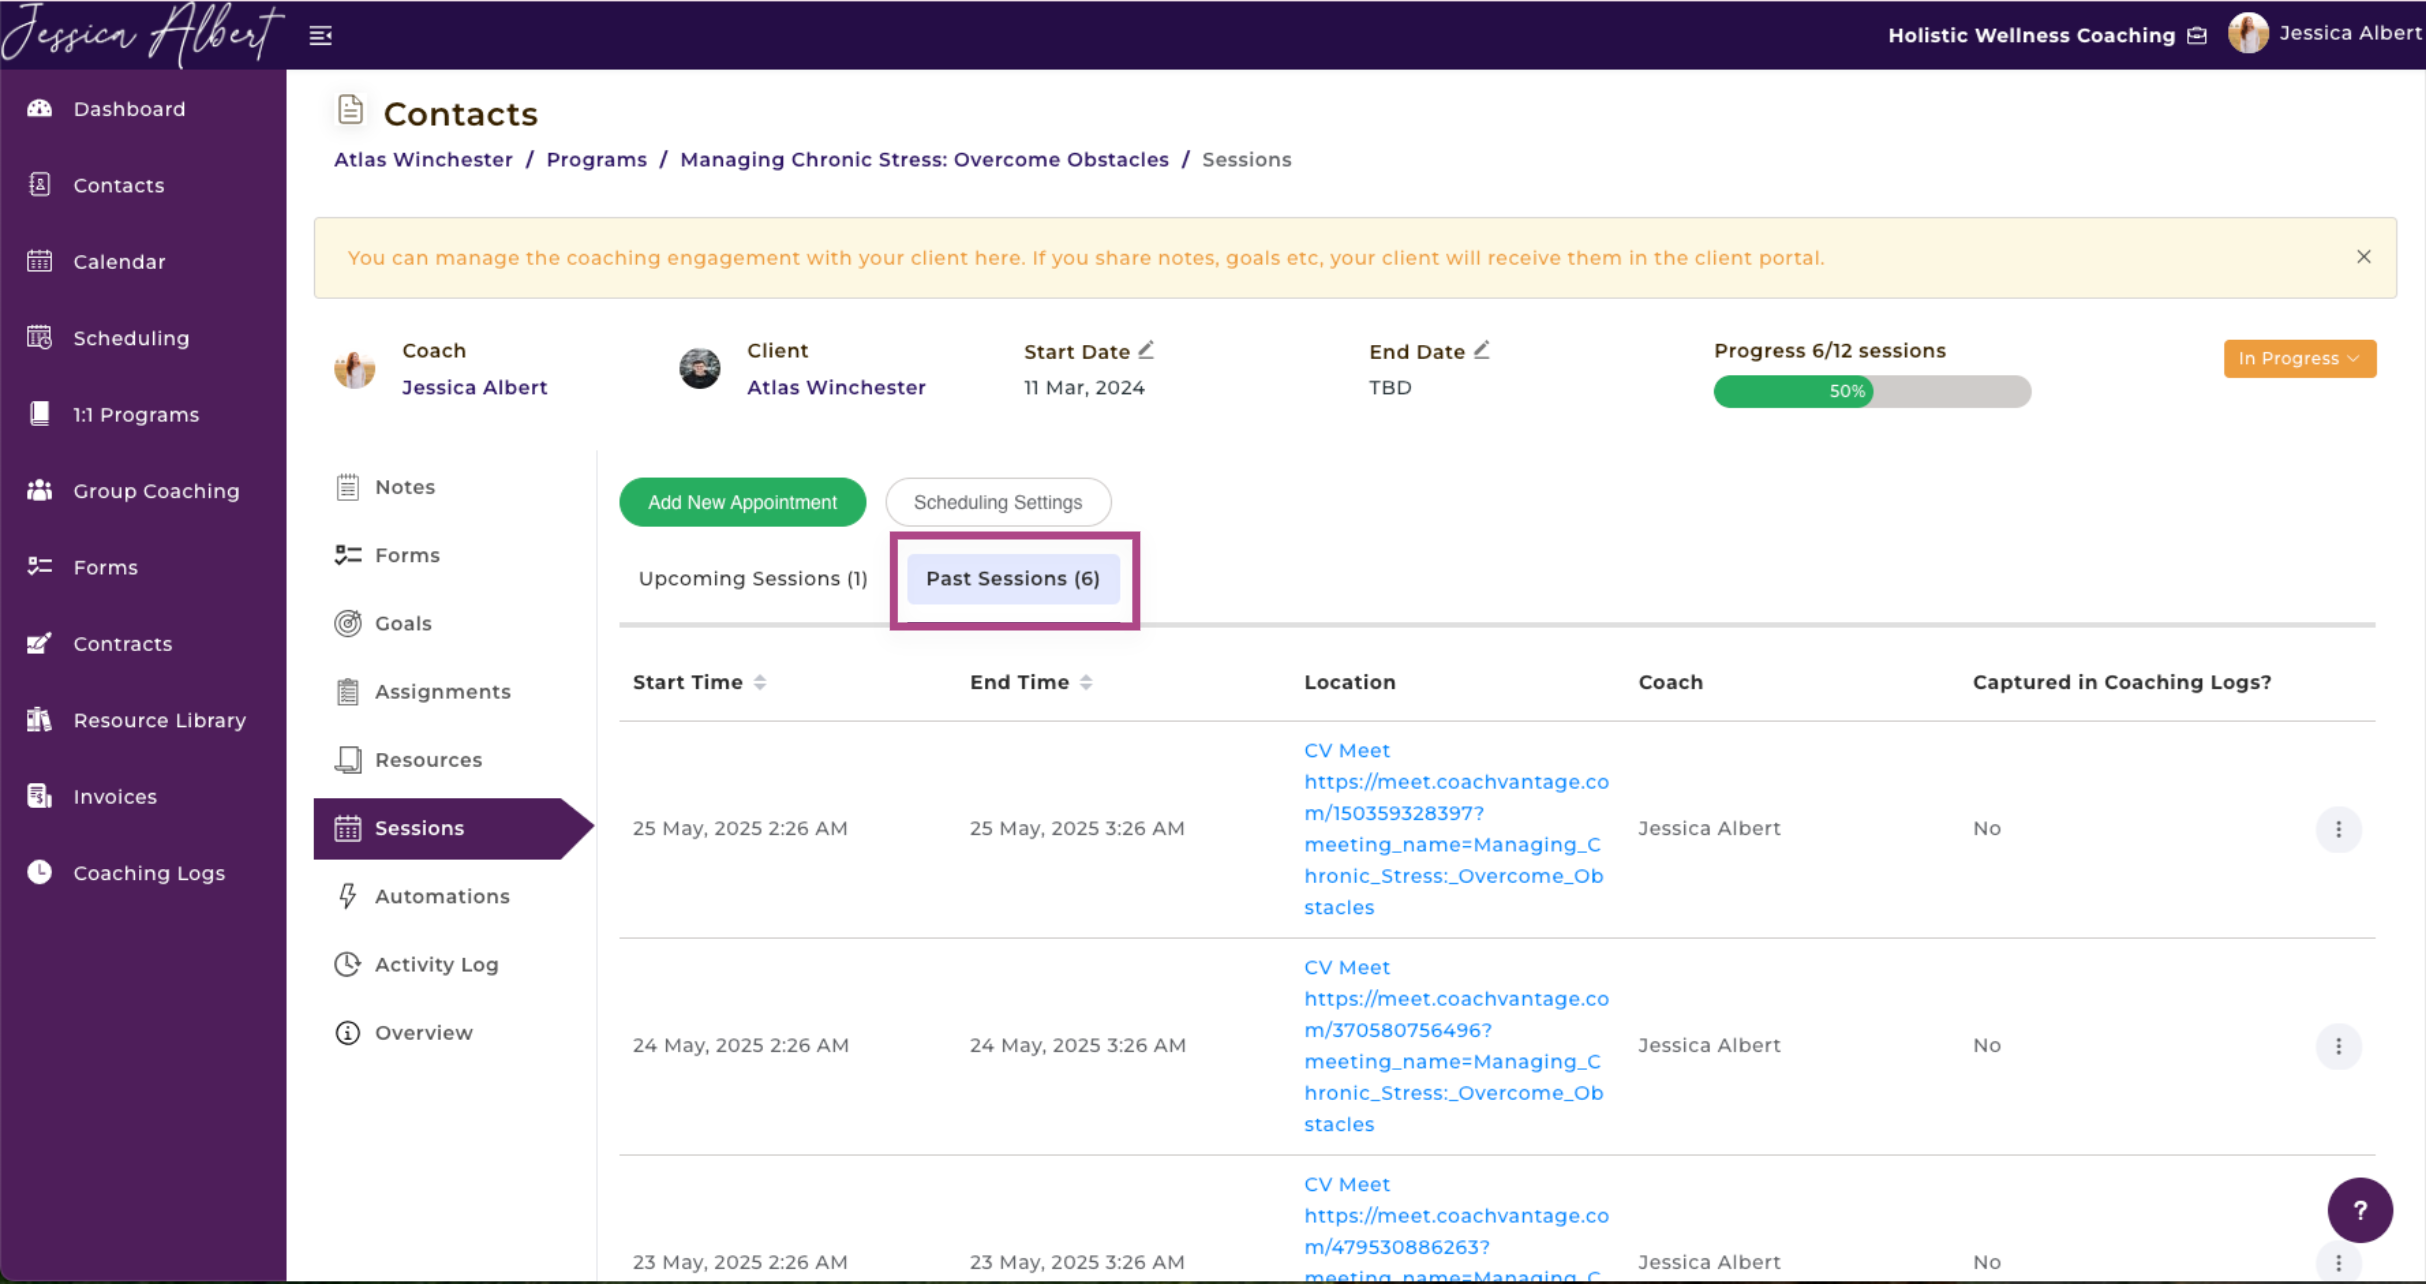
Past Sessions
The Past Sessions tab displays all past sessions (or completed sessions) for the program with this specific client.
You will see the Start Time, End Time, Location, Coach and Captured in Coaching Log details of a past session.
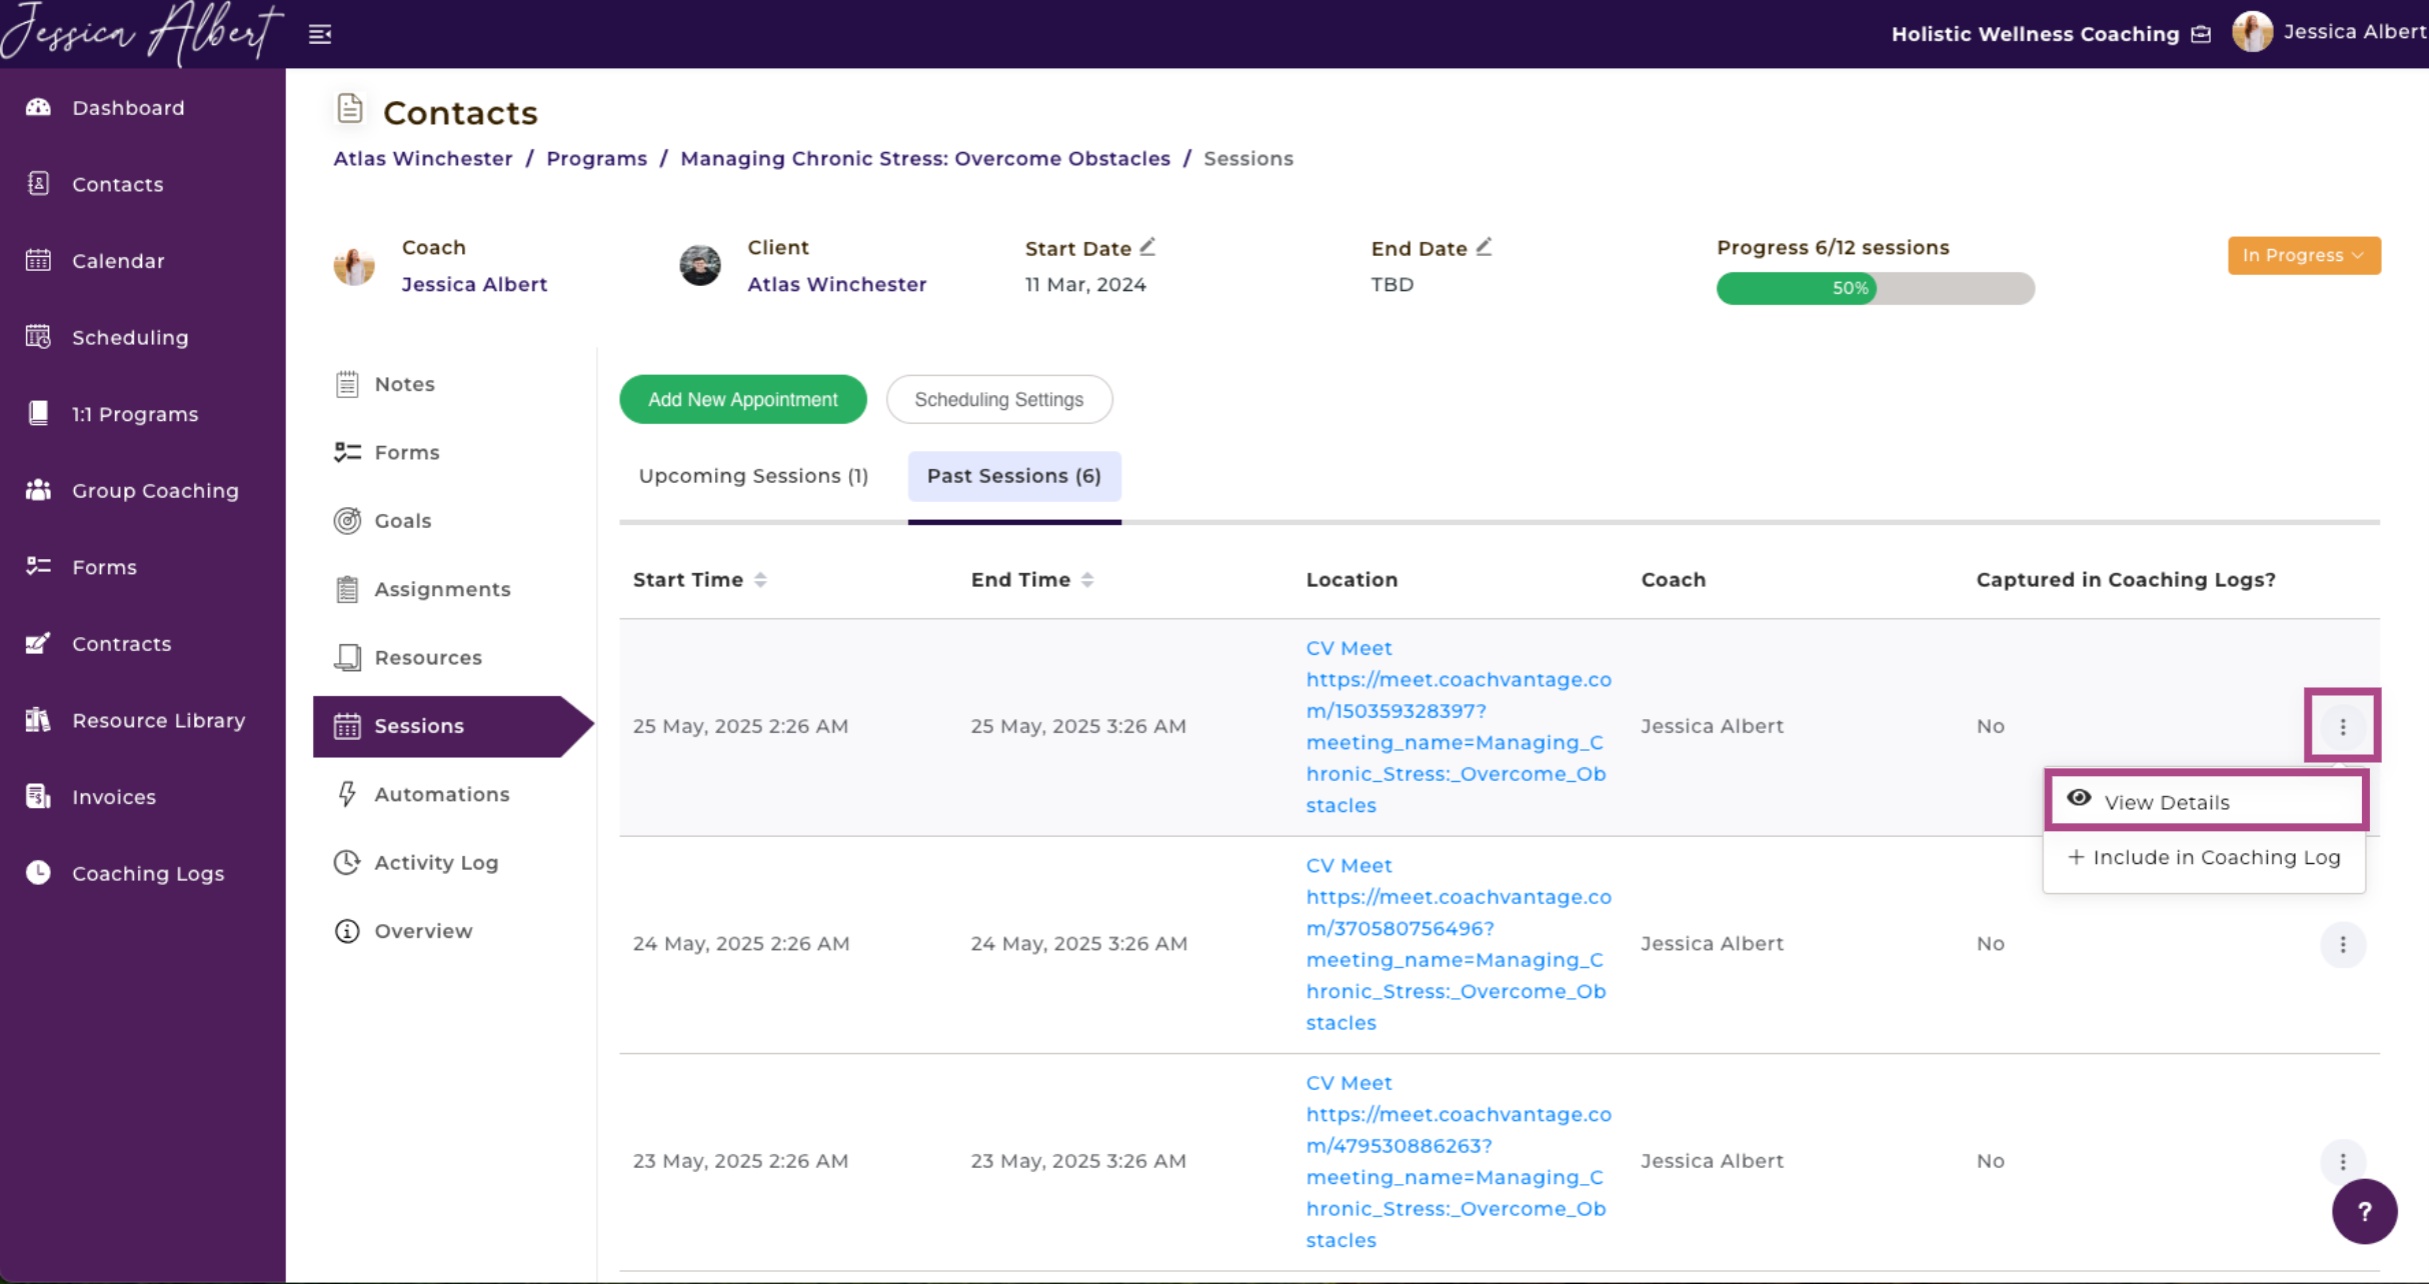
To view / edit a past session:
- Click on the 3-dot button menu on the right.
- You will see the following options: View Details and Include or Remove from Coaching Log.
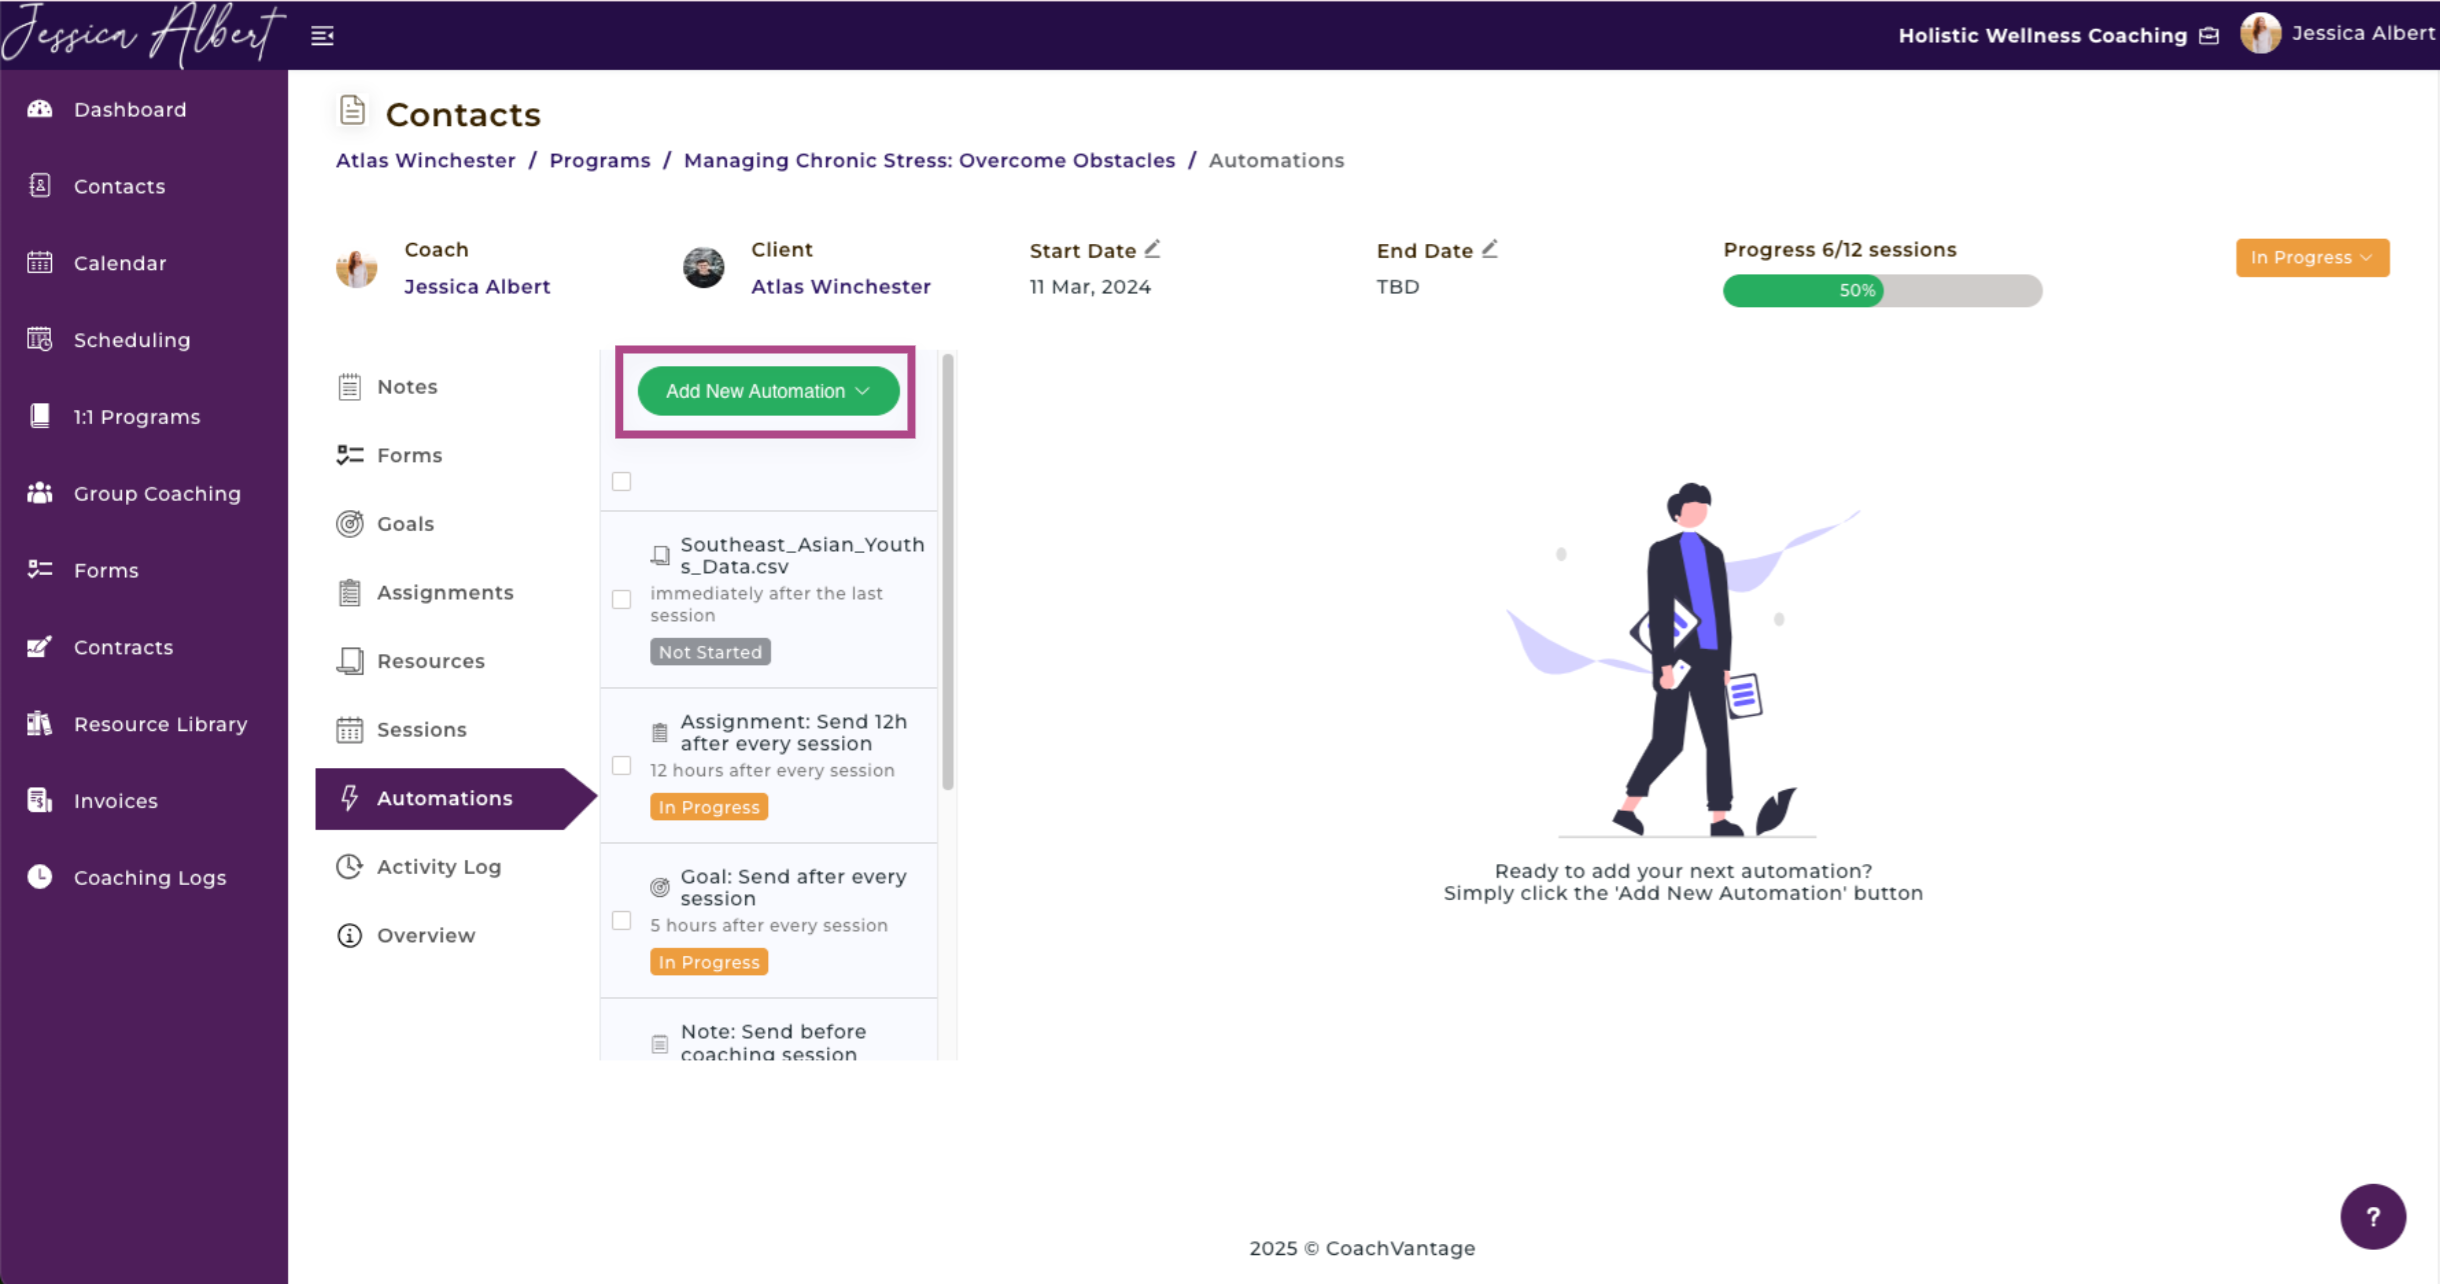
10. Automations
When you create a coaching program, you can configure Automation Rules to automate the delivery of coaching resources (files), notes, goals, assignments and forms to all clients who enroll in the program.
You can automate content delivery to clients immediately upon their enrollment, or before or after coaching sessions. Once you have set up Automation Rules, CoachVantage will automatically trigger the release of your content to every client who signs up for the program in accordance with the your configured rules.
Refer to the How to Create Automations for Your Coaching Programs article for more information.
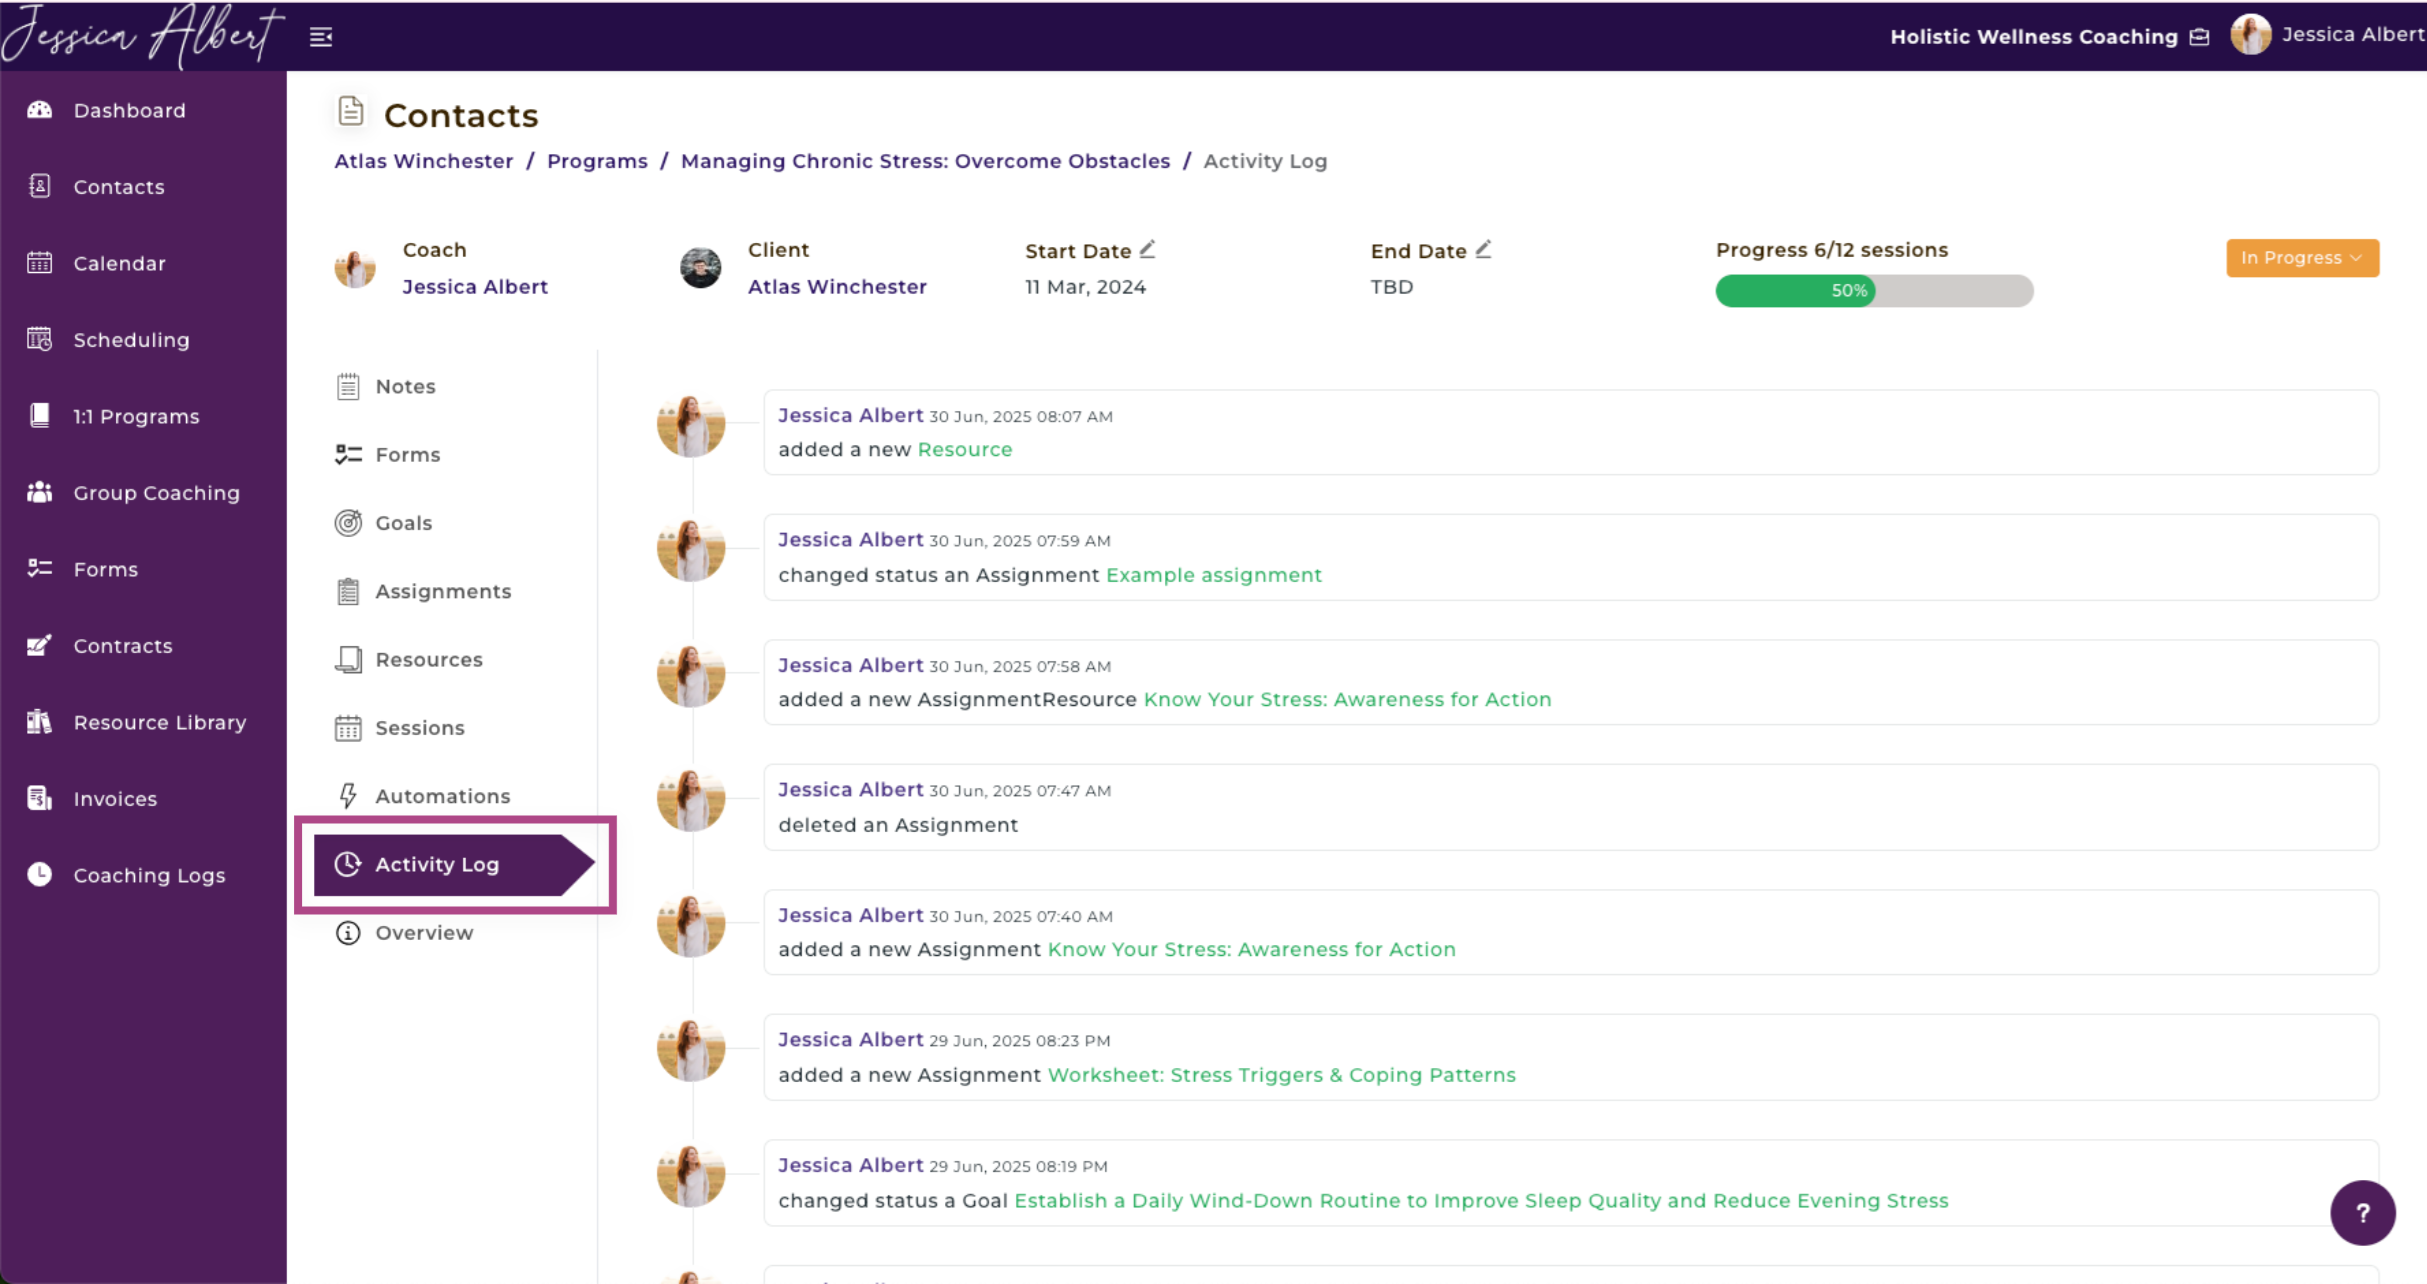
11. Activity Log
The Activity Log displays a history of all actions/transactions that were performed by coach and client throughout the course of this program engagement.
It also displays the date and time that each action was taken.
Note: The green text in the Activity Log are clickable links and take you directly to that page where the action was performed.
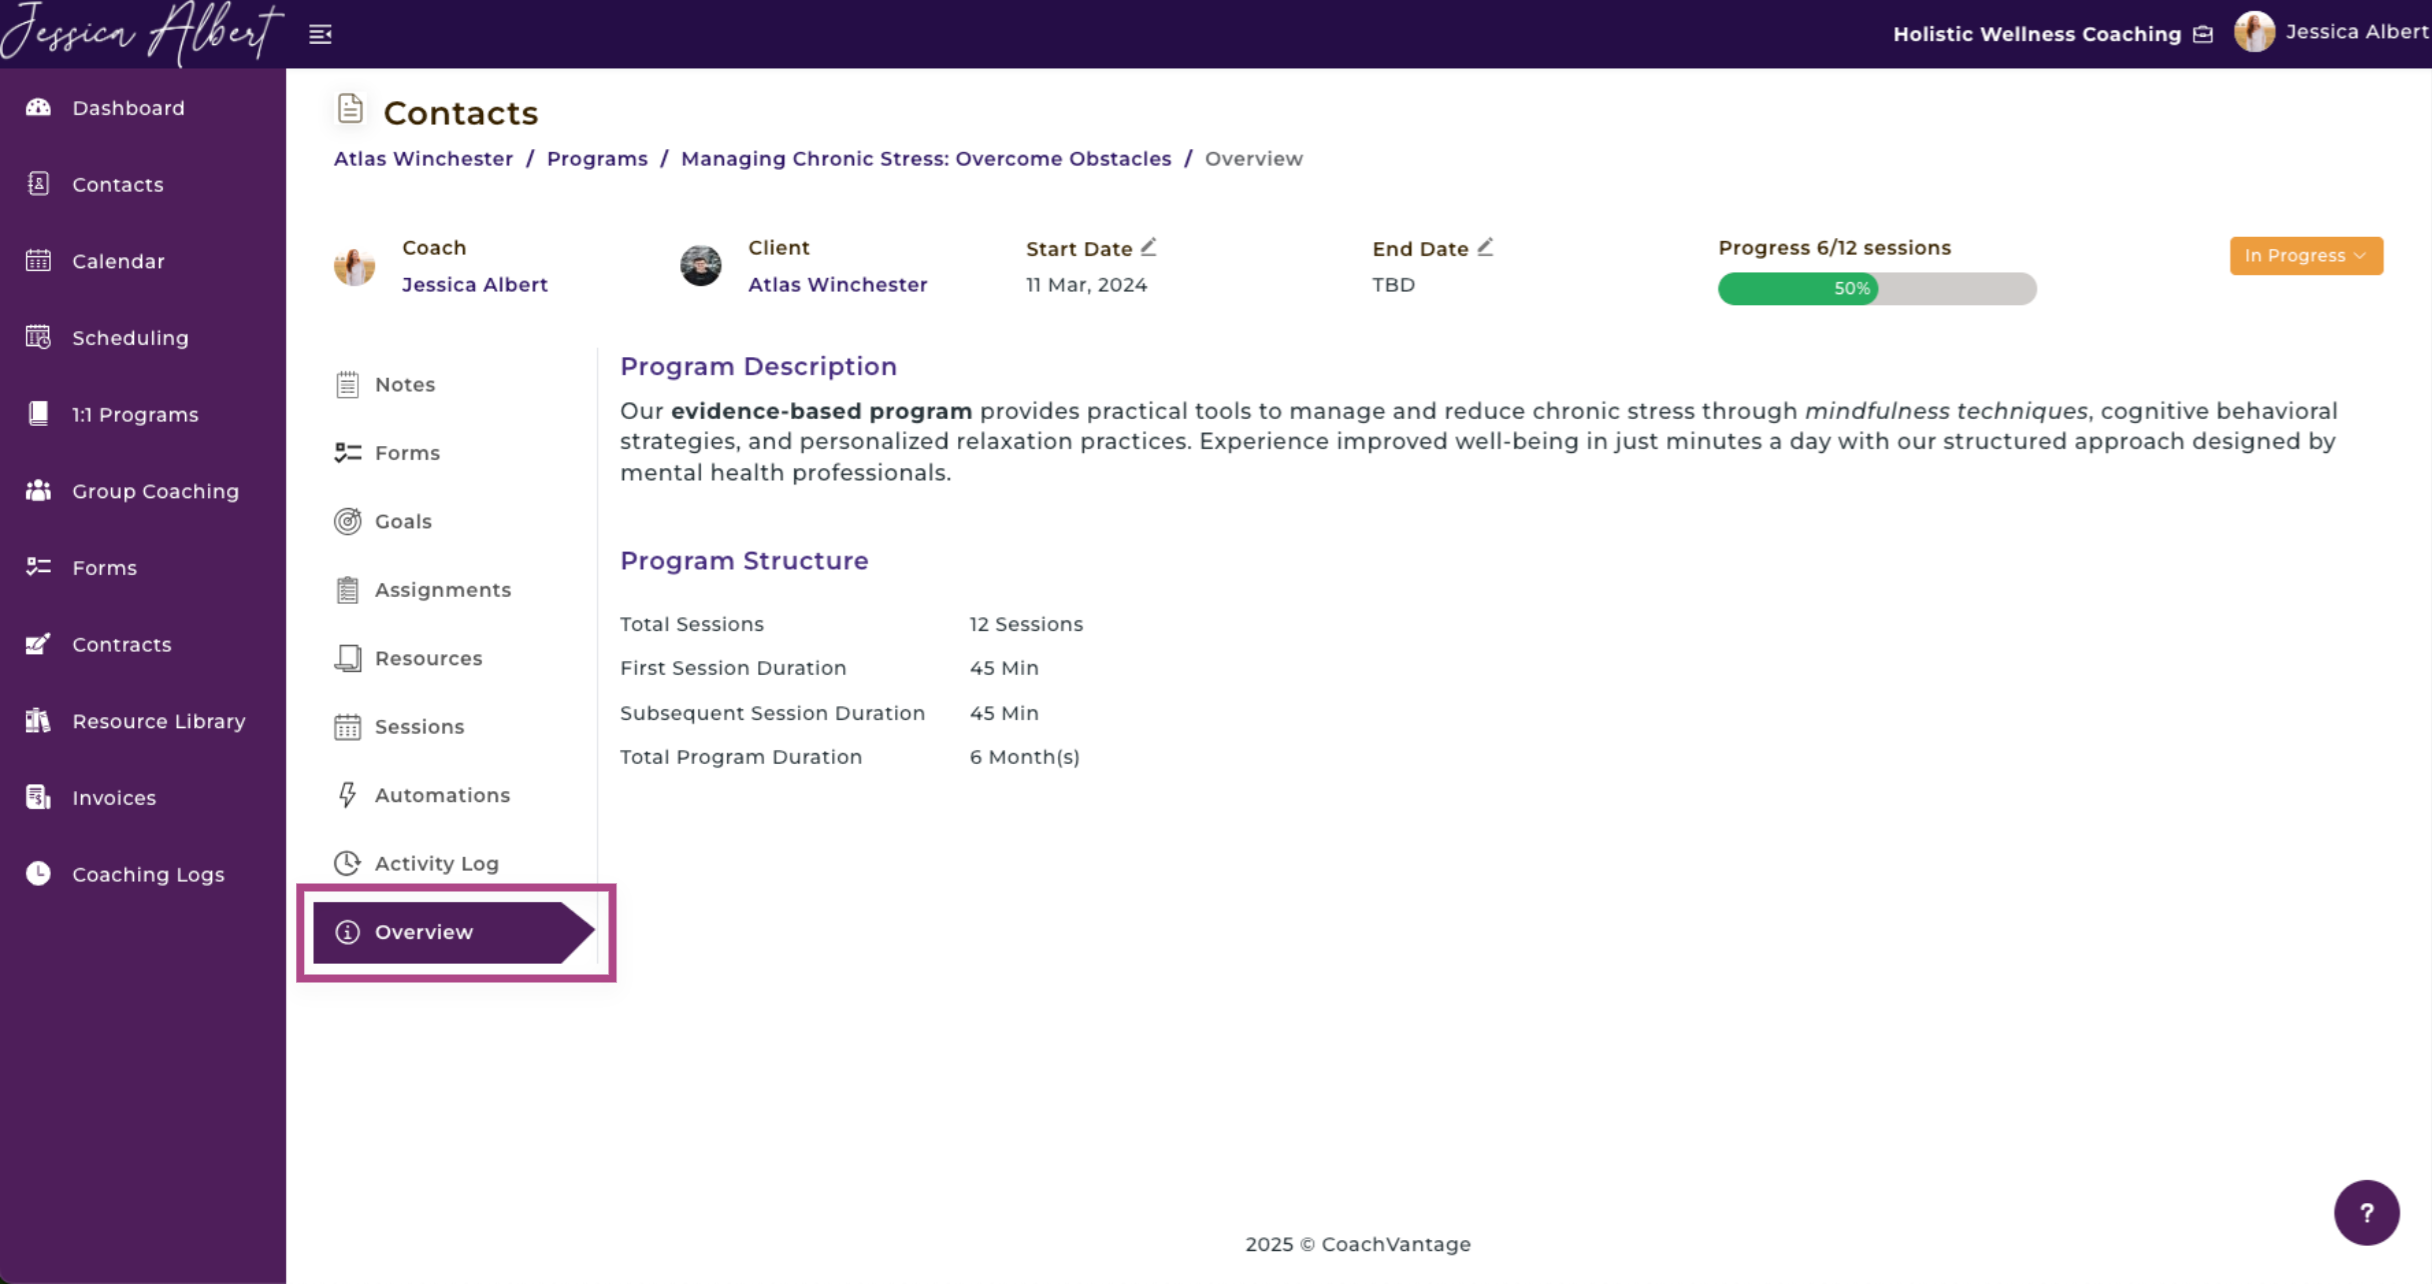
12. Overview
The overview page displays your Program Description and as well as your Program Structure. This includes your number of Total Sessions, First Session Duration, Subsequent Session Duration, and Total Program Duration.