Tagging Contacts
Overview
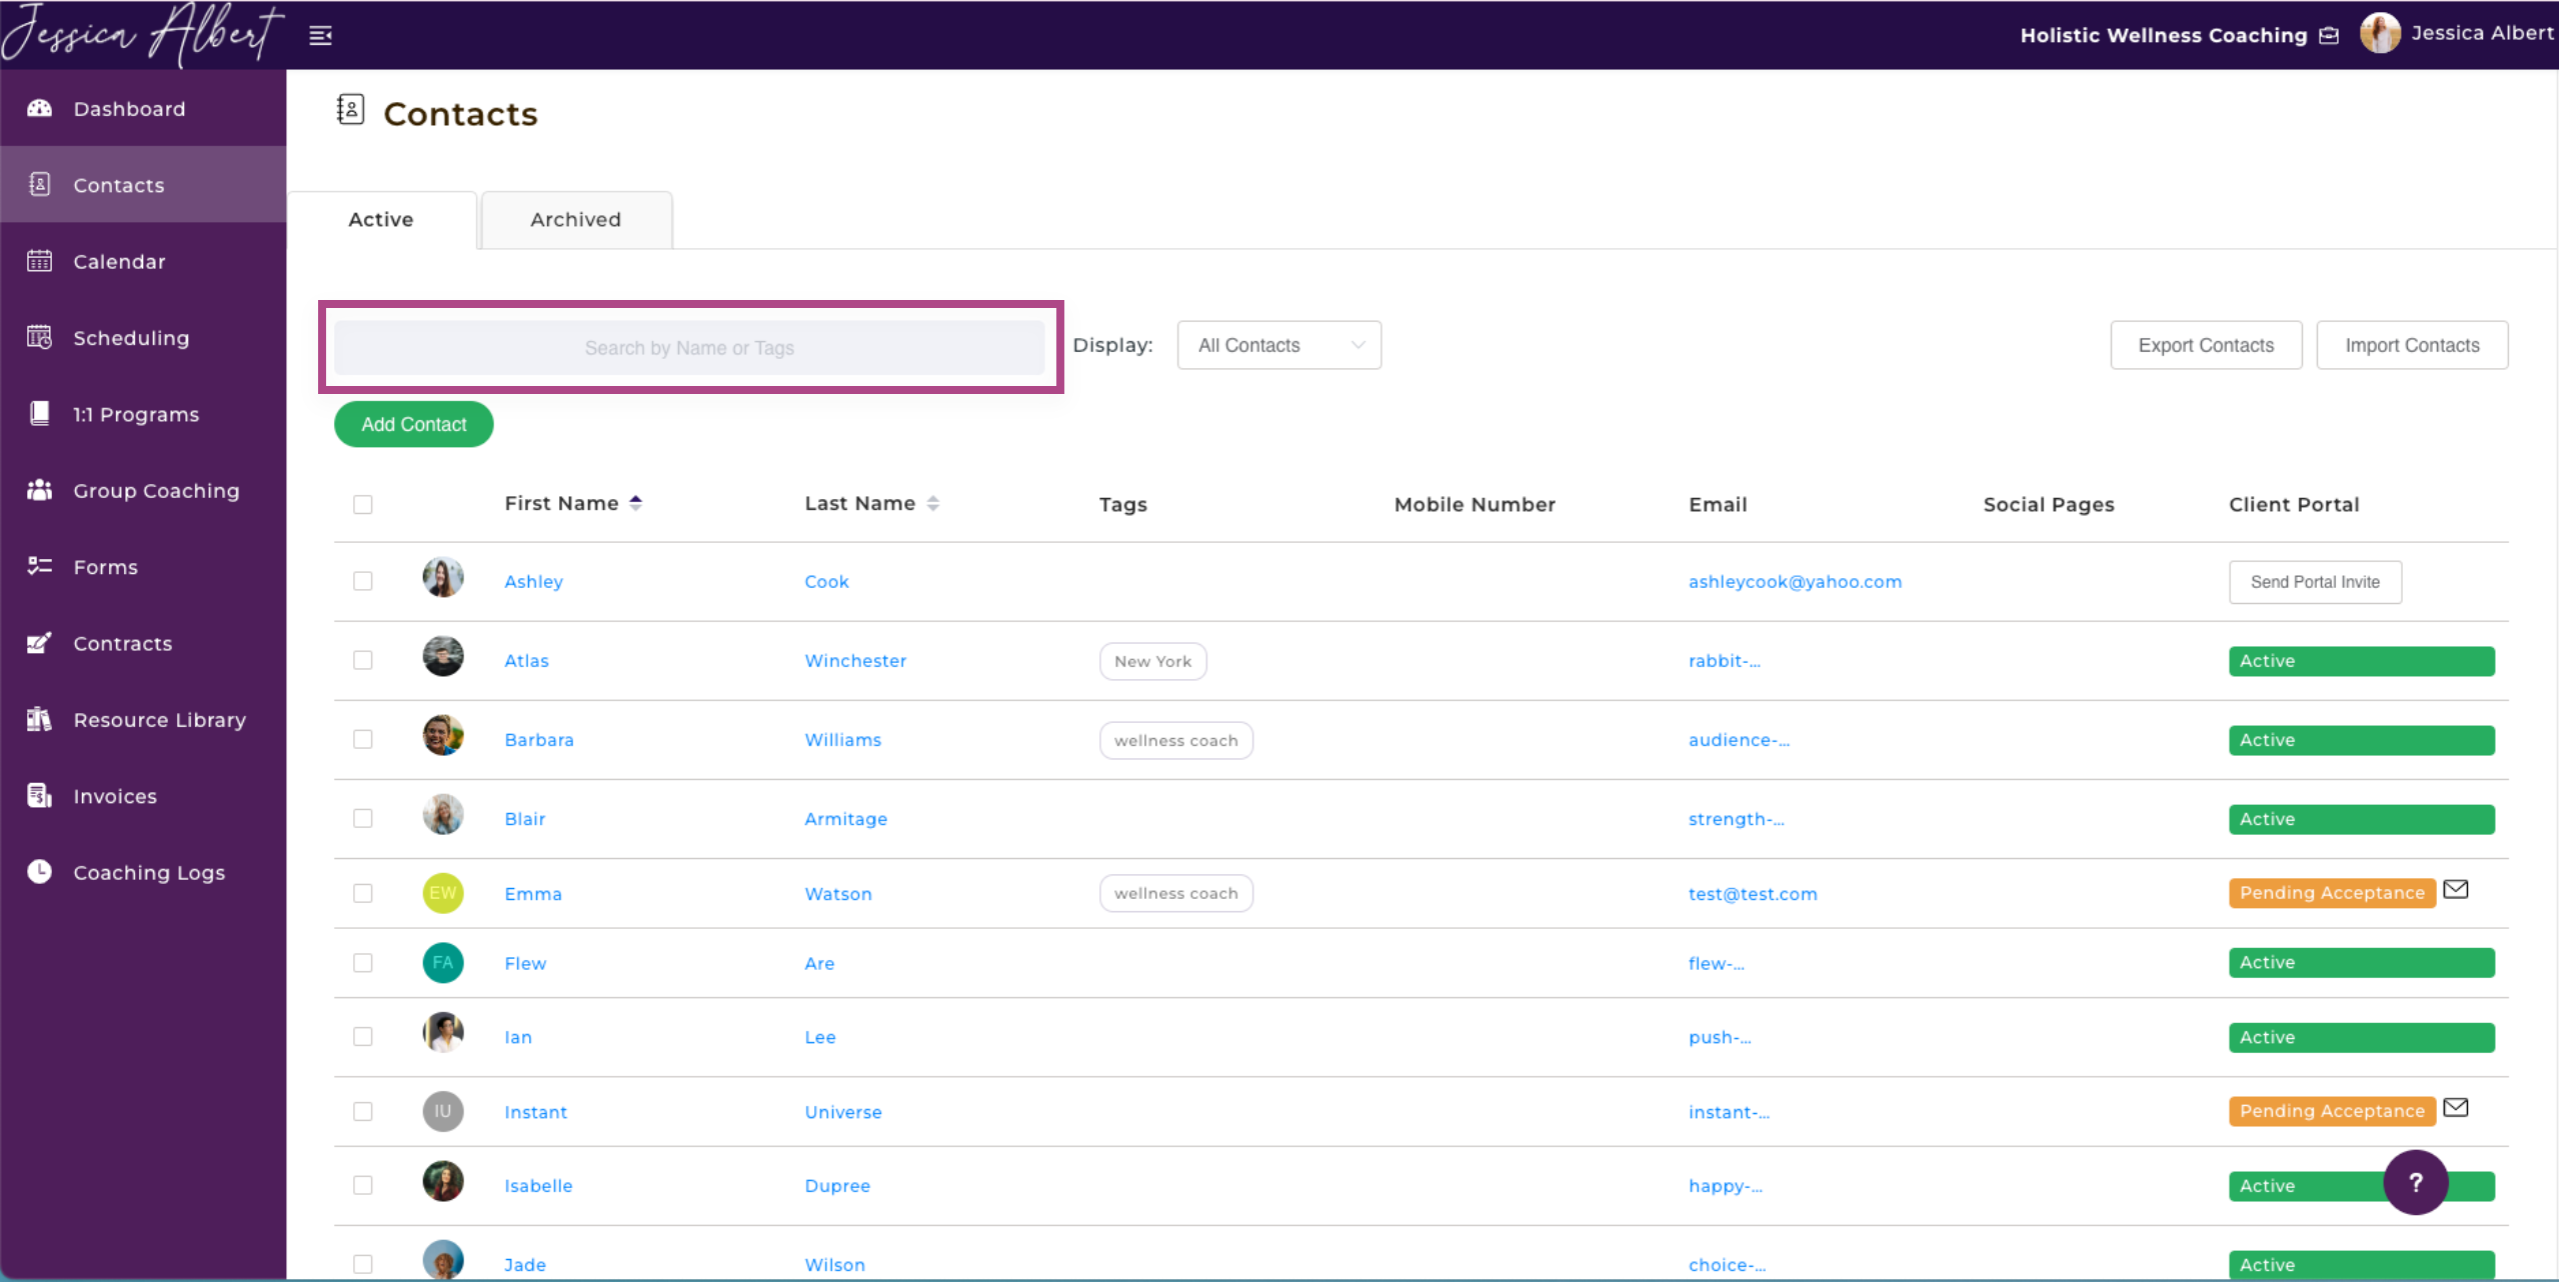
You can add tags to Contacts to have an easier time searching for them.
Useful Tags to Create 🏷️
To search for tagged contacts, simply enter the tag name in the Search Bar on the main Contacts page.
The tags you create should be specific to your contact.
Here are some ideas to get you started:
- Goals - You might want to quickly identify the Goals that your clients have set for themselves. For example - "Acceptance", "Leadership", etc. This would allow you to quickly identify clients with specific goals and invite them to your coaching program that could help them with their goals.
- Testimonial - If you have a valuable customer who particularly benefited from your coaching program, you can tag them as a ‘Testimonial’ candidate and follow up with all contacts with this tag at a later date to seek referrals from them.
- Organization - Tag your contacts by the position they hold in an organization. You can easily match programs that can benefit their roles held in a company.
- Programs Attended - You can have a quick overview of what programs your contact has attended. This would be particularly useful if you'd like to send them a form in the future in order to follow up on their progress or a feedback form to get feedback about your service.
Note: You can create multiple tags so feel free to add more than one tag for a particular contact, as needed.
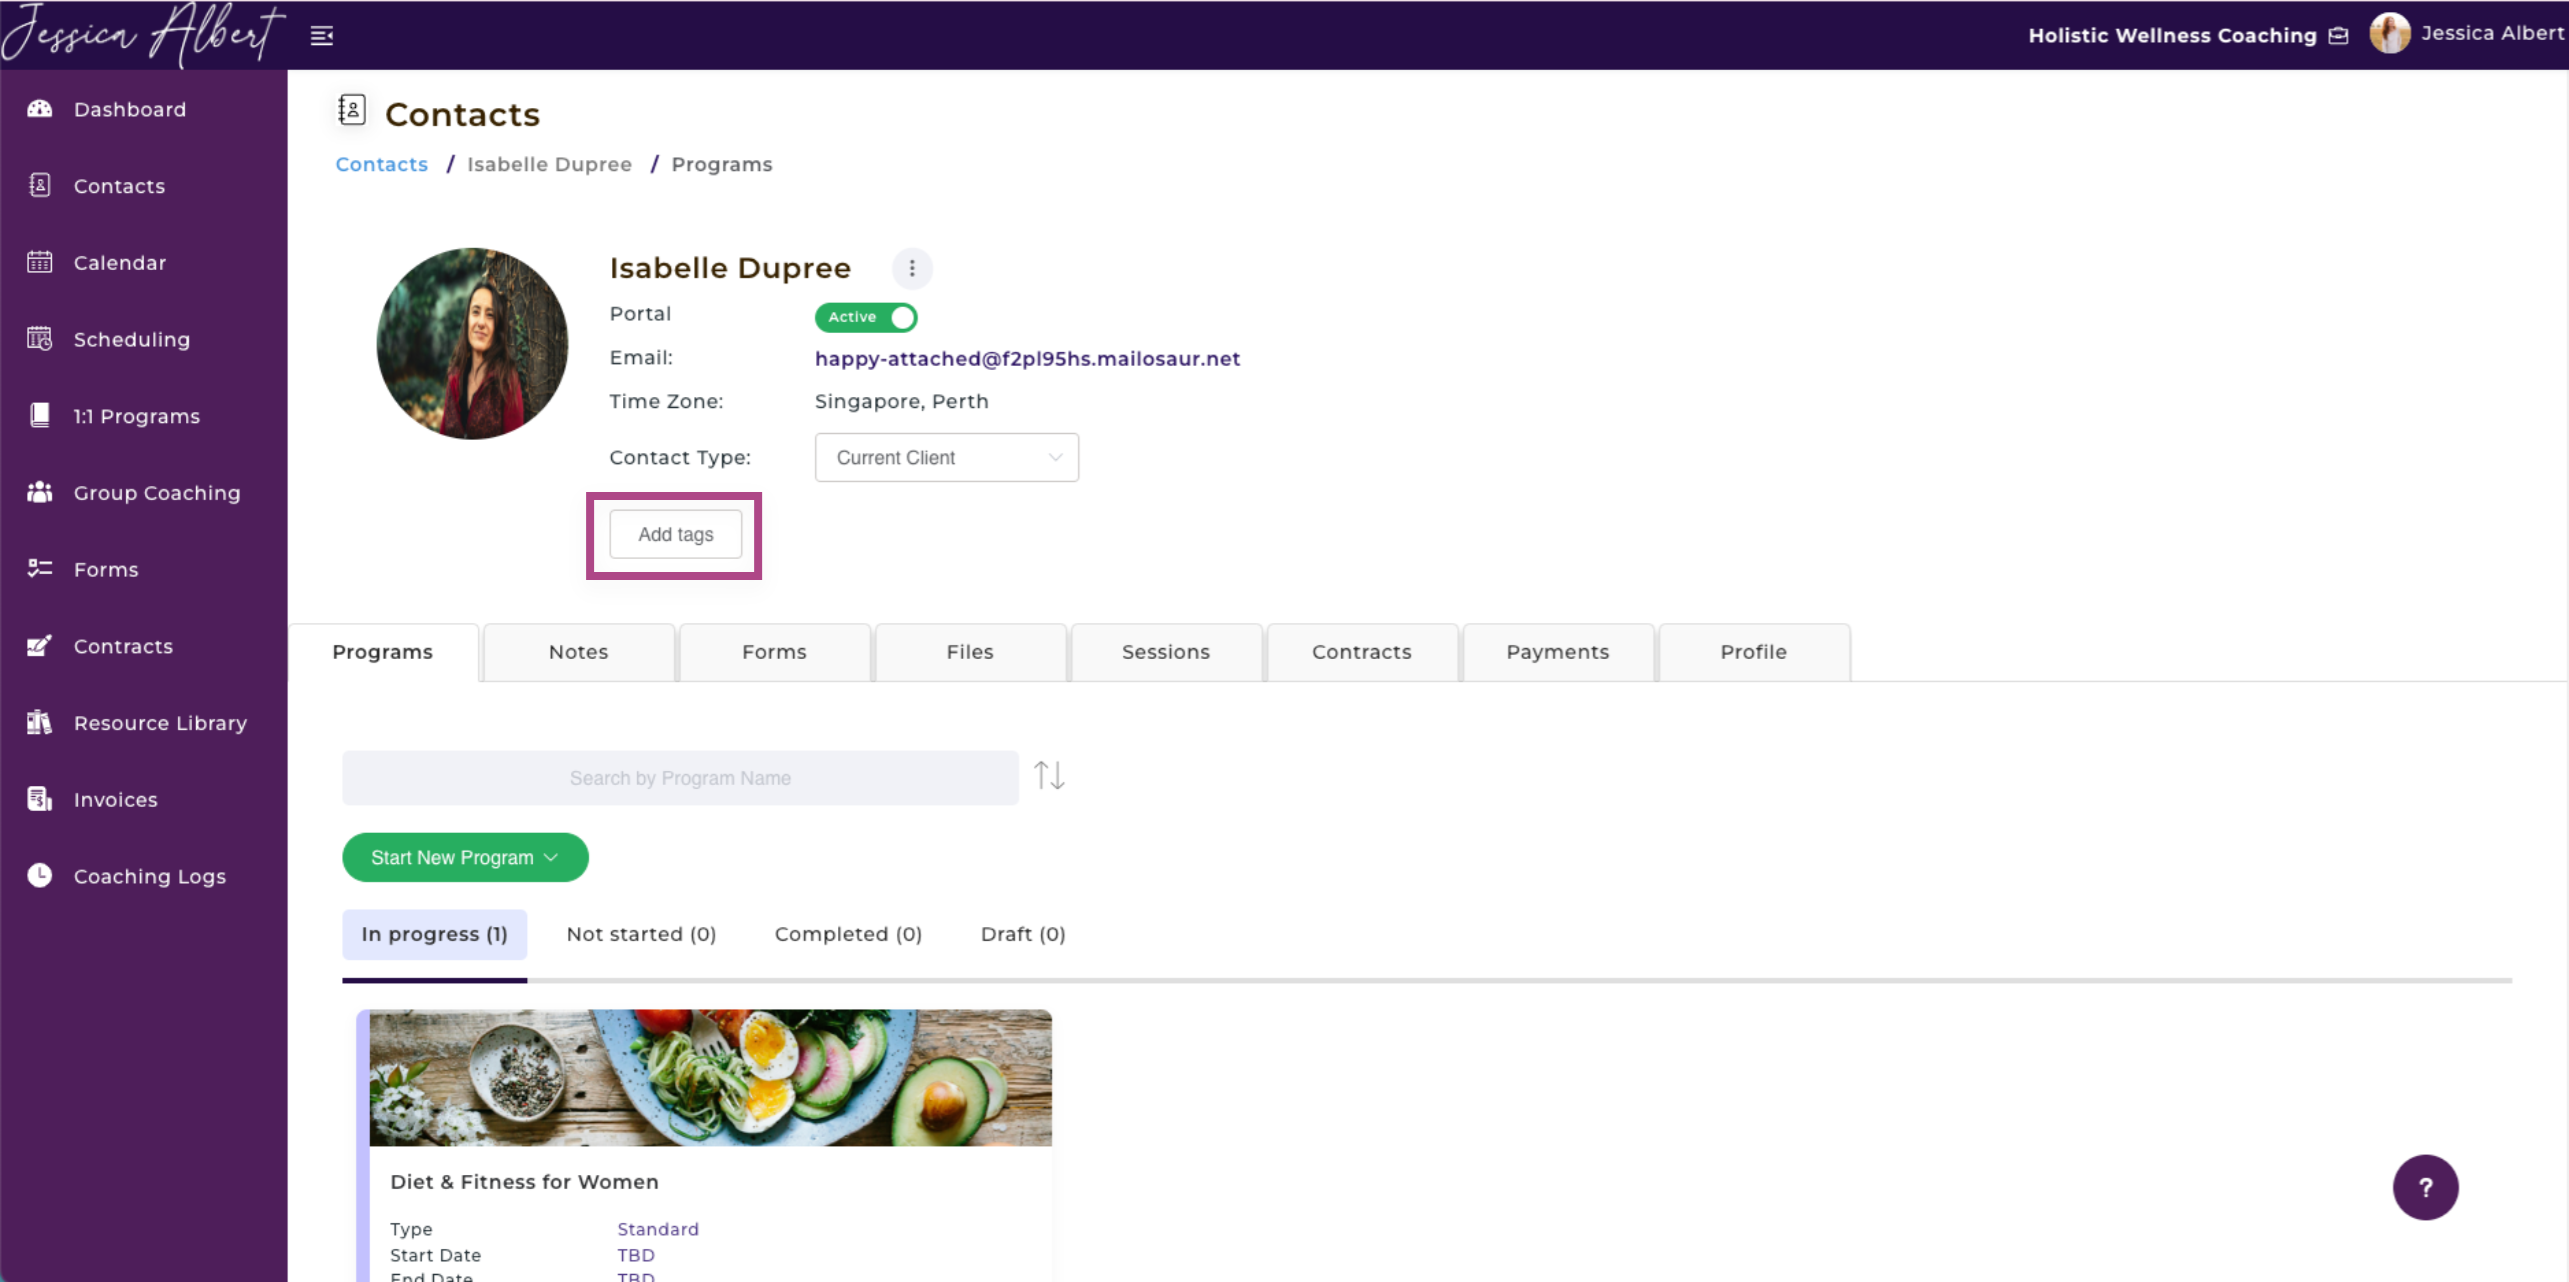
Adding a Tag to an Individual Contact 👨🦱
Alternatively, if you'd like to tag an individual contact, you can do so by selecting the Add Tag button on the individual contact record page.
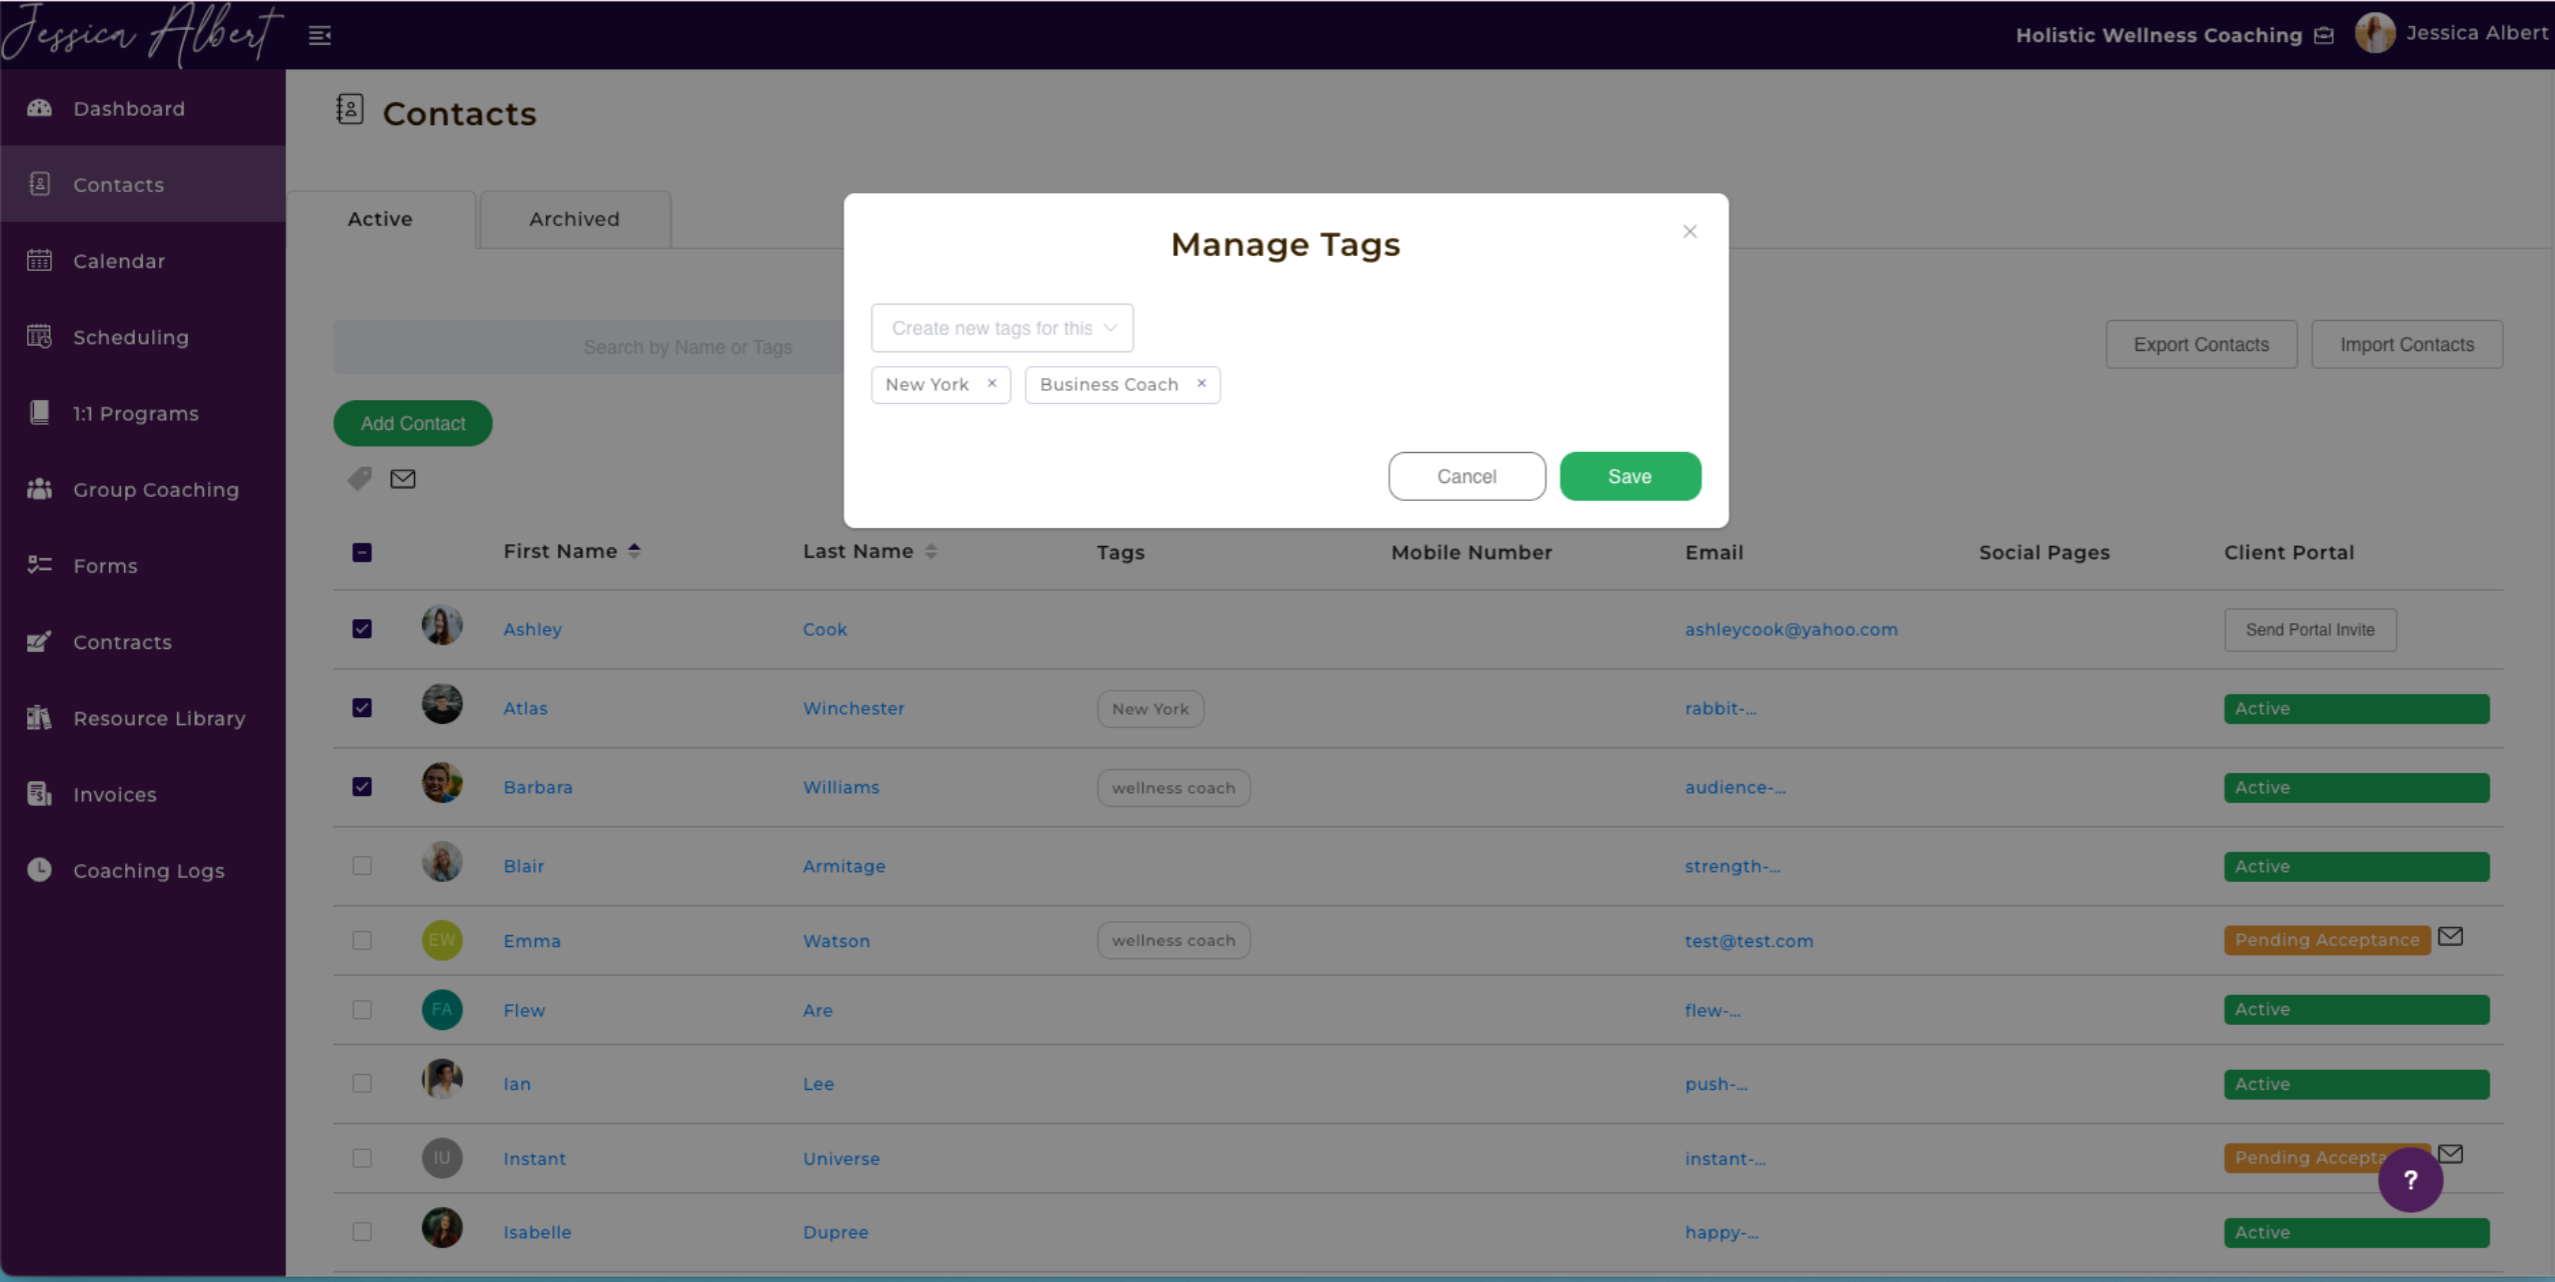
This will bring up the Manage Tags window. You will be able to select from pre-existing tags that you have previously created, or you can type in a new tag in the field.
IMPORTANT: You MUST hit the "Enter (or Return)" button on your keyboard after you've typed in the tag name AND THEN click Save to save the tag.
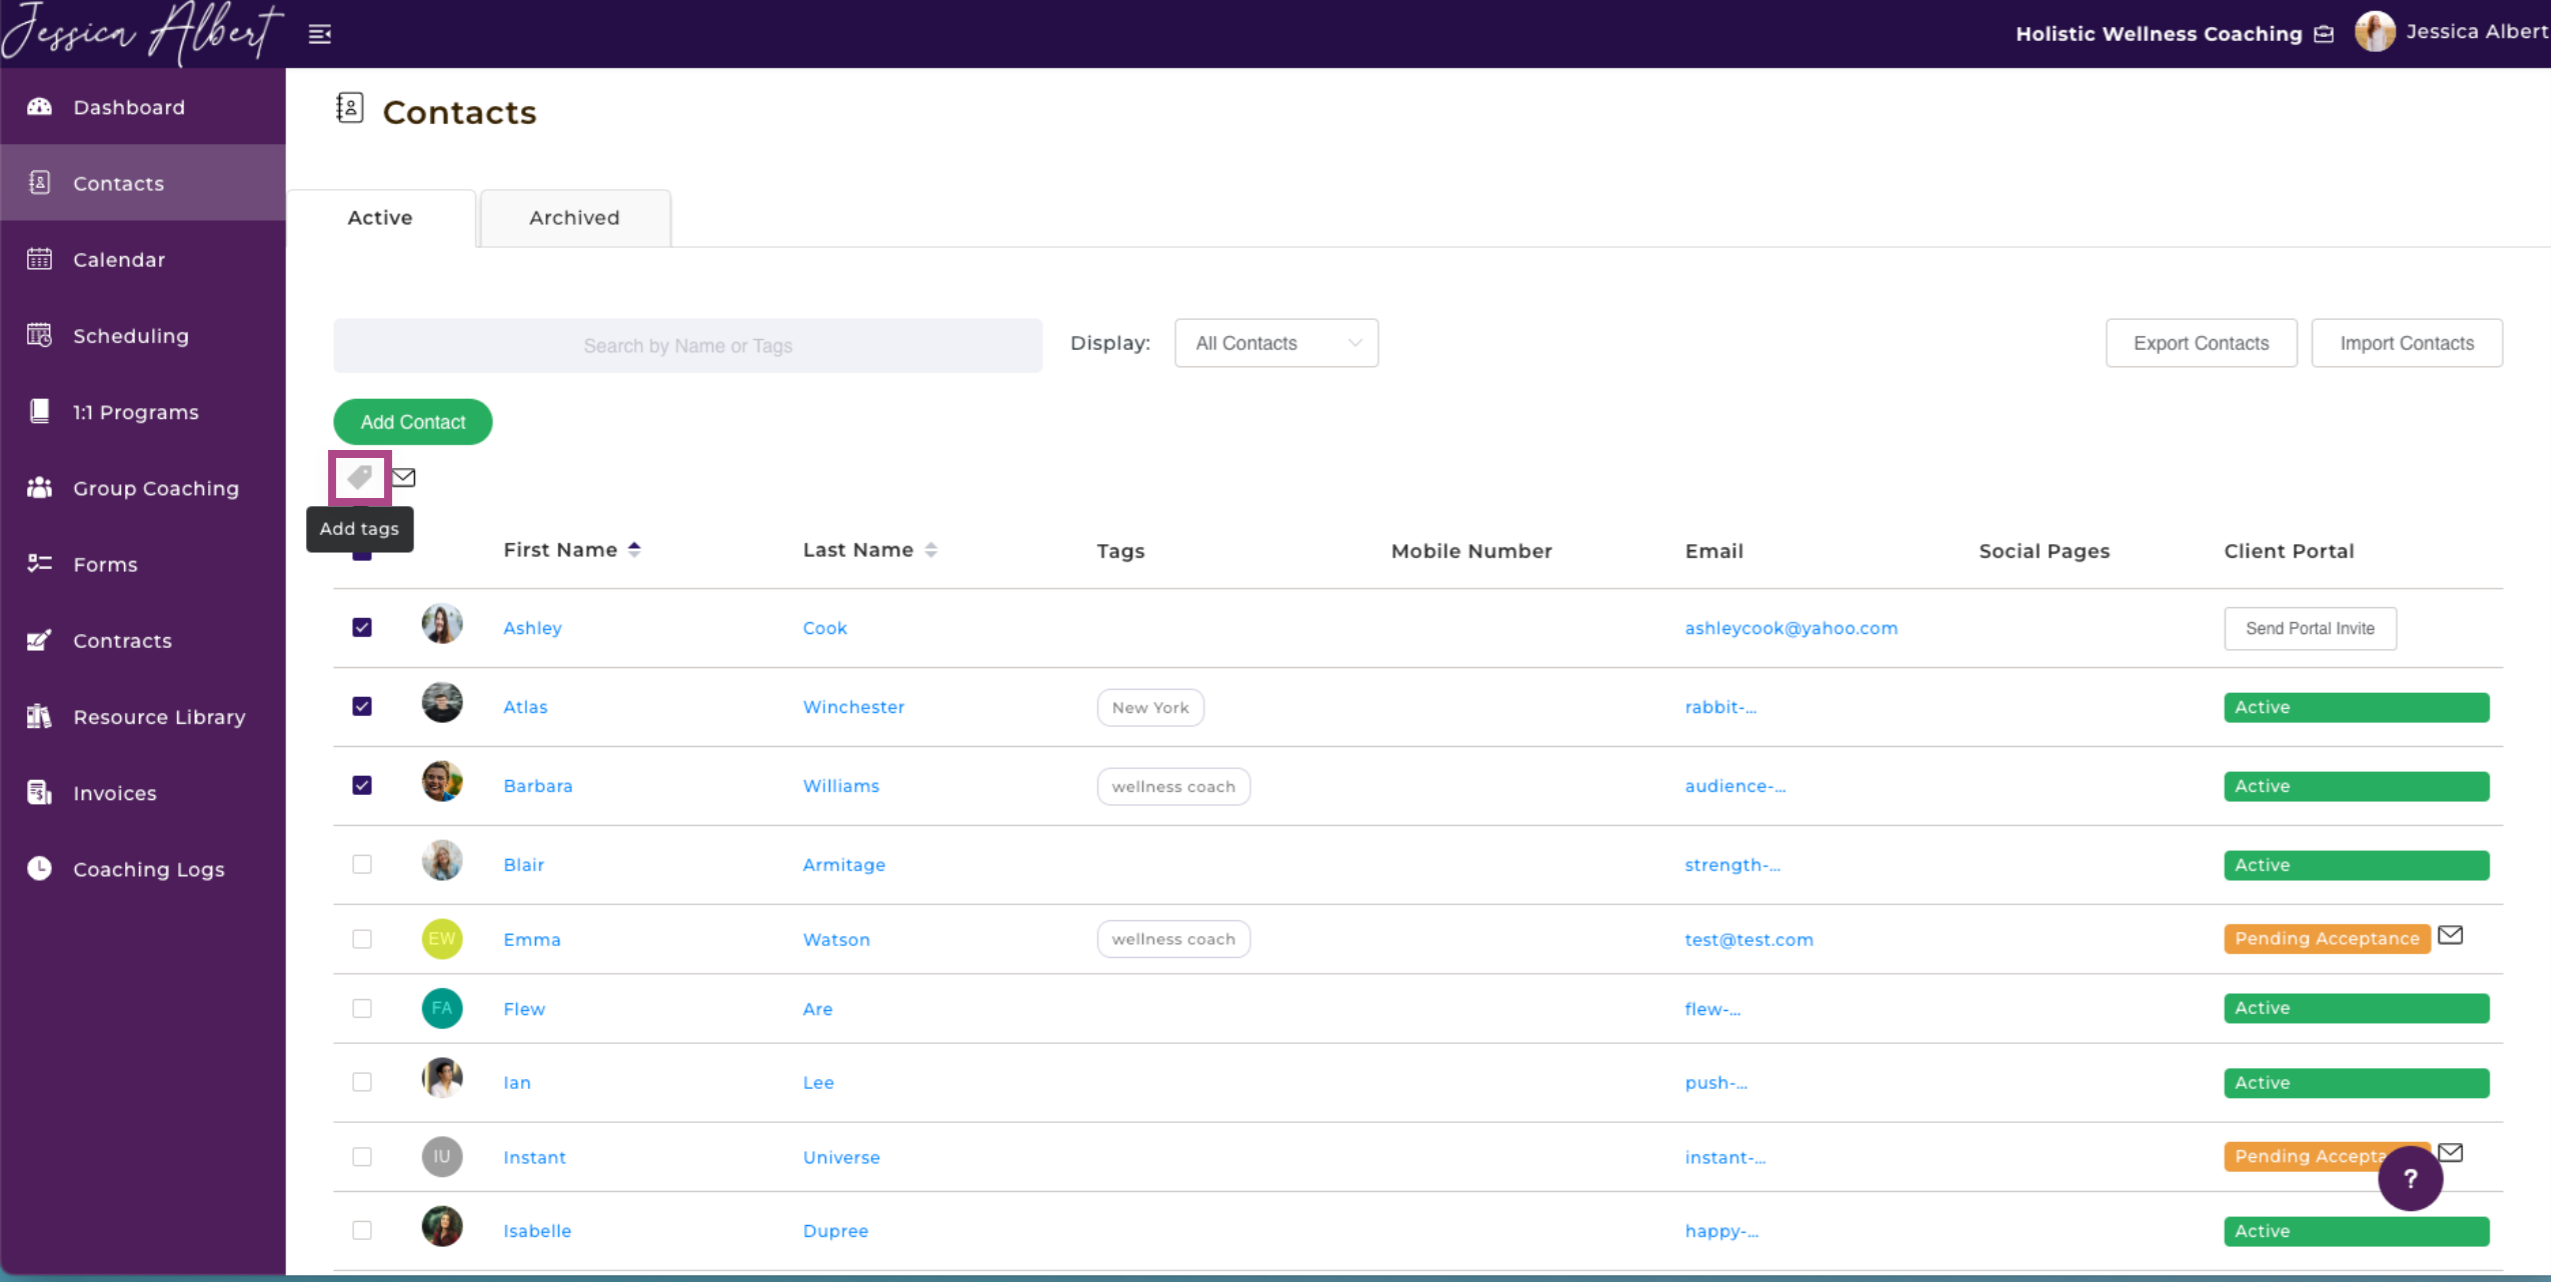
Adding a Tag to Multiple Contacts at Once 👥
Want to group multiple contacts with the same tag at once? You can choose to bulk tag.
Start off by navigating to your Contacts page on the left menu bar.
- Check the boxes of Contacts you'd like to tag.
- Click on the Tag Icon.
- Enter a new tag name (or choose from an existing tag).
- Click Save and done - your selected contacts are tagged!
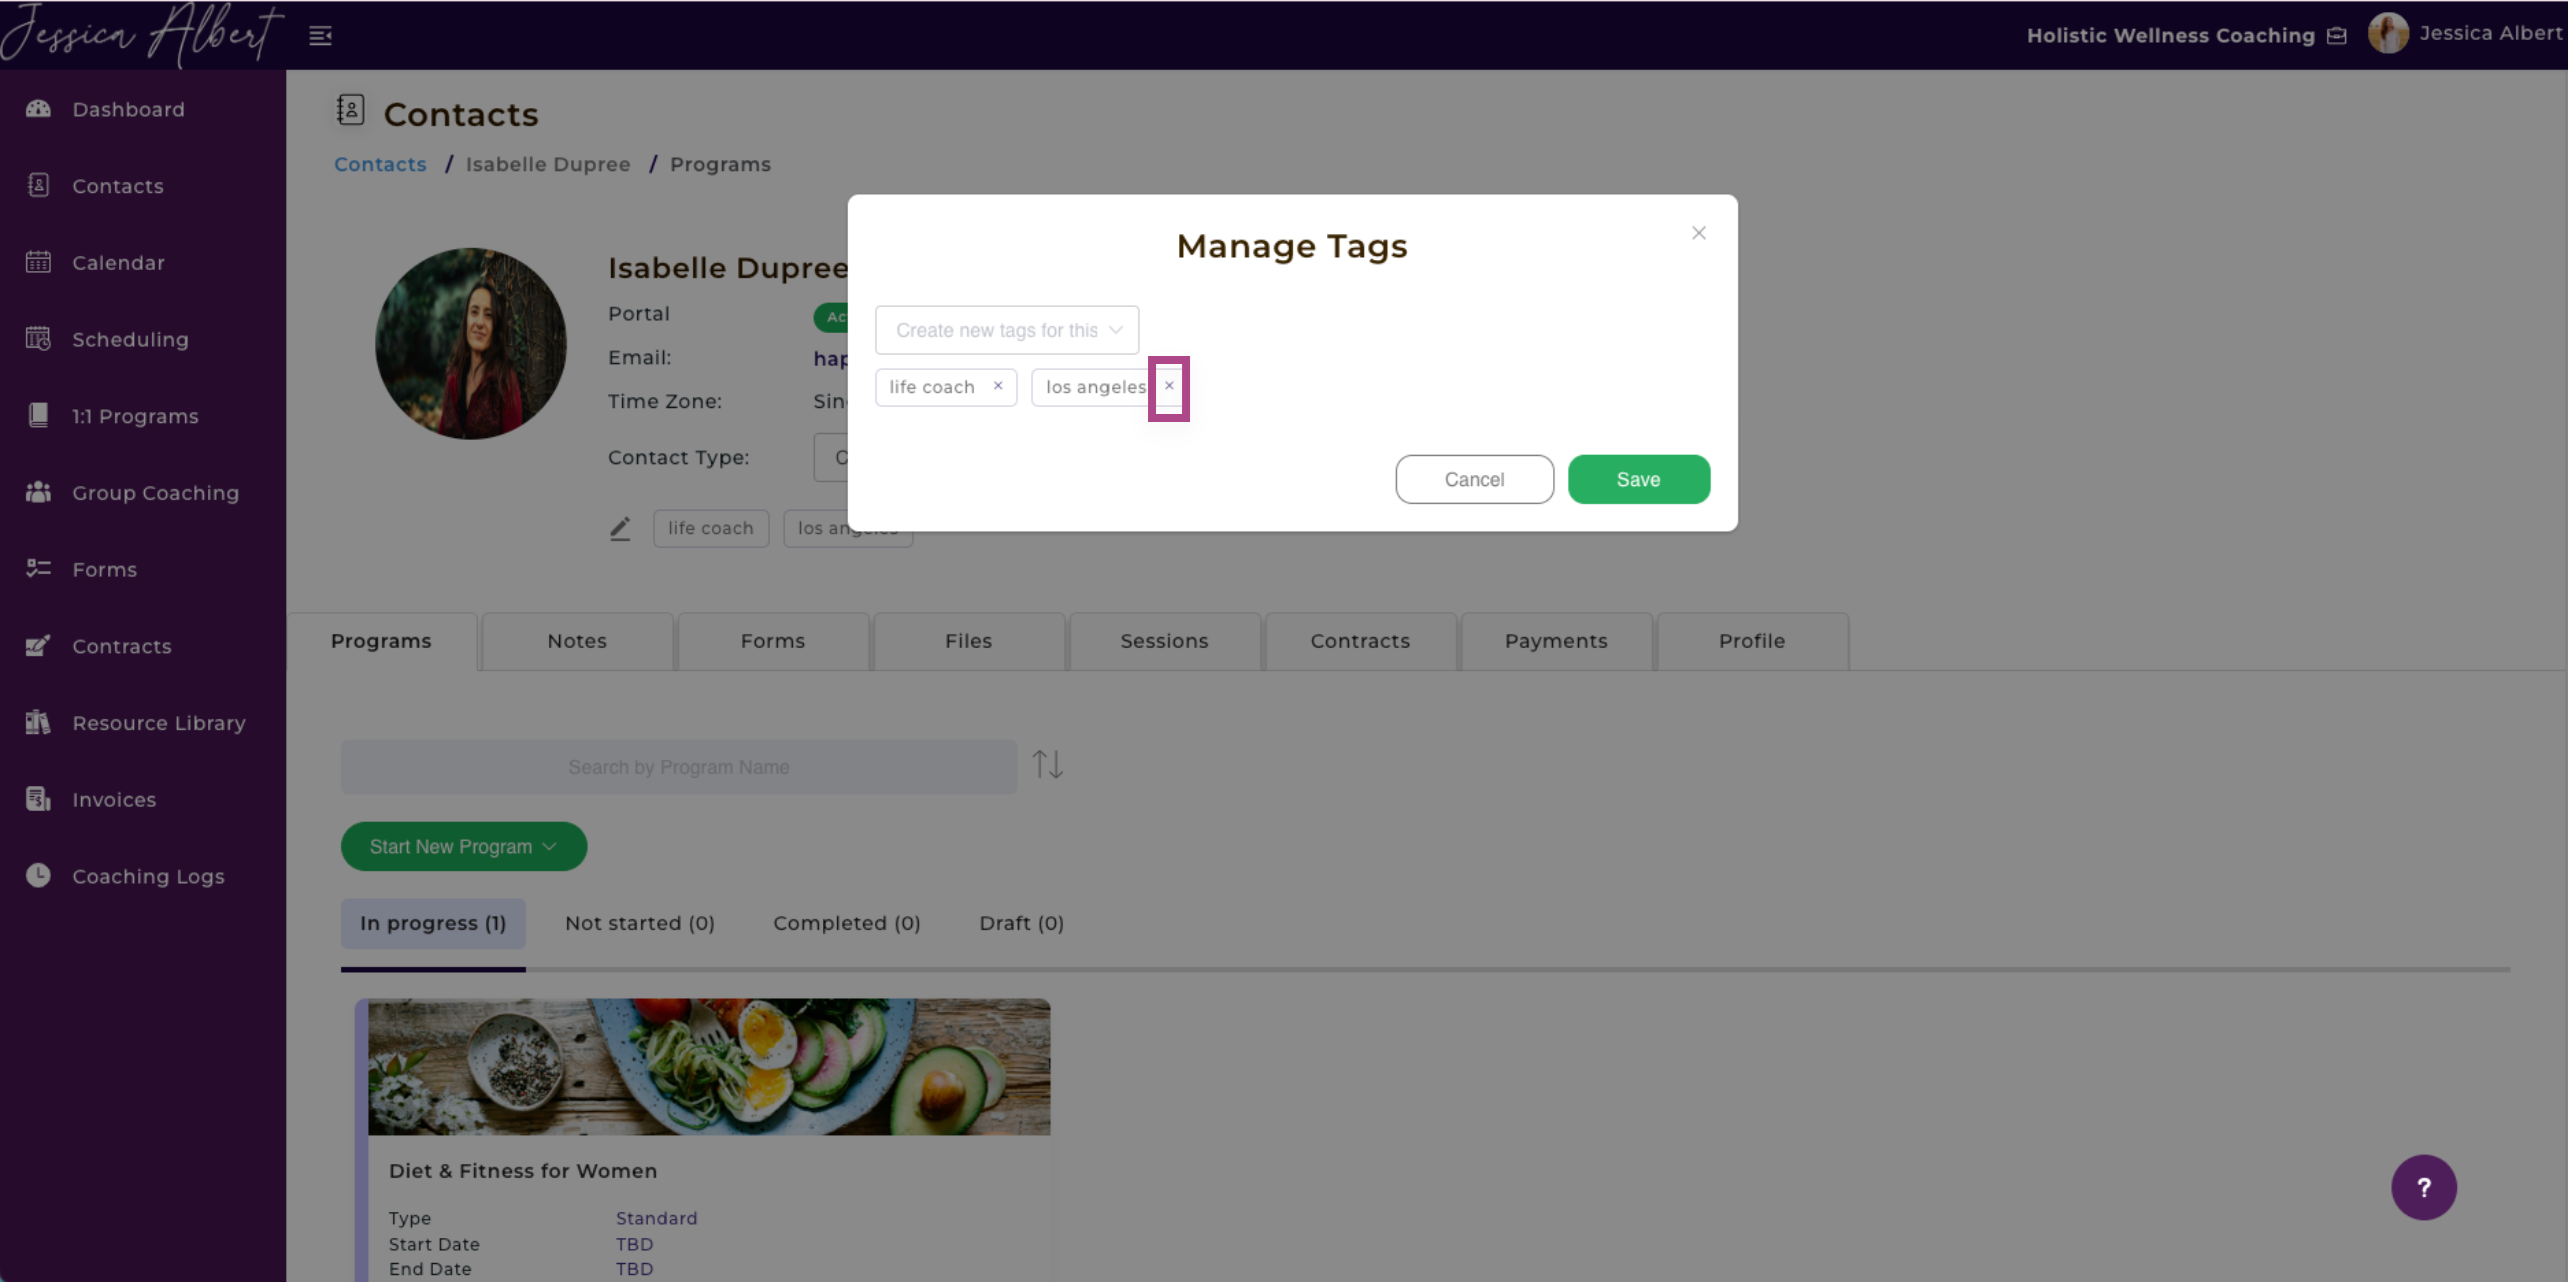
Editing or Deleting Tags 🖊️
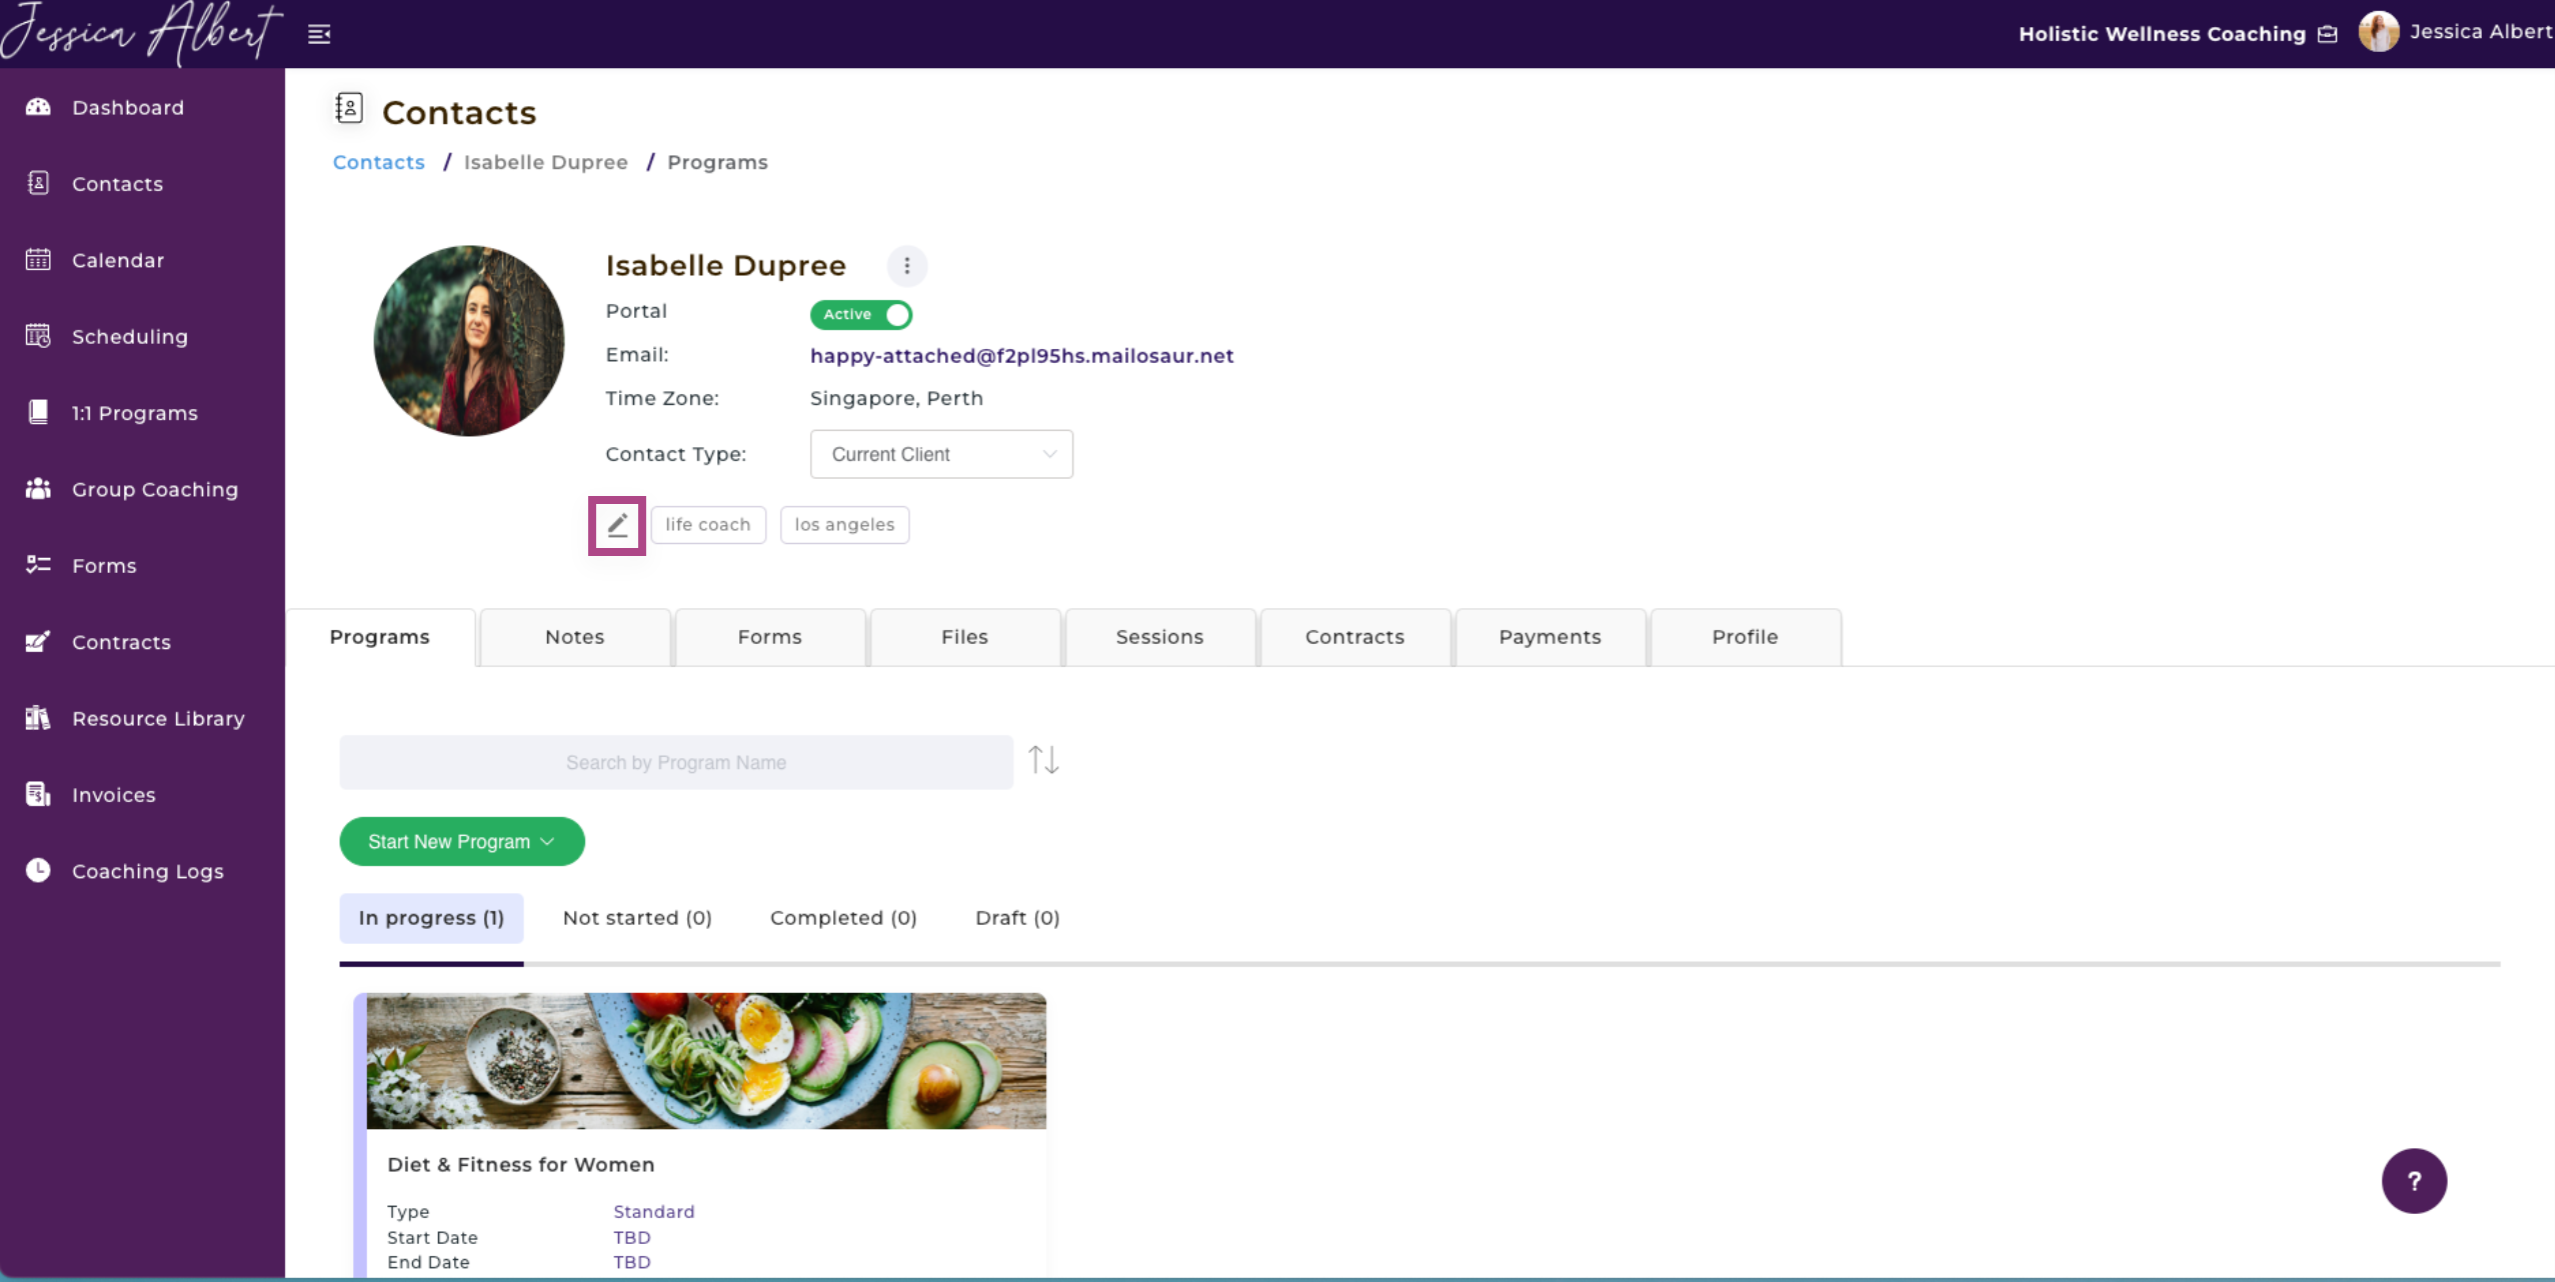
To edit or delete a tag, you will need to go to the individual contact's profile page.
Select the Edit icon (the little pencil icon next to the tags) which will then bring up the Manage Tags window.
You can then click inside a tag to edit the text.
Be sure to hit Enter to save the edits, and then click the Save button to save the changes.
To delete a tag, click the X icon in a tag, then click the Save button. This will remove the tag.