How to Create a Coaching Program (Standard Program)
Overview
CoachVantage makes it simple to create and publish coaching programs online—even without a website. Easily configure your program details, files, fees, and scheduling rules.
Each program automatically generates a hosted landing page where clients can sign up, complete forms, e-sign your agreement, make payments, and schedule sessions—all in one seamless, automated process.
Programs created on the Programs Page are called Standard Programs.
Read on to learn how to create one.
Creating a New Coaching Program
To create a standard coaching program:
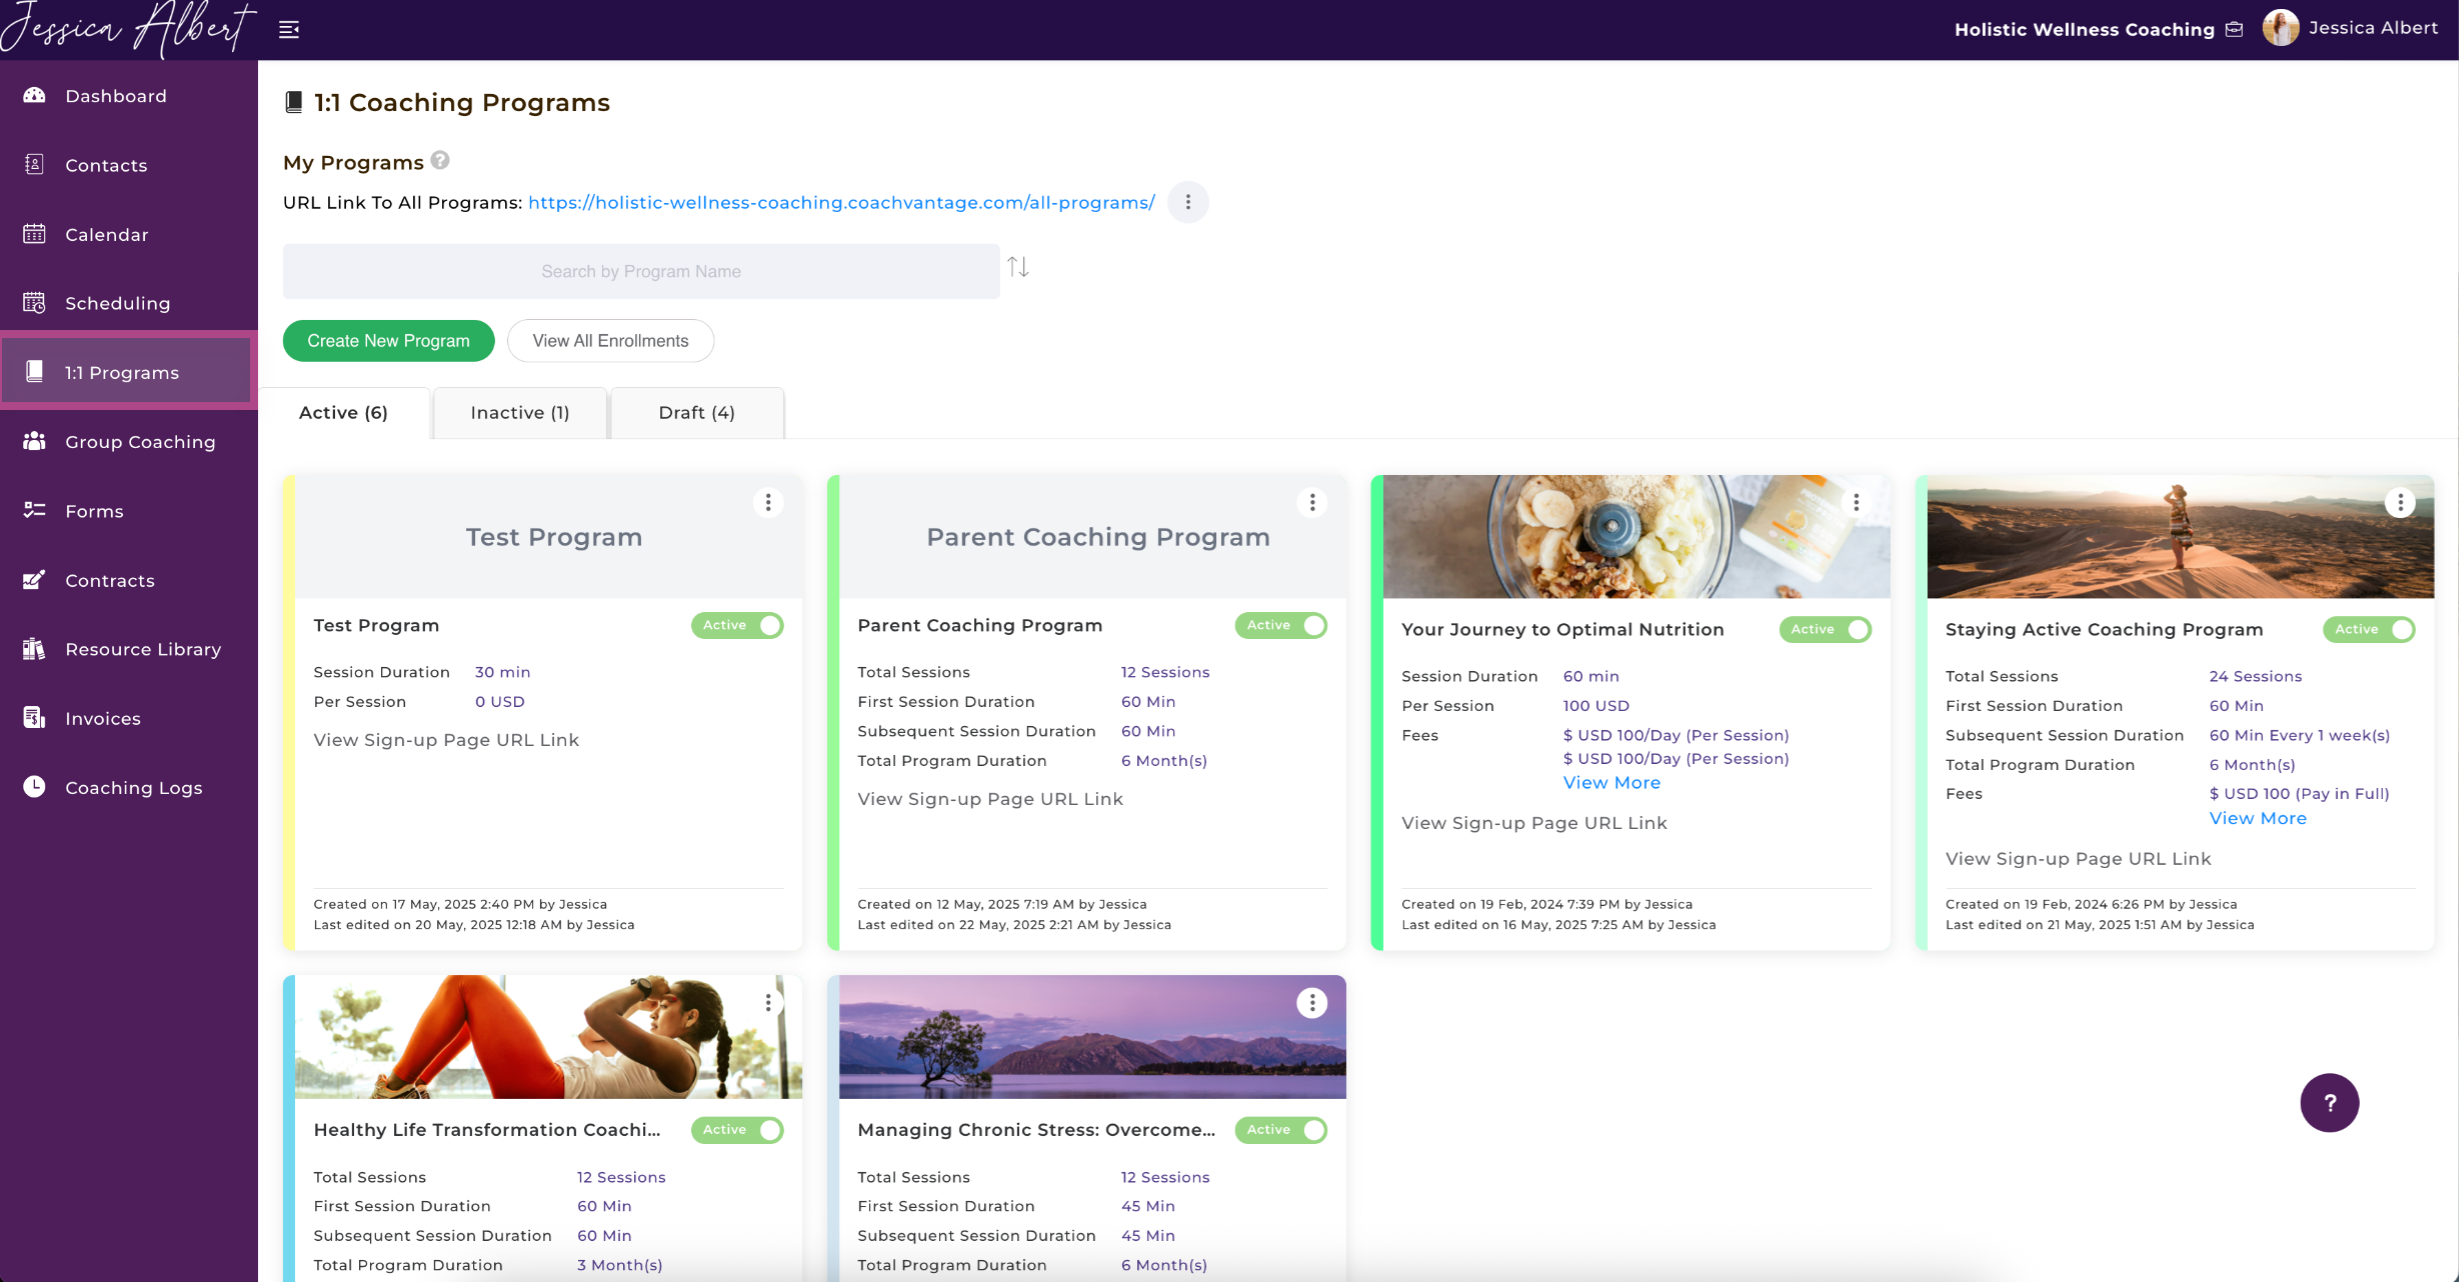
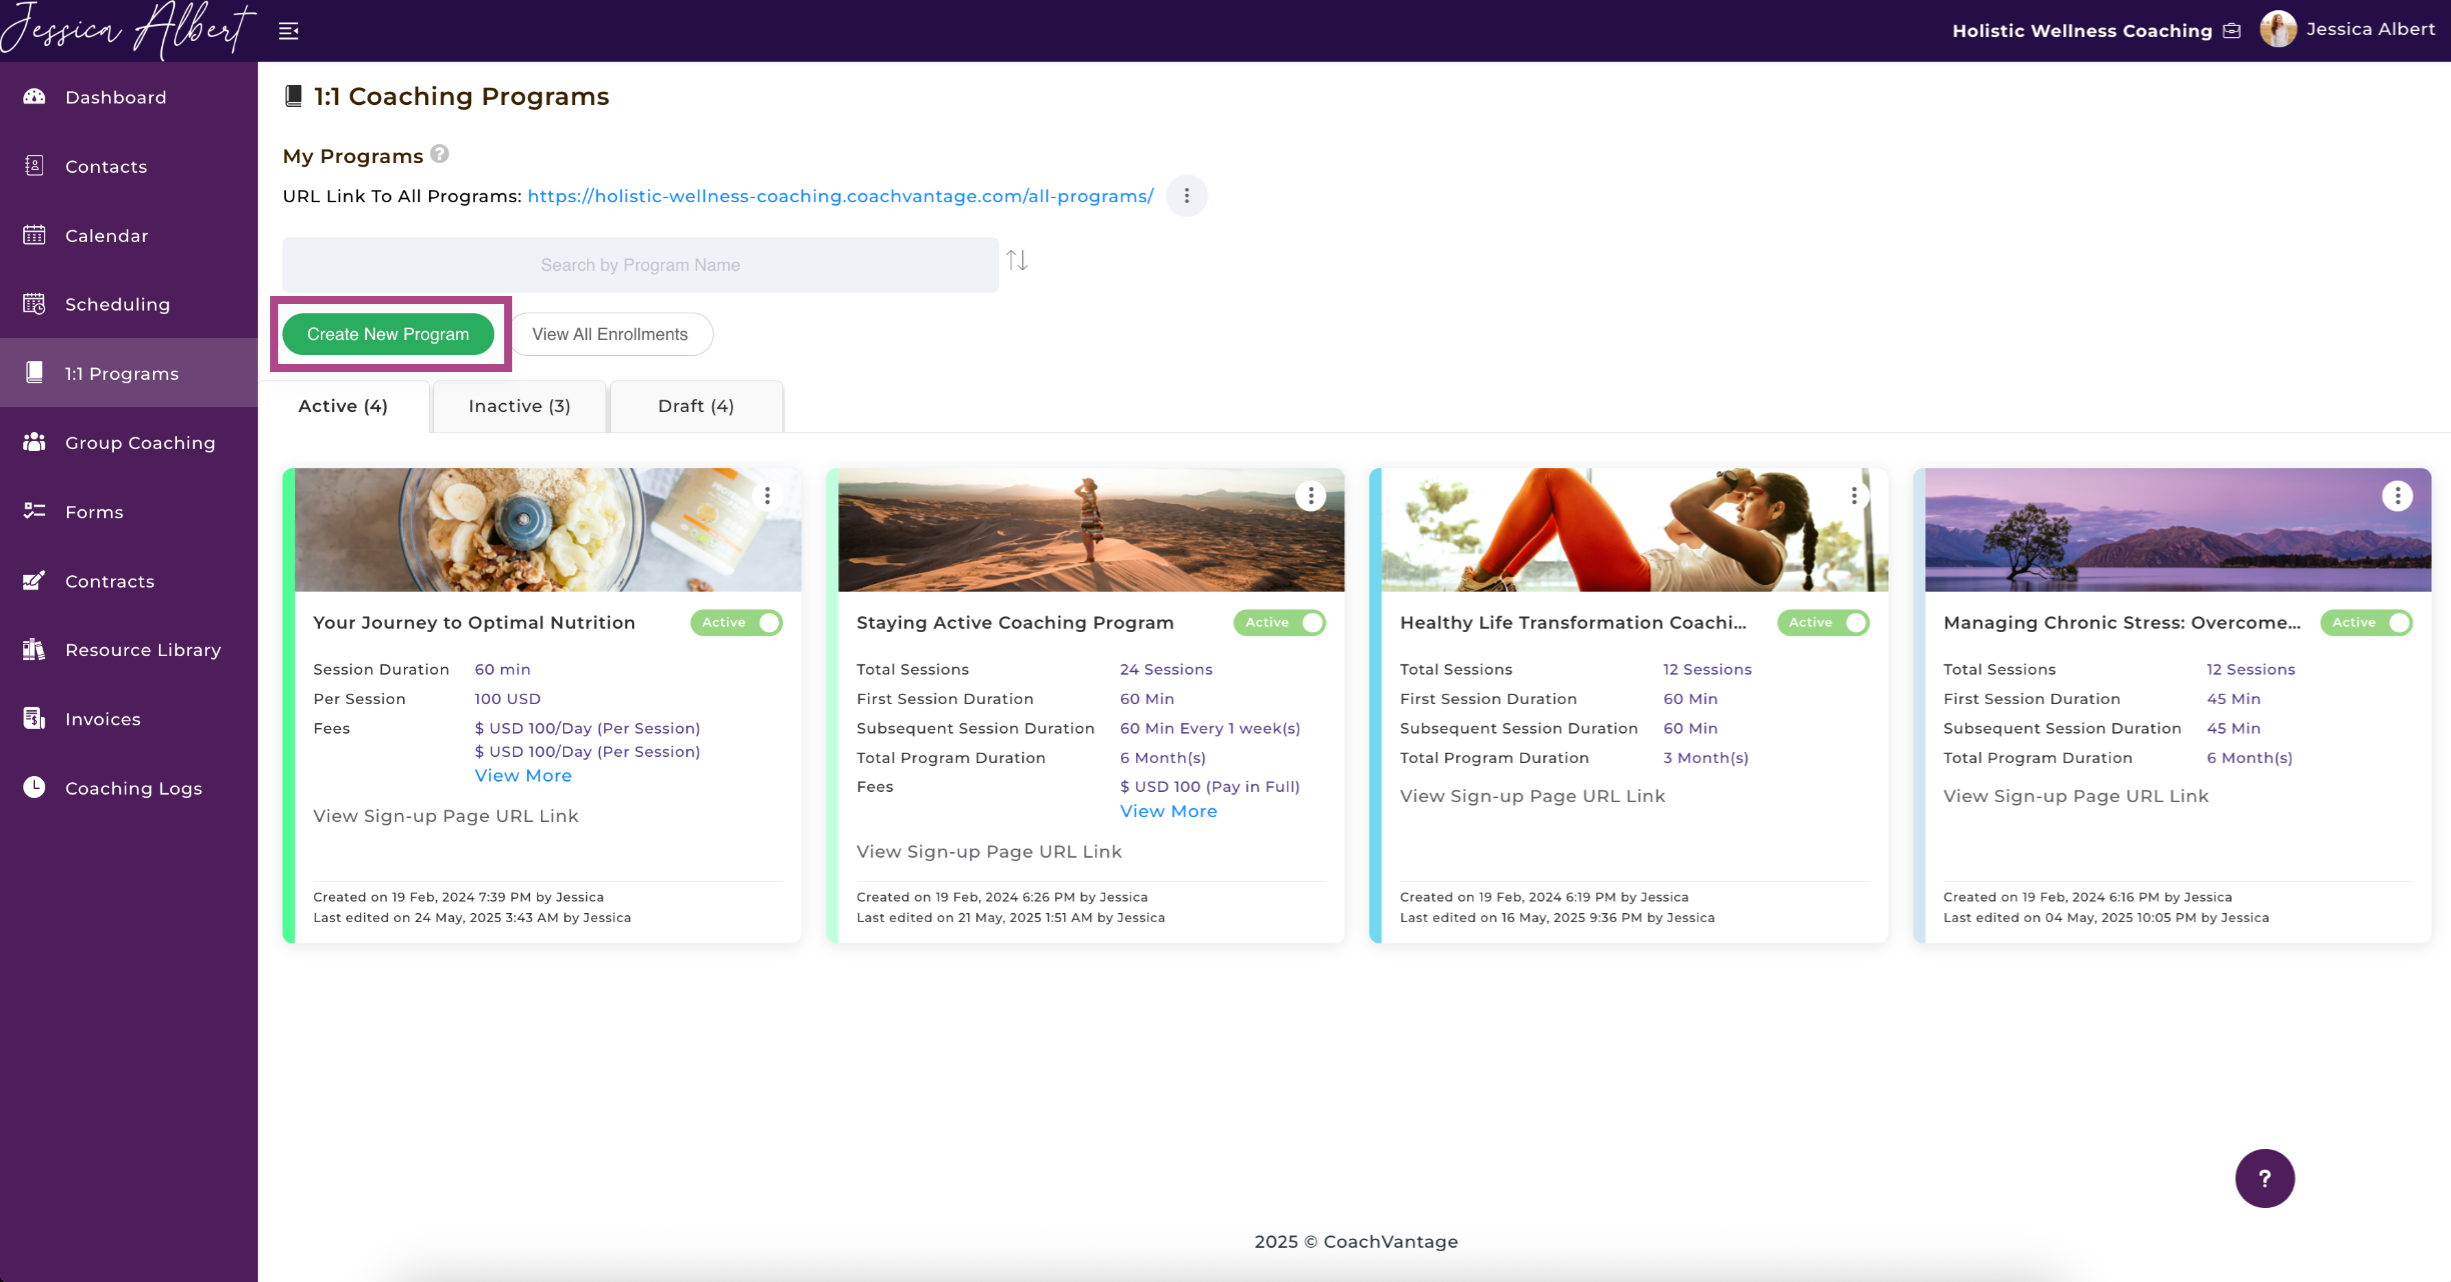
- Click Programs on the left menu.
- Click on the Create New Program button.
- The New Coaching Program page will open.
On the Coaching Program Page, You'll See the Following Steps In the Task Bar:

We'll cover each of these steps below in detail.
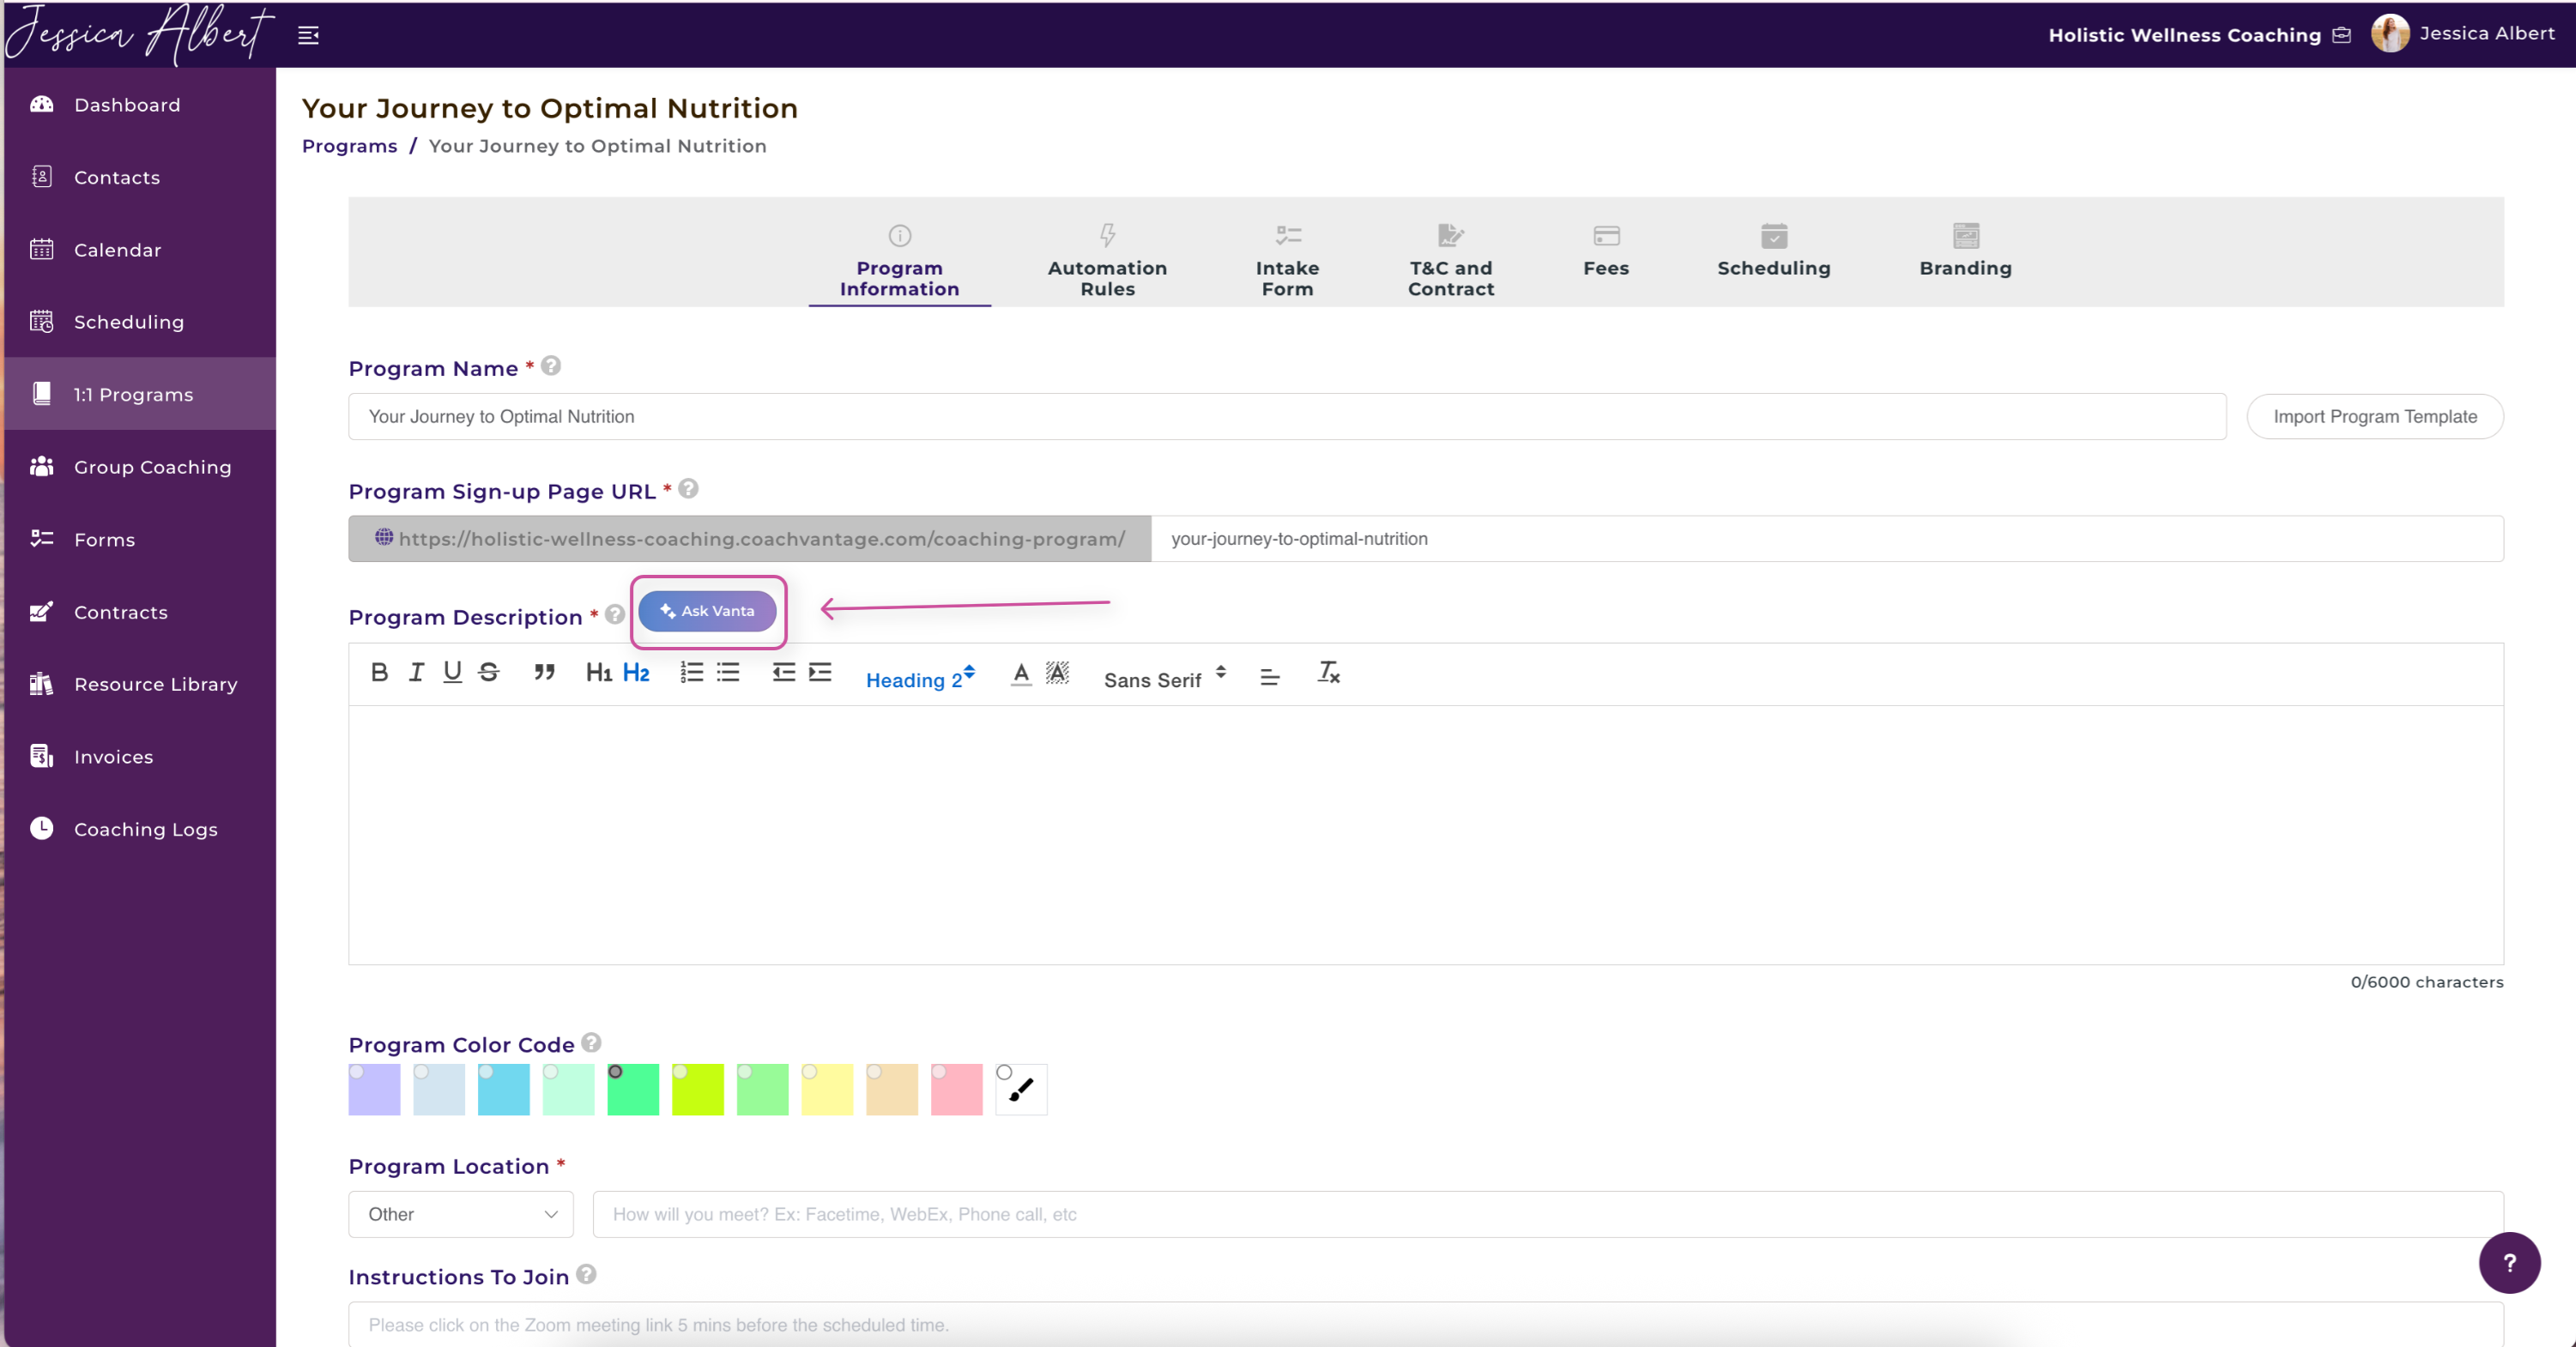
1. Program Information
You have to complete the program information step before you can move on to the next step, or save the program as draft.
Program Name
Enter a descriptive name for your program.
The program name will be displayed on the program sign-up page. There is a 150 max character limit for the program name.
Import Program Template
You can choose to import a program template from an existing program. This would clone all details (such as files, intake form, fees, scheduling rules, etc) of the pre-existing program to the new one that you're creating.
Program Sign-Up Page URL 🔗
As you type in the name of your program, you will notice that the URL name description gets populated automatically.
You can choose to use the default URL description that we’ve populated or type in a description that you would prefer to use.
Important: Do not use spaces or special characters (eg $ / @ > ) for the description. You can use hyphens (-) to separate words. You have to use a unique URL name for each program. This is especially so if you have imported from a Program Template.
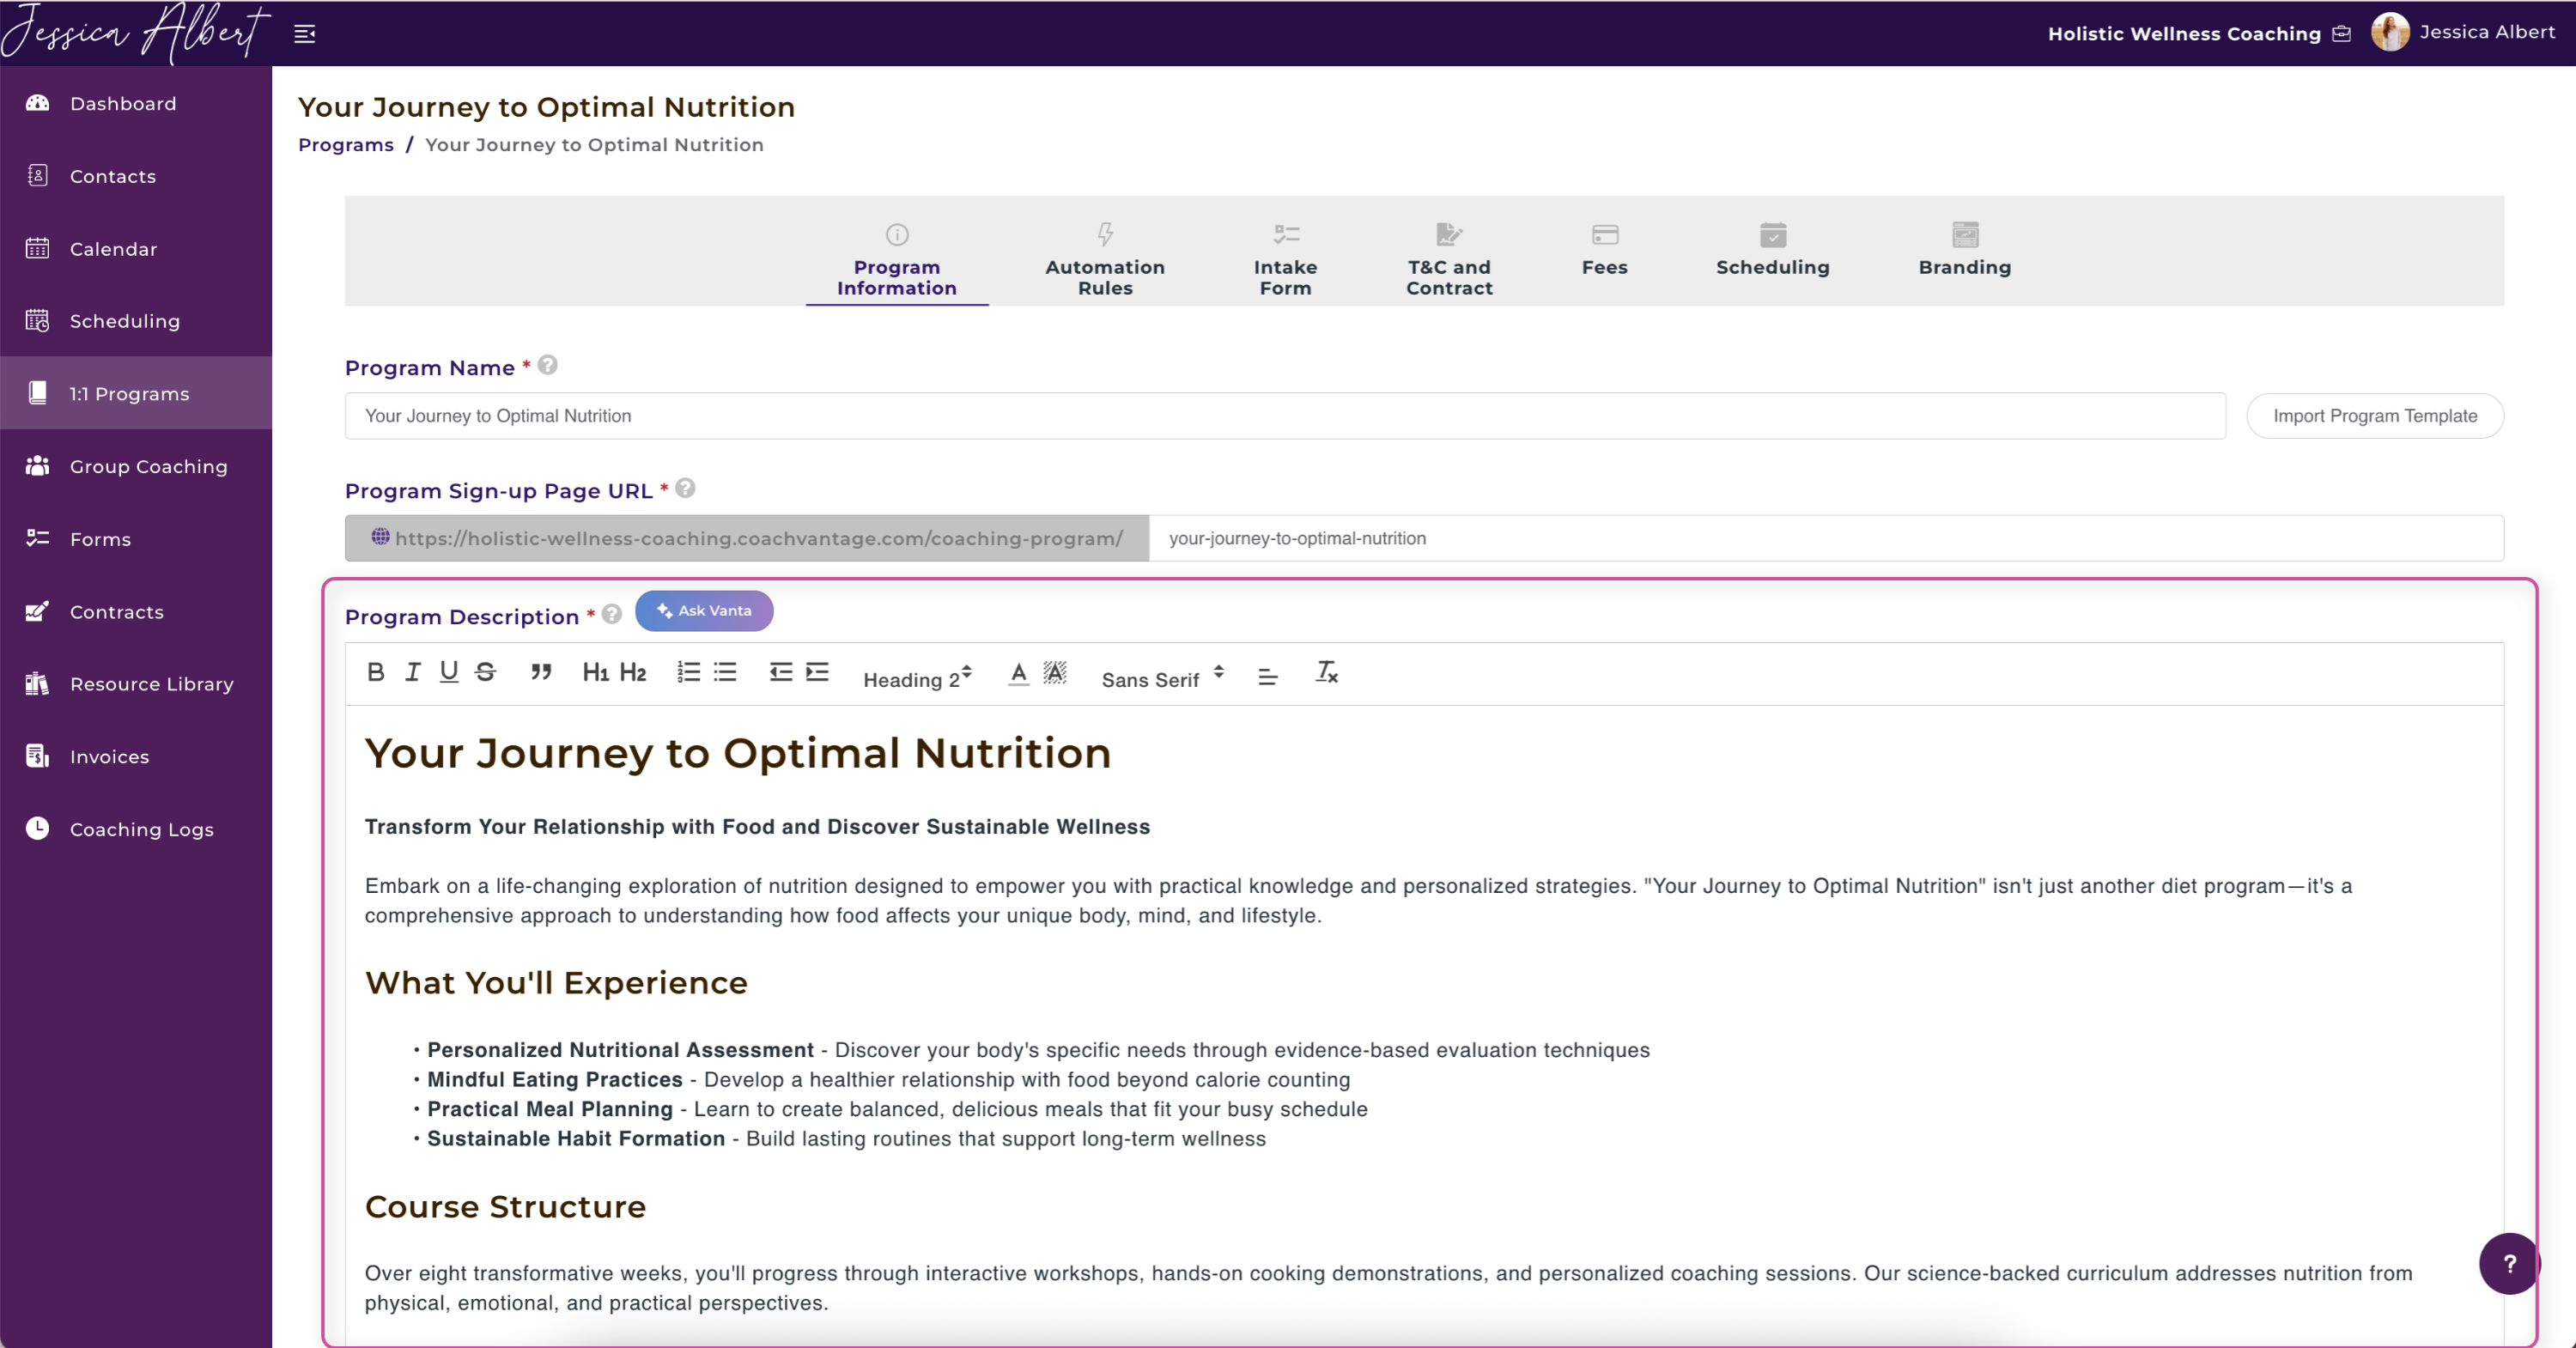
Program Description 🖊️
Briefly describe your program.
You can make use of the text editor to customize your description. For example, you can add header text, highlight text, choose different font types, etc.
Ask Vanta 🪄
Our new AI feature Ask Vanta is now live in CoachVantage!
Creating a program description has never been easier. Simply click on Ask Vanta and within seconds, this AI enhancement will create a program description for you.
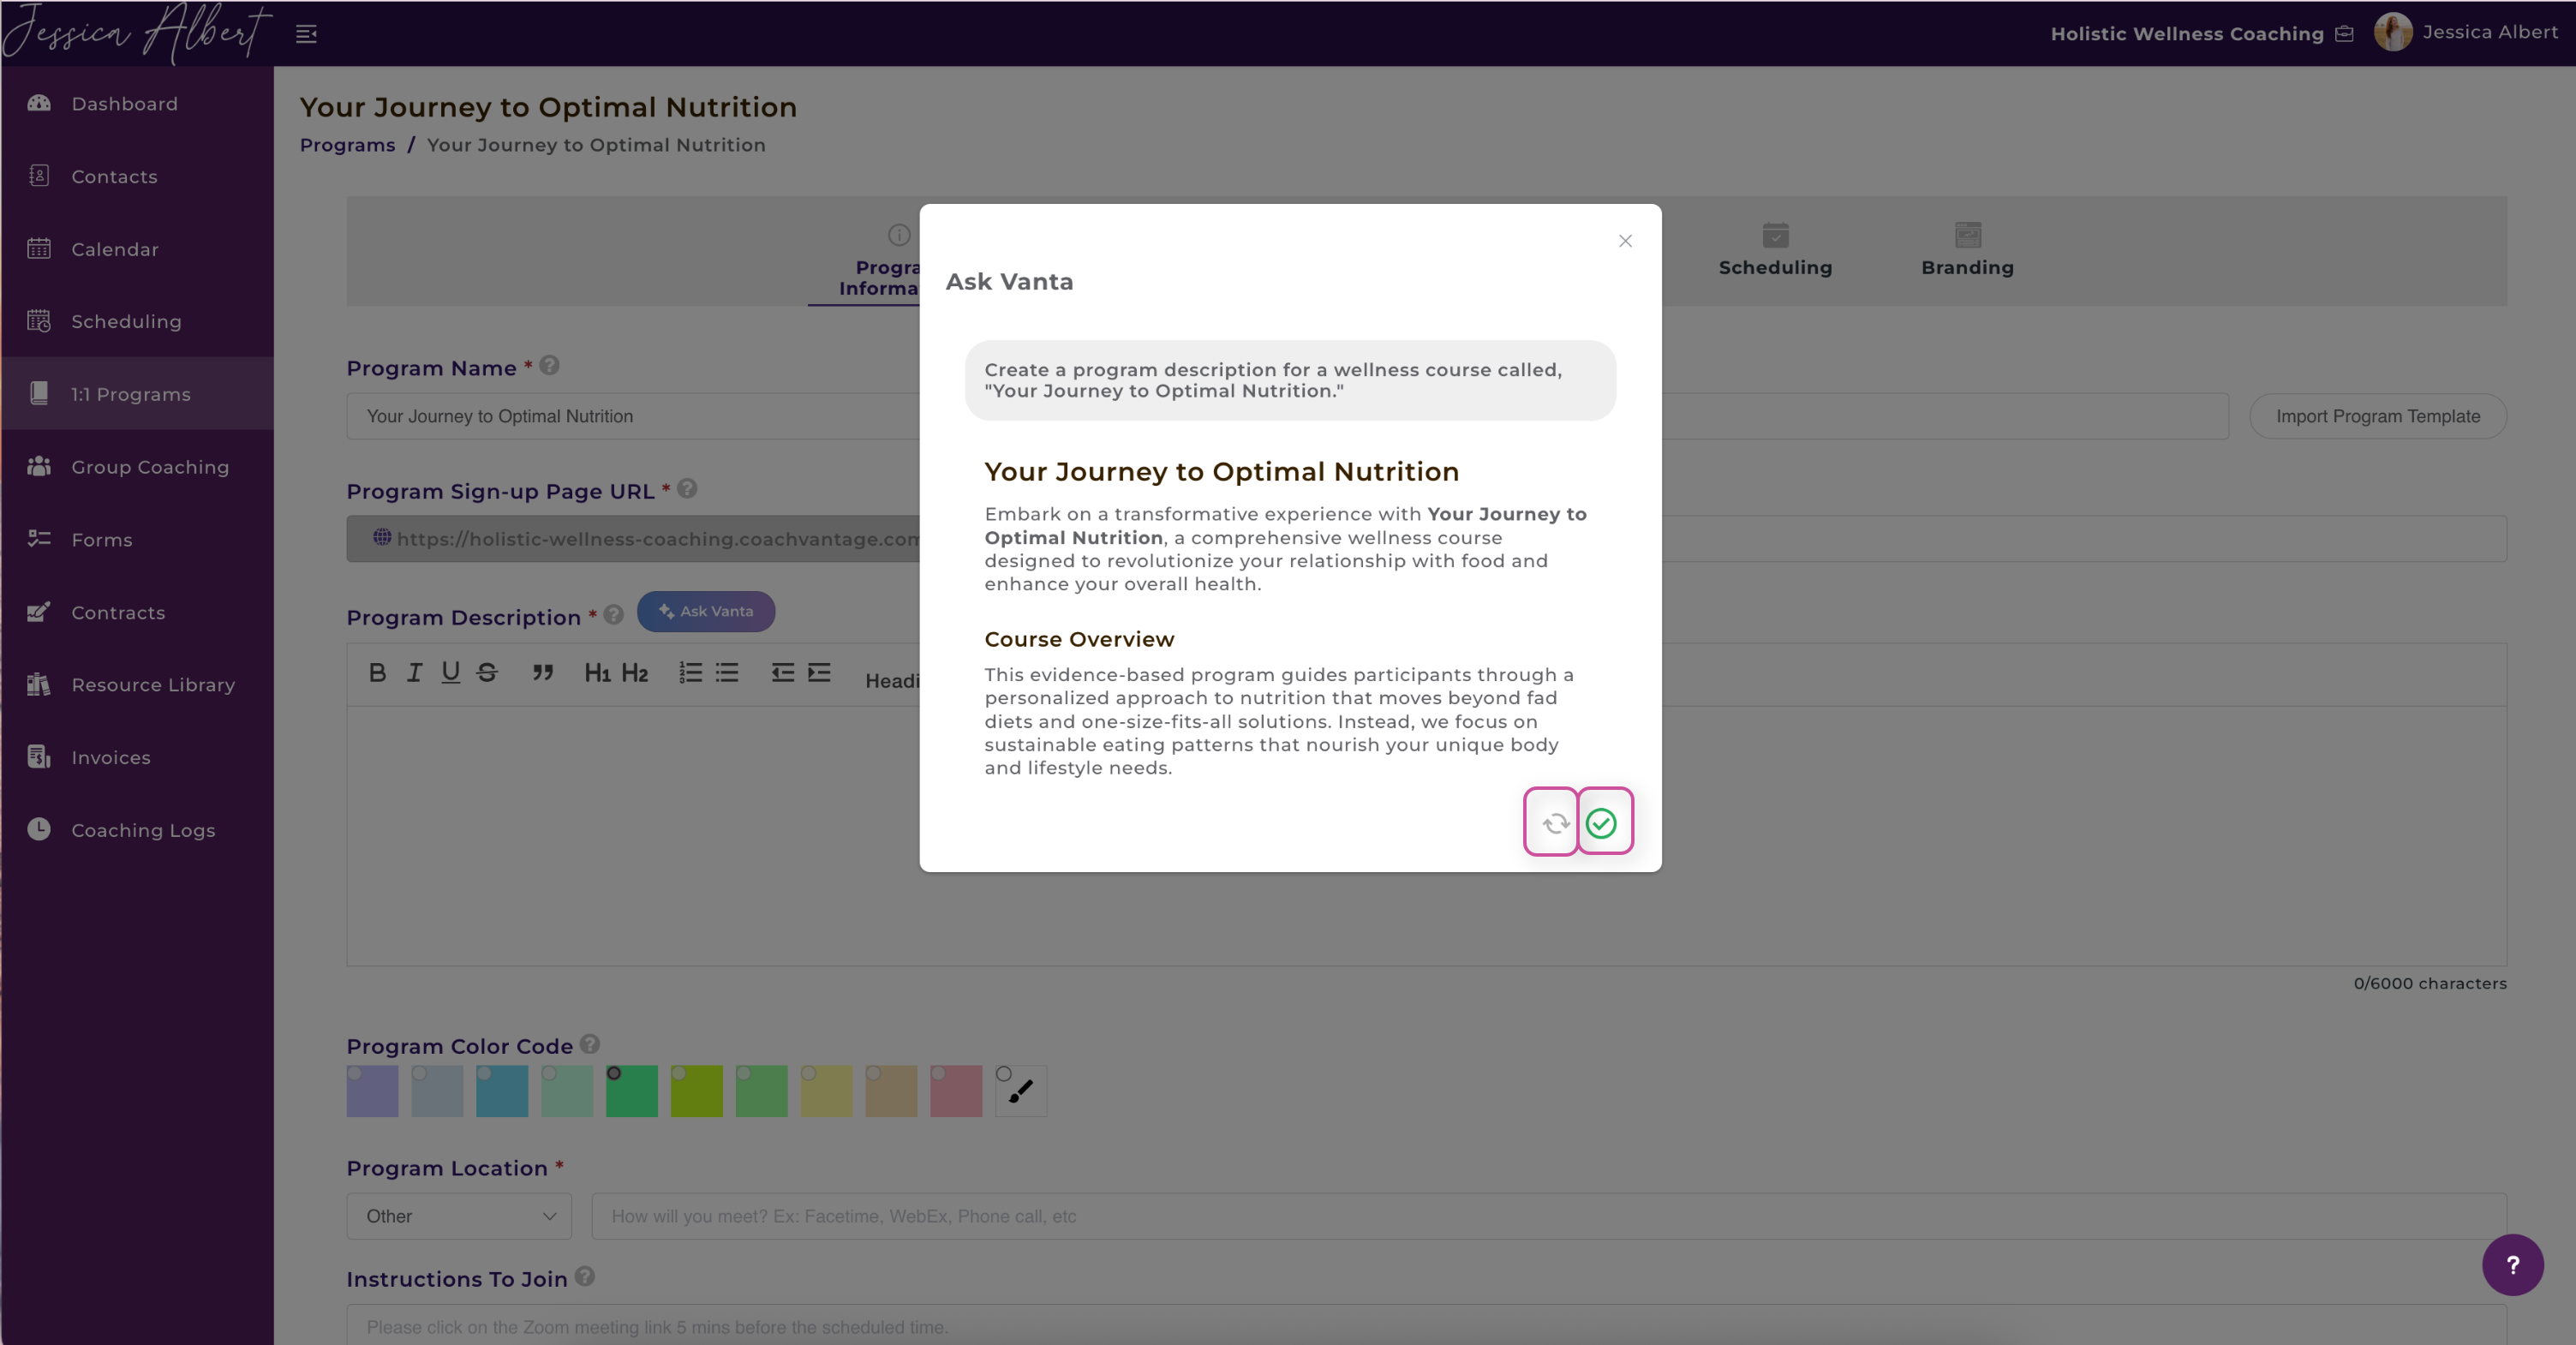
When you select Ask Vanta, a pop-up window will appear. Here is where you can enter a prompt. Some prompt examples include:
- Create a program description for a wellness course called, Managing Stress and Sleep.
- Write a course description that relates to anxiety, health, and wellness. Be sure to include why this course is unique.
- Draft an overview of a program course titled, Elevate & Energize – for those ready to level up their health and vitality.

Voila! Vanta creates a program description for you right before your eyes. Then, you can choose to either click on the regenerate button (as depicted by the grey circular arrows) or select the green check button to use the program description.
If you select the green check button, the generated text will be inserted in your program description. Feel free to edit accordingly!
Program Color Code 🟣
The color code is used as a visual cue on your Calendar for calendar entries associated with this program (i.e. client appointments related to this program).
When a color is selected, it will not be available for selection for other programs. You can also view the color code on your Program card.
Program Location 📍
Choose the location where you and your clients would meet for program sessions:
- CV Meet - Our native digital and audio communication tool that comes with your CoachVantage account.
- Zoom - If you have connected your personal zoom account to CoachVantage, we will automatically generate a unique zoom meeting URL link for each appointment booking.
- Google Meet - To use Google Meet as the meeting location, you must first integrate your Google Calendar with CoachVantage. You can do so at My Settings > Integrations. Be sure to disconnect any existing calendar before connecting your Google Calendar.
- Physical Location - Enter the name or address of the physical location of your meeting venue.
- Others - You can enter other location types here. e.g. FaceTime, WebEx meeting URL, Phone call, etc.
Instructions to Join 💻
Provide instructions to clients on how they can join your meeting, or any specific instructions you would like to inform your clients about.
For example, "Please click on the Zoom meeting link 5 mins before the scheduled time."
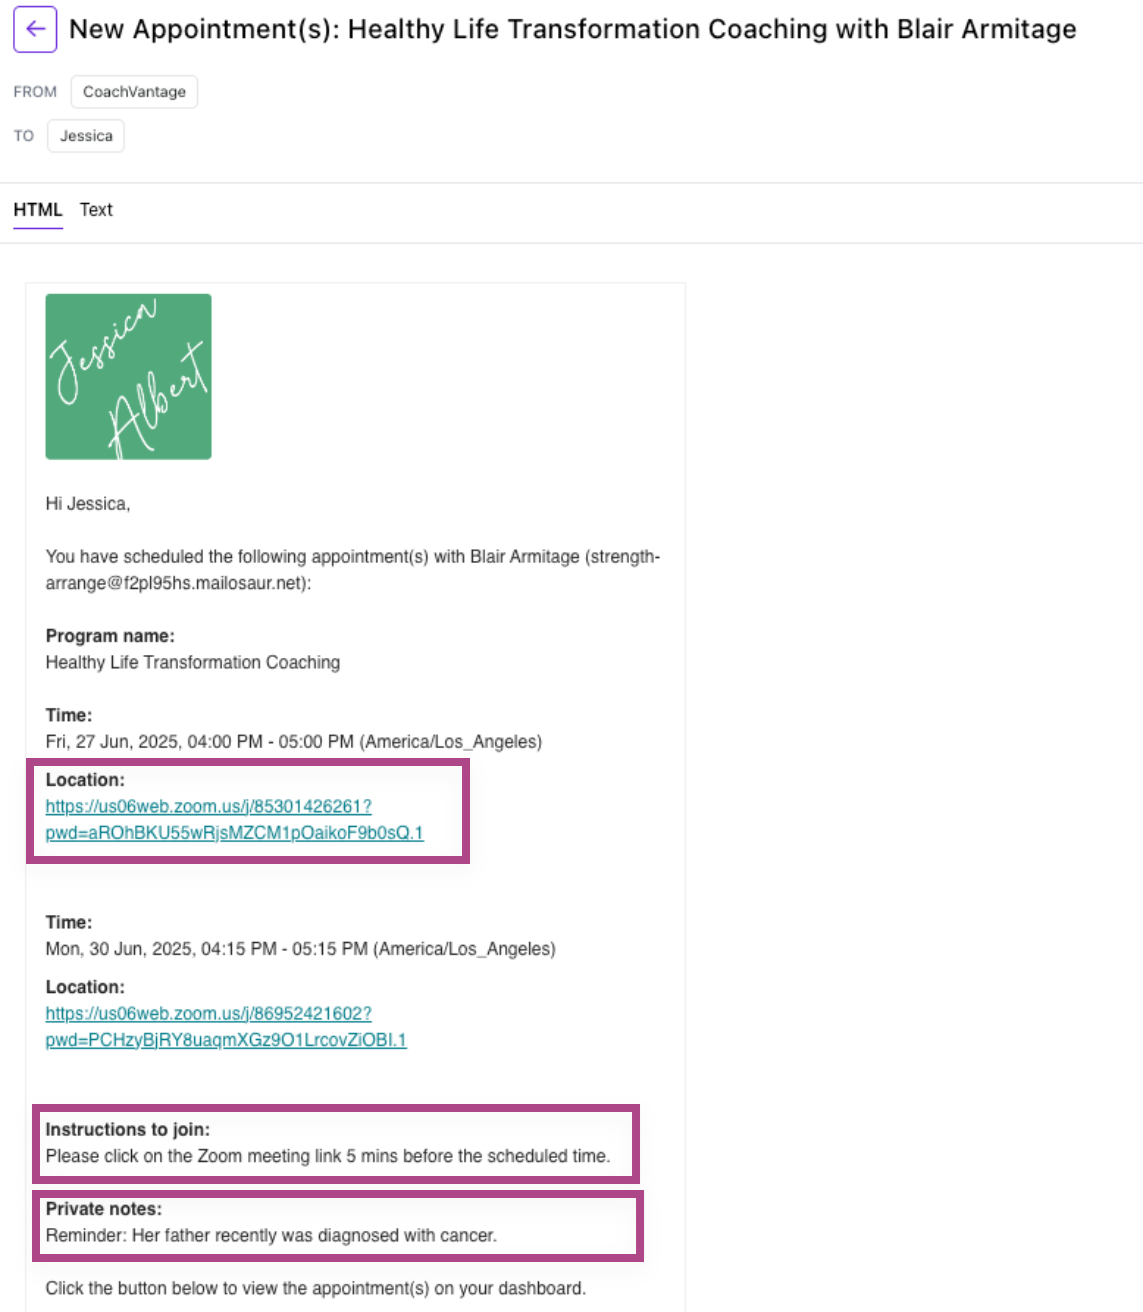
This information will be contained in the confirmation email to your clients.
Program Structure
This section allows you to spell out how many coaching sessions or hours is included in your coaching program, as well as the total duration or length of time of your program will run.
Specify your program structure such as the total number of coaching sessions, session duration and program duration.
- Total Sessions or Hours - You can choose Sessions or Hours by using the dropdown selector. This provides flexibility for how your program is structured - either as a package of coaching sessions or a bucket of coaching hours.
- First Session Duration - Specify the duration of the first session, in minutes. We differentiate between first session and subsequent sessions' duration as we know that sometimes, coaches spend longer with their coachee in the initial session.
- Subsequent Sessions Duration - Specify the duration of subsequent sessions, in minutes. If you check the box for Every, use the dropdown selector to specify how frequently the subsequent session would occur (i.e. daily, weekly, monthly).
- Total Program Duration - Use the dropdown selector to specify the duration of your coaching program.
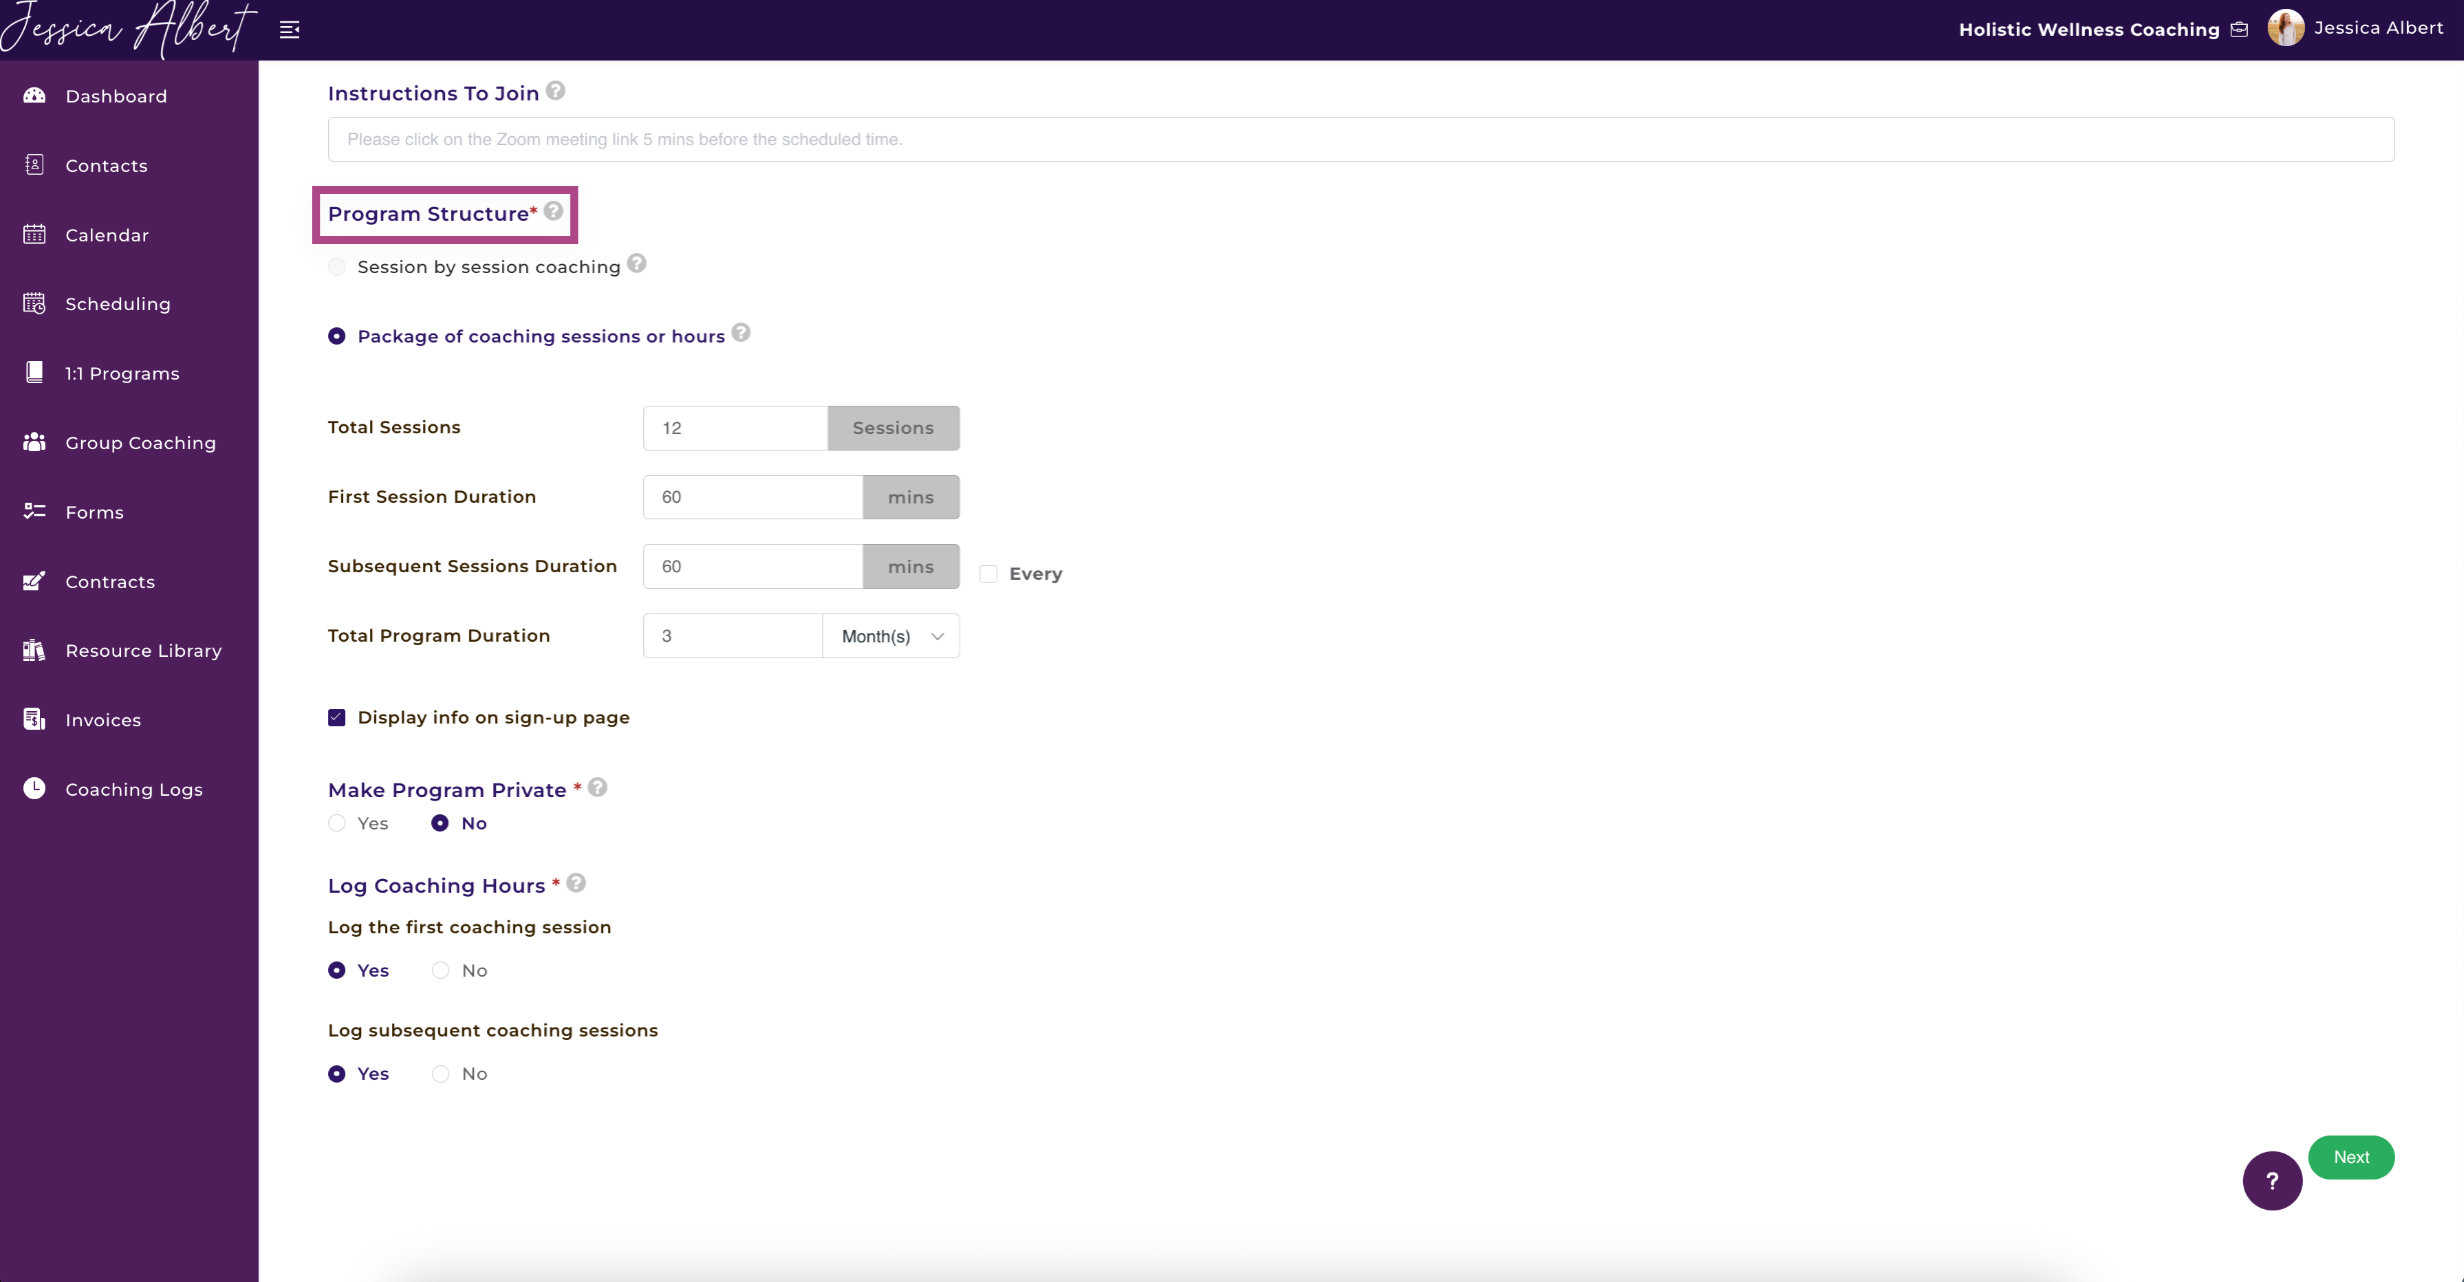
If you check the box to Display Info On Sign-Up Page, the information will be displayed on your sign-up page.
Make a Program Private
When you make a program private, it will not be displayed on your All Programs webpage.
This is useful if you'd like this program to be available only to specific clients by personal invitation only, rather than anyone who lands on your website.
Tip: If you would like this program to appear as an option for clients to sign up from the All Programs sign up page, then do not mark this program as private.
Log Coaching Hours 🕑
Select Yes to log your coaching hours for this program automatically in your coaching log.
After each session is completed for this program, CoachVantage will automatically capture the coaching hours in your Coaching Log (refer to this article on Coaching Logs Overview for more information).
2. Automation Rules (Optional) ⚡️
Set up Automation Rules to instantly share files with clients upon enrollment.
Files added here will be available in the client portal as soon as a client enrolls and creates their account.
Tip: Use this to automatically share welcome videos, info sheets, or program guidelines—saving time and eliminating the need for manual emails.
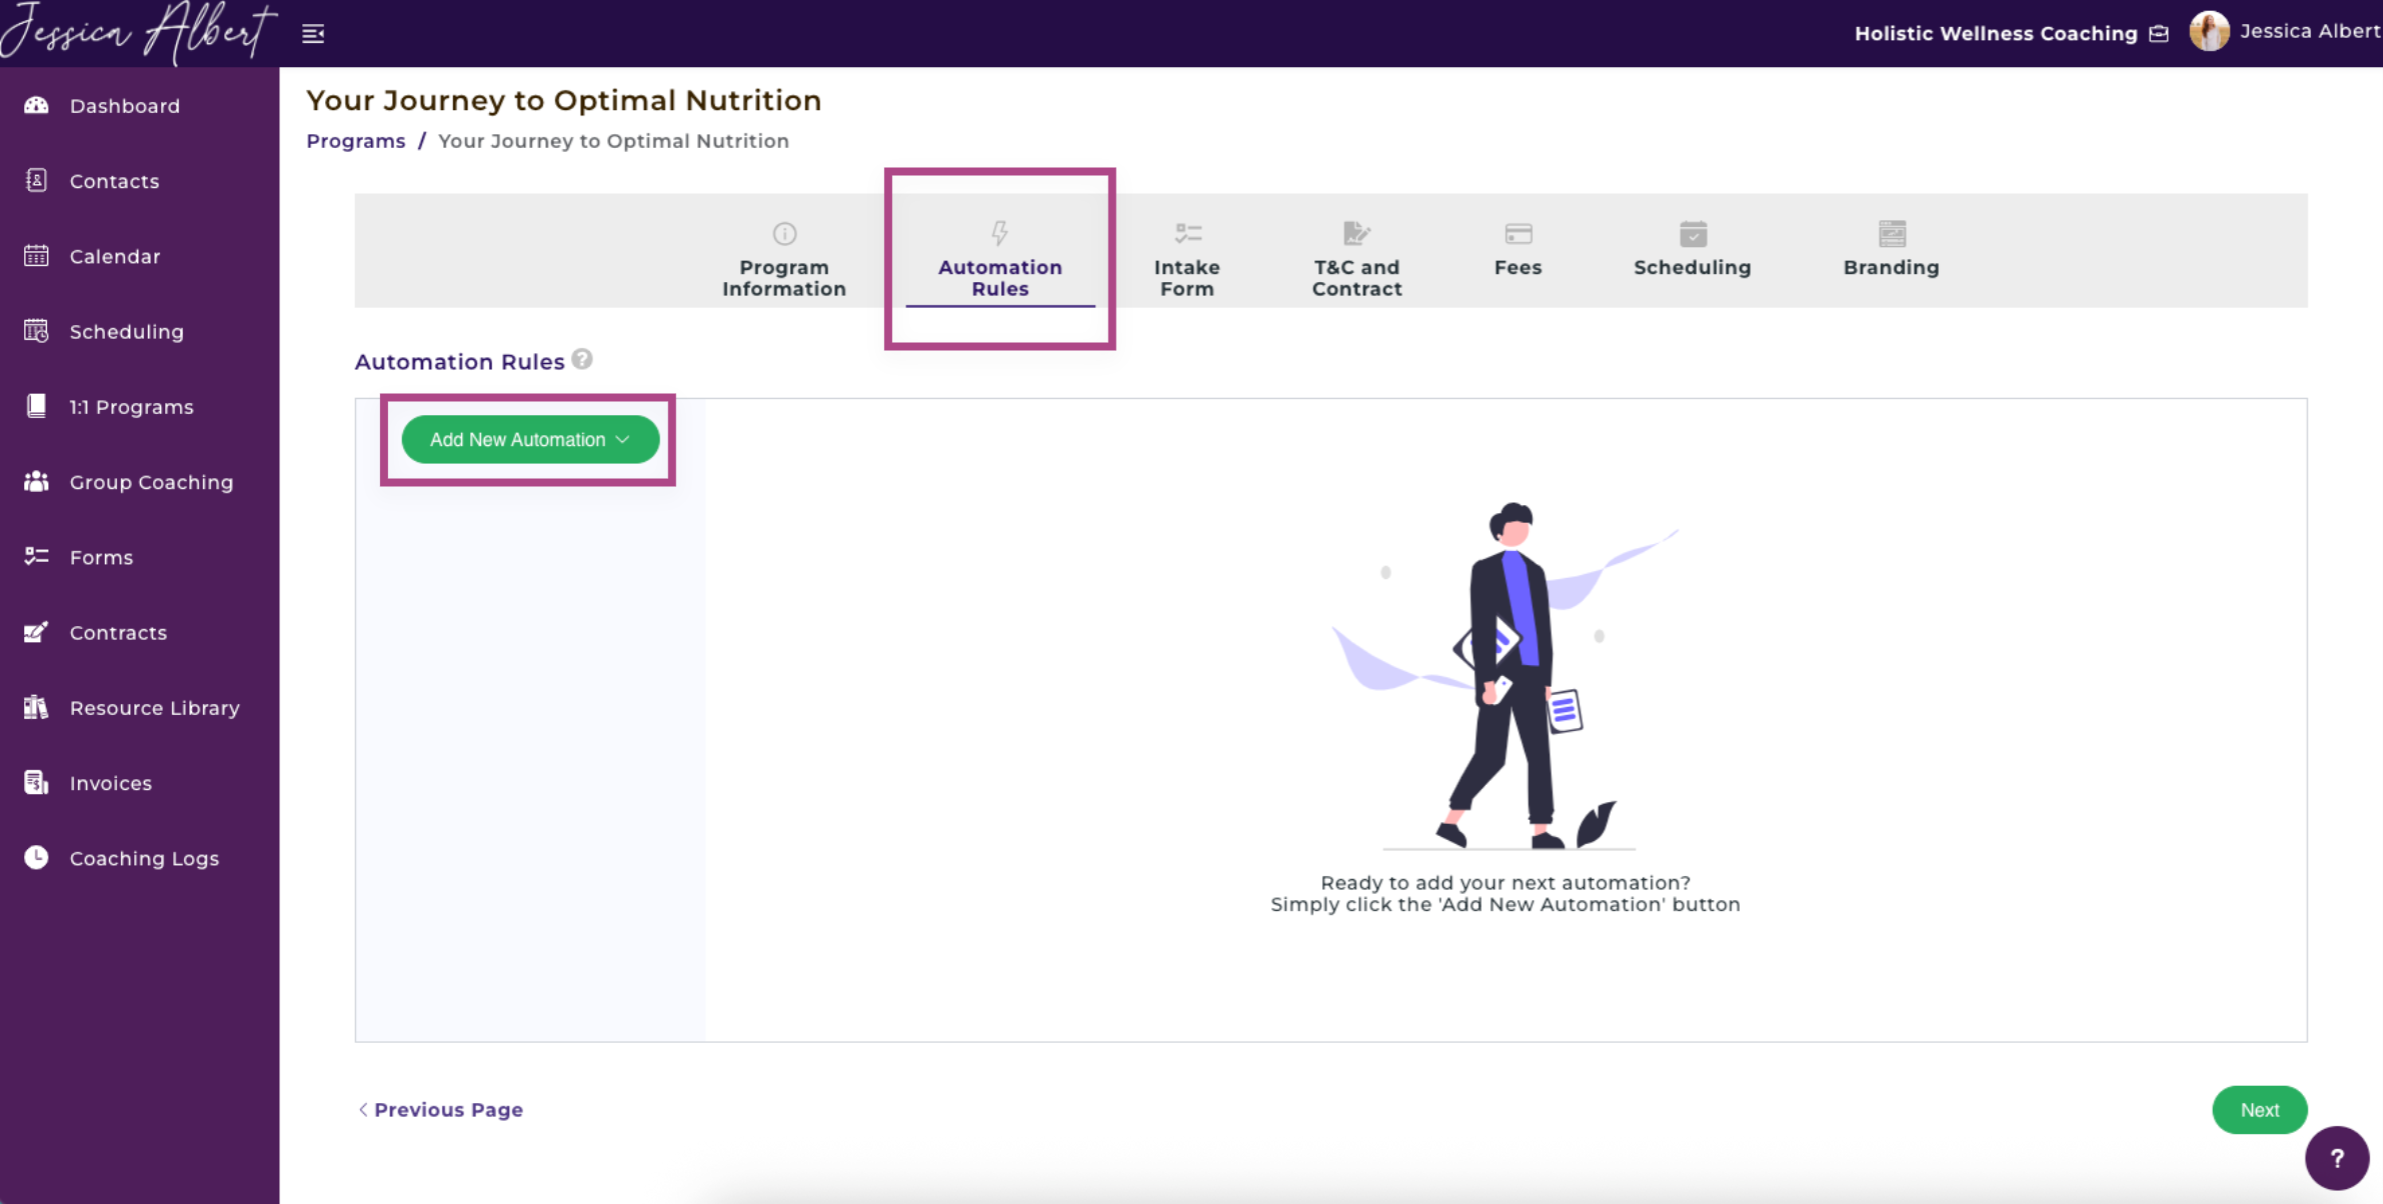
Add New Automation
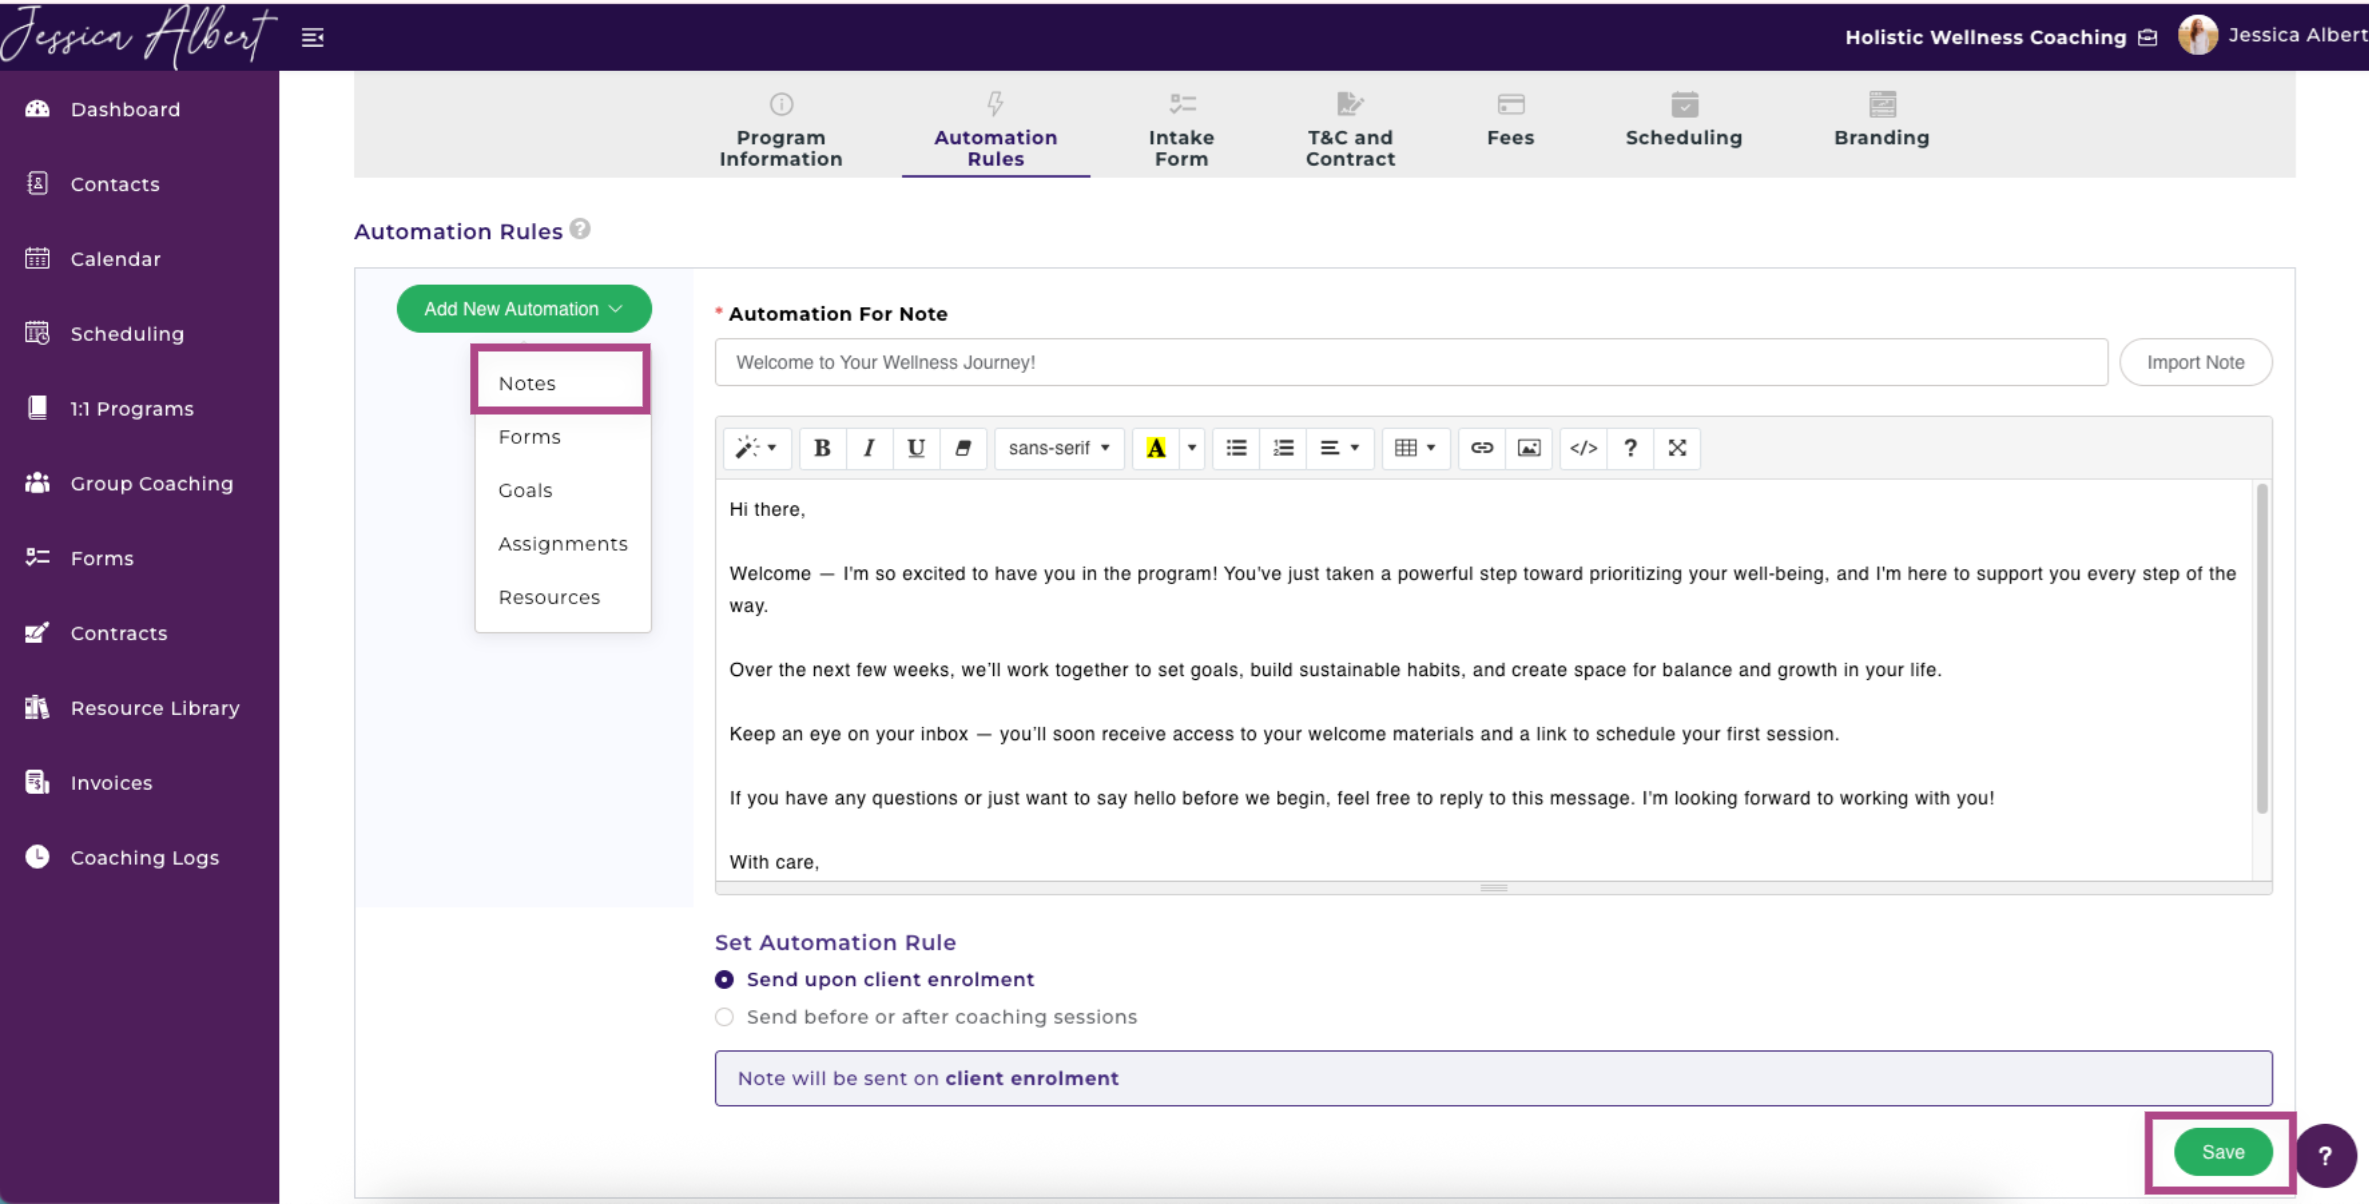
When you hover over the green Add New Automation button, you'll see you have the option of adding Notes, Forms, Goals, Assignments, or Resources. Select the type of file you'd like to include in your automation when a client signs up for your program.
Notes
Adding a Note to your Automation Rules allows you to upload any text from a file that you'd like a client to review upon signup.
If you plan on using the same note multiple times, you can easily insert it by selecting the Import Note button. You can save notes to import in your Resource Library.
Press Save to save your automation.
Forms
You can add an Automation For Form. When you select the dropdown menu, the forms that are saved in your CoachVantage account will populate. To learn more about how to create a form, refer to the Forms Page Overview article.

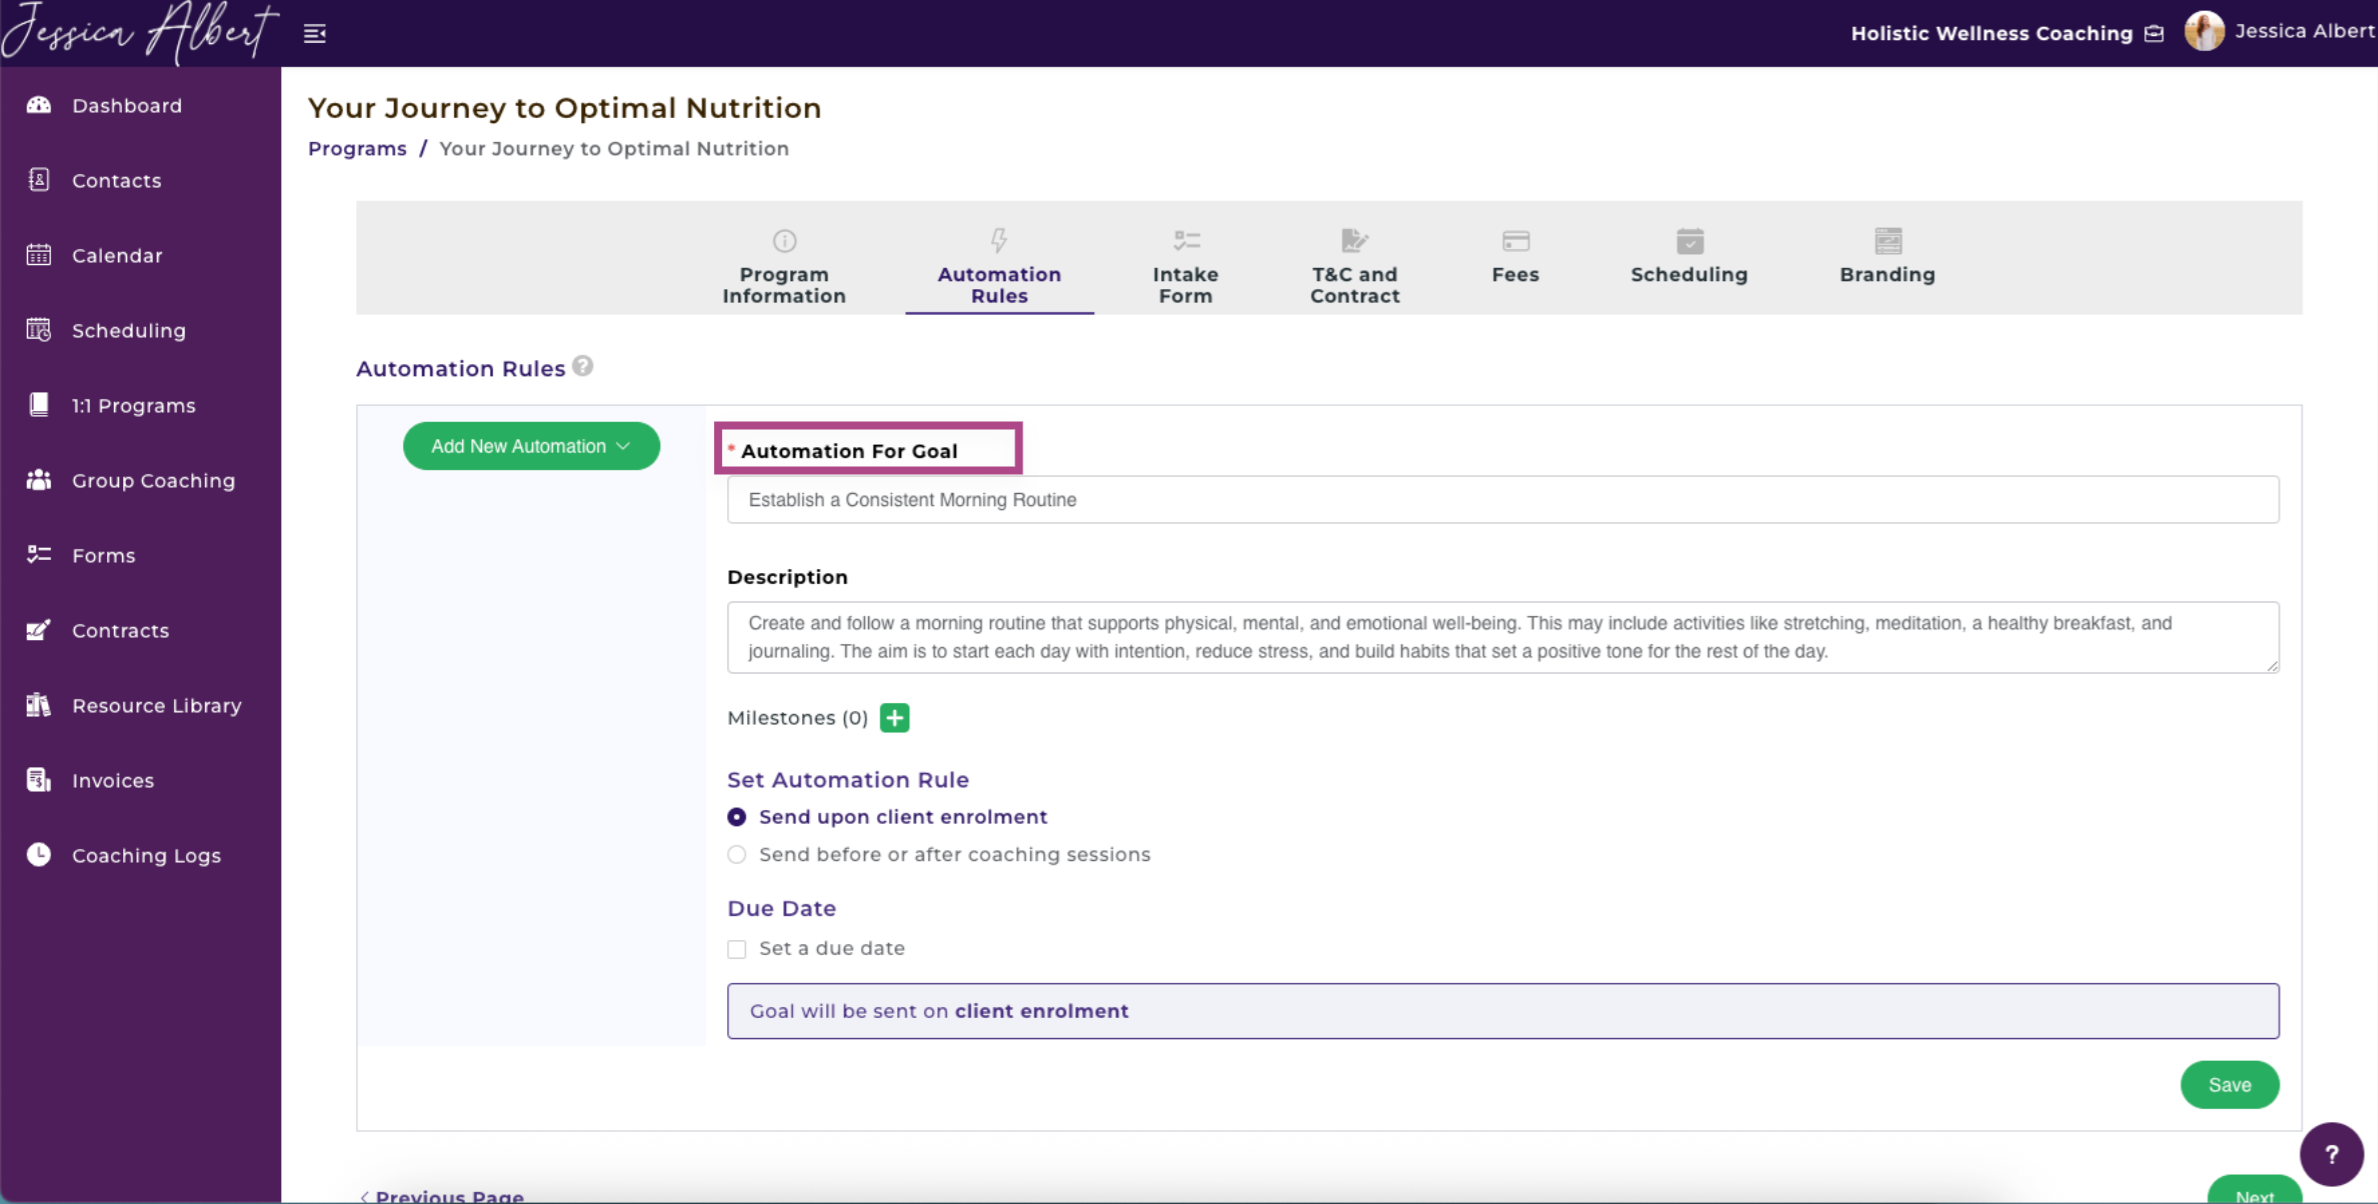
Goals
The Goals Automation Rule is a simple way to set pre-established Goals when a client signs up for your program.
Steps to Set Goals:
- Create a Automation For Goal or title of the goal.
- Write a Description.
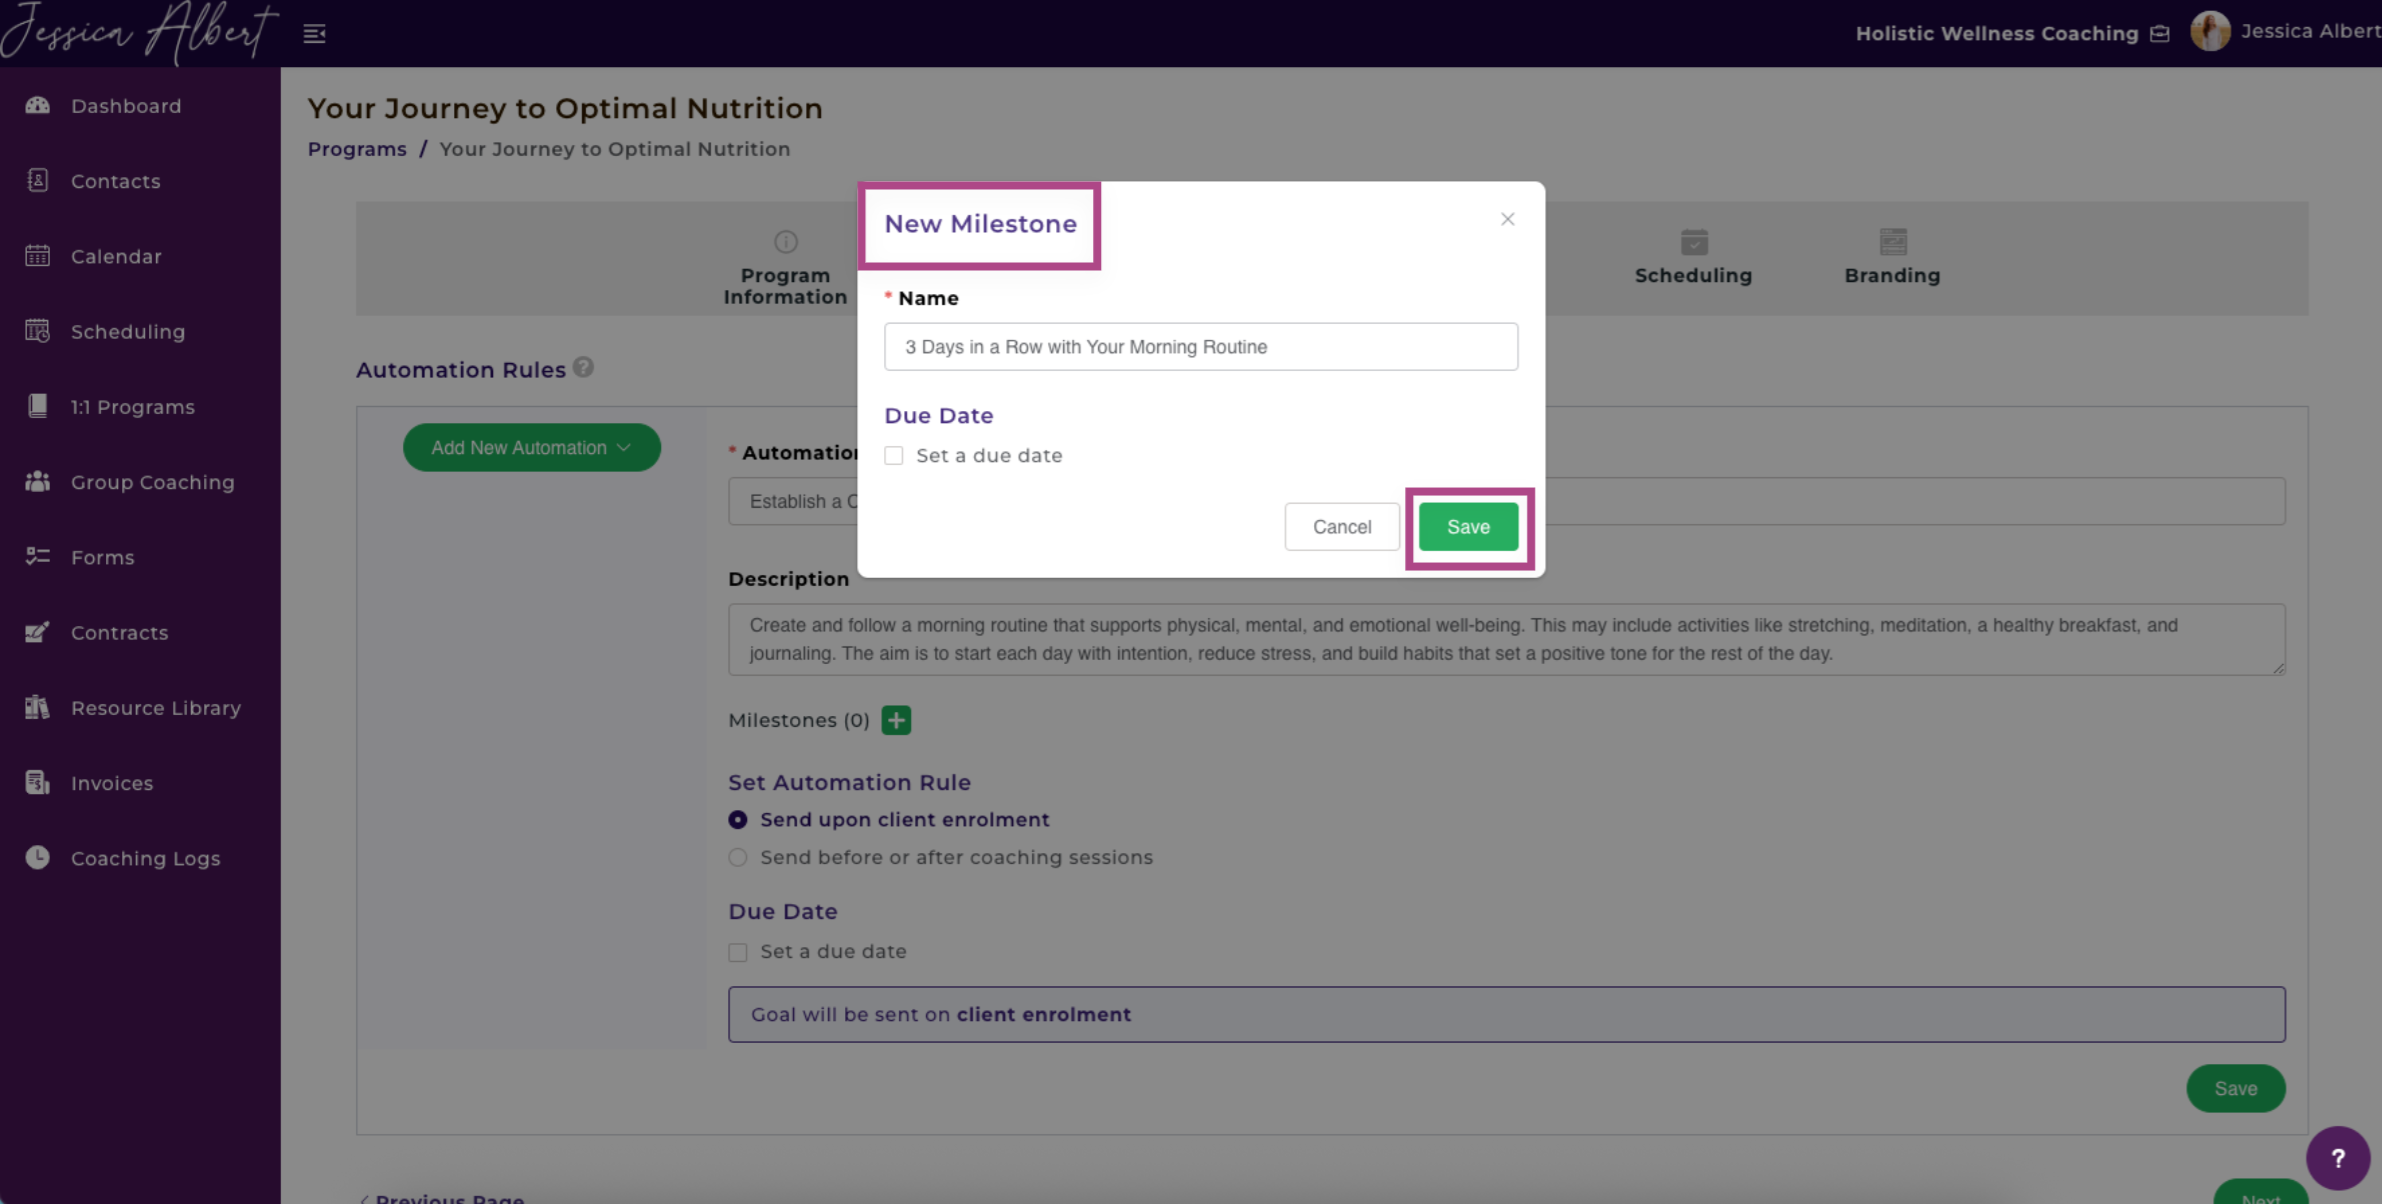
- Press the green + button to set Milestones (optional).
- Set Automation Rules (see below).
- Select a Due Date (see below).
- Press Save.
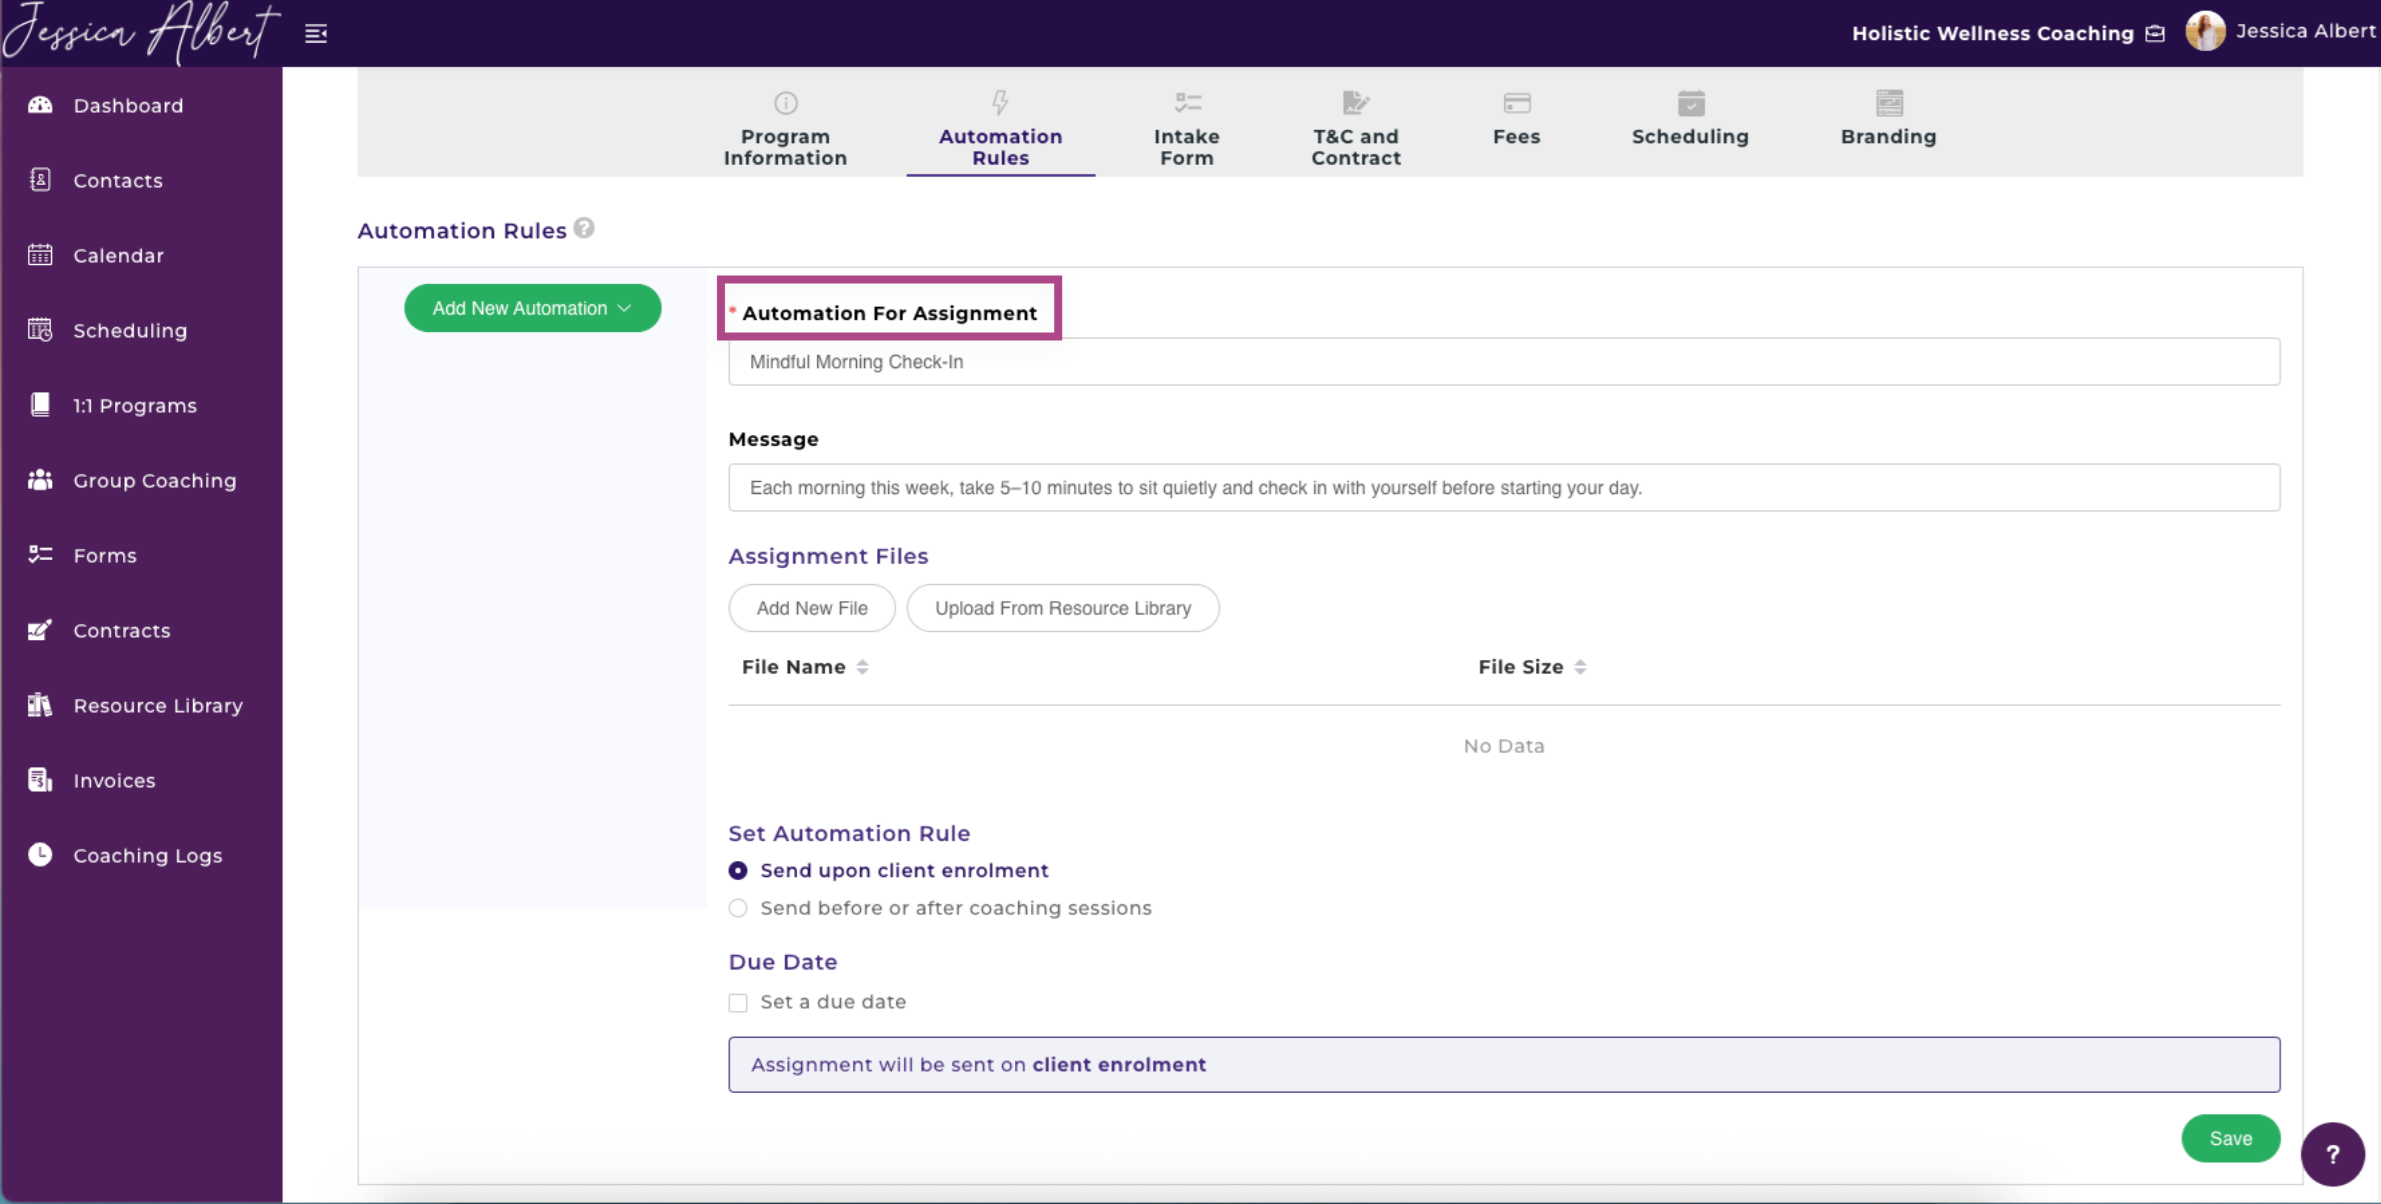
Assignments
As a coach, you have the option to create Assignments for your clients.
Steps to Create Assignments:
- Create a Automation For Assignment or title of the goal.
- Write a Message detailing the overview of the assignment.
- Include Assignment Files by either selecting Add New File or Upload From Resource Library. Once the File is uploaded, you'll see the File Name and File Size listed.
- Set Automation Rules (see below).
- Select a Due Date (see below).
- Press Save.
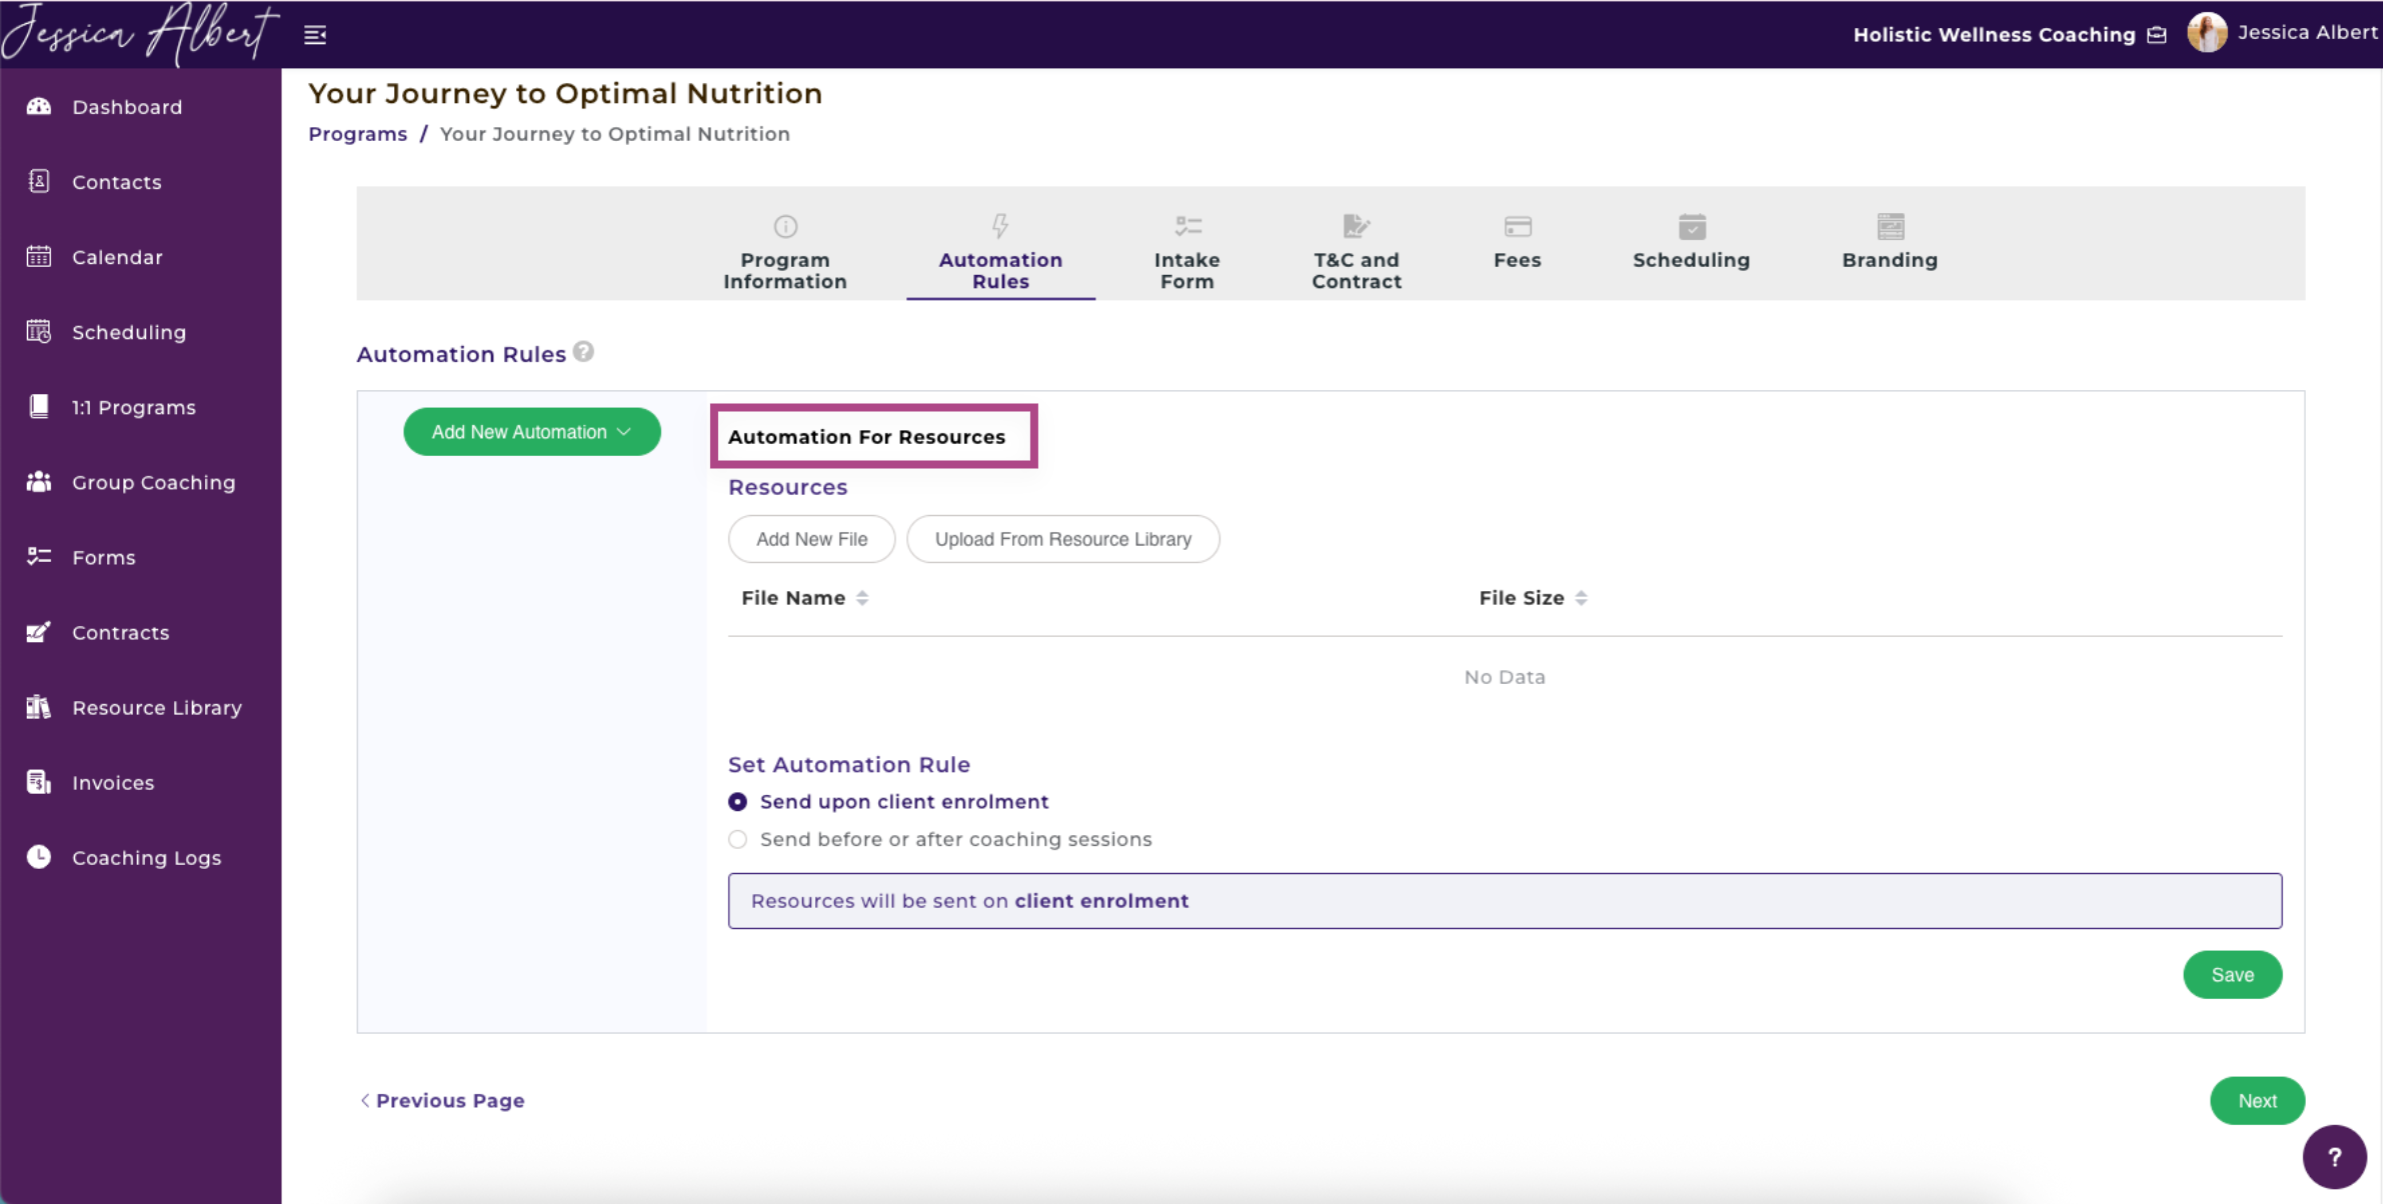
Resources
If you have any other additional resources that you'd like to share with your client, you had add them here (i.e. a video message, habit tracker, goal-setting template, audio file, program timeline, etc.)
Set Automation Rules
As a coach, when you upload any type of file whether it be Notes, Forms, etc., you have the options to either:
- Send Upon Client Enrolment - If selected, the item will be sent immediately upon client enrolment.
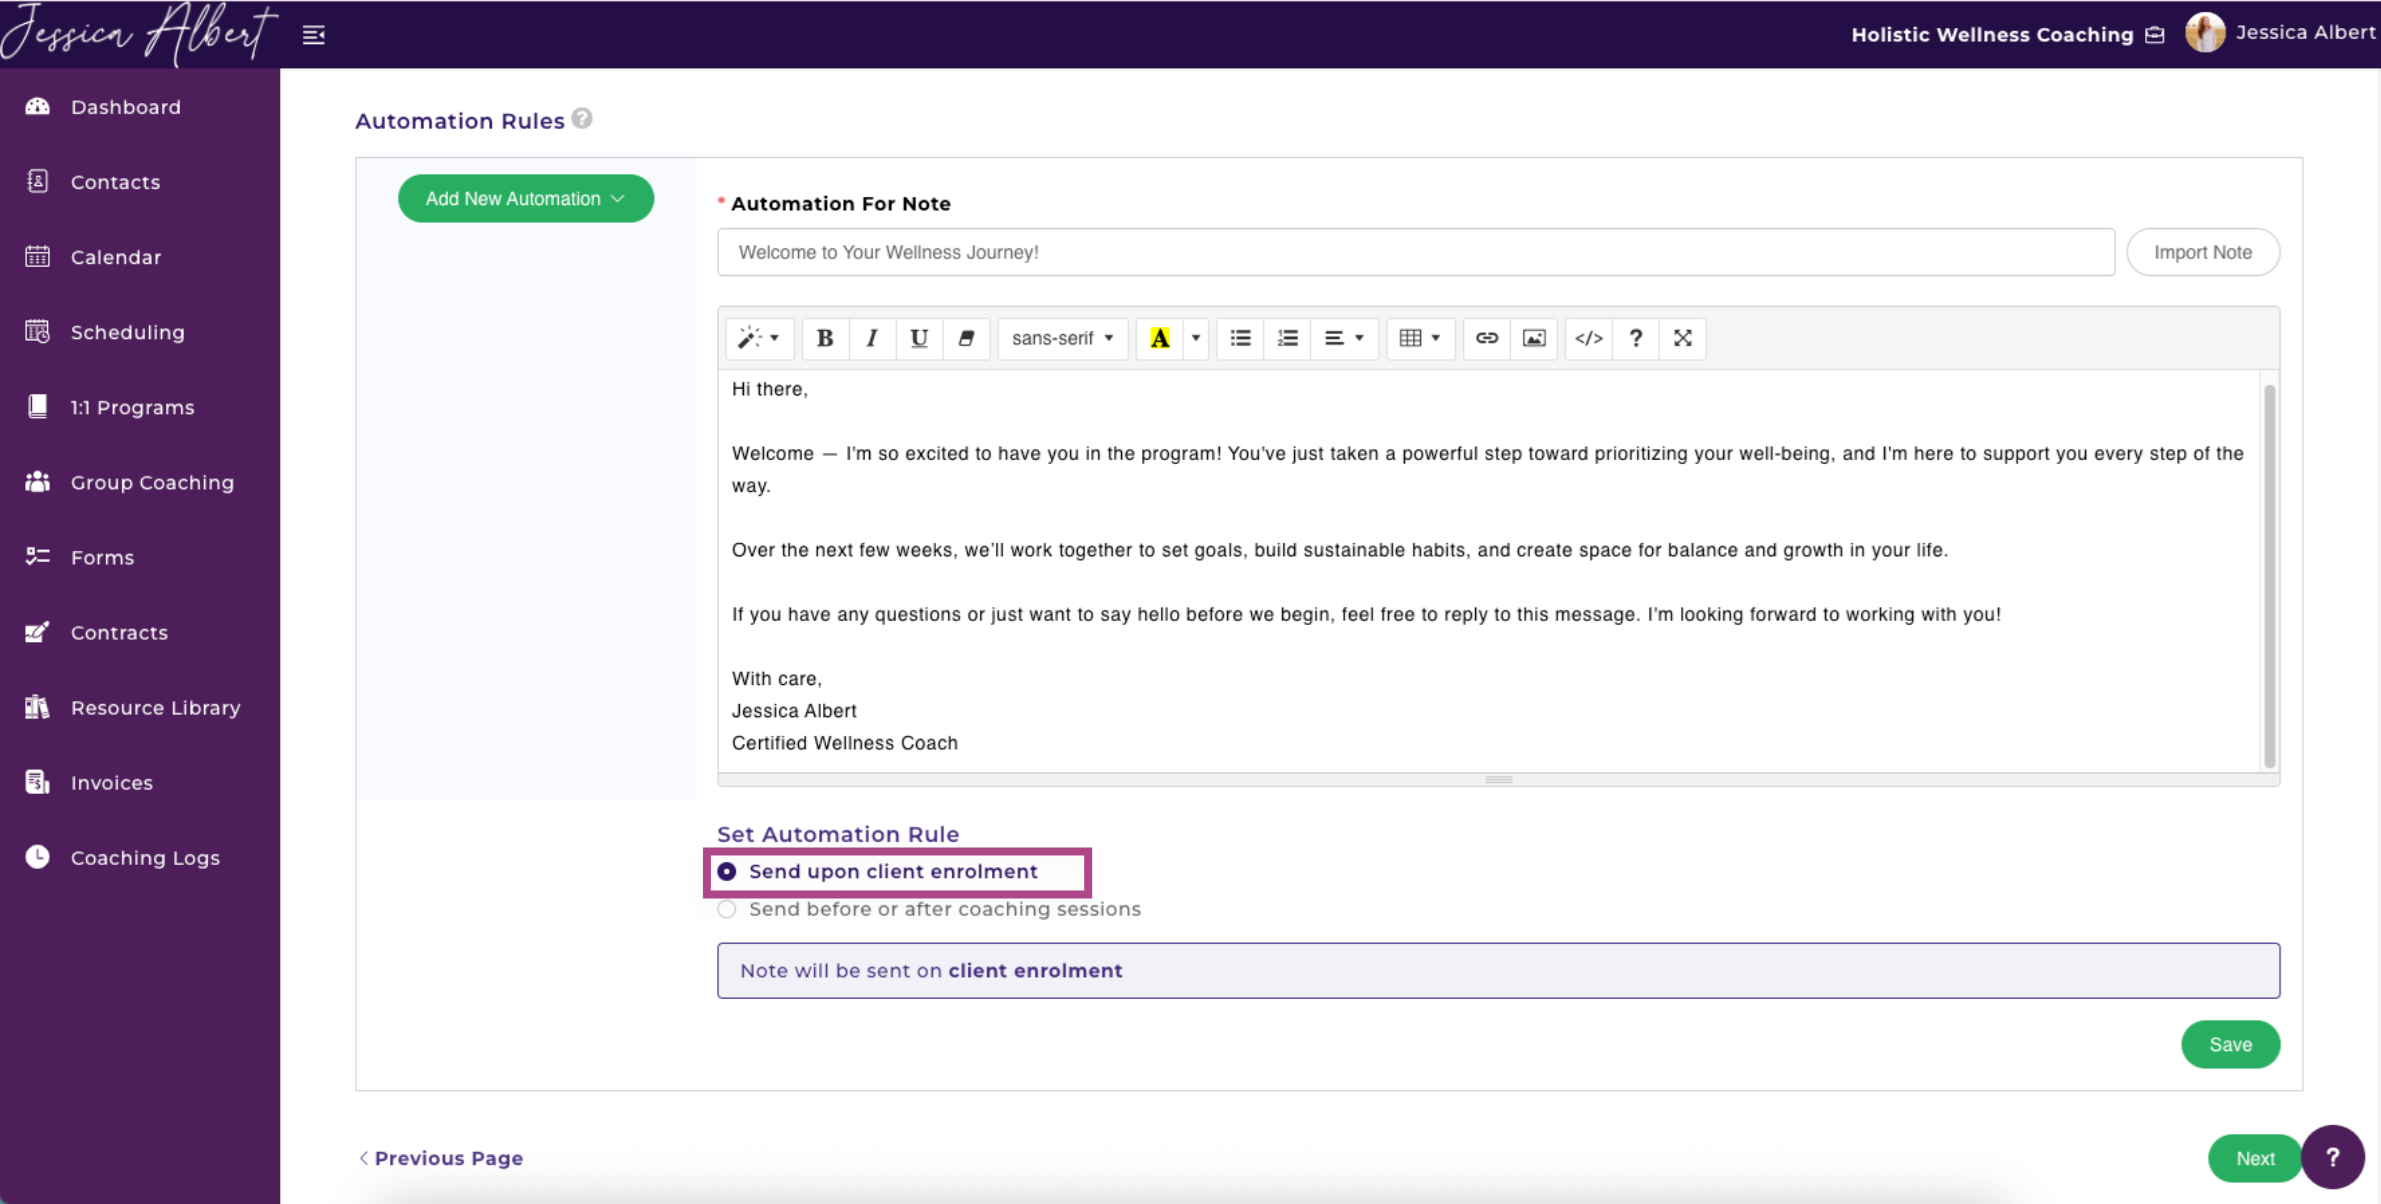
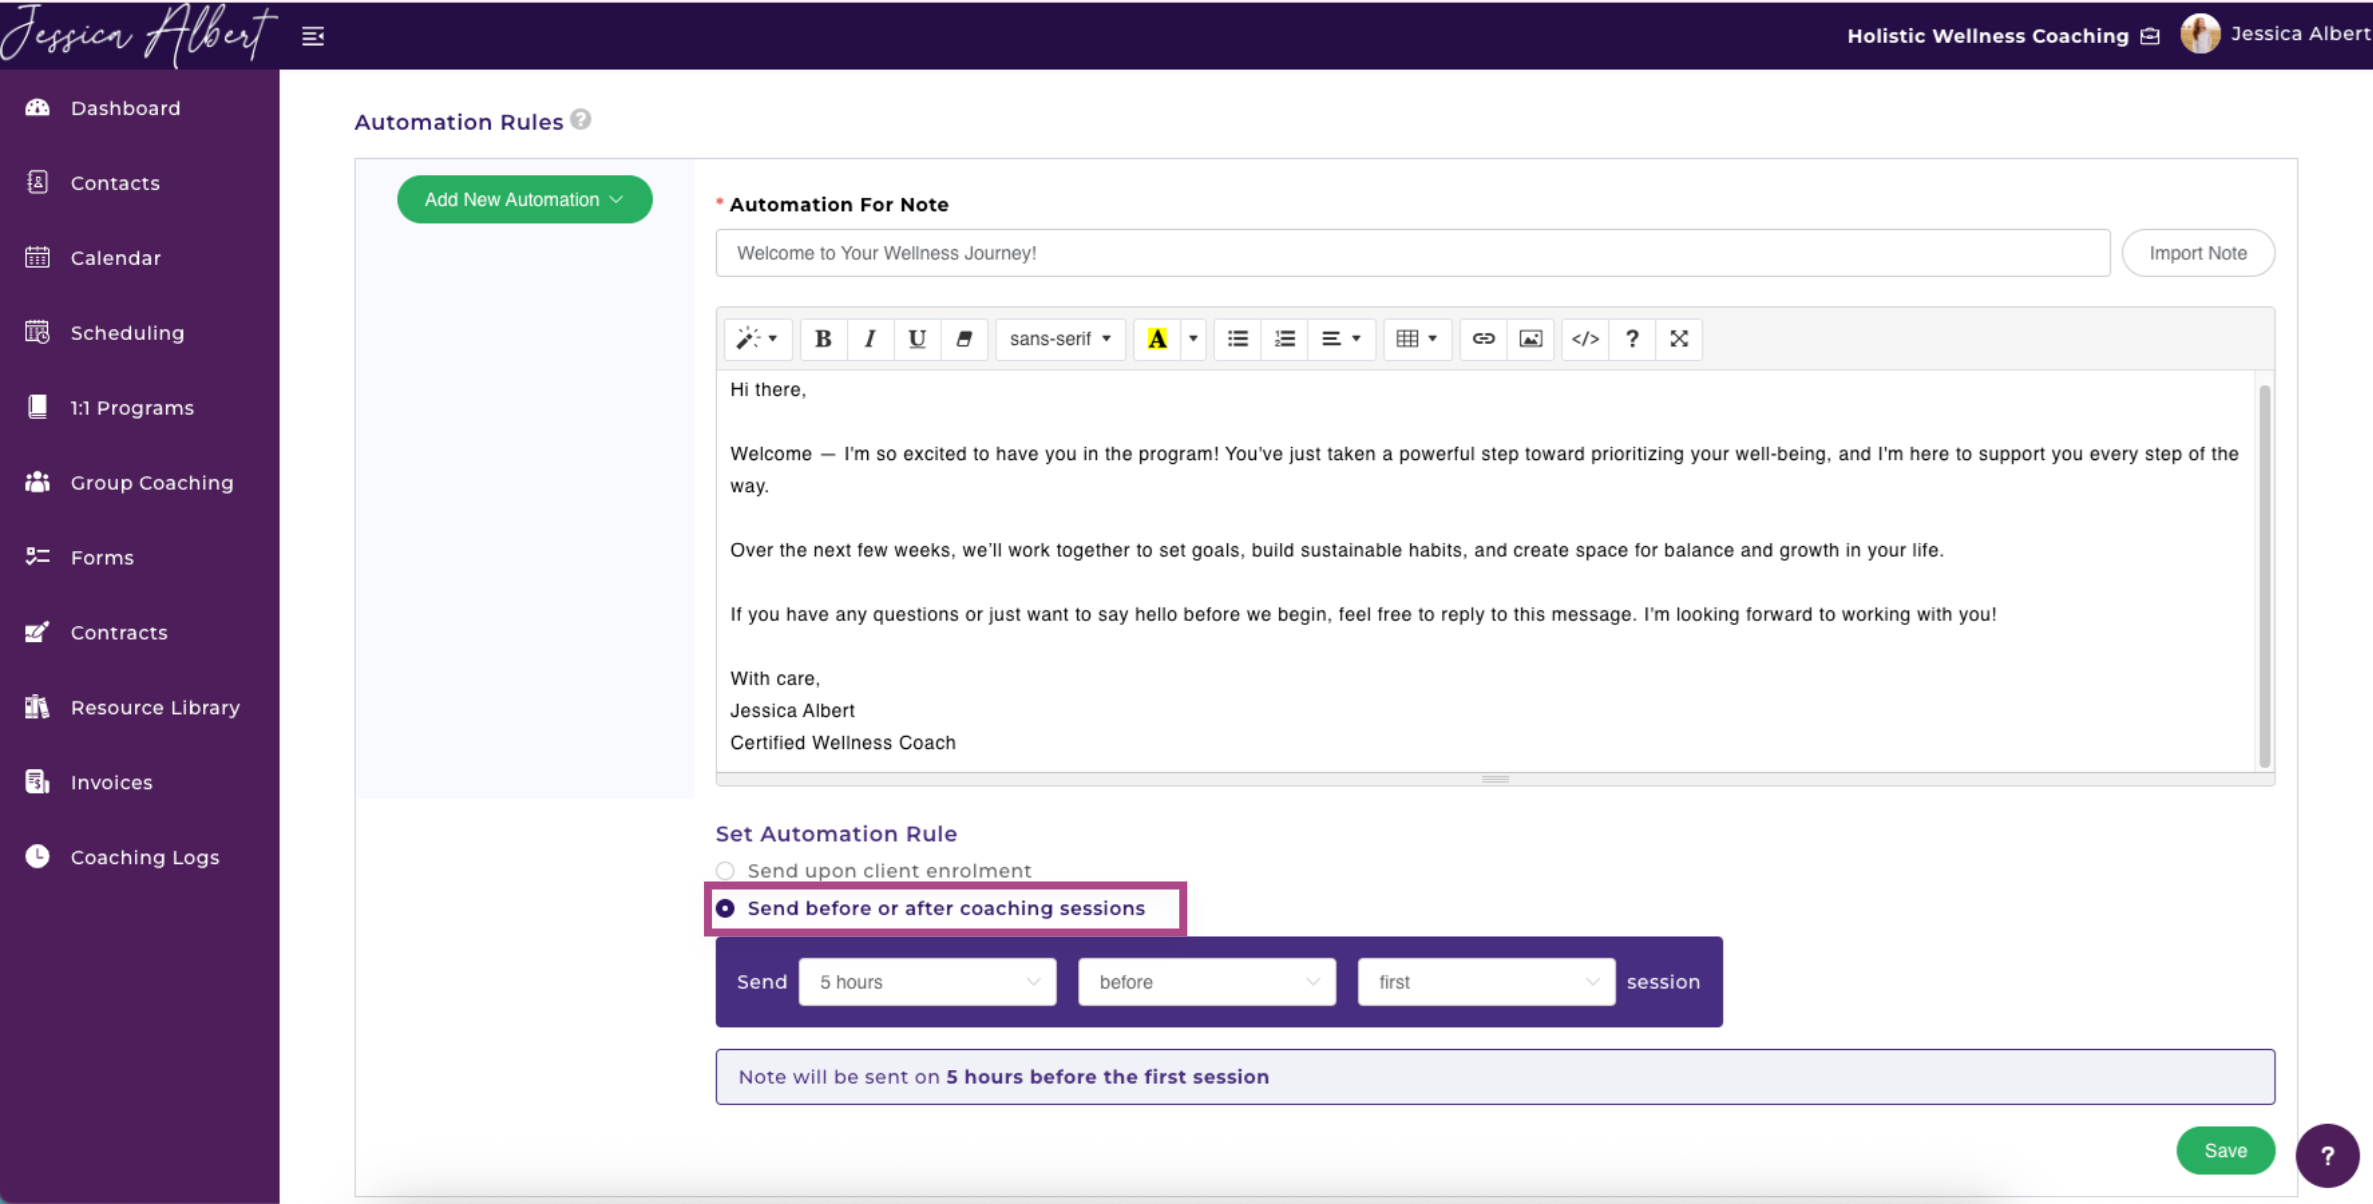
- Send Before or After Coaching Sessions - If selected, you get to choose when you want the Note to send.
You have the option to send Immediately, in X Number of Hours, or Days, Before, After, or Before And After, the First or Every Session.
Be sure to click Save when this step is complete.
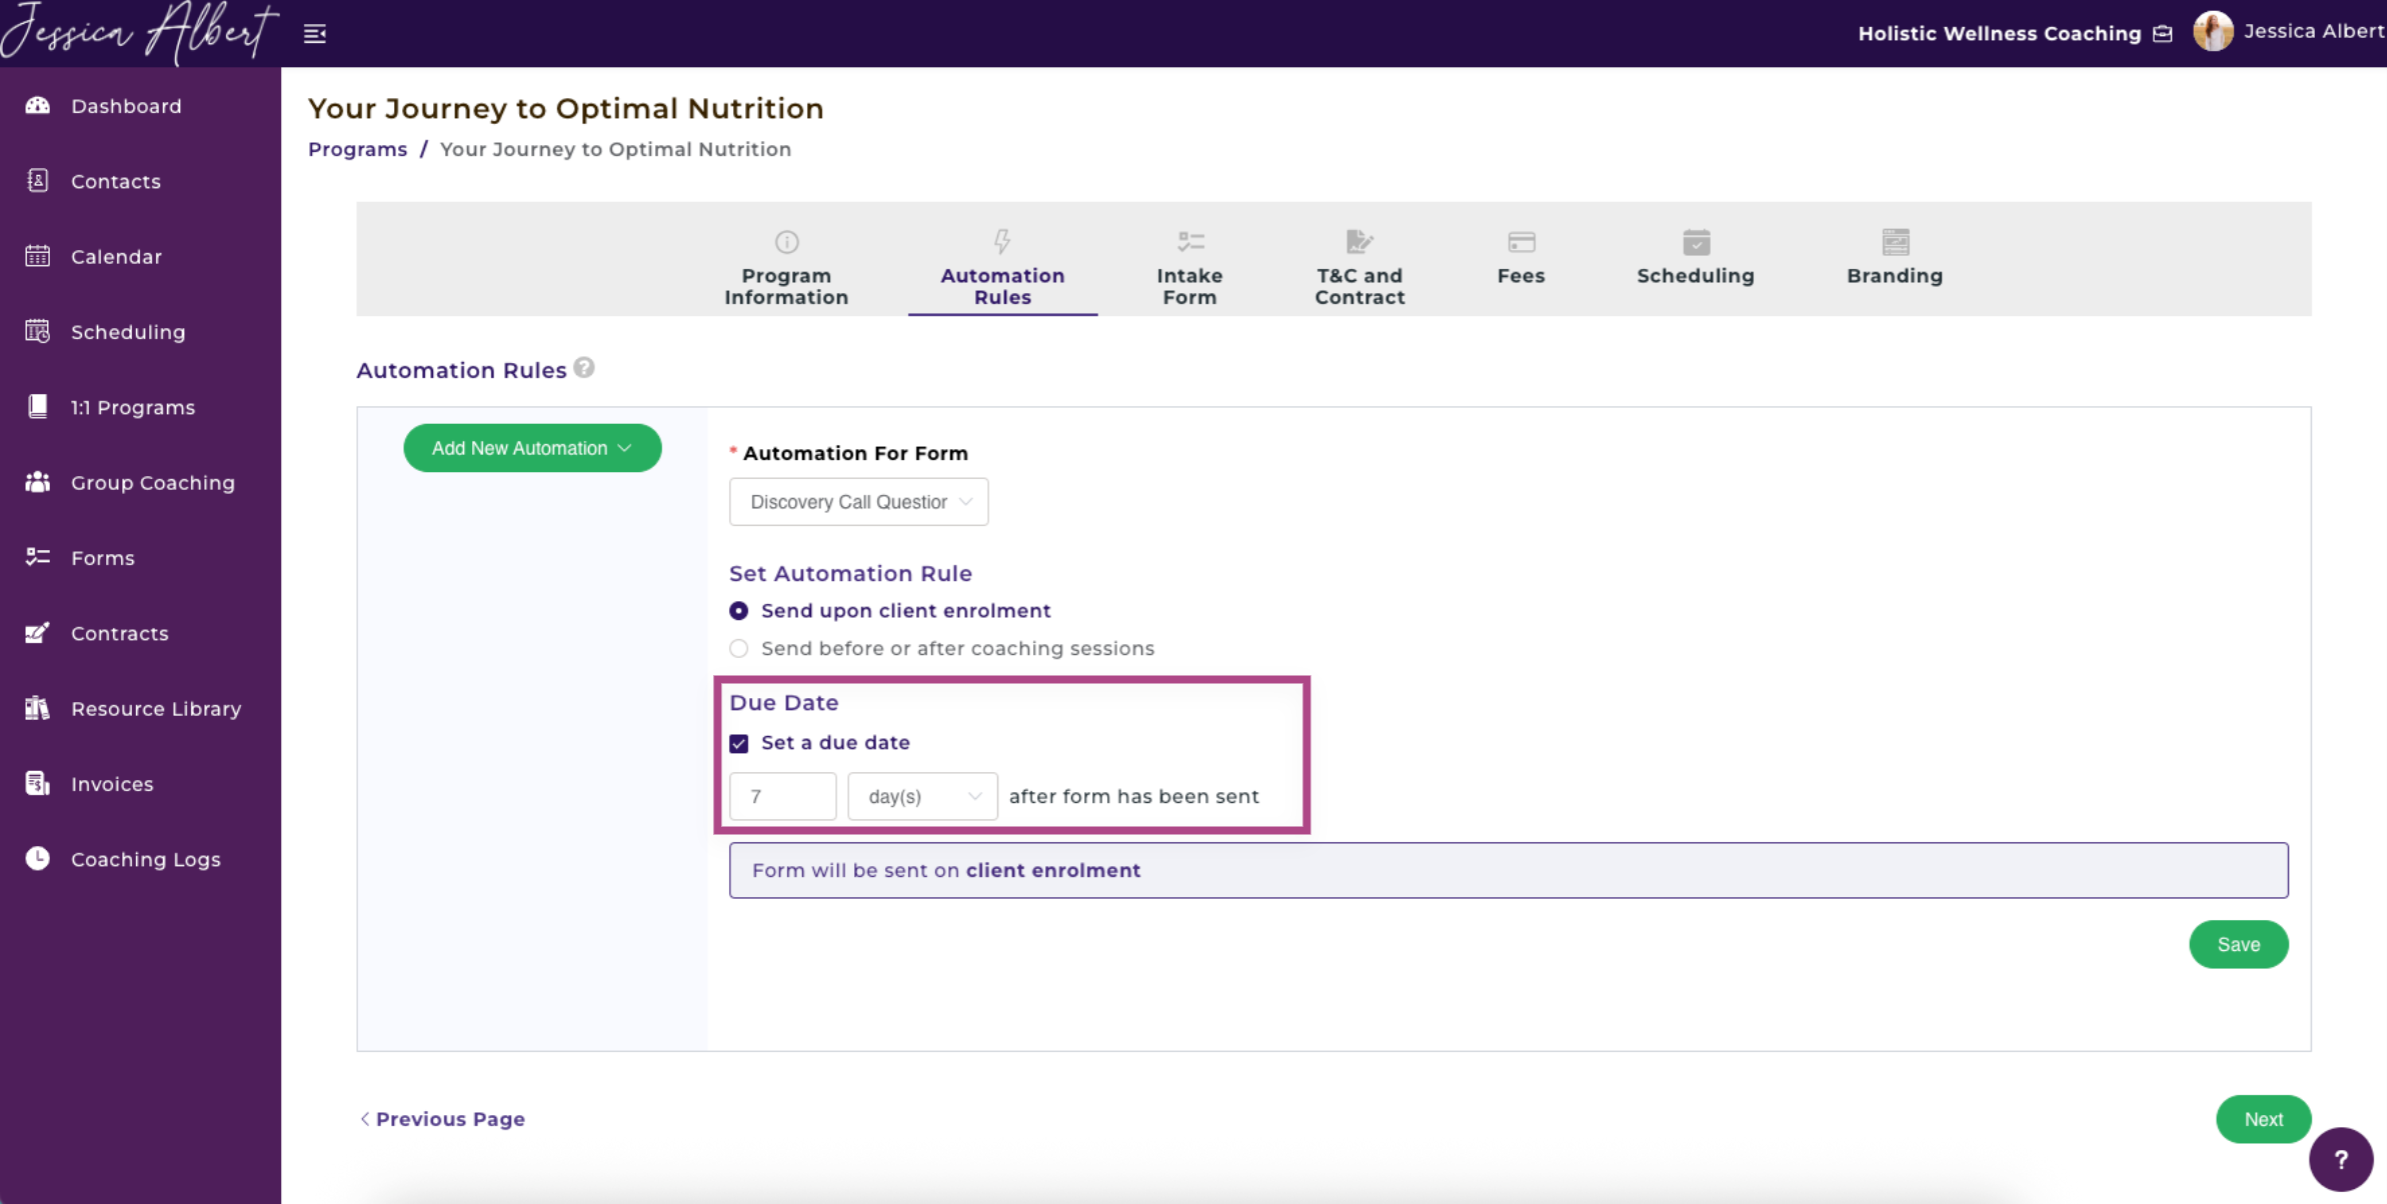
Due Date
For Forms, Goals, and Assignments, you have the option to create a Due Date.
You can make the item due after a certain number of Hours, Days, or Months, after it's been sent. When finished, remember to hit Save.
3. Intake Form (Optional) 📄
Client Registration Information
On the sign-up page, the First Name, Last Name and Email are mandatory fields that will always be displayed.
When a client signs up, they MUST enter the above information.
Additionally, you have the option to request additional information such as phone number, company name, address, etc.
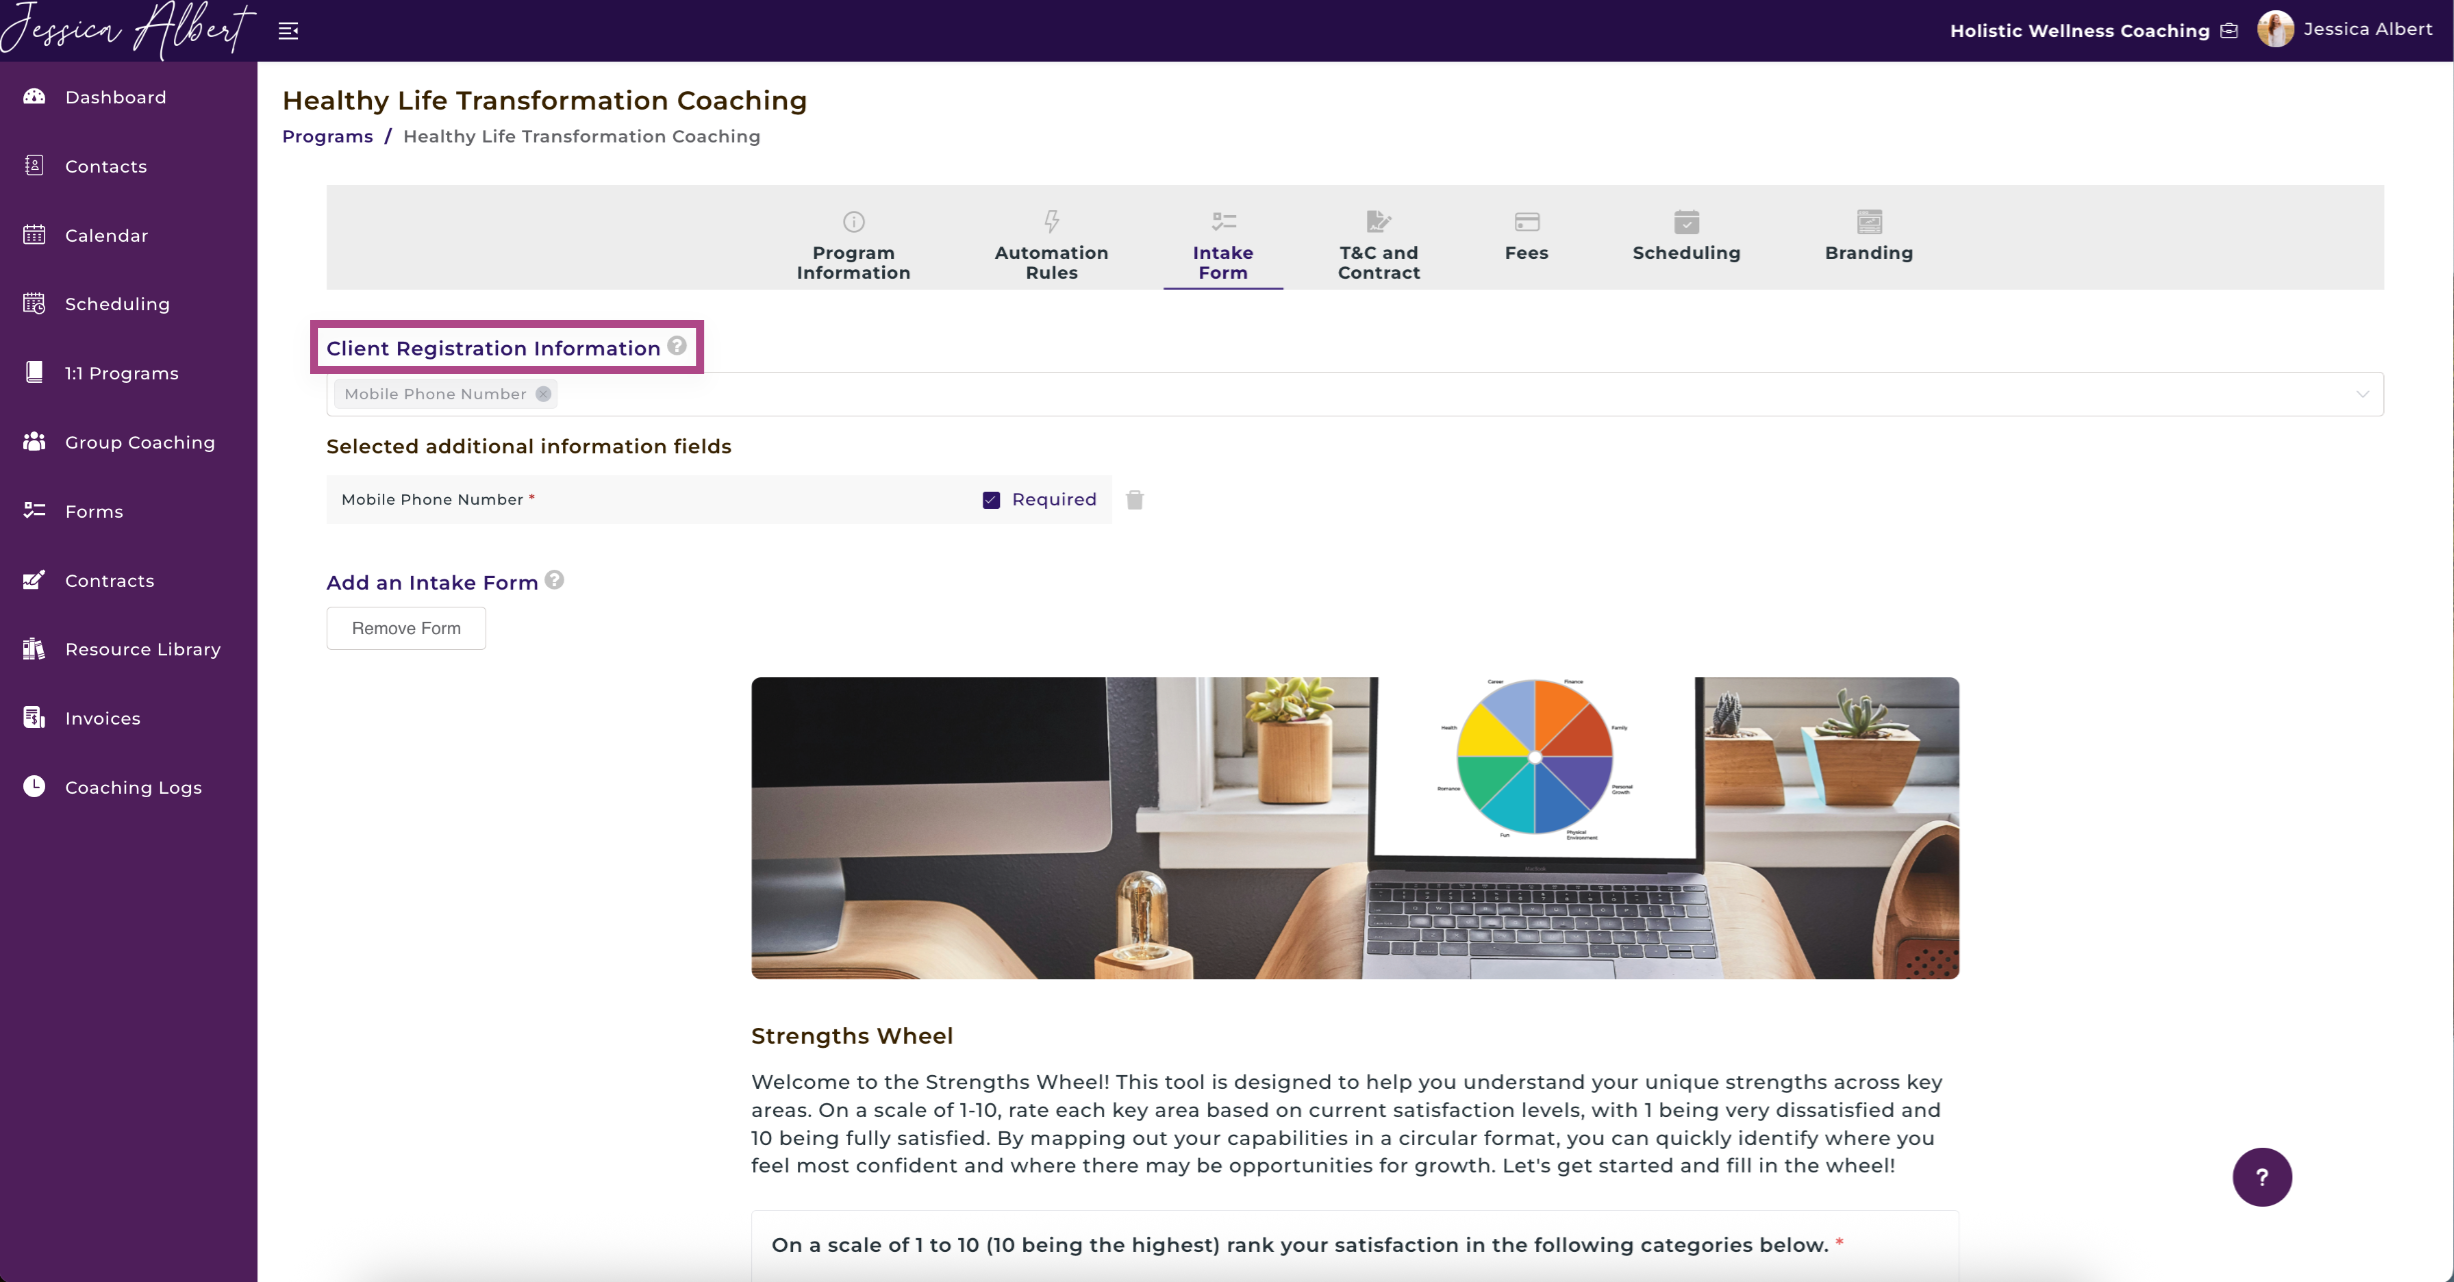
The additional client information that you can request is presented as a drop down selector for you to choose what information you wish to collect from clients during the sign-up process.
After the client has entered this information on the sign-up page, their inputs will be automatically saved to the client's Profile Page on the Individual Contact Record page.
Intake Form
You can create an intake form (or import an existing Form) to display on your program sign-up page.
On the sign-up page, the intake form will be displayed for the client to enter their responses.
Tip: Use Intake Forms if you wish to get more information from clients about their goals, challenges, current situation, etc.
Upon successful completion of the program sign-up, the client responses will be automatically saved in the Contact record (in the Forms tab) so that you can view their responses.
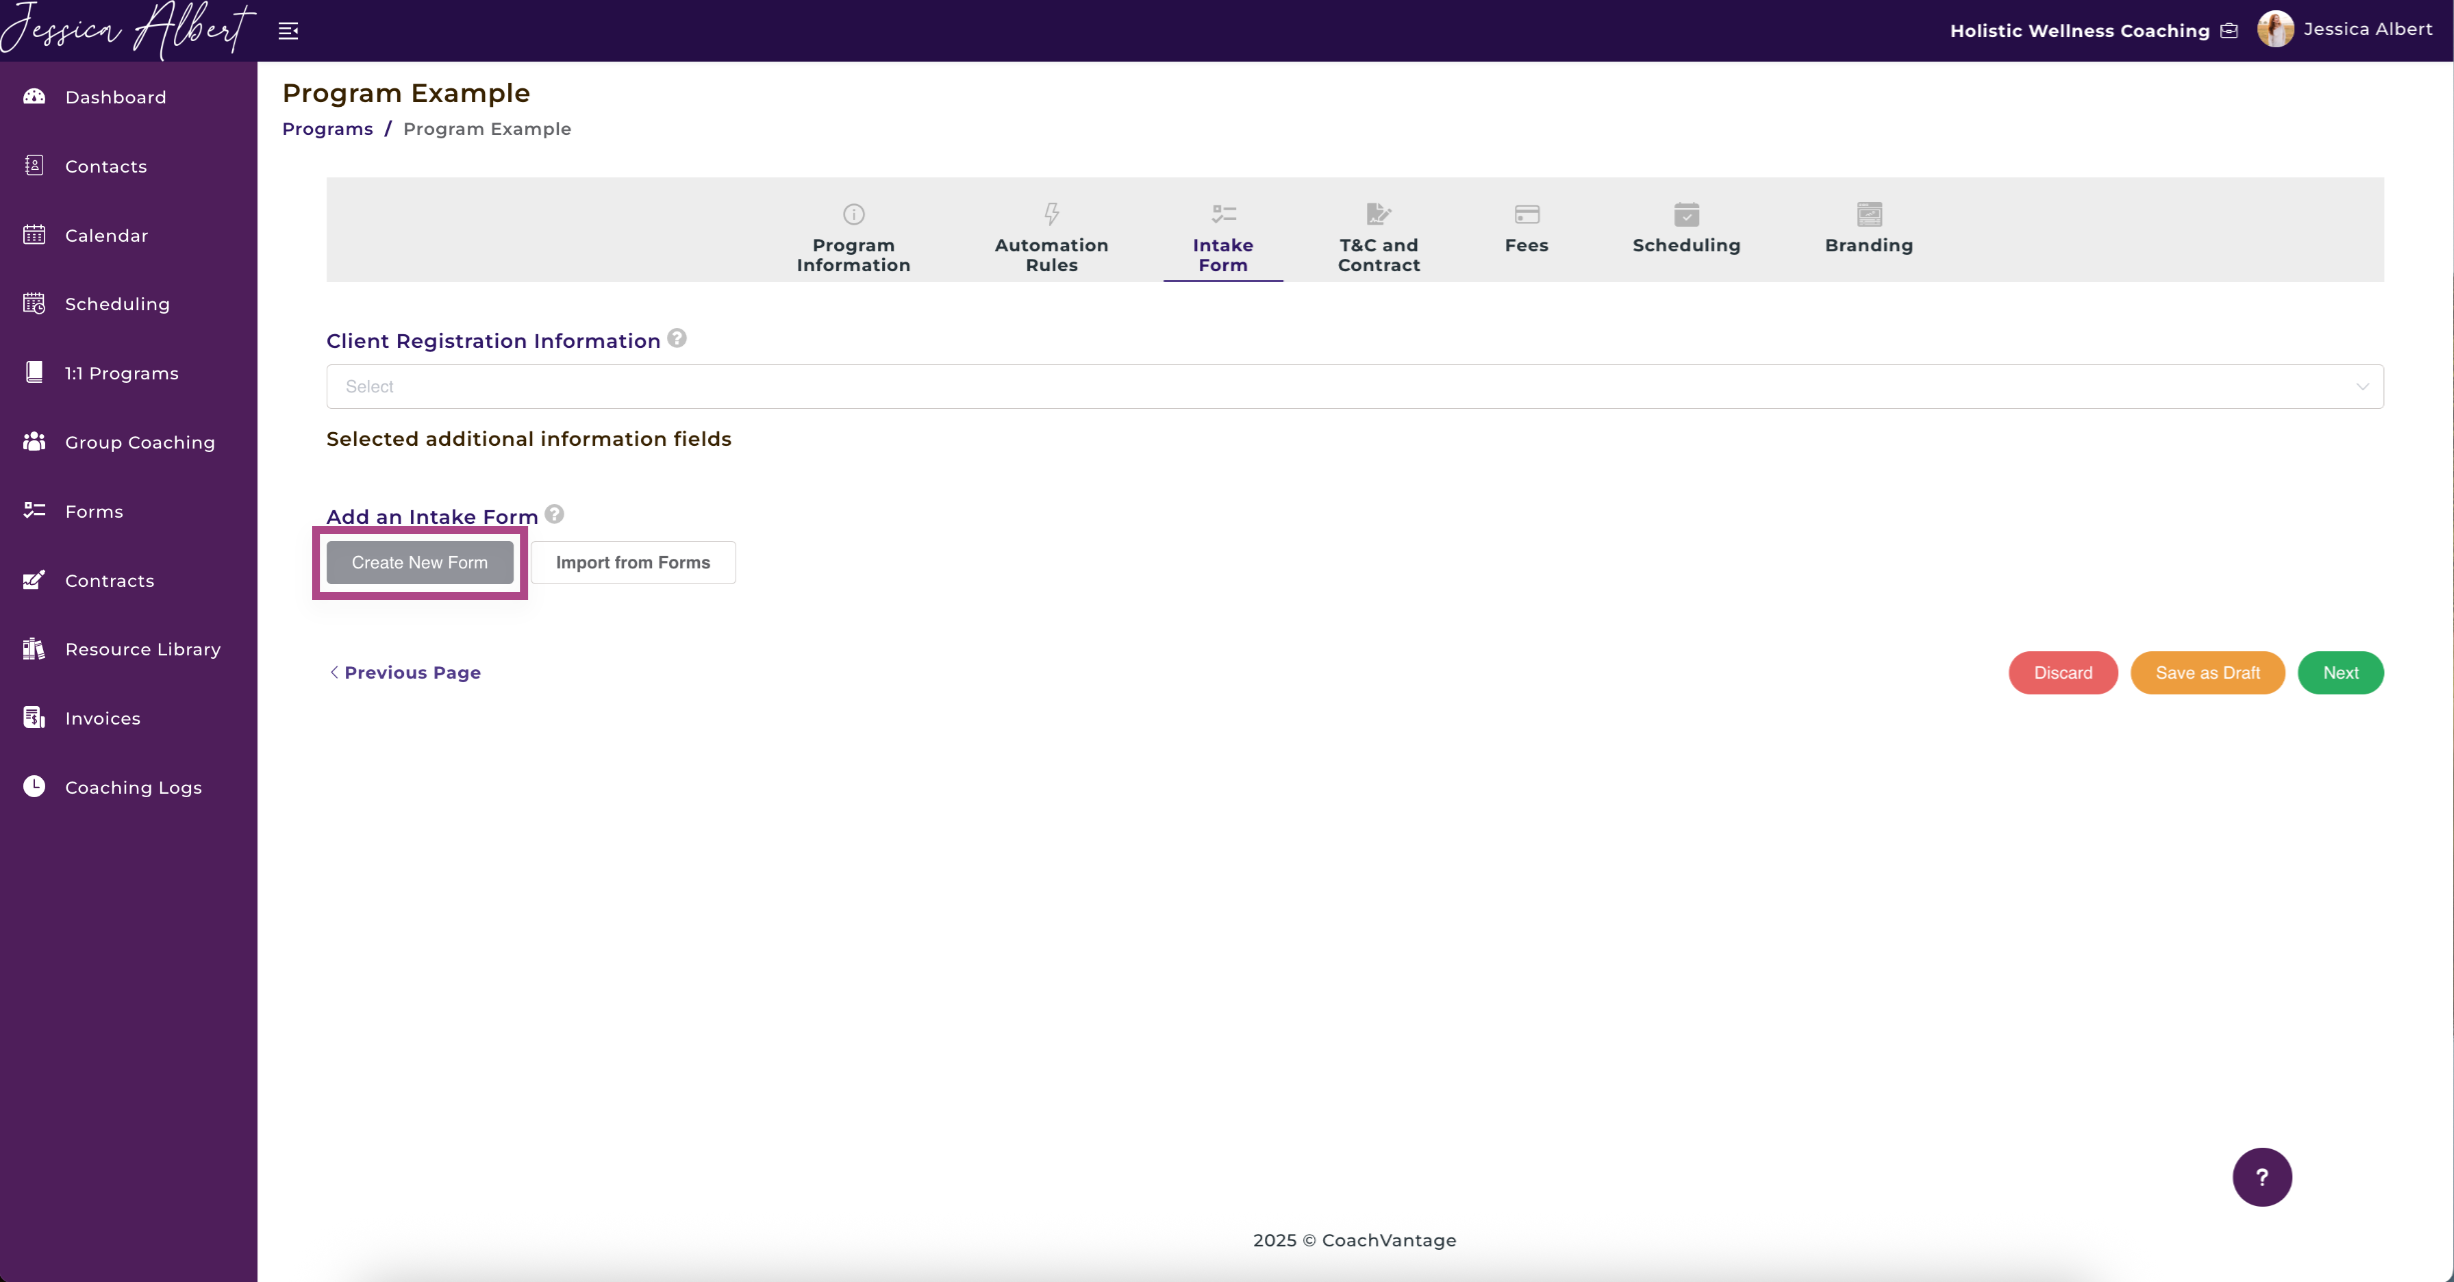
Create New Form
You may create a new intake form on the spot by clicking on Create New Form button.
- Enter the Form Name.
- Provide a Description (Optional).
- Choose the answer type from the drop down selector.
- Enter the question.
- Enter the answer options (if applicable, depending on the answer type you select).
- Check Required if the question is mandatory to be responded. Uncheck it if the question can be skipped by the client.
- Click on the Trash Bin icon if you wish to delete the question.
Tip: You may have as many questions as you wish on the Intake Form, but be mindful that you don't want your client to be frustrated by lengthy forms!
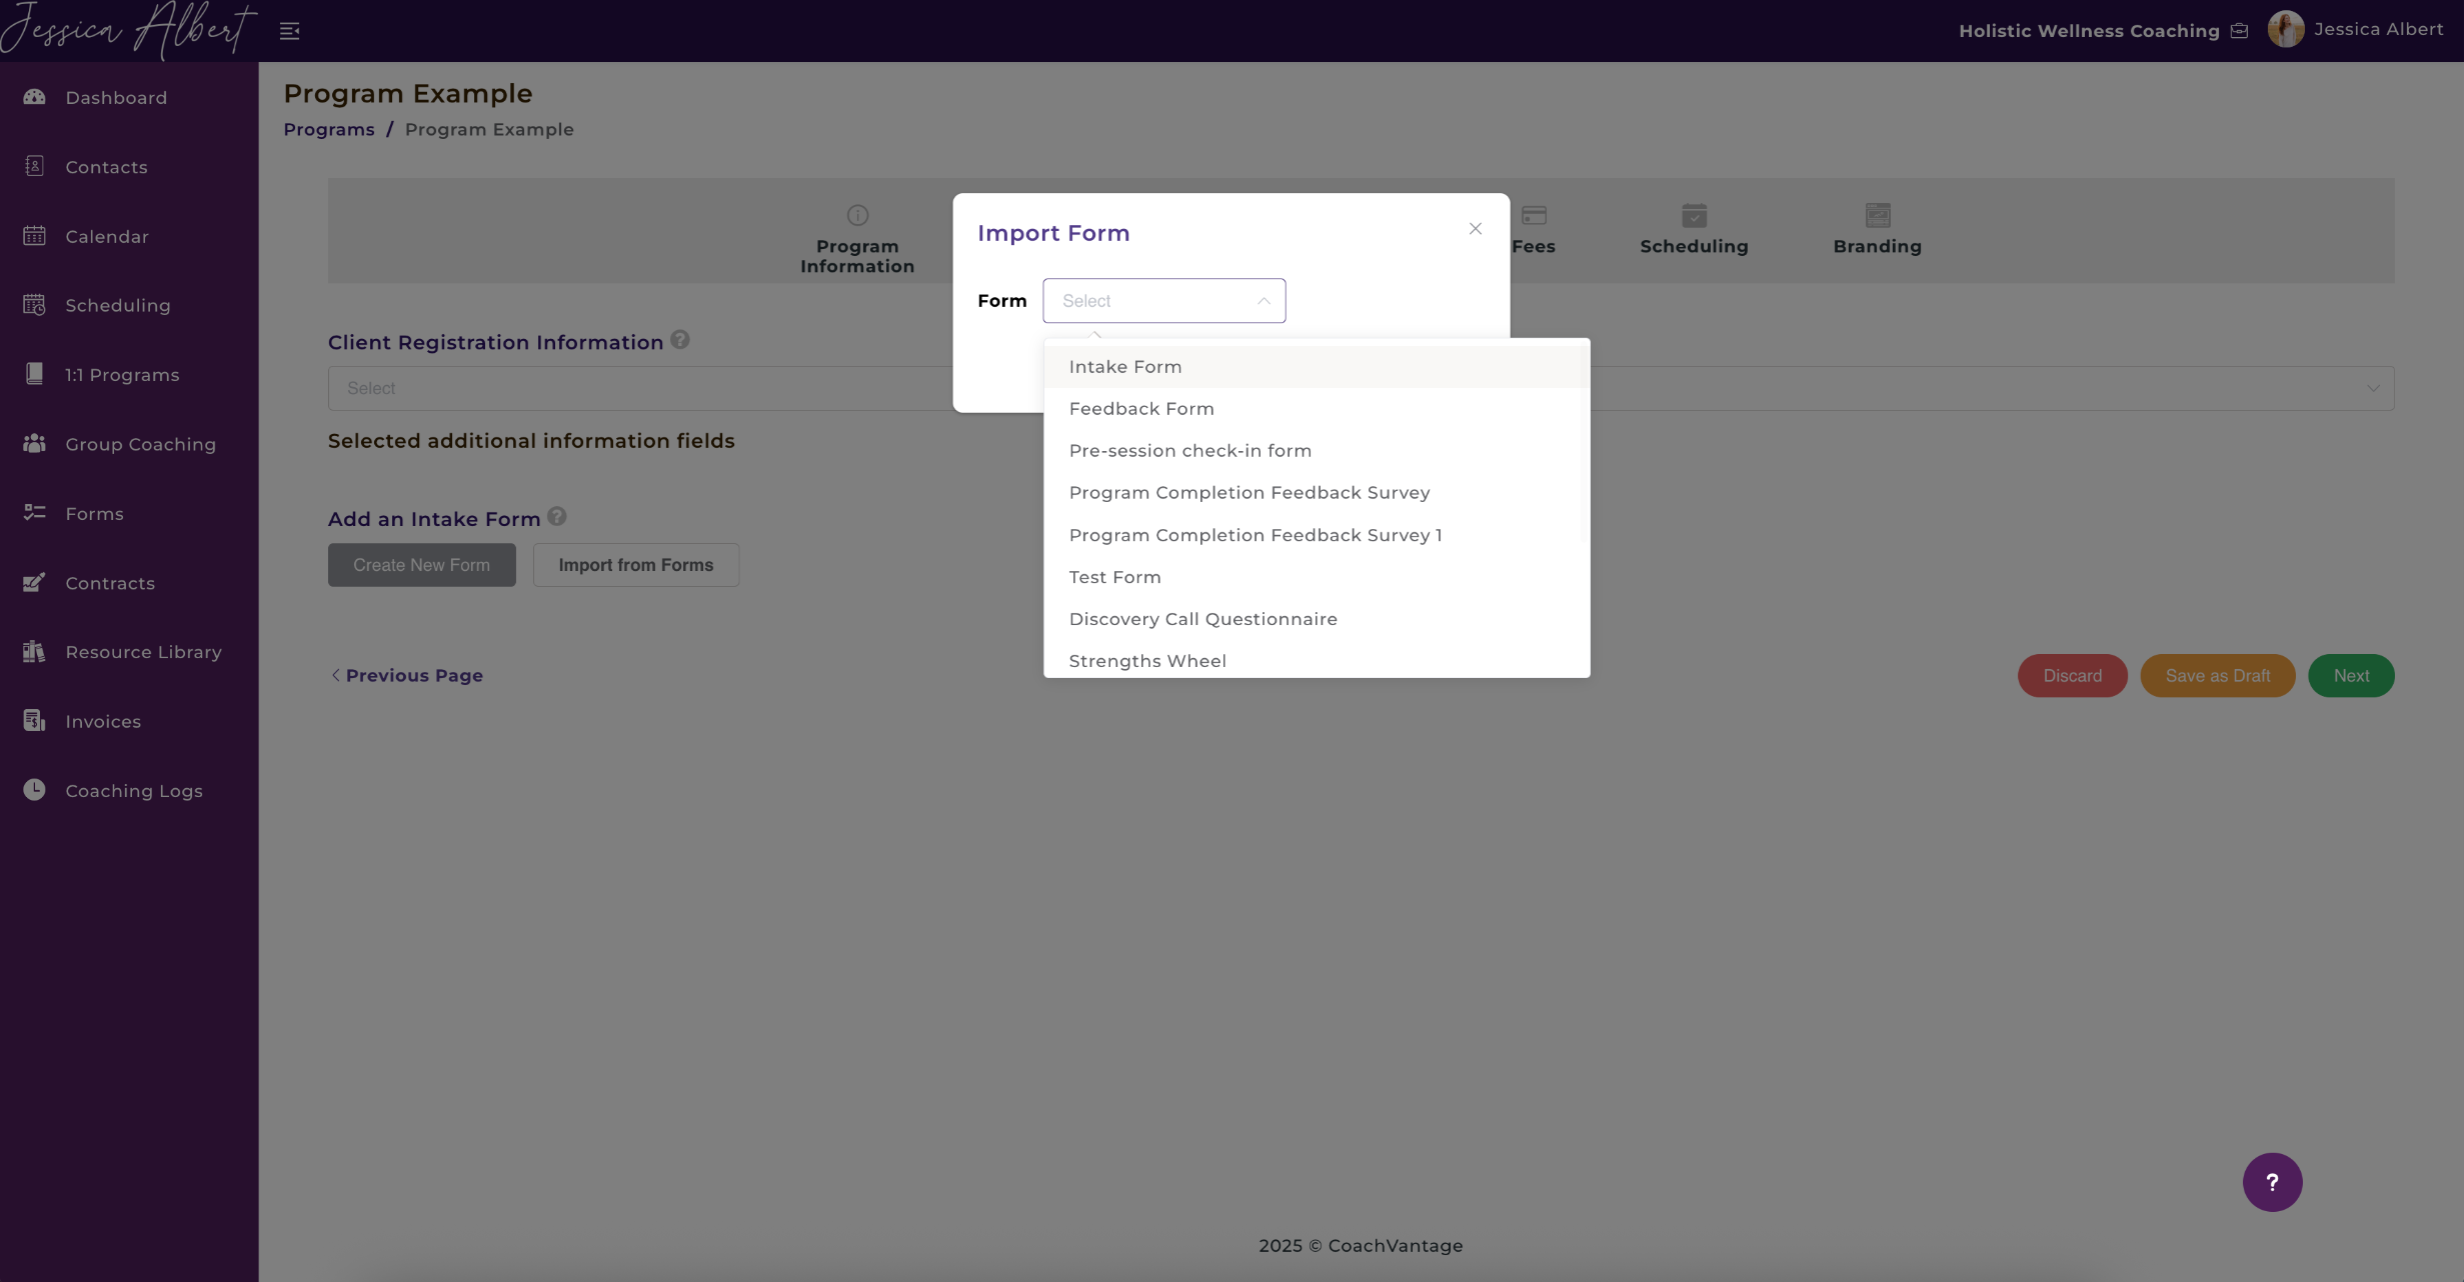
Import Form
The Import From Forms button makes it easy for you to import a form template that you have already created in the Forms page. Refer to the article Creating A Form for more details.
You can select the form you wish to use from the dropdown selector.
4. T&C and Contracts (Optional) 📃
Terms and Conditions
Specify your terms and conditions to be displayed on your sign-up page. You could specify refund policies, add a link to your privacy policy page, etc.
Tip: Use the T&C field if you would like to simply display general terms and conditions and don’t require clients to sign a Contract Agreement during the sign-up process. If your business policy requires a client to sign a contract, you may use the ‘Contract’ field below instead (this feature is only available for Aha! Plan subscribers).
T&C must be accepted by clients on the sign-up page.
If you select Yes, a checkbox will be displayed on the sign-up page. Clients must check it to confirm acceptance before continuing with the sign-up flow.
Note: Upon successful sign up, clients will receive an automated email notification that contains the details of your terms and conditions, as well as notifying the client that they acknowledged the T&Cs.
Contract
If you are on the Aha! Plan, you have the option to embed a contract document in the program sign-up page, or send an automated email to the client after they have signed up to your program. Clients will then be able to e-sign the contract.
The options available are:
- Don't email or embed a contract for e-signature
- Embed a contract in the program sign-up page for clients to e-sign
You must have an existing Contract Template that you can select for use. Read this article to learn how to create a Contract.
We’ll embed the contract document in the sign-up page for clients to e-sign as part of the sign-up flow. The contact must be e-signed before the payment step (if you are charging for this program).
- Send an automated email to clients to sign a contract after they have signed up for your program
You must have an existing Contract Template that you can select for use.
Once clients have successfully signed up for your program, we’ll automatically send an email with a link for them to e-sign the contract.
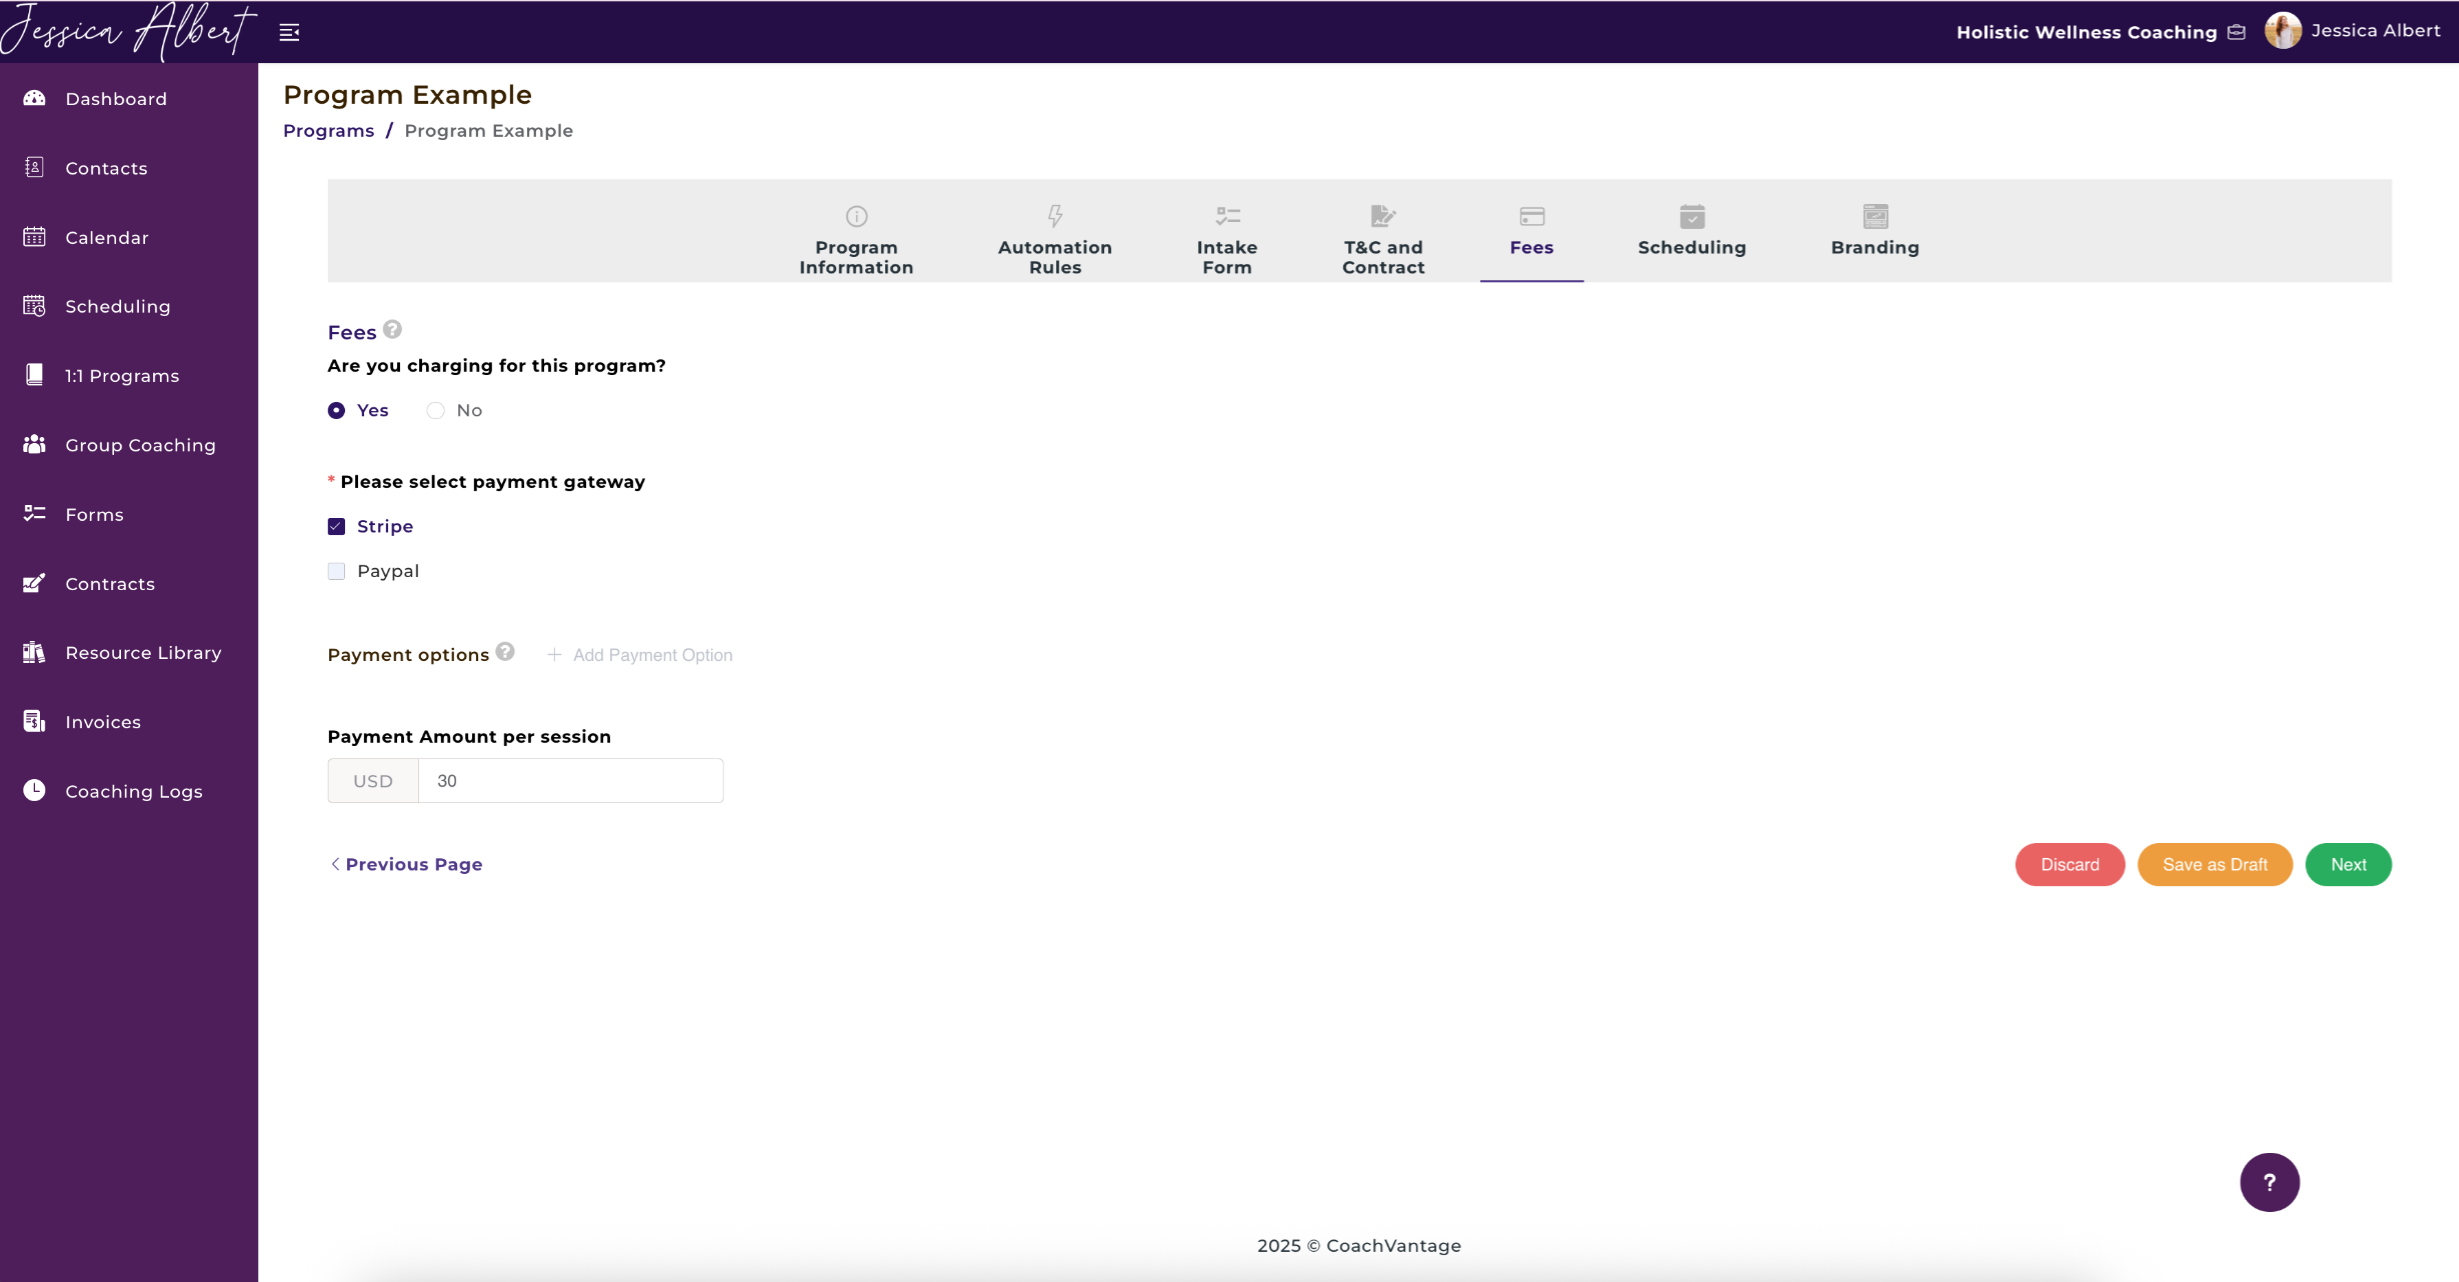
5. Fees (Optional) 💸
You can charge clients for your program by specifying the fees.
- Select Yes on the radio button to charge for the program.
- Check the Payment gateway option, PayPal of Stripe. You may check both.
NOTE: You must first have connected your PayPal and/or Stripe account to CoachVantage before you can add a payment option. - Enter Payment Option. Use the drop own selector to specify whether clients make One-Time or Recurring payments.
If you choose not to charge for the program but checked the box to automatically log coaching hours, CoachVantage would automatically count the hours as Pro Bono Hours instead of Paid Hours.
IMPORTANT:
On the sign-up page, clients will be redirected to the Stripe or PayPal checkout pages to make payment online. Upon successful payment completion, CoachVantage will automatically generate an invoice to the client with the status as Paid.
You will see this invoice in your CoachVantage account in the Contact record (in the Invoices tab).
6. Scheduling 📆
This is where you specify the scheduling rules for the program. You have flexibility to allow clients to self-book sessions, or you can disable this if you prefer to be the one who sets up appointments for coaching sessions with clients.
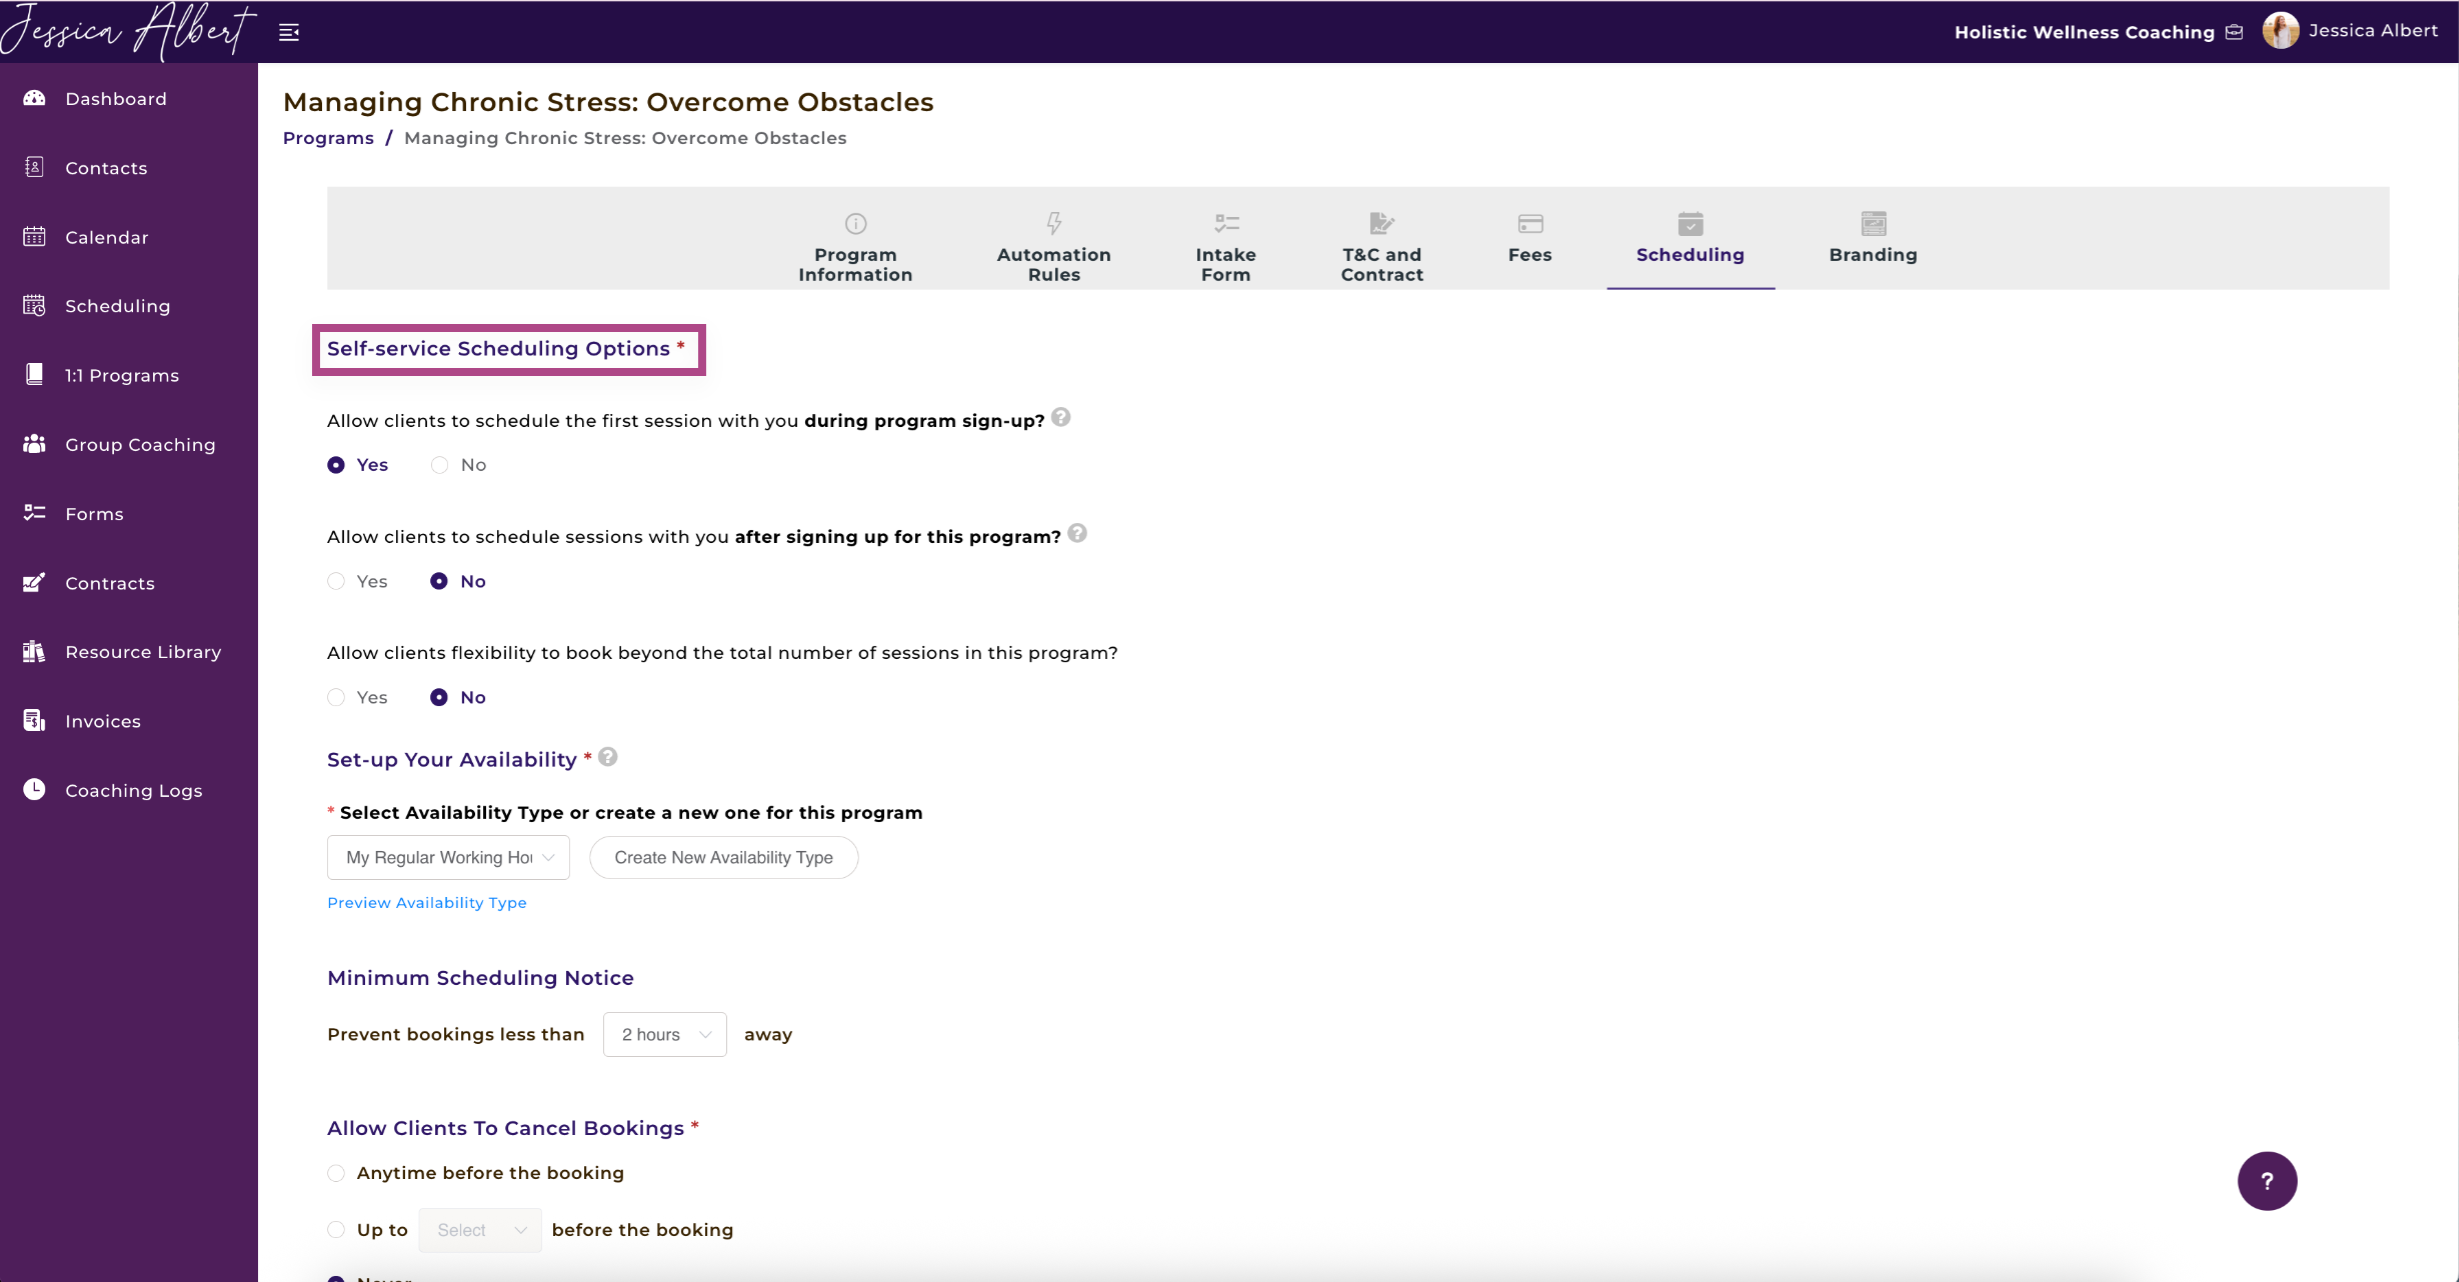
Self-Service Scheduling Options
- Allow clients to schedule the first session with you during program sign-up. If you allow clients to schedule the first coaching session during program sign-up, your booking page will be displayed on the sign-up page. The client can pick a date/time for the first coaching appointment with you, during the sign up process.
- Allow clients to schedule sessions with you after signing up for this program. If you allow clients to schedule sessions after signing up, they will be able to book sessions from the client account portal.
- Allow clients flexibility to book beyond the total number of sessions in this program. This would allow clients to book beyond the number of total sessions that you had set up in the Program Information step.
This provides flexibility for you to manage your business rules and client engagements.
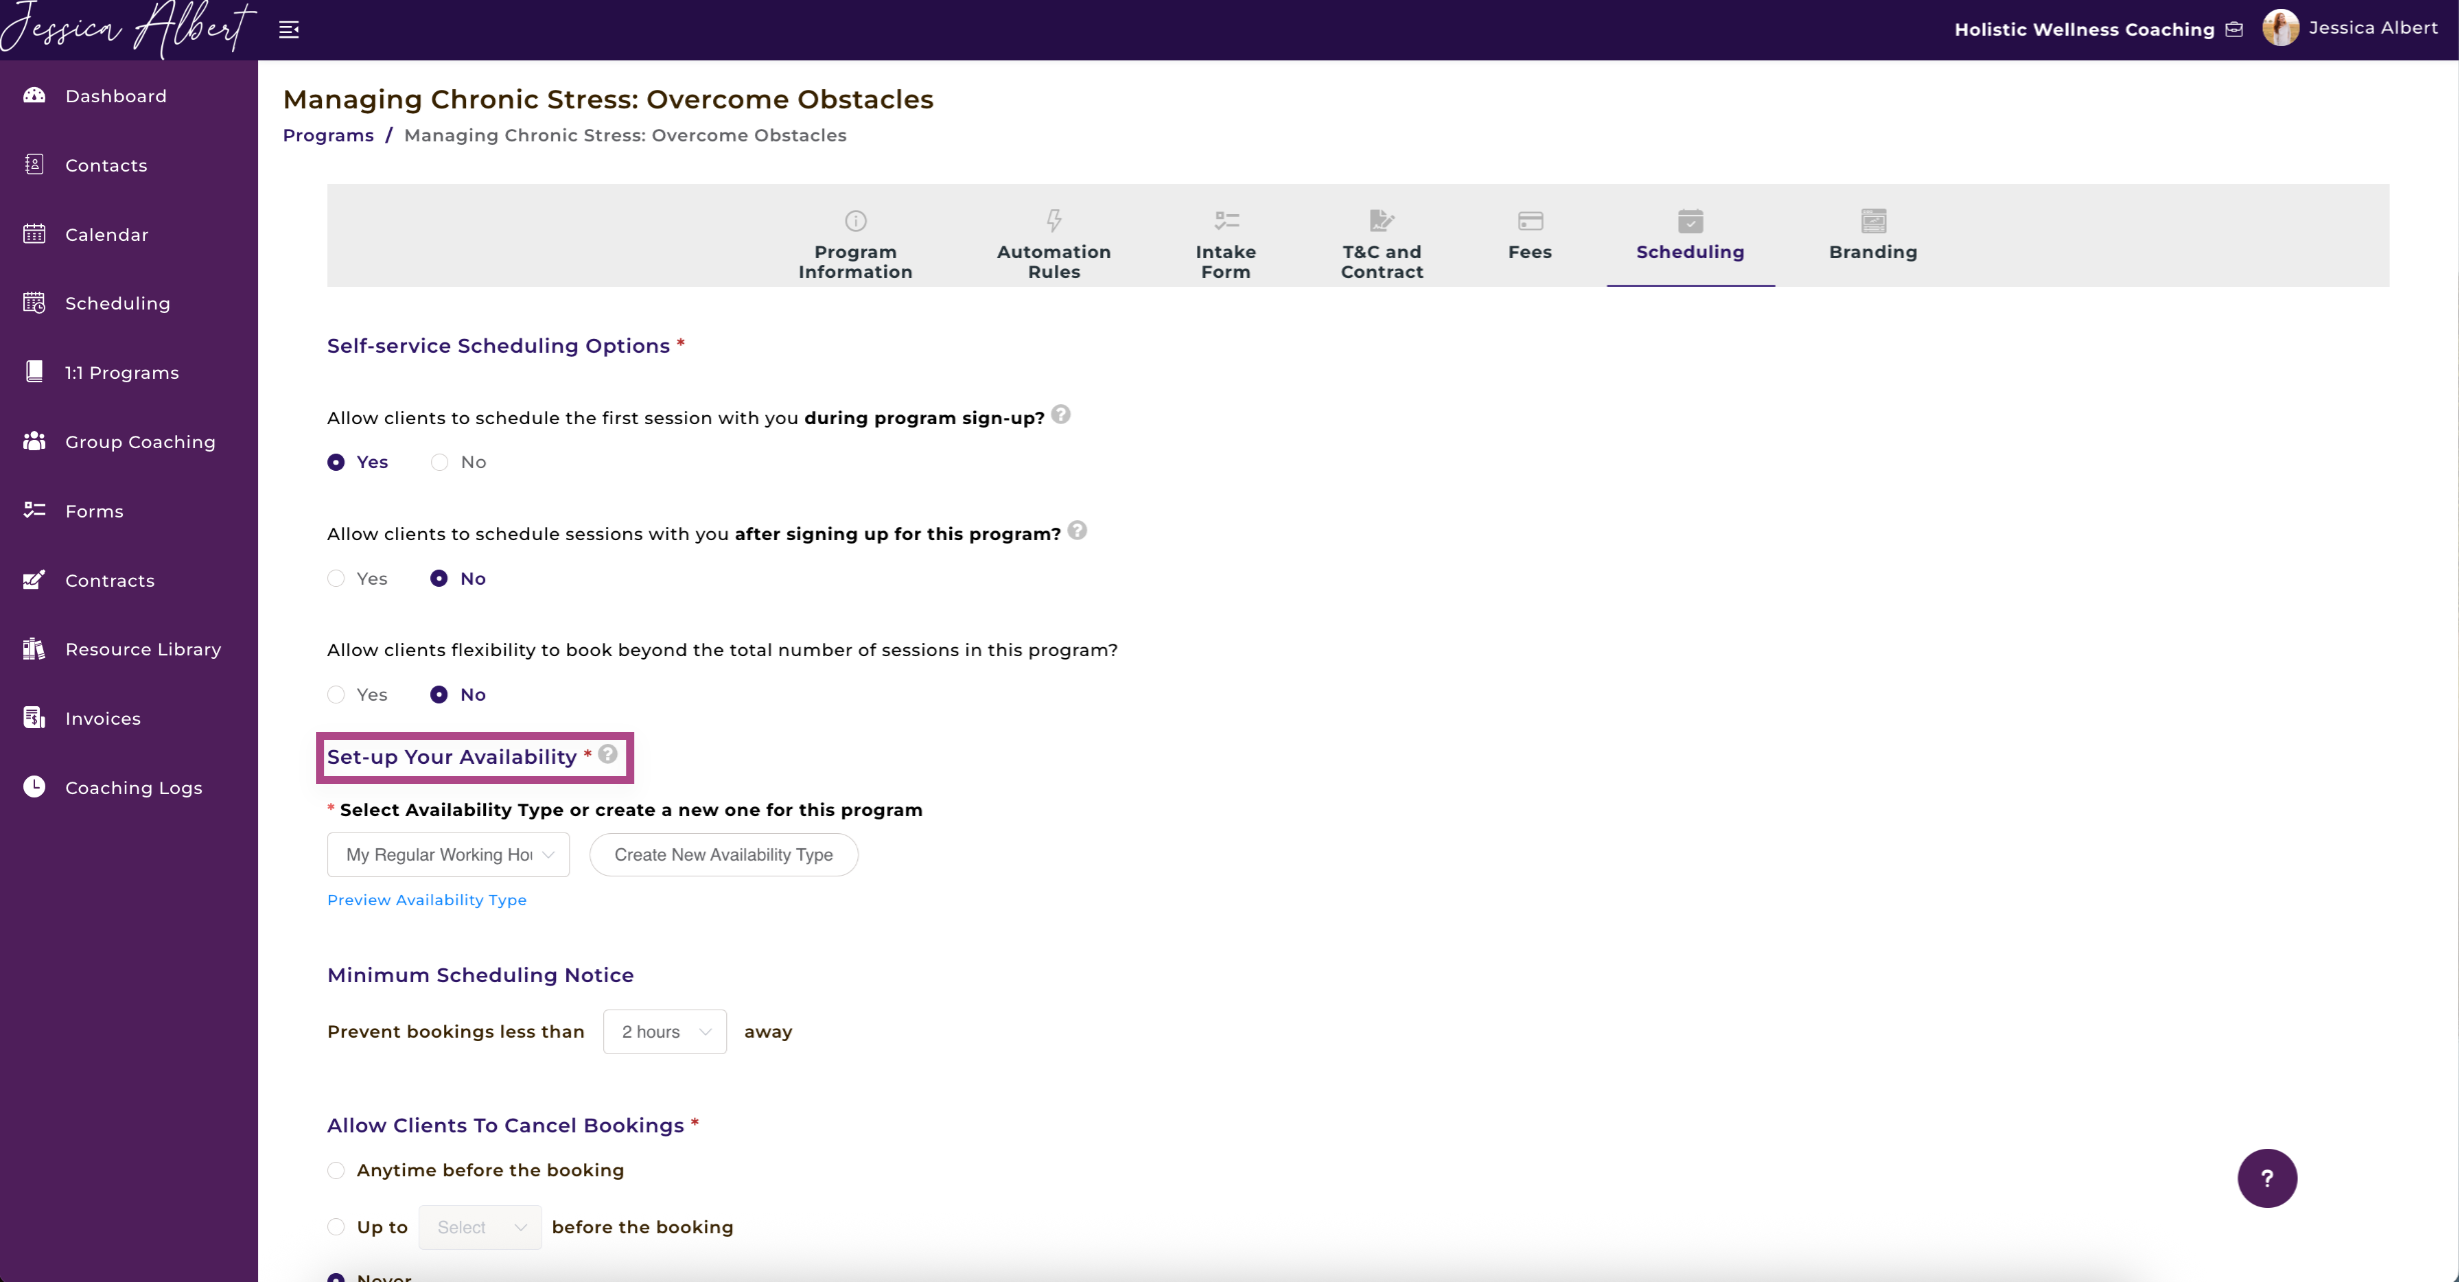
Set-Up Your Availability
If you allow Self-Service Scheduling Options, this is an important step as it defines your availability rules and time slots for this program.
You will need to either:
- Select an Availability Type that you've already created, or
- Create a New Availability Type on the spot.
Refer to this article on Creating/Editing/Deleting Availability Types to understand more about creating an Availability Type.
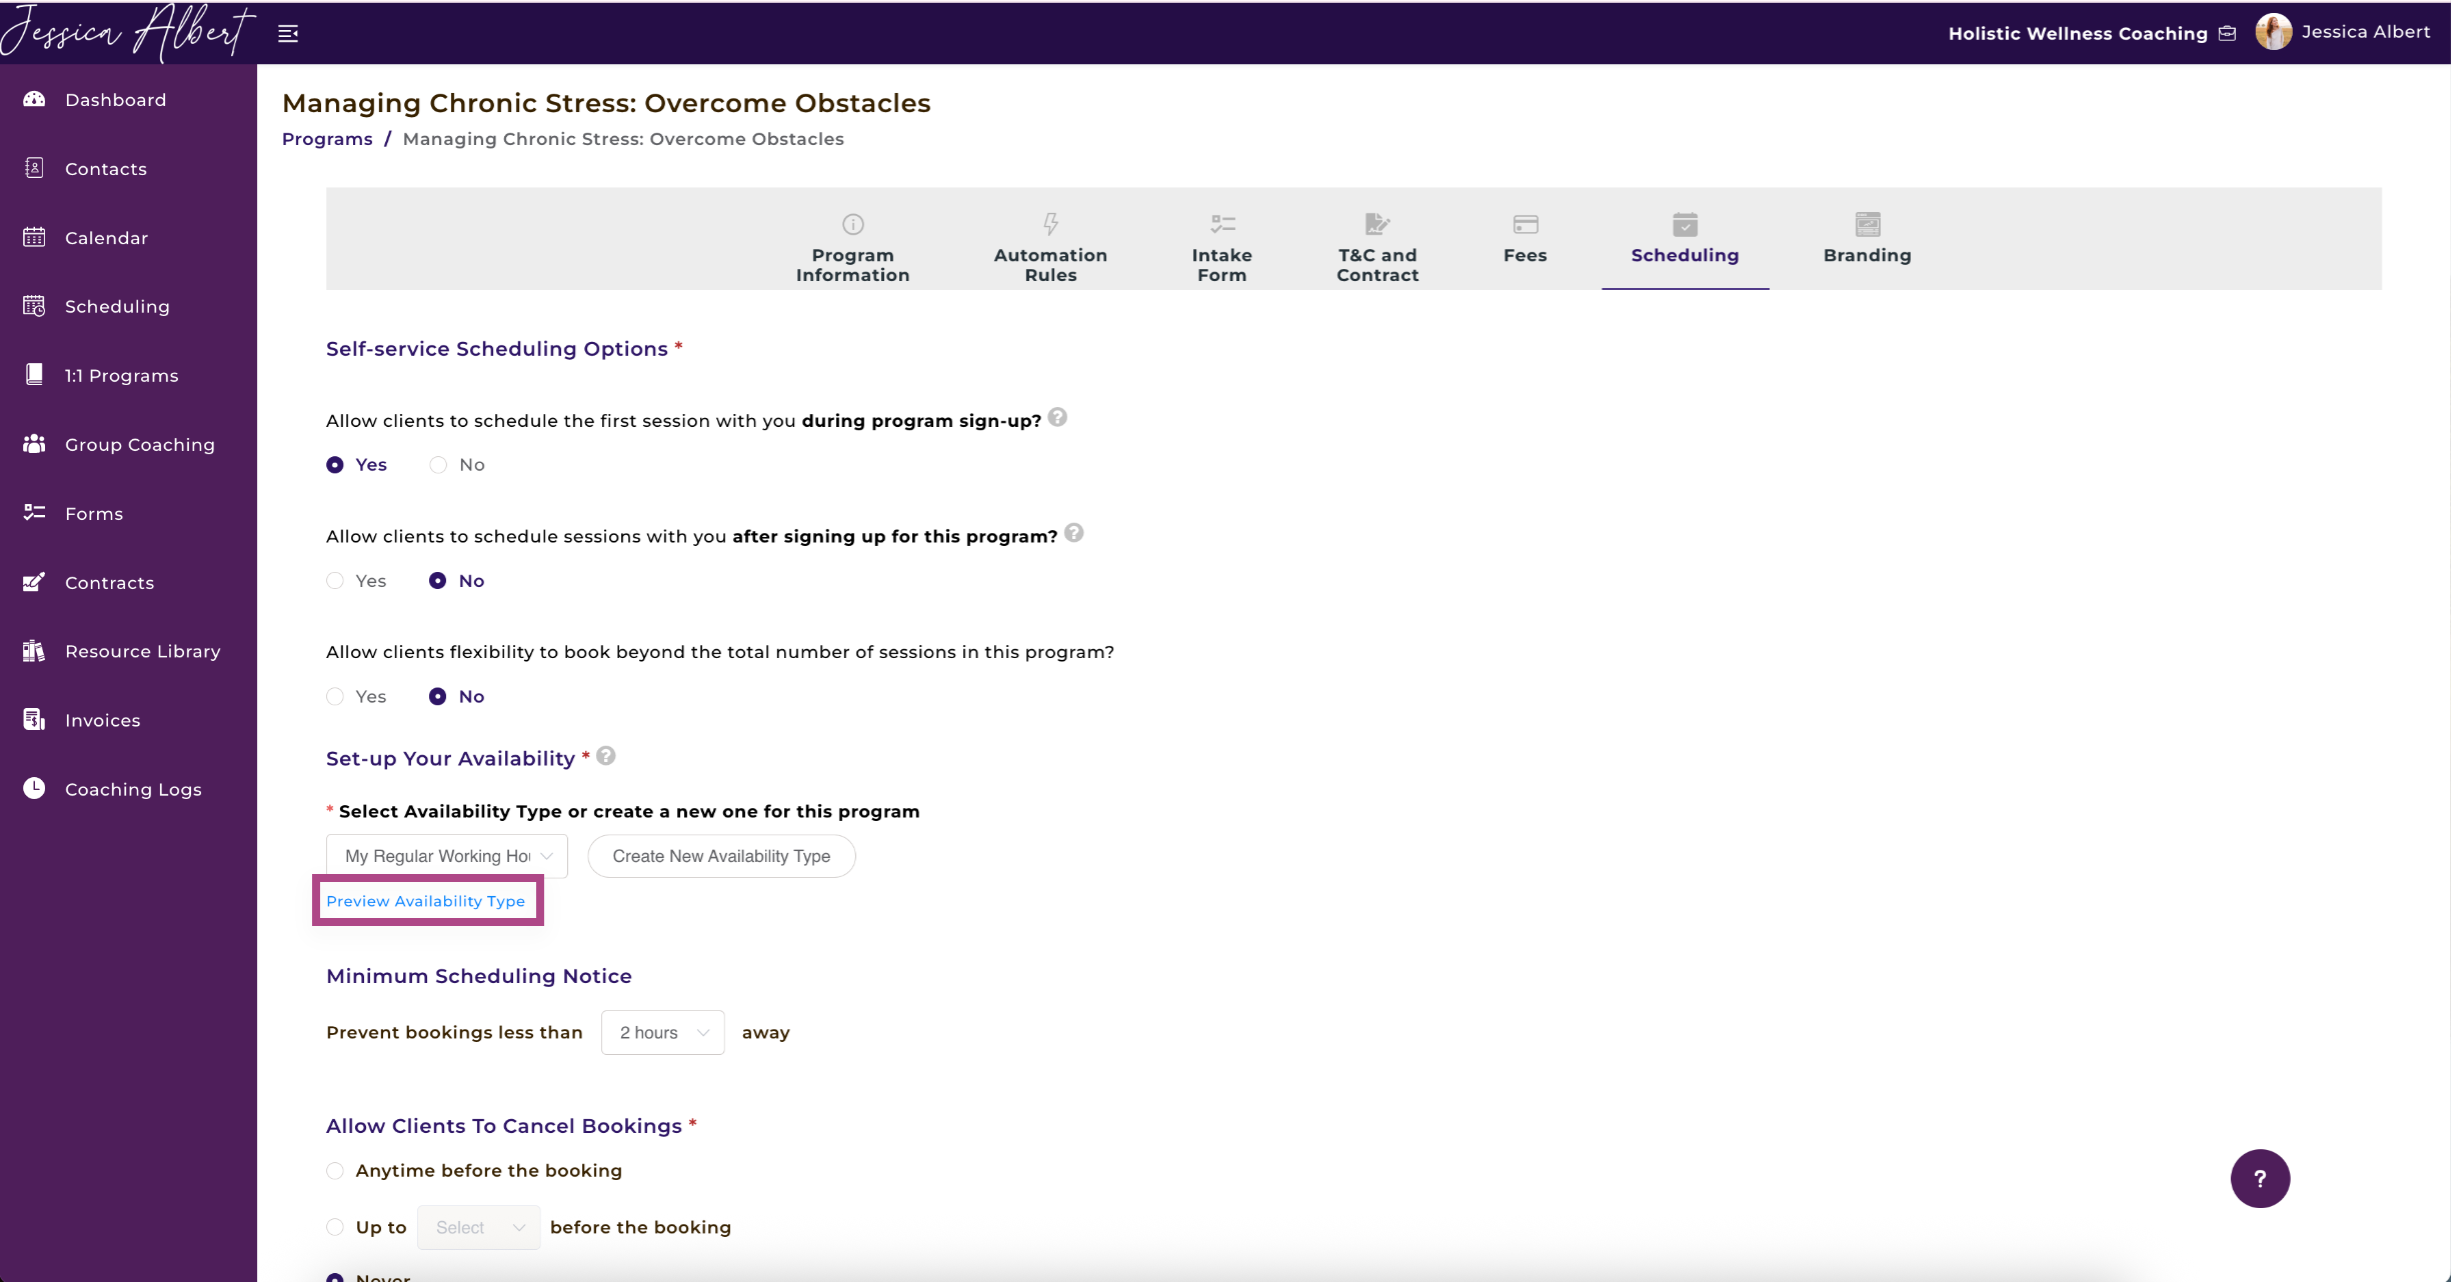
You can Preview the Availability Type that you have selected by clicking on the Preview Availability Type text. A window will appear to let you see your schedule of availabilities that you have configured:
Minimum Scheduling Notice
This setting lets you determine a minimum period of time when clients can make a booking (thus giving you sufficient advance notice of when an appointment is booked)
You can prevent last-minute bookings by setting a minimum scheduling notice.
Use the drop-down selector to 'prevent bookings less than X mins/hours away'.
For example, if you need at least 24 hours of advance notice before someone can book an appointment slot with you, then select '1 day' from the drop down selector.
NOTE:
If you have set up several events or coaching programs in your CoachVantage account and you want to limit the total number of bookings you will accept per day for any event or coaching program, then you should configure this in My Settings > Appointment & Calendar > Appointment Daily Limit Setting. Refer to this article on the Appointment Daily Limit Setting for more details.
Allow Clients to Cancel Booking 🚫
You can allow your clients the option to cancel an appointment booking. You can also set time limits on when they can cancel the appointment, by using the drop-down bar.
Cancellation Policy
You can choose to display your cancellation policy to your clients. Specify your cancellation policy by typing in the text box.
Your cancellation policy would be displayed on your sign-up page as shown below.
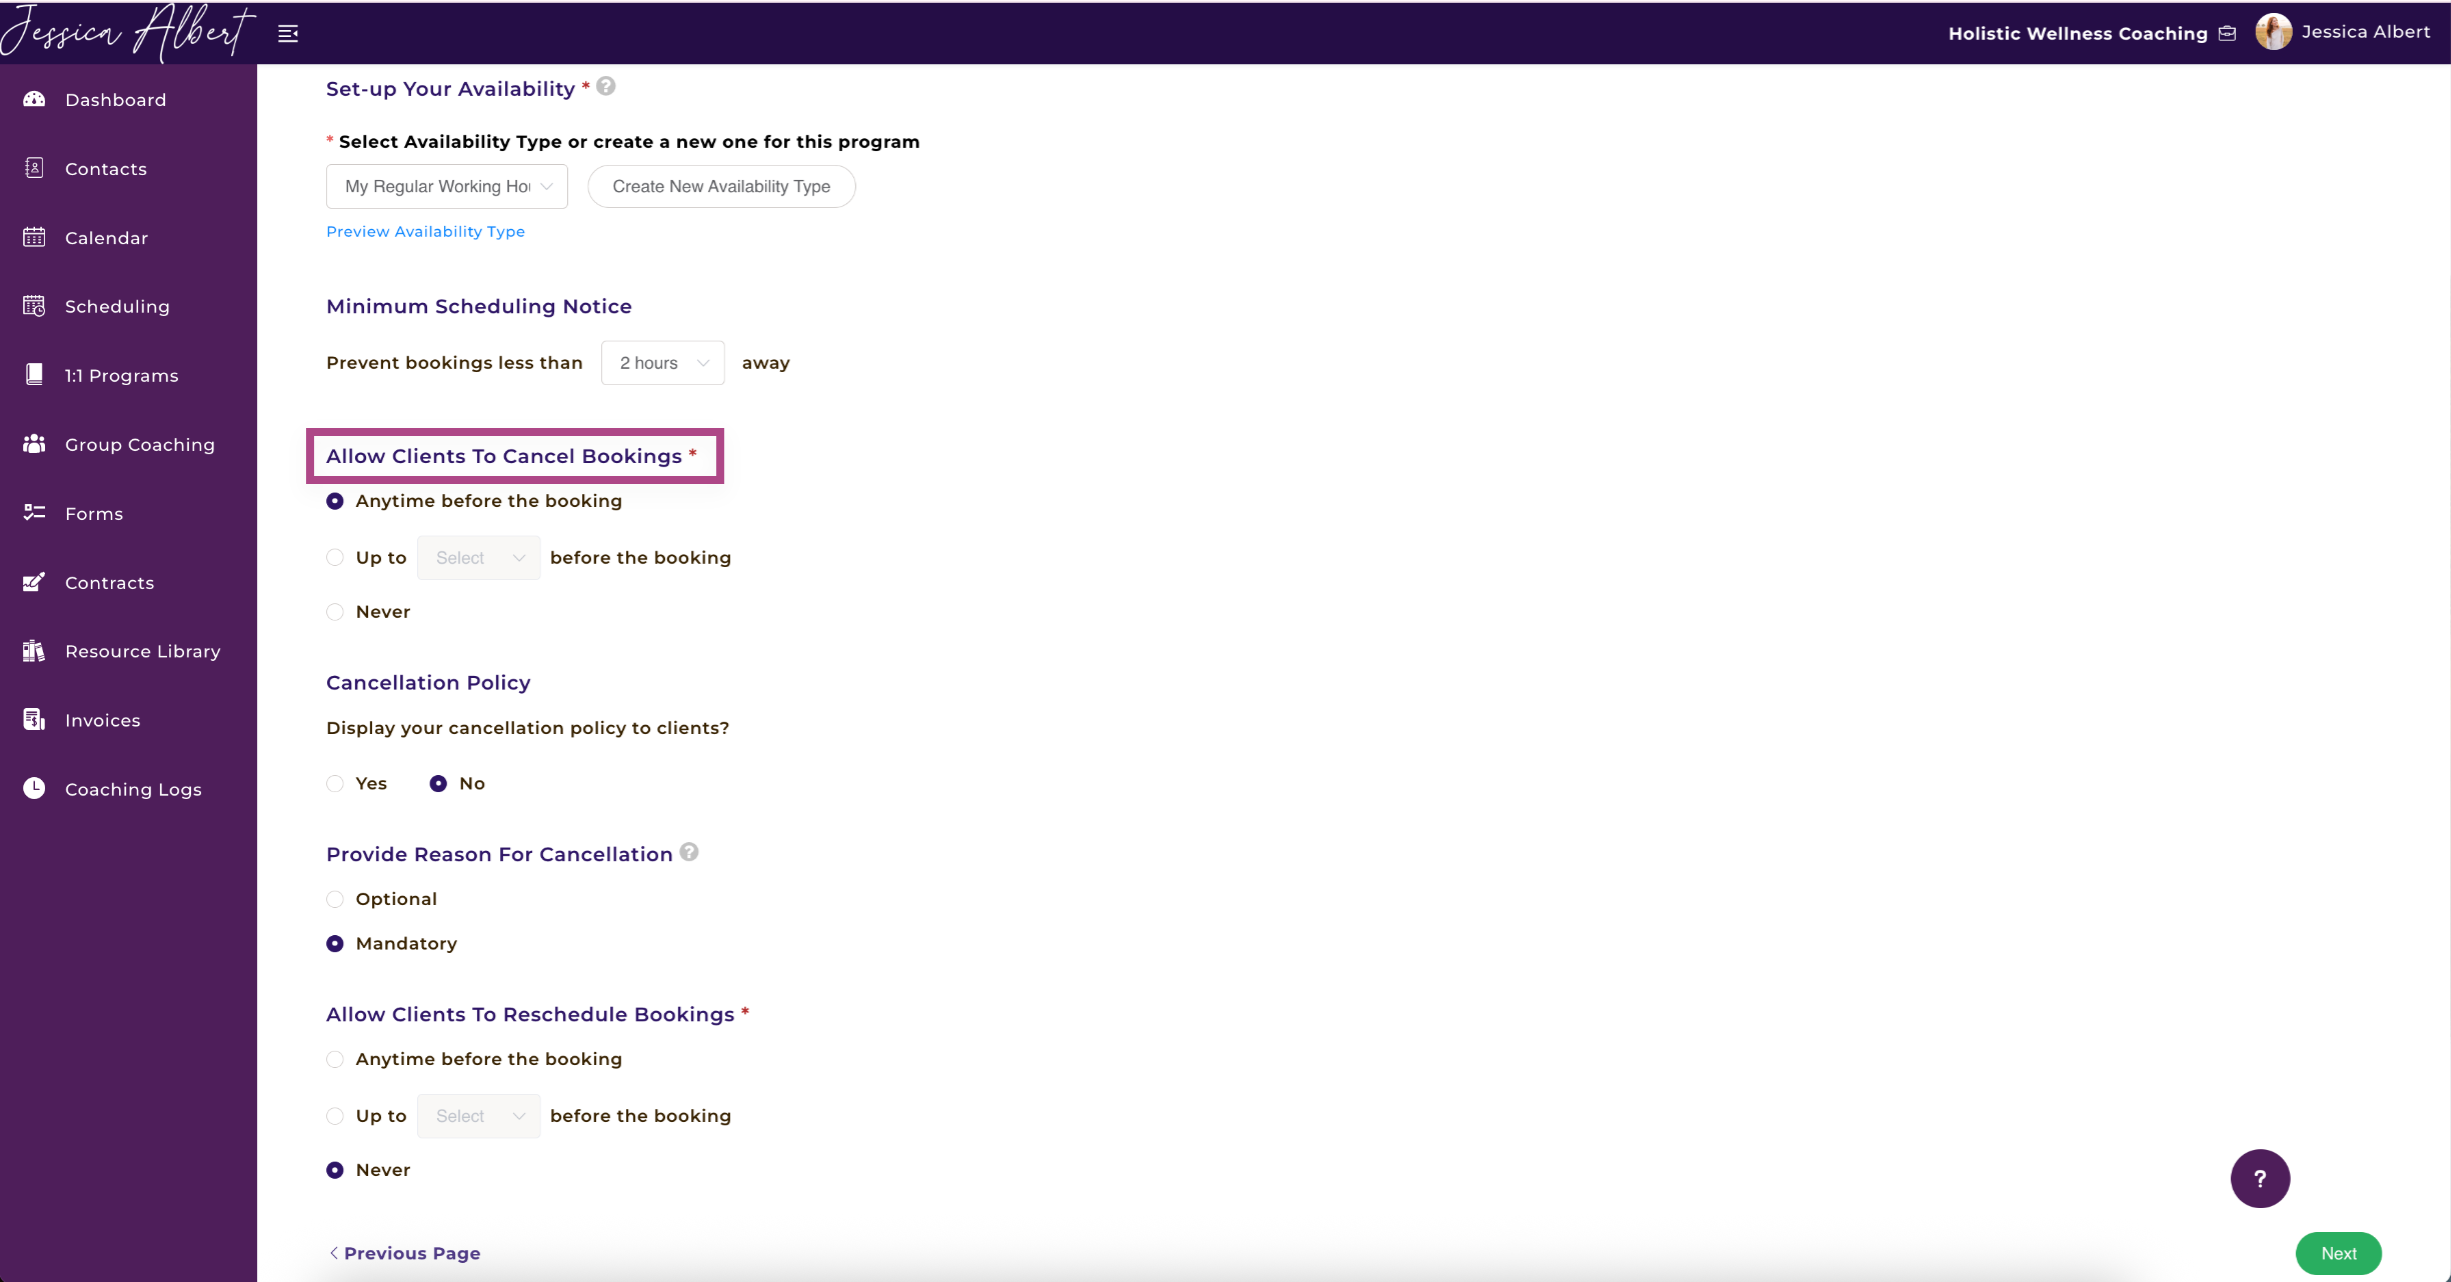
Provide Reason for Cancellation 🖊️
When clients cancel an appointment, they will be asked to provide a reason for cancelling. You can make this optional or mandatory.
Allow Clients to Reschedule Booking
You can allow your clients the option to reschedule the appointment booking from their client portal. You can limit the amount of time they have to reschedule the booking by using the drop-down bar.
Rescheduling Policy
You can choose to display your rescheduling policy to your clients. Specify your rescheduling policy by typing in the text box.
Your rescheduling policy would be displayed on your sign-up page as shown below.
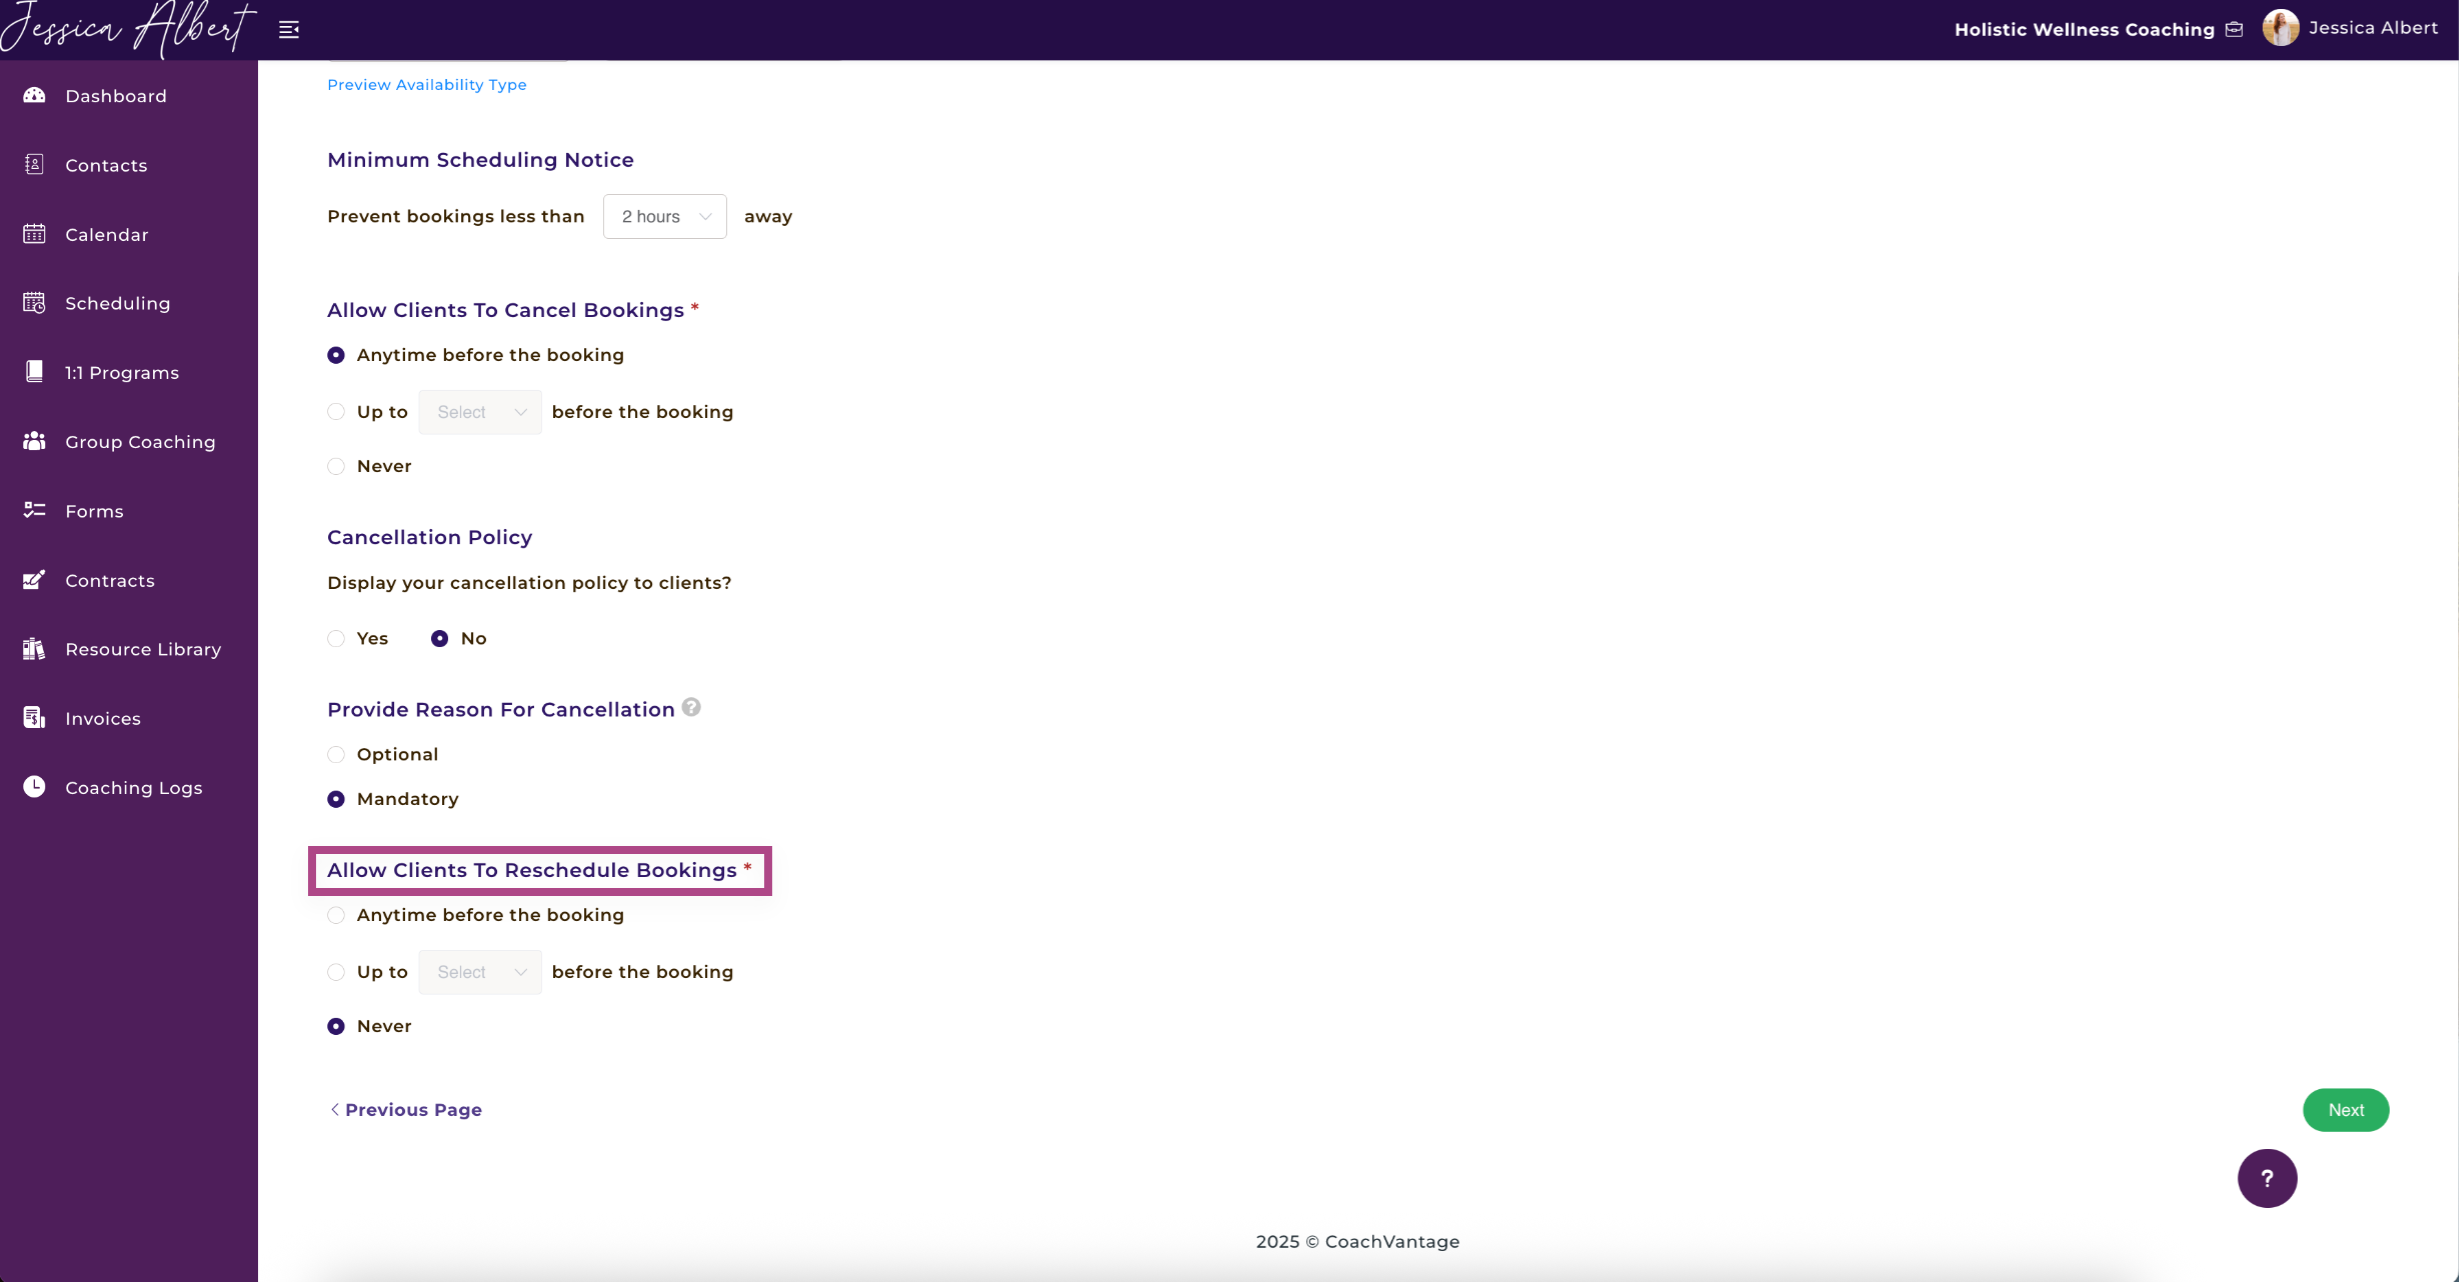
Provide Reason for Rescheduling
When clients reschedule an appointment, they will be asked to provide a reason for rescheduling. You can make this optional or mandatory.
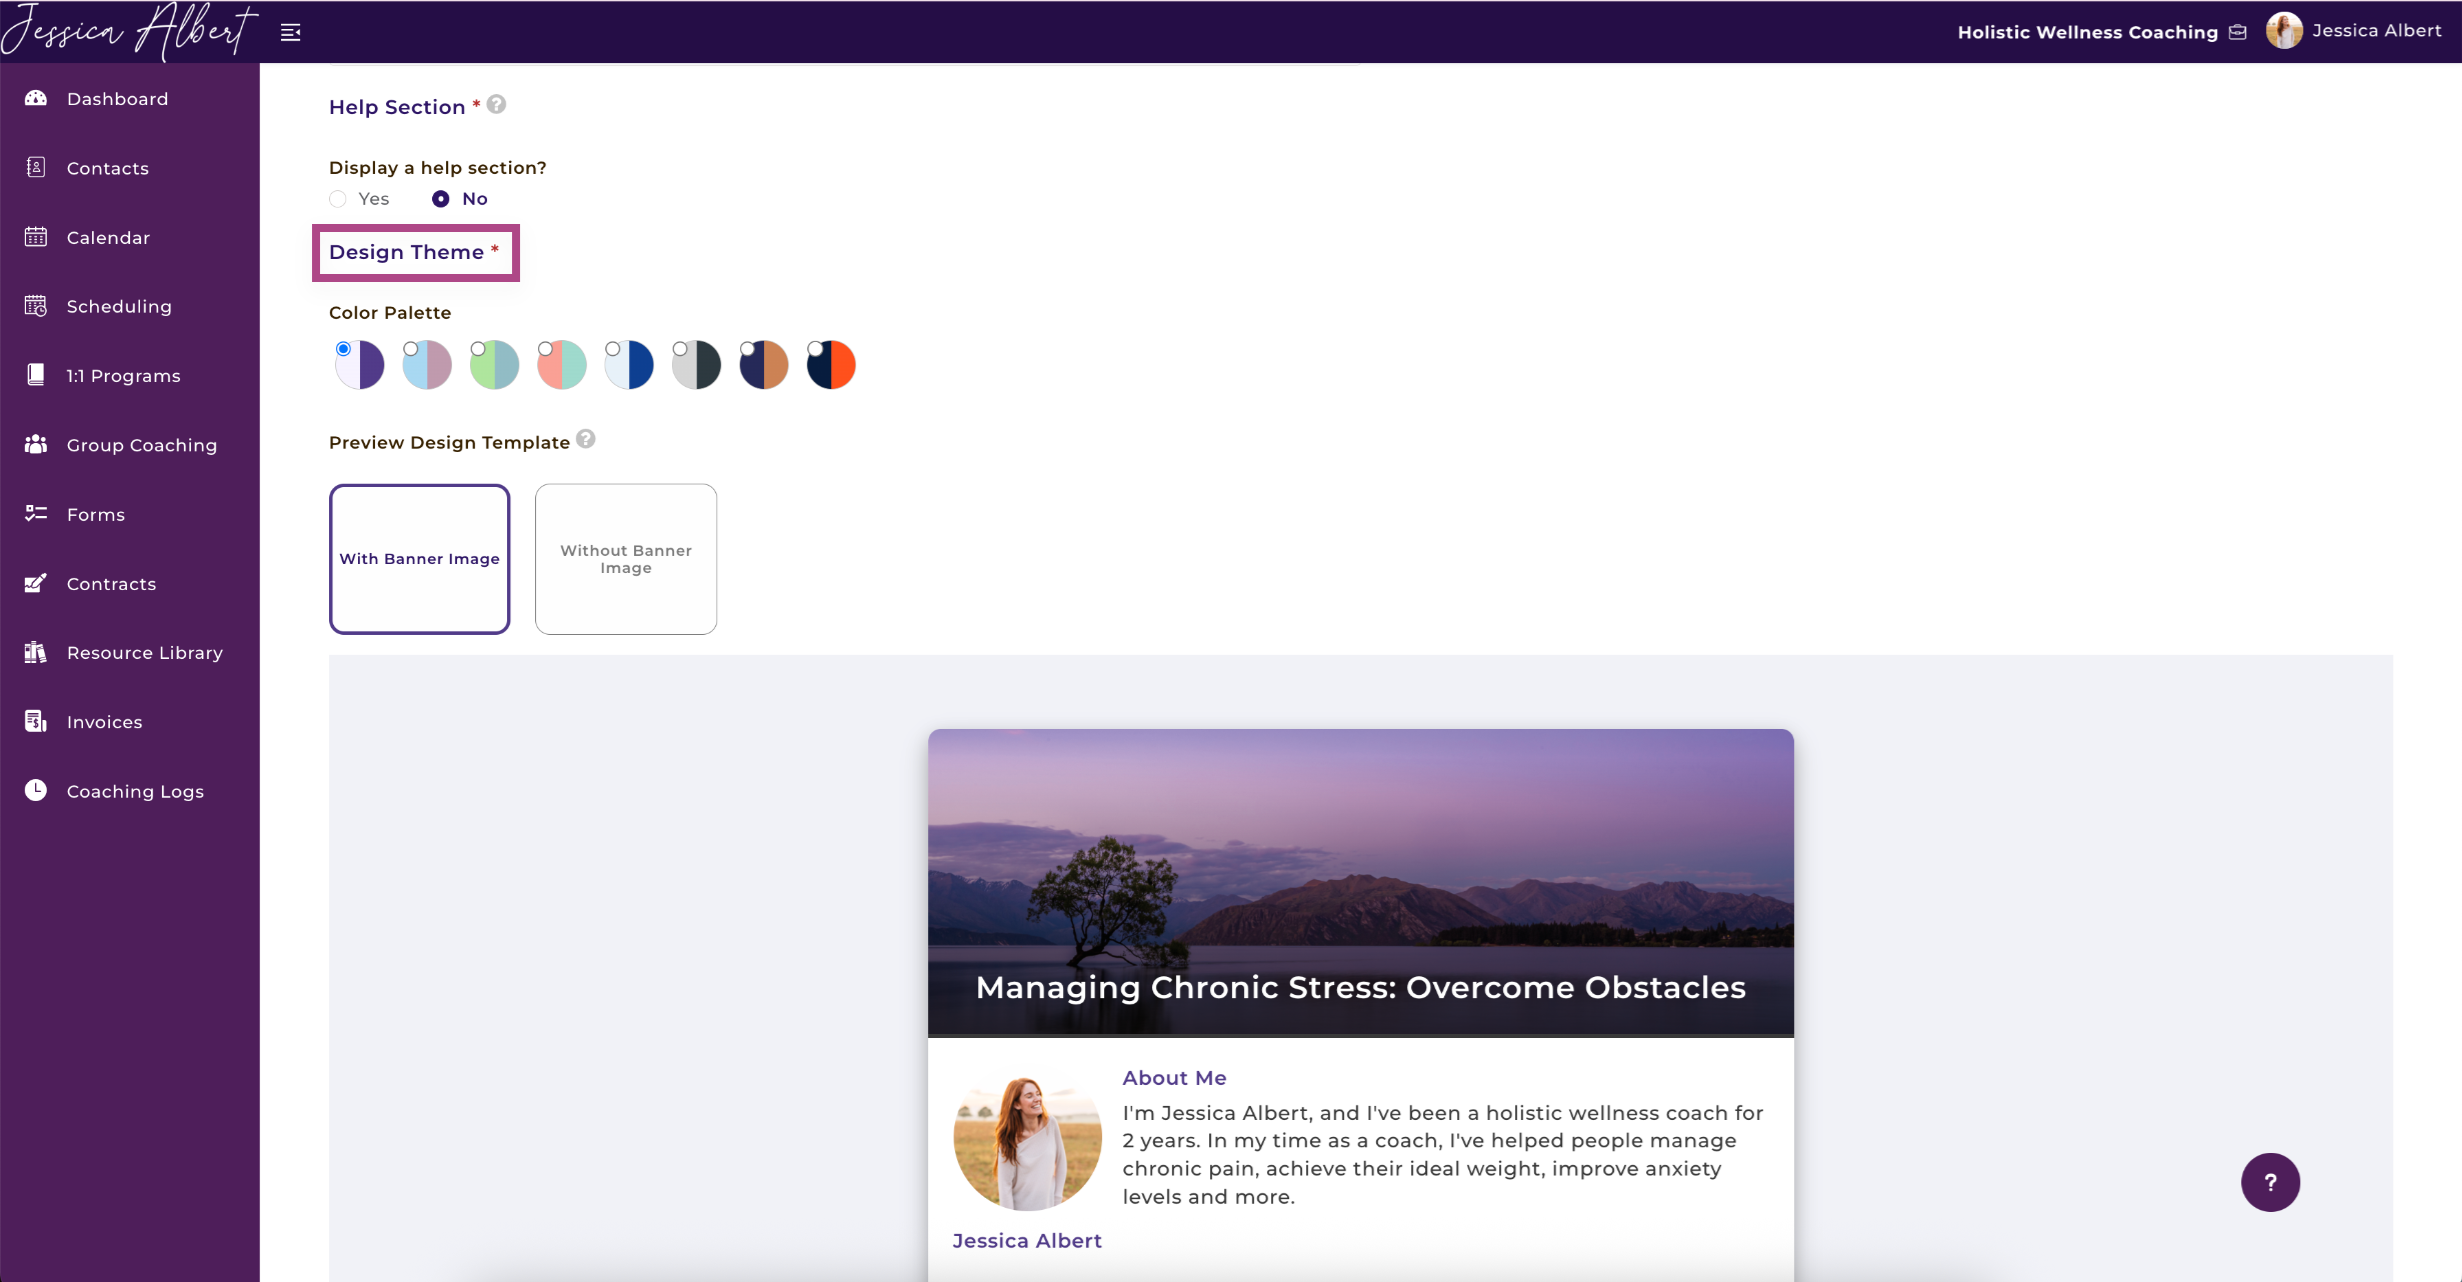
7. Branding 🎨
The Branding step provides you with options to customize how your sign-up page will look.
Below, you will see example images of how your sign-up page would look like as you set up your branding information :
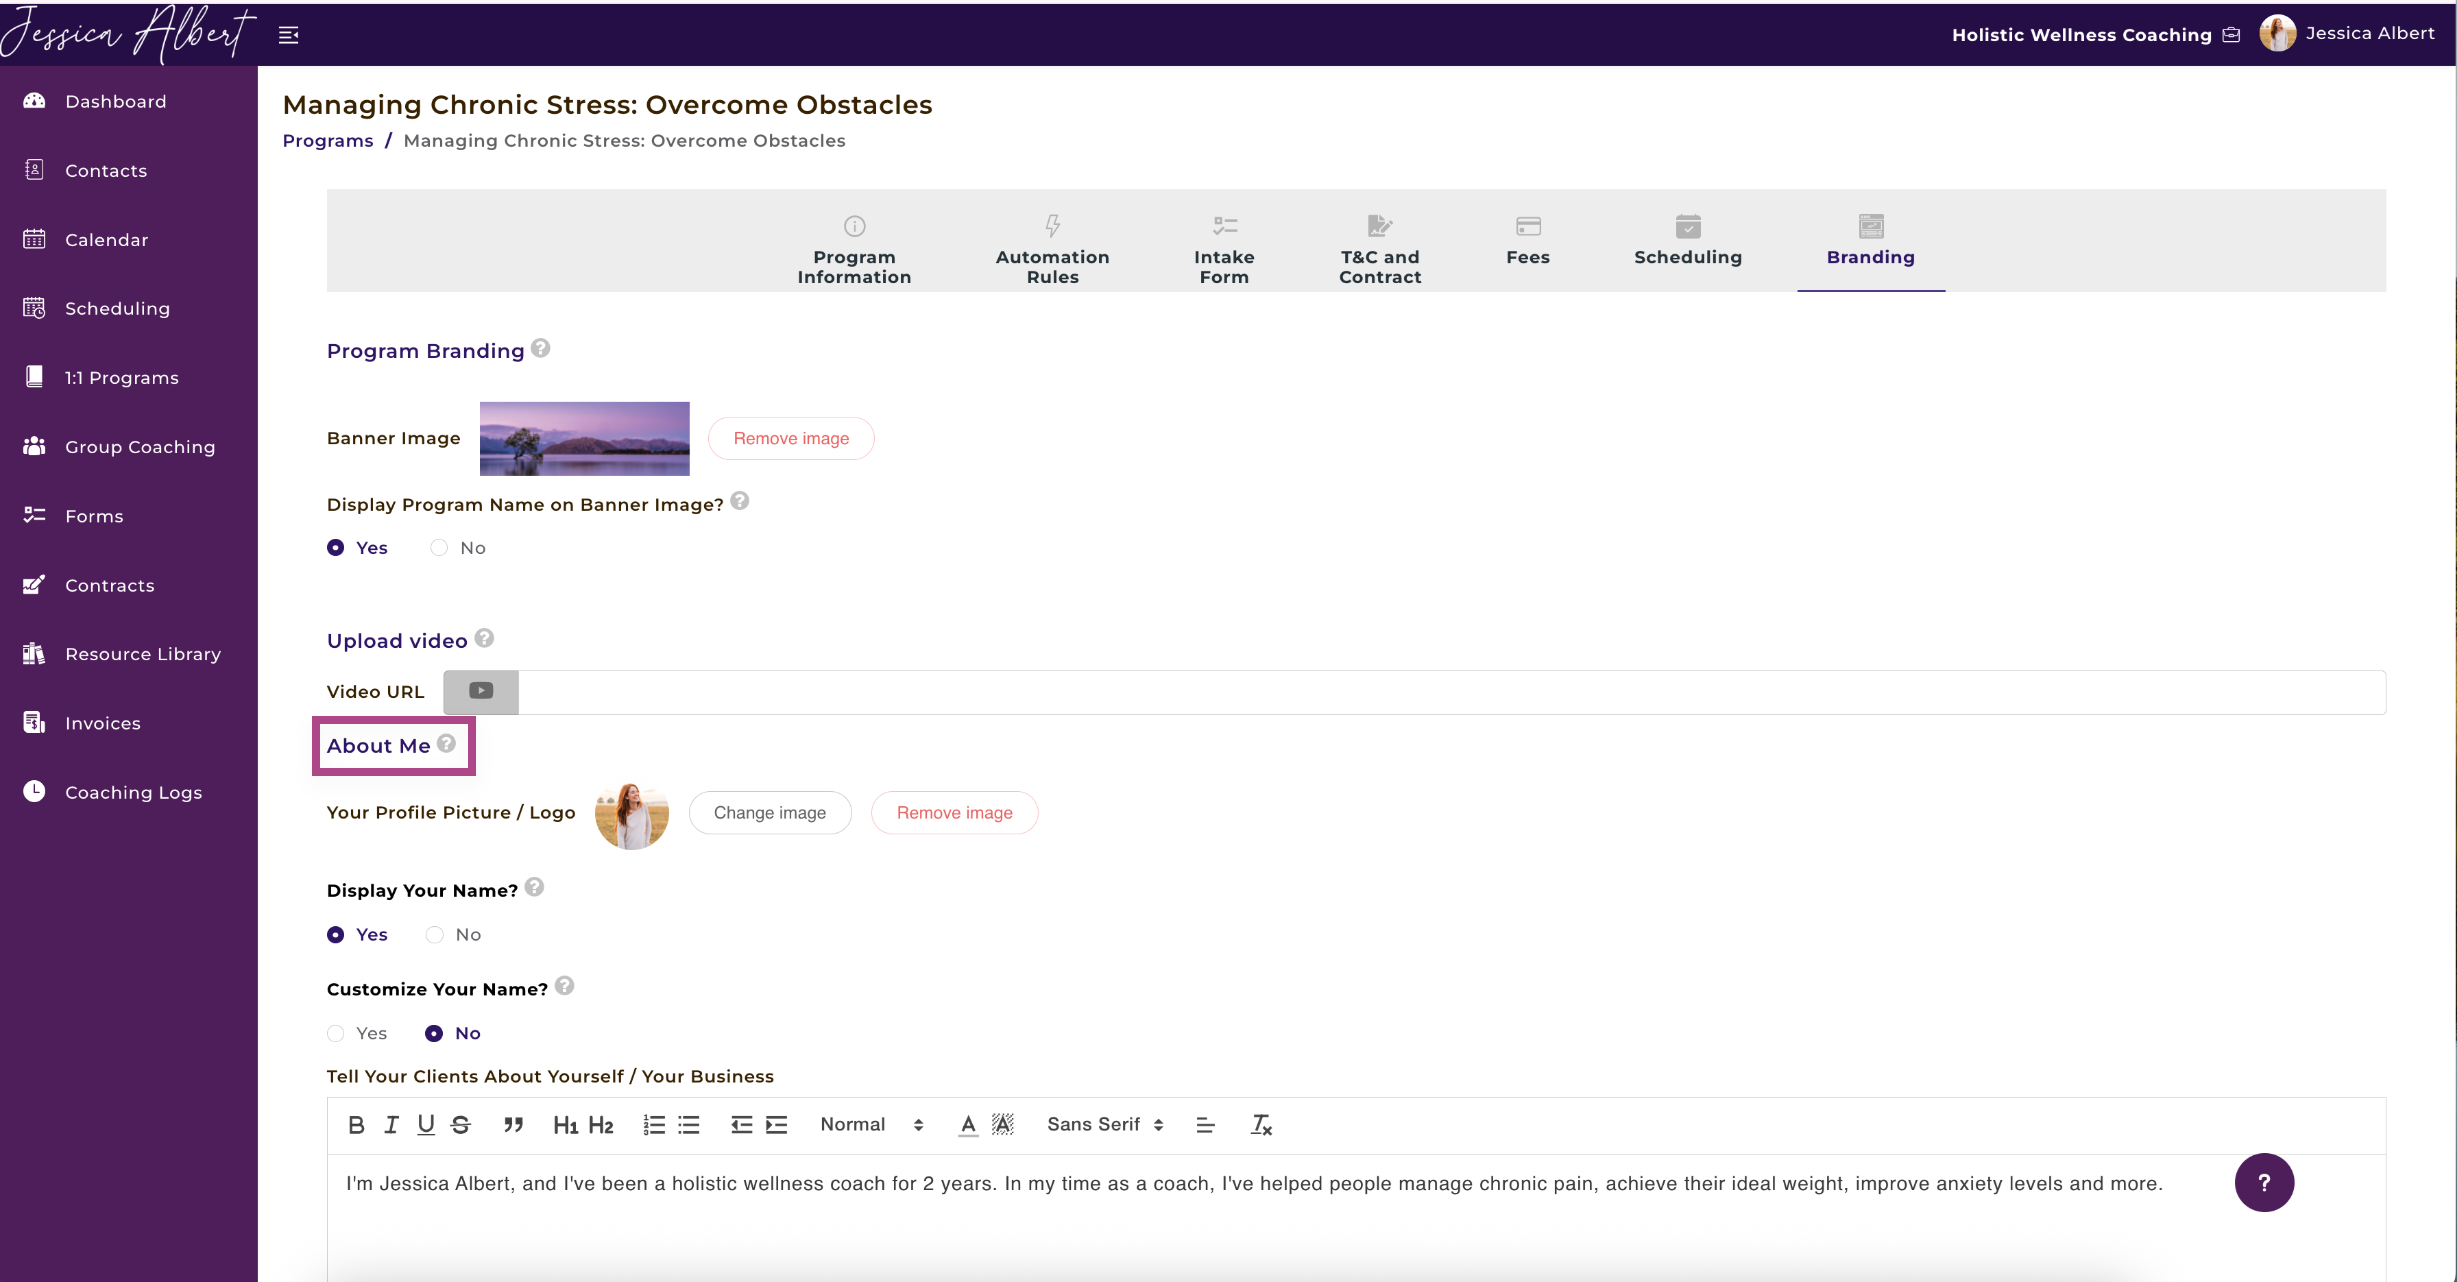
Program Branding
Select a Banner Image.
Select Yes or No depending on whether you'd like to Display Program Name on Banner Image.
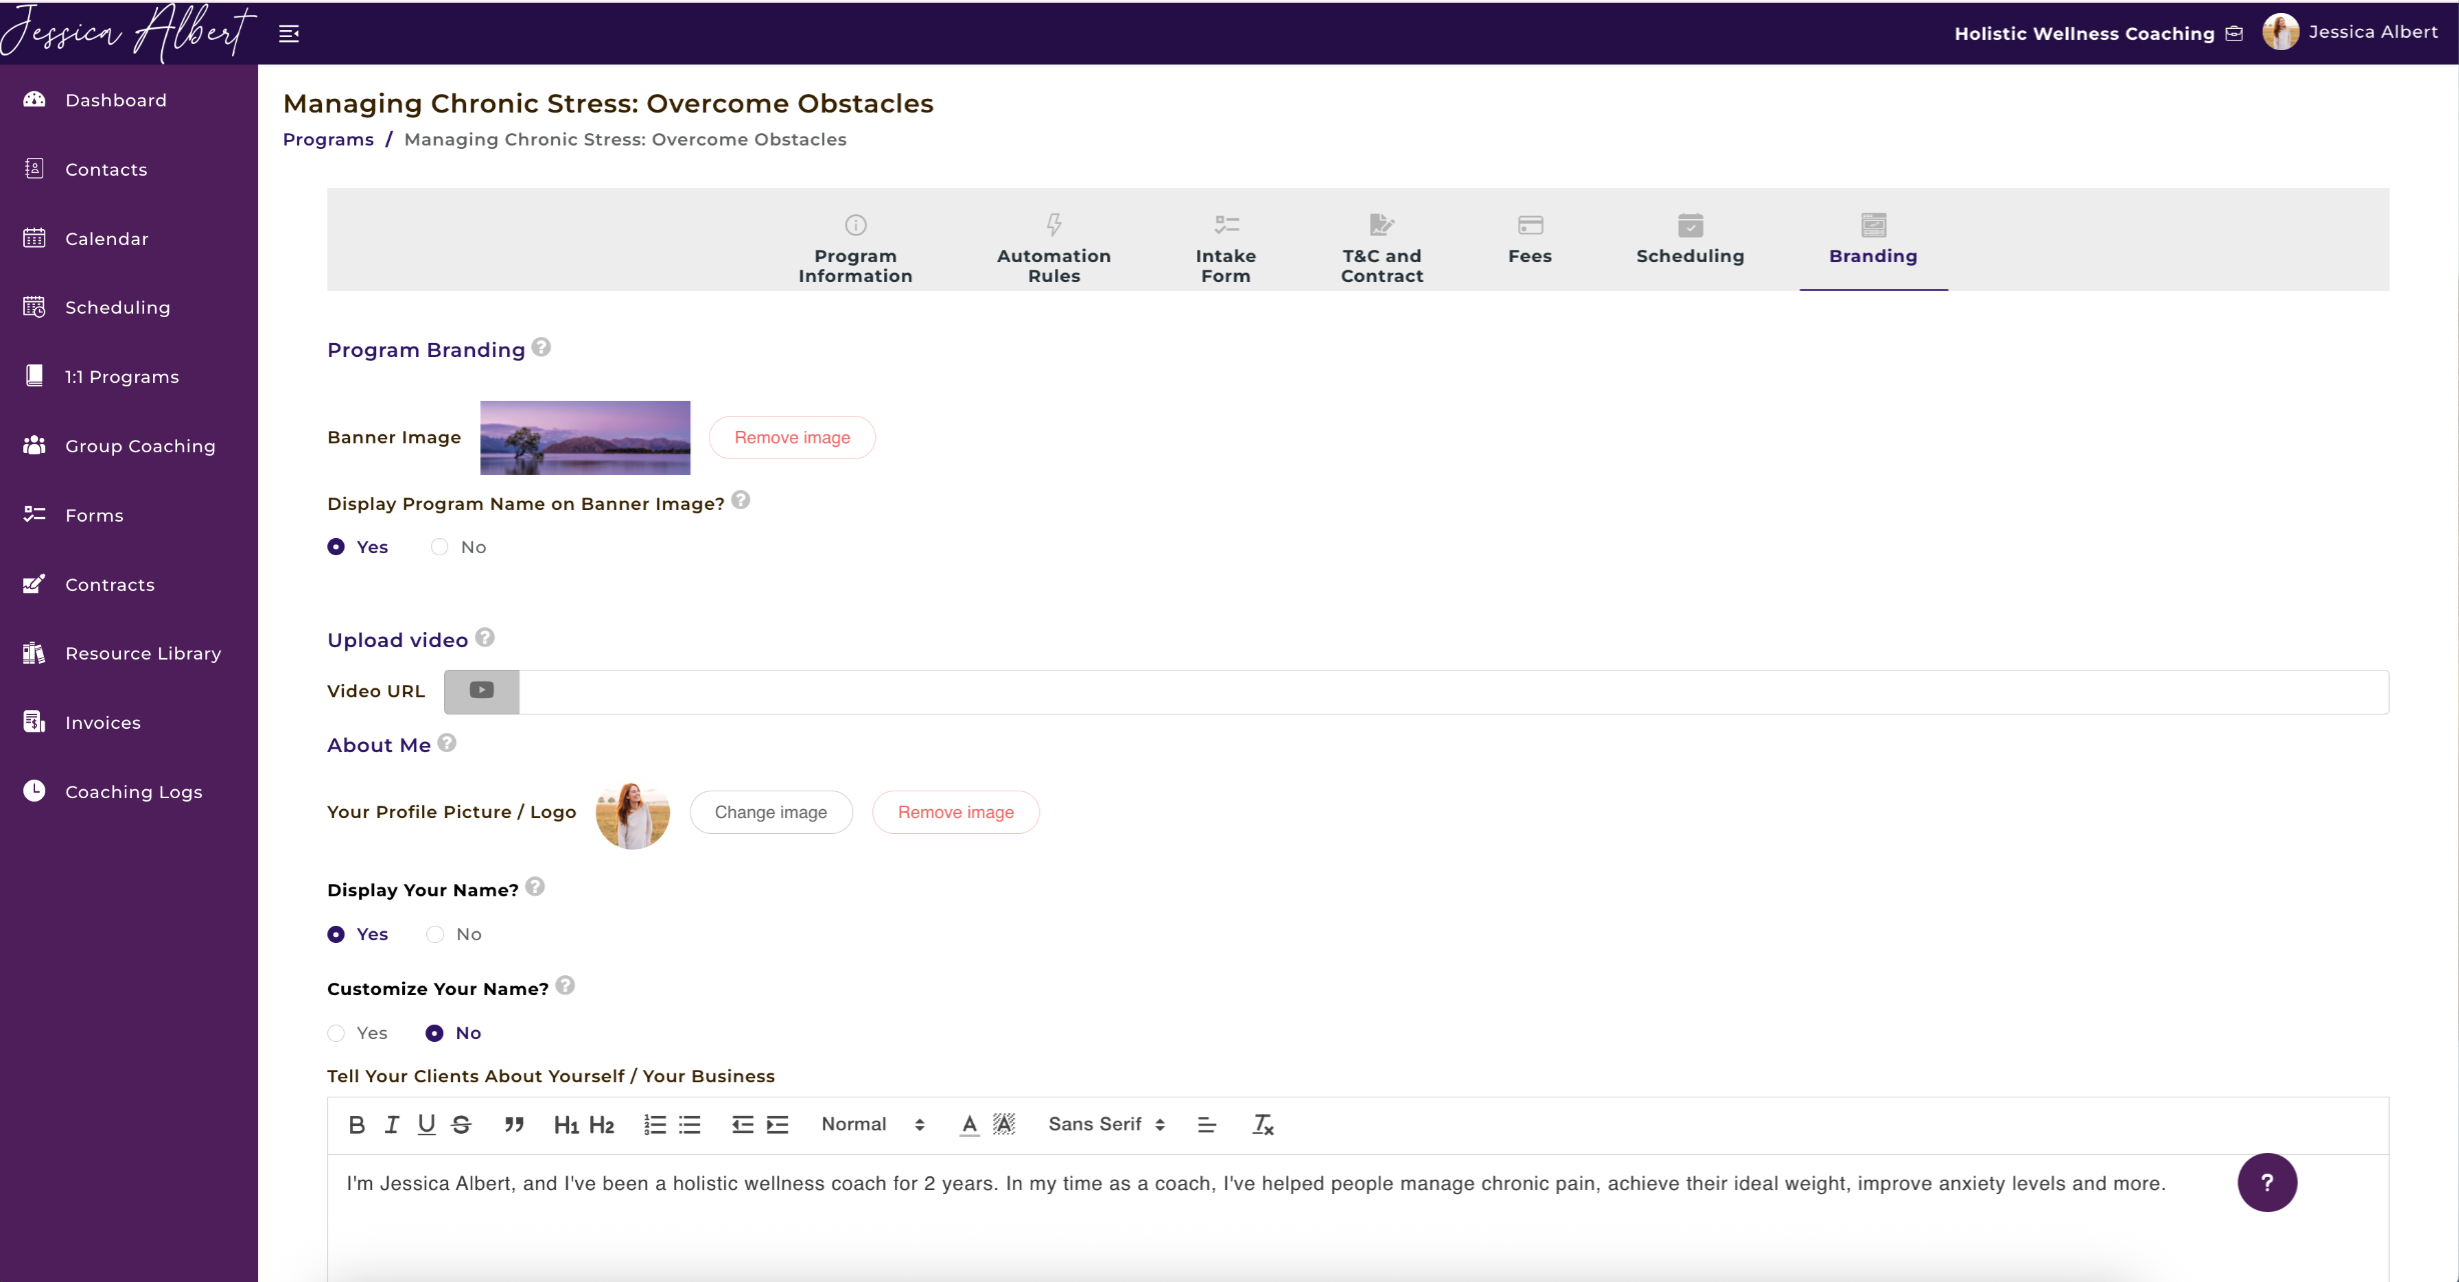
Upload Video
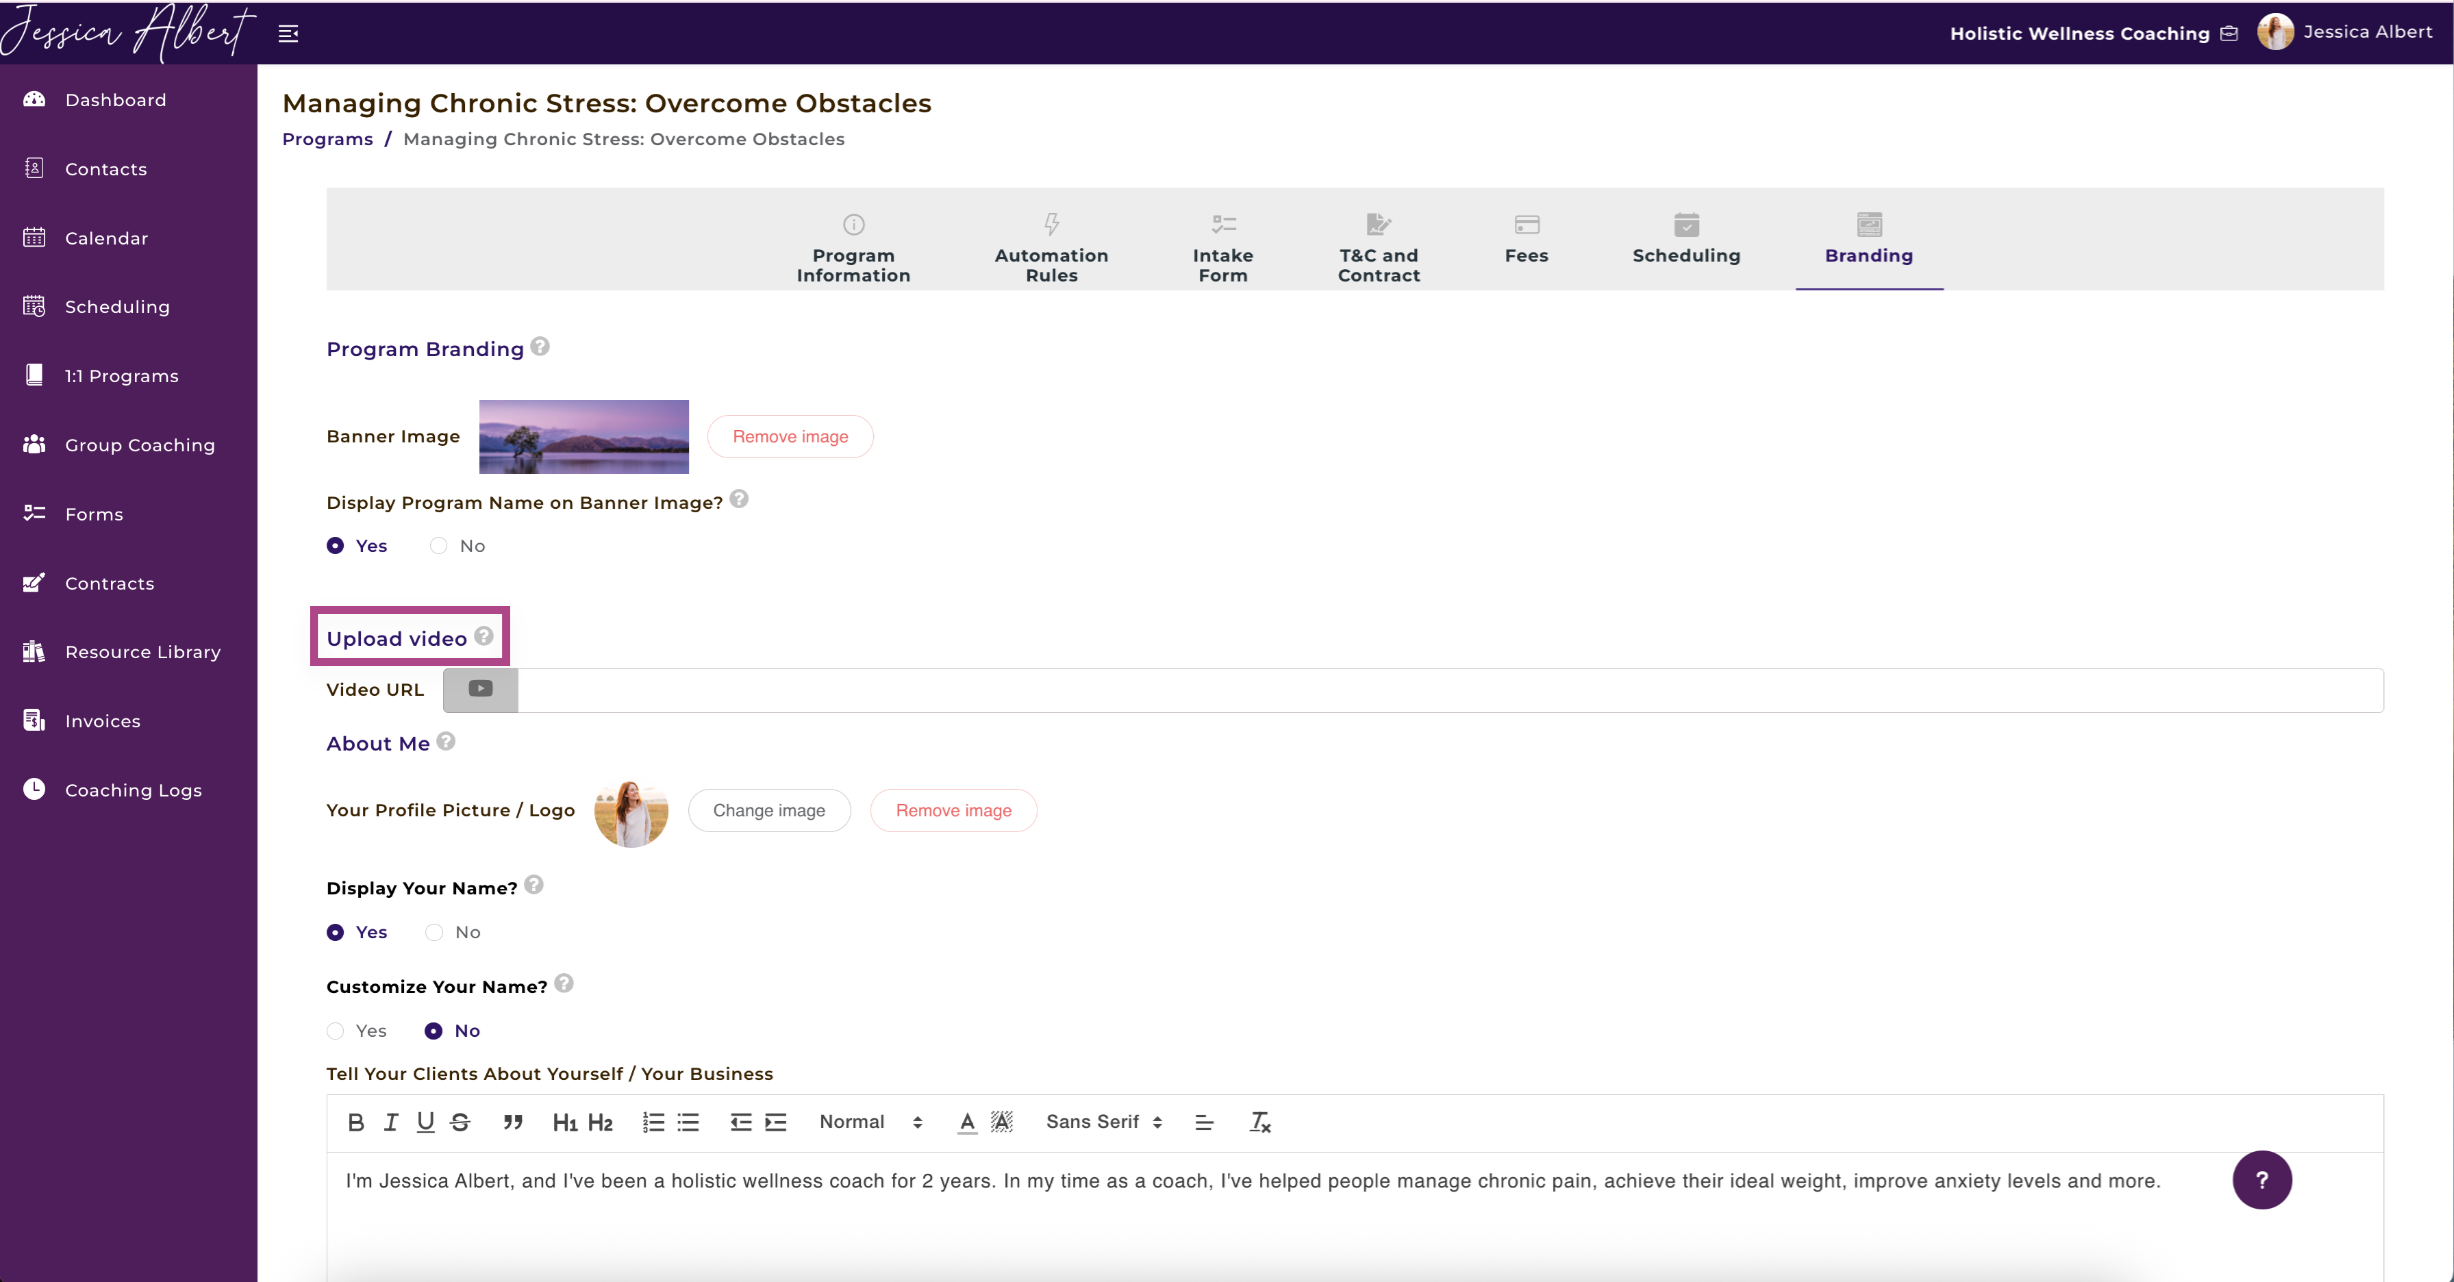
About Me
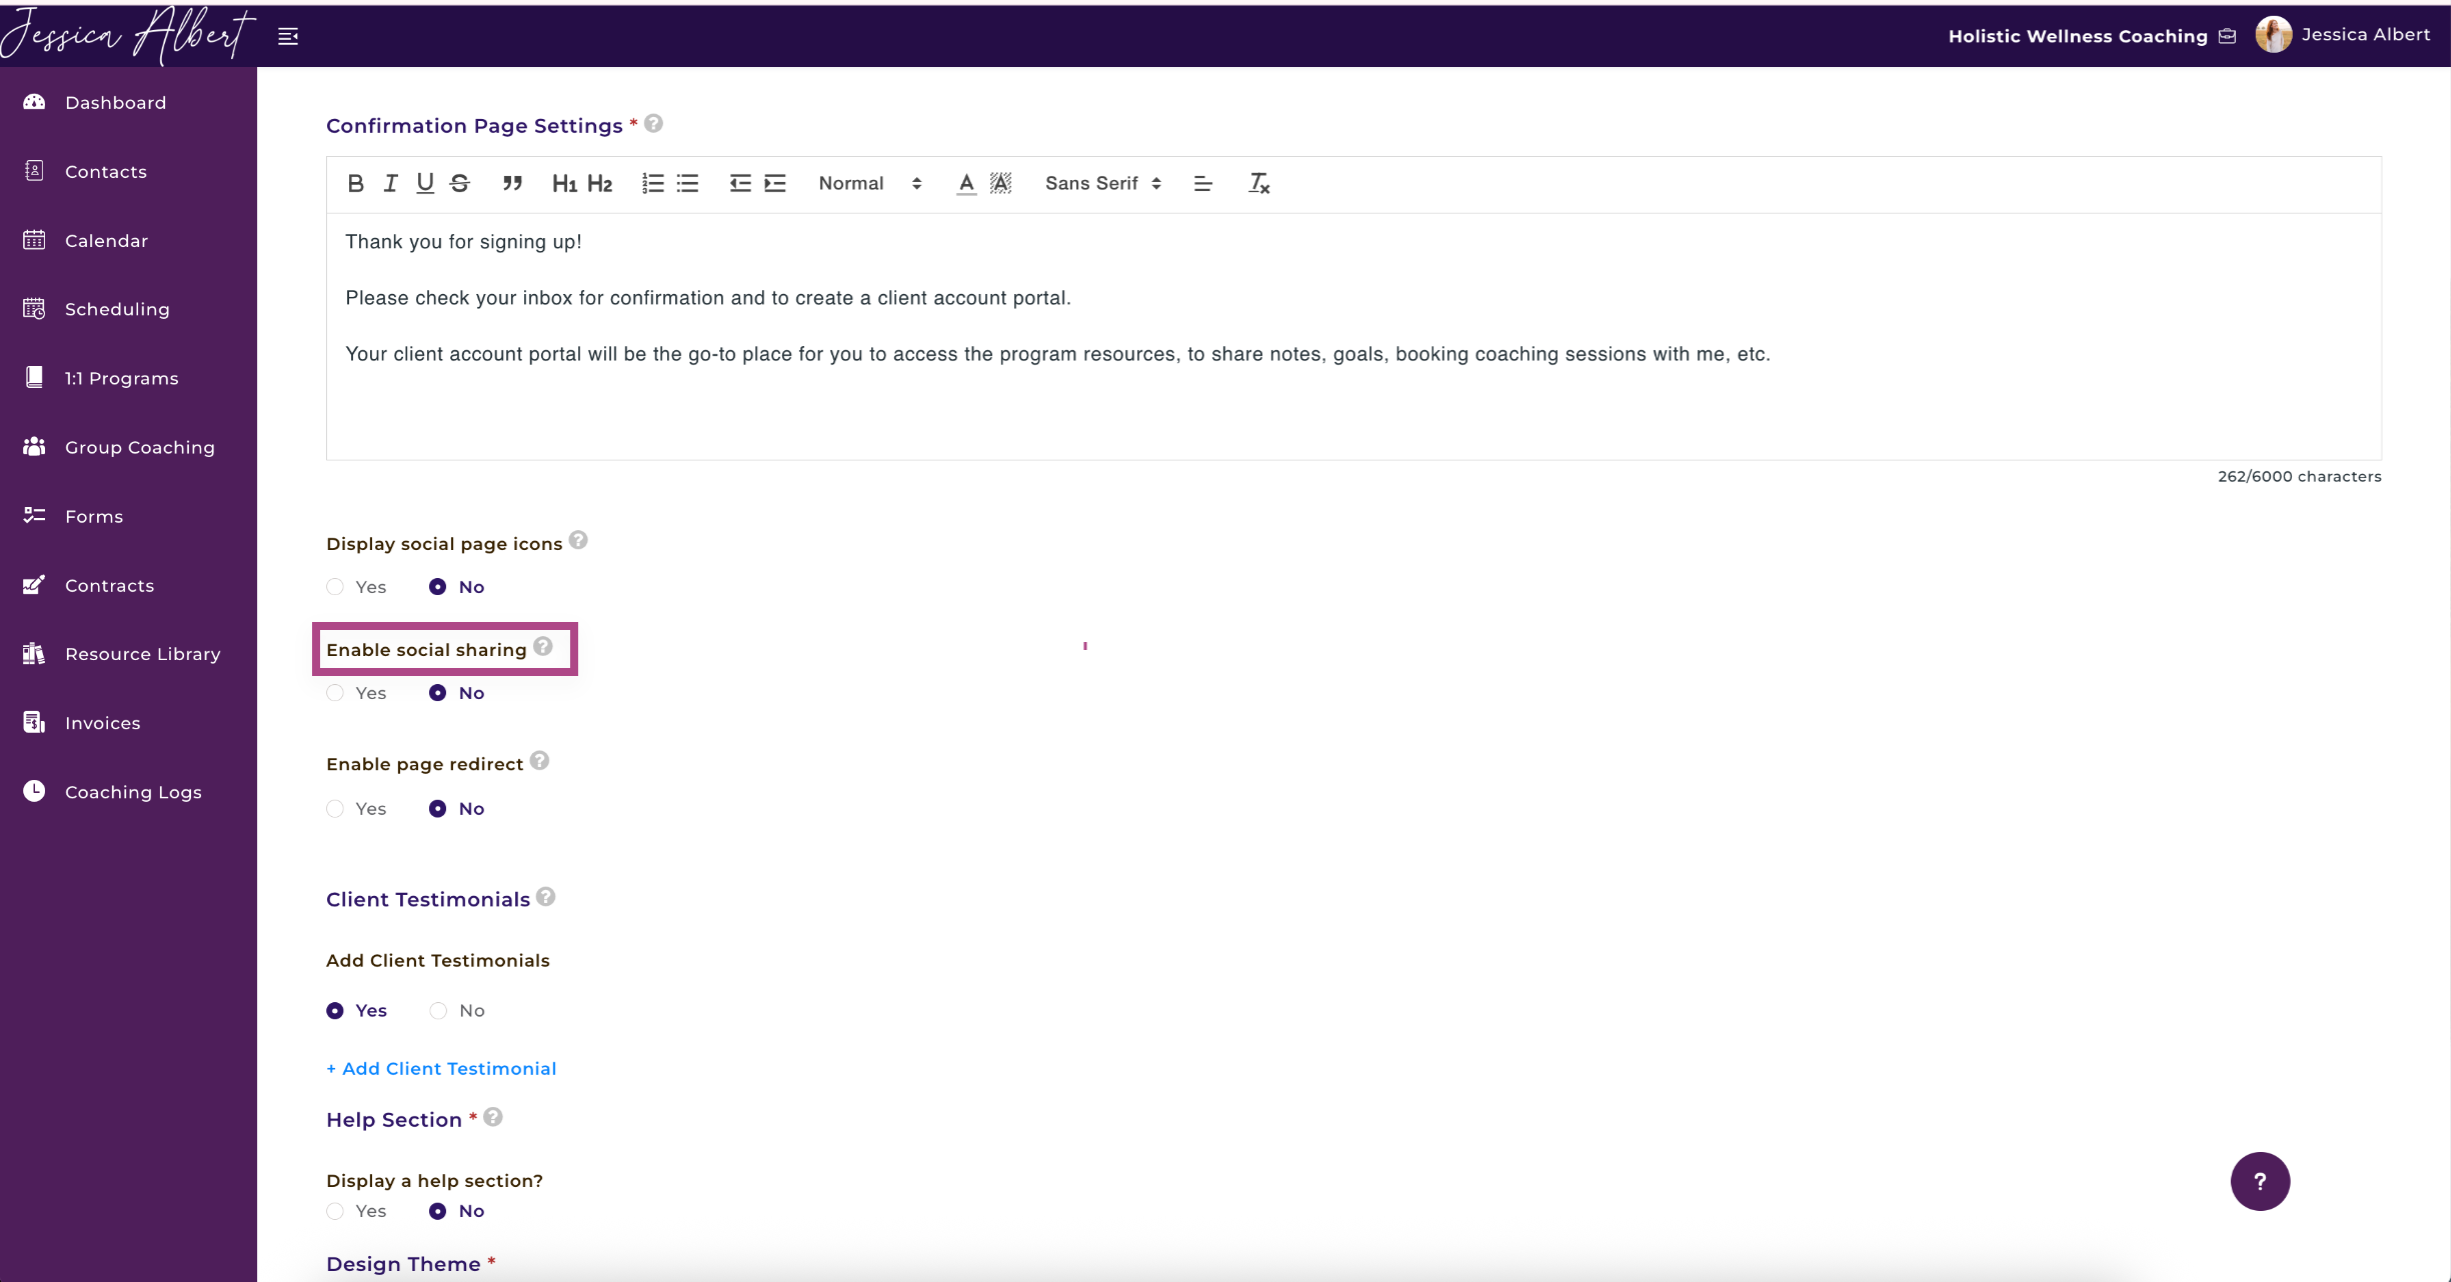
Confirmation Page Settings
We've added a default message that your clients will see on the confirmation page after successfully signing up to the program. Feel free to customize the confirmation message to your liking.
Important: When your clients have successfully signed up, CoachVantage automatically sends an email confirmation of their enrollment into the program. We will also notify your clients to create their client portal account in the same email.

Display Your Social Pages' Icons
If you select Yes, your social pages' icons (Facebook, Instagram, etc) will be displayed on the confirmation page.
Note: You must configure your social pages' URL in My Profile > Business Details for the icons to be displayed.
Enable Social Sharing 📲
If you select Yes, your clients can promote your coaching program on their social pages after they have signed up for your program.
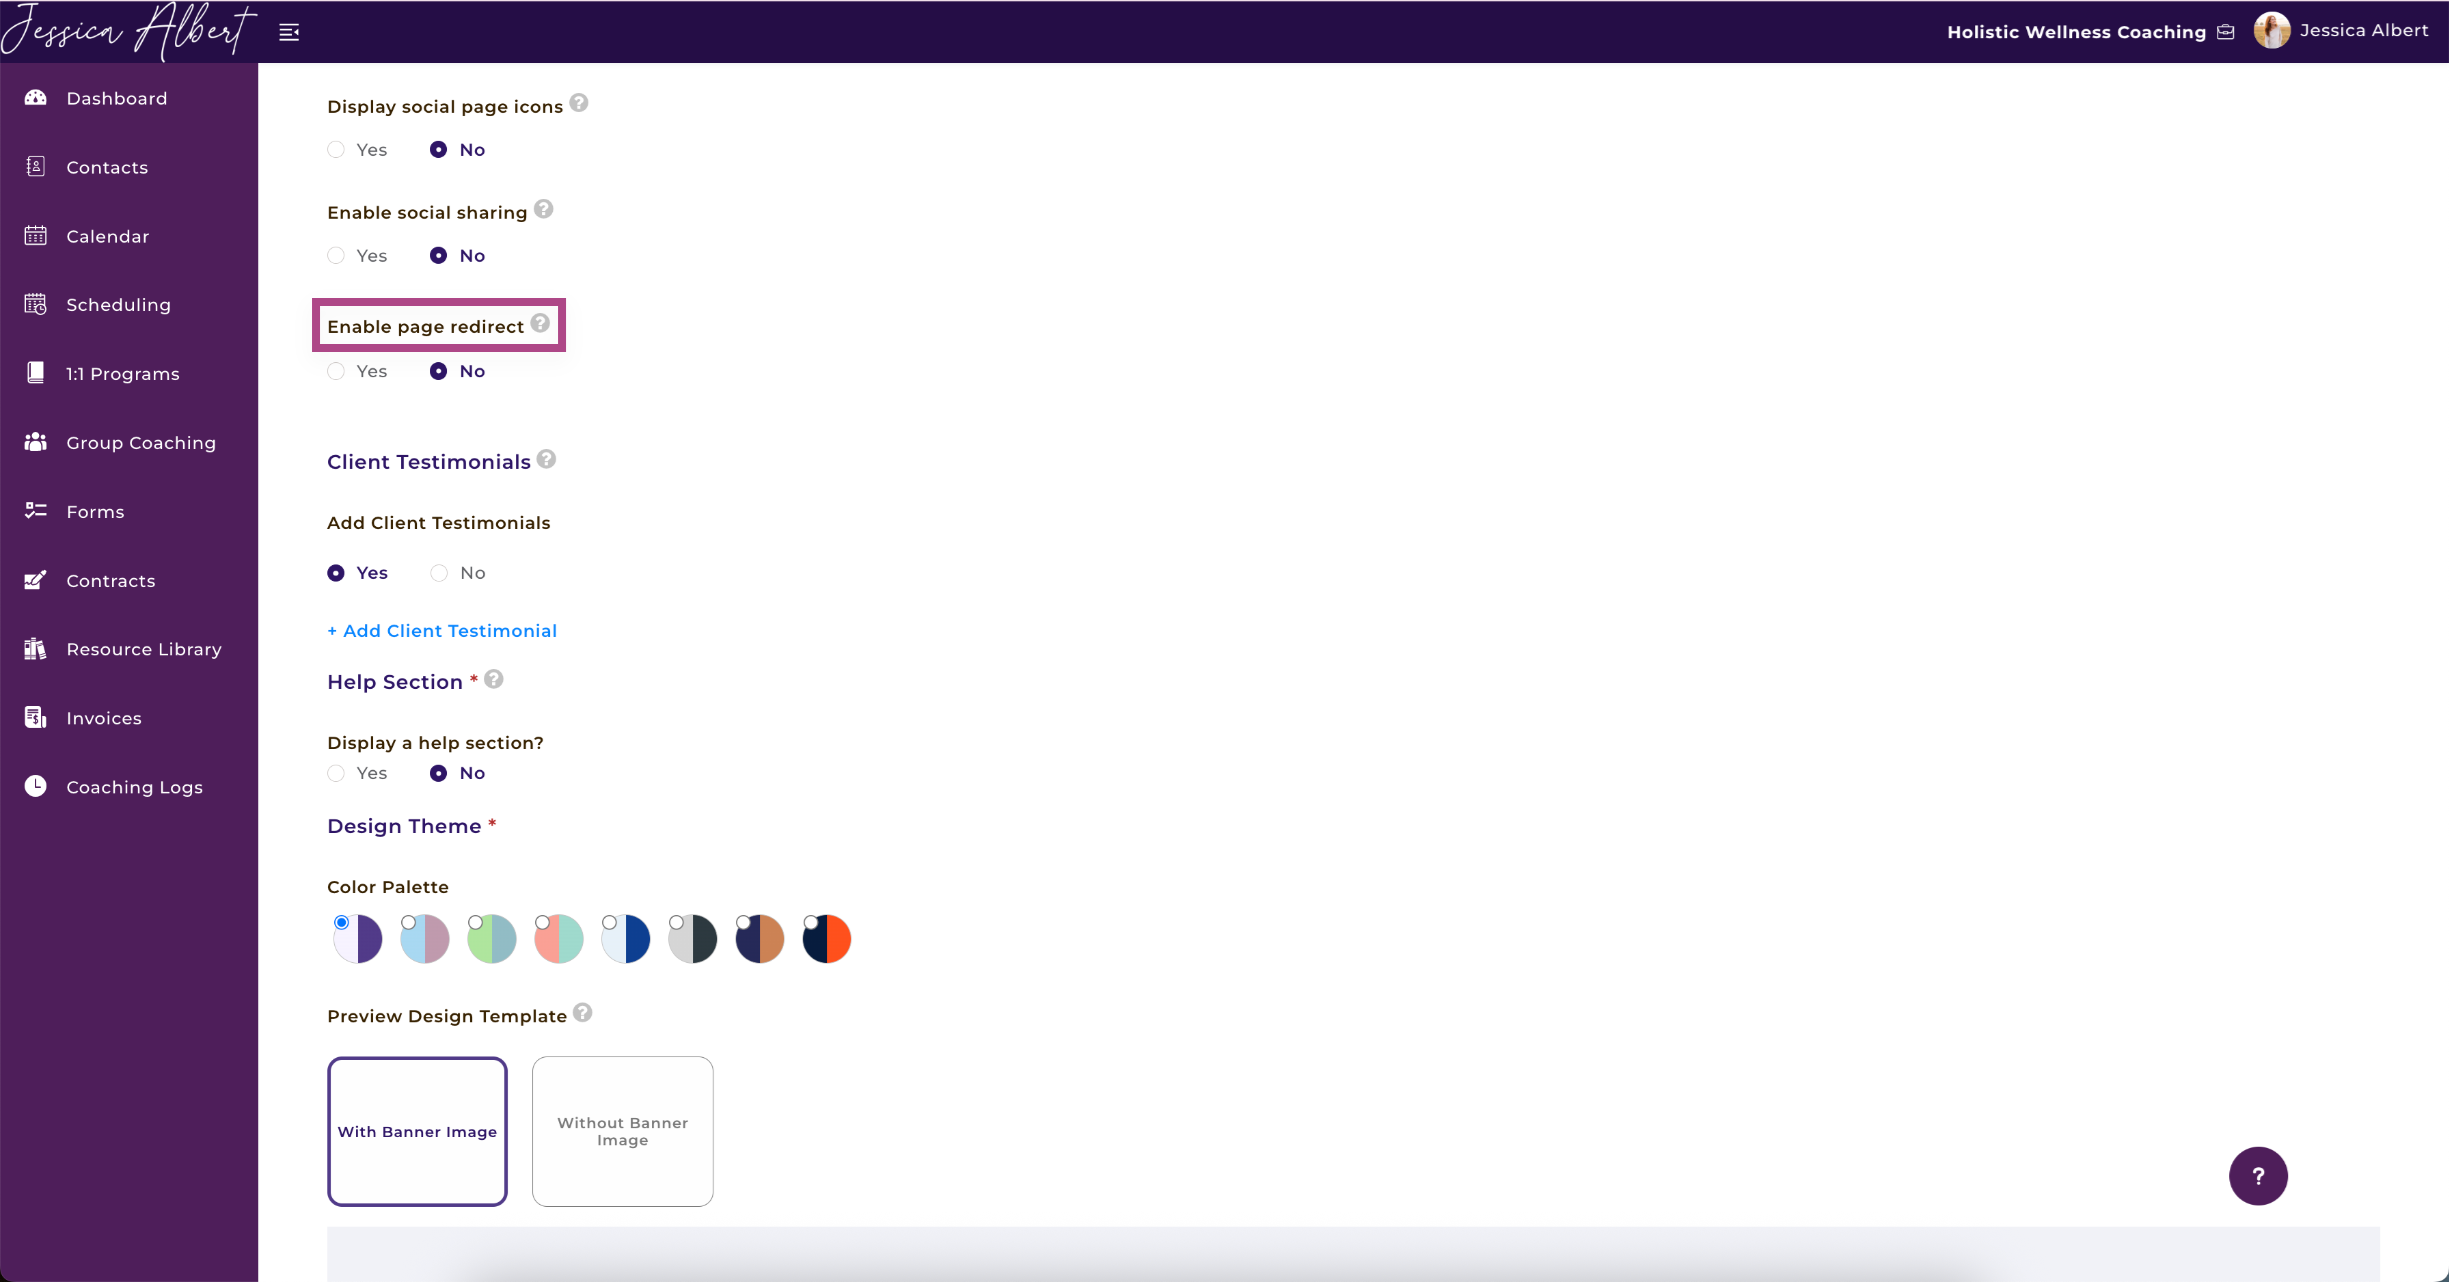
Enable Page Redirect
If you select Yes, you can automatically redirect clients to another web page (such as to your website or a custom thank you page) from the confirmation page.
Simply enter the URL of the web page and set the time (in seconds) for auto-redirect.
Tip: You'll want to give your clients sufficient time to read the messages on the confirmation page, so be sure to set sufficient time before the redirection.
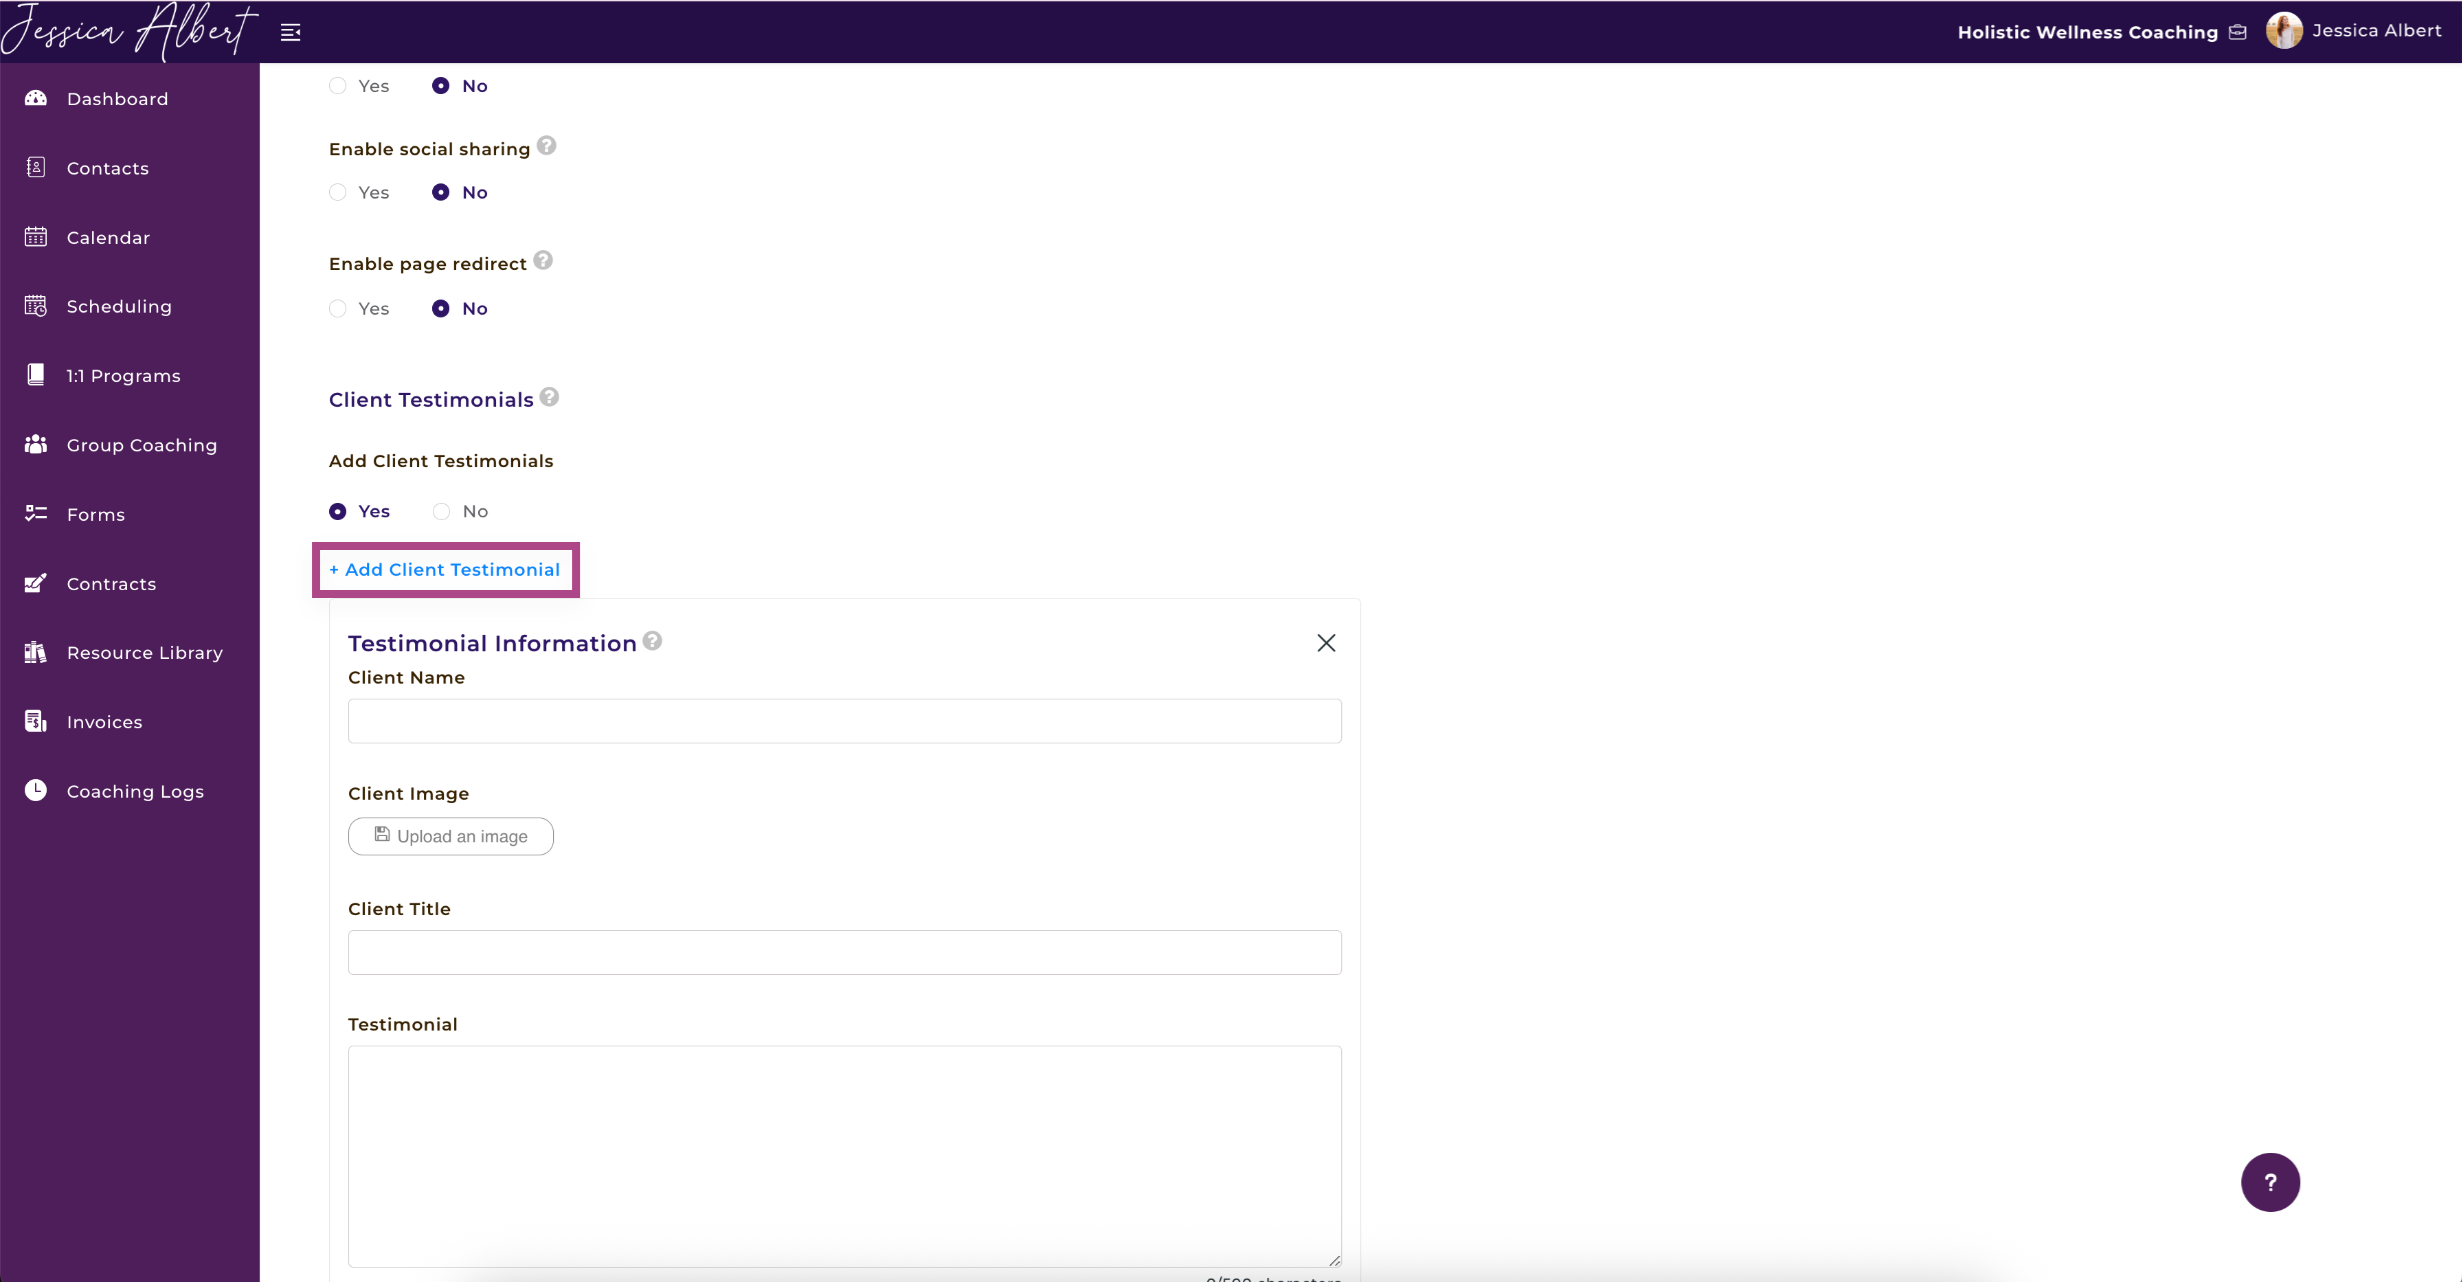
Client Testimonials 🗣️
You can add up to 5 client testimonials.
Tip: Client testimonials are great for providing honest, unbiased feedback about your services, from satisfied clients! Please be mindful about your client confidentiality and ensure that you have obtained their permission to use their name and/or other details.
Design Theme