Scheduling Feature Overview
Overview
The CoachVantage Scheduling feature makes it easy for you to create and publish Events for people to self-book Appointments with you.
Examples of Events:
- 1:1 virtual meetings (i.e. a Discovery Call or Consult Call)
- A physical meeting
- A 1:1 yoga class conducted virtually or in-person
Currently, only single attendee events are supported. Group events where multiple attendees can book a slot, is a future enhancement. Stay tuned!
Refer to the article How to Create an Event to learn how to create an event.
Once you've created and saved your events, a public-facing booking page is automatically created and hosted by CoachVantage. Every event booking page has a unique URL link where clients can self-book appointments for your event.
To see what your booking page looks like, refer to this article What Does My Booking Page Look Like?
The booking page can be embedded into your website or you can simply share the booking page URL link, for instance in your newsletters, in your marketing emails, on your social pages such as Facebook, LinkedIn, on coaching directories where you list your services, etc.
IMPORTANT:
You should not use Events to create and manage coaching programs with clients. Instead, to create and manage coaching programs with your clients, you should use the Programs feature in CoachVantage.
We also do not recommend creating Events for clients to book coaching program sessions. You should use the Programs feature found on the left menu for this. Refer to the article How to Create a Coaching Program for more details.
How Many Events Can You Create? 📆
The number of events that you can create depends on your CoachVantage subscription plan:
Clarity Plan:
You can create 2 active event booking pages (i.e. at any point in time, you can have up to 2 event booking pages that you can publish online for client bookings).
Aha Plan:
You can create Unlimited active event booking pages.
Note: Inactive and Draft events do not count towards the Active events count.
(To learn more about the difference between 'Active', 'Inactive' and 'Draft' events, scroll to the bottom of this article)
Scheduling Page Overview
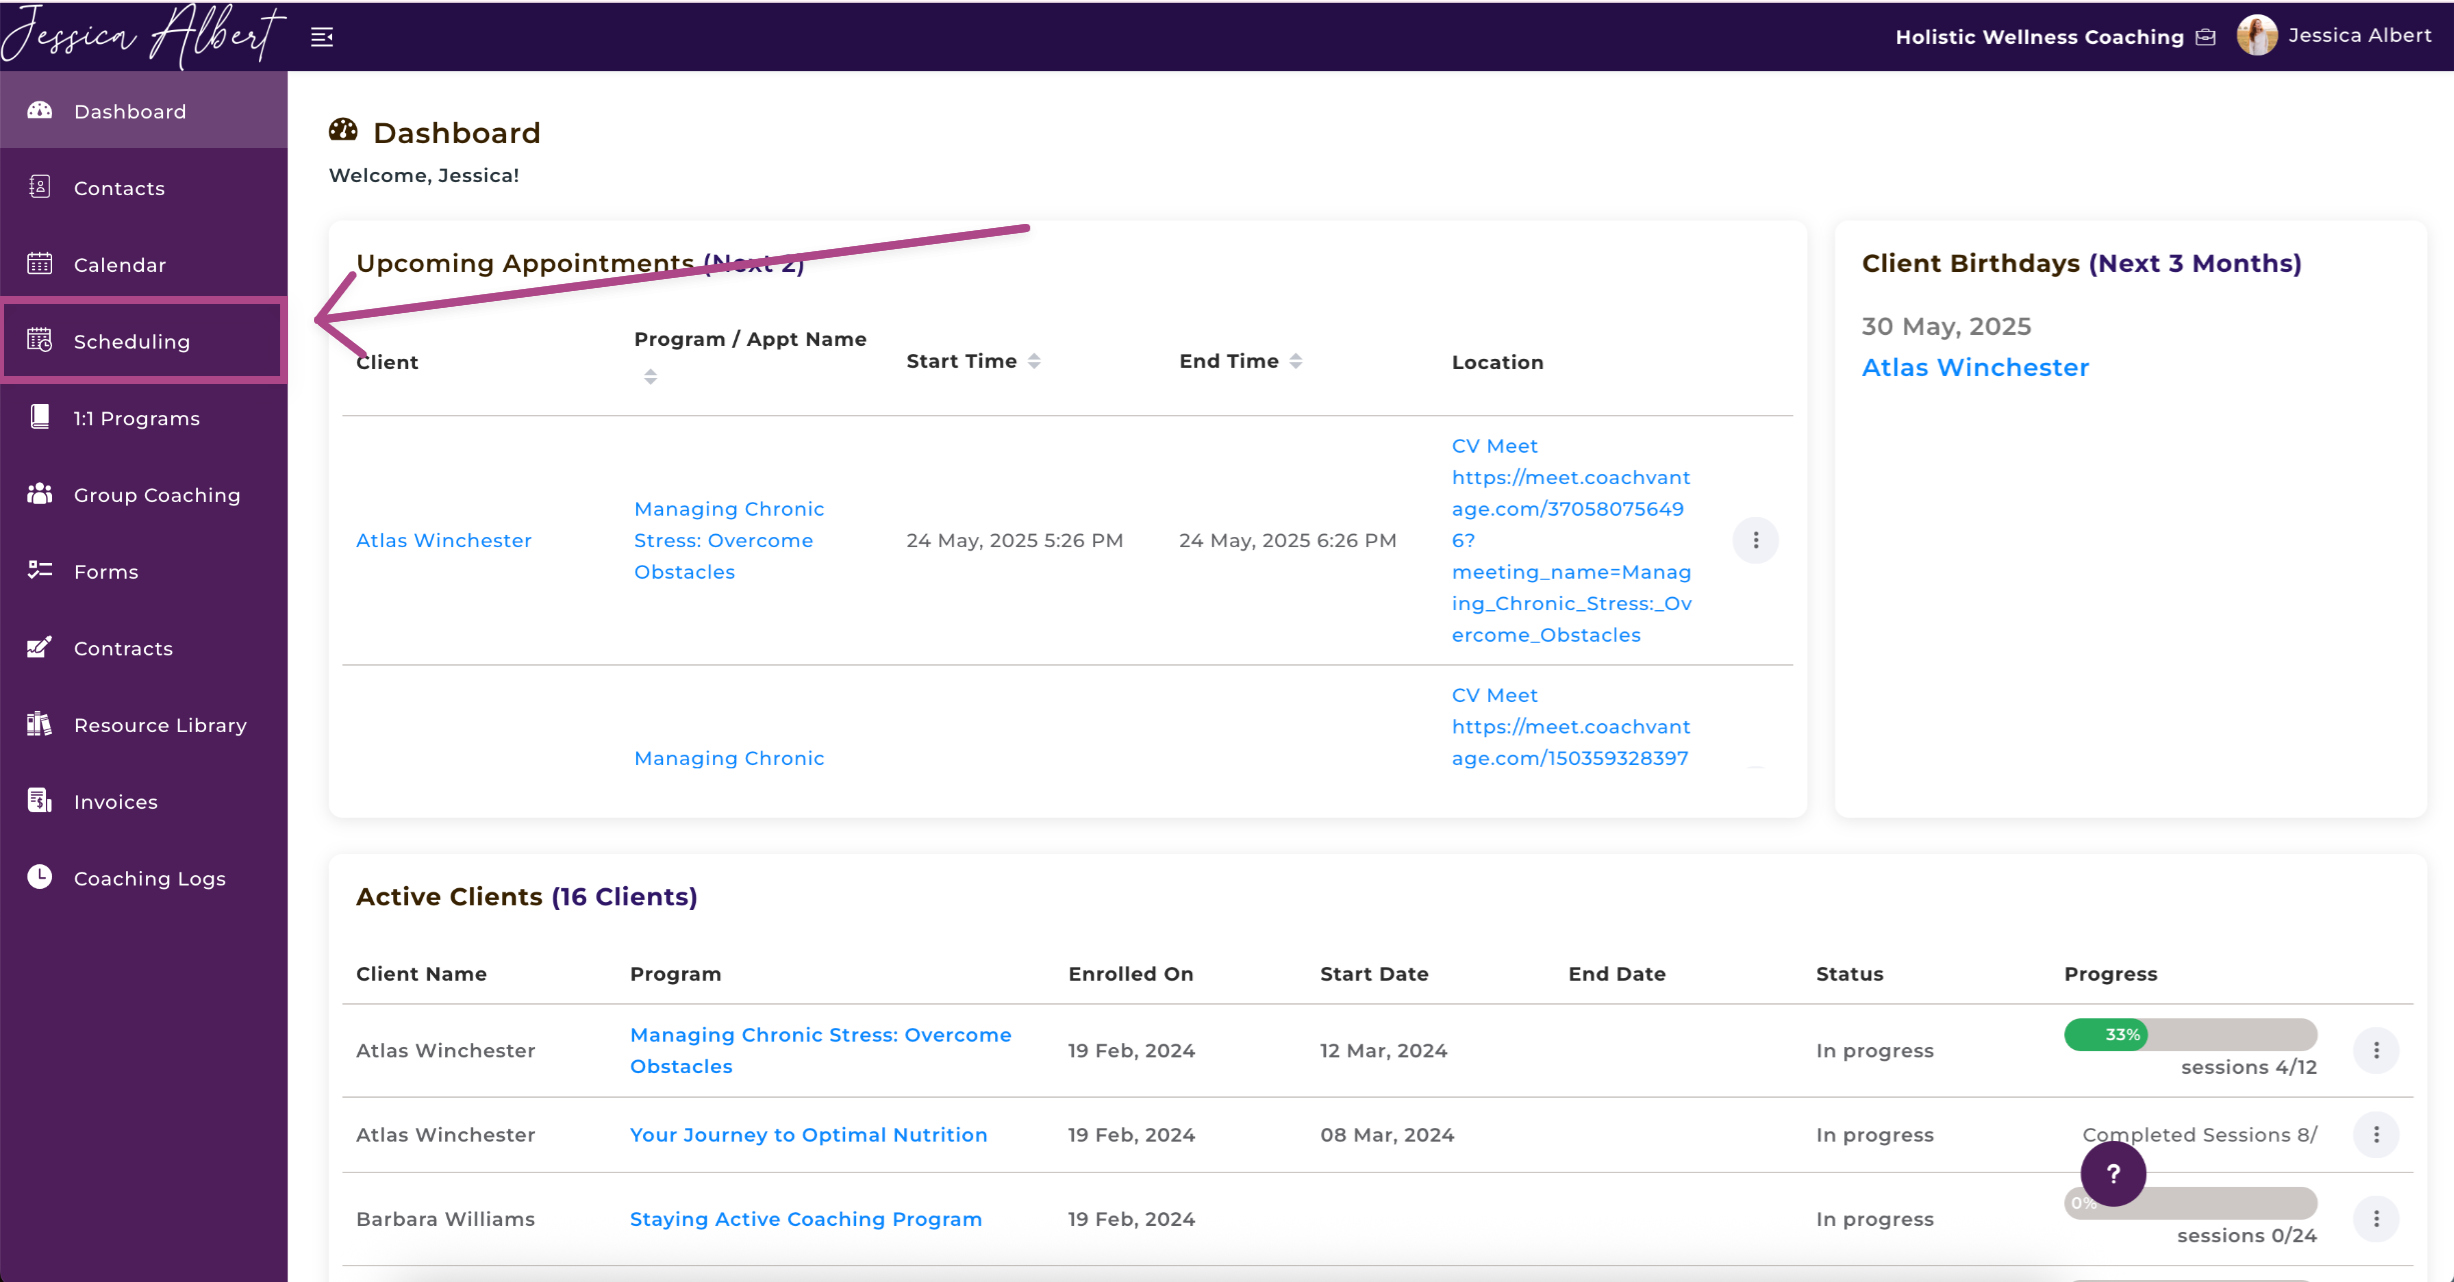
To get to the Scheduling page, click Scheduling on the left menu.
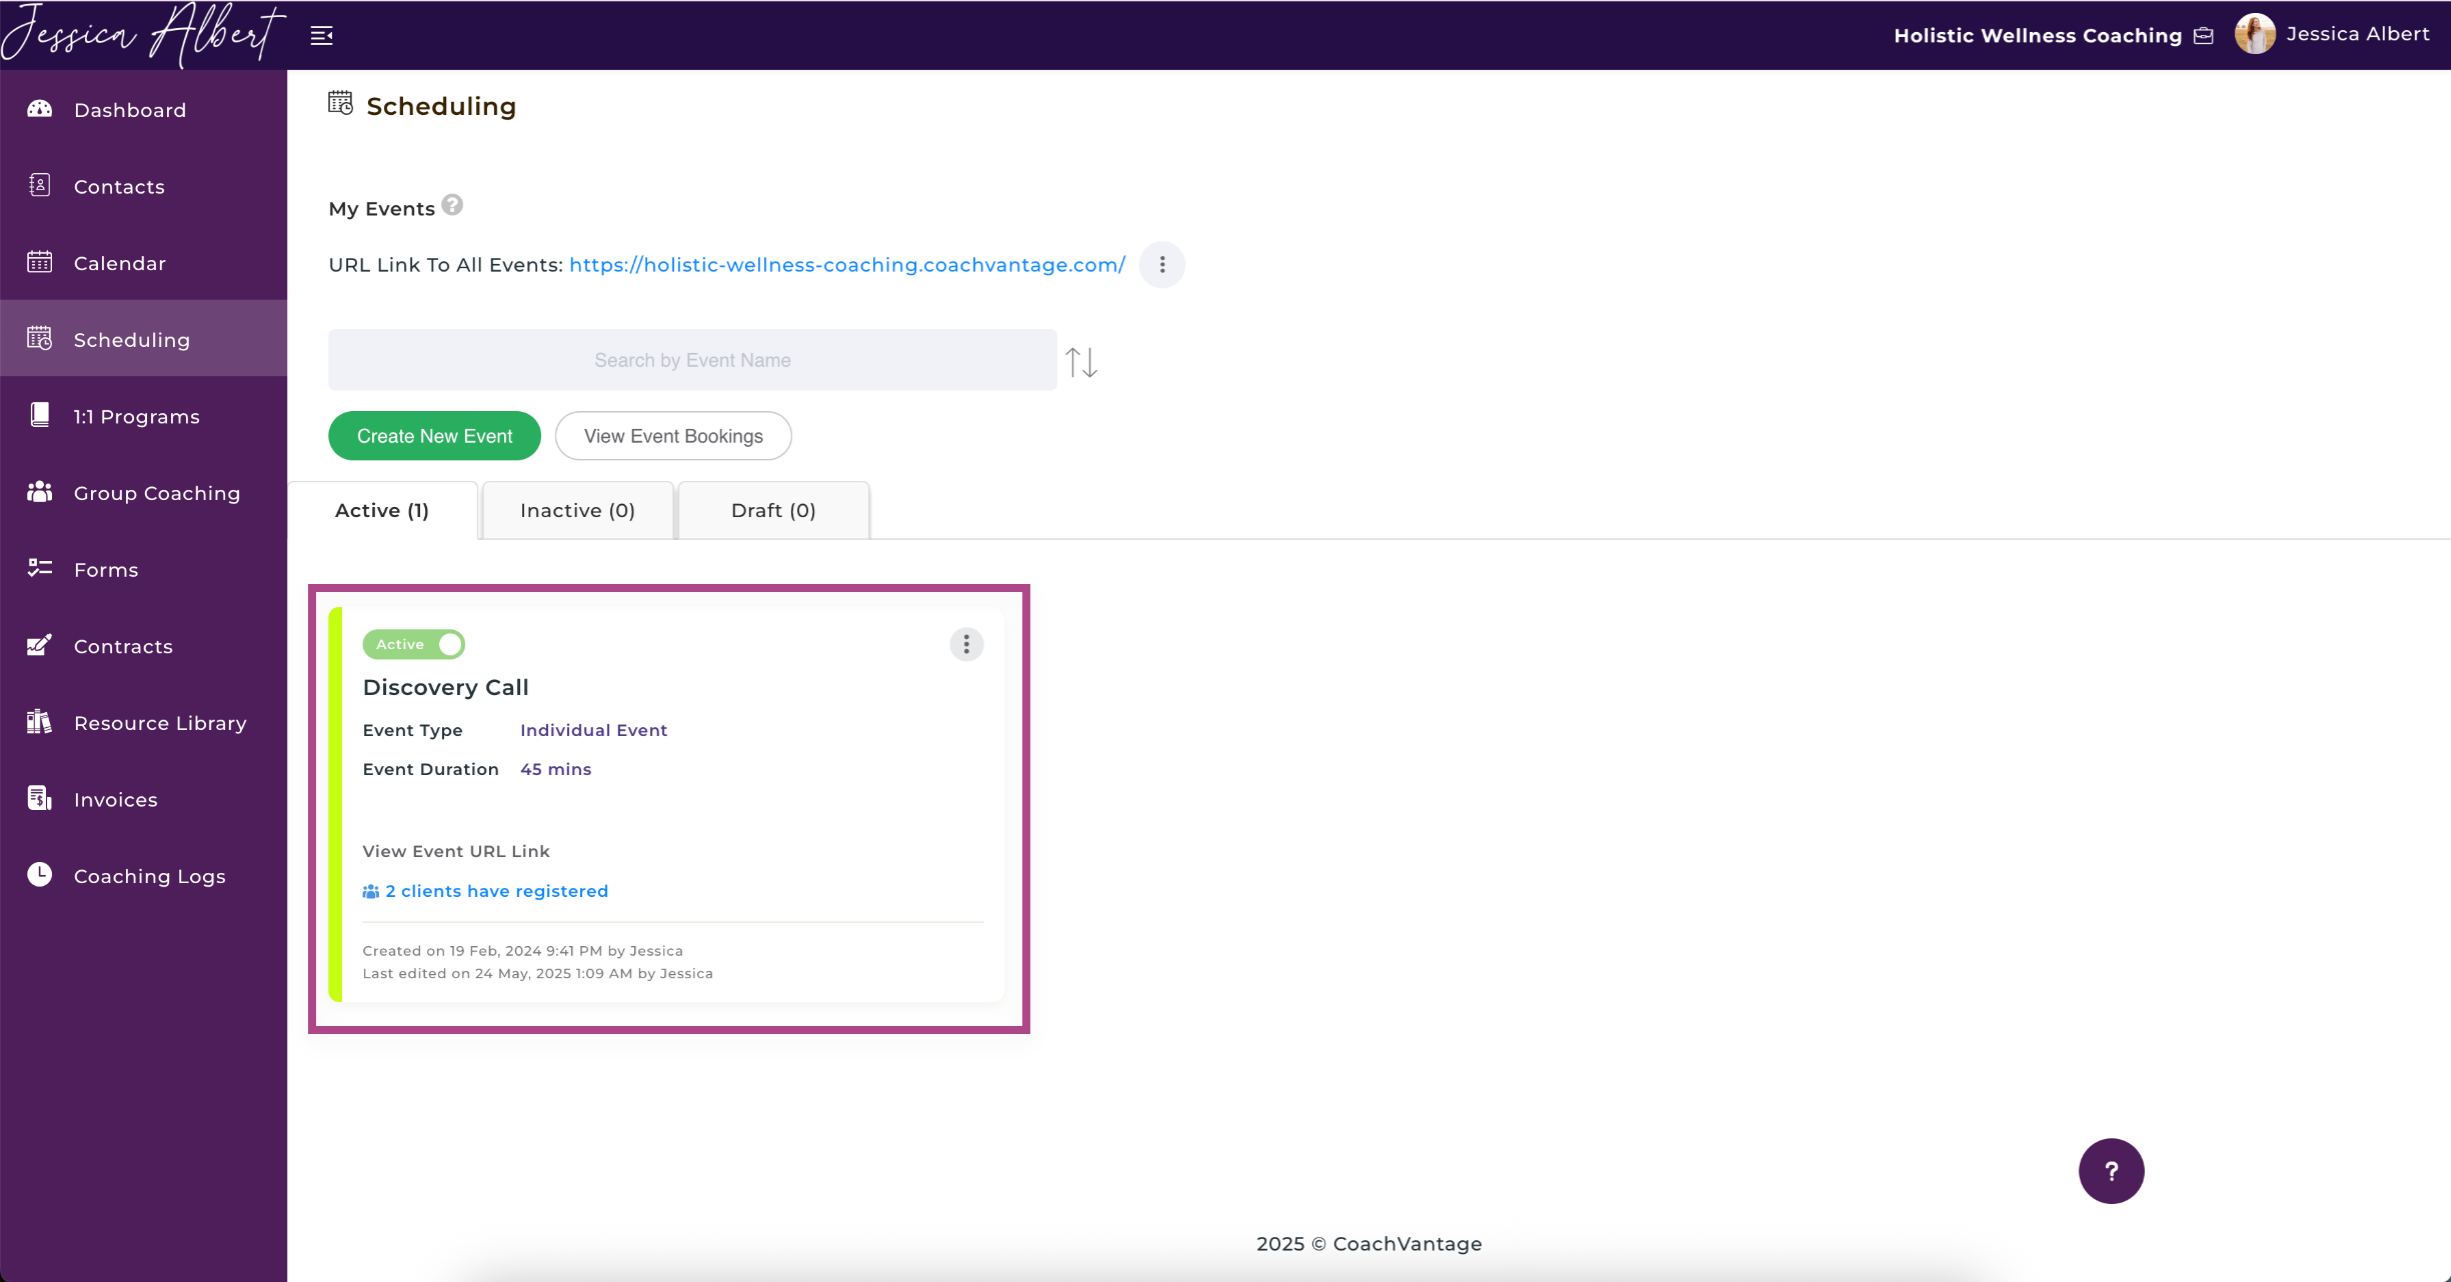
On the Scheduling page, you'll see:
- Your URL Link To All Events
- Search Bar & Sort icon
- Create New Event Button
- View Events Bookings Button
- Event Cards
- Event Status Tabs
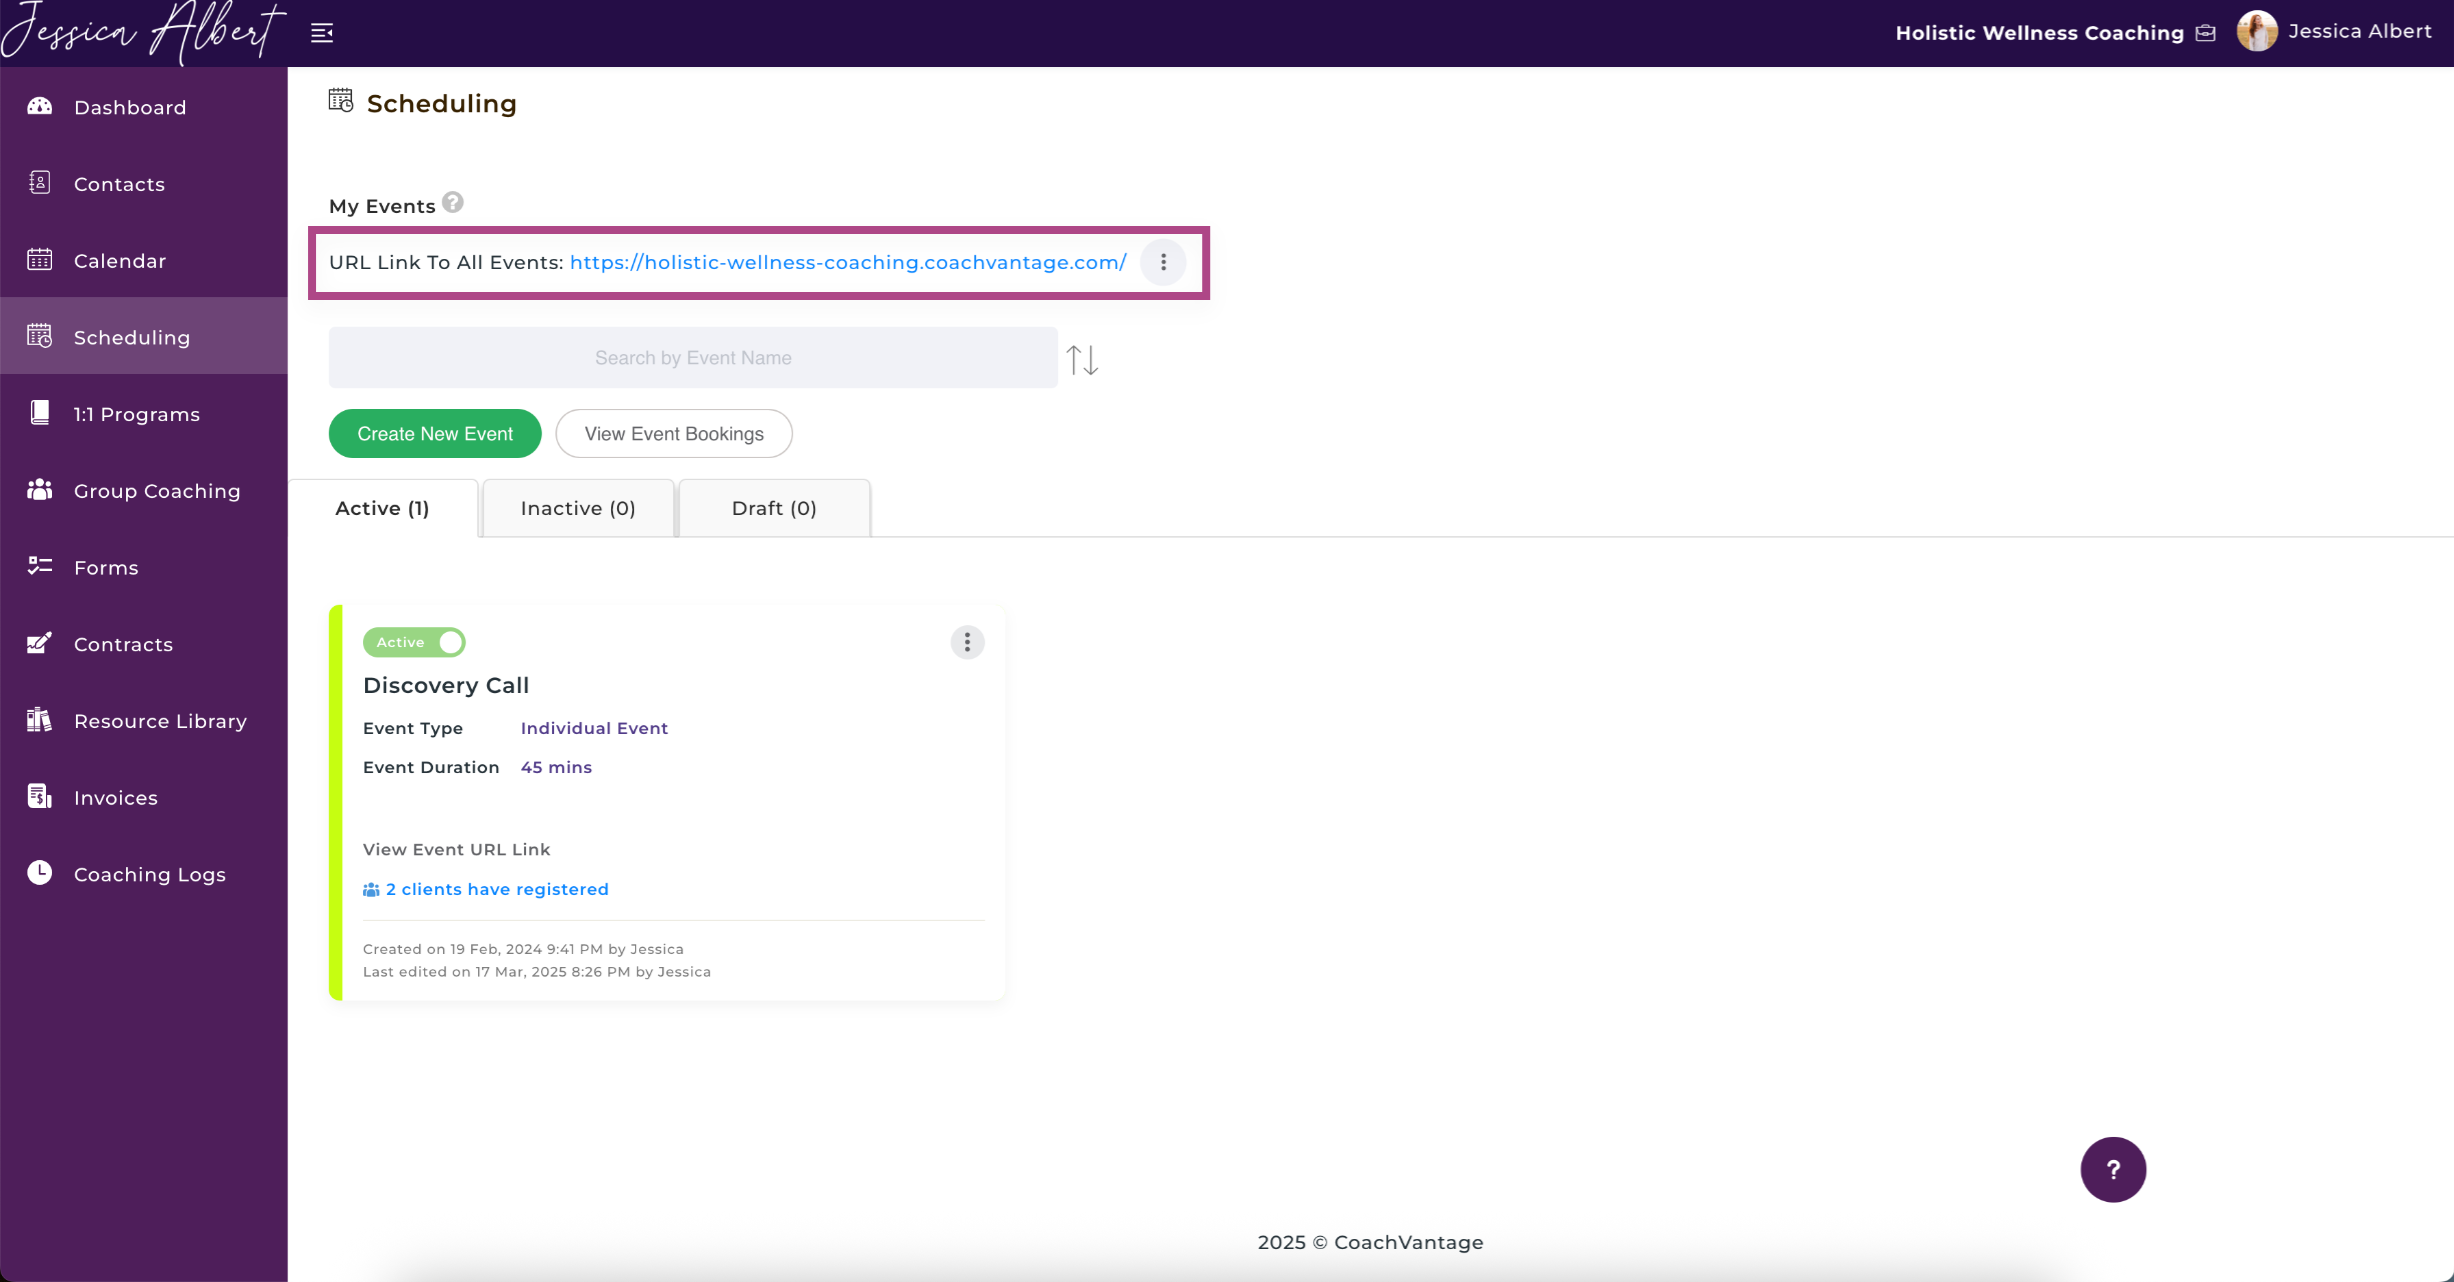
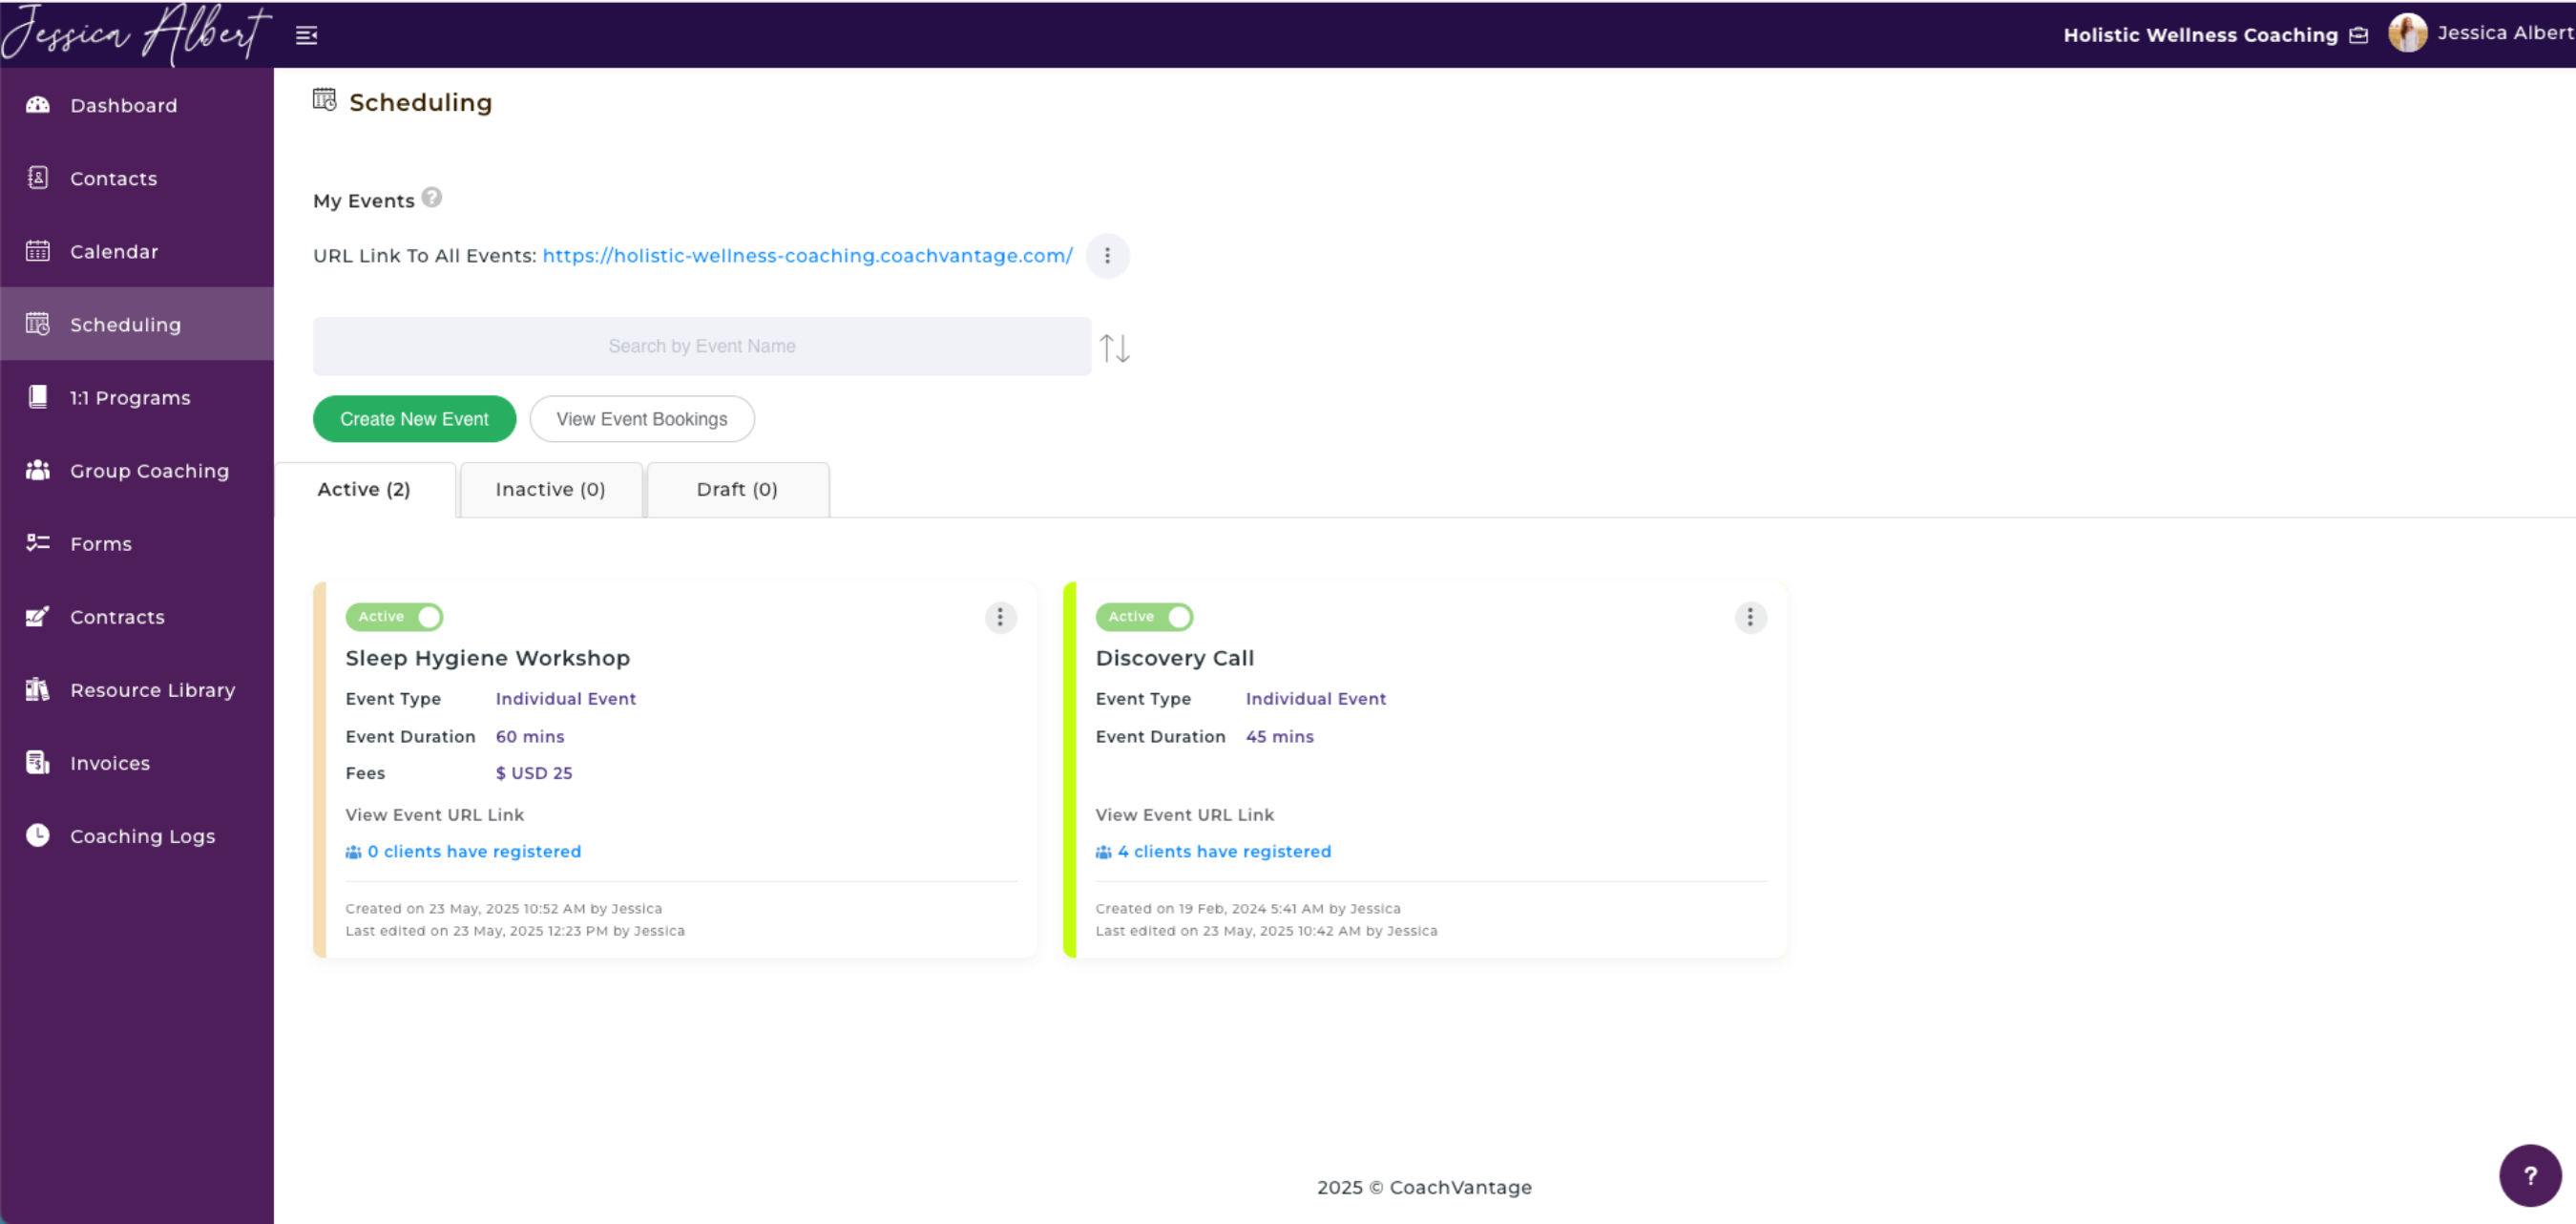
1. Your URL Link to All Events 🔗
The URL Link to All Events (see image above) is a webpage that lists all of your events that you make available for clients to book appointments for. Clients / prospects can select the events that they would like to book online.
The image below is an example of the All Events webpage:
Note: If you have set an event to be a Private Event in the event settings page, it will not be displayed on the All Events webpage. This is because you have set it to be a private event and therefore it will not be shown to the general public for bookings.
The image below is an example of what the All Events page looks like to clients:

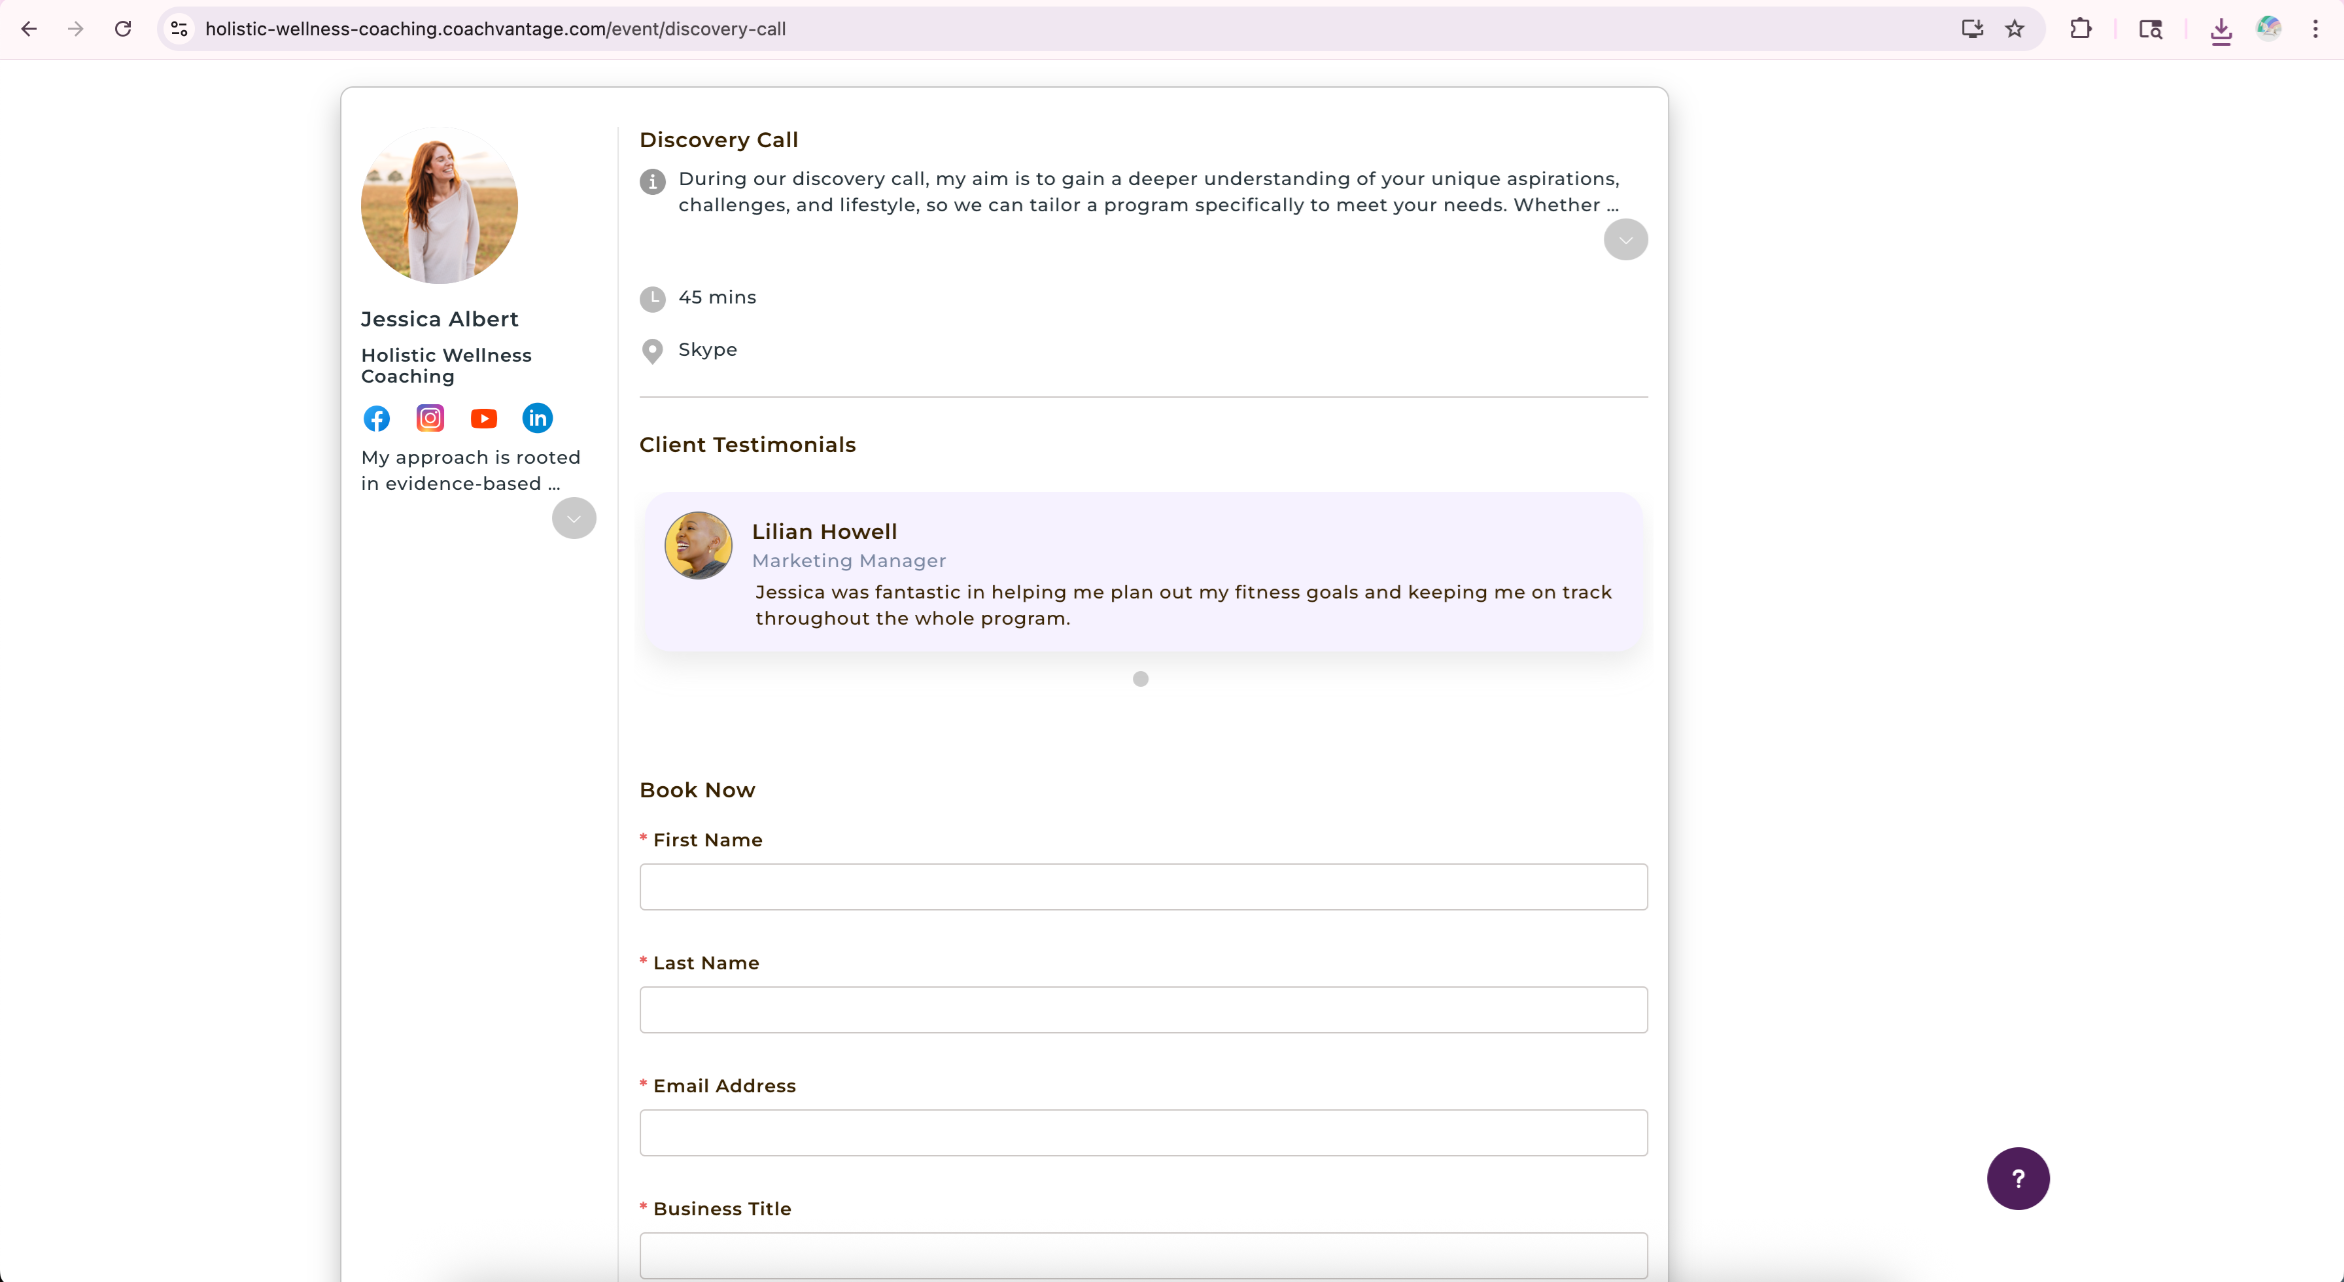
When clients click the Book Now button, they will be redirected to the booking page for that specific event.
Refer to the article What Does My Booking Page Look Like to Clients? for more details.
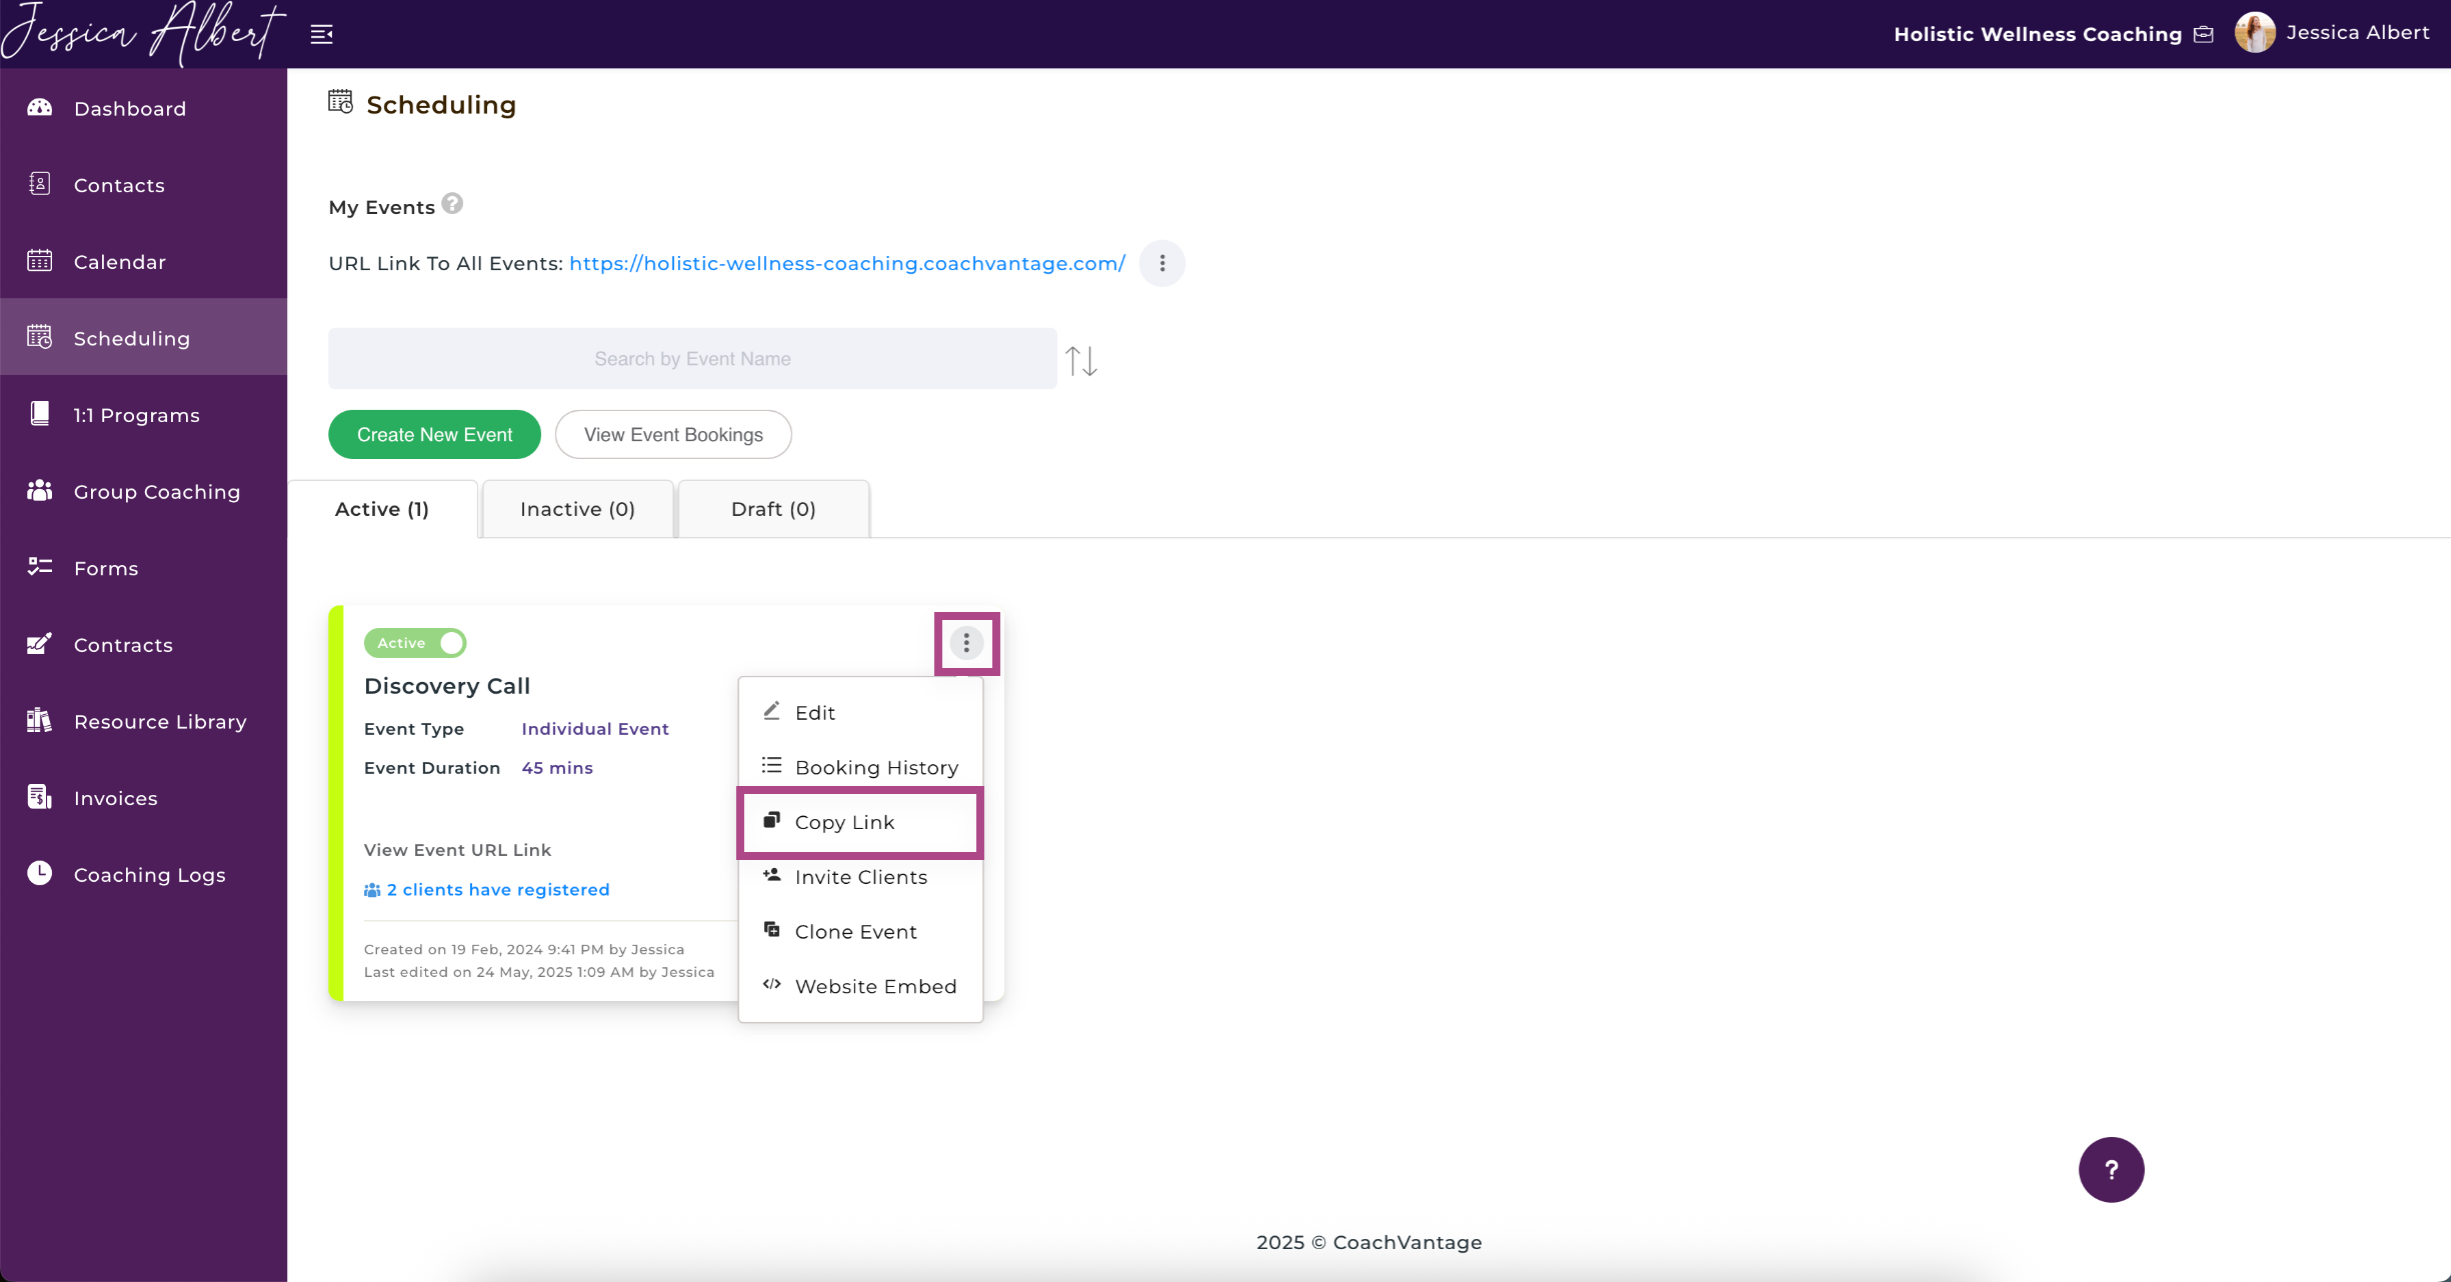
Clicking on the 3-dot button menu next to the URL link gives you the option to Copy Link or Website Embed, as shown below:
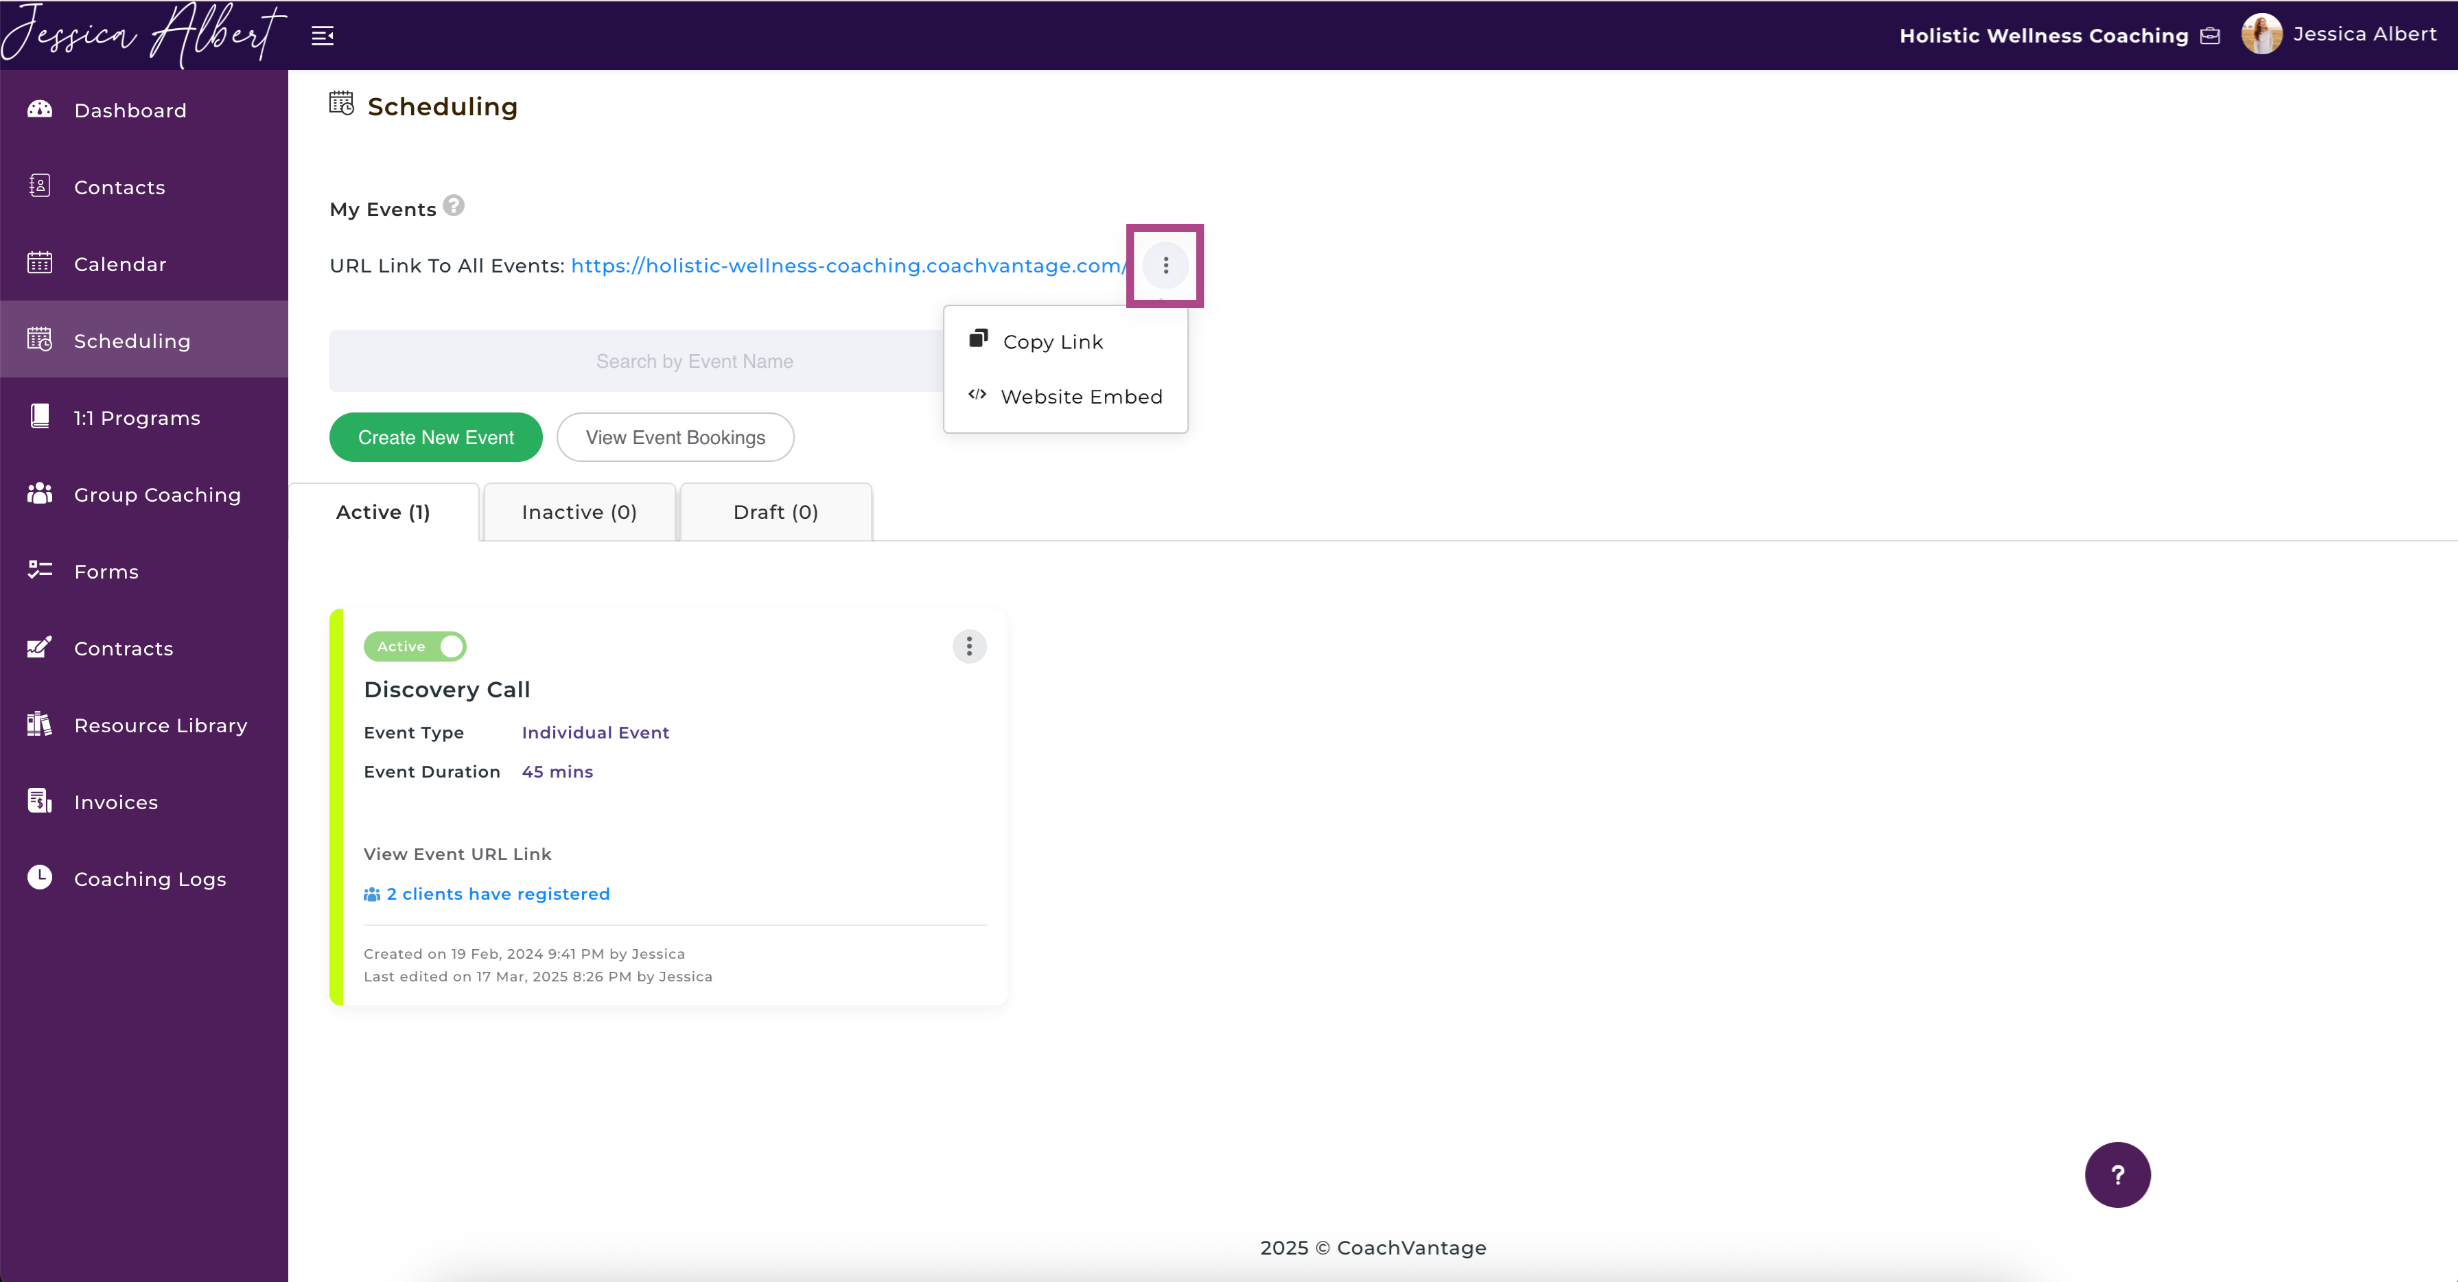
1. Copy Link
Select Copy Link to copy the URL link. You can then Paste the link where ever you like, such as in emails, on your social pages like LinkedIn, Facebook, etc. When people click on the URL, they will be redirected to your All Events webpage where they can select the specific event that they would like to book.
2. Website Embed
Select Website Embed if you would like to embed the All Events webpage to your website, or to insert a Book Now button on your website.
A window opens up for you to copy a snippet of code, as shown below. Click on Copy and then Paste the code snippet into your website builder to generate the Book Now button or to embed the booking page into your website.
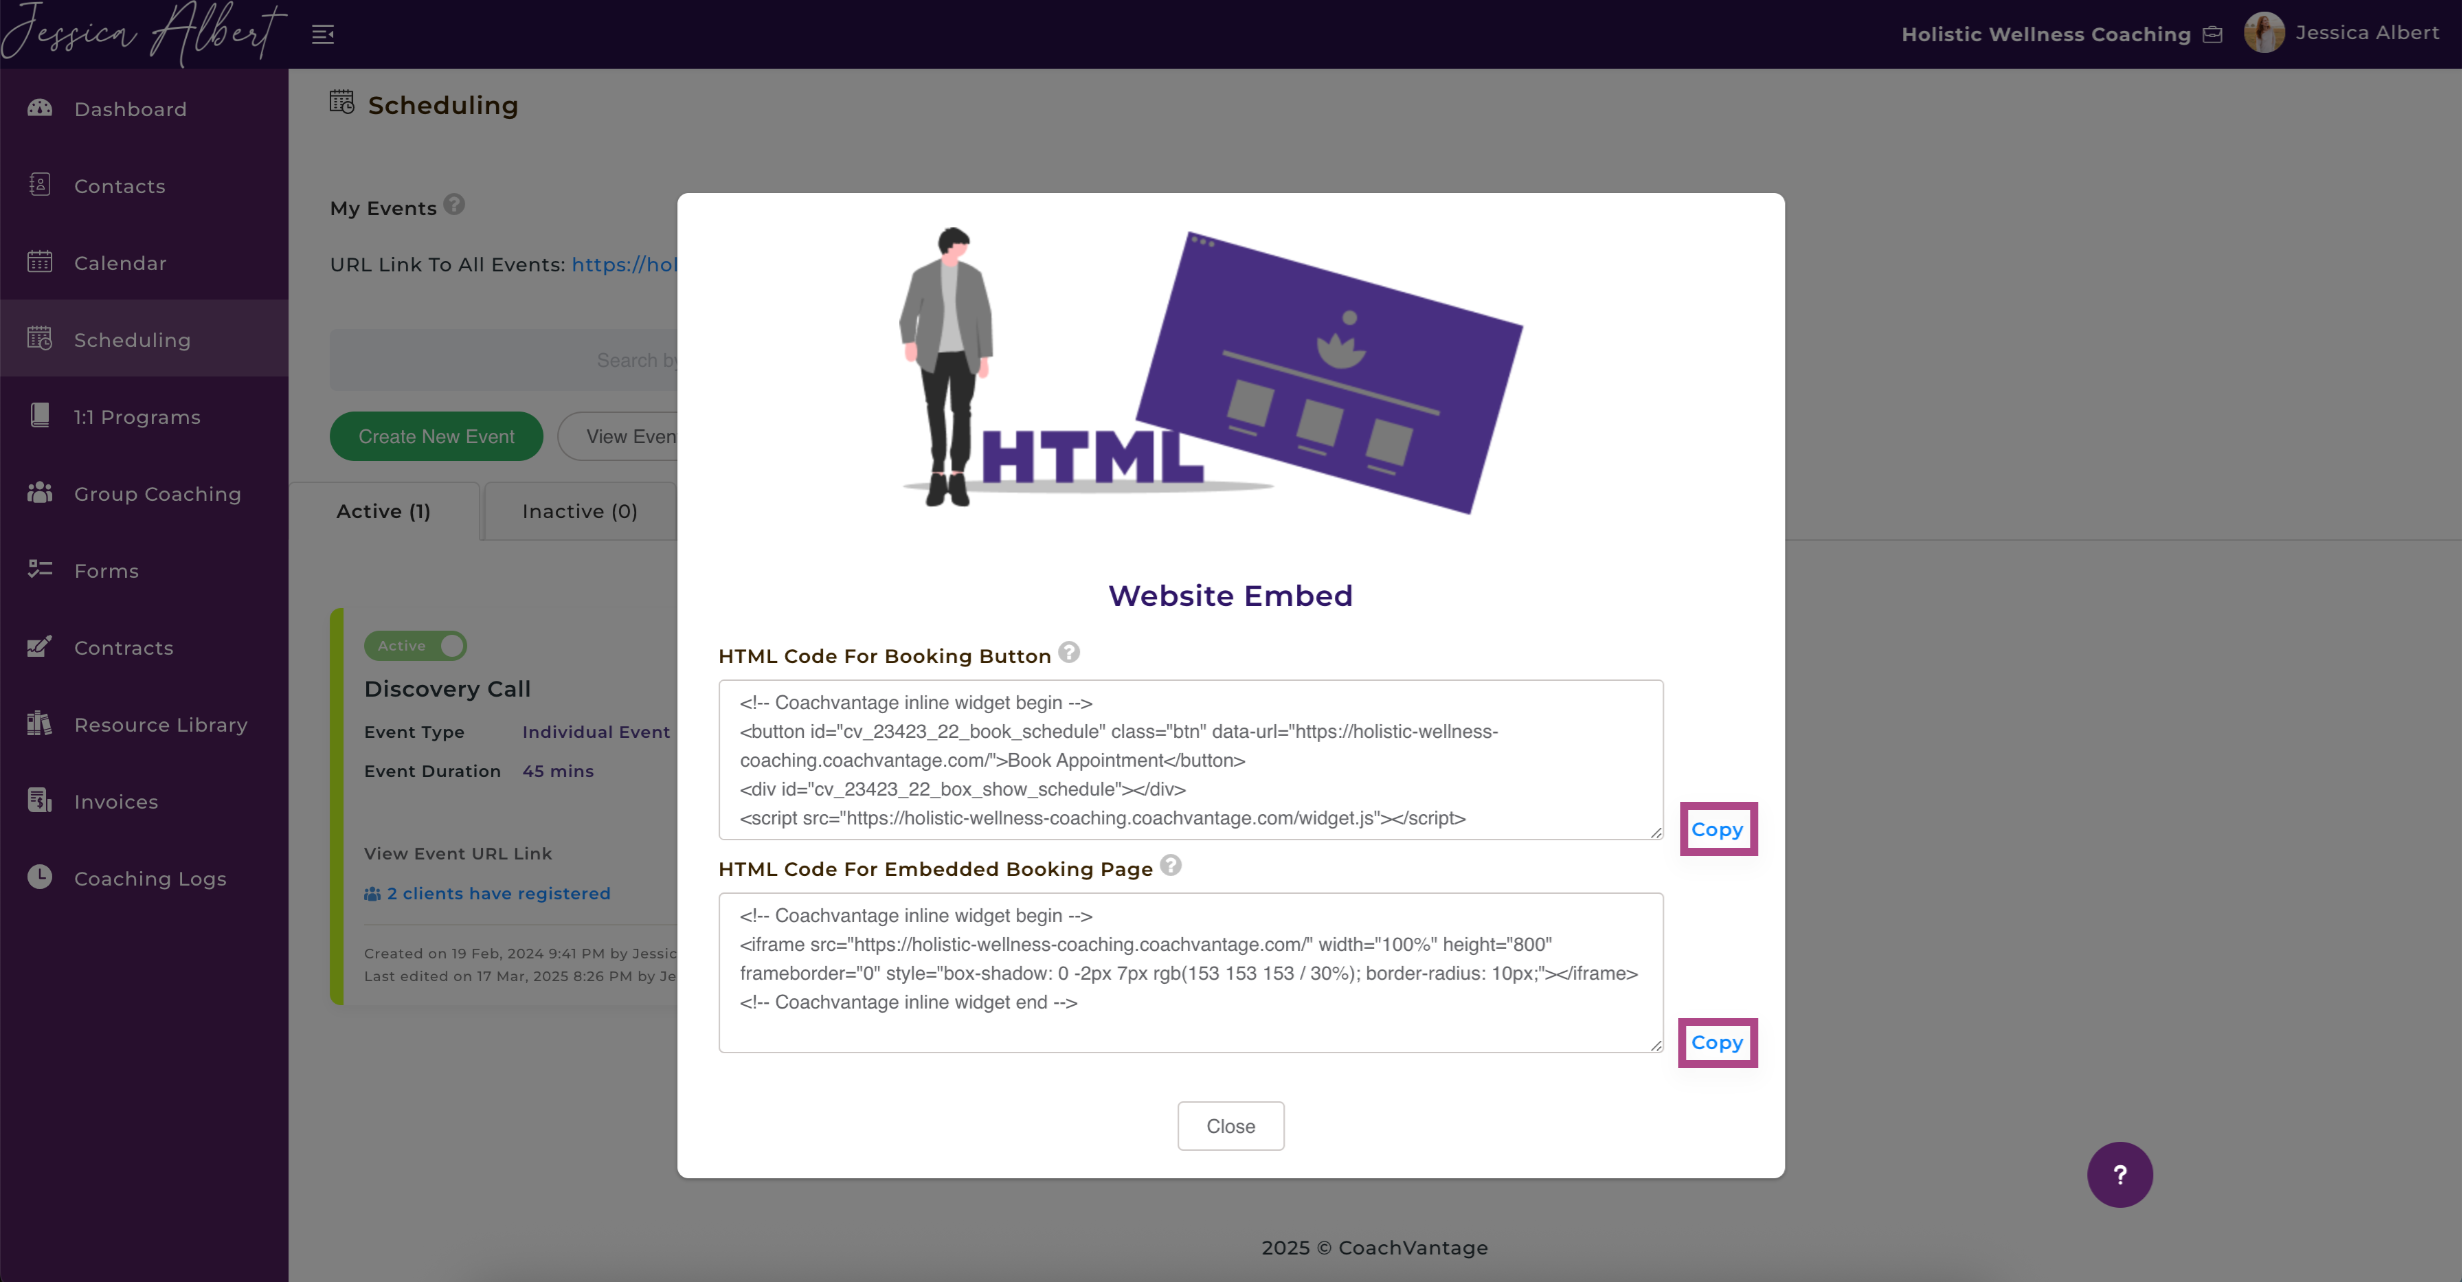
Read How to Embed your Booking Page to your Website article to learn how to embed this on your website.
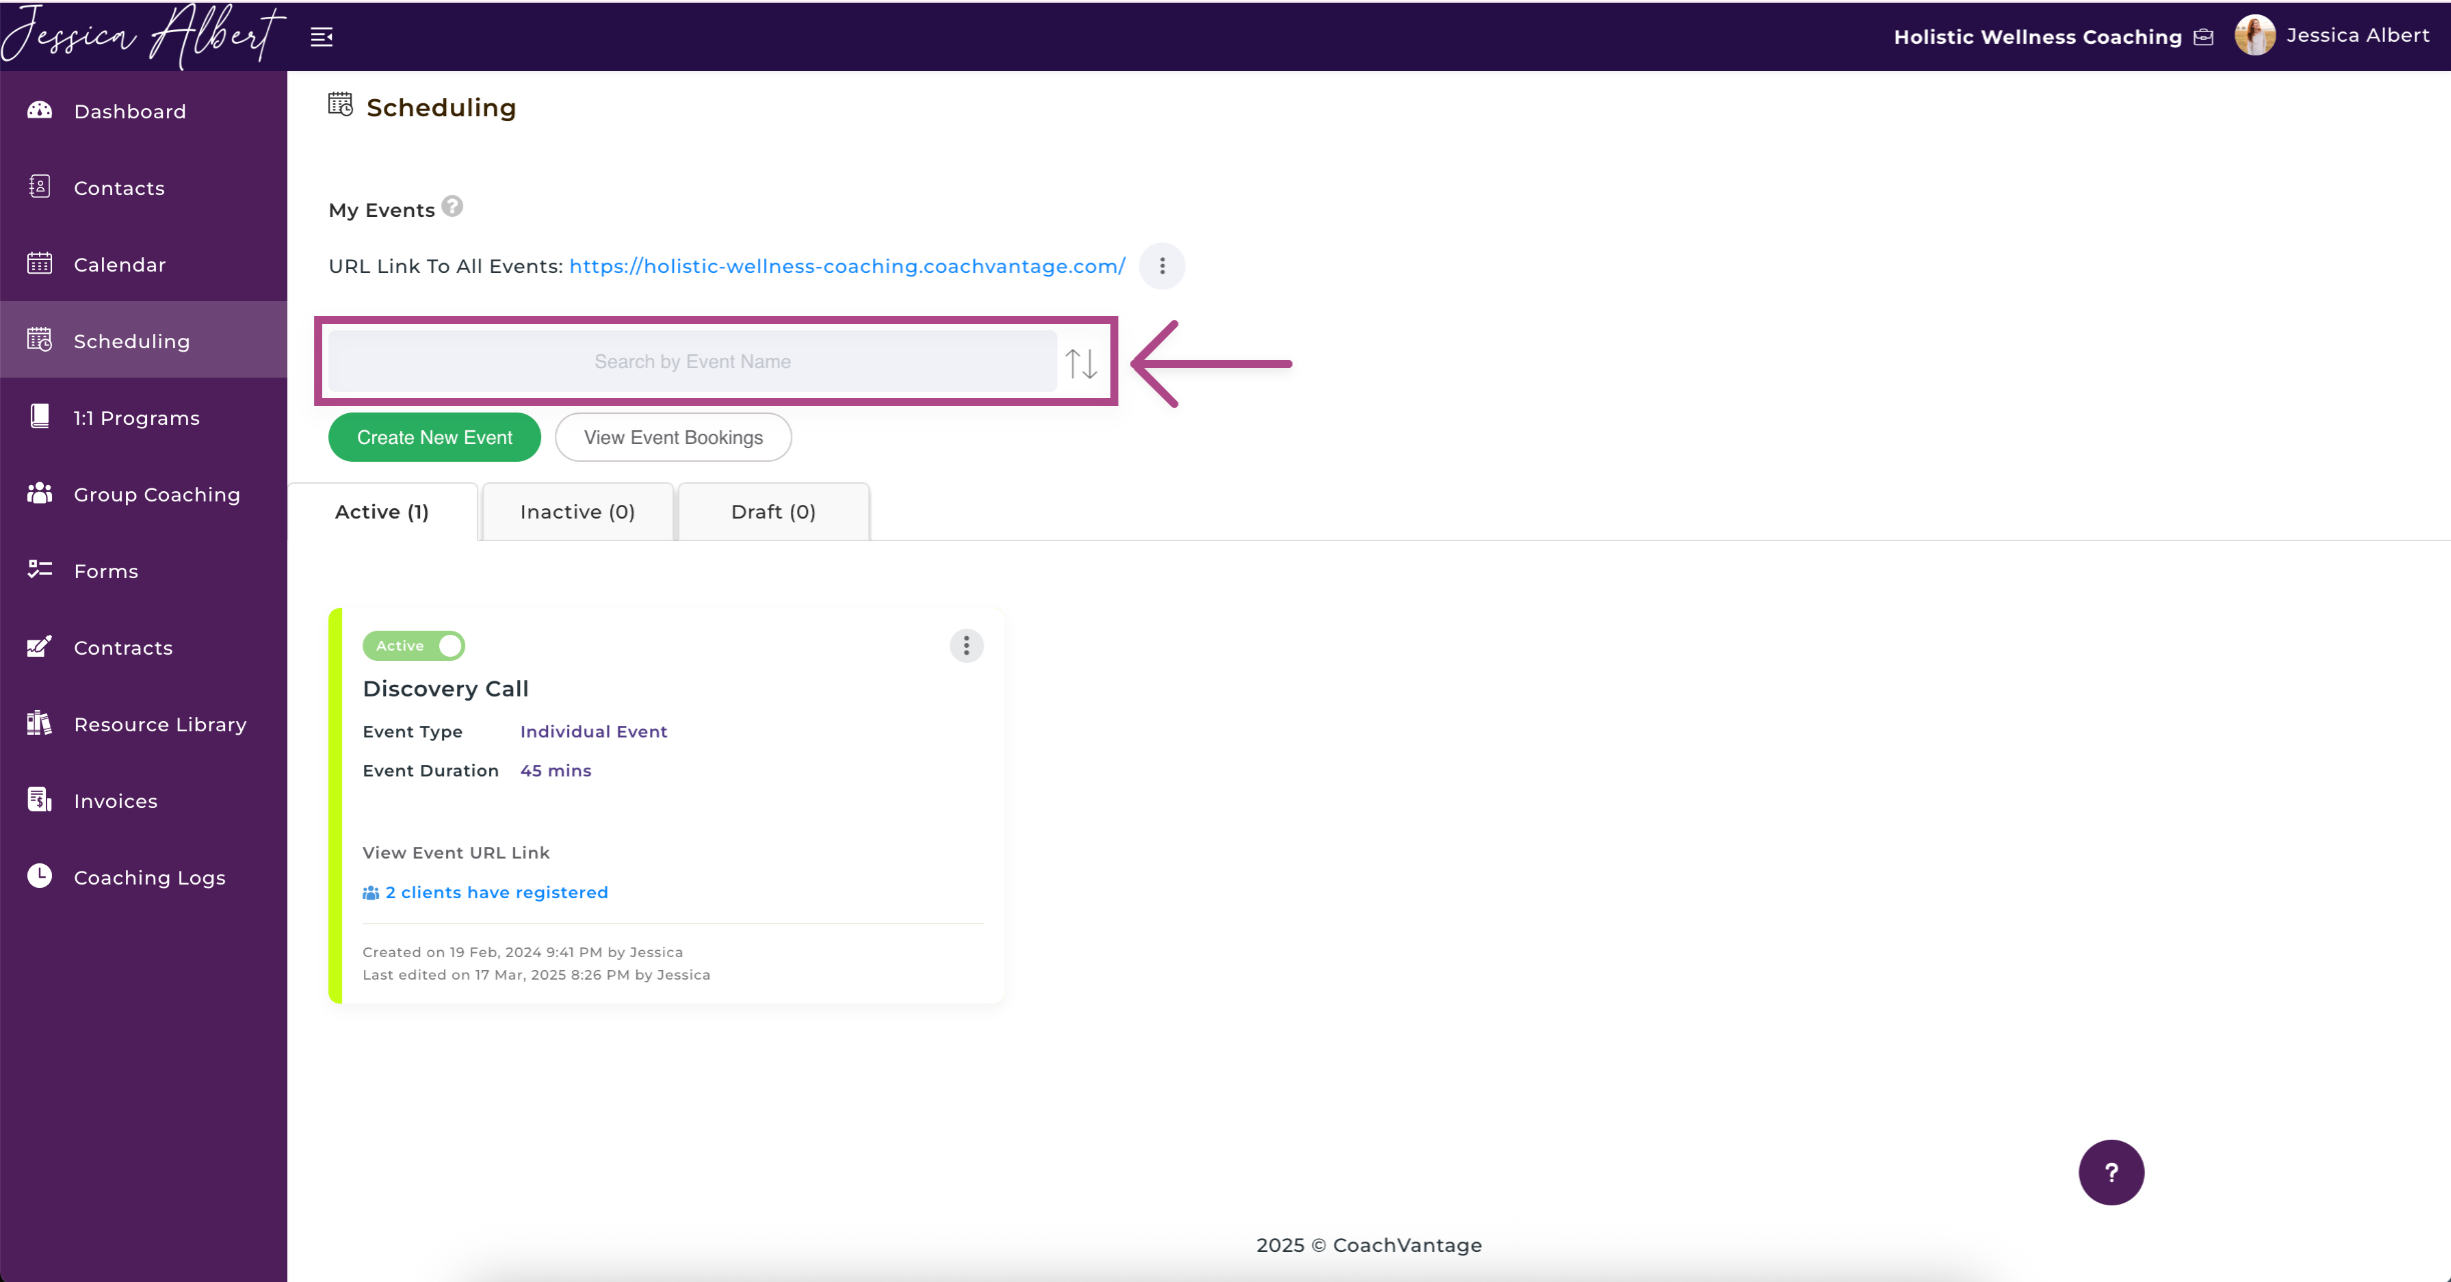
2. Search Bar and Sort Icon 🔎
Use the Search Bar and type in the name of the event you're looking for.
Alternatively, you can sort your events by alphabetical order or the recency of the event.
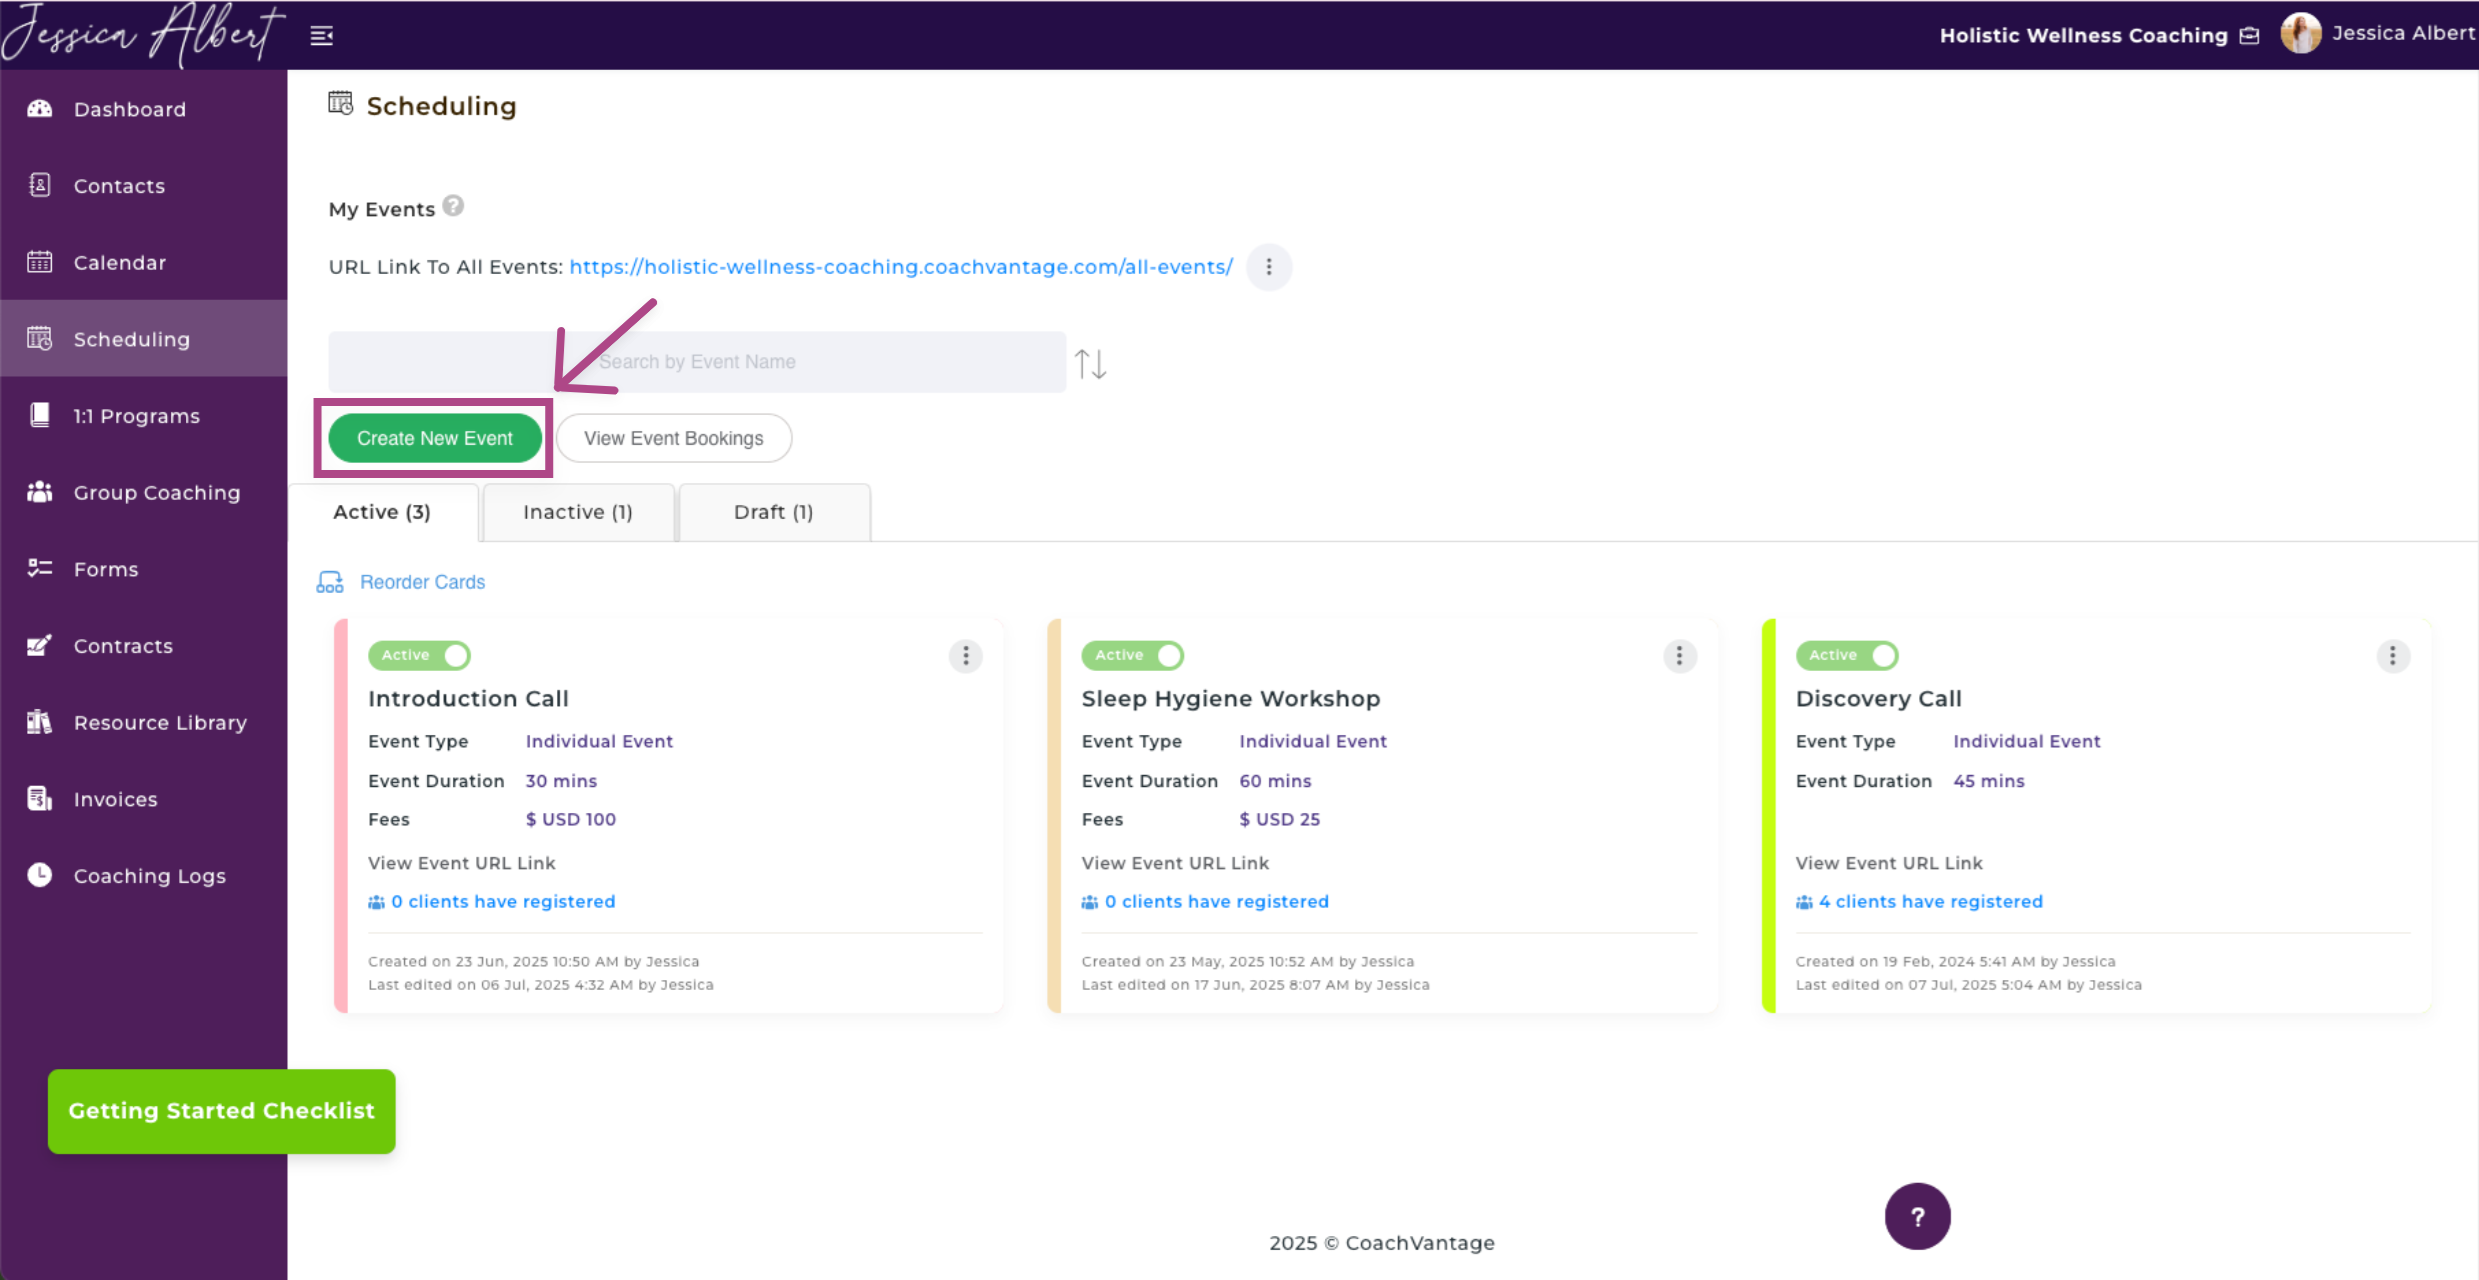
3. Create New Event
Click on the Create New Event button to create a new event.
Refer to the article How to Create an Event to learn how to create an event.
4. View Event Bookings 👀
Click on View Events Bookings button to view and manage client bookings for all of your events, in one place.
This page displays all Upcoming, Past, and Cancelled event bookings made by clients.
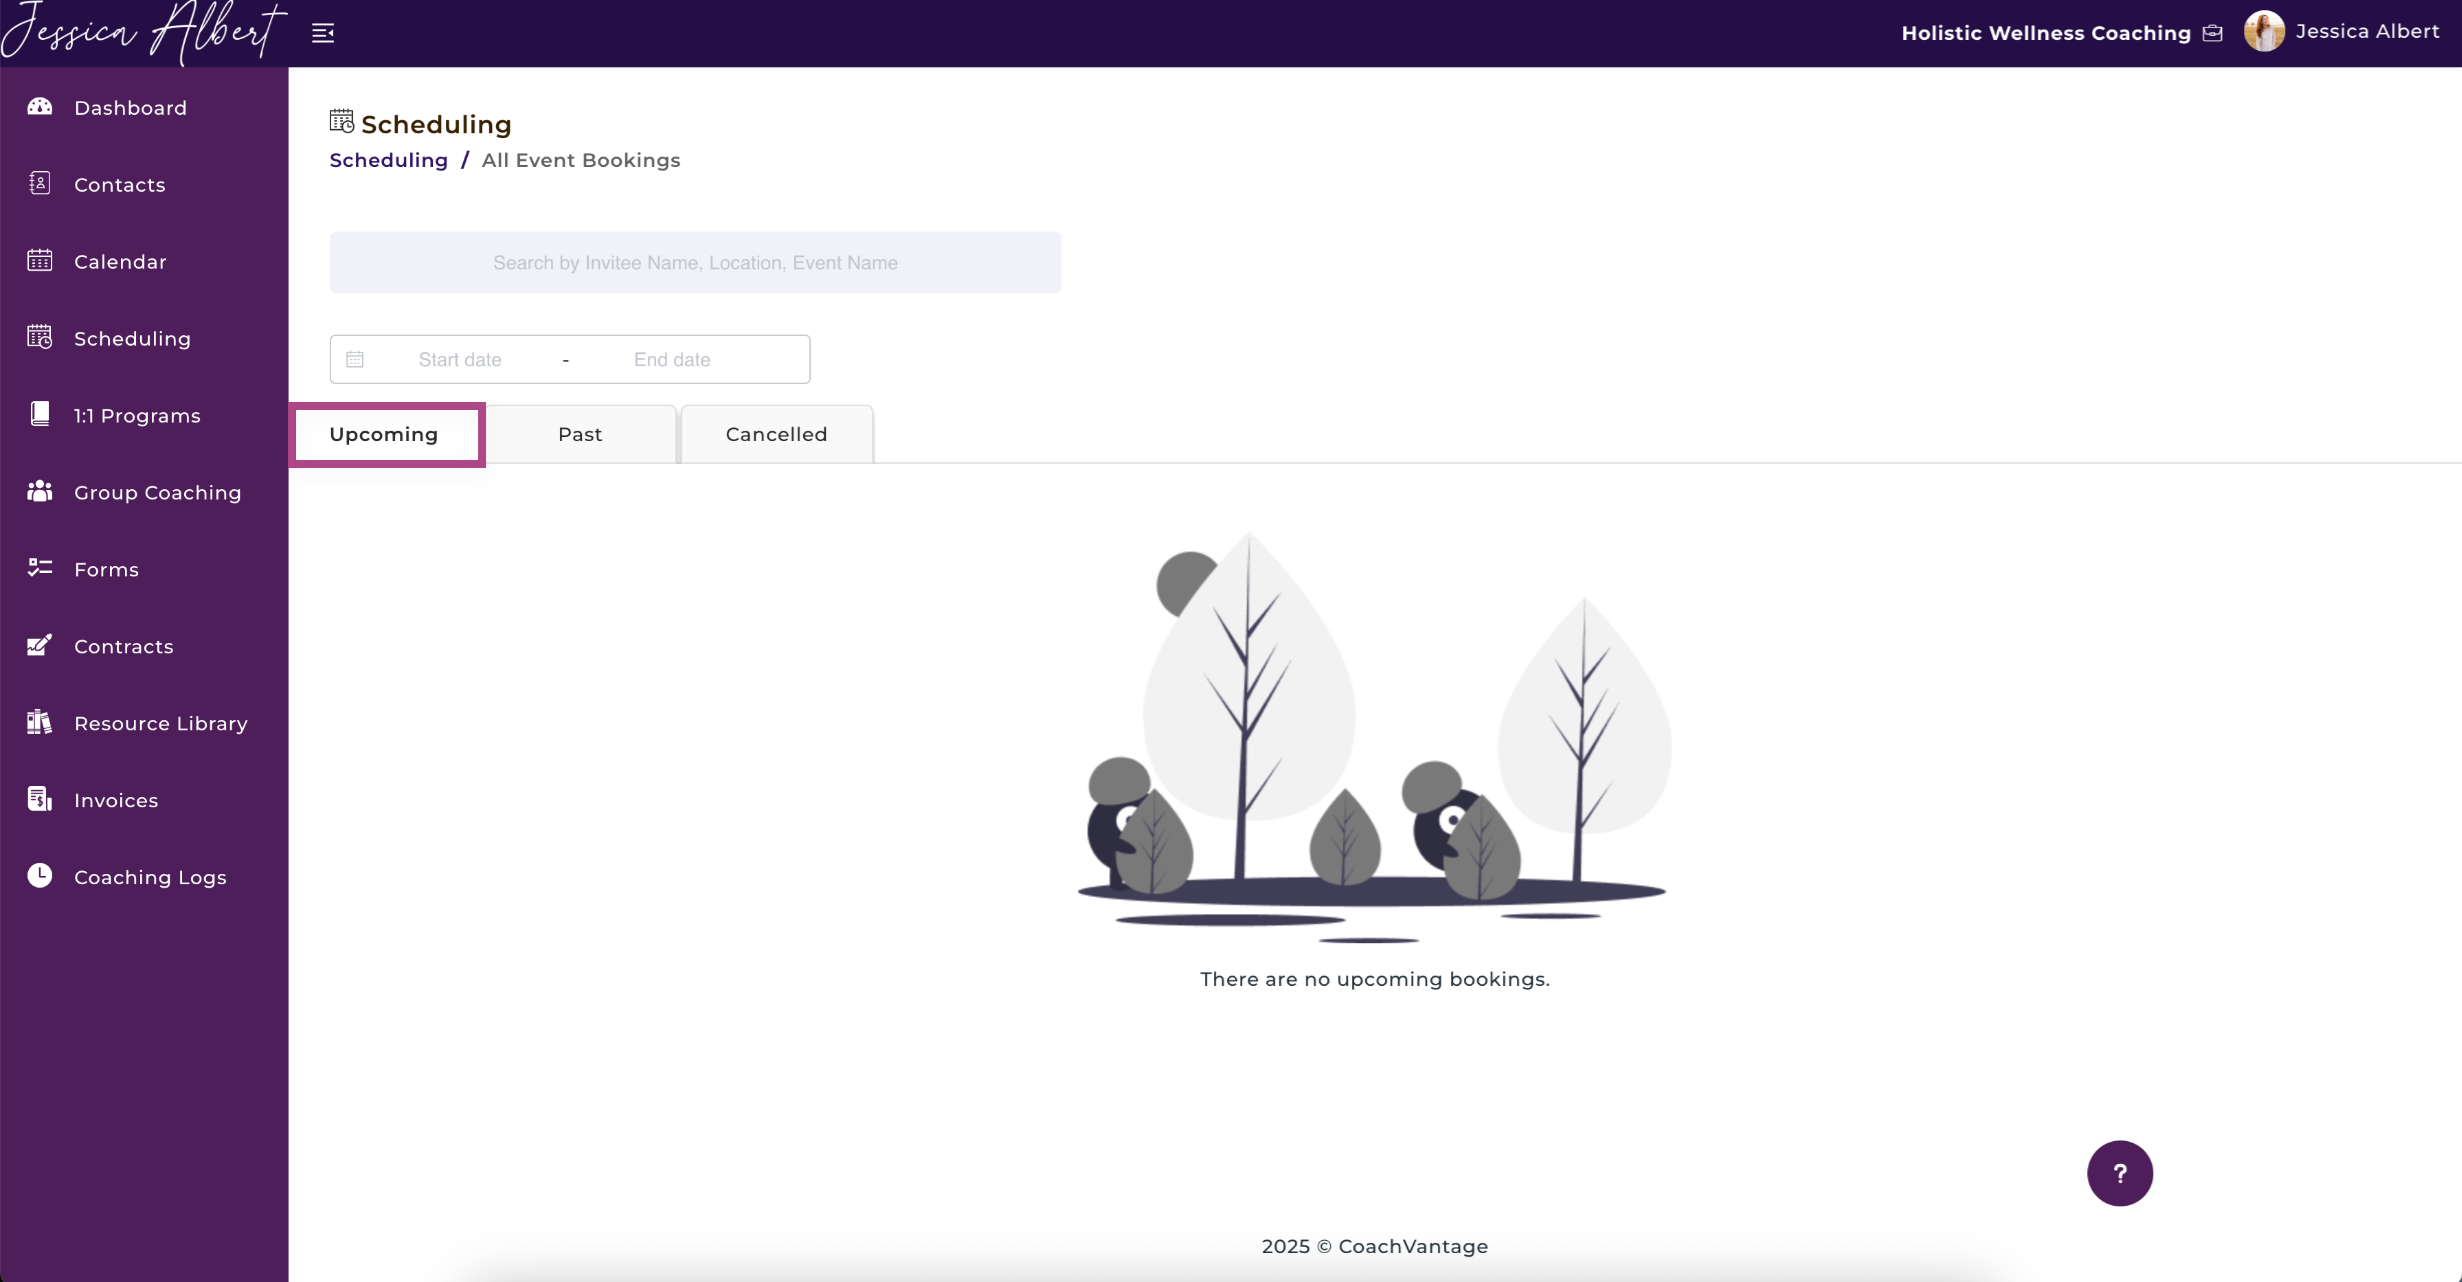
For more details on how to view and manage client bookings, refer to this article: View Events Bookings Page Overview.
5. Event Status Tabs
There are 3 event status tabs - Active, Inactive and Draft.

Depending on the status of your event, the event cards will be displayed in the respective tabs.
IMPORTANT:
You cannot delete Active or Inactive events. You can only toggle between making an event Active or Inactive. You can only delete a Draft event.
To disable an event if it is no longer relevant, you can use the Active/Inactive toggle button to make the event Inactive. When you make an event Inactive, the booking page for that event will be disabled and no bookings can be made.
If you would like to enable the event again to accept bookings, simply click on the Active/Inactive toggle button again to make it Active.
Note: If you are on the CoachVantage Clarity Plan, you can have a maximum of 2 active events. If you would like to have more than 2 active events, you will need to upgrade to the Aha! Plan, which allows unlimited active events.
The table below is a summary of each status:
Active Event
| Inactive Event
| Draft Event
| |
| Booking Page is 'Live'? (i.e. bookings can be made by clients) | yes | no | no |
| Can Delete Event? | no | no | yes |
| Can Edit Event Settings? | yes | yes | yes |
6. Event Cards
Once an event has been created and saved, an Event Card will be displayed on the Scheduling page.
On the event card, the following details are displayed:
1. Active Radio Button
Click on the Active Radio Button to make an event inactive. An Inactive Event would no longer allow new appointment bookings.
Note: All prior bookings that were made by clients before the event was made inactive will not be affected.
2. Event Name
Title of the event would be displayed here.
3. Event Type
The event type is displayed, indicating if it is an Individual Event (i.e. a single attendee only can book a slot), or a Group Event (i.e. multiple attendees can book a slot).
(Currently, only 'Individual Events' is supported. 'Group Events' is a future enhancement. Stay tuned!)
4. Event Duration
The duration of the event / meeting is displayed here.
5. Fees
If you are charging for your event, the fee amount is displayed here. The field is blank if you have not set up fees for the event.
6. View Event URL Link
- Click on the View Event URL to be redirected to the booking page, or
- Hover over and select Copy Link to copy the URL link of the booking page
7. Number of Clients Registered
The total number of clients that have registered for this event is displayed here.
8. 3-dot button menu
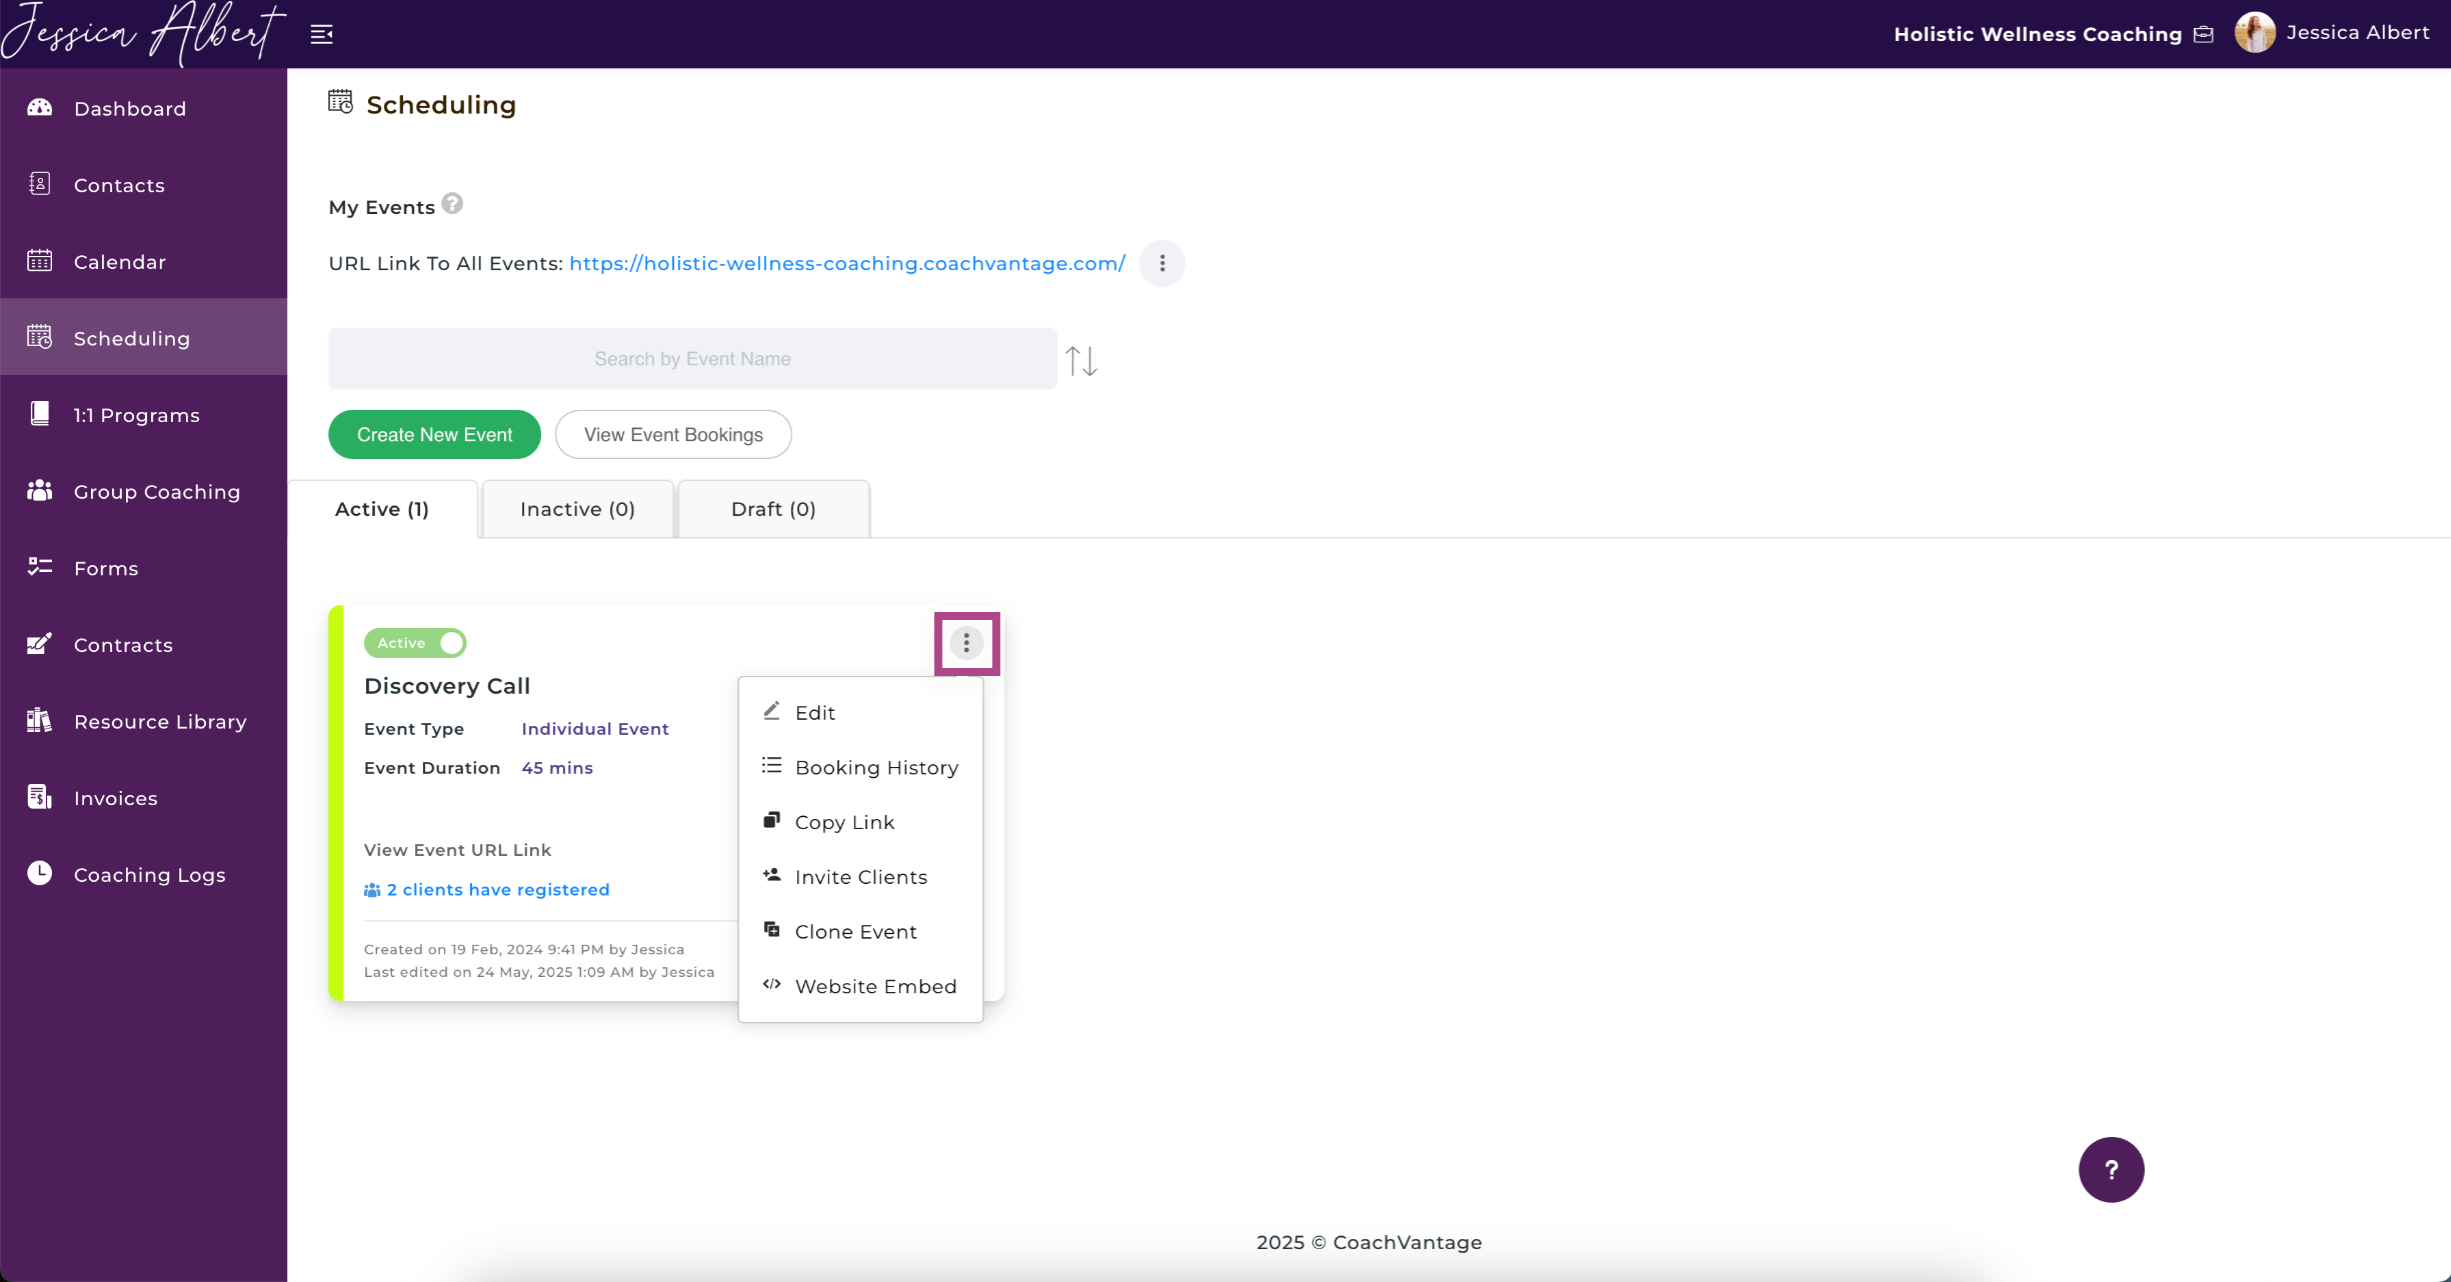
You can manage your event by clicking on the 3-dot button:
- Edit the event
- View the booking history of this specific event
- Copy the link of this event's booking page
- Clone this event
- Embed the booking page of this event on your personal website
9. Color Coding
Your Event Cards are color-coded according to the color you've chosen when creating the event. The color code is a visual cue on your Calendar for calendar entries associated with this event's bookings.
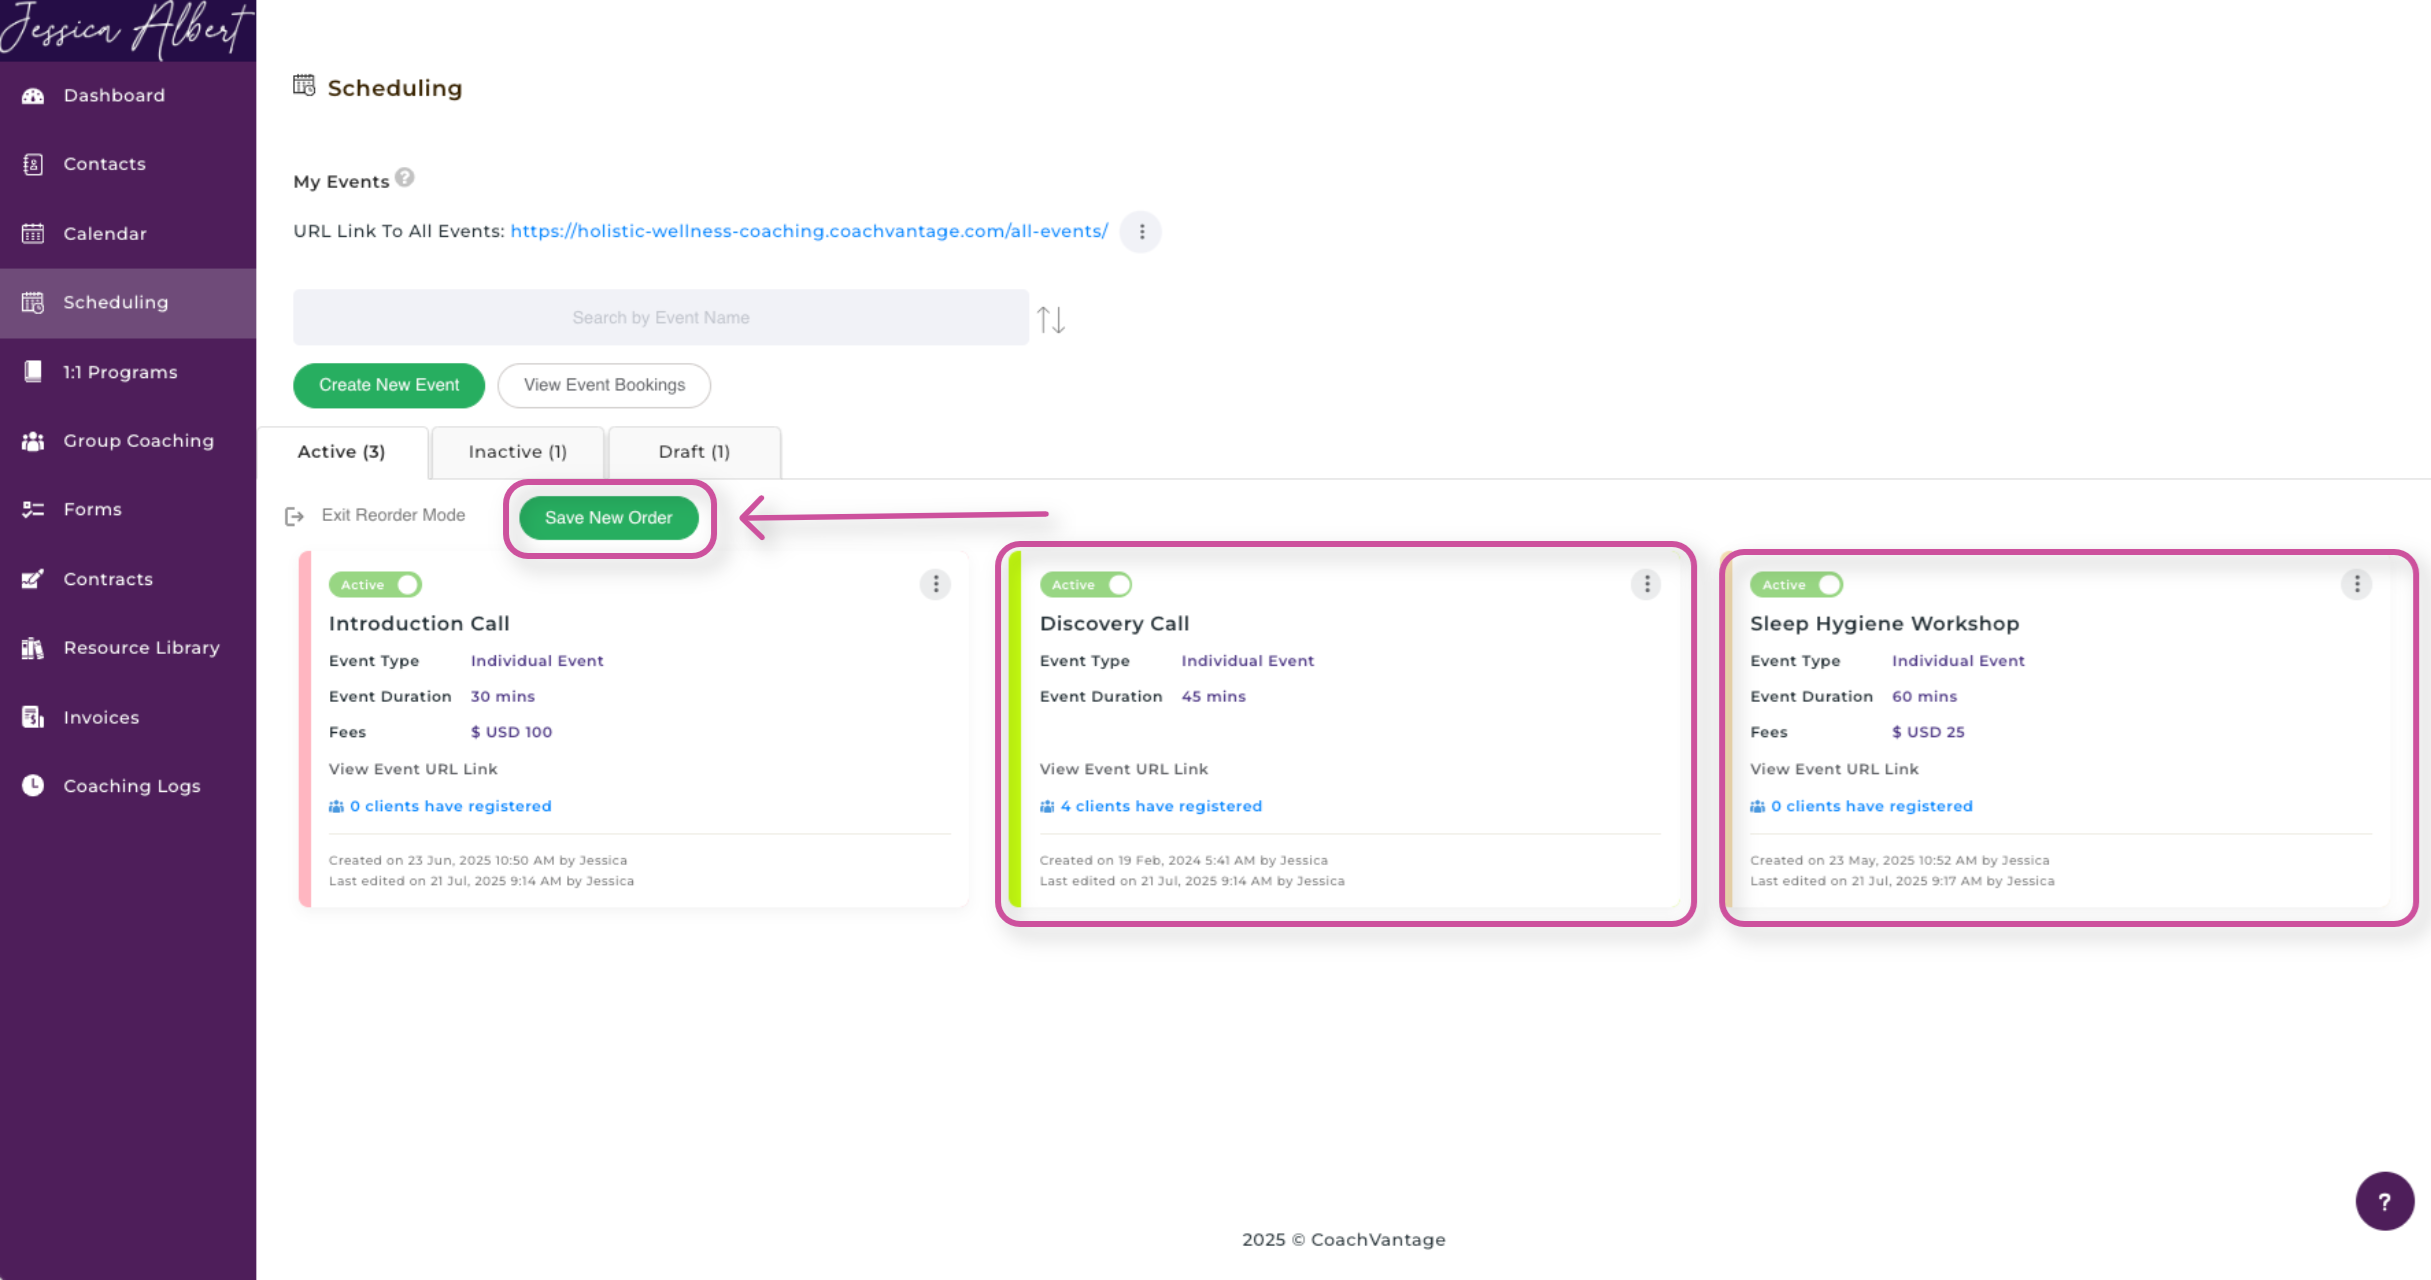
10. Reorder Cards
To reorder the program cards to an orientation of your choosing, simple click the Reorder Cards button shown below.
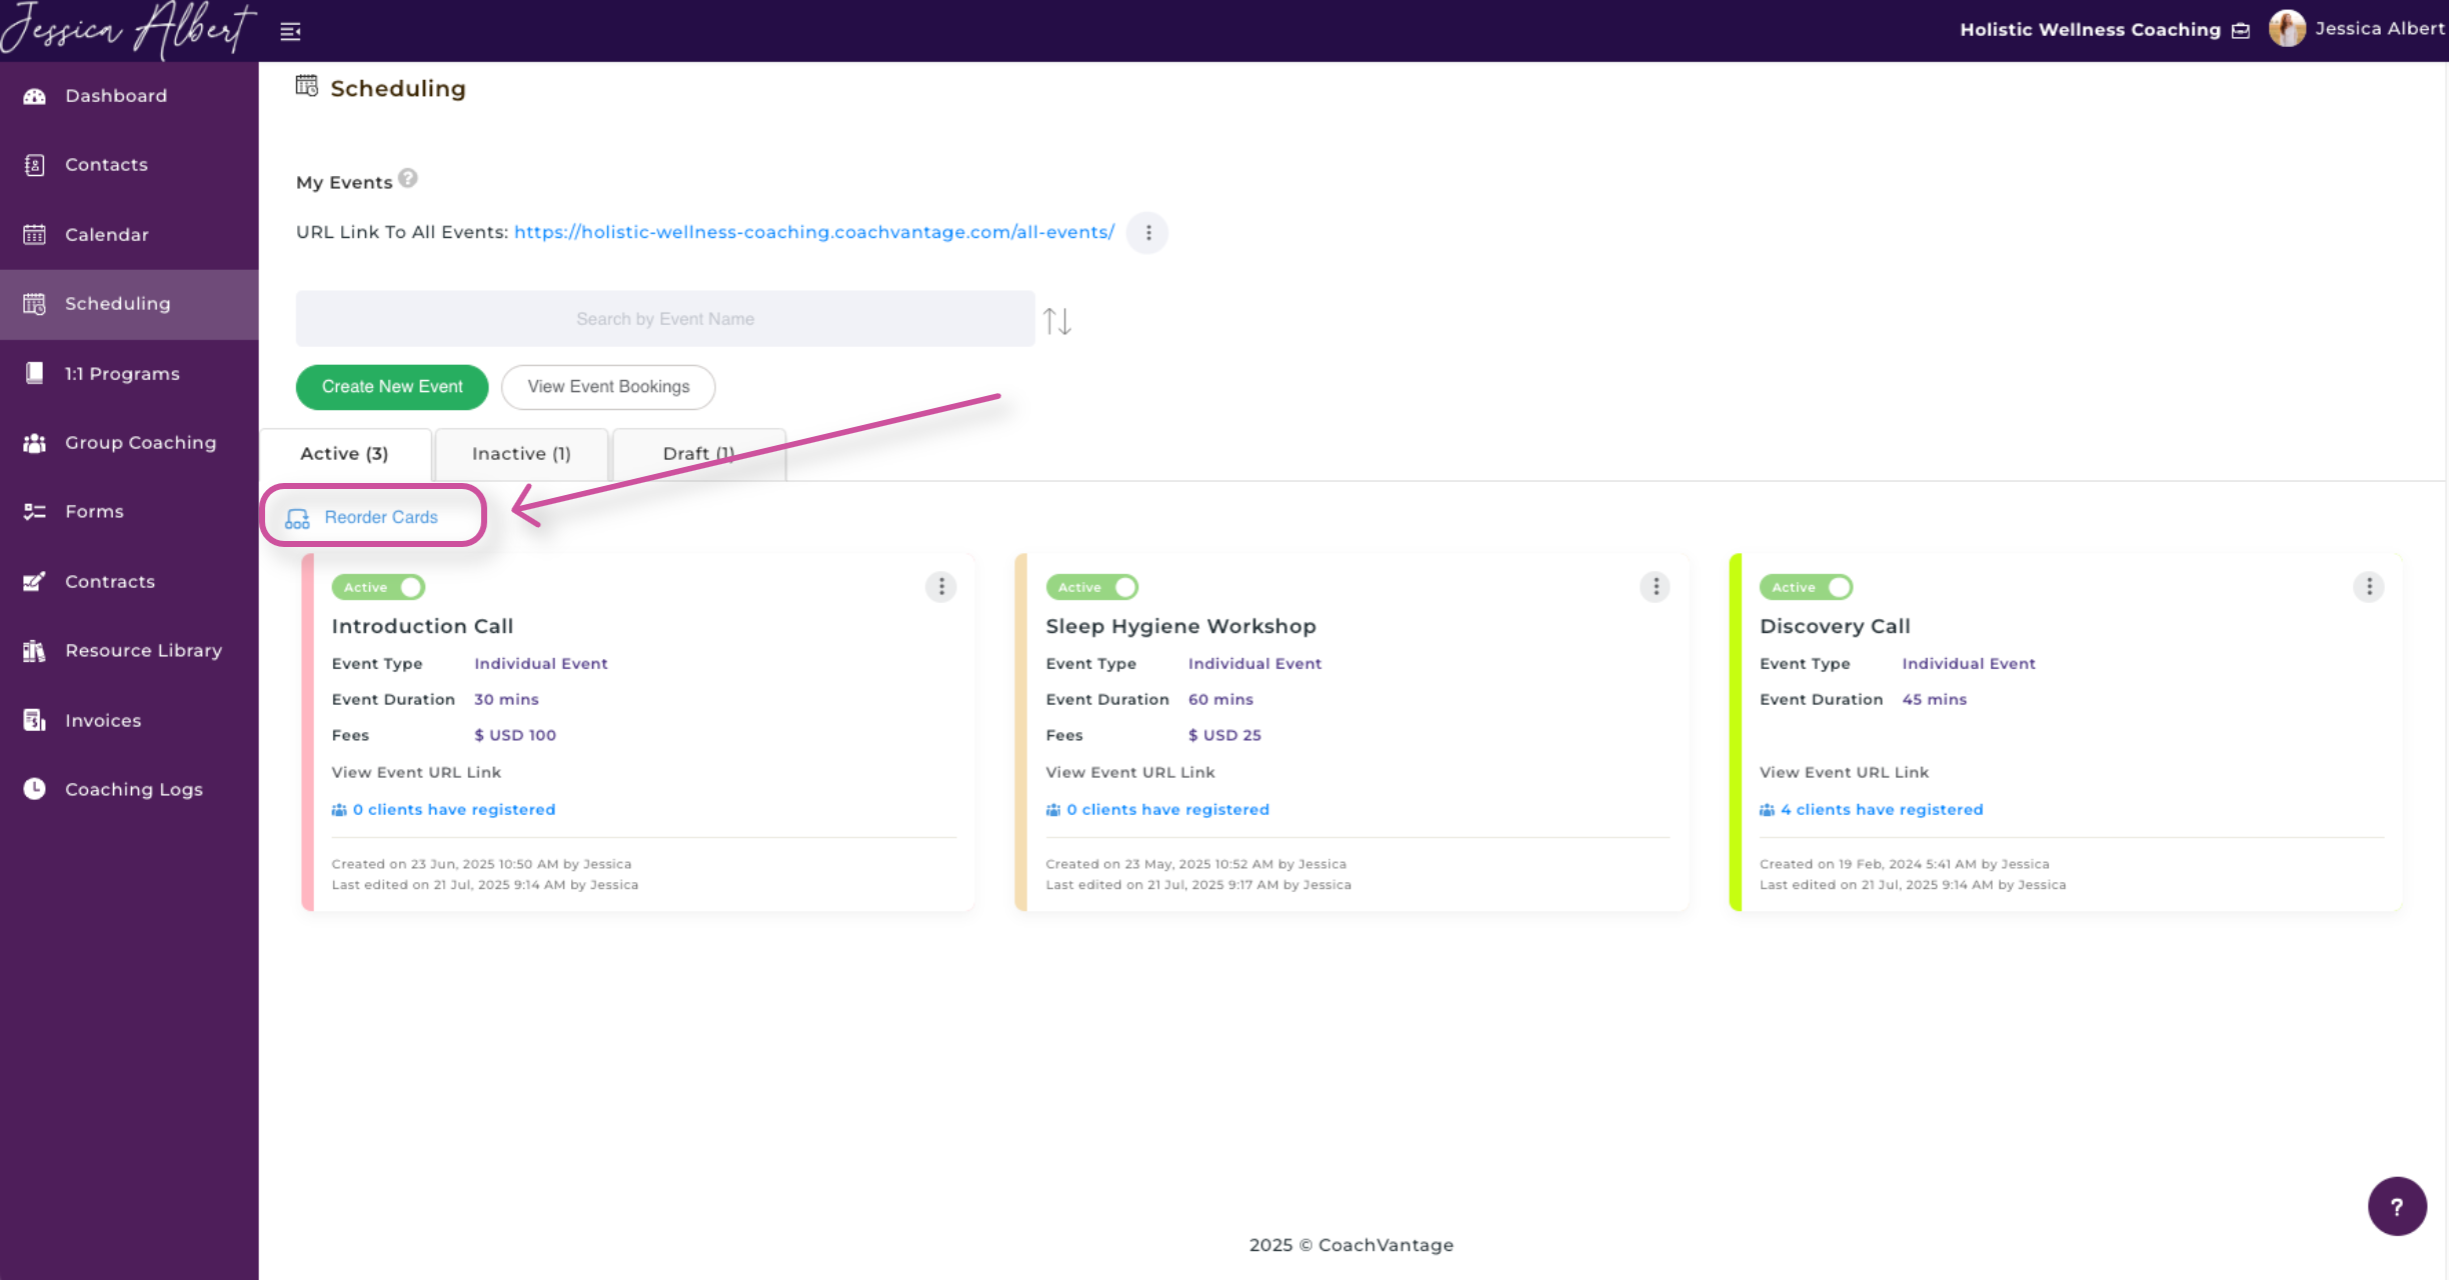
Then, hover over and select a Program Card and drag and drop it to where you would like for it to be.
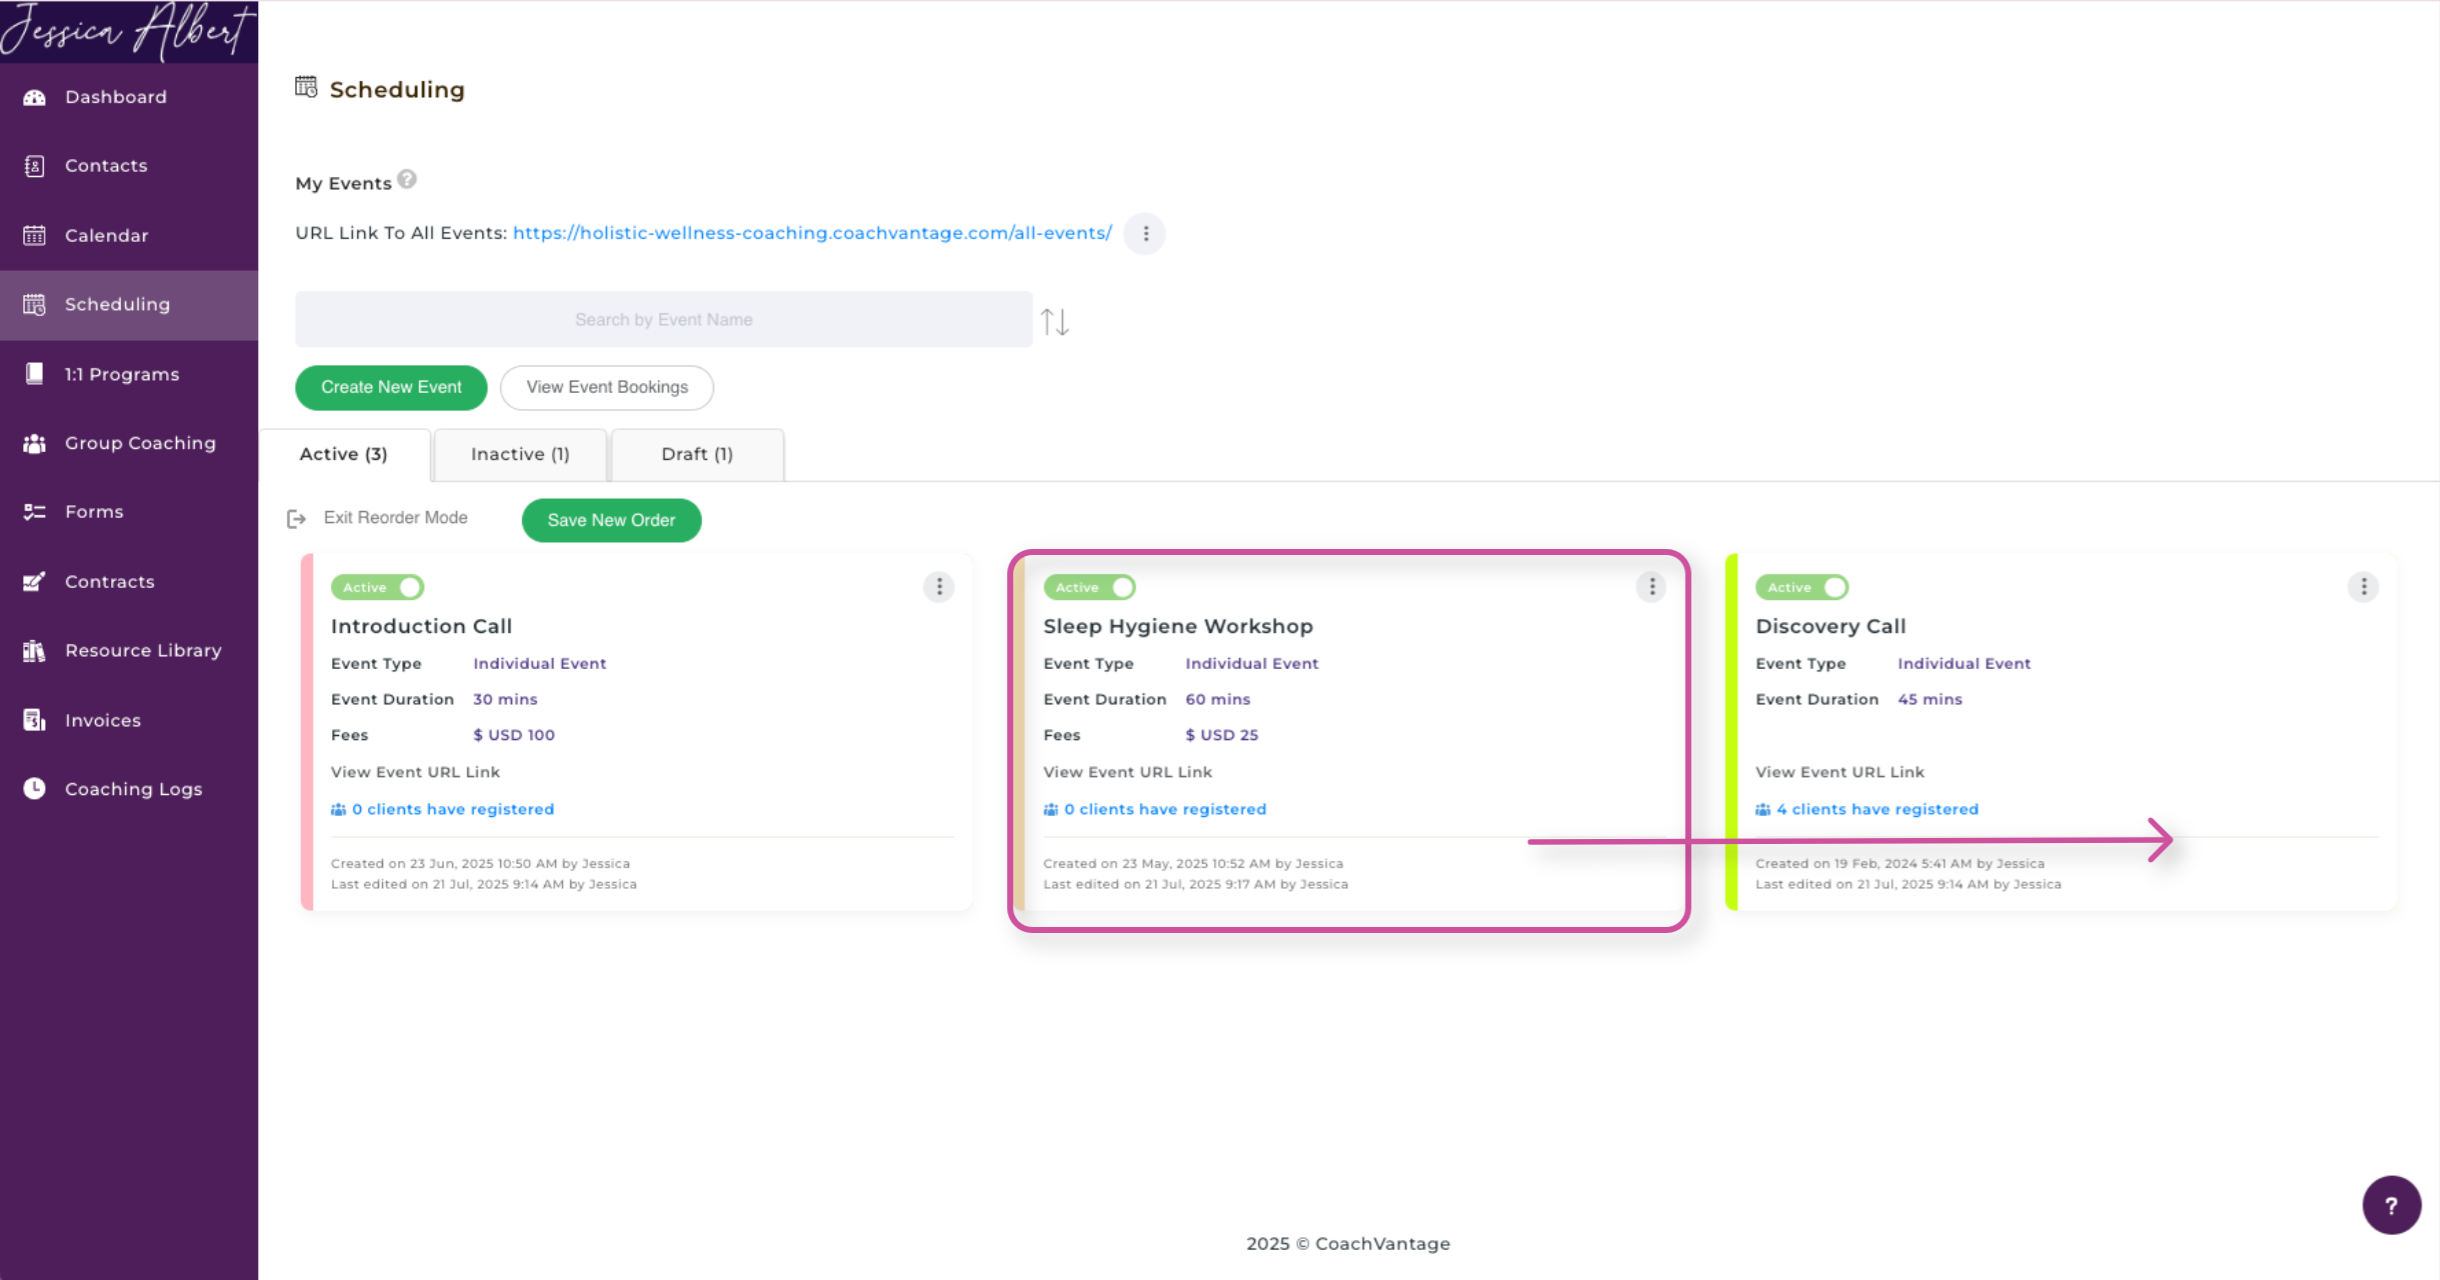
Select Save New Order when you've ordered the Program Card to your desired order.