How to Create Automations for Your Coaching Programs
Overview
When you create a coaching program, you can configure Automation Rules to automate the delivery of coaching resources (files), notes, goals, assignments and forms to all clients who enroll in the program.
You can automate content delivery to clients immediately upon their enrollment, or before or after coaching sessions. Once you have set up Automation Rules, CoachVantage will automatically trigger the release of your content to every client who signs up for the program in accordance with the your configured rules.
Example:
Let's consider an example of Coach Jane who wants to automate the delivery of the following content to clients who enrol in her coaching program:
1. Deliver a PDF document, Terms of Coaching Engagement, to clients immediately upon their enrollment.
2. Deliver a Welcome Video to clients immediately upon enrollment into the program.
3. Two days before every coaching session, send a Pre-Session Check-In Form to clients so that as a Coach, I am prepared for the objectives of upcoming coaching sessions.
4. Immediately after every coaching session, send a Post-Session Evaluation Form to clients so that as a Coach, I receive valuable insights on the effectiveness of the session from my clients' point of view.
Automation Rules enables Coach Jane to automate the content delivery as described above for every client who enrols into her program so that she doesn't have to do it repetitively and manually. It's a huge time saver and you can be sure that CoachVantage will always remember to send out the documents and forms, even if Coach Jane forgets!
Tip: Whenever an automation rule is triggered, CoachVantage will automatically send an email notification to your clients so that they are aware and can log into the client portal.
Note: The Automation Rules feature in this article is for configuring automation rules at the program level. CoachVantage also supports automation rules at the individual client level. To learn more, refer to How to Configure Automations for Client To-Do's.
1. How to Create Automation Rules ⚡️
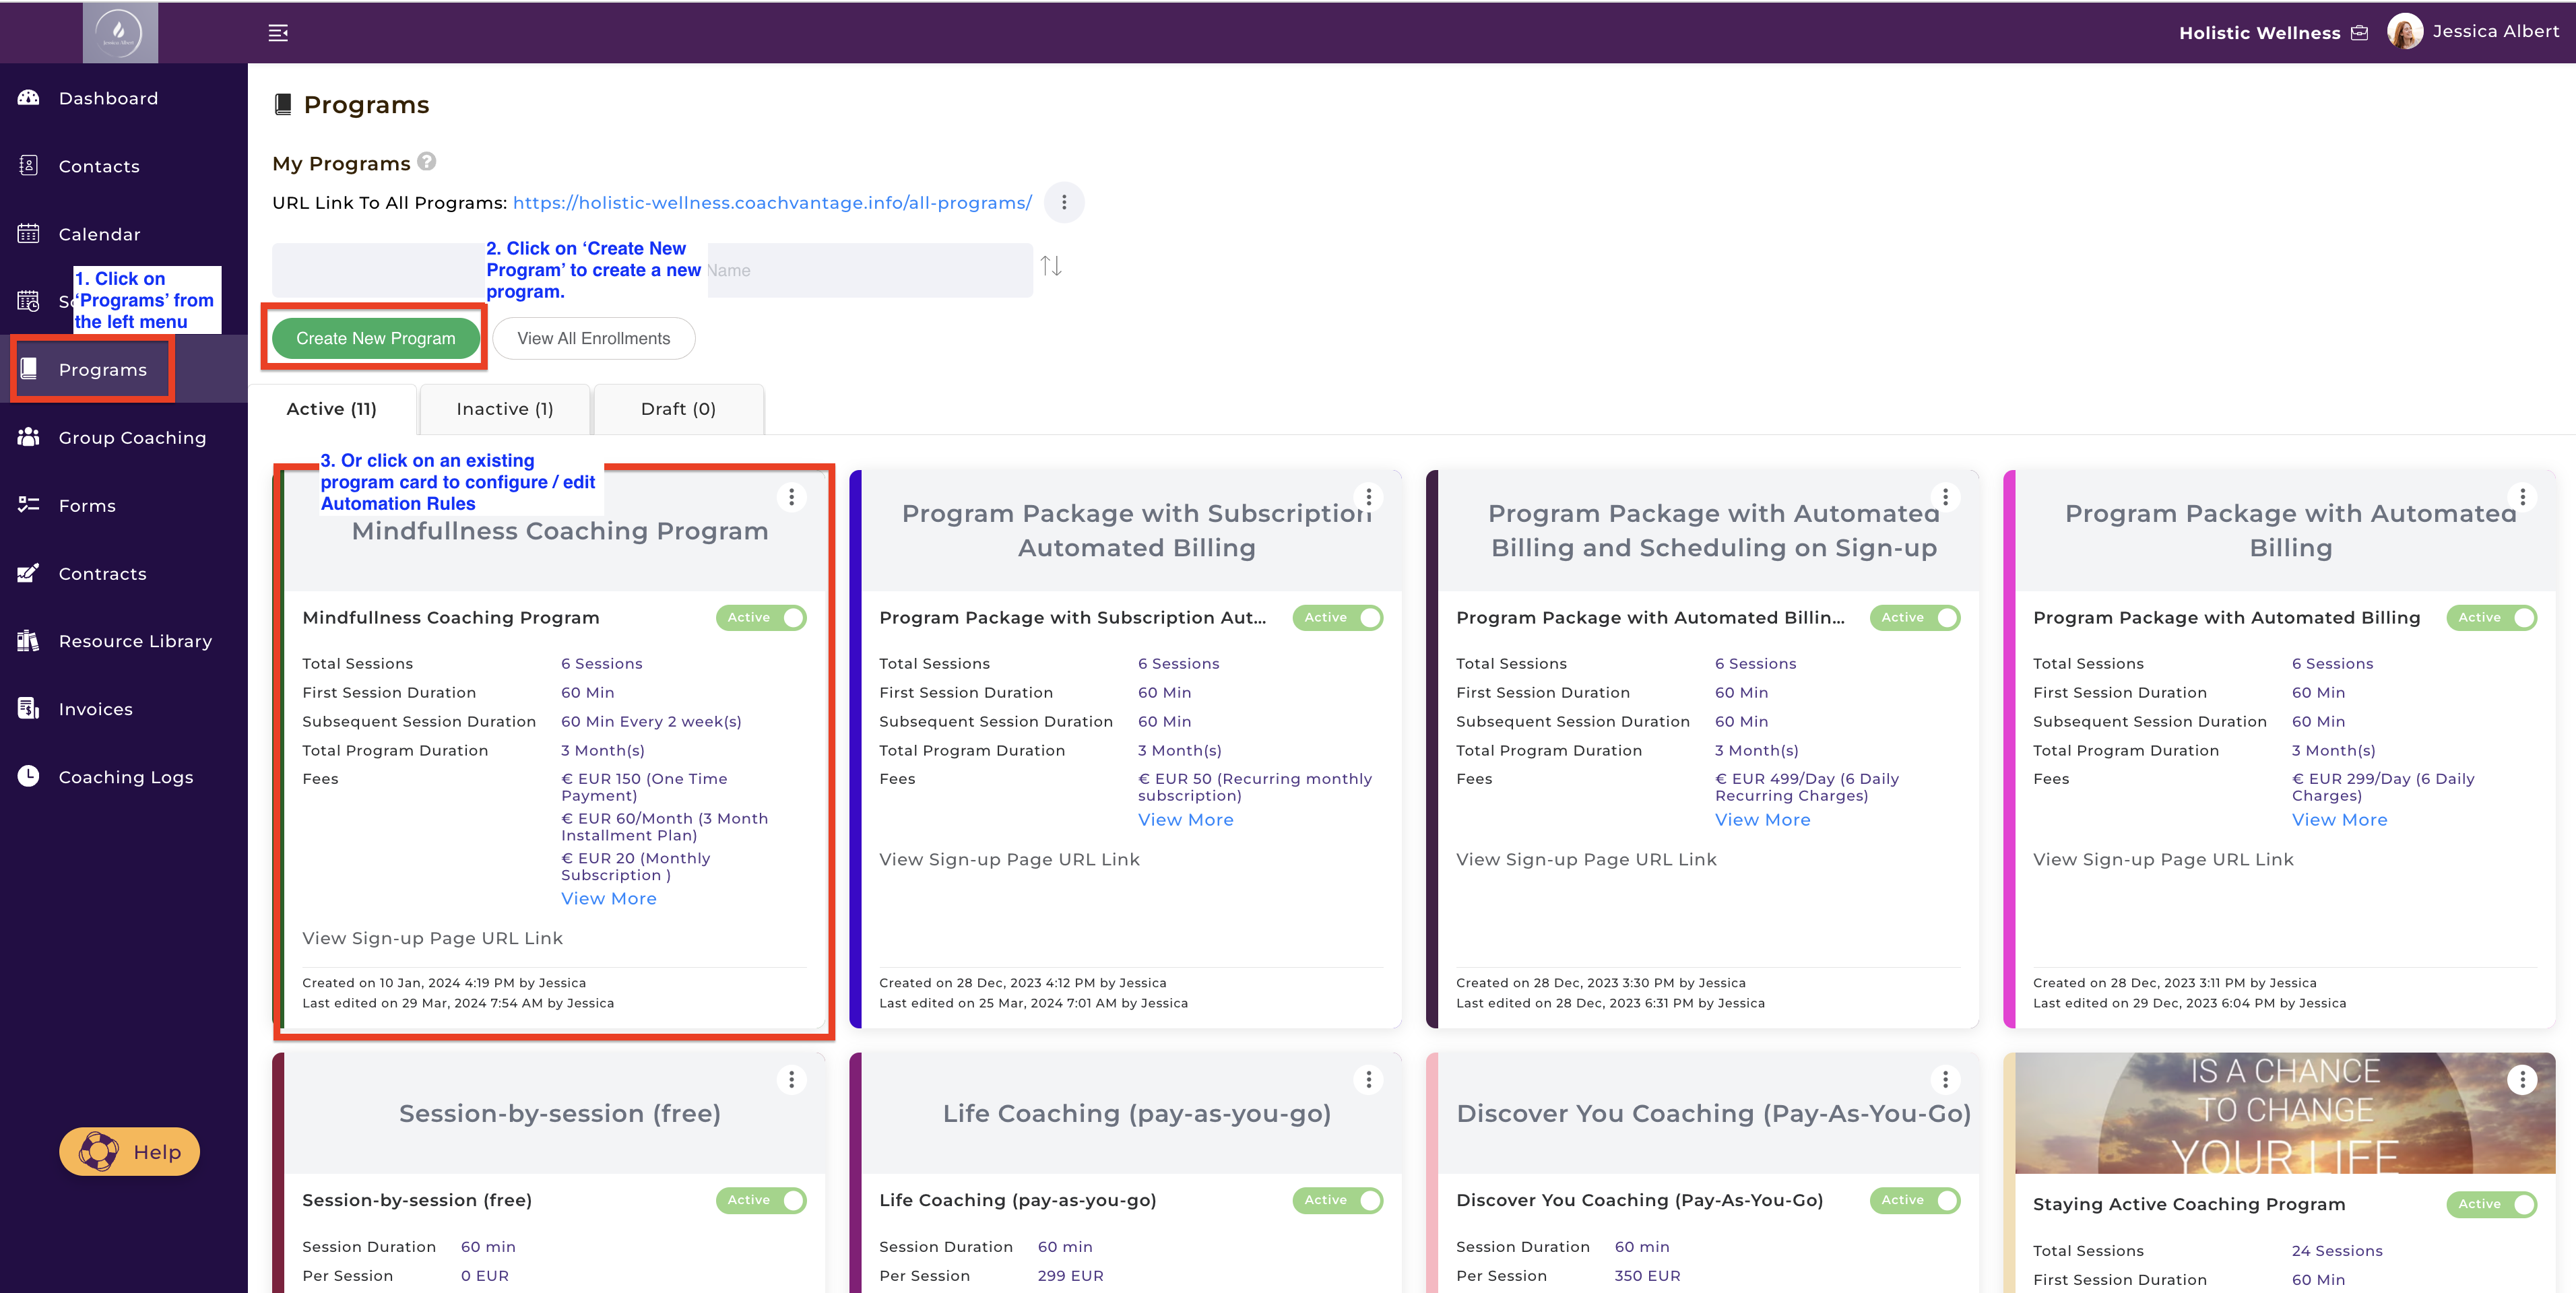
1.1 On the Programs menu page, click on a Program Card or Create New Program button as shown below:
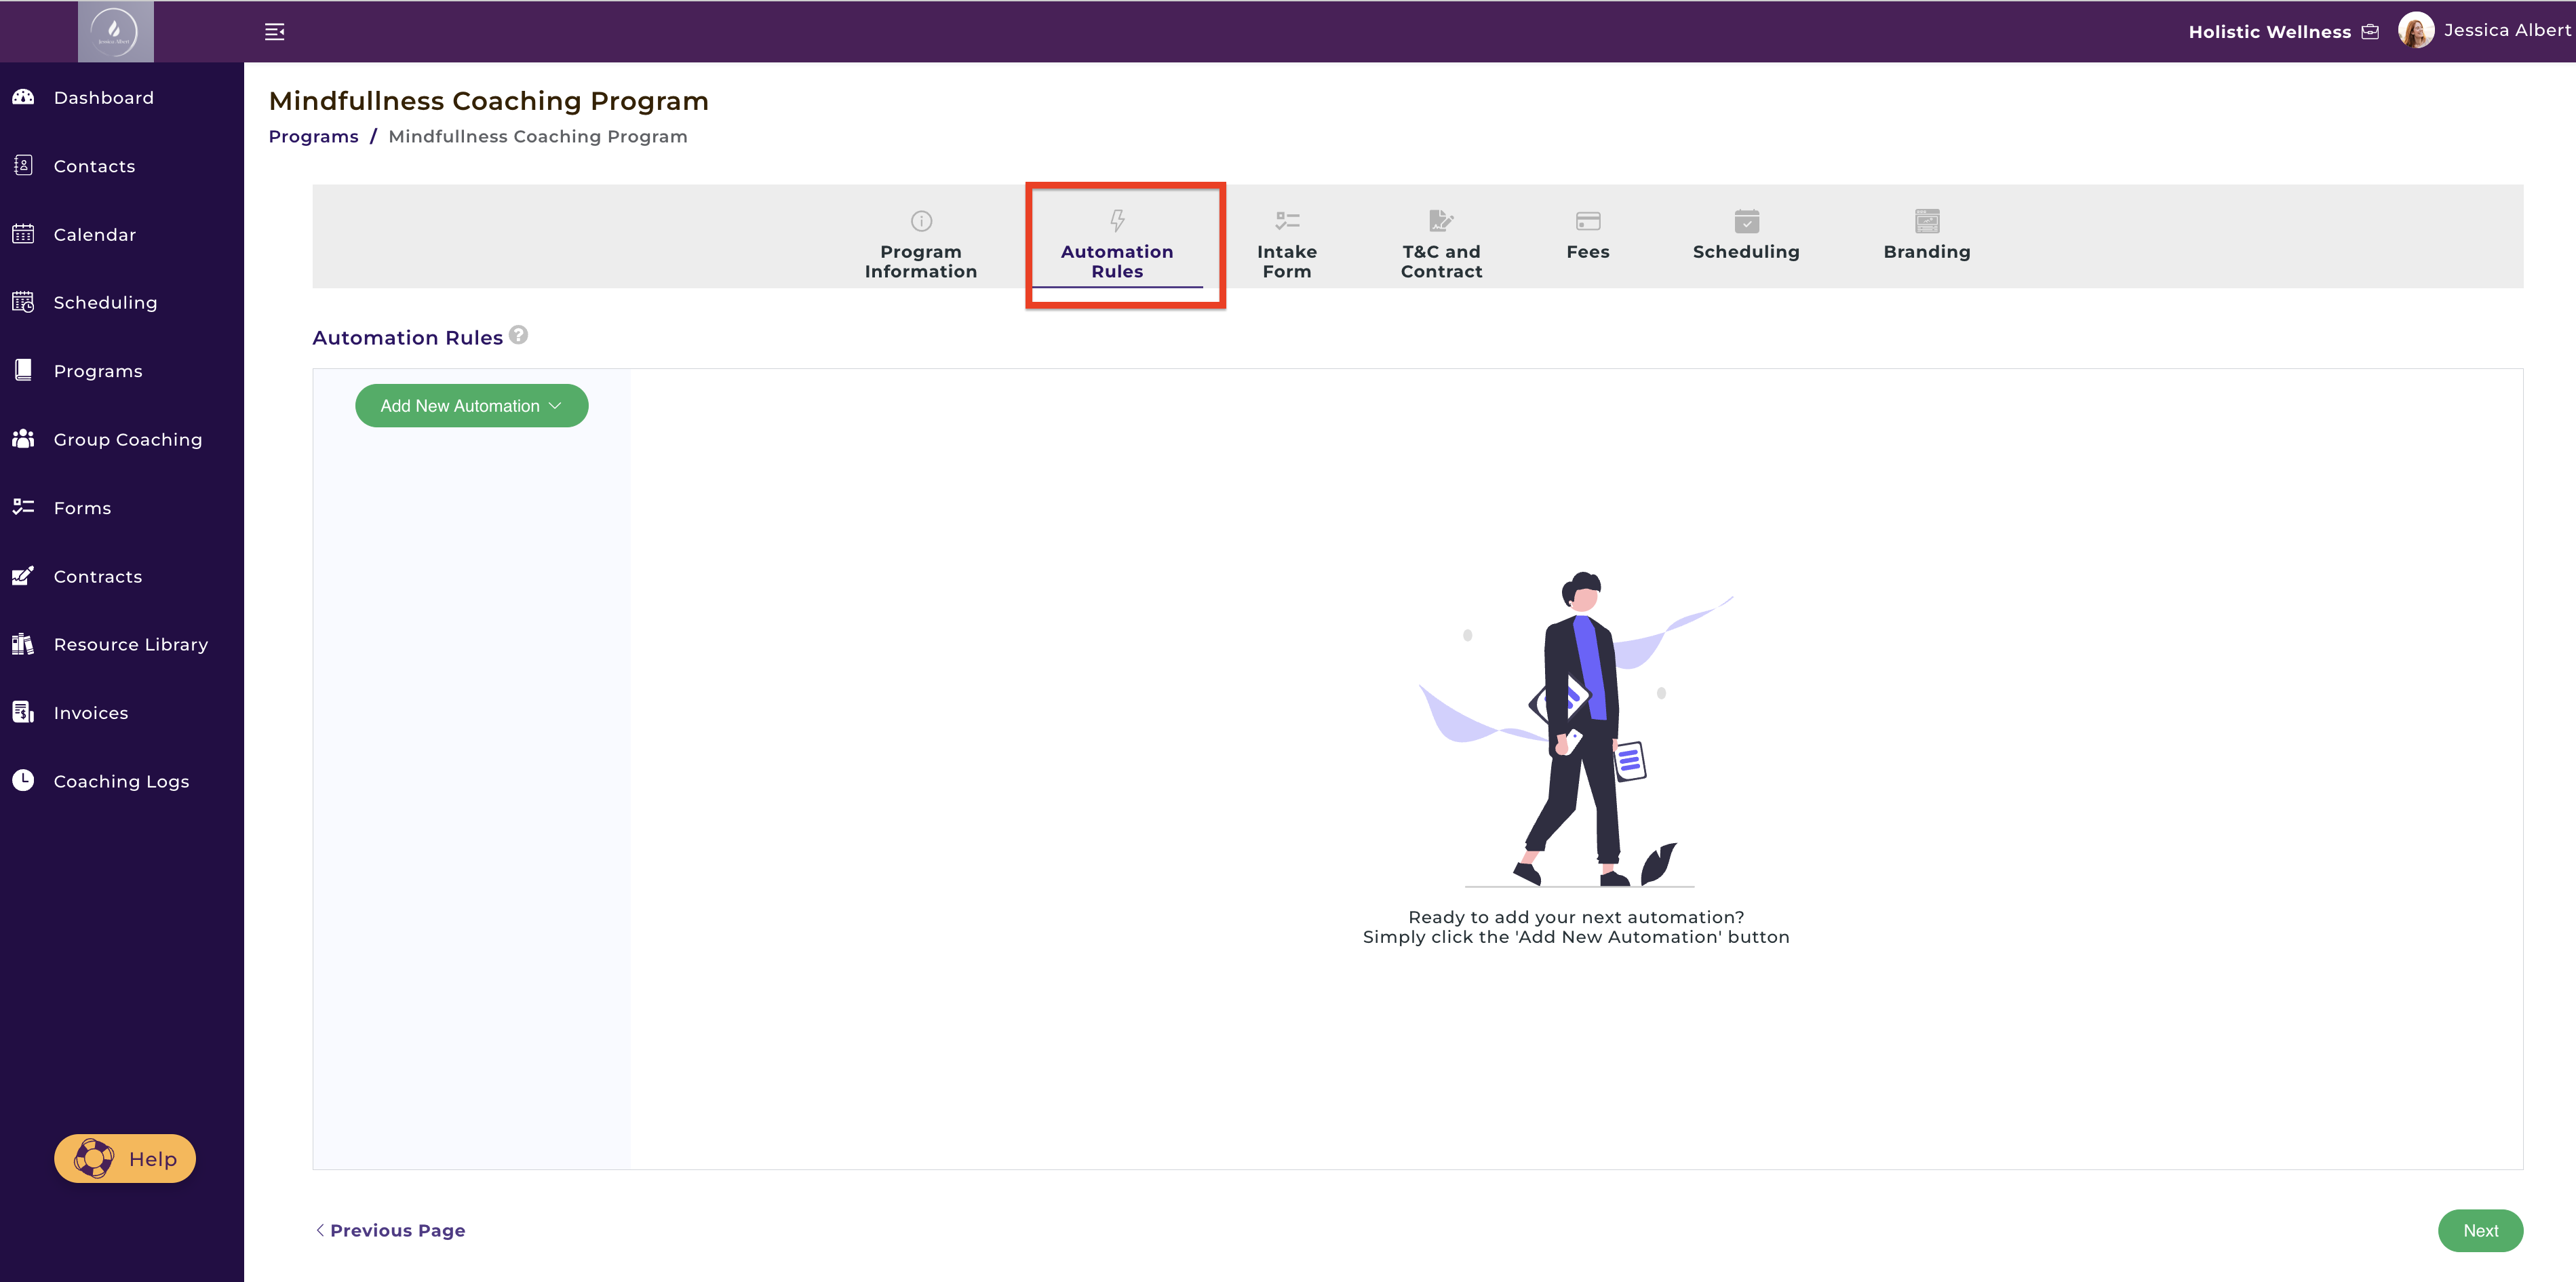
1.2 Automation Rules can be configured after completing the first step, Program Information, as shown below:
Once you have completed the Program Information step, you will be taken to the Automation Rules step, as shown below:
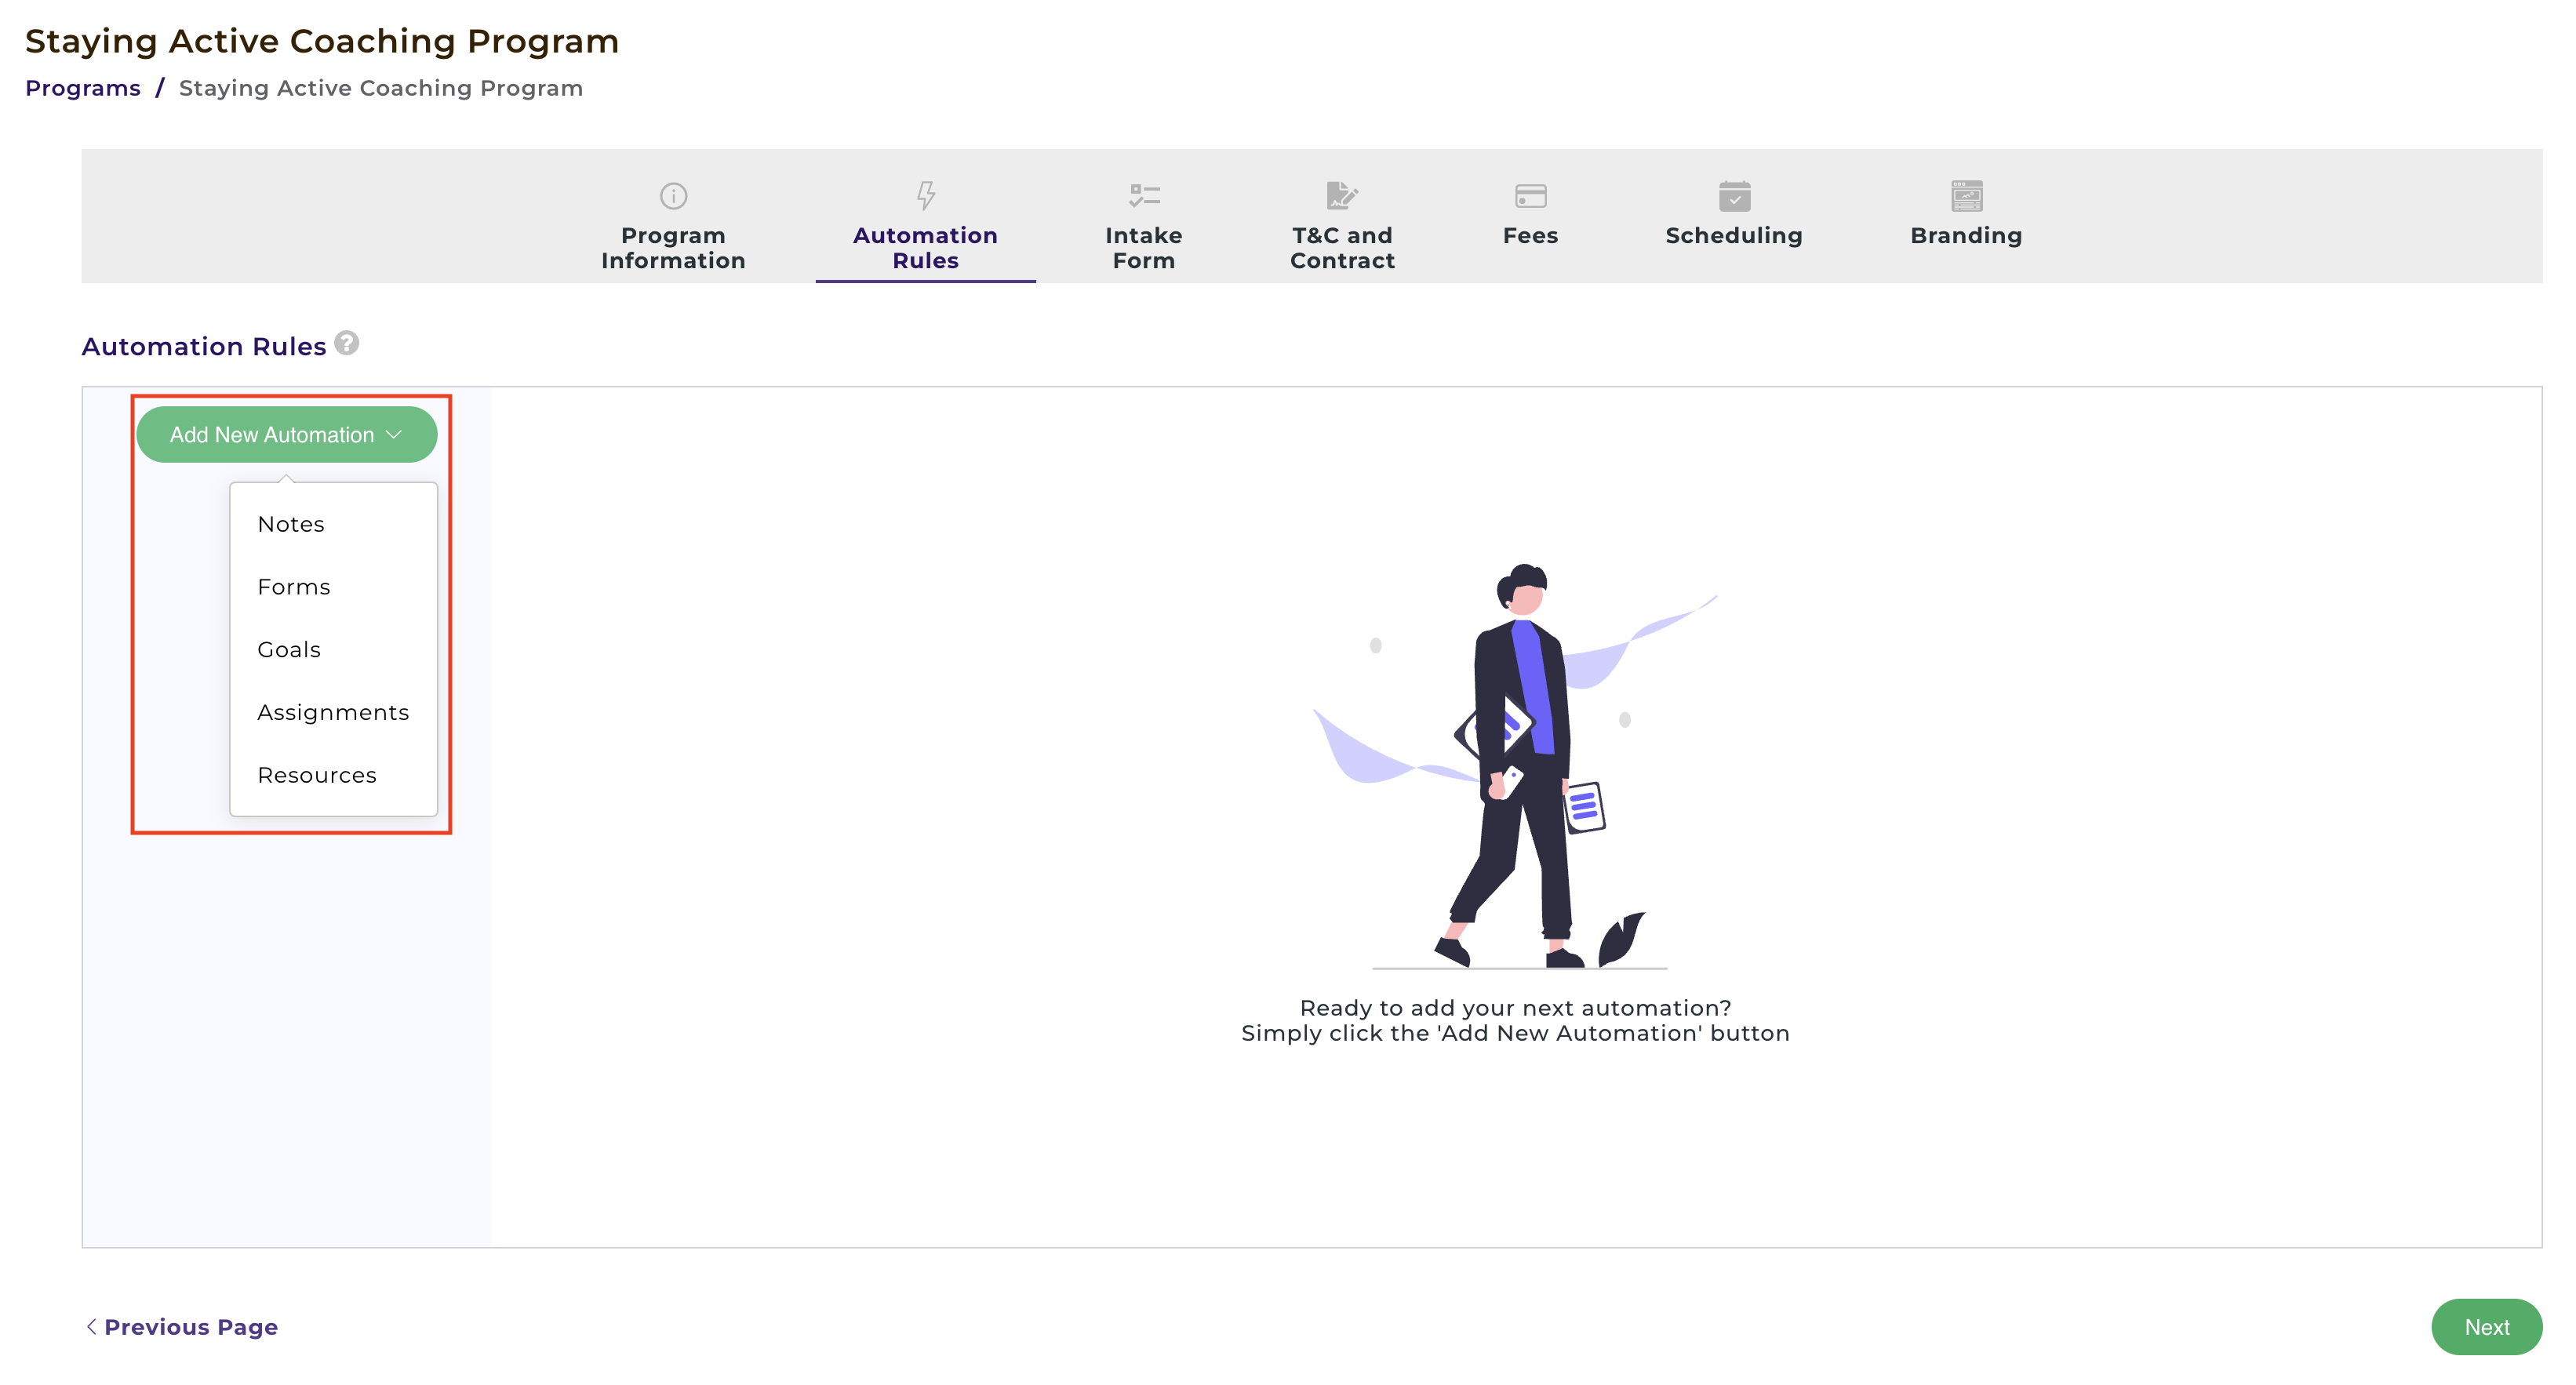
1.3 Click the Add New Automation button and you will be presented with a drop down list to select one of the following attributes:
Notes, Forms, Goals, Assignments, or Resources (Files)
Your clients will receive automated email notifications to let them know that you have shared the respective attribute(s) with them. Clients will be able to access the attribute(s) from within the Client Portal as soon as the automation is triggered.
A) Steps to set up automation rules for Notes:
Select the Notes attribute to send out notes or instructions that you would like to convey to clients.
The Notes editor is versatile and can be used to enter plain text, images, URL links, tables, and even embedded videos that can be played back within the note itself!
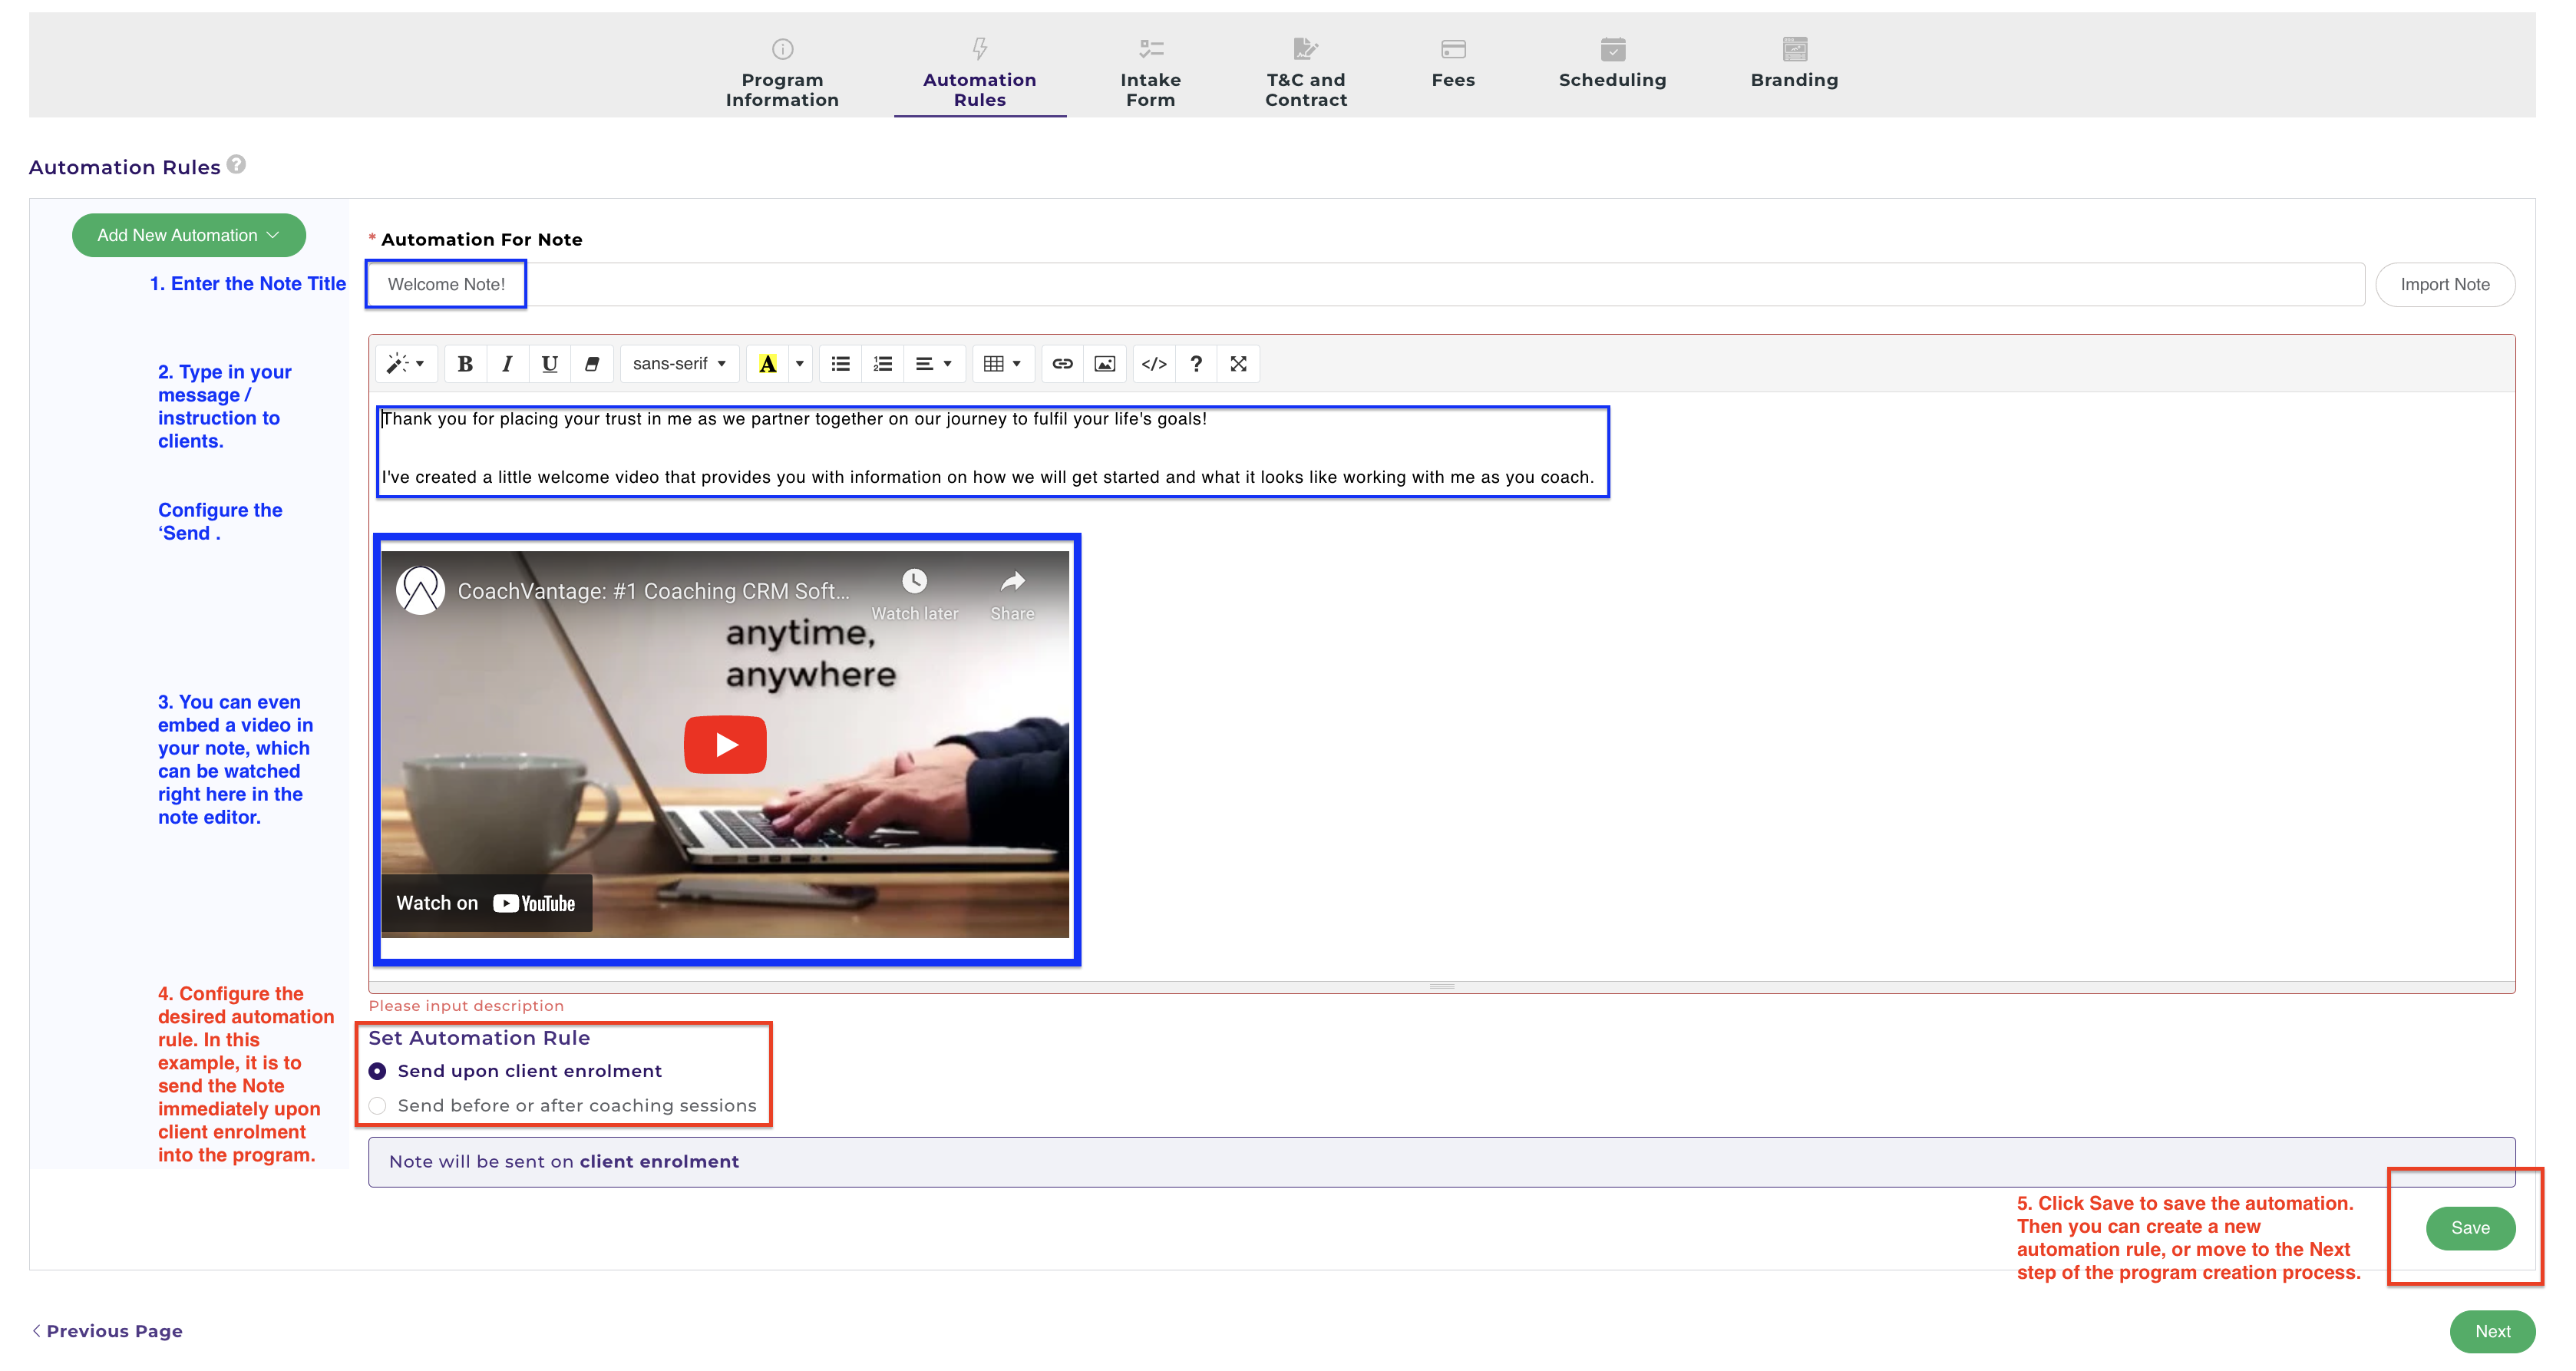
1. Enter the Note Title.
2. Type in your message / instruction to clients
3. You can embed videos into your note, too, if you wish.
4. Configure the desired automation rule, either:
a) Send Upon Client Enrollment to send the note immediately upon client enrollment.
b) Send Before or After Coaching Sessions to send the note before or after coaching sessions.
5. Click Save to save the automation rule.
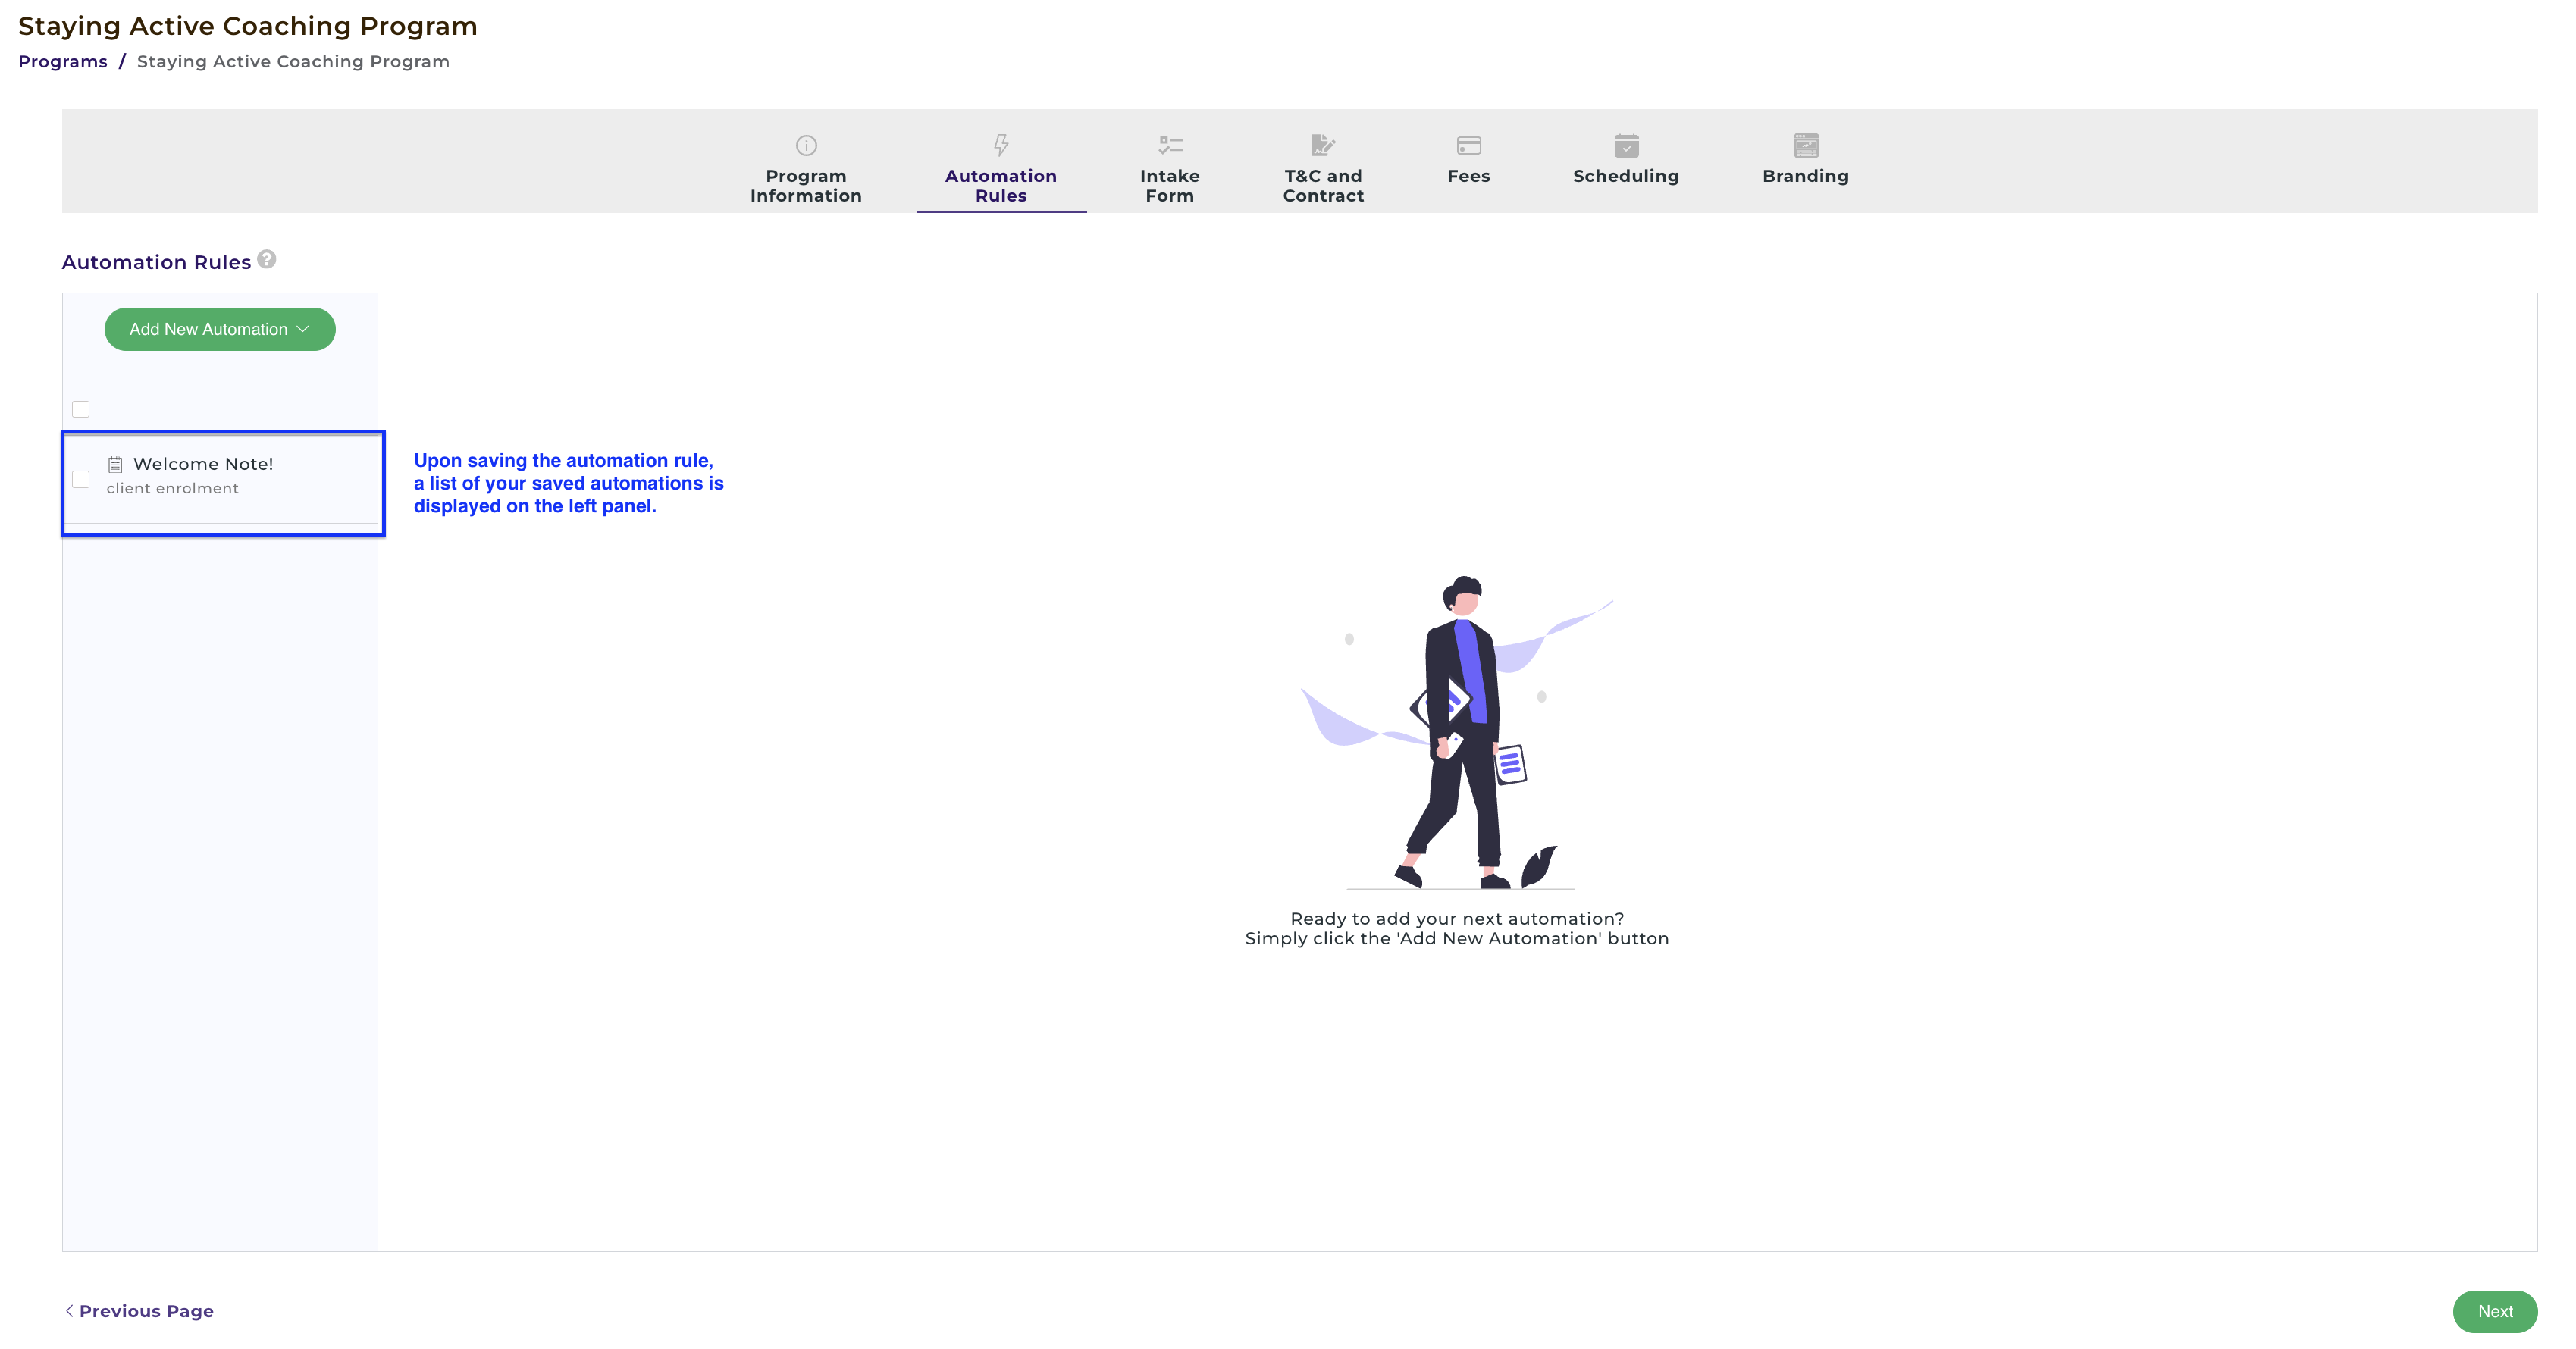
Once you have saved the automation, it will be displayed on the left panel as shown here:
B) Steps To Set Up Automation Rules for Forms:
1. Select the desired Form from the dropdown selector.
Note: As a pre-requisite, you must first create your Form from the Forms menu page of your CoachVantage account. You can't create a form from within the Automation Rule step itself. Refer to this article to learn more about how to create Forms.
2. Configure the desired automation rule, either:
a) Send Upon Client Enrolment to send the note immediately upon client enrolment.
b) Send Before or After Coaching Sessions to send the note before or after coaching sessions.
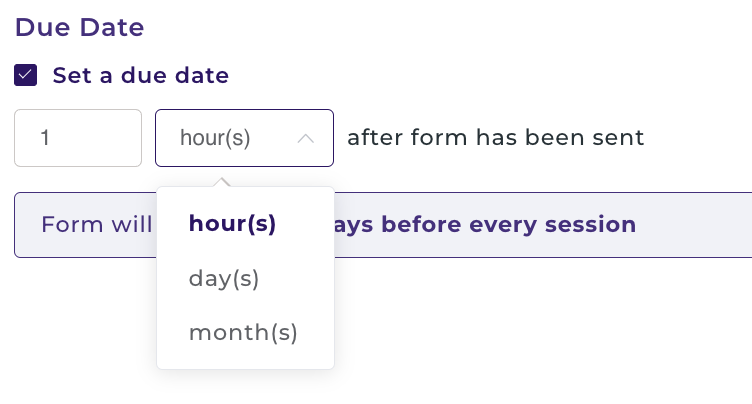
3. You can optionally set a due date for the form, as shown here:
4. Configure the desired automation rule, either:
a) Send Upon Client Enrolment to send the note immediately upon client enrolment.
b) Send Before or After Coaching Sessions to send the note before or after coaching sessions.
5. Click Save to save the automation rule.
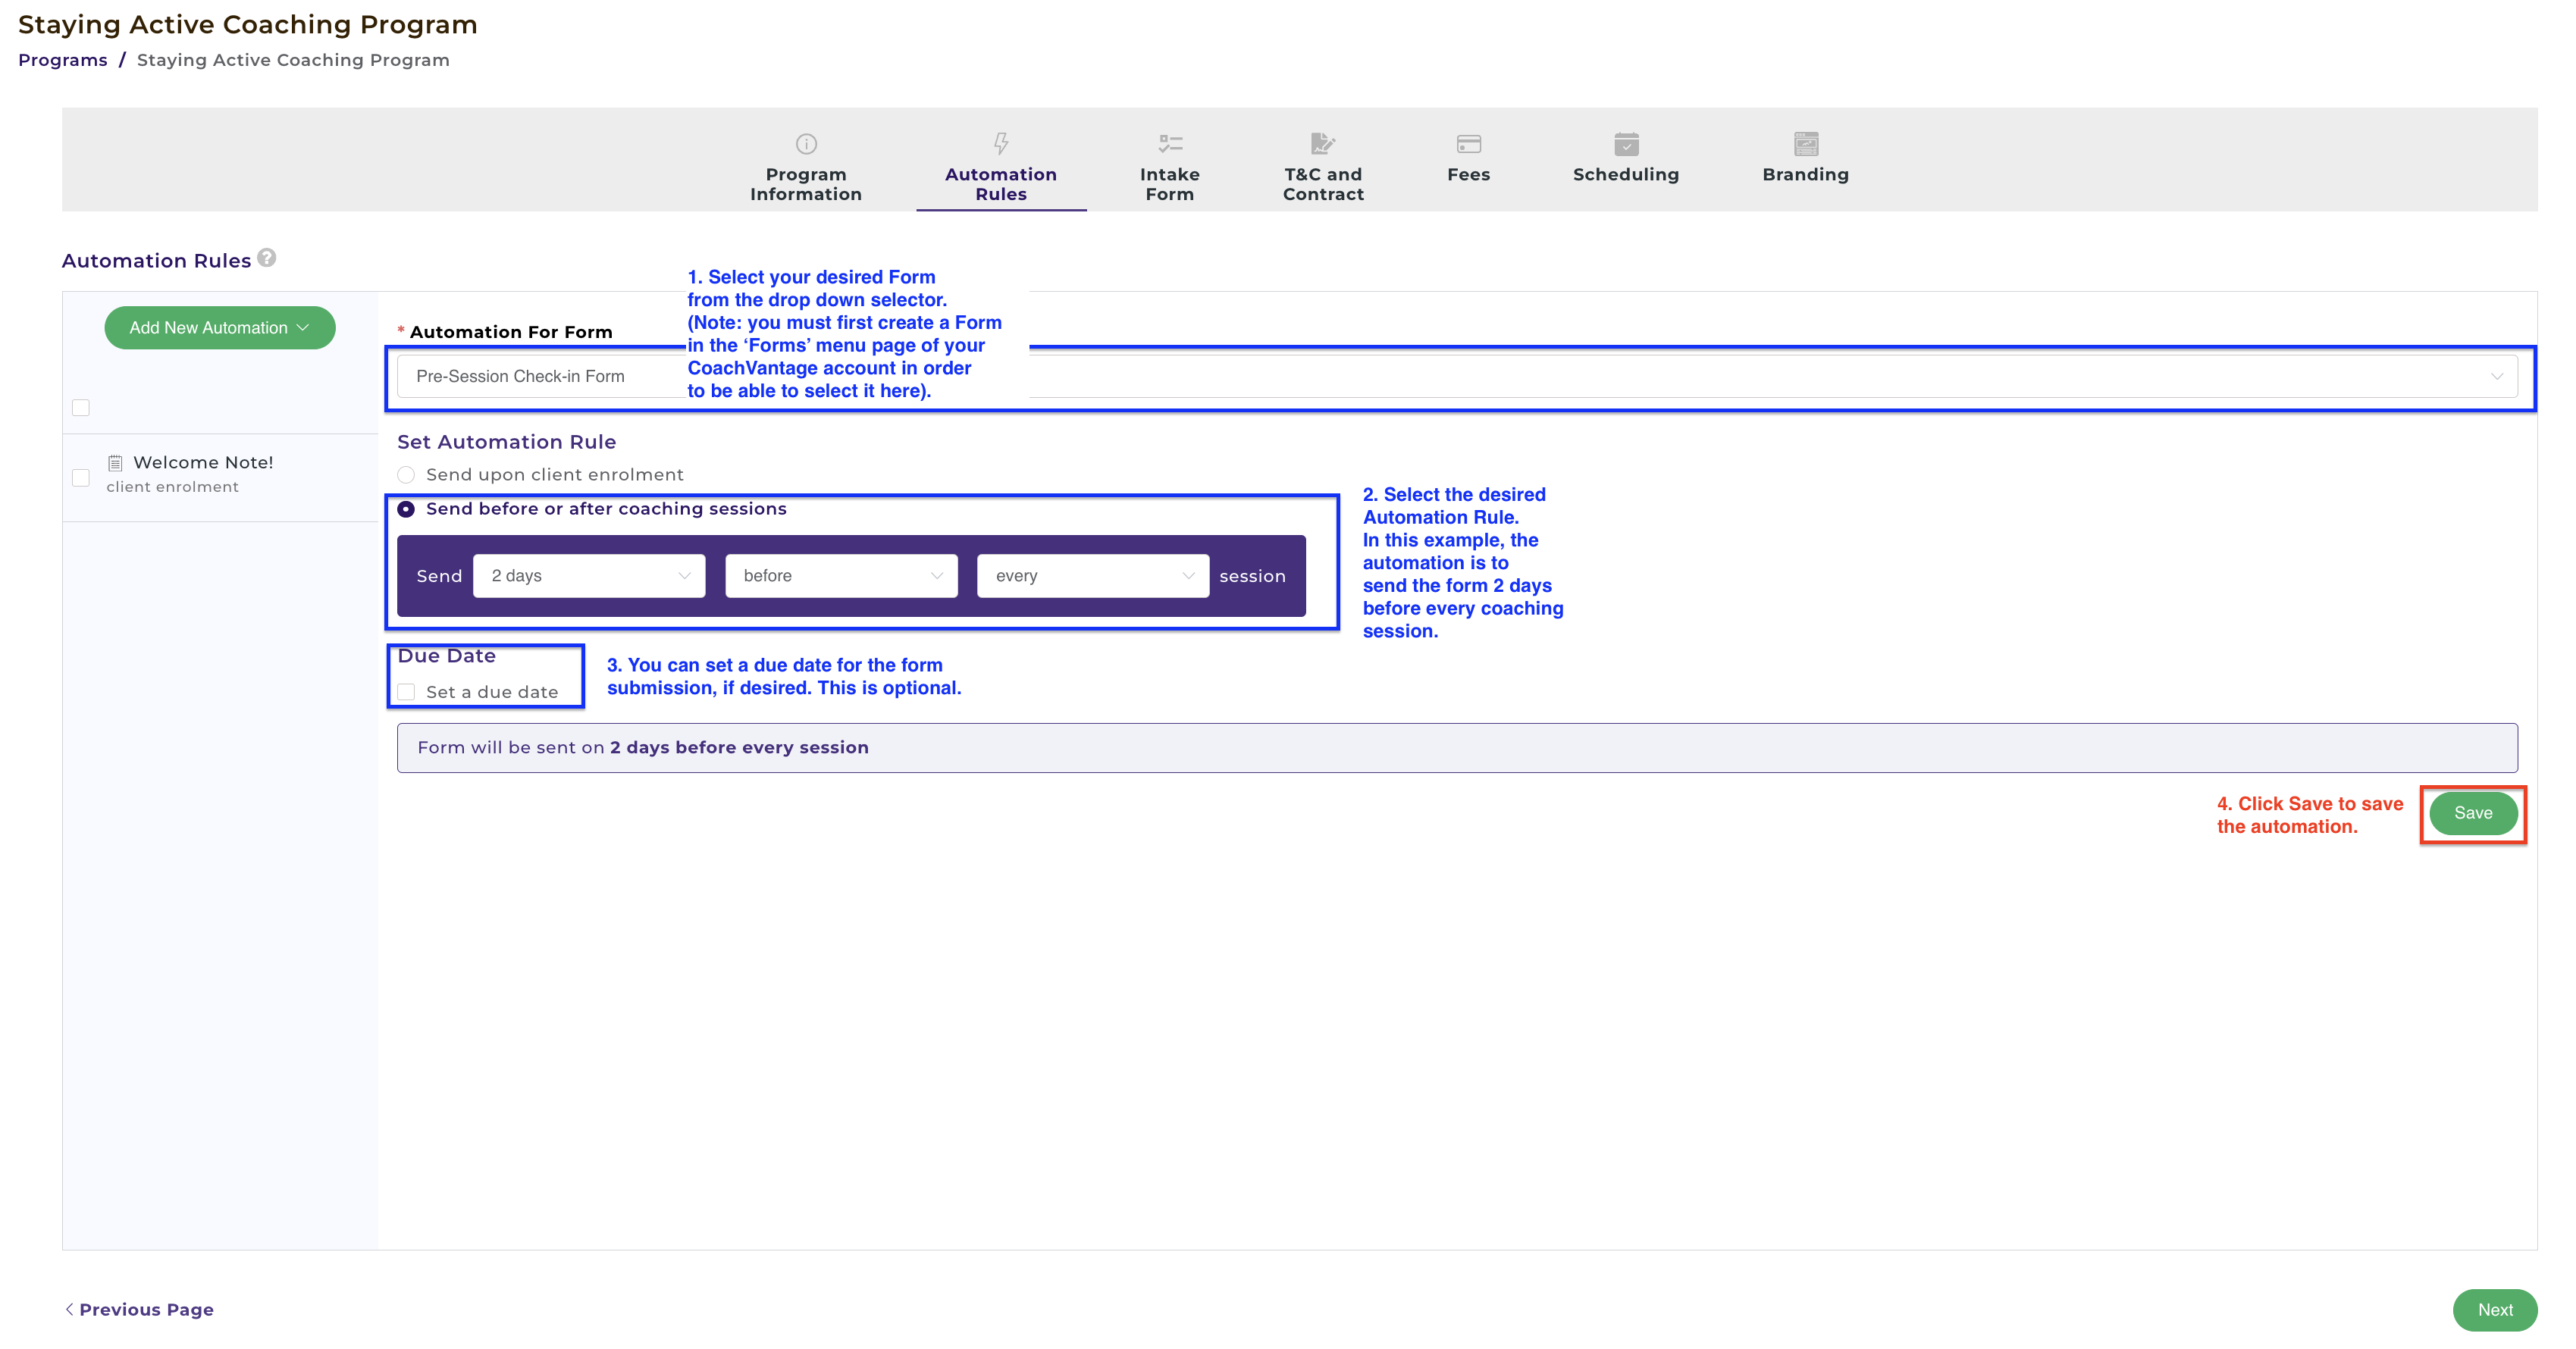
Once you have saved the automation, it will be displayed on the left panel as shown here:
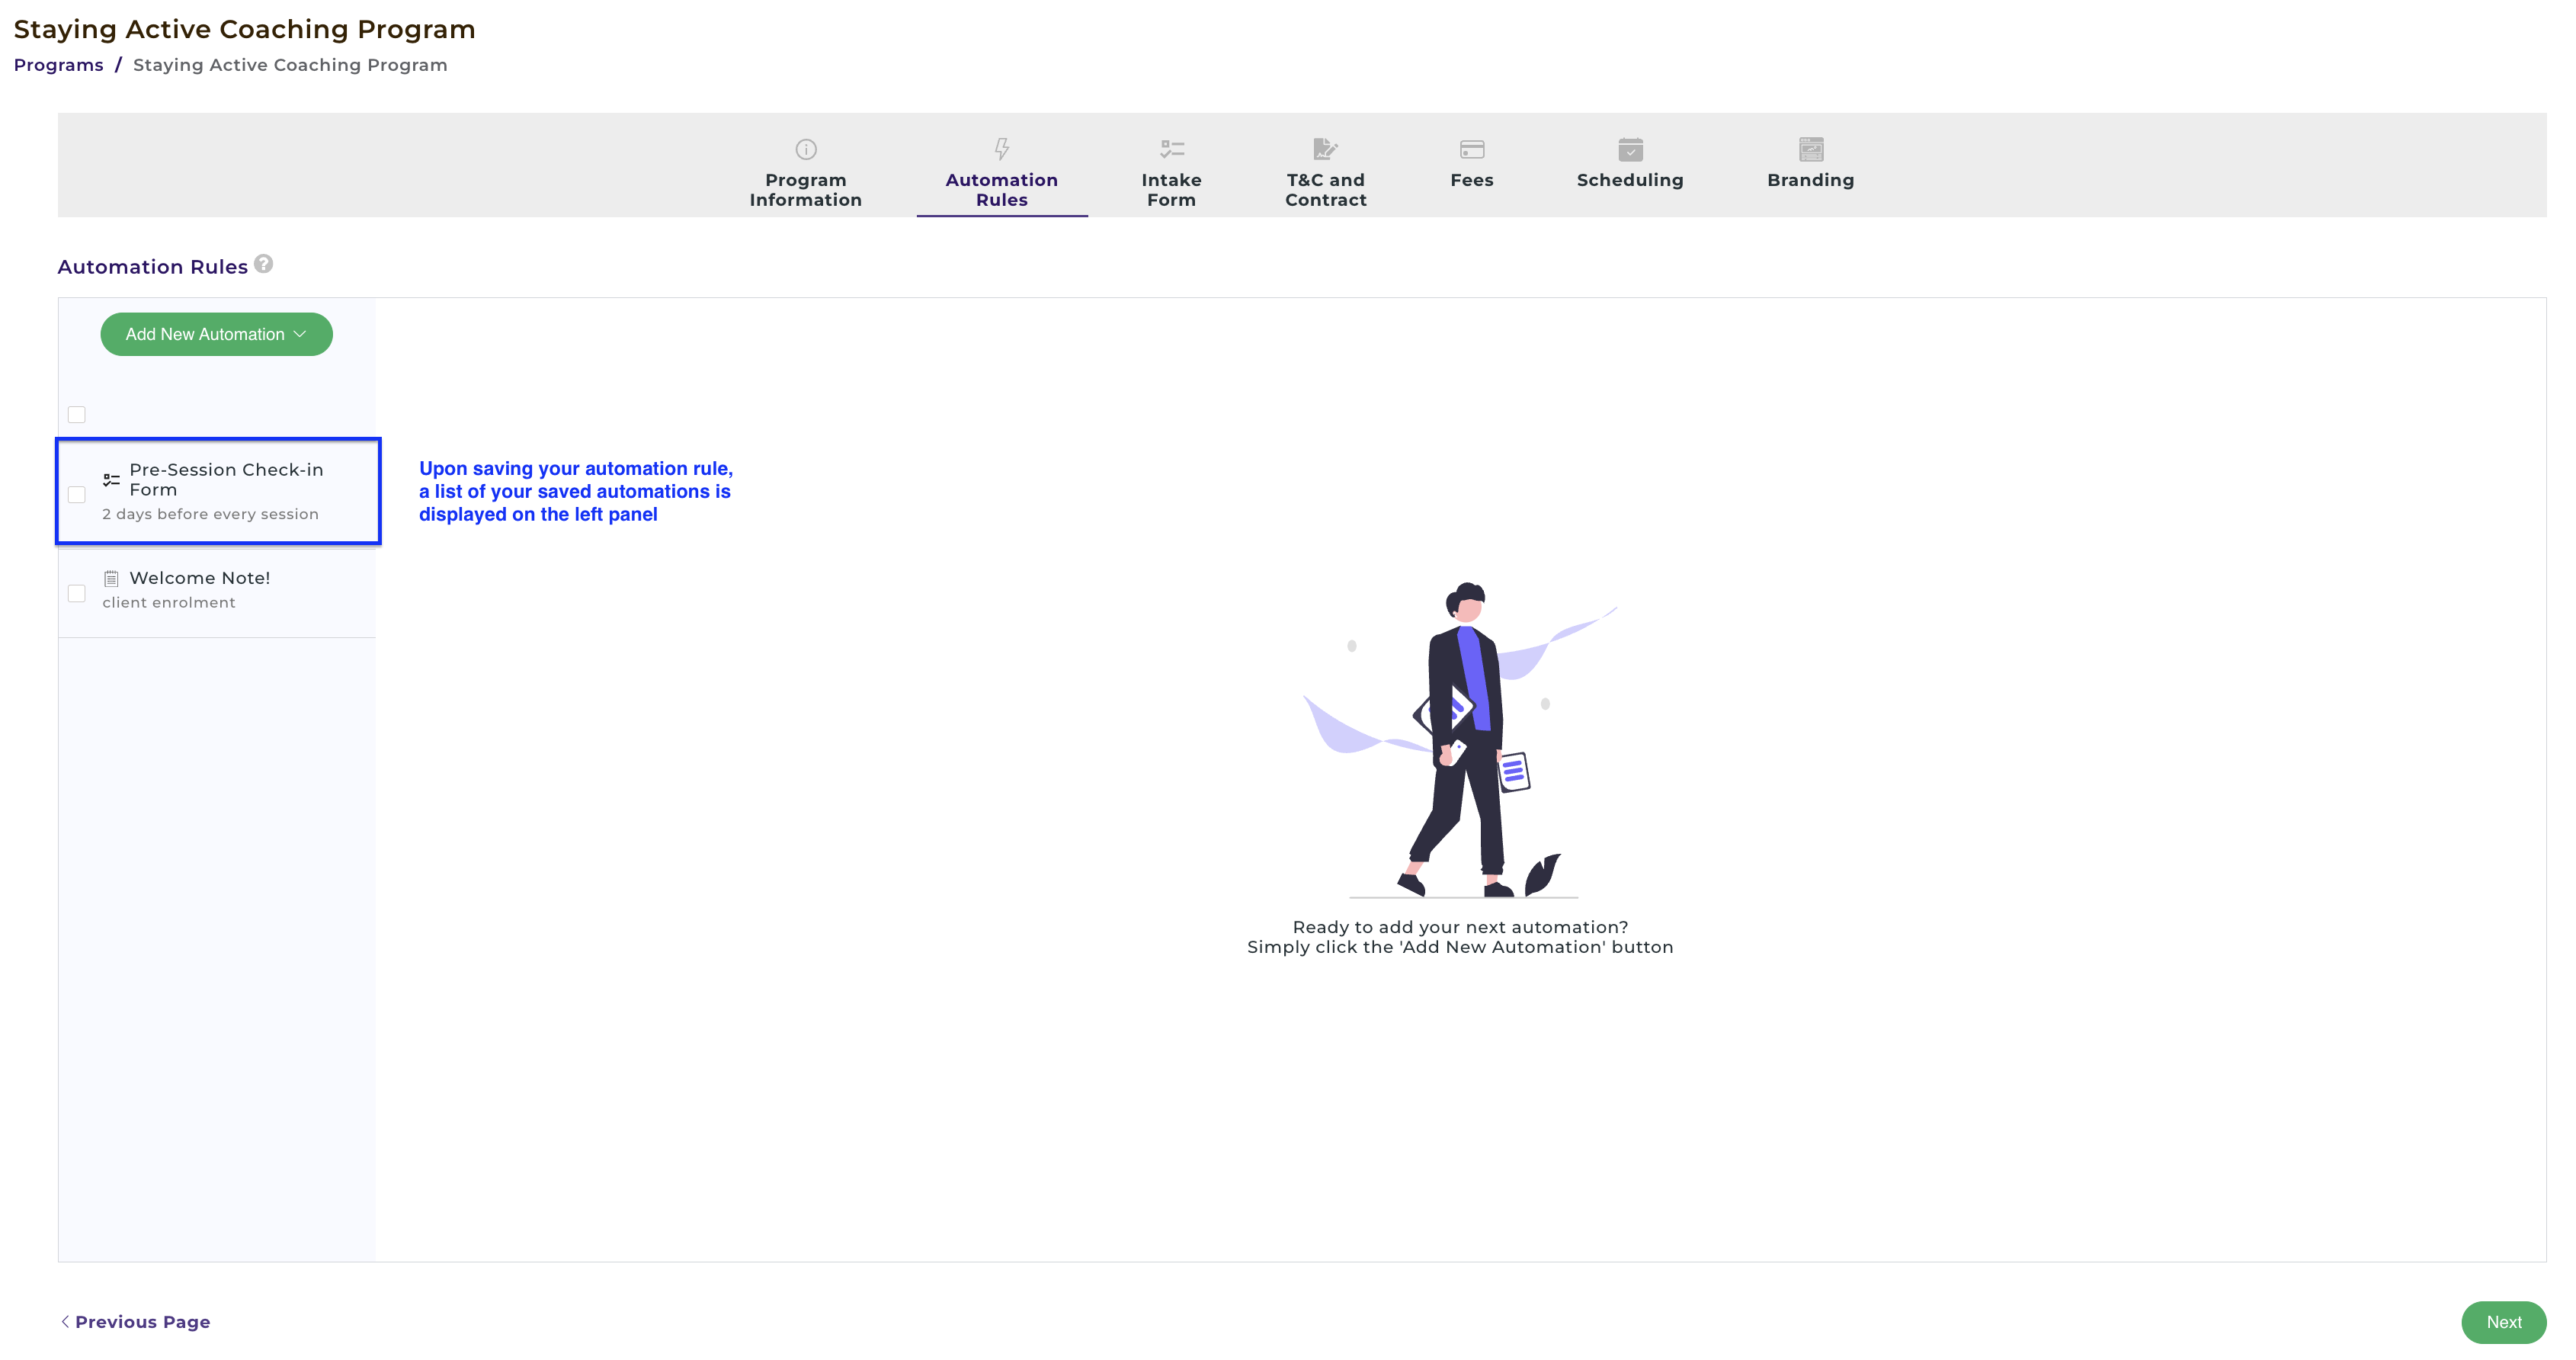
C) Steps to Set Up Automation Rules for Goals:
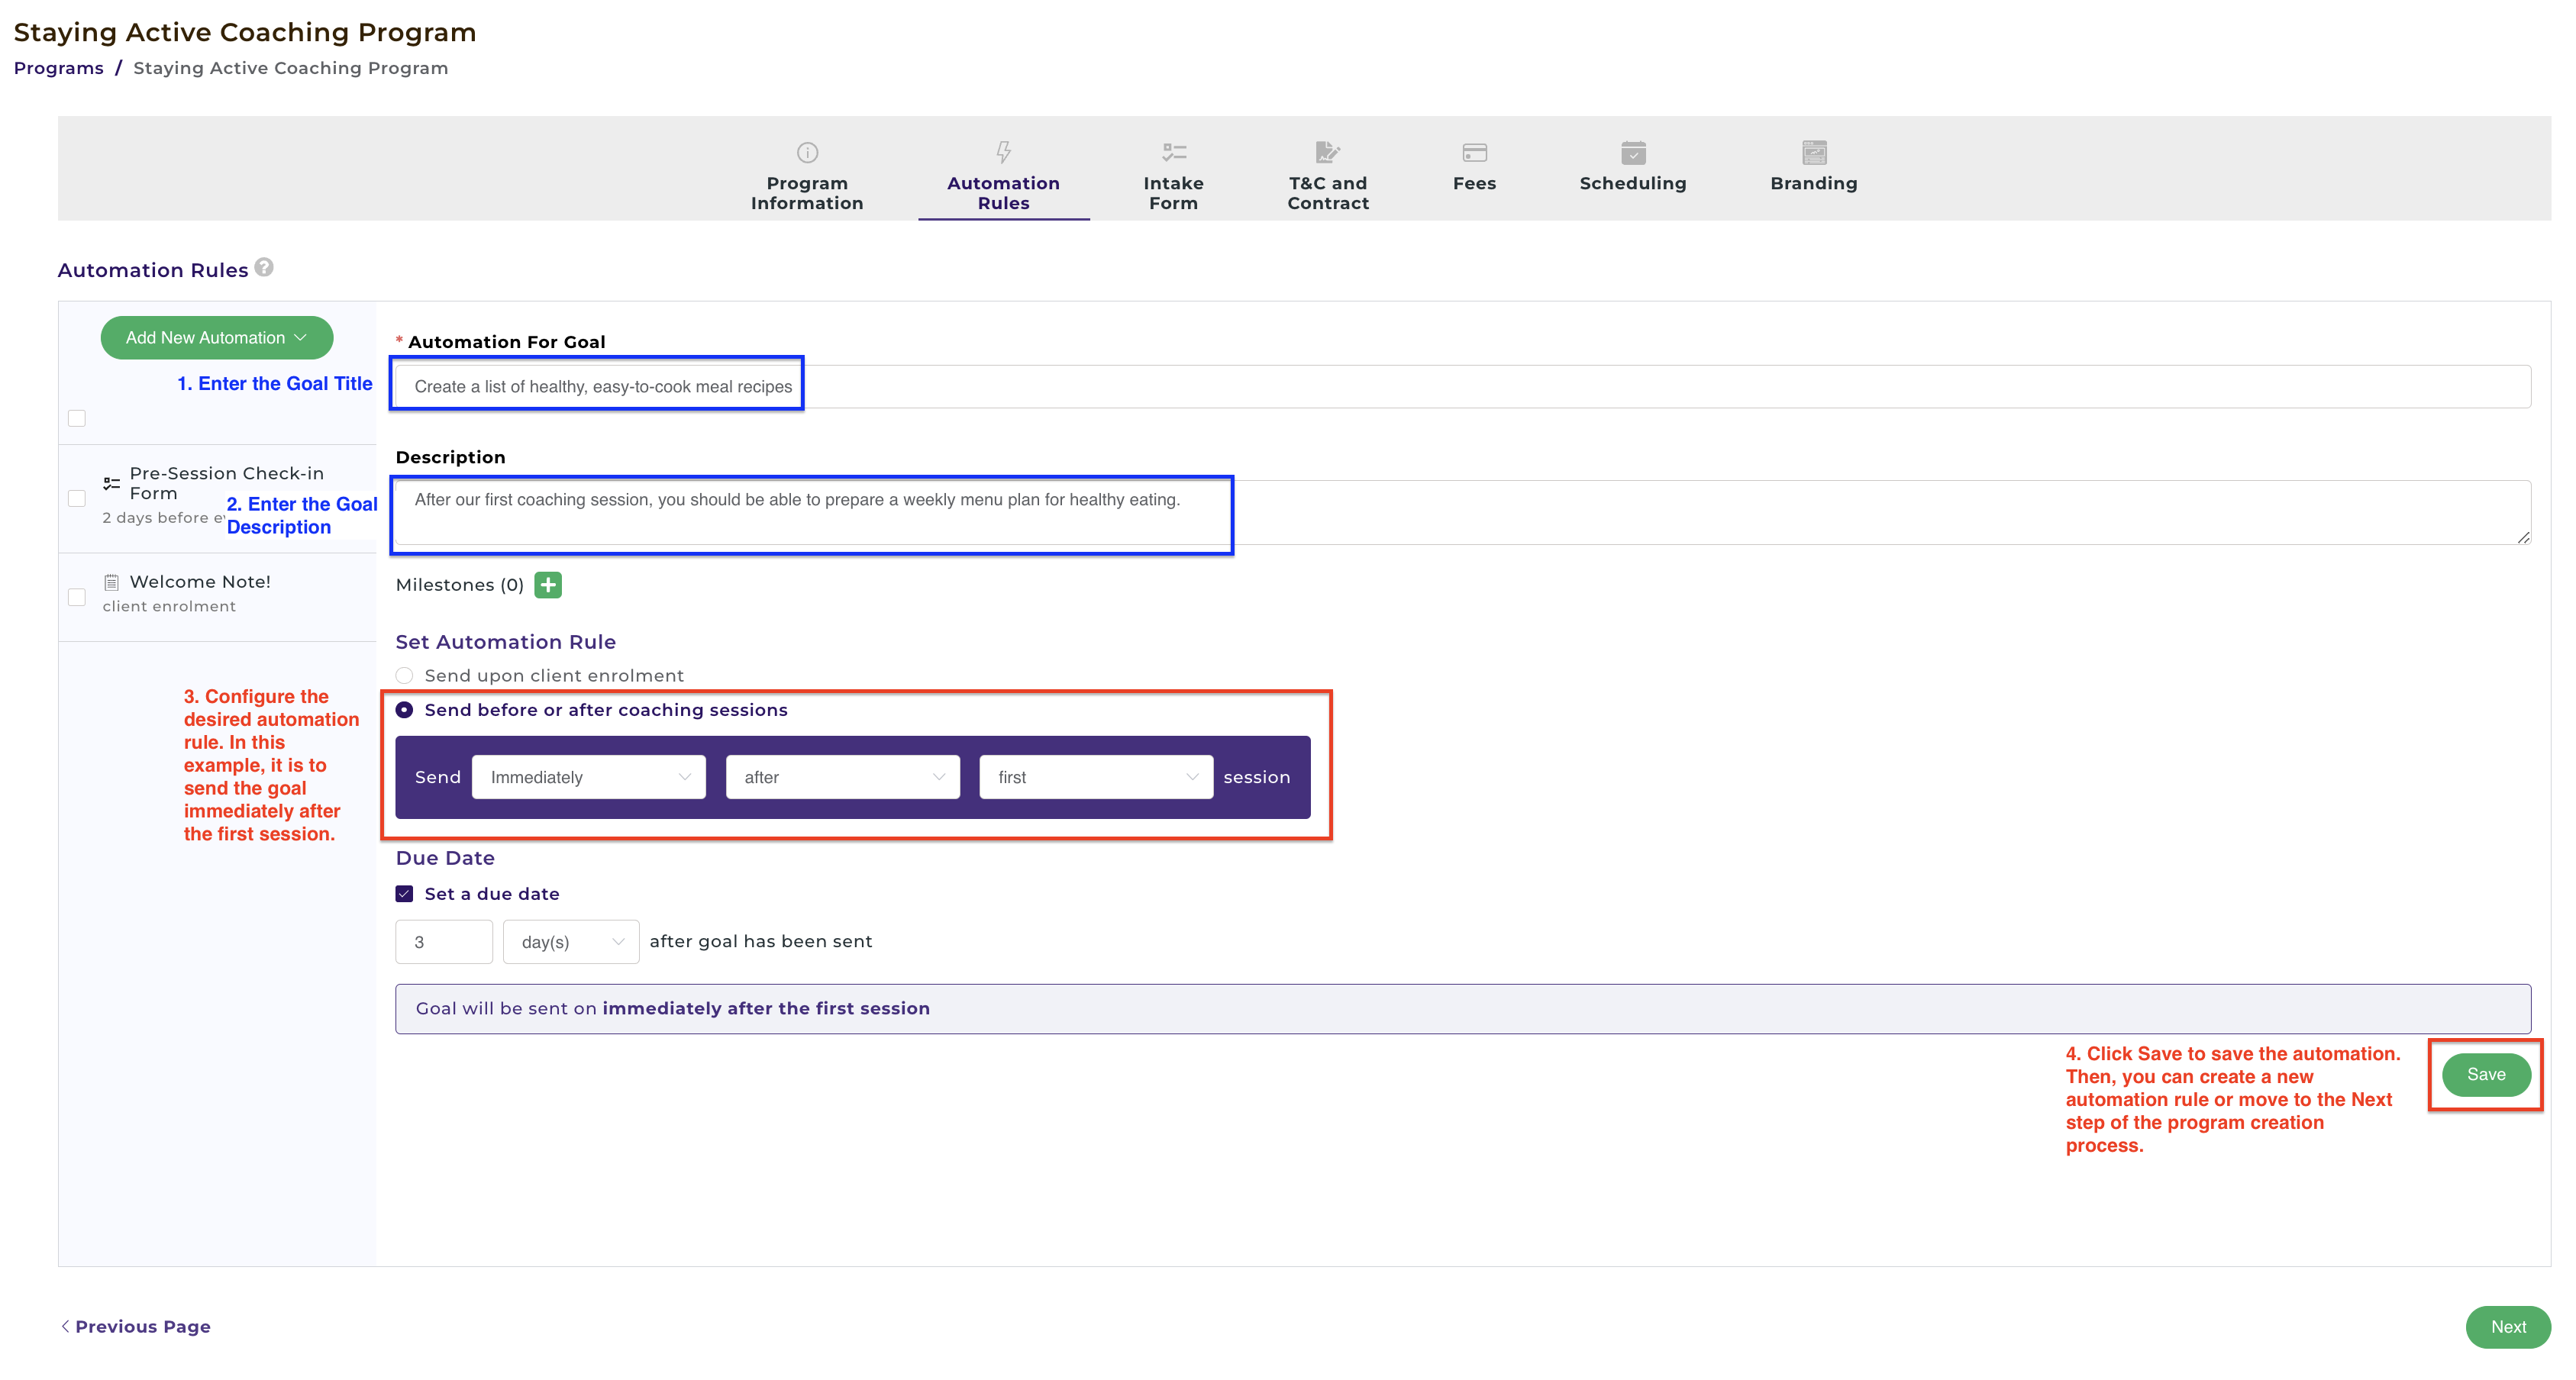
The Goals attribute automation is great if you have pre-determined goals that you would like to send to clients. For example, if you're a health & wellness coach, you might set up a goal for clients to create a list of healthy, easy-to-cook recipes after the first coaching session.
Note: This might not be applicable for you if you create goals that are customized / tailored towards each individual client. In this situation, you should use the Automation Rules feature in the Program Management page for each individual client. Yes, CoachVantage also supports automation rules for each individual client! To learn more, refer to this article on How to Configure Automations for Client To Do's.
1. Enter the Goal title.
2. Enter the Goal description.
3. Configure the desired automation rule, either:
a) Send Upon Client Enrolment to send the note immediately upon client enrolment.
b) Send Before or After Coaching Sessions to send the note before or after coaching sessions.
4. Click Save to save the automation rule.
D) Steps to Set Up Automation Rules for Assignments:
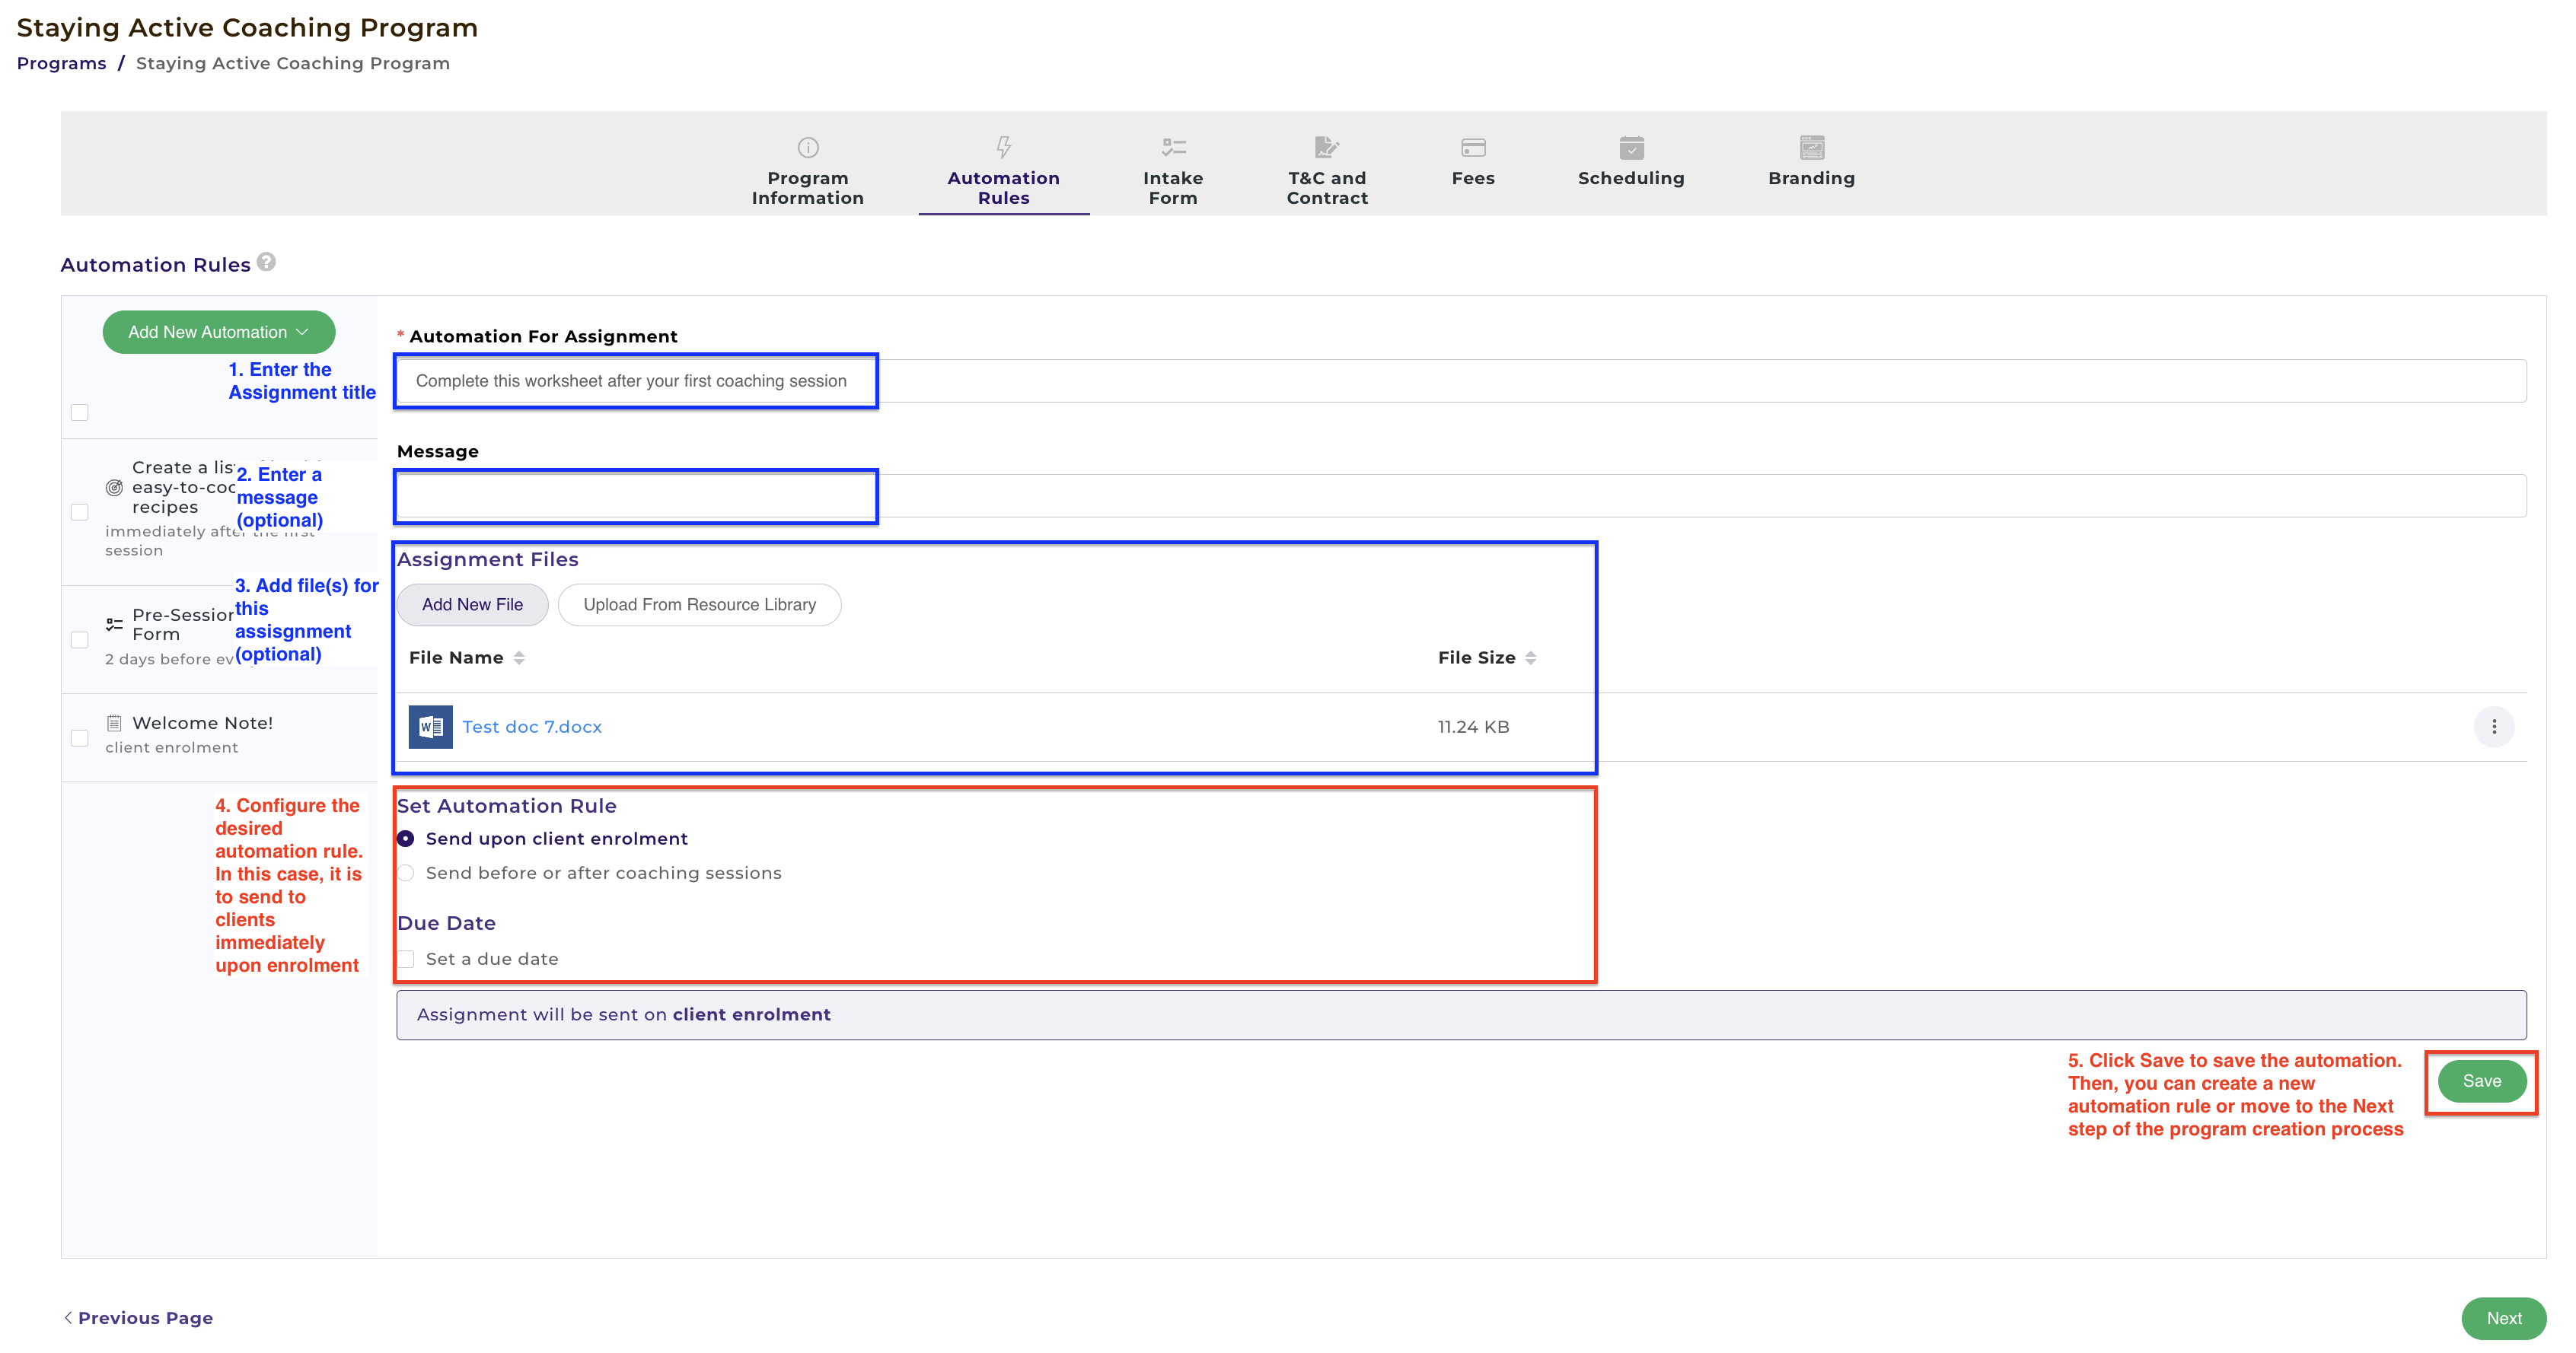
The Assignments attribute automation is great if you have pre-determined assignments that you would like to send to clients. For example, if you're a health & wellness coach, you might set up an assignment for clients to complete a wellbeing checklist document before the first coaching session.
Note: This might not be applicable for you if you create assignments that are customized / tailored towards each individual client. In this situation, you should use the Automation Rules feature in the Program Management page for each individual client. Yes, CoachVantage also supports automation rules for each individual client! To learn more, check out this help article.
1. Enter the Assignment Title.
2. Enter a message that provides more instructions (optional).
3. Add File(s) for this assignment (optional).
4. Configure the desired automation rule, either:
a) Send upon client enrolment to send the note immediately upon client enrolment.
b) Send before / after coaching sessions to send the note before or after coaching sessions.
5. Click Save to save the automation rule.
E) Steps to set up automation rules for Resources:
The Resources attribute automation is used to send files / documents to all clients who enrol in your program.
When you add files here, they will be accessible by clients from the client portal, immediately after they have enrolled and have created their client portal.
1. Add the File(s). You can add file(s) from your local machine or from your CoachVantage Resource Library. The file names you've added will be displayed.
2. Configure the desired automation rule, either:
a) Send upon client enrolment to send the note immediately upon client enrolment.
b) Send before / after coaching sessions to send the note before or after coaching sessions.
3. Click Save to save the automation rule.
2. How to Edit or Delete Automation Rules 🖊️🗑️
After creating automation rules, you can edit or delete them by following the steps below.
IMPORTANT: When you edit or delete an automation rule, the changes apply from that point onwards, meaning that only clients who enrol into your program after the changes have been made will be impacted. Clients who had enrolled into your program before the changes are made will not be impacted. If you need to edit or delete automation rules for these clients, you will need to go to the individual contact record page to make the required changes. Refer to this article on how to edit automation rules for individual clients.
A) Steps to Edit Automation Rules
To edit an automation, simply click on it from the left panel:
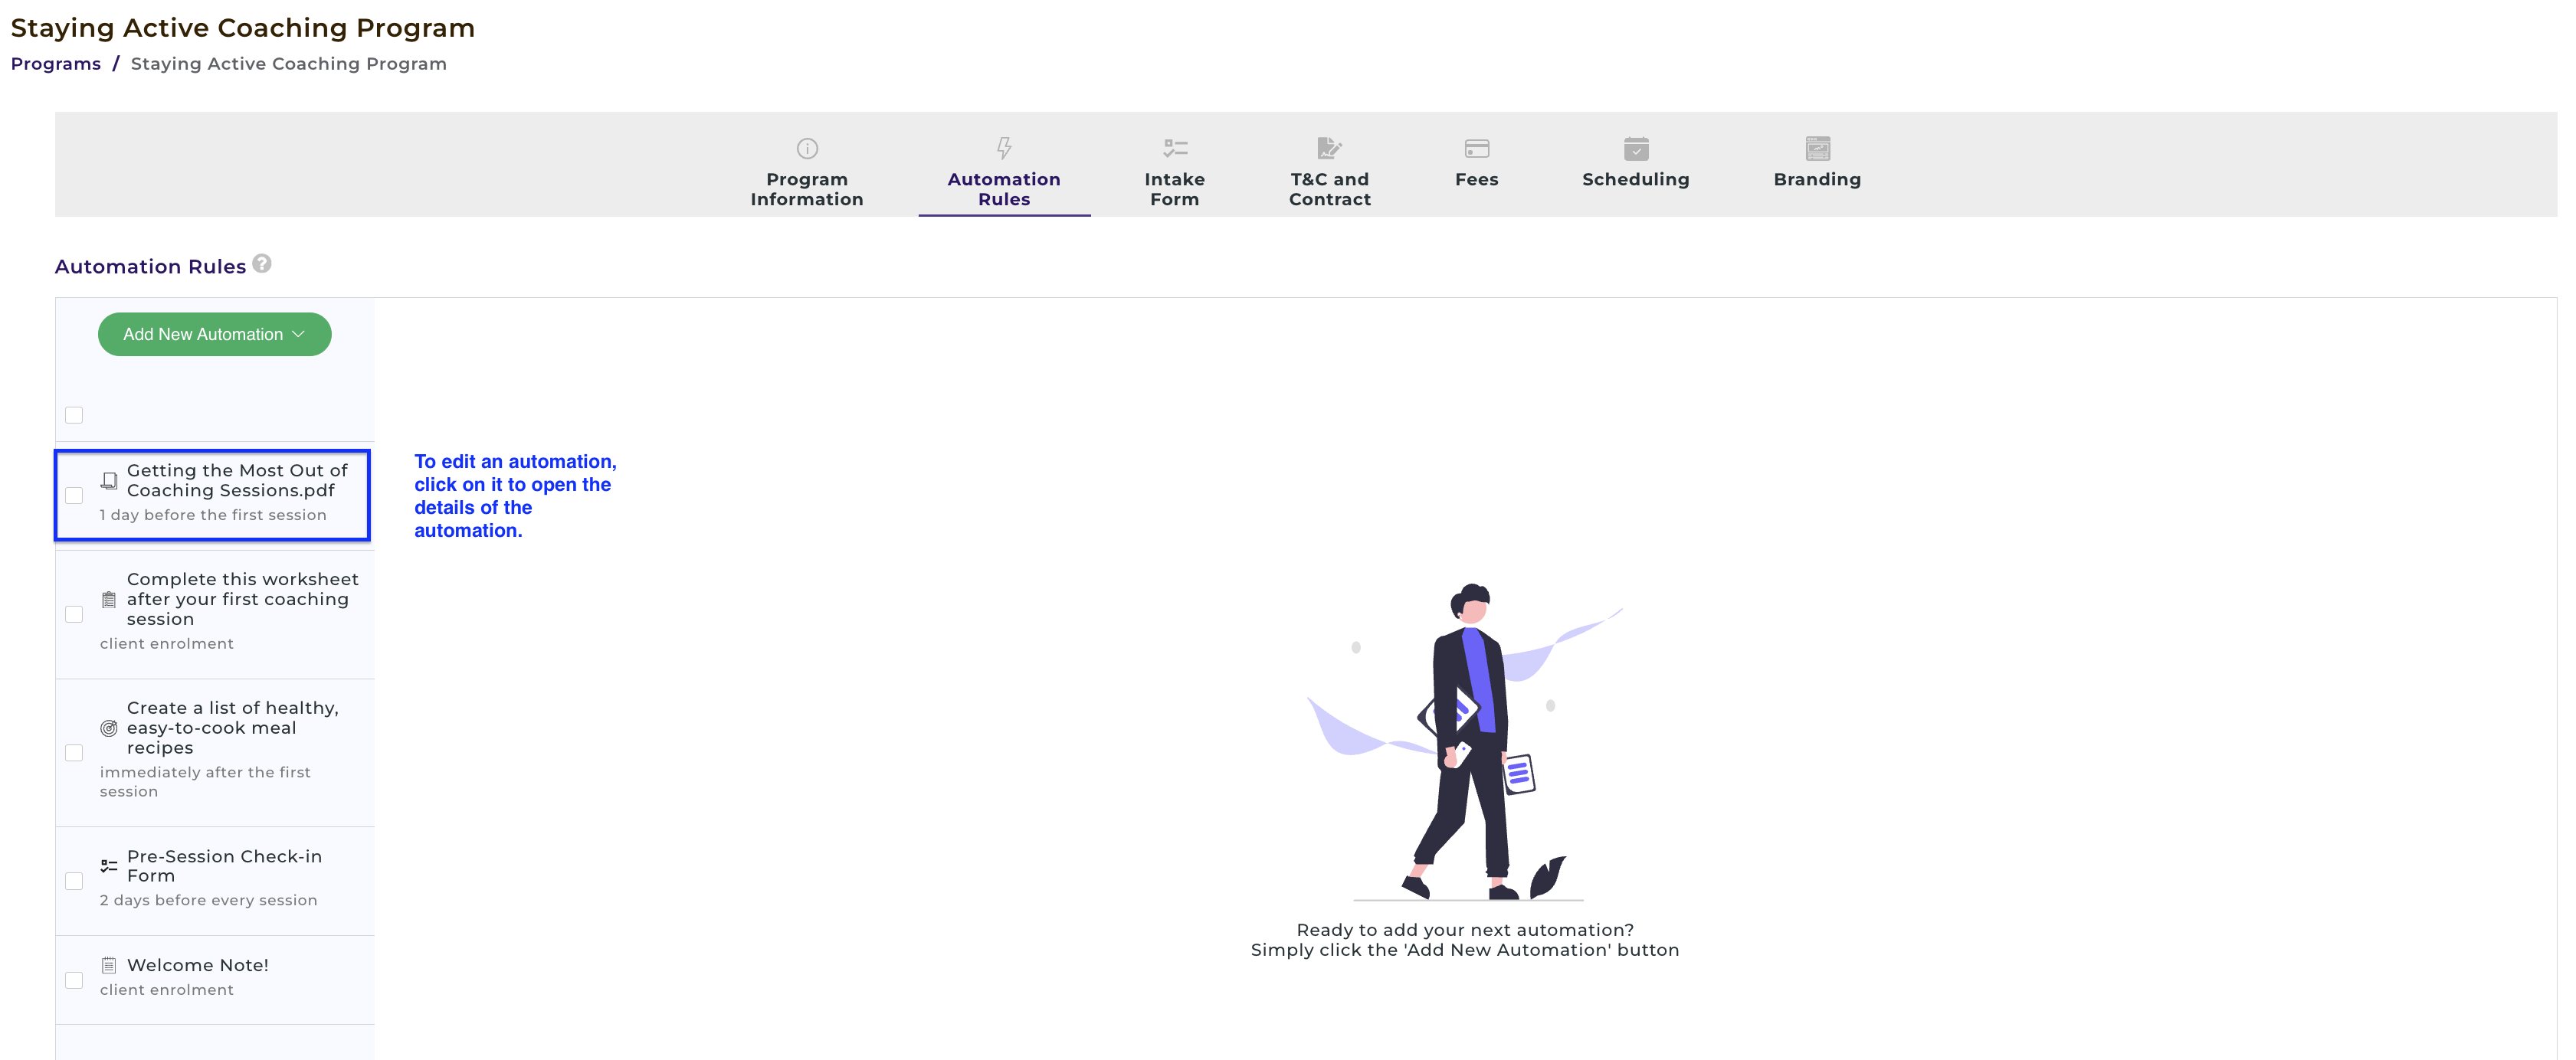
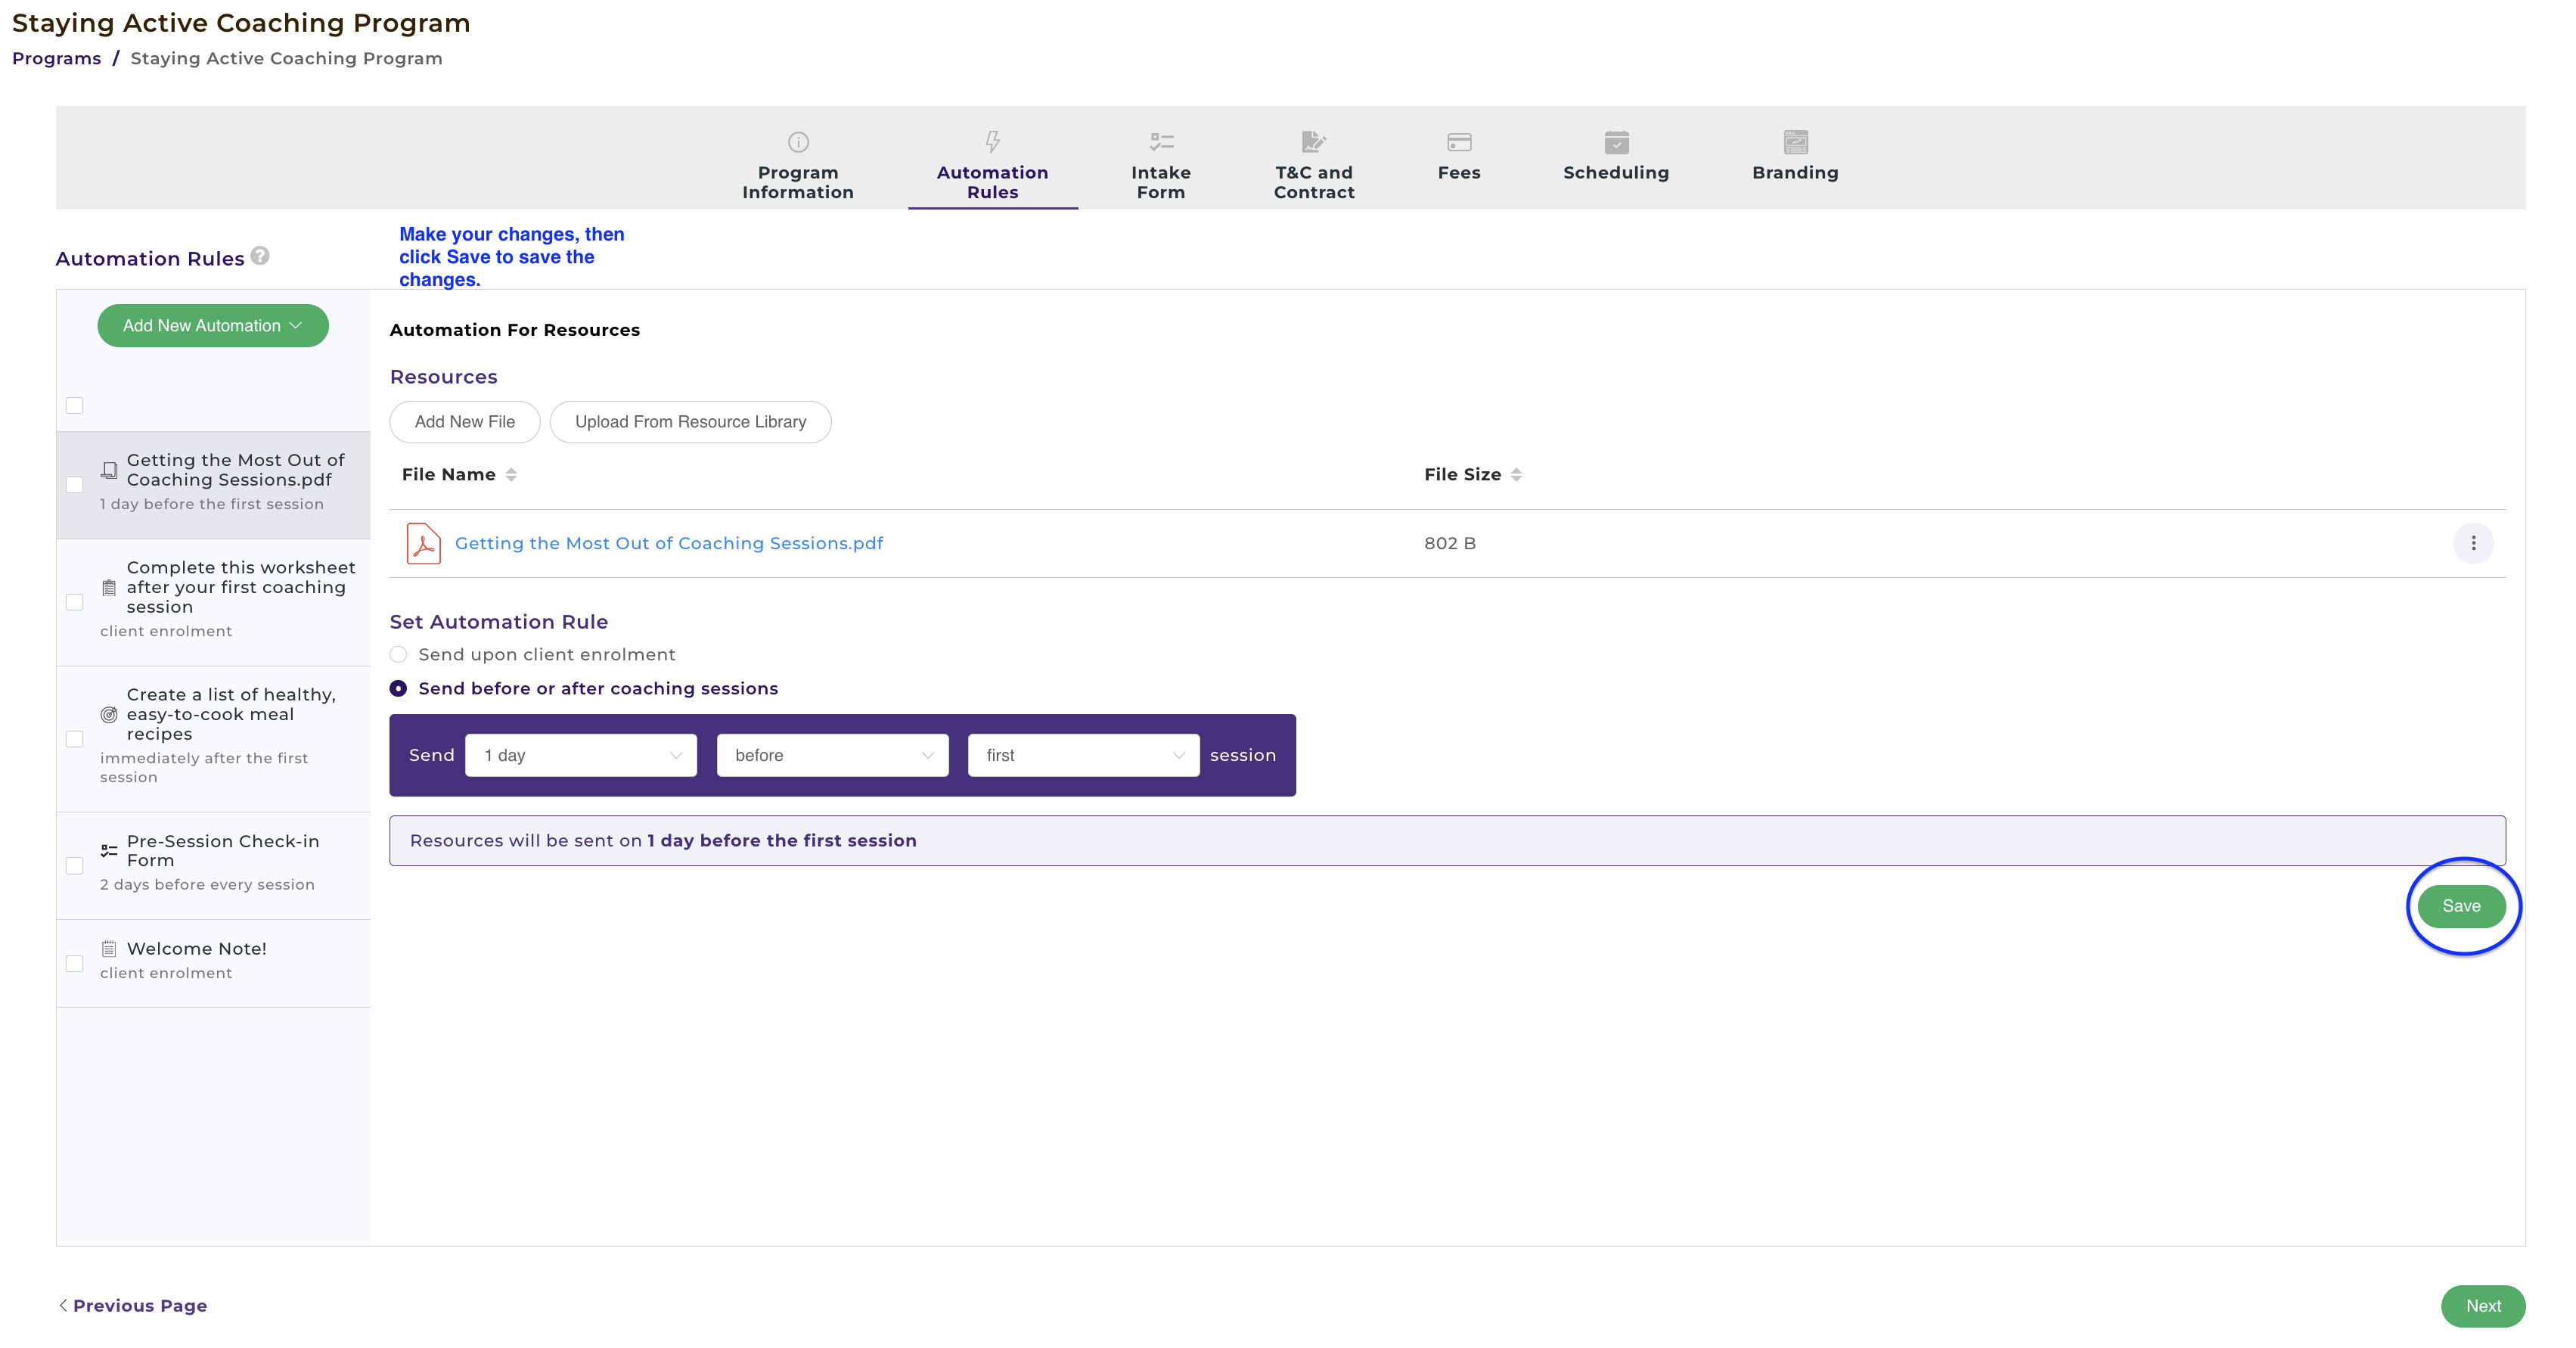
It will open the details of the automation. You can then make the required changes, and click Save to save your changes:
B) Steps to Delete Automation Rules
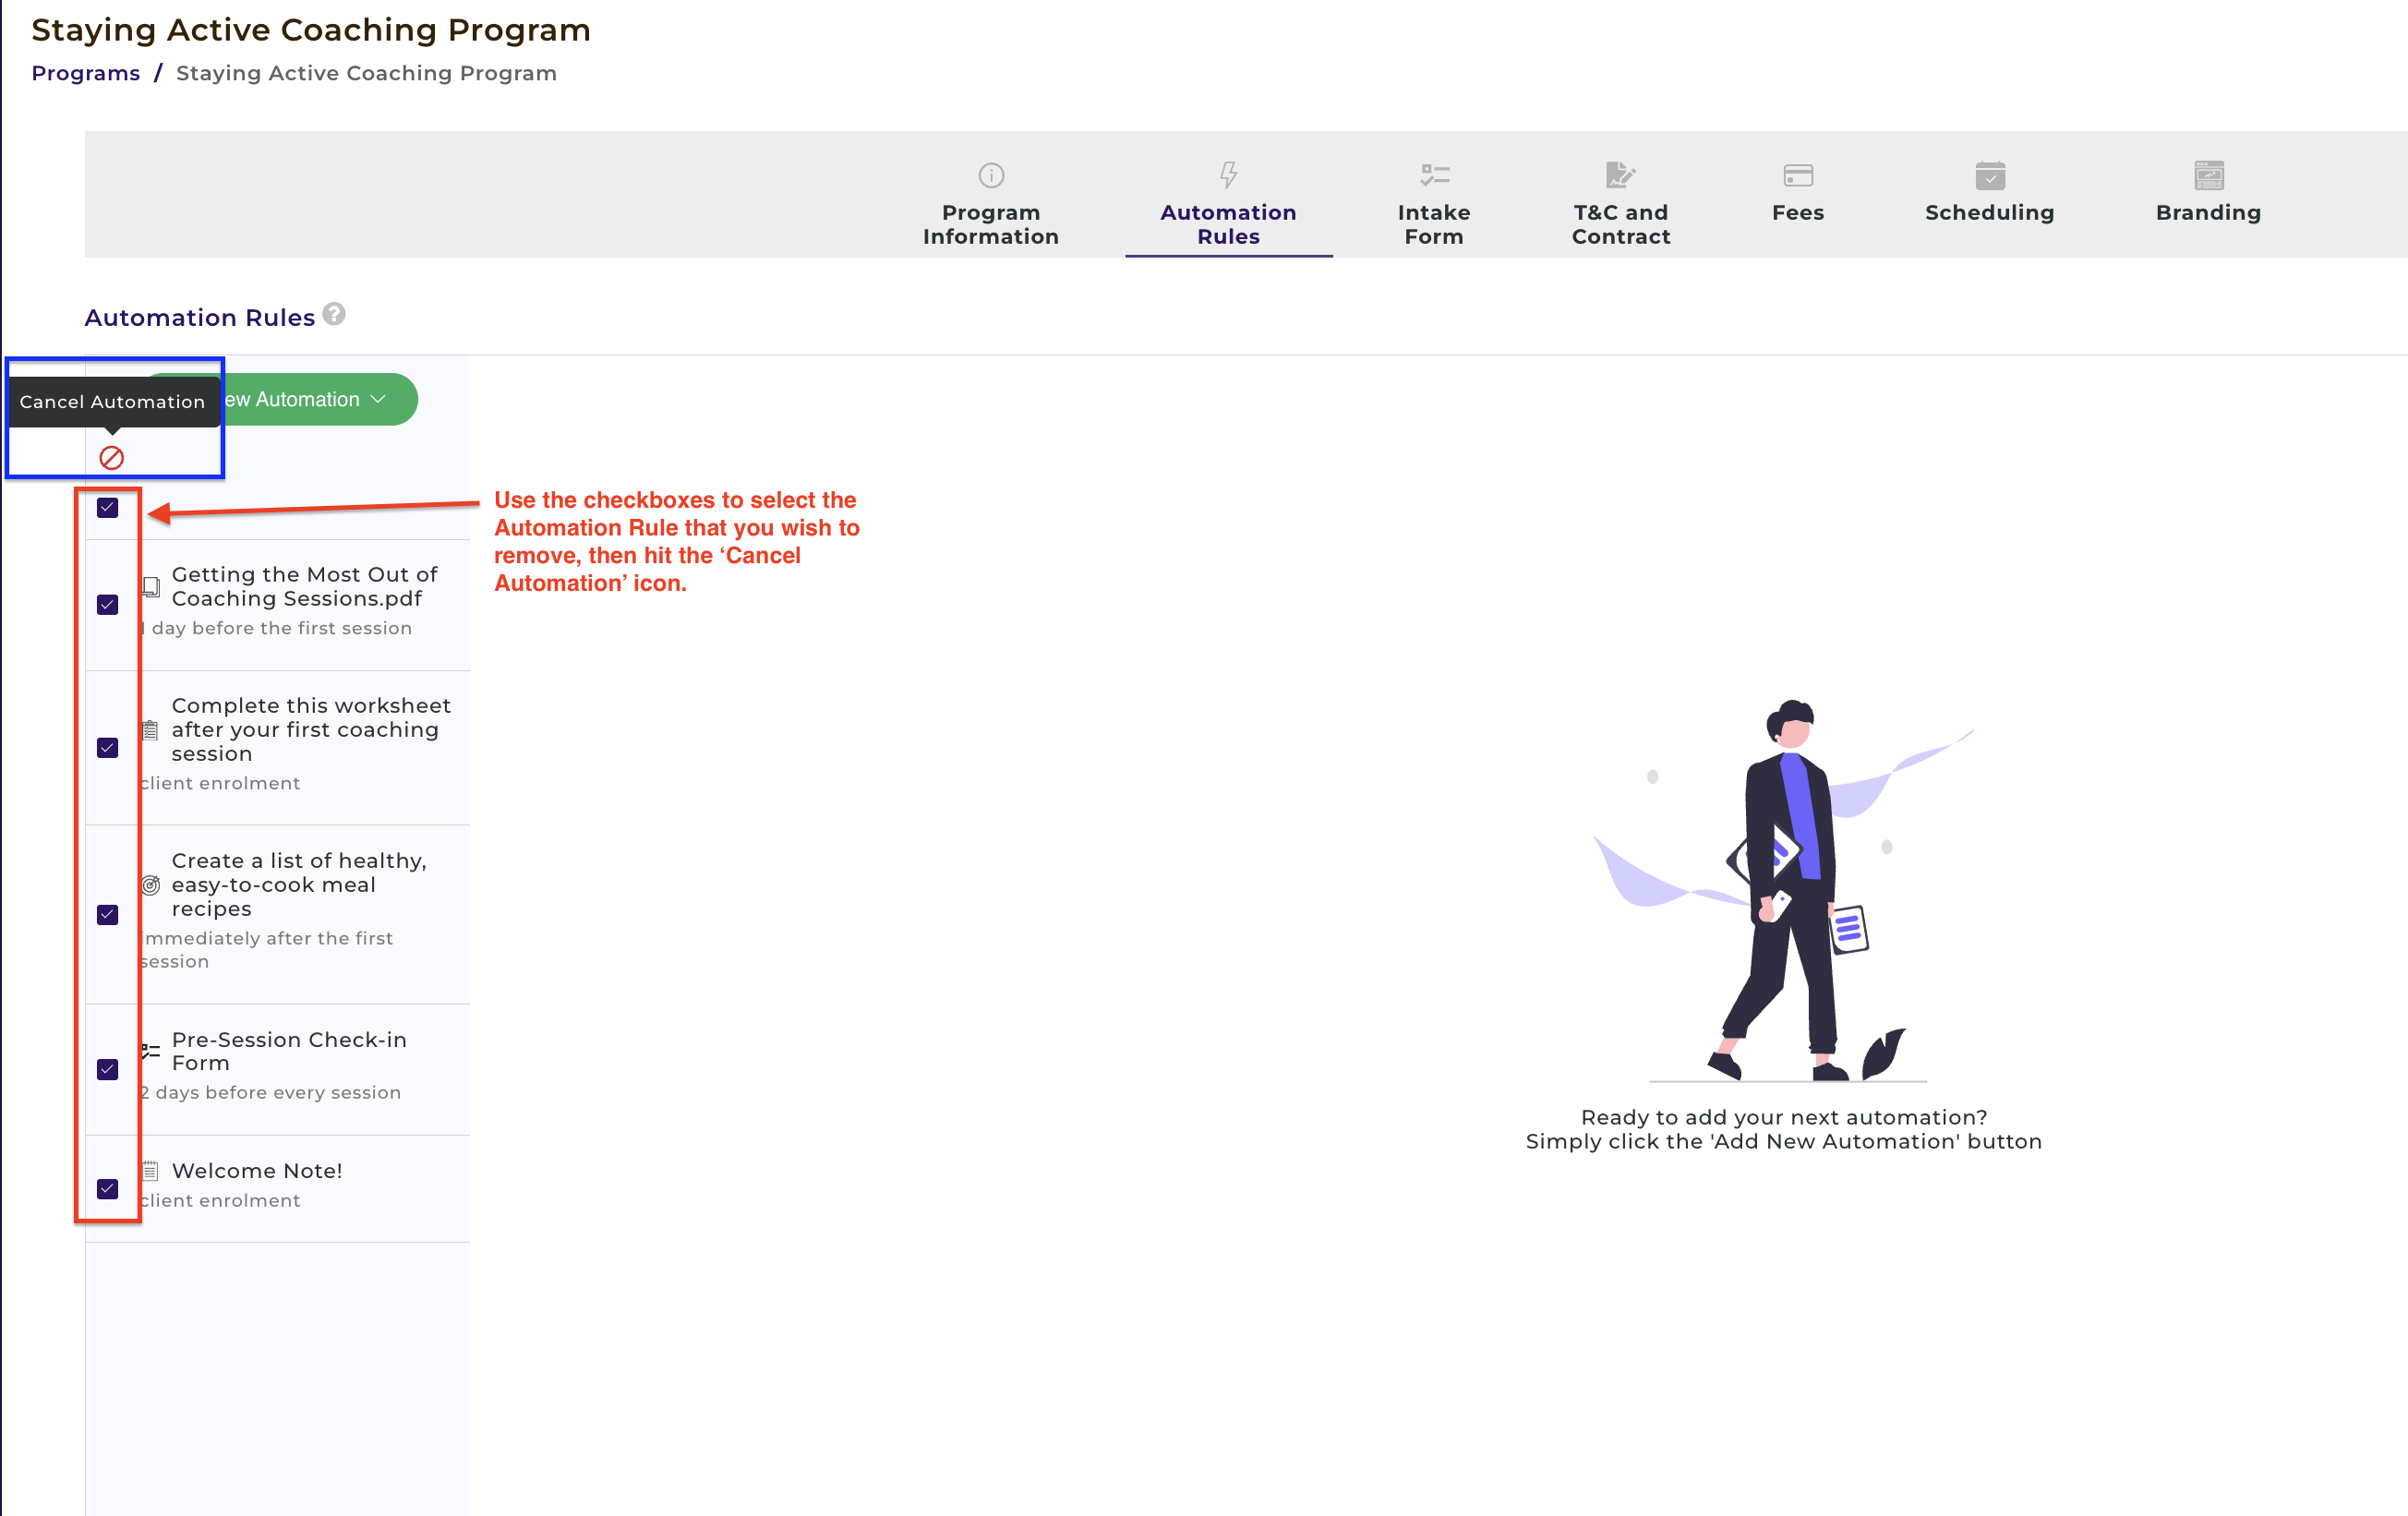
To delete one or more automation rules, simply click on the checkbox next to it, then click the Cancel Automation icon as show below. The automation will be deleted permanently and irreversibly.
