What do the Cancel and Reschedule booking pages look like?
Allowing Your Clients to Cancel or Reschedule 🚫
Your clients would only be able to cancel or reschedule if you allowed them to do so in your Events set-up in the Scheduling step.
Steps to Allow Clients to Cancel or Reschedule
- From your Dashboard, click Scheduling on the left hand side of your screen.
- Click on the Event you would like to edit.
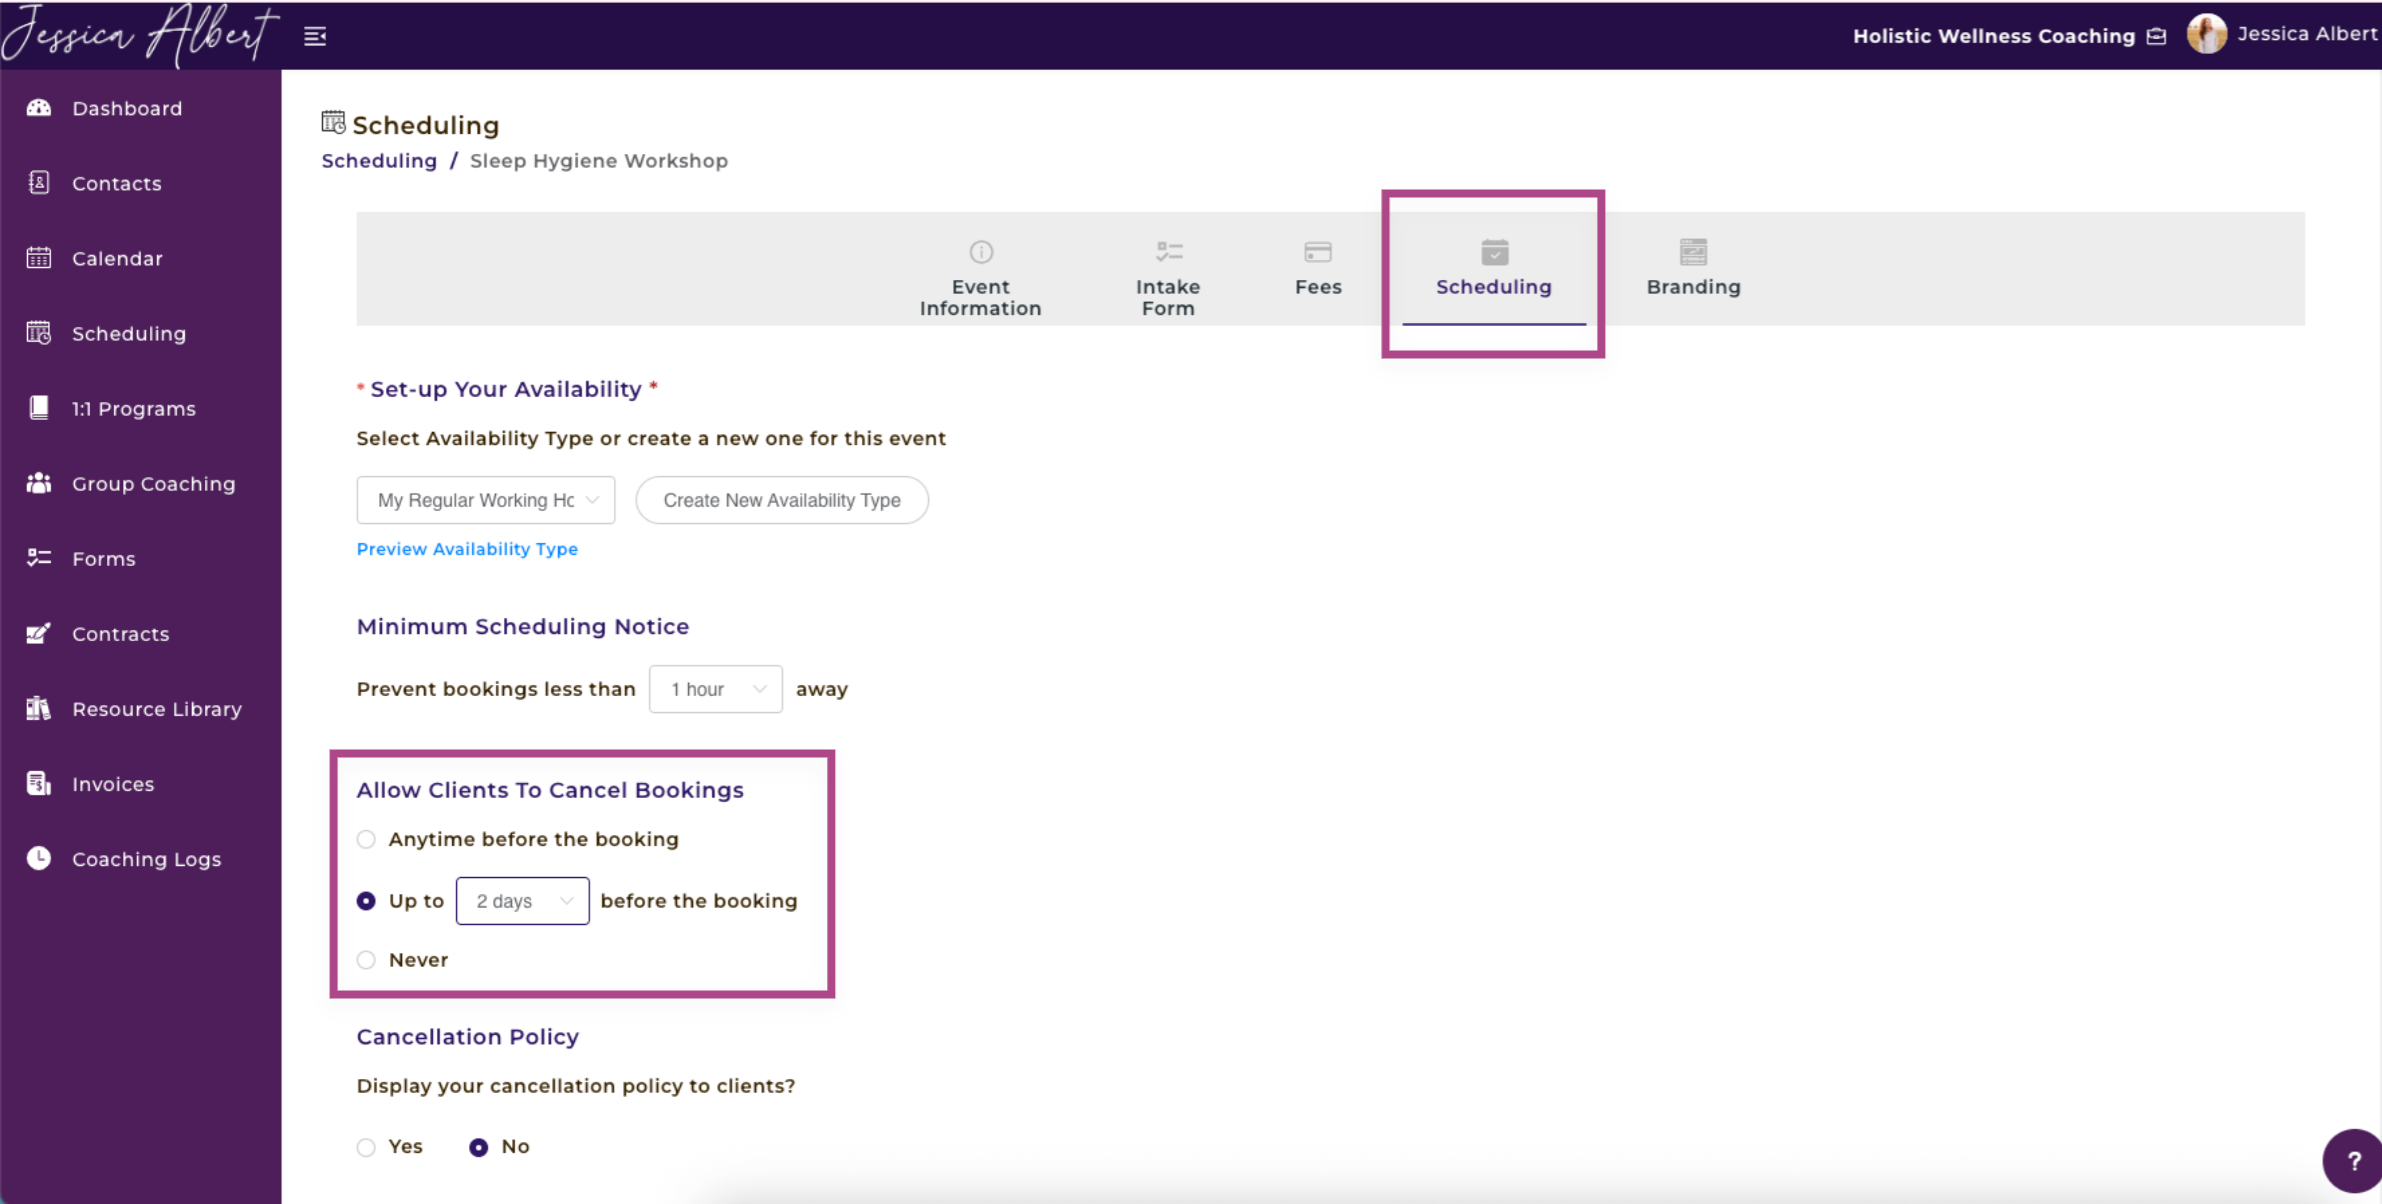
- Then, click the Scheduling tab at the top and you will be brought to this window shown below.
Cancel
- Scroll down to the section titled All Clients to Cancel Bookings.
- You will be presented with 3 options. Select the option you would prefer:
- Anytime before the booking
- Up to ____ before the booking
- Never
Reschedule
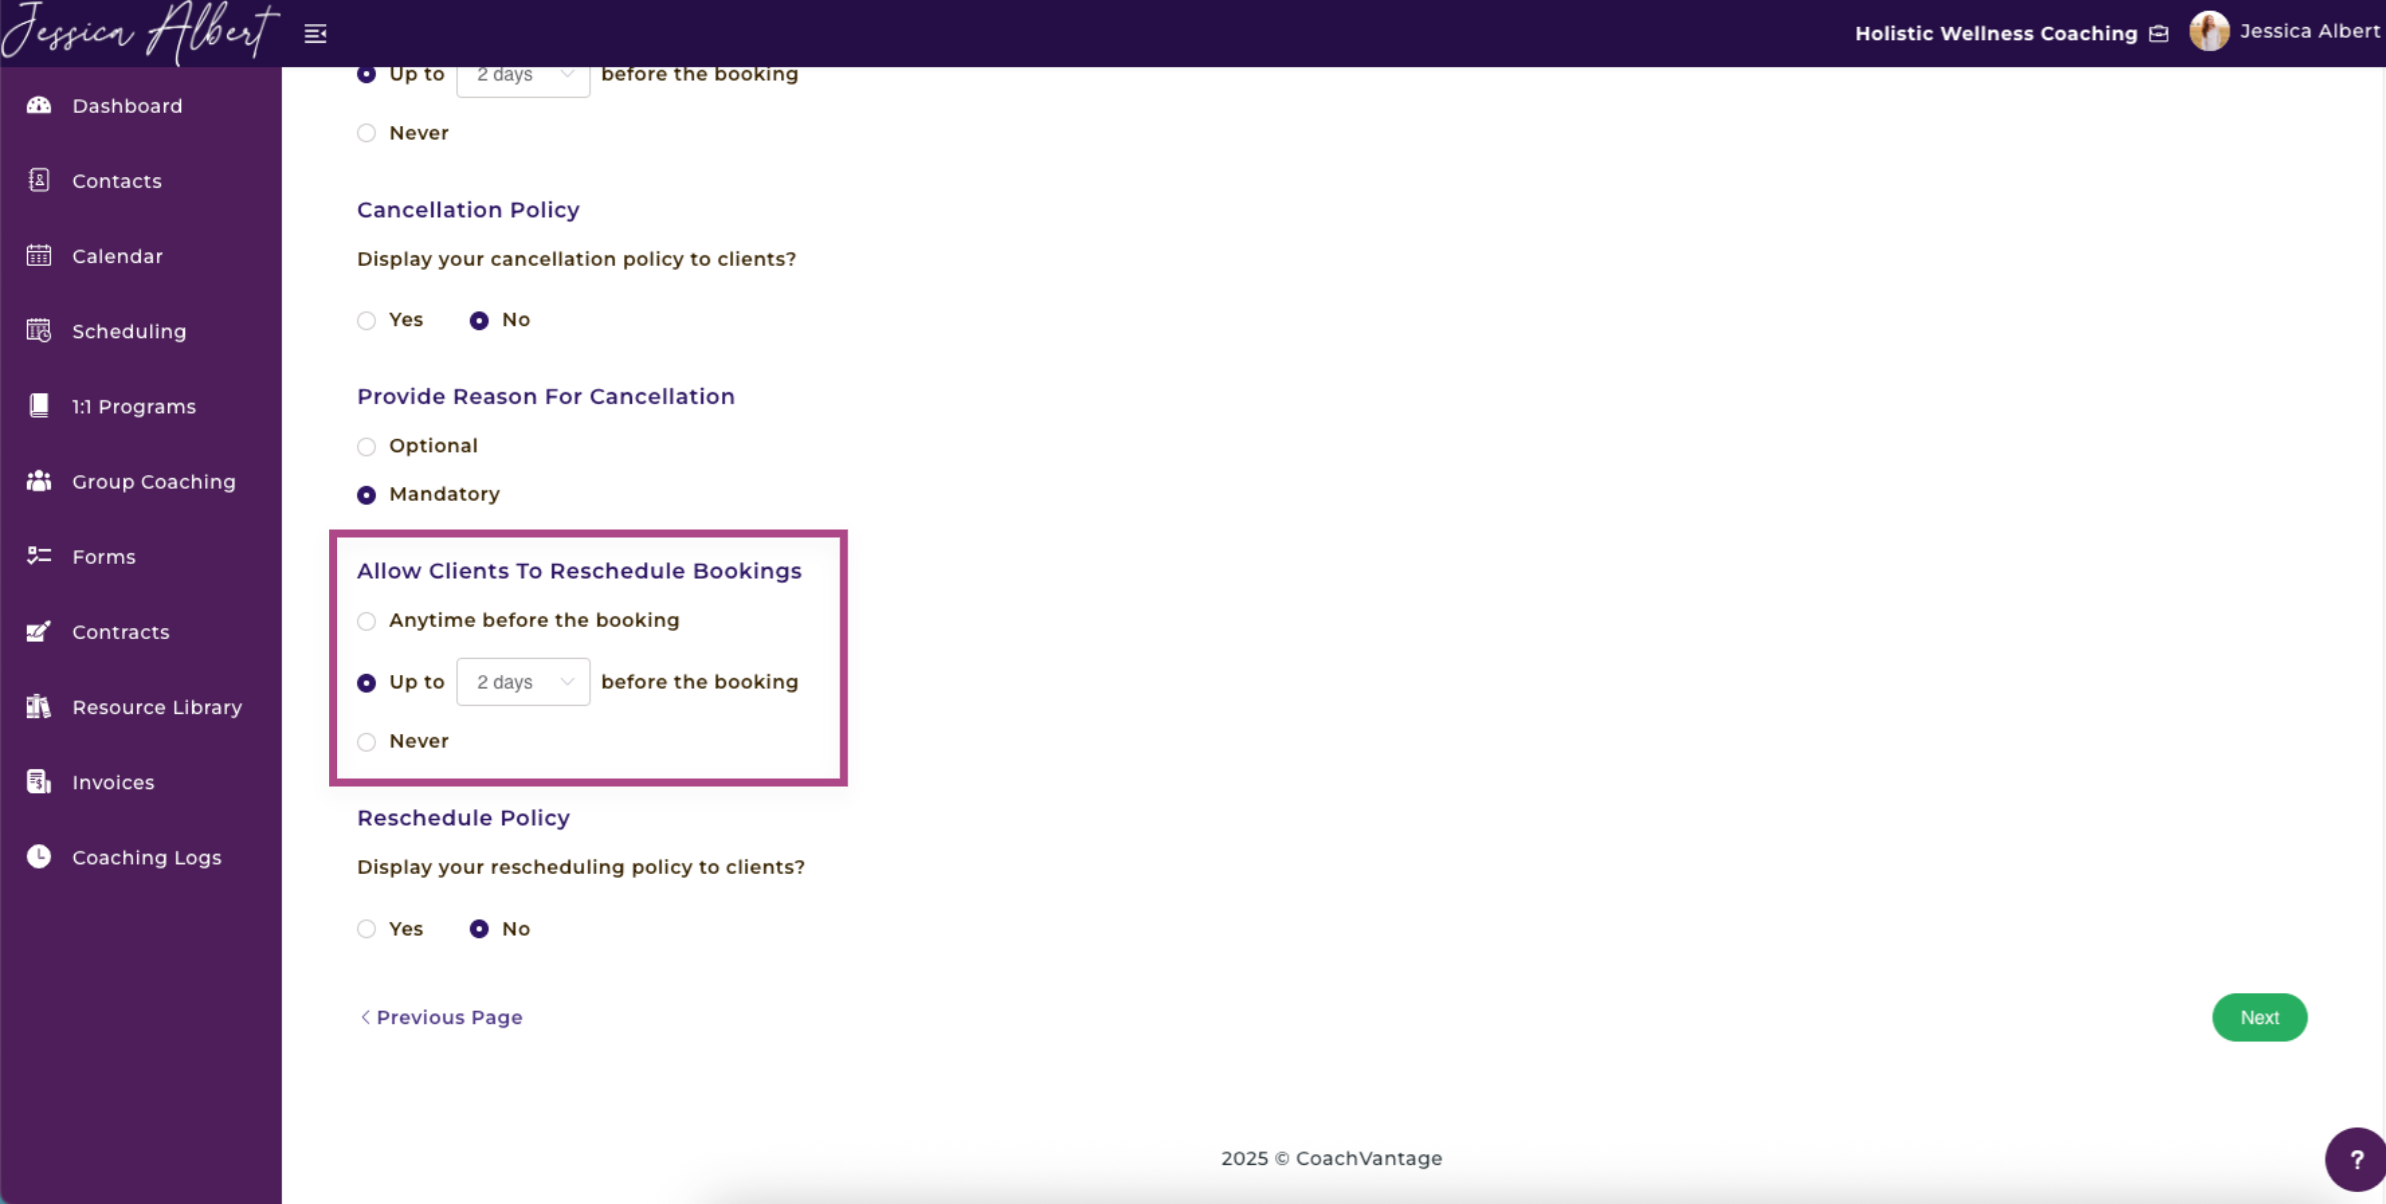
- Scroll down to the section titled Allow Clients to Reschedule Bookings.
- You will be presented with 3 options. Select the option you would prefer:
- Anytime before the booking
- Up to ____ before the booking
- Never
Below are images that illustrate what your Cancel and Reschedule booking pages look like to clients:
Cancel Booking Page
When a client signs into the Client Portal, a list of his/her/their Upcoming Appointments will be shown in the top right hand corner of the screen. A client can click the 3-dot button menu and then click View Details.
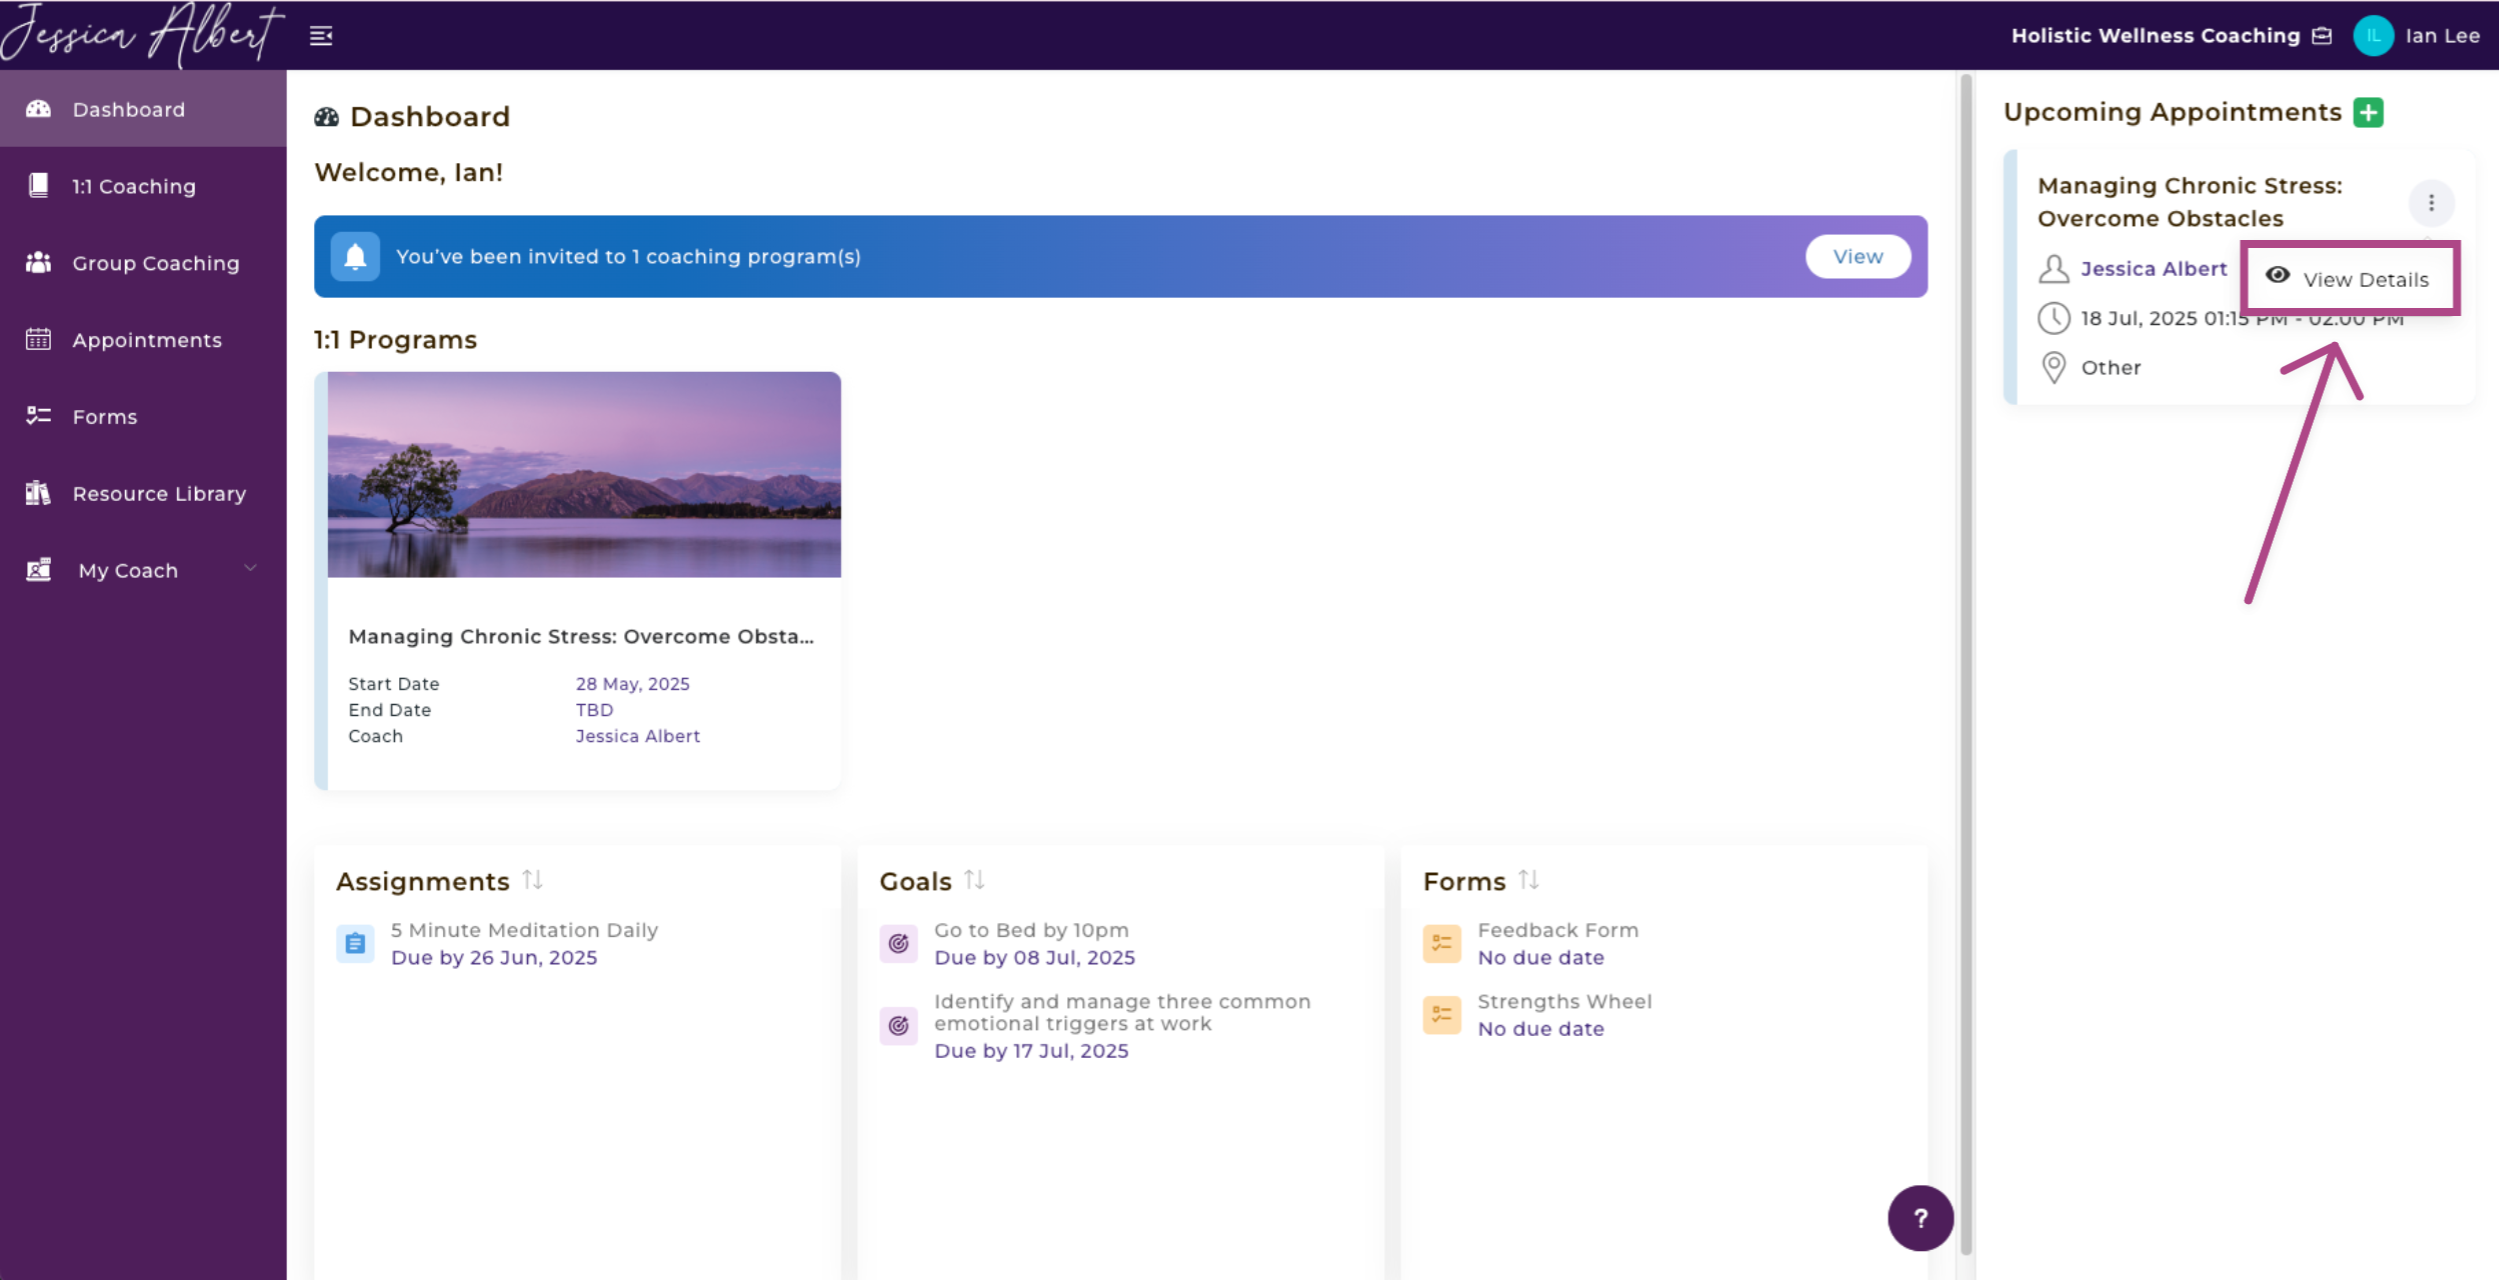
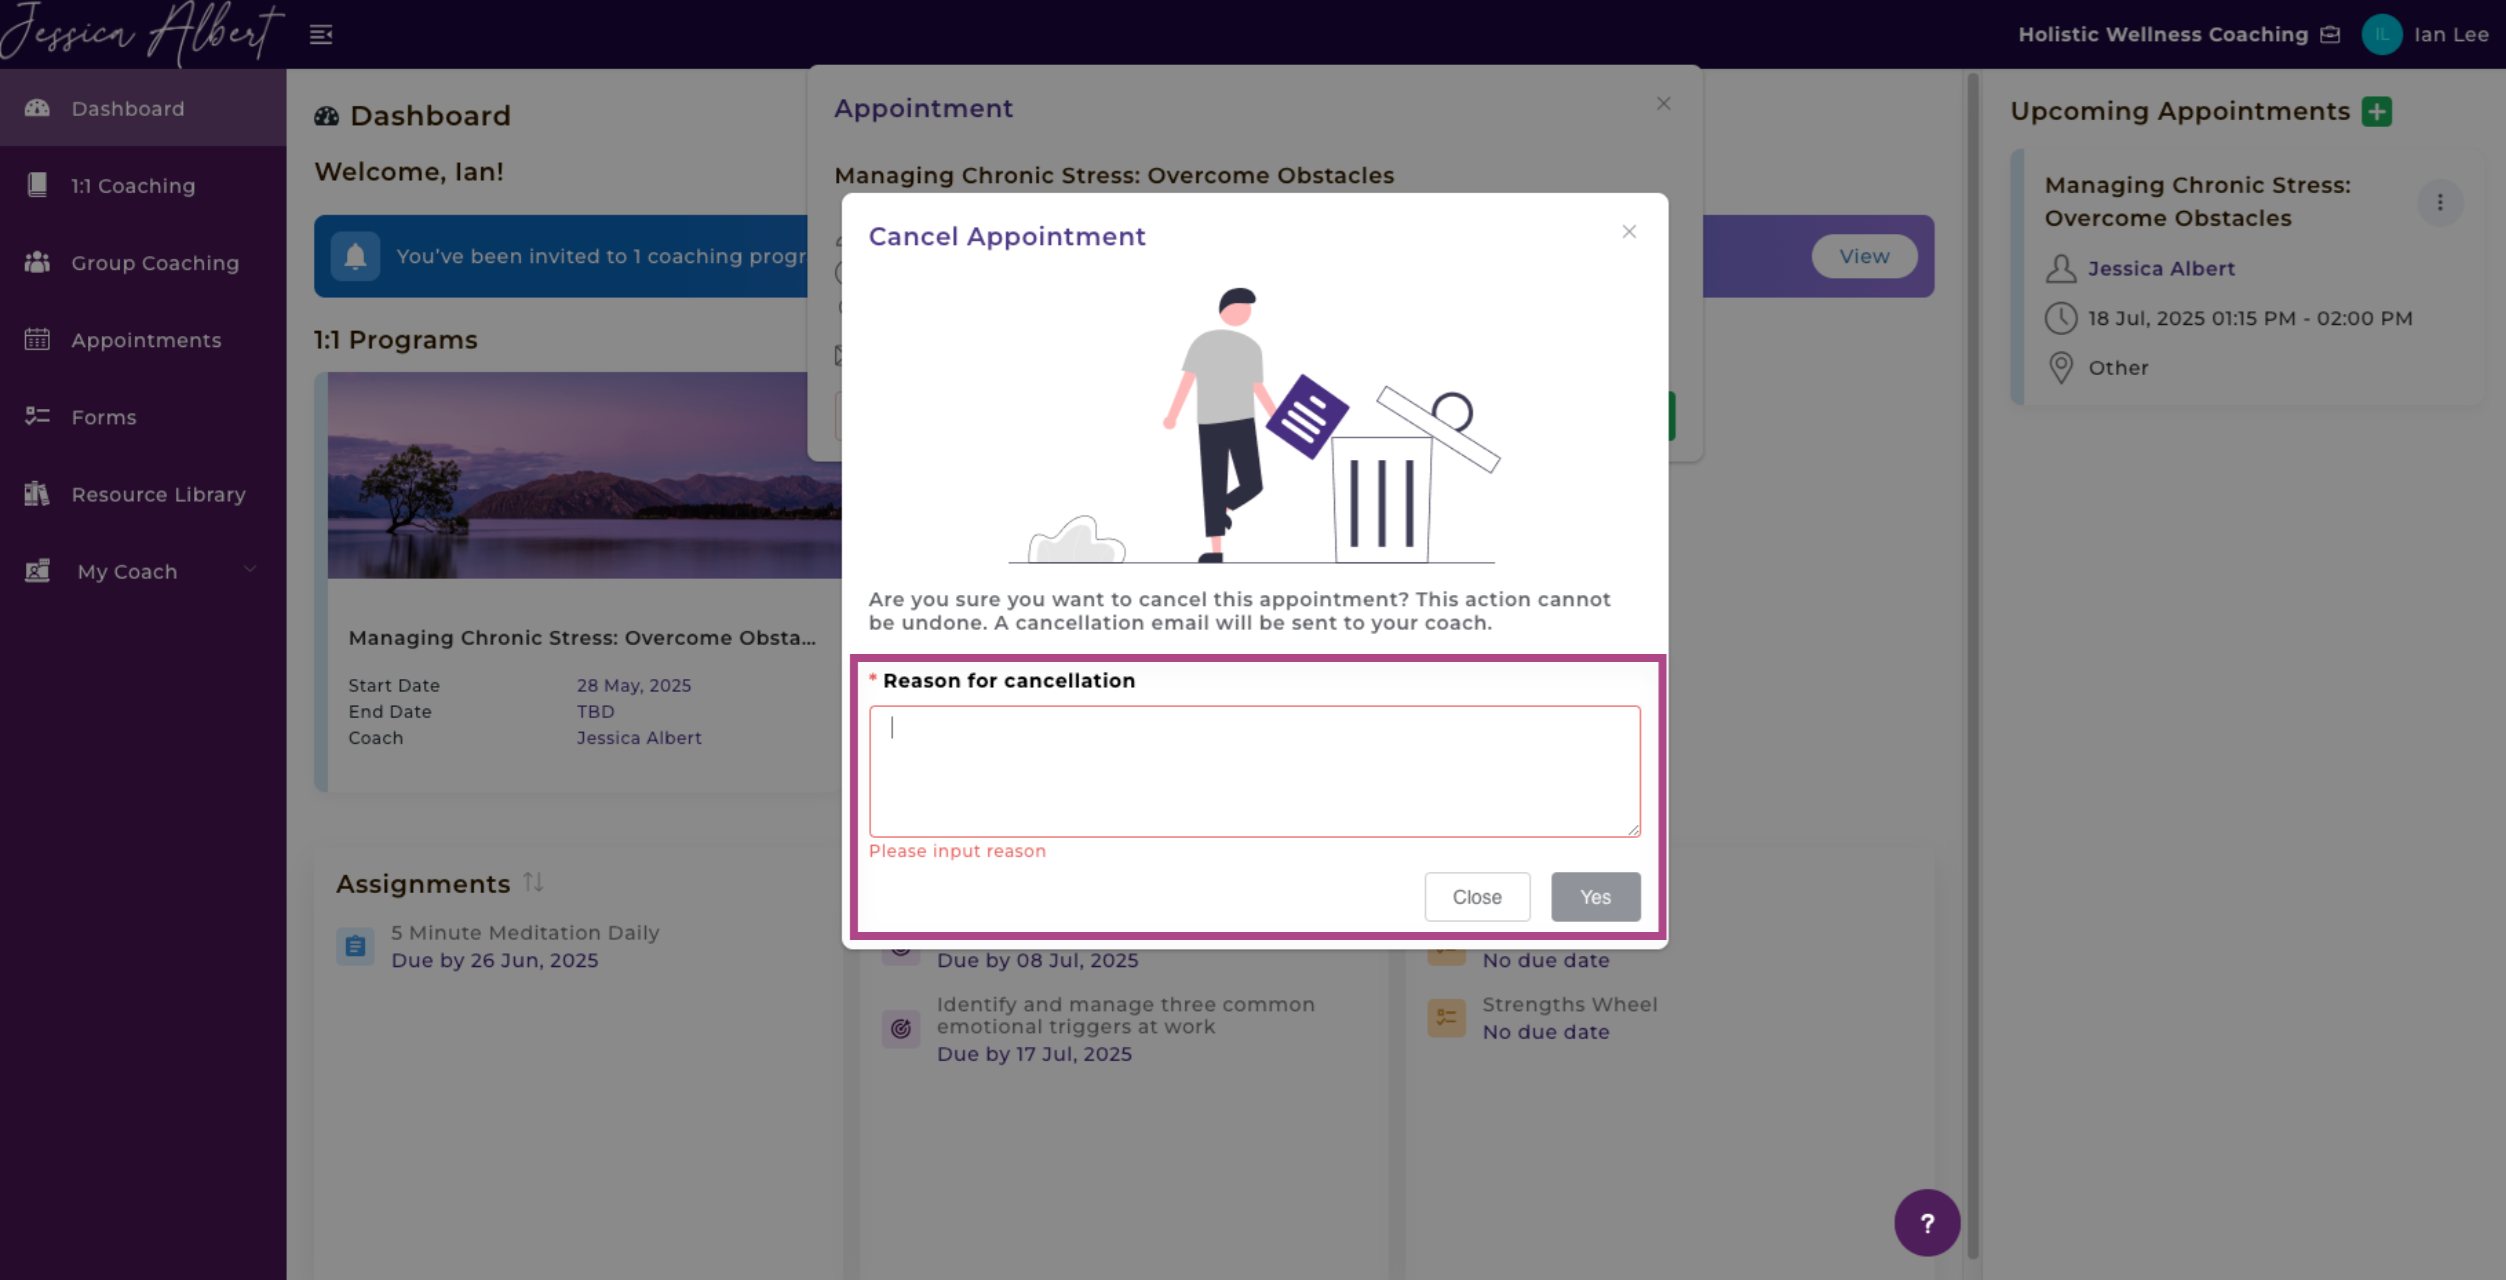
If you, the coach, have given clients the ability to Cancel, this option will be displayed on the pop-up window.
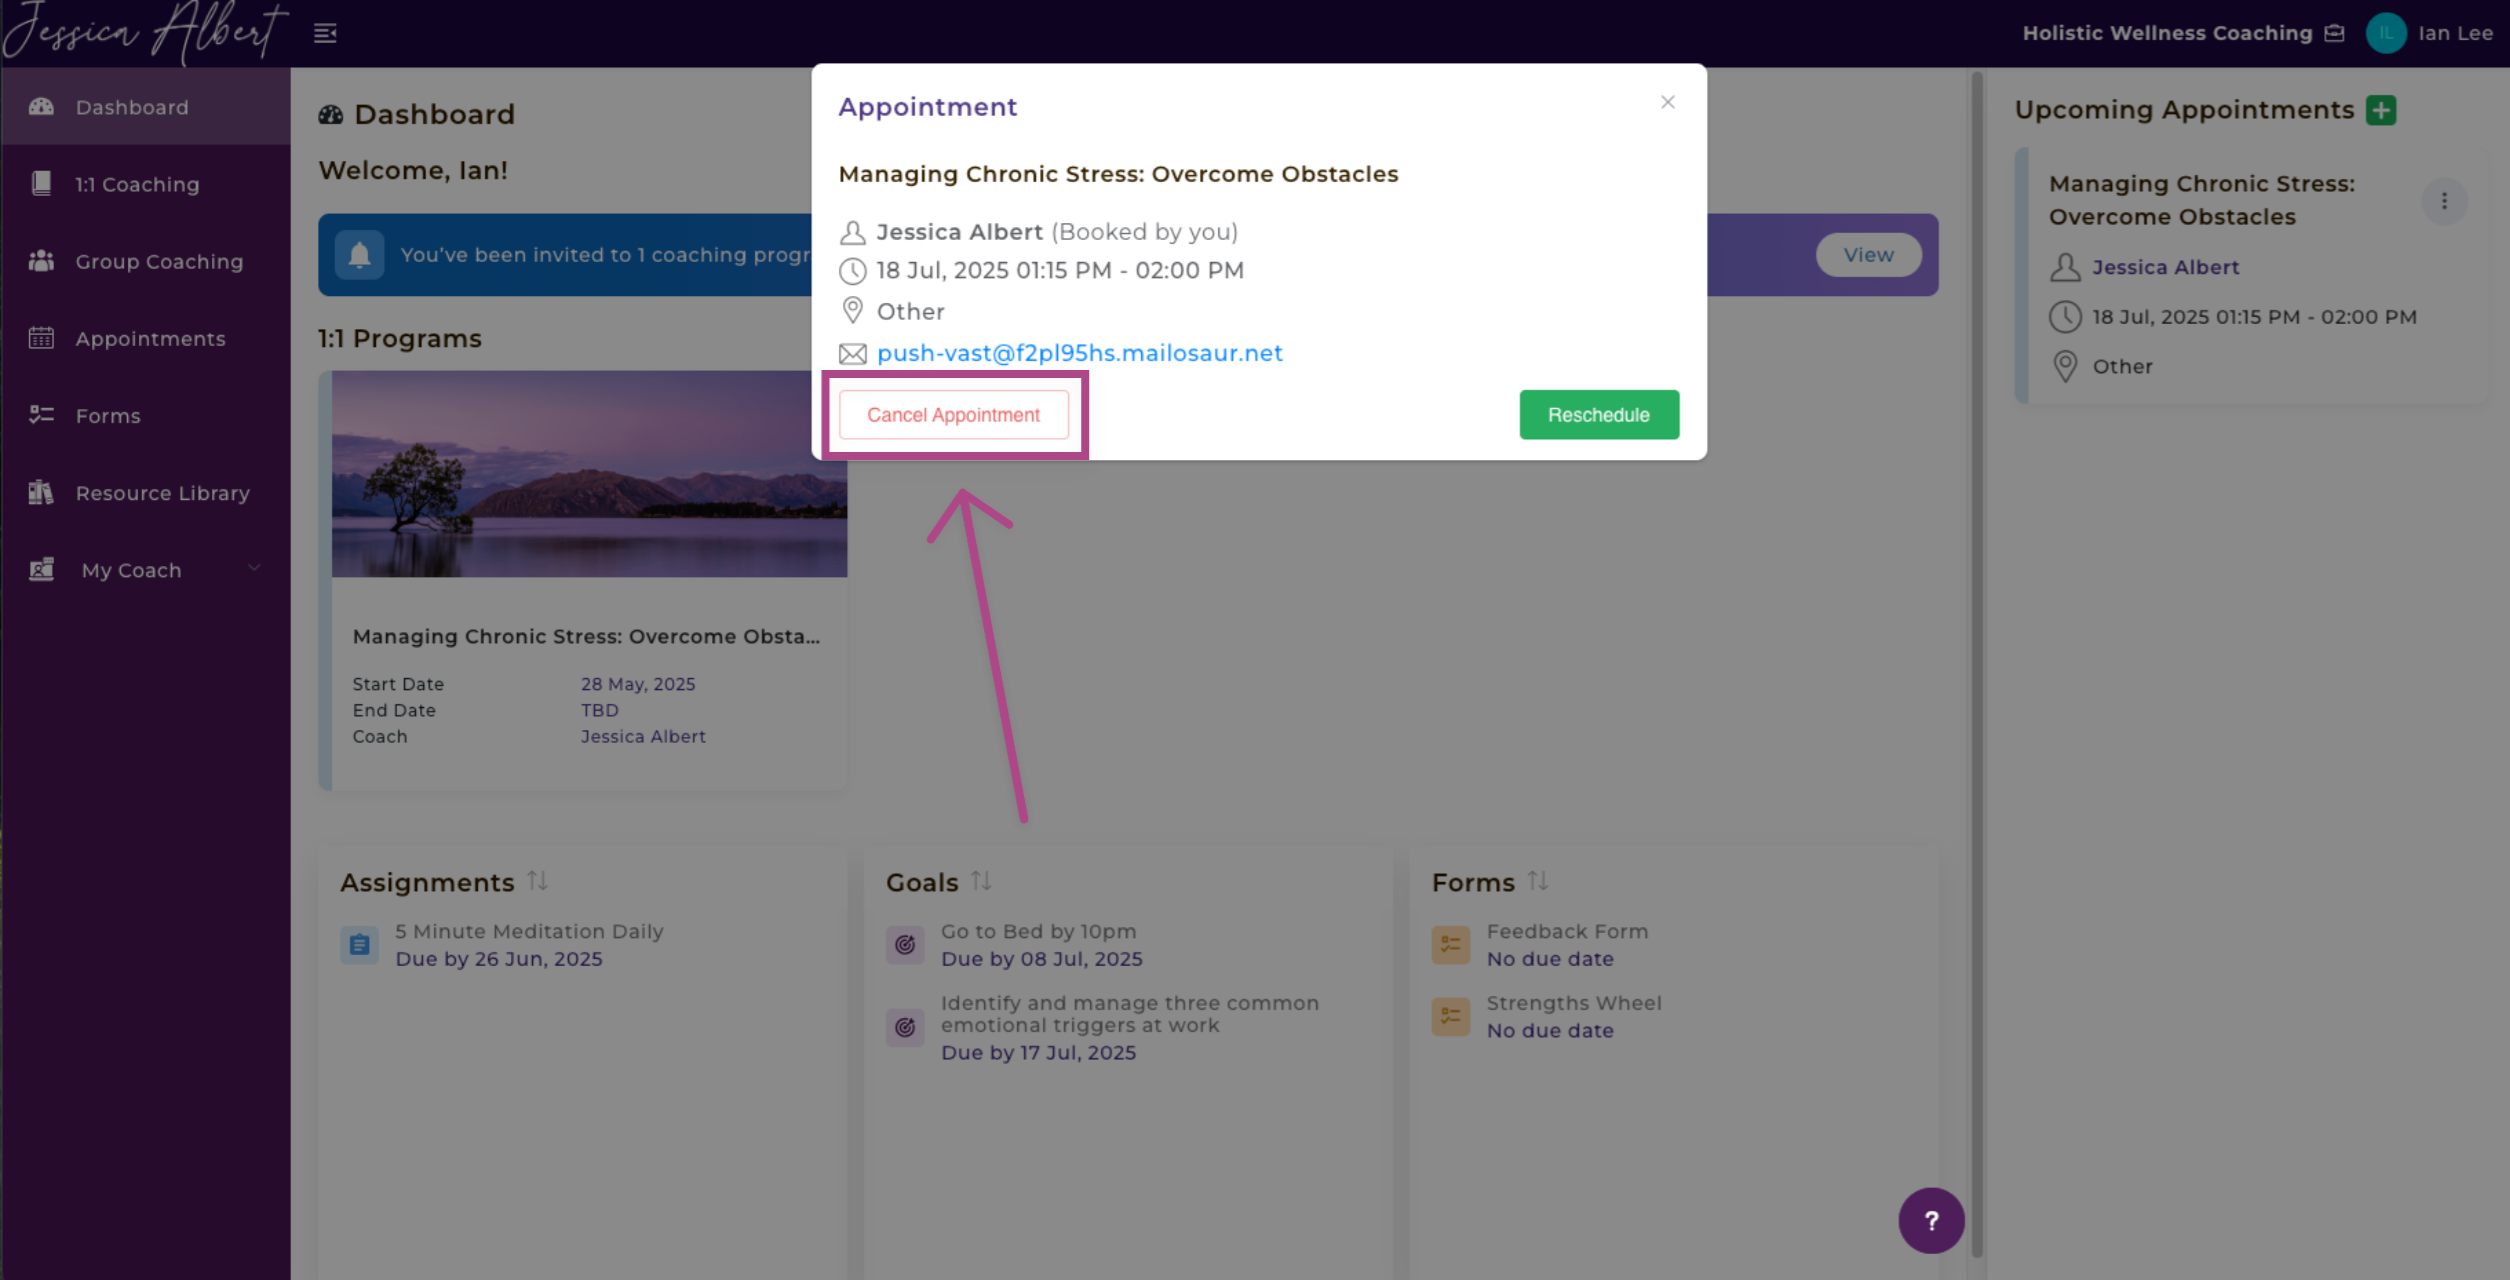
A client can click on the desired action and then confirm they would indeed like to Cancel or Reschedule.
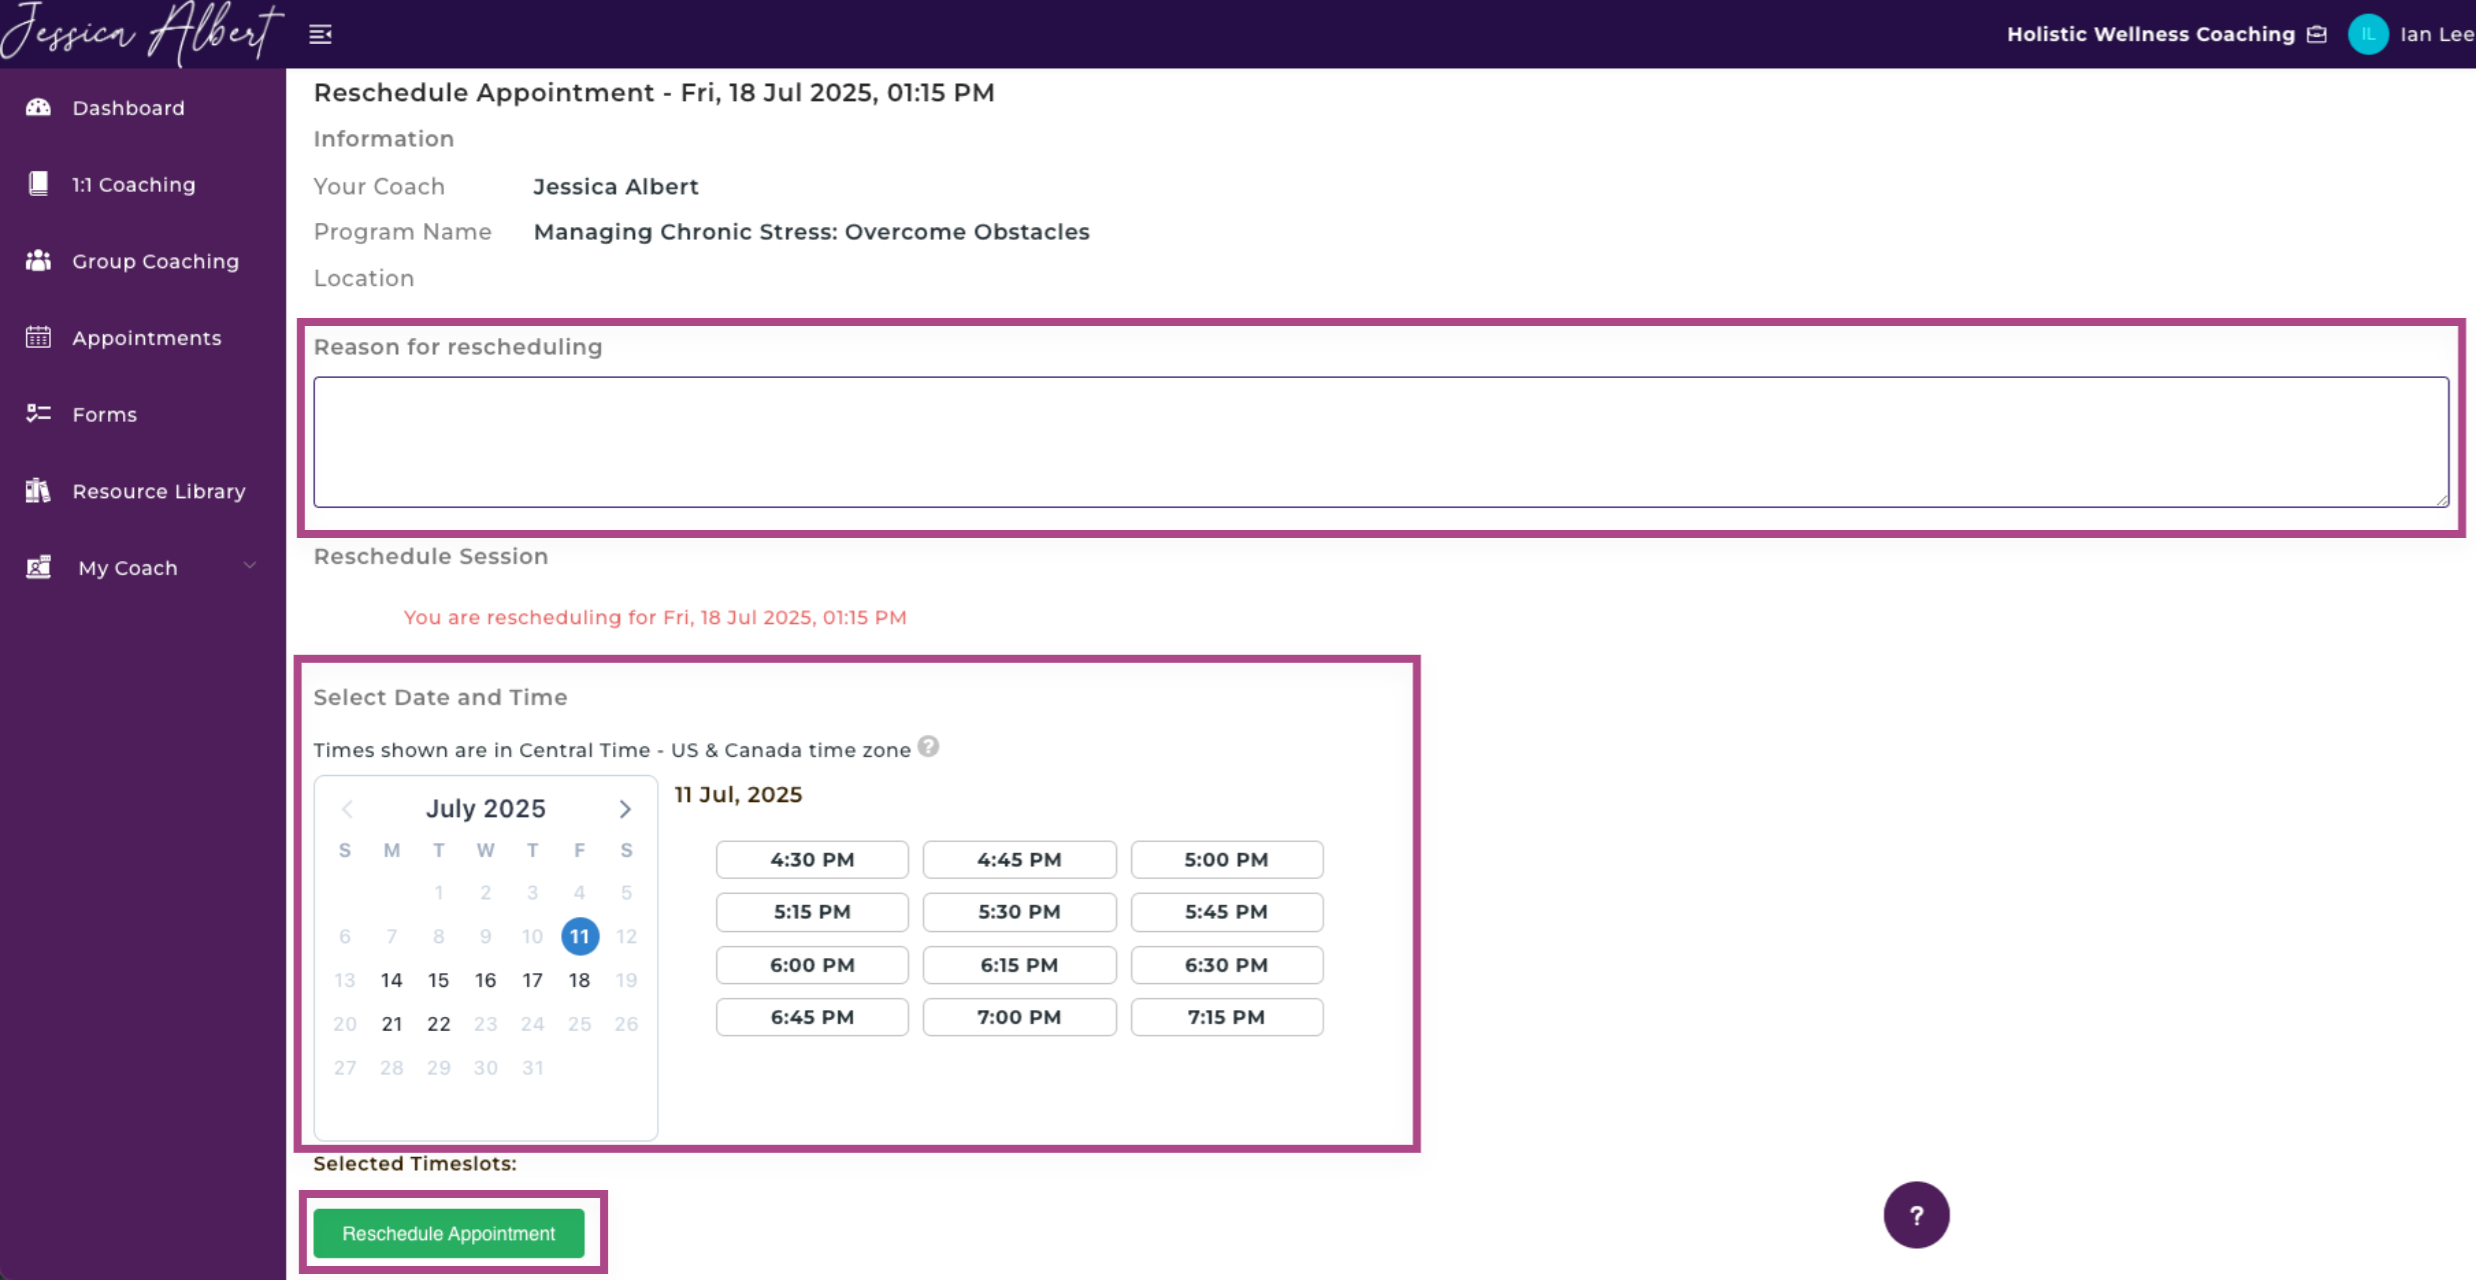
Reschedule Booking Page
Similarly, if a client would like to Reschedule, he/she/they would go to their Upcoming Appointments list, click the 3-dot button menu and then click View Details.
Once again, if you (the coach) have given clients the ability to Reschedule, this option will be displayed on the pop-up window.
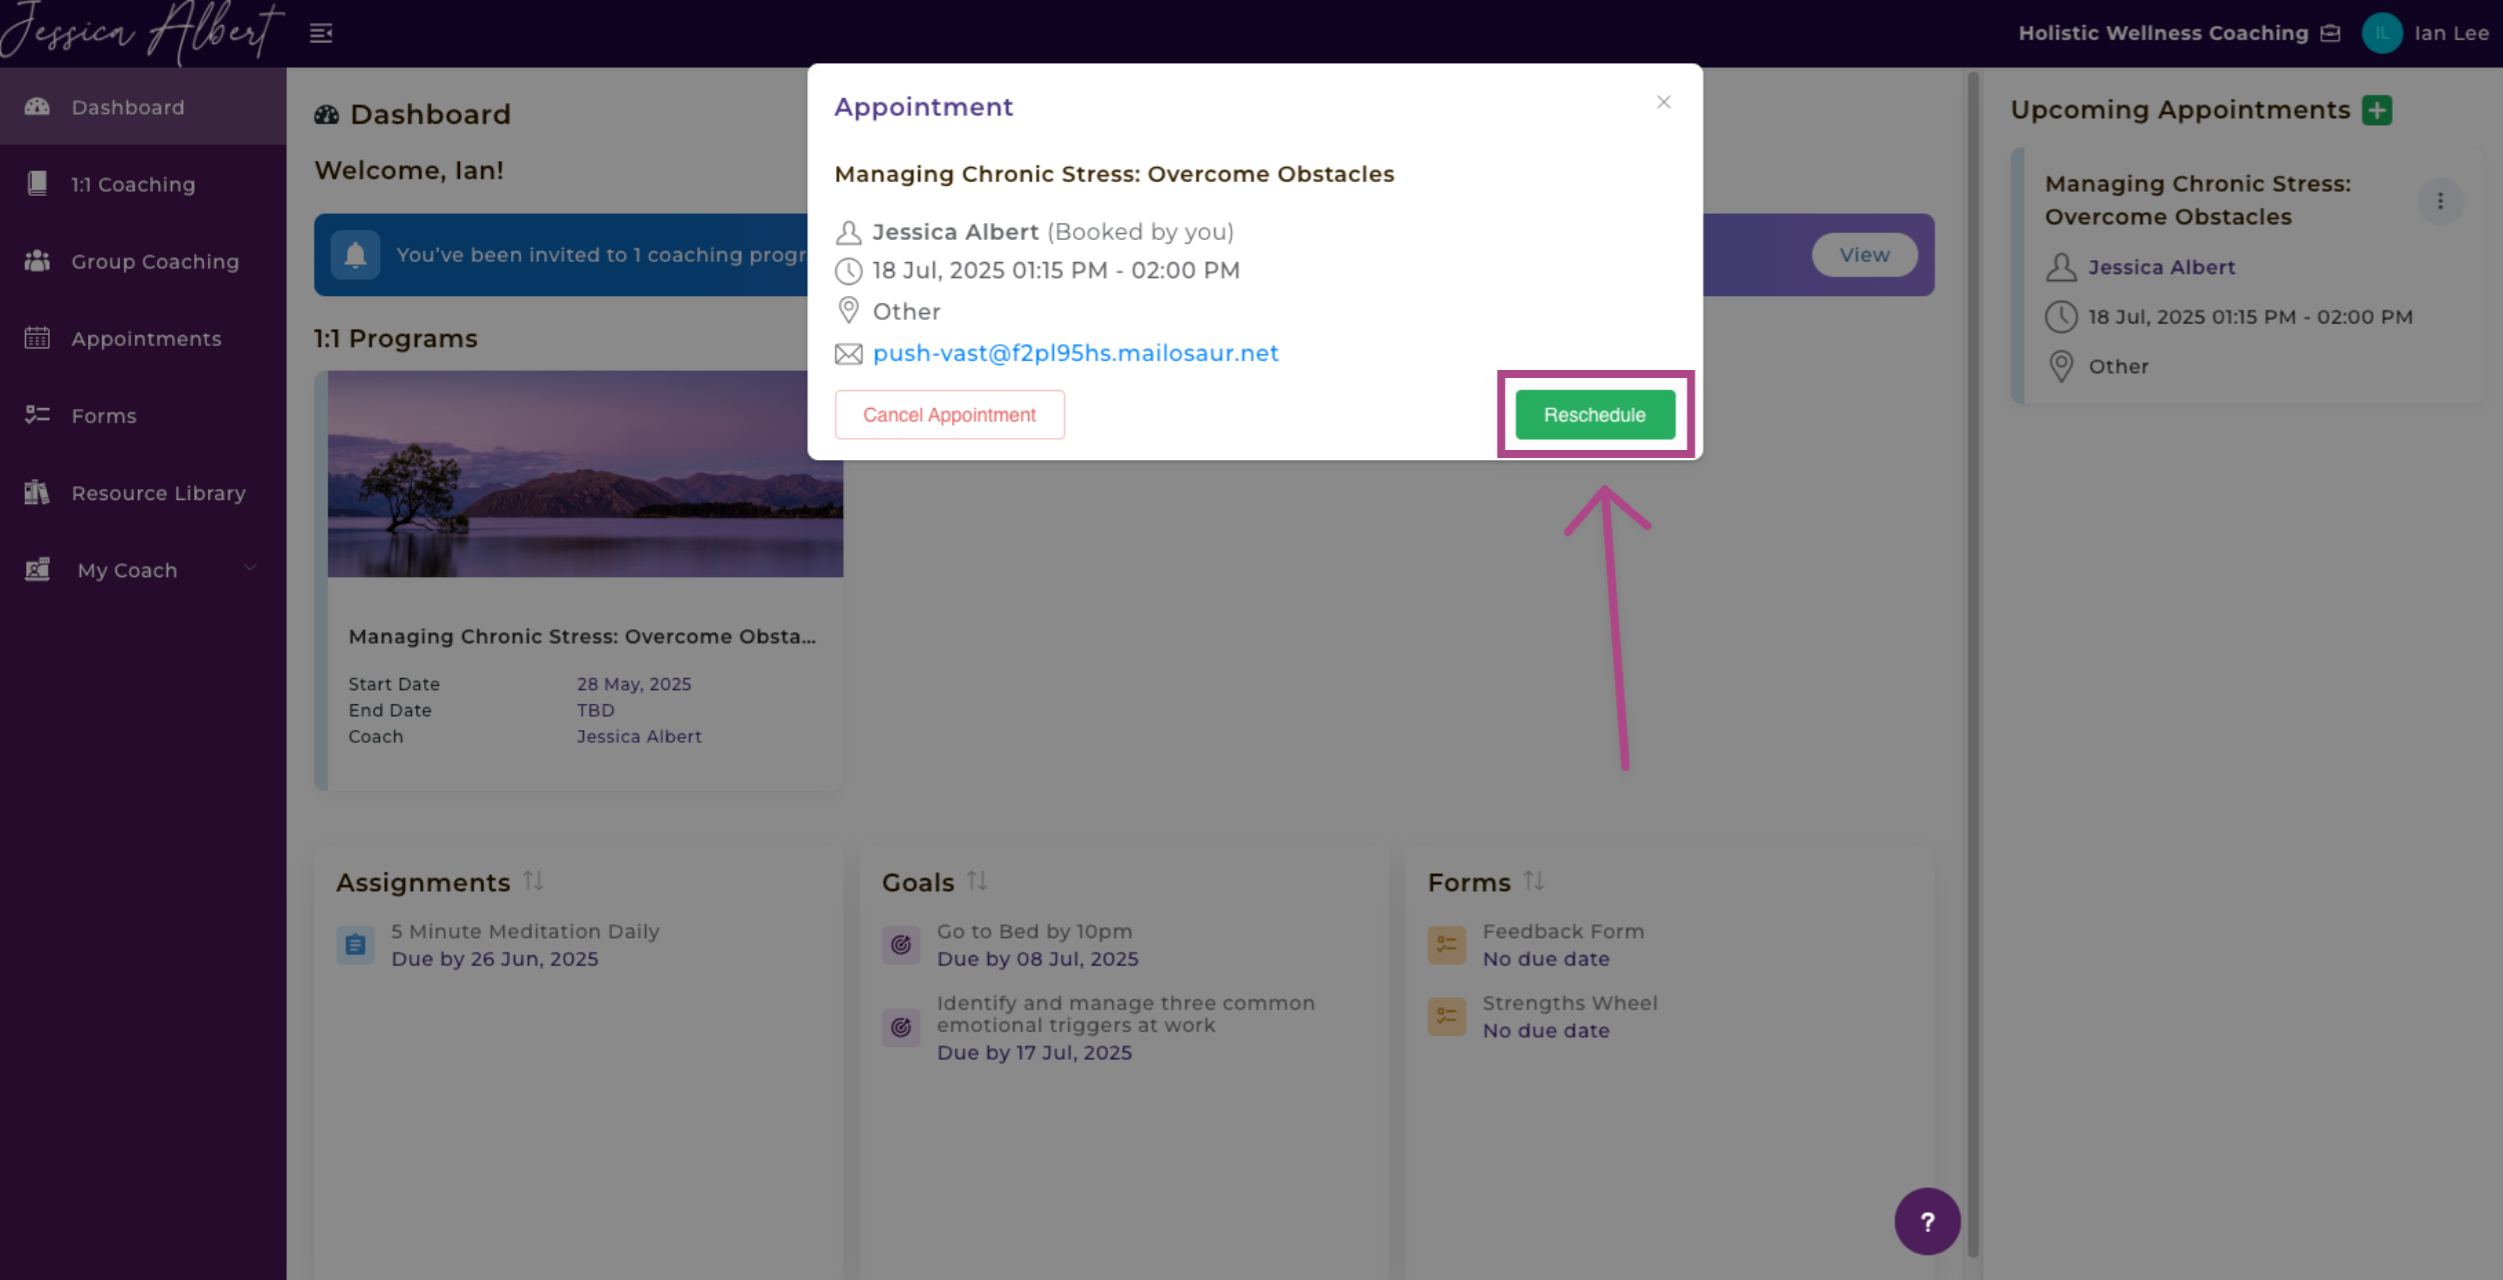
As a coach, you have the option to make listing a Reason for Rescheduling Mandatory or Optional when a client reschedules.