How to Create a New Appointment with Your Clients
Overview
In CoachVantage, there is flexibility for either you or your clients to set up Appointments.
Clients can book Appointments with you using the self-service scheduling functionality for Events (refer to this article) or for Program Sessions (refer to this article).
This article describes how you, as a coach, can set up appointments with your clients.
In this article, we'll cover:
1. Where You Can Create a New Appointment
There are 2 ways to create a new client Appointment from the Calendar page:

- Click on a particular date box in the Calendar that you want to create a client Appointment. This will open the Add New Appointment window, or
- Click the Add button. This will open the Add New Appointment window.
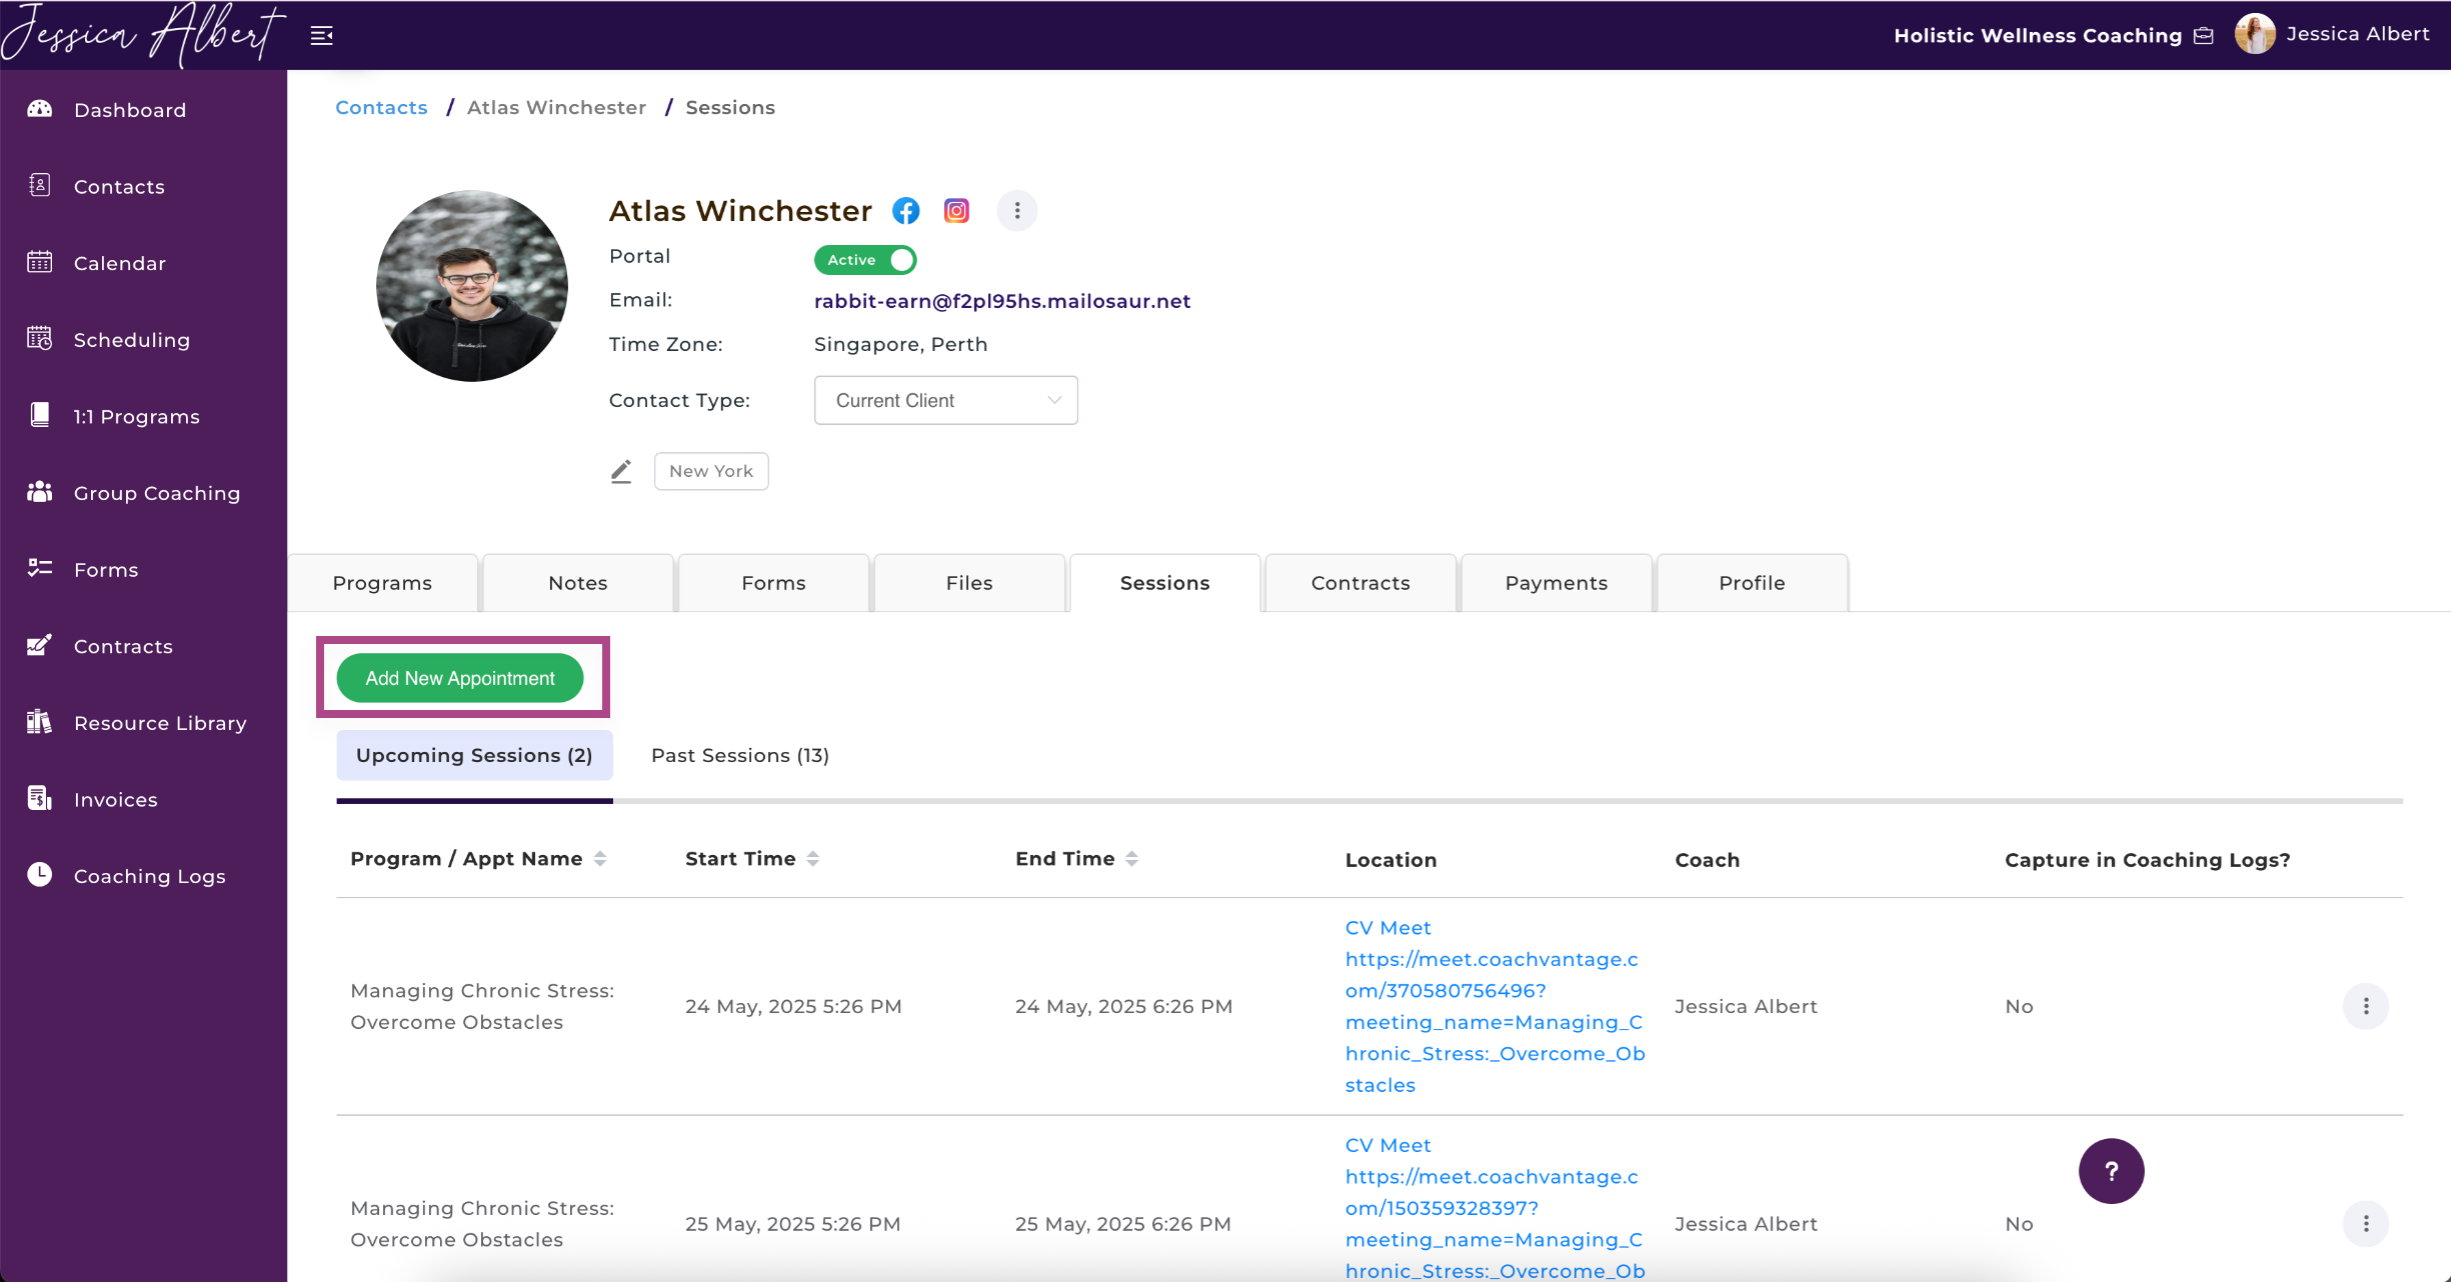
Tip: You can also create a new client Appointment from the client's Individual Contact Record Page page by clicking on the Add New Appointment button (refer to this article for more details).
2. How to Create an Appointment 📆
From your Dashboard, click Calendar on the left ribbon bar. From there, you can either:
- Click on the Add button at the top right of your screen, or
- Click on a particular date box on the calendar
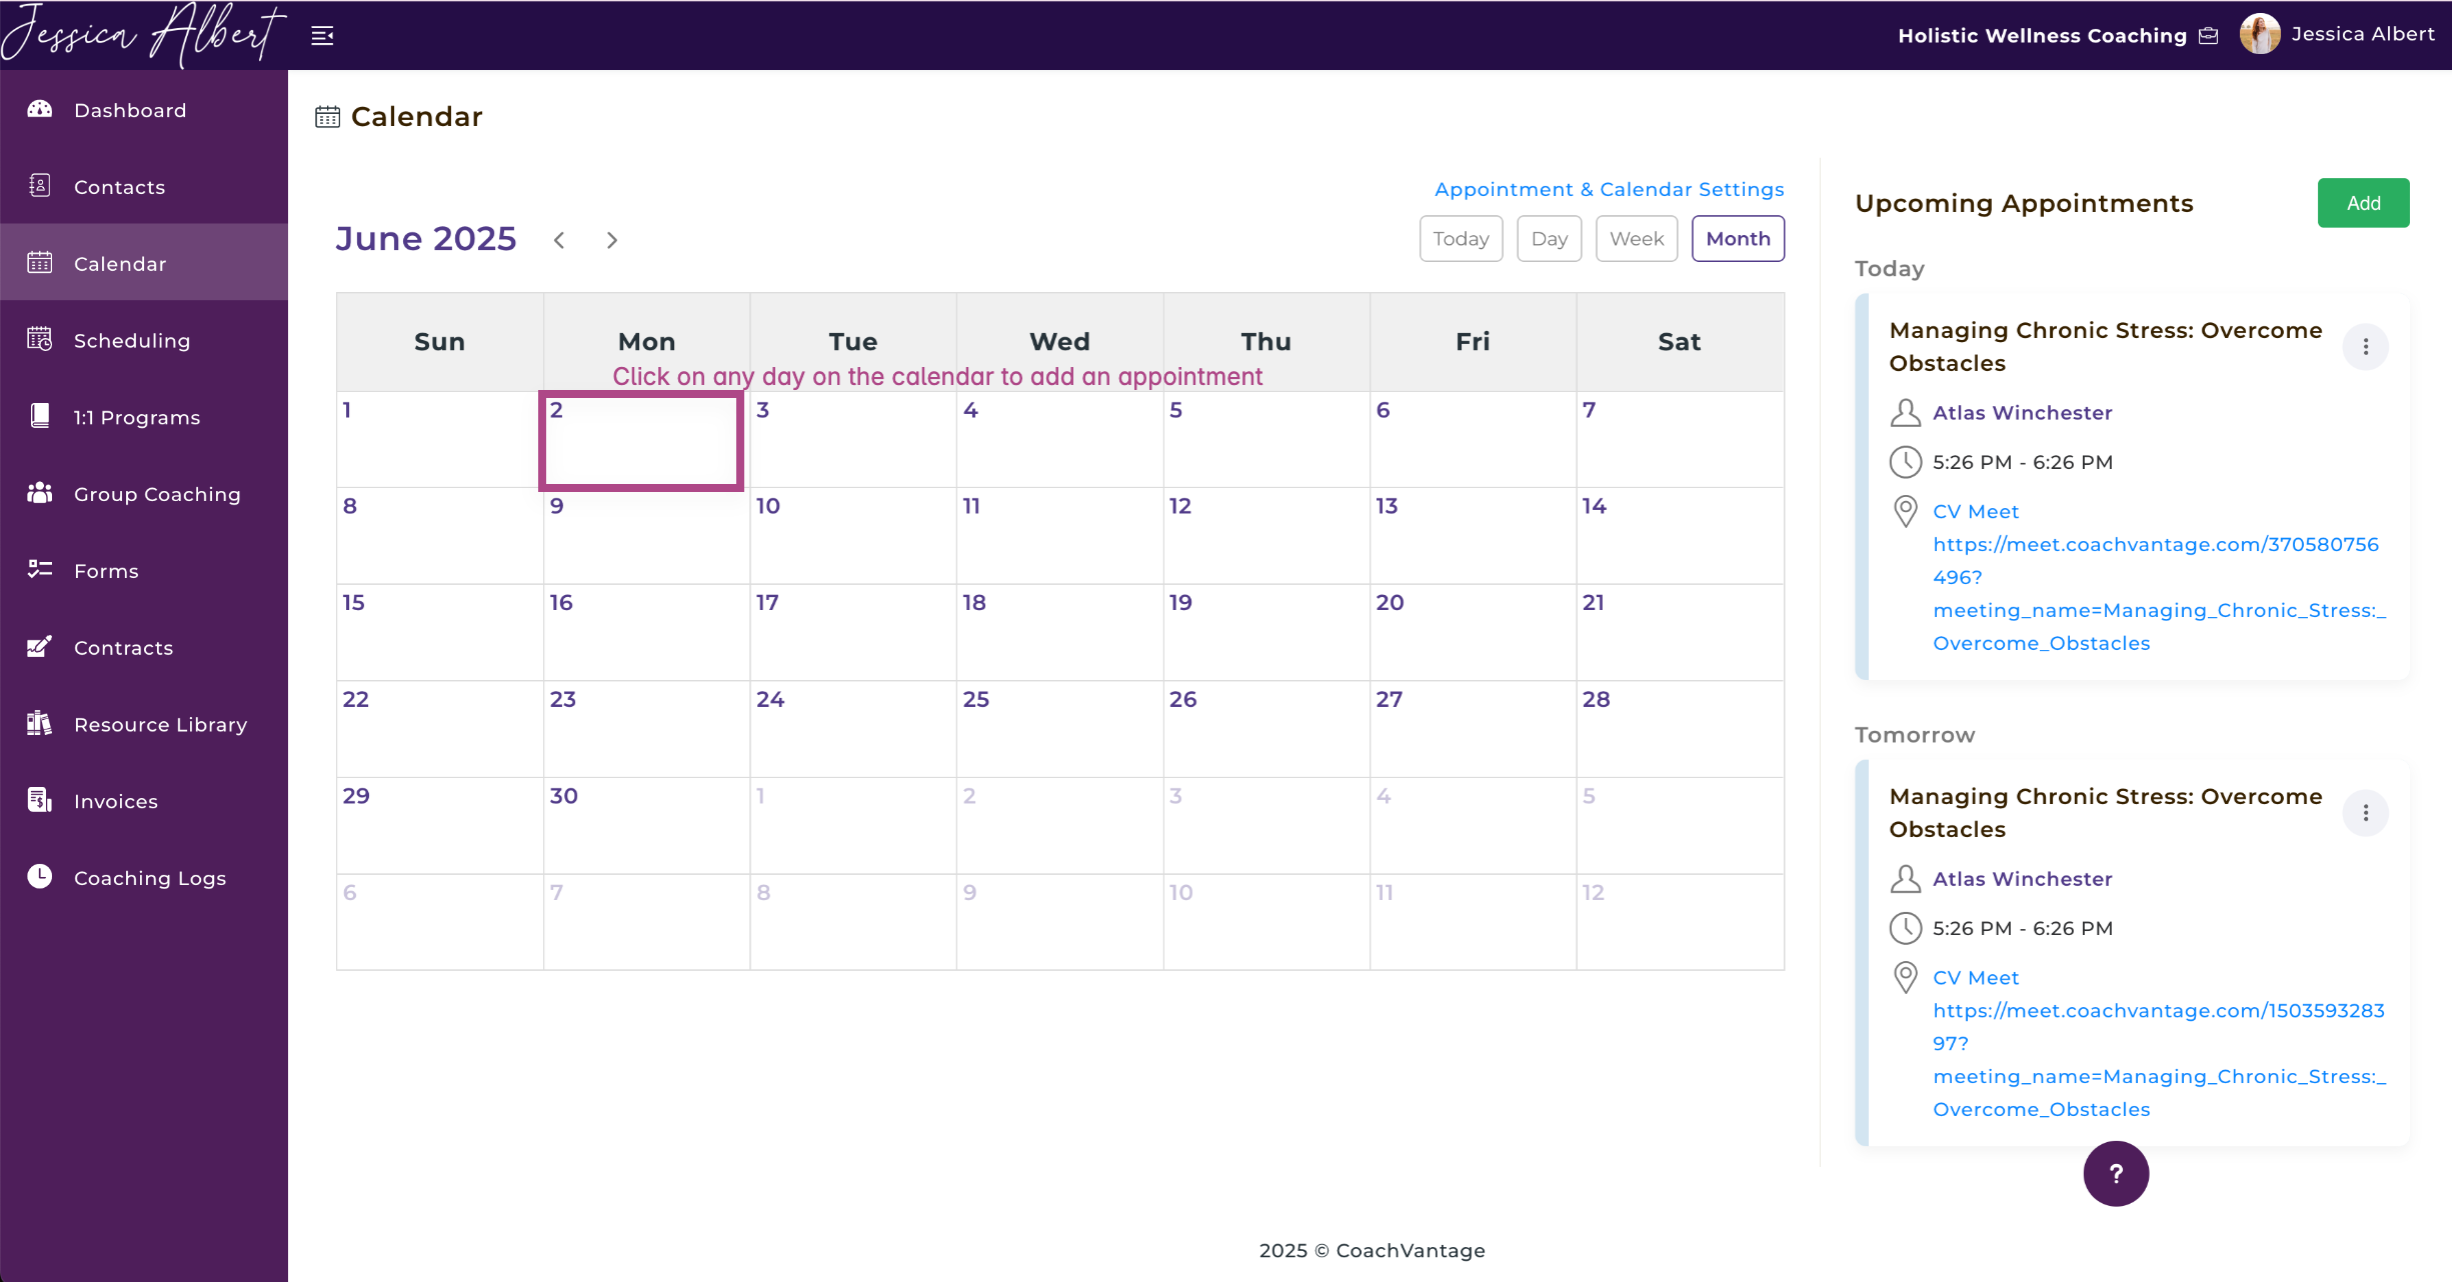
Either of these actions will bring up the Add New Appointment pop-up window, as shown in the image below.
You may refer to the numberings to learn more about a specific feature.
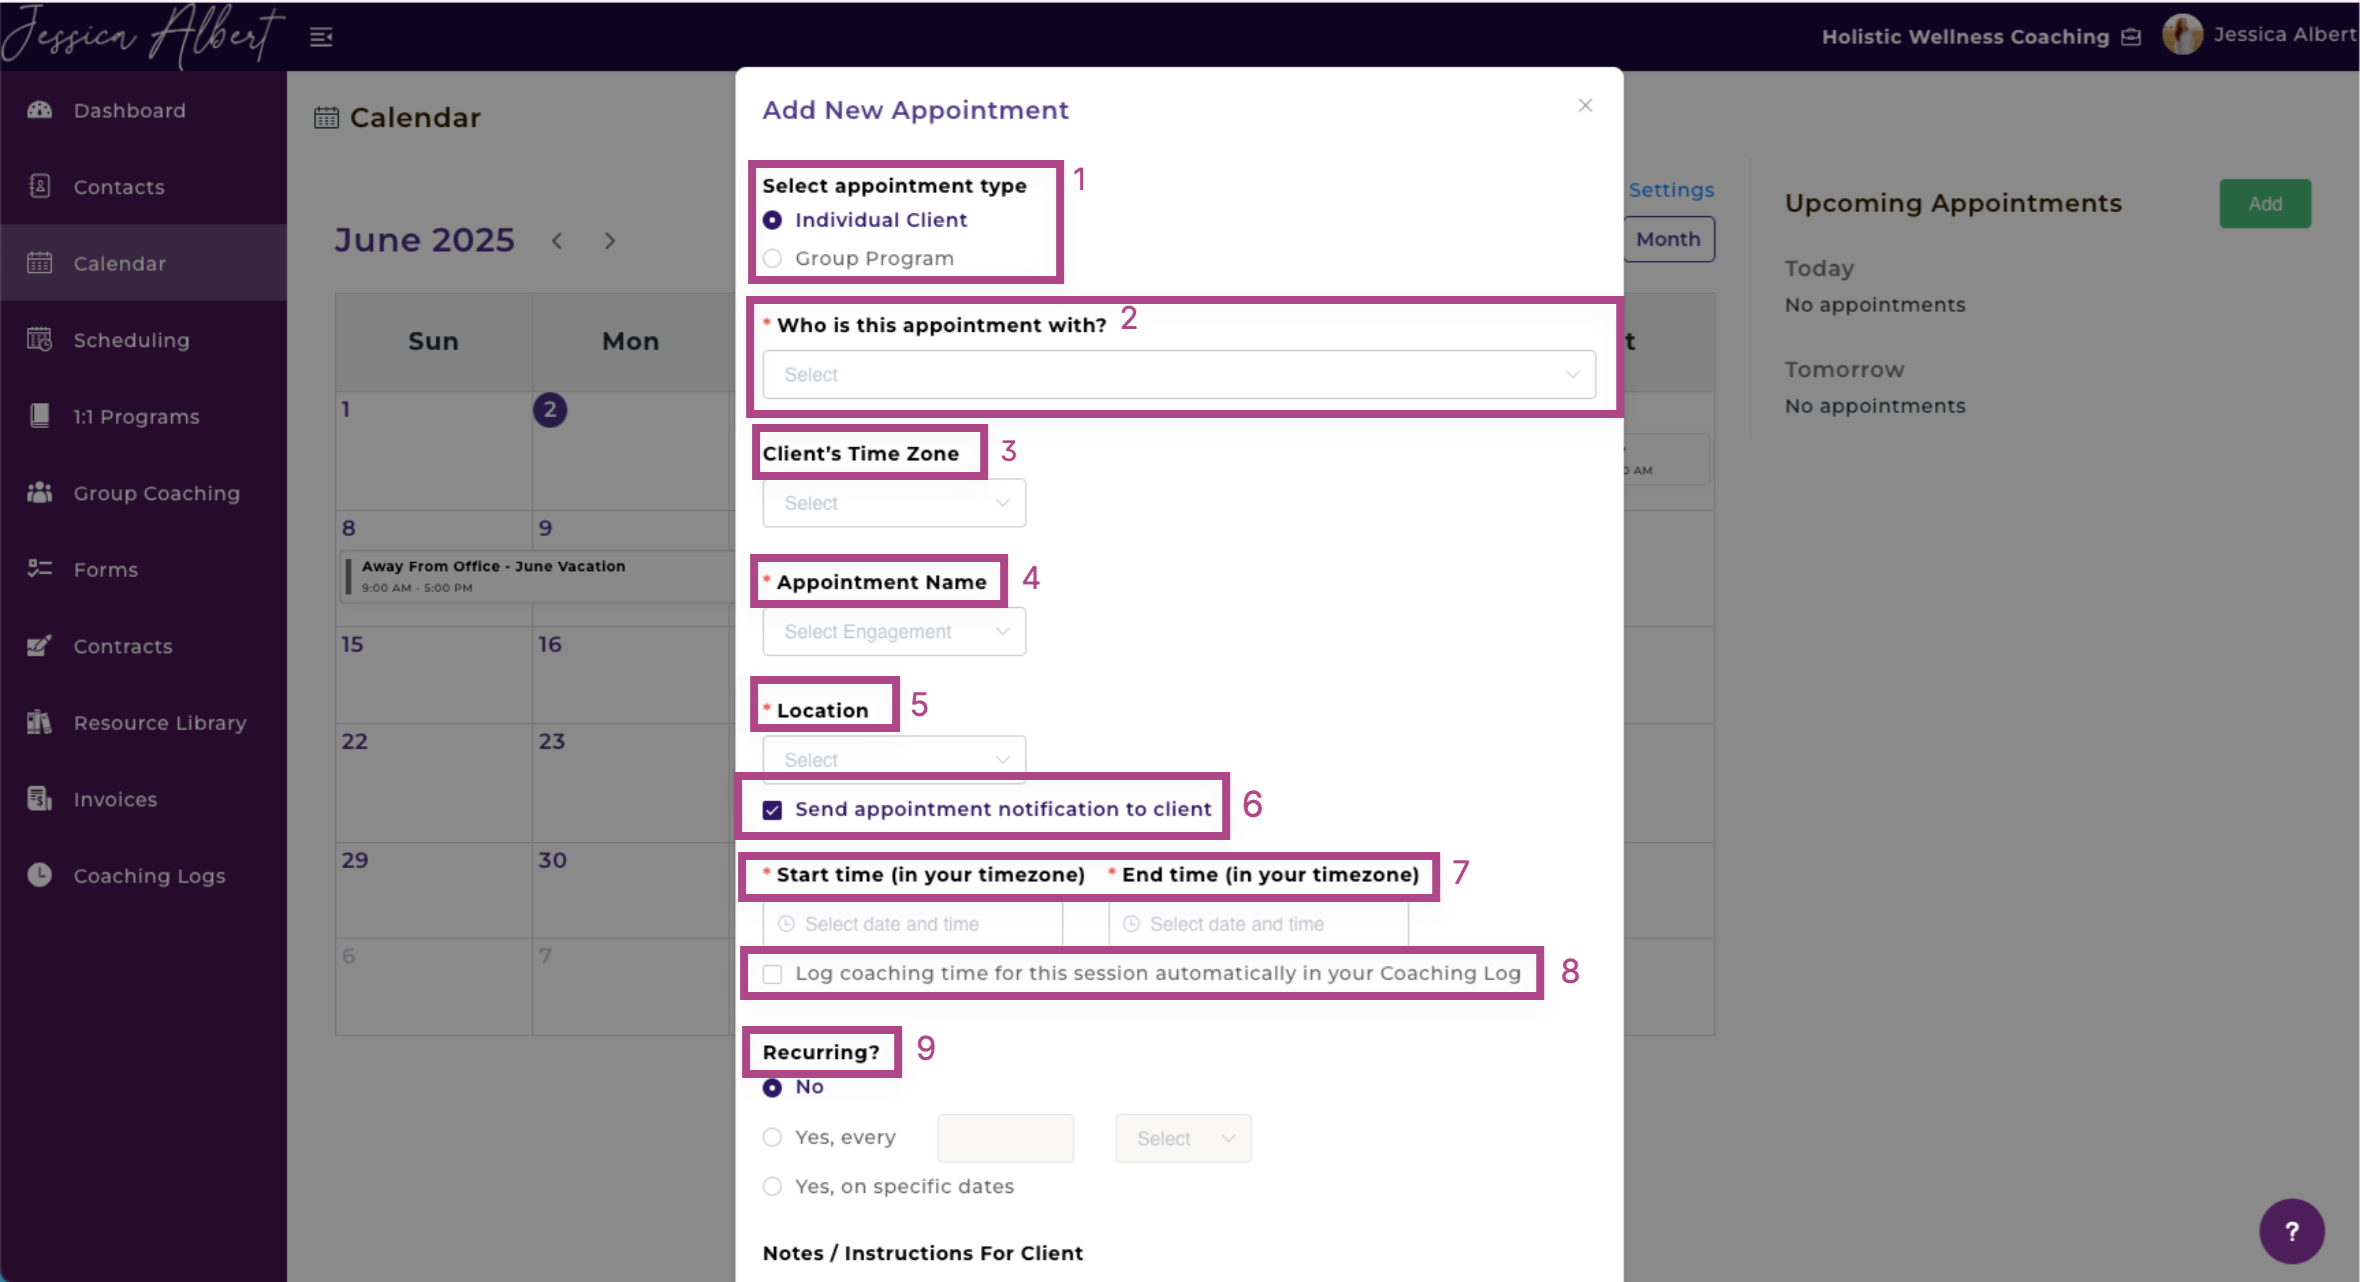
- Select Appointment Type - Select either an Individual Client or Group Program.
- Who is This Appointment With? - Select the name of the client that you wish to schedule an appointment with. This is a scrollable drop-down menu that displays your current contacts. It also works as a search bar, allowing you to type the name you're looking for.
- Client’s Time Zone 🕚 is already populated by default, if the time zone is already saved in the Client Profile. If not, select your client's time zone from the drop-down menu. Doing so will ensure that your client receives the meeting notification in their own time zone. (CoachVantage automatically converts the meeting time to the client's time zone in the client email notifications).
Note: When you select a time zone for the client, it gets saved automatically to the client profile and will be used when you set up future appointments with this client.
- Appointment Name has a drop-down menu with all the coaching programs that a client is enrolled in. Alternatively, select Other and then give the appointment a new name by typing it in.
Note: If you select a program name for an appointment, CoachVantage will automatically track the completion of that appointment (or session) against that particular program's progress.
Tip: Select Other if your appointment is an ad hoc meeting that's not associated with a coaching program.
- The Location📍 drop-down menu provides the following options for your meeting location:
- CV Meet – Our native digital and audio communication tool that comes with your CoachVantage account.
- Physical Location – You can specify the location details.
- Phone Call – The client’s phone number will be populated automatically (if it's saved in the client's profile page).
- Zoom – A Zoom meeting URL link will be generated and included in the meeting notification and will also appear in the meeting details on your account after you've saved the appointment.
- Note: You can select Zoom as the meeting location only if you have already integrated your Zoom account to CoachVantage. Once you've connected your Zoom account to CoachVantage, a unique Zoom meeting URL link for each appointment will be automatically generated from the API calls that CoachVantage makes to Zoom. (Refer to this article Connecting to Zoom on how to integrate your Zoom account to CoachVantage).
- Other – You can add your own details, for example, a webinar link or other video conferencing tool meeting link.
6. Check the box Send Appointment Notification to Client 🔔 if you'd like an email notification to be automatically sent to your client with the appointment details.
- Note: You can configure Appointment Reminder Notifications in Settings > Appointment and Calendar. Refer to Appointment and Calendar Settings article for more details.
7. Select the Start Time (in your time zone) of the Appointment. Clicking in the Start Time field opens a date and time picker. Use it to select the start time, then click OK. You will notice that the End Time field will then be populated to end in 60 mins, by default. You can change the end time by clicking on the End Time field, and then set the end time of your appointment.
- Note: CoachVantage will automatically convert to the client's time zone in the email notification to your client.
8. Check the box Log Coaching Time for This Session Automatically in My Coaching Log to log your coaching sessions automatically in the Coaching Log. When you check this box, the This is a Pro Bono Session check box appears. You can check this box if it is a pro-bono coaching session, i.e. you are not charging for this coaching session.
- Tip: The automatic capture of your coaching time in the Coaching Log is great if you are seeking certification and need to produce evidence of your coaching time (both for paid and pro bono sessions). It's also useful for you to generate data about your coaching hours from month to month. Refer to the article Coaching Logs Page for more details.
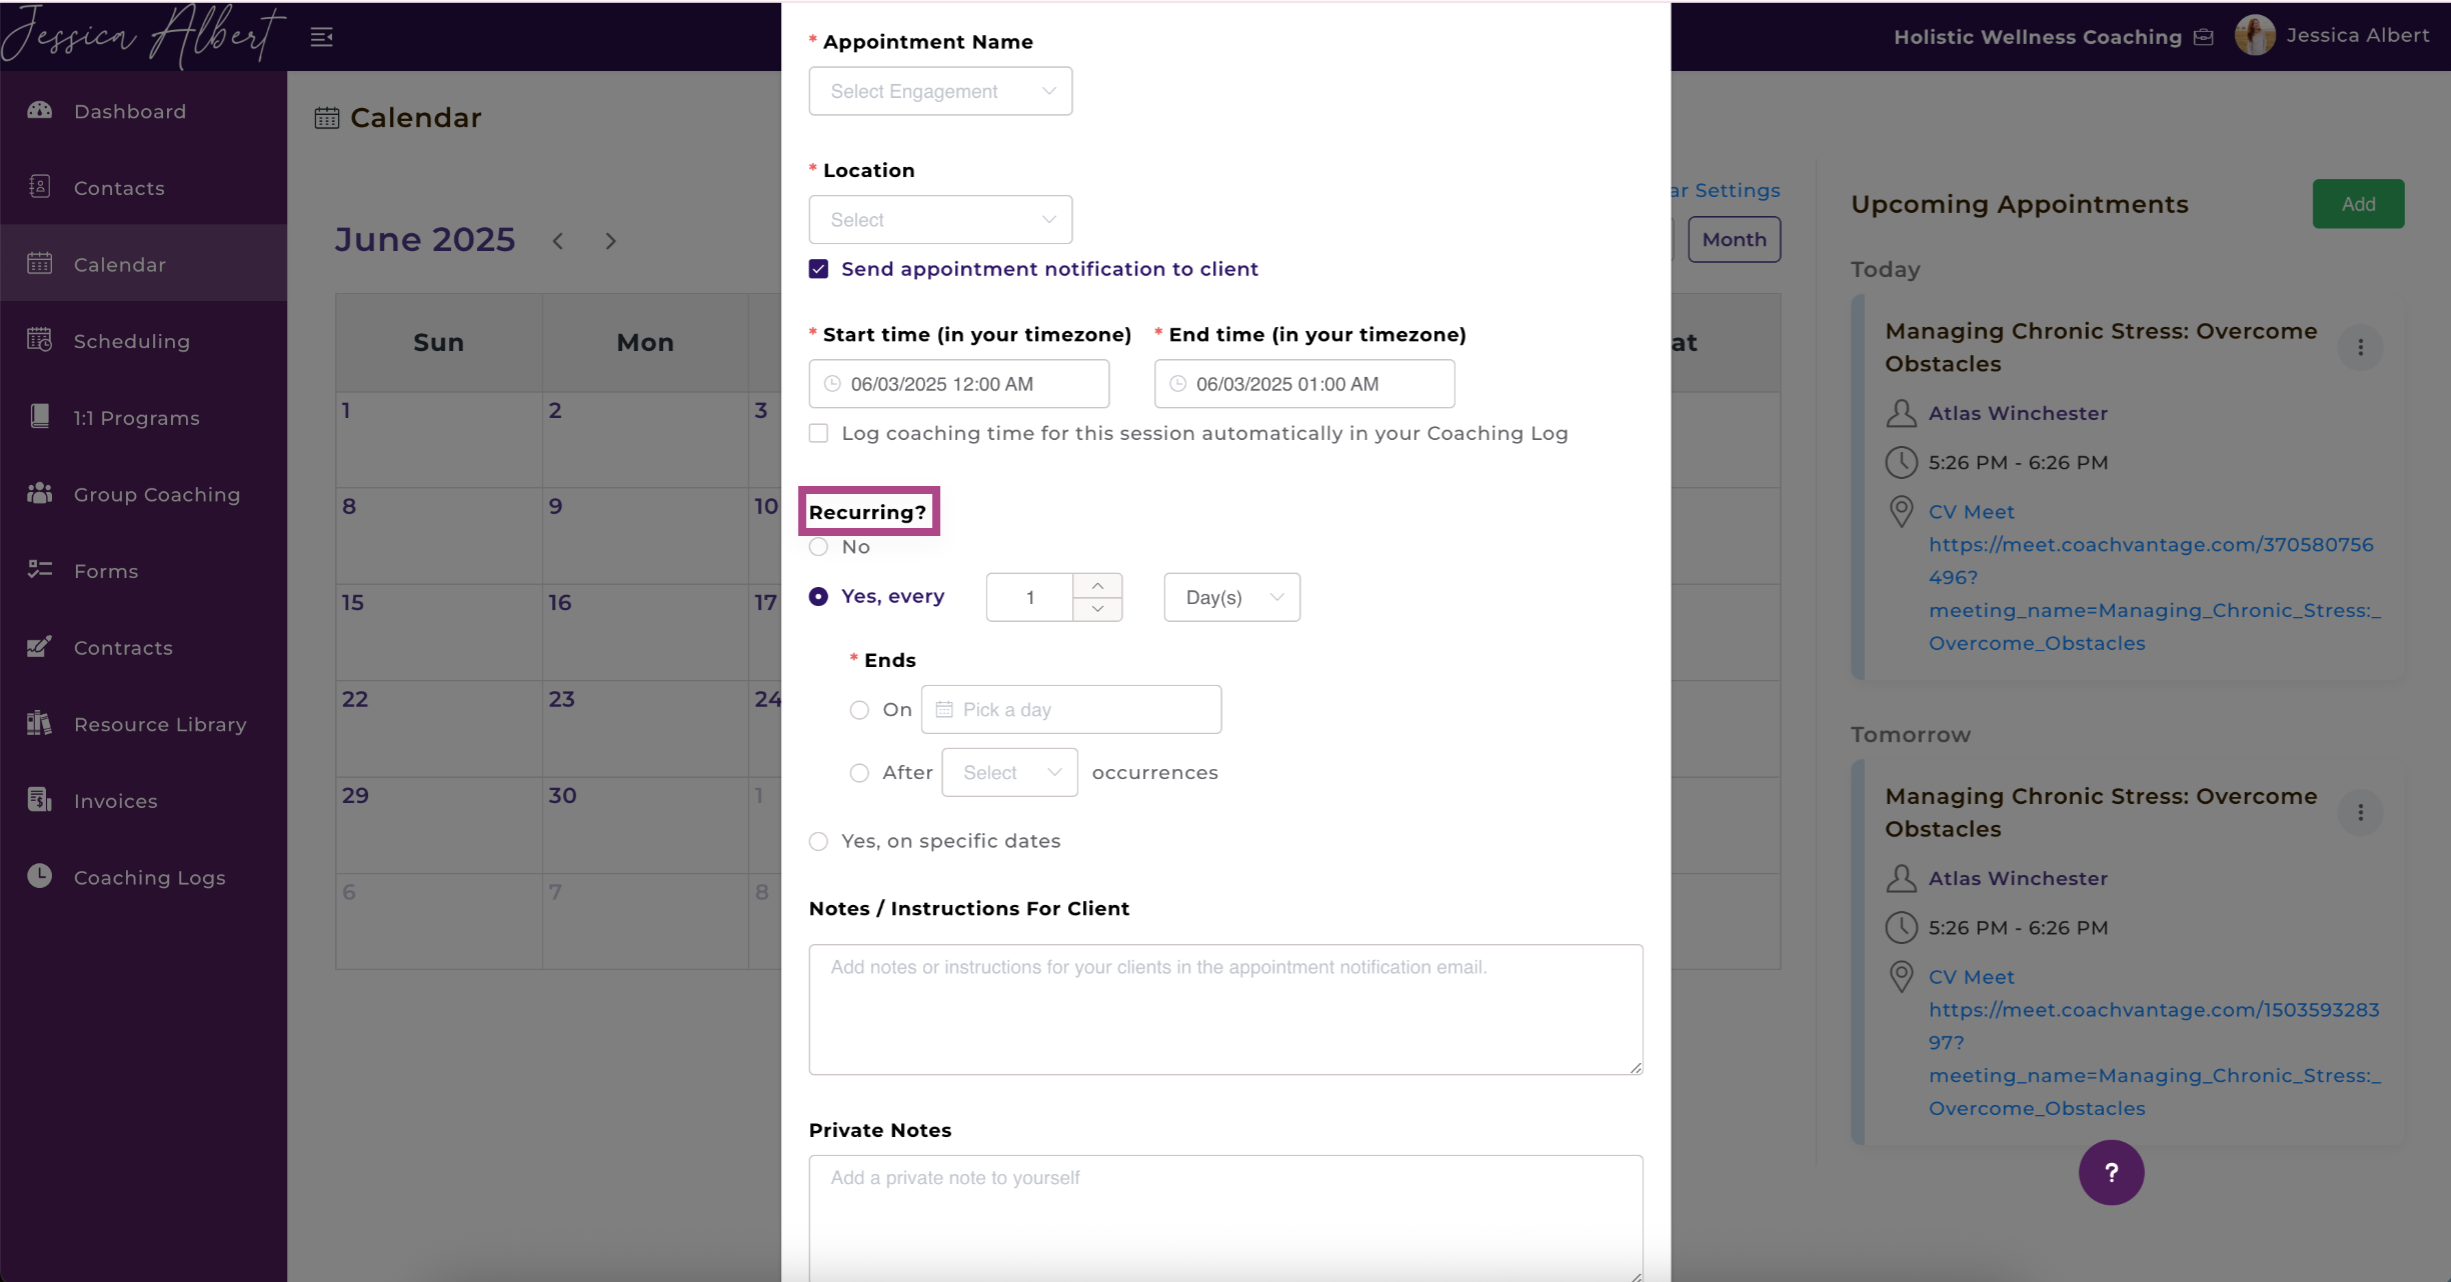
9. If you'd like to set up a Recurring Appointment 🔁, you can do so by selecting Yes in the Recurring section. You have 2 options for setting up recurring (or multiple) appointments:
1) Daily or Weekly Frequency Cadence
2) Selecting Specific Dates
- Choose recurring Daily or Weekly by using the drop-down selector. You can customize the frequency (or cadence) of the recurring appointment series by entering the appropriate number:
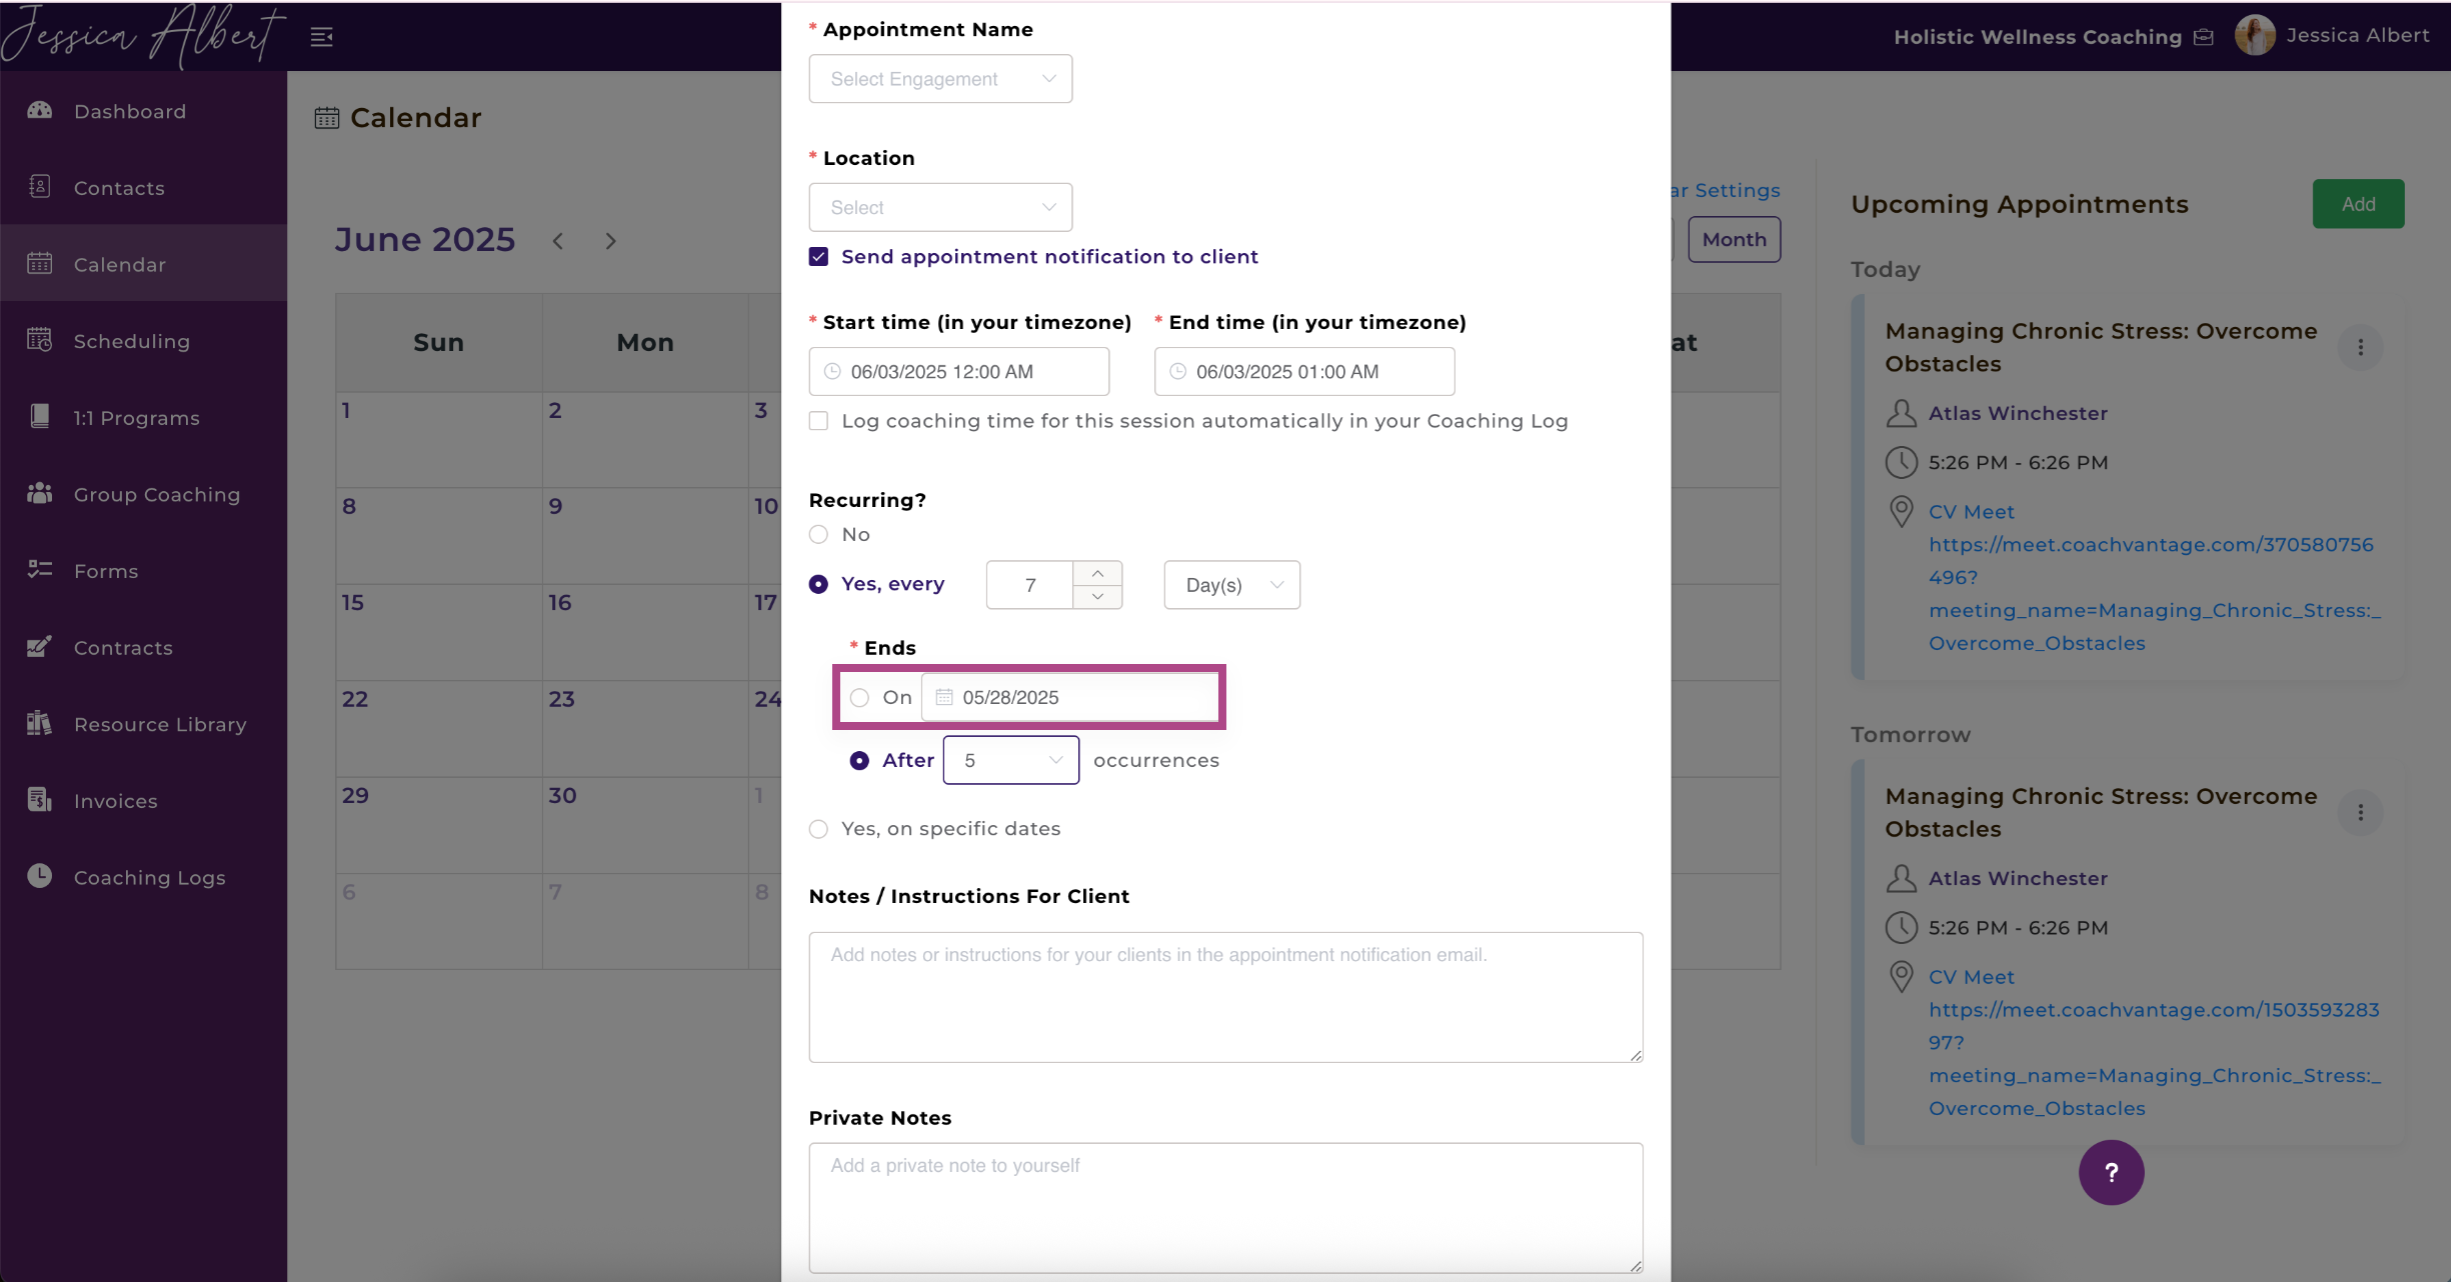
You can then choose a specific date for the recurring appointment series to end:
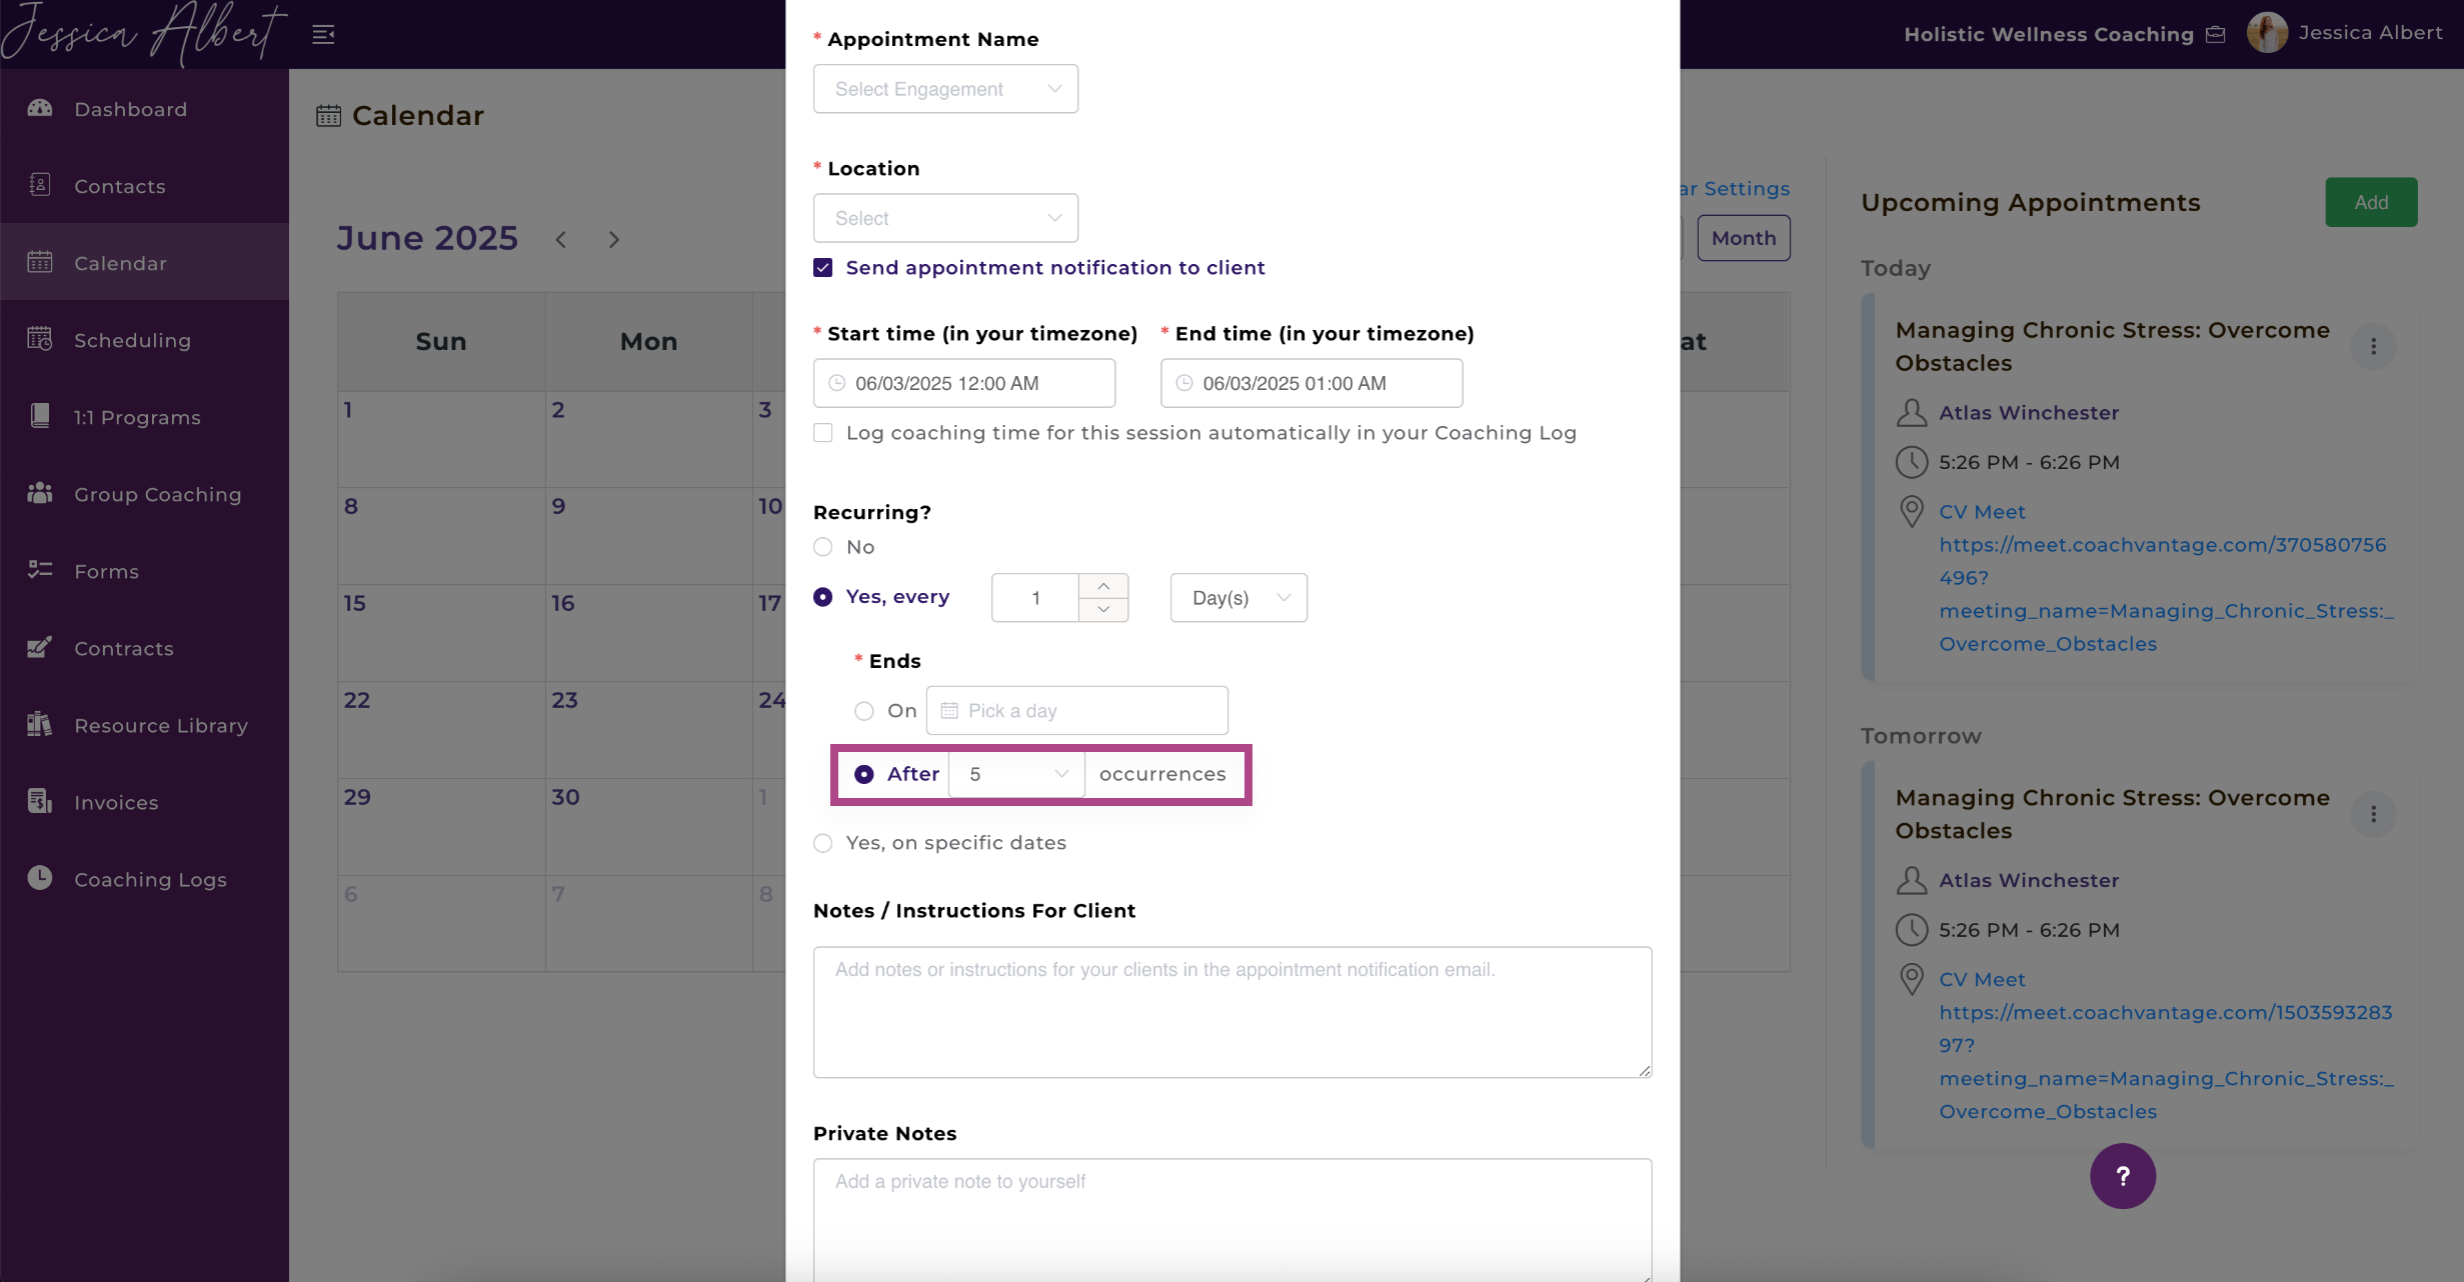
Alternatively, you can select the number of meeting Occurrences before the recurring appointment series ends:
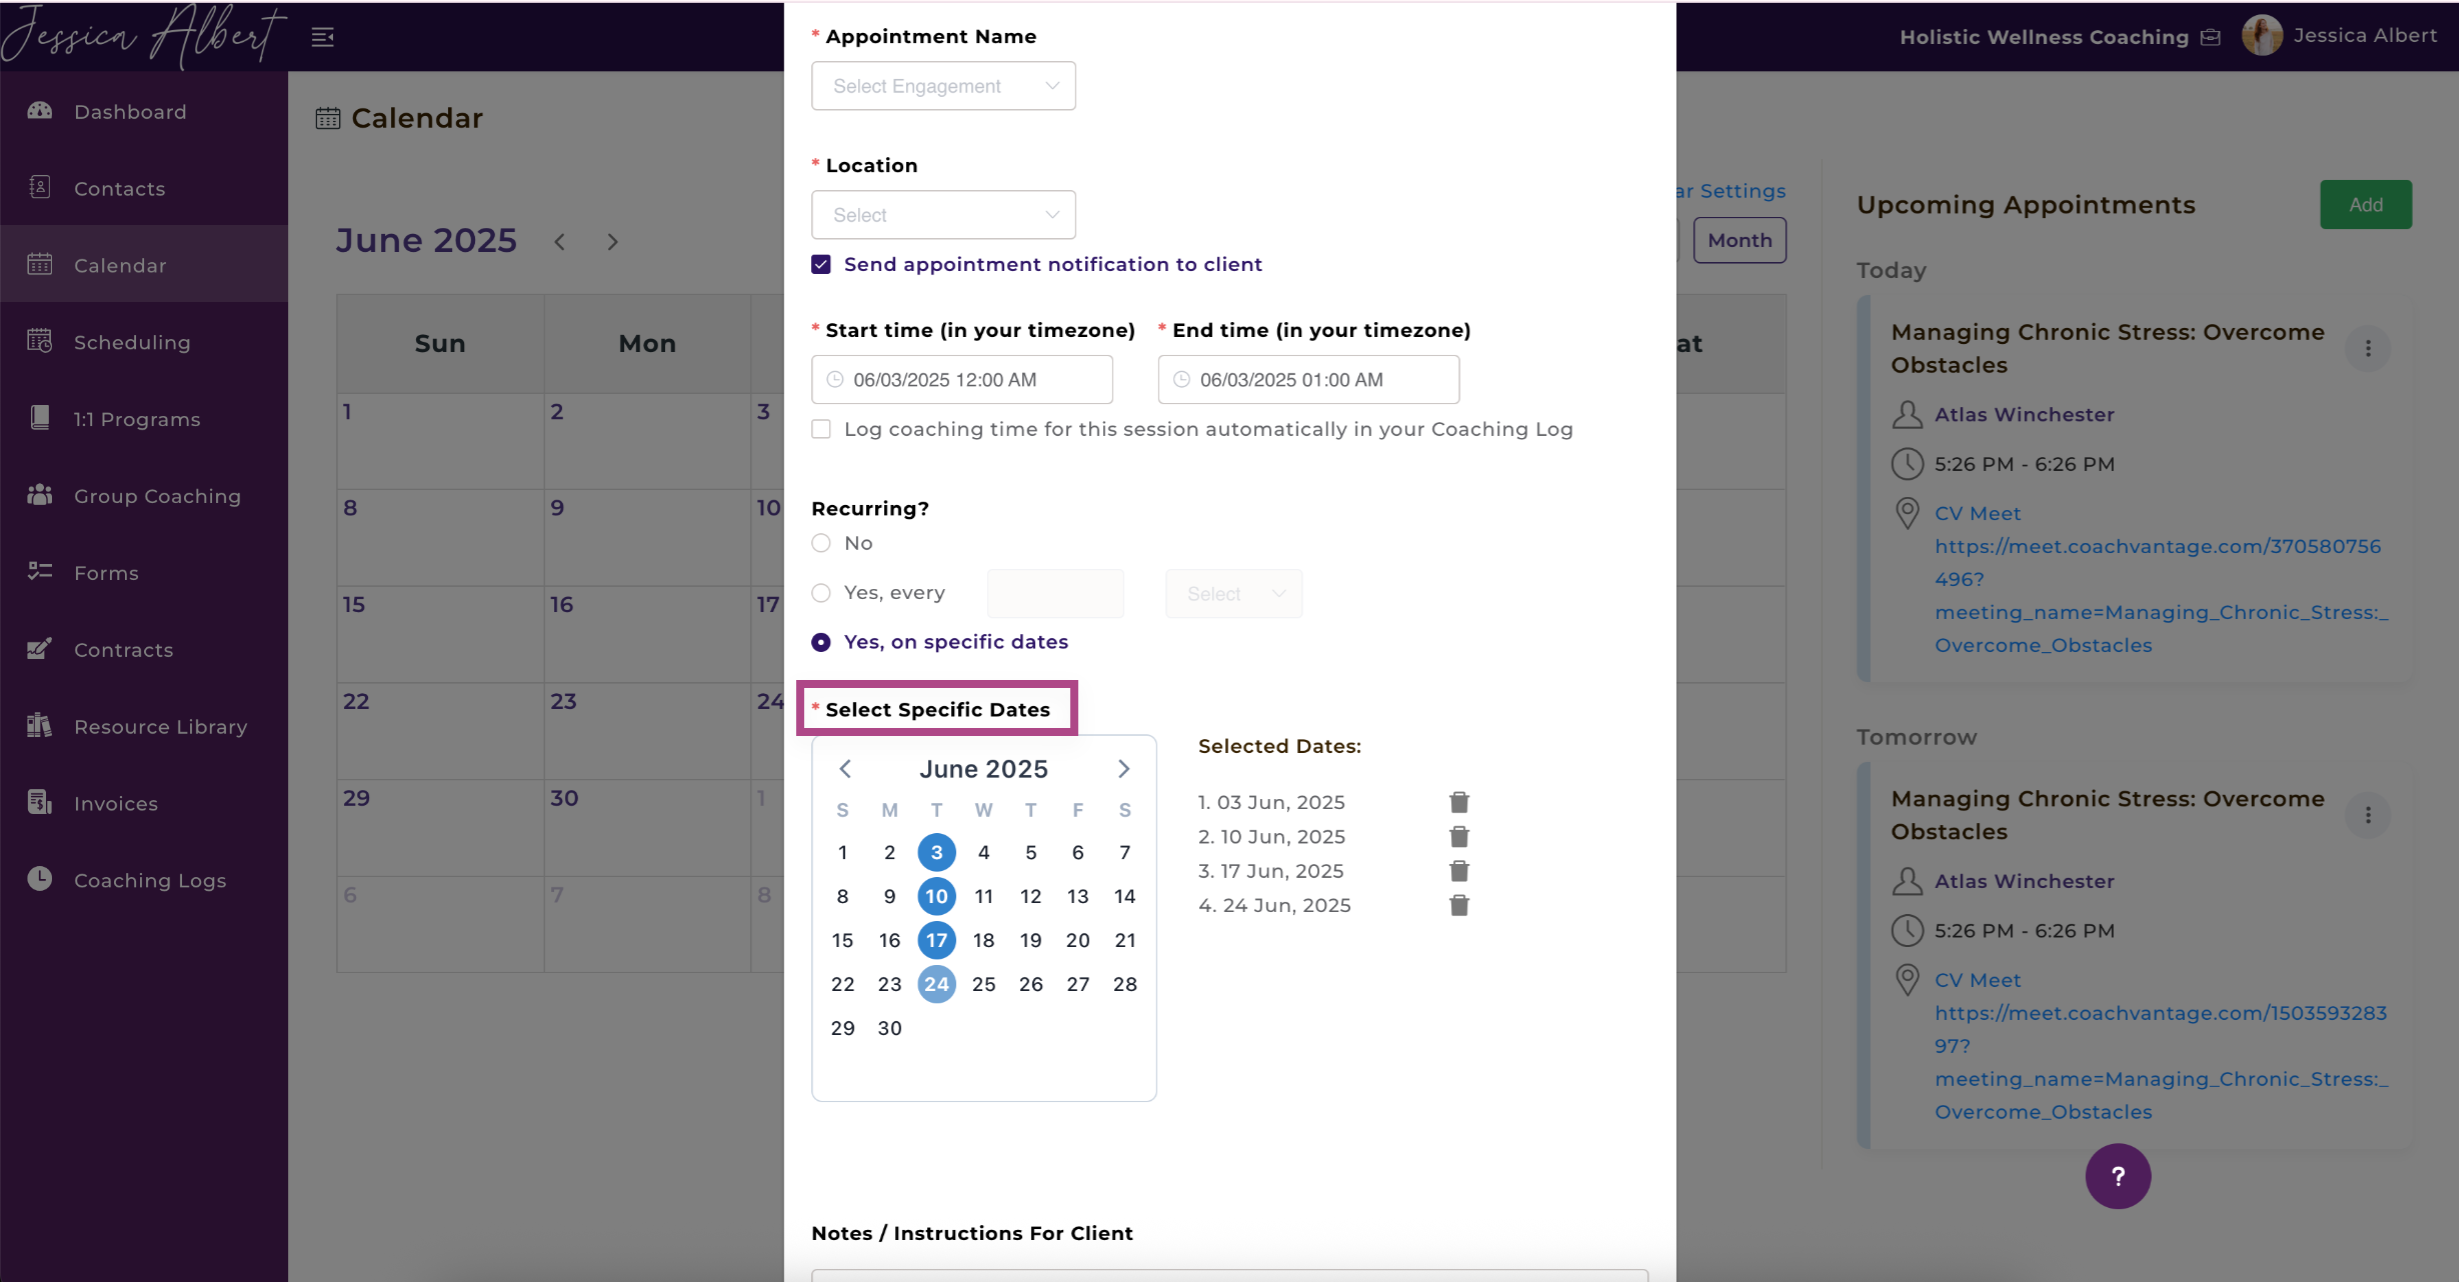
Select Specific Dates to set up multiple appointments:
10. You have the option to set up a Cancellation Policy for the appointment. You can choose to allow clients to cancel appointments, or do not allow cancellations. You can also set a lead time notice, after which your client cannot cancel the appointment.
- Tip: Setting up your cancellation policy is useful if your coaching agreement specifies a cancellation policy with regards to refunds, etc.
11. You can also choose to display your Cancellation Policy to clients. When you enter the details of the policy in the field, these details will be displayed to your client in the email notification.
12. Notes/Instructions For Client 📓 - information entered here is for your client's information. These are included in the appointment email notification that your client receives.
- Tip: Use this field if you'd like to provide instructions to your clients in relation to the appointment, how to connect on Zoom, preparations needed prior to the meeting, etc.
13. Private Notes are for your eyes only. You might want to jot down some information or reminder in relation for this appointment. This will not be shared with your client.
3. Client Notifications 🔔
CoachVantage will automatically send email notifications to your client if you have checked the boxes to Send Appointment Notification to Client and Send Reminder Notifications to Client (the email content is not customizable).
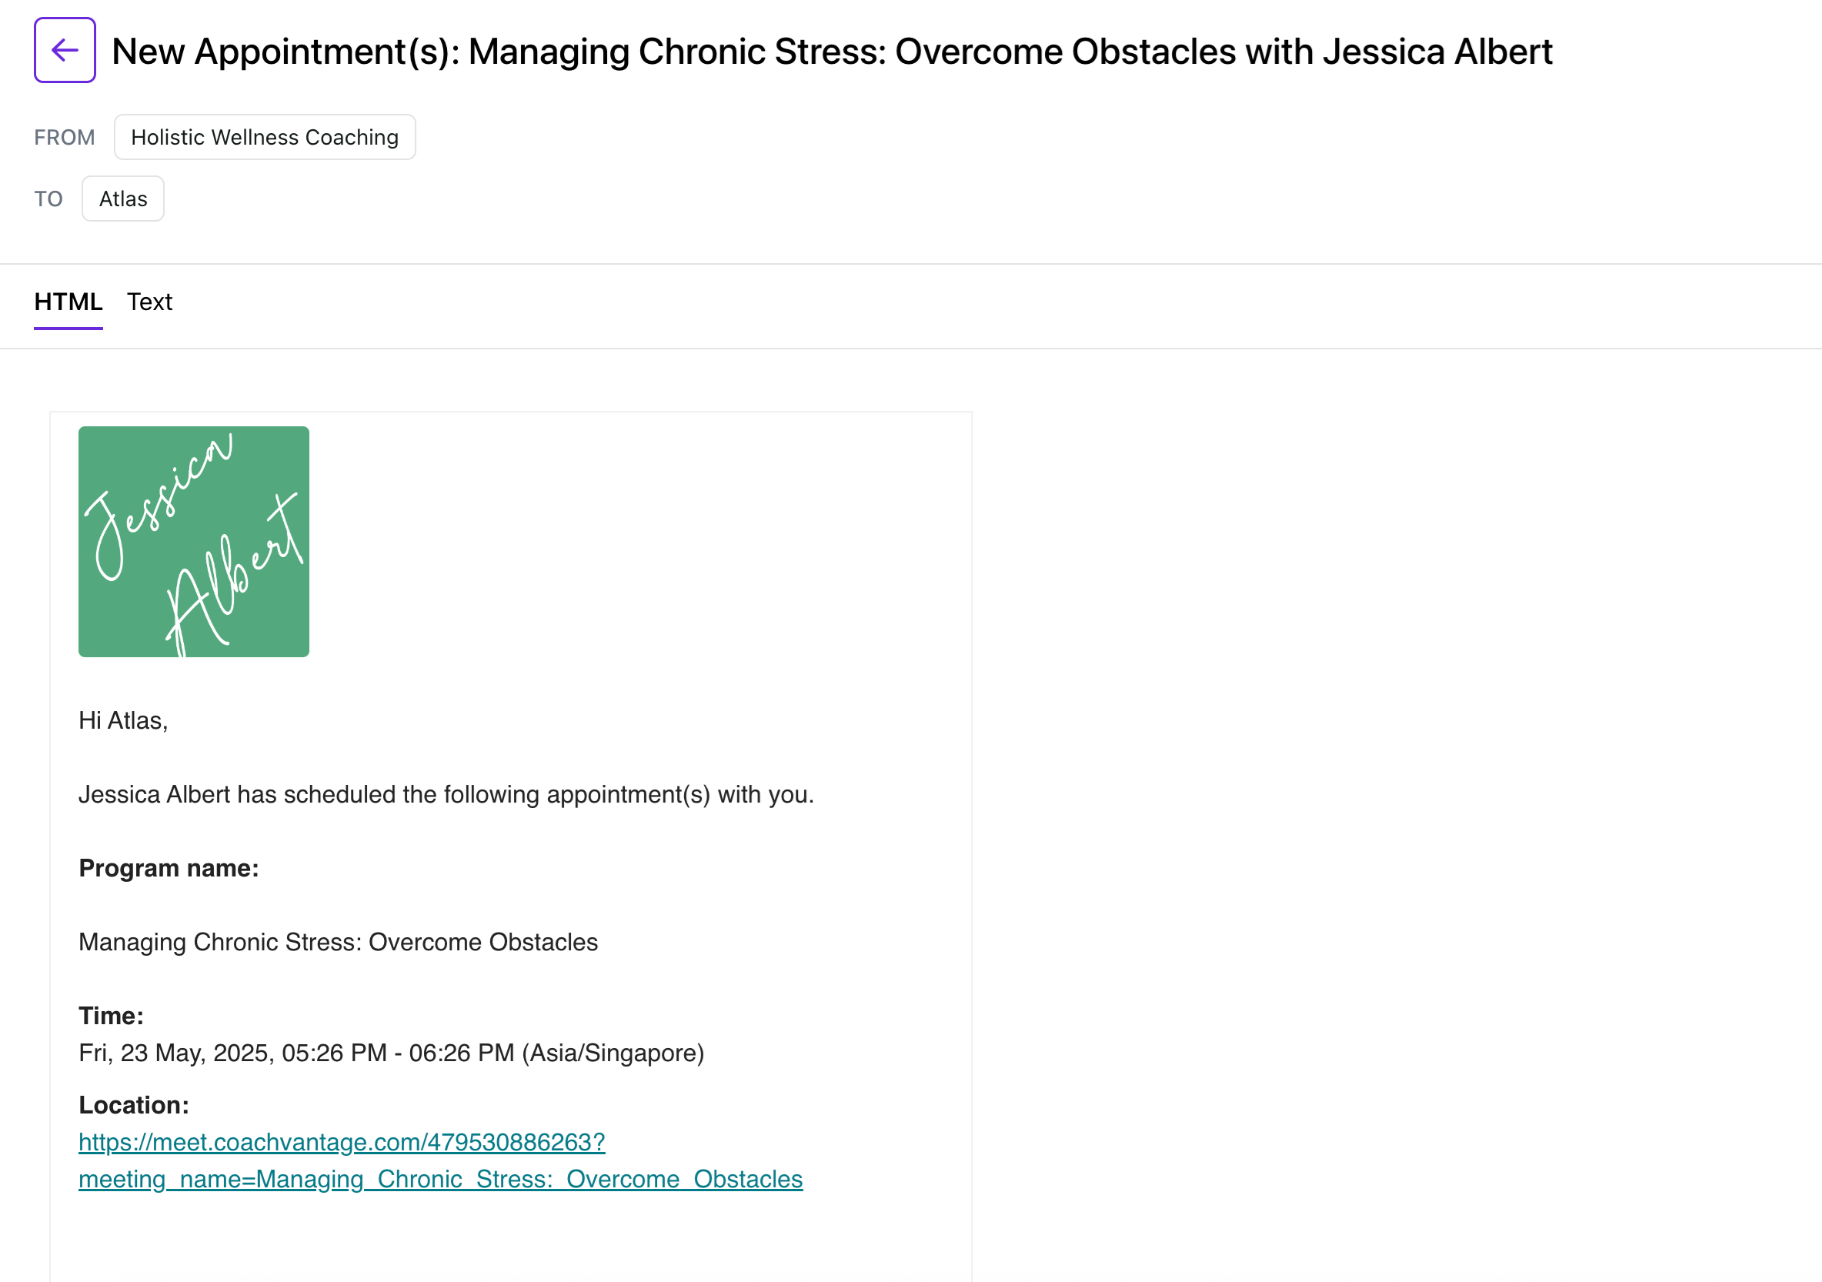
Here are examples of emails that your clients will receive:
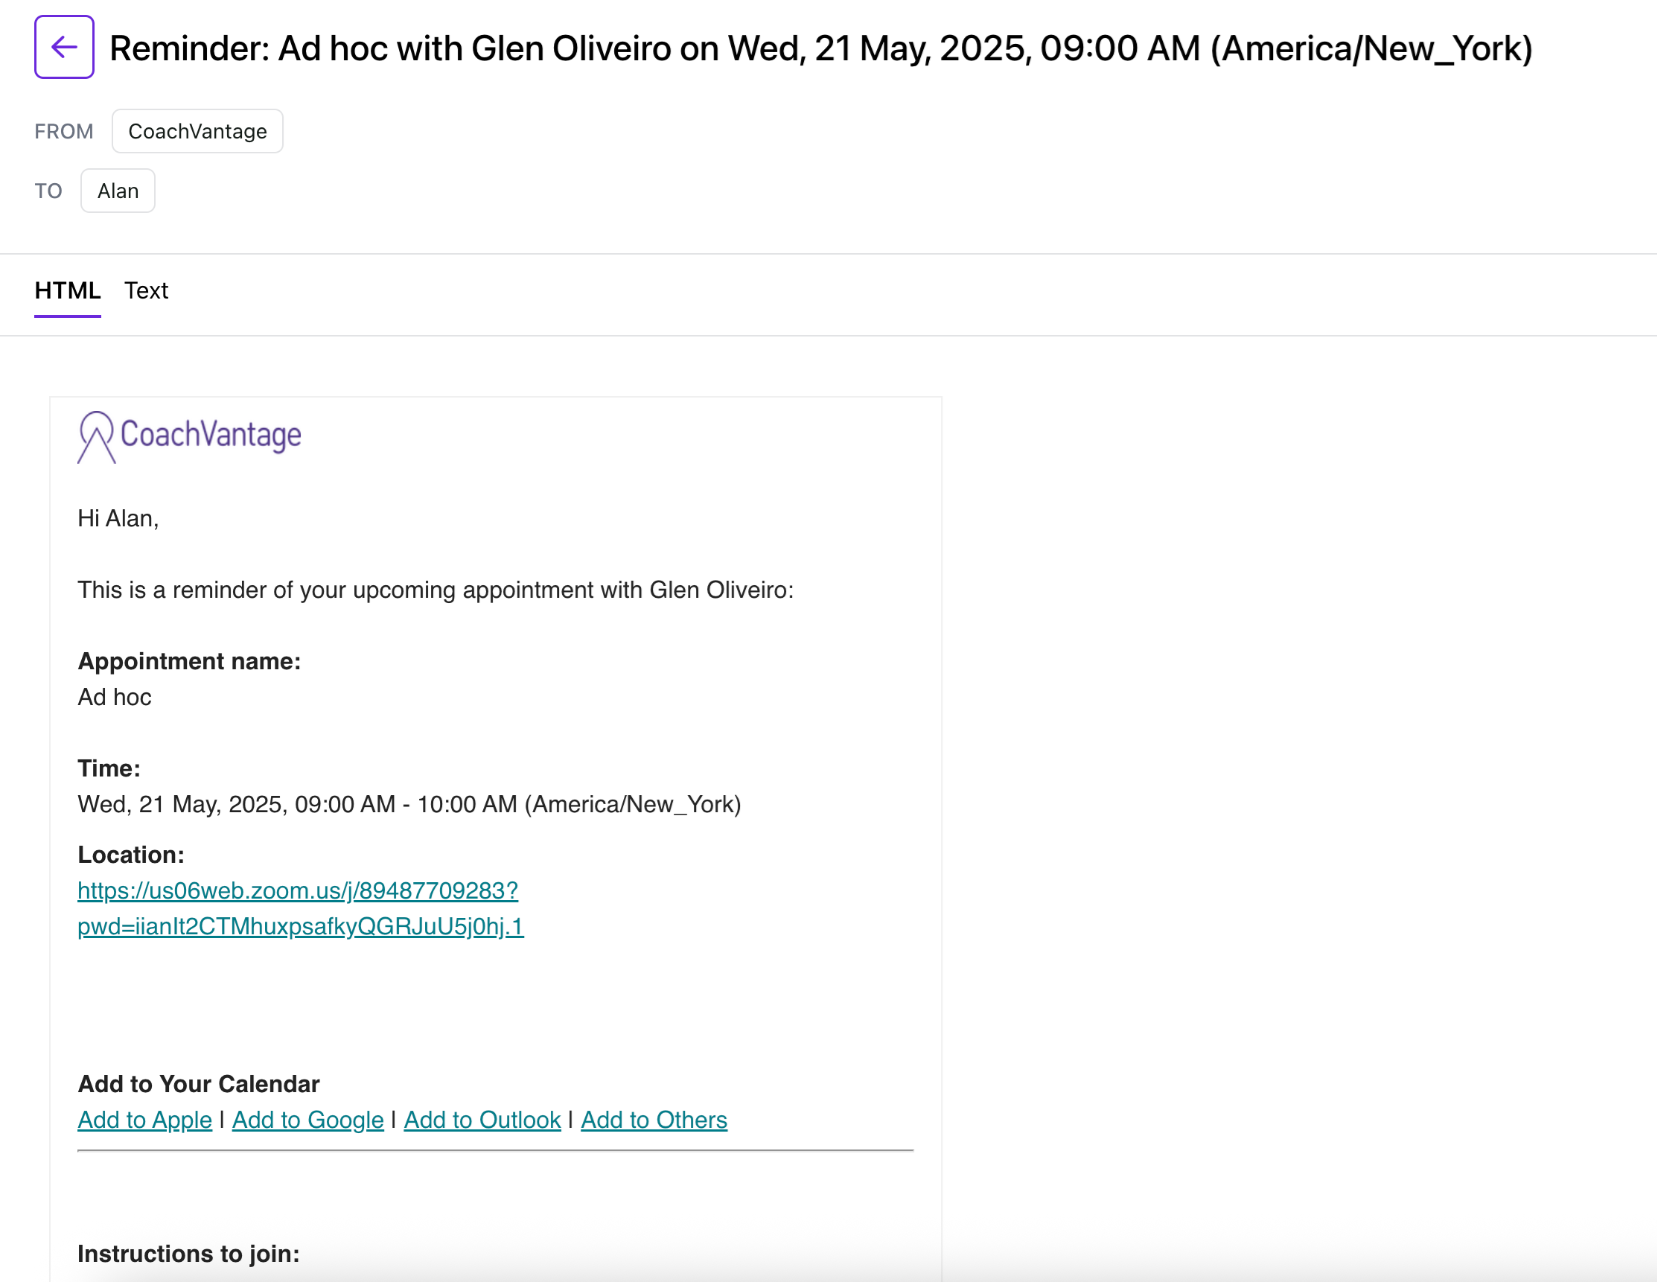
Appointment Notification
Reminder Notification