
Group Coaching - How to manage group members and create cohorts
Overview:
This article provides an overview of how to invite contacts, view members, create cohorts and assign members to your cohorts in CoachVantage.
Table of Contents
- The Group Program Management Page
- Inviting Existing Contacts to Sign Up to Your Group
- How to View Invited and Enrolled Members
- Creating Cohorts for your Group (Aha! Plan only)
- How to Assign Group Members to a Cohort
- How to View Participants in your Cohort
- How to Suspend Members from your Group
- How to Remove Members from your Group
1. The Group Program Management Page
After you've created and published your group program, you'll see the group program card appear on the main Group Coaching page, as shown below:
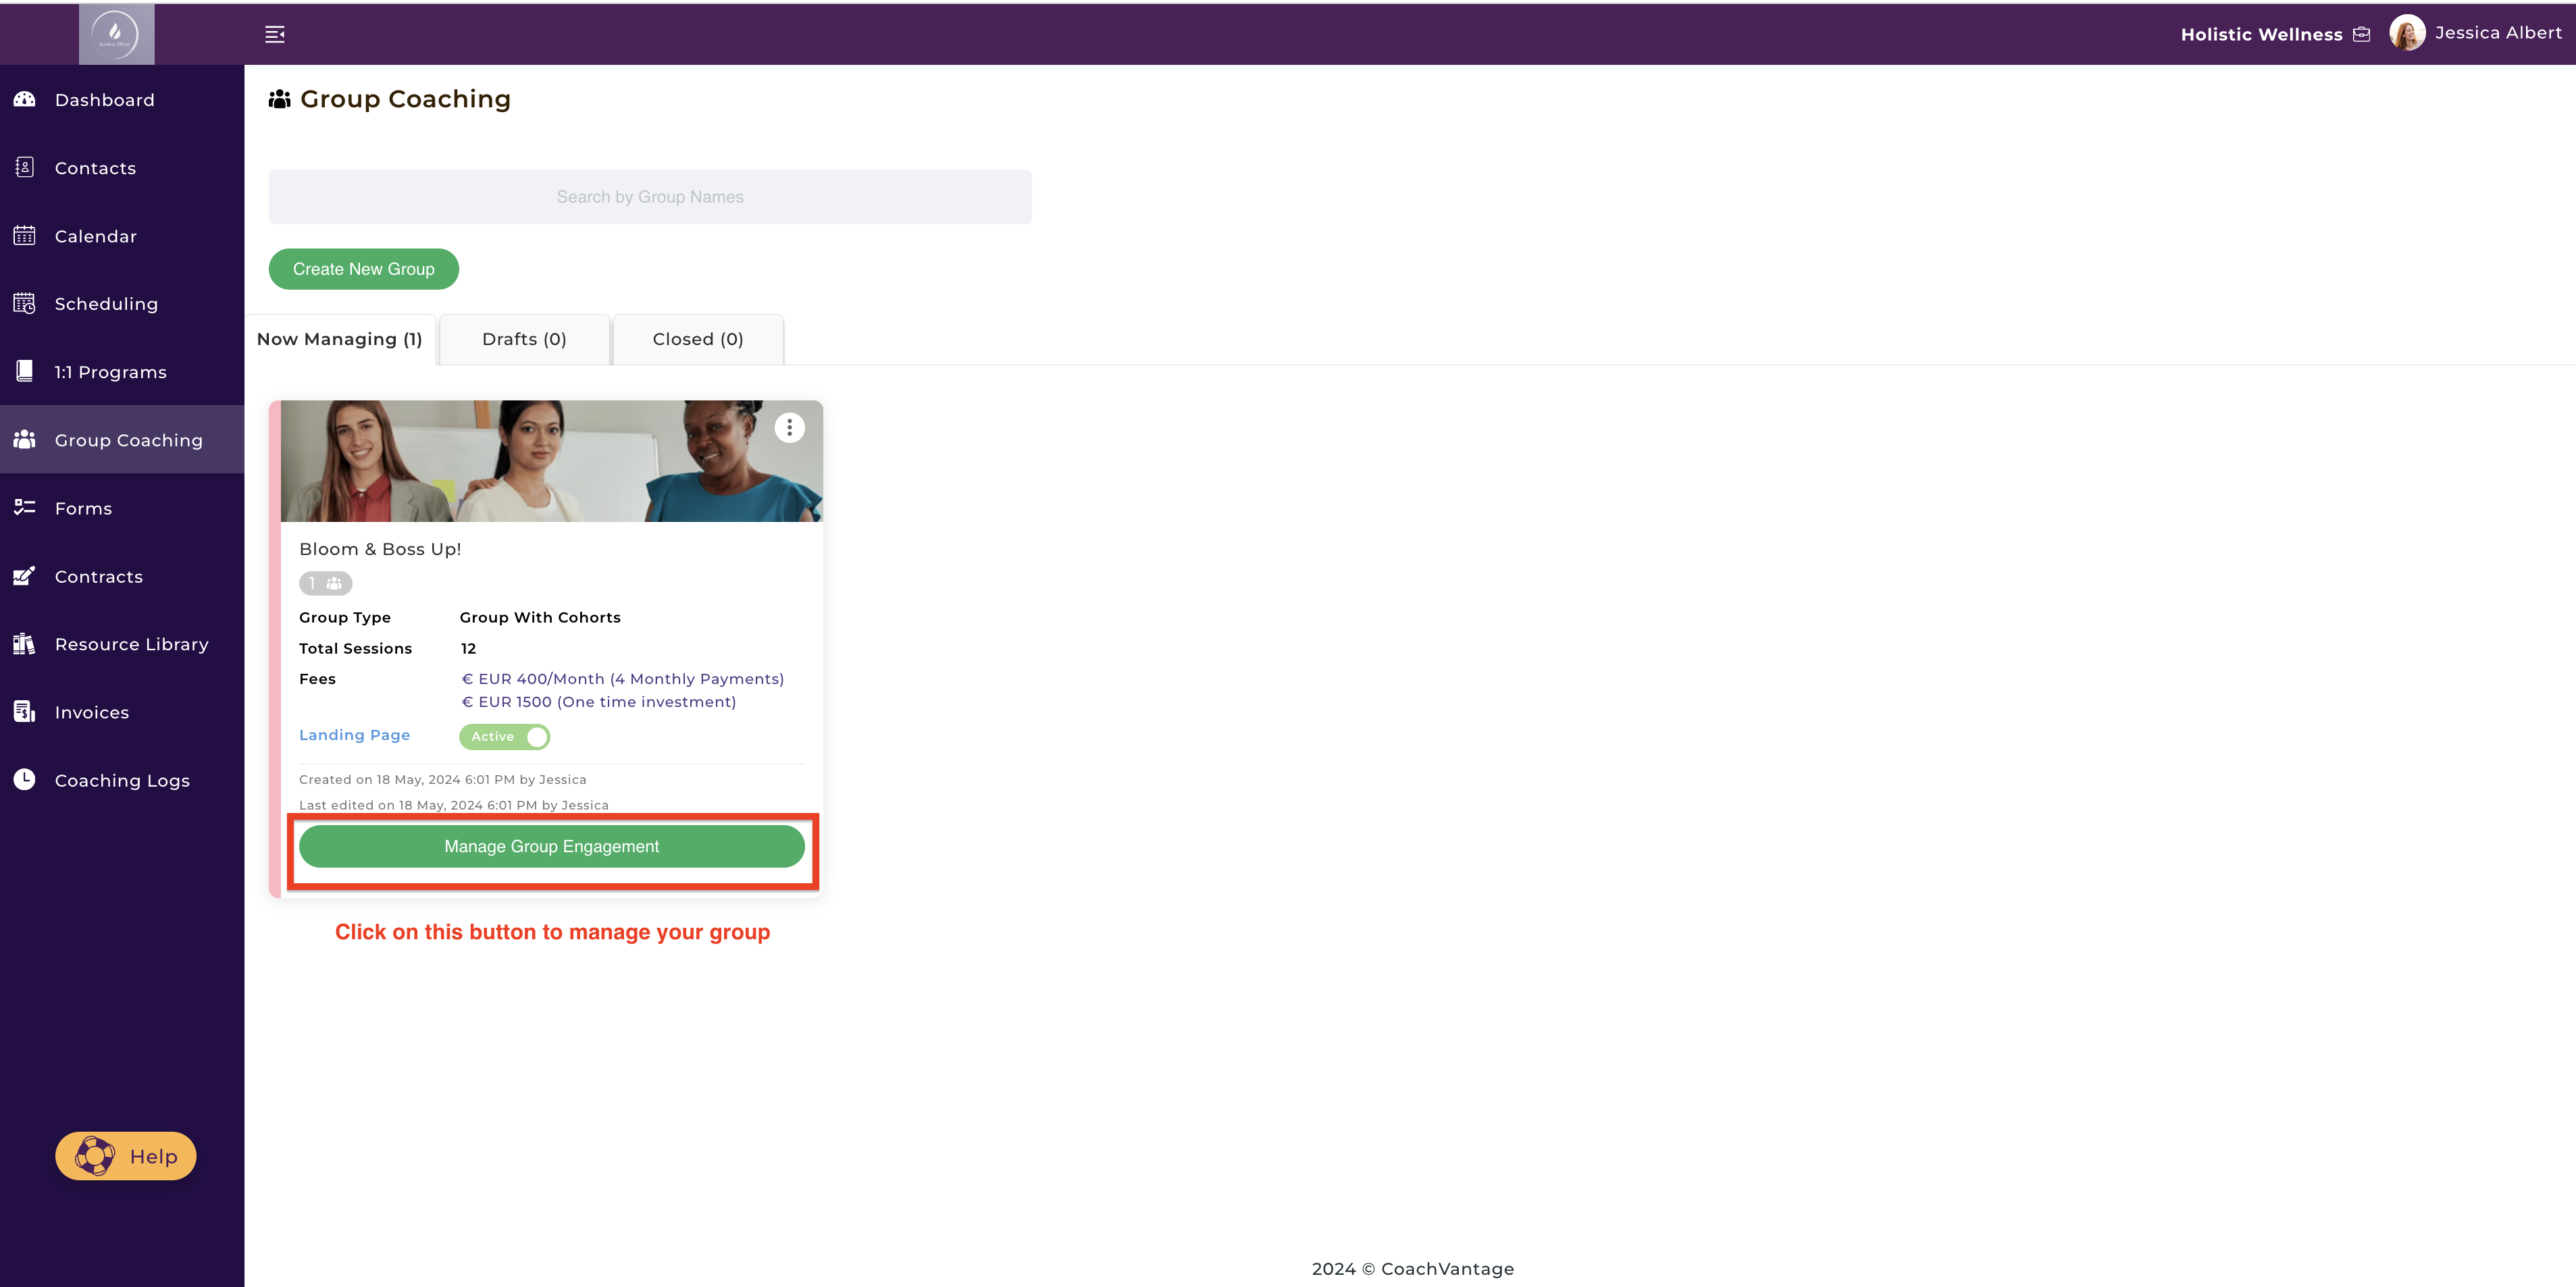
Click the Manage Group Engagement button and you'll be taken to the Group Program Management page, as shown below:
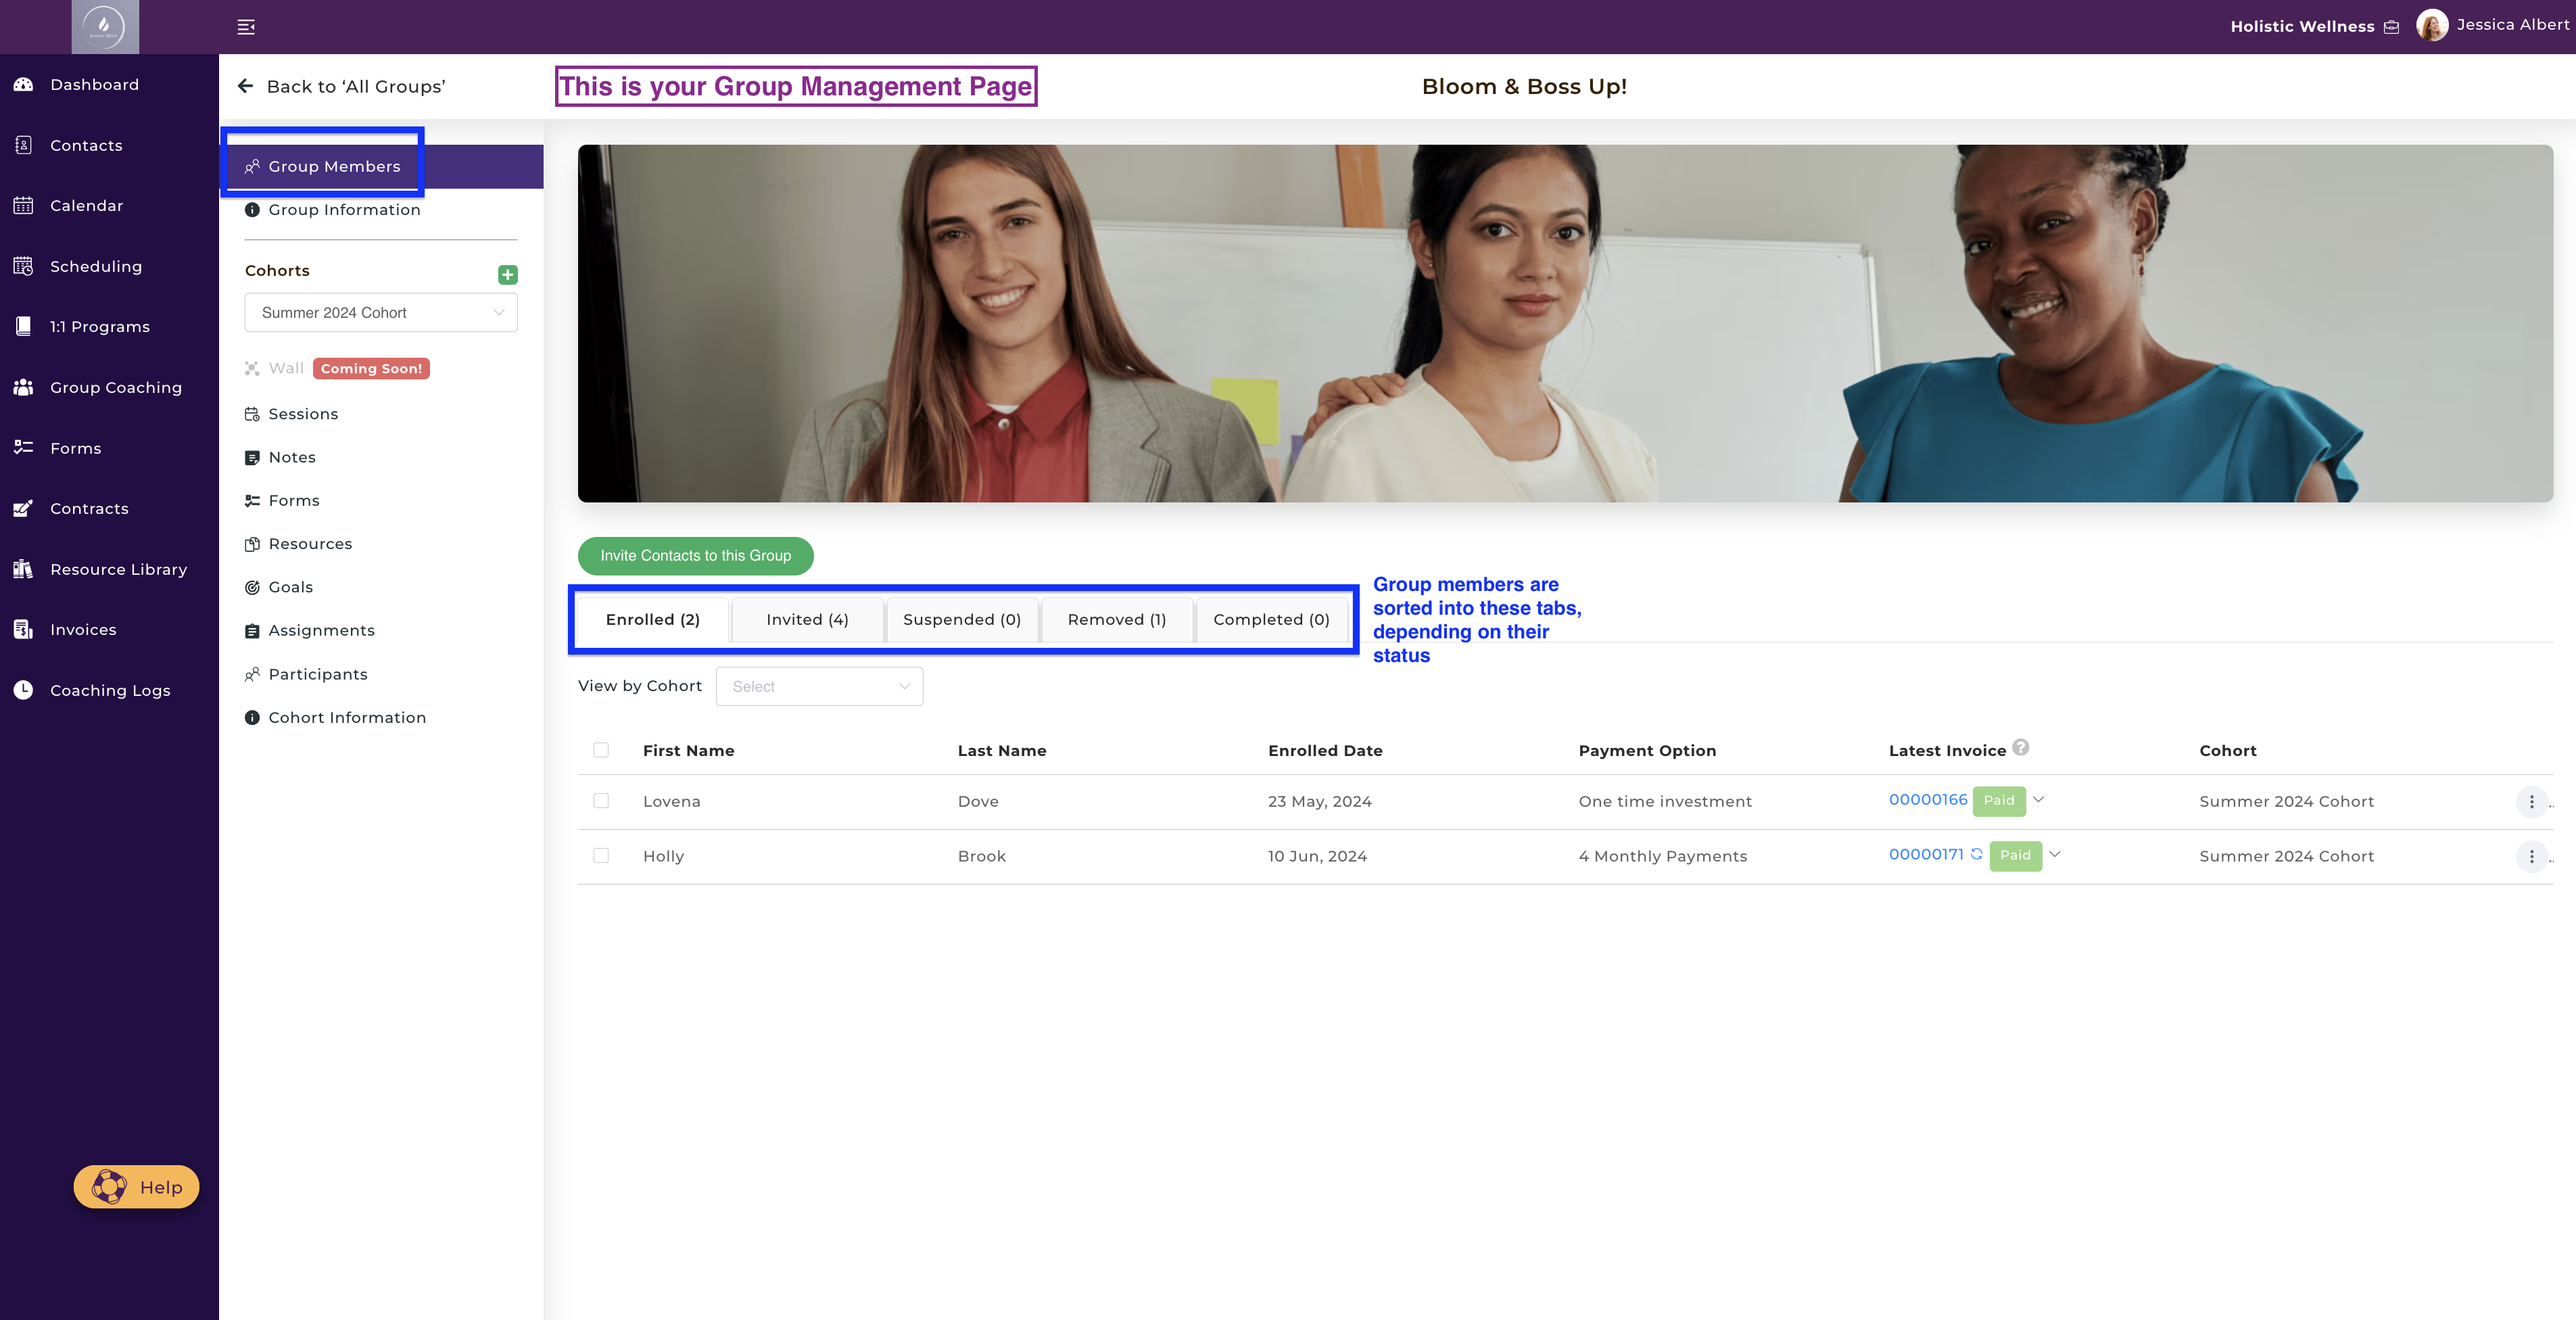
The first screen you'll see is the Group Members page. Group members are organized into the following tabs:
- Enrolled - Members who have completed the sign-up process for your group.
- Invited - Members you've invited to join your group but who haven't completed the sign-up process. ✉️
- Suspended - Members whom you've suspended temporarily from your group.
- Removed - Members whom you have removed permanently from your group.
- Completed - Members who have completed the group program. ✅
2. Inviting Existing Contacts to Sign Up to Your Group 👩🦱
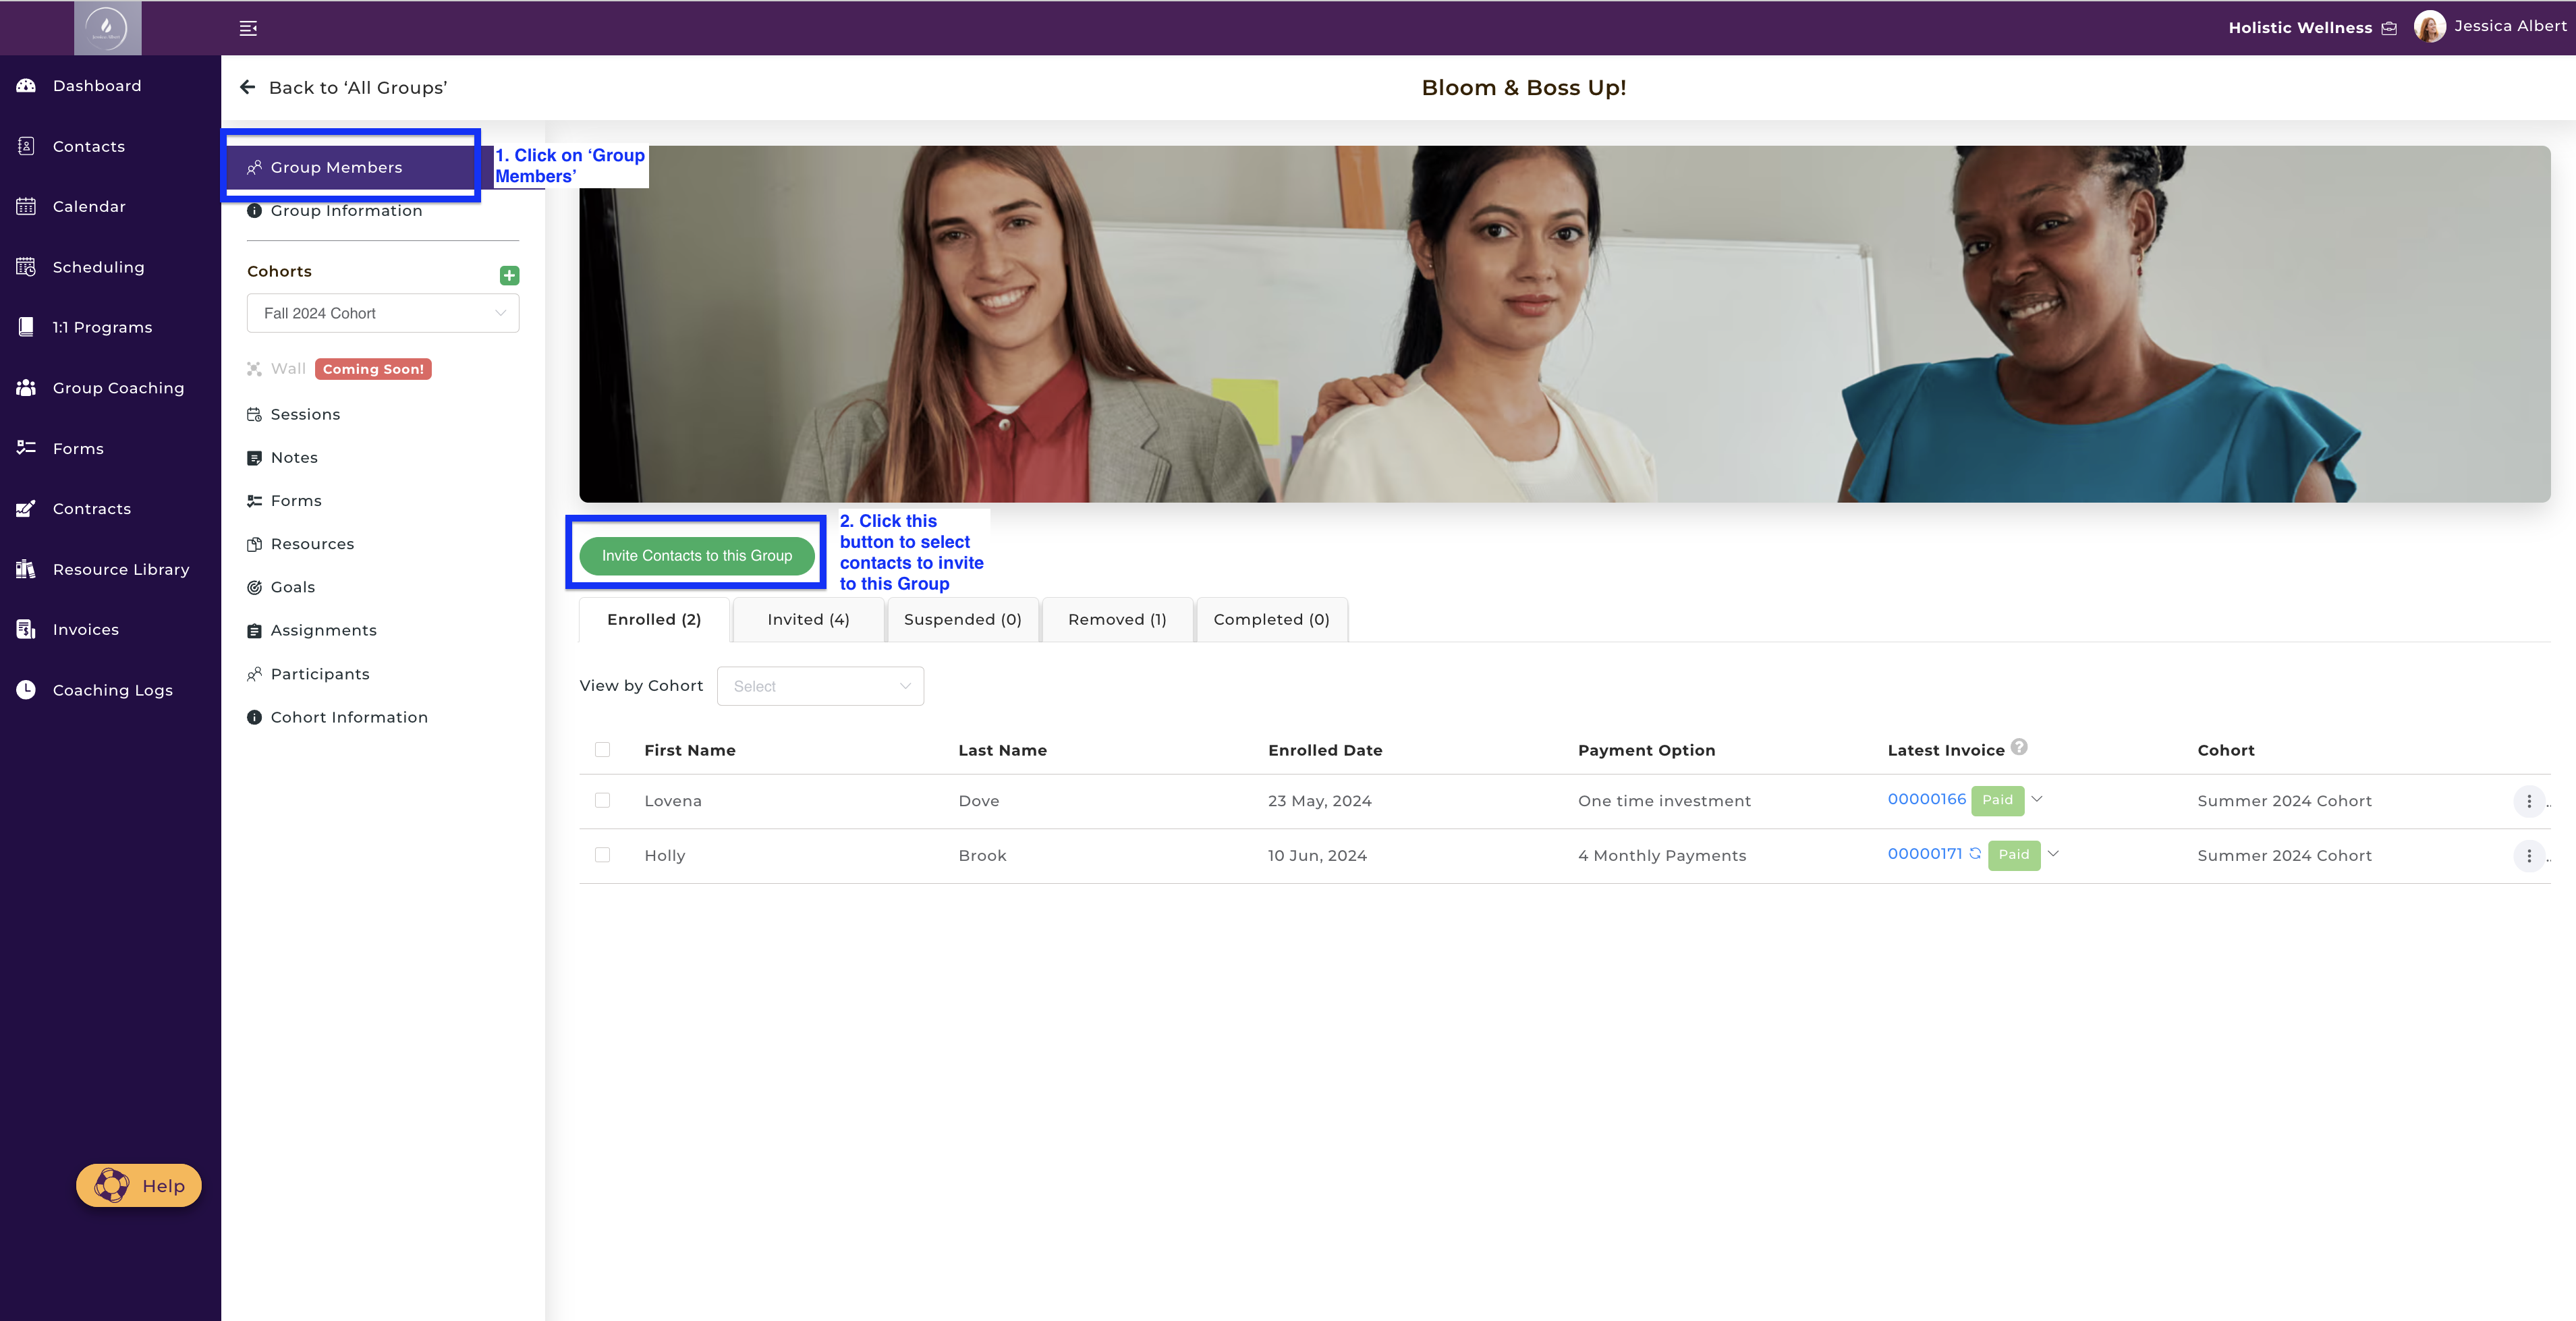
To invite existing Contacts in your CoachVantage account to your Group, click on Group Members, then click the Invite Contacts to this Group button, as shown below:
The Add Group Members modal pops up that lists your existing contacts. Select the contacts that you wish to invite to your Group, then click on Send Invite, as shown below:

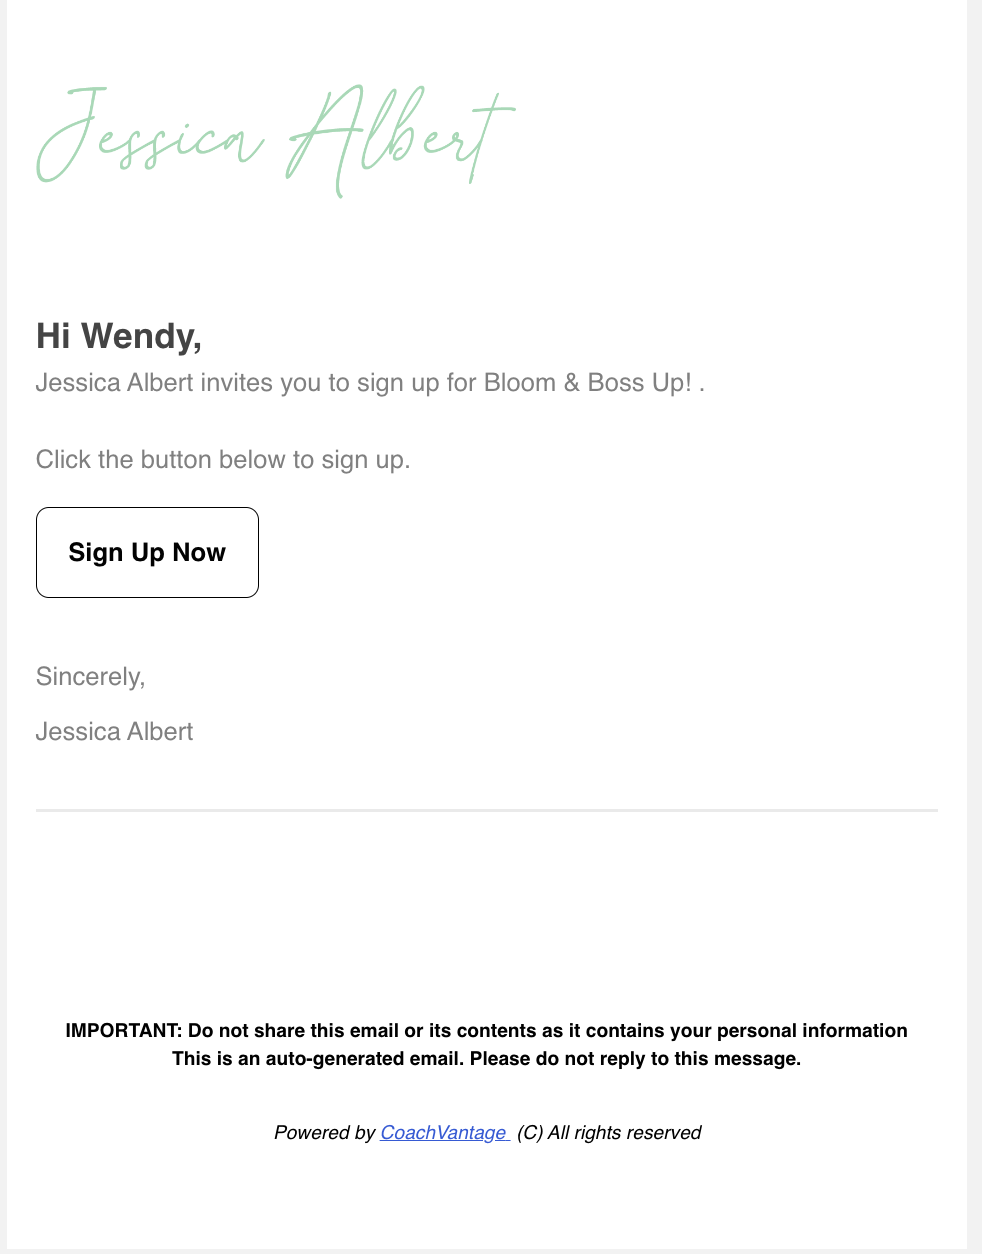
After you click Send Invite, CoachVantage automatically sends an email notification to these contacts, asking them to sign up to your Group. An example of the email notification that your clients will receive is shown below:
3. How to View Invited and Enrolled Members 👁️
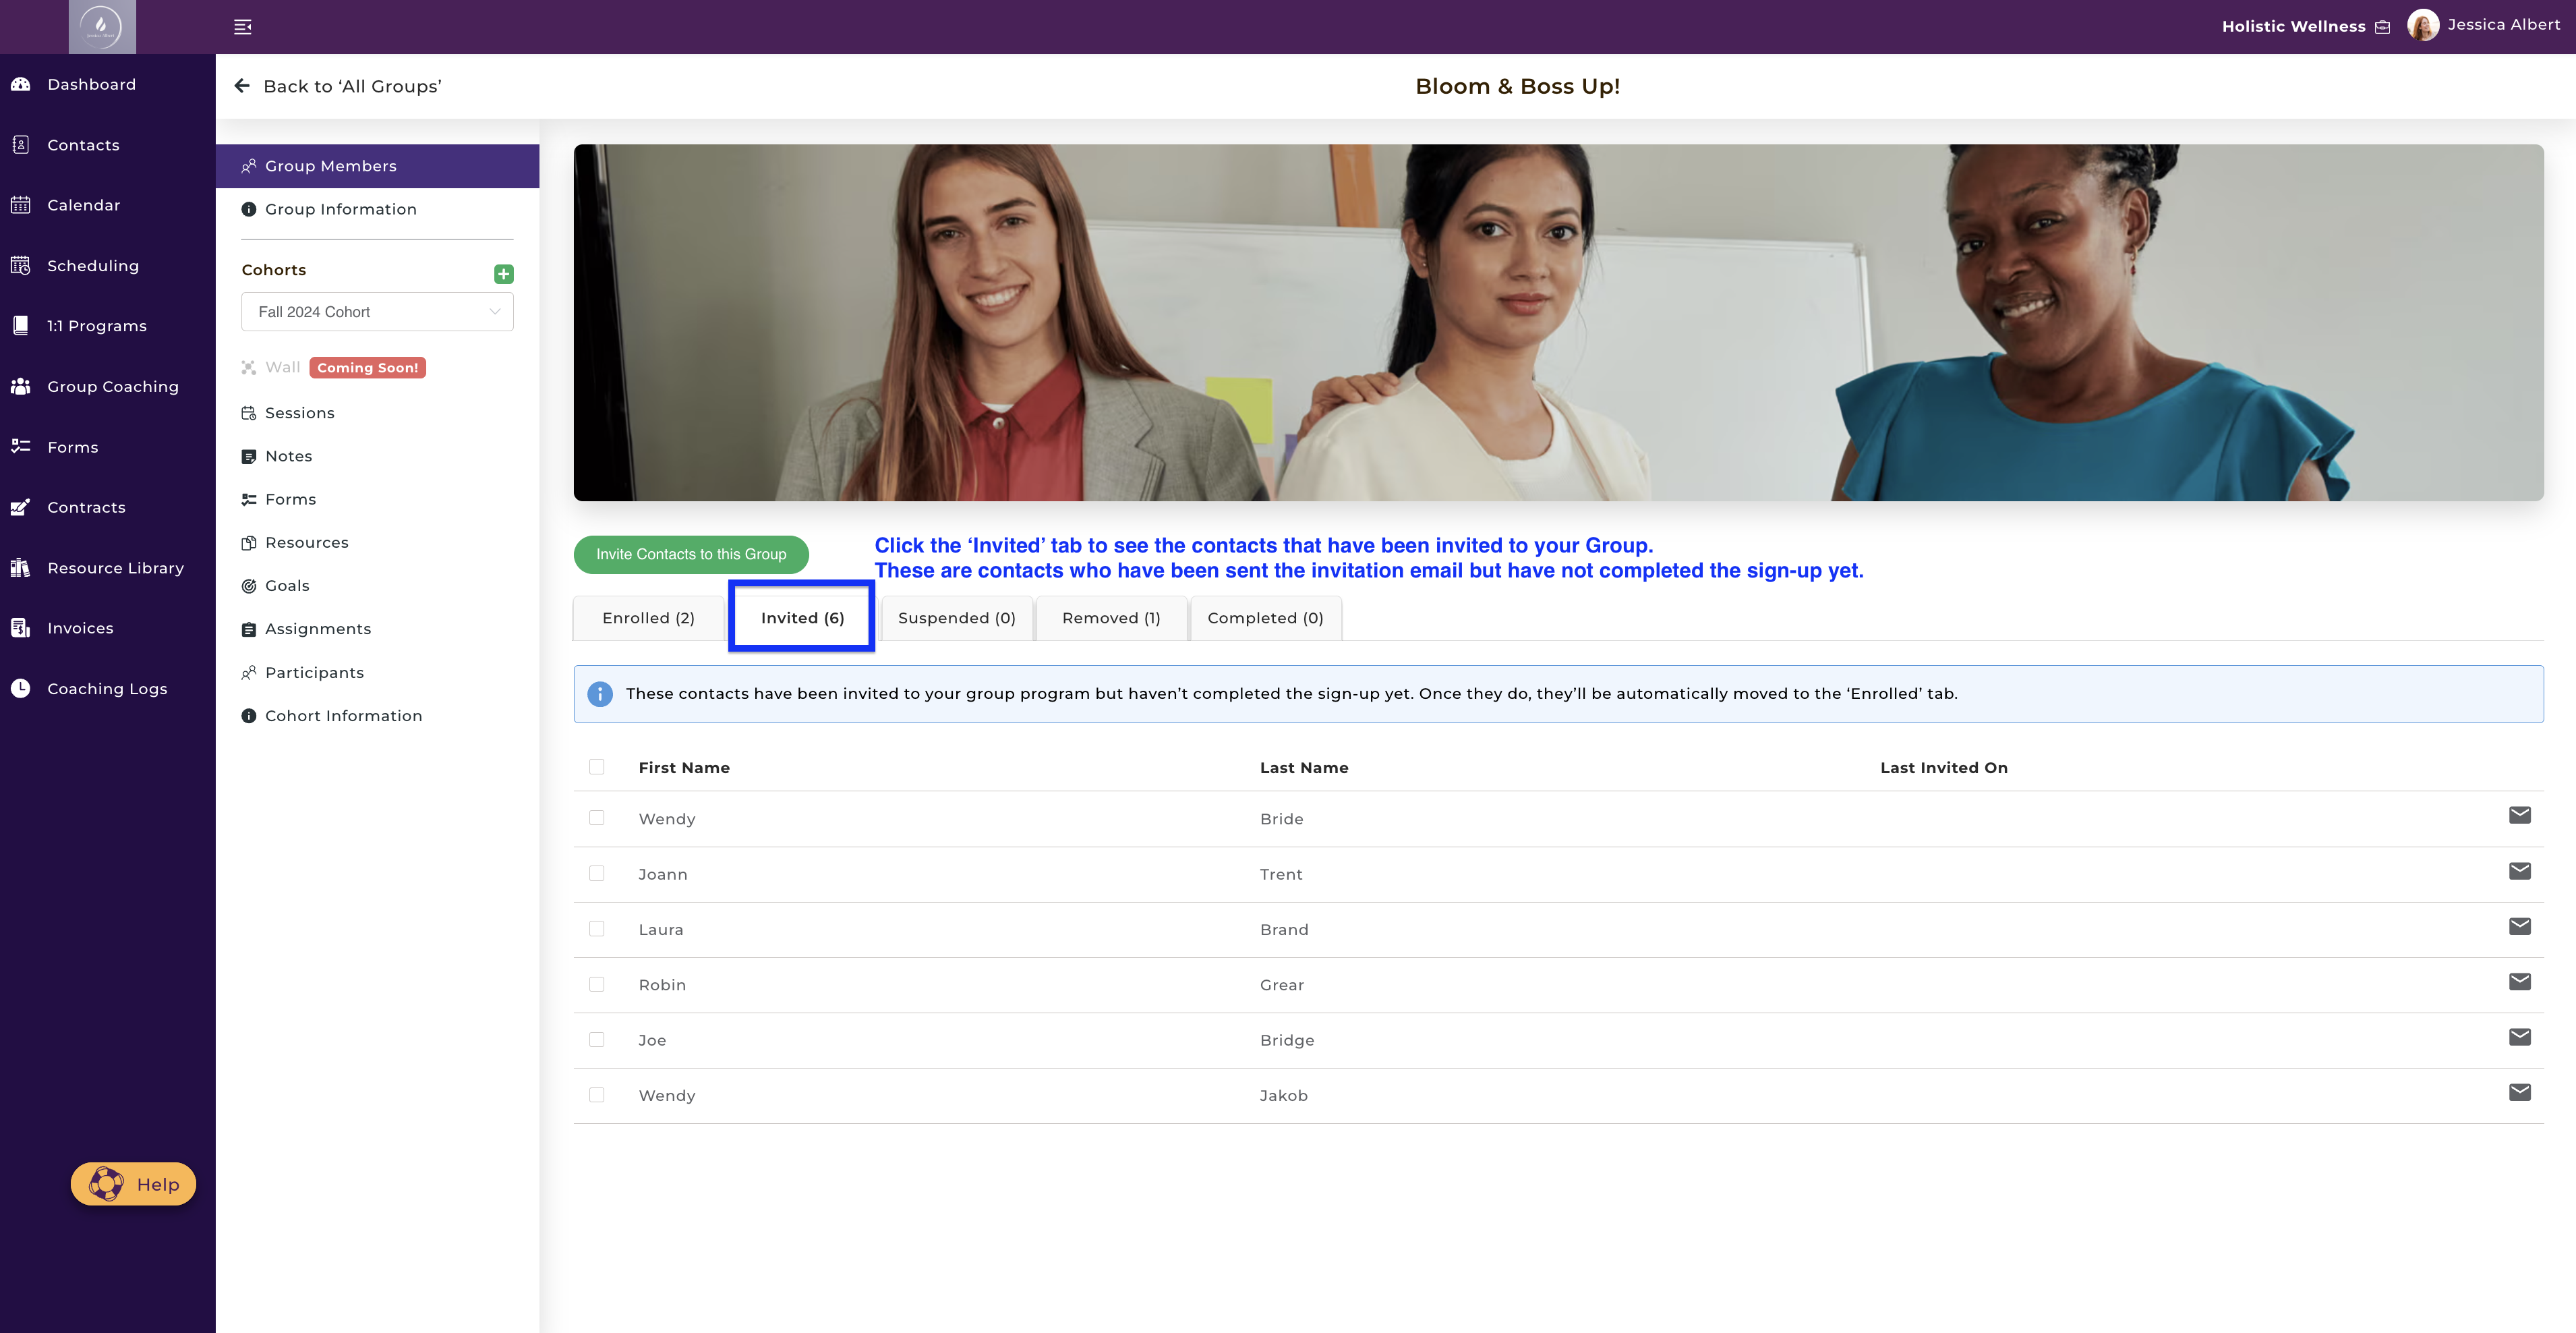
On the Group Members page, click on the Invited tab to view group members whom you have invited to your Group but who haven't completed the sign-up process, as shown below:
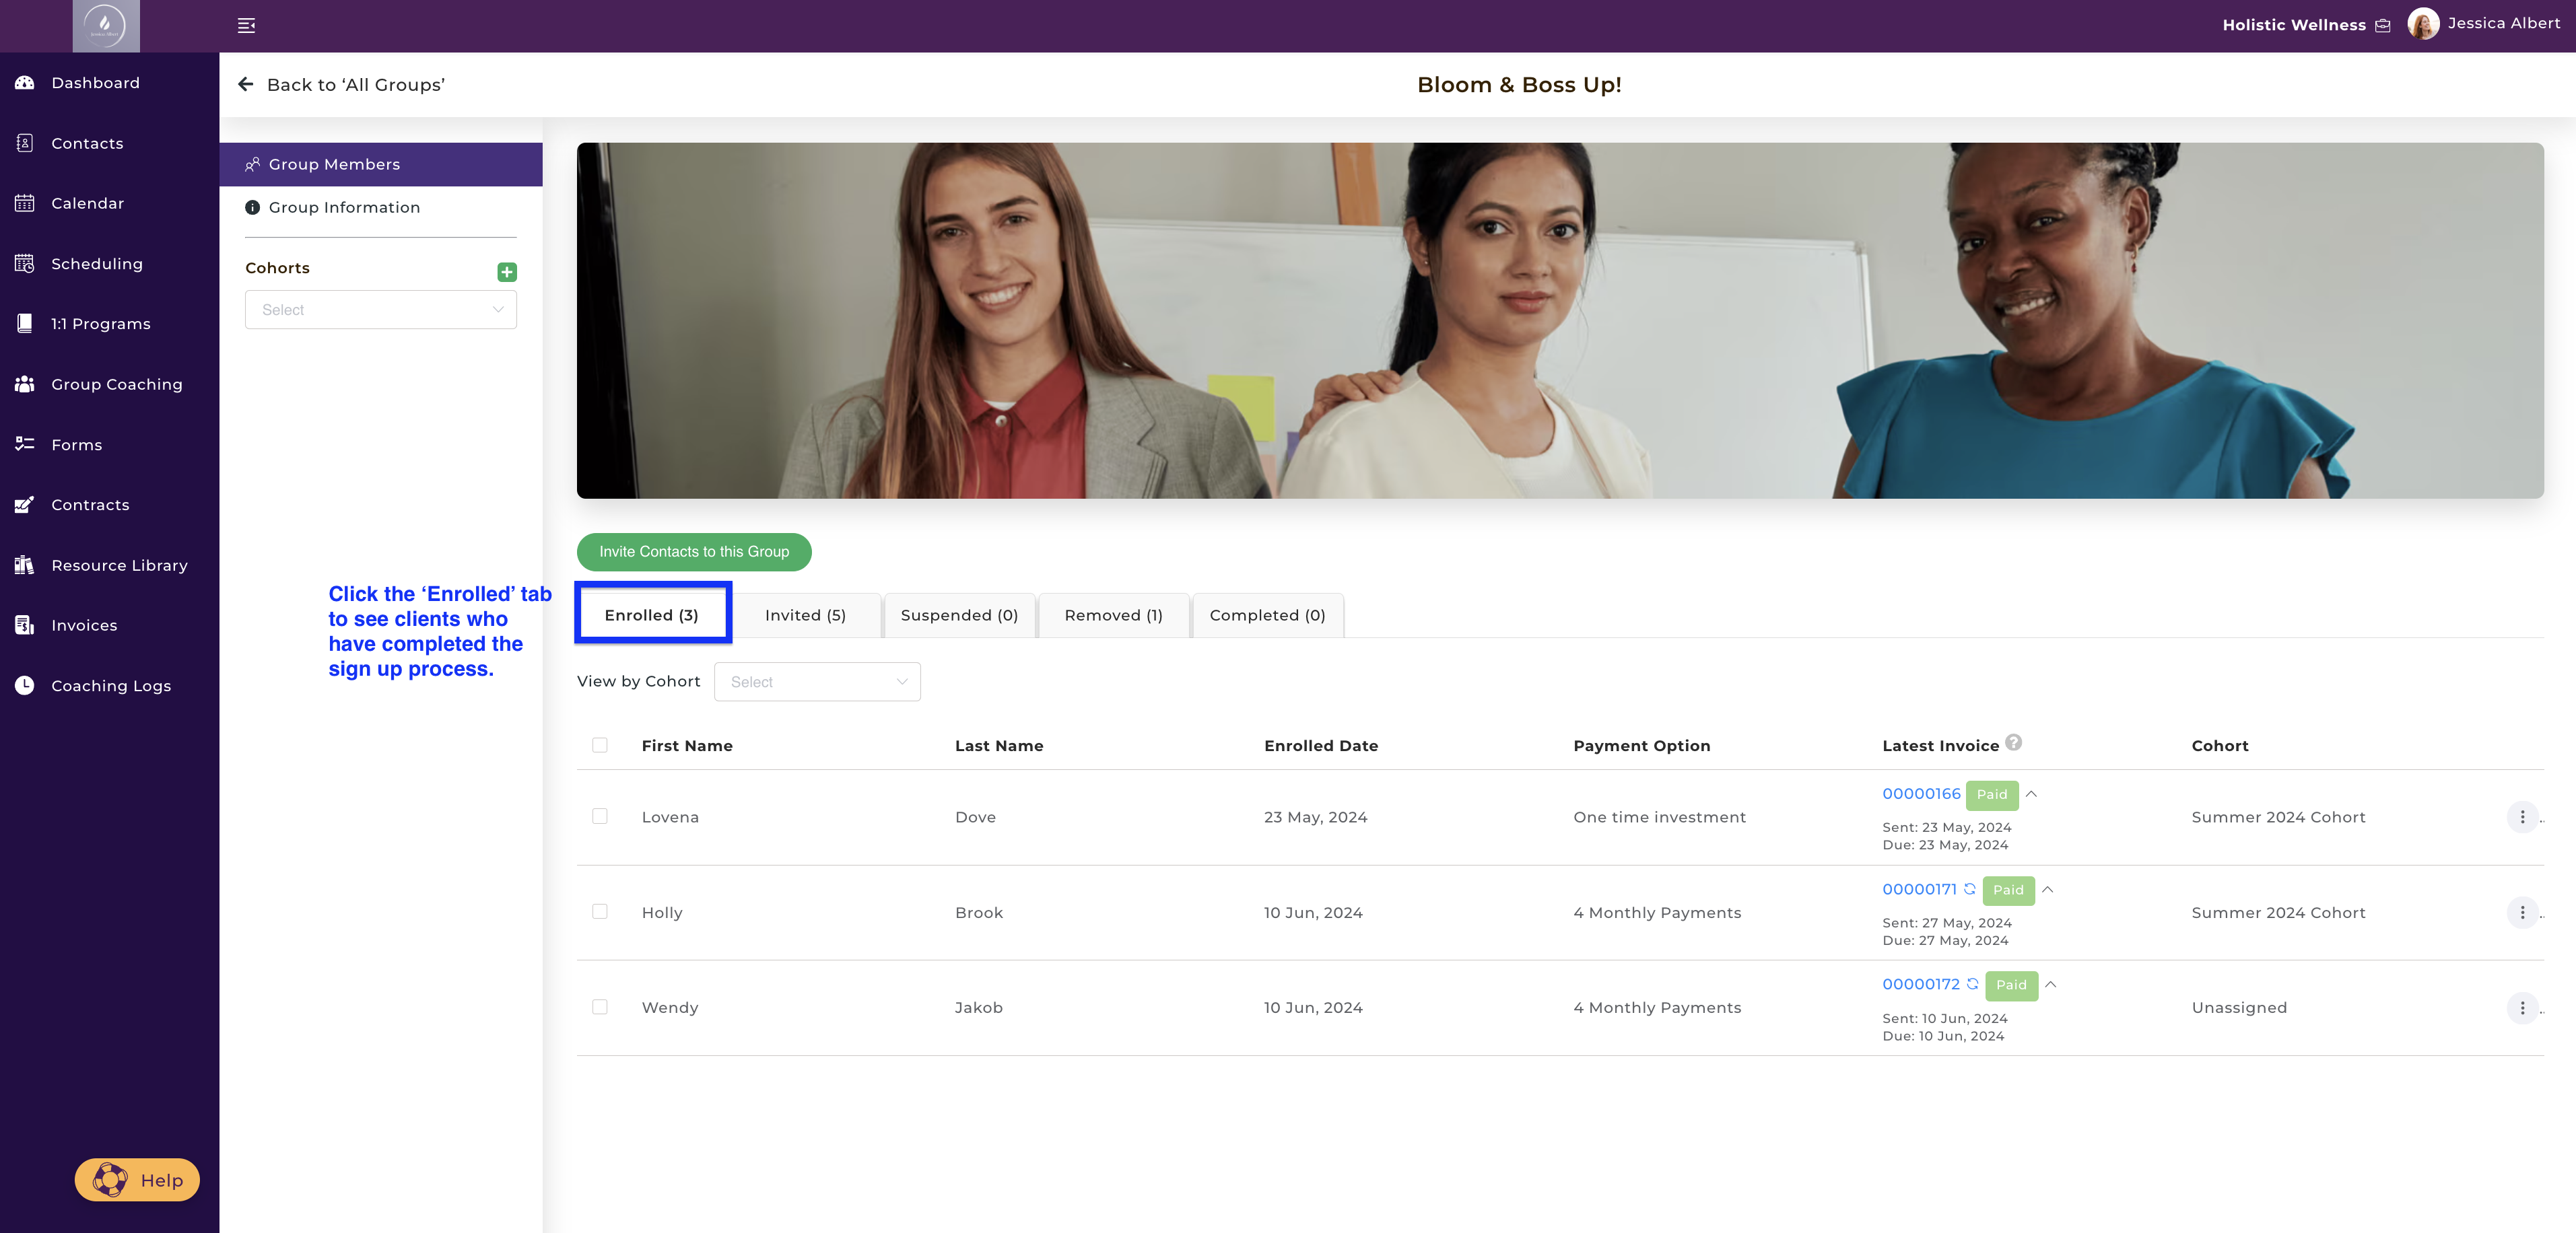
Click on the Enrolled tab to view members who have completed the sign up process to your Group. If they have made payment to join your Group, you'll see the status of their last invoice in the Latest Invoice column. This is useful for you to see at one glance which of your clients have made a payment or those who may have defaulted on payments, as shown below:
4. Creating Cohorts for your Group (Aha! Plan feature only)
You can create cohorts for your Group, if you are on the Aha! Plan (cohort creation is not supported on the Clarity Plan). Cohort creation gives you the ability to sub-divide group members into smaller groups.
You can set different start and end dates for each cohort. This is especially useful if your group attracts a large number of sign-ups, or if you wish to have staggered start and end dates for each cohort.
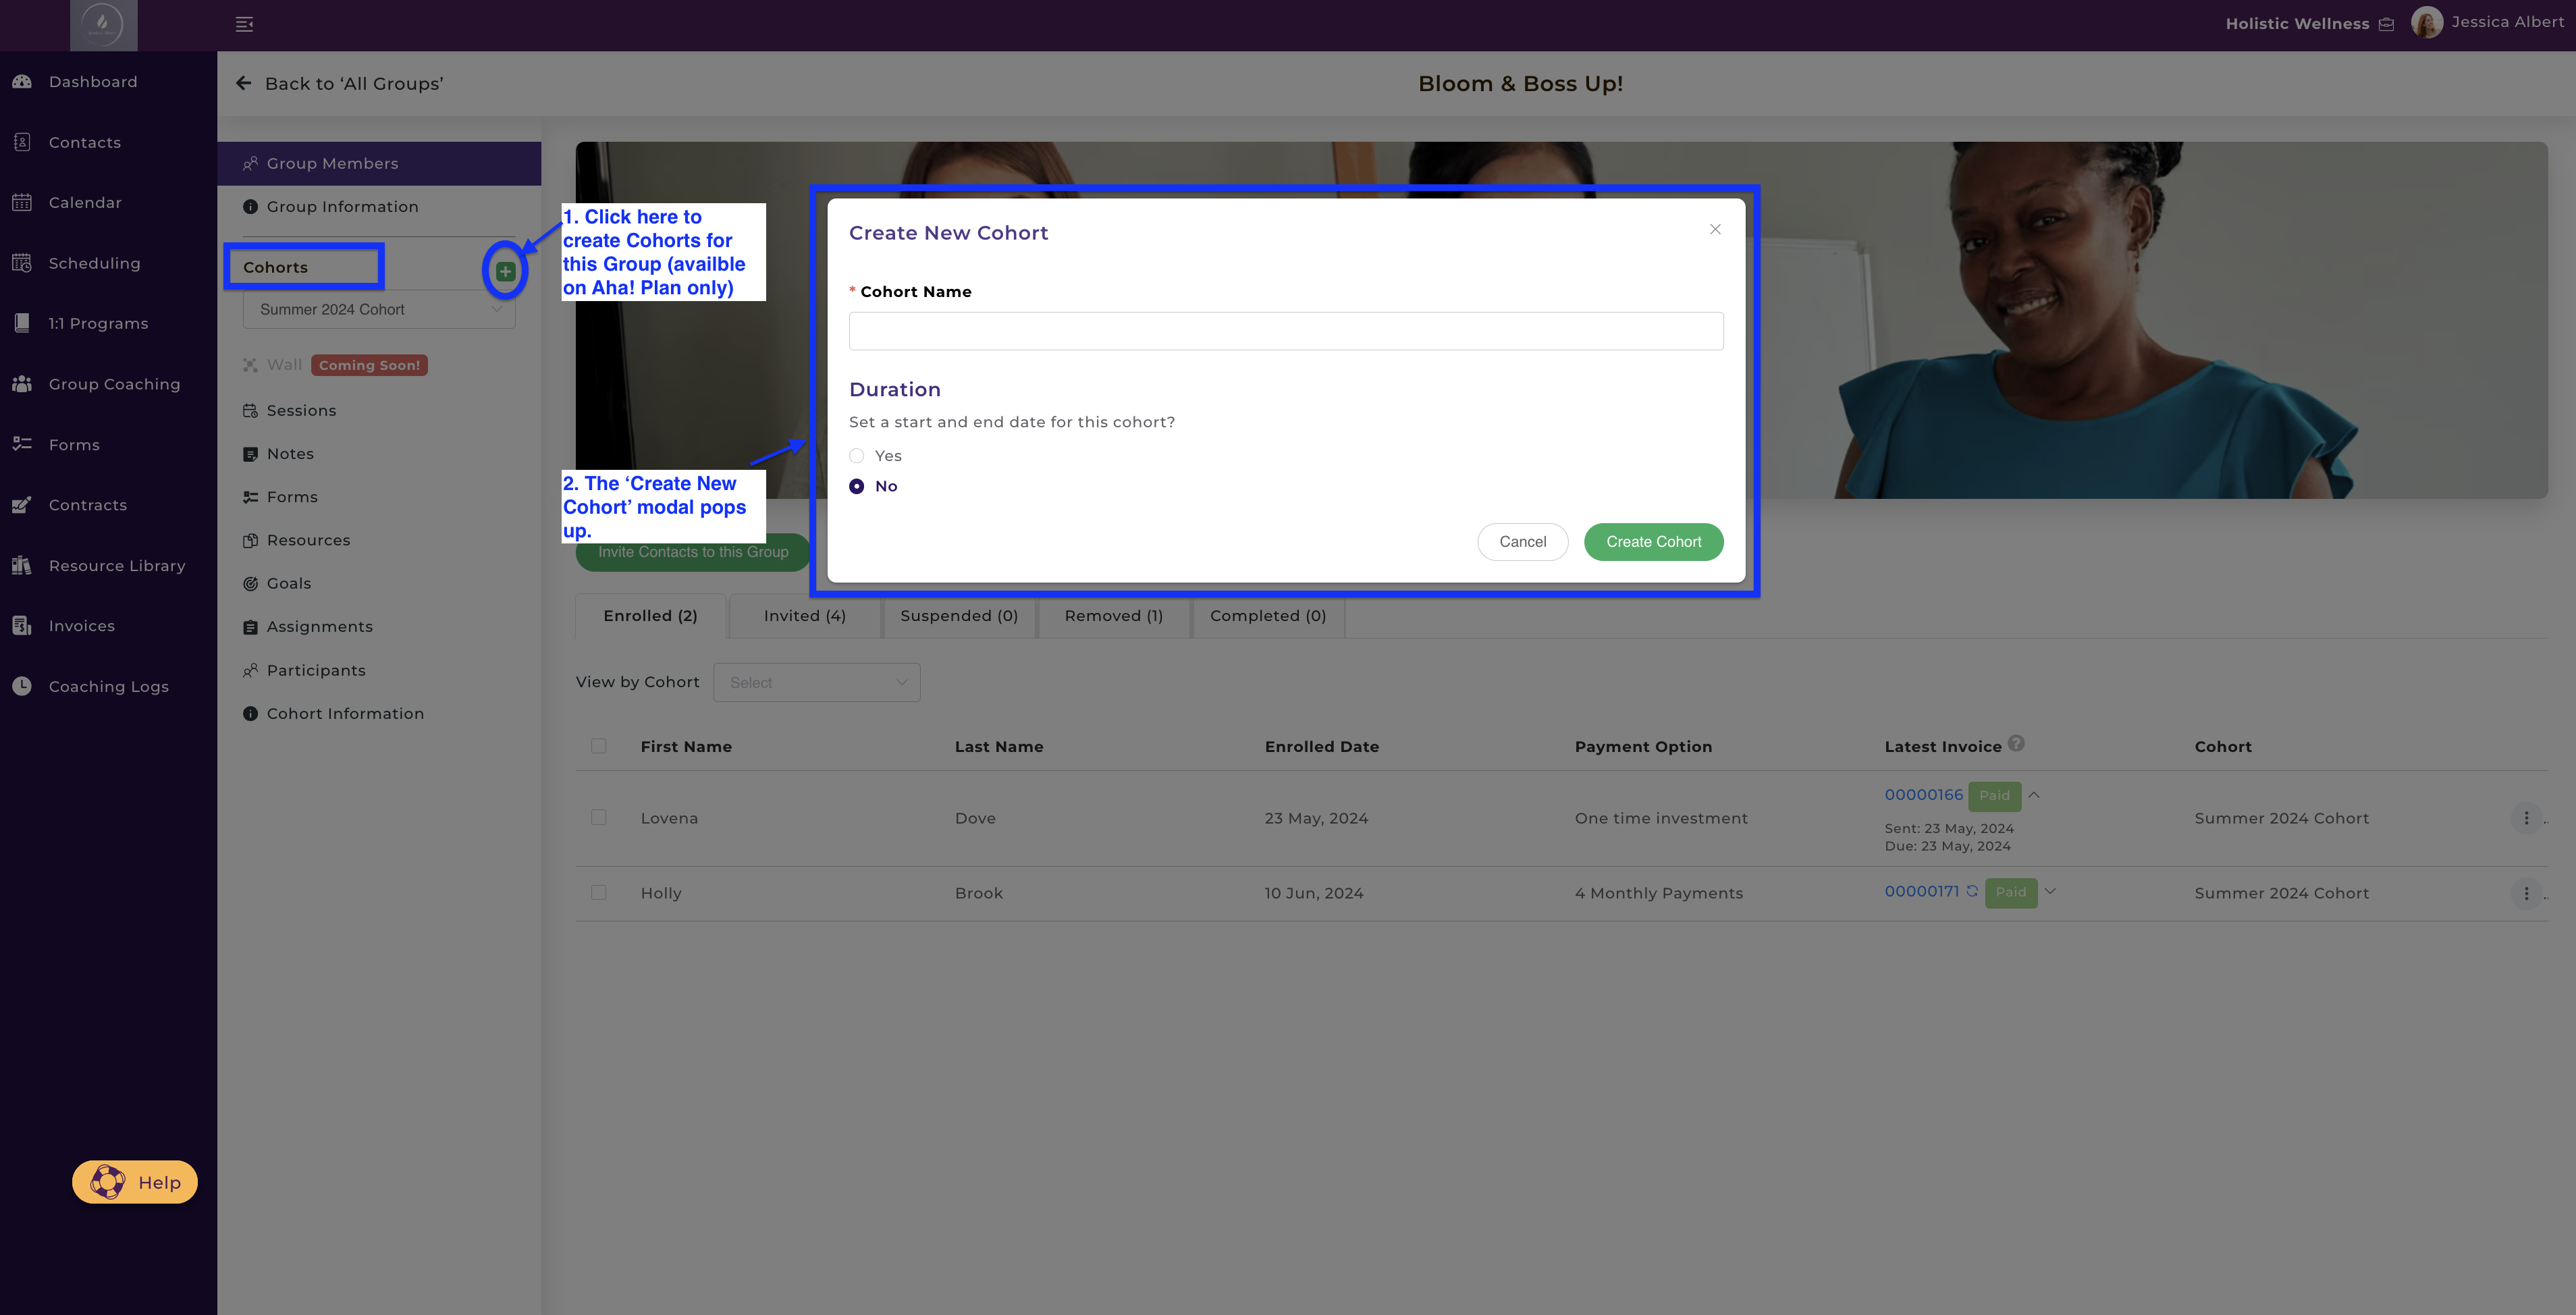
To create a cohort, click on the + icon next to the Cohort line and the Create New Cohort modal will pop up, as shown below:
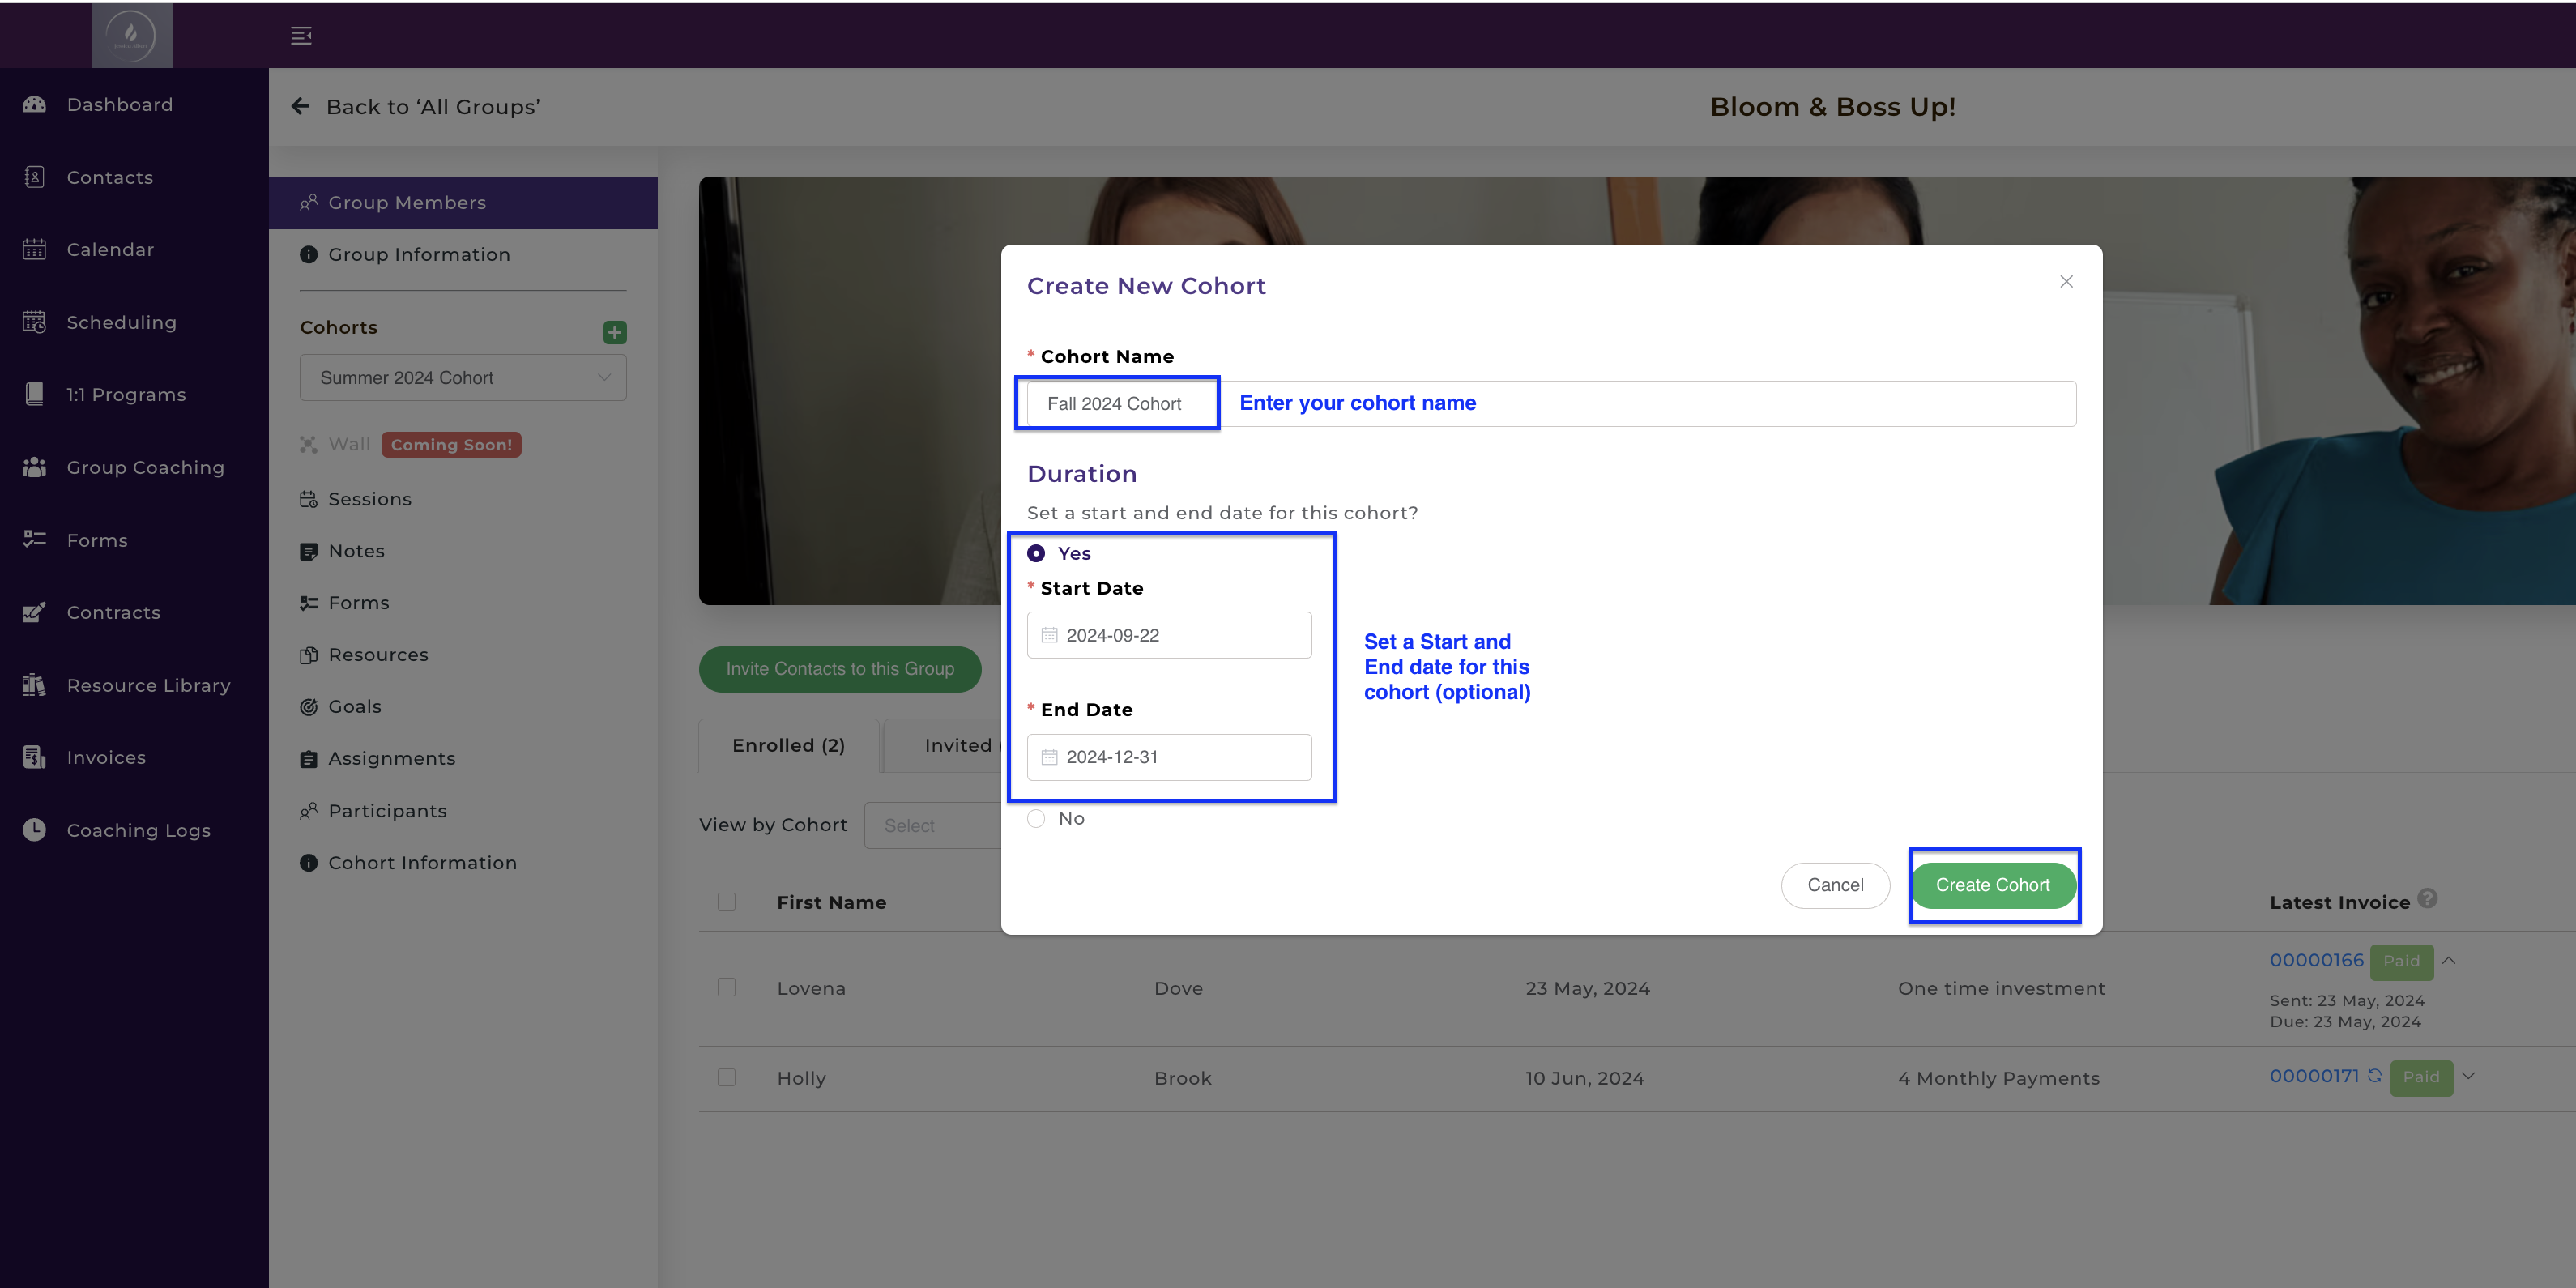
Enter a descriptive name for your Cohort, such as Fall Cohort. You also have the option of entering a Start and End date for each cohort that you create then click on Create Cohort, as shown below:
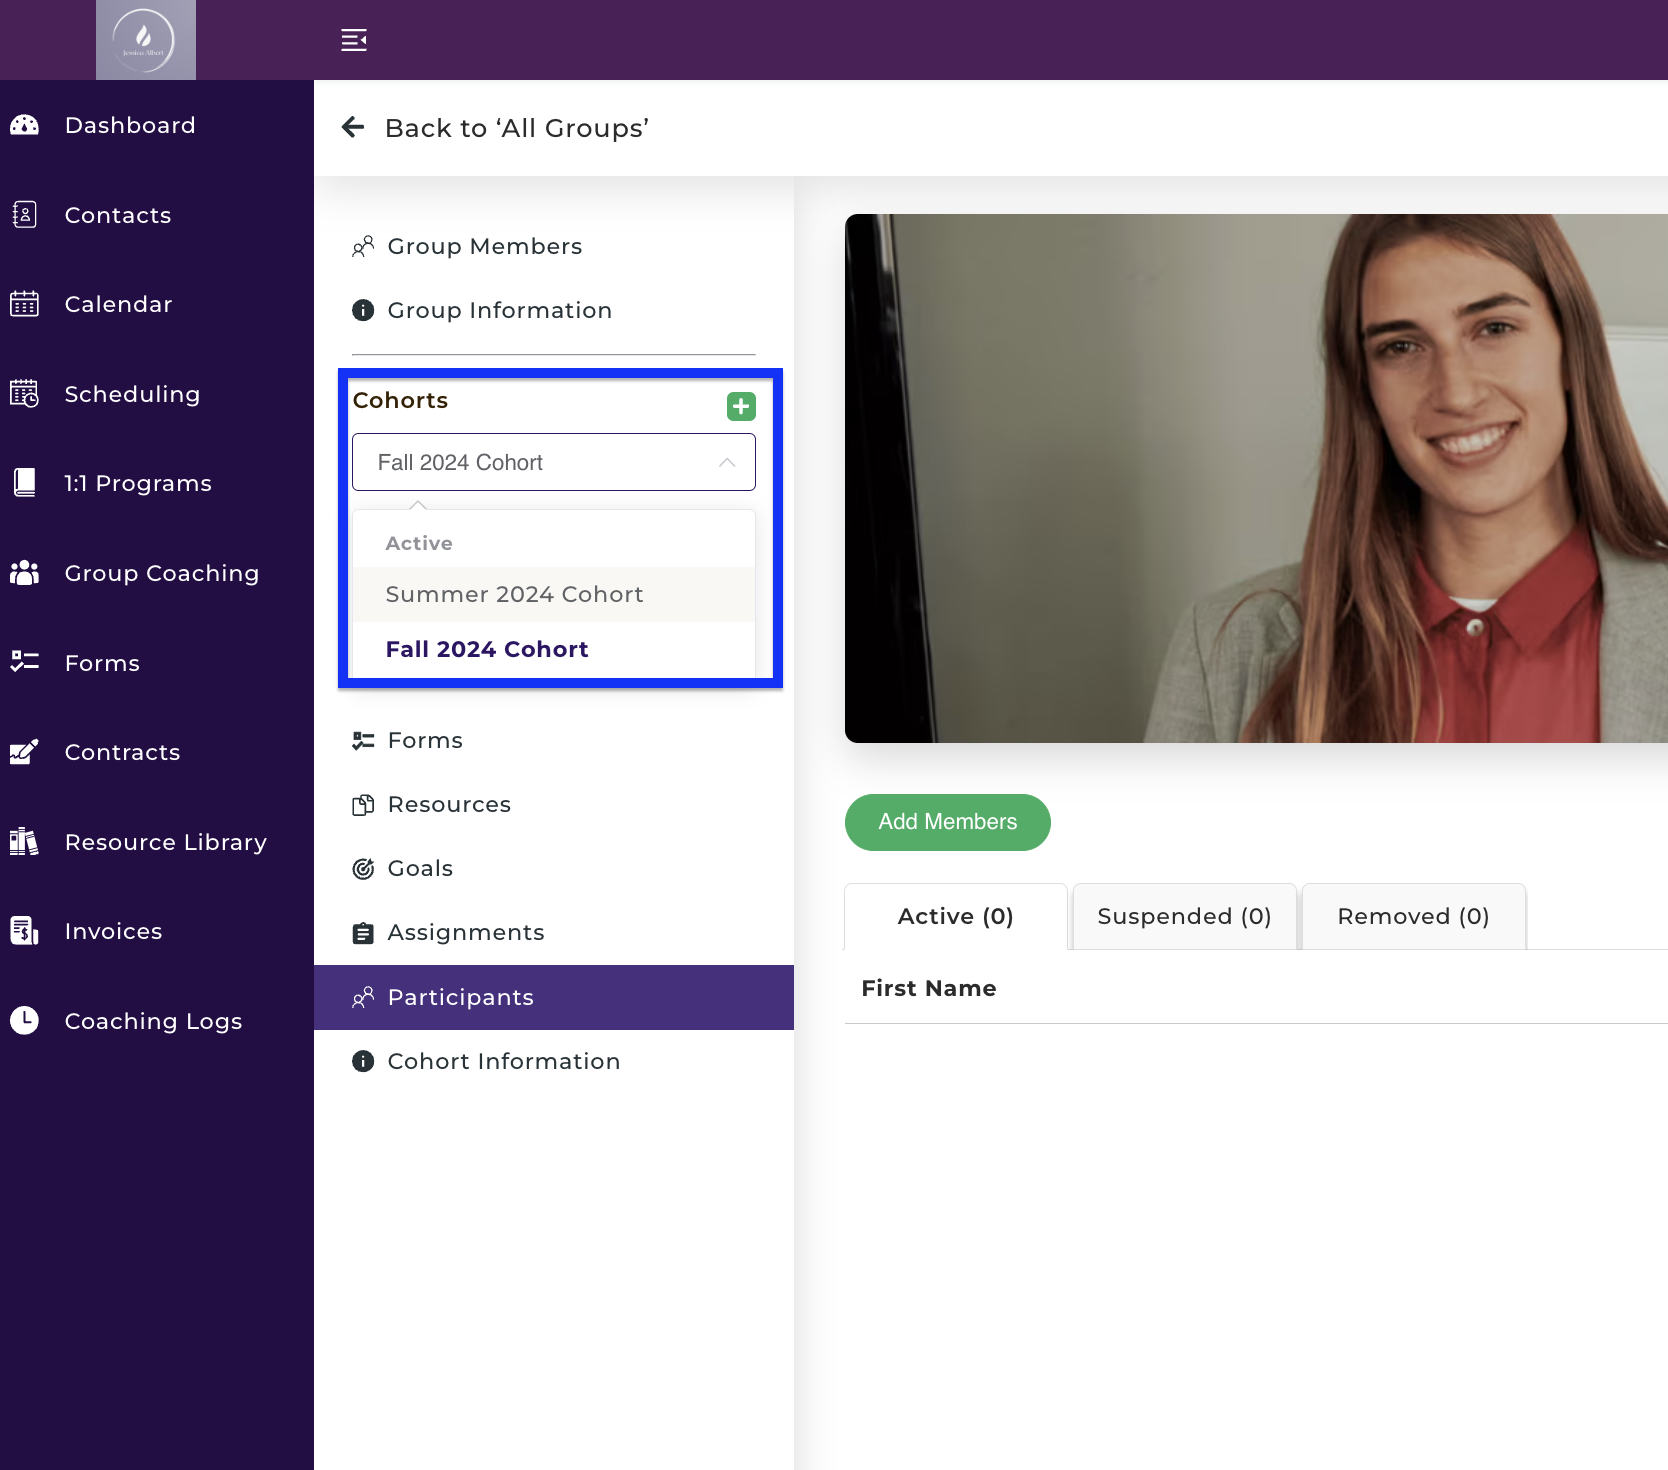
Once you've created Cohorts, you'll see the cohort names in the Cohort dropdown menu. Select the Cohort that you wish to manage, as shown below:
5. How to Assign Group Members to a Cohort
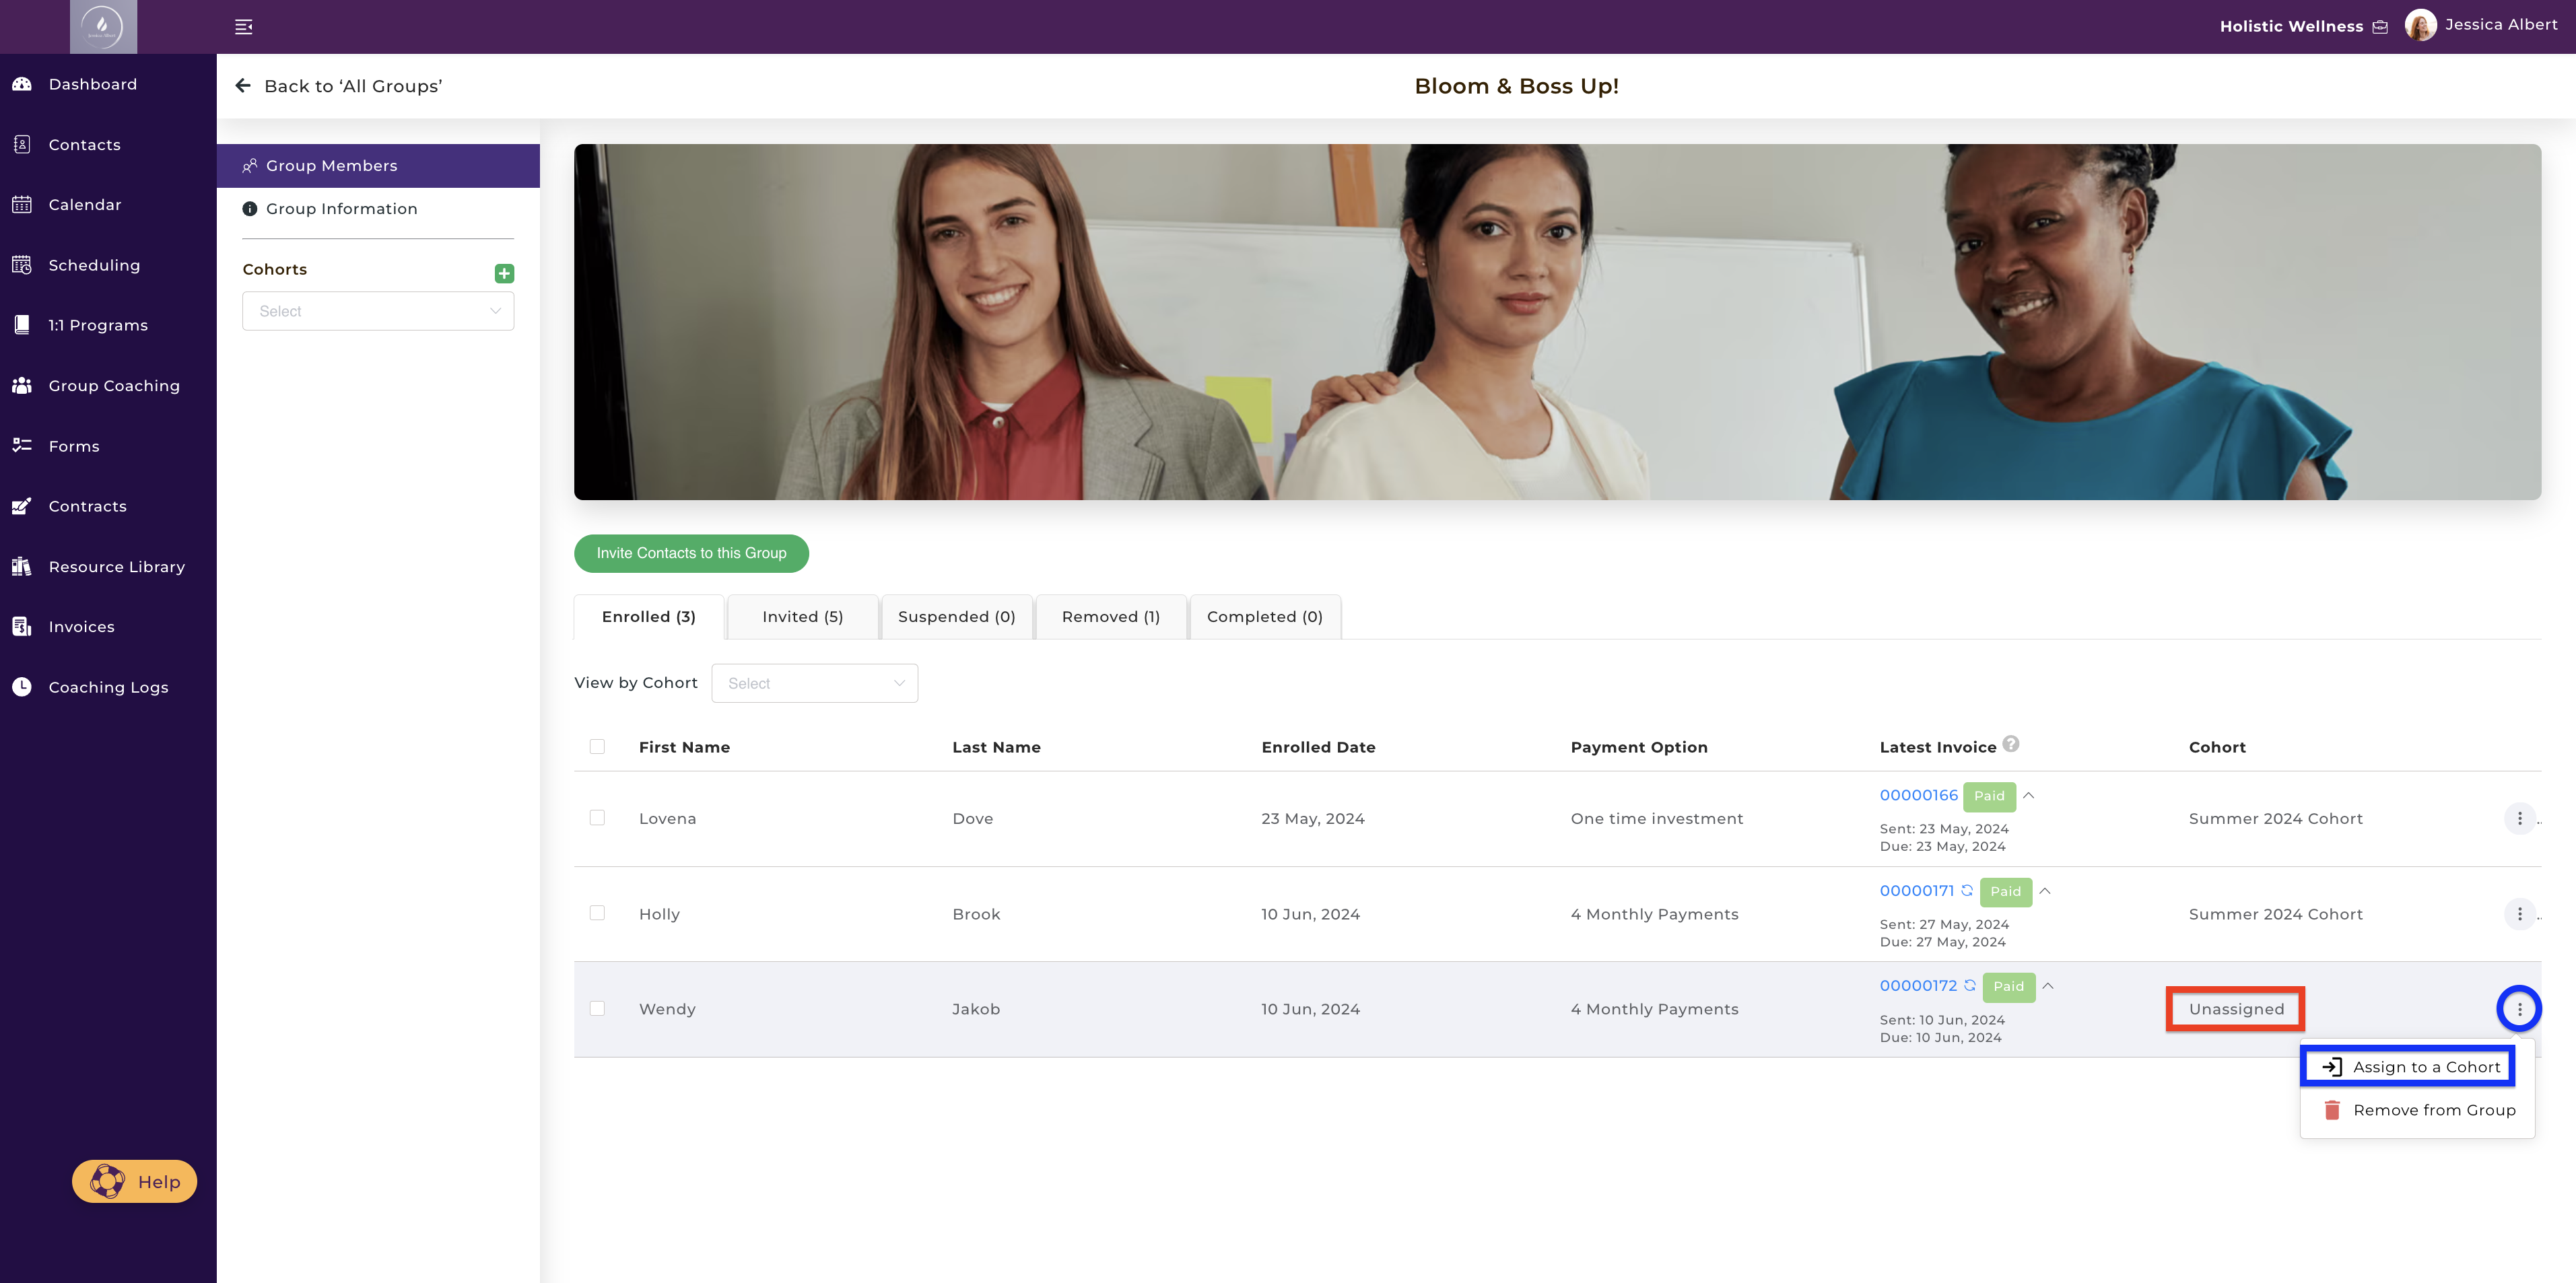
If your Group has Cohorts (Aha! Plan only), you'll need to assign the group members to a cohort. Once a member has completed the sign up process to your group program, they are moved to the Enrolled tab but their Cohort status (as seen in the Cohort column of the table below) will be Unassigned.
IMPORTANT: You'll need to take action to assign group members to a specific cohort. Click on the 3-dot button menu and select Assign to a Cohort, as shown below:
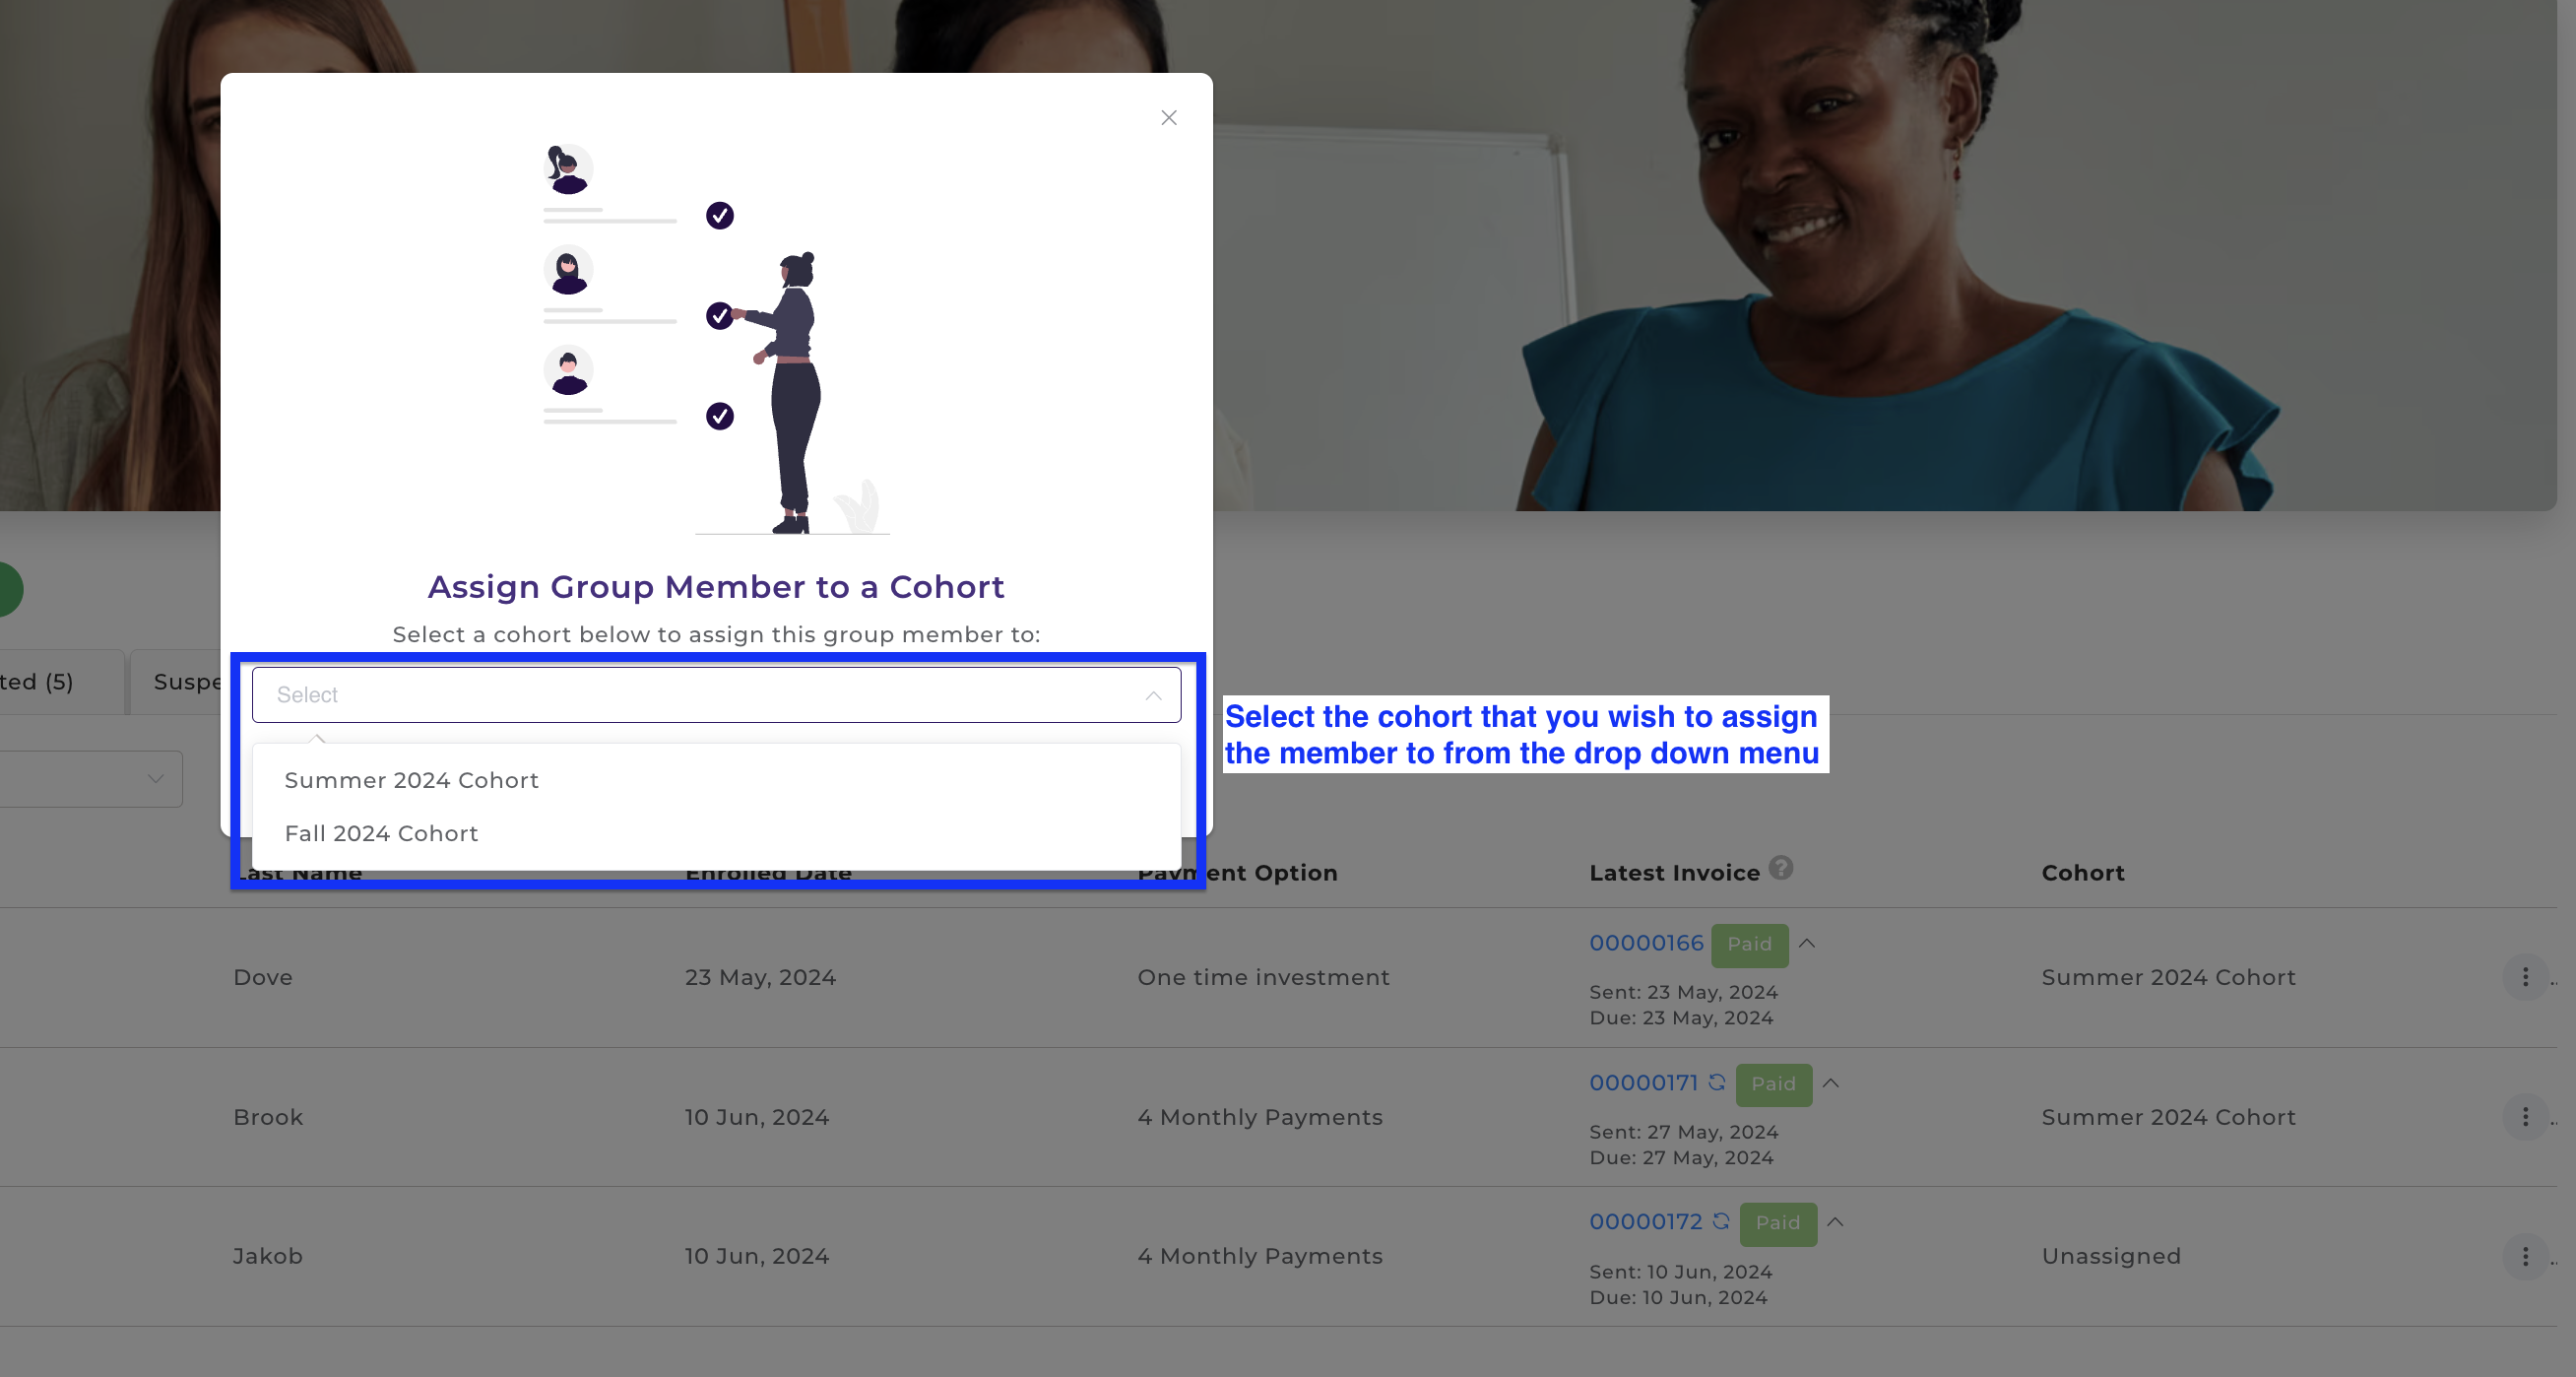
The Add modal pops up. From the drop down menu, select the cohort that you wish to assign the member to:
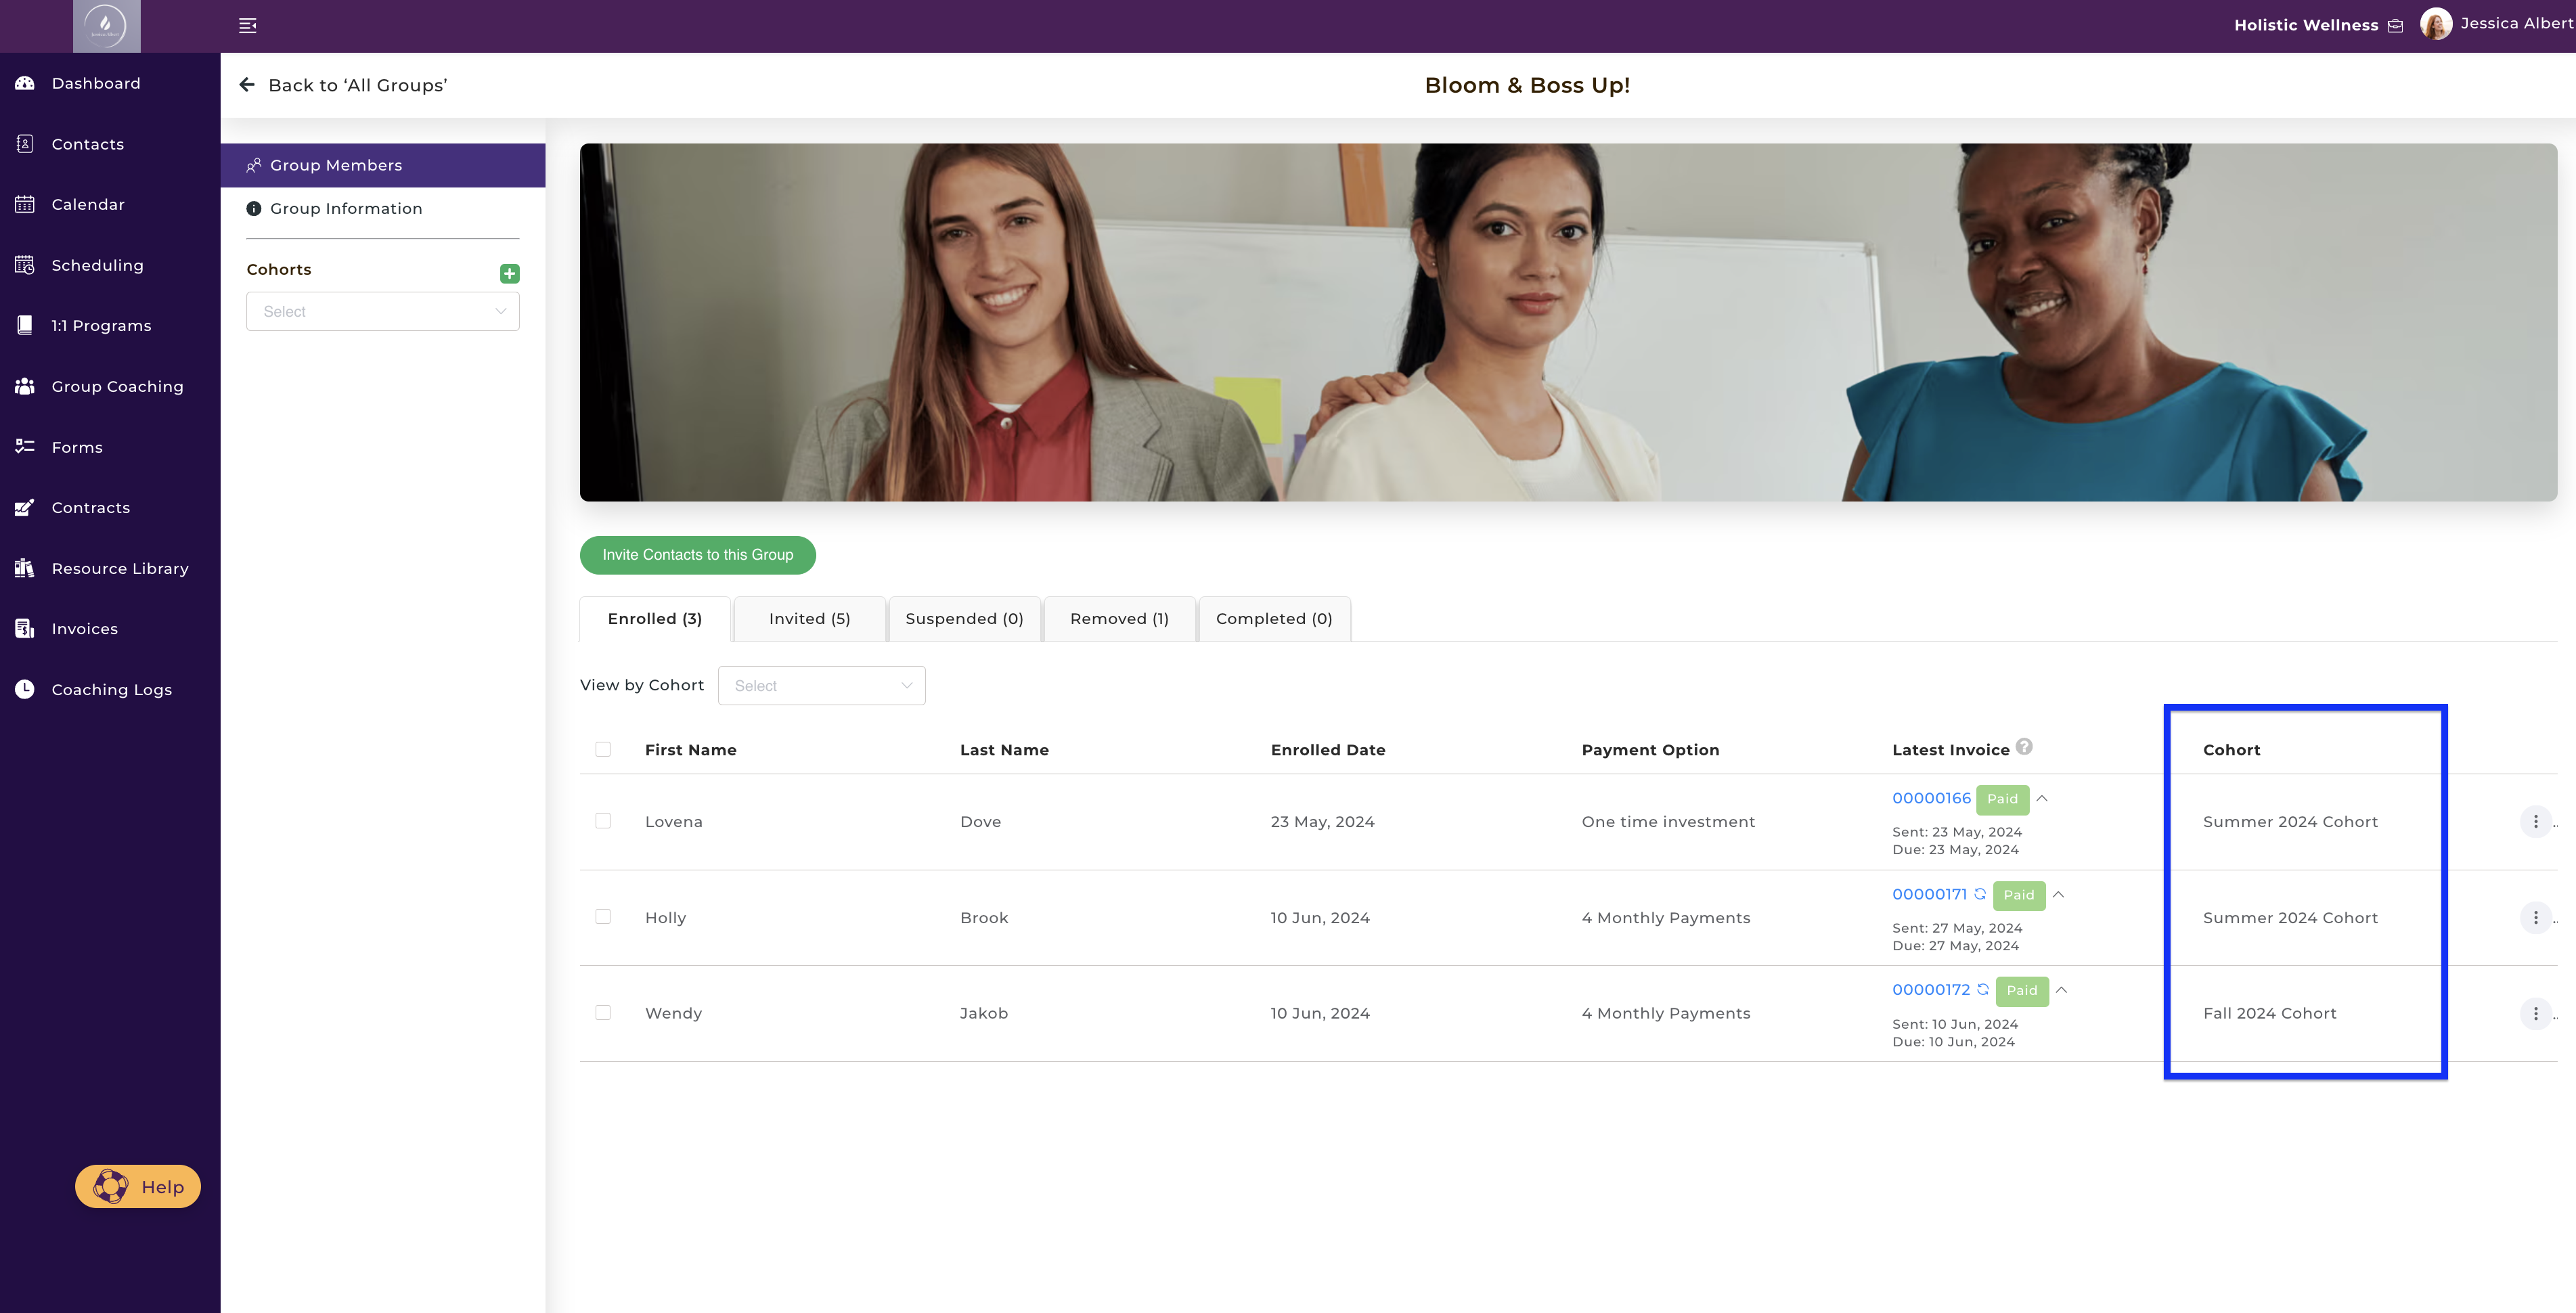
Next, click the Proceed button and the Enrolled table will be updated so you'll see the name of the Cohort that the member has been assigned to in the Cohort column, as shown below:
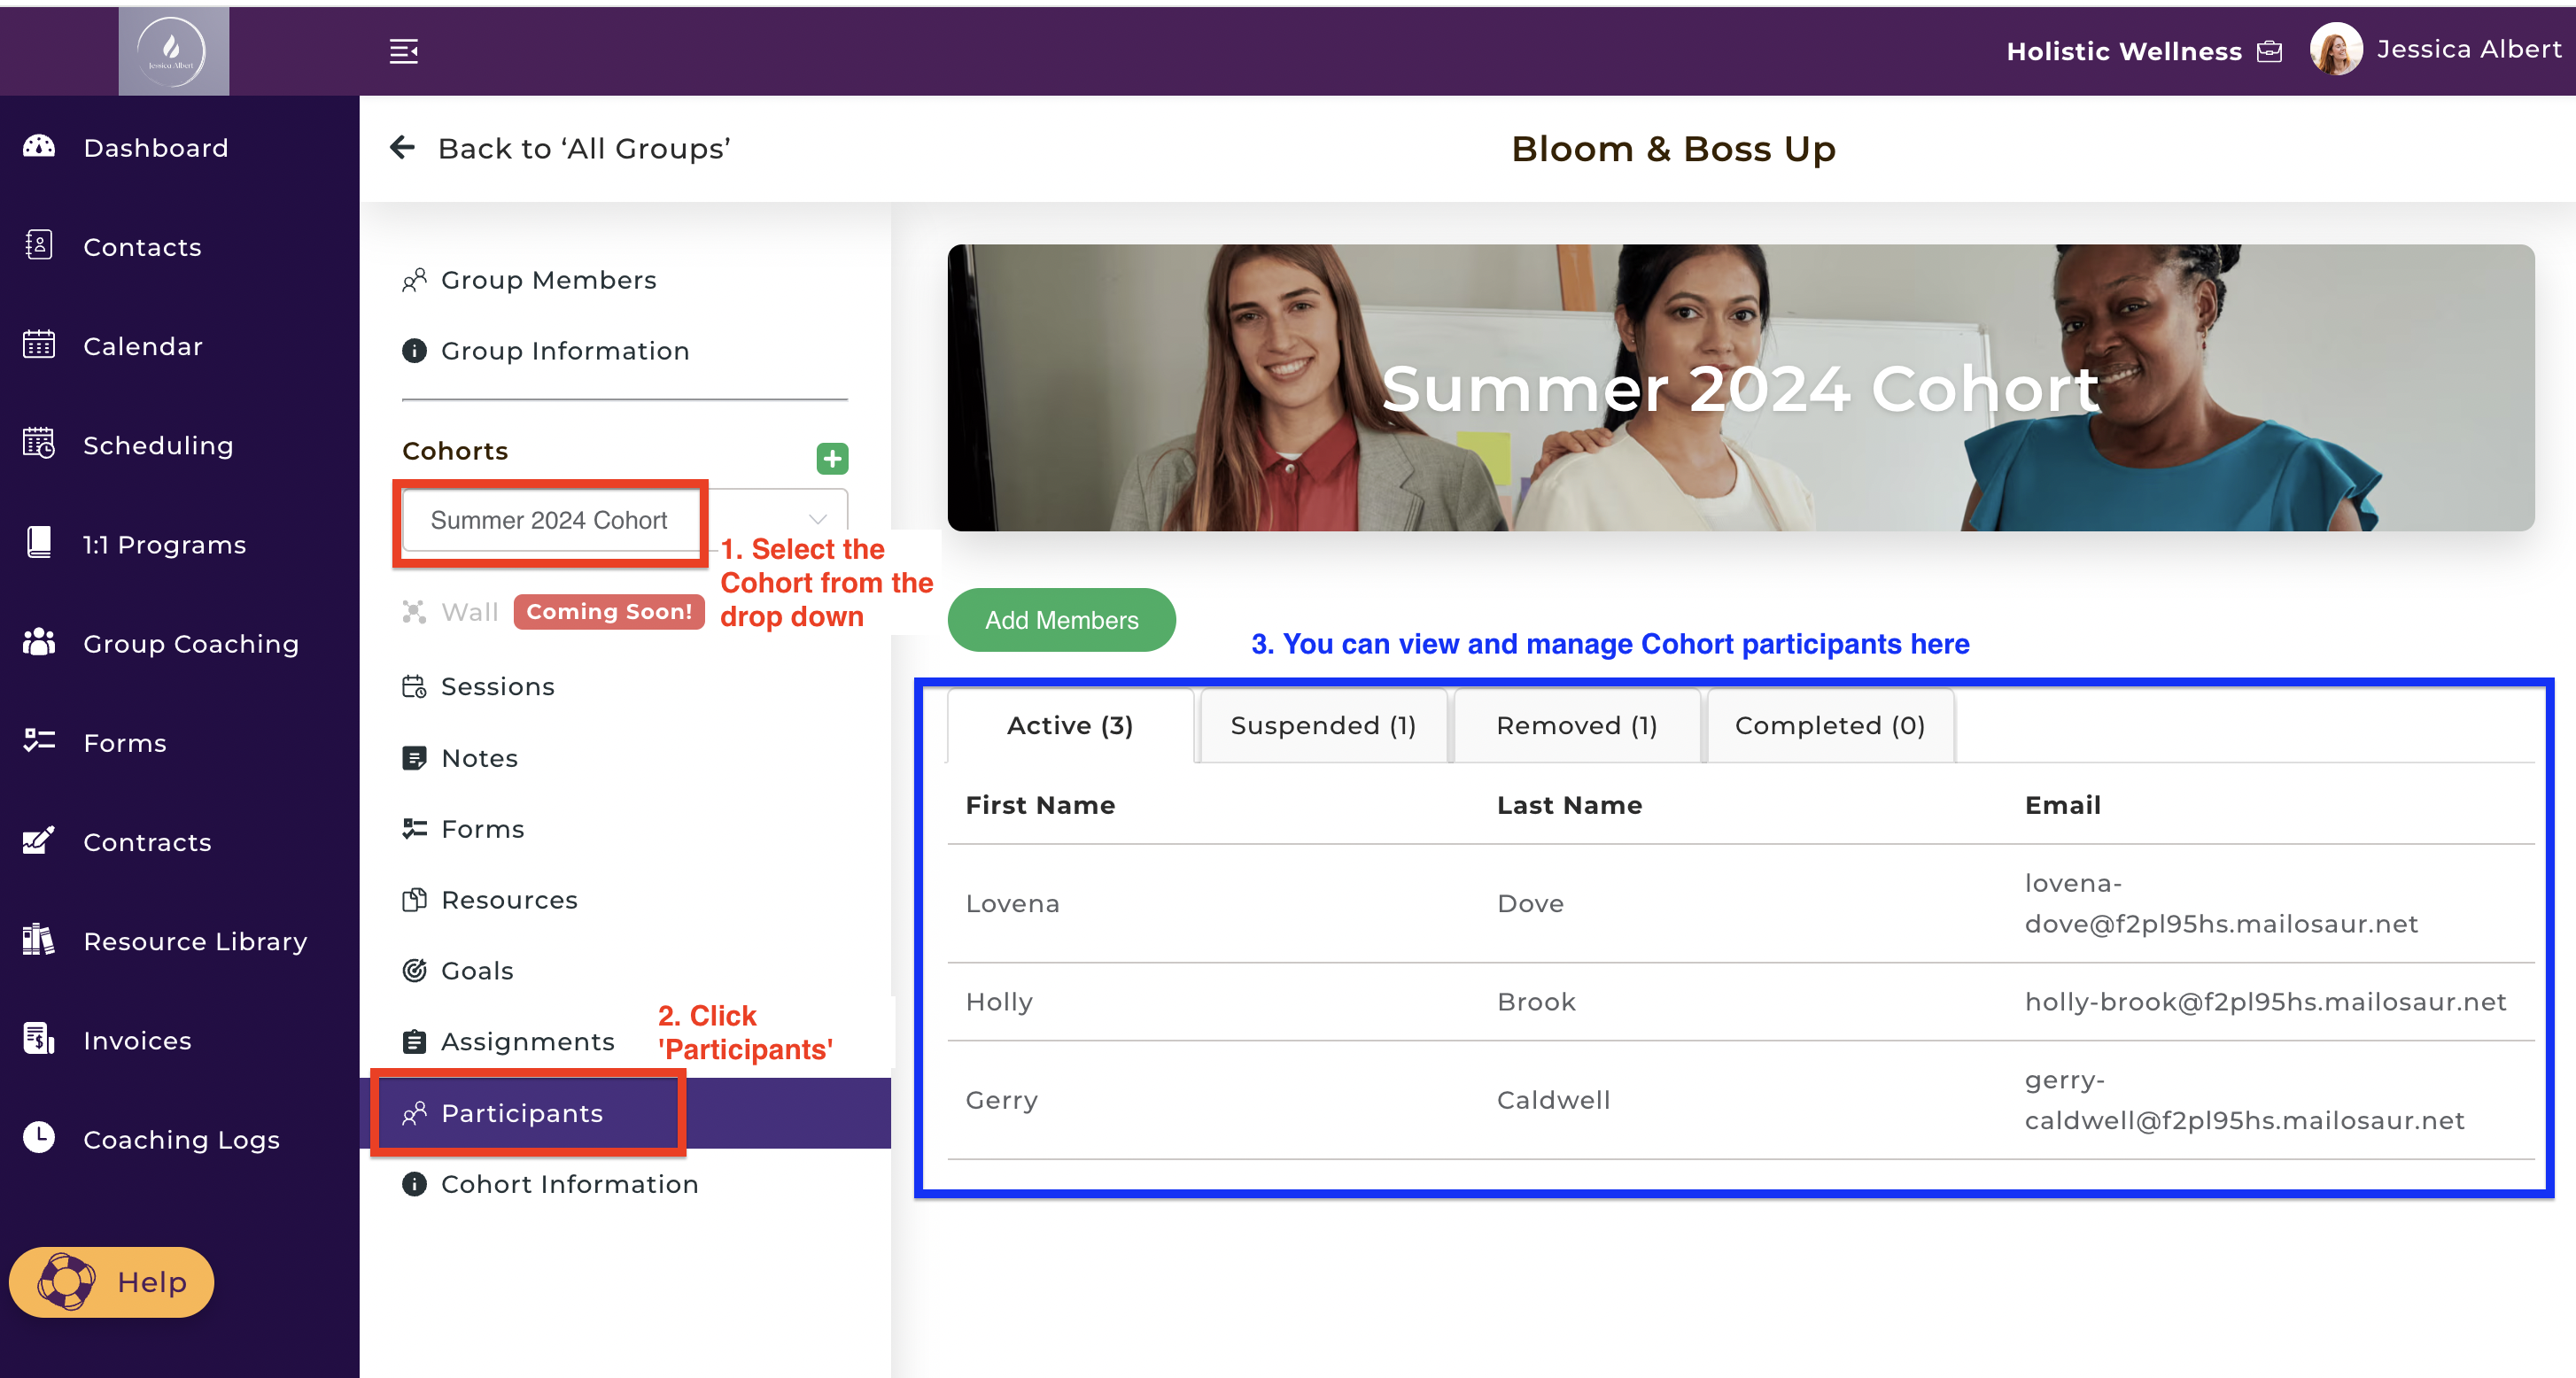
6. How to View Participants in your Cohort
Note: After a group member has been assigned to a specific Cohort, they are known as Participants of that cohort.
You can view cohort participants by selecting the cohort from the dropdown menu, and then click on the Participants ribbon, as shown below:
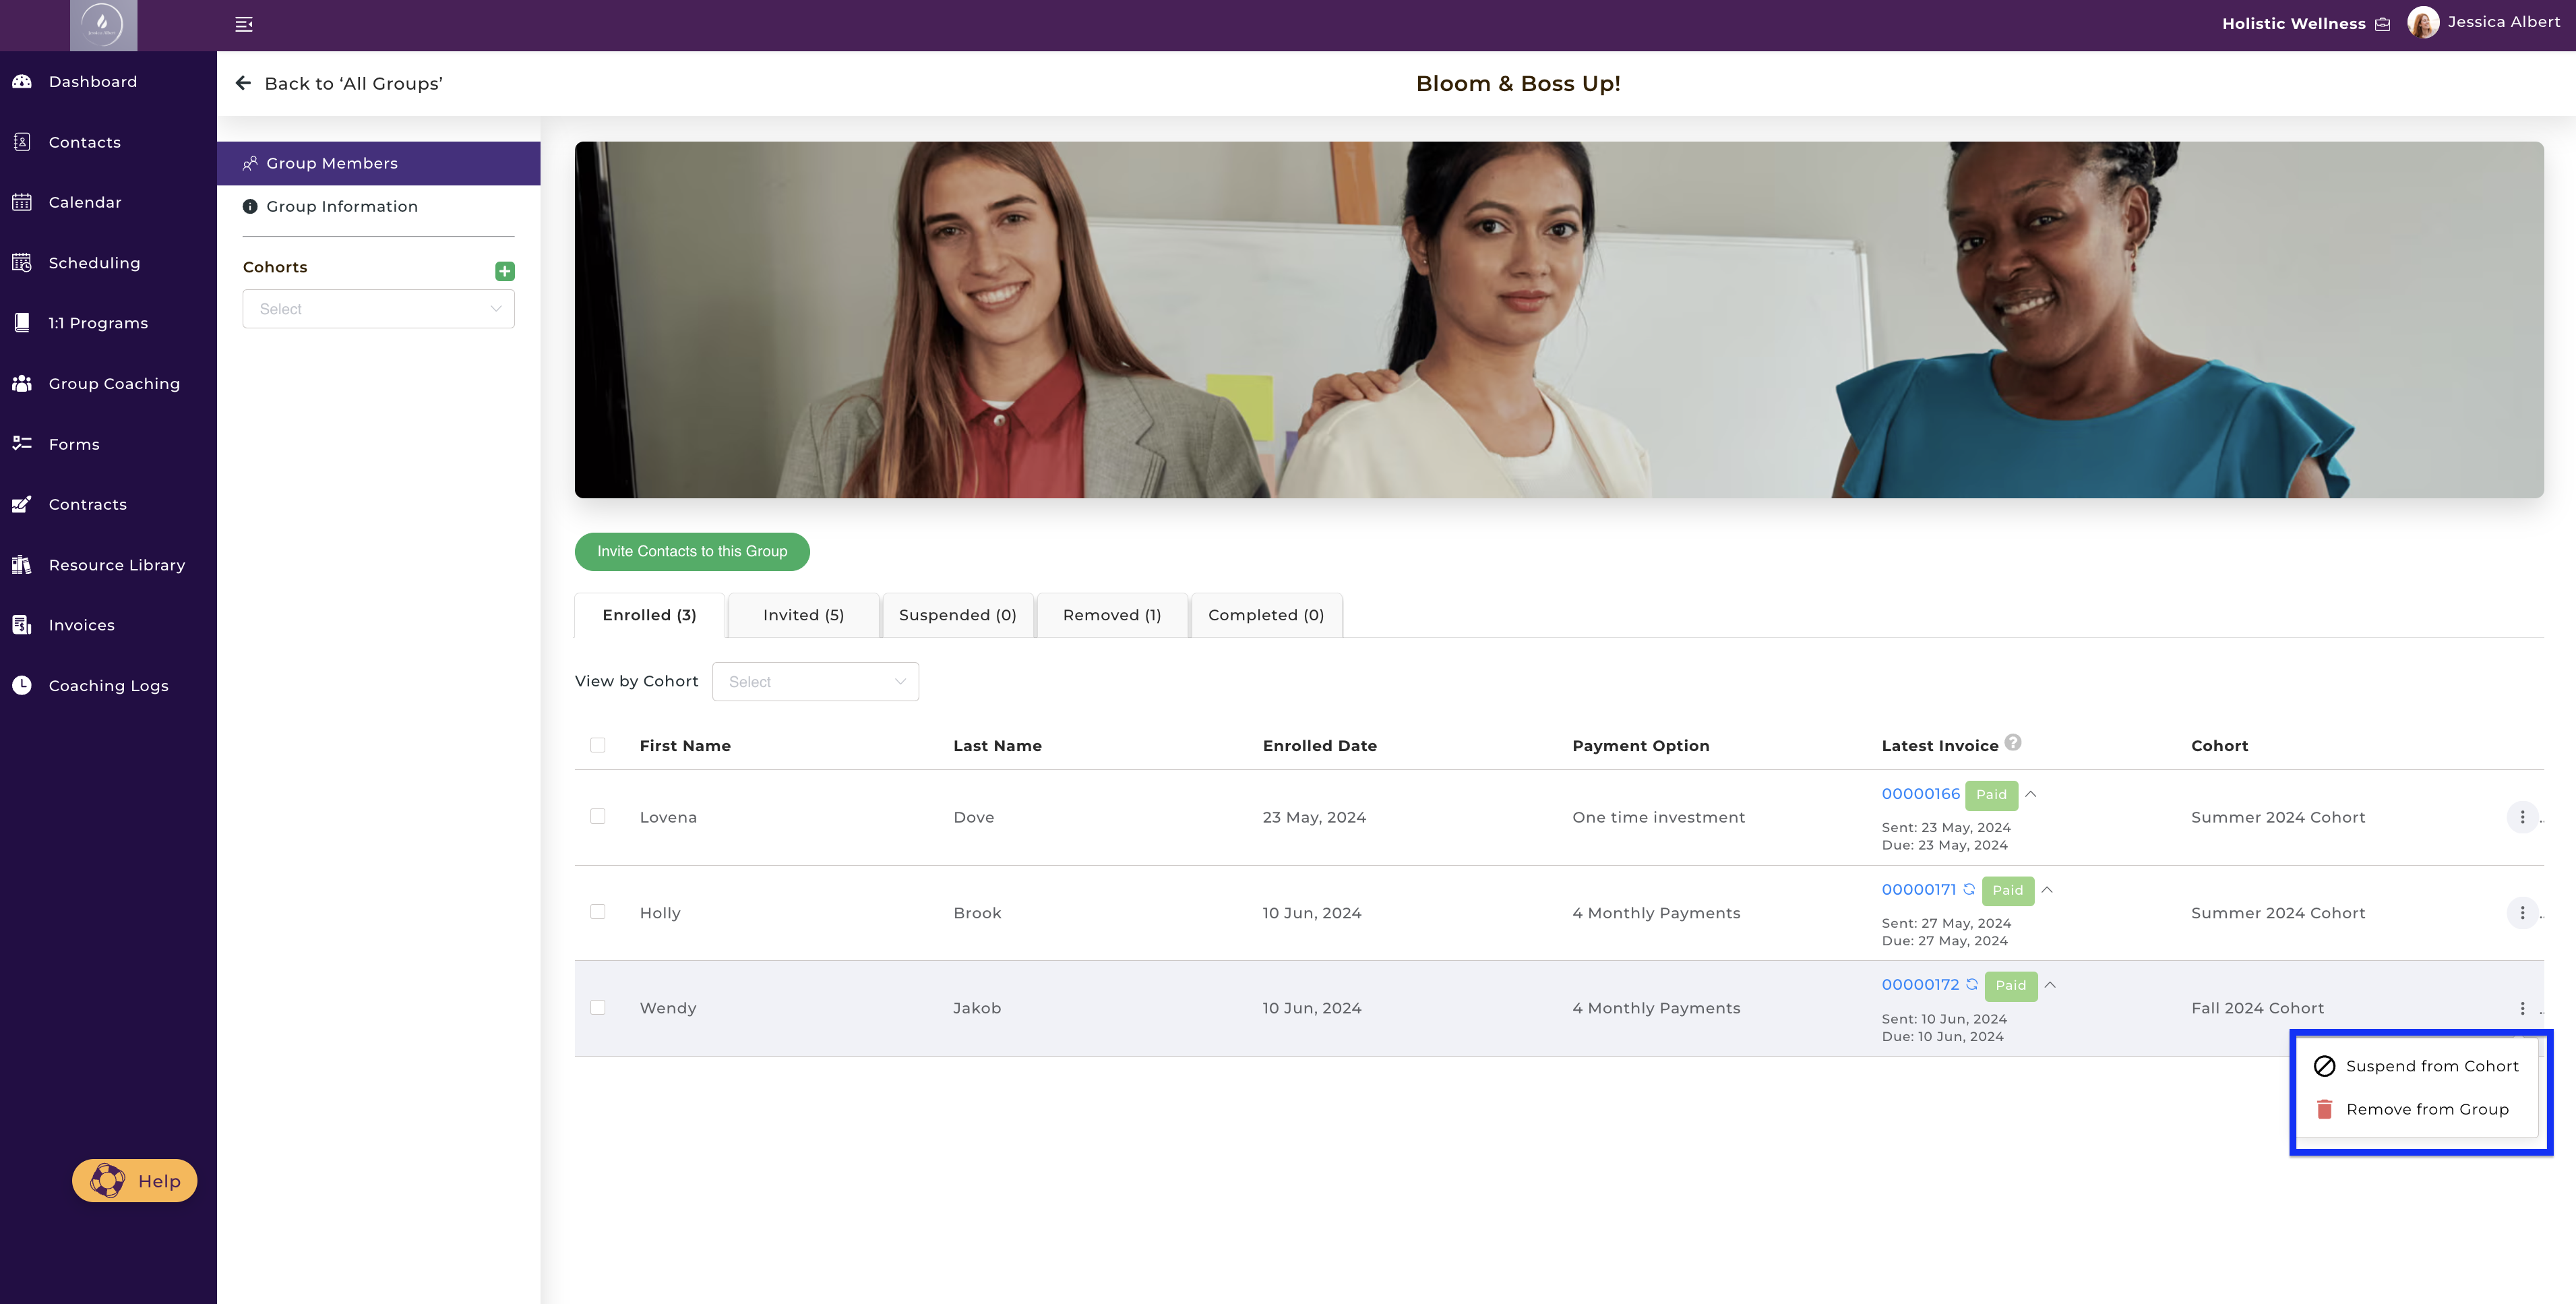
7. How to Suspend Members from Your Group 🕑
In the event that you need to temporarily suspend members from your Group (for example the client wants to take some personal time off, or perhaps defaulted on their monthly payment), you can do so by clicking the 3-dot button menu and select Suspend member as shown below:
After clicking on Suspend, you will be prompted with a confirmation modal as shown below:
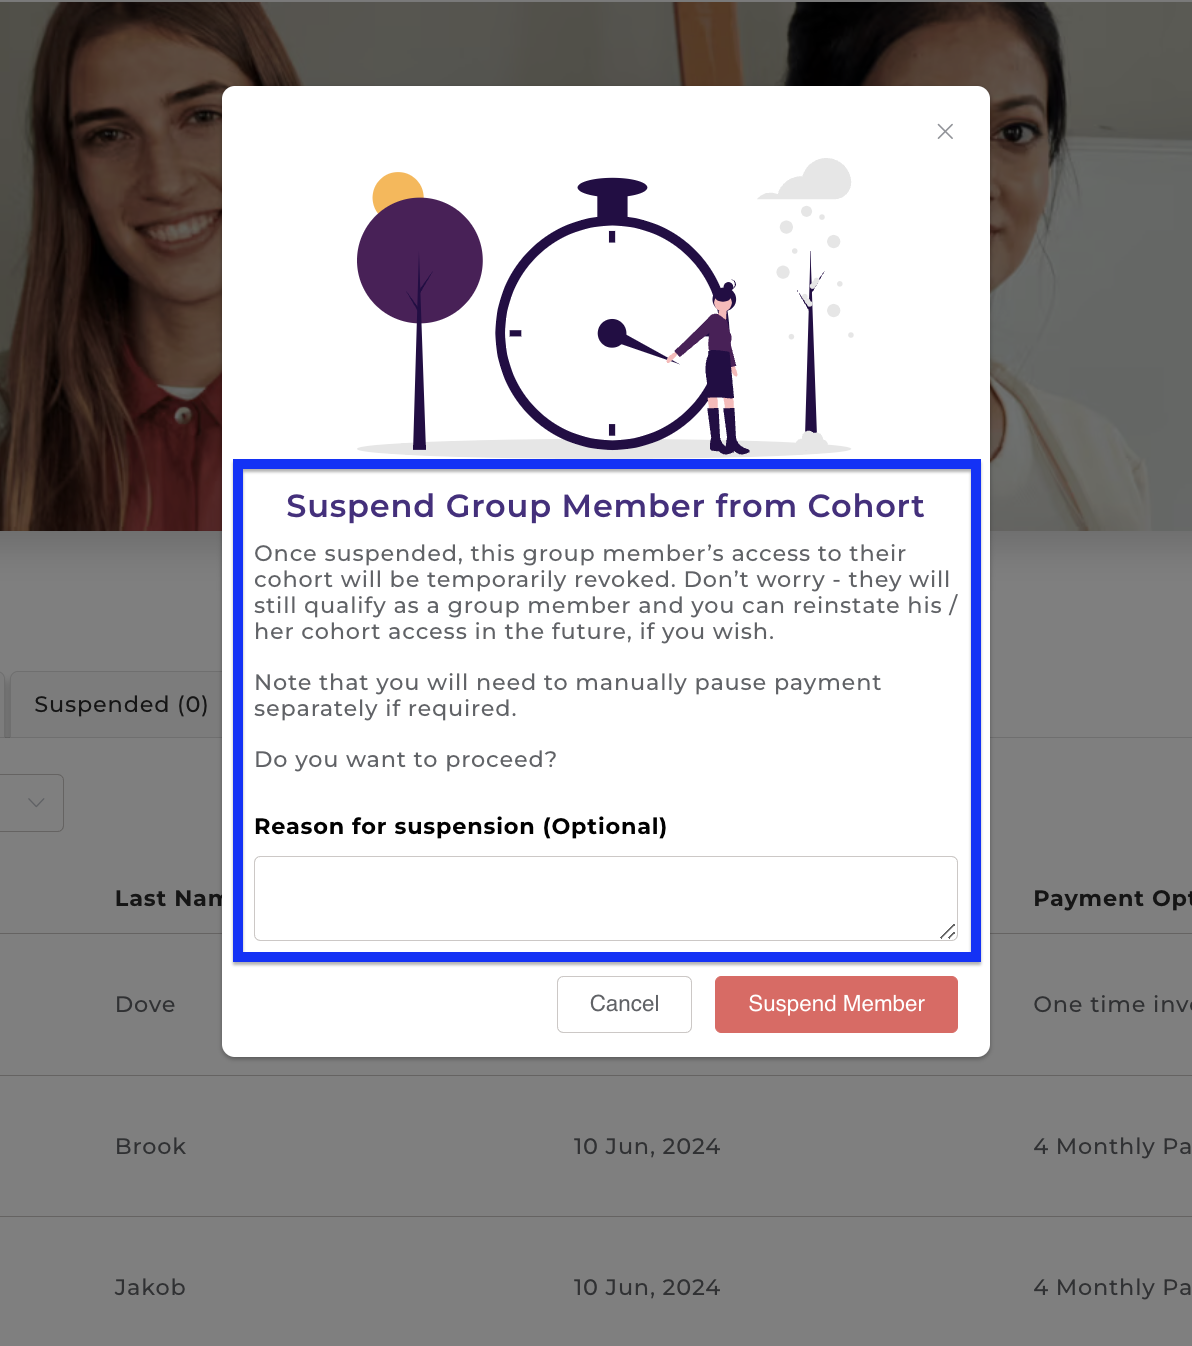
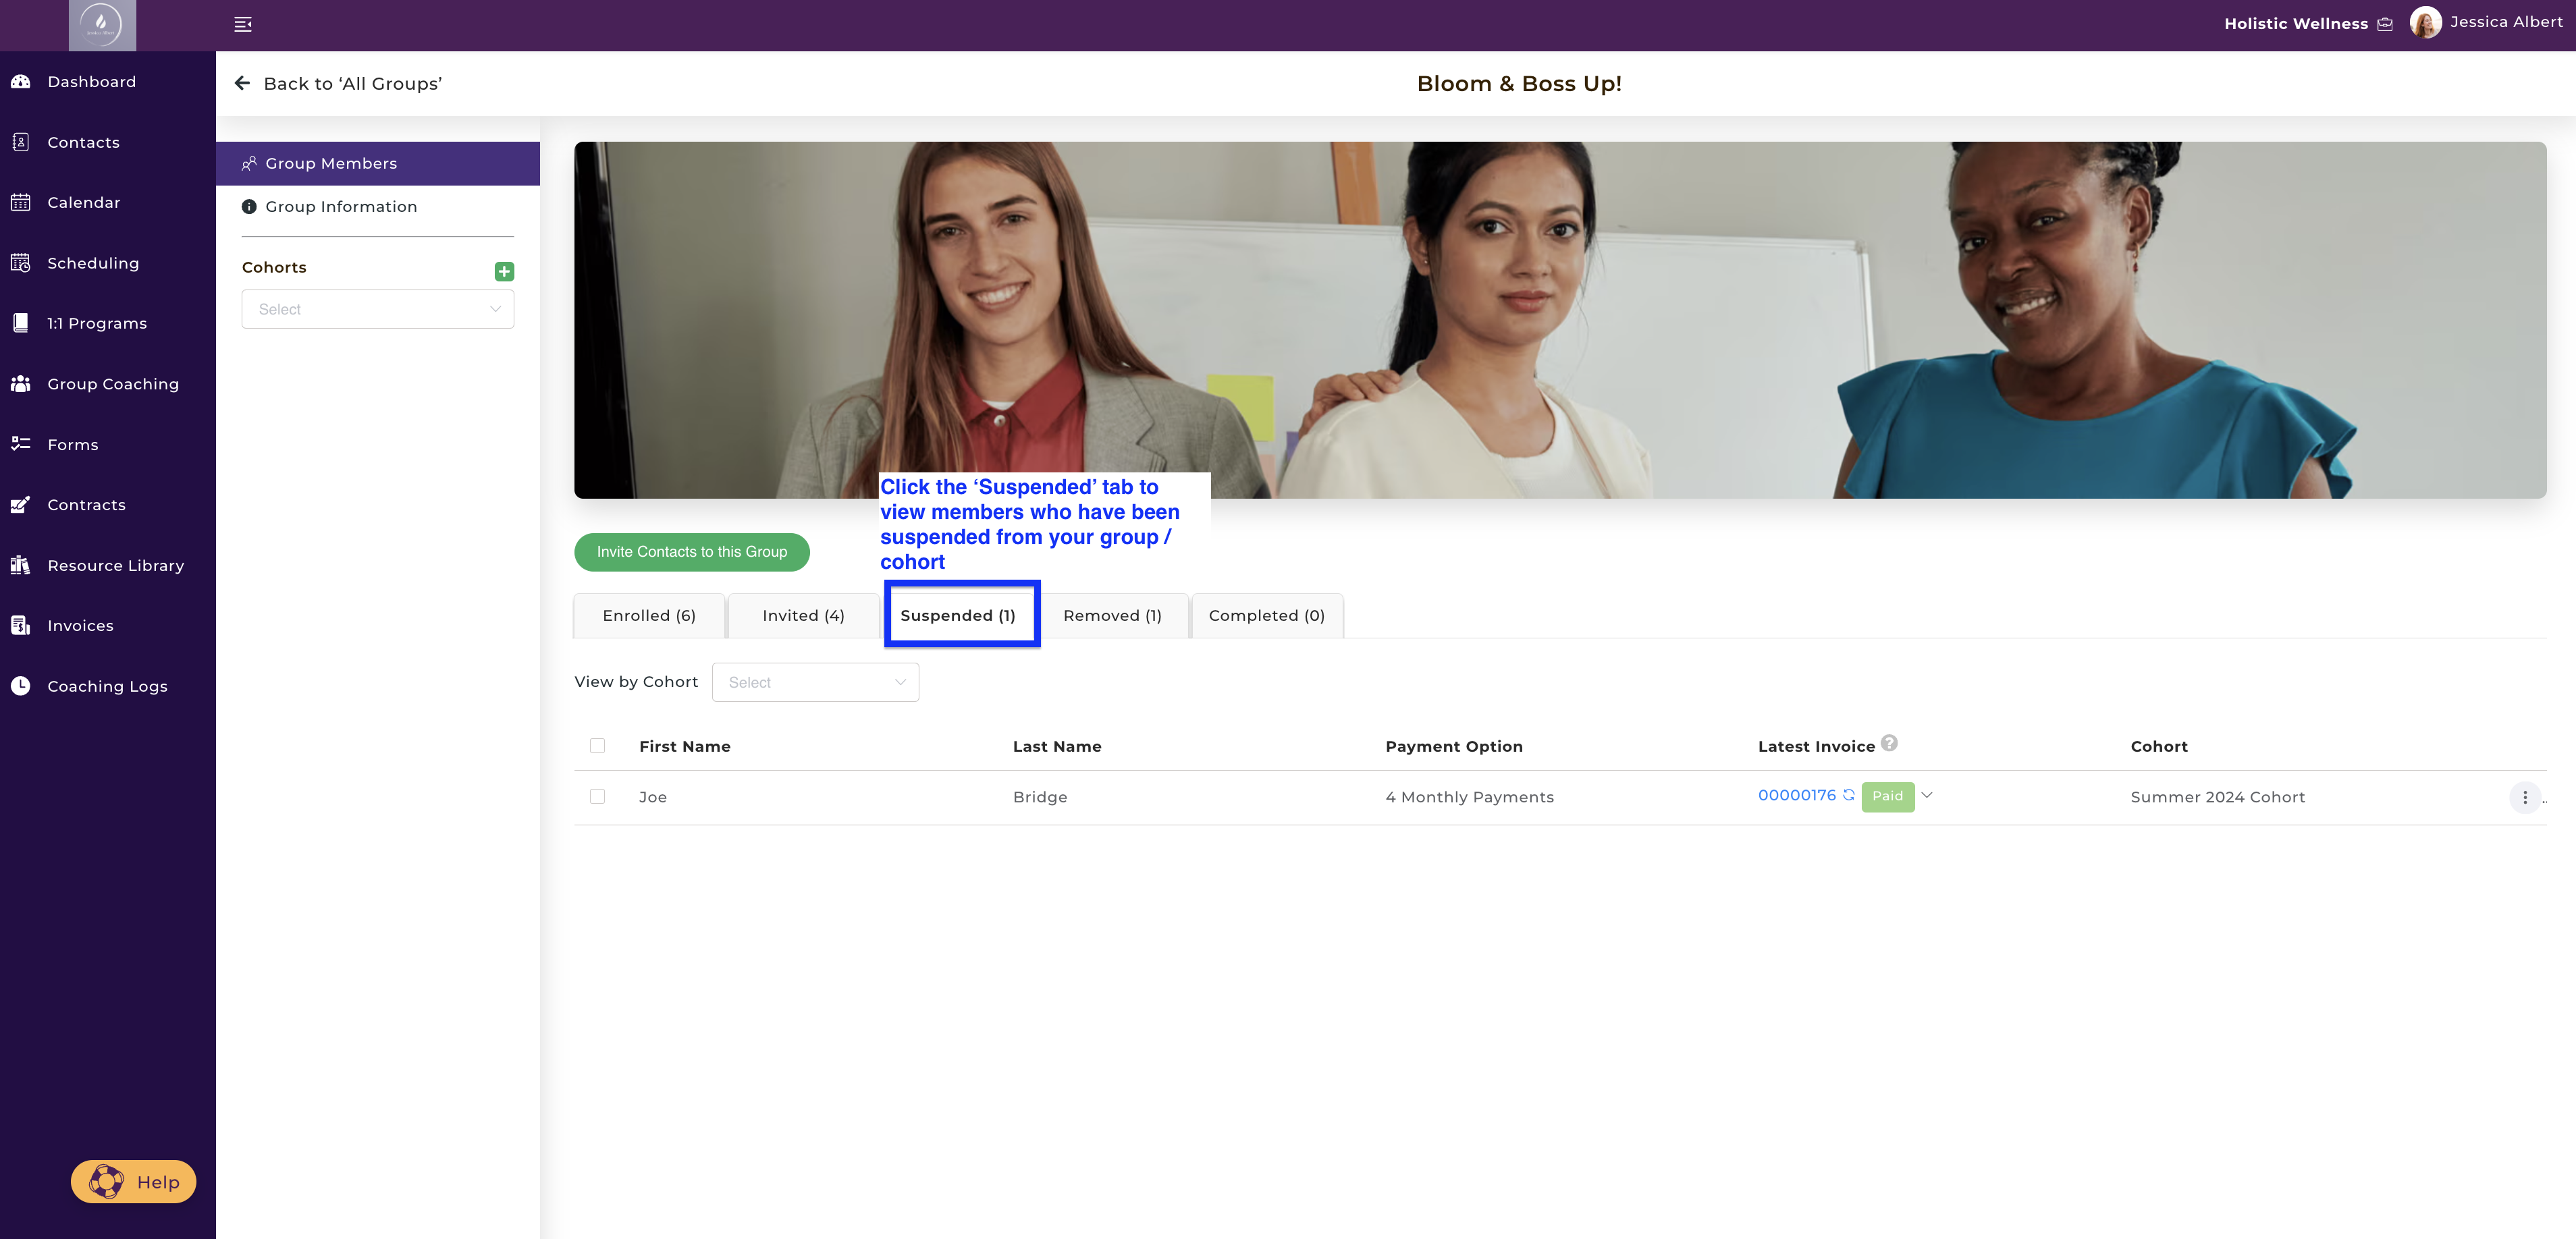
To proceed with the suspension, click on Suspend Member. You can view suspended members by clicking on the Suspended tab, as shown below:
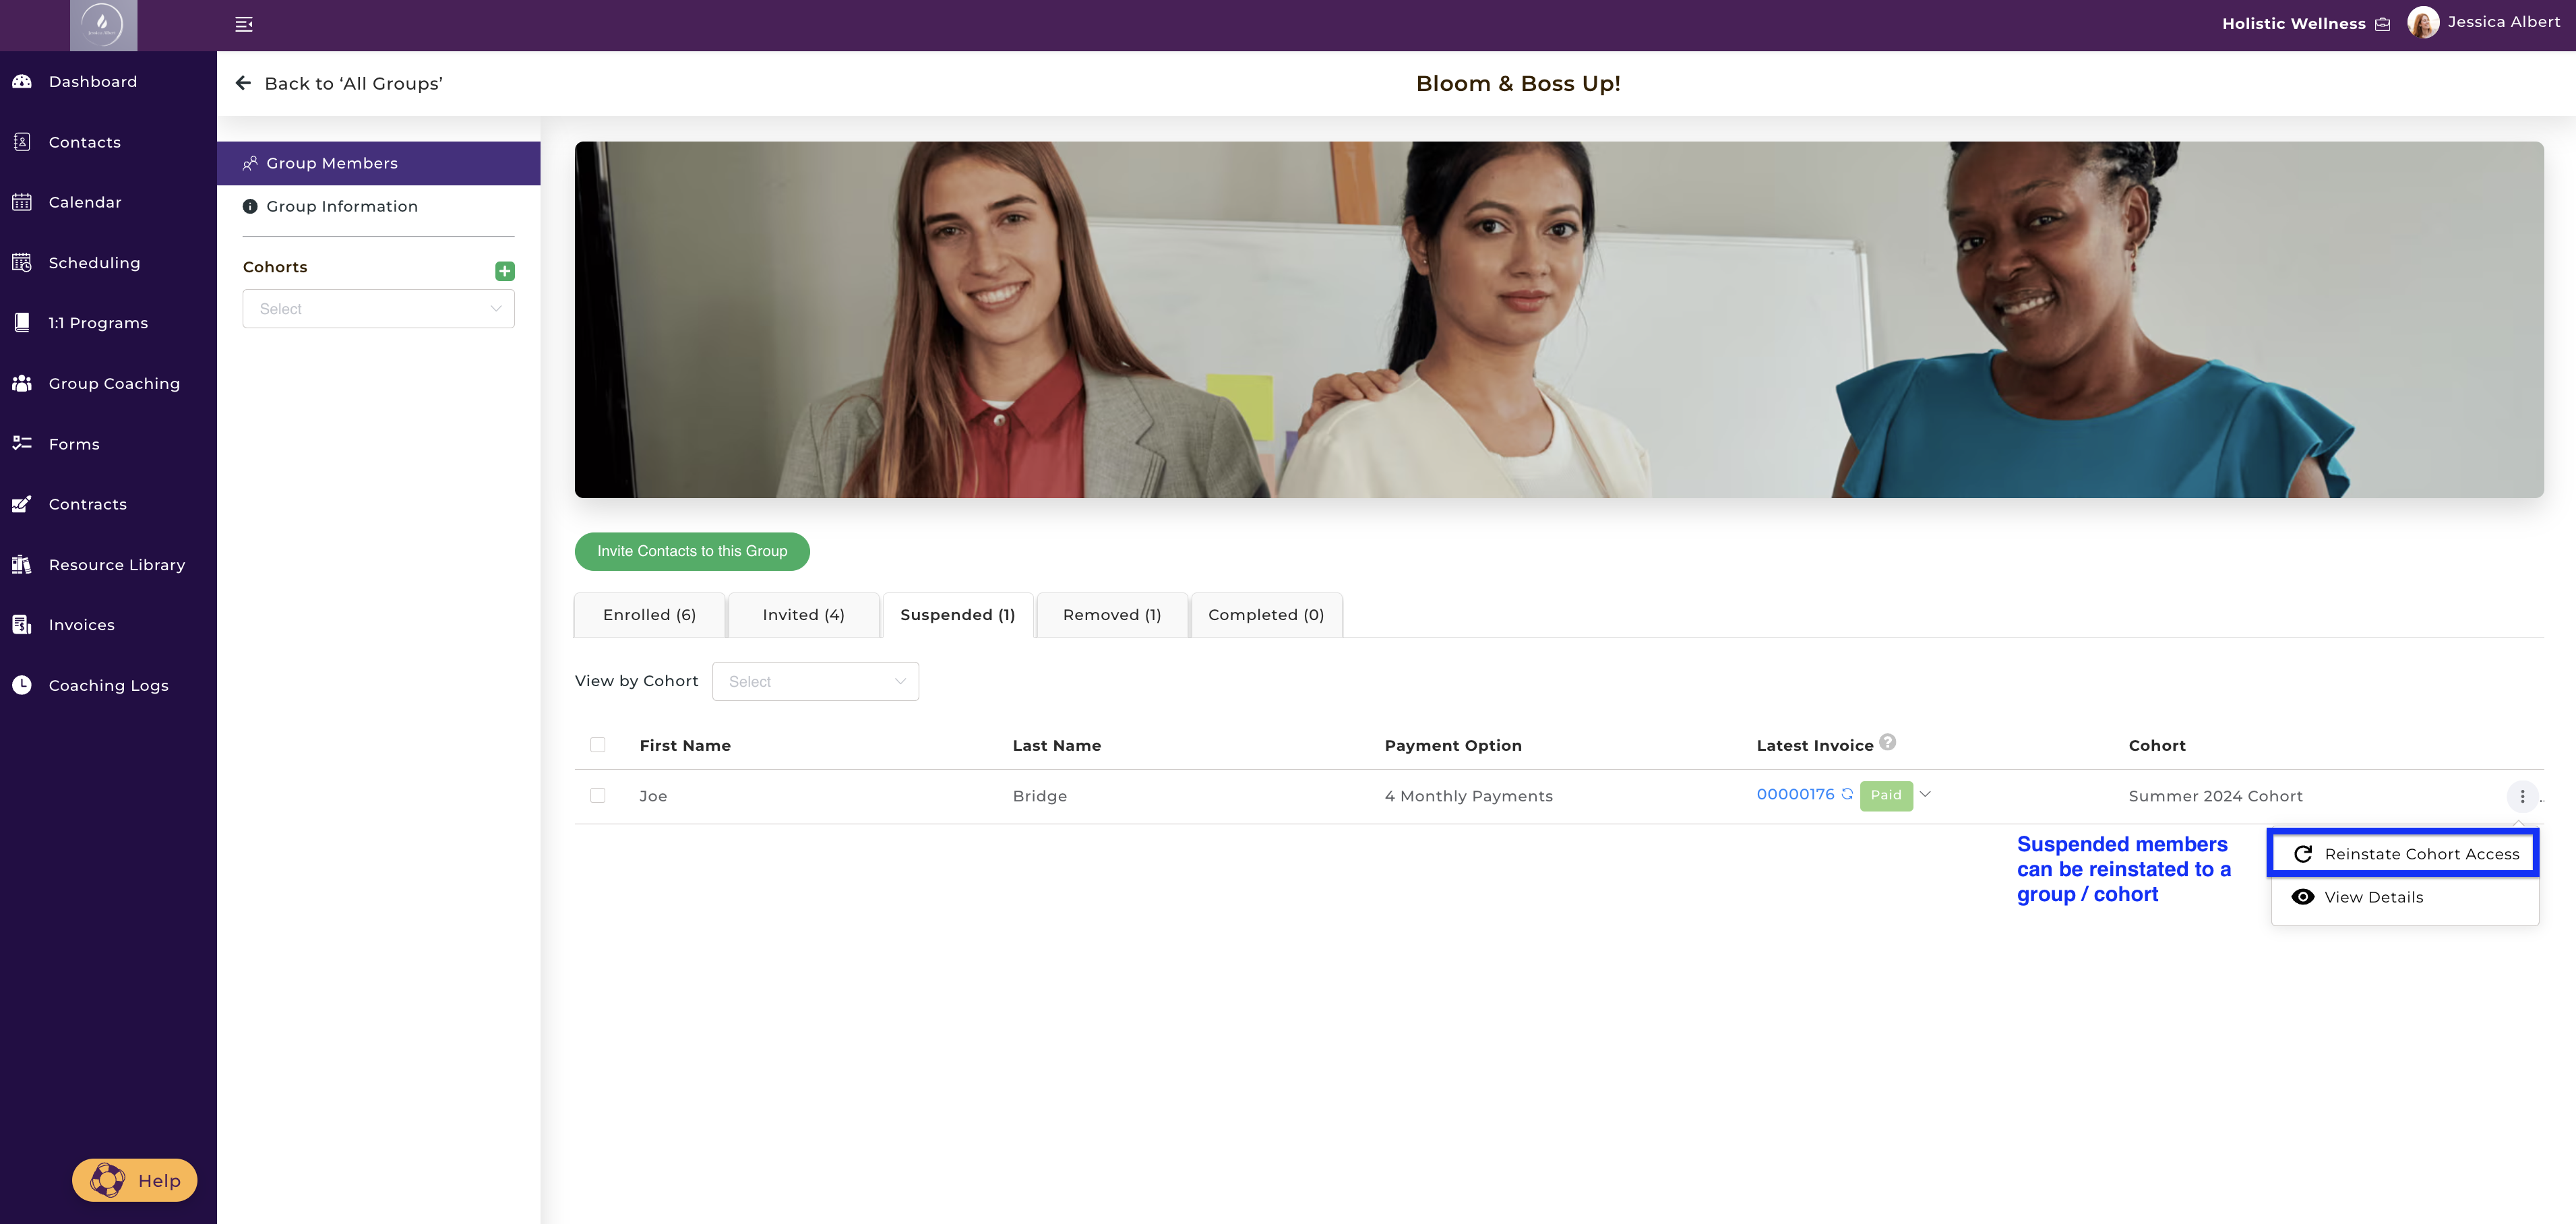
Suspended members can be reinstated into a group or cohort, if you wish to do so. Click on the 3-dot button menu and you will see the Reinstate option. Click that to reinstate the member, as shown below:
You will be prompted with a confirmation modal, as shown below:
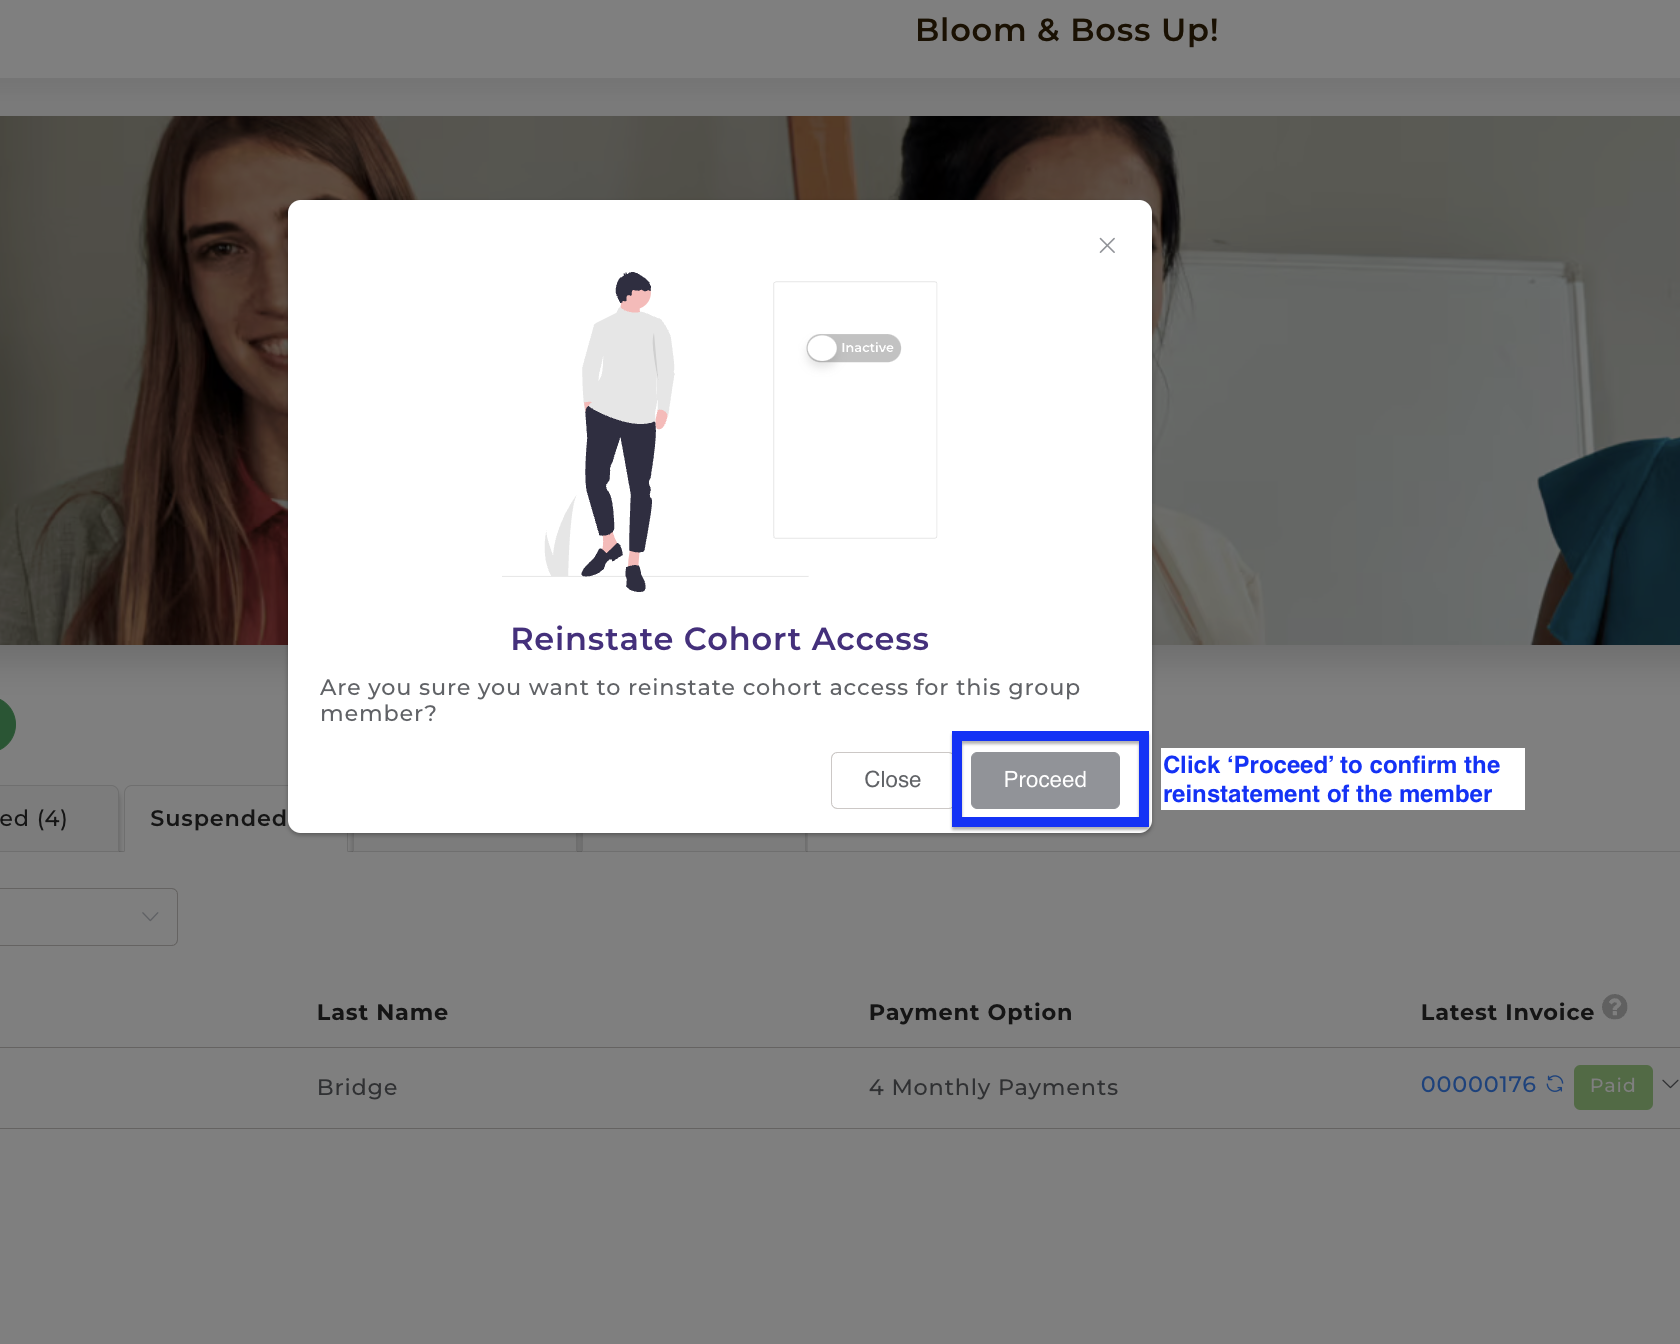
Click Proceed to confirm the reinstatement of the member.
8. How to Remove Members from Your Group 🚫
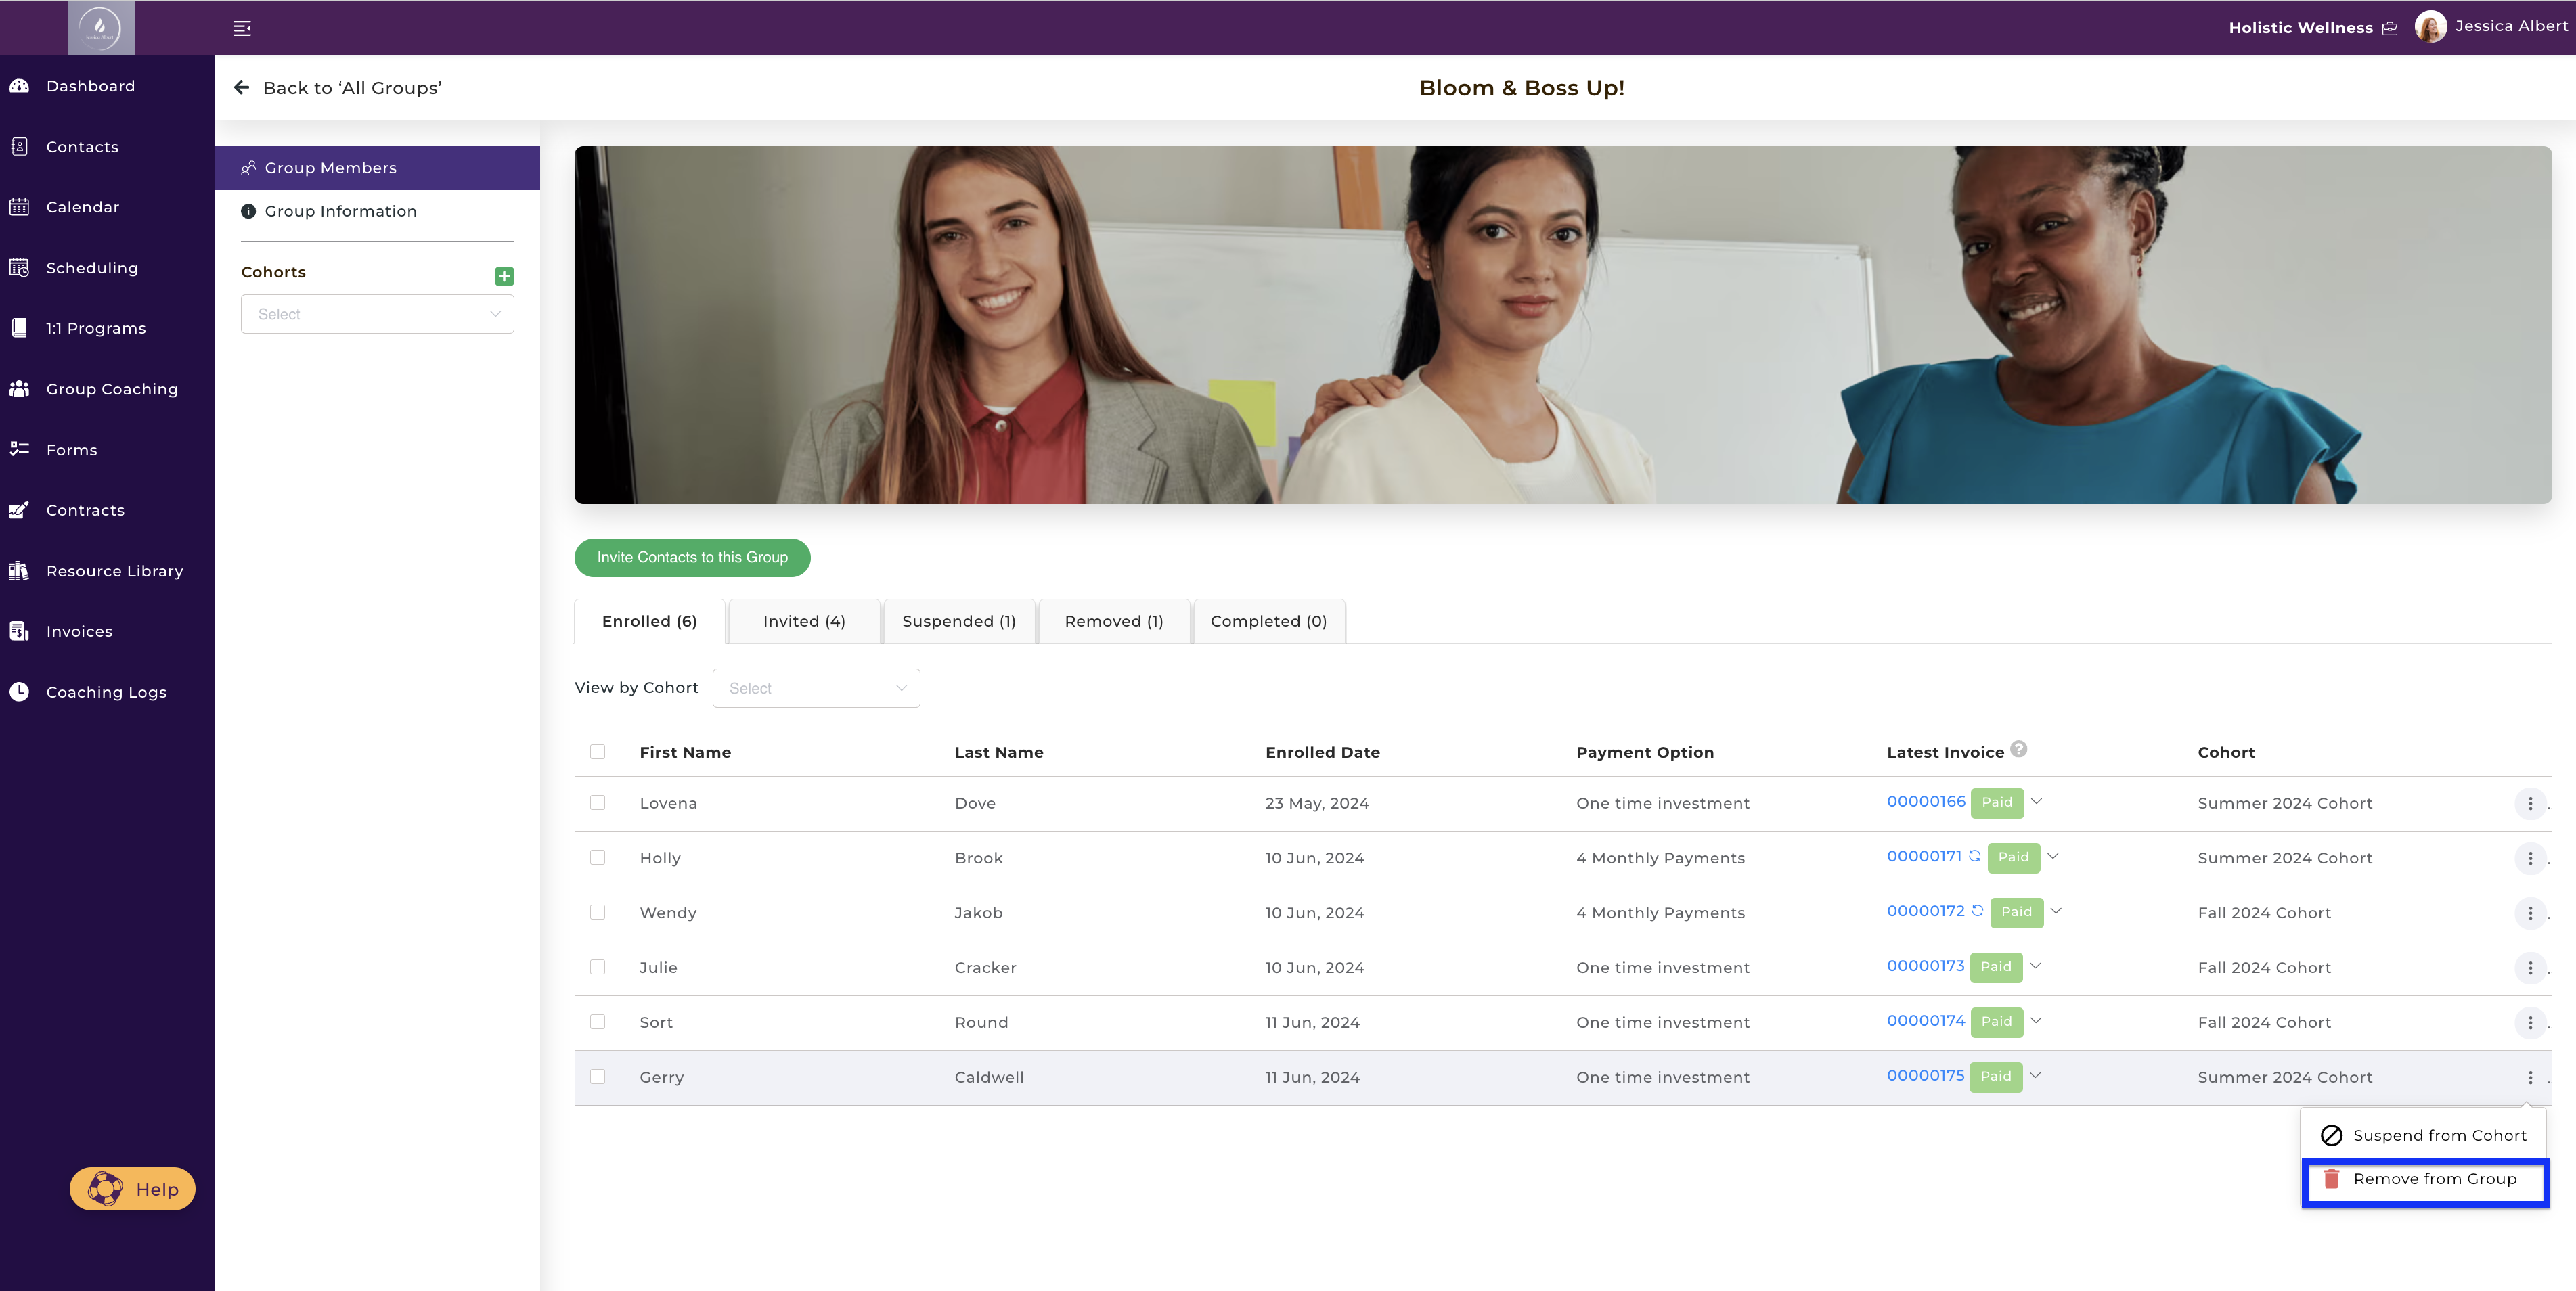
In the event that you need to remove members from your Group (for example the client has defaulted on payments, or has flouted your group engagement rules, or the client has decided to leave the group), you can do so by clicking the 3-dot button menu and select Remove from Group shown below:
After clicking on Remove, you will be prompted with a confirmation modal as shown below:
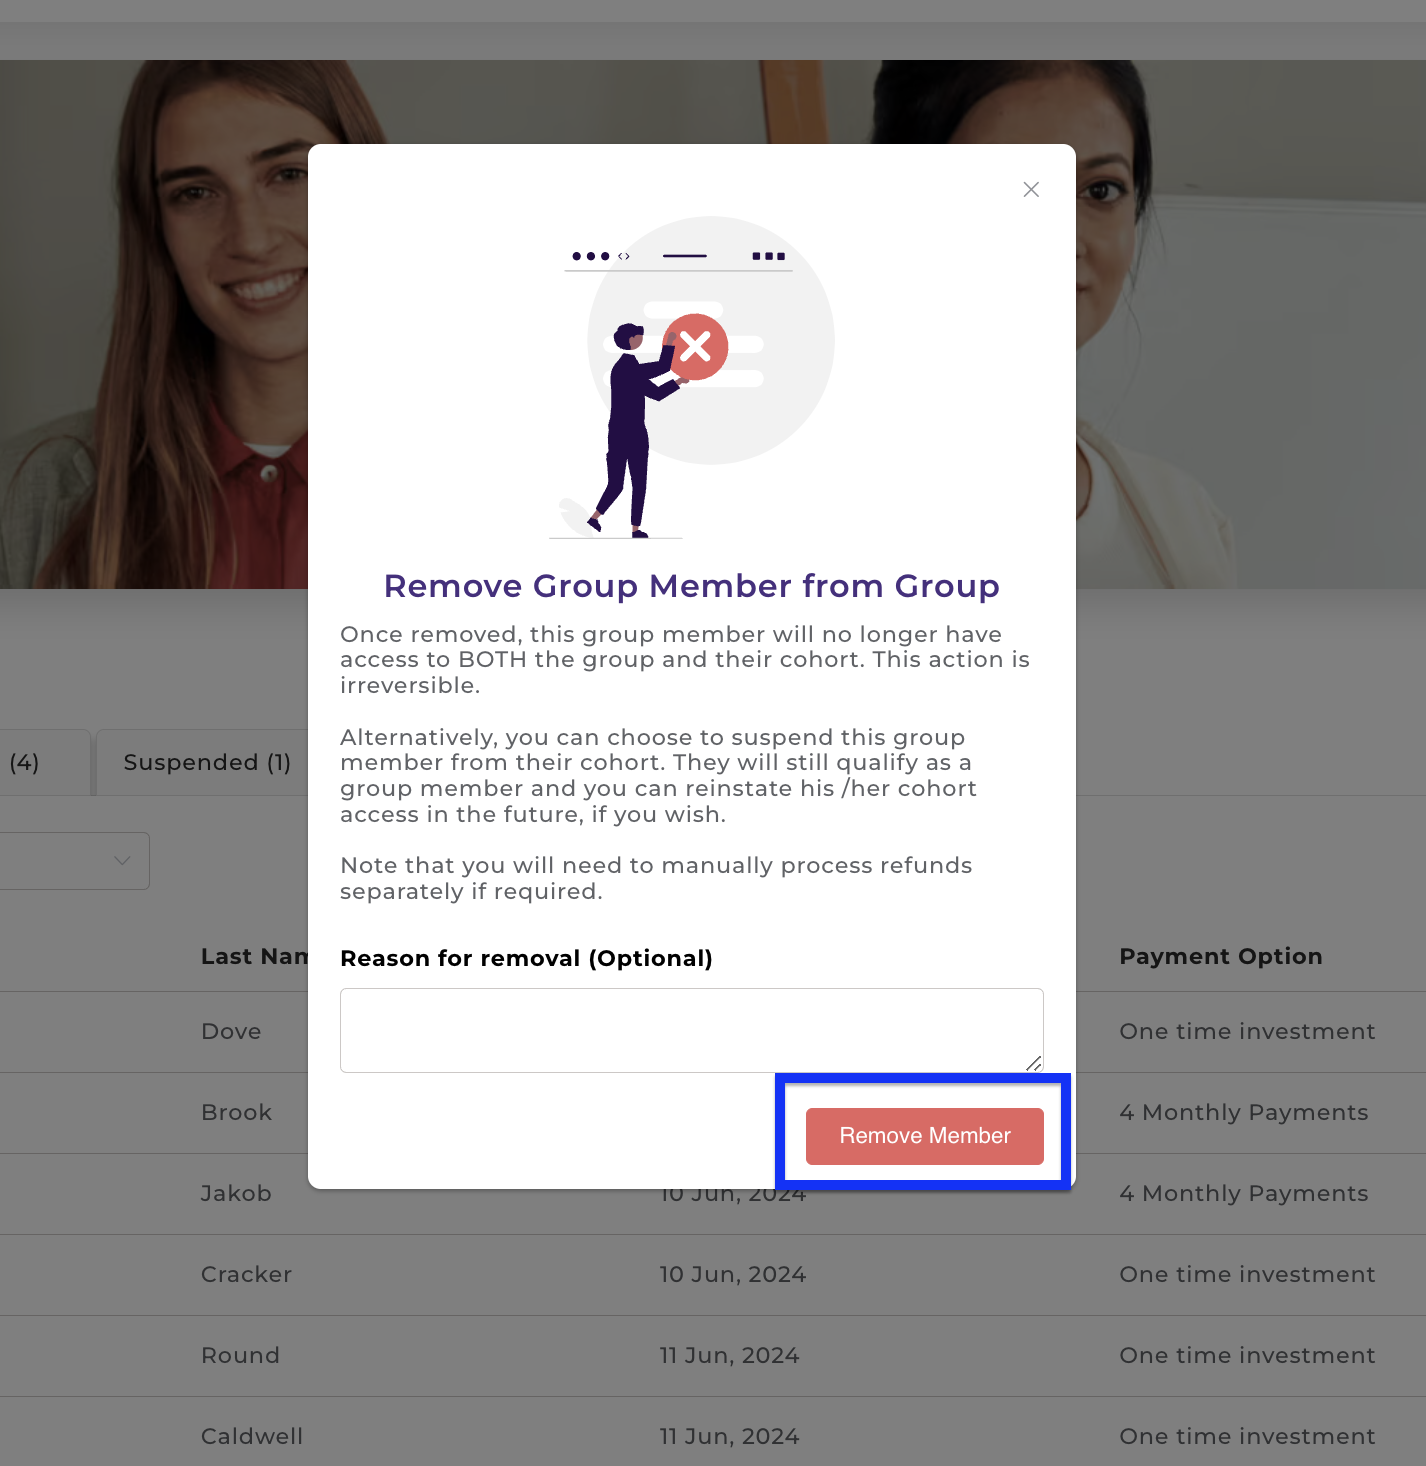
To proceed with the removal, click on Remove Member. You can view removed members by clicking on the Removed tab, as shown below:
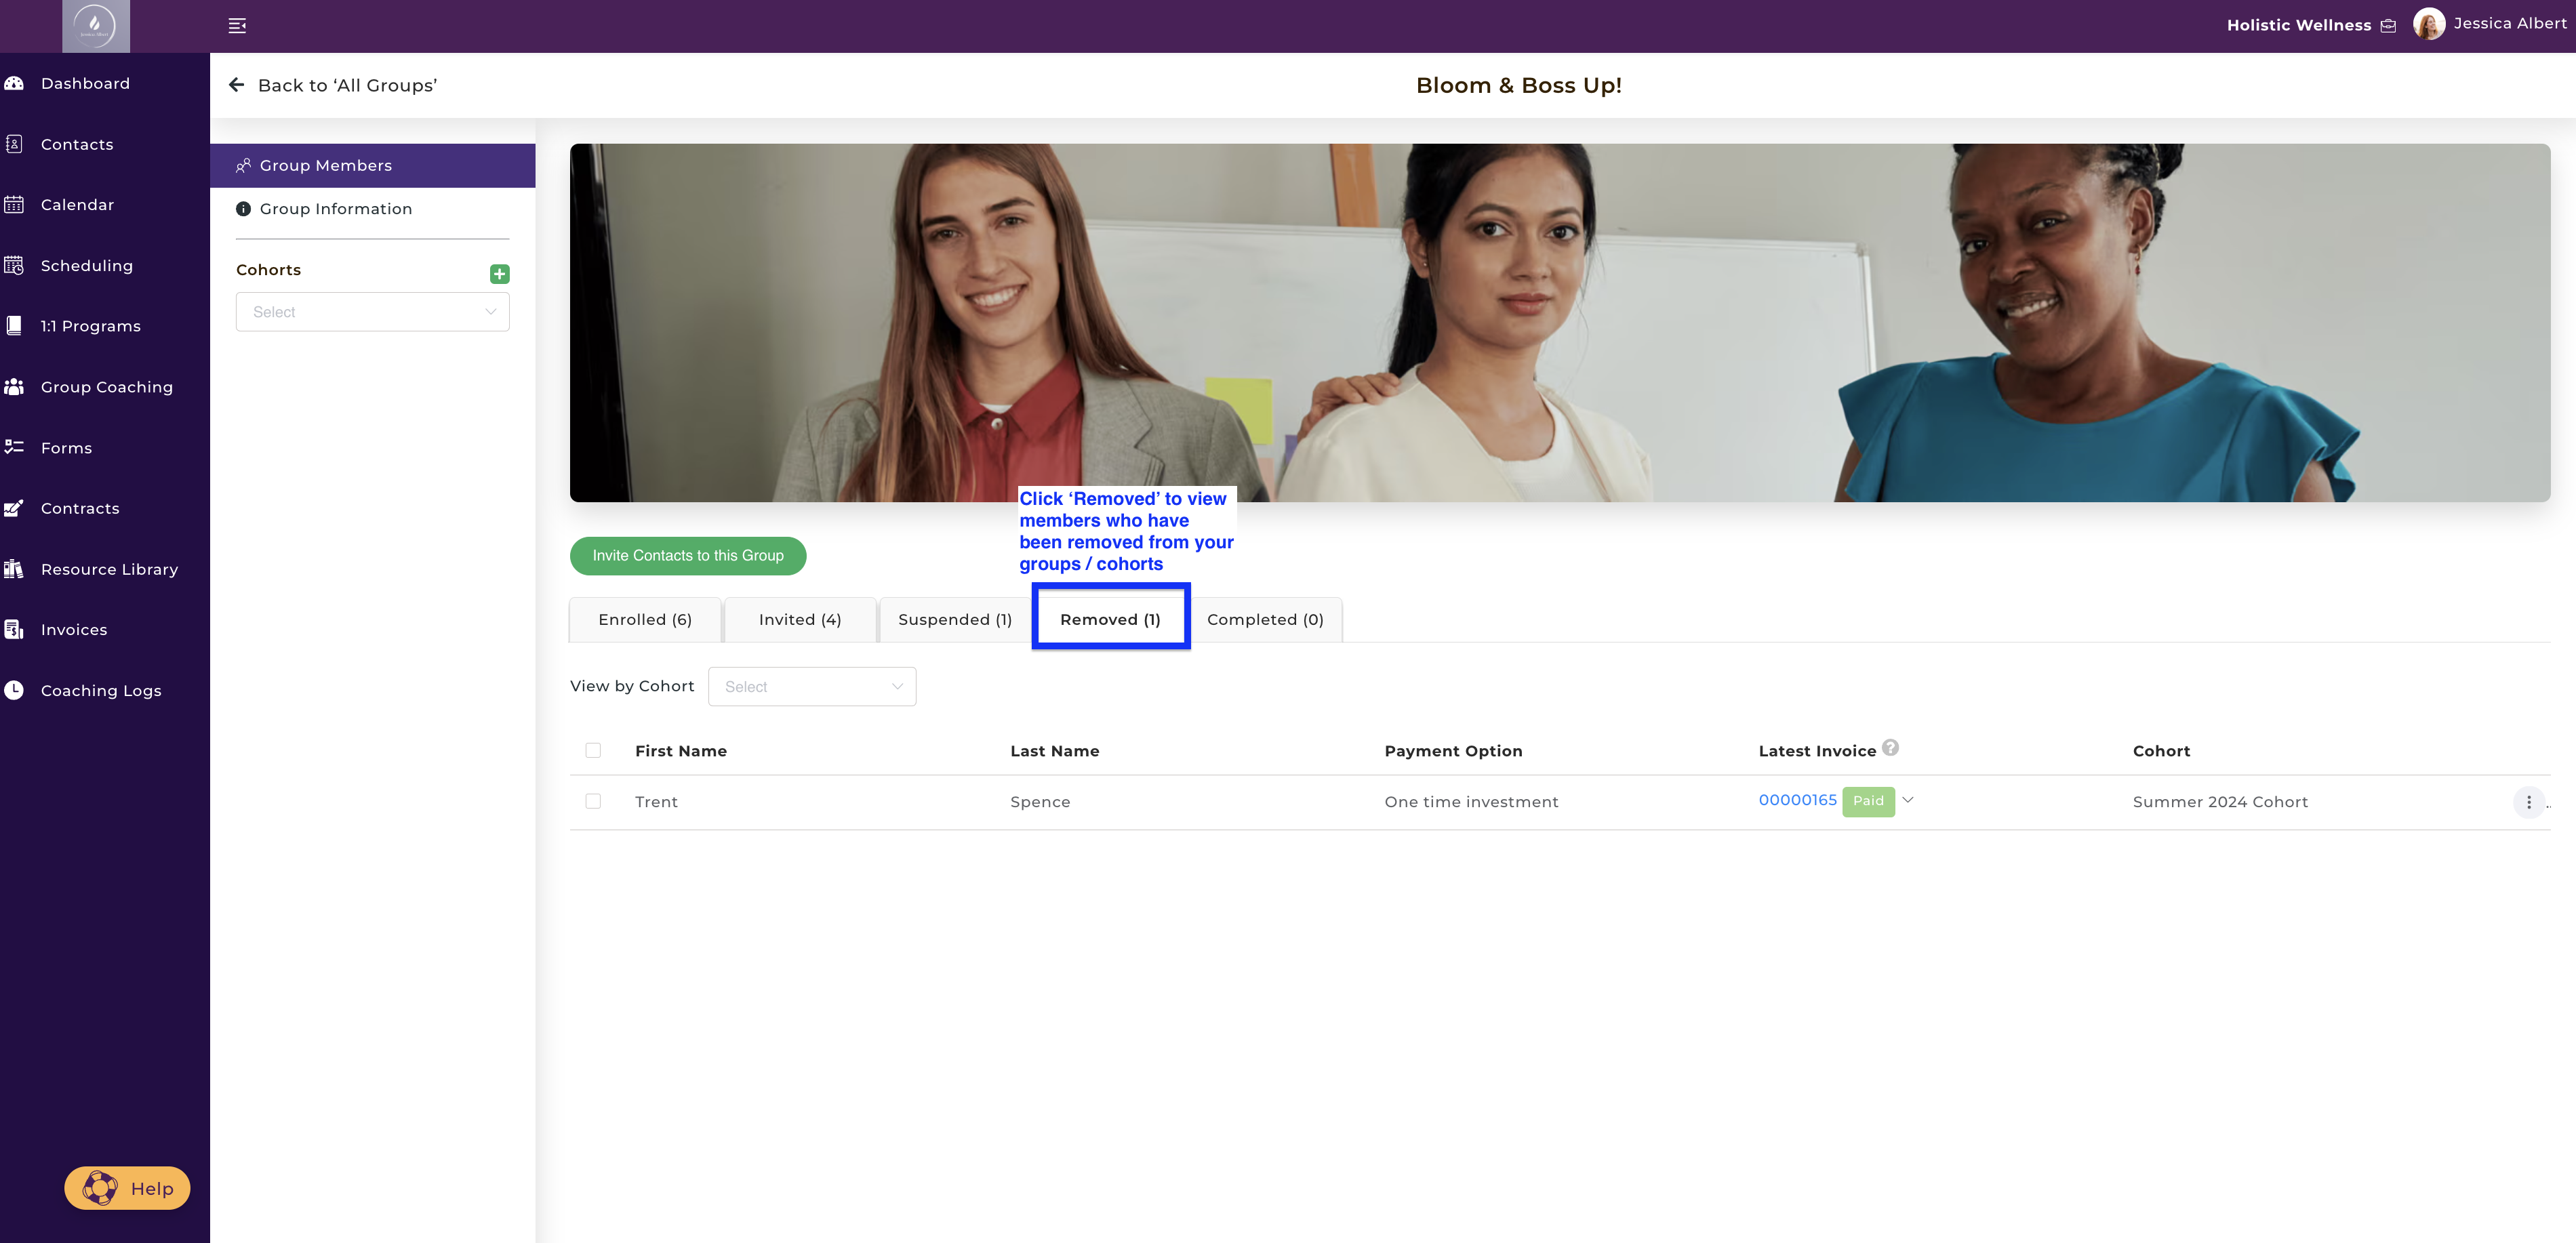
Notes:
1. Removal of members is permanent and they cannot be reinstated to your group or cohort. If you would like to bring this member back into your group, you will need to invite him/her again to sign up to your group.
2. When you remove or suspend a member from your top-level Group, they will also be removed or suspended from the Cohort that they have been assigned to in that Group.