How to Create an Event
Overview 📅
With CoachVantage’s Scheduling feature, you can create Events that allow prospects and clients to self-book appointments via an online booking page.
Examples of Events include:
- 1:1 virtual meetings (e.g., Discovery Call, Consult Call)
- In-person meetings
- 1:1 yoga or wellness sessions (virtual or in-person)
IMPORTANT: Currently, events support a single attendee per booking.
Group events with multiple attendees are planned as a future enhancement.
Prospects and clients can:
- Select the Event they’d like to book
- Choose a date and time based on your availability rules
- Confirm their appointment
You can also configure whether an Event allows a single appointment or multiple appointments per booking.
💡 Note: When someone successfully books an appointment online, CoachVantage automatically creates and saves the contact to your account.
Important — When NOT to use Events
Events are not intended for managing coaching programs or program sessions.
To create and manage coaching programs:
- Use the Programs feature in the left menu
- Refer to the article How to Create a Coaching Program
We do not recommend using Events for clients to book program sessions.
Tip — How Events Fit Into Your Workflow
The Scheduling feature is ideal for managing the upstream client acquisition process, such as:
- Allowing prospects to book discovery or intro calls
- Hosting informational sessions or webinars
- Offering one-off client appointments
- Running virtual or in-person 1:1 sessions (e.g., yoga, coaching, wellness)
Since CoachVantage includes a fully-featured Scheduling tool, you don’t need a separate standalone scheduling app.
What This Article Covers
In this article, you’ll learn how to:
- Create an Event
- Configure booking rules
- Publish your Event booking page
Creating a New Event 🗓️
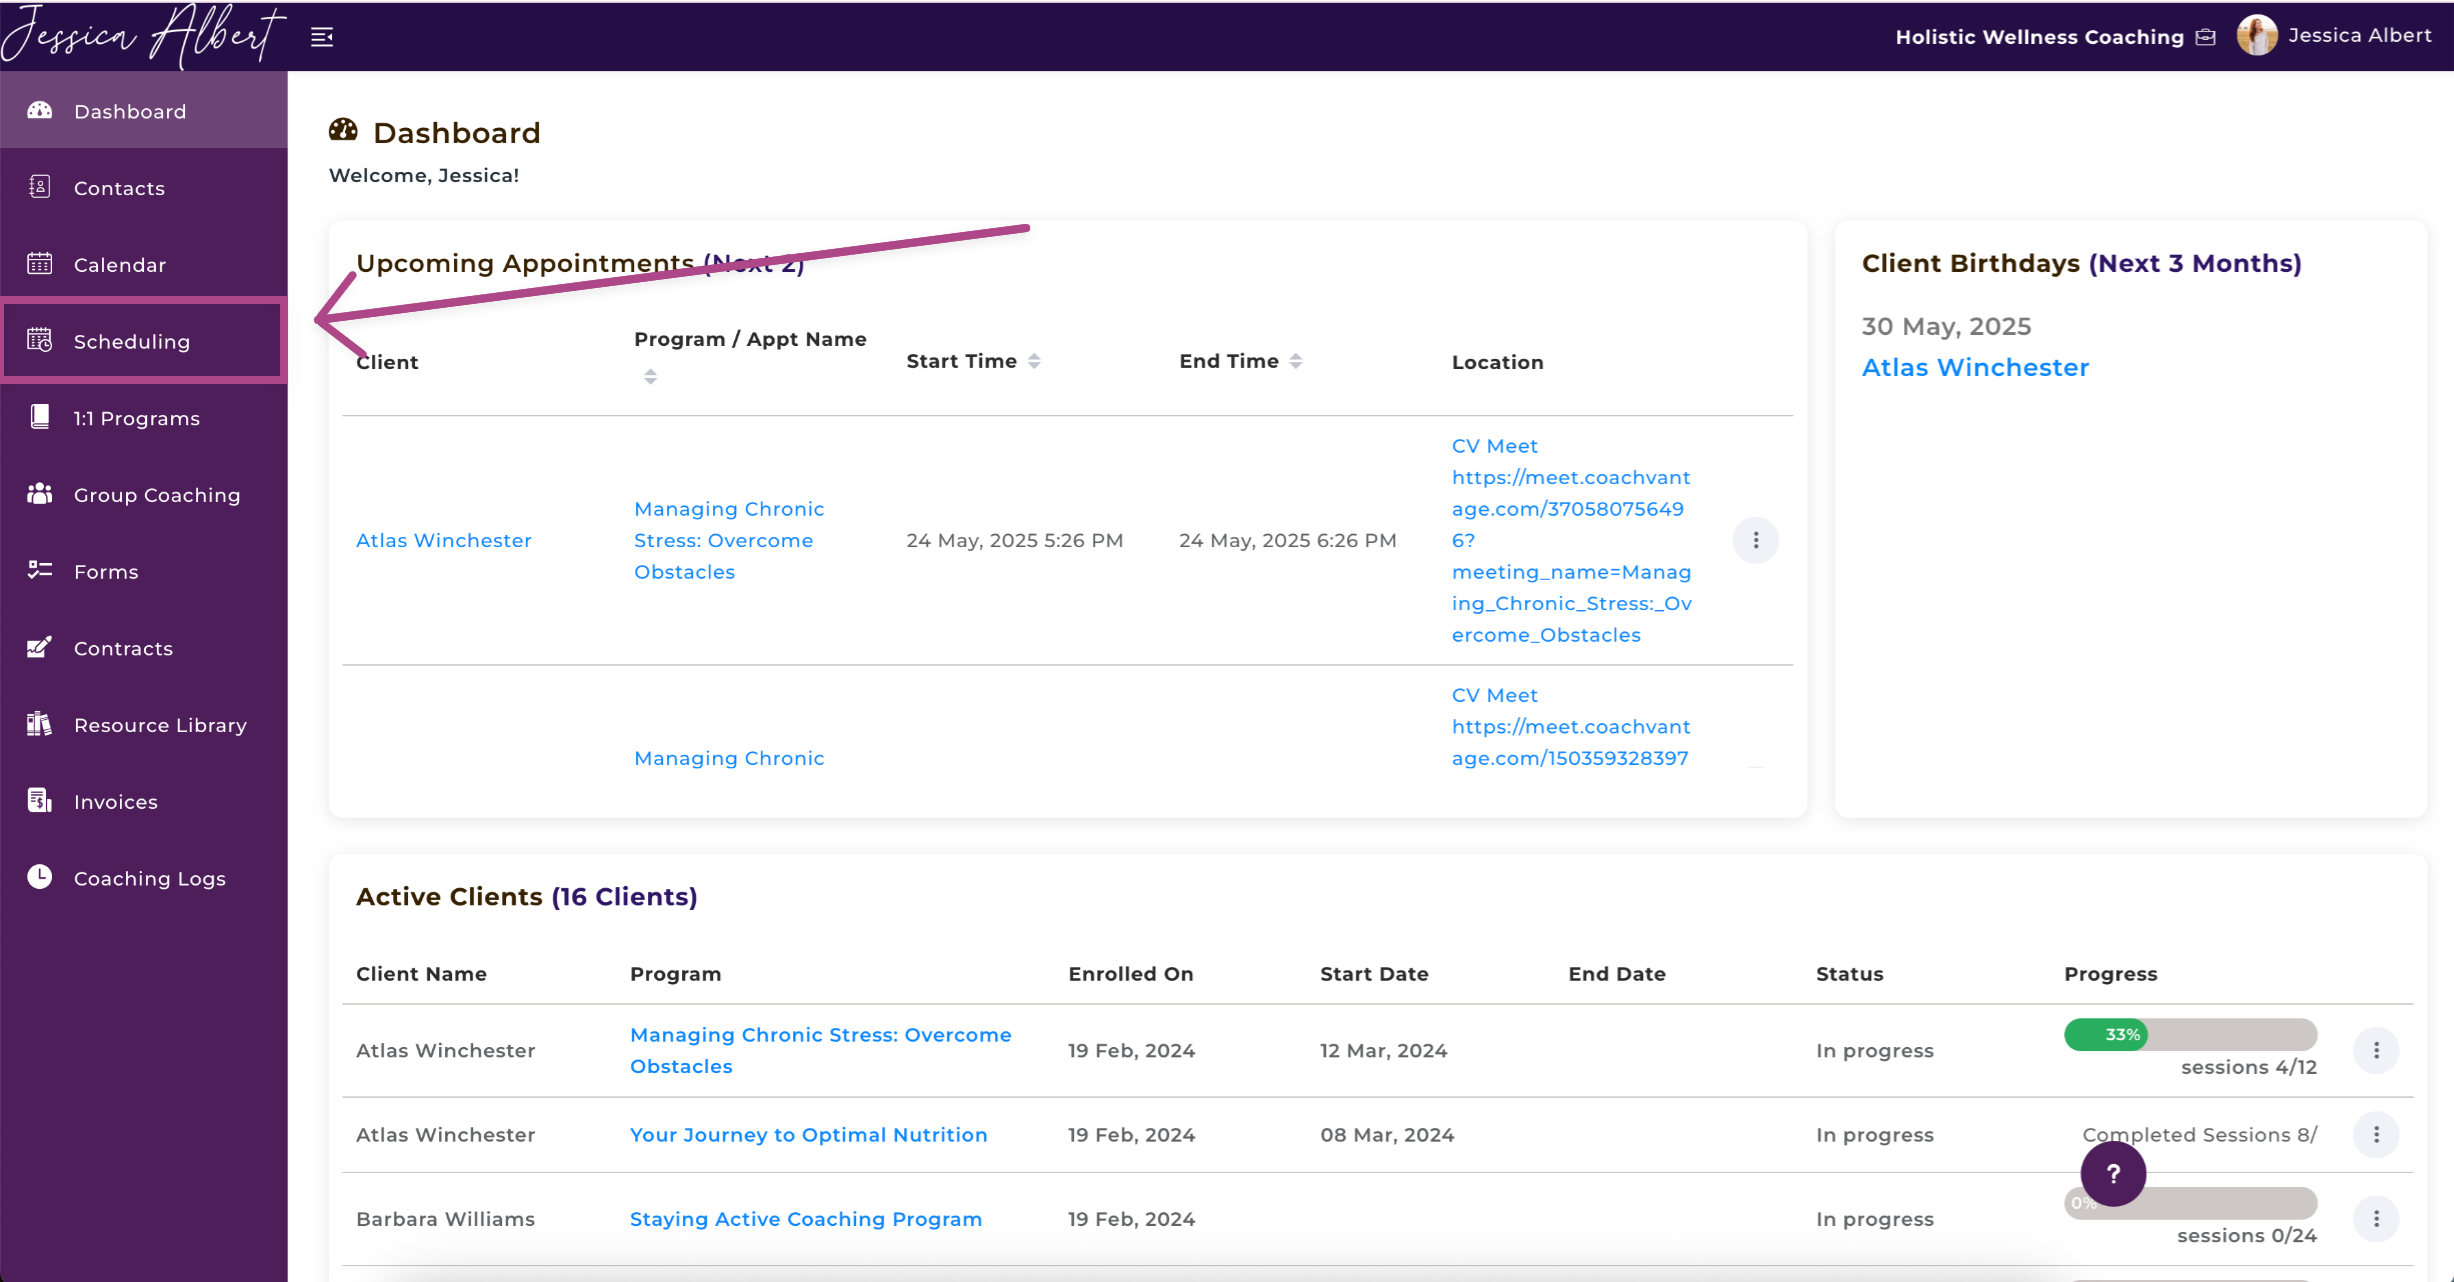
- Click Scheduling on the left menu.
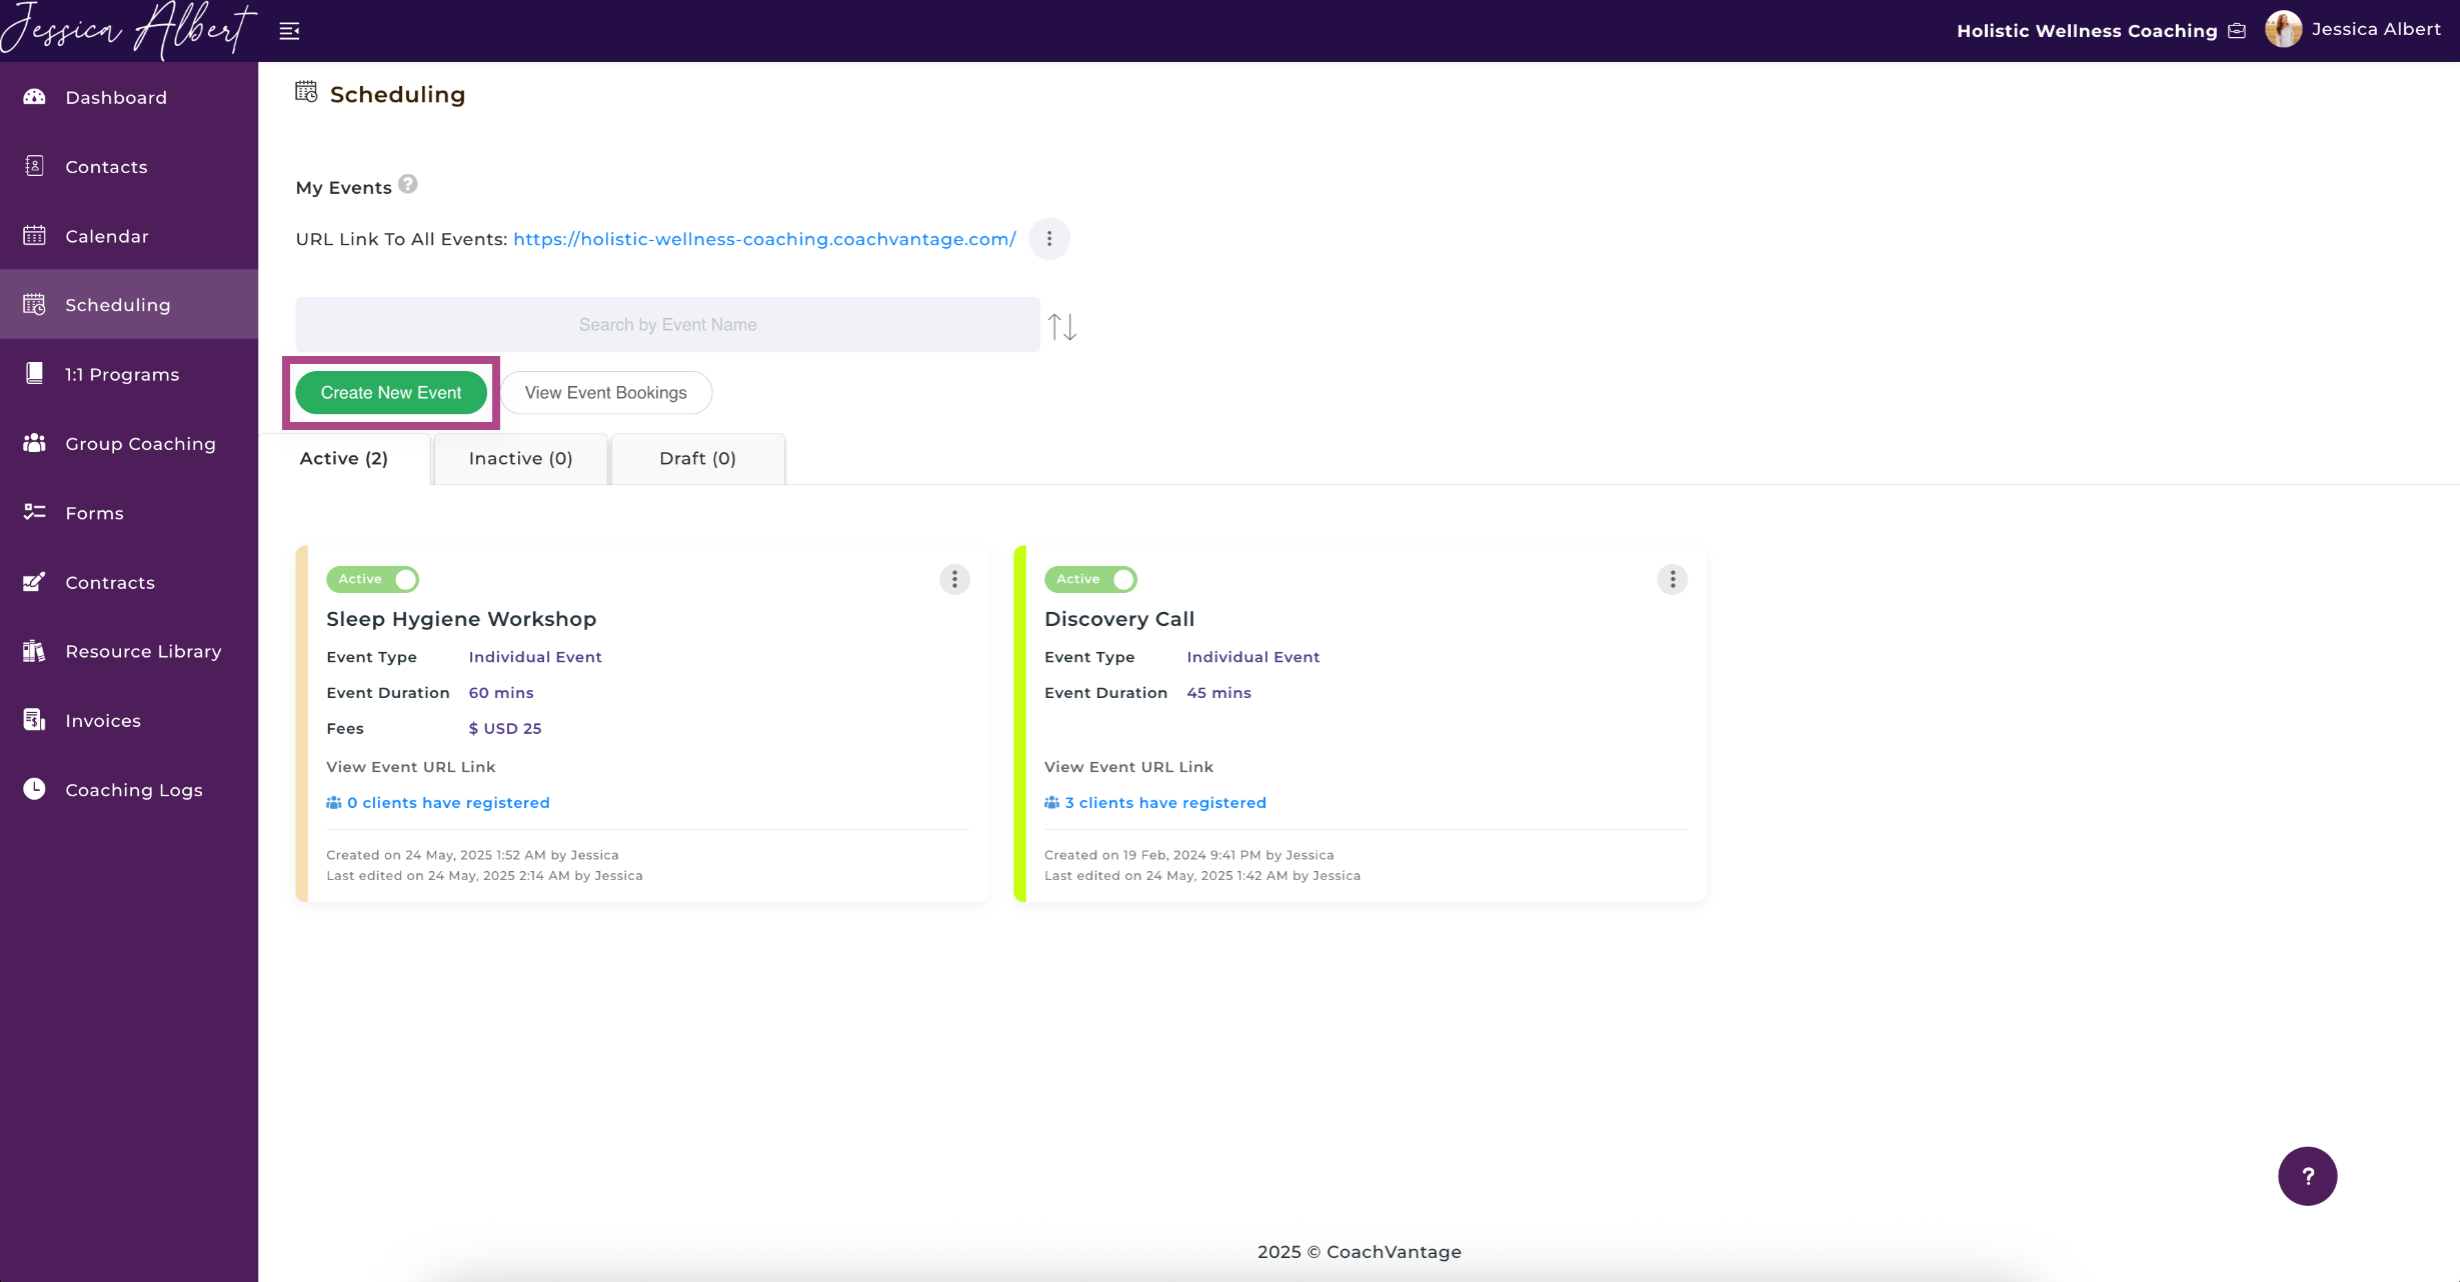
- Click the Create New Event button.
- The Create New Event page will open.
On the Create New Event Page, You'll See the Following Steps in the Task Bar:
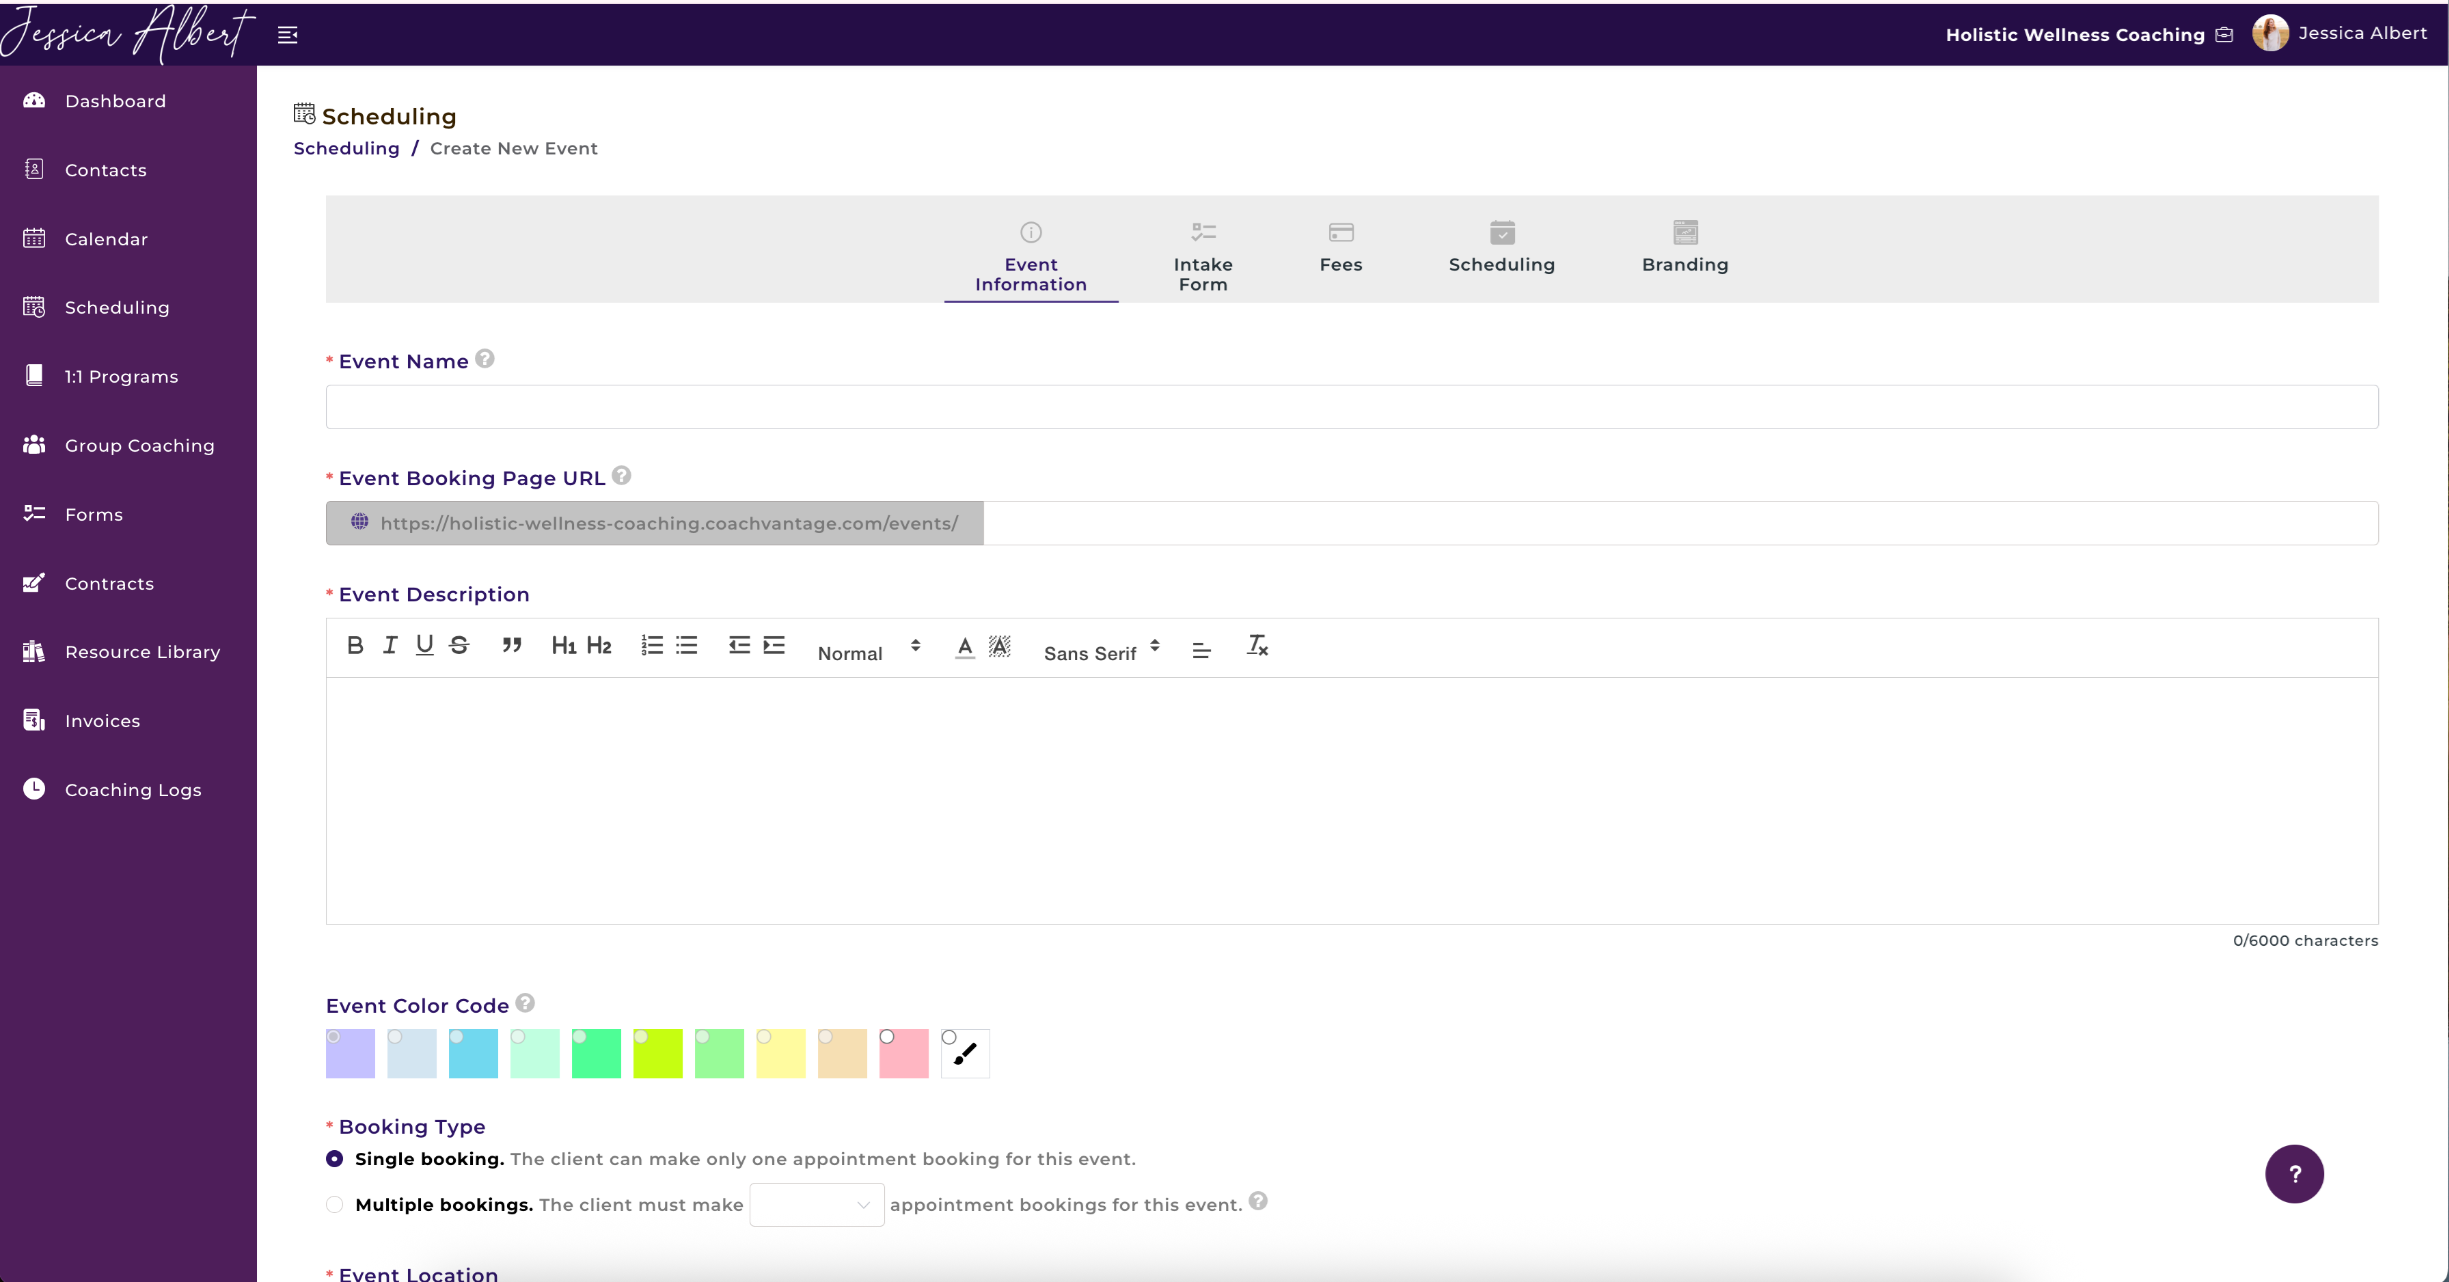
We will cover each of these steps below in detail:
1. Event Information ℹ️
Event Name
Enter a descriptive name for your event.
An Event is essentially a meeting or service that you provide. Examples of events are "Discovery Call," "Chemistry Call," "Virtual Yoga Sessions," etc.
Event Booking Page URL 🔗
As you type in the name of your event, you will notice that the URL name description gets populated automatically.
You can choose to use the default URL description that we’ve populated, or type in a description that you would prefer to use.
Important: Do not use spaces or special characters (eg $ / @ > ) for the description. You can use hyphens (-) to separate words. You have to use a unique URL name for each event.
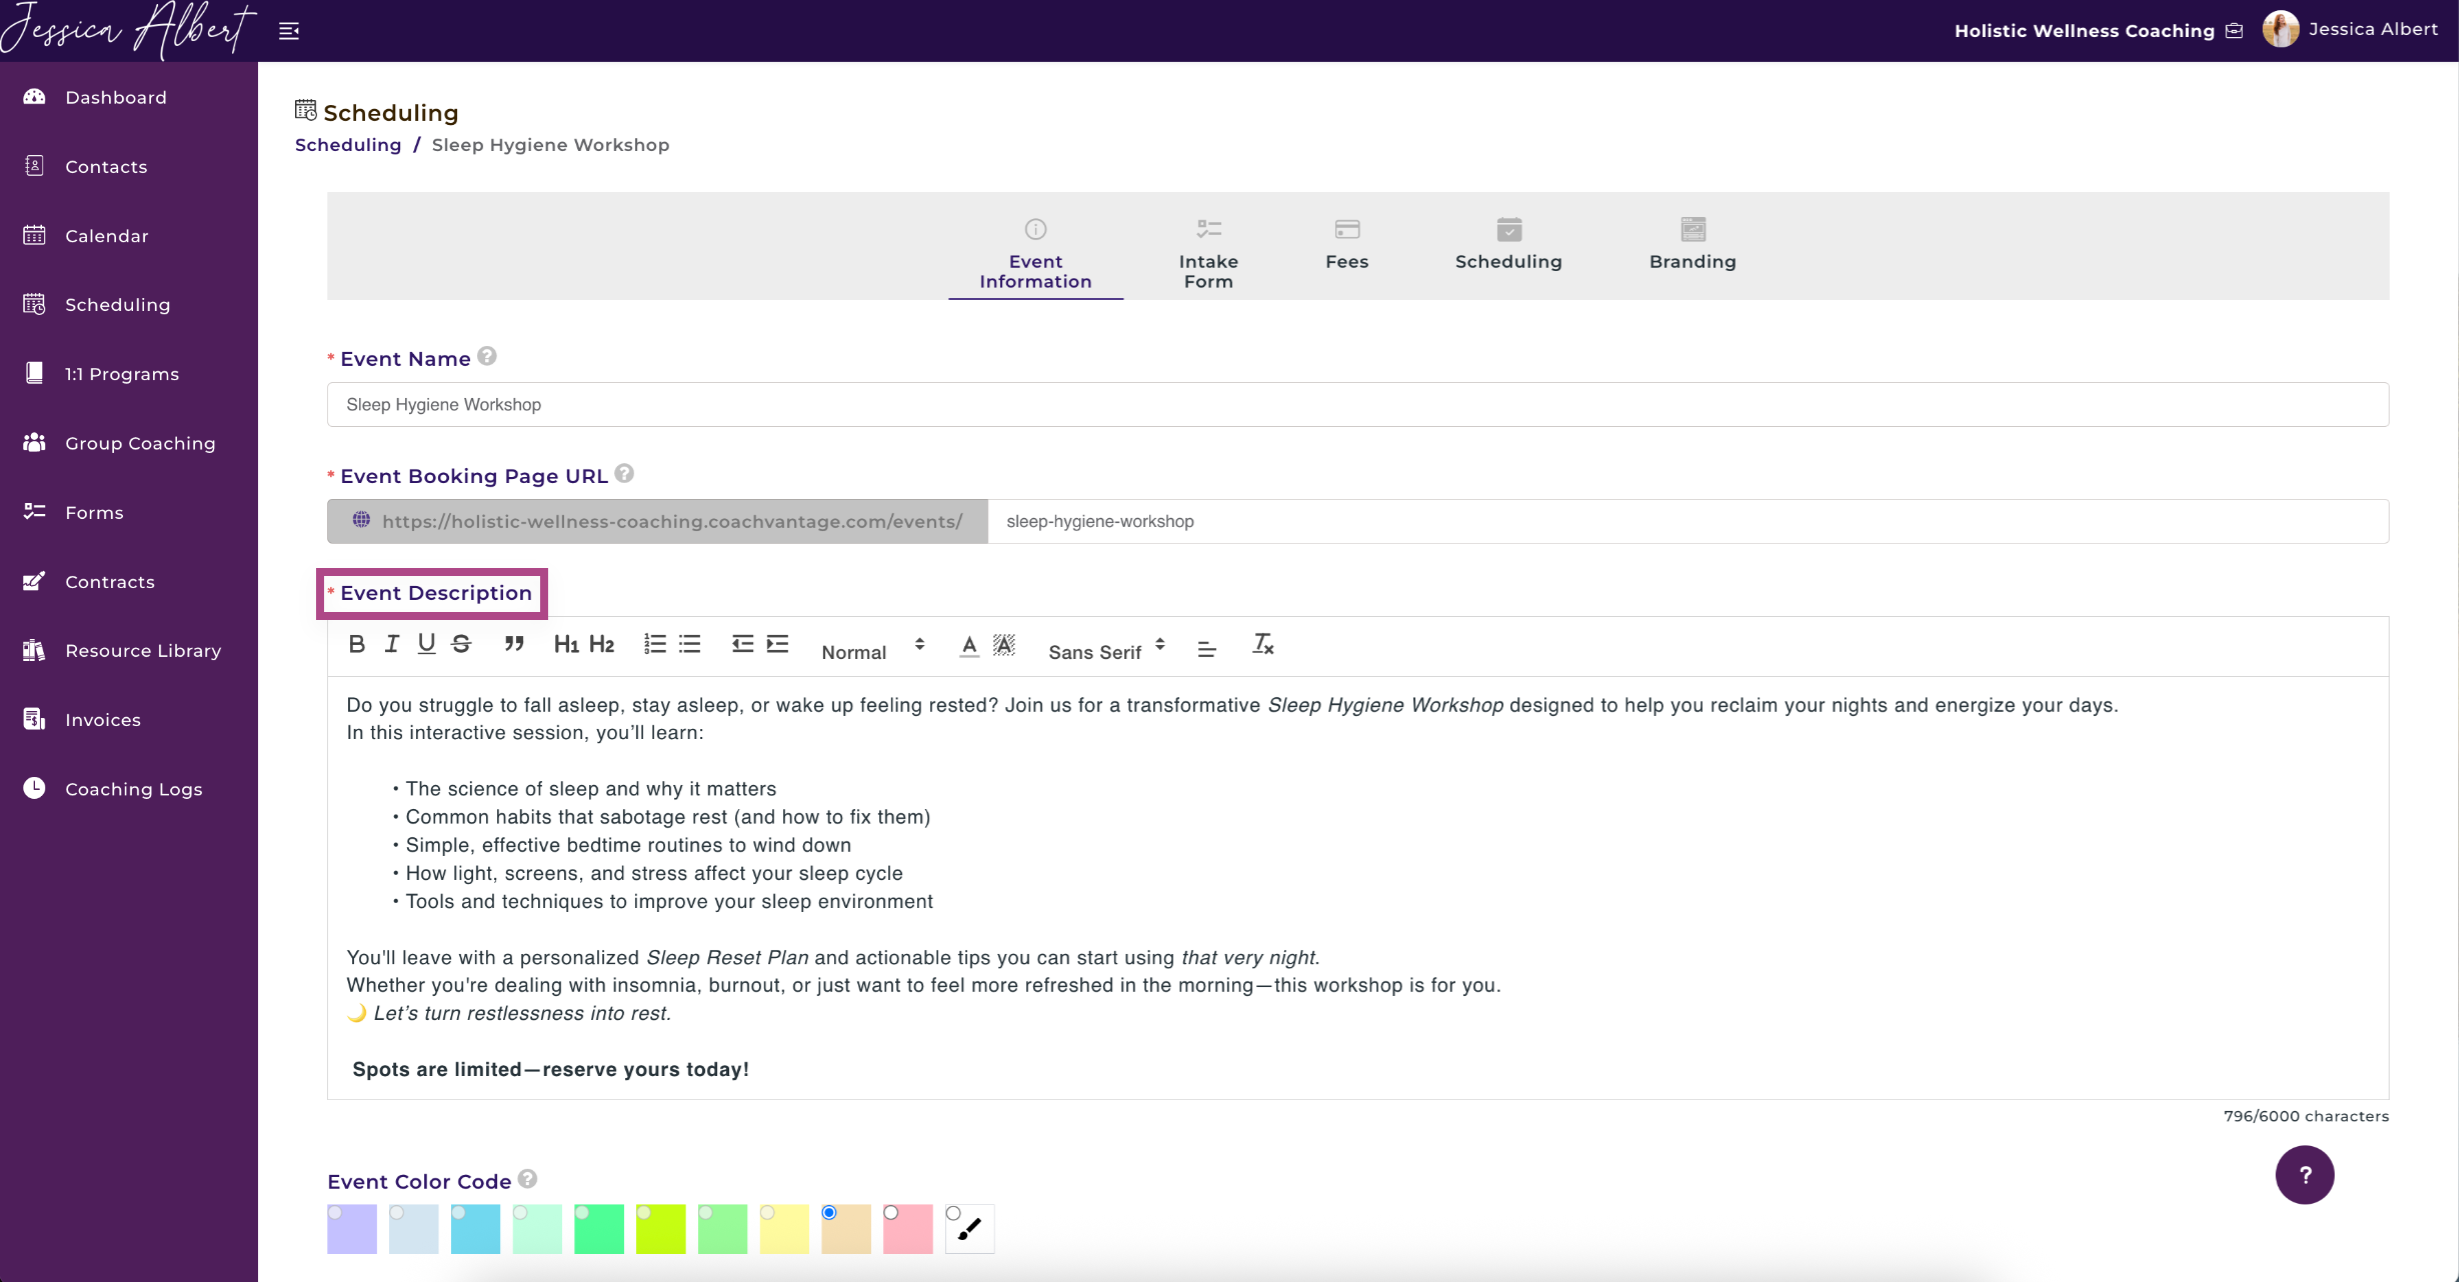
Event Description
Briefly describe your event.
You can make use of the text editor to customize your description. For example, you can add header text, highlight text, choose different font types, etc.
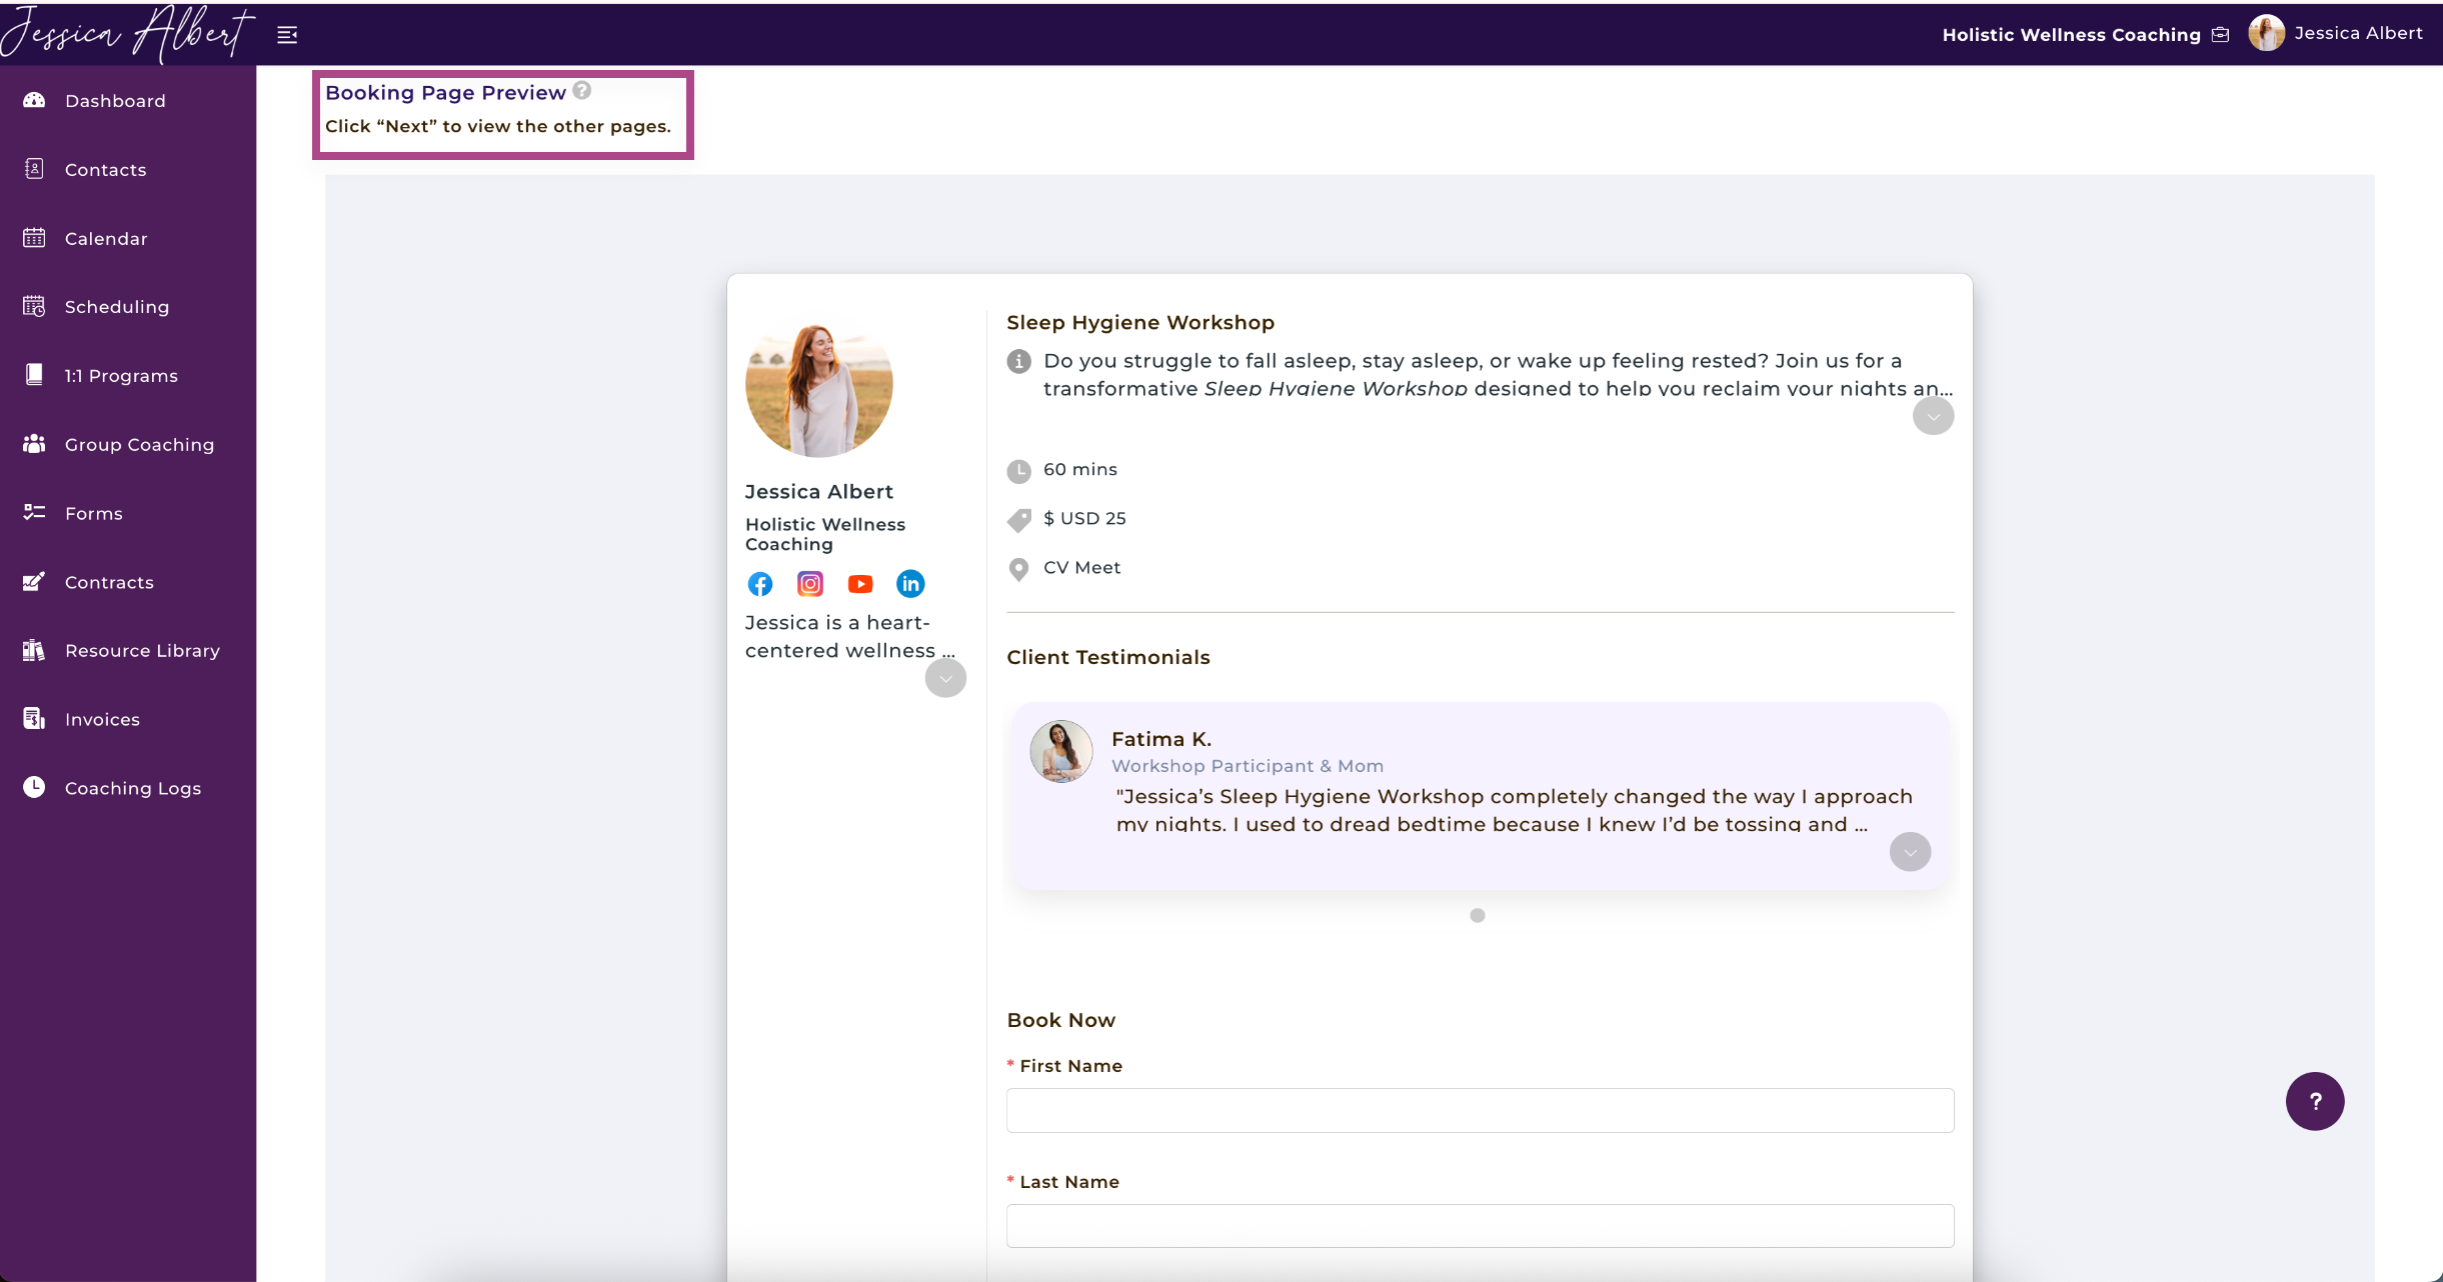
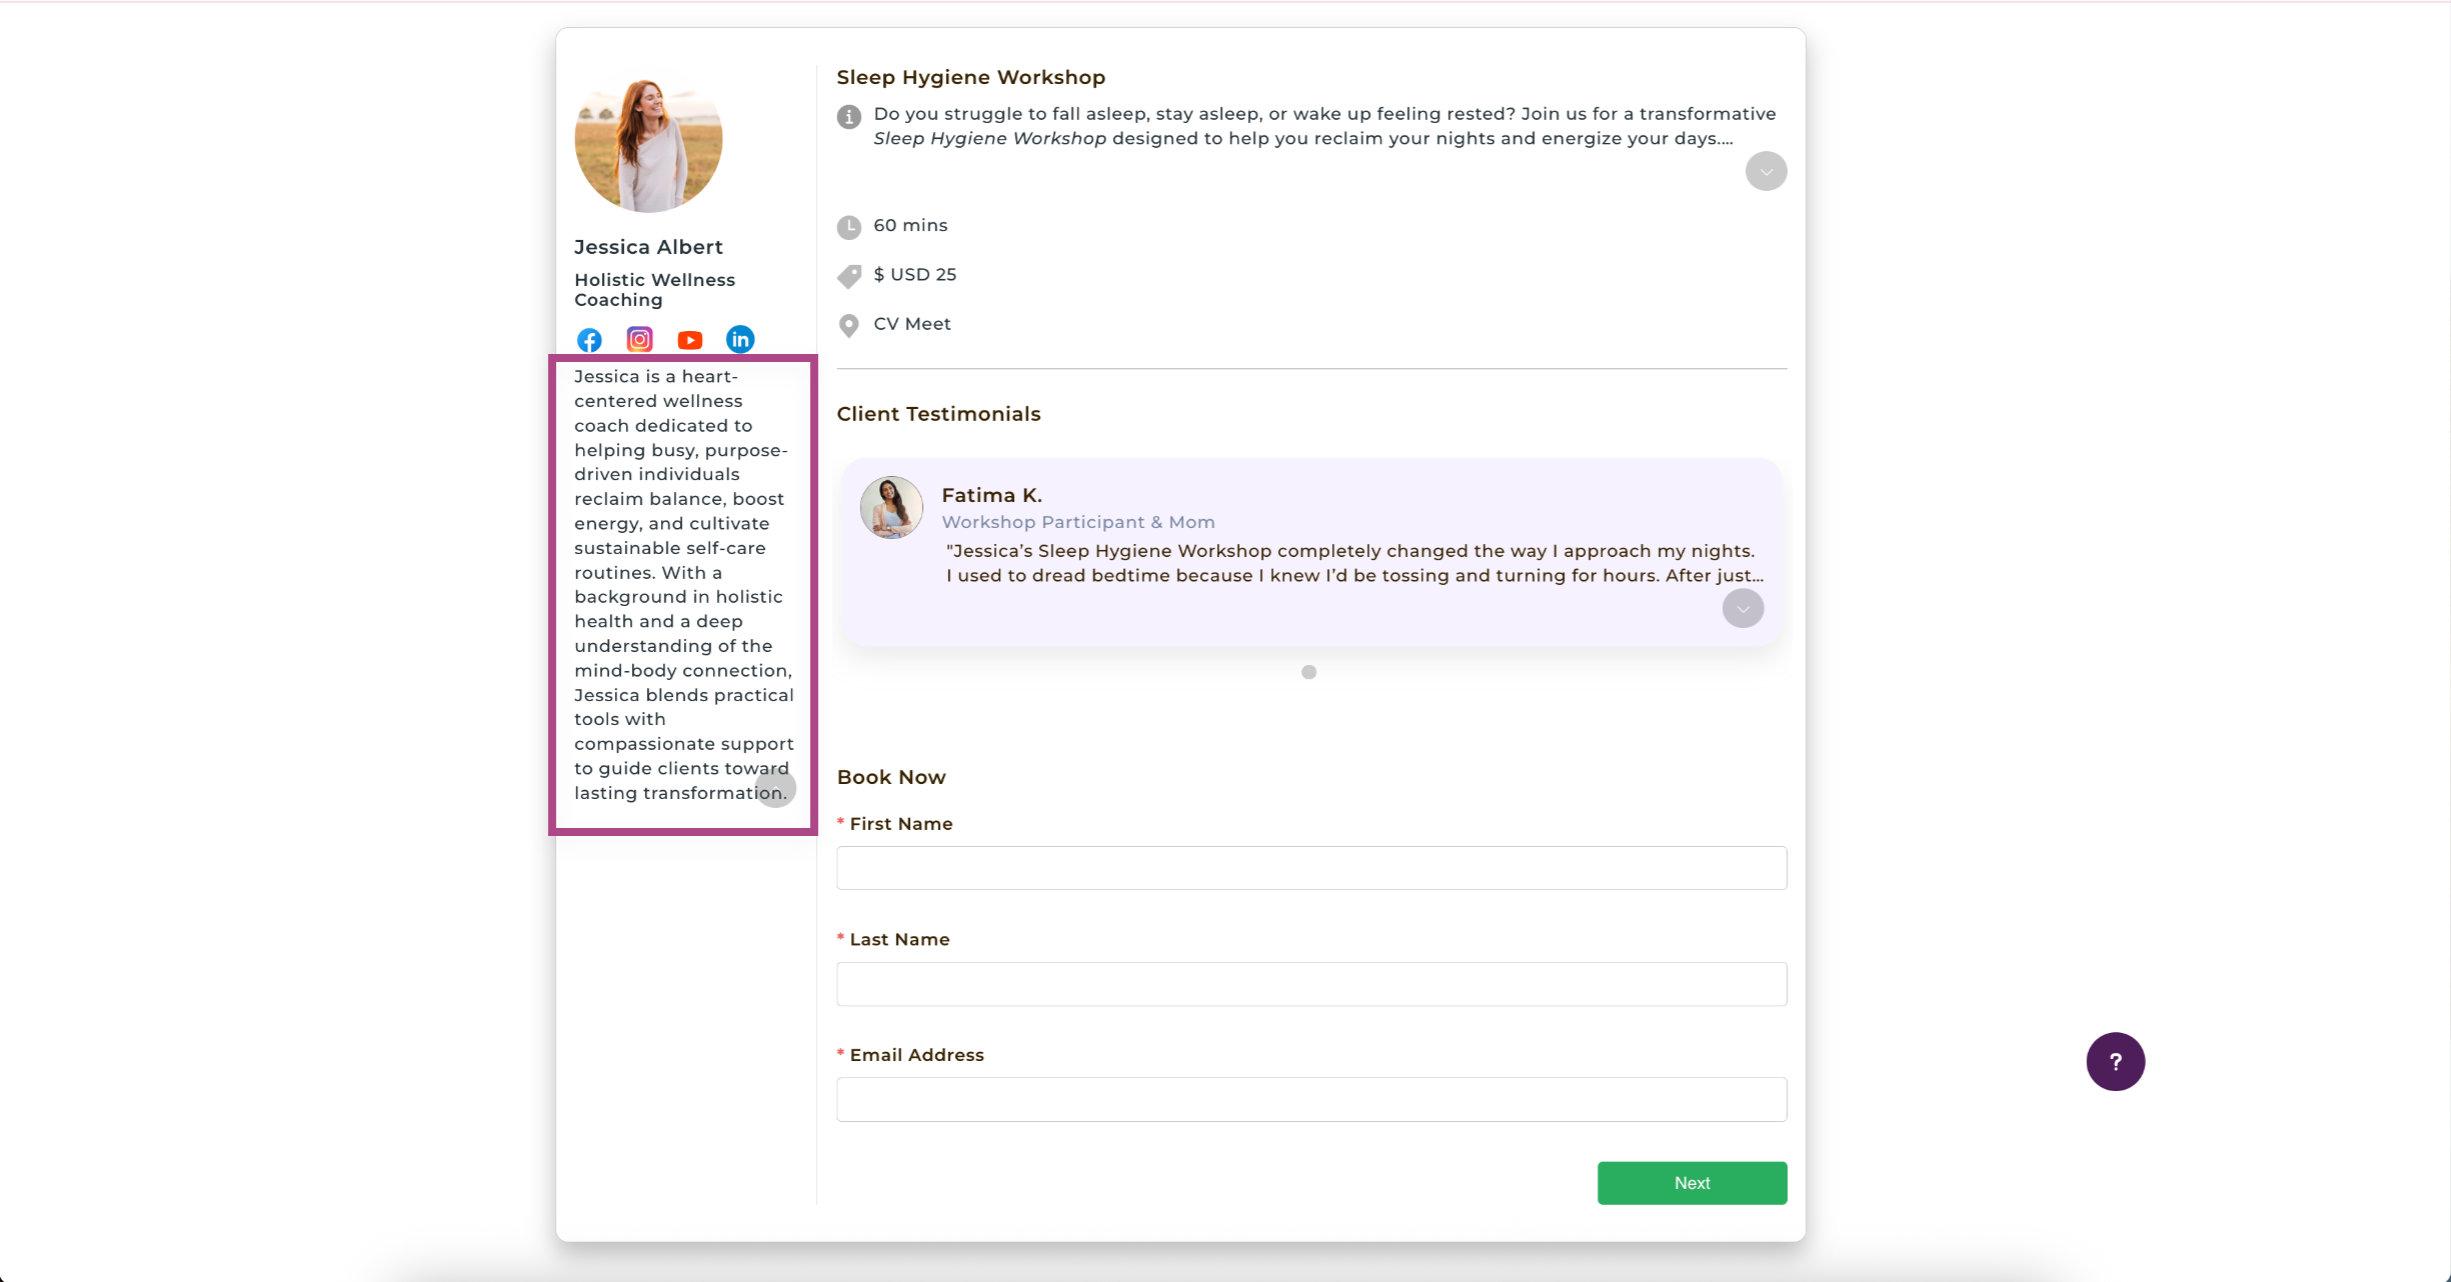
Your event description would be displayed on your Booking Page as shown below.
Event Color Code 🌈
The color code is a visual cue on your Calendar for calendar entries associated with this event. When a color is selected, it will not be available for selection for other programs. You can also view the color code on your event card on the Scheduling Page.
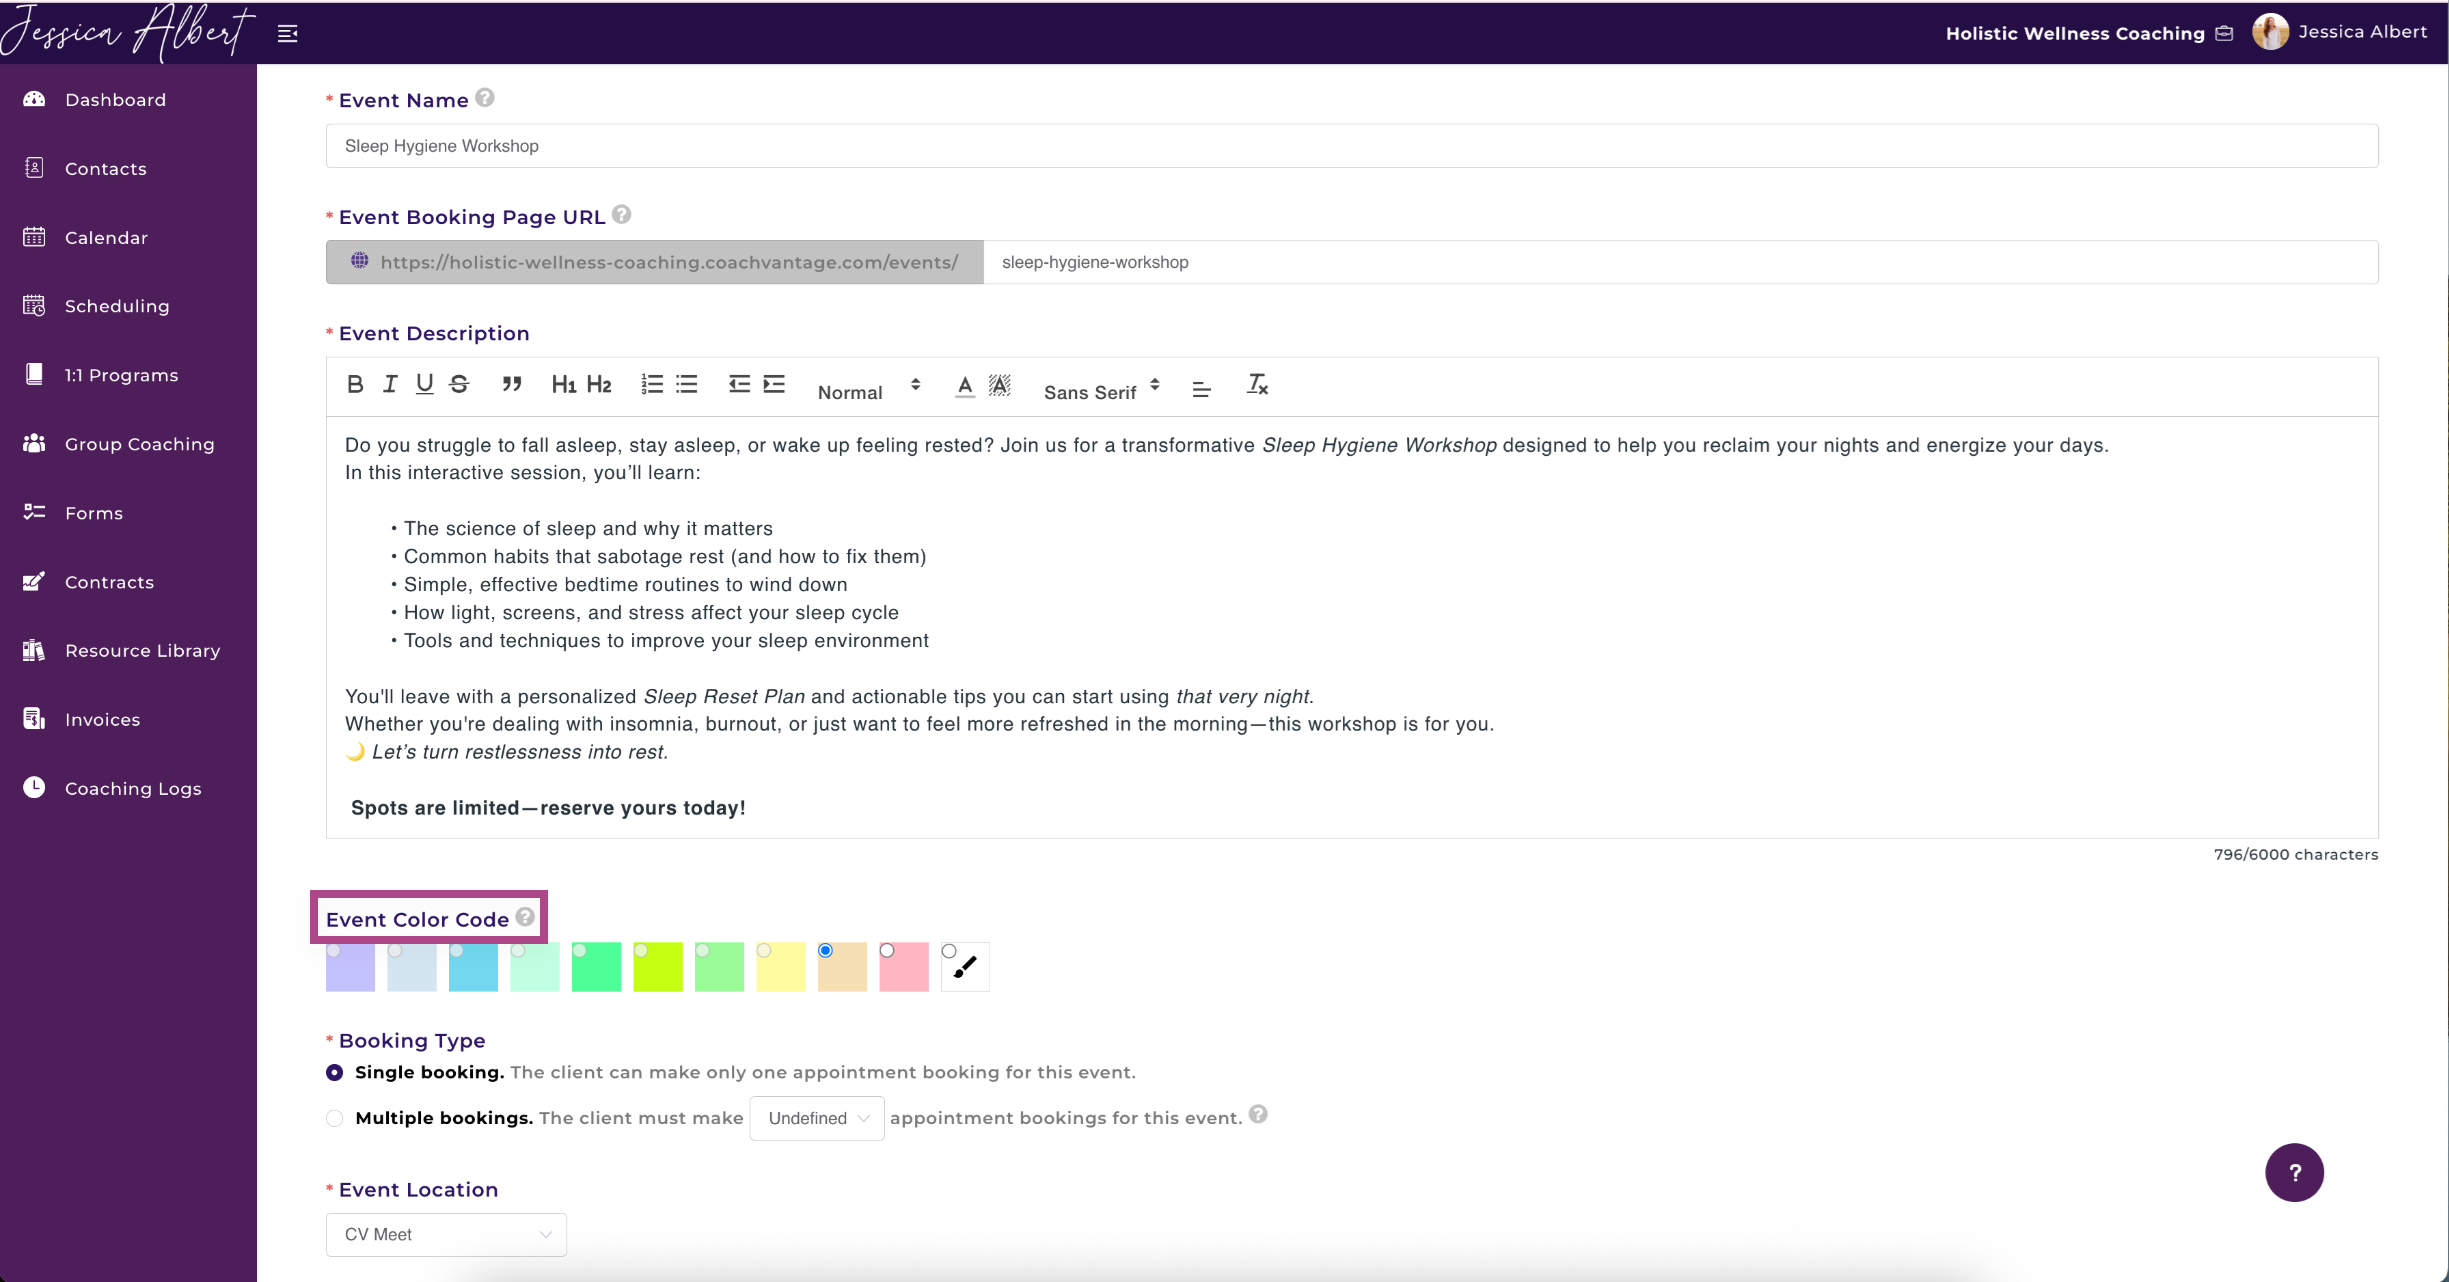
Booking Type
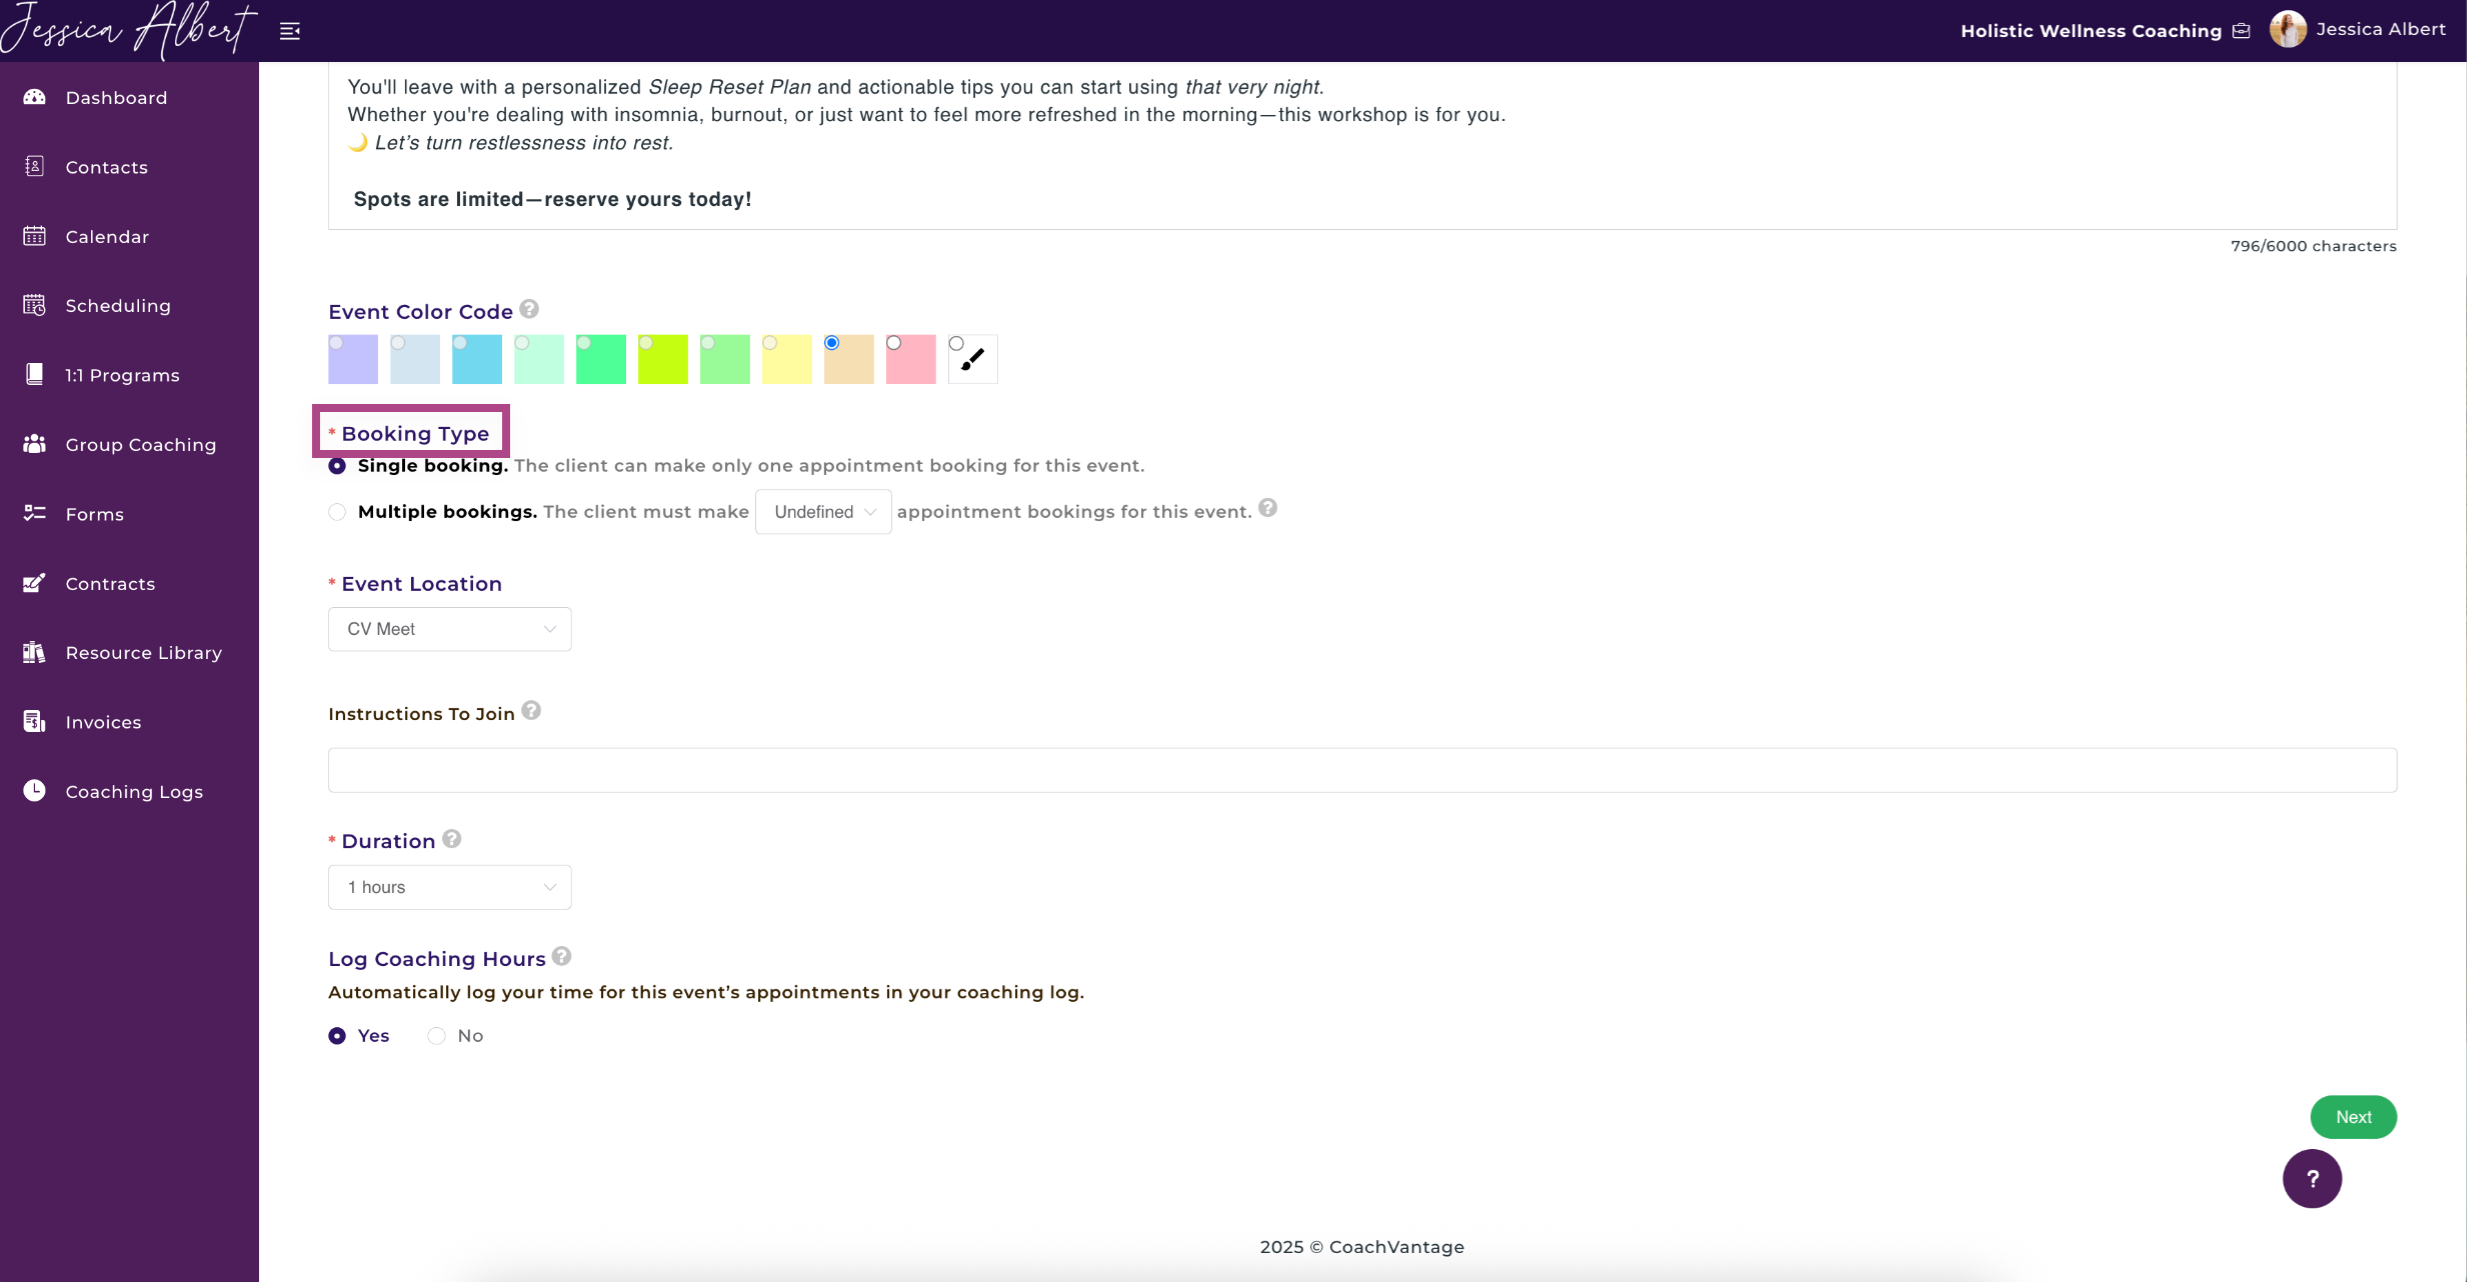
- Select Single Booking if you want the client to make one appointment booking.
- Select Multiple Bookings if, for example, you're holding a series of workshops or mastermind sessions and you want clients to book multiple appointments in one booking flow. Use the drop down selector to set how many bookings they must make.
- If left as Undefined, your clients can book as many appointments with you as they like (i.e. there is no limit to how many appointments they can book).
Event Location 📍
Choose the location where the event will take place. You can add multiple location options, allowing clients to select their preferred location during booking.
- CV Meet - Our native digital and audio communication tool that comes with your CoachVantage account.
- Zoom - If you have connected your personal zoom account to CoachVantage, we will automatically generate a unique zoom meeting URL link for each appointment booking.
- Google Meet - To use Google Meet as the meeting location, you must first integrate your Google Calendar with CoachVantage. You can do so at My Settings > Integrations. Be sure to disconnect any existing calendar before connecting your Google Calendar.
- Physical Location - Enter the name or address of the physical location.
- Others - You can enter other location types here. e.g. FaceTime, WebEx meeting URL, Phone call, etc.
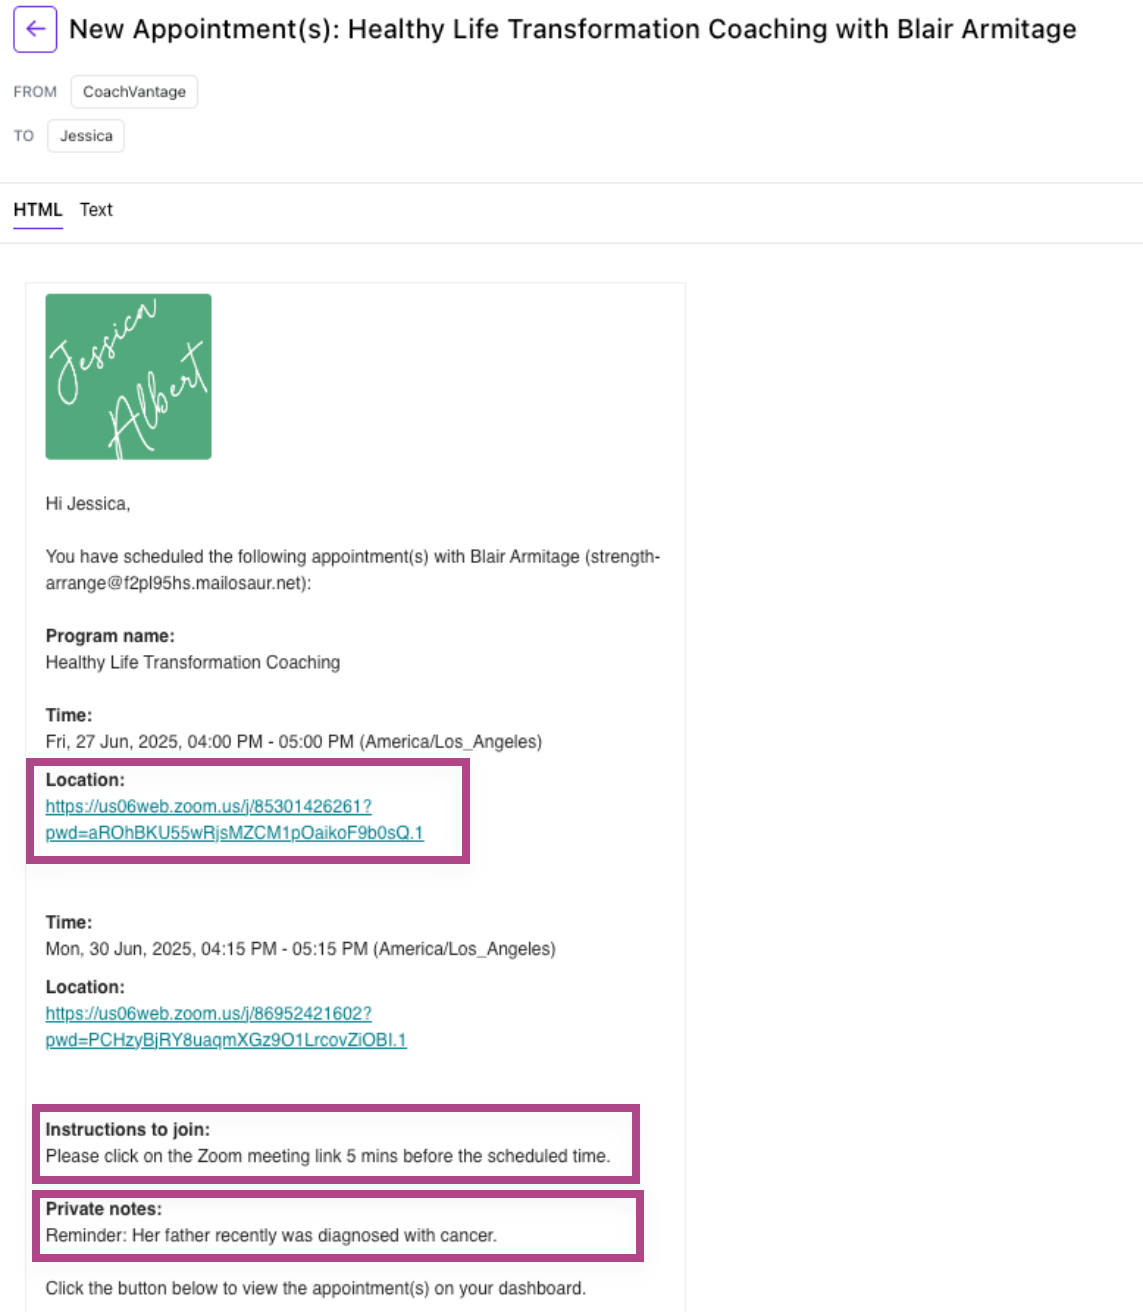
Instructions to Join 💻
Provide instructions to clients on how they can join your meeting, or any specific instructions you would like to inform your clients about.
For example, 'Please click on the Zoom meeting link 5 mins before the scheduled time.'
This information will be contained in the confirmation email to your clients.
Duration
Use the dropdown selector to specify the duration of your appointment or meeting.
The duration can be as long as 24 hours but cannot cross over to another day.
Log Coaching Hours 🕦
If you'd like to capture your time for this event as Coaching Hours, select Yes. This setting will not be shown to clients.
For example, you may set up an event as an 'Ad hoc Coaching Session' and you'd like your time spent for this meeting to be captured as coaching hours.
When you select Yes, CoachVantage will automatically capture the time duration of the meeting in your Coaching Log, immediately after the appointment has ended.
Refer to the Coaching Logs Page article to learn more.
2. Intake Form (Optional)
Client Registration Information
On the booking page, the First Name, Last Name and Email are mandatory fields that will be displayed by default.
When a client makes a booking, they MUST enter the above information.
You have the option to request additional information such as phone number, company name, address, etc.
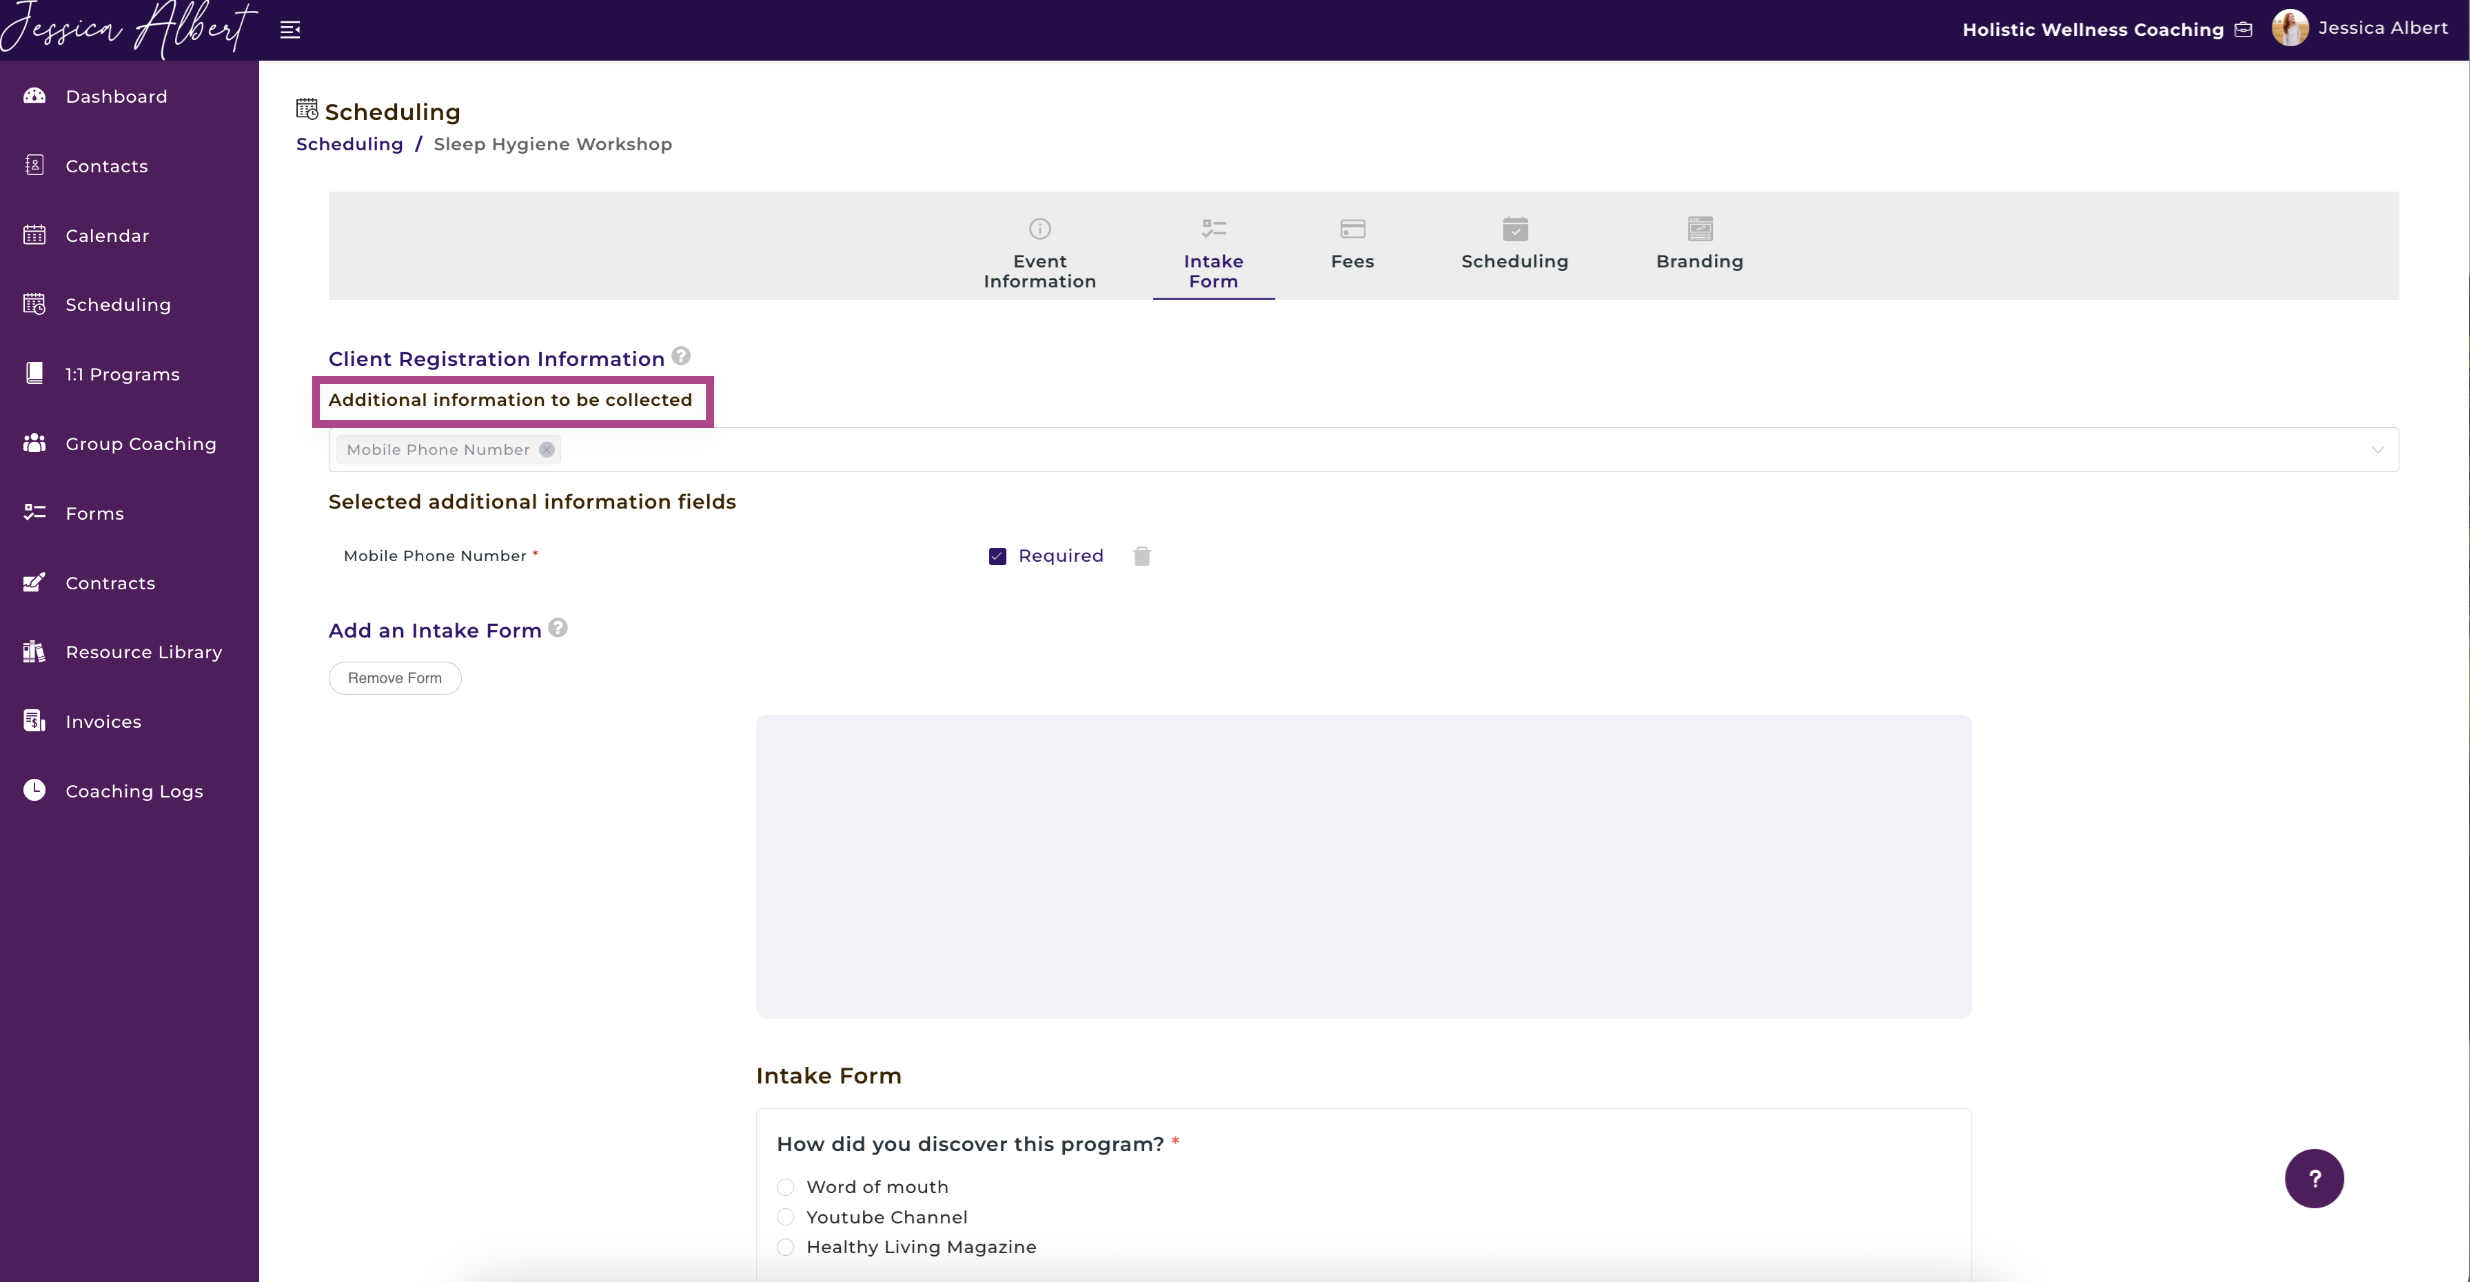
The additional client information that you can request is presented as a dropdown selector for you to choose what information you wish to collect from clients during the booking process.
Note: Additional information that you wish to collect will be displayed as mandatory fields that the client must enter when completing the booking.
After the client has entered this information on the booking page and completed the booking, their inputs will be automatically saved on the contact's Profile Page in your account.
Intake Form
You can create an intake form (or import an existing Form) to display on your booking page.
On the booking page, the intake form will be displayed for the client to enter their responses.
Tip: Use Intake Forms if you wish to get more information from clients about their goals, challenges, current situation, etc.
Upon successful completion of the booking, the client's responses will be automatically saved in the Individual Contact Record page (in the Forms tab) so that you can view their responses.
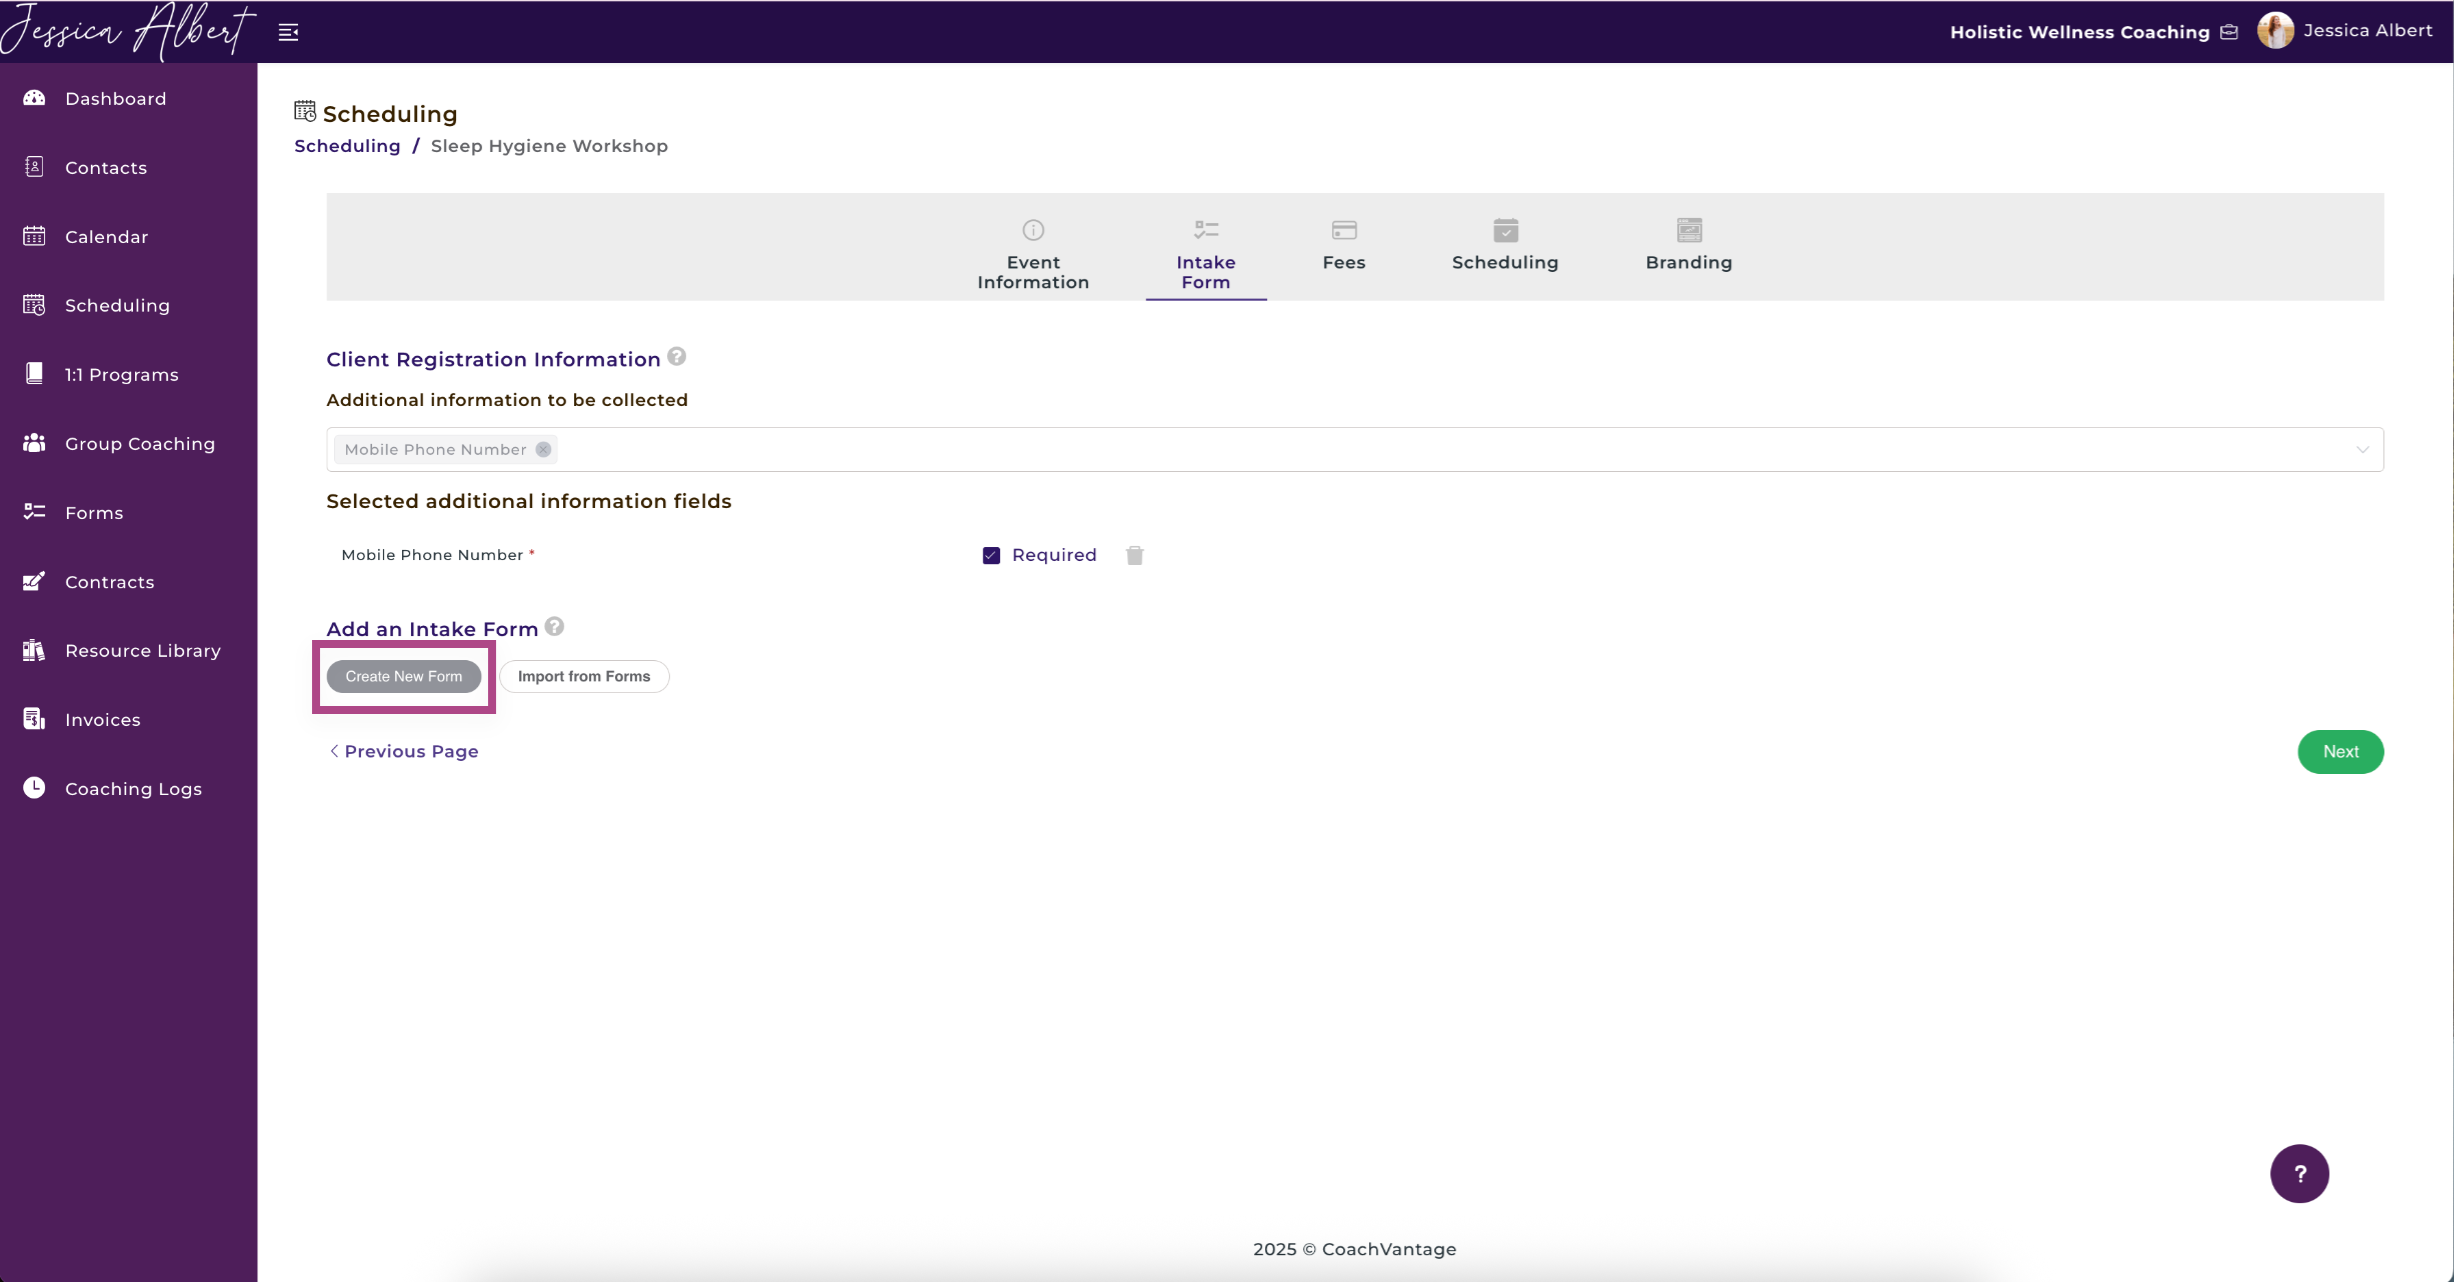
Create New Form
You may create a new form on the spot by clicking on Create New Form button.
- Enter the Form Name
- Provide a Description (Optional)
- Choose the answer type from the drop down selector
- Enter the question
- Enter the answer options (if applicable)
- Check Required if the question is mandatory to be responded. Uncheck it if the question can be skipped by the client.
- Click on the Trash Bin icon if you wish to delete the question
Tip: You may have as many questions as you wish on the Intake Form, but be mindful that you don't want your client to be frustrated with lengthy forms!
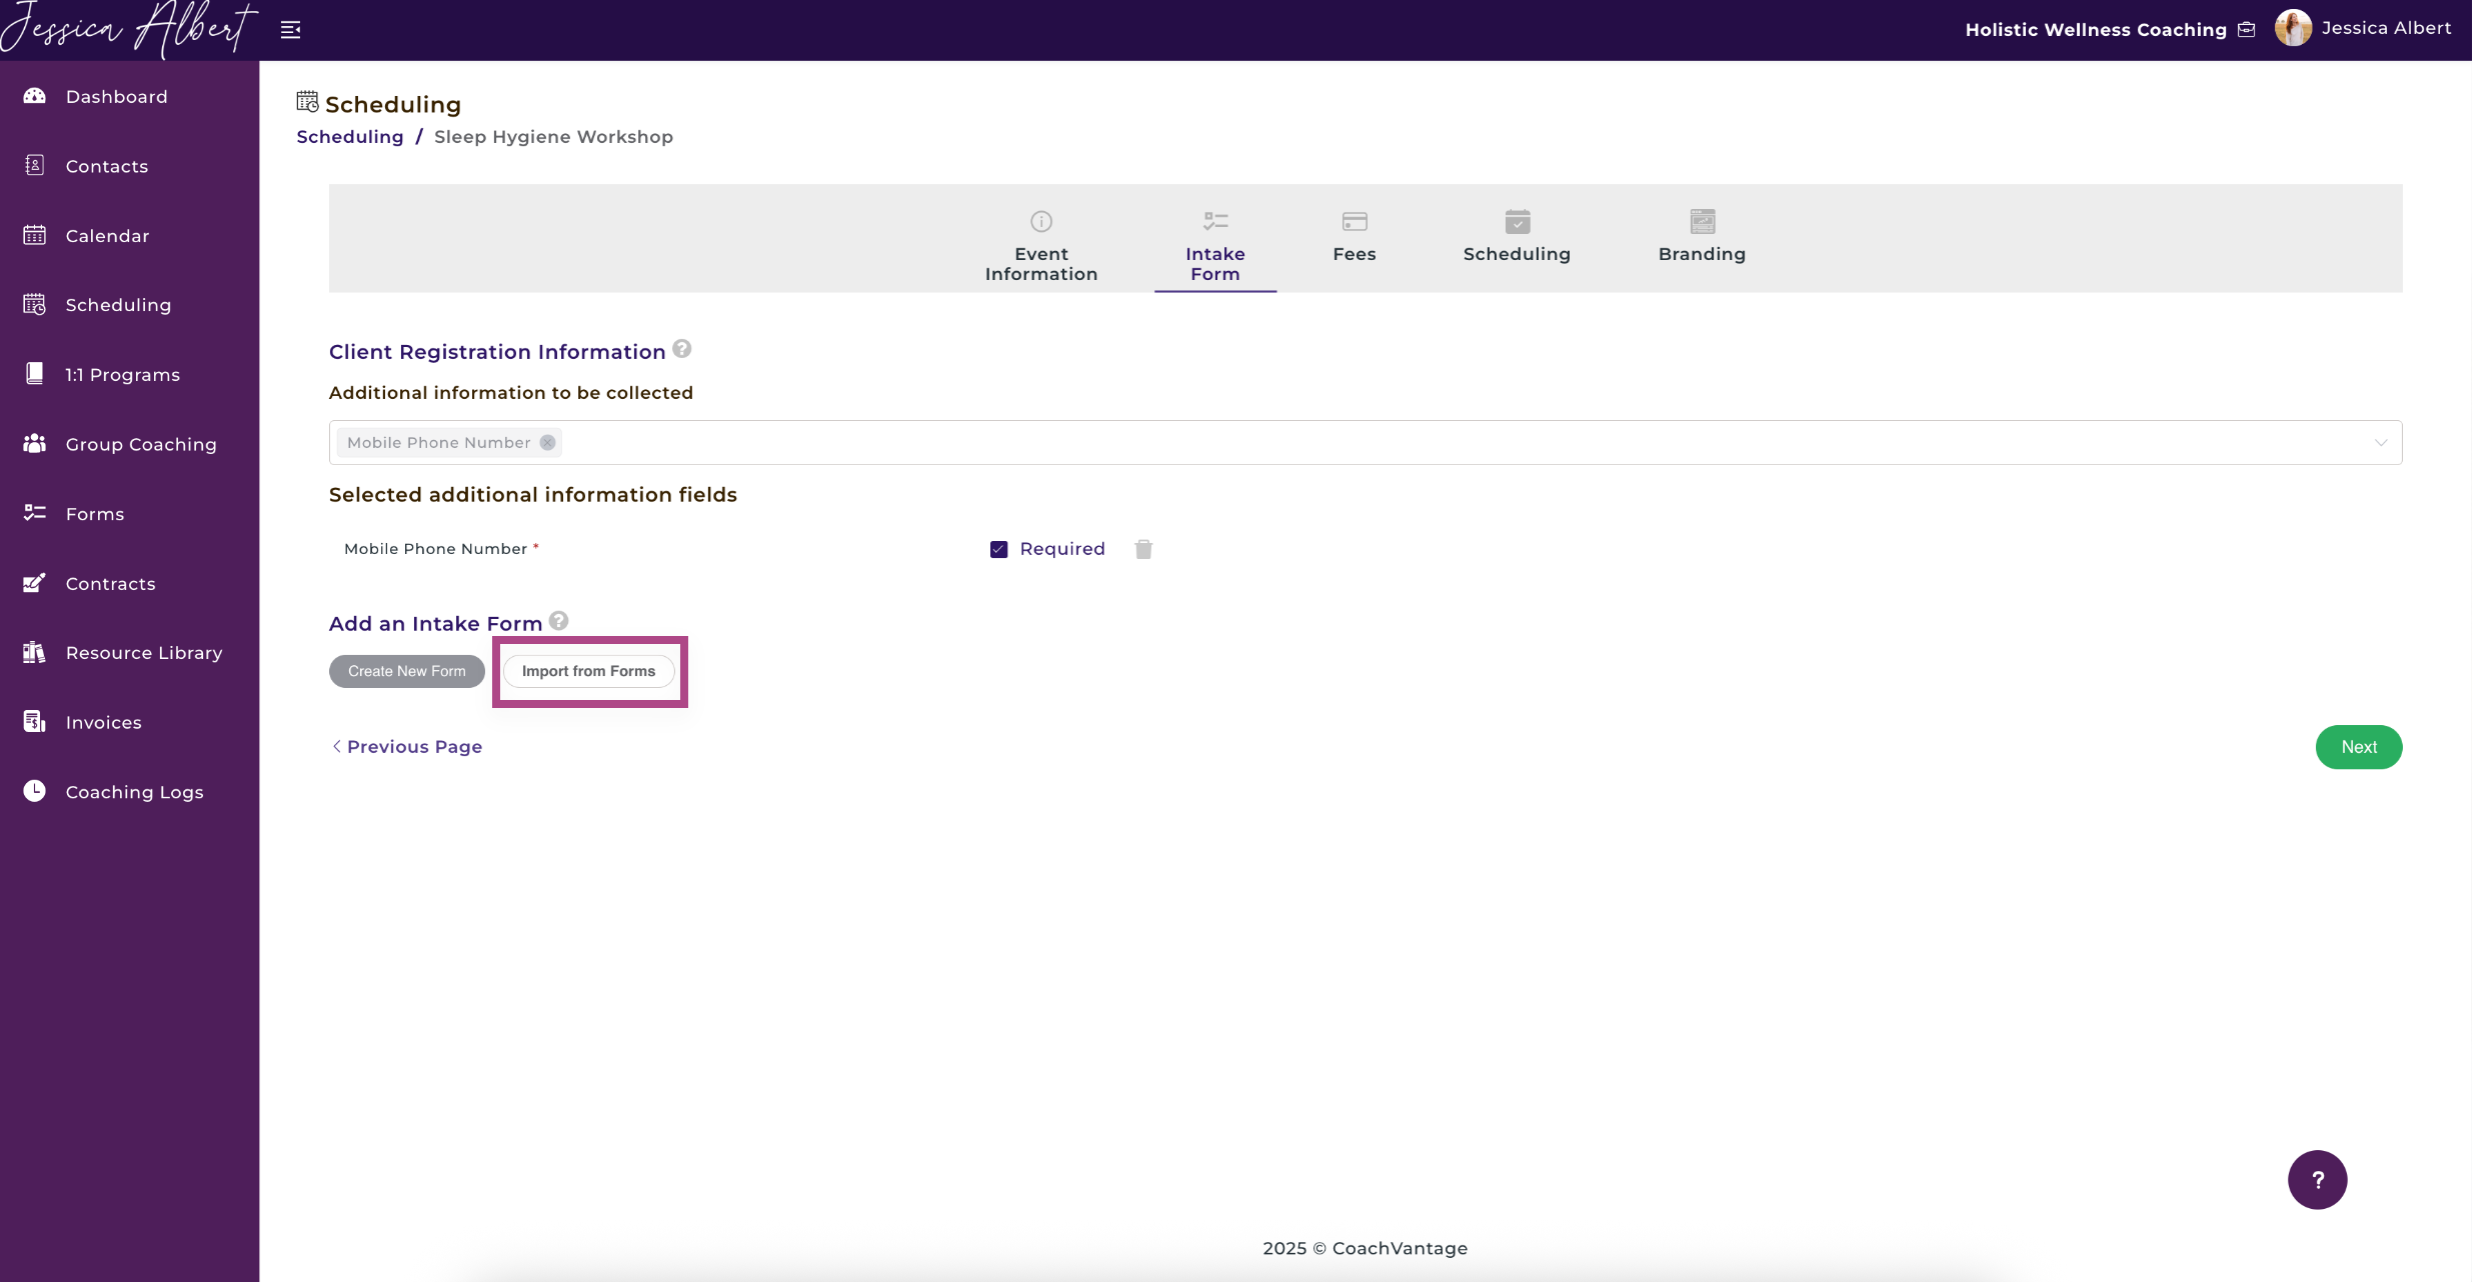
Import Form
The Import From Forms button makes it easy for you to use a form template that you have already created in the Forms page. (Refer to the article Creating A Form for more details)
You can select the form you wish to use from the dropdown selector.
3. Fees (Optional)
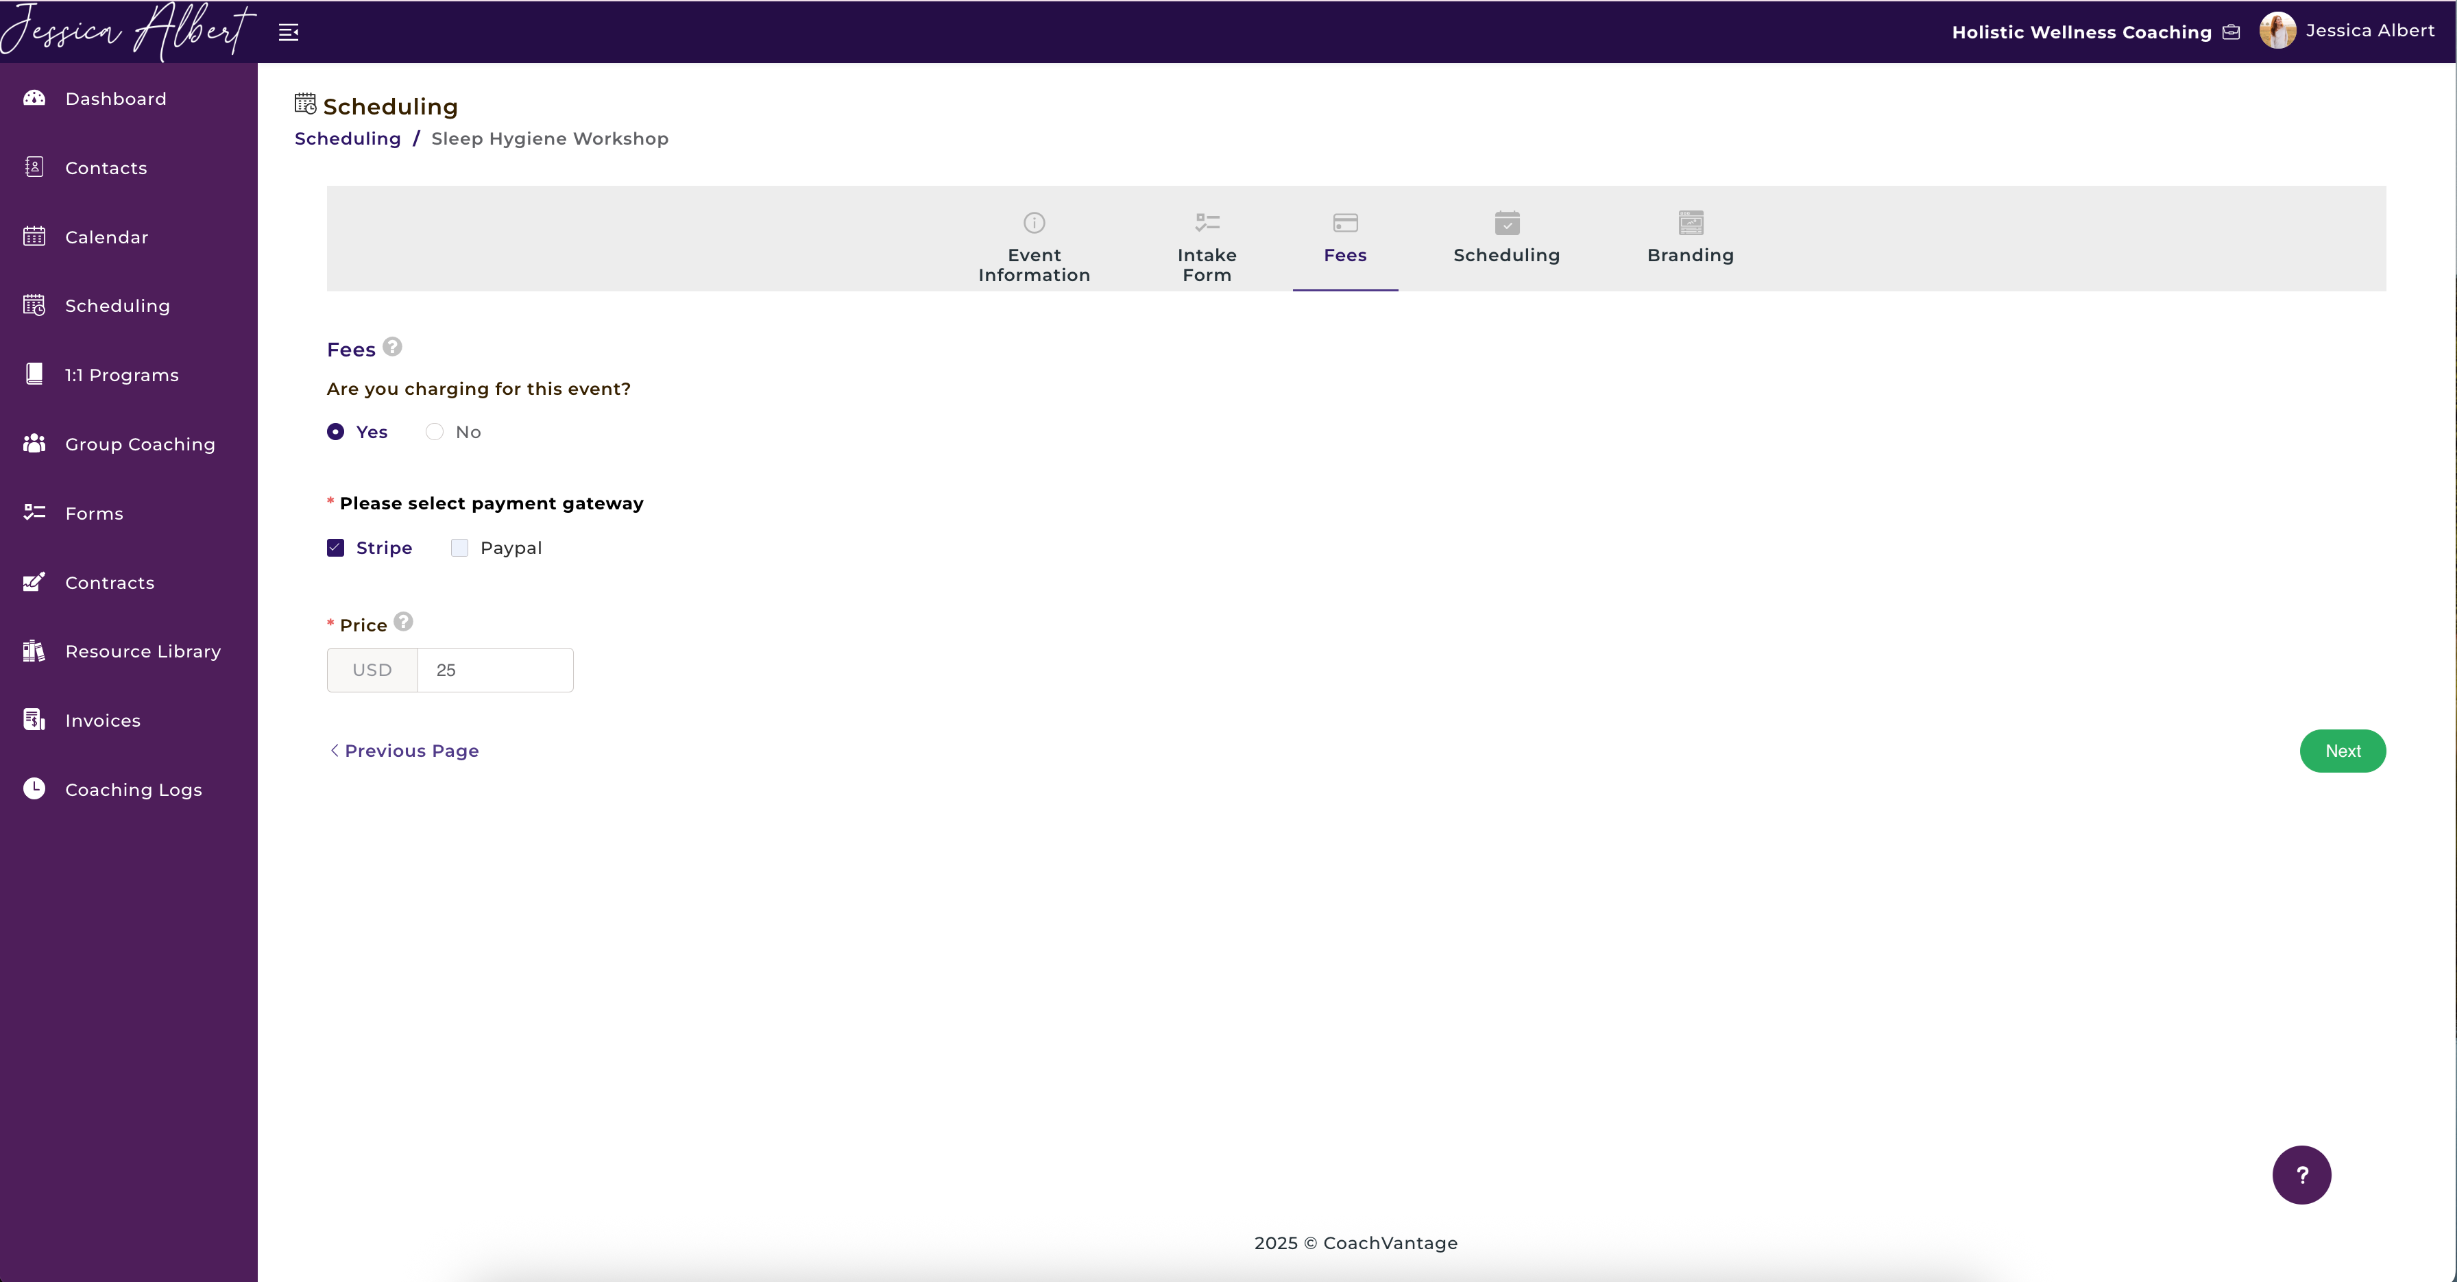
You can charge clients a Fee for making an event booking, if required.
1. Select Yes on the radio button to charge for the event.
2. Check the Payment options, PayPal or Stripe. You may select both.
NOTE: You must first have connected your PayPal and/or Stripe account to CoachVantage before you can add a payment option.
3. Enter the fee amount.
NOTE: The fee amount is the total amount that will be charged to the client, regardless of how many appointment bookings are made for the event. For example, if your event requires the client to make 4 appointment bookings and you specify a fee of $500, the client will pay a total of $500, not $2,000 (4 x $500).
If you choose not to charge for the event and checked the box to automatically log coaching hours, CoachVantage would automatically count the hours as Pro Bono Hours instead of Paid Hours.
IMPORTANT:
On the booking page, clients will be redirected to the Stripe or PayPal checkout pages to make payment online. Upon successful online payment by the client, CoachVantage will automatically generate an invoice to the client with the status as Paid.
You will also be able to see this invoice in your CoachVantage account in the Individual Contact Record page (in the Invoices tab), as well as in the Invoices page.
4. Scheduling Settings ⚙️
Set-Up Your Availability
This is an important step as it defines your availability rules and time slots for this event.
You'll need to either:
- Select an Availability Type that you've already created, or
- Create a new Availability Type on the spot.
Refer to this article on Manage Your Availability Type Settings to understand more about creating an Availability Type.
You can preview the Availability Type that you have selected by clicking on the Preview Availability Type text. A window will appear to let you see your schedule of availabilities that you have configured:
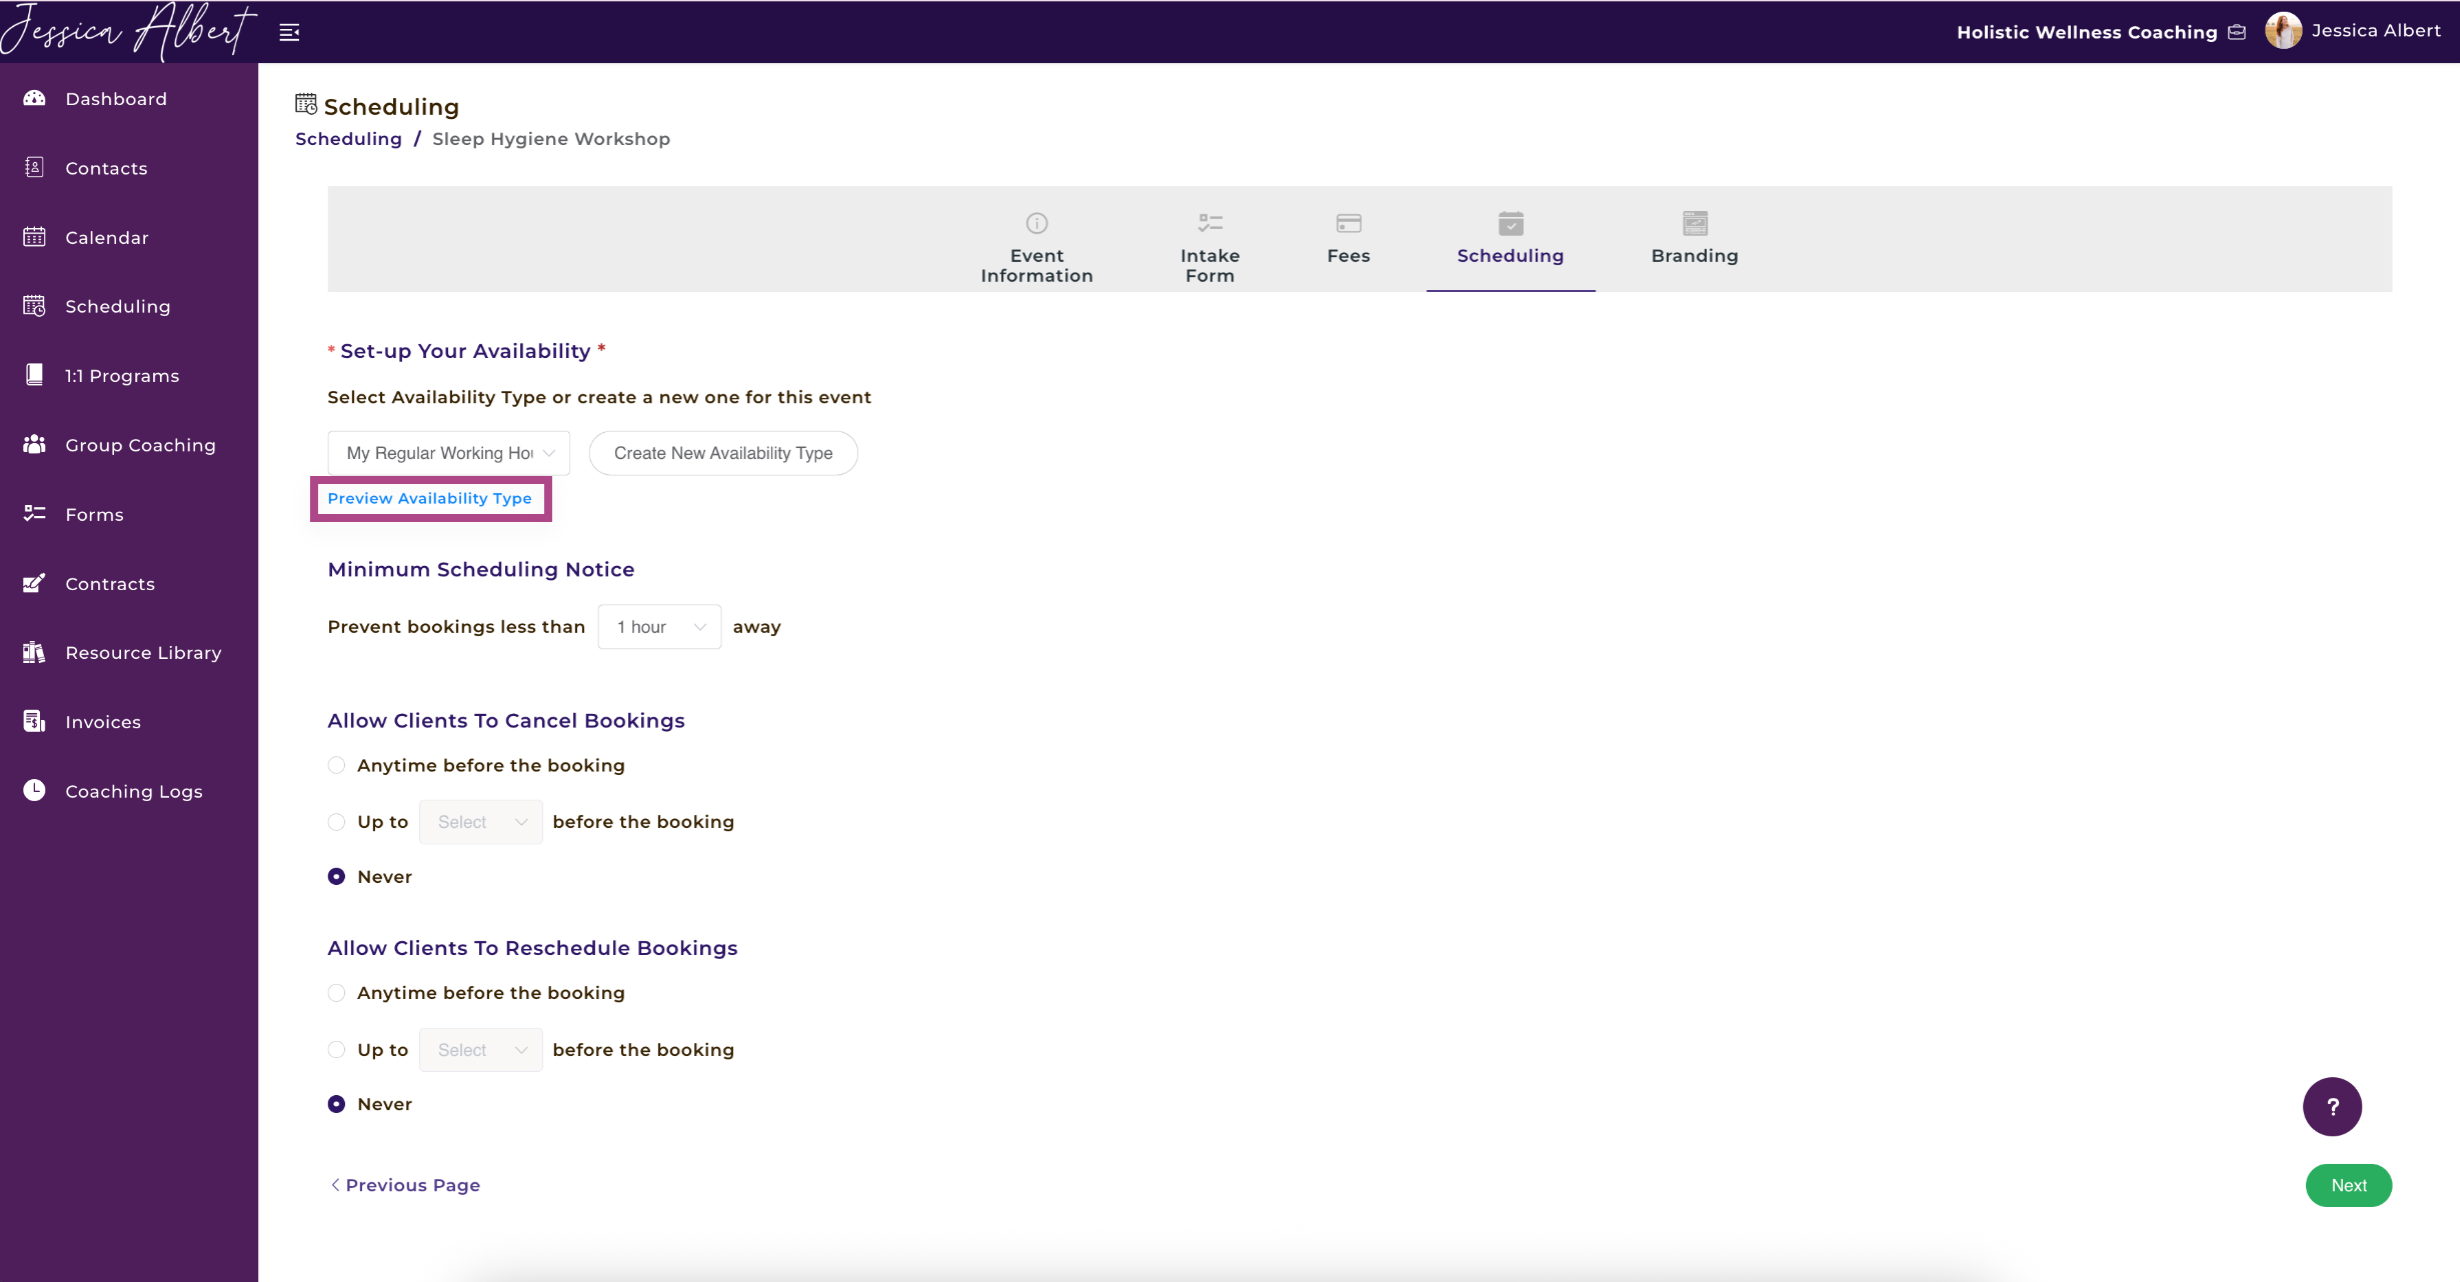
Minimum Scheduling Notice
This setting lets you determine a minimum period of time when clients can make a booking.
You can prevent last-minute bookings by setting a minimum scheduling notice.
Use the dropdown selector to Prevent Bookings Less Than X mins/hours Away.
For example, if you need at least 24 hours of advance notice before someone can book an appointment slot with you, then select 1 day from the dropdown selector.
NOTE:
If you have set up multiple events or coaching programs in your CoachVantage account and you want to limit the total number of bookings you will accept per day for all events and coaching programs, then you should configure this in My Settings > Appointment & Calendar > Appointment Daily Limit Setting.
Refer to this article on How to Create a Coaching Program for more information.
Allow Clients to Cancel Bookings
You have the option to set up a Cancellation Policy to allow or disallow clients to cancel bookings. You can limit the amount of time they have to cancel the booking by using the drop-down bar.
Allow Clients to Reschedule Bookings
You have the option to set up a Reschedule Policy to allow or disallow clients to reschedule bookings. You can limit the amount of time they have to cancel the booking by using the drop-down bar.
5. Branding 🎨
Attached below is an image that shows what your online booking page would look like to clients:
About Me
The About Me section is displayed on the left-hand side of your booking page. This section helps new clients learn more about who you are and your background.
Confirmation Page Settings
We've added a default message that your clients will see on the confirmation page after successfully booking the appointment. Feel free to change it or customize your message.
Note: When clients have successfully booked, CoachVantage automatically sends an email confirmation containing the appointment details.
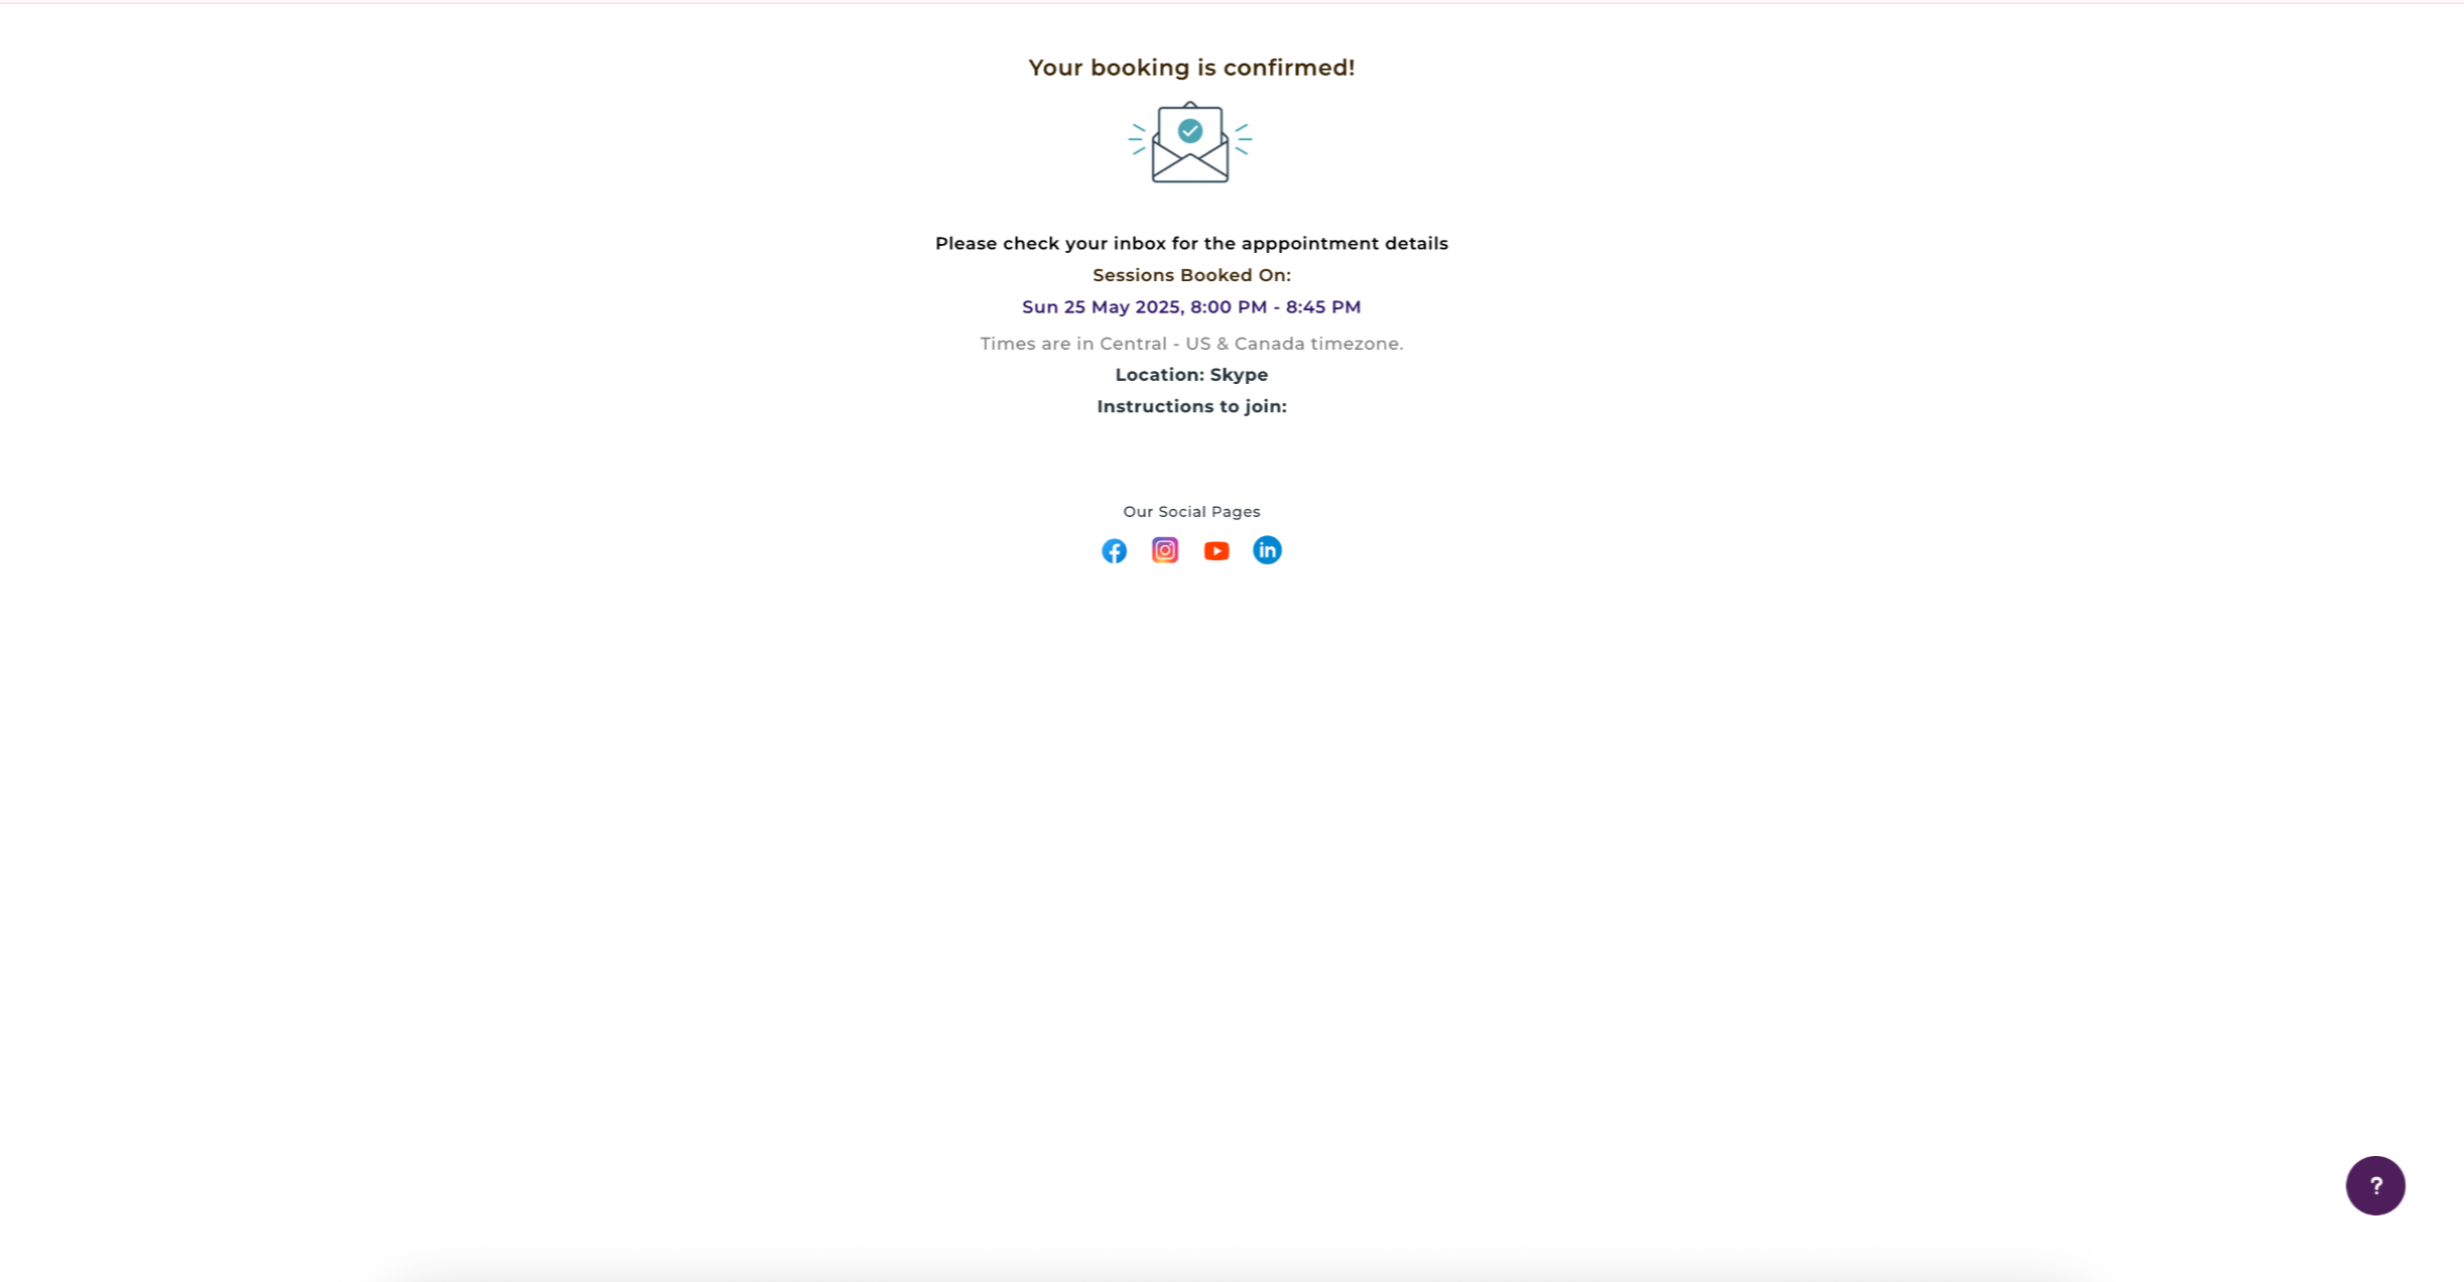
Display Your Social Pages' Icons 📲
If you select Yes, your social pages' icons (Facebook, Instagram, etc) will be displayed on the confirmation page.
Note: You must first configure your social pages' URL in My Profile > Business Details for the icons to be displayed.
Enable Social Sharing
If you select Yes, your clients can promote your event on their social pages after they have signed up for your event.
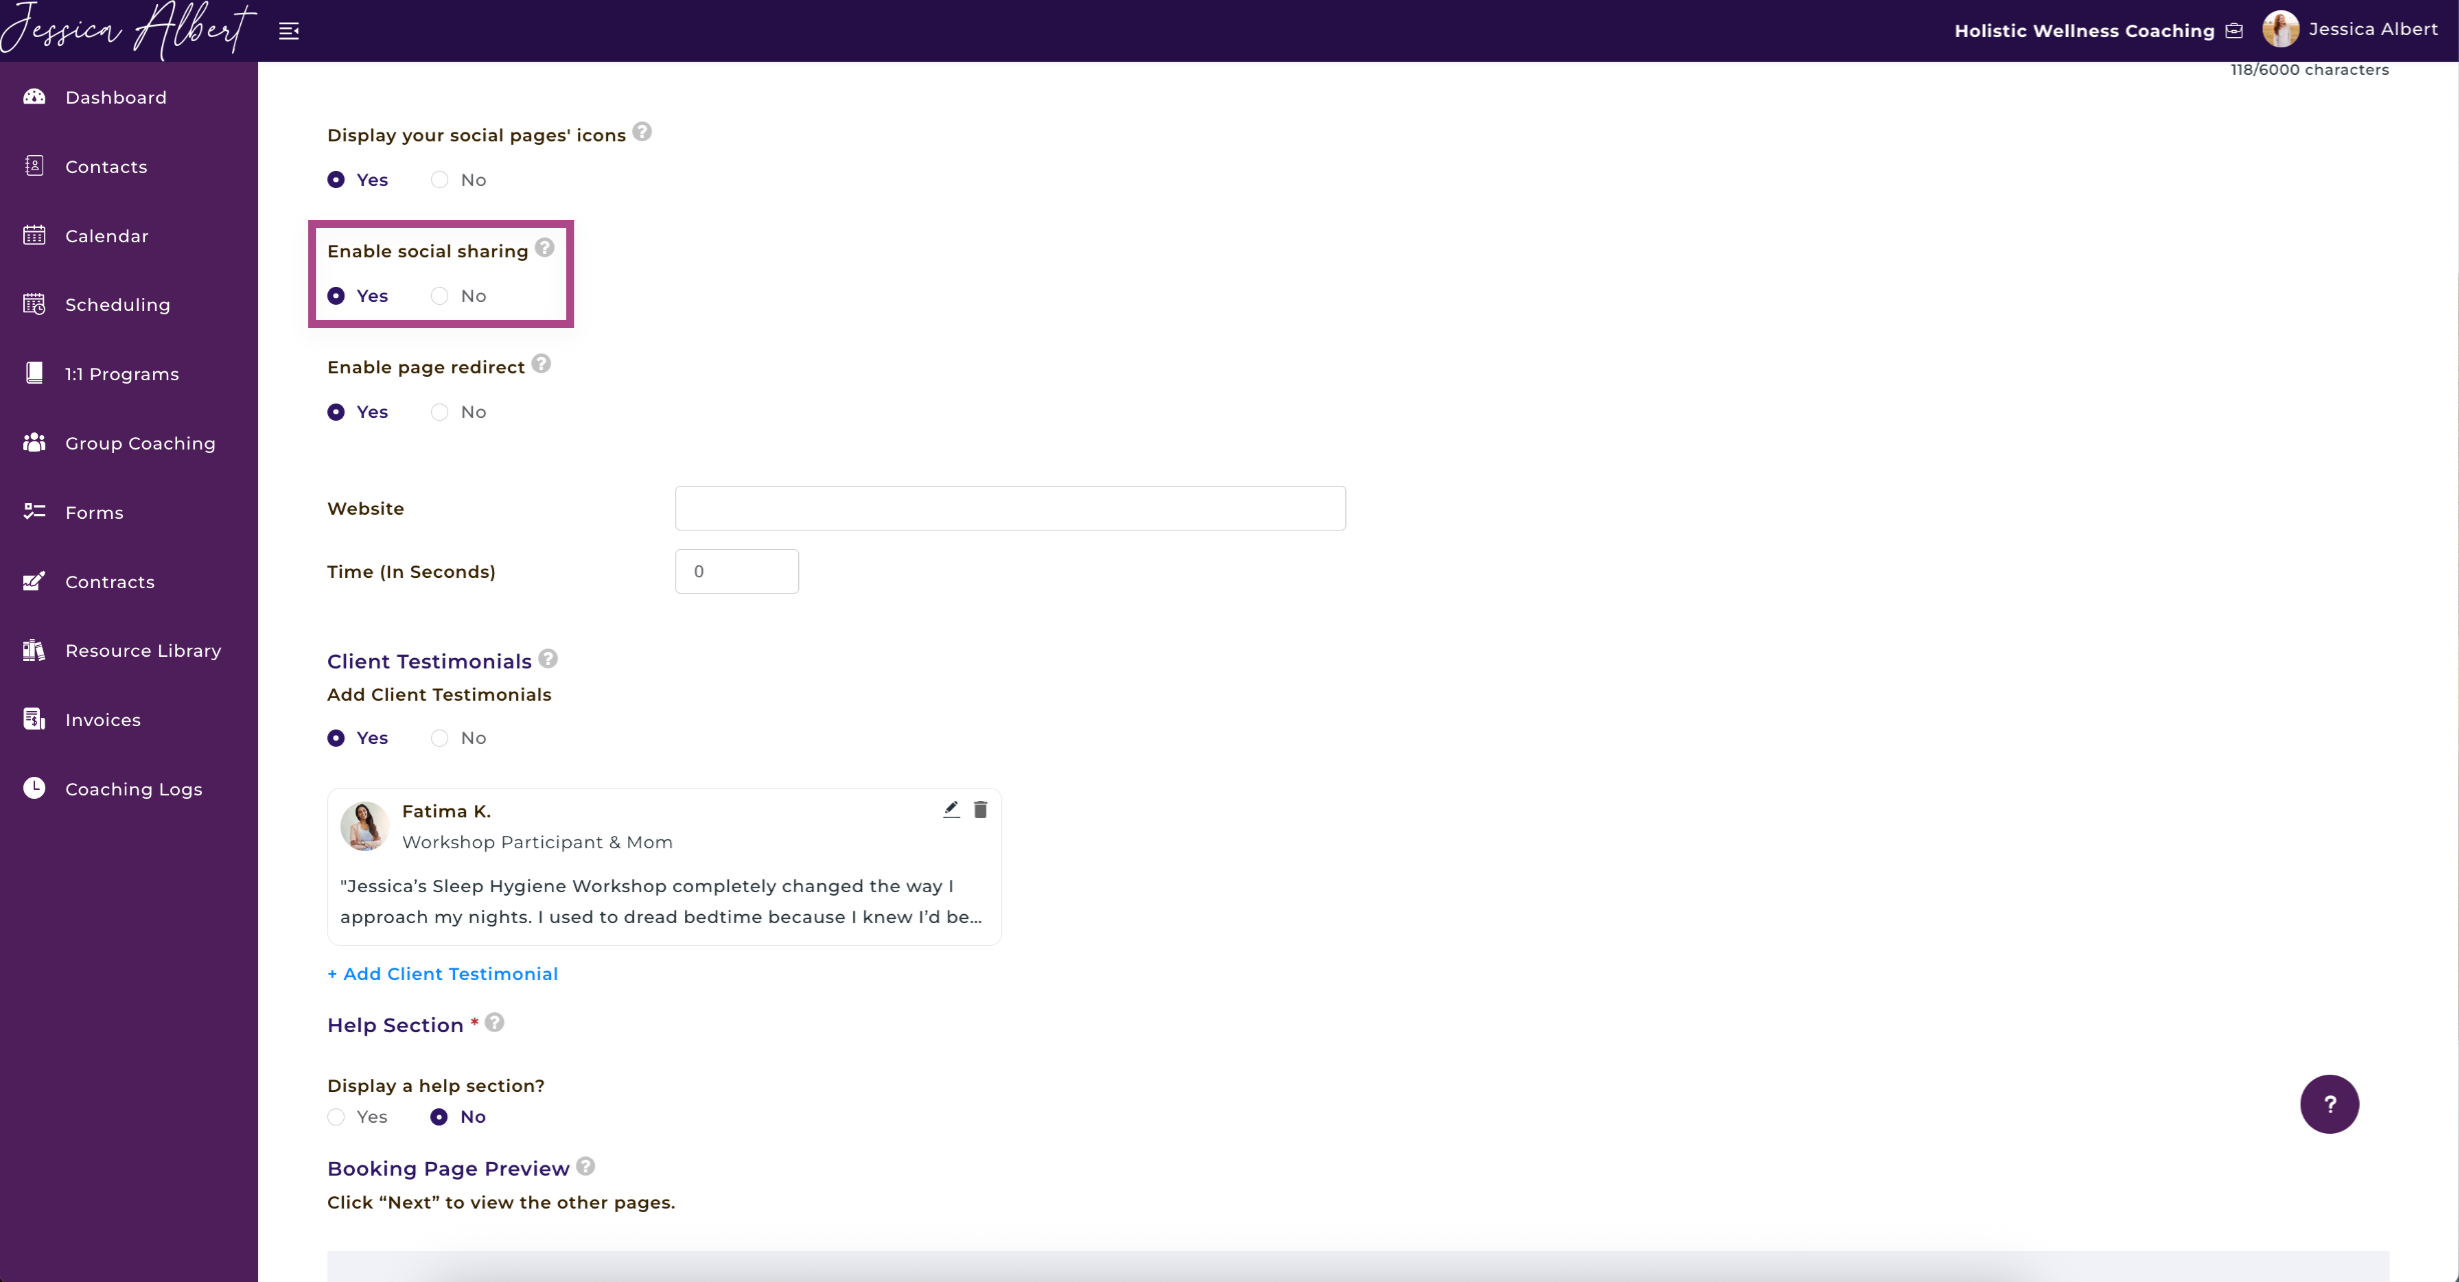
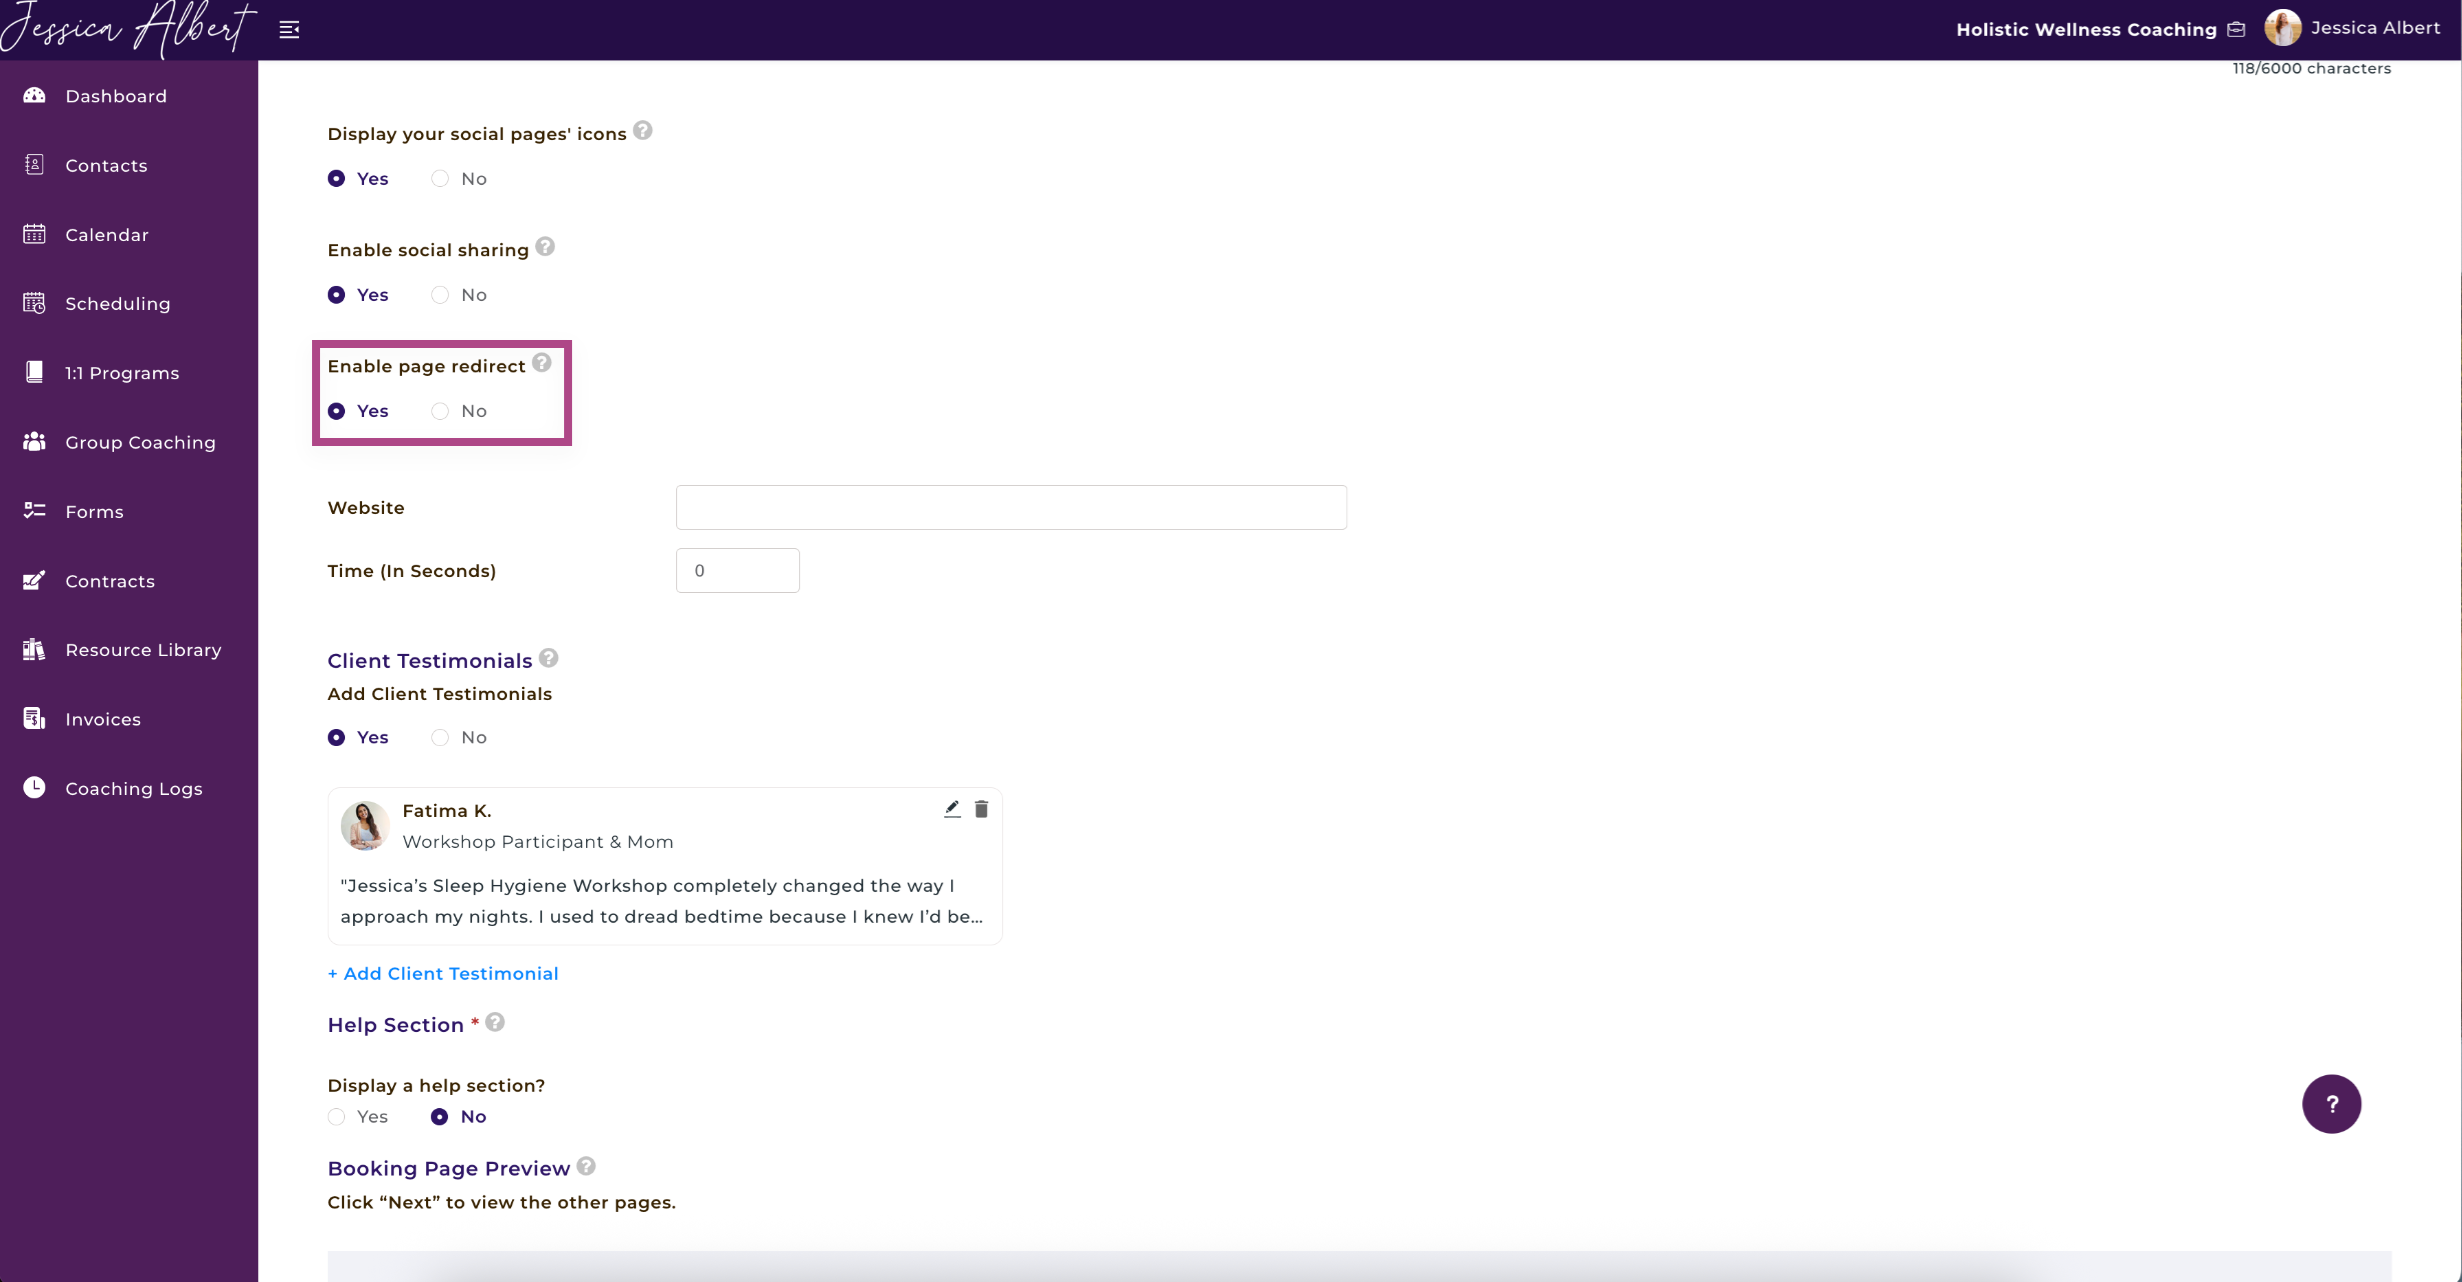
Enable Page Redirect
If you select Yes, you can automatically redirect clients to another web page (such as return to your website or a custom thank you page) from the confirmation page.
Simply enter the URL of the web page and set the time (in seconds) for auto-redirect.
Tip: You'll want to give your clients sufficient time to read the messages on the confirmation page, so be sure to set sufficient time before the redirection.
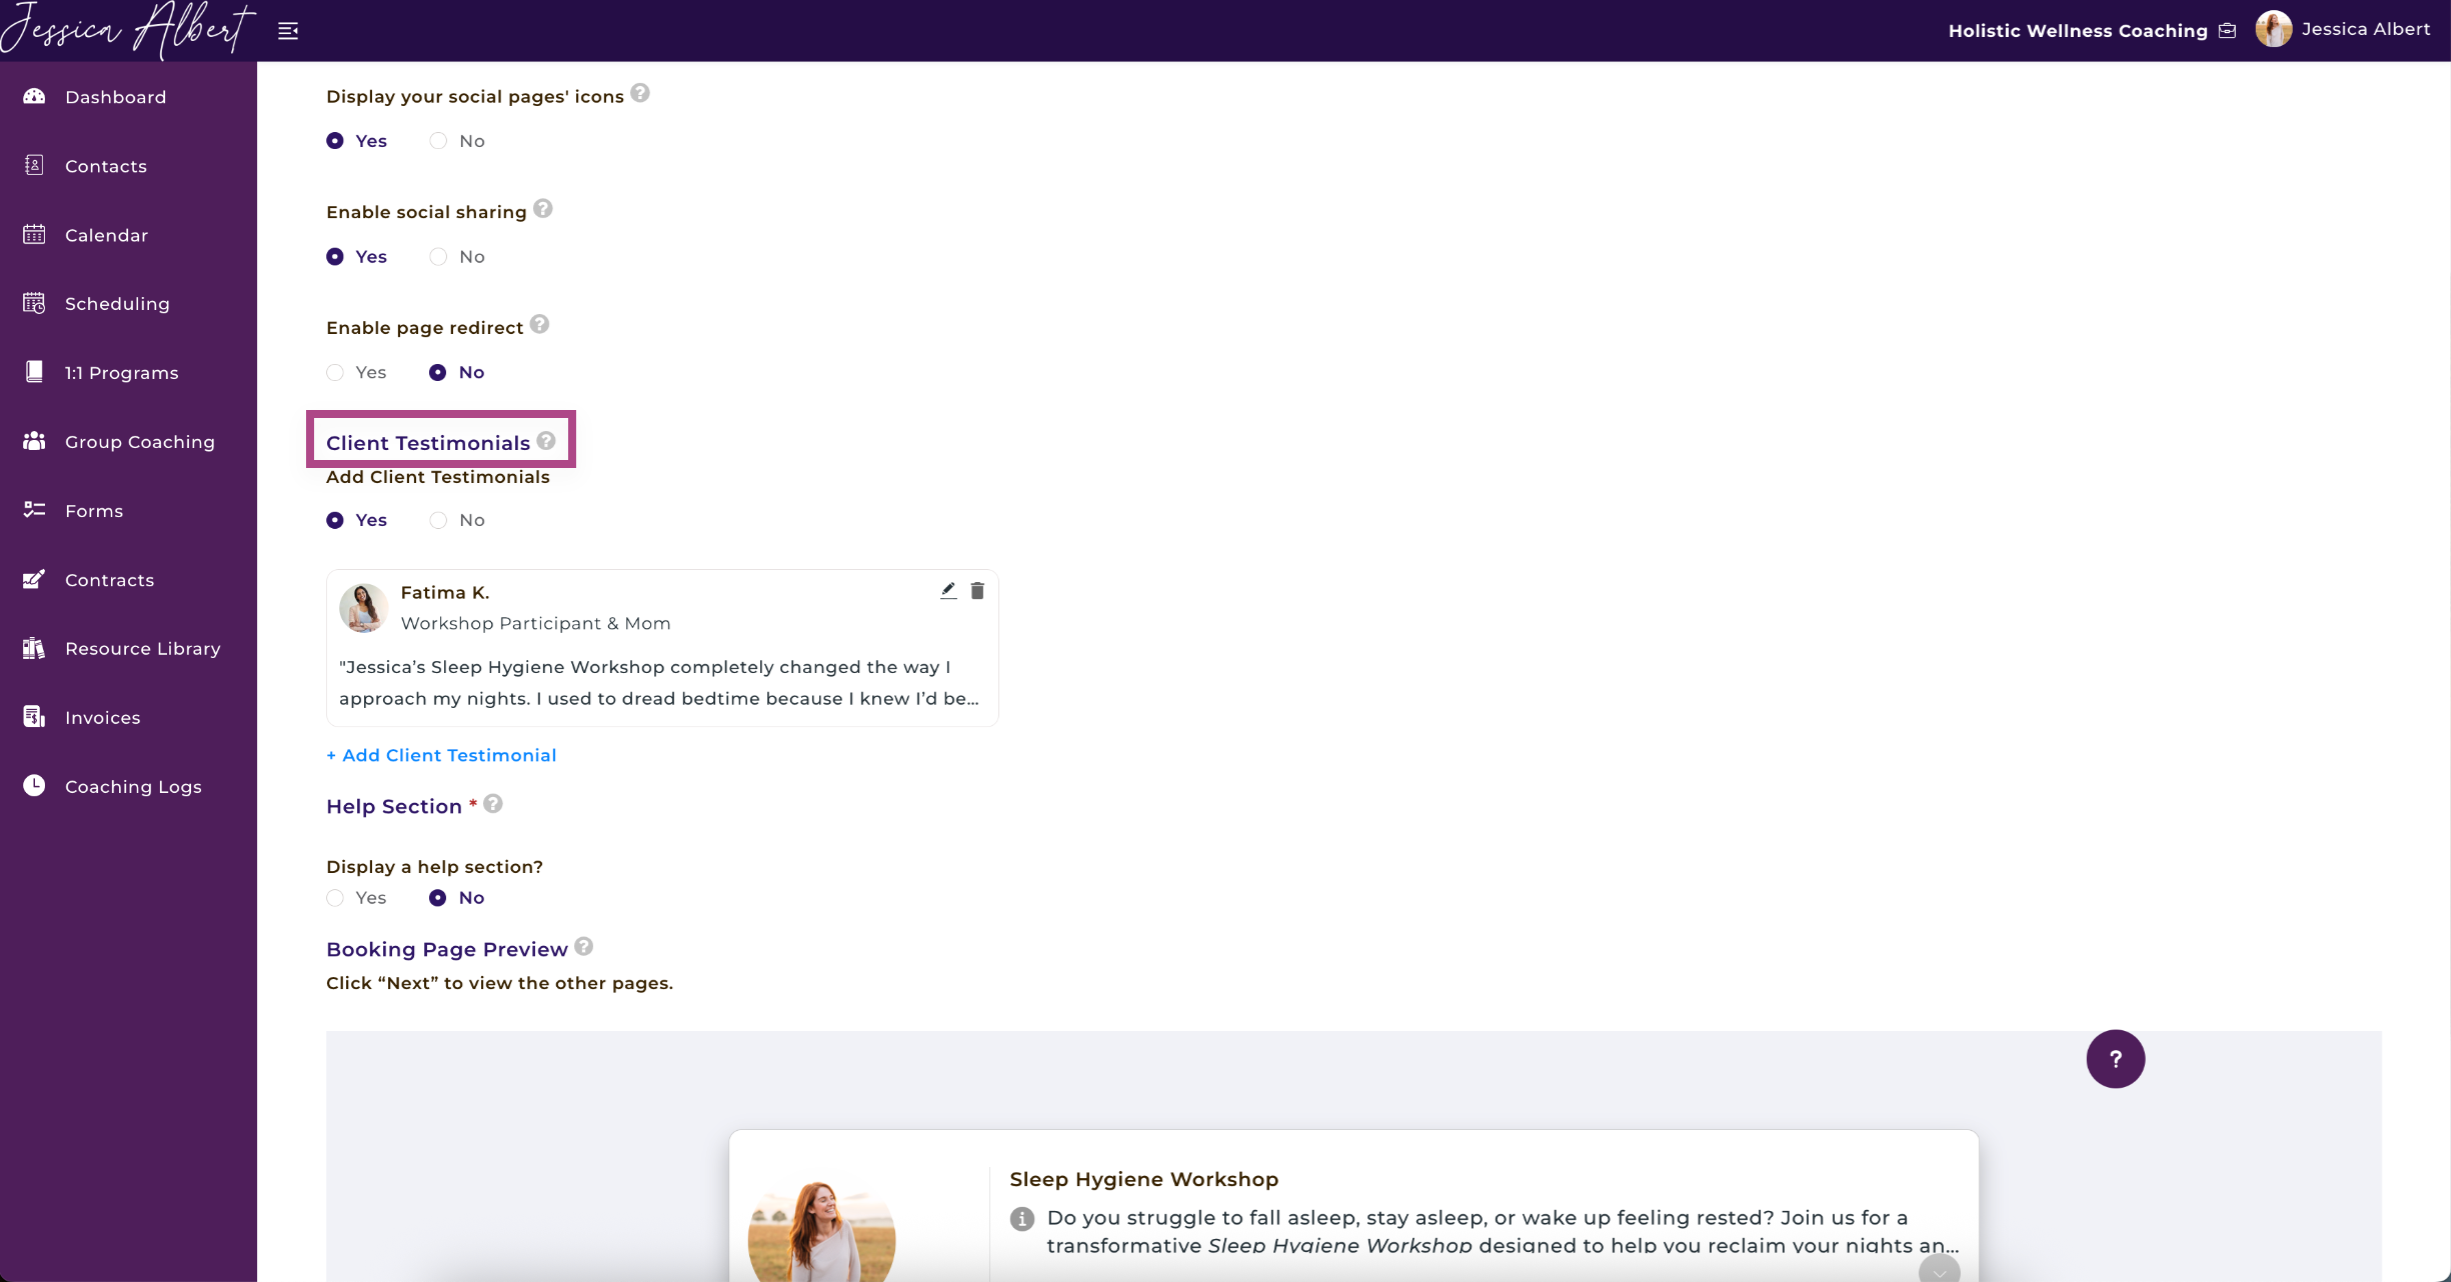
Client Testimonials 🗣️
You can add up to 5 client testimonials.
Tip: Client testimonials are great for providing honest, unbiased feedback about your services, from satisfied clients! Please be mindful about your client confidentiality and ensure that you have obtained their permission to use their name and/or other details.
Booking Page Preview 📖
The image below is a preview of what your online booking page looks like when published.
For more details on what your online booking page looks like to clients, refer to this article: What Does My Booking Page Look Like to Clients?