Contracts Feature Overview
Contracts Feature Overview
To get to the Contracts Page, click Contracts on the left menu.
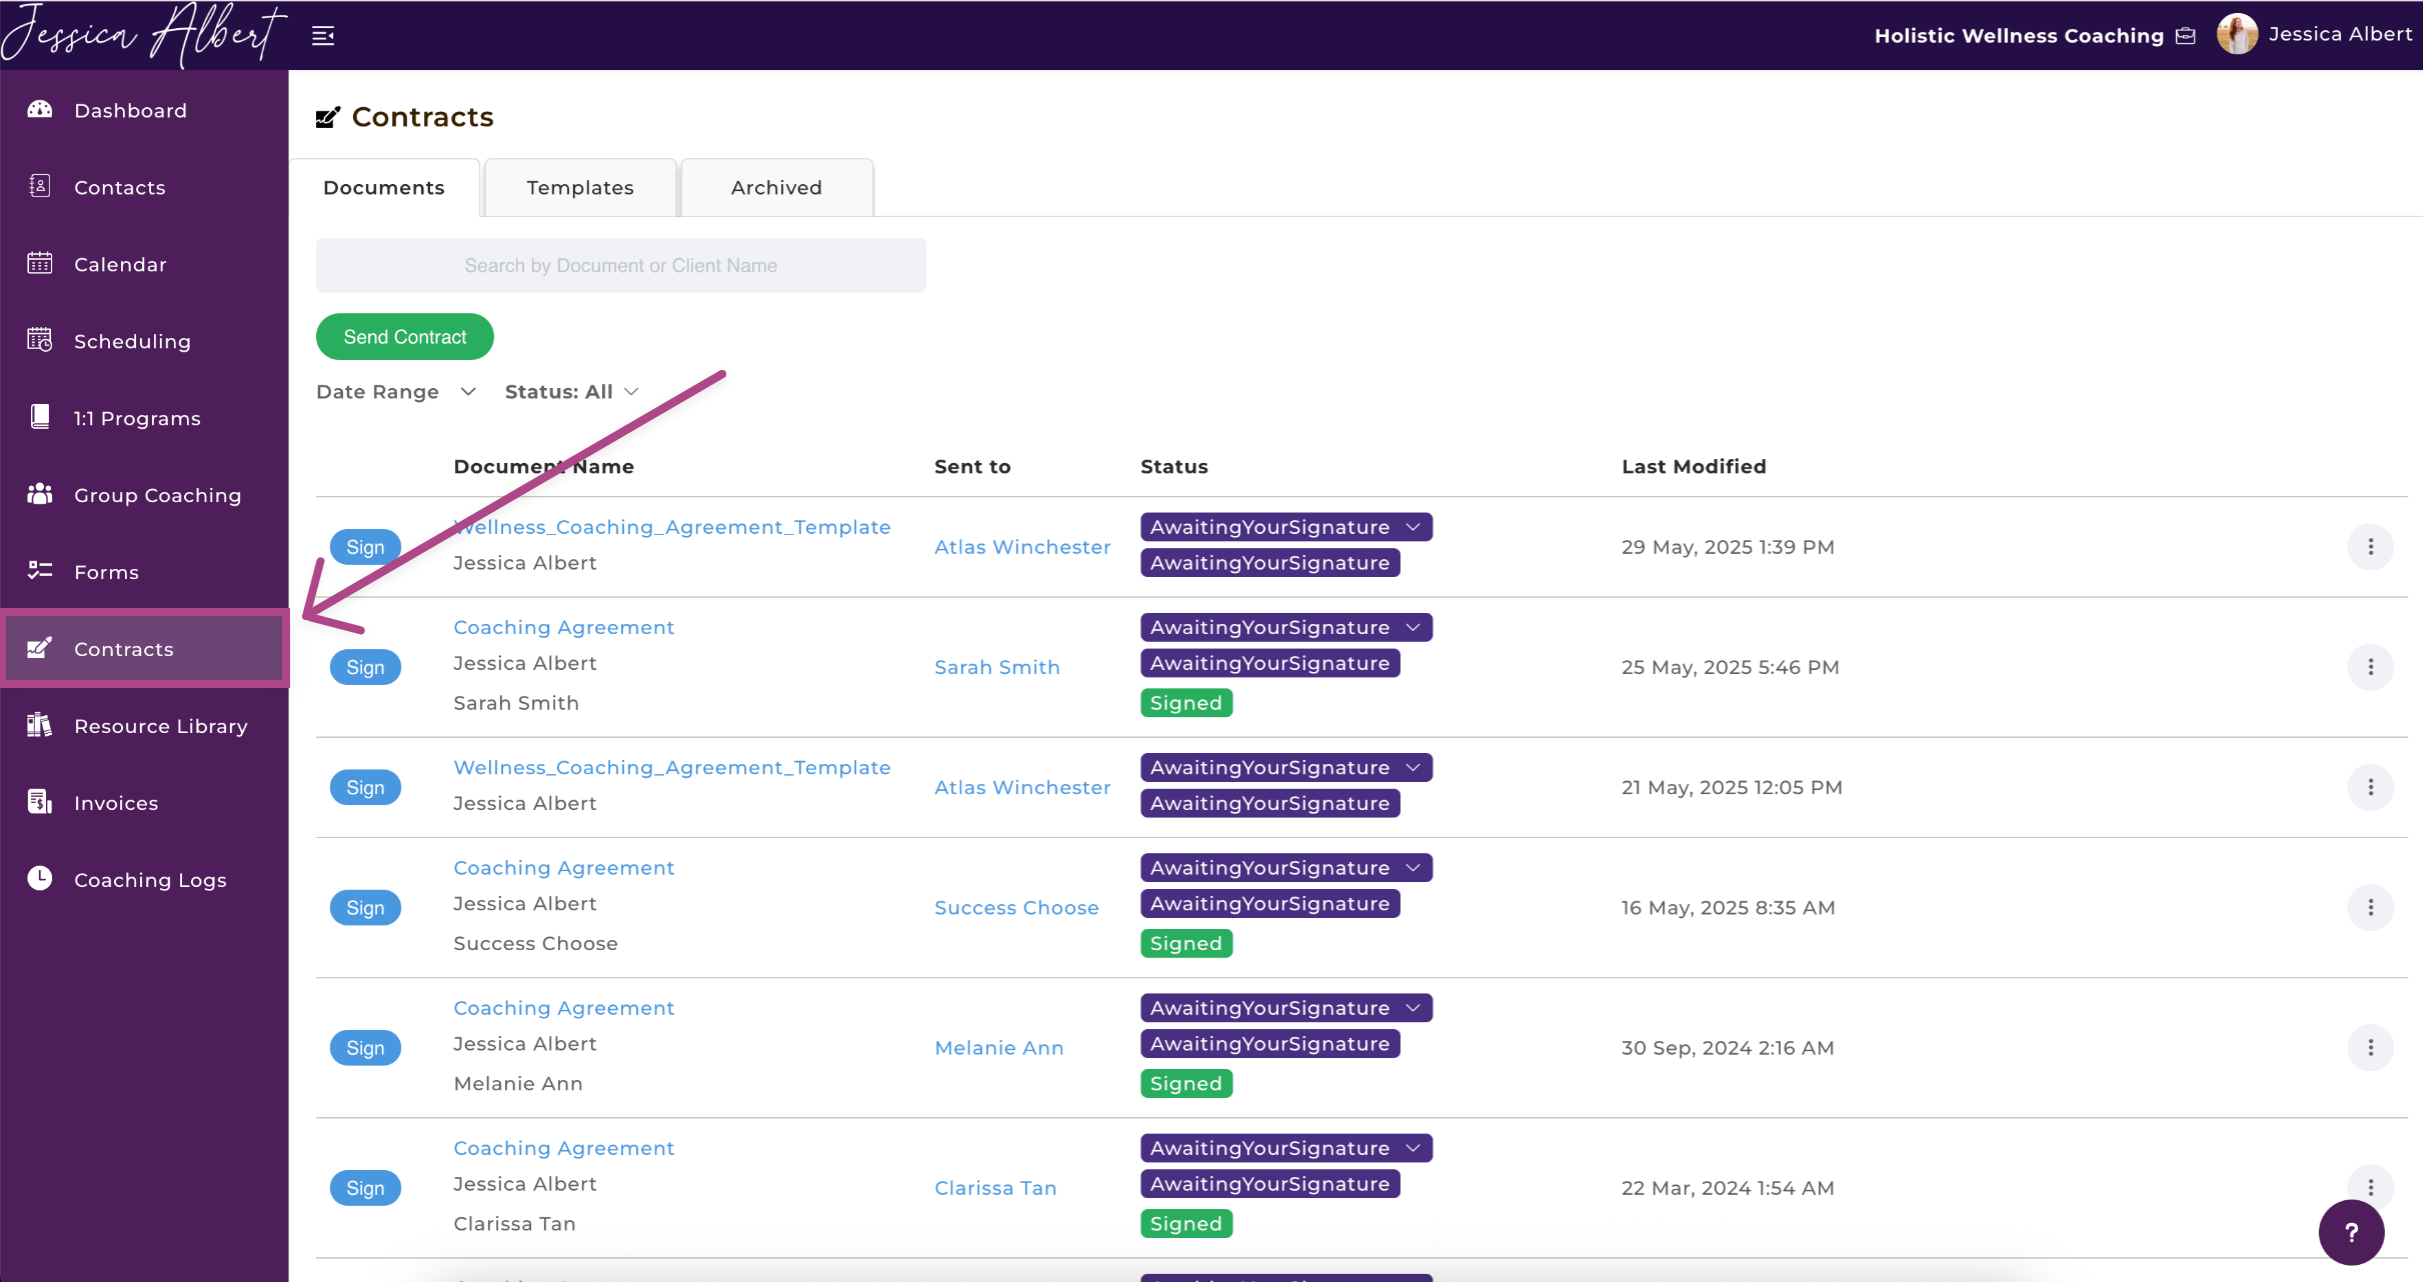
On the Contracts page, you'll see:
Contract Signature and Template Limits 🖊️
Depending on the CoachVantage plan that you are subscribed to, there are limits on the number of contract e-signature requests and the number of contract templates that you can store in your account.
Note: CoachVantage does not provide pre-written or legal contract templates. The Contract Templates section is simply a place for you to upload, store, and reuse your own contract documents.
You must upload your own contract files (created by you or your legal advisor) before sending them for e-signature.
Clarity Plan Limits:
- 4 Contract E-signature requests per month
- 2 Contract Templates
Aha! Plan Limits:
- Unlimited Contract E-signature requests per month
- 5 Contract Templates
In addition, you can embed contract documents to your coaching program sign-up pages so that clients can e-sign the document during the online sign-up workflow.
1. How to Look Up Contracts 🔎
1. Search Bar
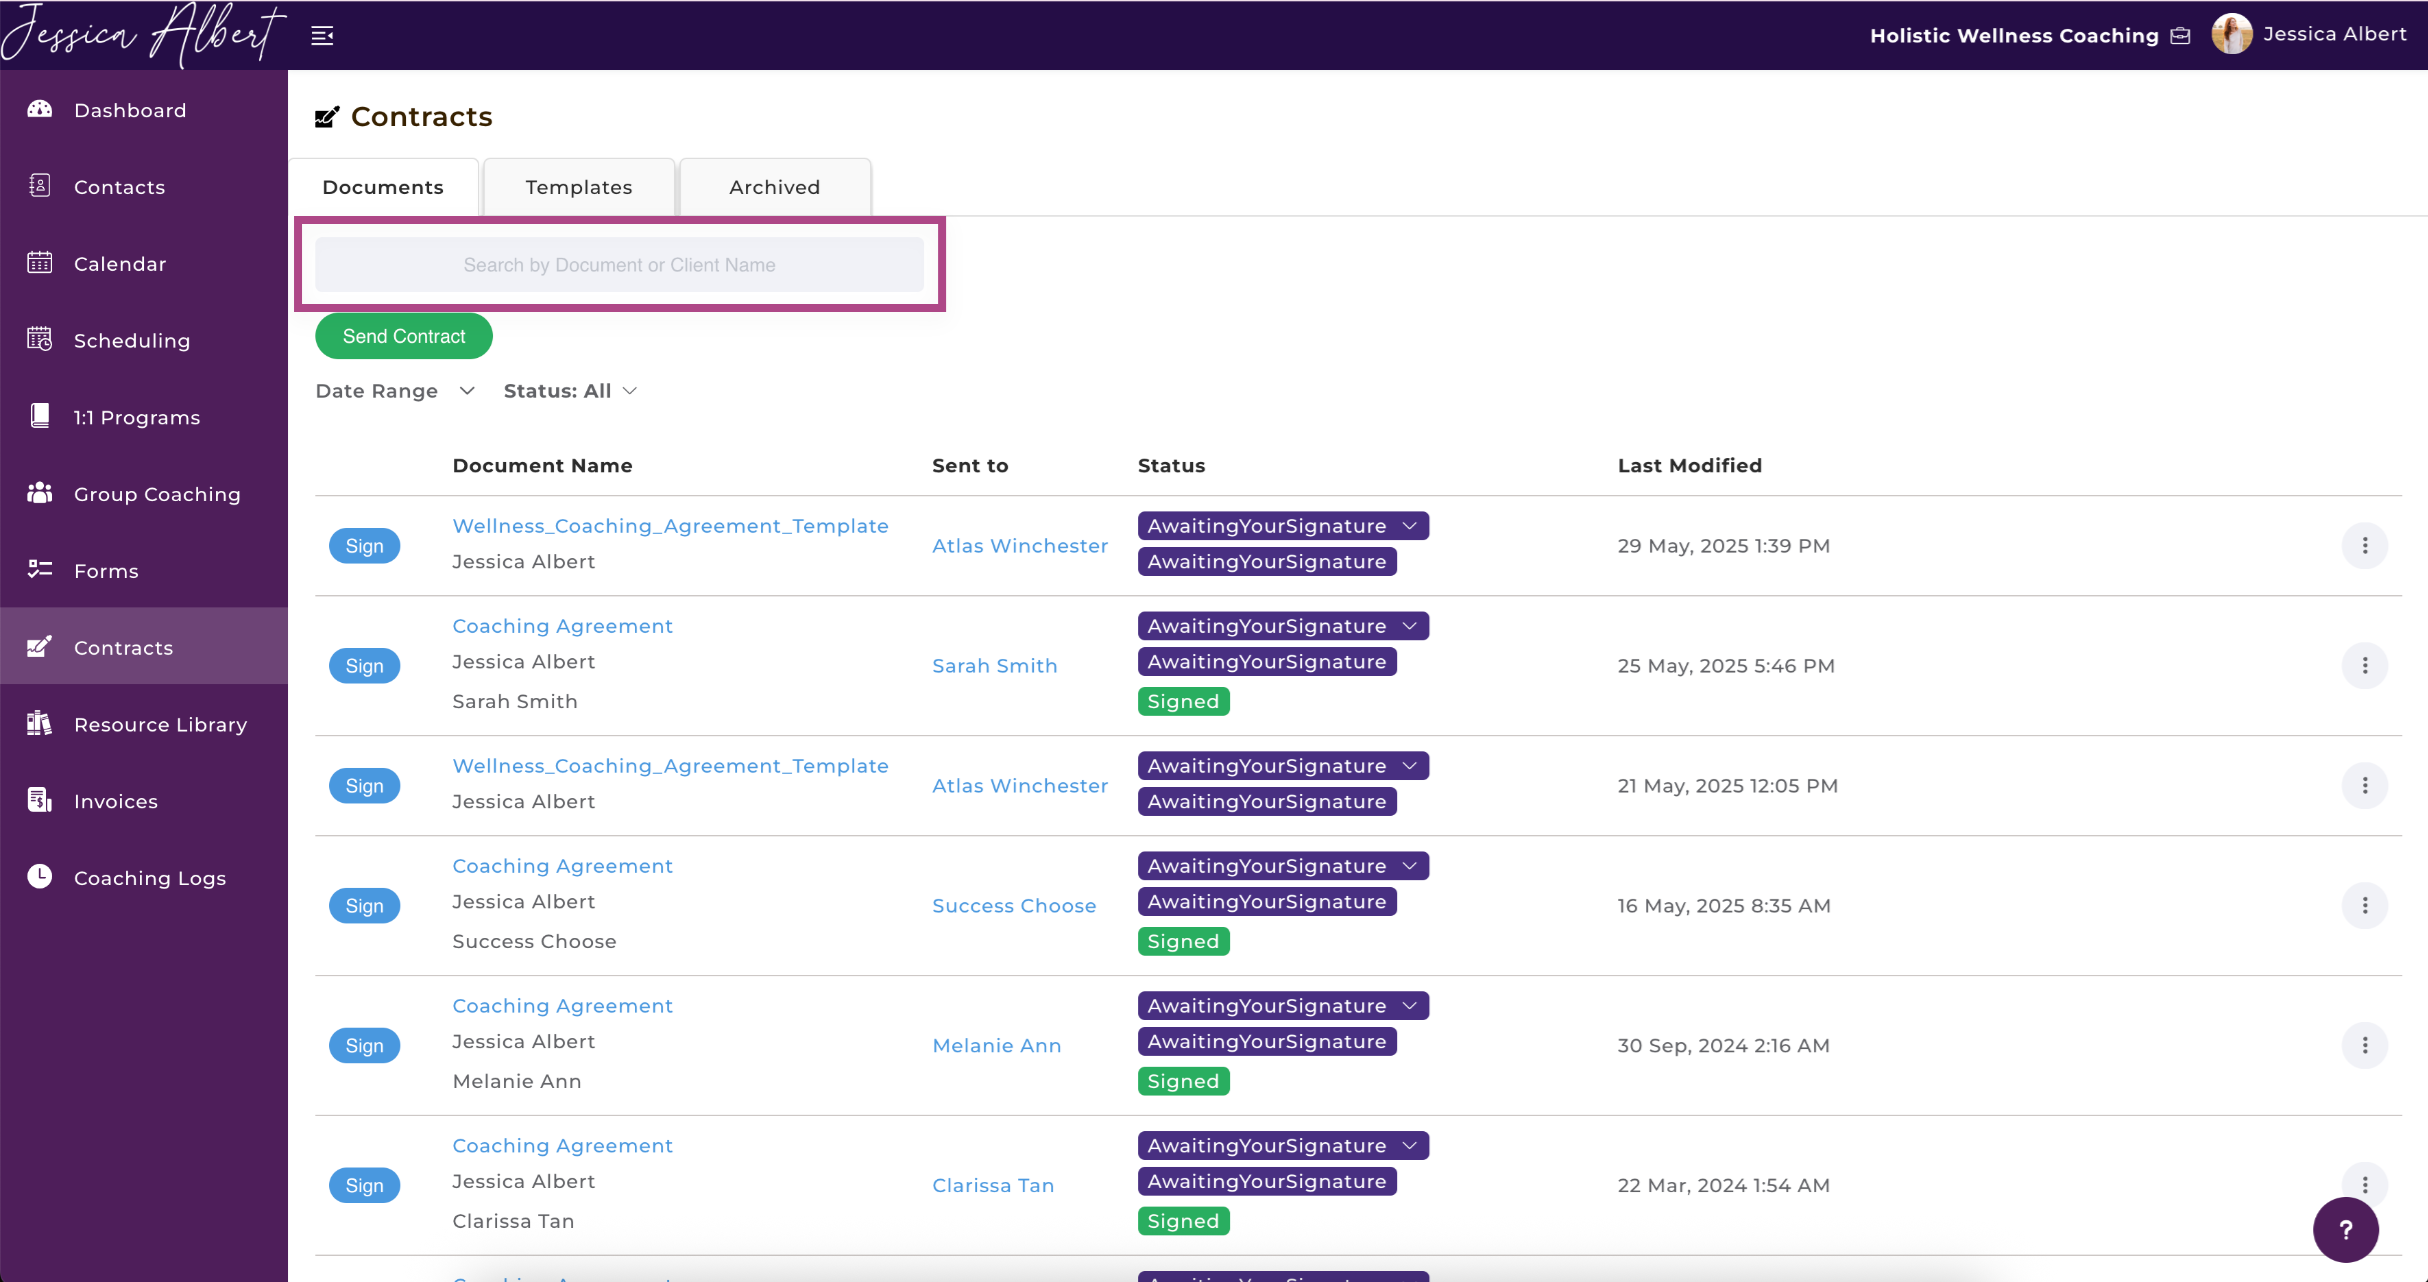
Enter the Document Name or Client Name in the search bar to search for a specific contract document or for documents sent to a specific client, respectively.
2. Date Range
Search for contract documents (Last modified date) according to a date range by selecting the desired start date and end date.
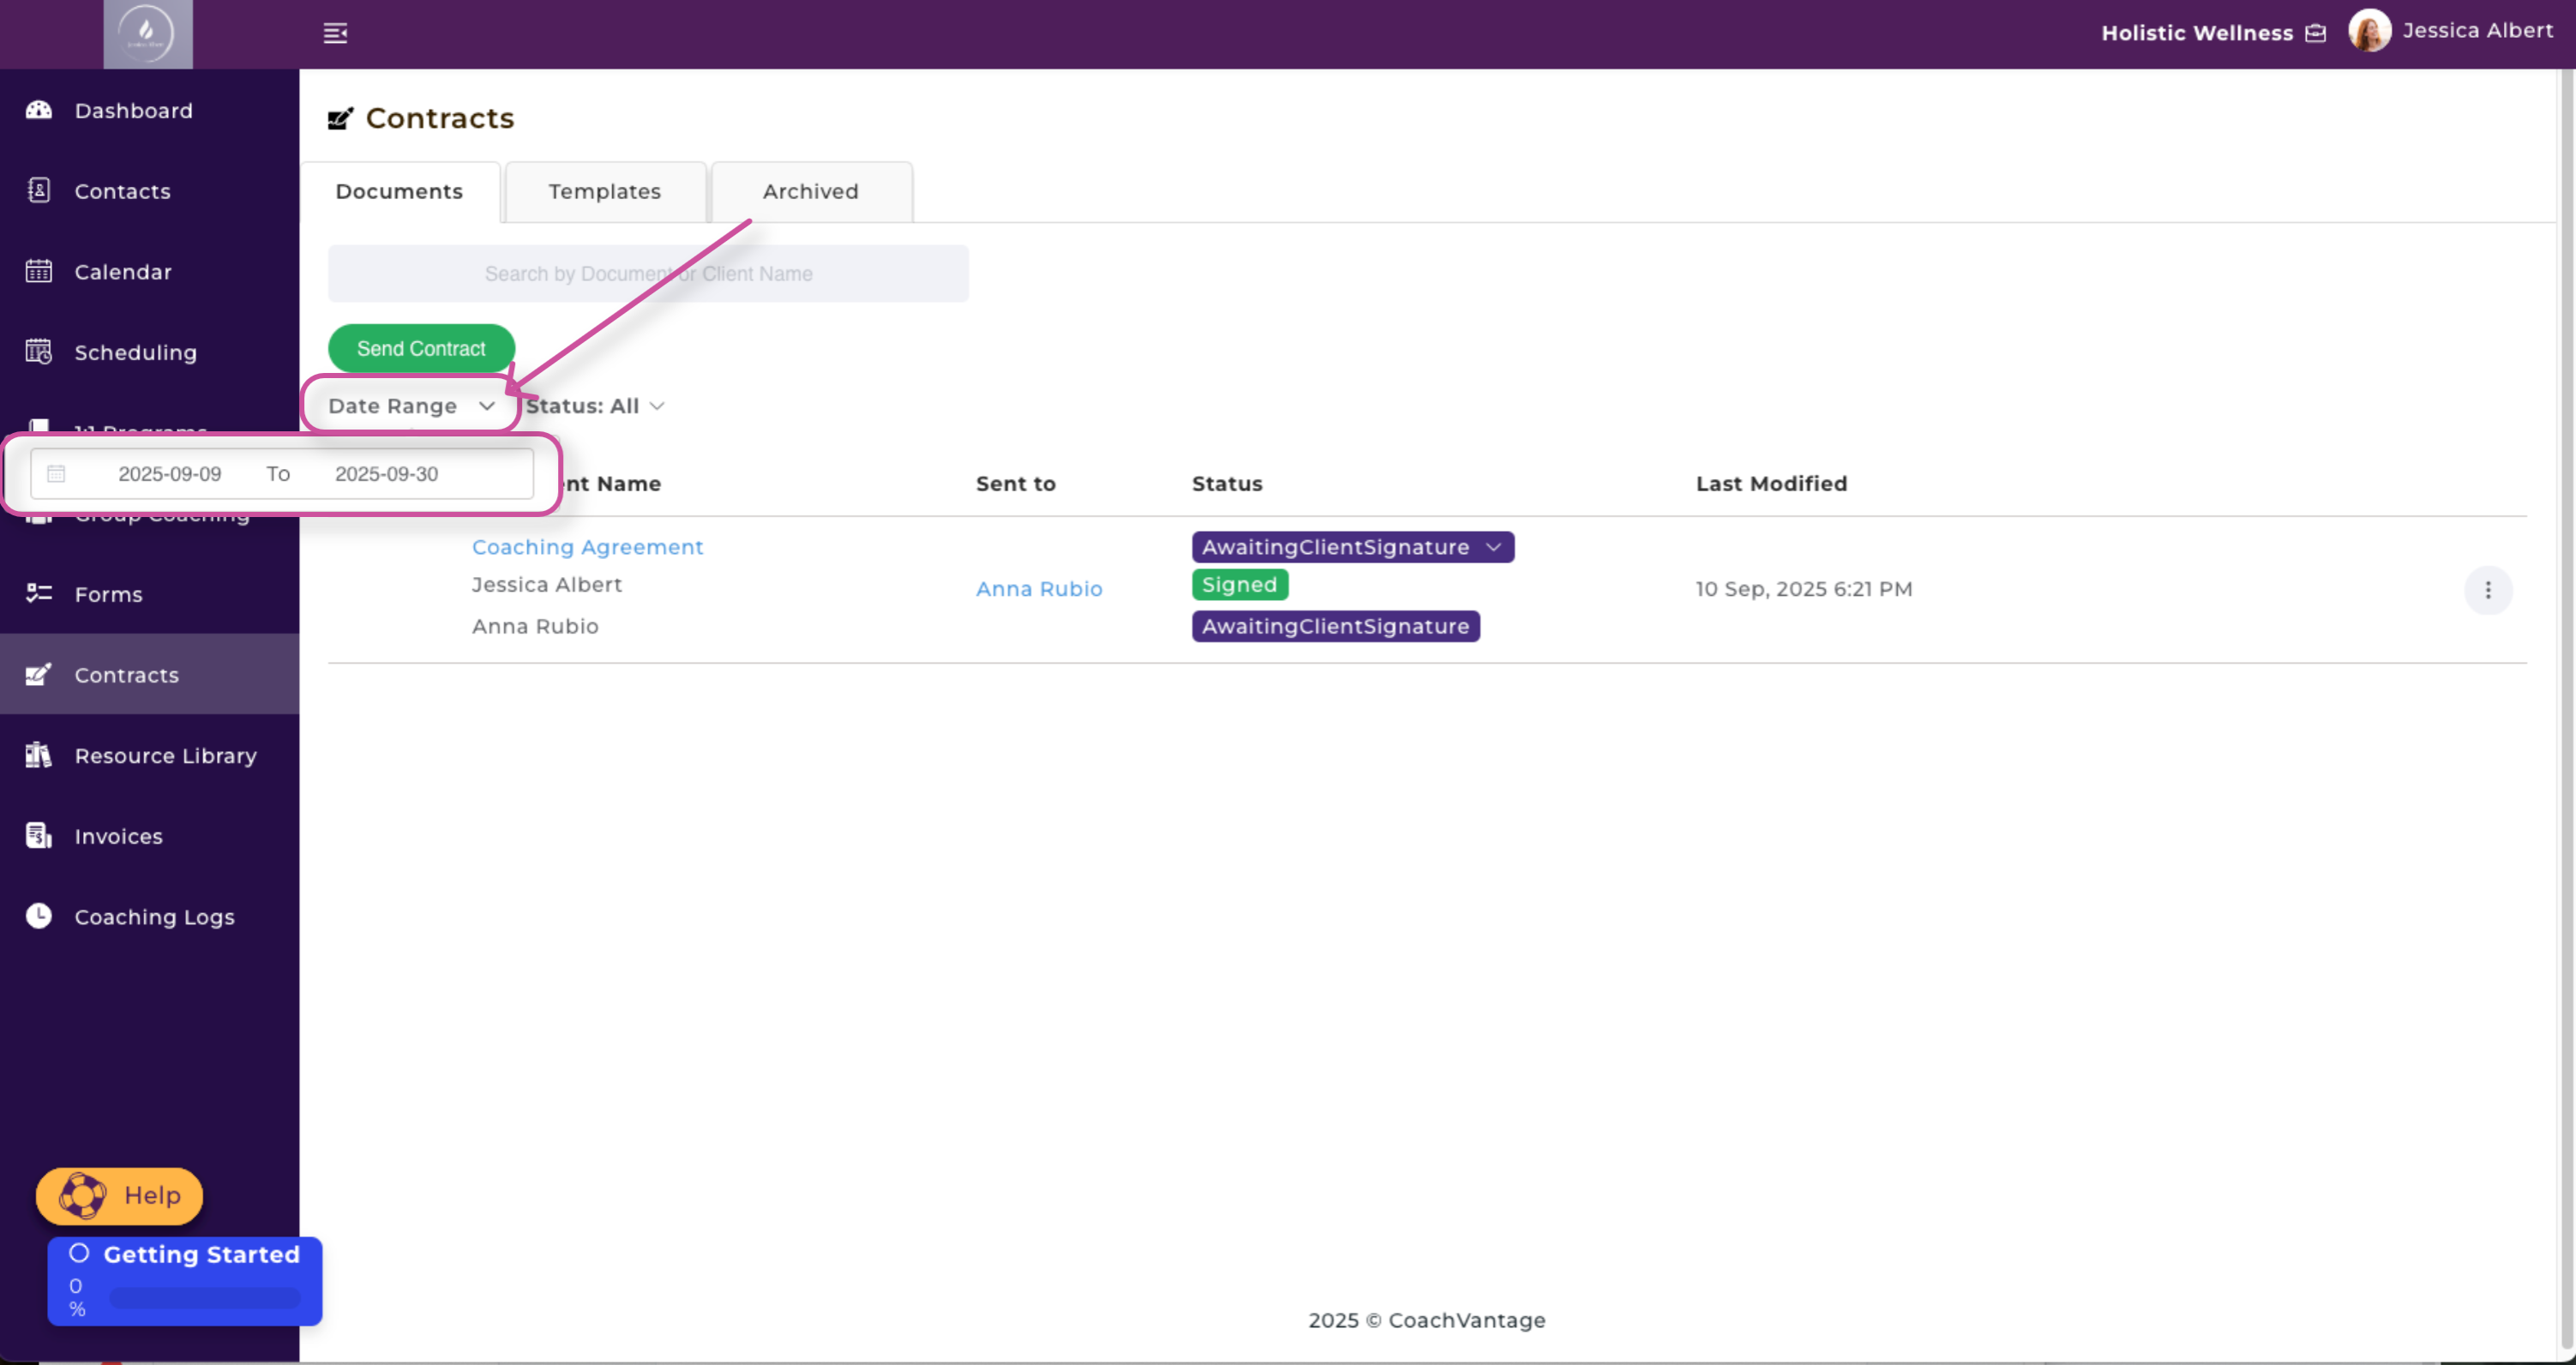
To clear the date range, simple select the X icon on the right-hand side of the date list.

3. Status
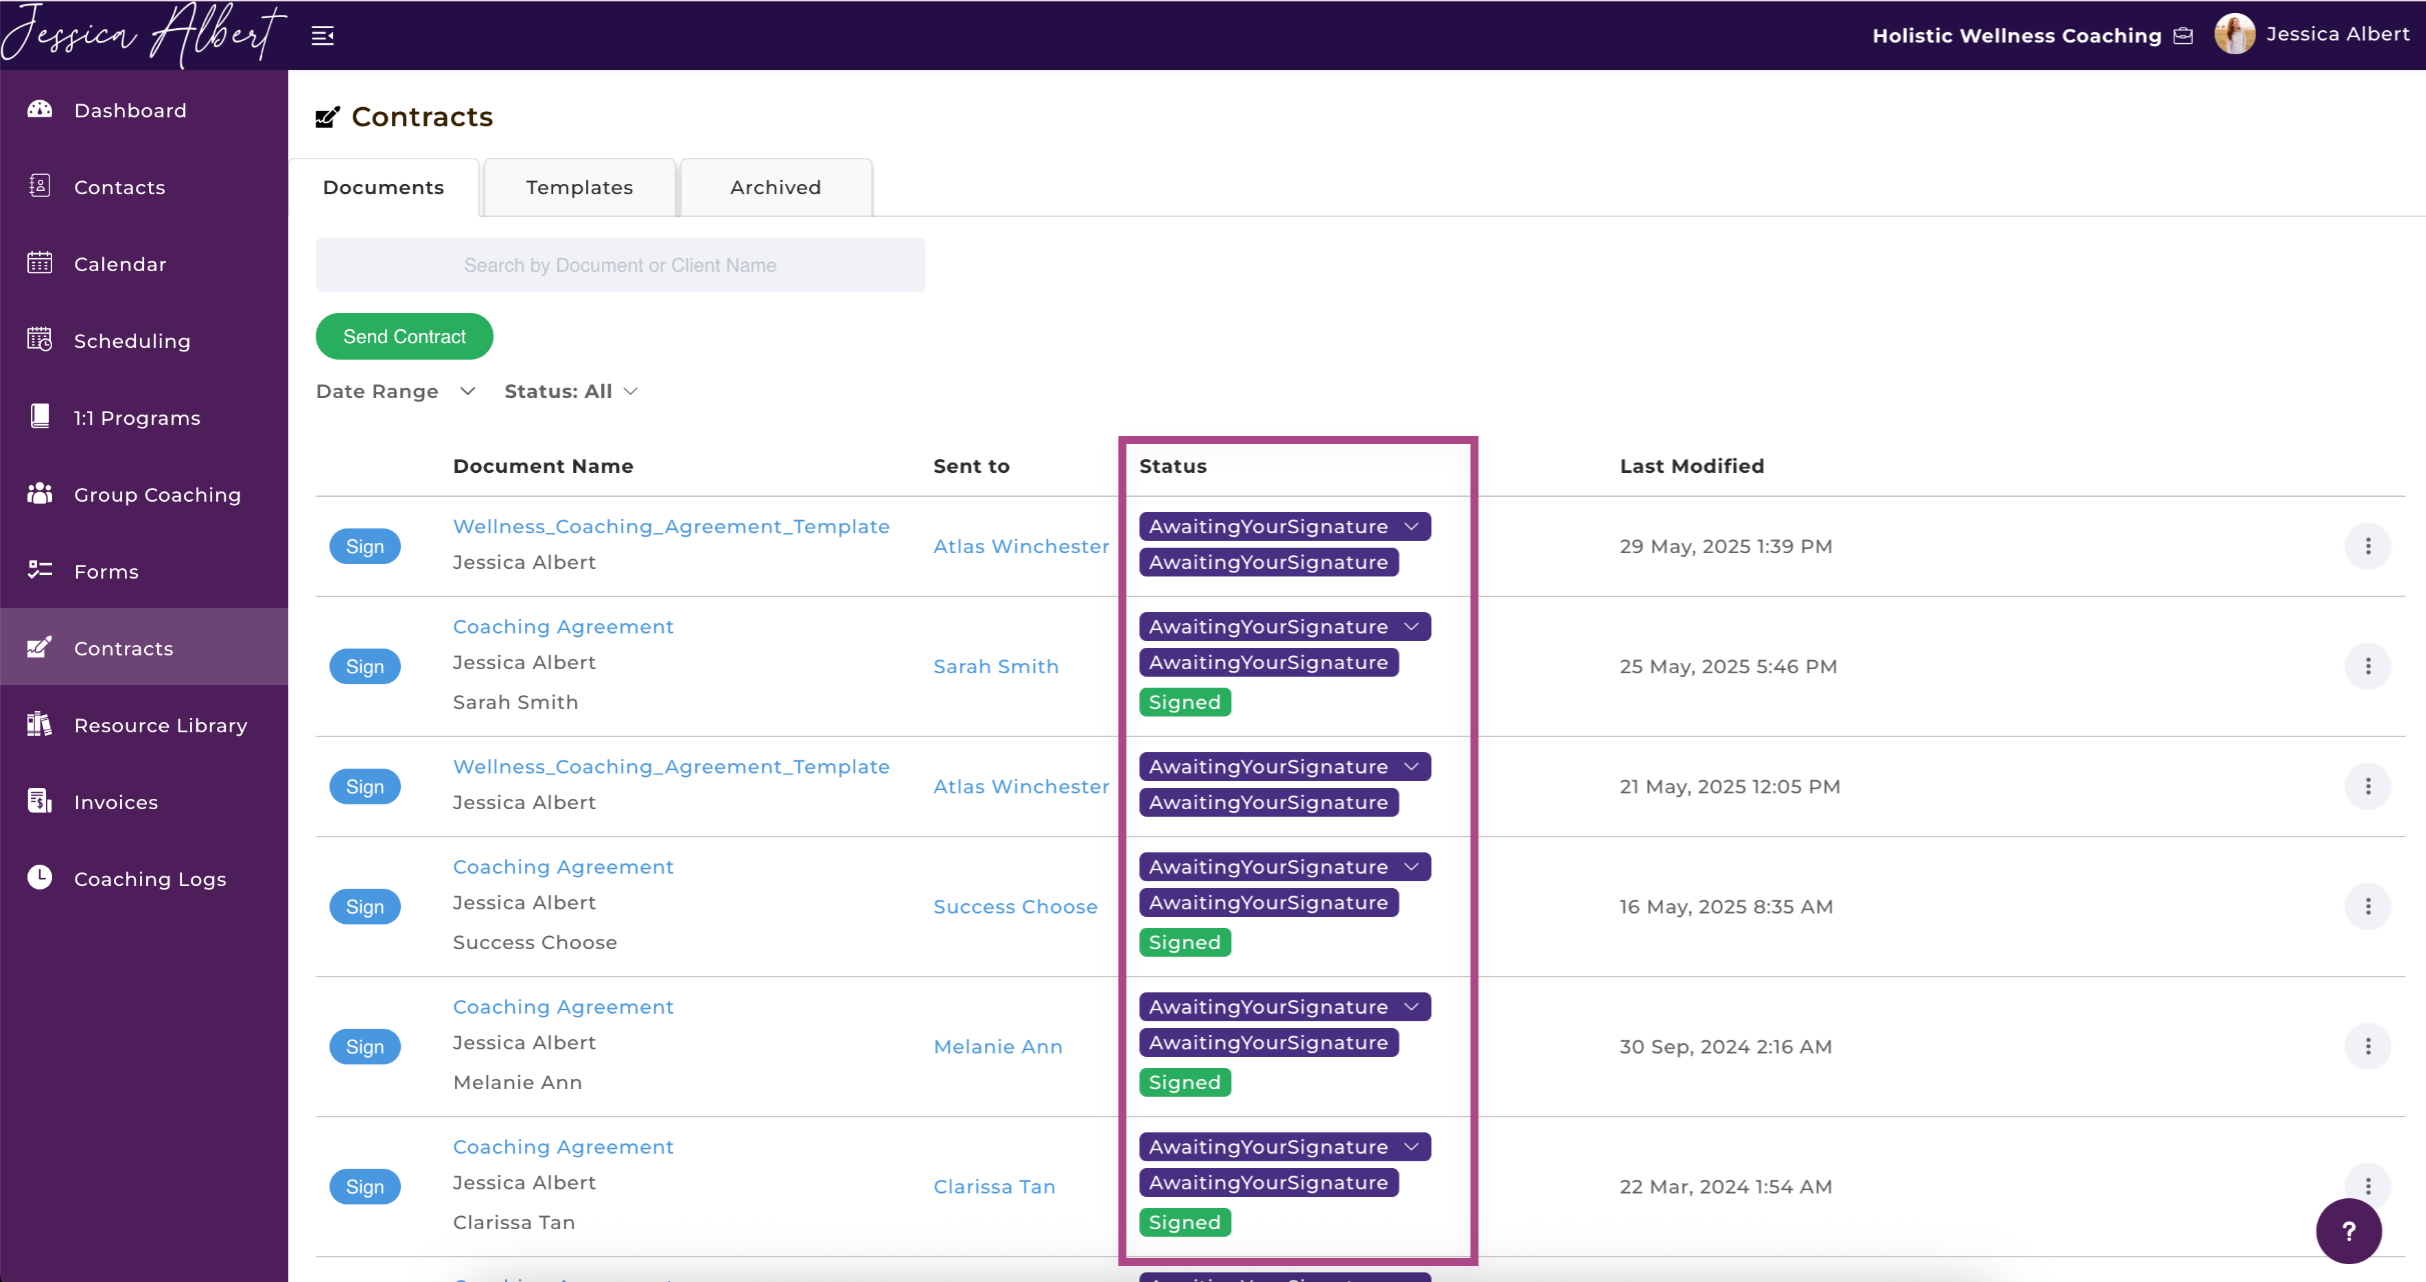
View contracts according to their status. Use the dropdown selector shown in the image above to select the status.
All refers to viewing all of the contracts that are completed, awaiting signatures, and out for signature.
Completed refers to documents where both parties, Coach and Client, have signed the document.
Awaiting Your Signature refers to documents that are pending your signature.
Out for Signature refers to documents that have been sent to clients and are pending their signature.
2. Sending Contracts to Clients 📧
You can send contracts by clicking the Send Contract button.
Refer to this article on How to Send Contracts to learn more.
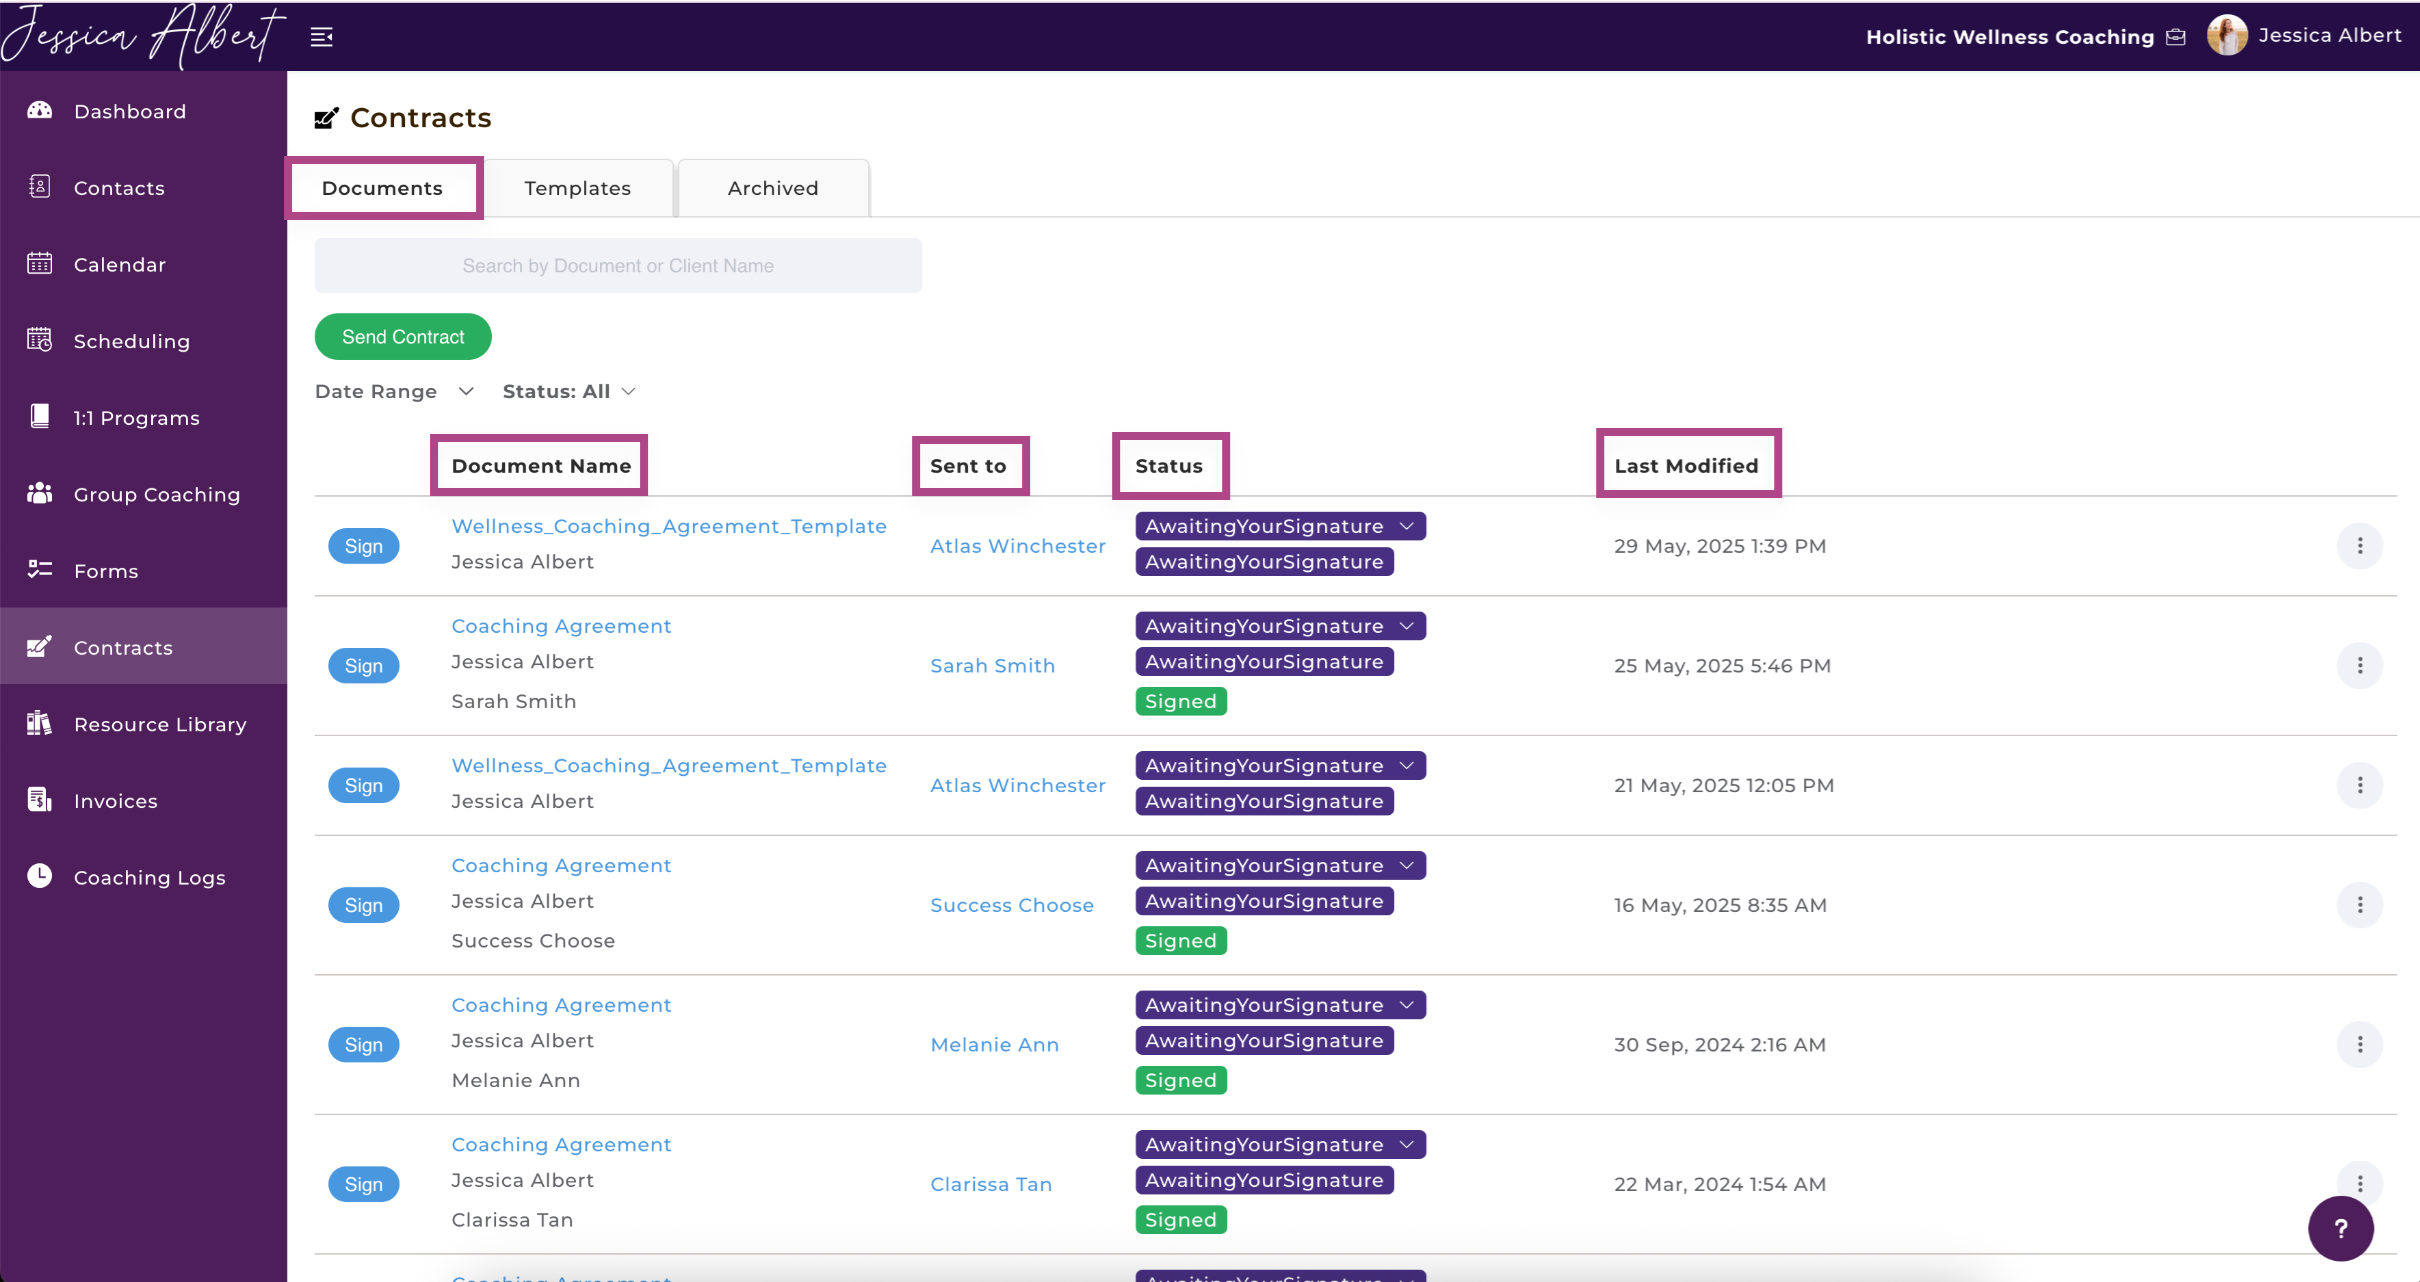
3. Documents Tab 🗂
Select the Documents tab to view contracts that have been sent to clients.
You'll be able to view Document Name, Sent To, Status and Last Modified.
Sign Contracts
You can sign contracts by clicking on the blue Sign button on the left of Document Names (see image below). It will open the document for you to add your e-signature and other information as needed in the relevant placeholders.
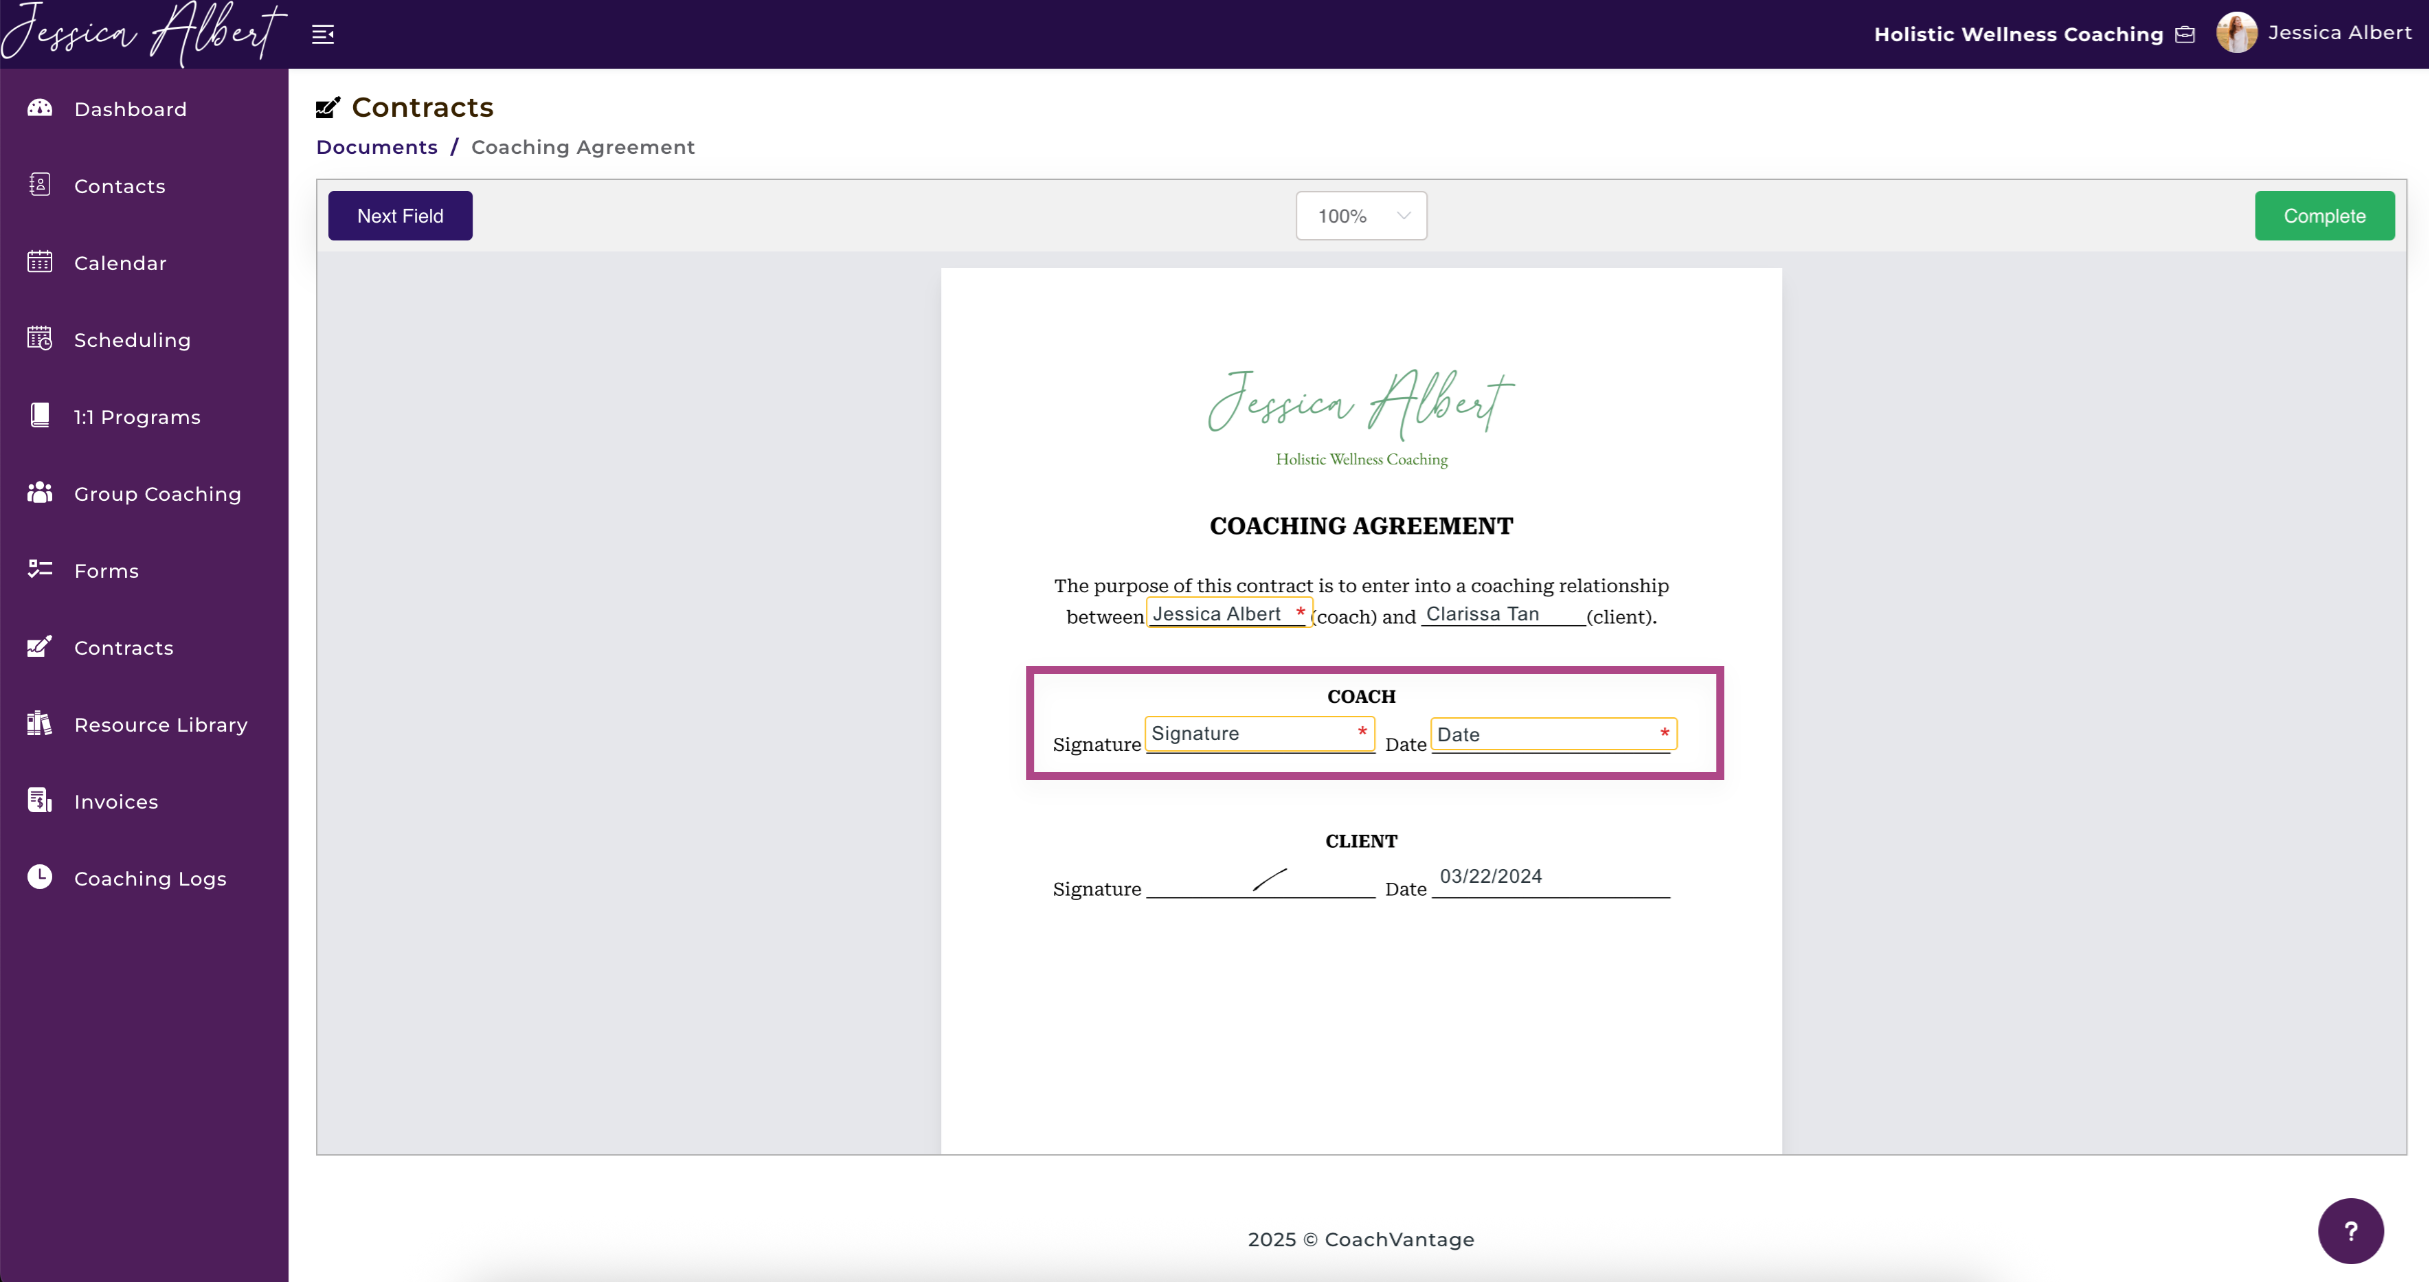
The placeholders that you need to complete as a Coach will be displayed to you for completion.
Note: The placeholders that must be completed by respective parties are identified with a red asterisk.
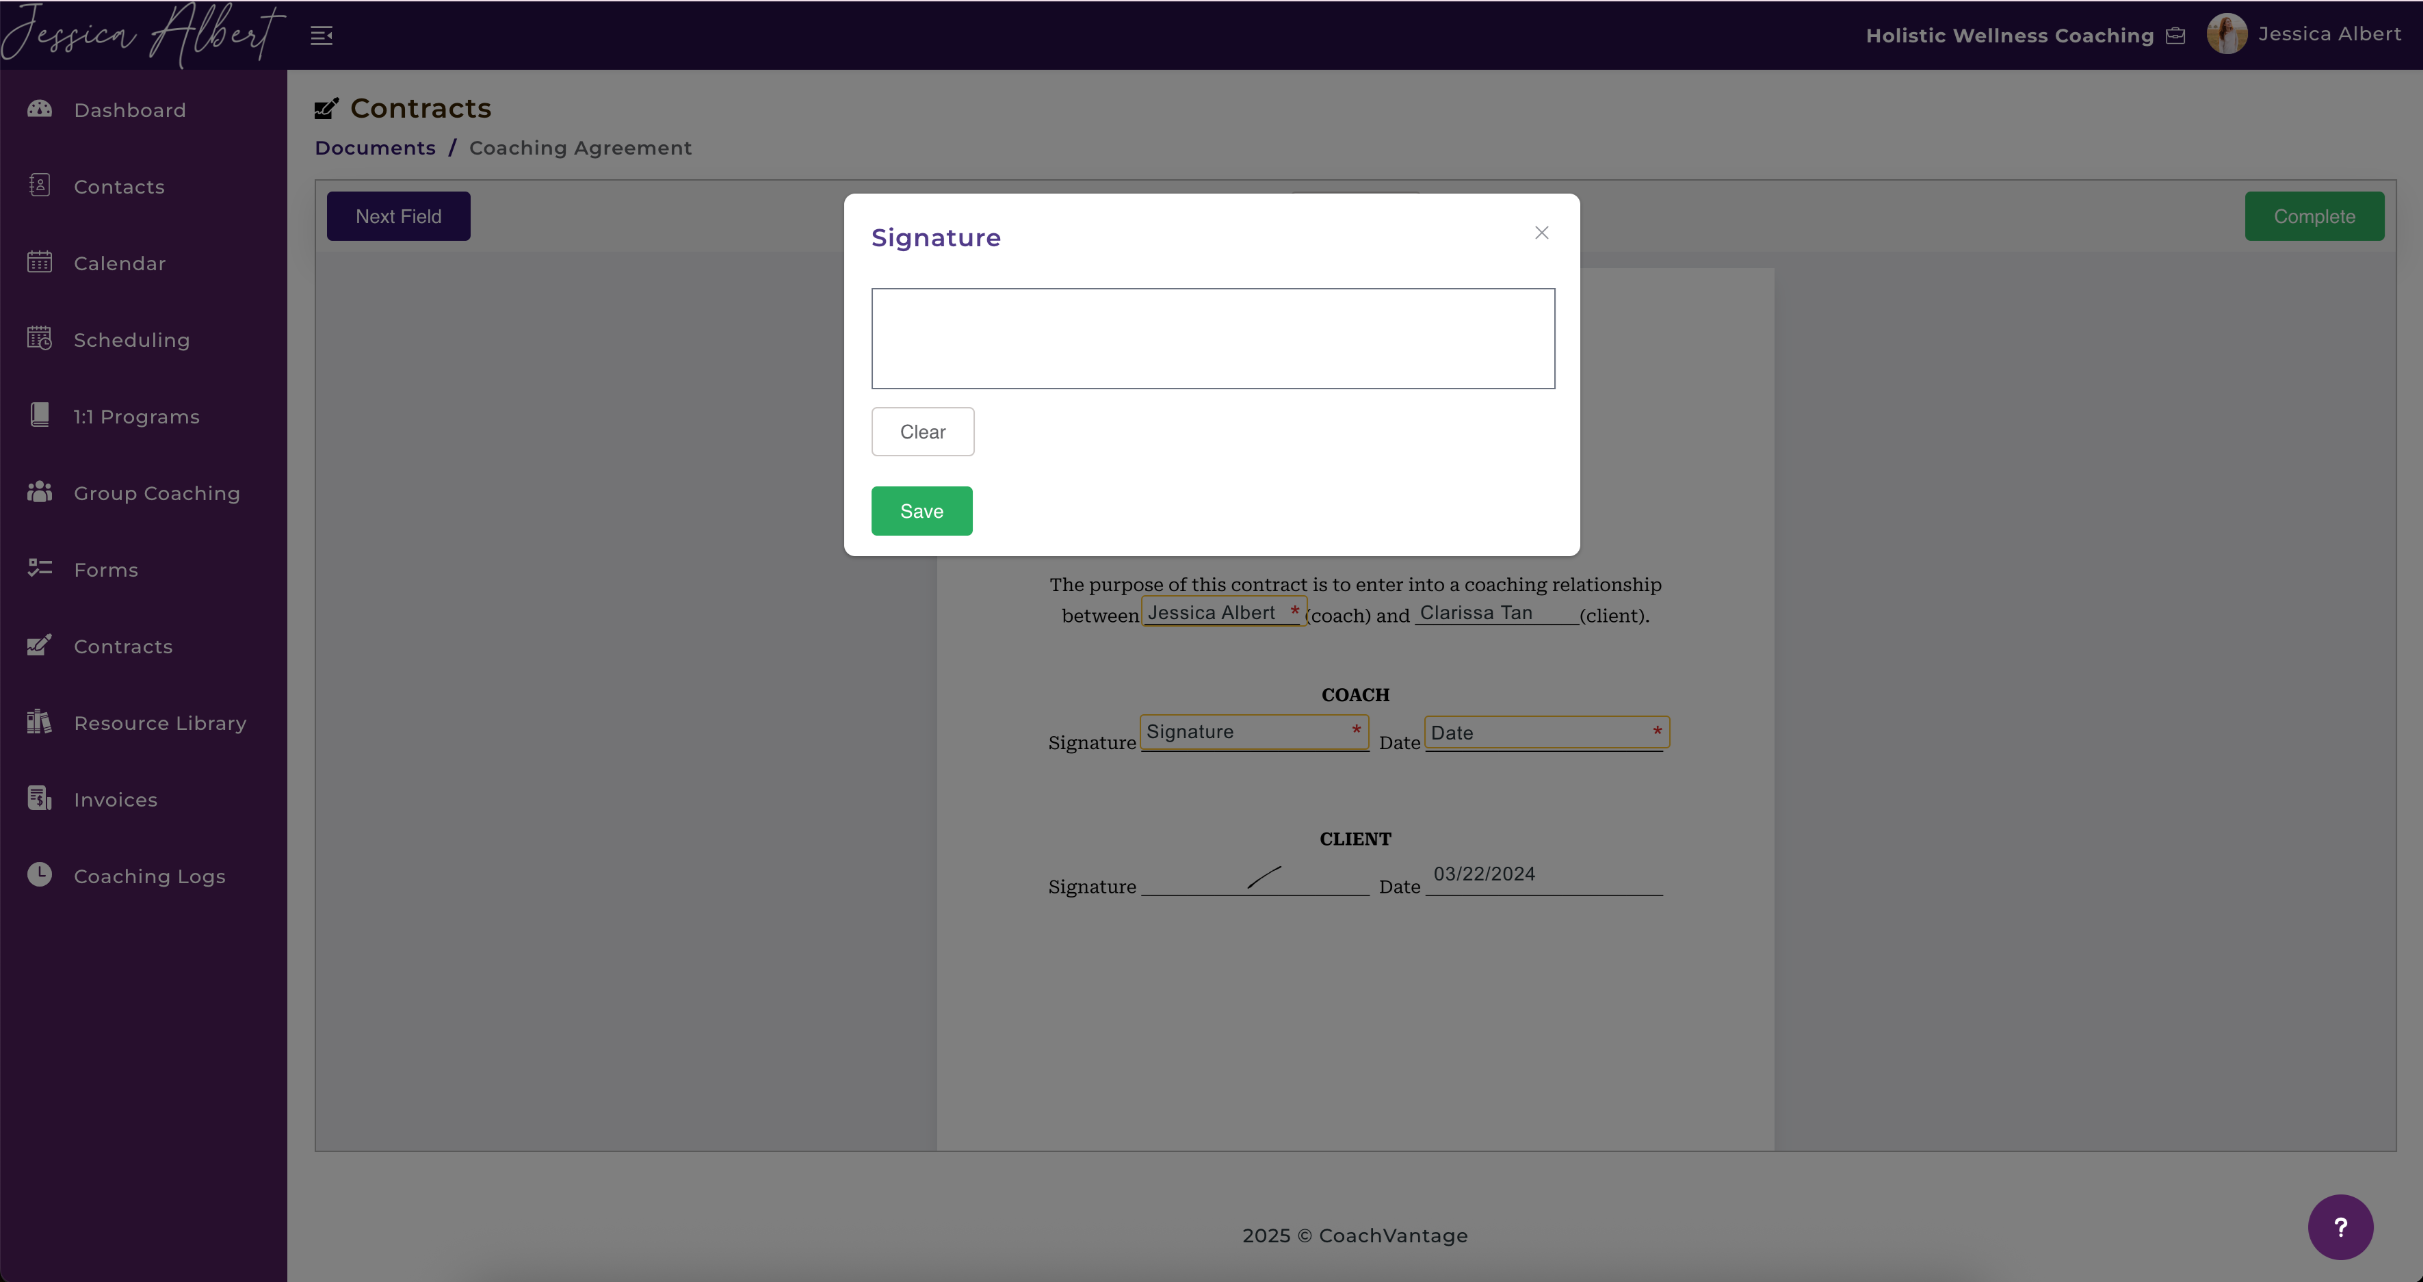
When the signature placeholder has been clicked on, a window will pop-up allowing you to draw in your signature.
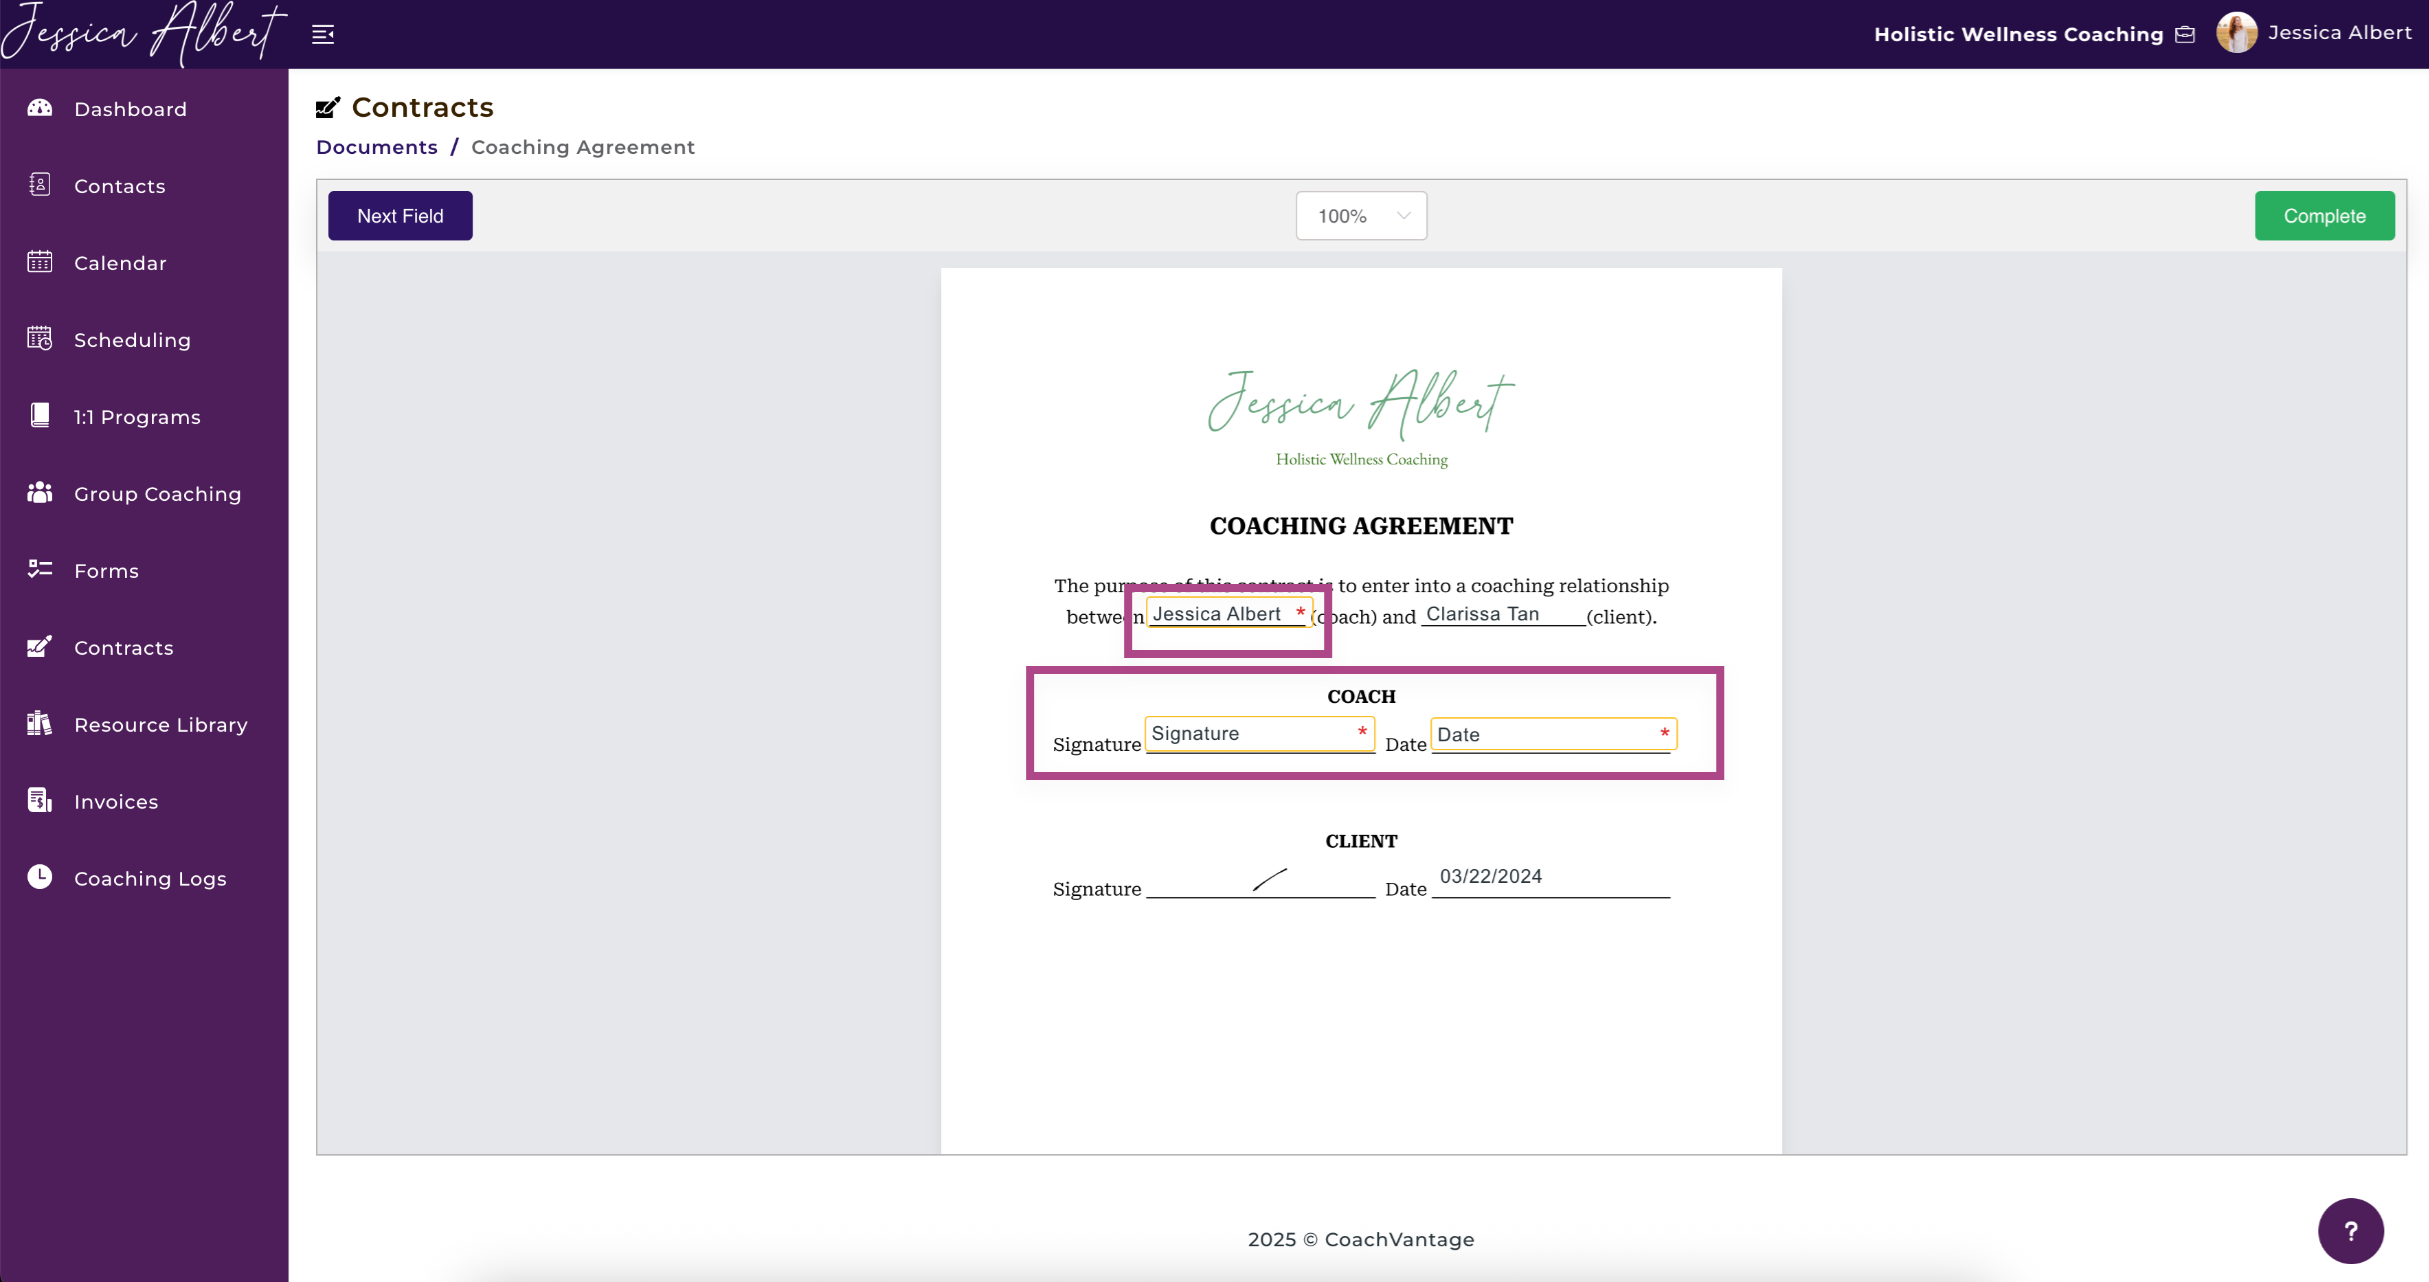
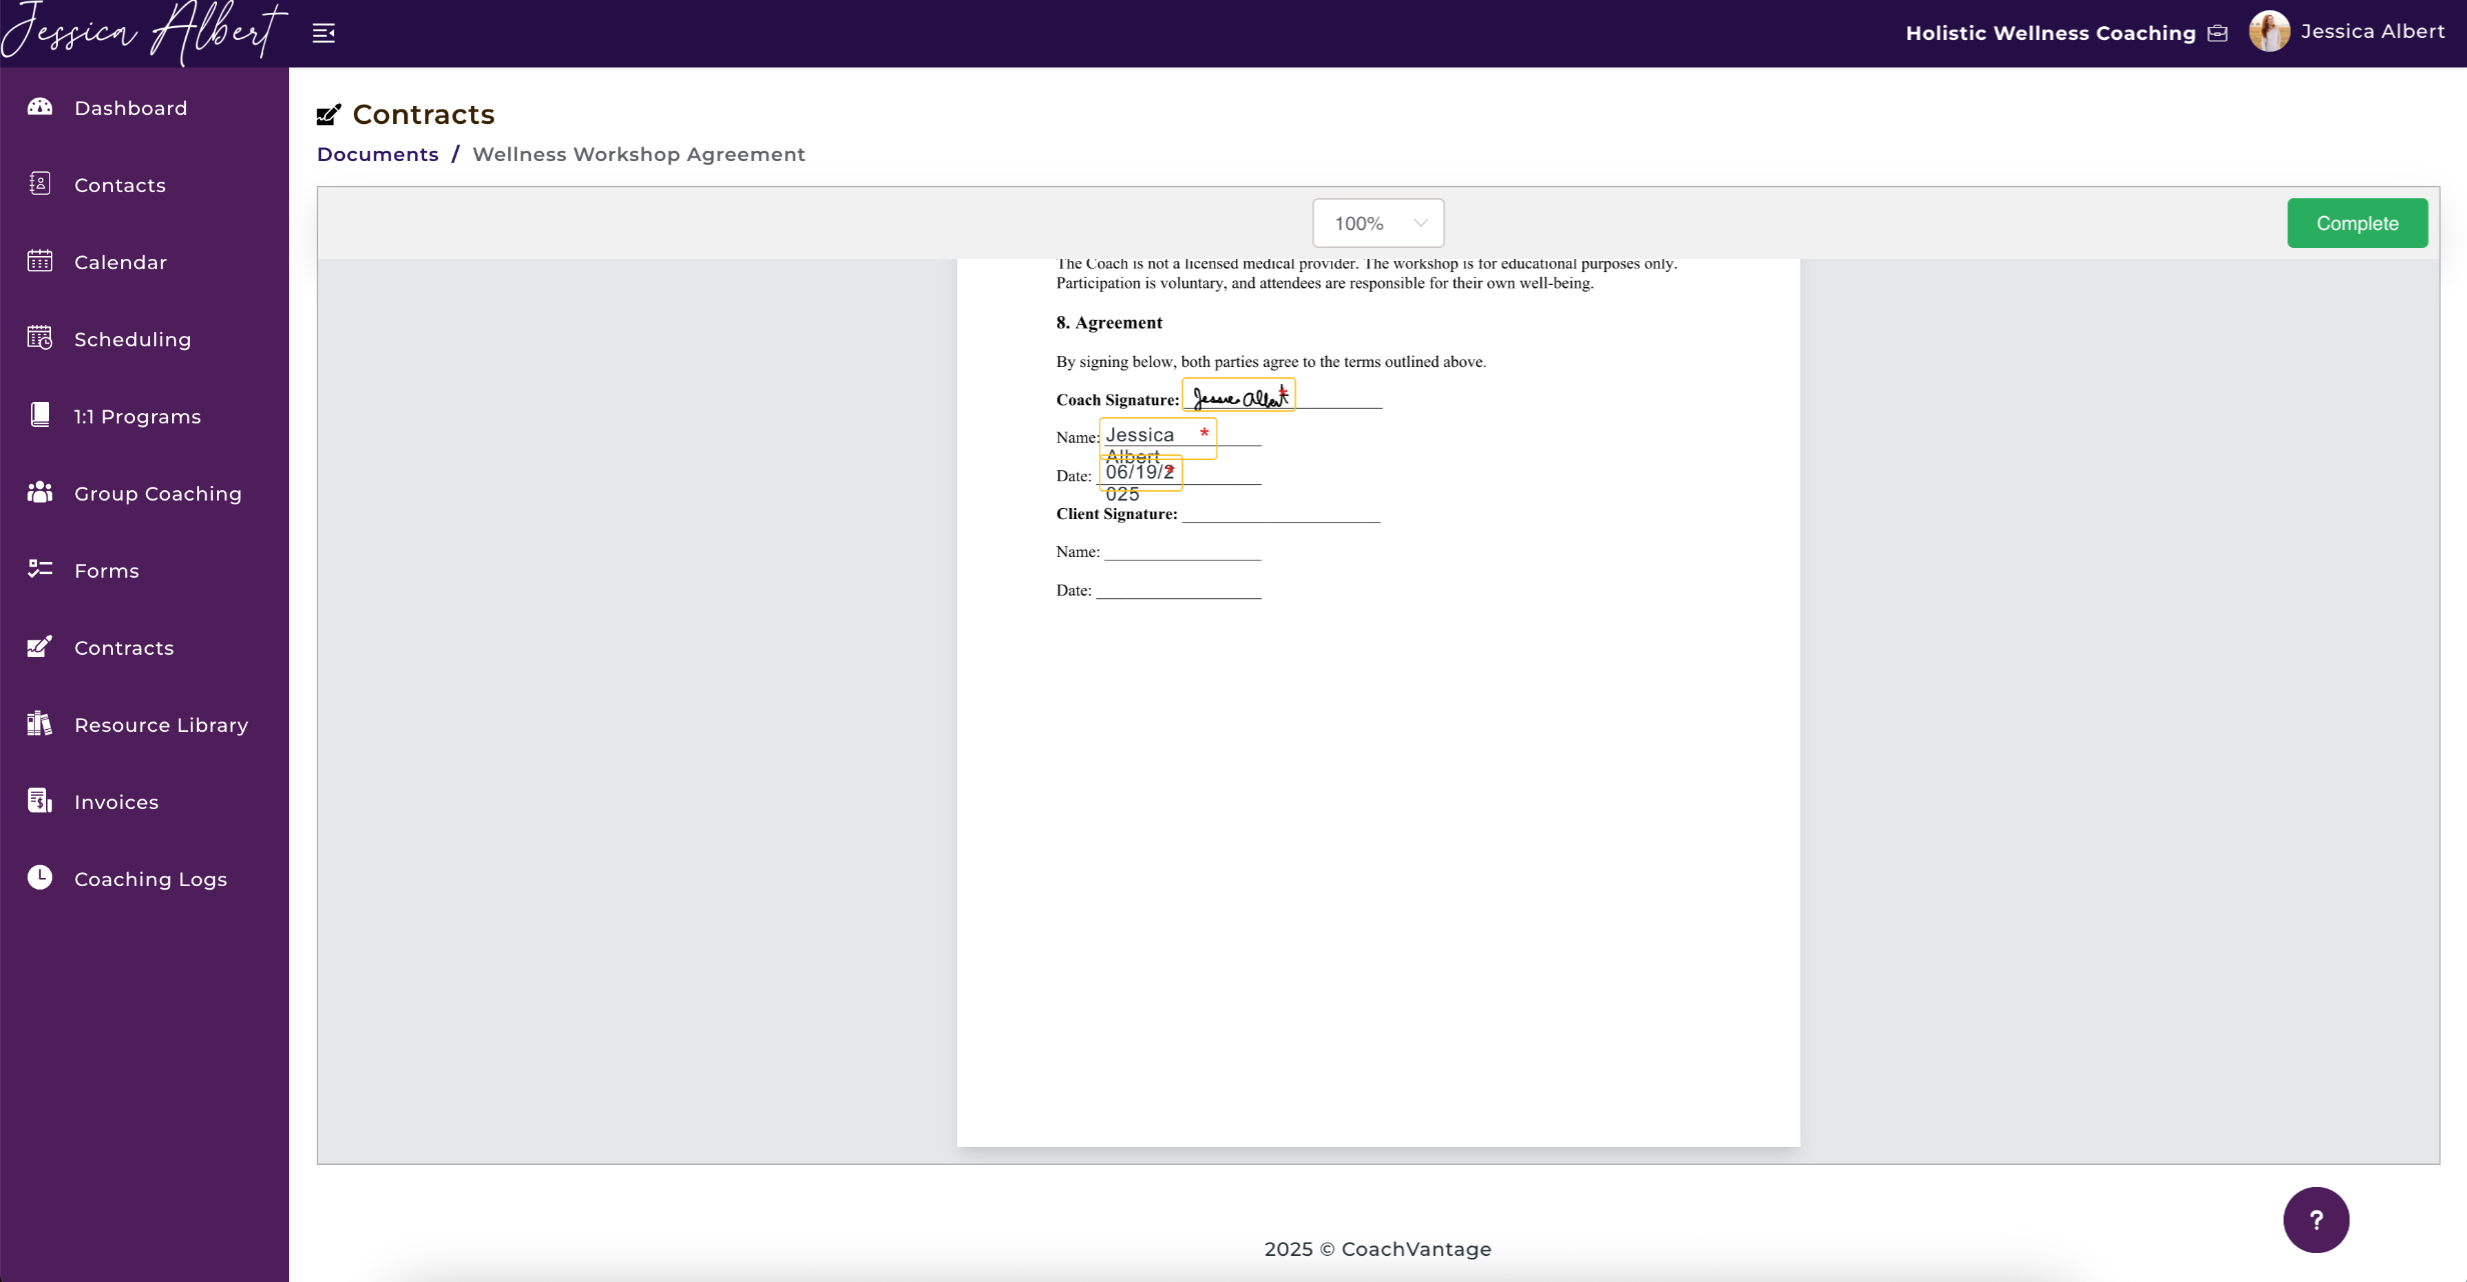
When the placeholders have been completed, it would look similar to the image shown below:
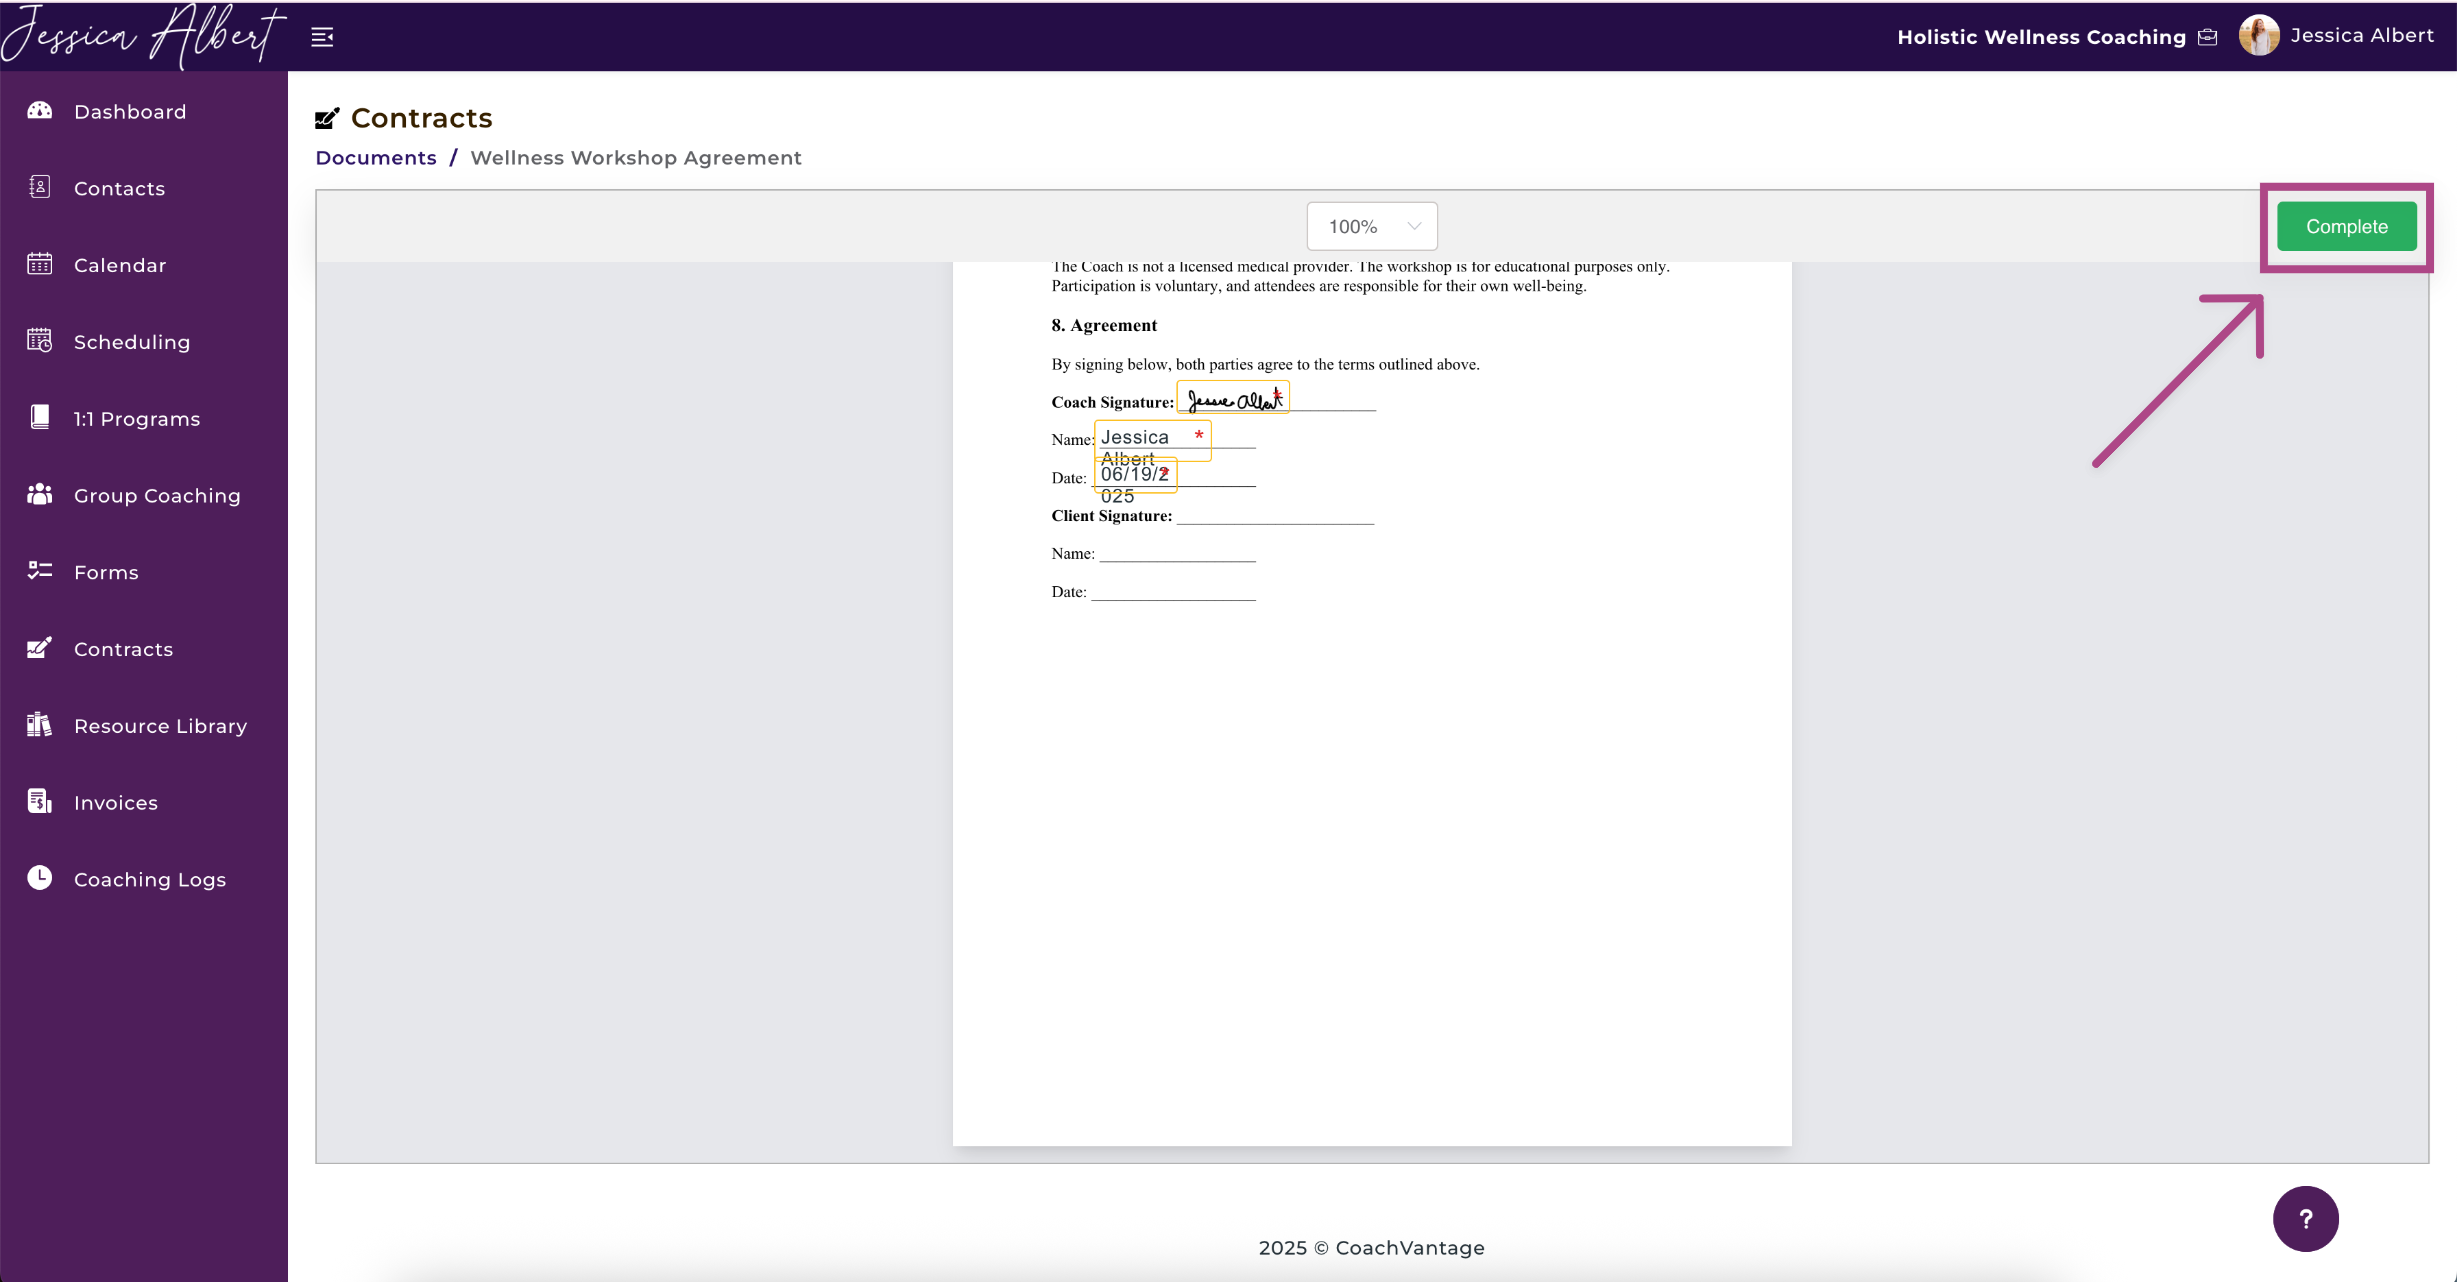
Finally, click Complete to submit the contract (see image below).
Managing Contracts
You can manage your contract documents by clicking the 3-dot button menu:
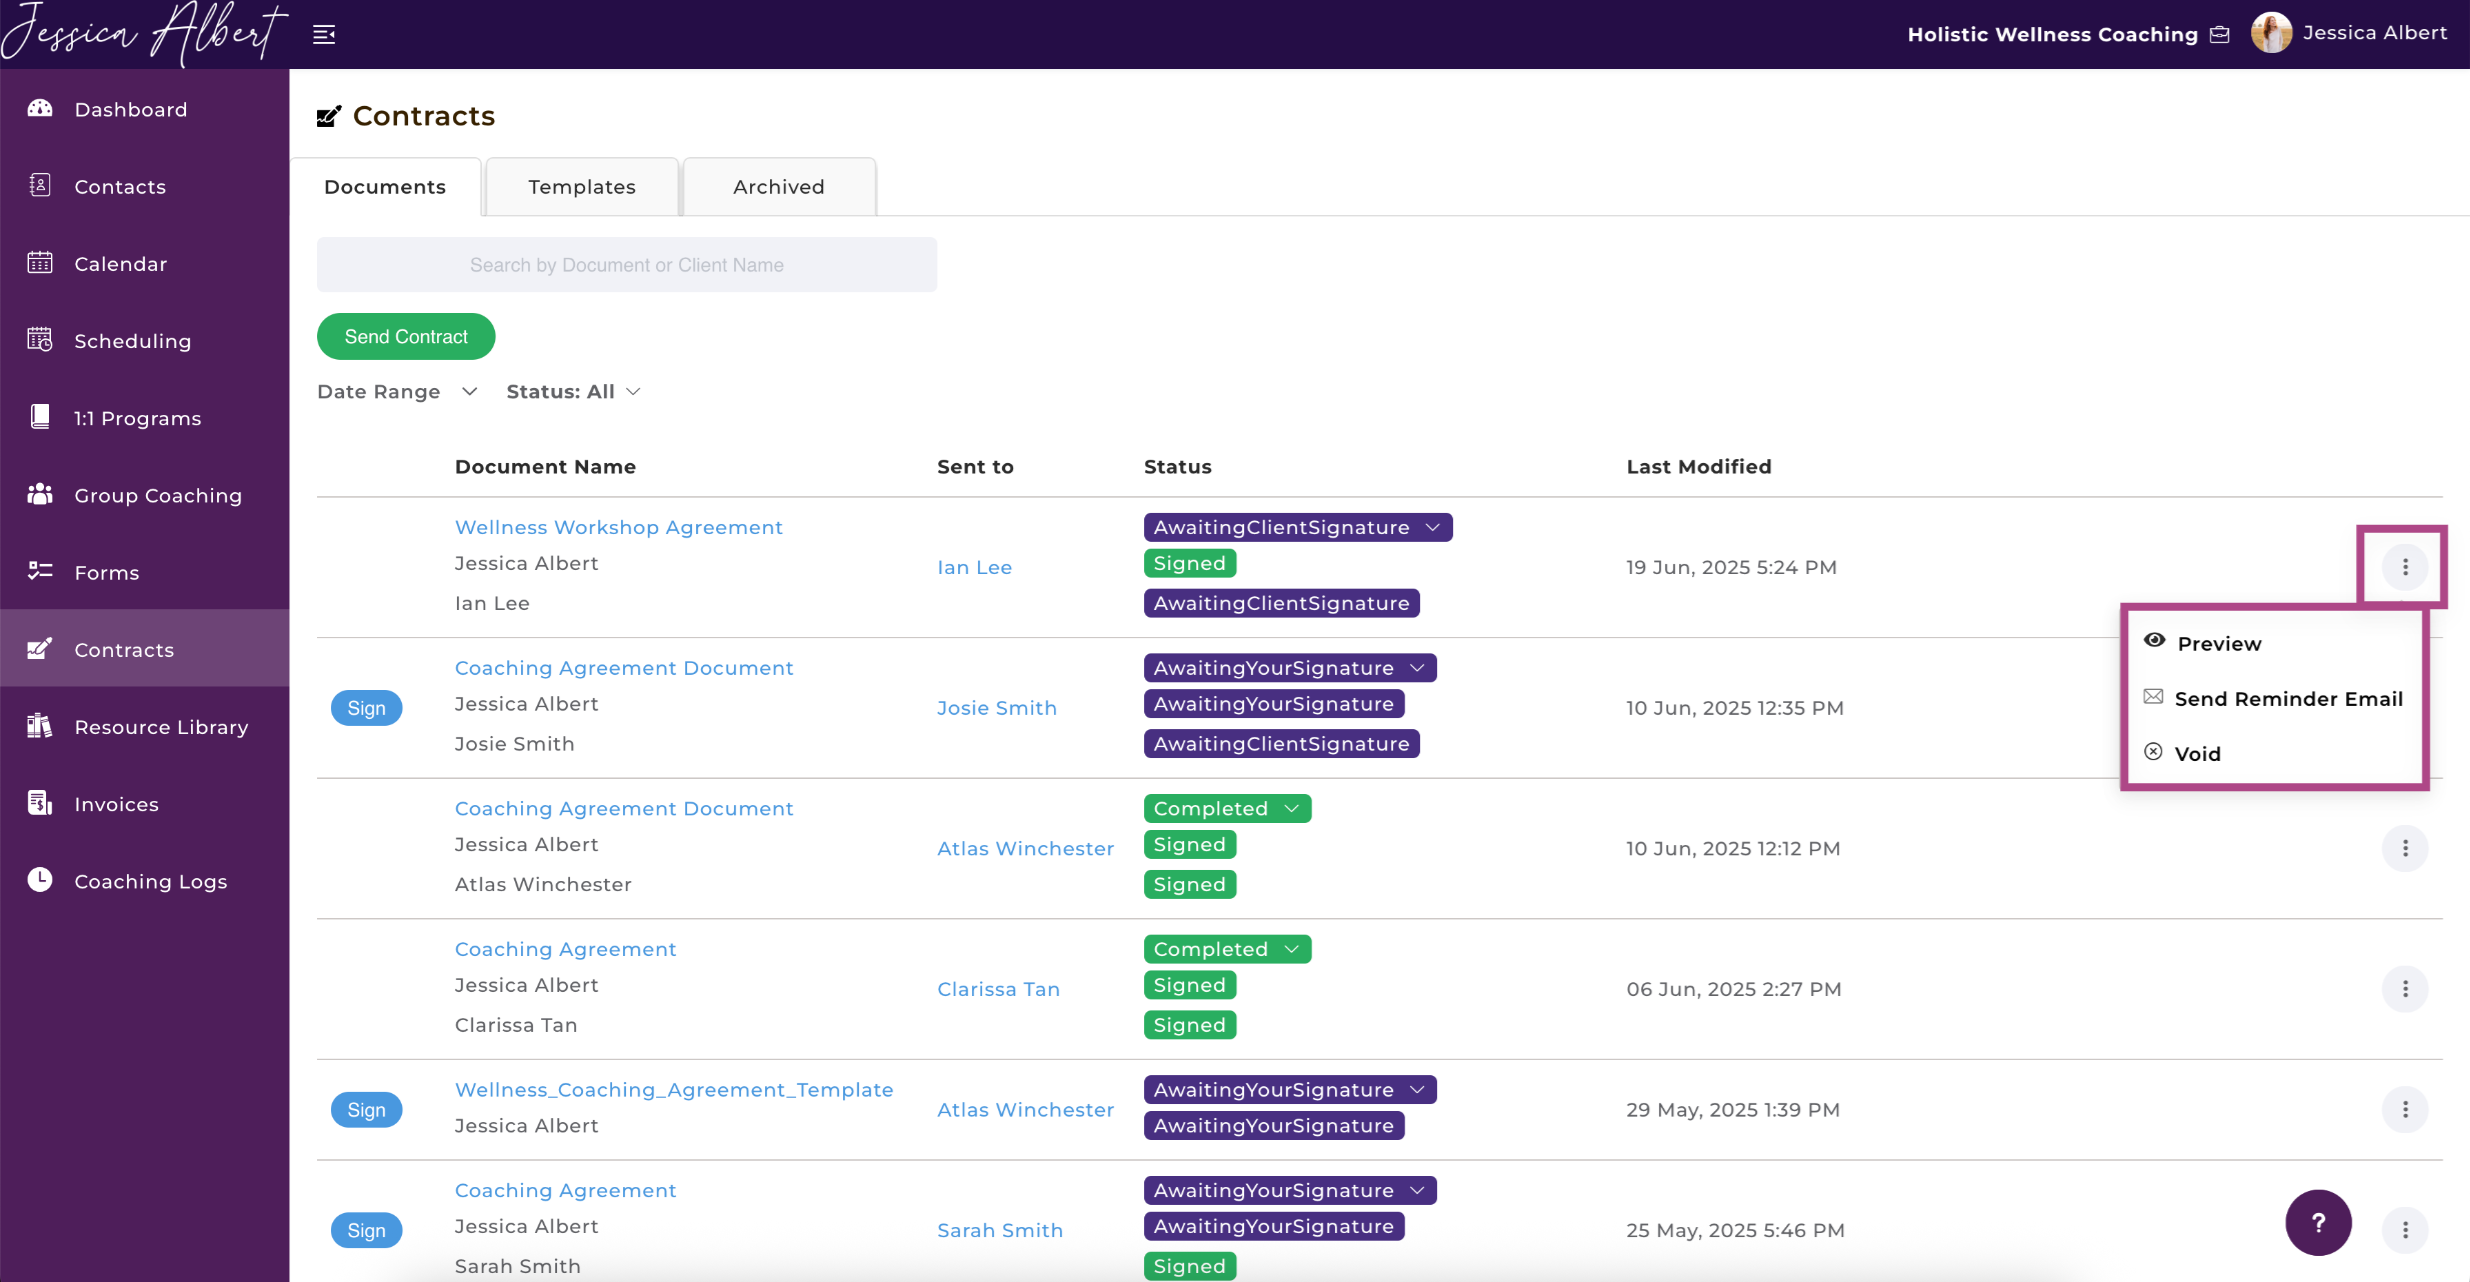
1. Preview
Preview allows you to view the contents of the document without downloading it to your device. A new browser tab opens that displays the document preview.
2. Download 📥
You can download the document to your device.
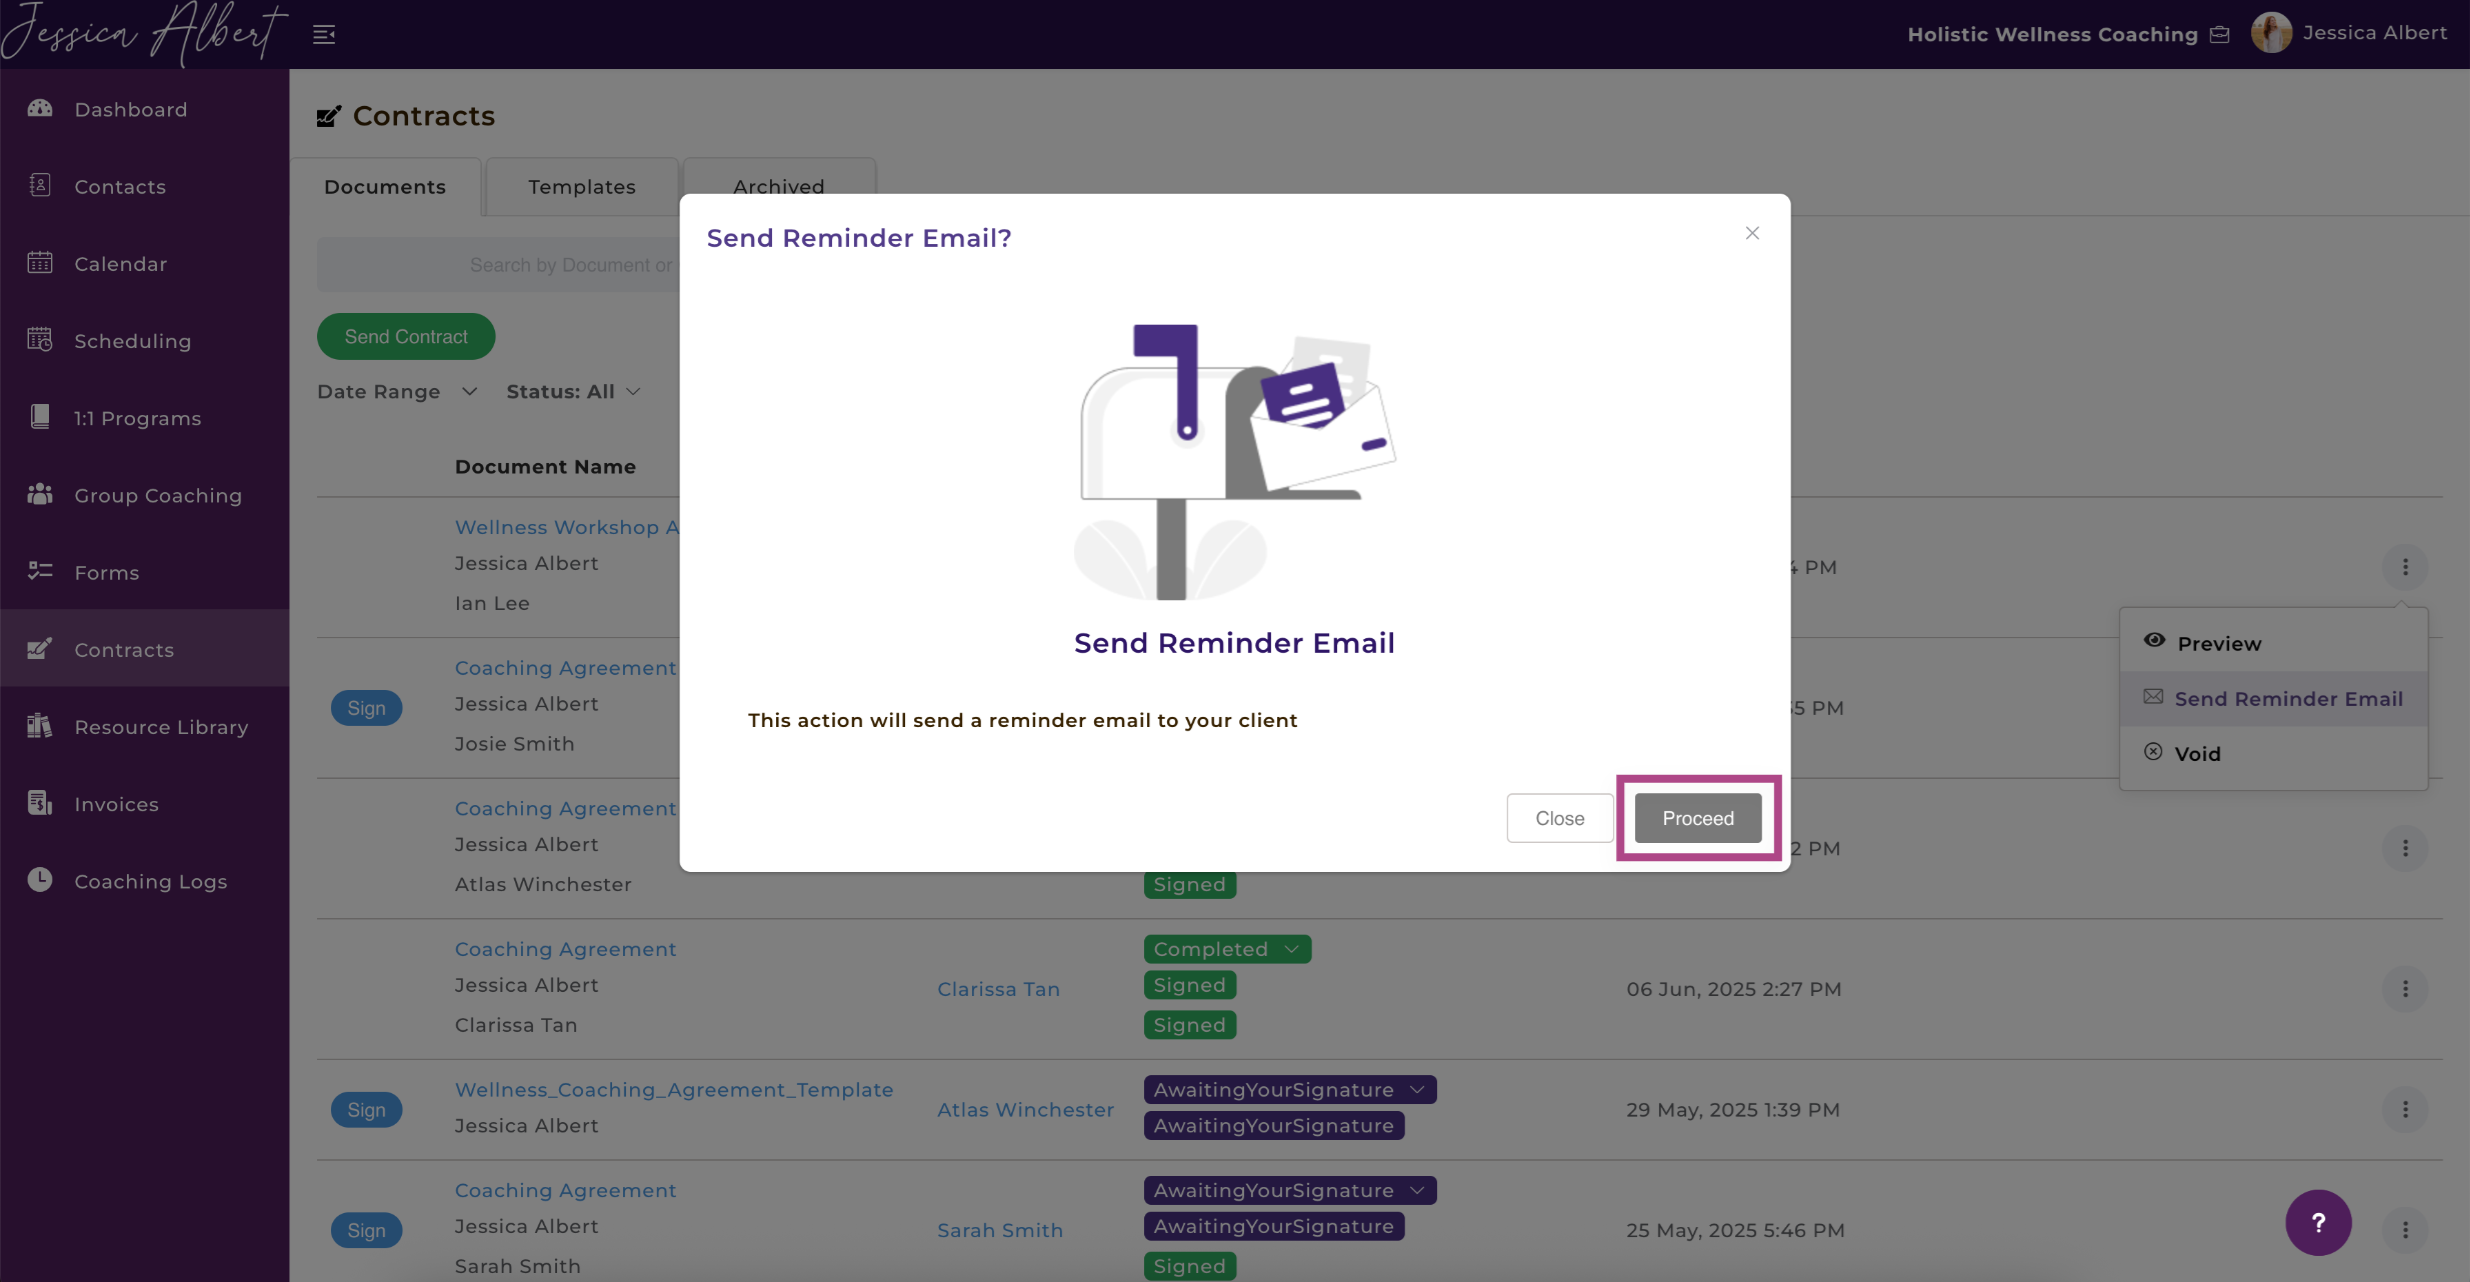
3. Send Reminder Email 🔔
CoachVantage will automatically send a reminder email to your client, reminding them that they have a contract that requires their signature.
A pop-up window would be triggered asking for confirmation to send a reminder email.
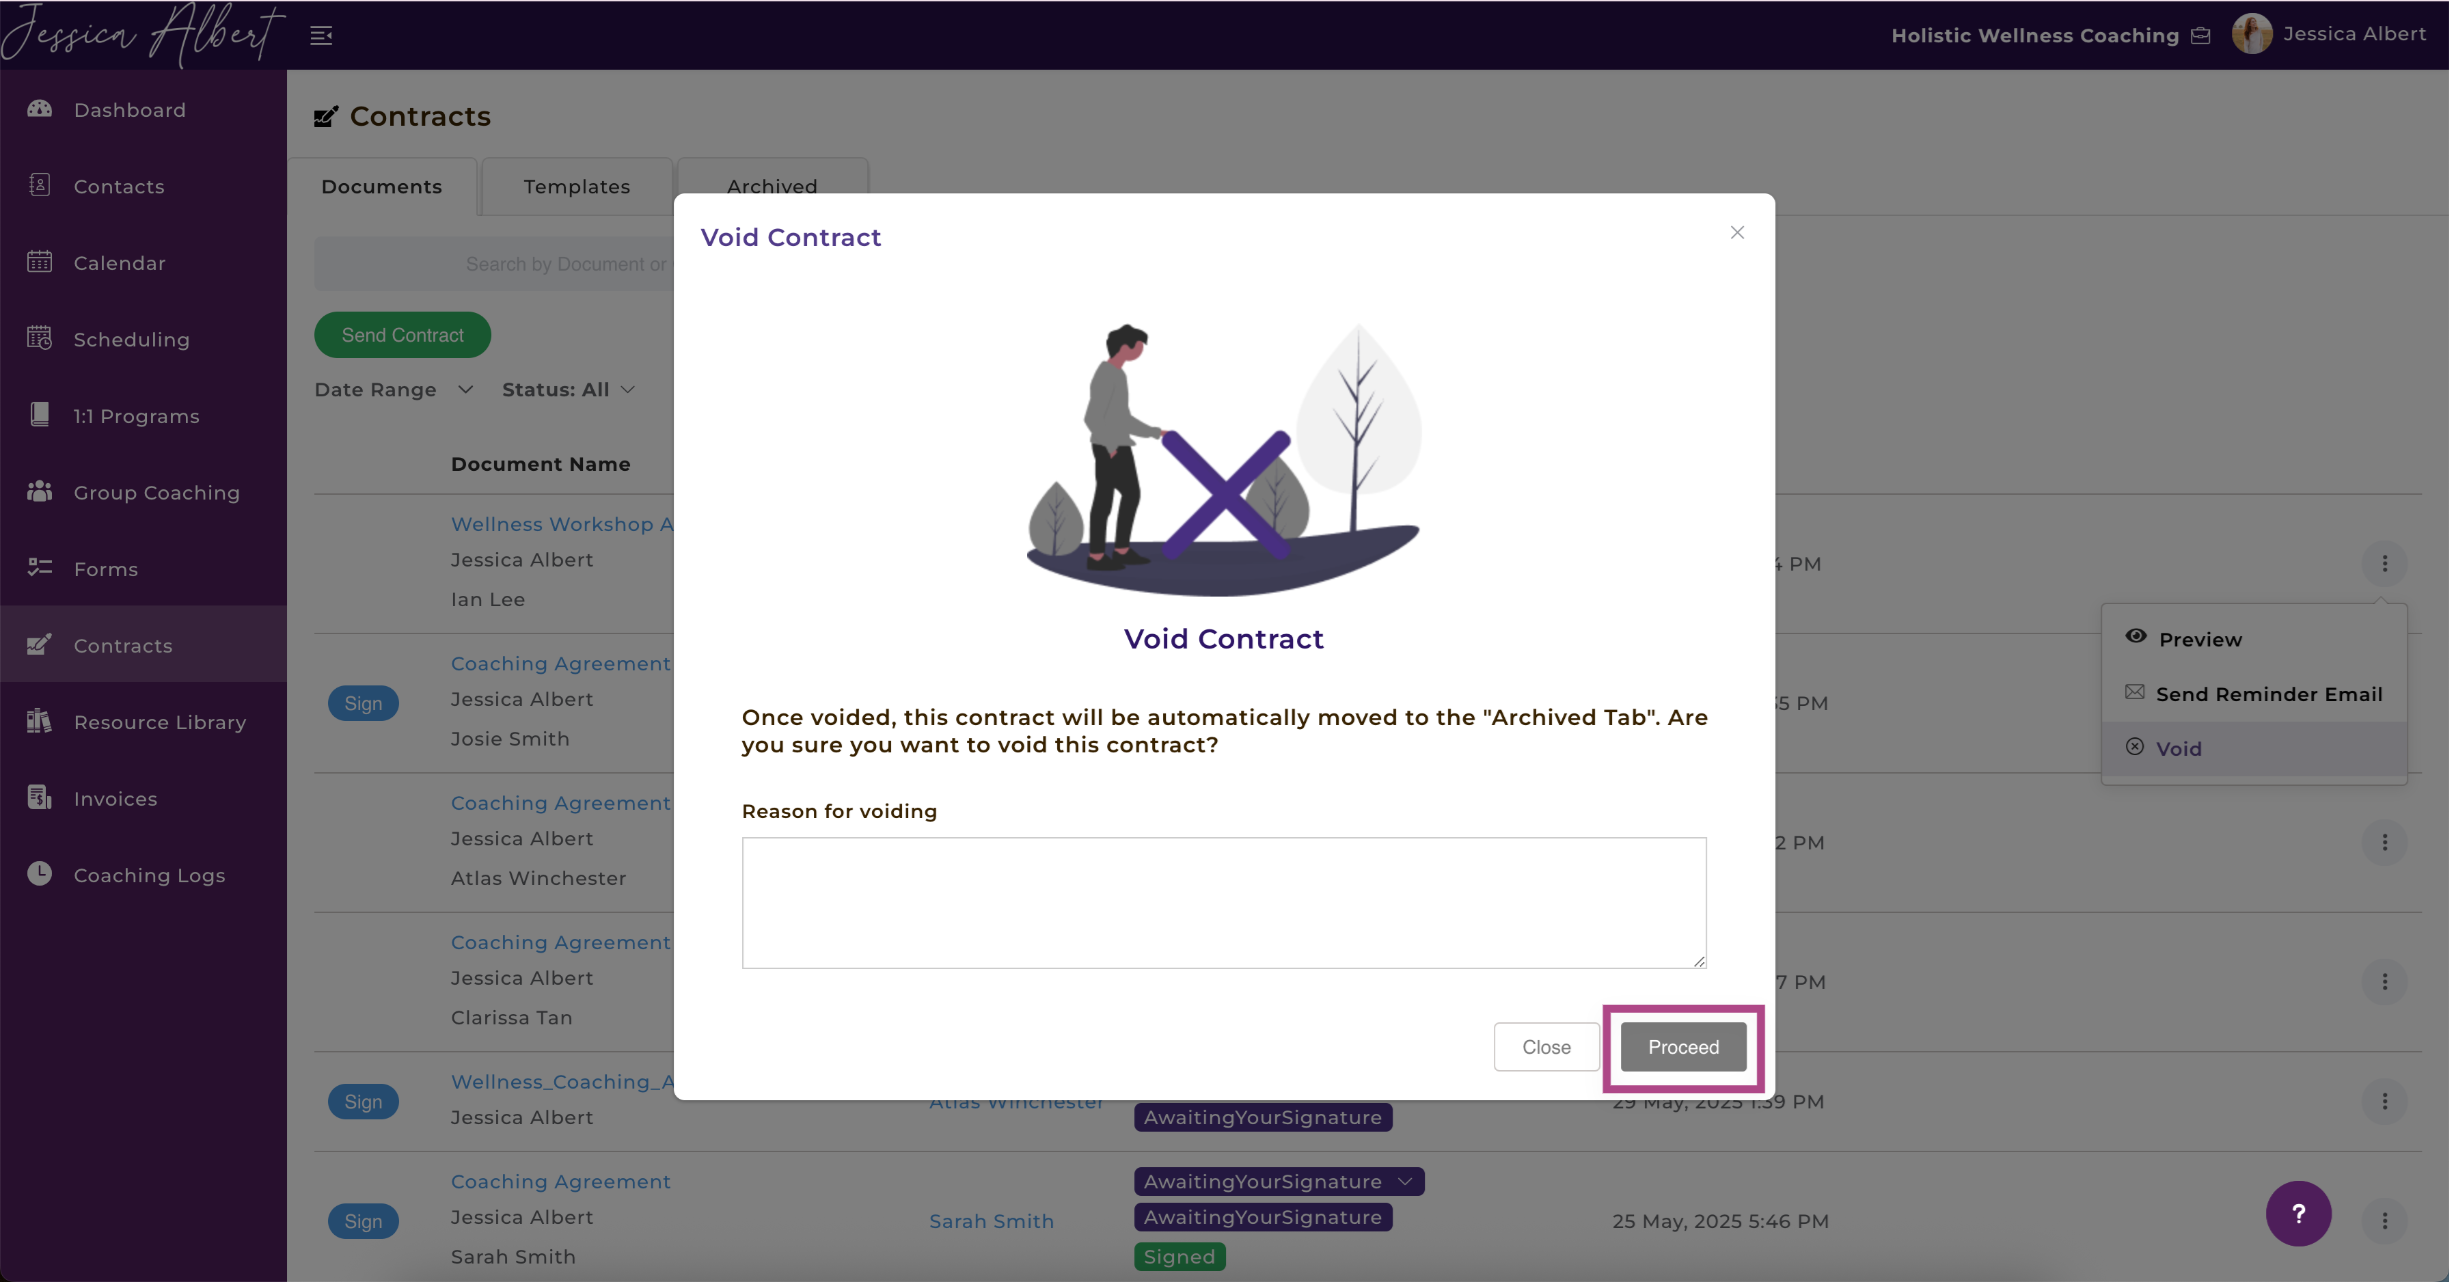
4. Void
If you'd like to void a contract after it's been sent, you can select Void to negate the contract.
Clicking on the Void button would trigger a pop-up window asking for confirmation to void your contract. You can also provide a reason for voiding the contract which would be included in the email to your client informing them of the contract being voided.
Once you have voided a document, it will move to the Archived tab.
Important: You cannot void a Completed document.
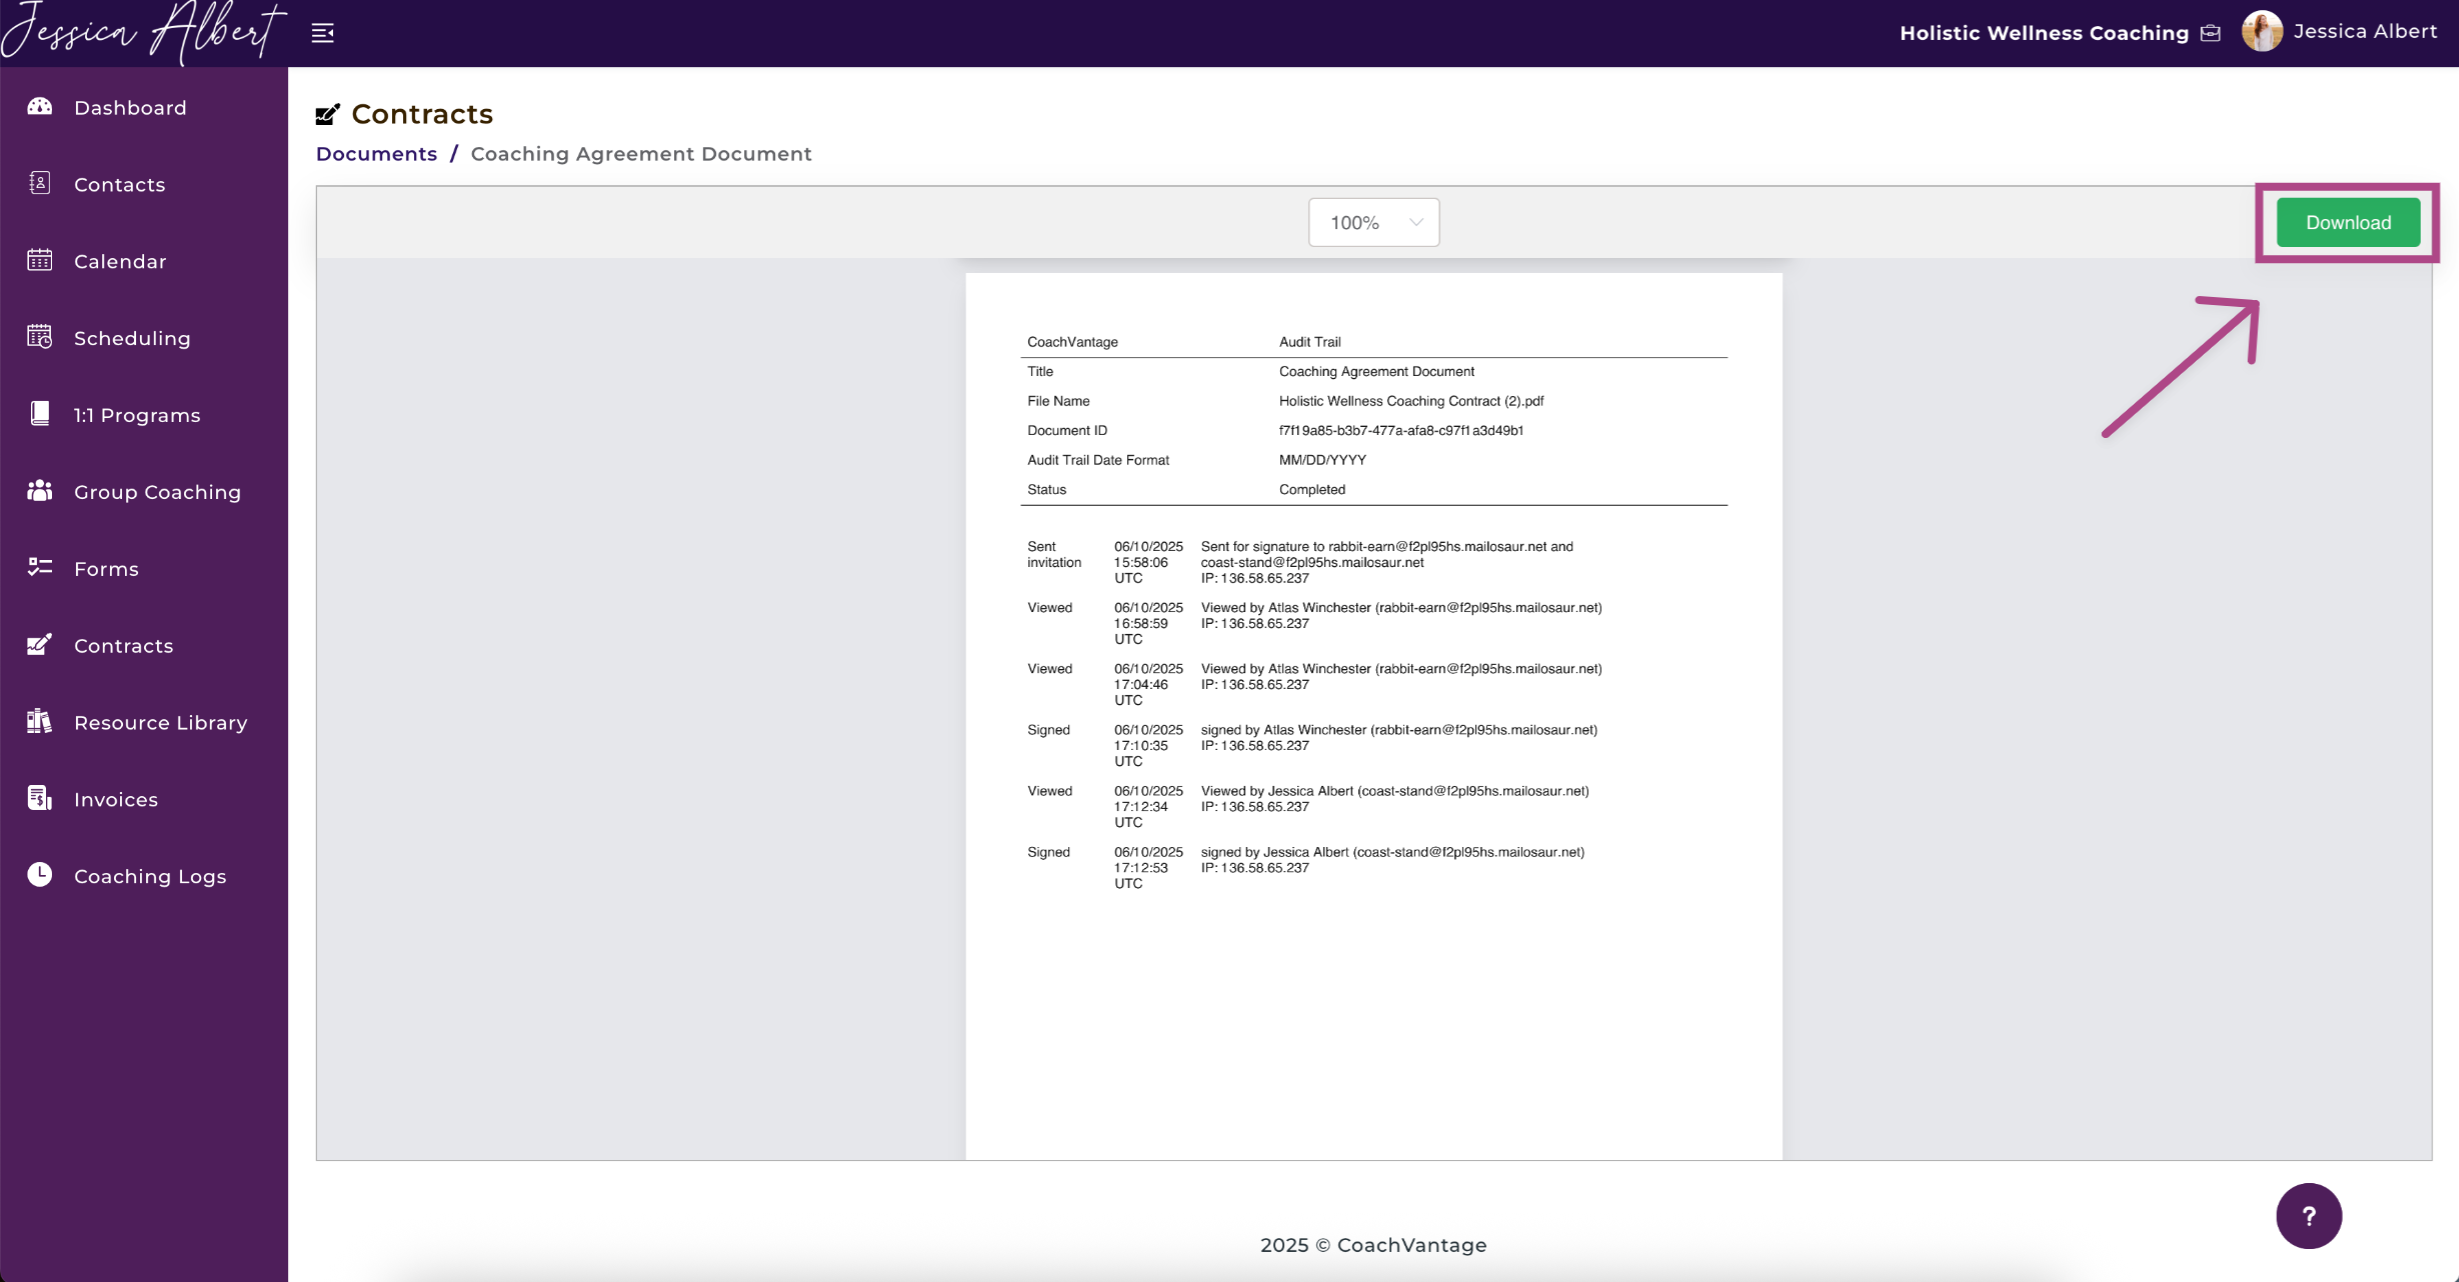
Contract Audit Trails
Once a contract has been signed by both parties, you will be able to find the Audit Trail section at the end of the document when you preview the contract, as shown in the image below.
The audit trail provides a log of the date/time stamp when the document was sent, viewed, and signed, along with the IP addresses.
4. Contract Templates
Select the Templates tab to create and manage contract templates.
Tip: Contract templates will save you time if you use the same document for clients to sign.
Note: You can upload documents in PDF format only. Other file formats like .doc, .png, etc, are not supported at this time.
After uploading the template document (for example, your Coaching Agreement), simply drag and drop the placeholder fields like Signature, Name, Date, etc on the template document. Once the template is saved, you can select it whenever you wish to send your Coaching Agreement to clients for signature. In this way, you won't need to drag and drop the placeholder fields each and every time you wish to send your Coaching Agreement to clients.
Note: Contract templates are also used if you wish to embed a contract for clients to e-sign during the program sign-up workflow. This feature is available only for Aha! Plan subscribers.
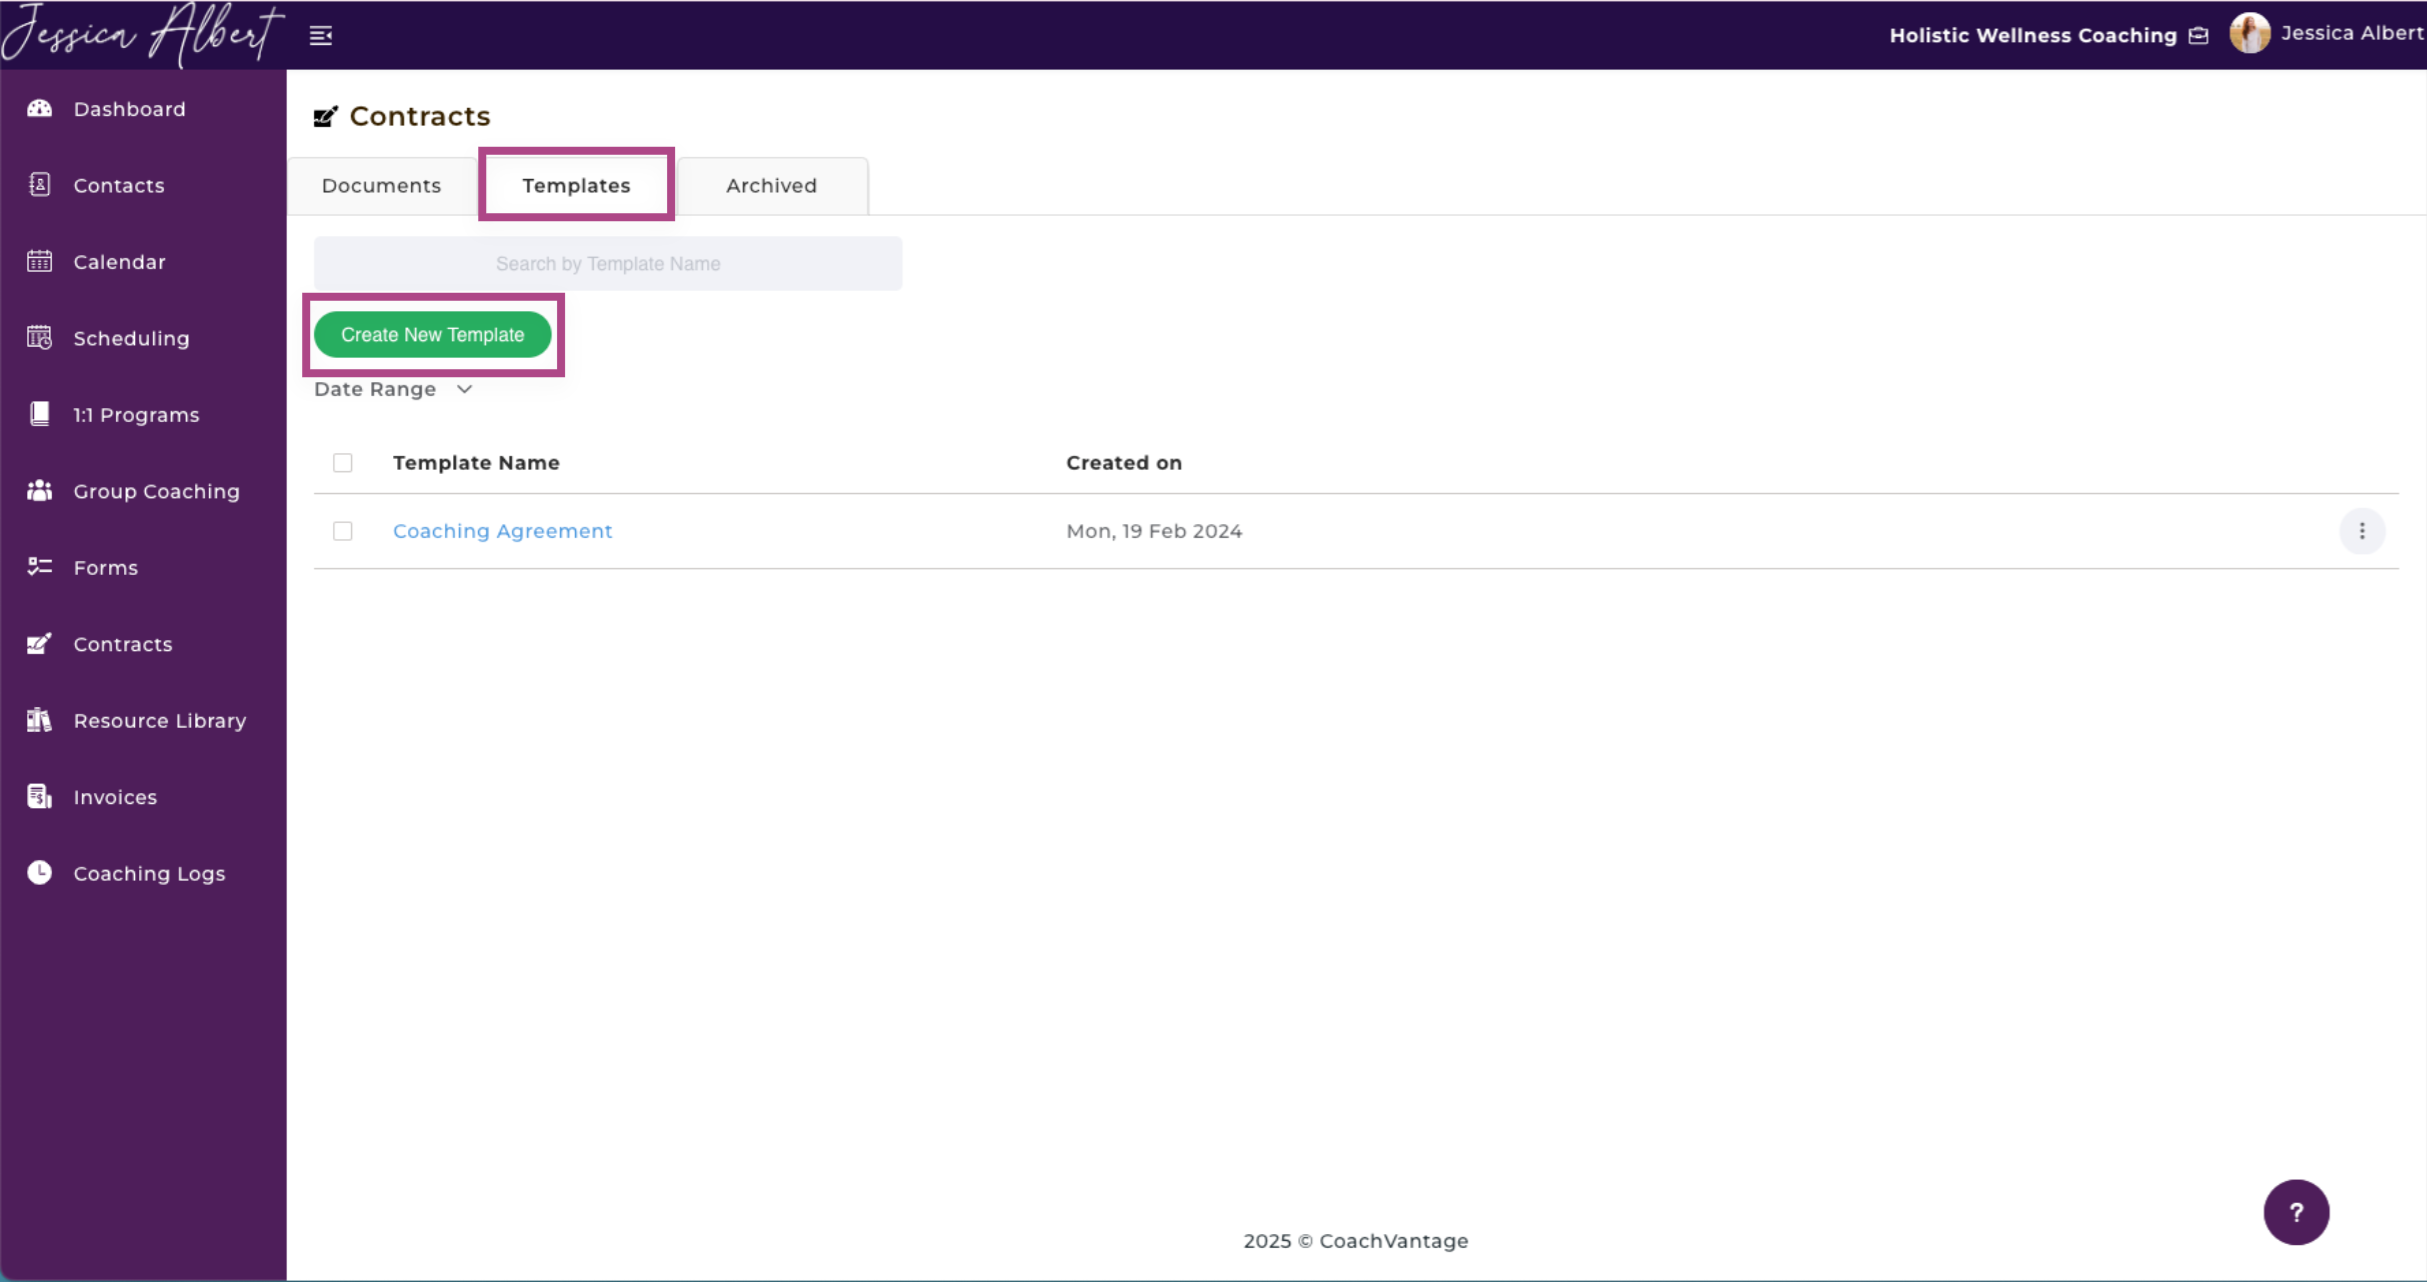
Create New Contract Template
1. From your Dashboard, select Contracts on the left-hand menu.
2. Select the Templates tab at the top of your screen. Then, select the green Create New Template button.
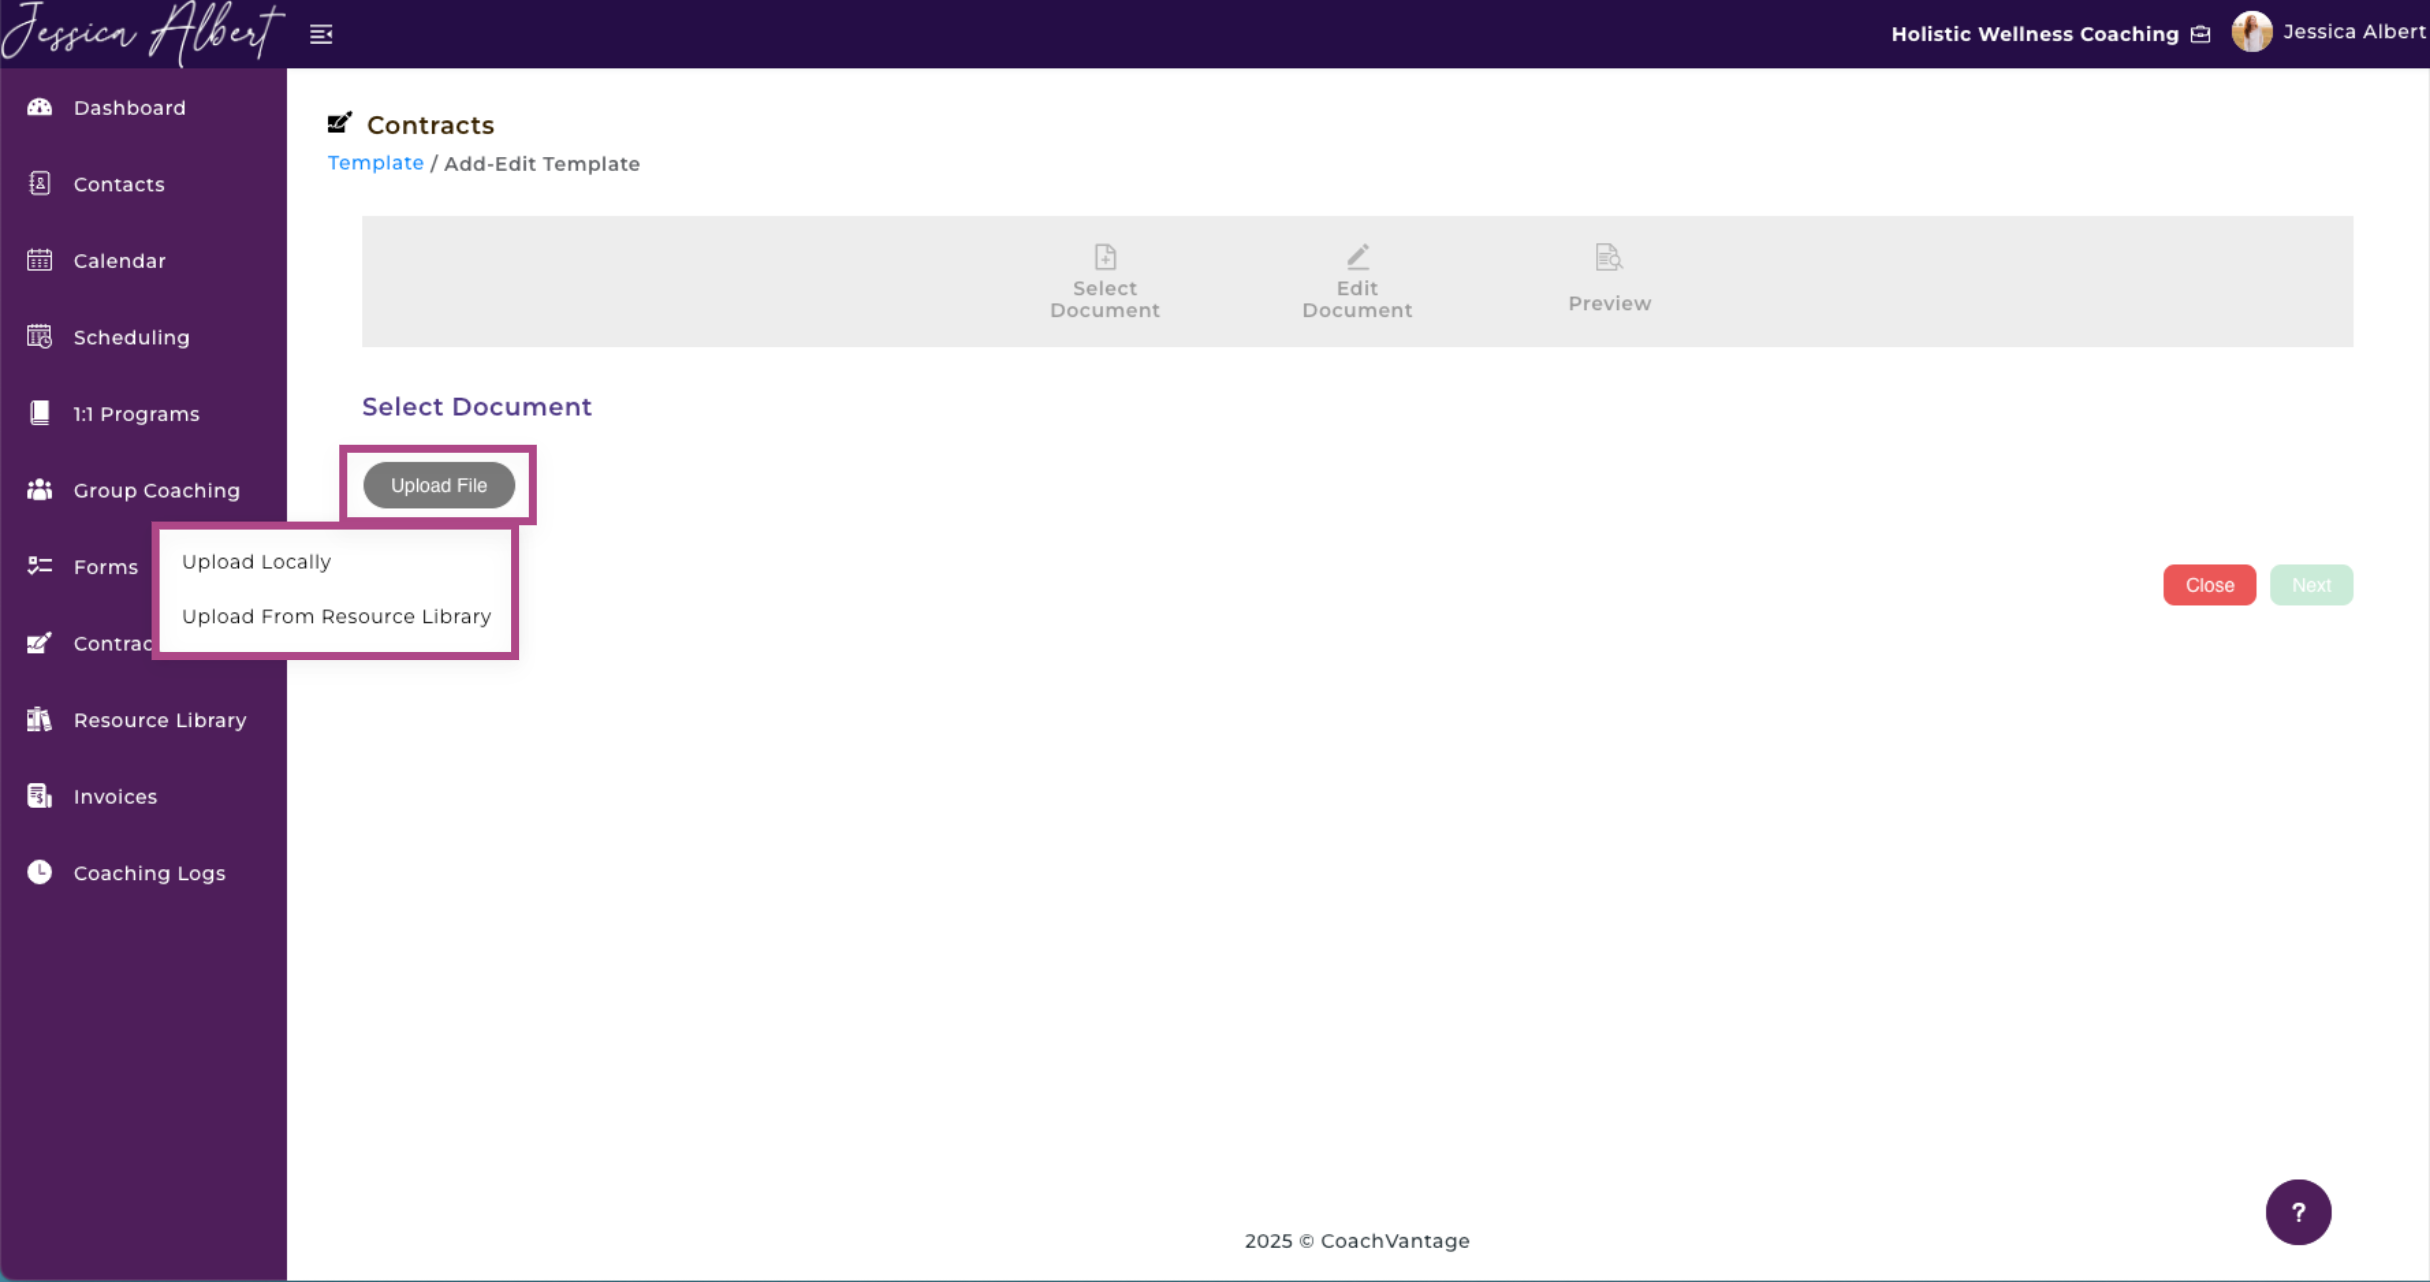
3. Click Upload File and choose to Upload Locally or Upload from Resource Library. The file format must be PDF only. Other formats like .doc, .png, etc are not supported at this time.
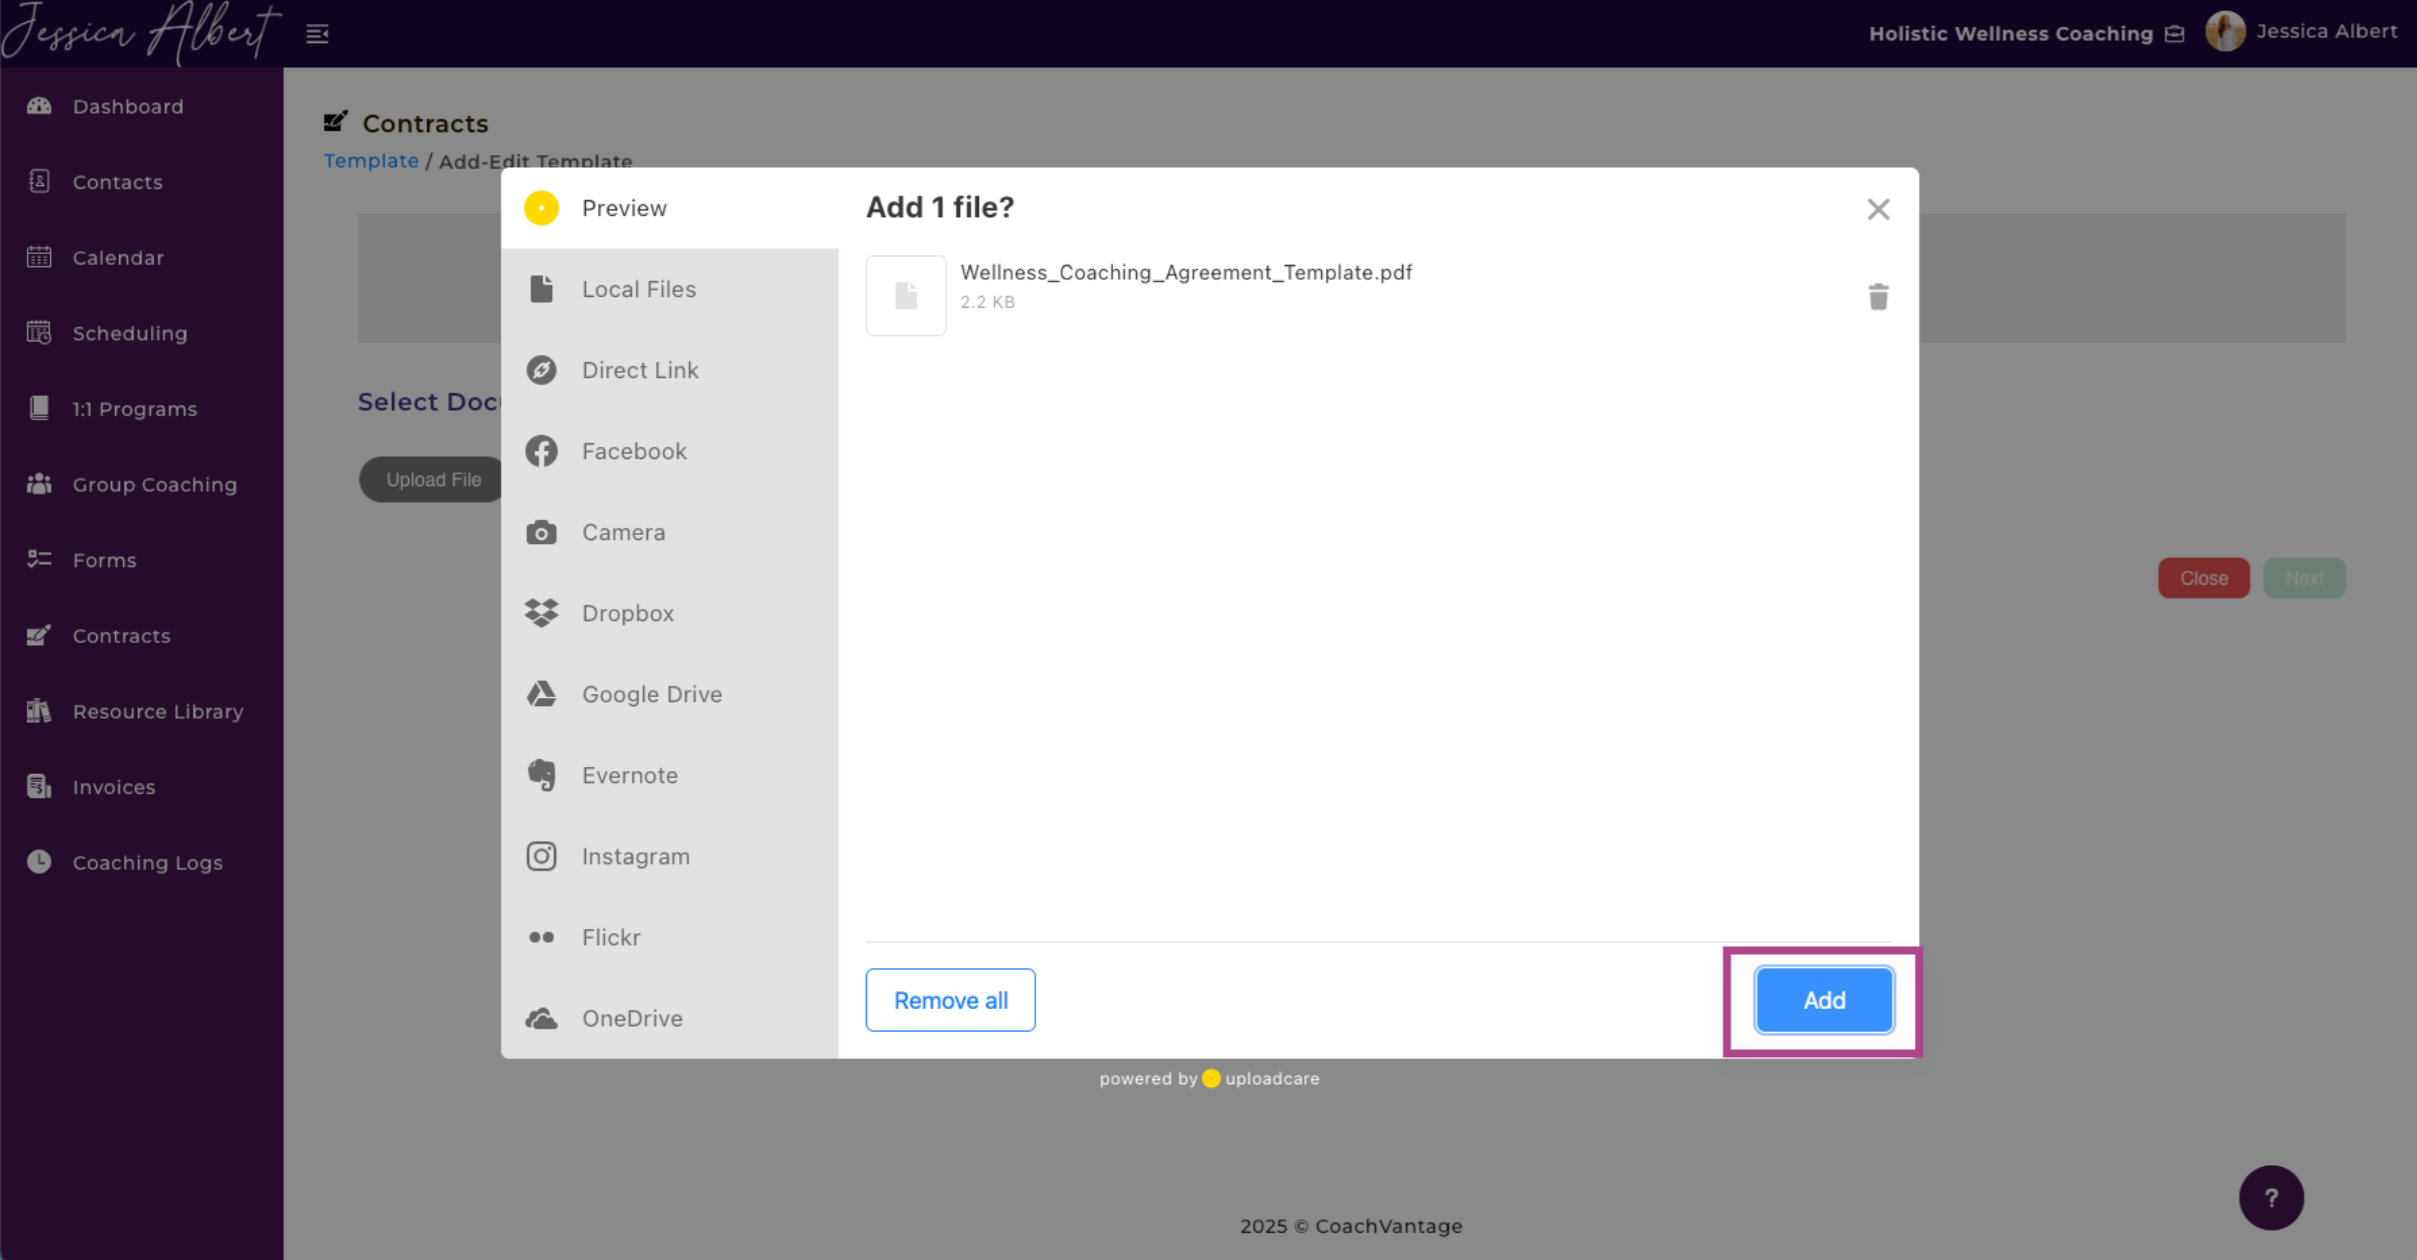
4. If Uploading Locally, select the File you'd like to upload. Click Add.
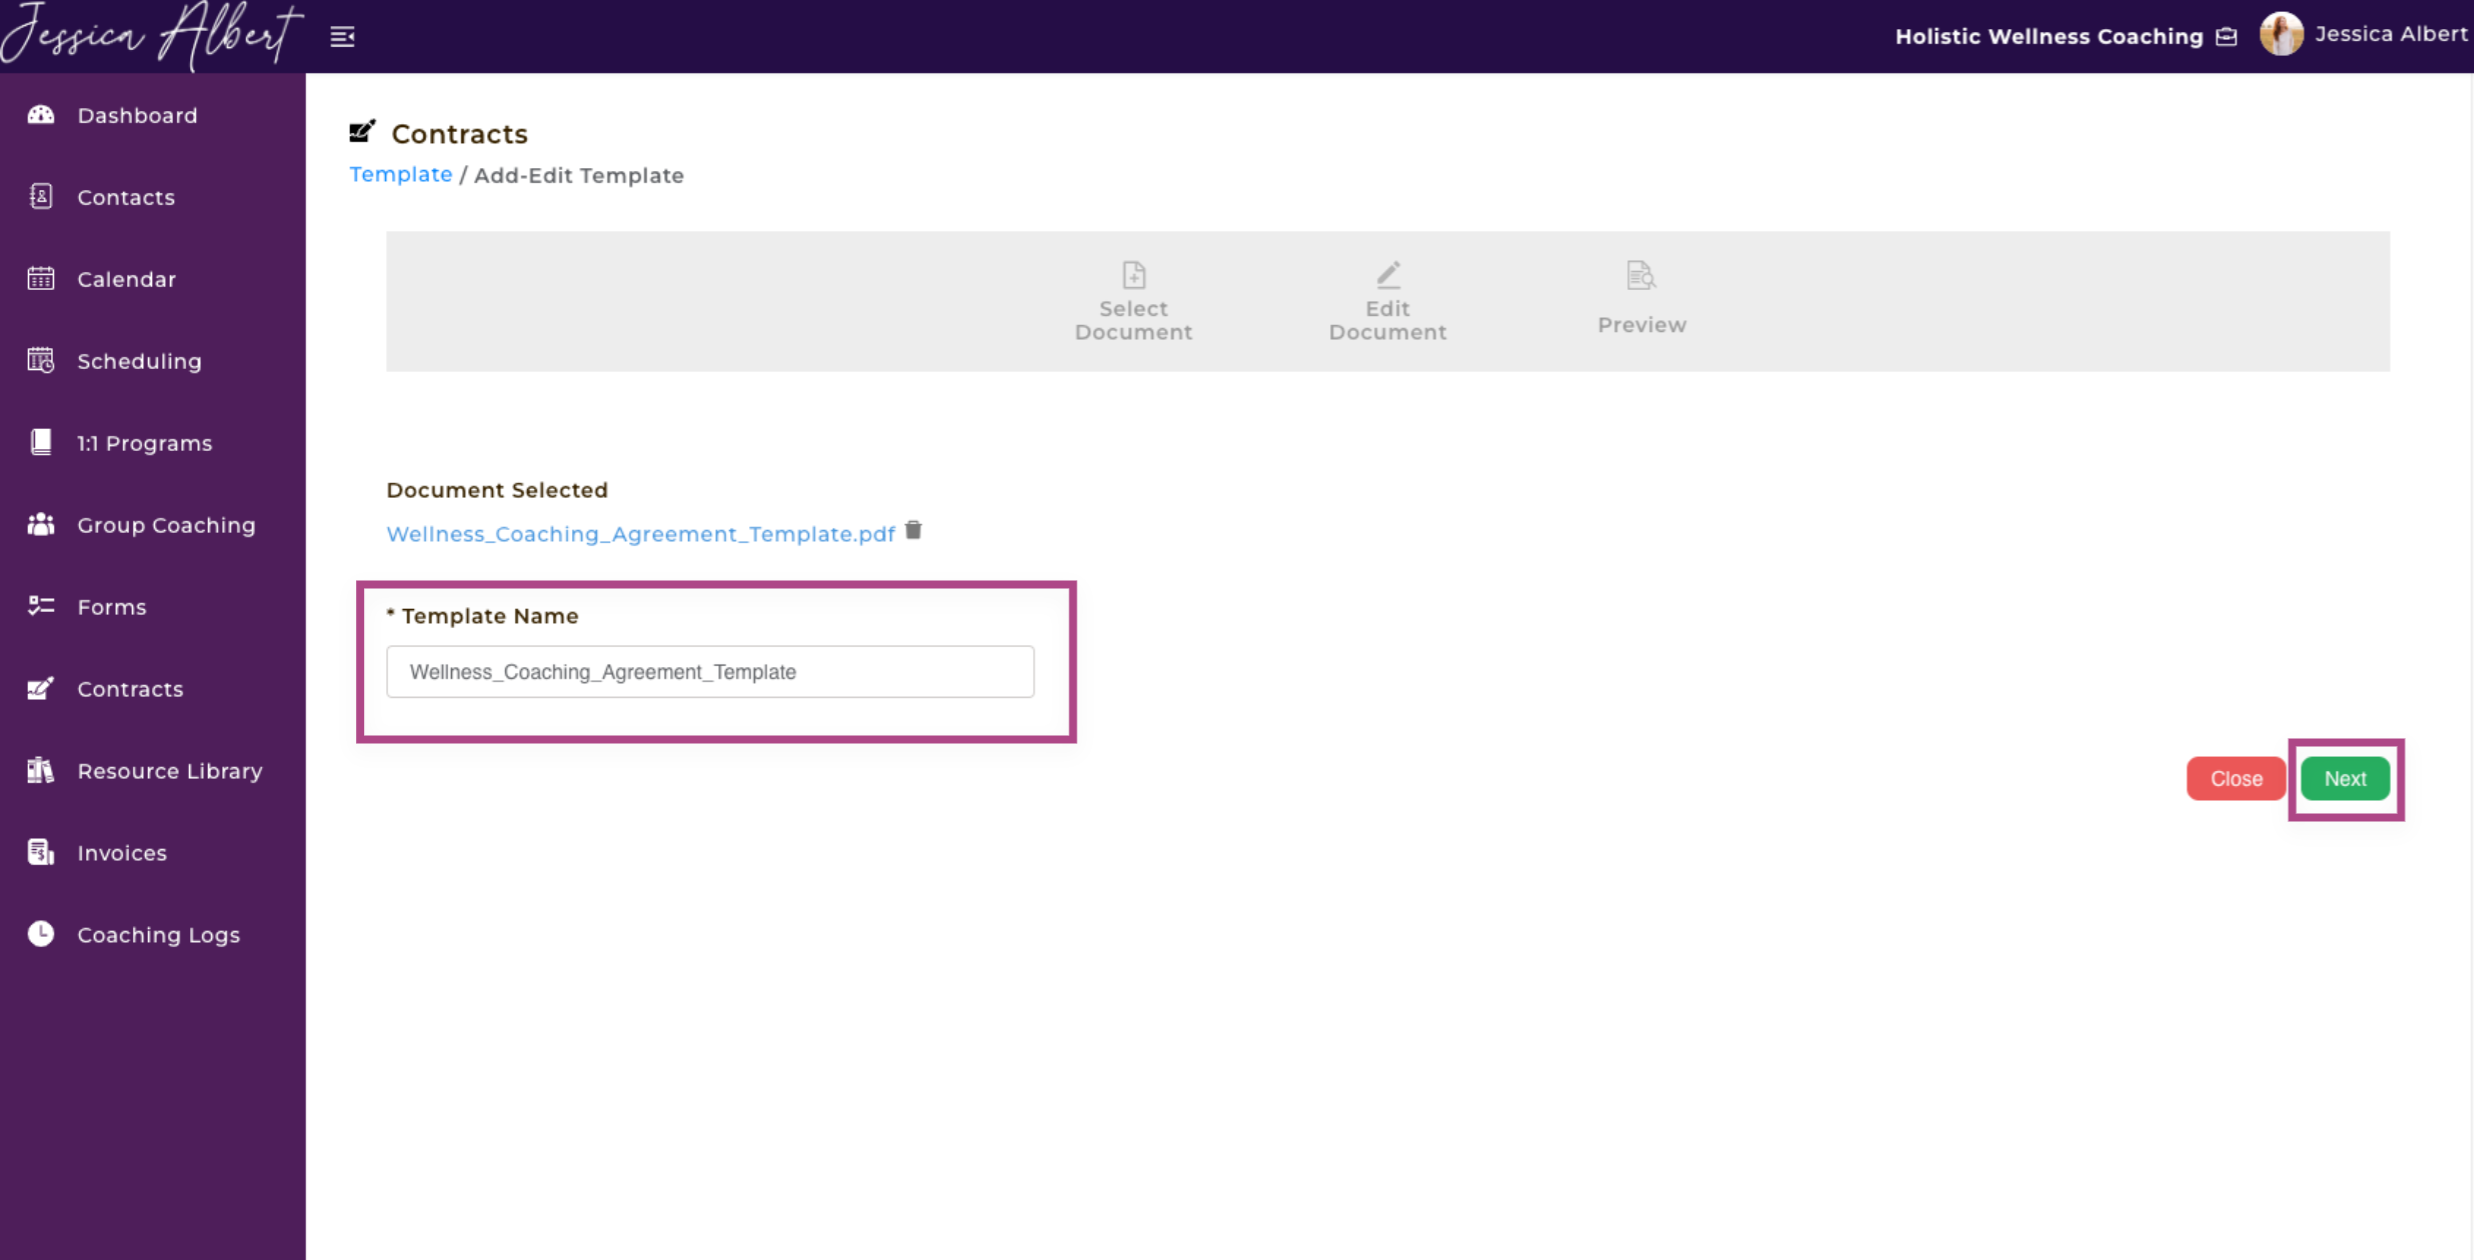
4. Type in a Template Name and click Next.
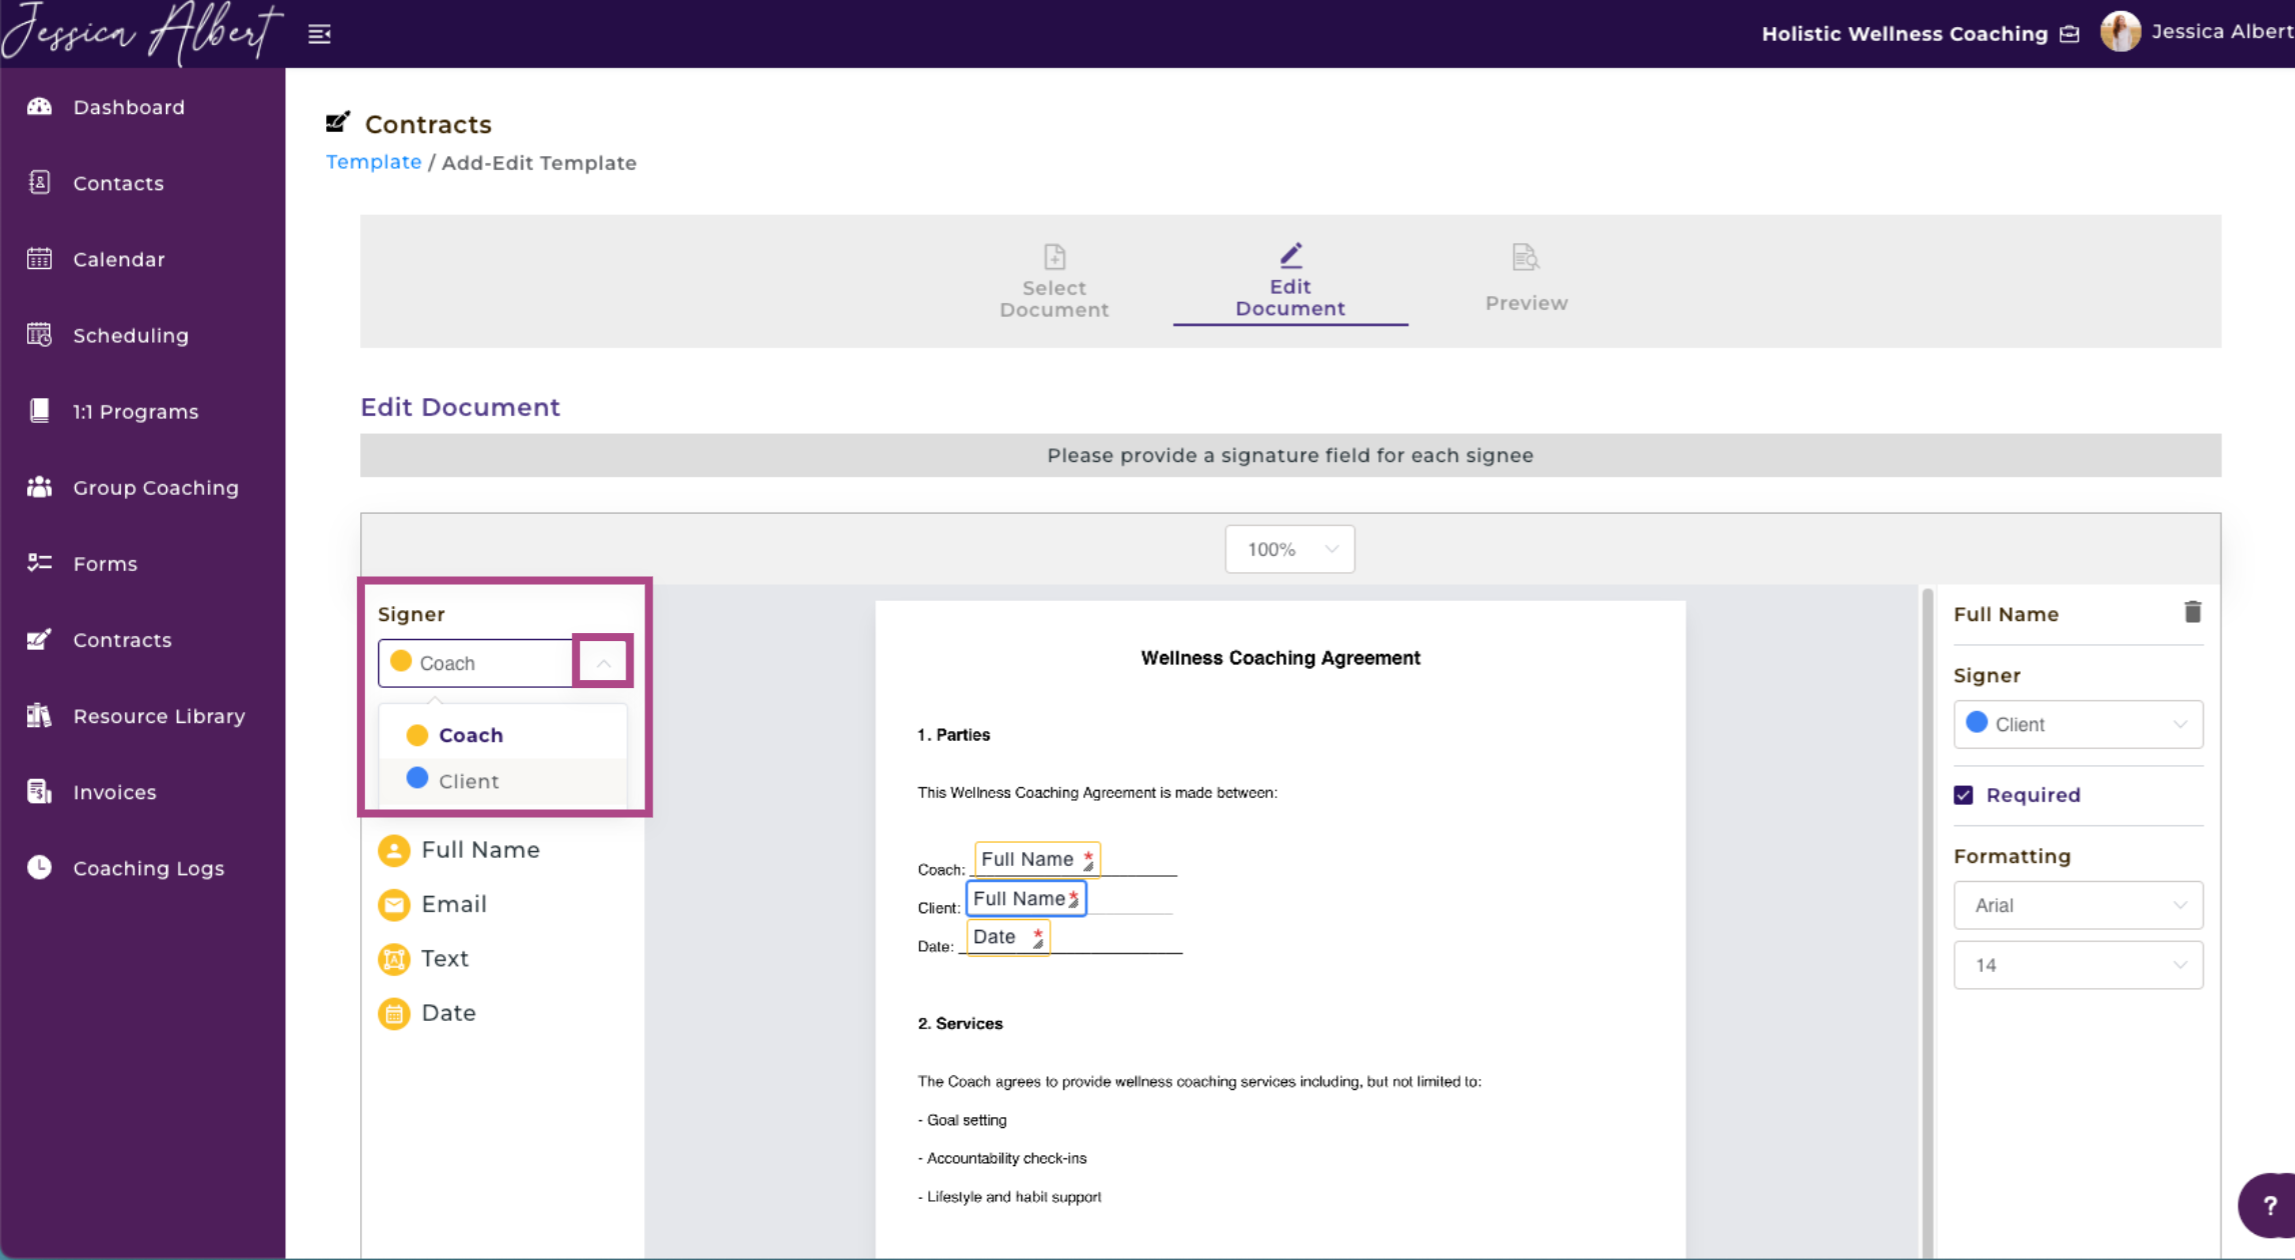
5. Edit the document by dragging and dropping the placeholder fields for Signature, Date, Name, Email. It's up to you which fields you need to place on your template.
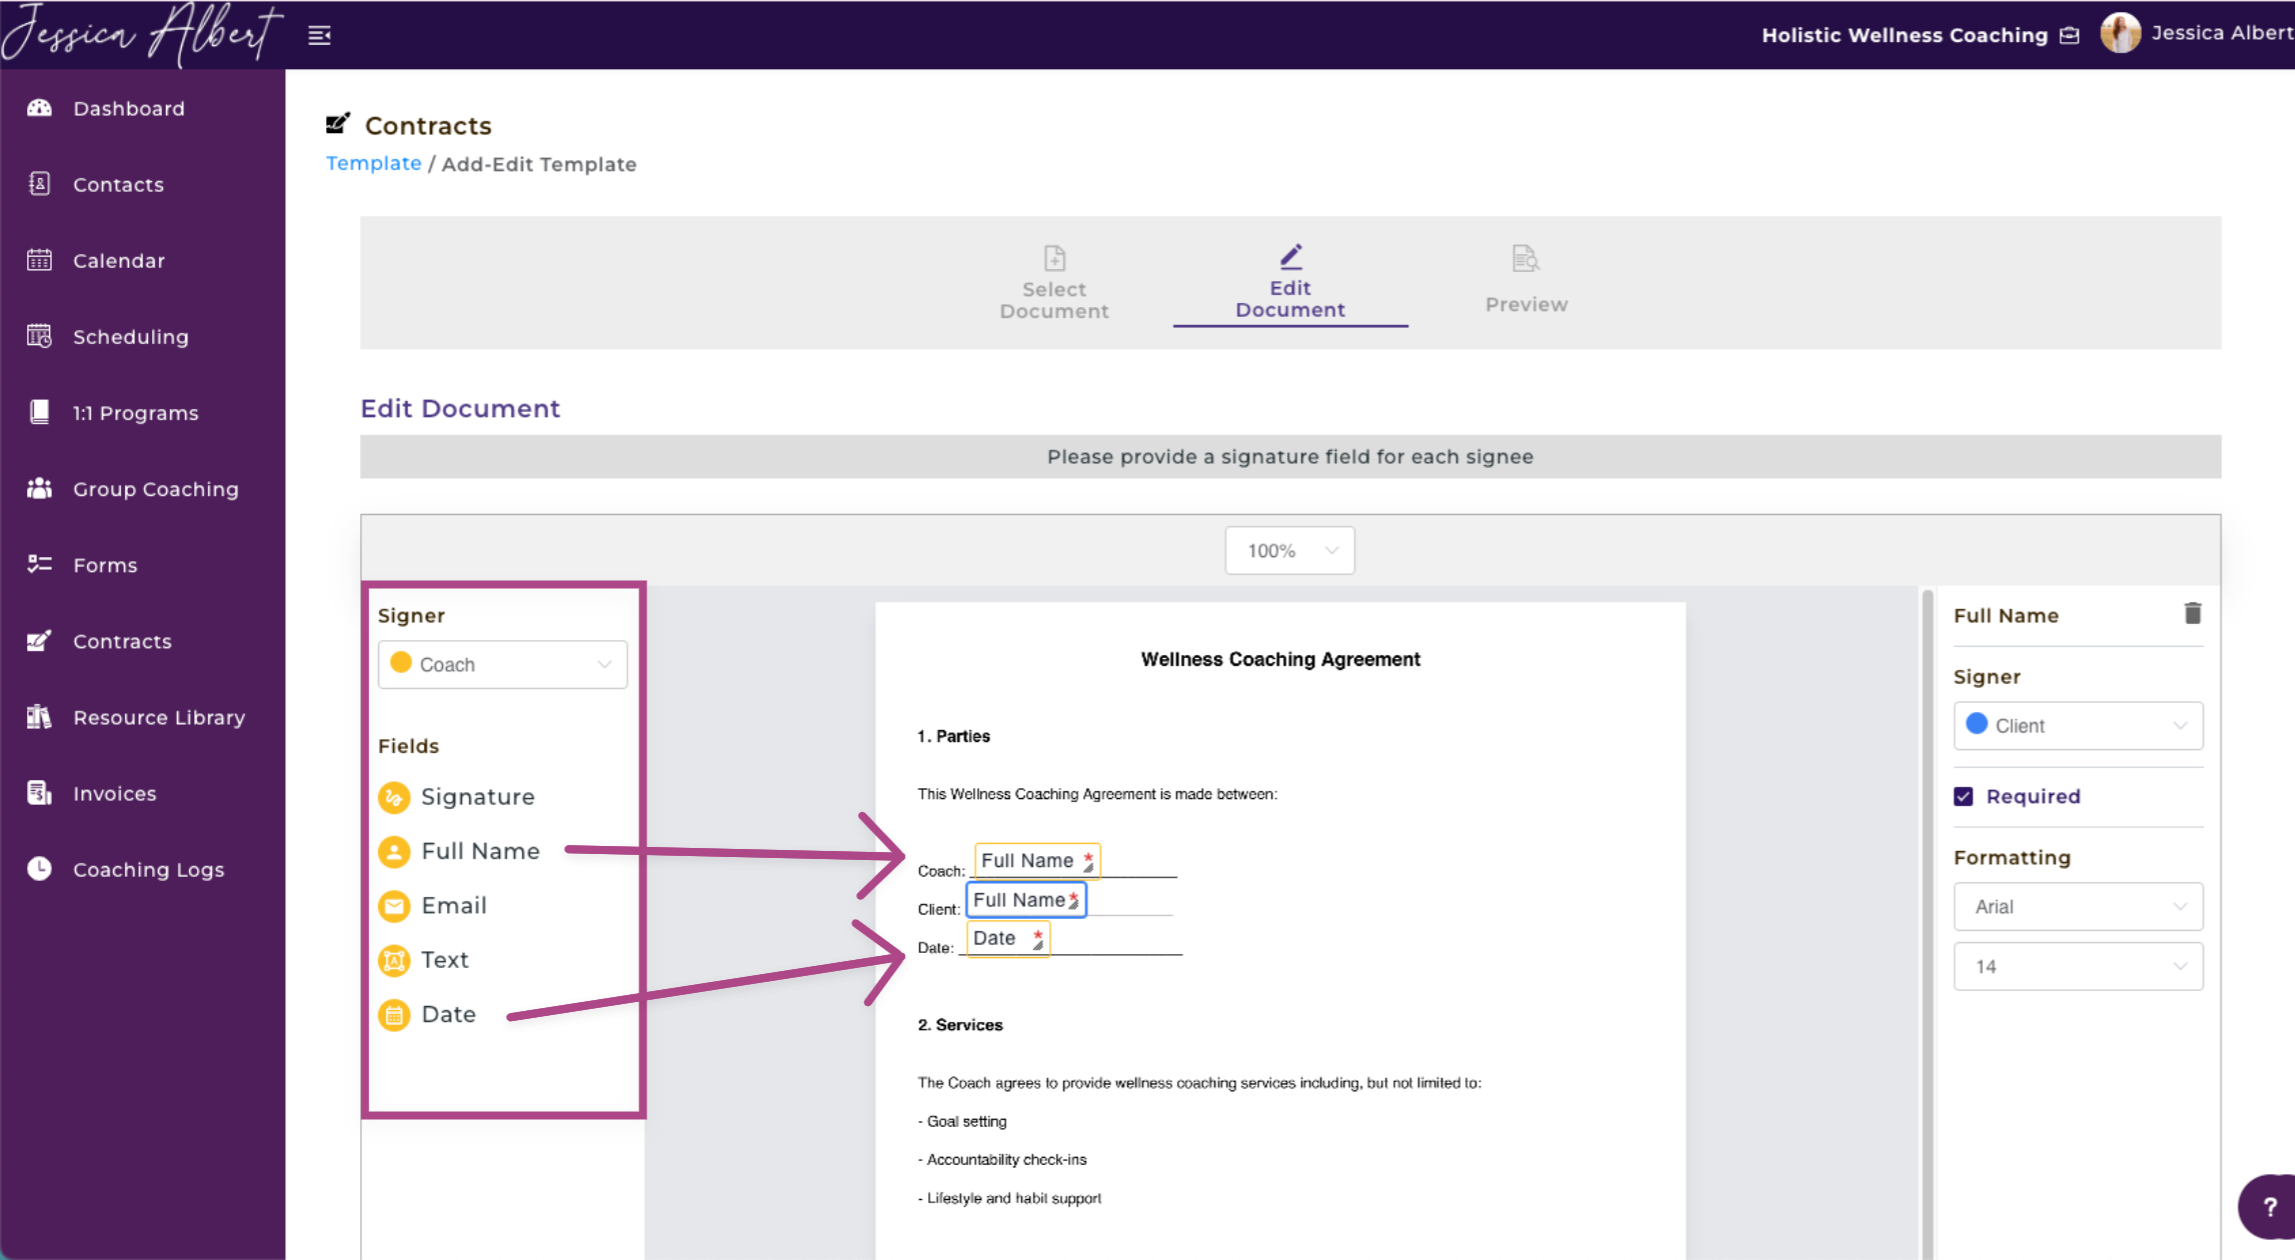
Note: You can change the Signer options from Coach to Client if you'd like to insert fields related to the Client.
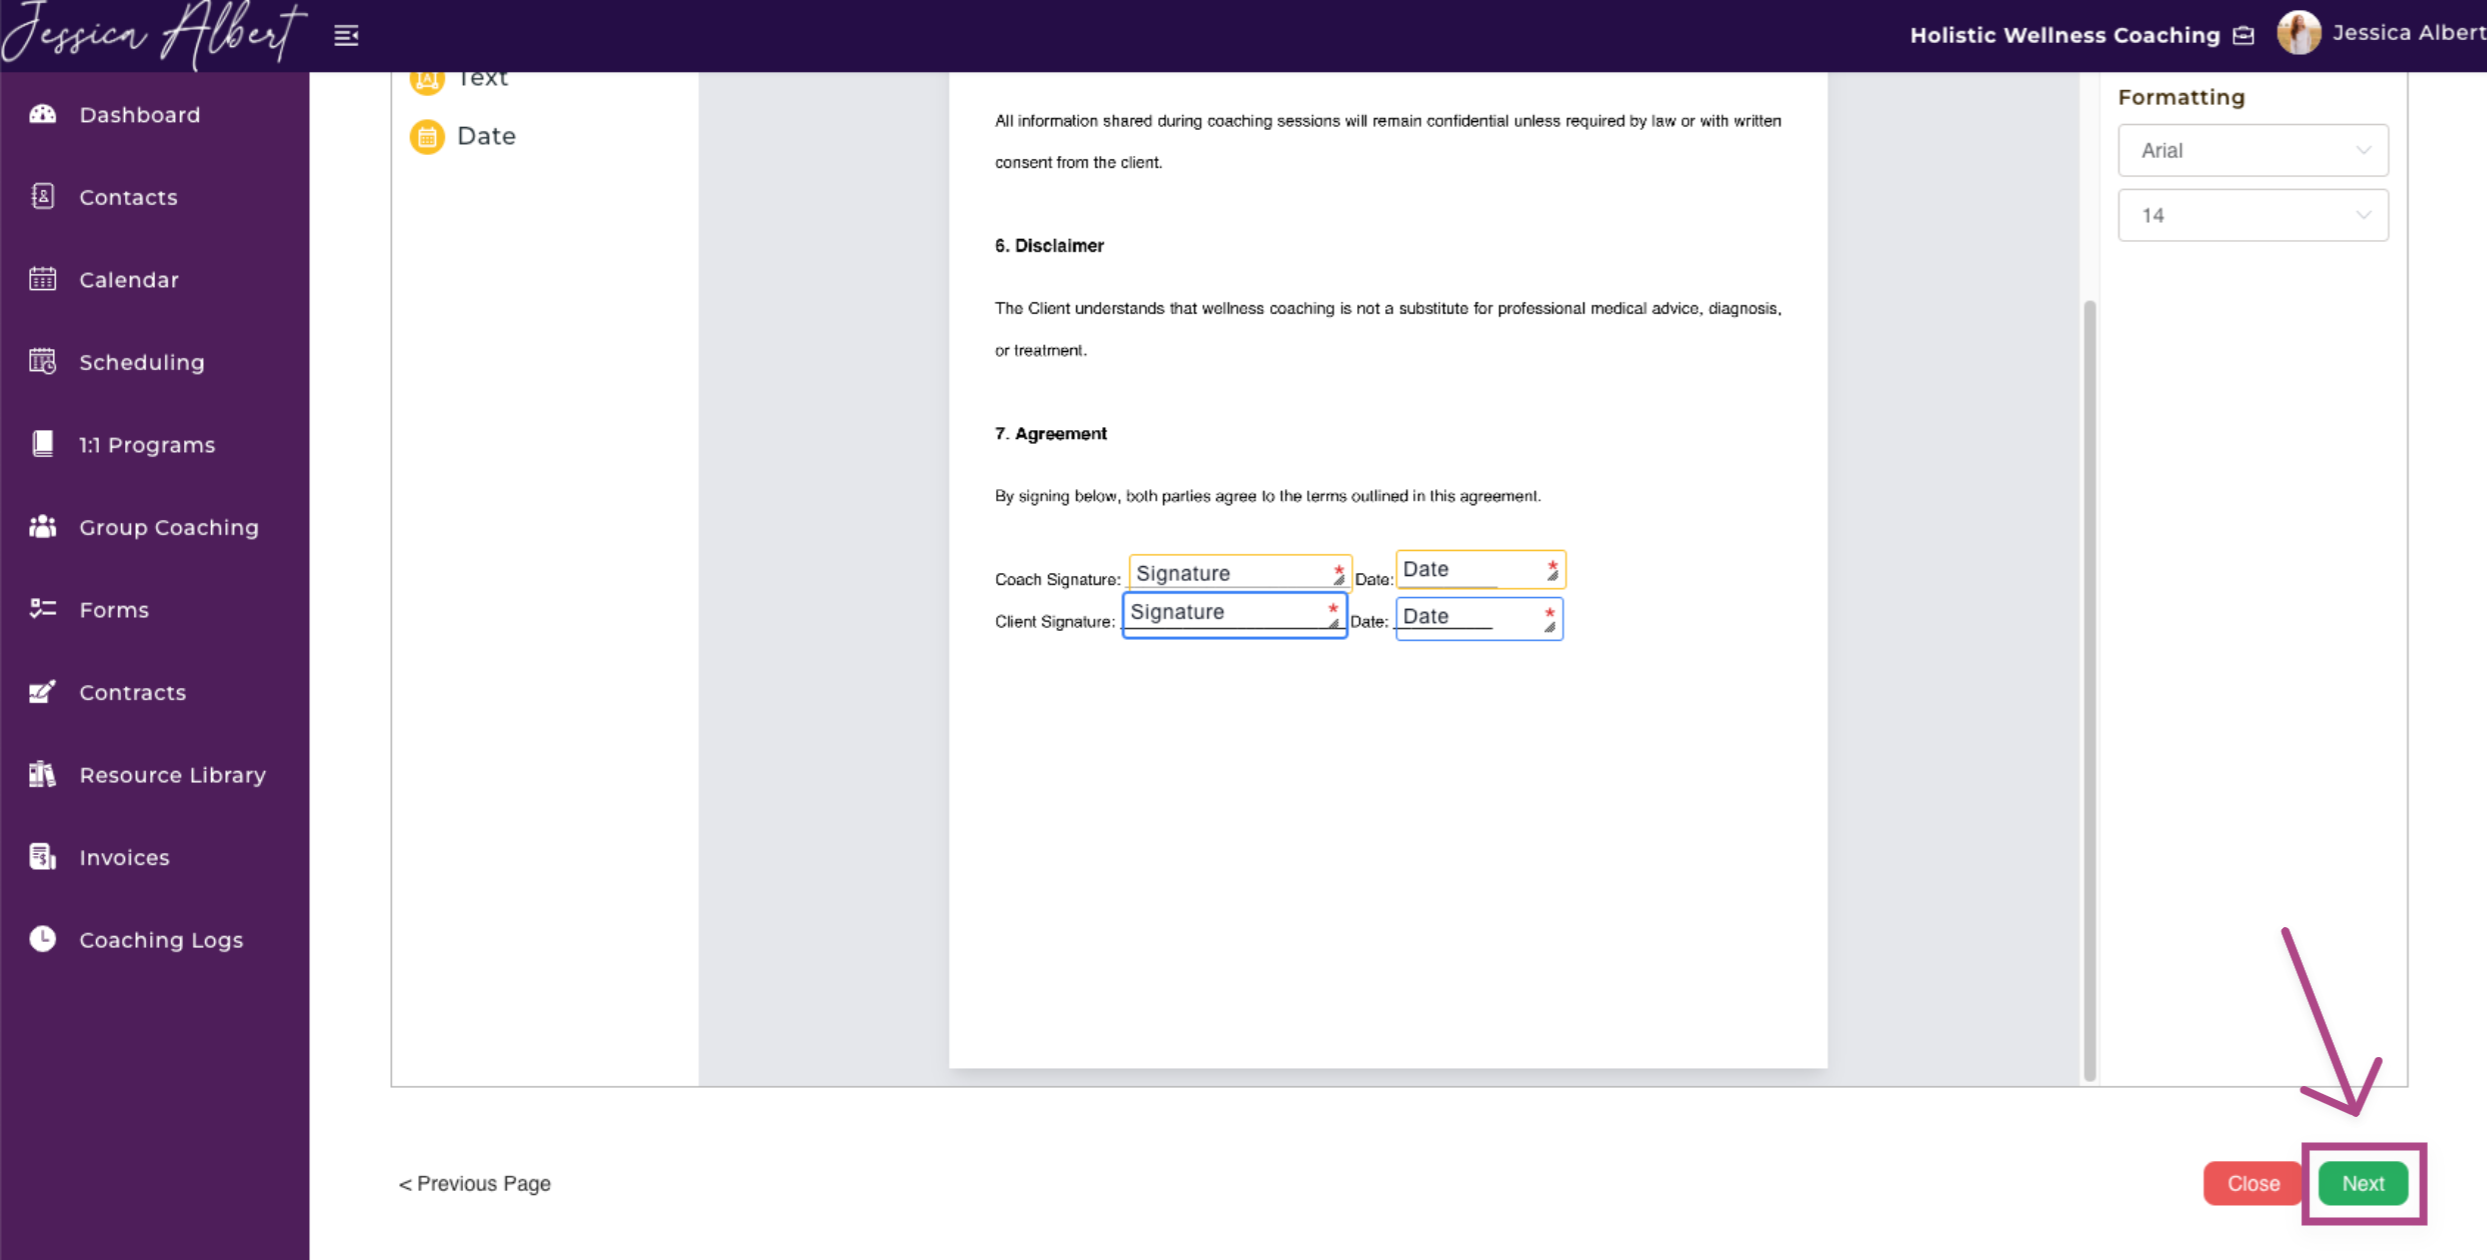
6. Press Next after you've finished inserting the correlating fields.
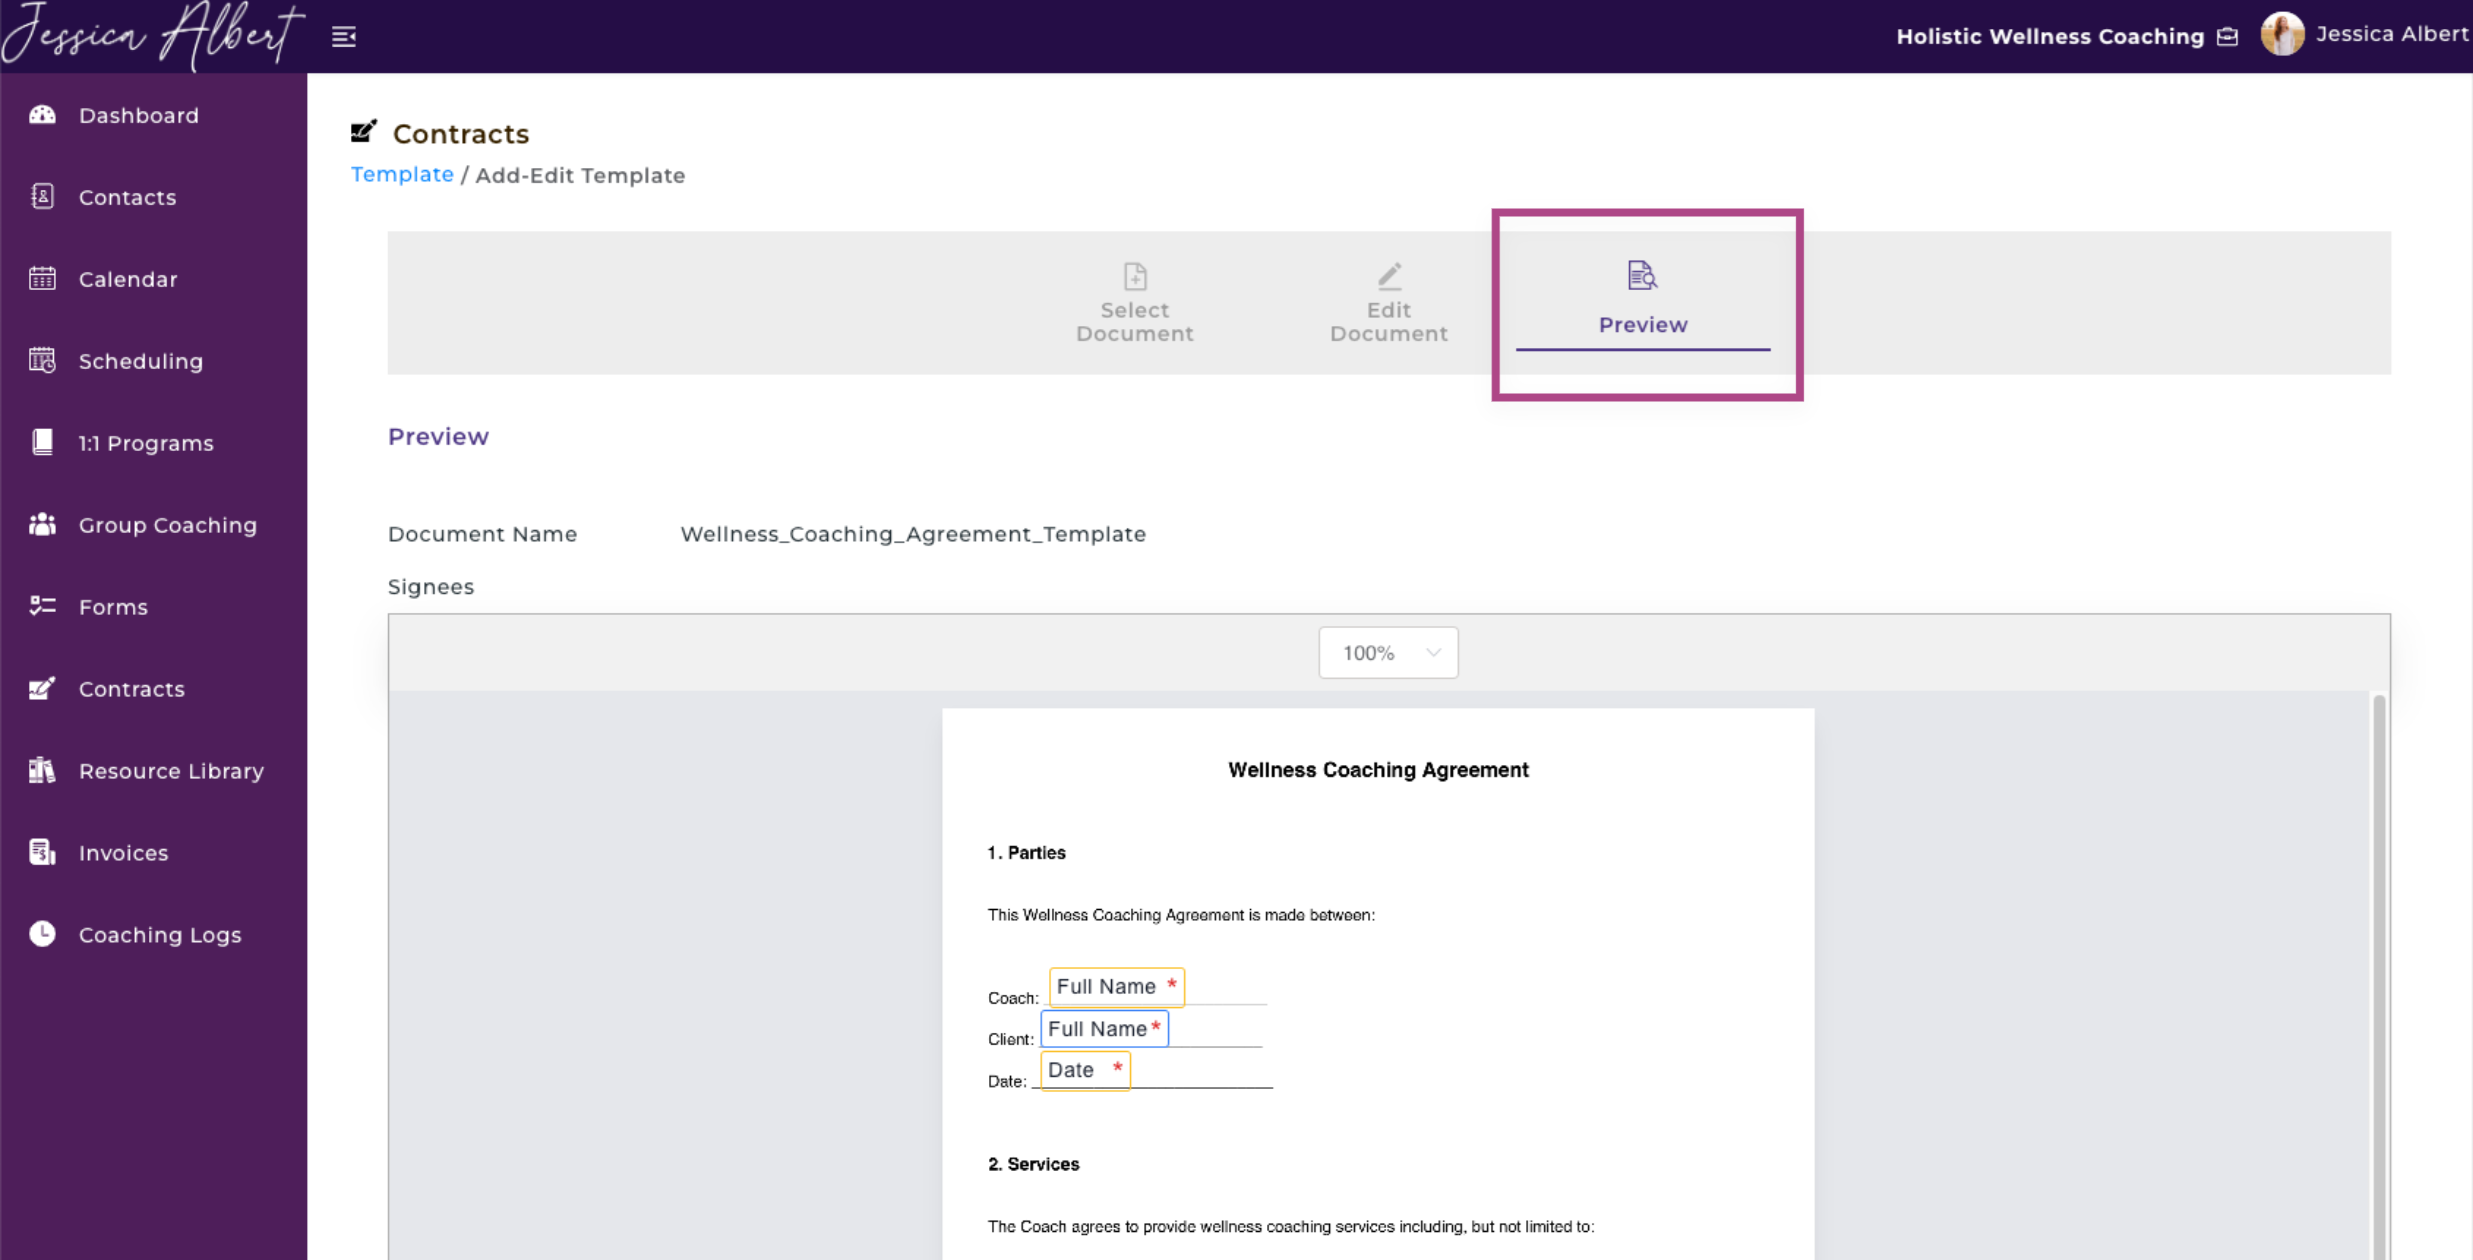
7. Preview the final template and scroll down and click Next.
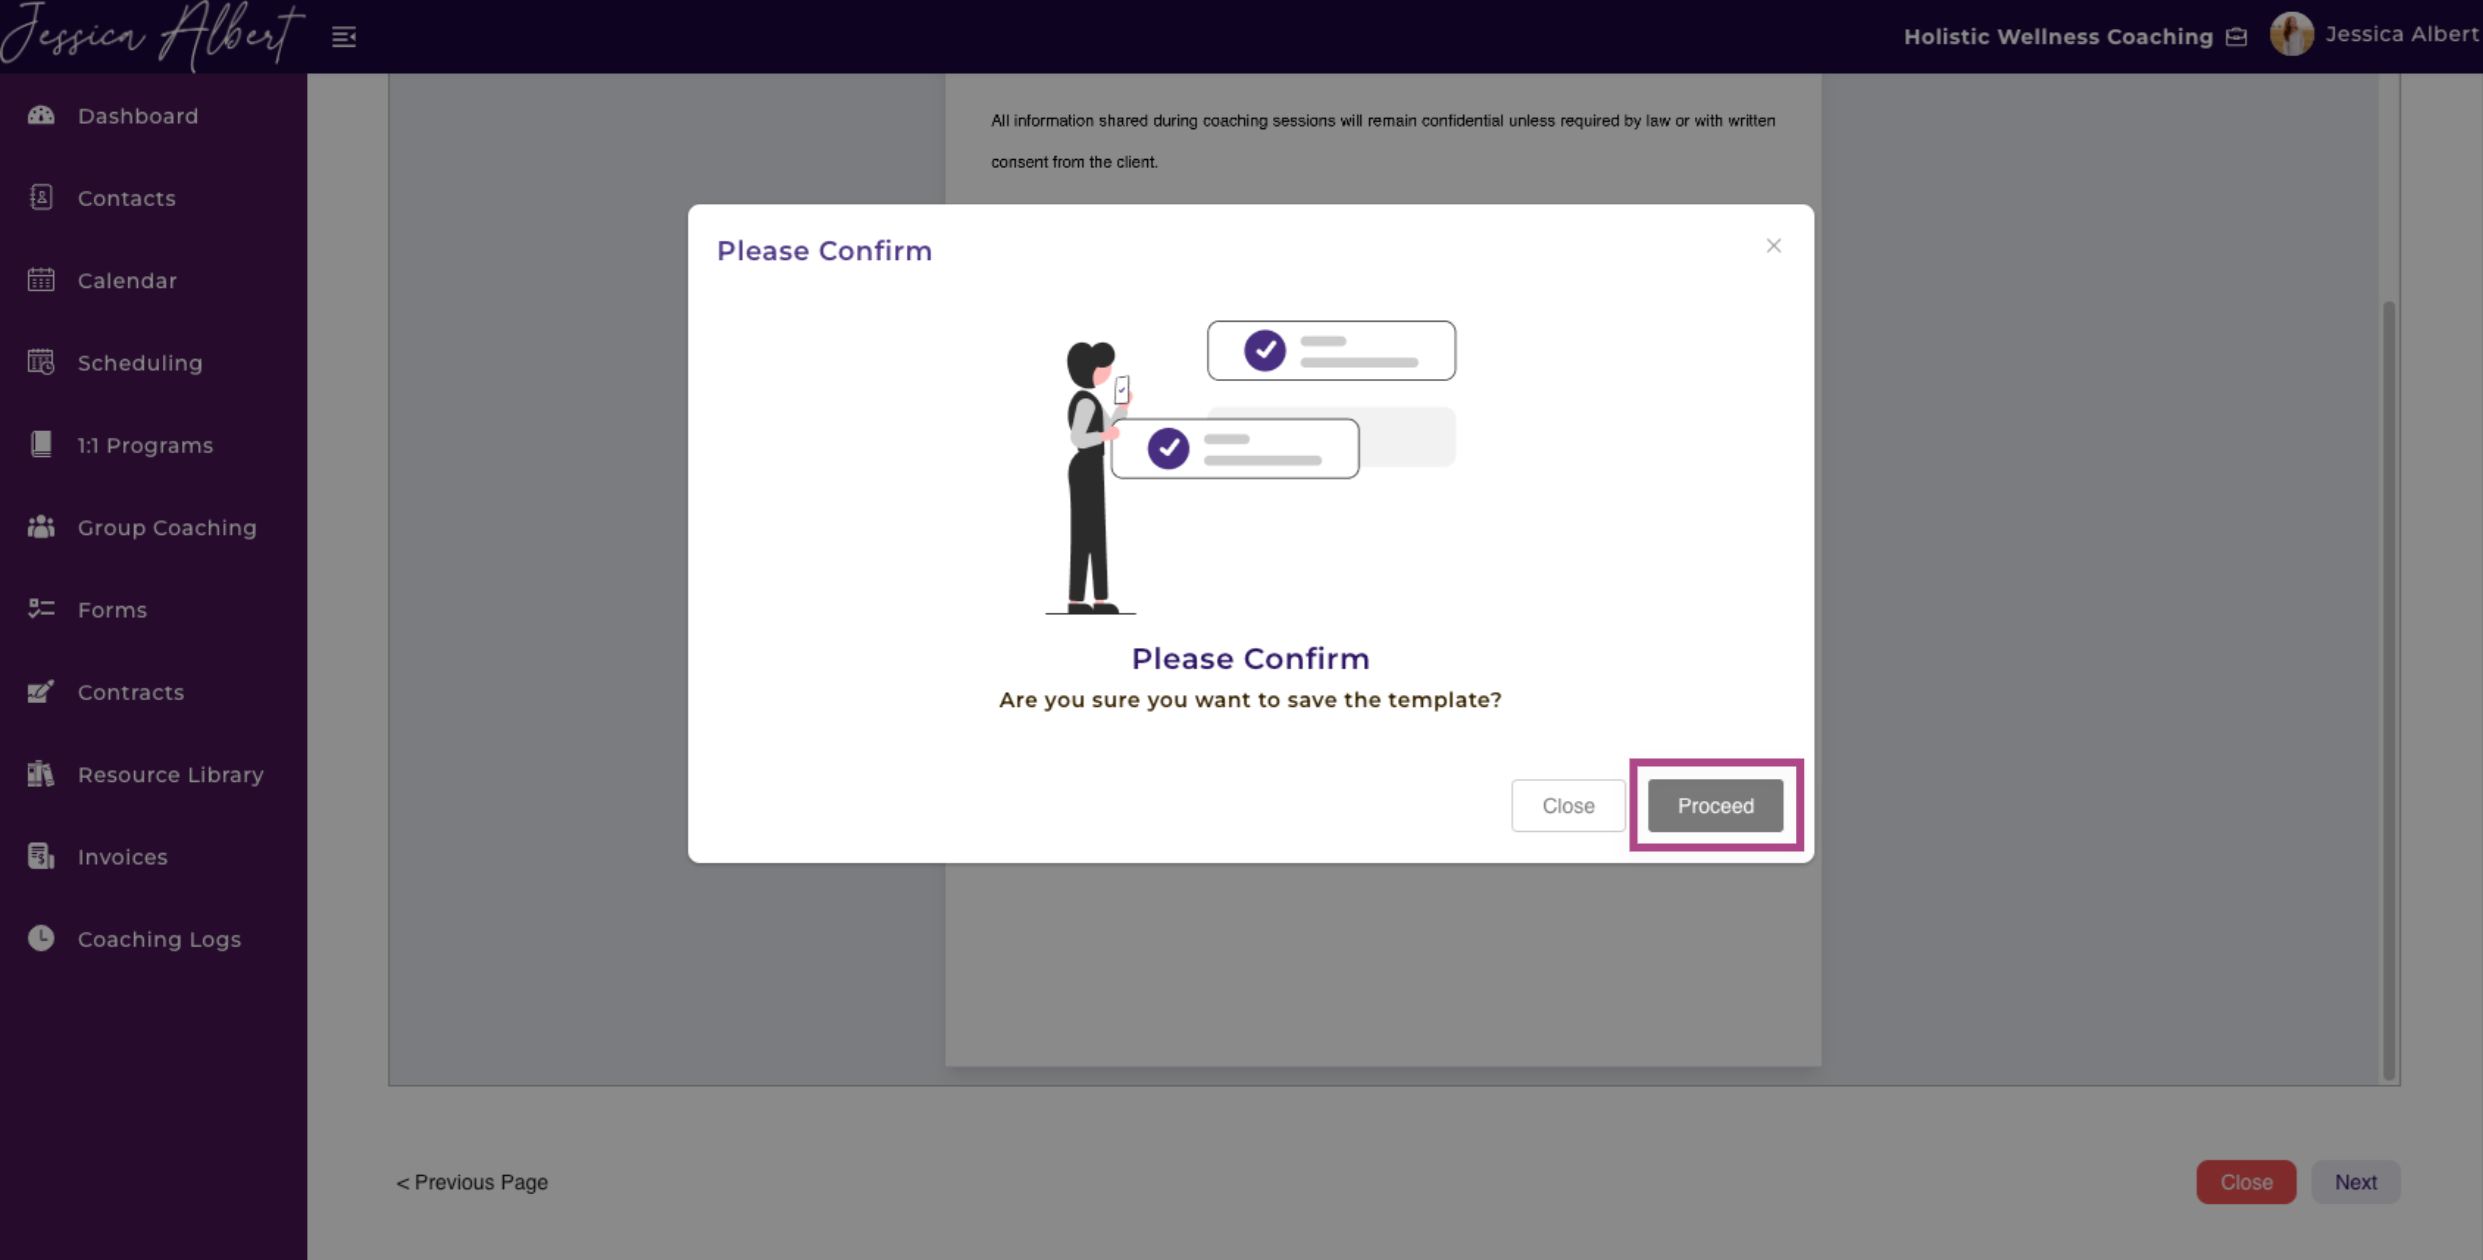
8. Select Proceed on the confirmation window to save the template.
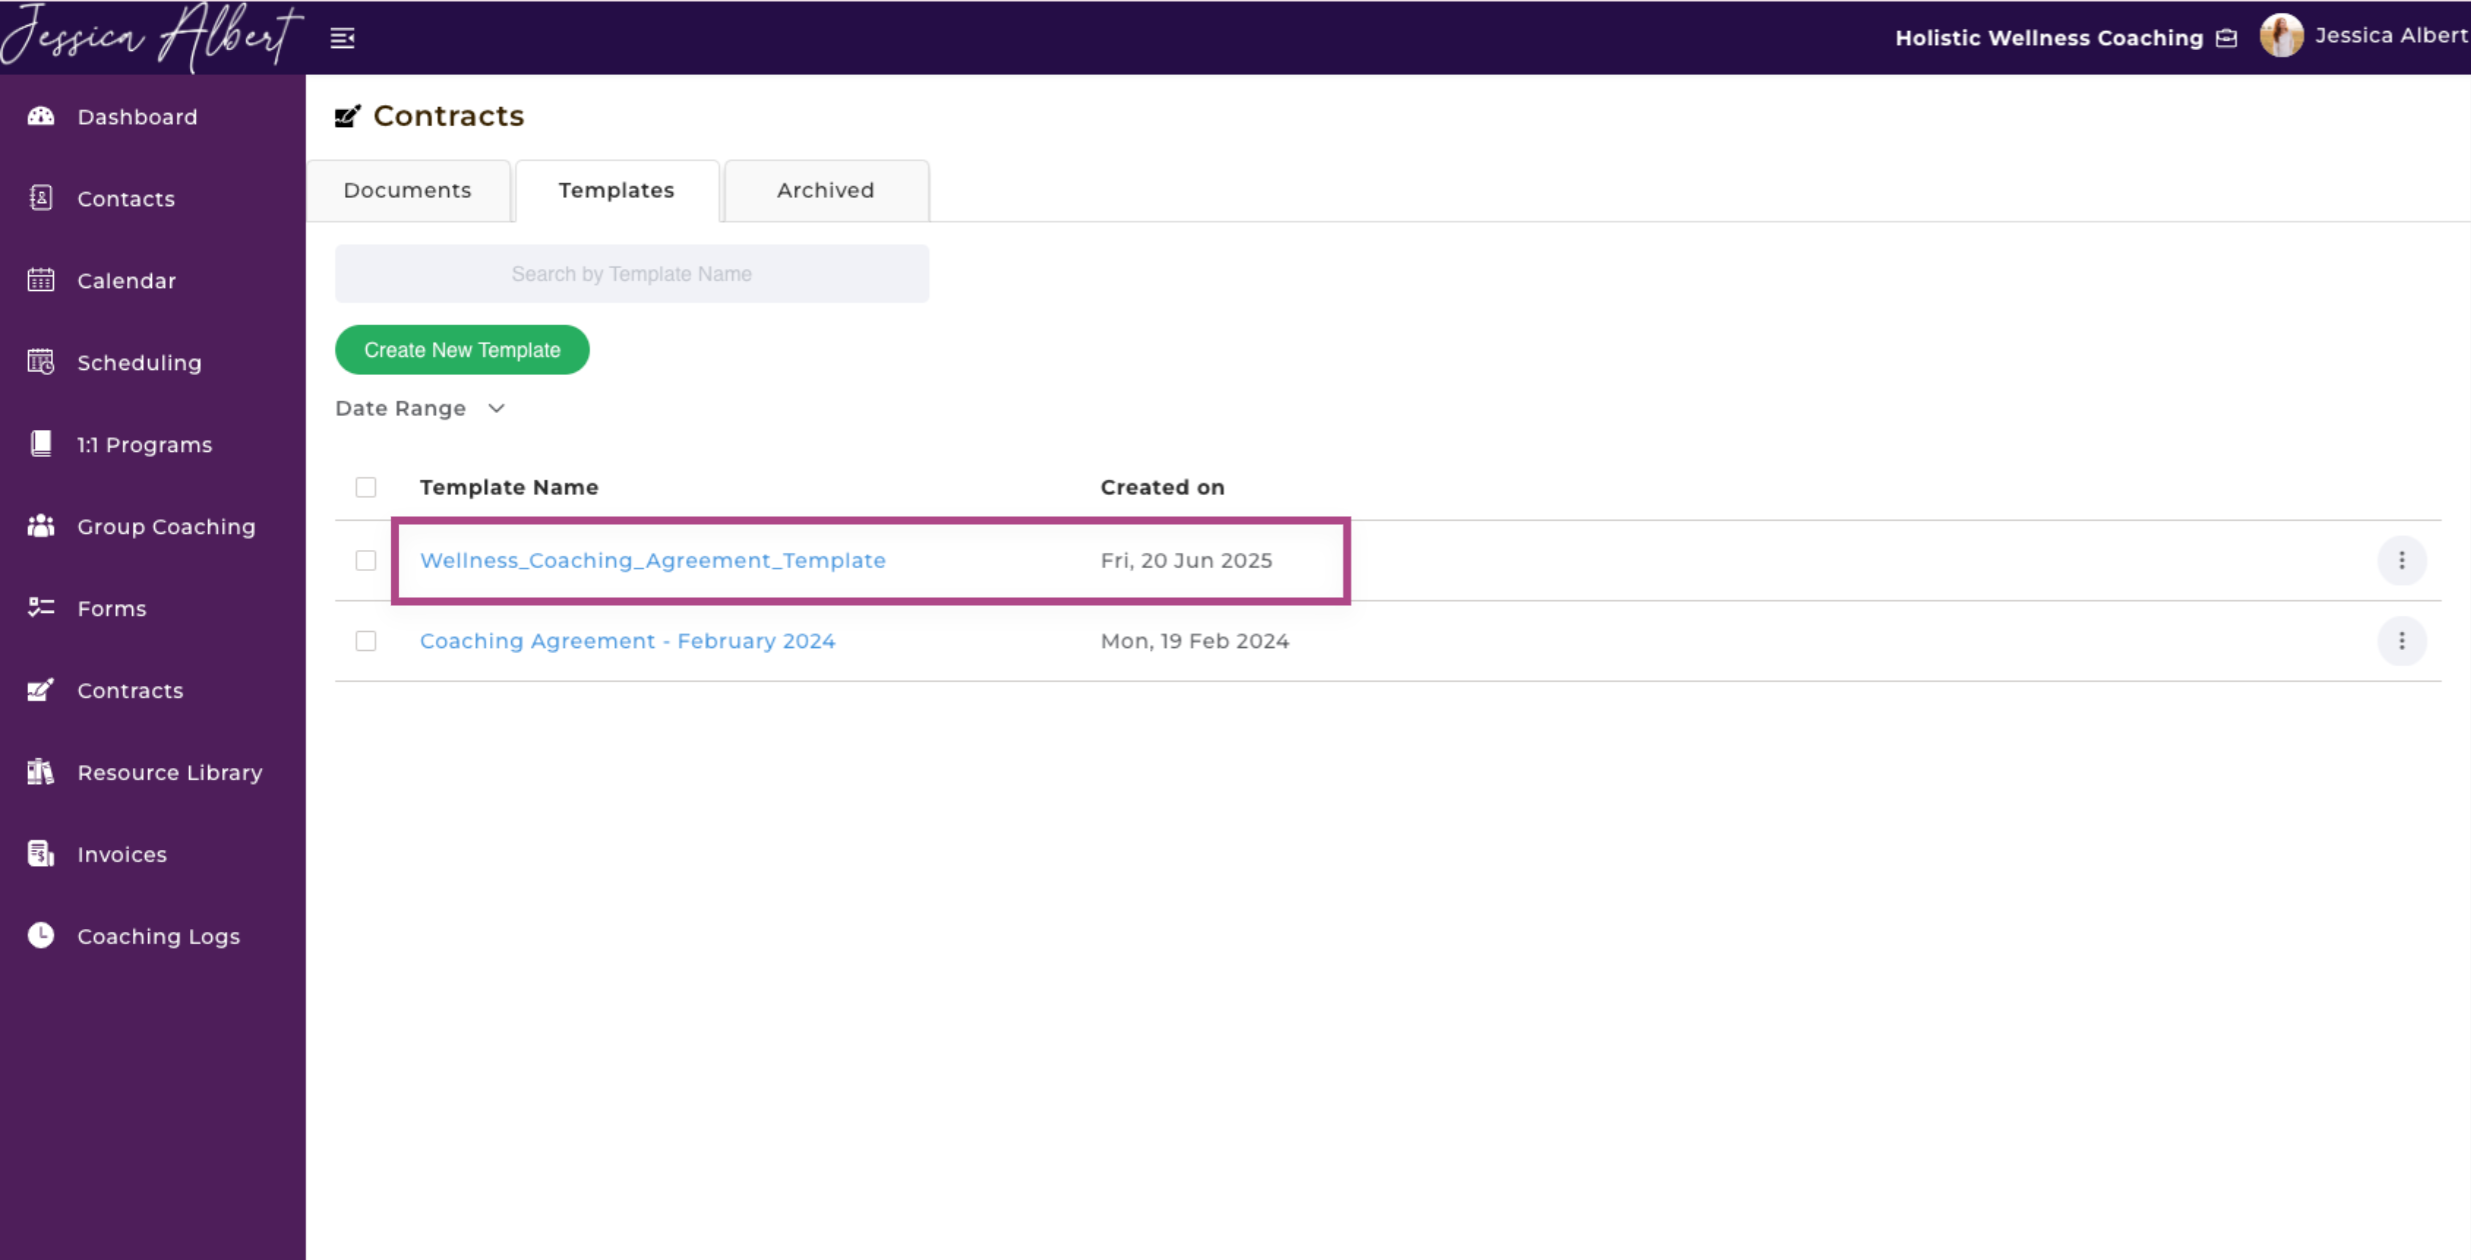
You should see the new template saved in the Templates tab.
Managing Templates
You can manage your contract templates by clicking the 3-dot button menu:
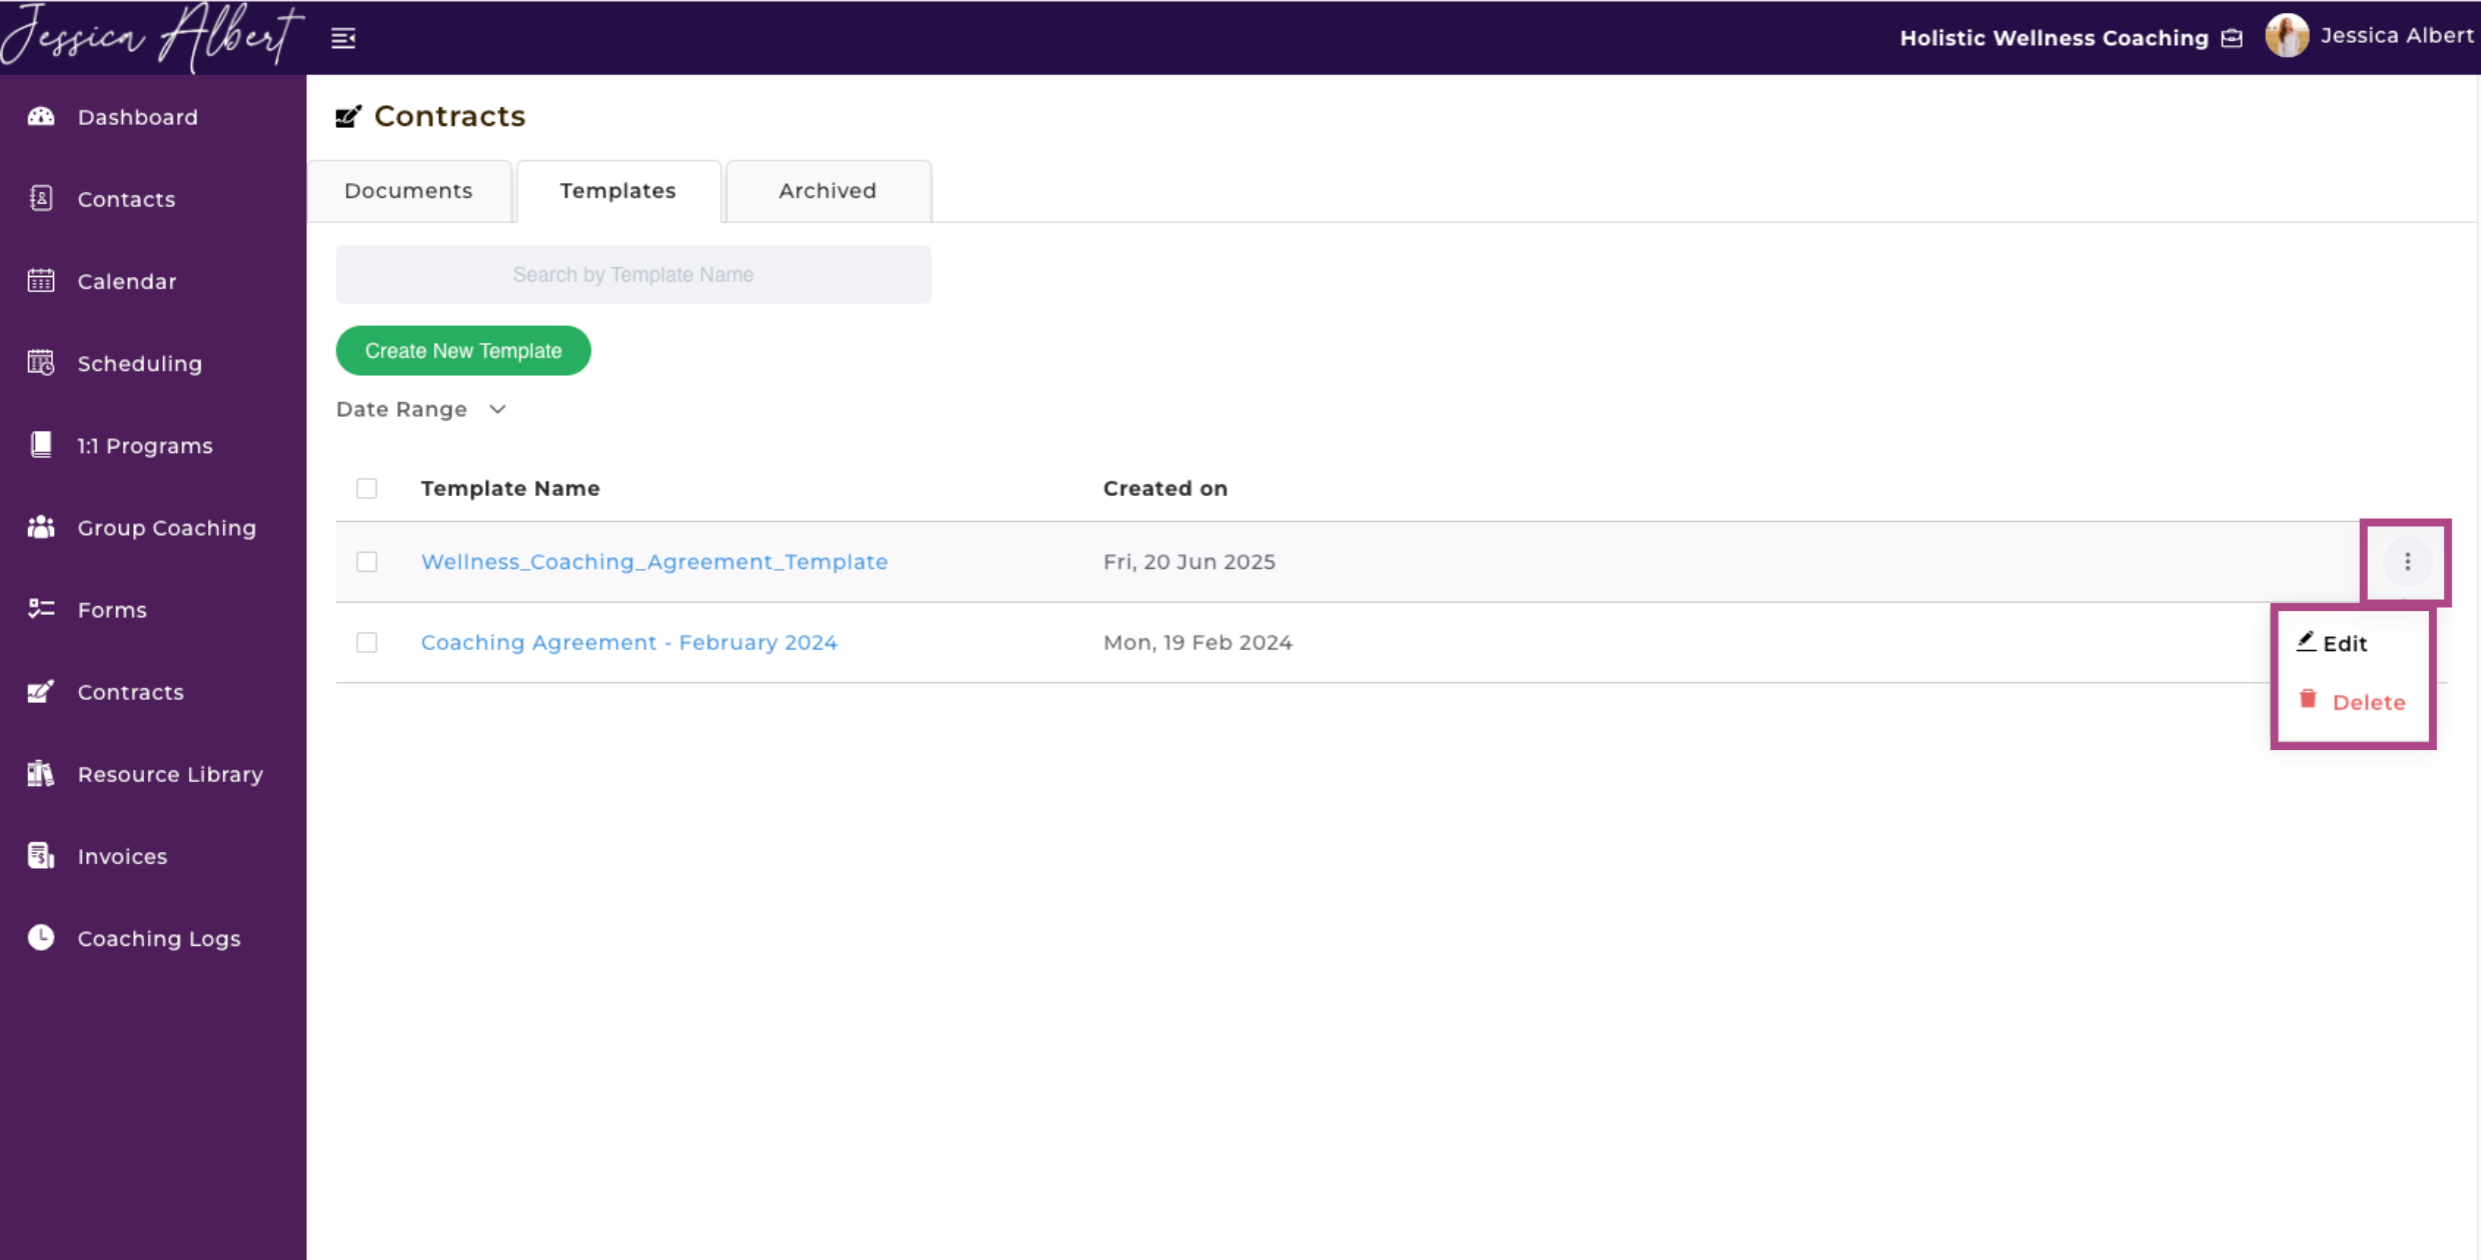
1. Edit
Make changes to your templates.
Important: These changes would not apply to templates that have already been sent out to clients.
2. Download
You can download the document to your device.
3. Delete
You can delete templates if they are no longer needed.
Important: Templates that are currently being used as embedded contract documents in your programs are not able to be deleted. You will first have to remove them from your program settings before you can delete the template.
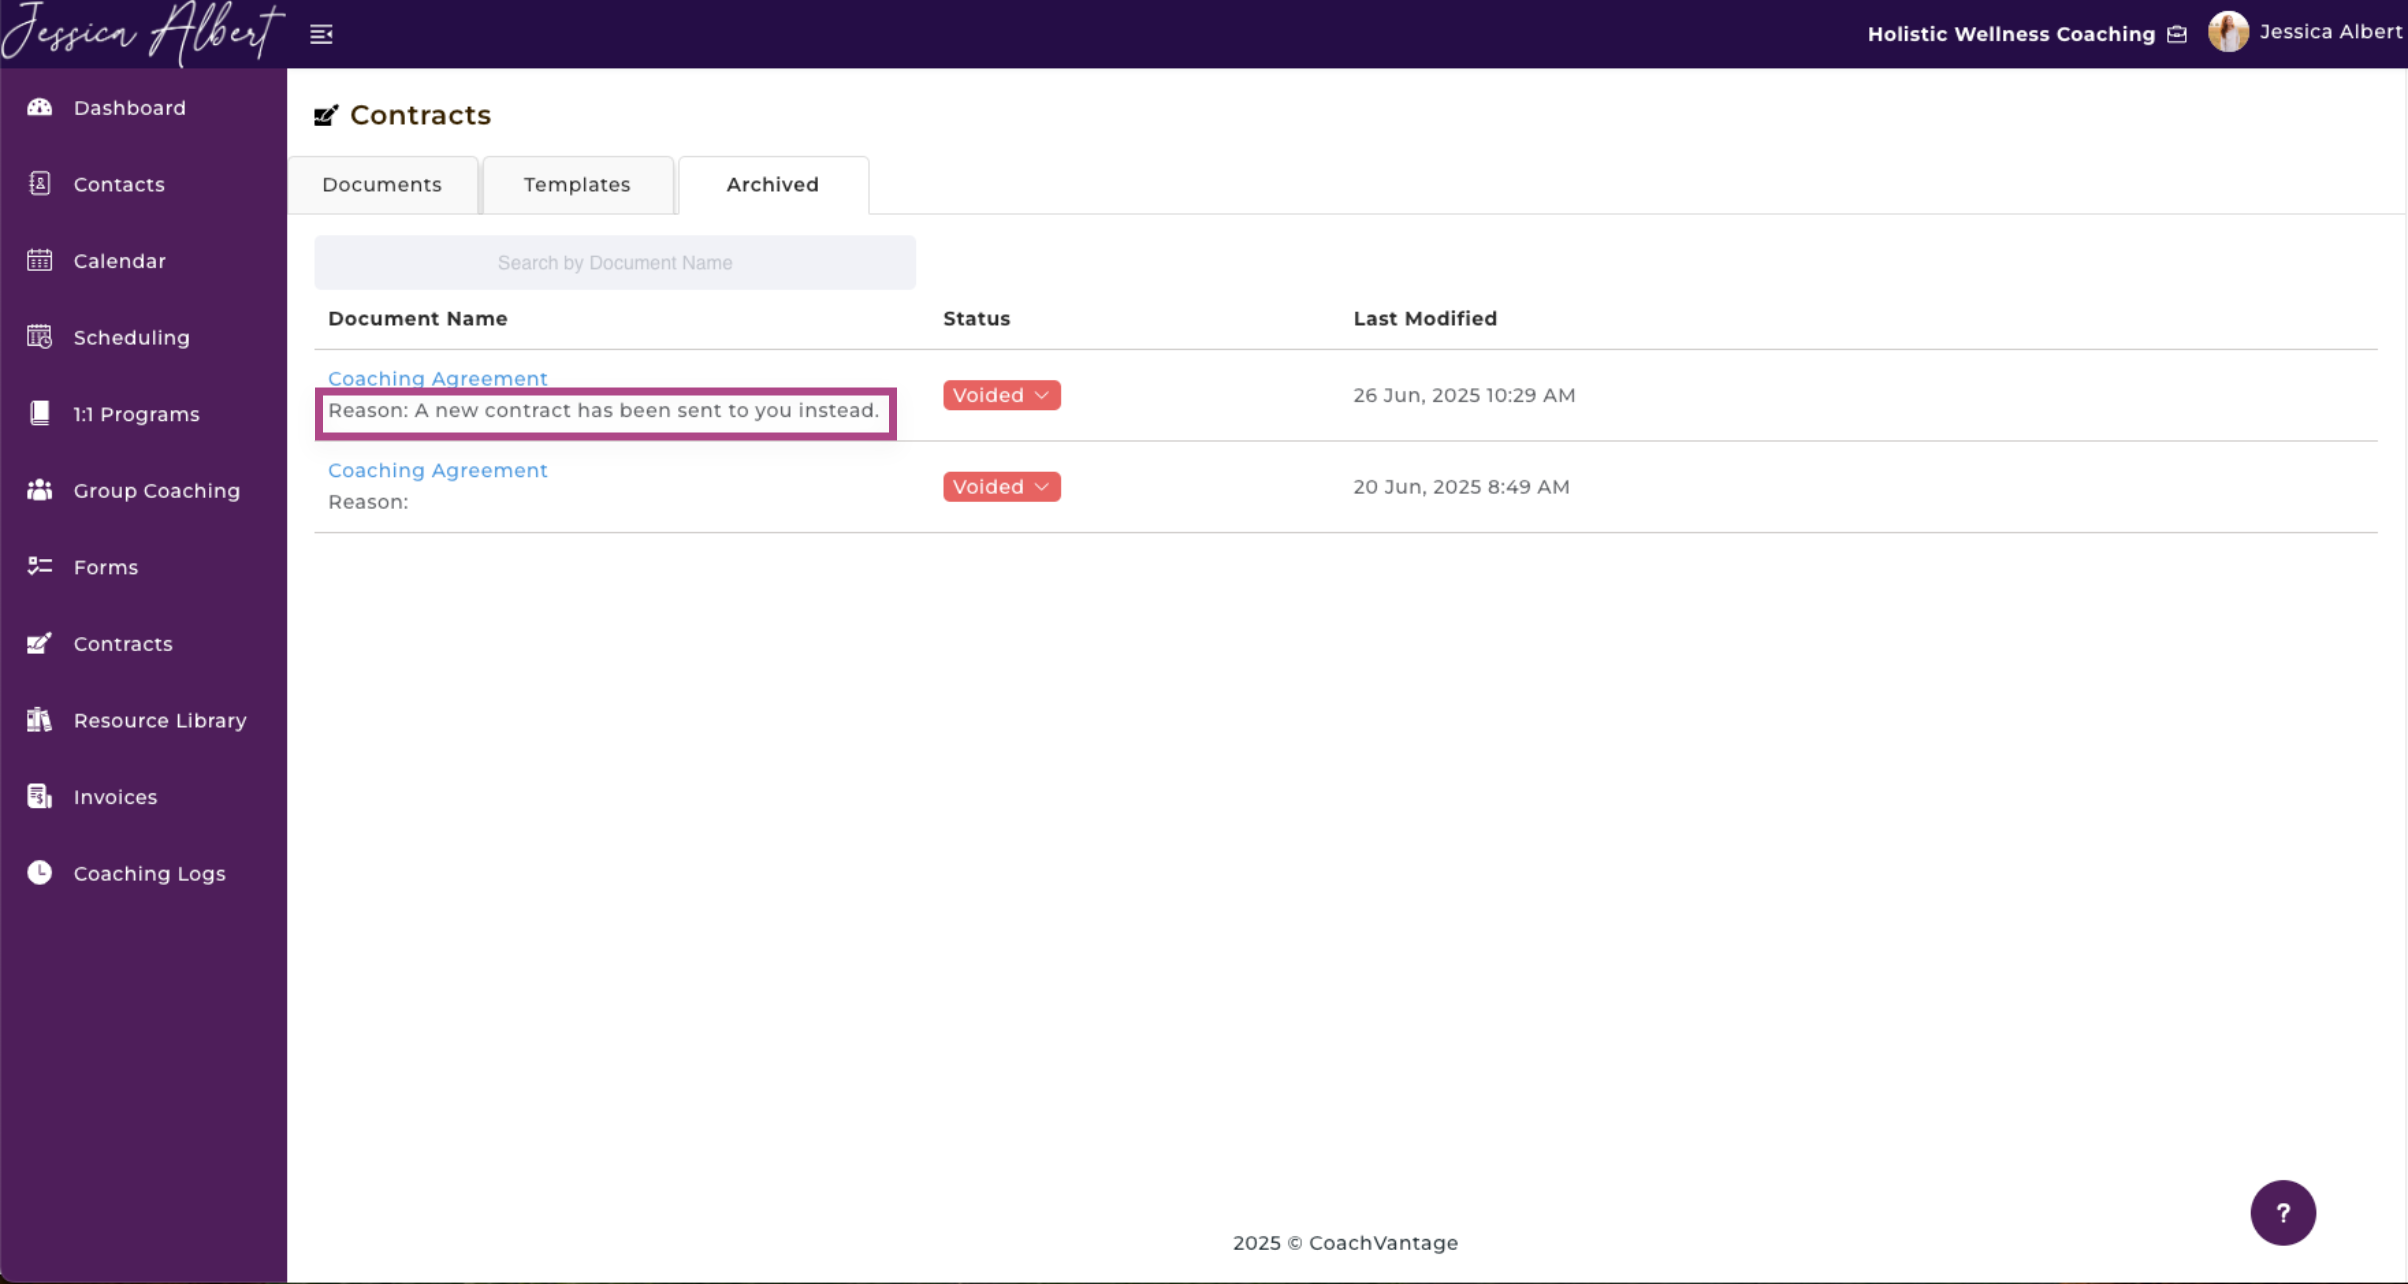
5. Archived Tab 🗑️
Contracts that you've voided can be found in the Archived tab.
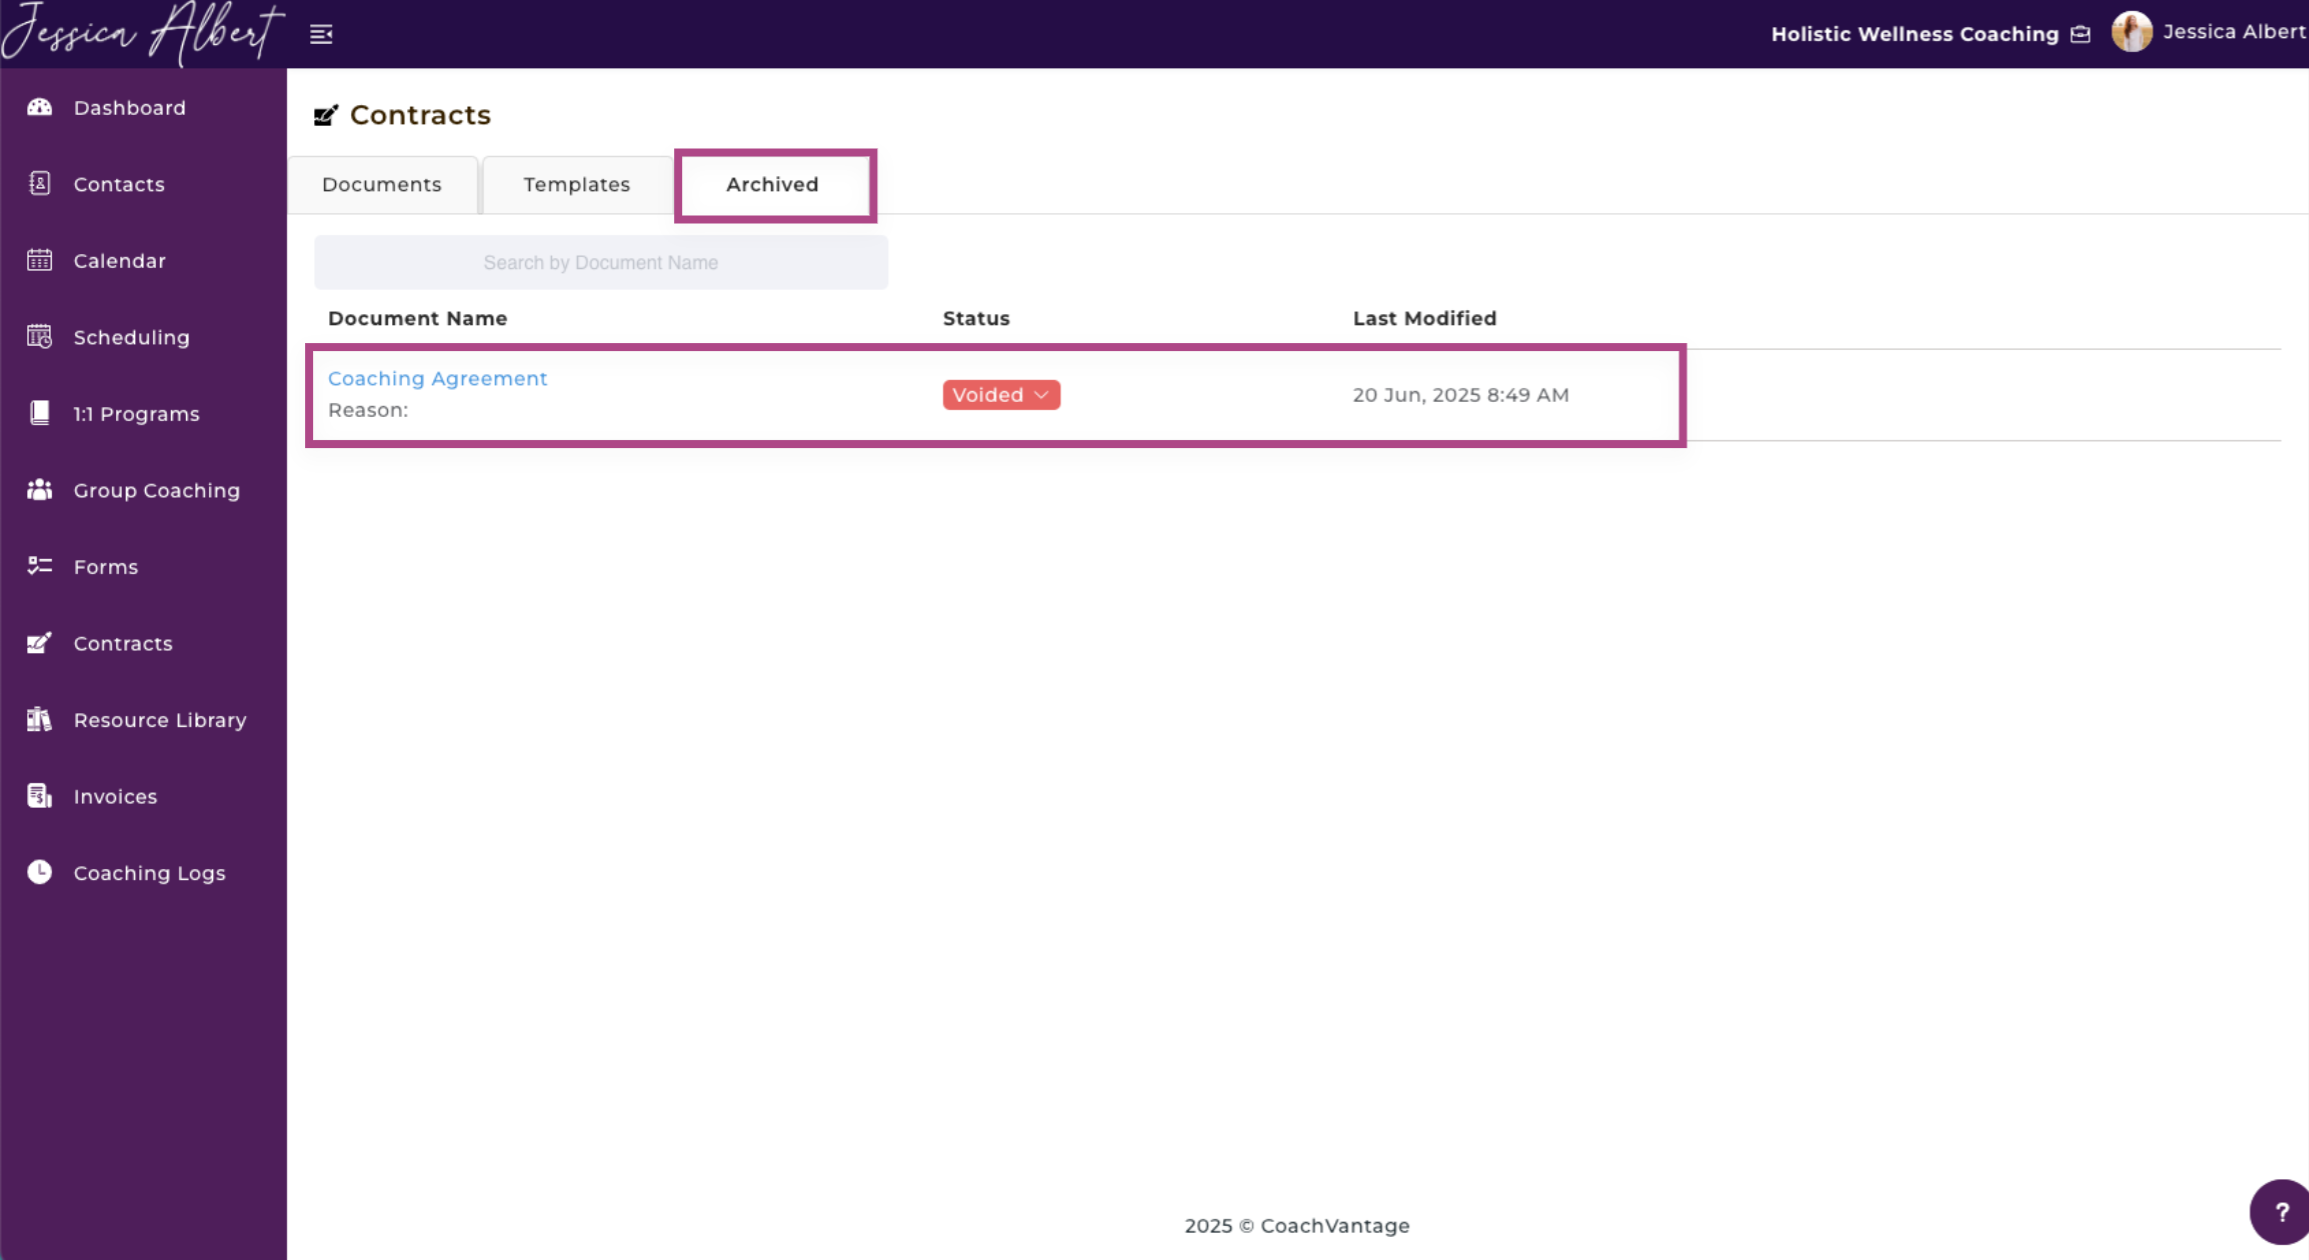
You'll be able to view Document Name, Status and Last Modified.
If you provided a Reason for voiding the contract, it will appear below the Document Name in blue.