
How to Create a Quick Start Program for Clients
With a Quick Start Program, you can enroll clients immediately, without them having to sign up from a sign-up page (or landing page).
You have the option to configure a Quick Start program setting to send invoices later by email, and to get a contract e-signed (only for Aha! Plan subscribers) which will be emailed separately to your client.
Tip: Quick Start Programs are great if you would like to import existing clients into CoachVantage mid-stream through an ongoing coaching engagement. This will help you to migrate easily from another platform, to CoachVantage.
(If you would like to fully automate the client onboarding process and have clients enroll to your coaching programs via a sign-up page, then you should invite clients to a Standard Program or Custom Program).
Creating a Quick Start Program 🎉
To create a quick start program:
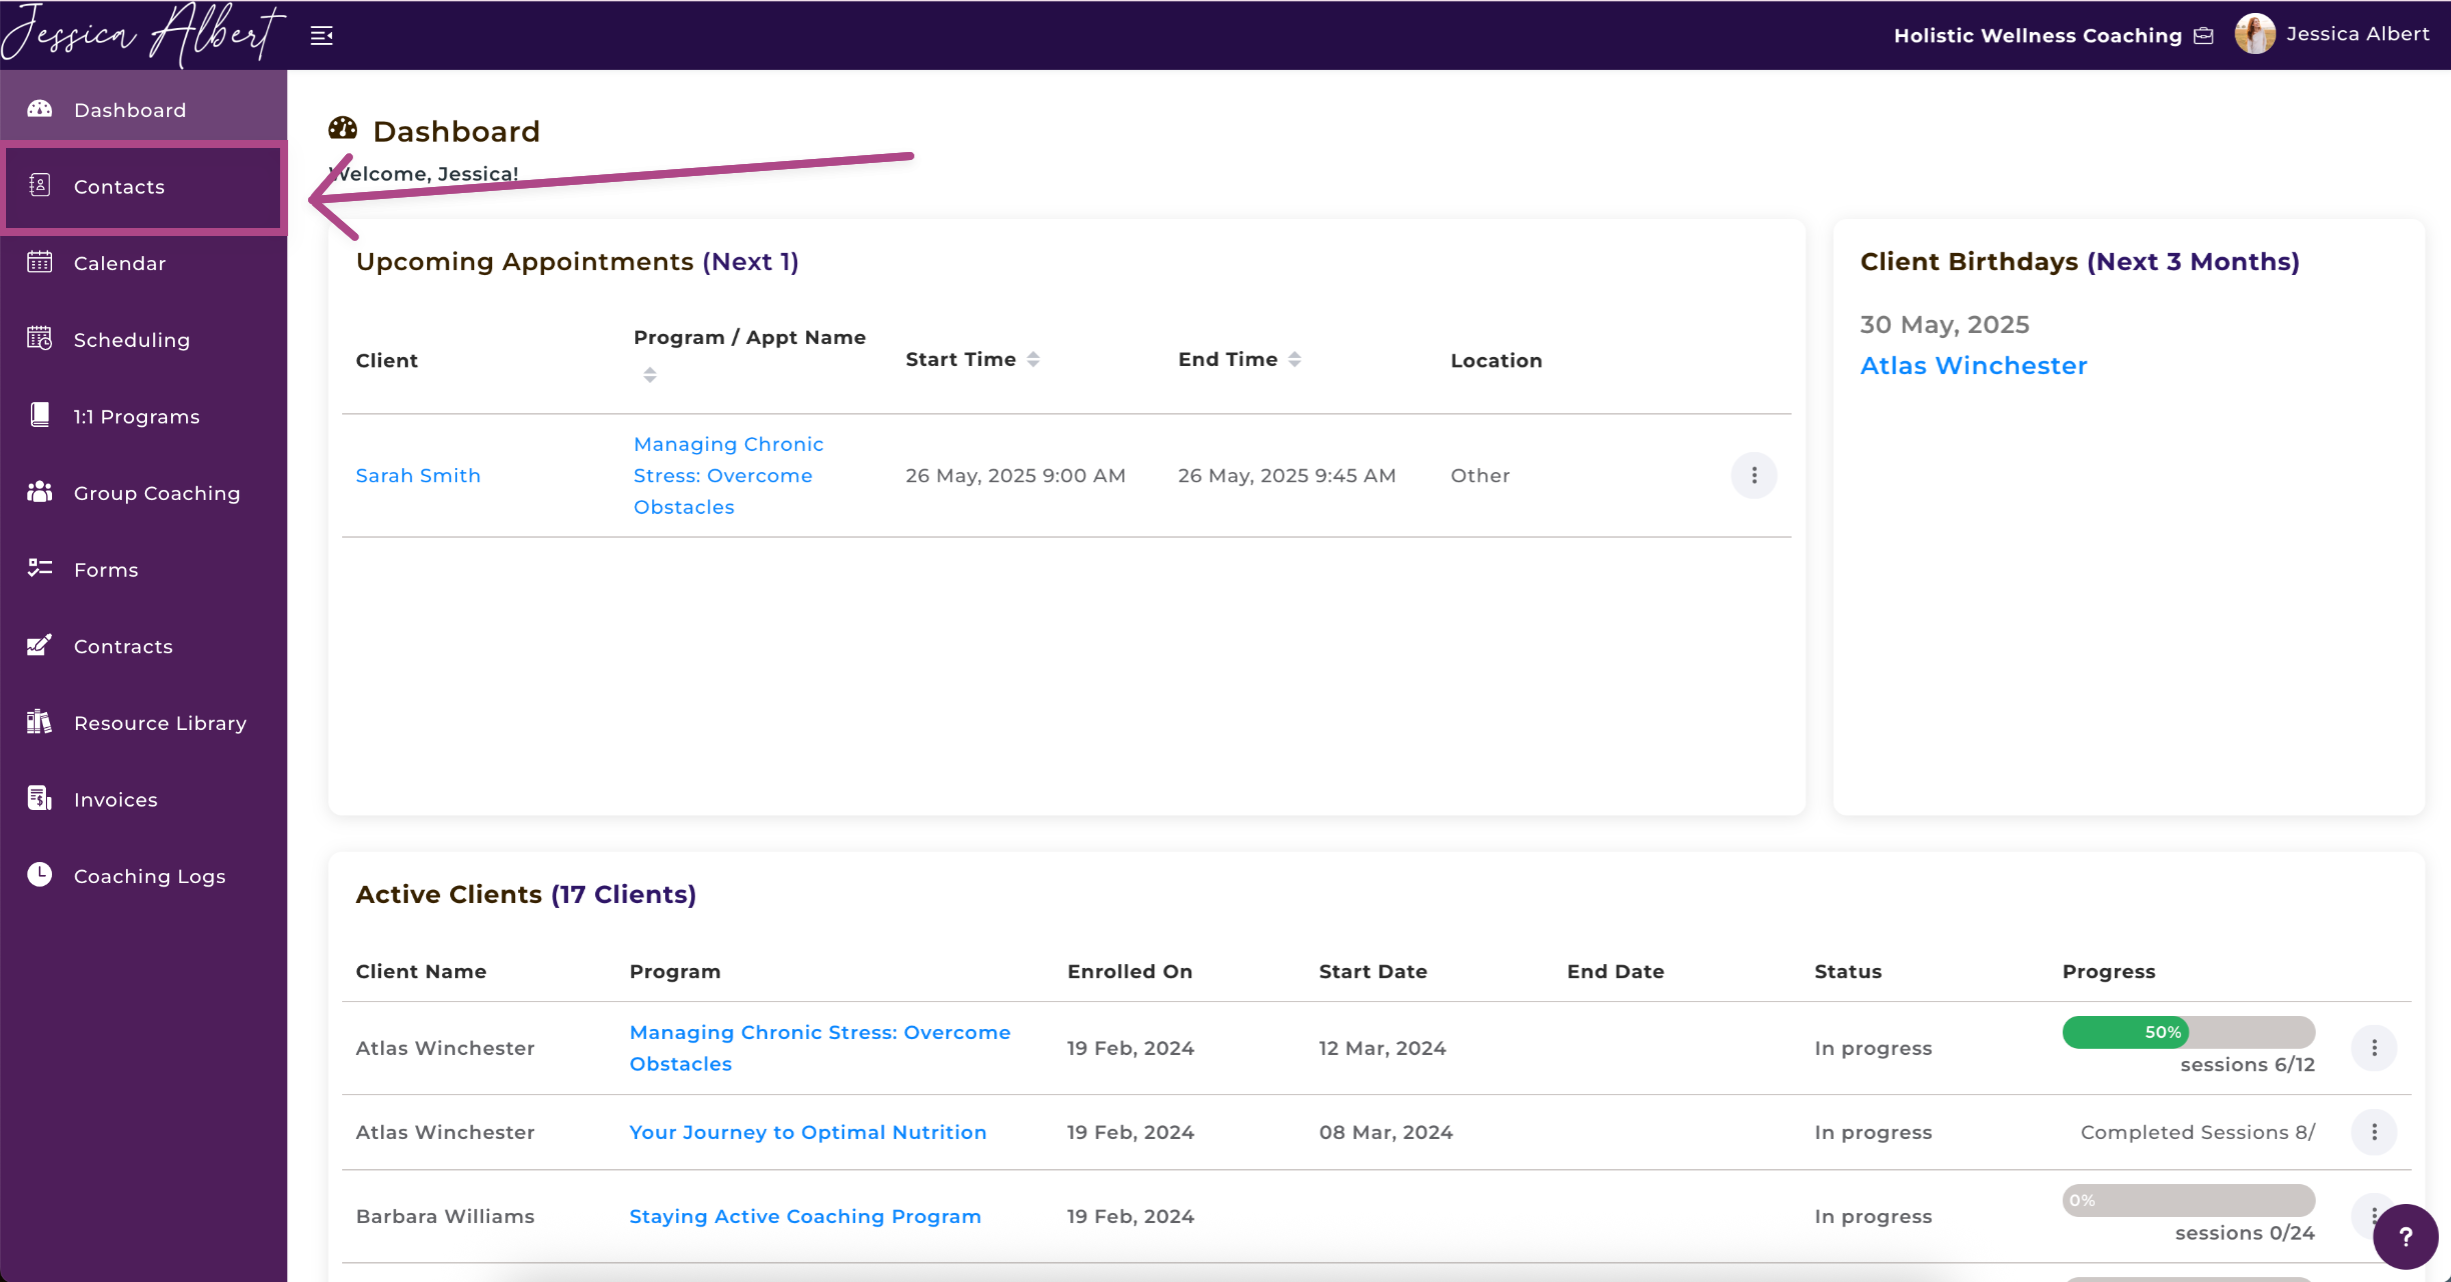
- Click on Contacts on the left menu.
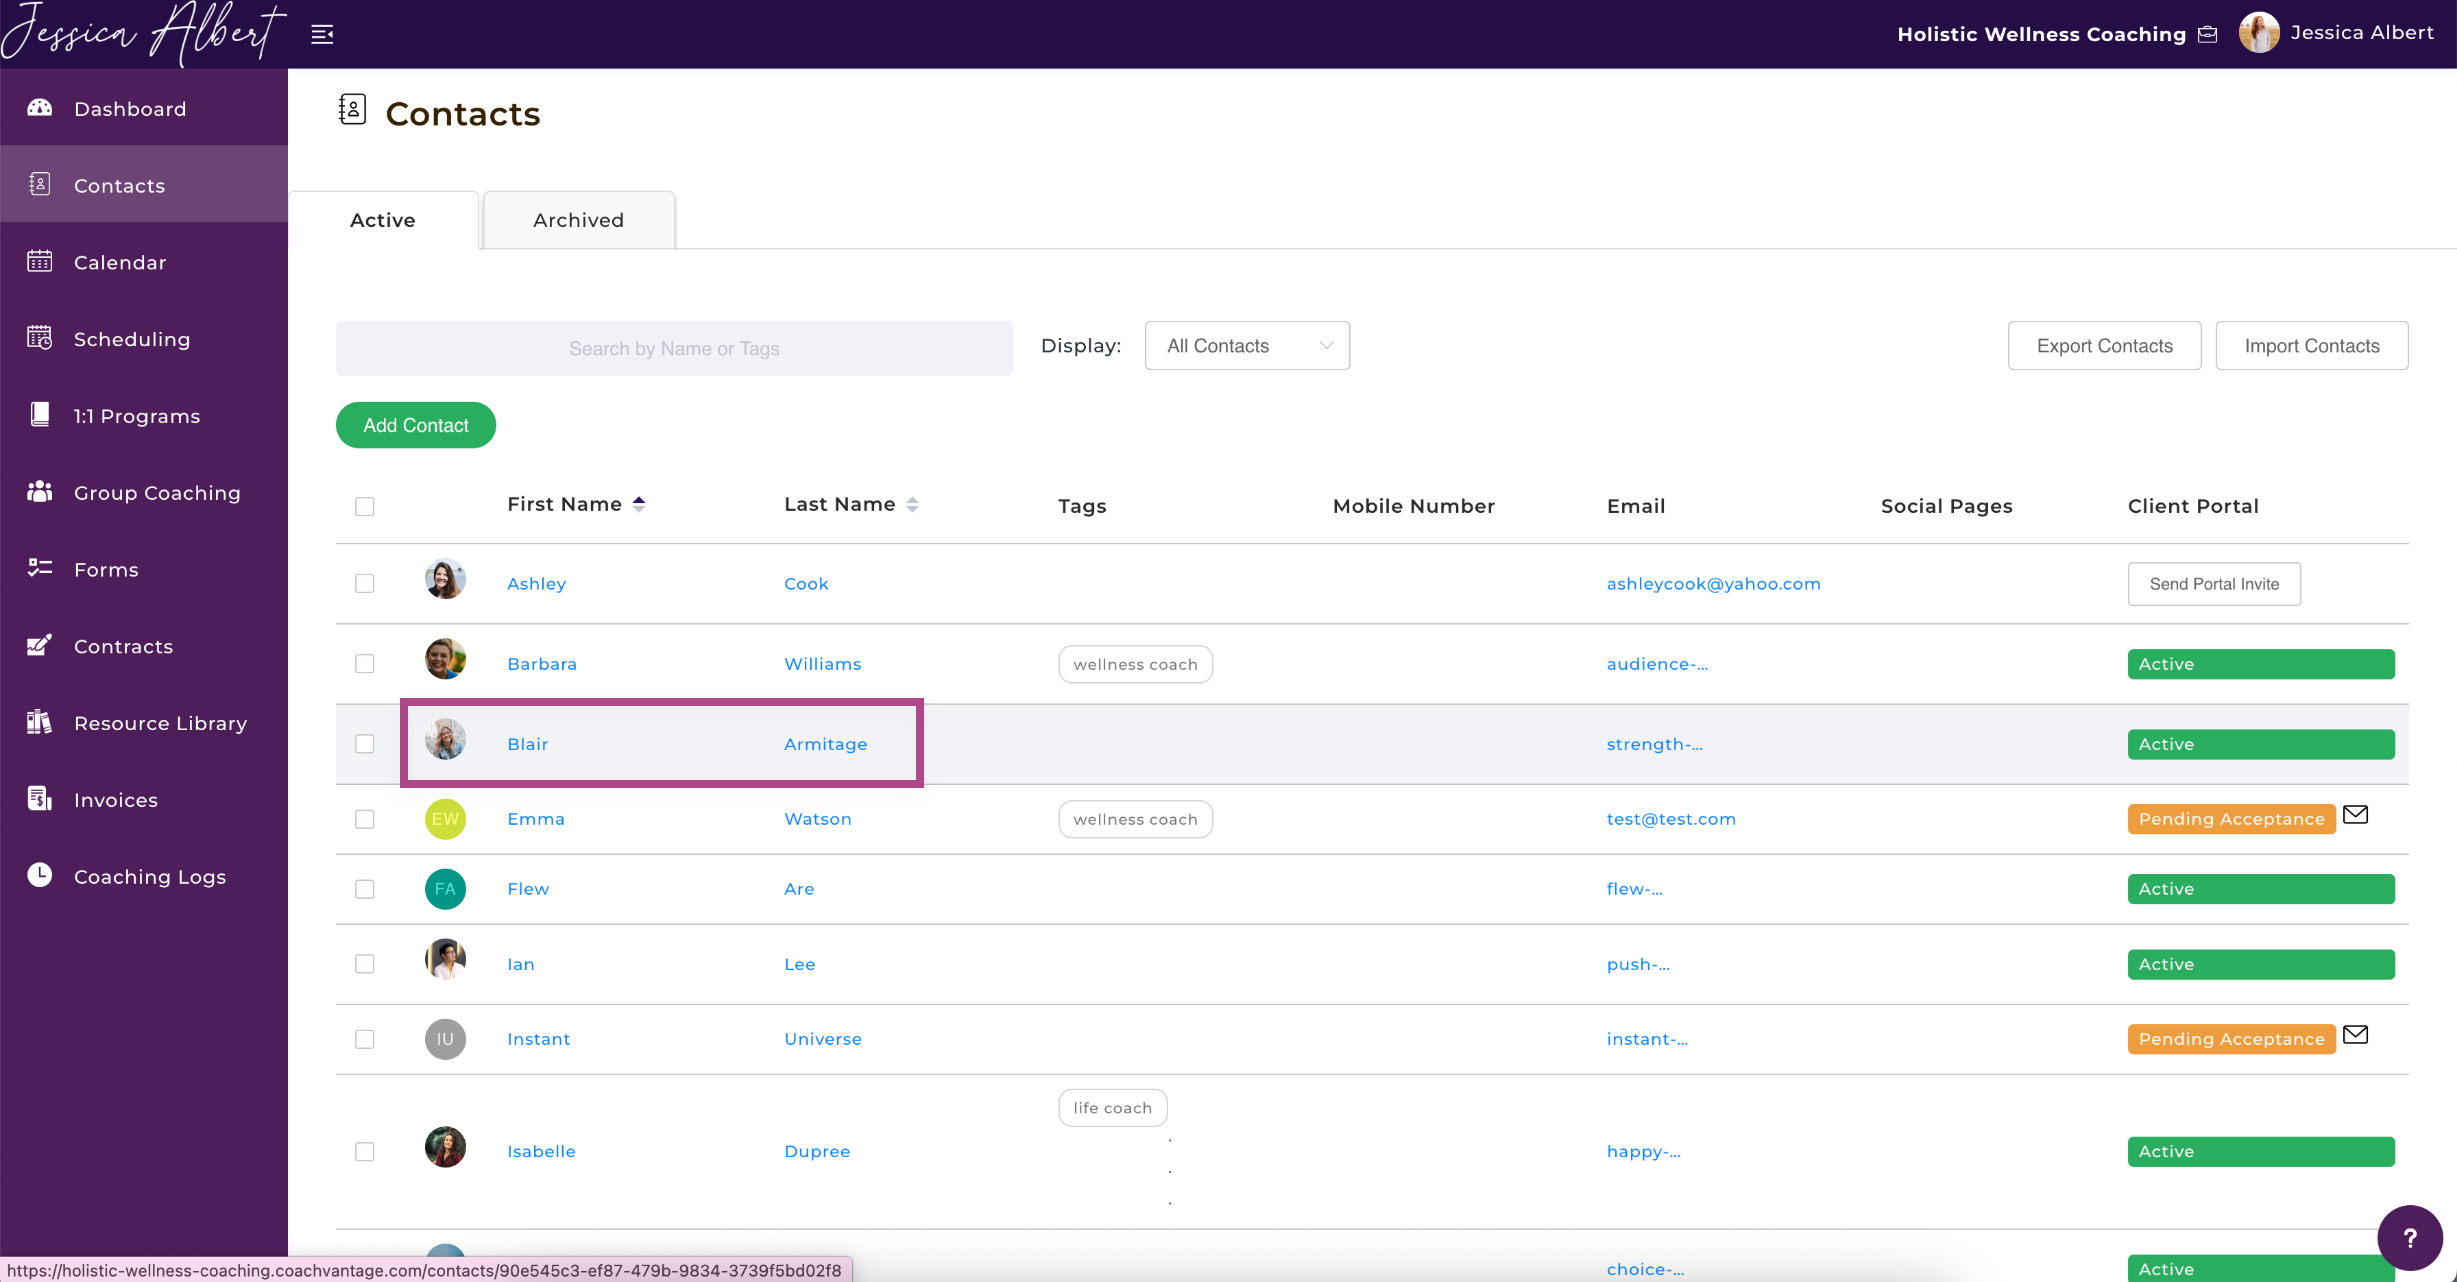
- Select the Contact that you would like to enroll into a quick start program.
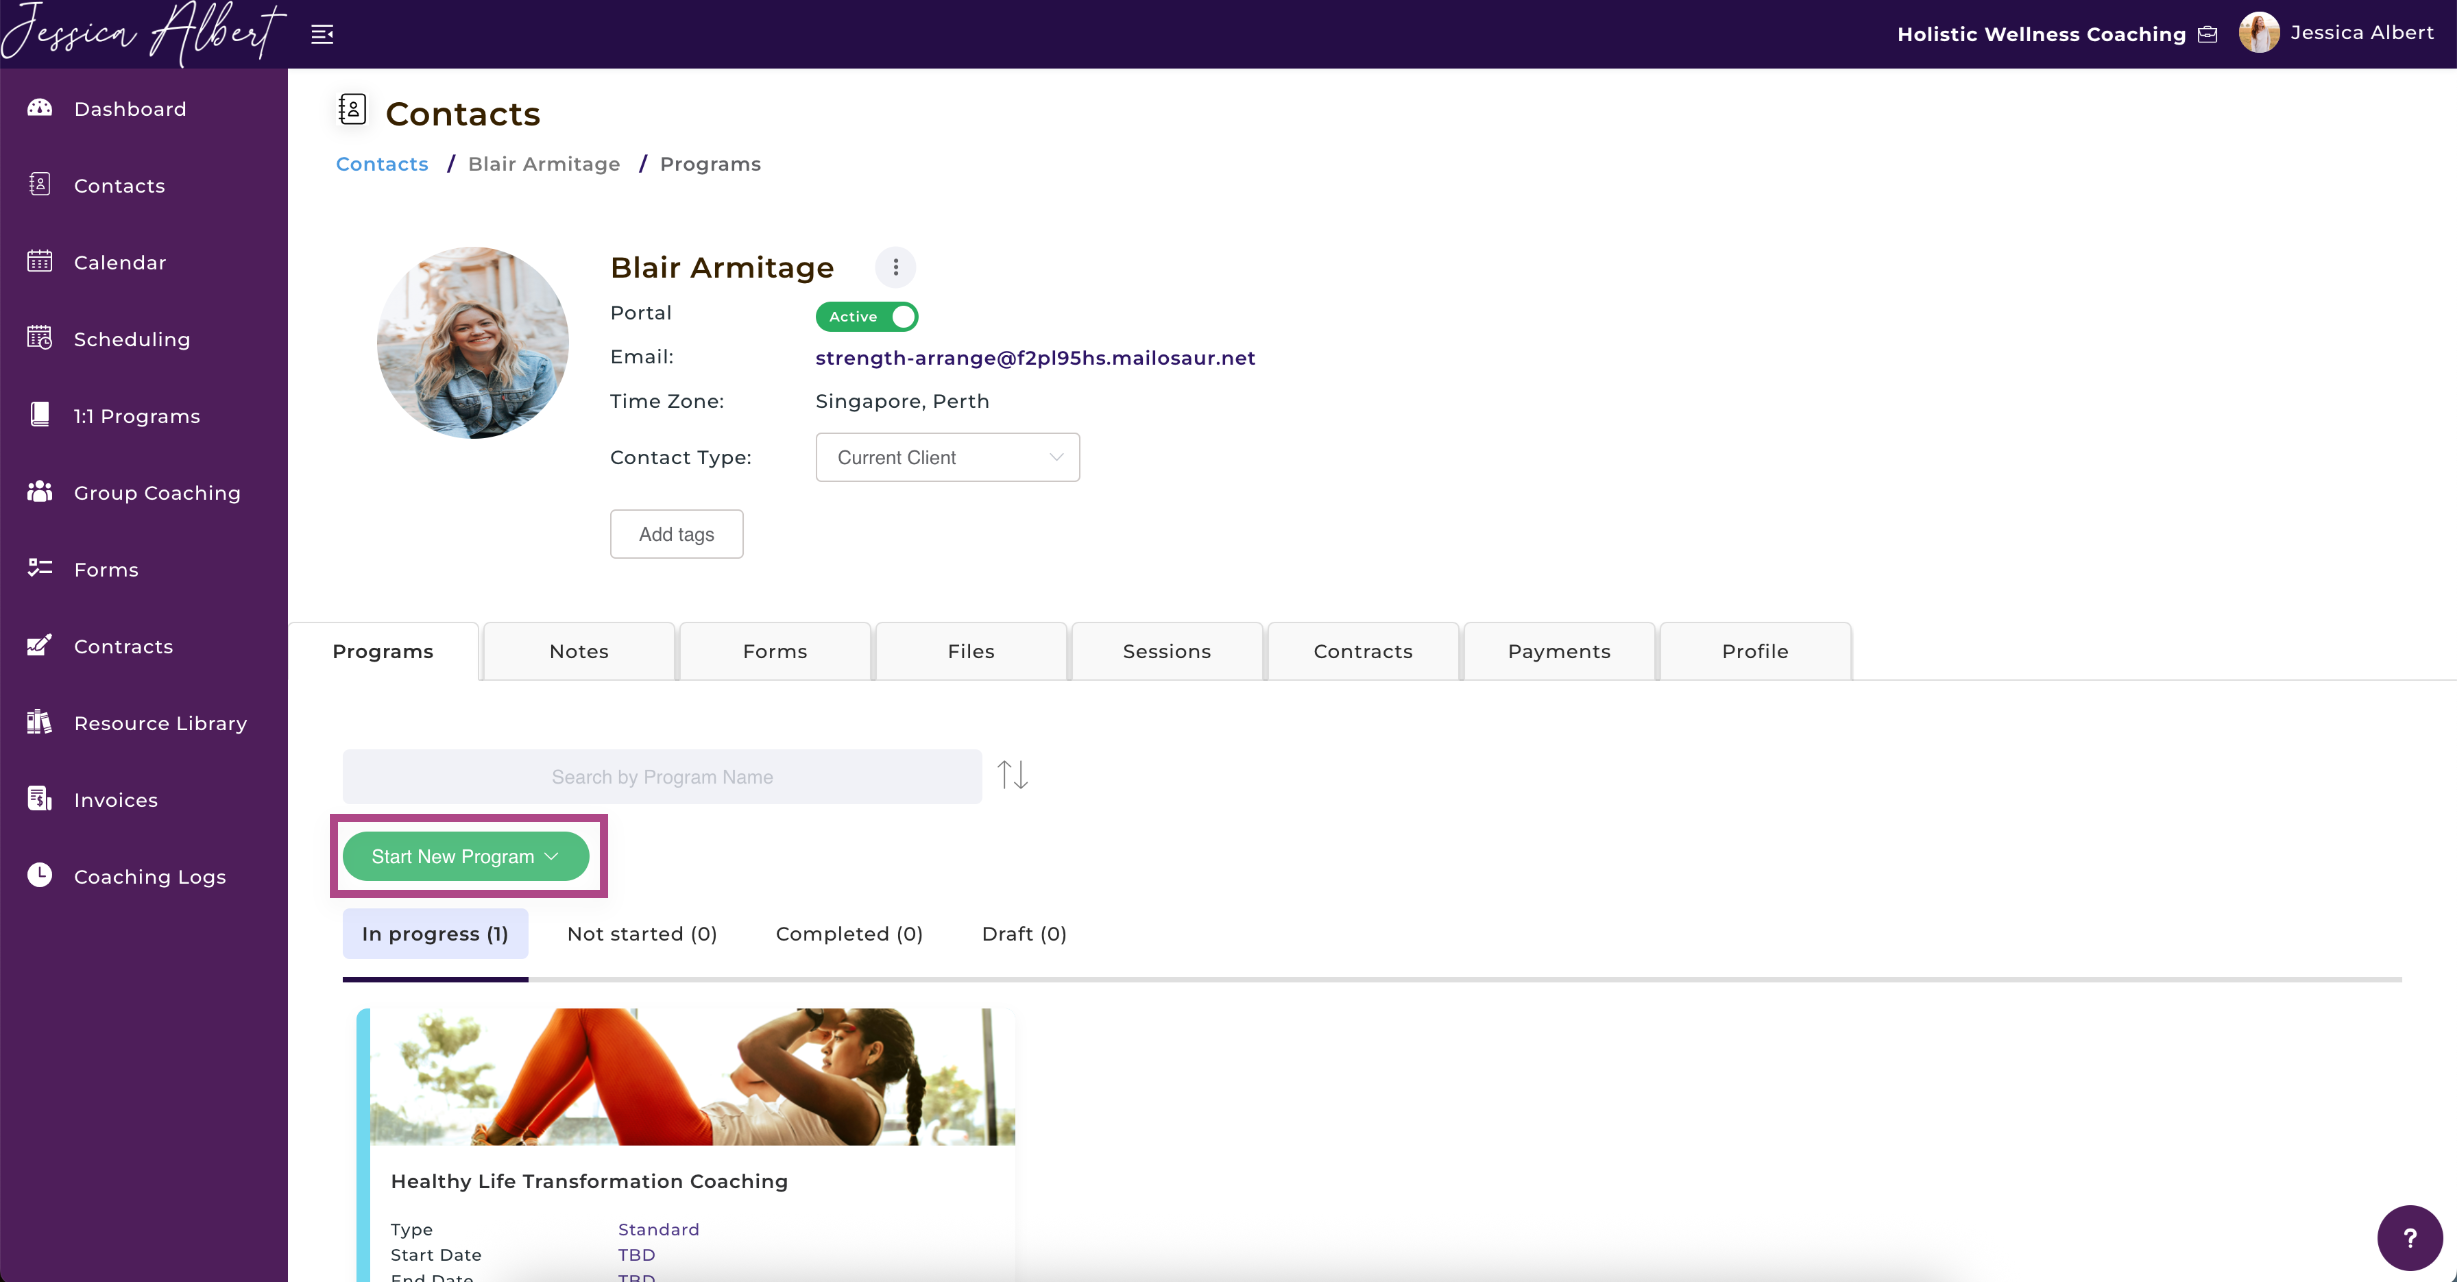
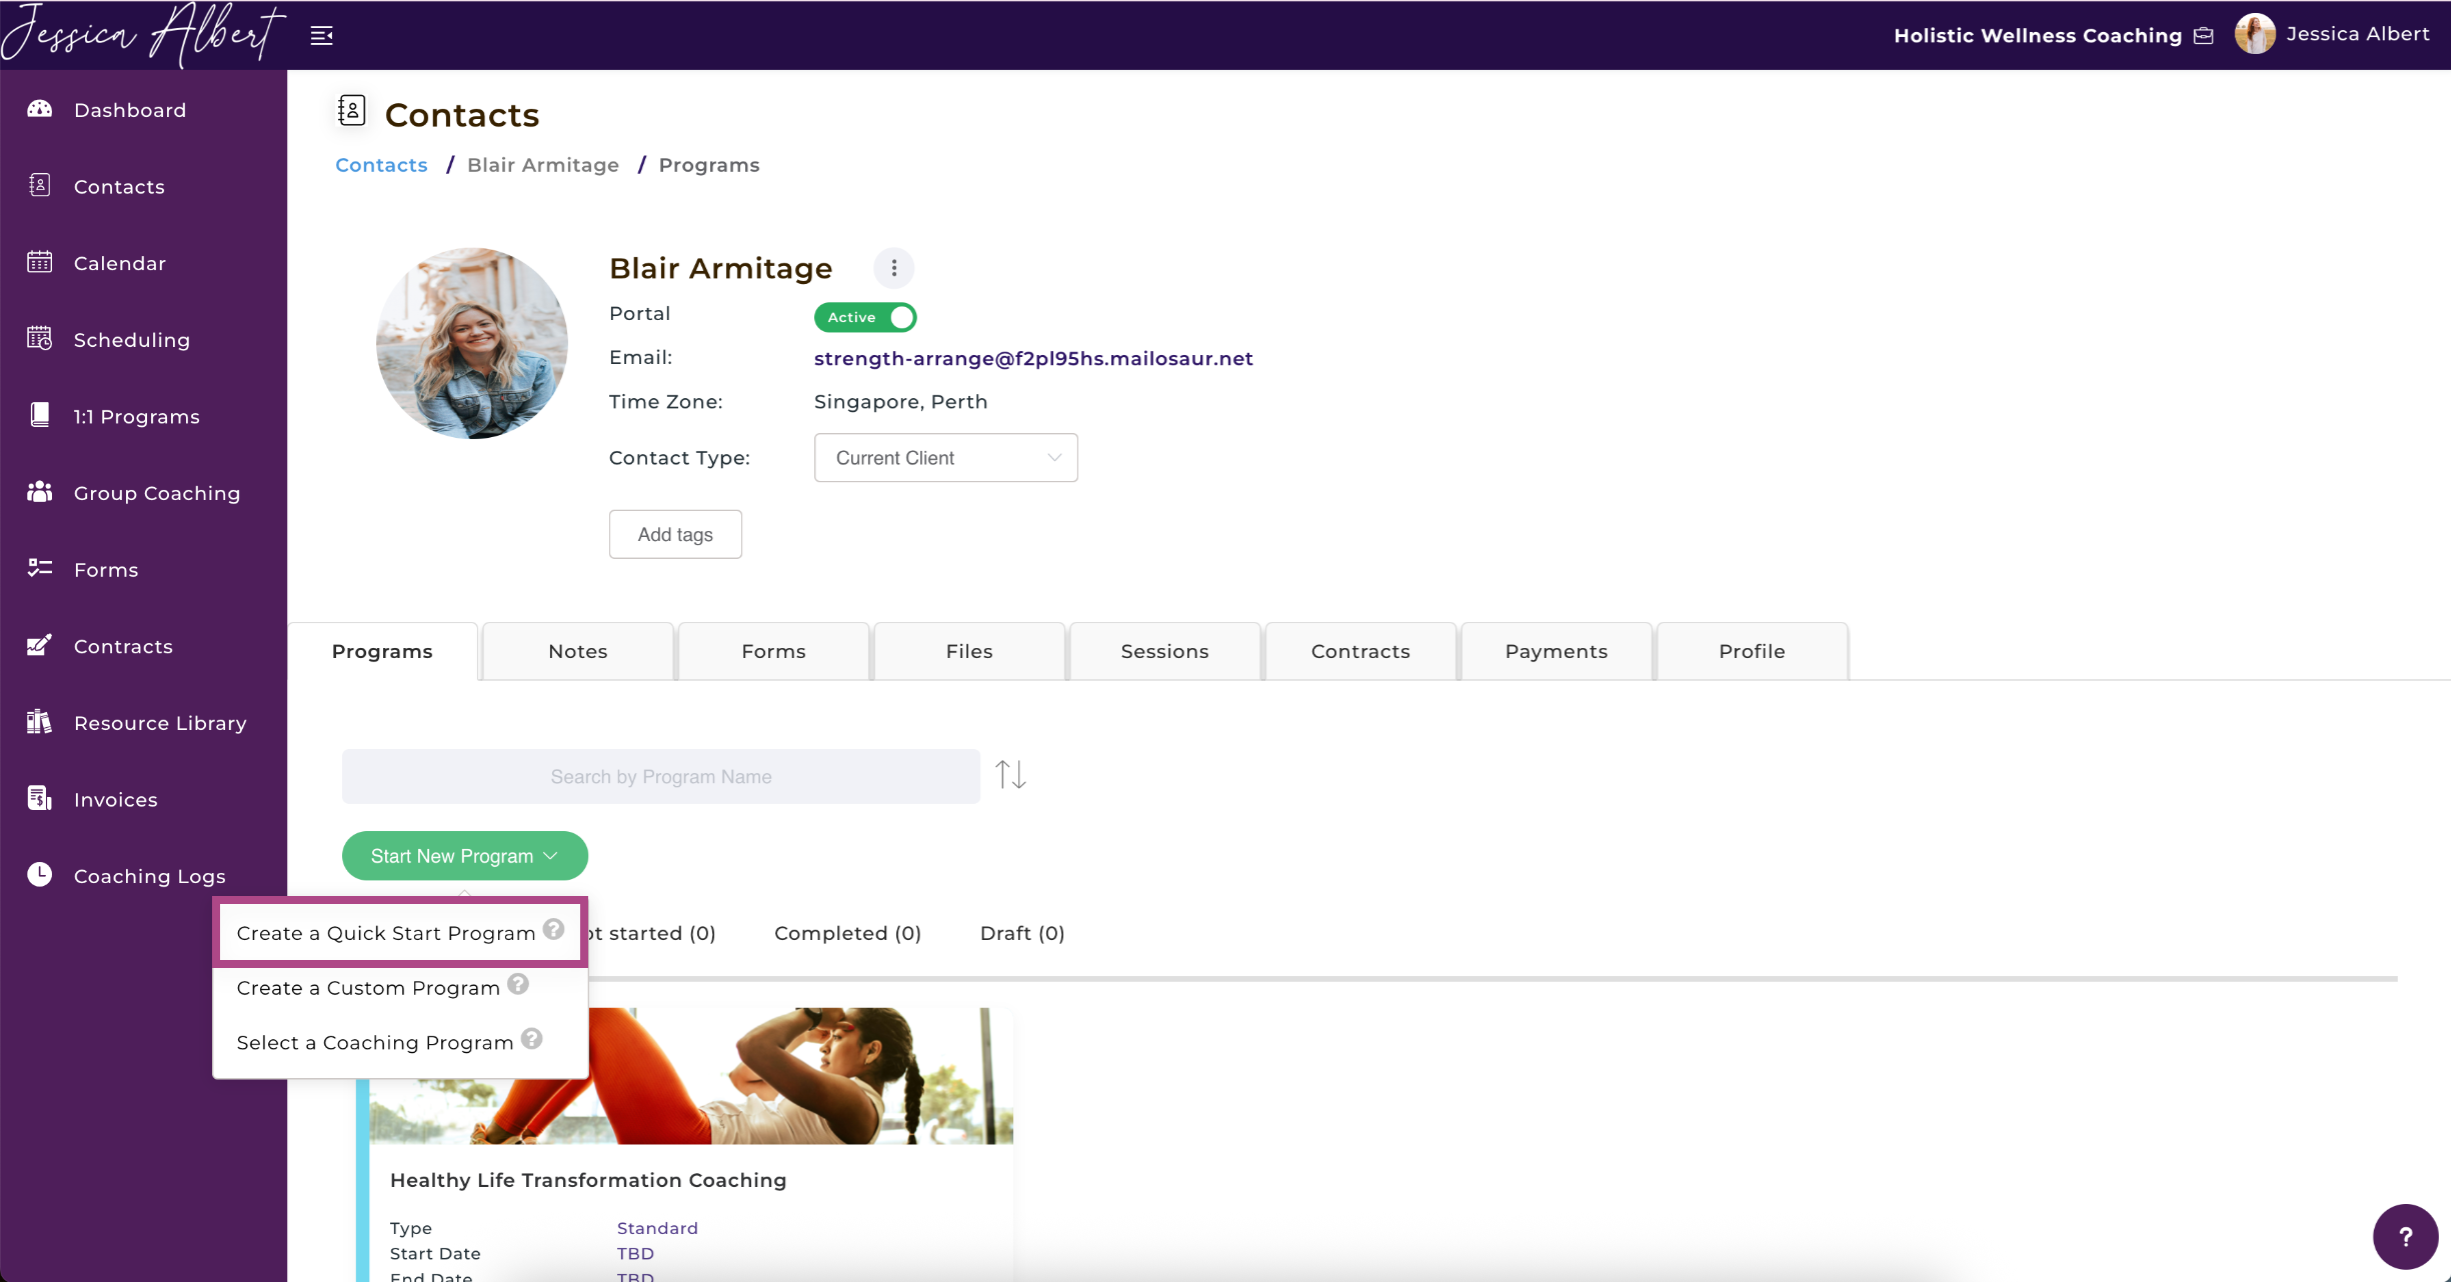
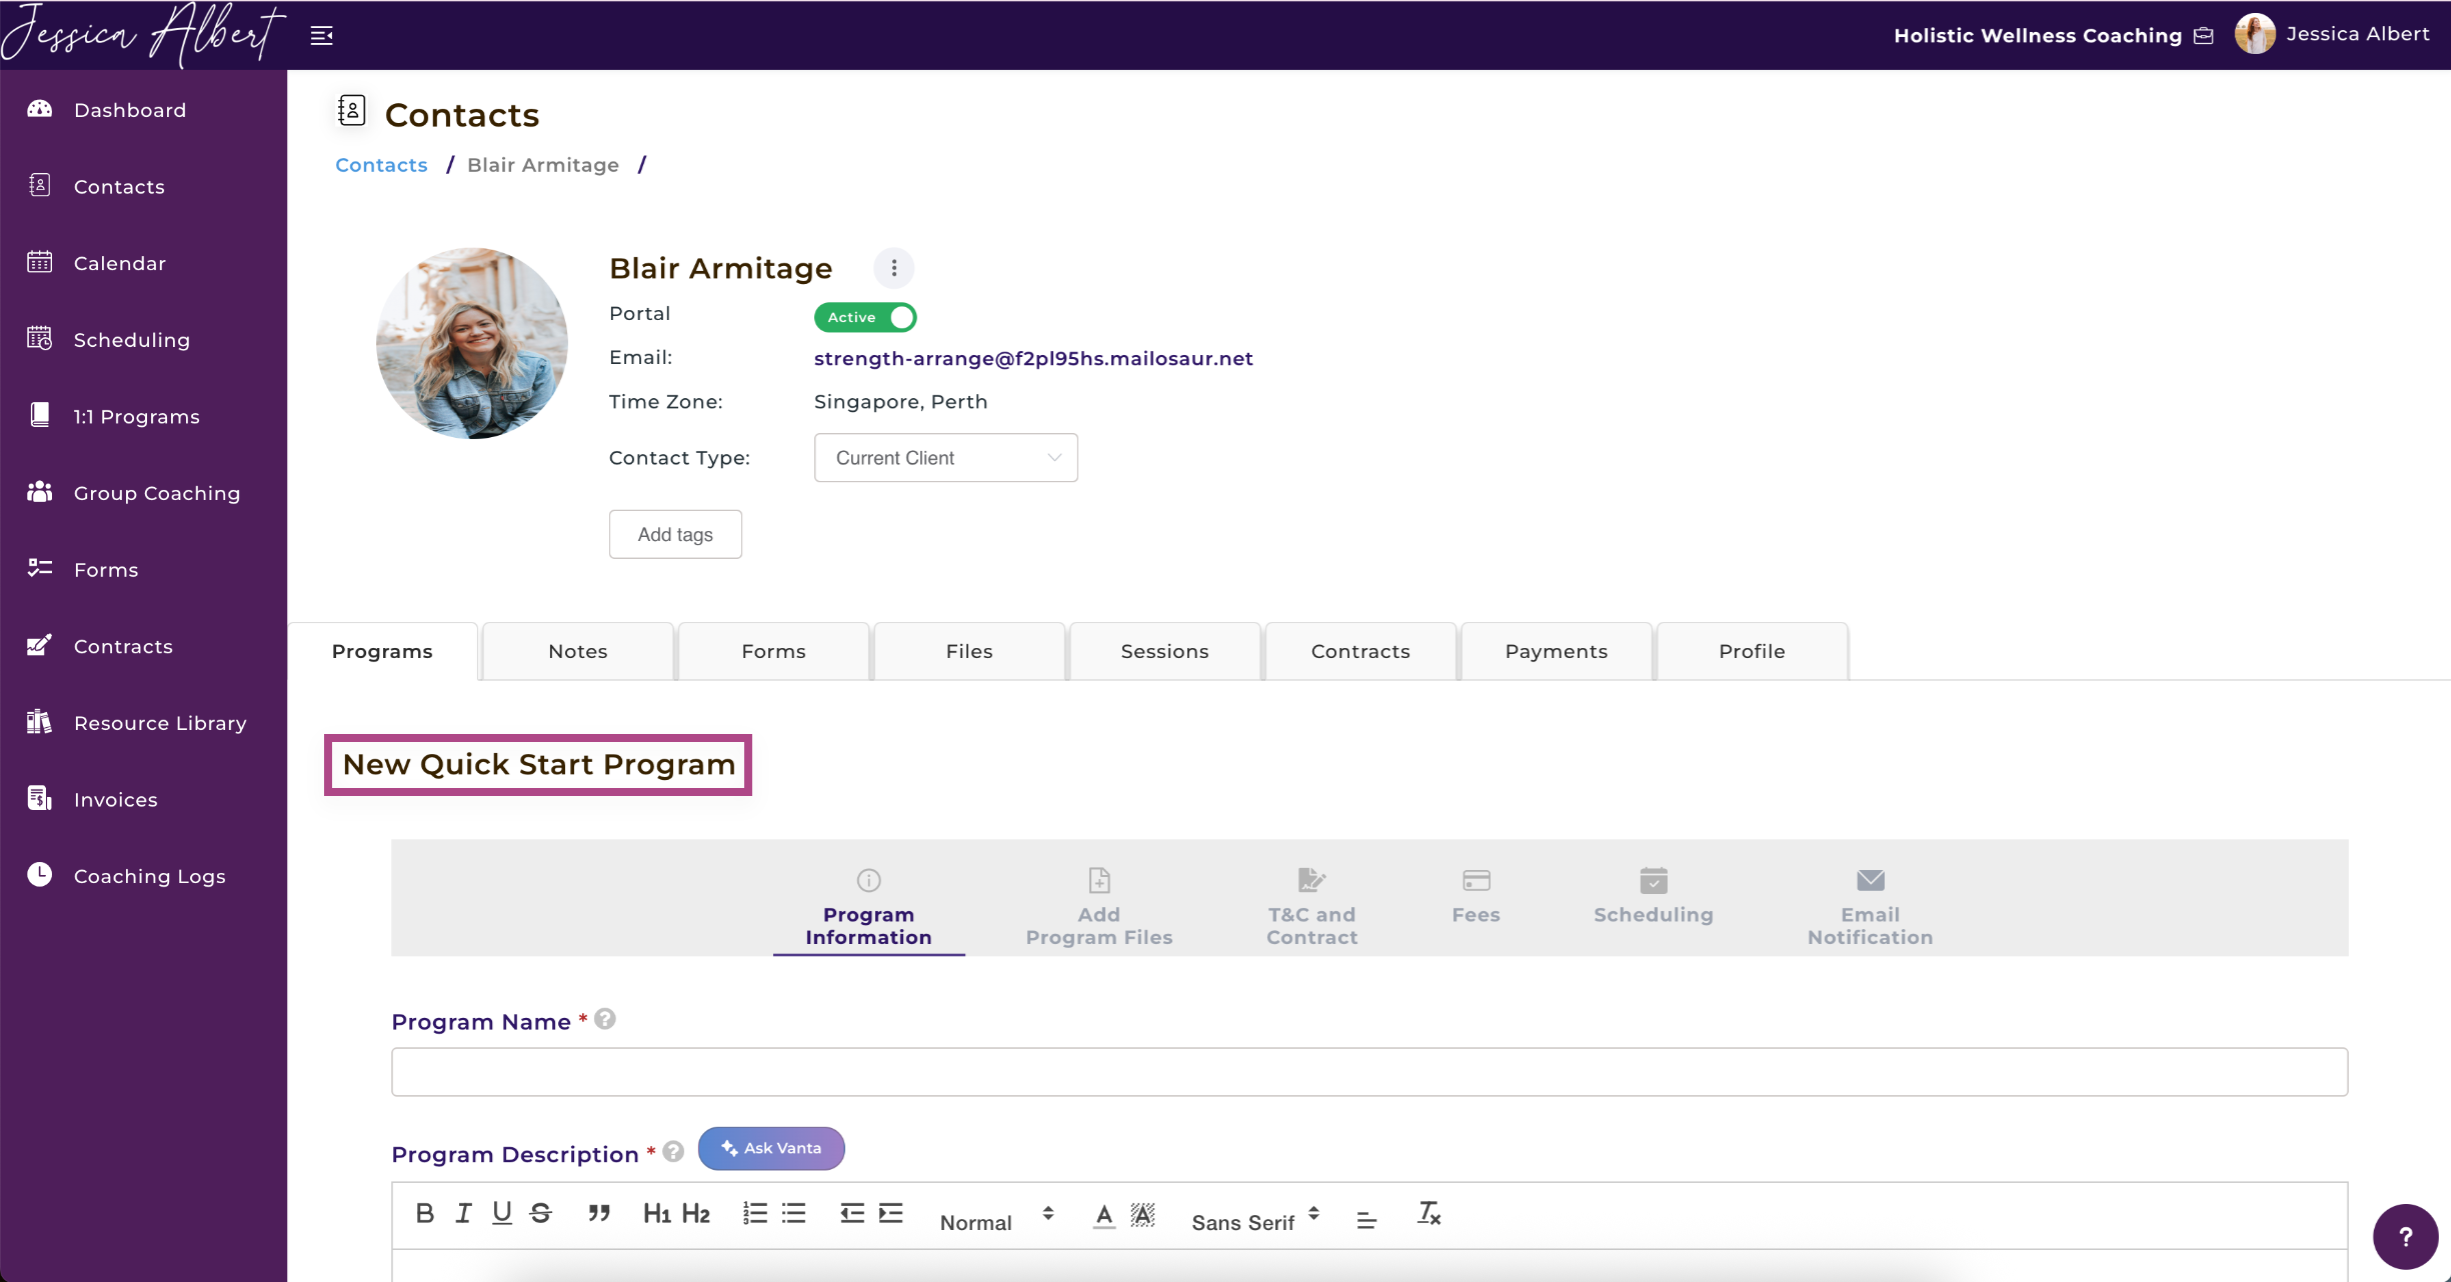
- Click on the Start New Program button and select Create a Quick Start Program from the dropdown selector.
- The New Quick Start Program page will open.
New Quick Start Program Task Bar
- Program Information
- Add Program Files
- T&C and Contract
- Fees
- Scheduling
- Email Notification
We'll cover each of these steps below in detail.
1. Program Information ℹ️
Program Name
Enter a descriptive name for your program.
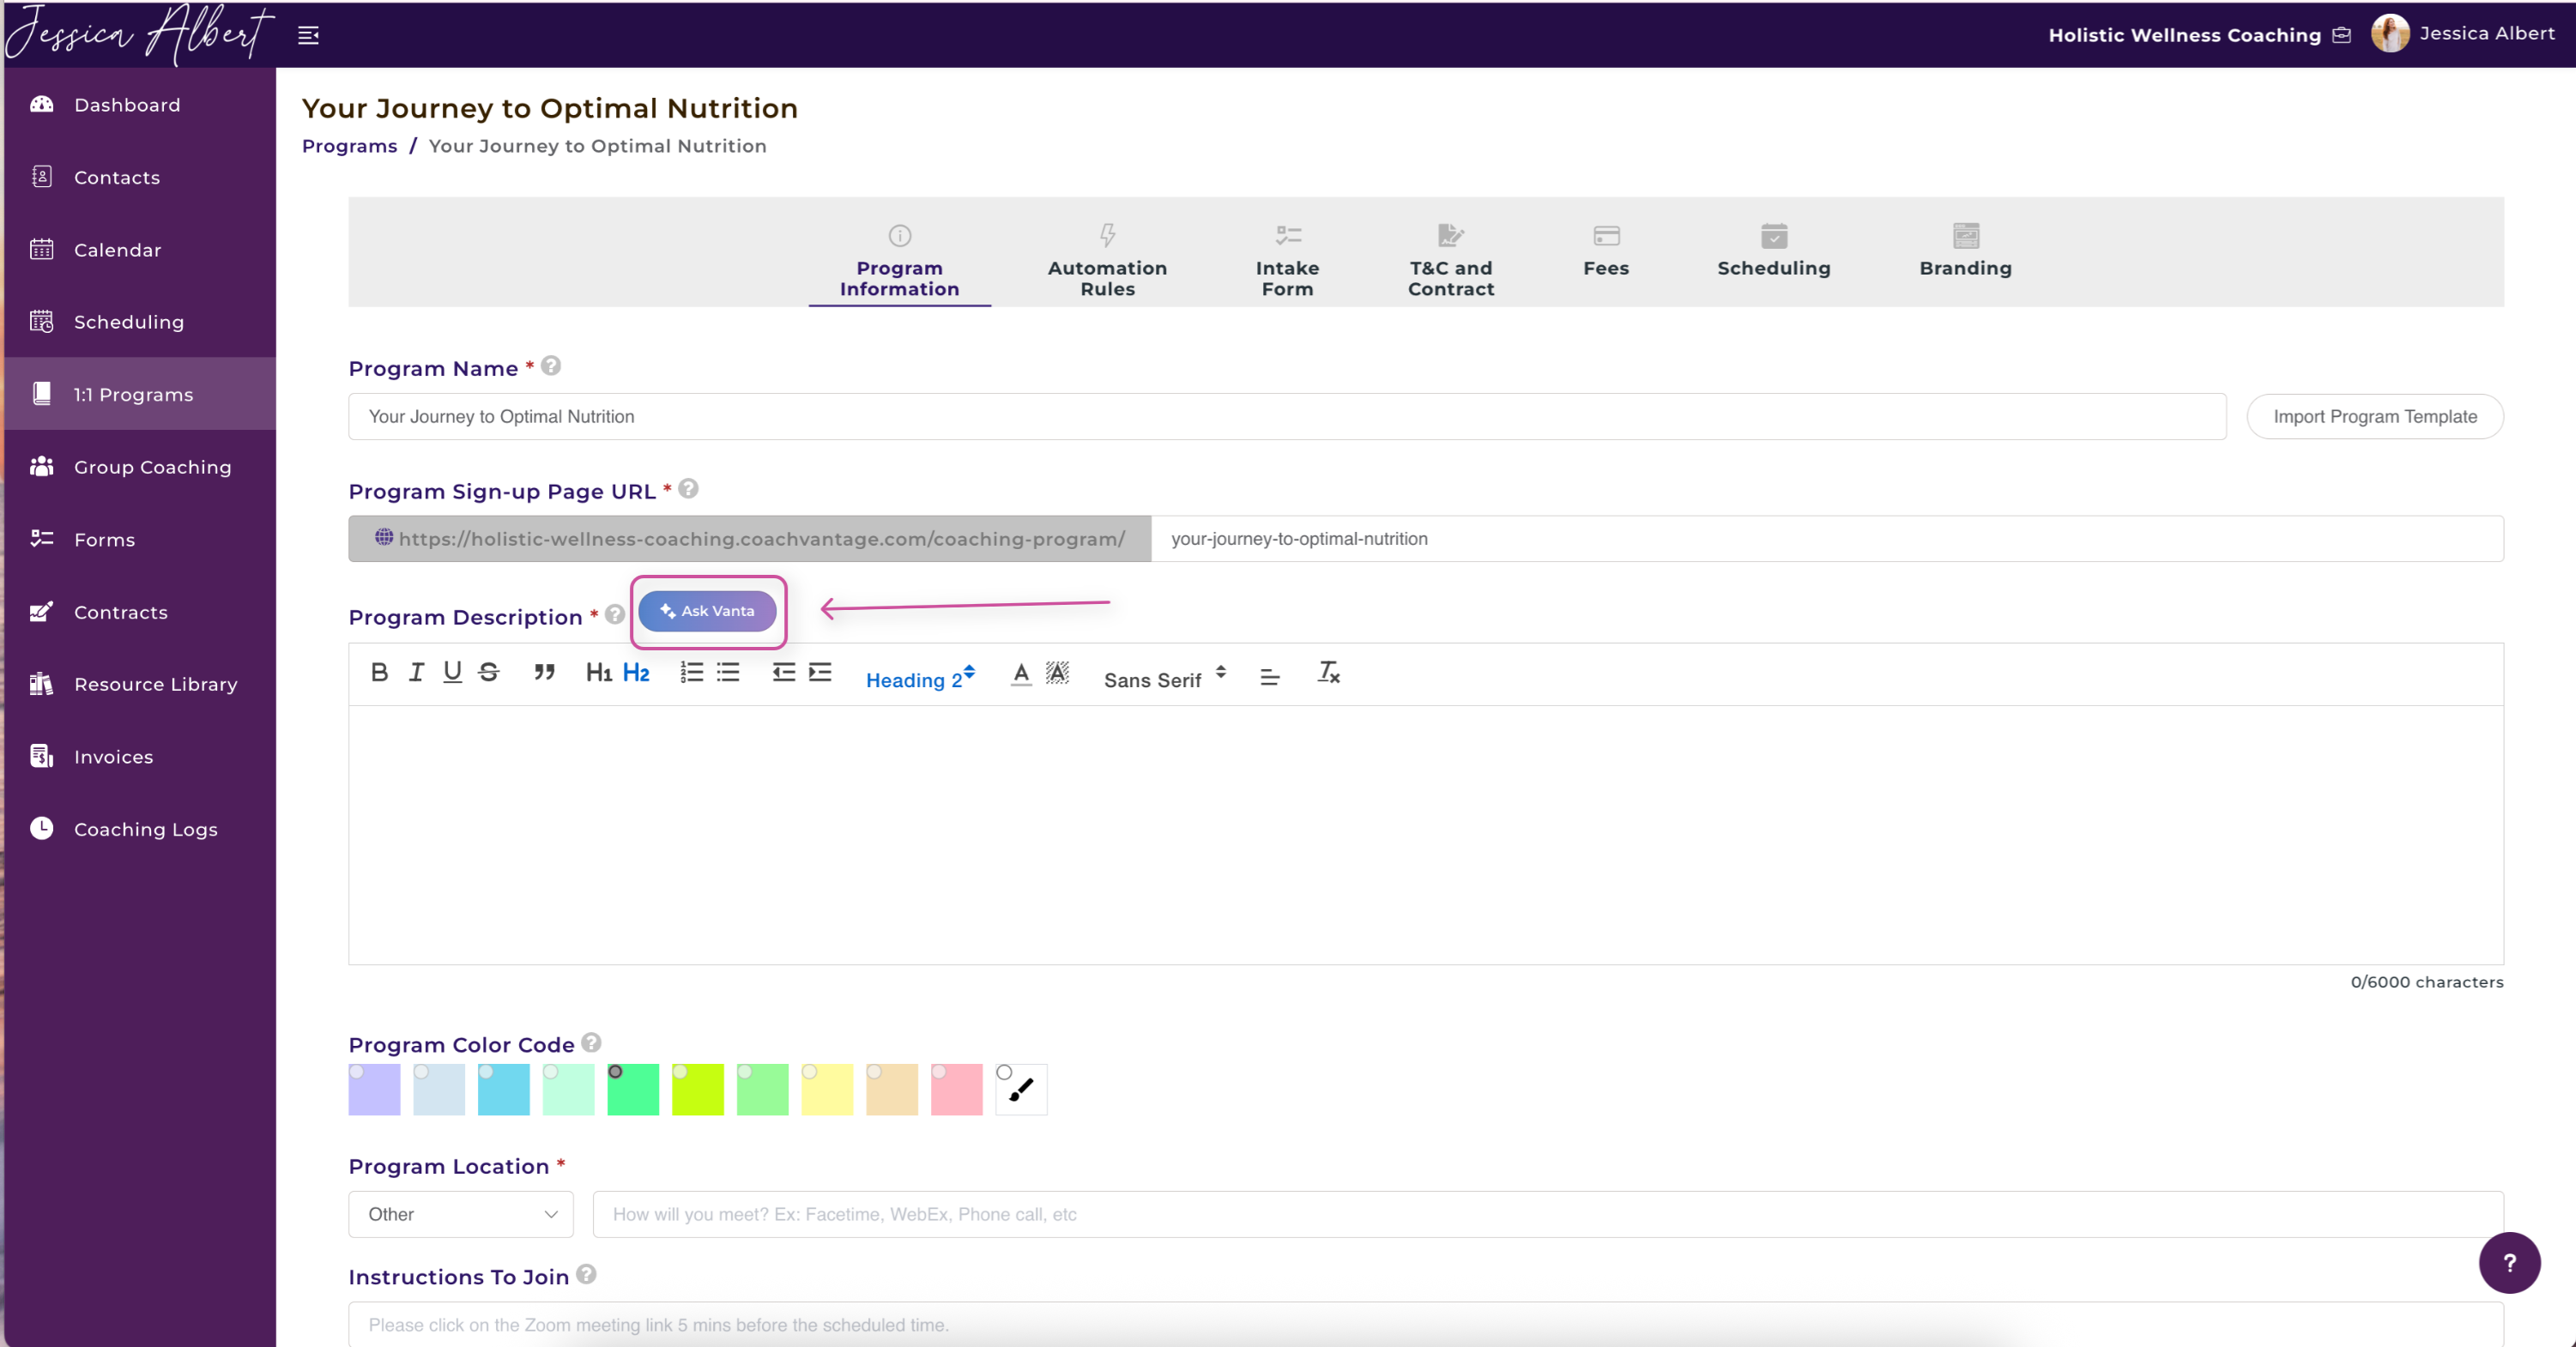
Program Description 🖊️
Briefly describe your program.
Ask Vanta 🪄
Creating a program description has never been easier. Simply click on Ask Vanta and within seconds, this AI enhancement will create a program description for you.
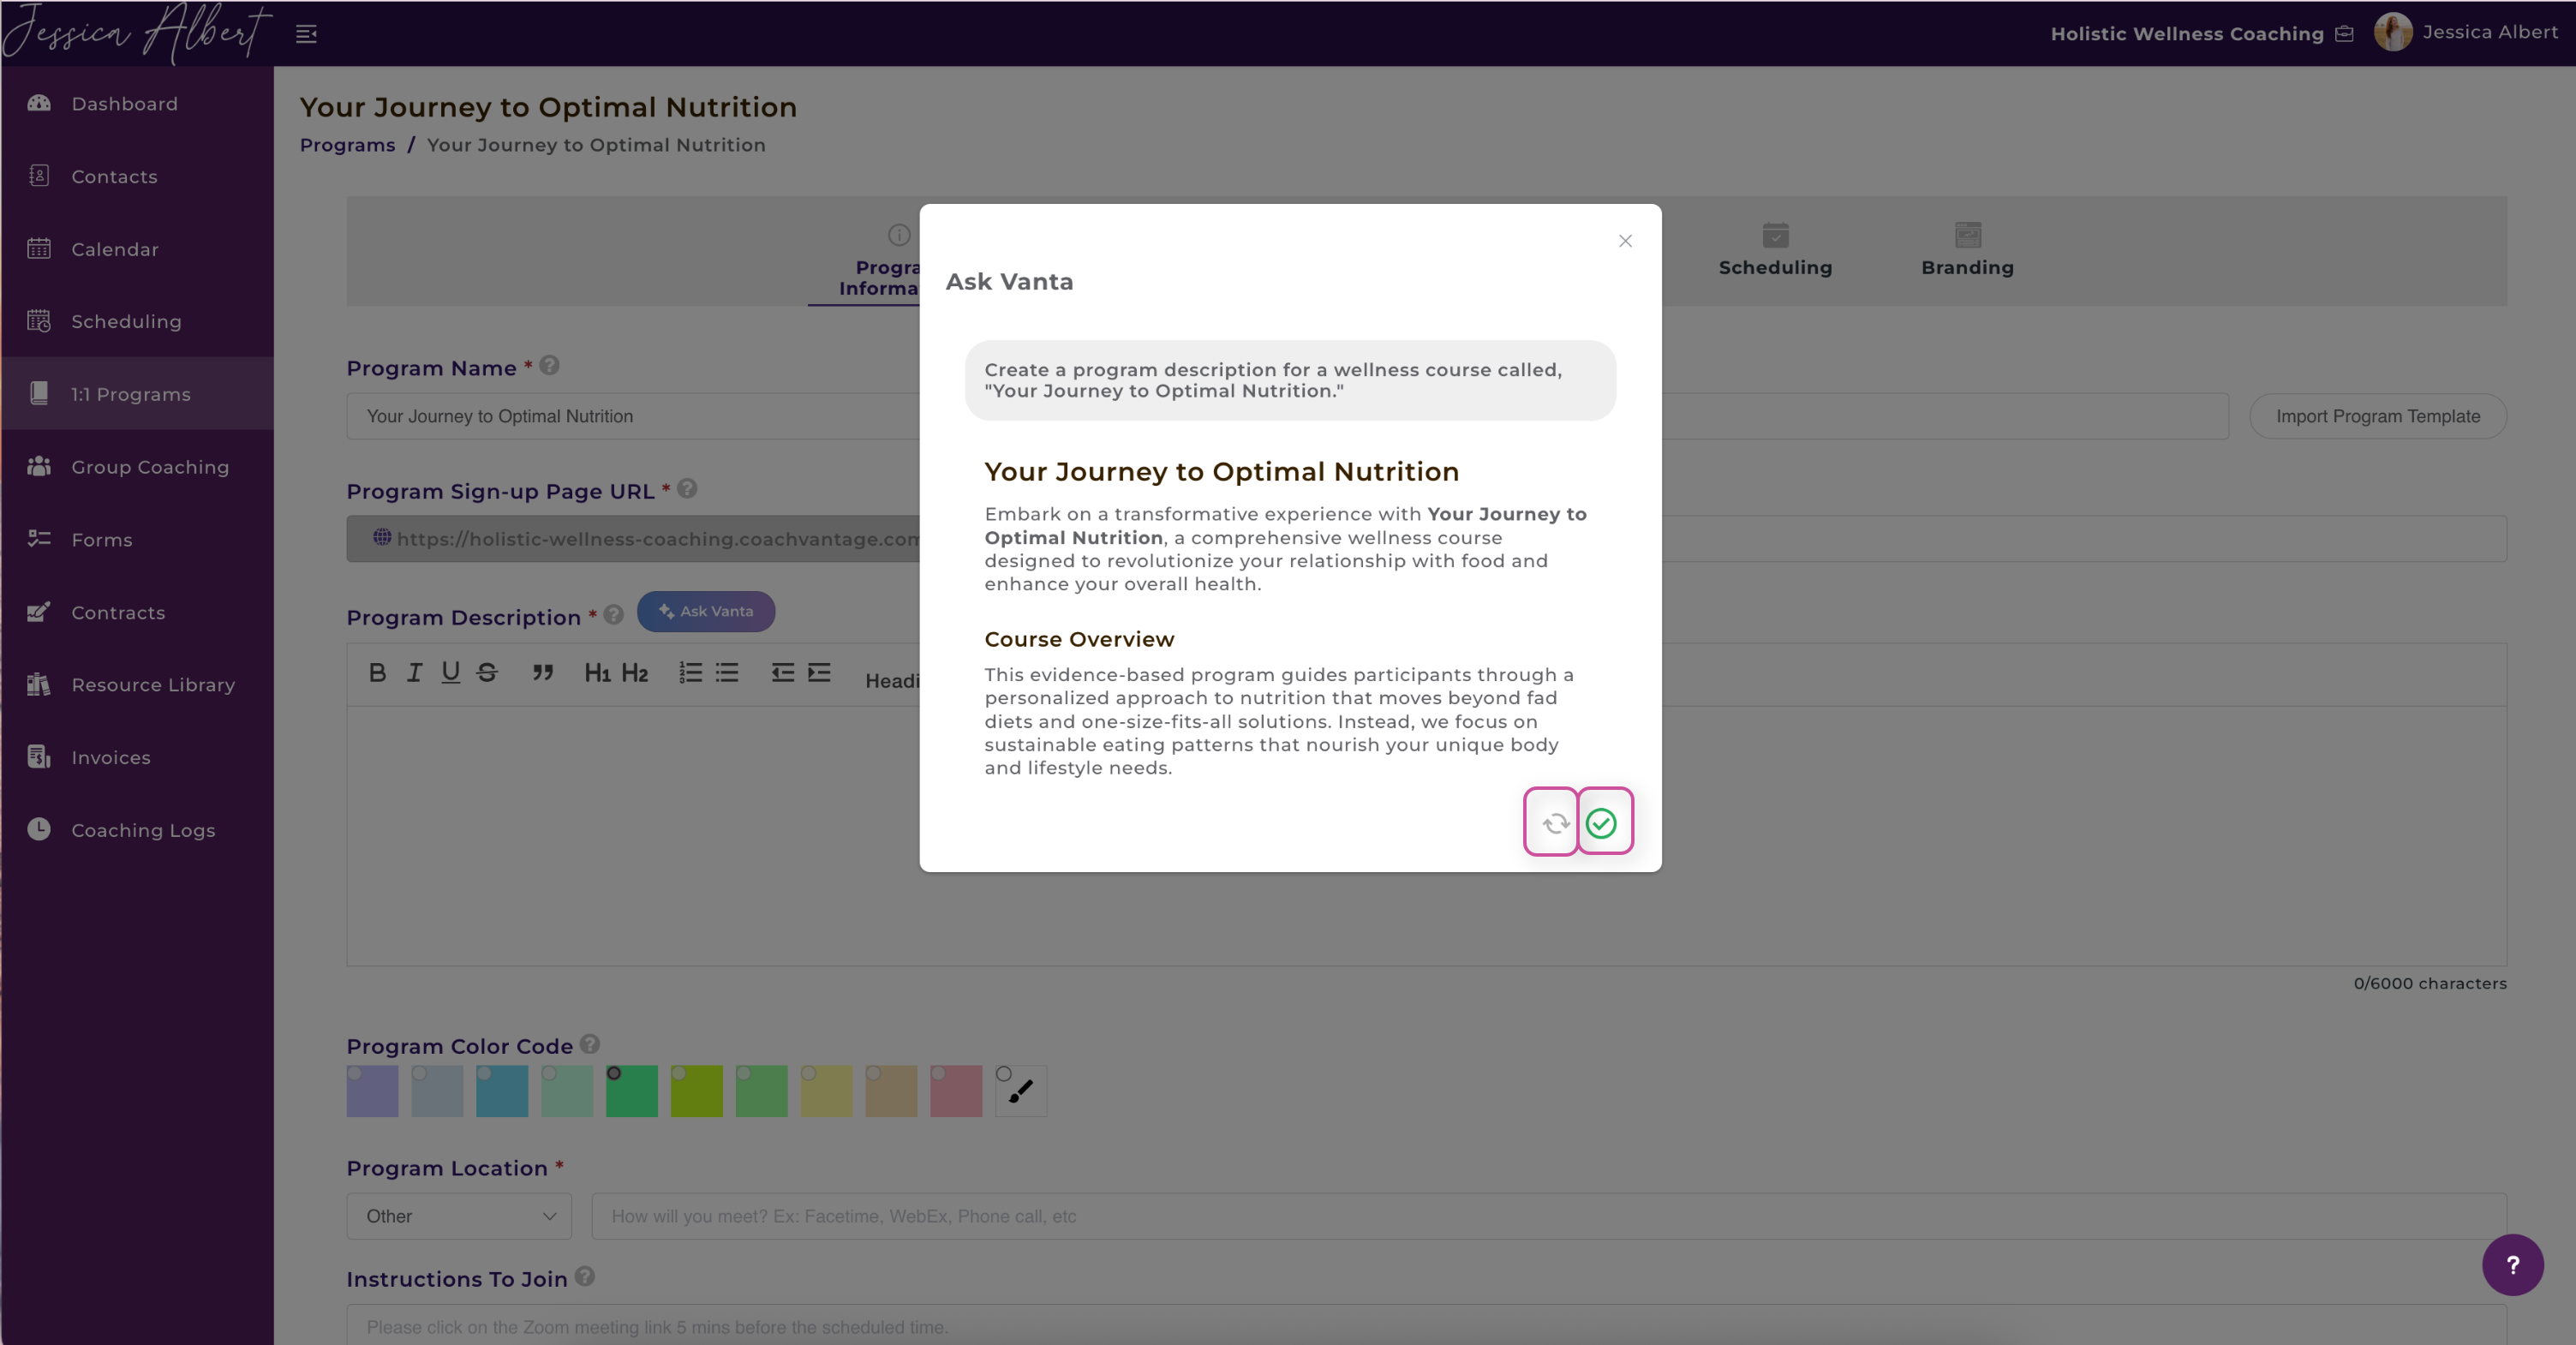
When you select Ask Vanta, a pop-up window will appear. Here is where you can enter a prompt. Some prompt examples include:
- Create a program description for a wellness course called, Managing Stress and Sleep.
- Write a course description that relates to anxiety, health, and wellness. Be sure to include why this course is unique.
- Draft an overview of a program course titled, Elevate & Energize – for those ready to level up their health and vitality.

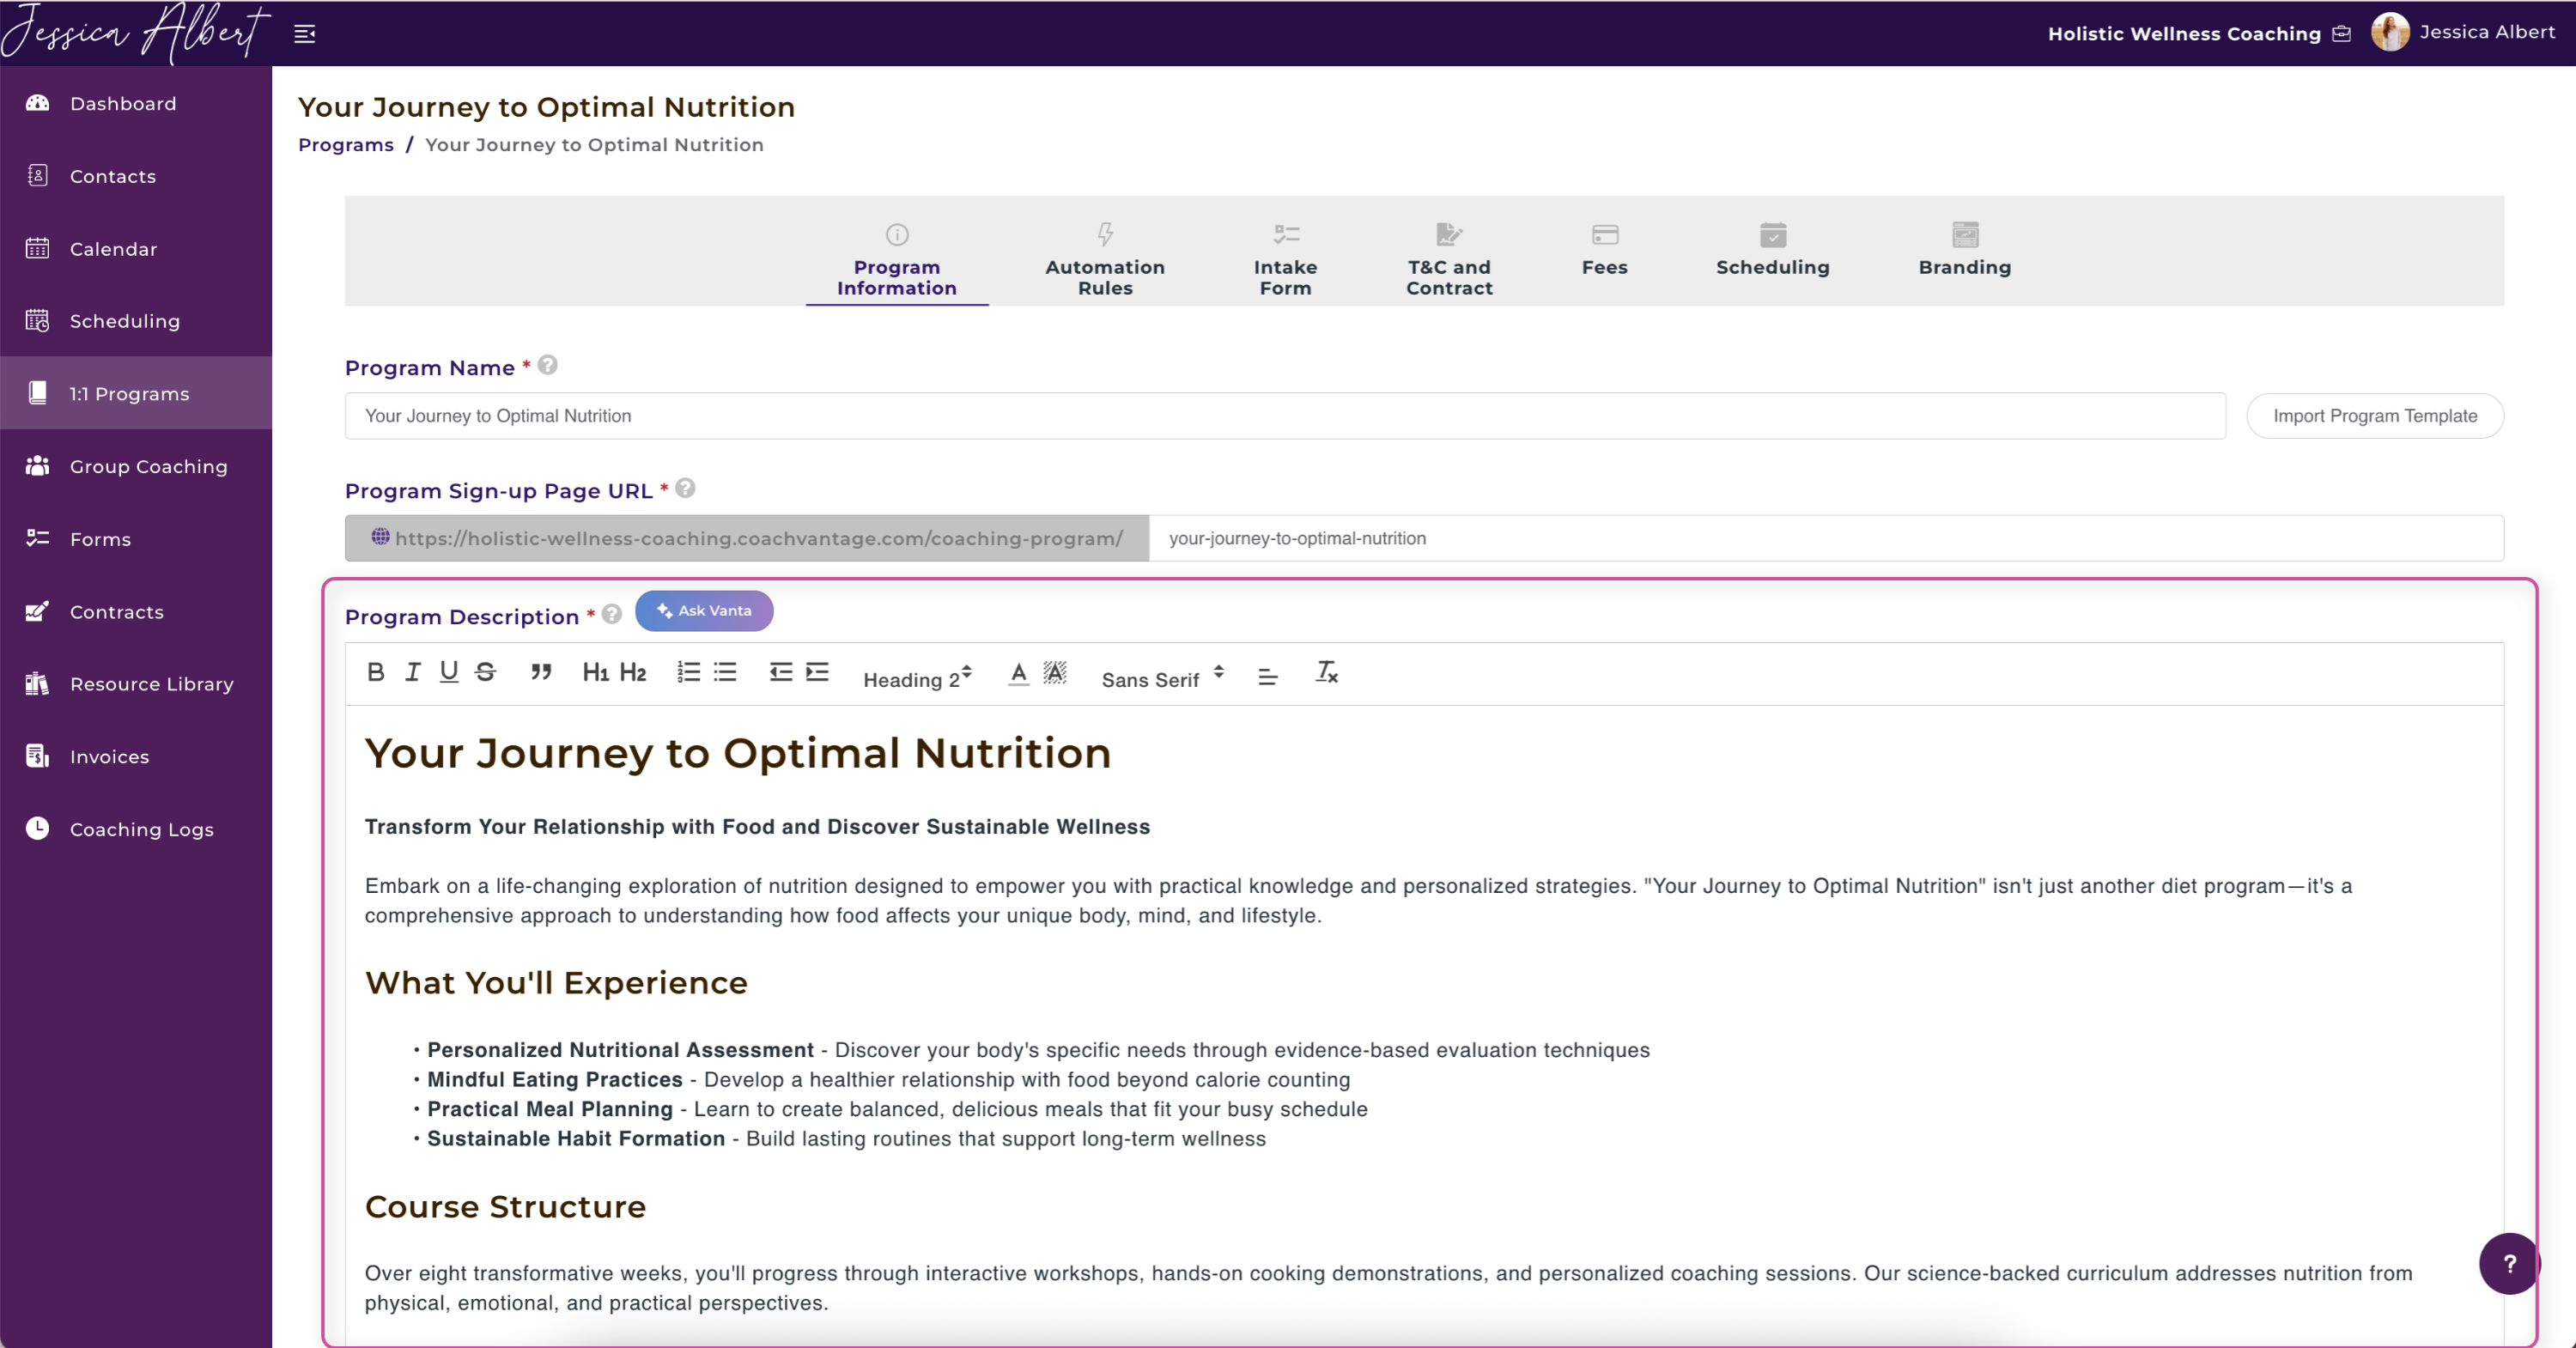
Voila! Vanta creates a program description for you right before your eyes. Then, you can choose to either click on the regenerate button (as depicted by the grey circular arrows) or select the green check button to use the program description.
If you select the green check button, the generated text will be inserted in your program description. Feel free to edit accordingly!
Program Location 📍
Choose the location where the program will take place. You can add multiple location options, allowing clients to select their preferred location during booking.
- CV Meet - Our native video and audio communication tool that comes with your CoachVantage account. Learn more about CV Meet here.
- Zoom - Ensure that your personal zoom account has been connected to CoachVantage. We will automatically generate a unique zoom meeting link URL for each appointment.
- Google Meet - To use Google Meet as the meeting location, you must first integrate your Google Calendar with CoachVantage. You can do so at My Settings > Integrations. Be sure to disconnect any existing calendar before connecting your Google Calendar.
- Physical Location - Enter the name or address of the physical location
- Others - You can enter other location types here. e.g. FaceTime, WebEx meeting URL, Phone call, etc
Instructions to Join
Provide instructions to clients on how they can join your meeting, or any specific instructions you would like to inform your clients about.
For example, "Please click on the Zoom meeting link 5 mins before the scheduled time."
Program Structure
You have the option to set up your program structure as either:
A) Session by Session Coaching
This structure allows your clients to book coaching sessions as and when they would like to. Clients can book sessions from the client portal provided that you have configured this in the 'Scheduling' step (see 'Scheduling' for more details).
If you are charging for the program, clients will be able to make the payment from within the client portal when they book a session date. You can set up the fee amount in the 'Fees' step.
B) Package of Coaching Sessions or Hours
Specify your program structure such as the total number of coaching sessions, session duration and program duration.
Total Sessions - You can choose to set up your program by sessions or hours by using the drop down selector.
First Session Duration - Enter the duration of the first session (or appointment).
Subsequent Sessions Duration - Enter the duration of subsequent sessions. If you check the box for "Every", use the drop down selector to specify how frequently the subsequent sessions would occur.
Total Program Duration - Use the dropdown selector to specify the duration of your coaching program
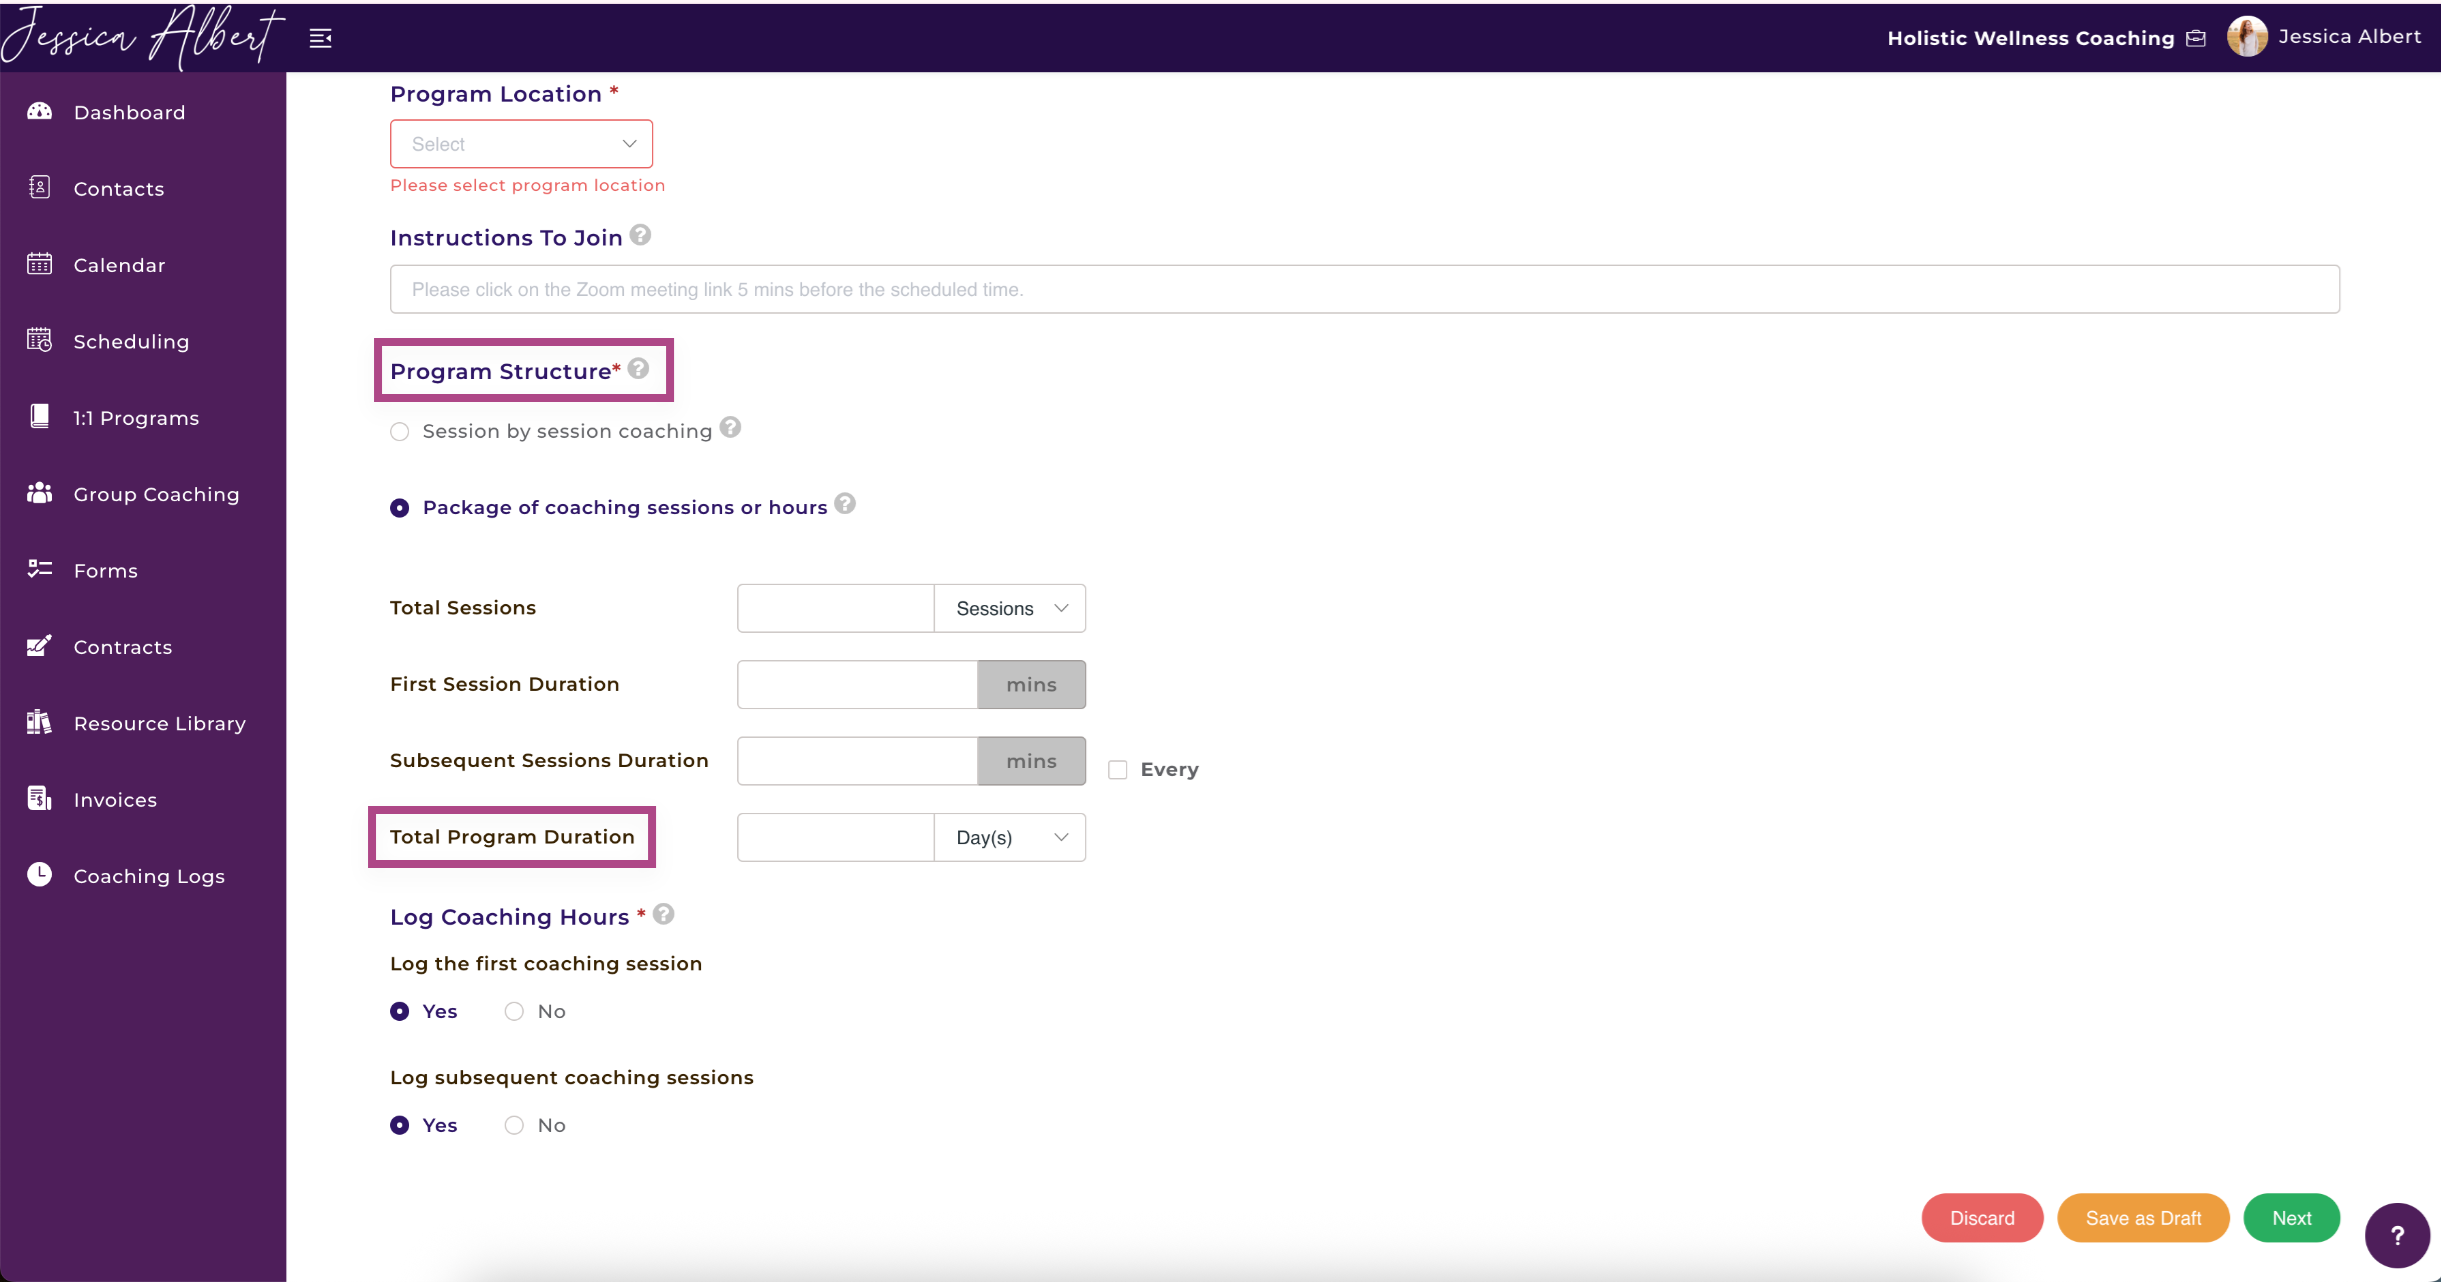
Log Coaching Hours
Select Yes to log your coaching hours for this program automatically in your coaching log.
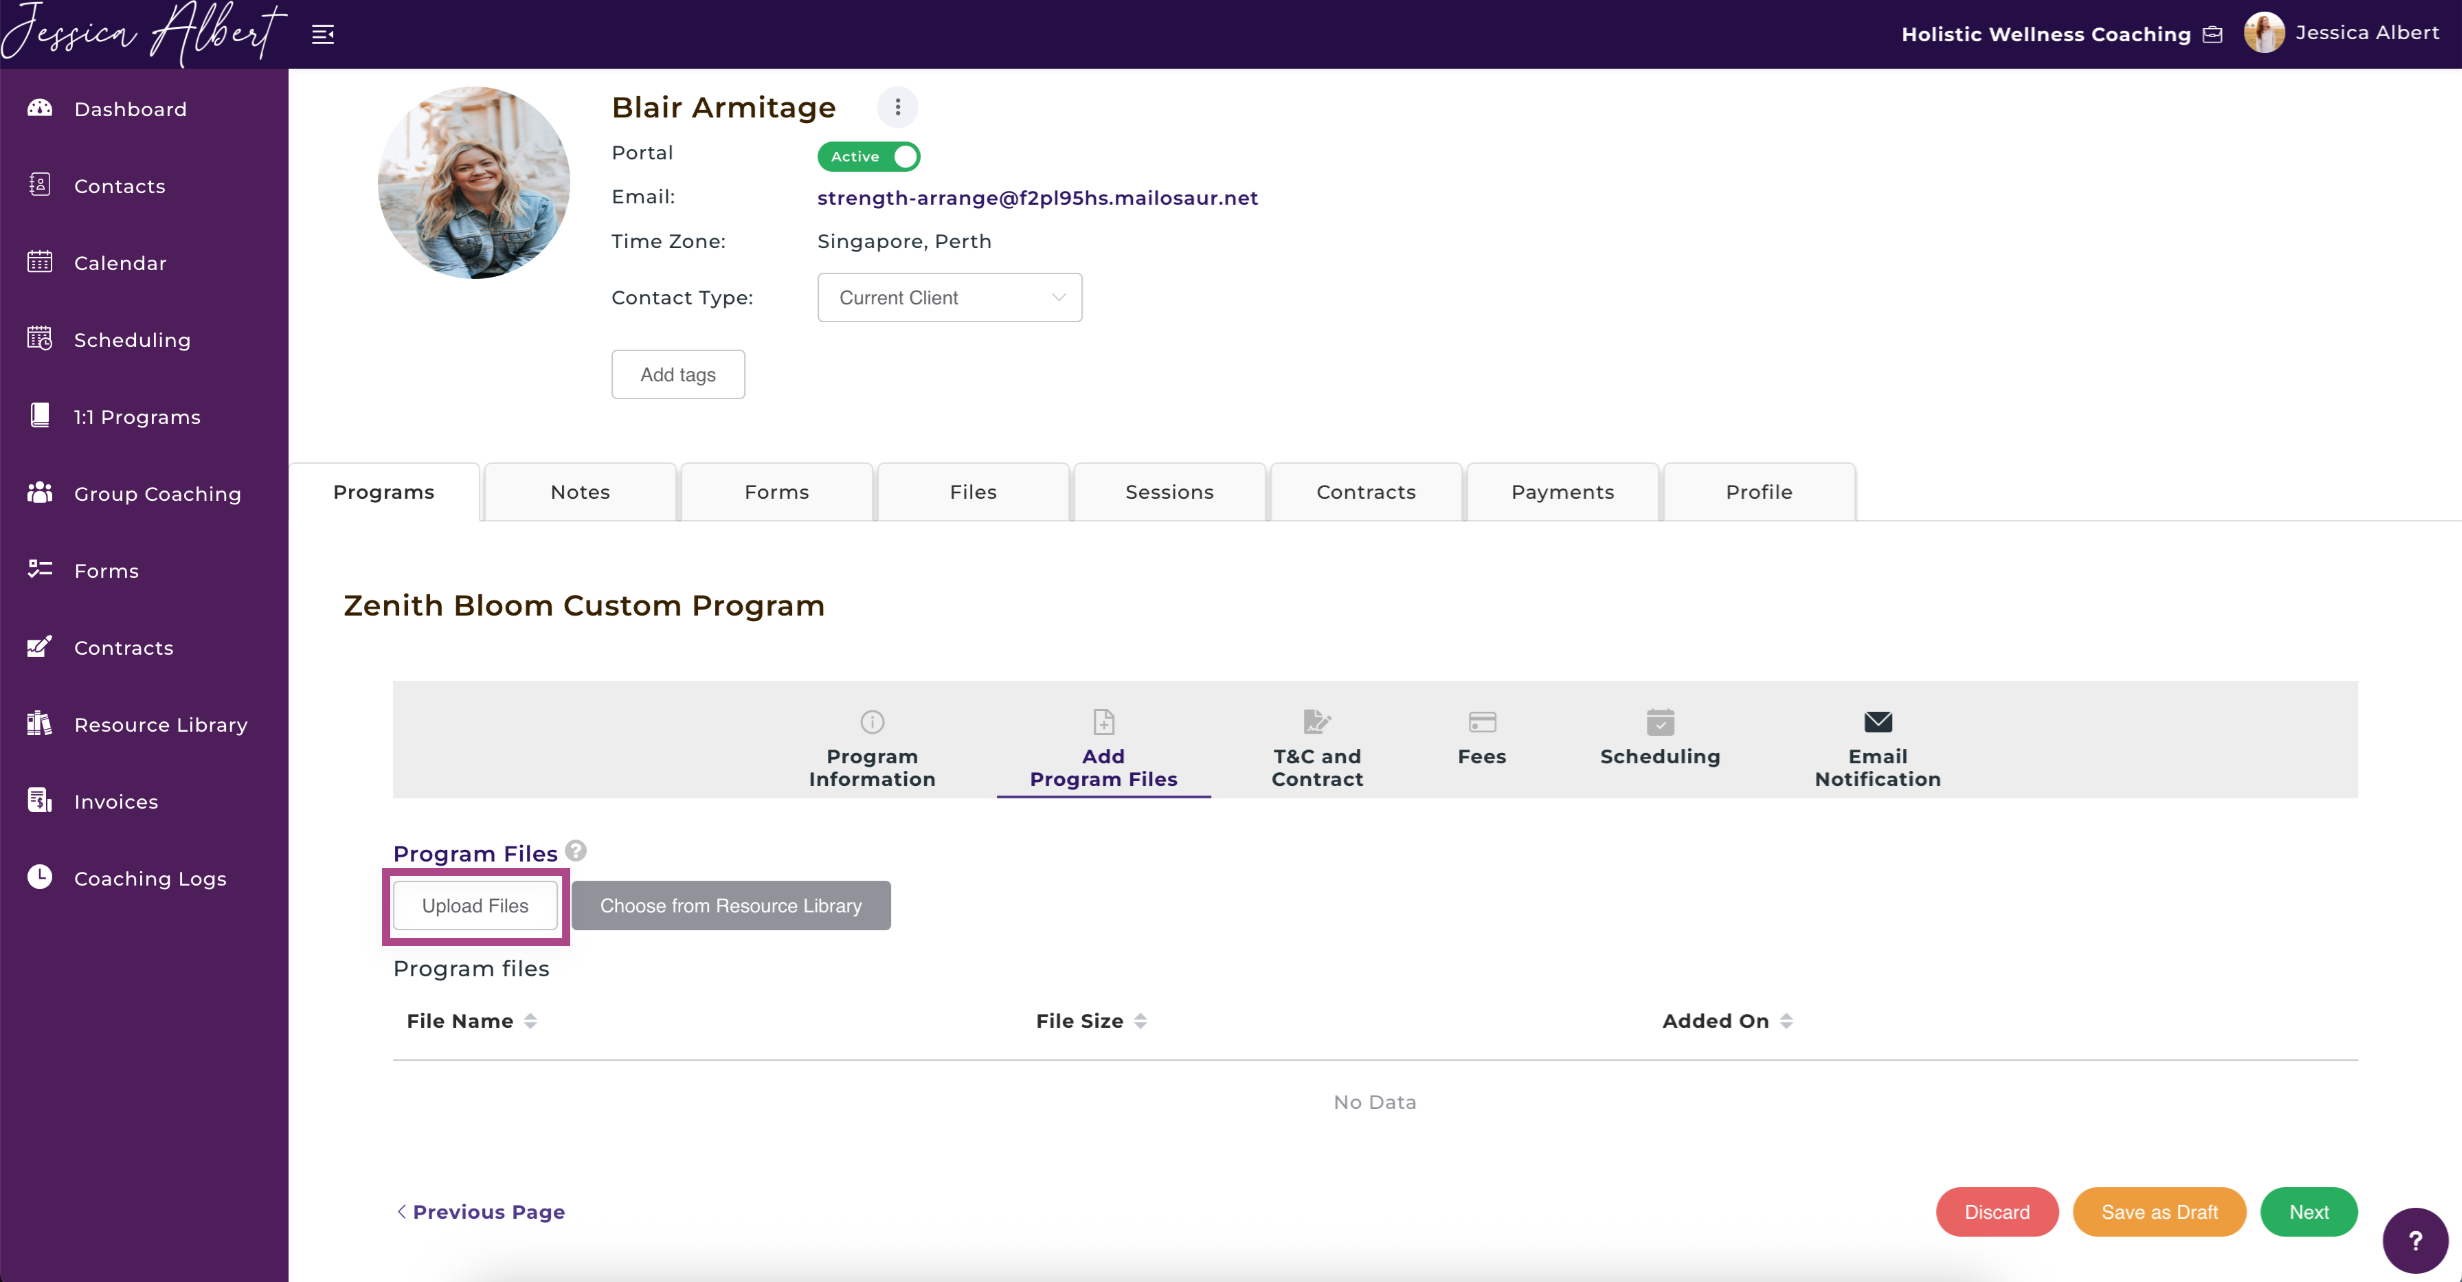
2. Add Program Files (Optional) 🗂️
If you have documents or files that you'd like your clients to have access to immediately after they have enrolled into your program, this is the place to do it.
When you add files here, they will be accessible by your clients from the client portal, immediately after they have enrolled and have created their client portal.
Upload Files
Choose this option if you wish to upload files from your computer or from other source origins such as Google Drive, Dropbox, One Drive, Facebook, Instagram, etc.
Click the Upload Files button.
An upload widget will open and you can select the source origin of the file that you wish to upload. Once you've selected the files you wish to upload, click Add. The file will be uploaded.
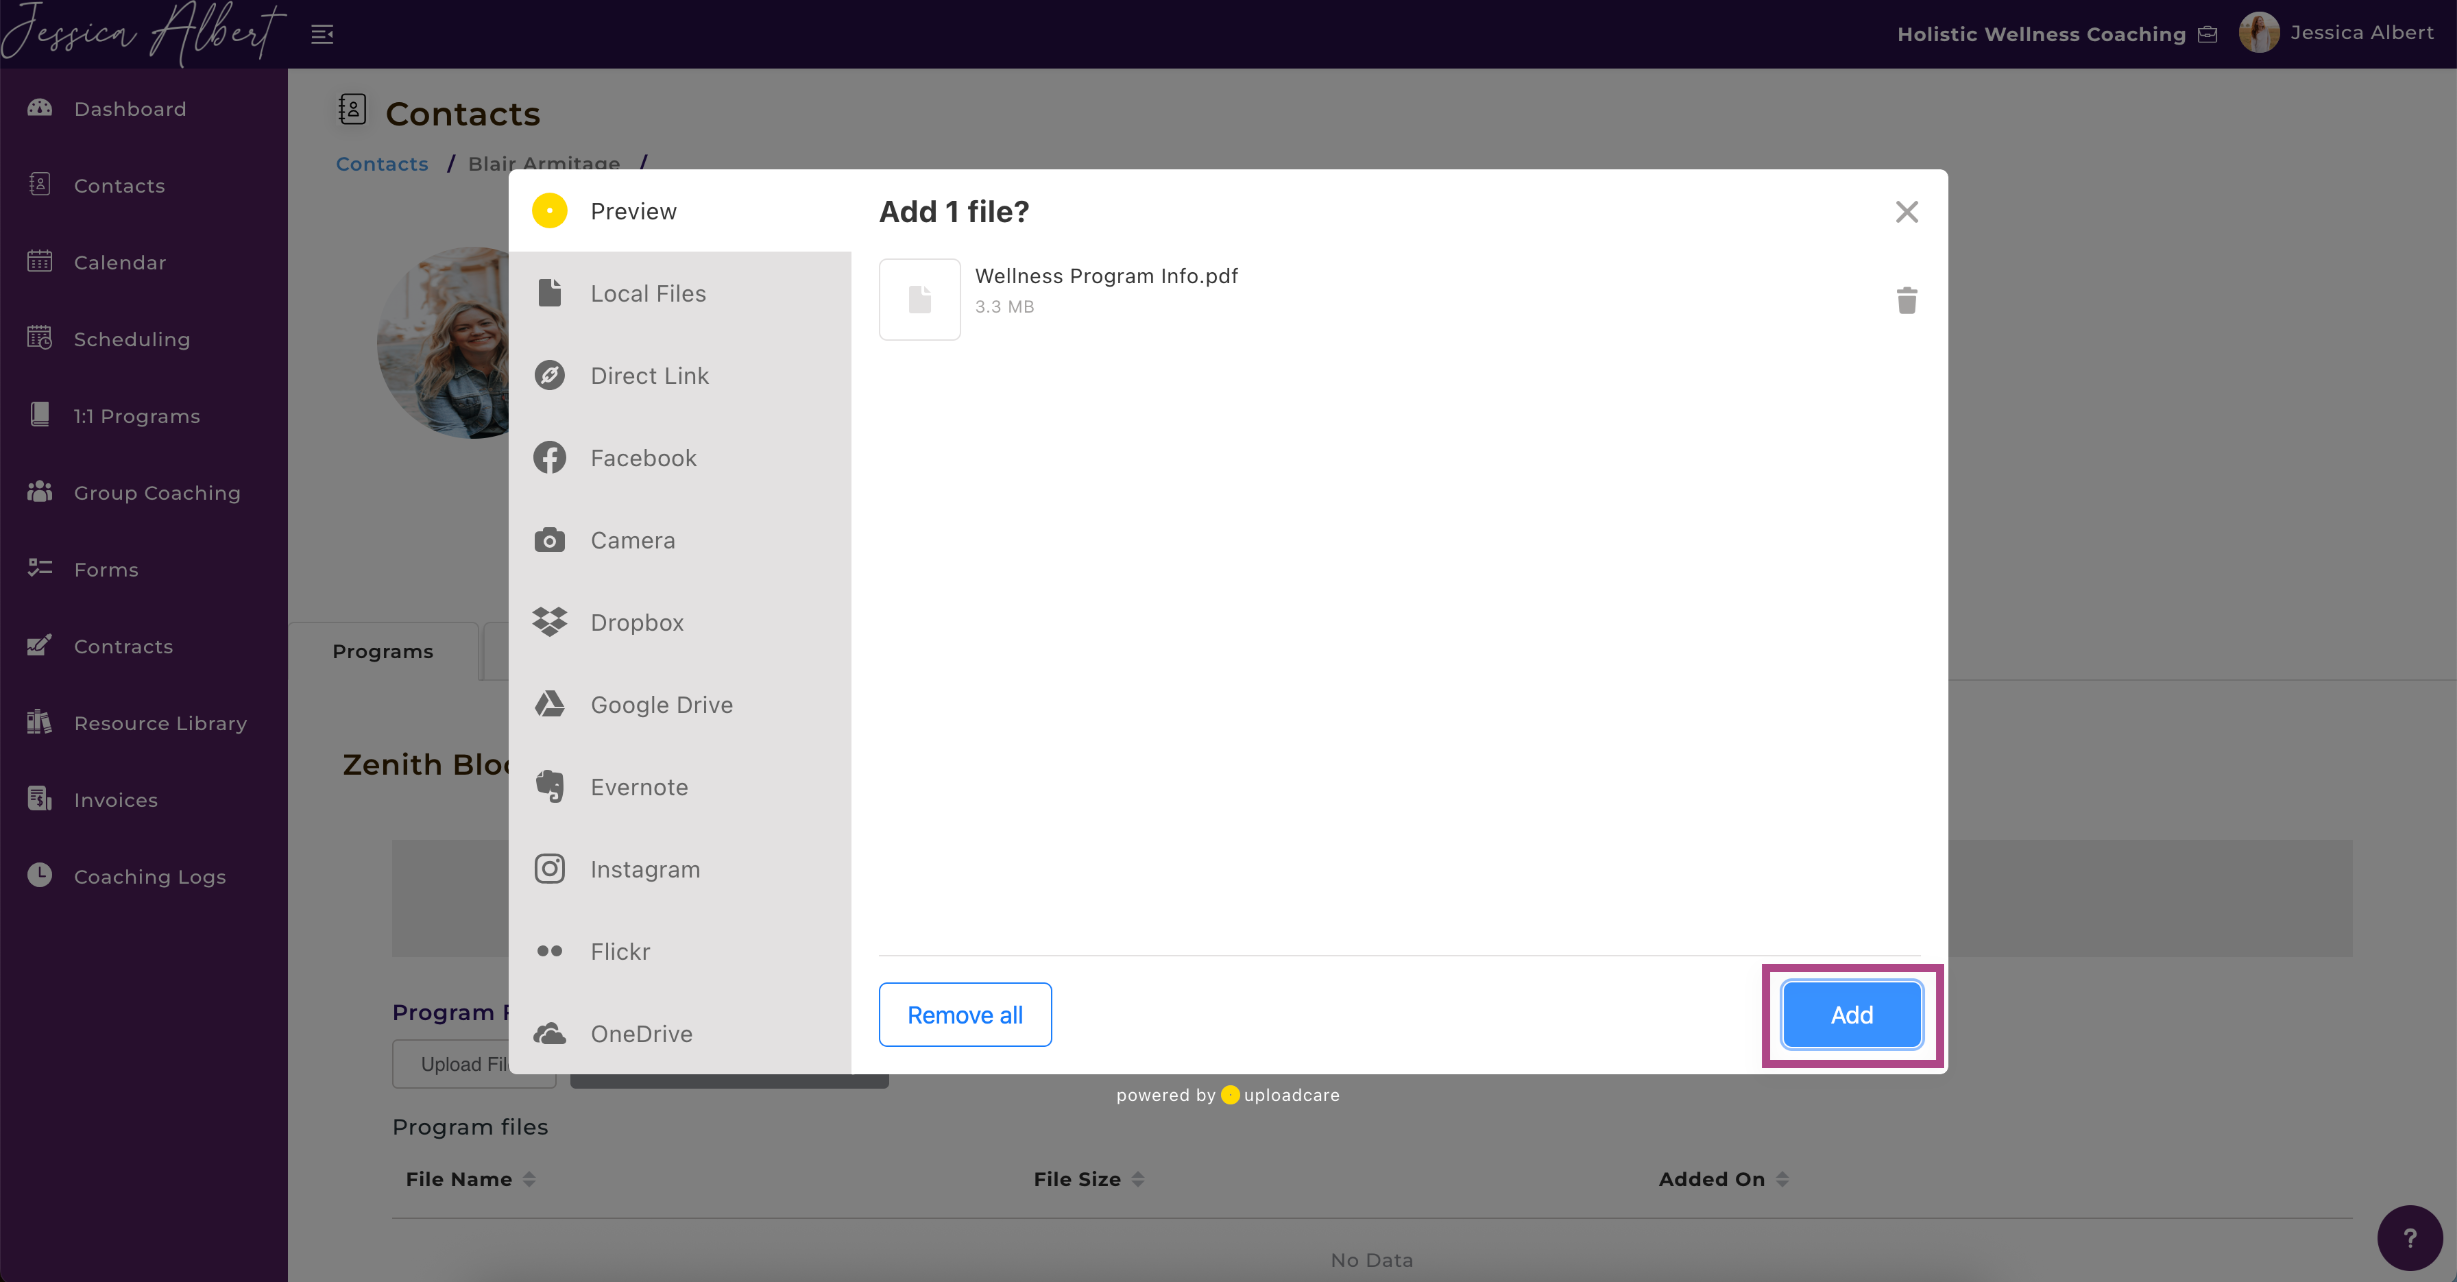
Note: When you upload a file directly to a program, it only gets uploaded in this specific program, for this specific client. The file does not get added to your Resource Library.
Adding a File From Your Resource Library
You also have the option to upload files from your Resource Library to your program. Refer to the Resource Library article for more details on how to use it.
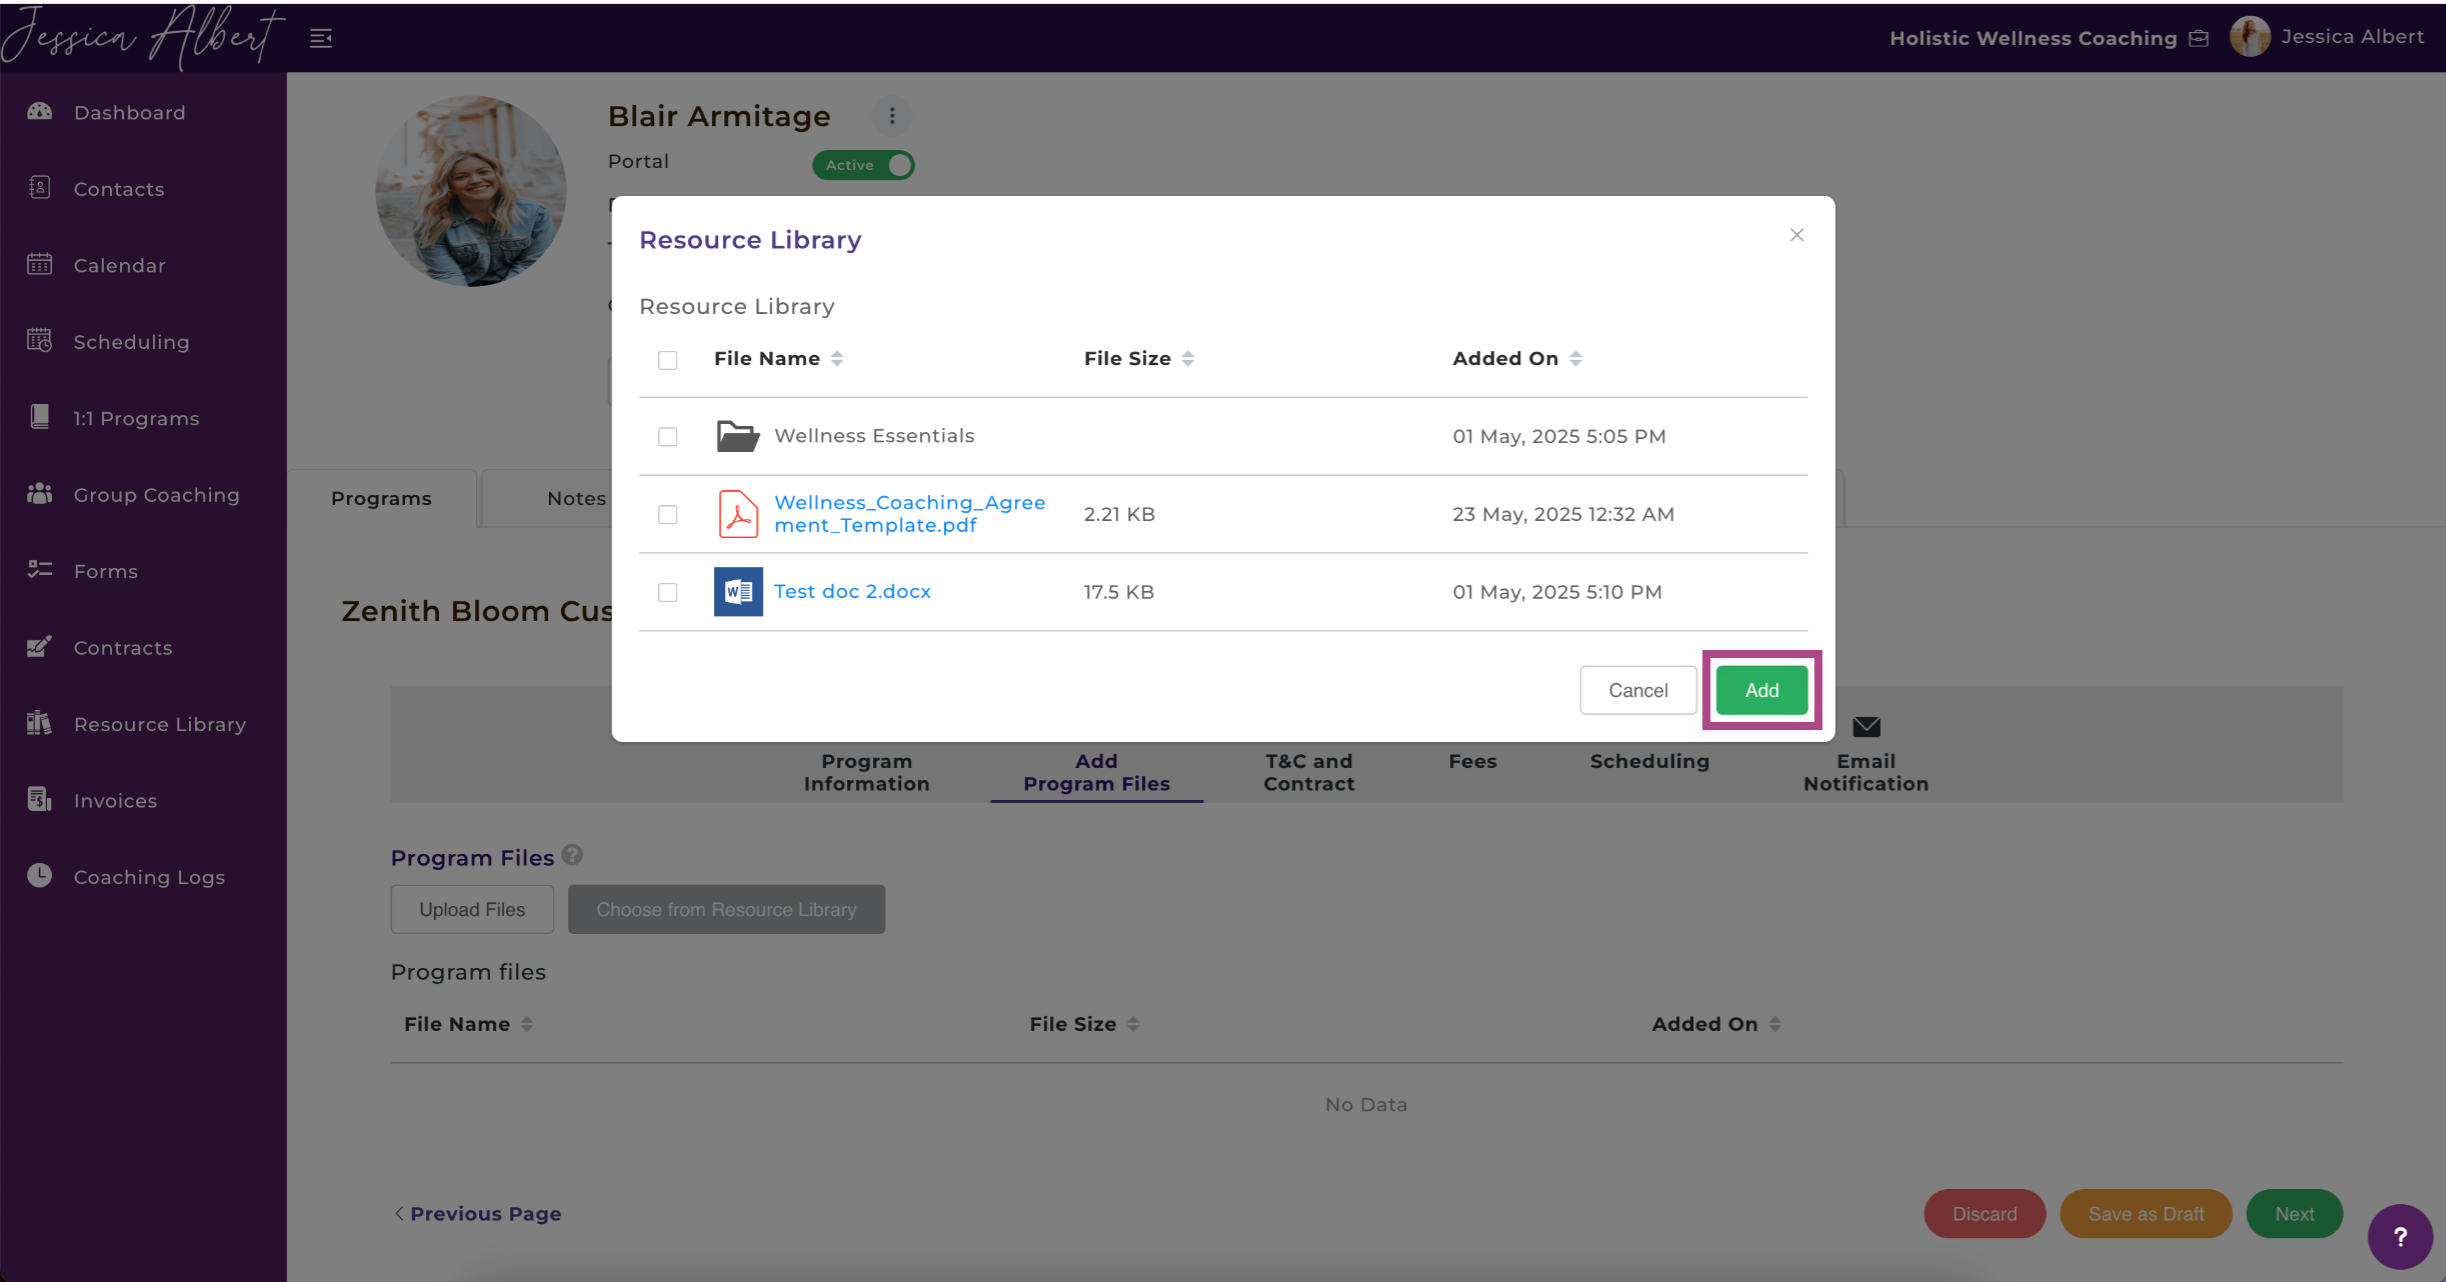
To add a file from your Resource Library, click the Choose from Resource Library button.
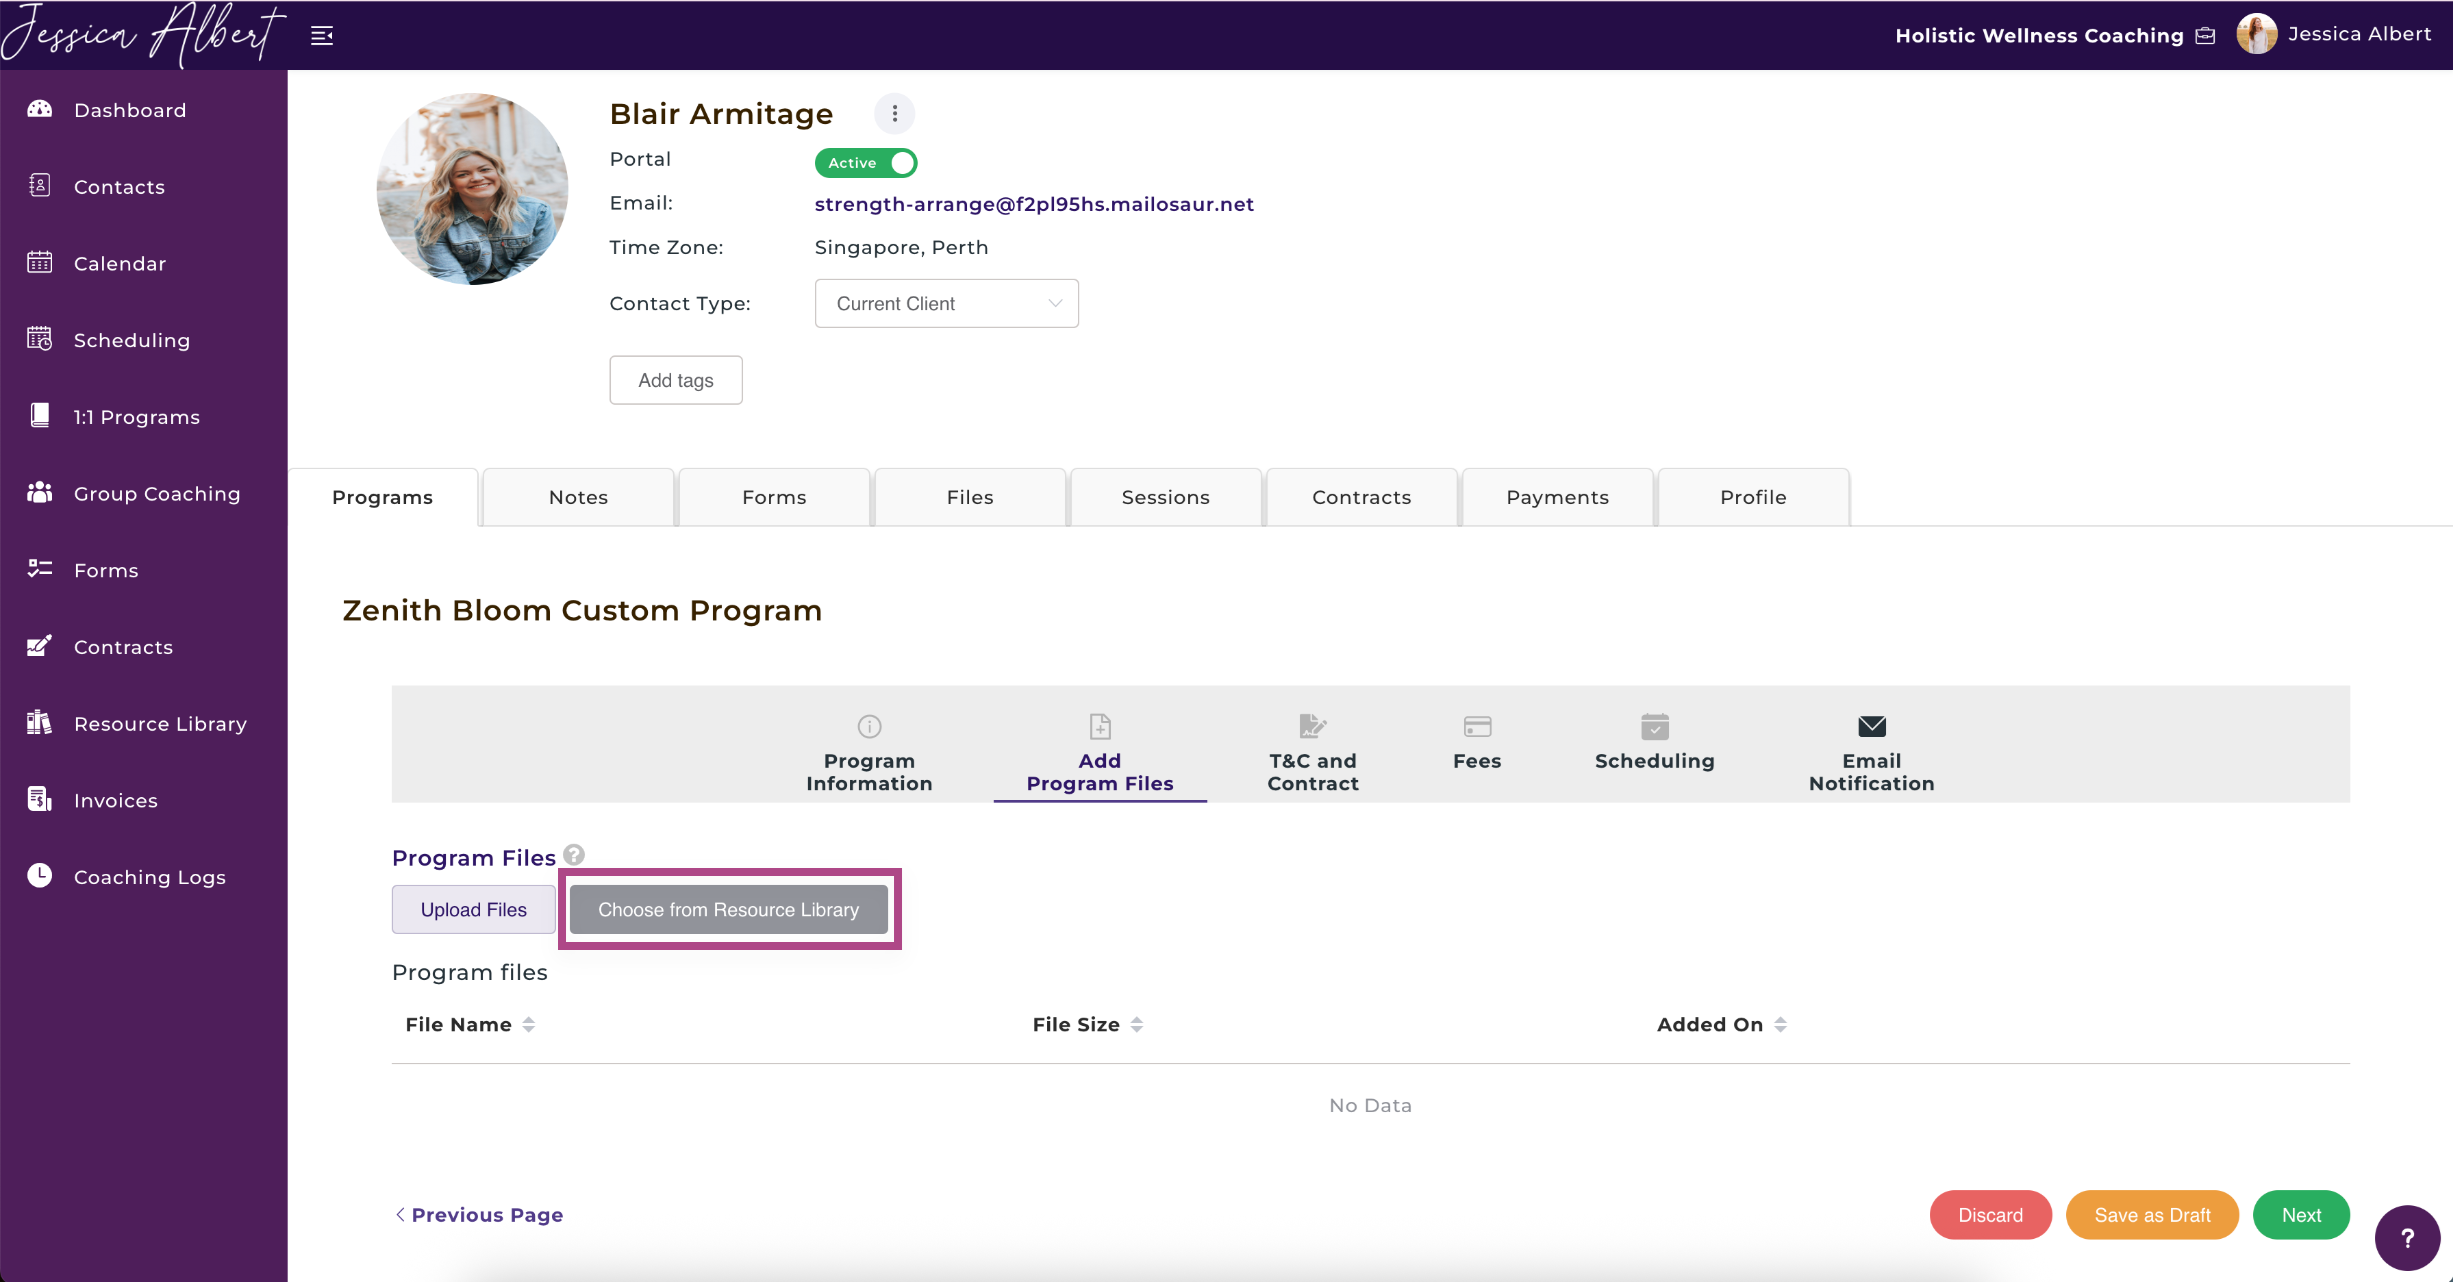
A window will open that lists all files and folders that reside in your Resource Library. Use the checkbox to select the files you wish to upload, then click Add. The file will be uploaded to the program.
3. Contract (Optional) 📄
You have the option to email a contract to the client for e-signature.
Note: This feature is available only for Aha! Plan subscribers.
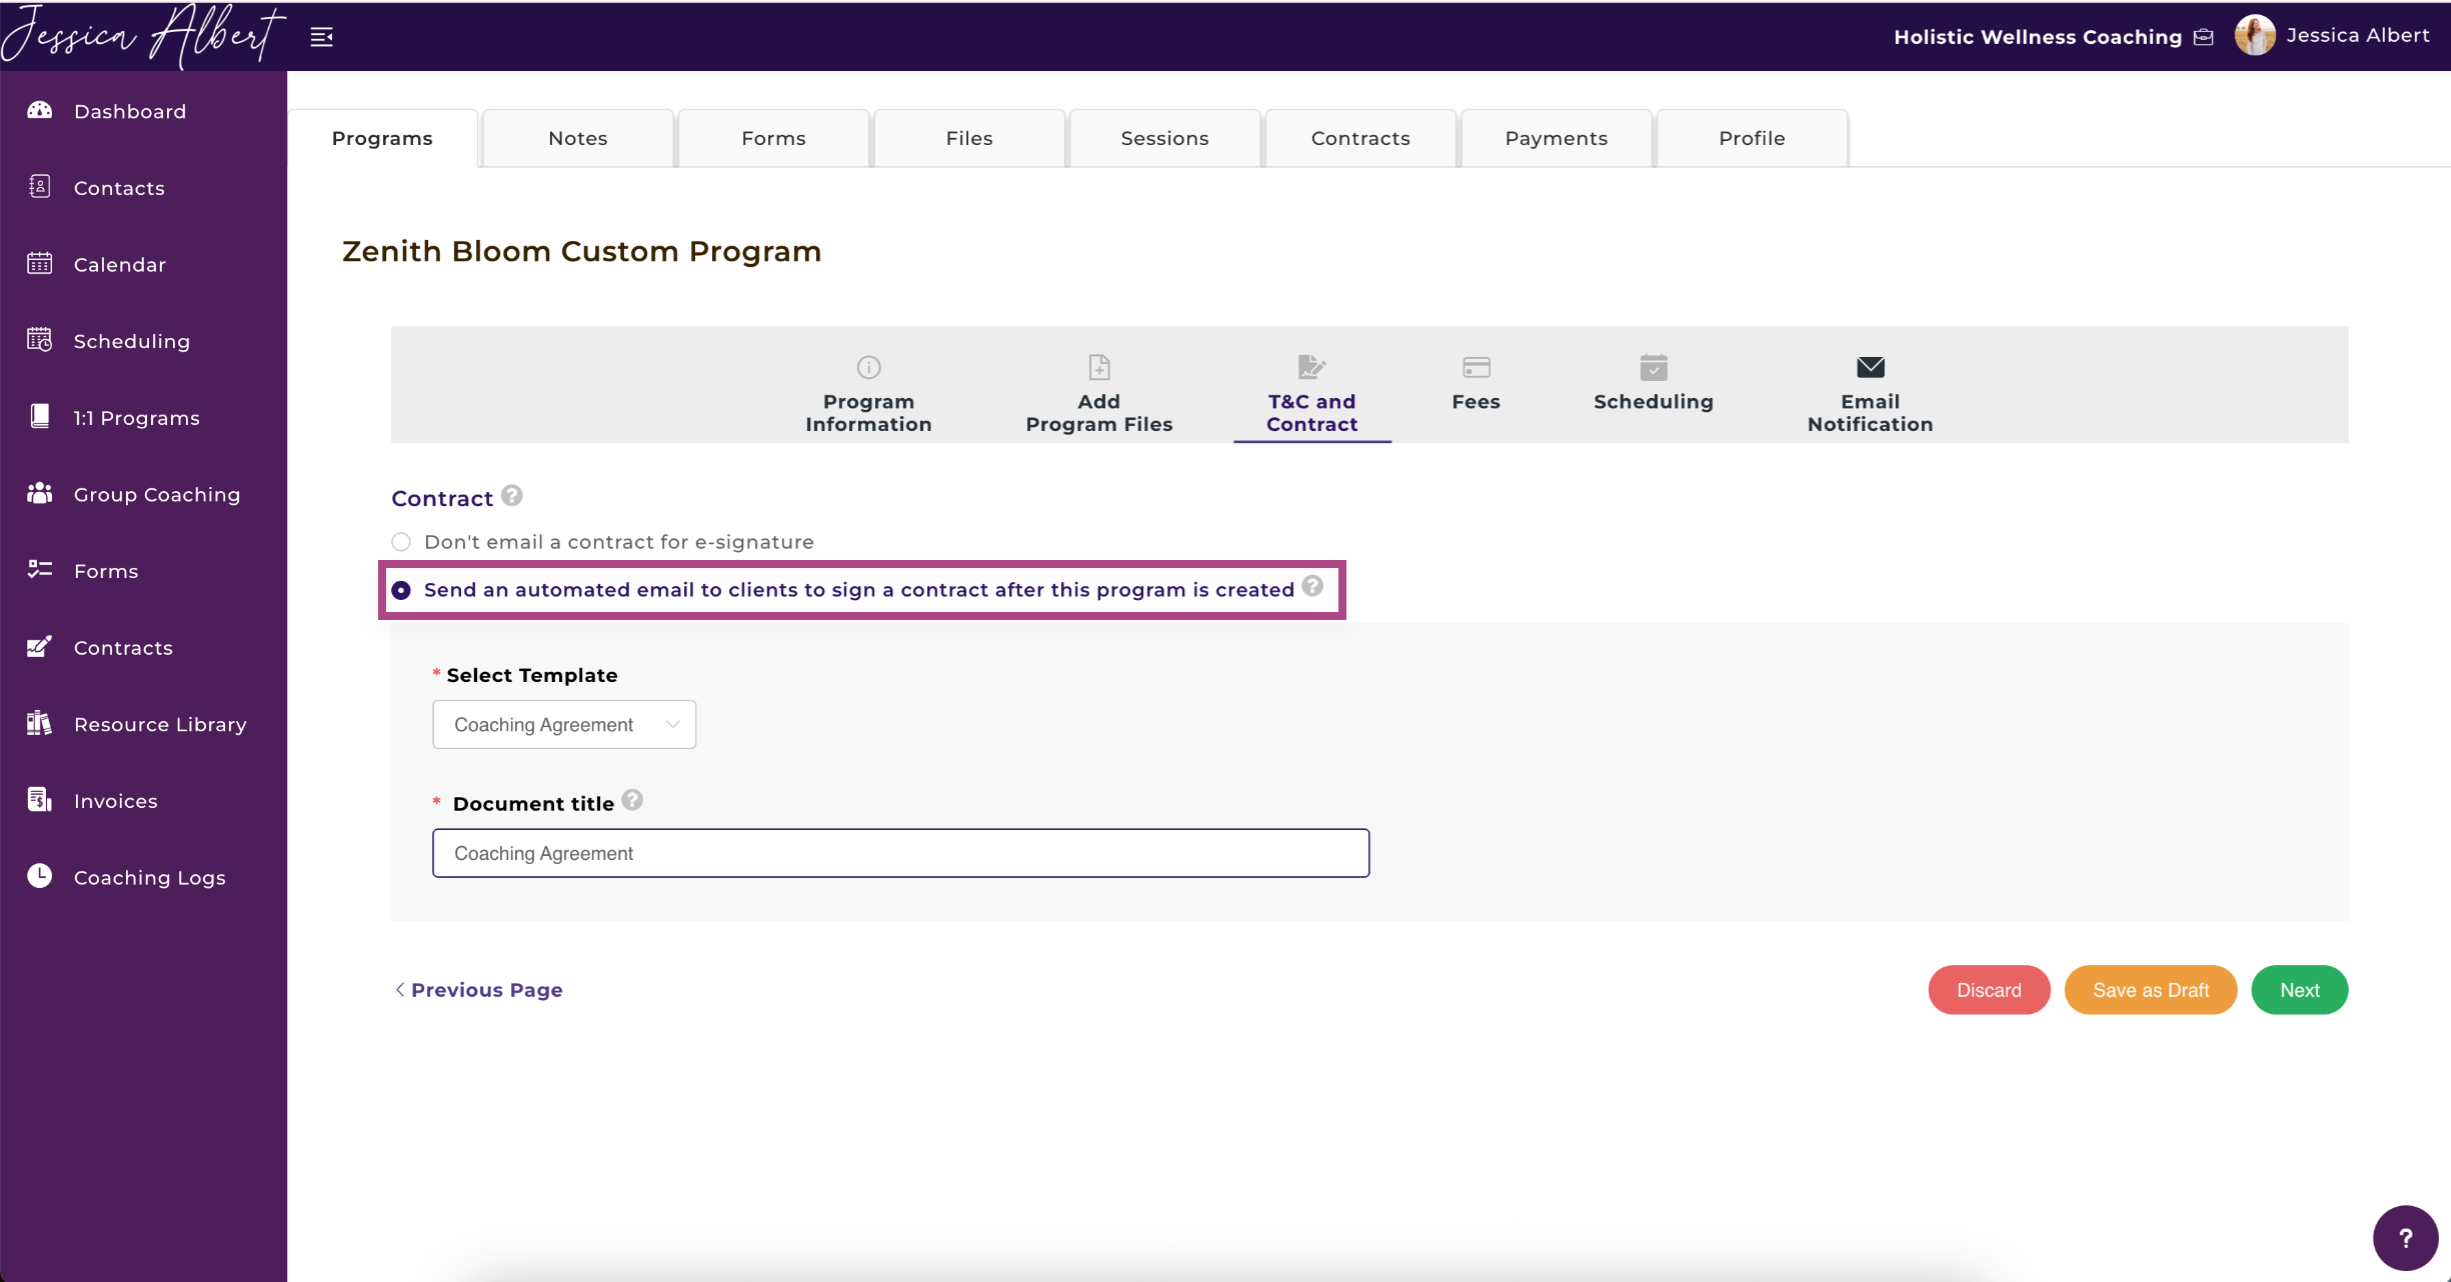
To email a contract to the client automatically after the quick start program has been created:
- Select the radio button for Send an automated email to clients to sign a contract after this program is created.
- Choose a Contract Template from the drop down selector (to learn how to create a Contract Template, refer to the article How to Create a Contract Template).
- In the Document Title field, give a name to the document. Select Next.
4. Fees (Optional) 💸
You can charge clients for enrolling into your program, if required.
If you choose not to charge for the program but checked the box to automatically log coaching hours, CoachVantage would automatically count the hours as Pro Bono Hours instead of Paid Hours.
1. Select Yes on the button to send an invoice to your client for the program.
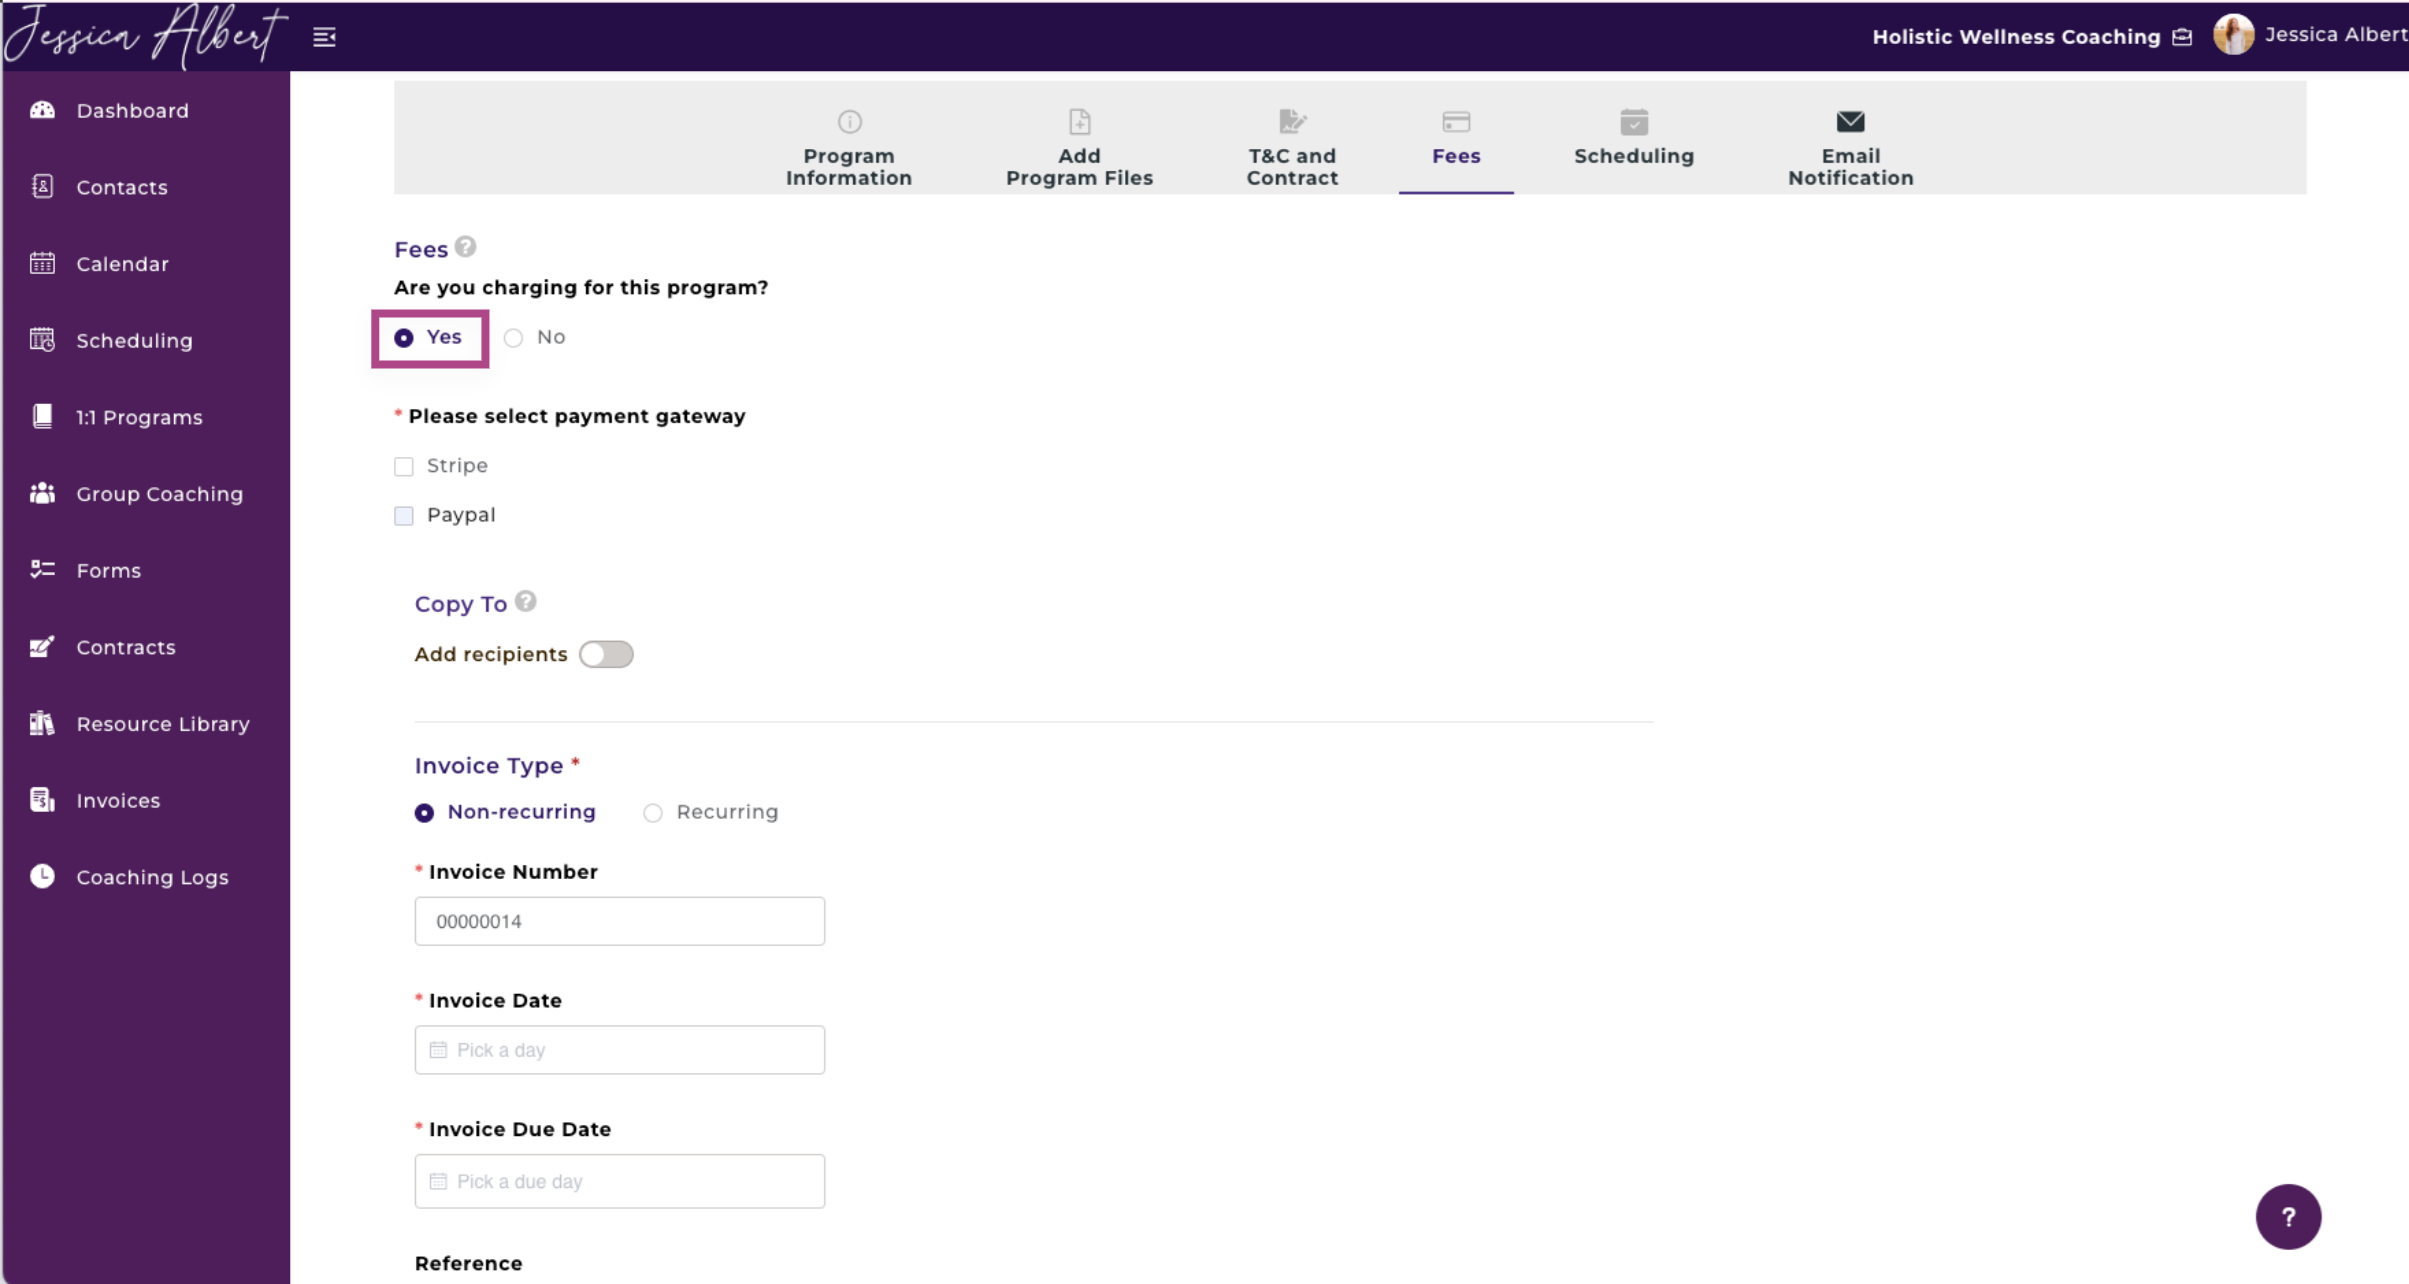
2. Check the Payment Gateway options, PayPal or Stripe, to enable the payment methods by PayPal or by credit card, respectively. You may check both options as well.
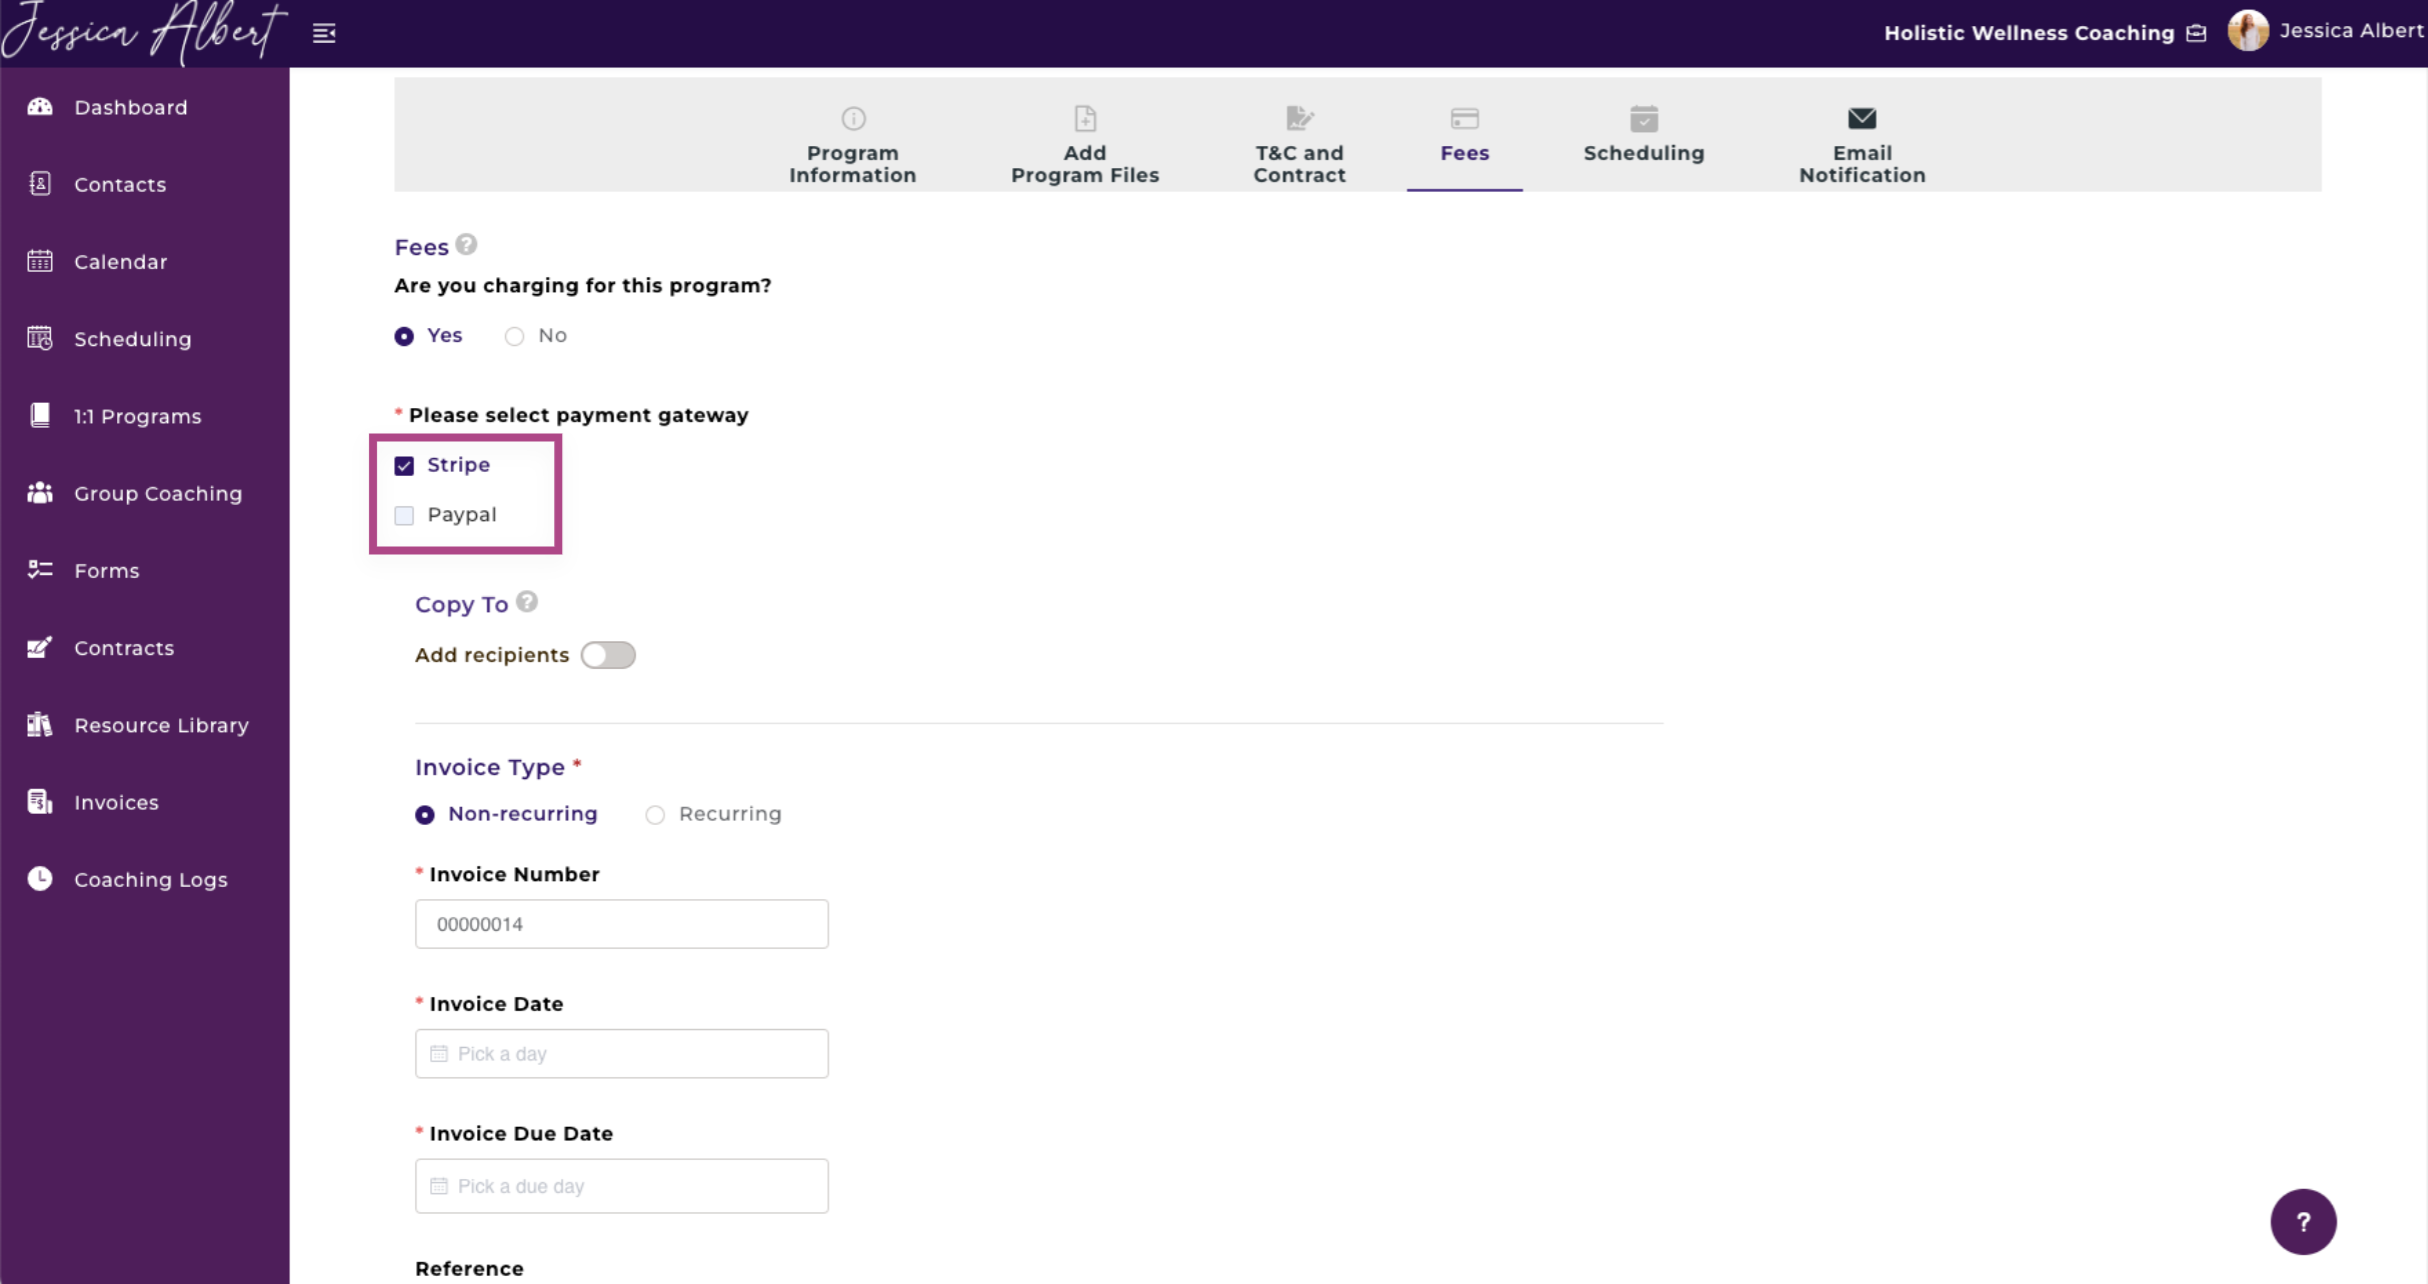
NOTE: You must first have connected your PayPal and/or Stripe account to CoachVantage before you can add a payment option.
3. You can include recipients, other than the client, that need to receive the invoice in the Copy To section. Recipients do not have to be in your contact list in order to receive the invoice.
To include recipients, type in the name and email of recipient and select Add Recipient. You may add up to three recipients.
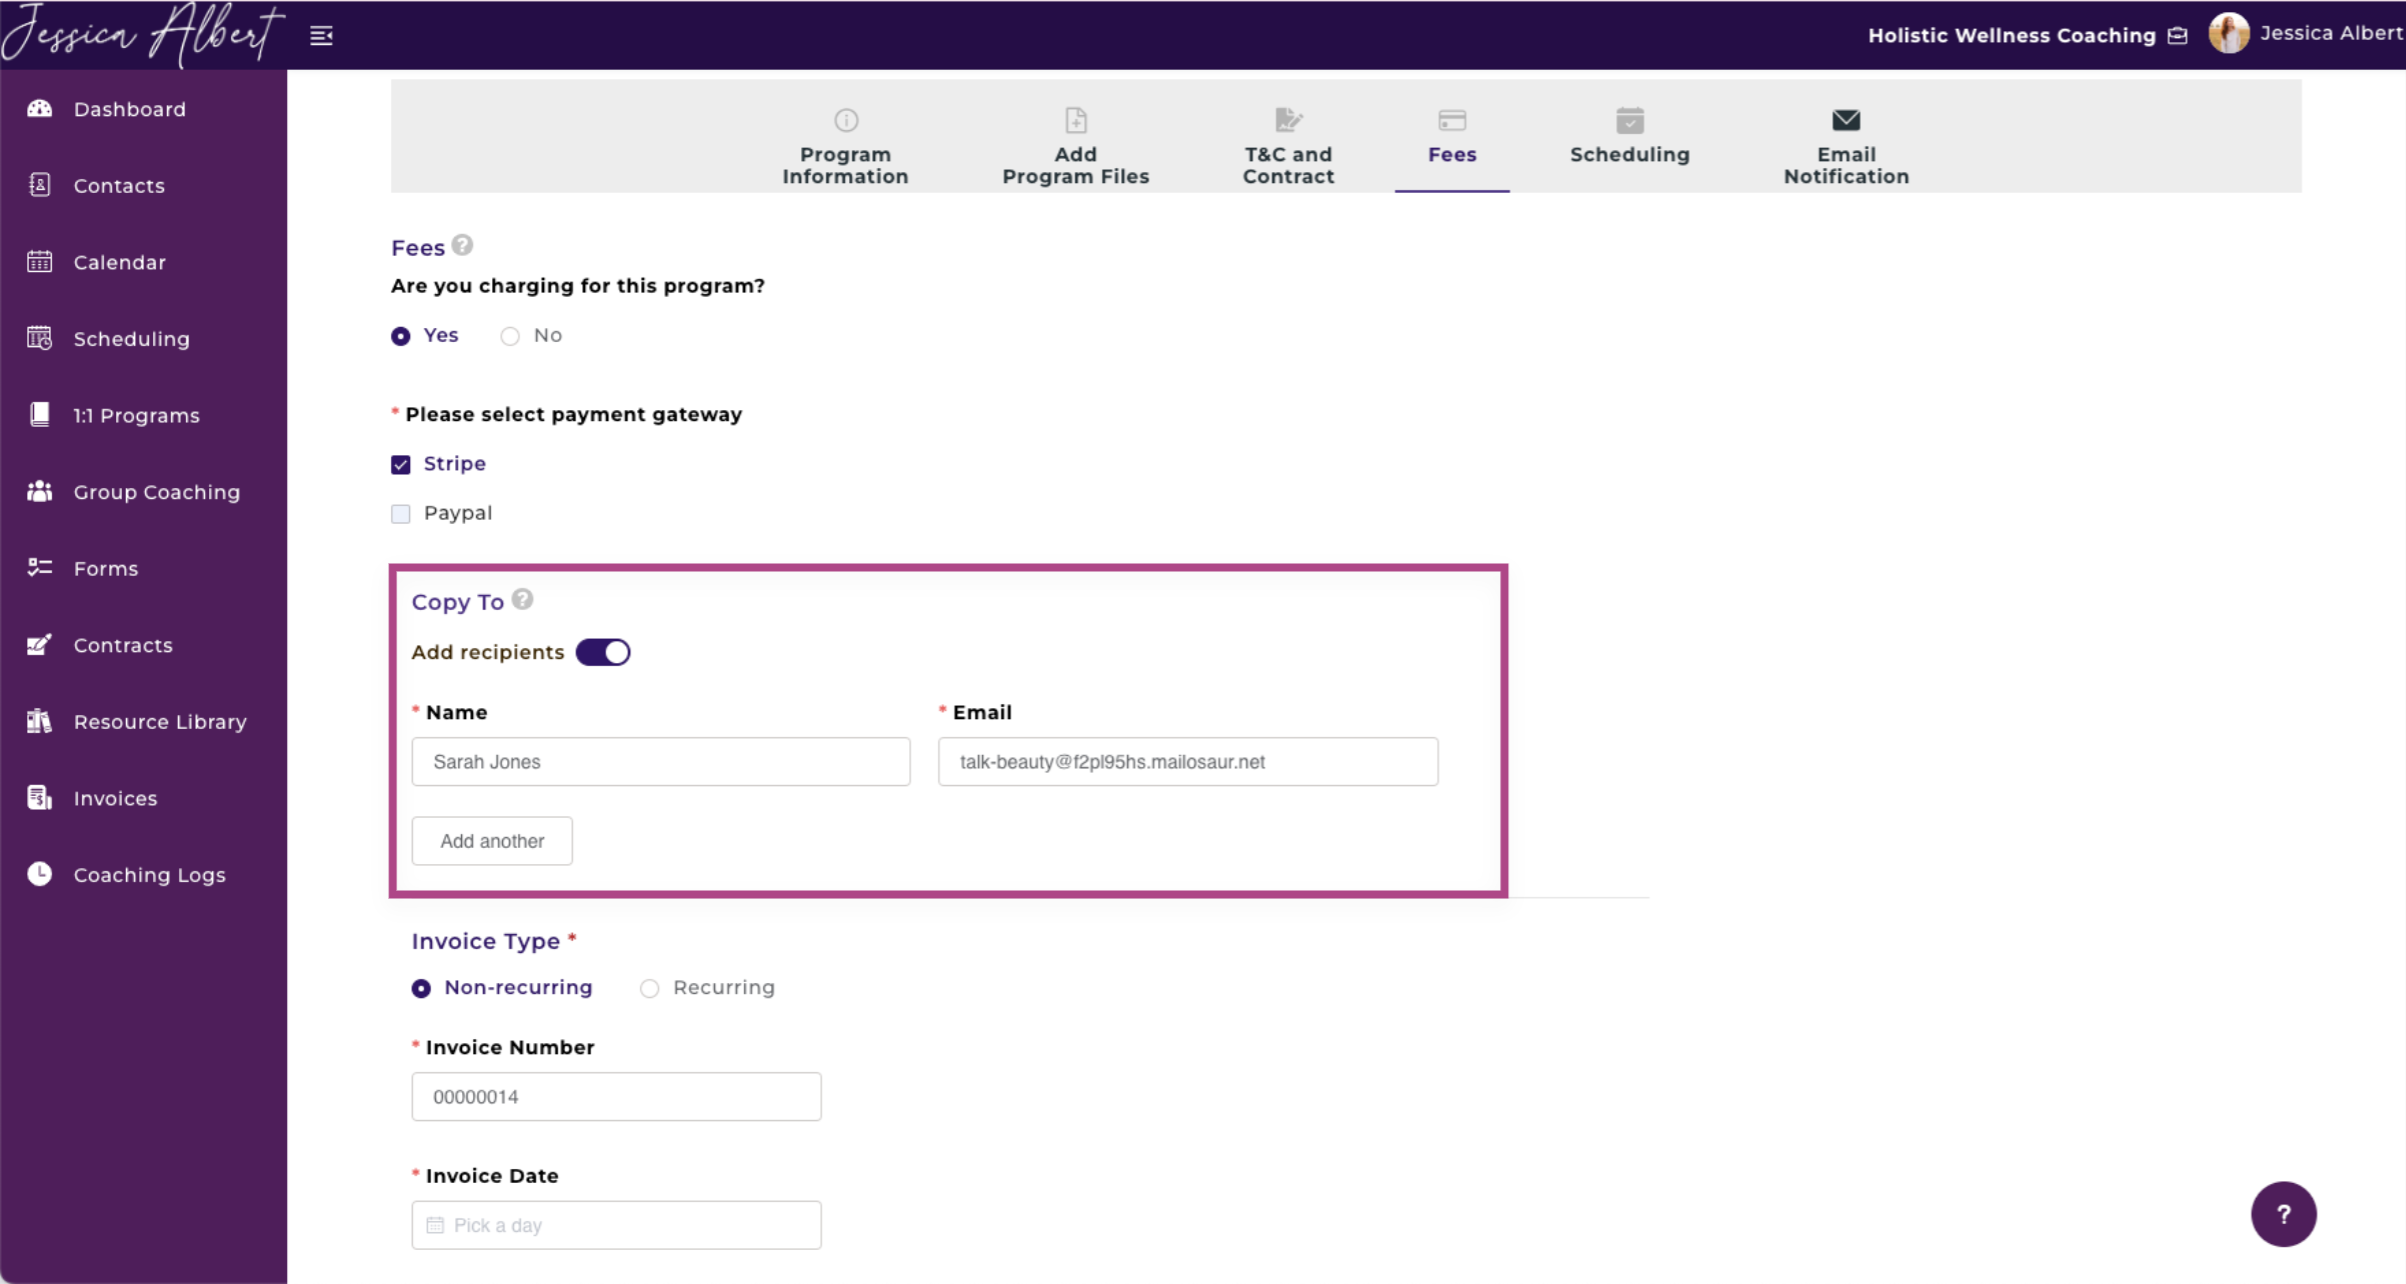
Note: Recipients that you add do not get saved as Contacts. They will only receive the invoice in their email.
4. You may now chose the invoice type:
- Non-Recurring
- Select Non-Recurring invoice if you wish to send a one-time invoice to your client.
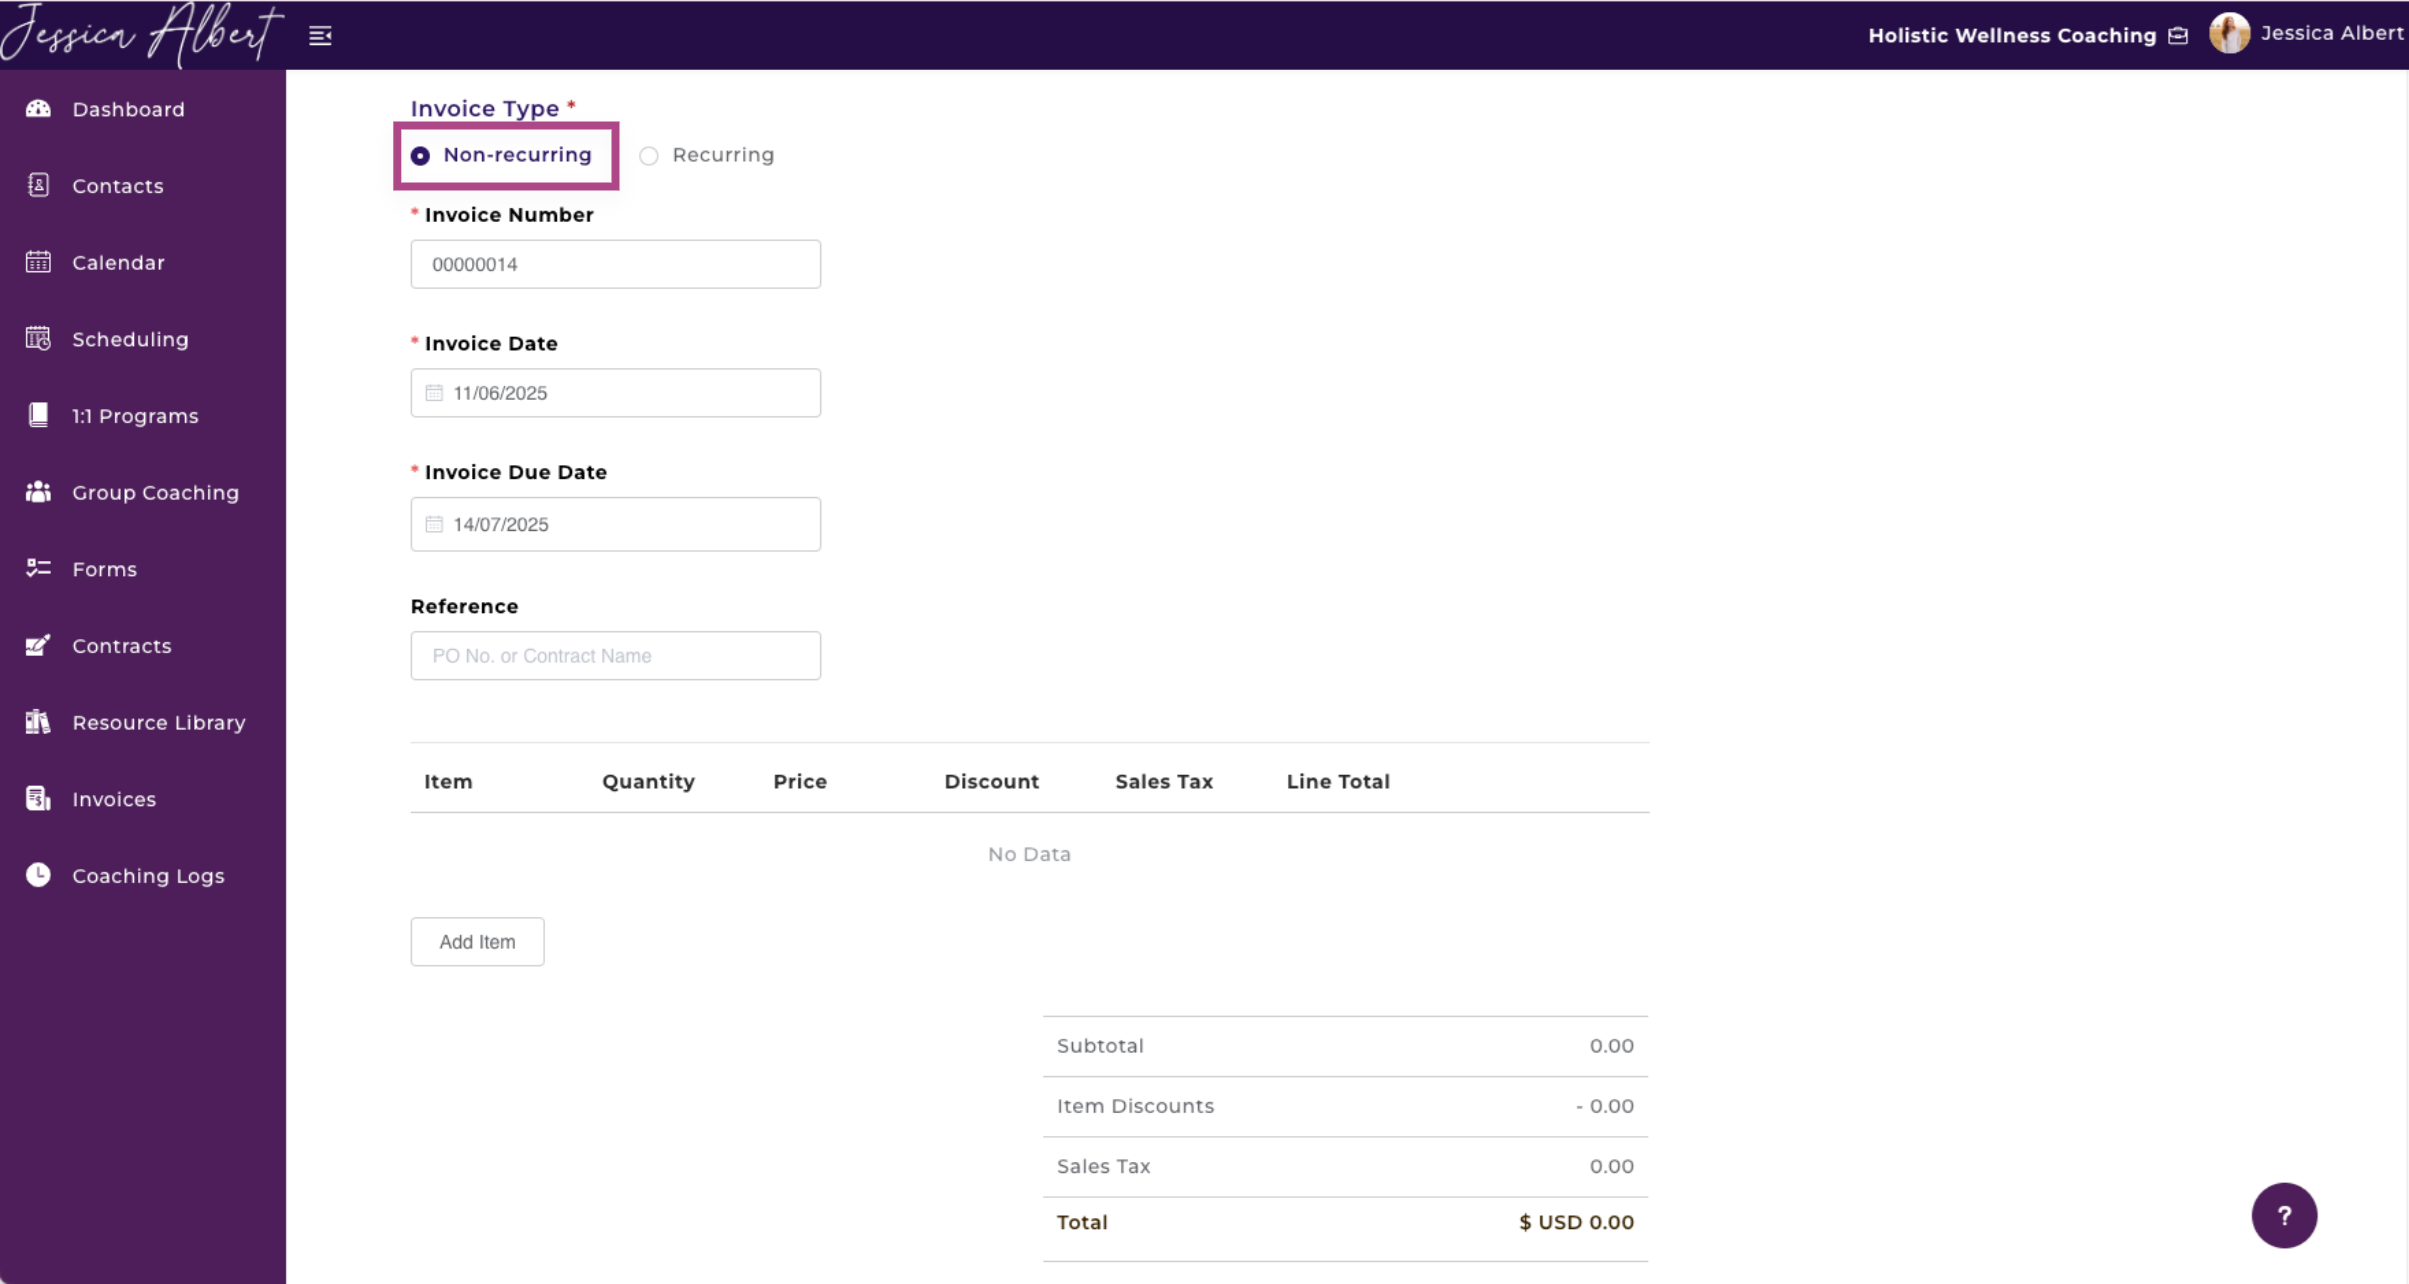
- Invoice Number - The invoice number is automatically generated by CoachVantage in sequential order. The very first invoice number starts at 00000001 and has 8 digits.
You may customize the invoice number if desired by typing in the invoice number you would like to use.
Note:
If you customize an invoice number, the next invoice number that CoachVantage automatically generates will be incremented by '+1'. For example, if you have entered a custom number such as 8900023, CoachVantage will use 8900024 as the next invoice number.
b. Invoice Date - Date of Issue. The invoice date would be the day your contacts receive the invoice via their email.
c. Invoice Due Date - The invoice due date would be the day your contacts should make payment by. You may choose a specific date using the calendar function or select a time duration from the date of issue.
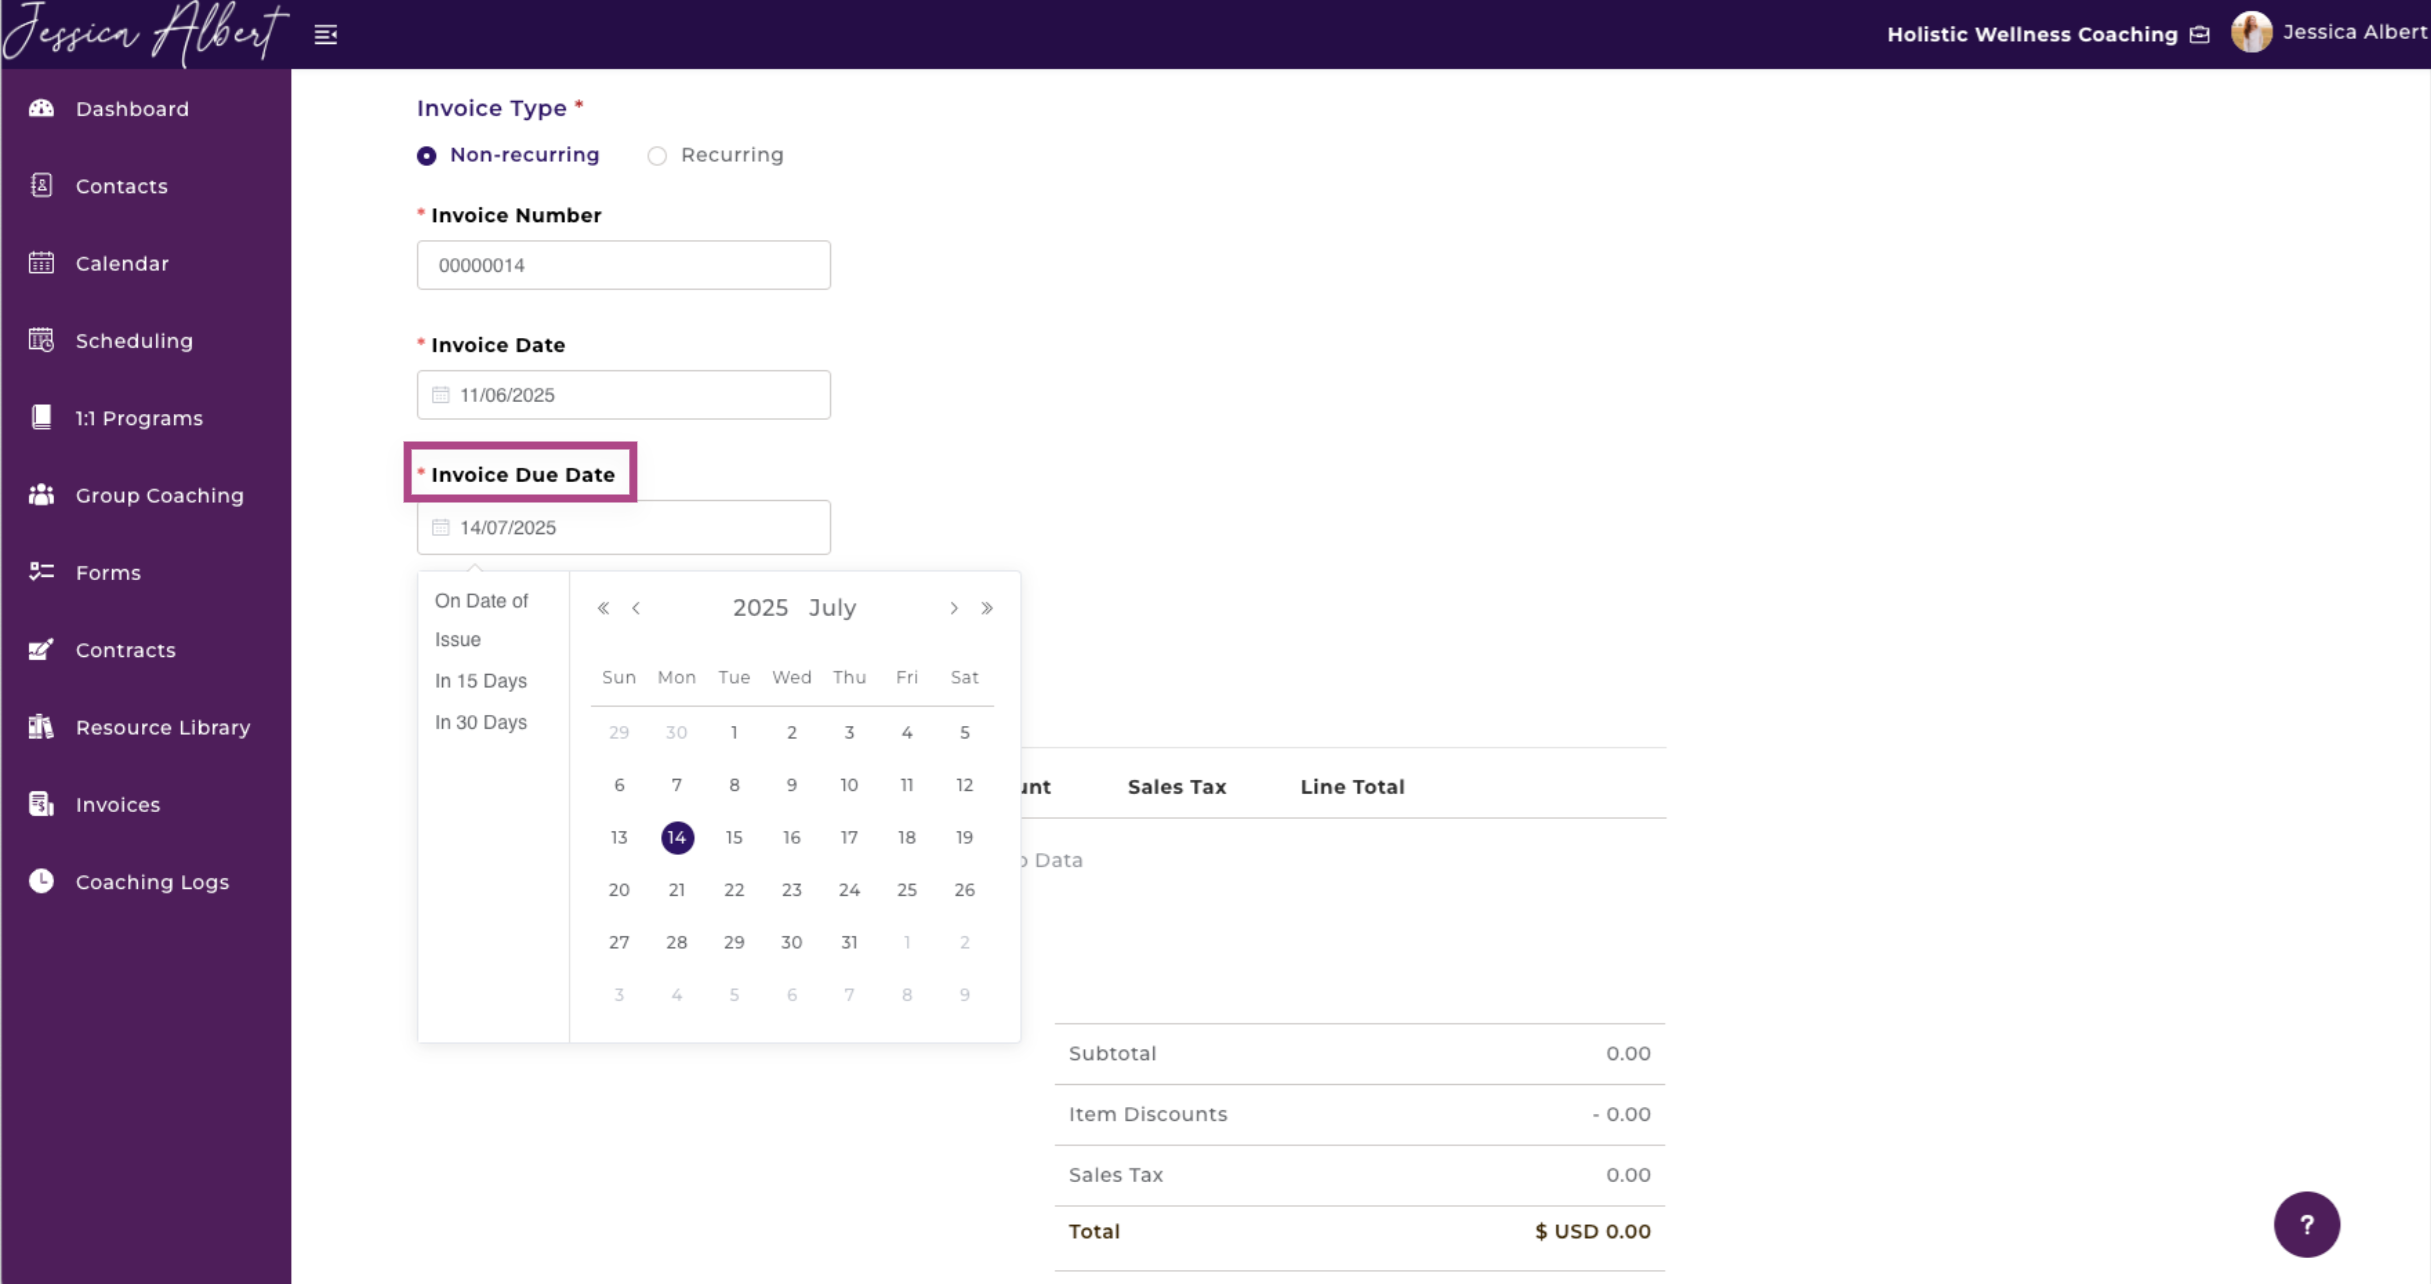
d. Reference (optional) - You may enter a reference description for what this invoice is for, such as a Purchase Order Number or a Contract Name here.
- Recurring
Select Recurring invoice if you would like to create a recurring invoice series. This feature is useful if you would like to invoice your clients automatically, based on a frequency that you define such as weekly, monthly, etc.
Once you have set up a Recurring Invoice series, CoachVantage will automatically send the invoices based on the billing frequency that you configure in the settings.
Note: You will not see any pre-populated invoice number when you set up a Recurring series (unlike in the Non-recurring Invoice setting which displays the invoice number). CoachVantage will automatically generate the invoice number when the scheduled invoice is sent out to your client.
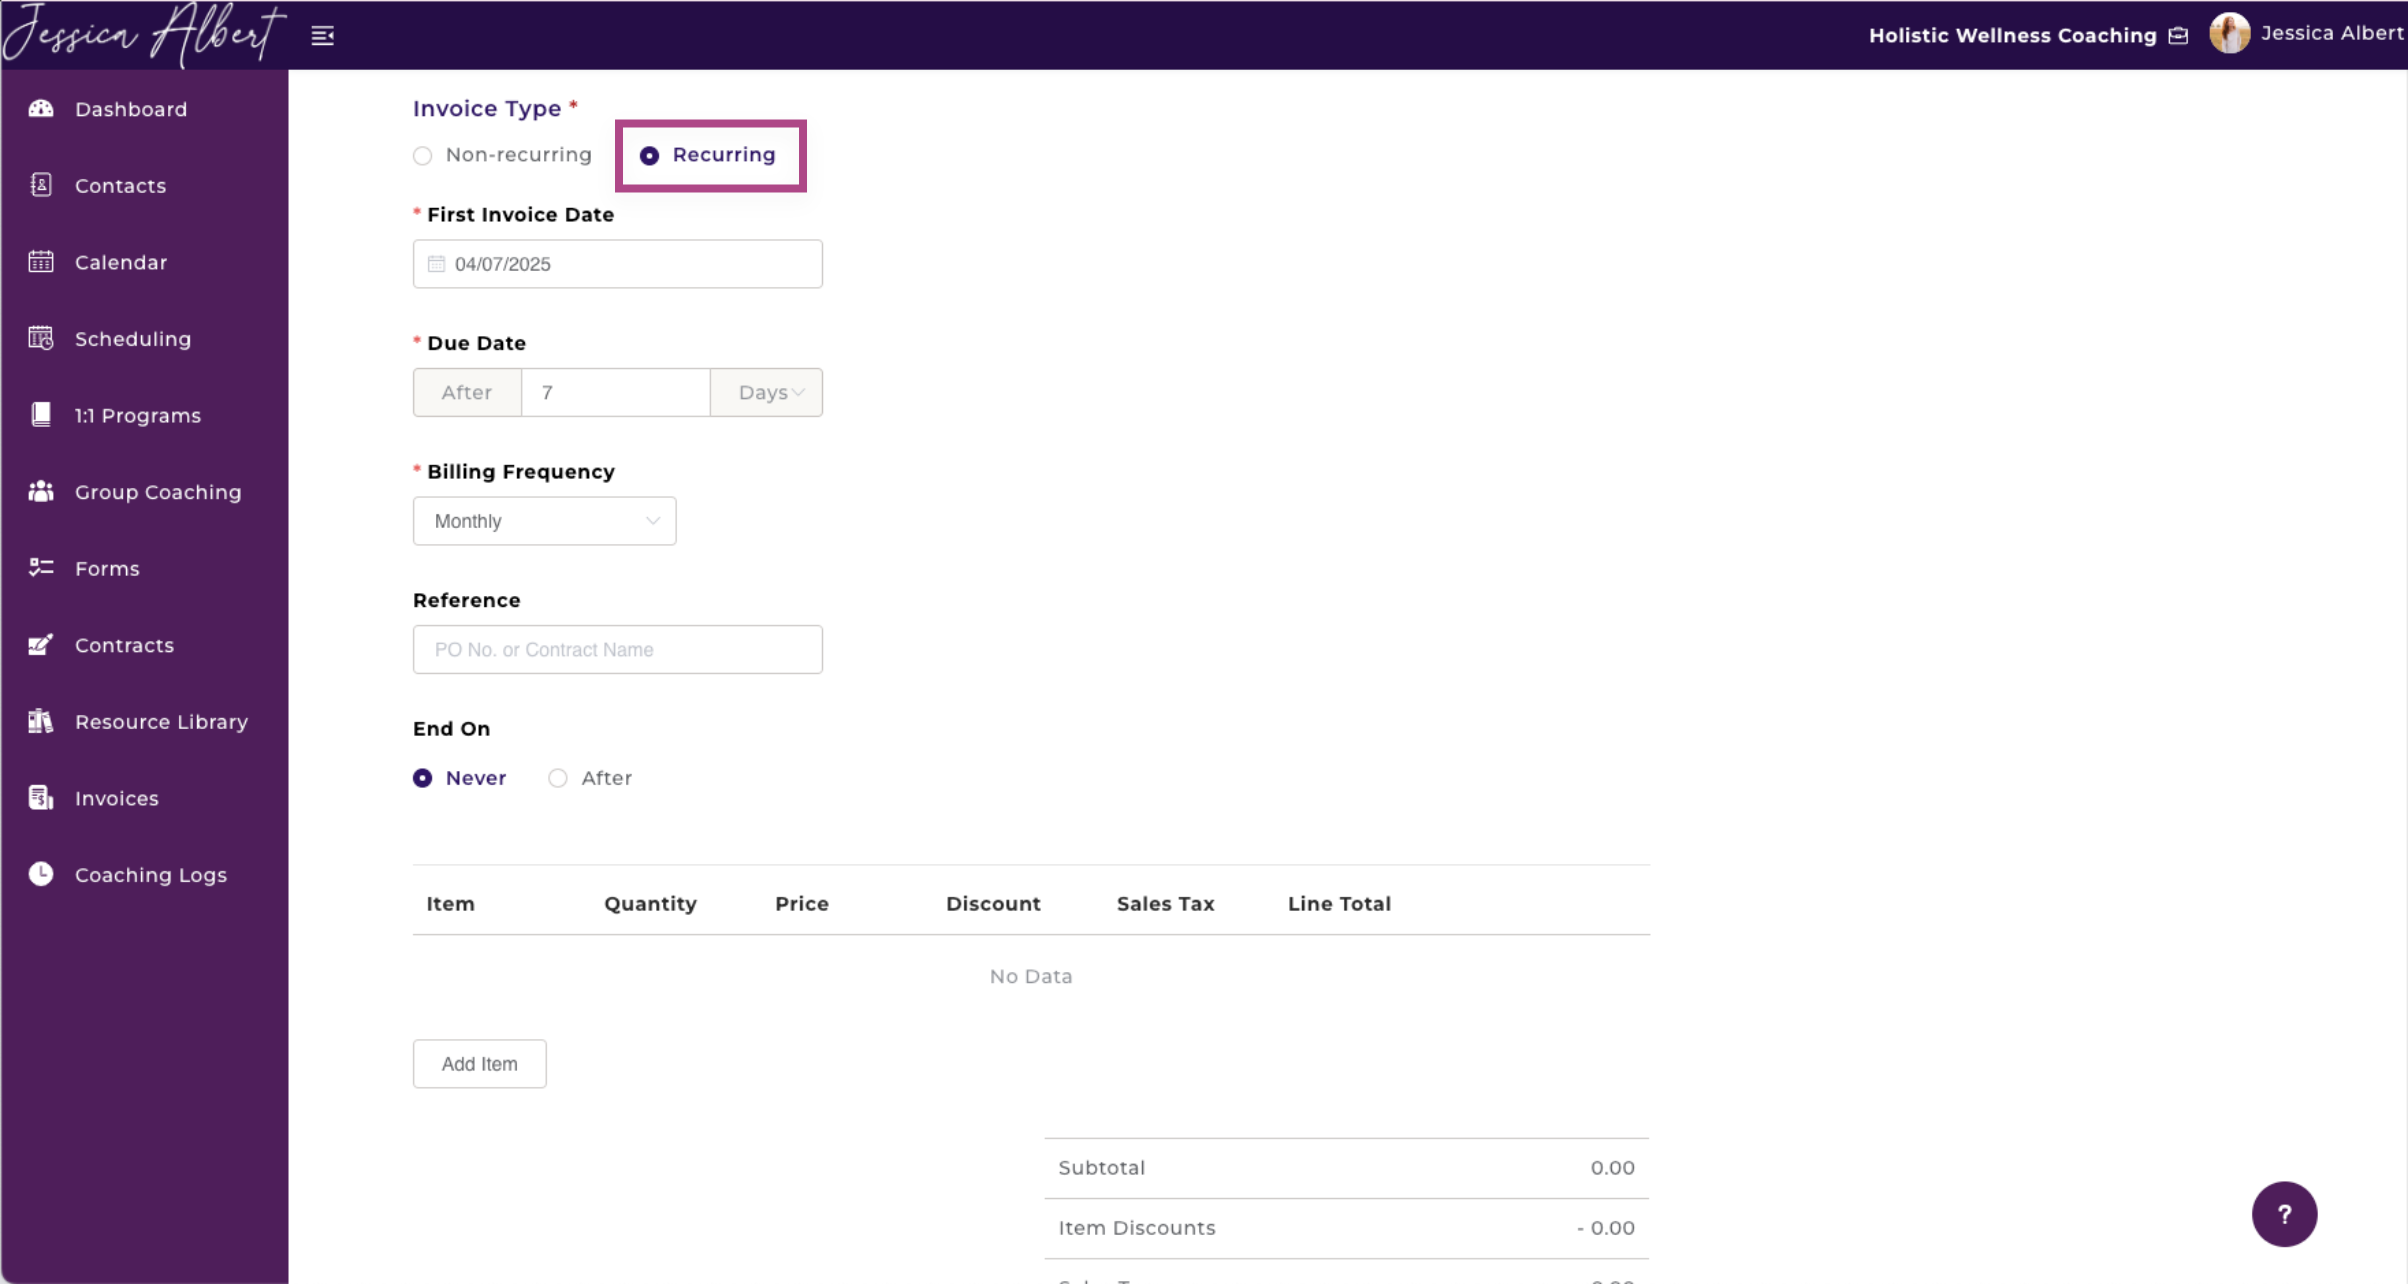
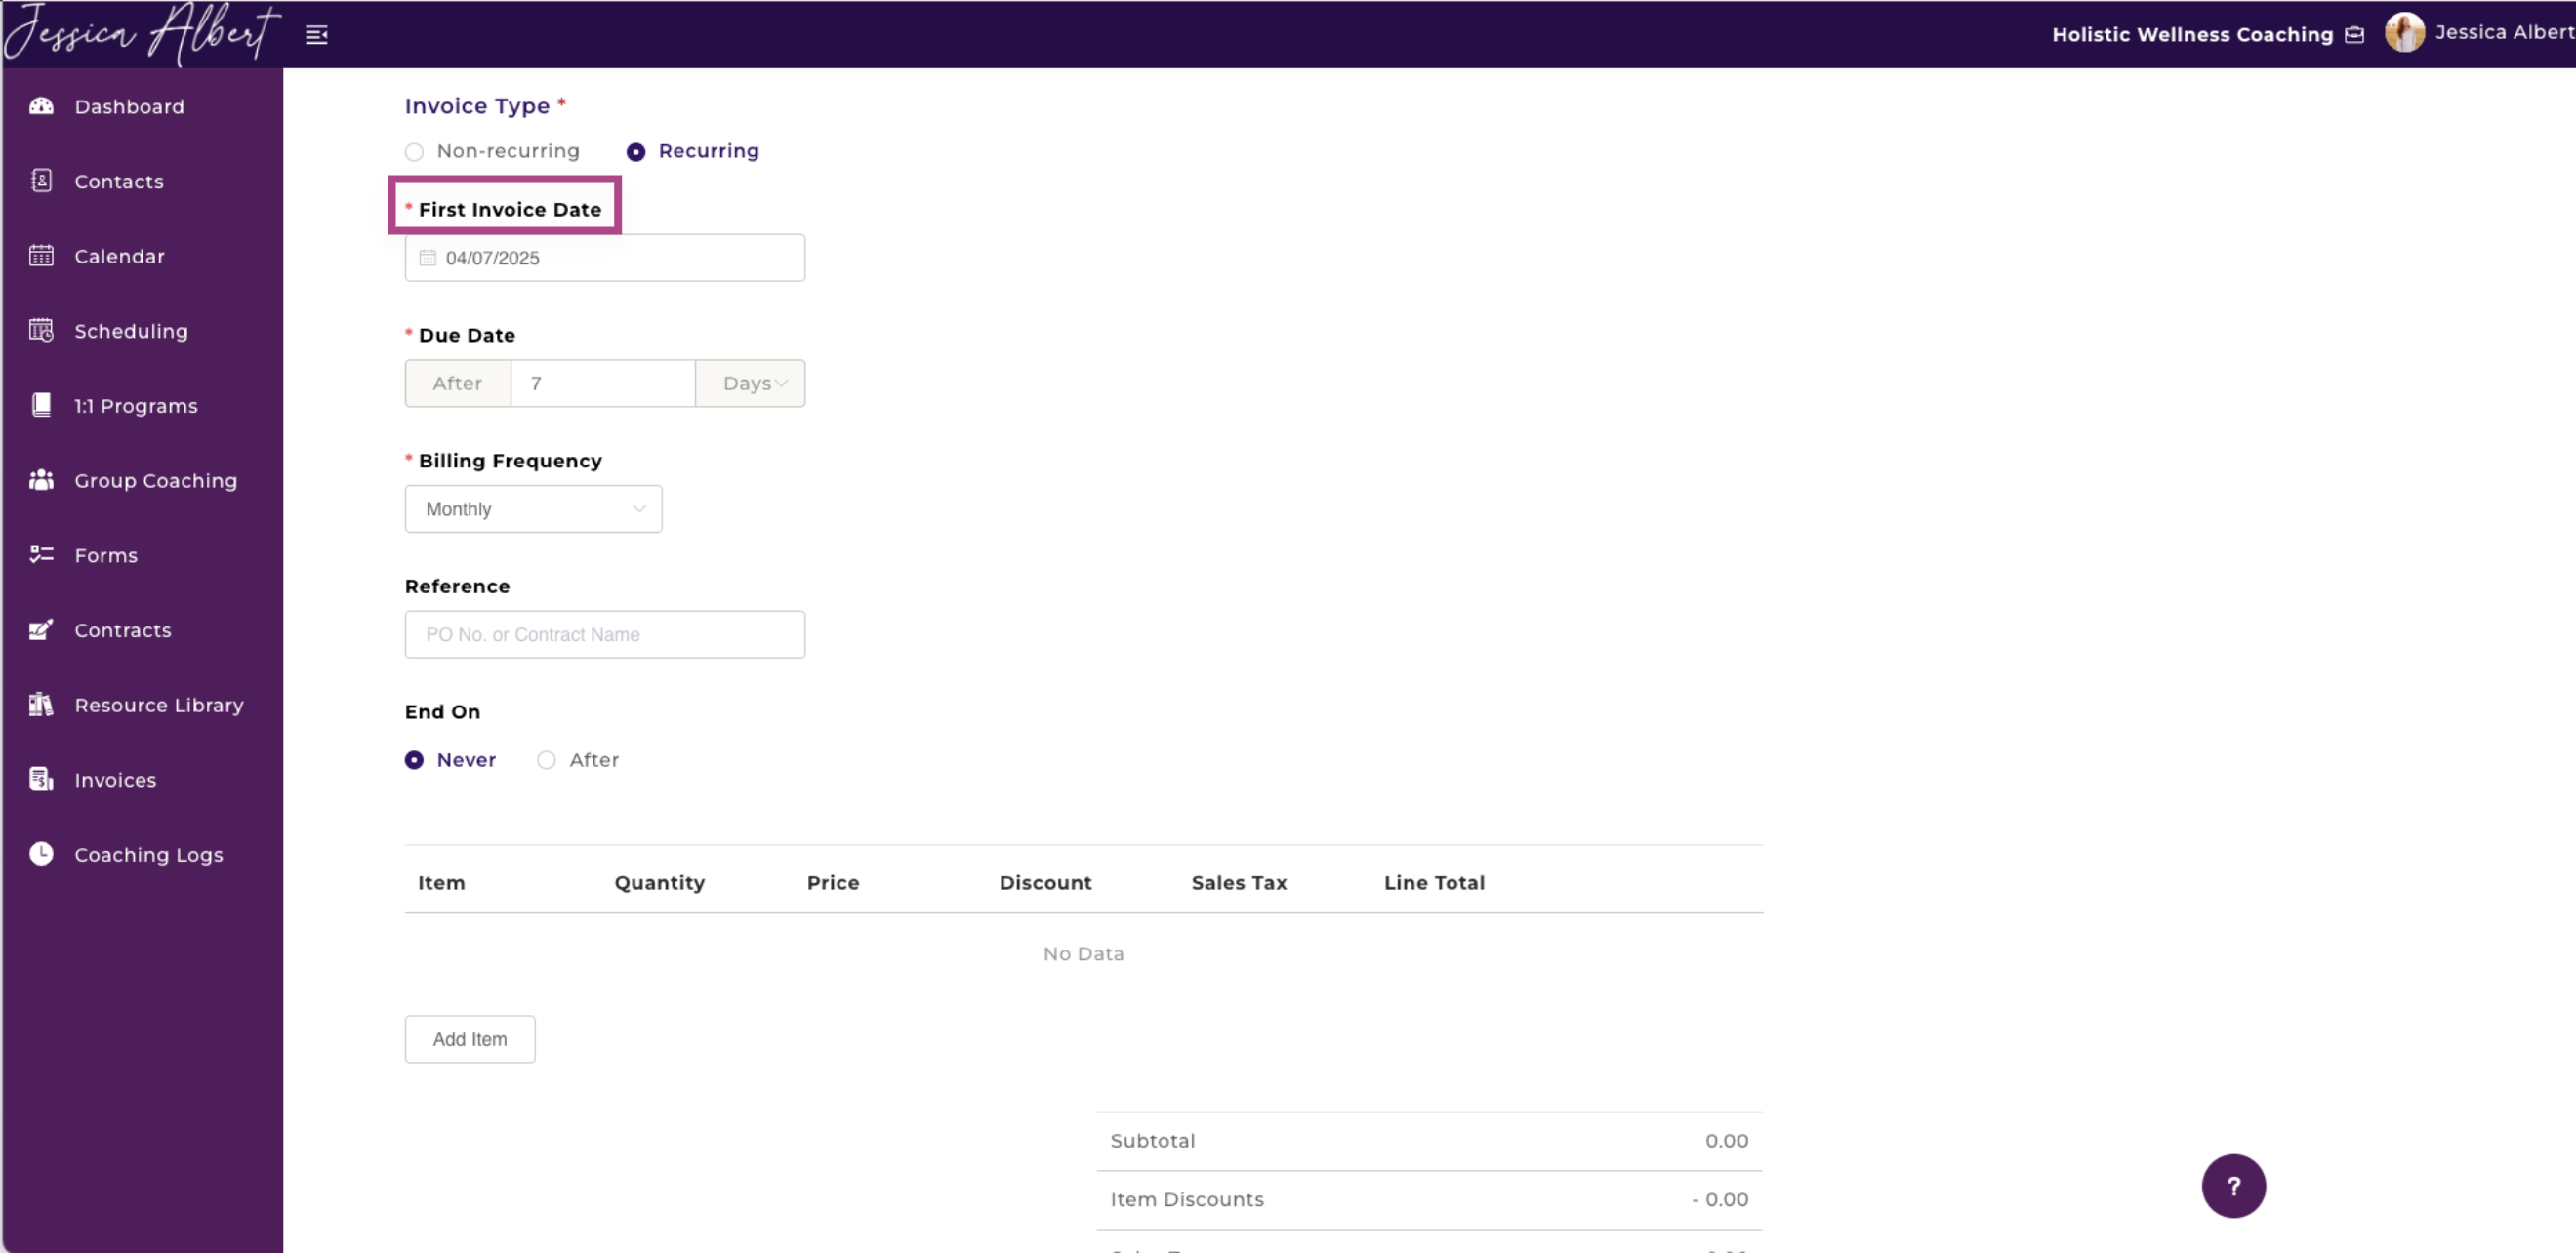
a. First Invoice Date - First Date of Issue. Select the date that you wish the very first invoice of this series will be sent to your contact.
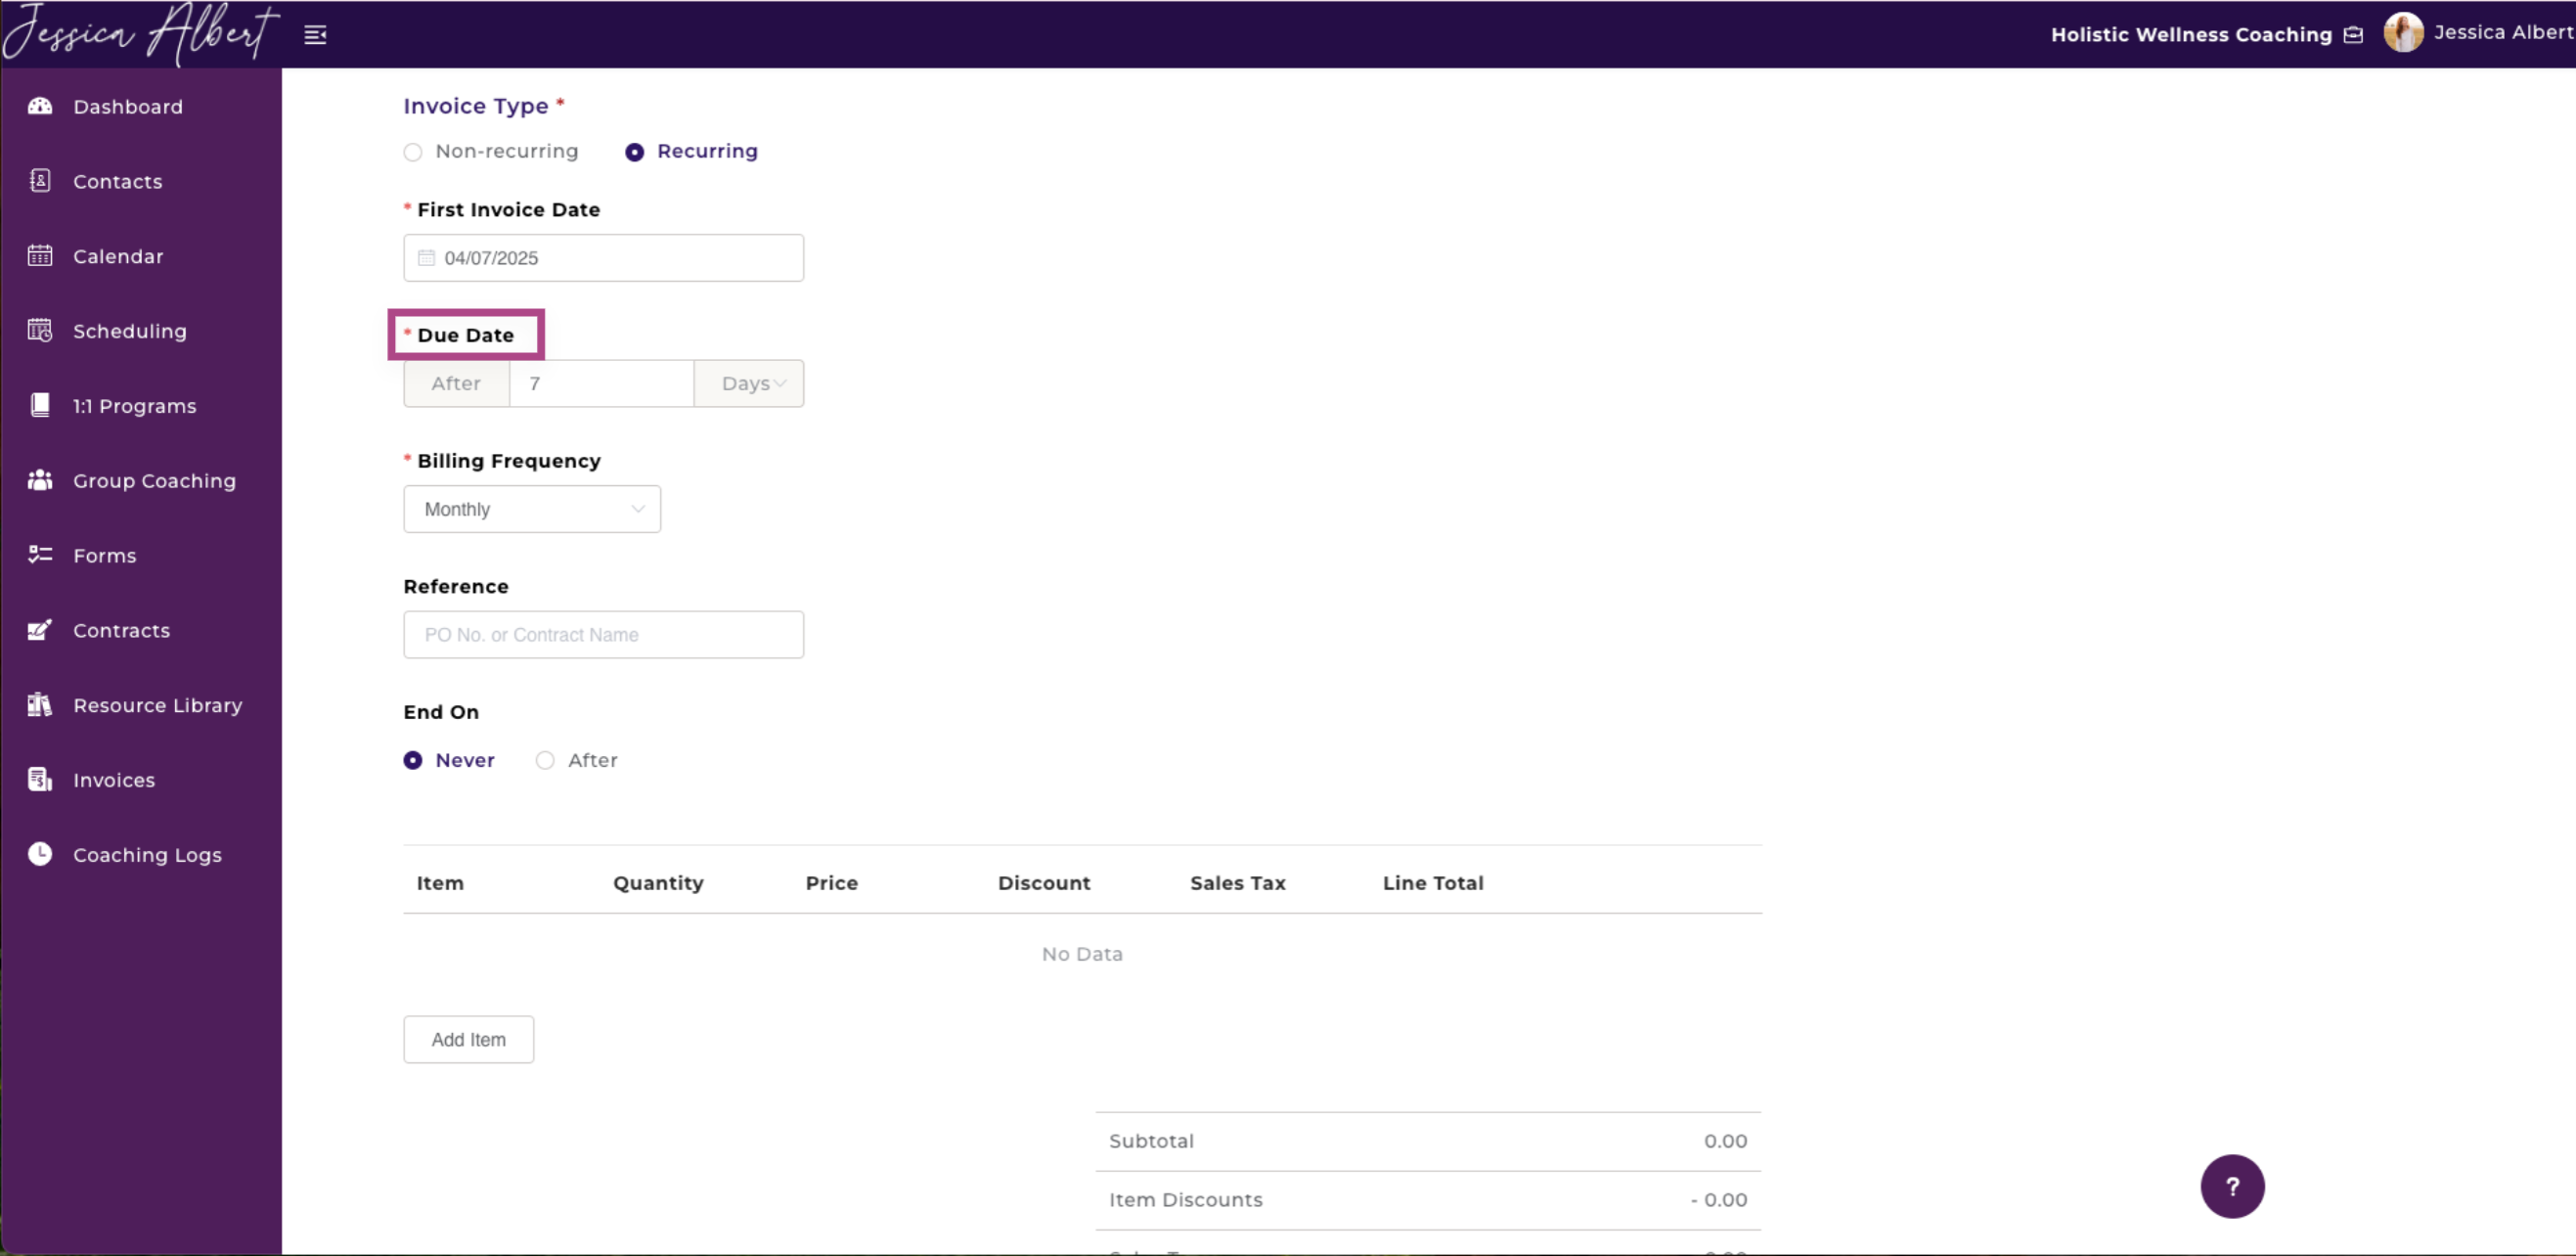
b. Due Date - Specify the amount of time when the invoice needs to be paid, from the date of issue. Use the drop-down selector or customize the due date by typing the number of days.
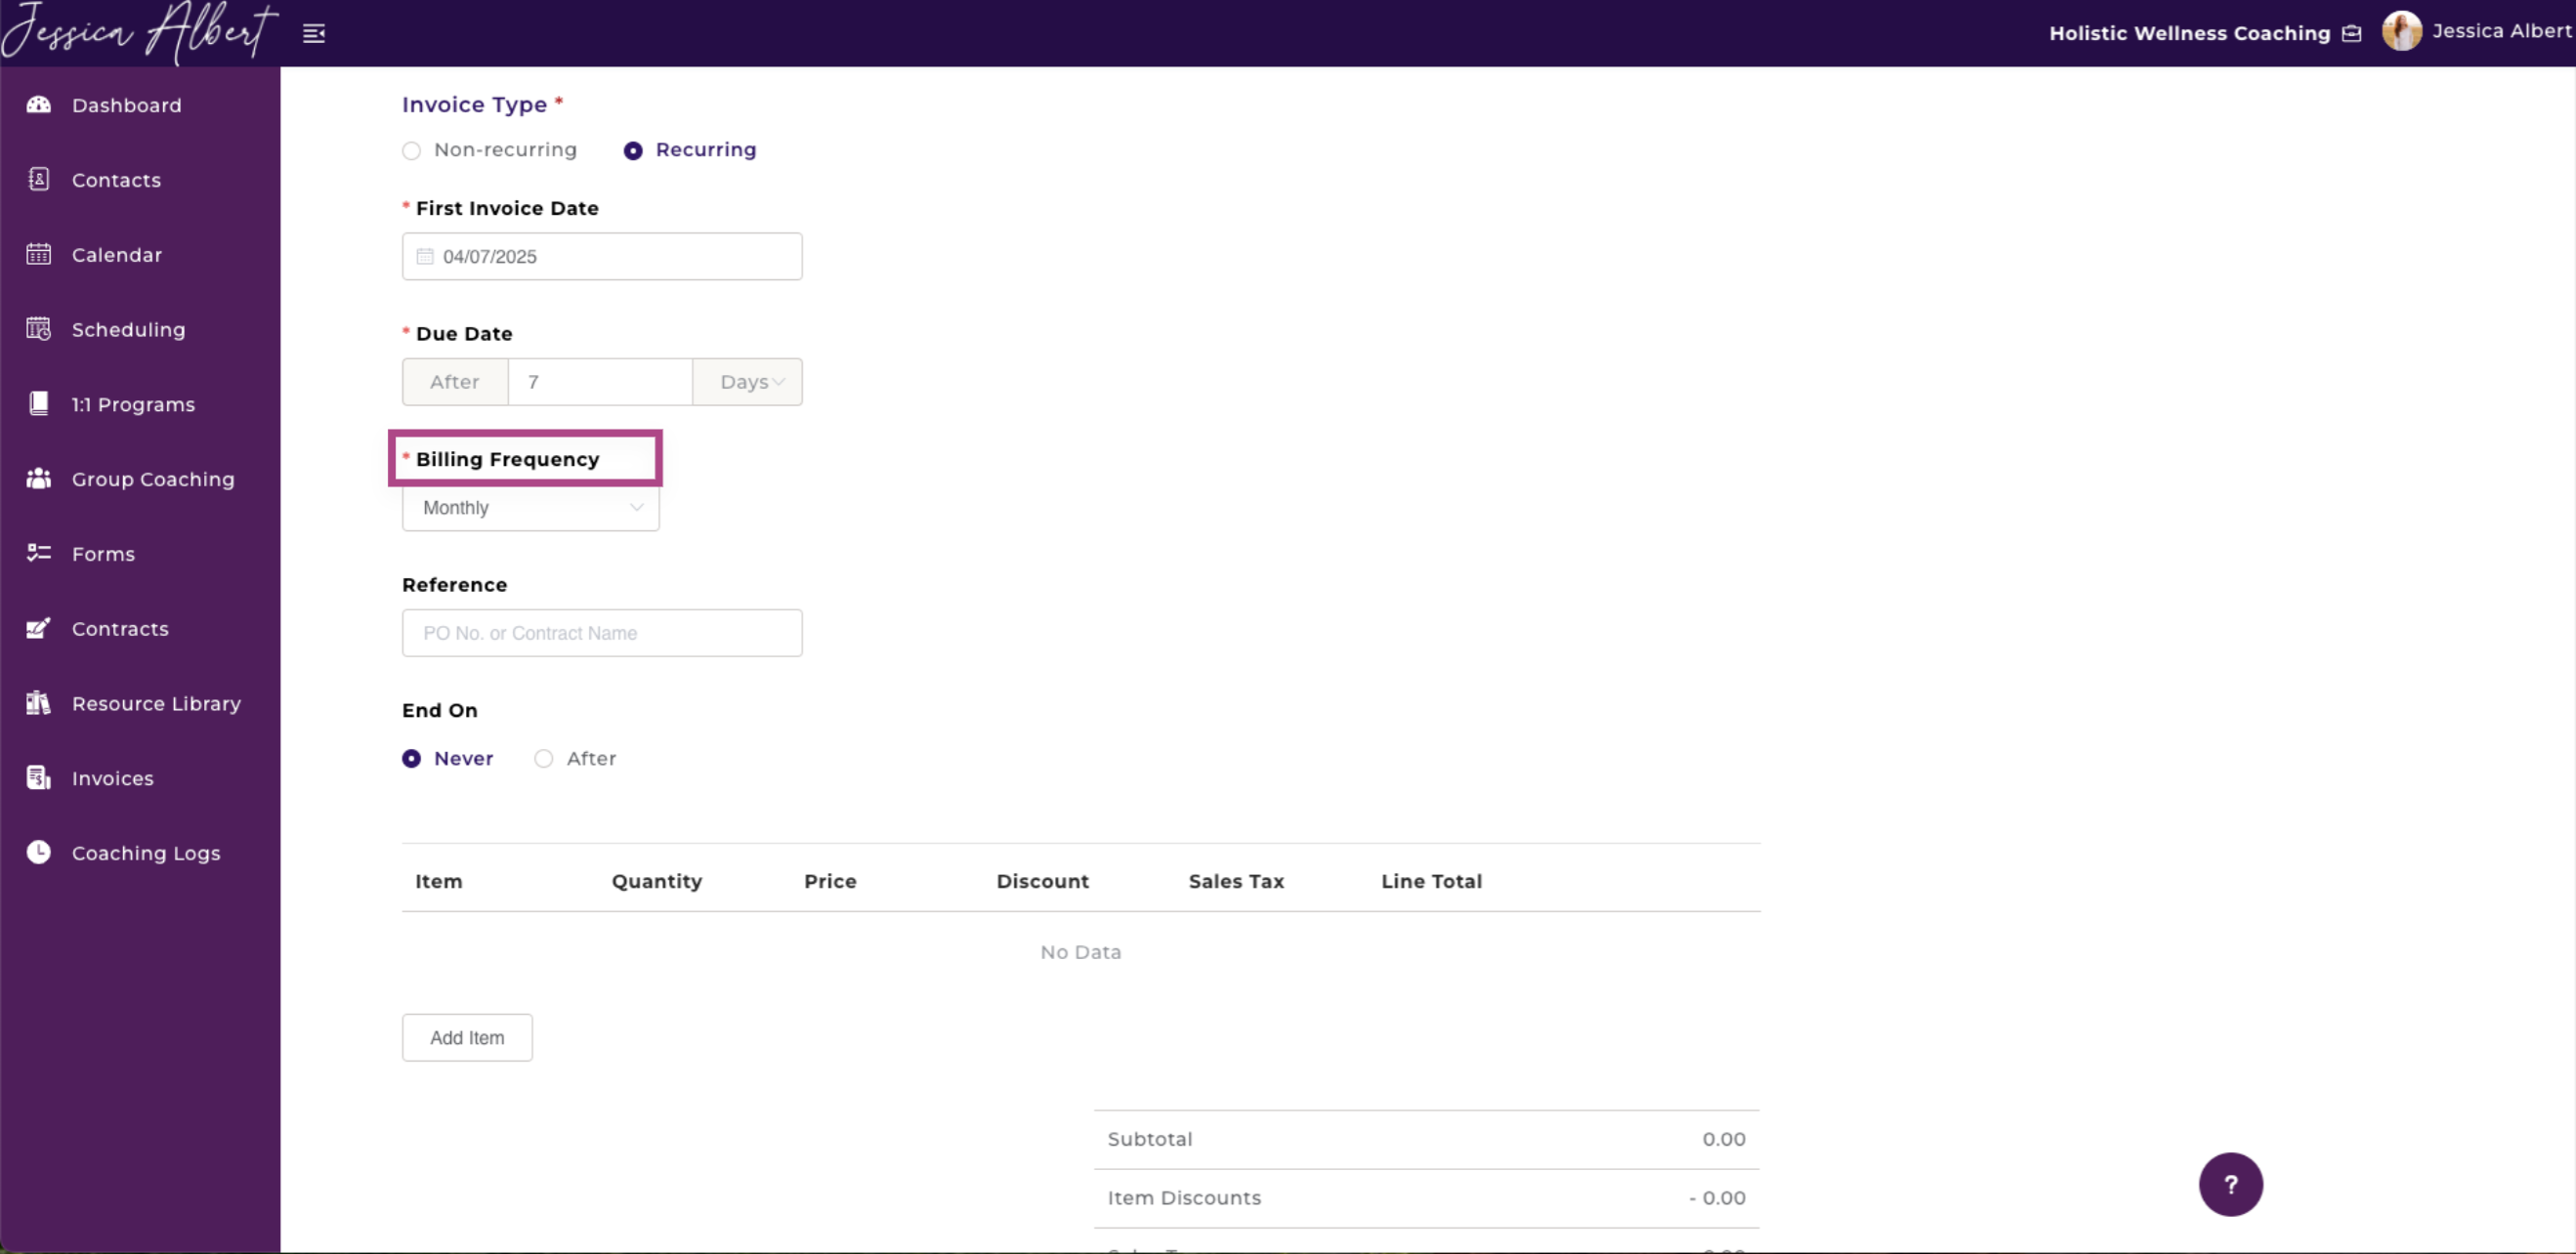
c. Billing Frequency - Select the invoicing frequency. This specifies the time intervals that CoachVantage should trigger the invoice to be sent.
For example, if you wish the invoice to be sent out every 2 weeks, select 'Custom', type in '2' and select 'Week(s)'.
Note: CoachVantage will use the 'First Invoice Date' as the first point of reference, and will automatically send subsequent invoices on the anniversary date of the first invoice date.
d. Reference (optional) - You may enter a reference description for what this invoice is for, such as a Purchase Order Number or a Contract Name here.
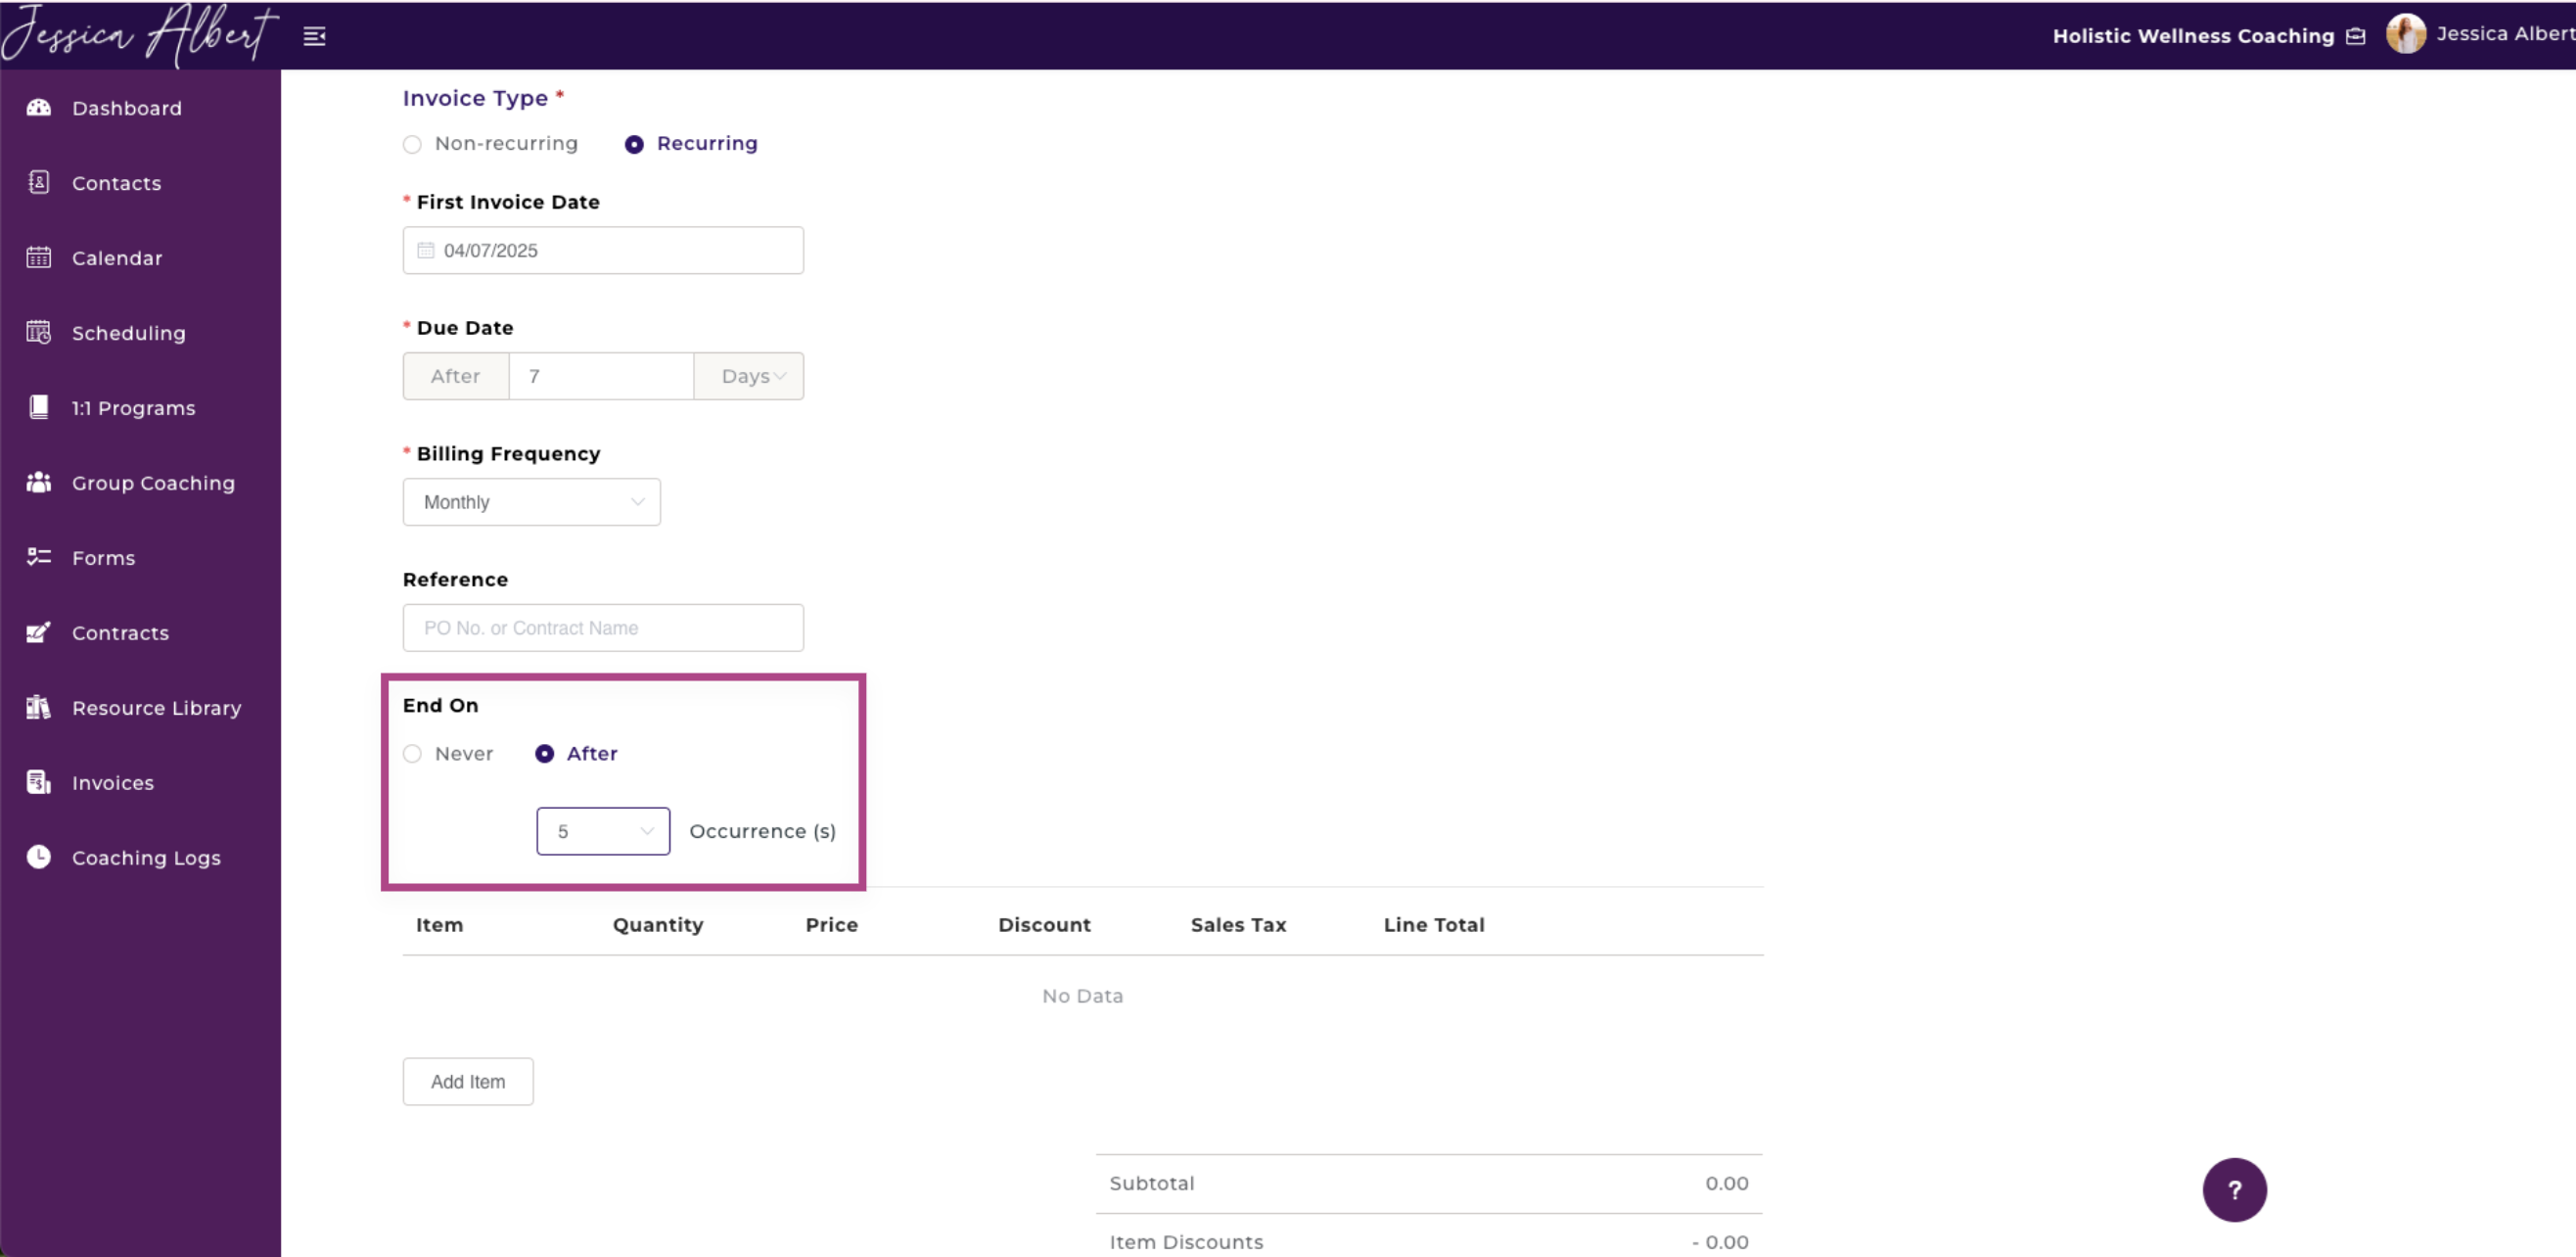
e. End On
- Select Never if you want this invoice series to go on indefinitely, until you manually Cancel the recurring invoice series.
- Select After a Number of Occurrences to specify how many invoices should be sent. For example, if you wish to invoice your client 6 times in this series, select 6.
The maximum number of occurrence is capped at 50.
5. Lastly, add the billing items.
Add the service, items, program you are selling. The total amount due will be automatically calculated.
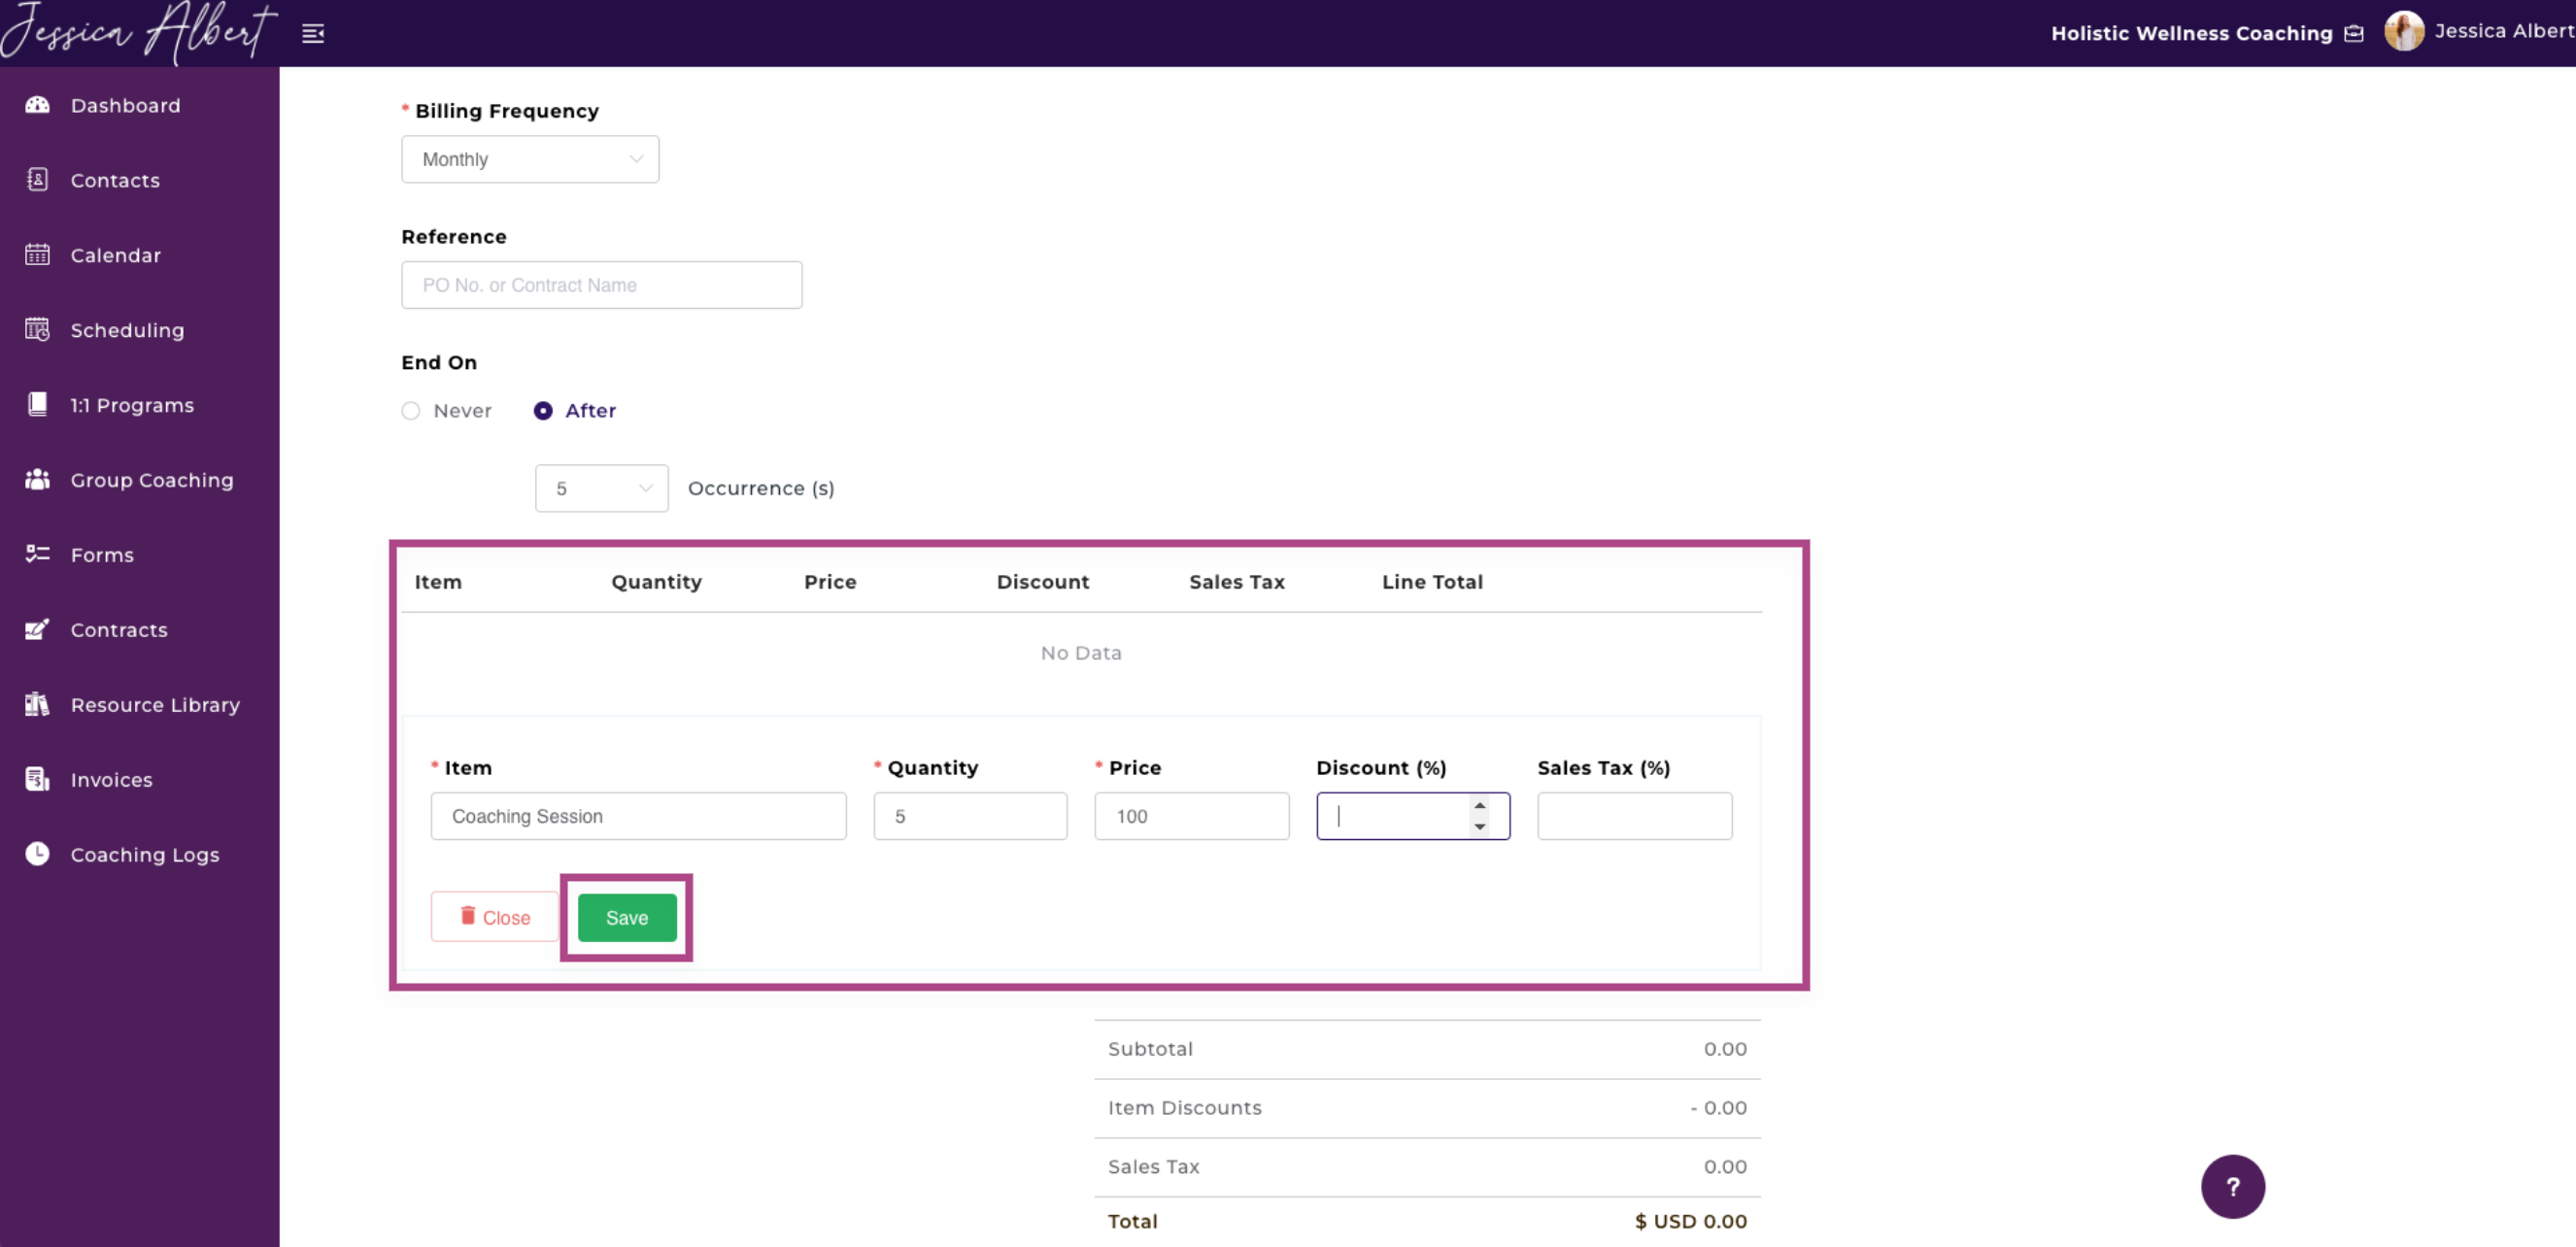
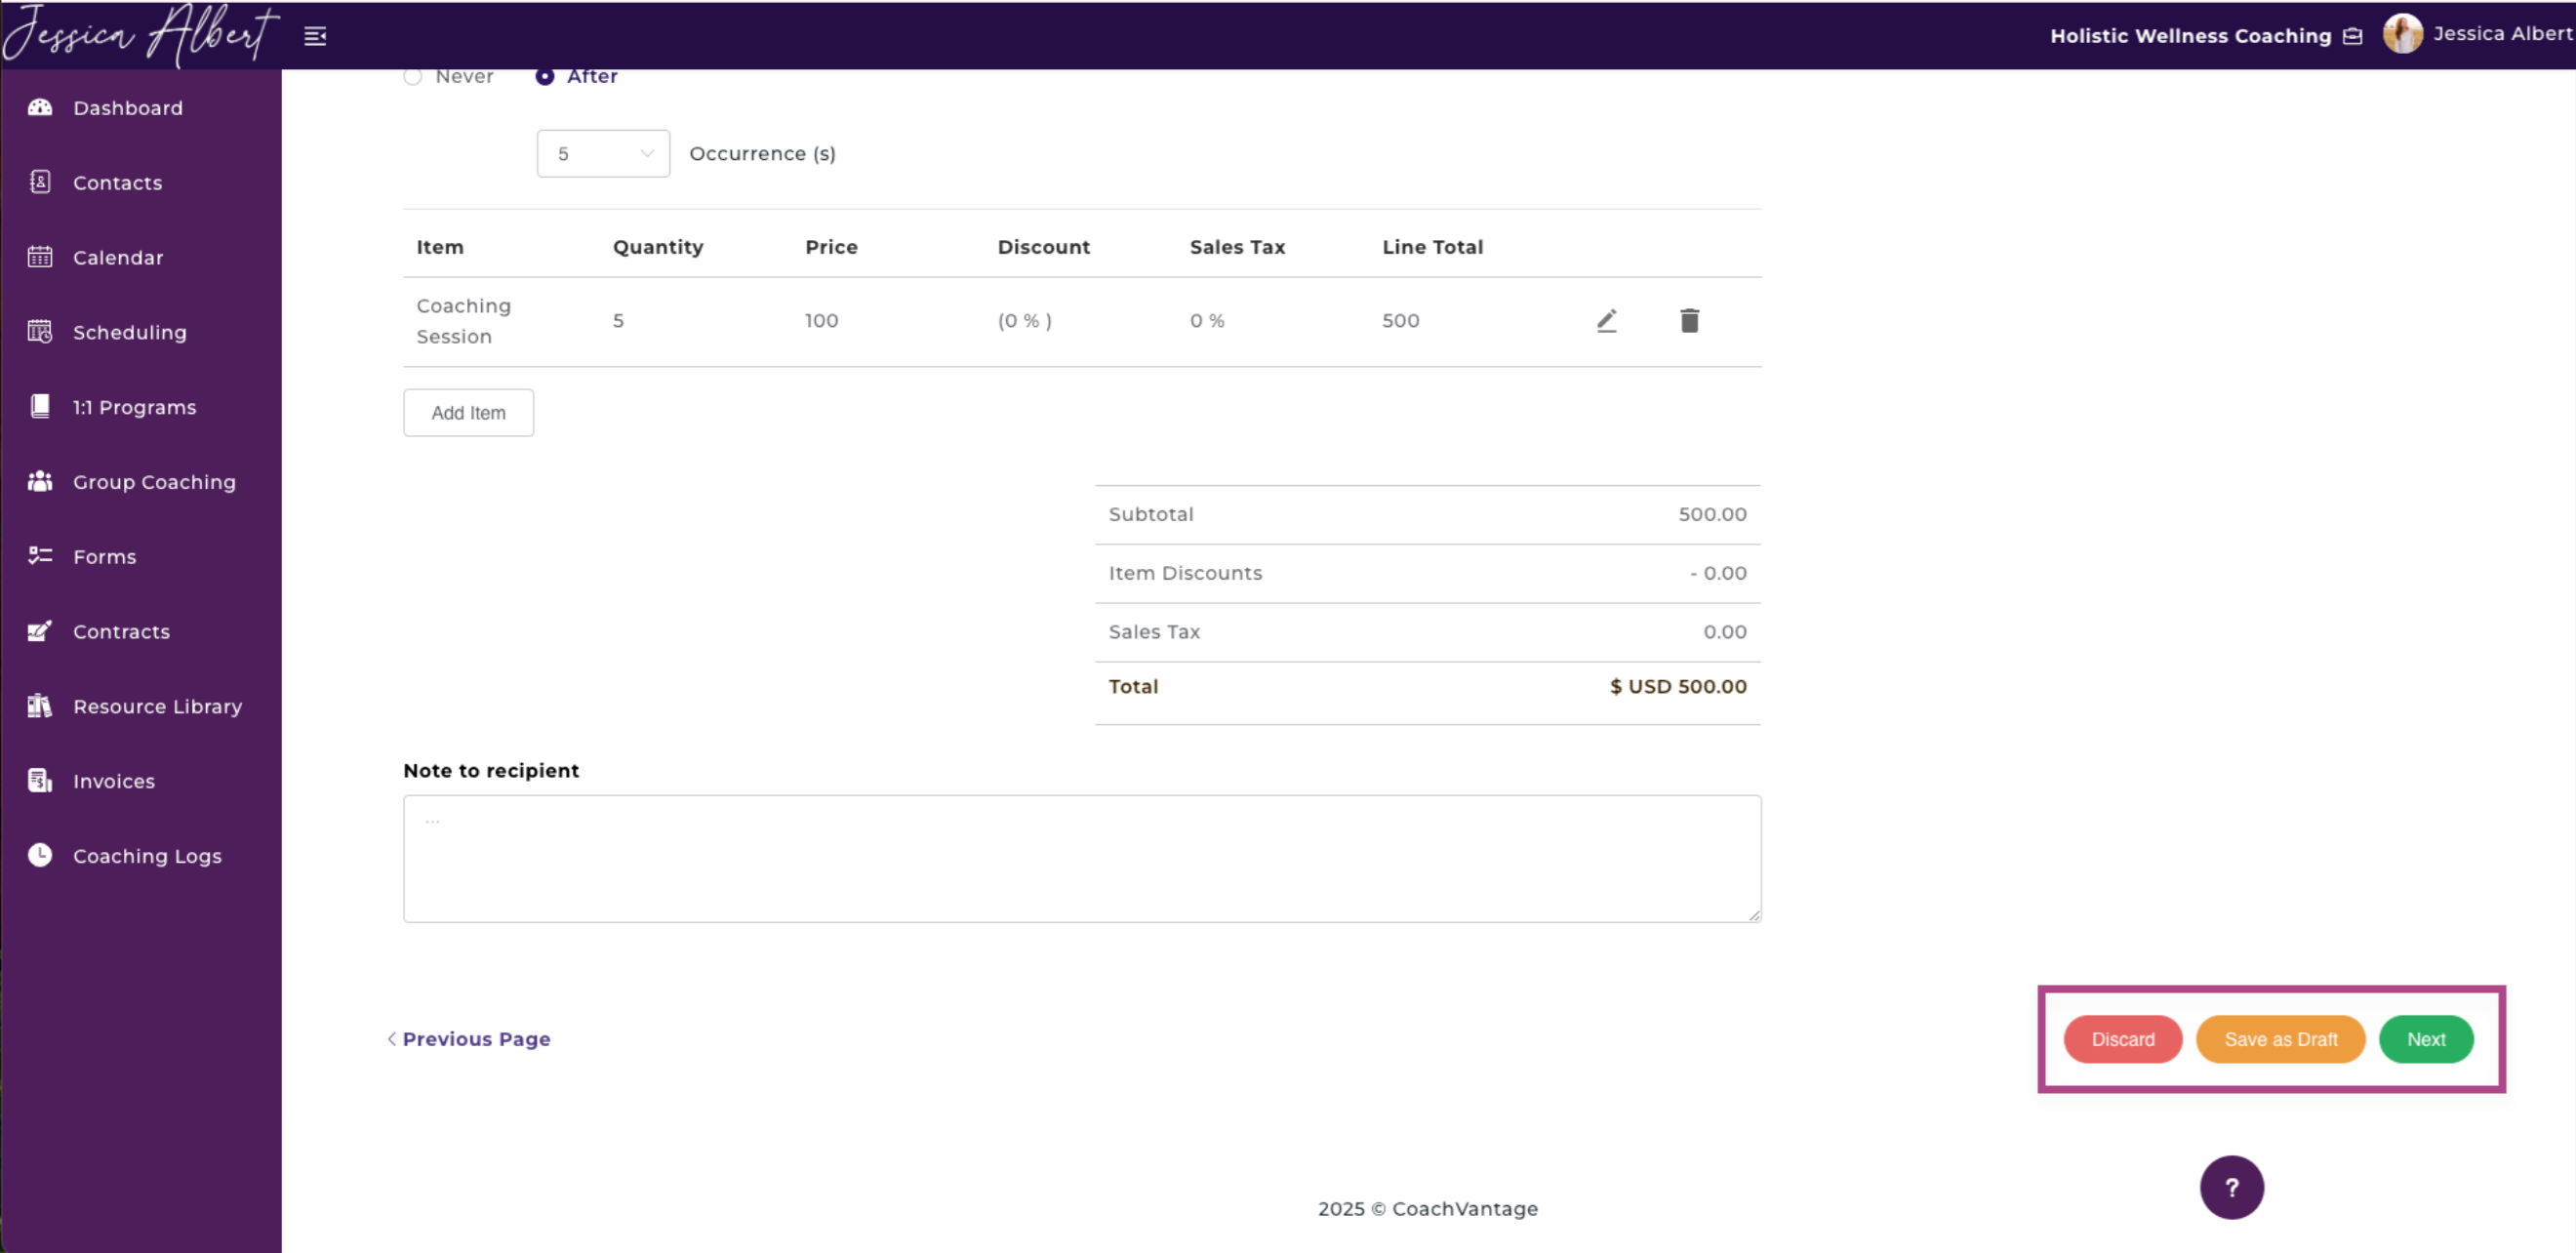
Lastly, if you have a note you'd like to include in the footer of the invoice, simply type it in the Note To Recipient field shown below.
Additionally, Note To Recipient will automatically populate on your invoice if you have set this up in your Invoice & Payment Settings. You can edit the note if required when you create a new invoice. Refer to this article to learn more.

Tip: The note could indicate your contact details for any inquiries relating to the invoice, thus allowing your client to reach out if they have questions. It could also specify your bank details for clients to make direct bank transfers, etc.
Select Save as Draft to save the invoice and exit Quick start Program Creation or click Next to go the Scheduling Options.
IMPORTANT:
Once your client has confirmed enrollment to the quick start program from the client portal, we will automatically send an email with a link to the invoice for the client to make payment.
5. Scheduling 📆
Self-Service Scheduling Options
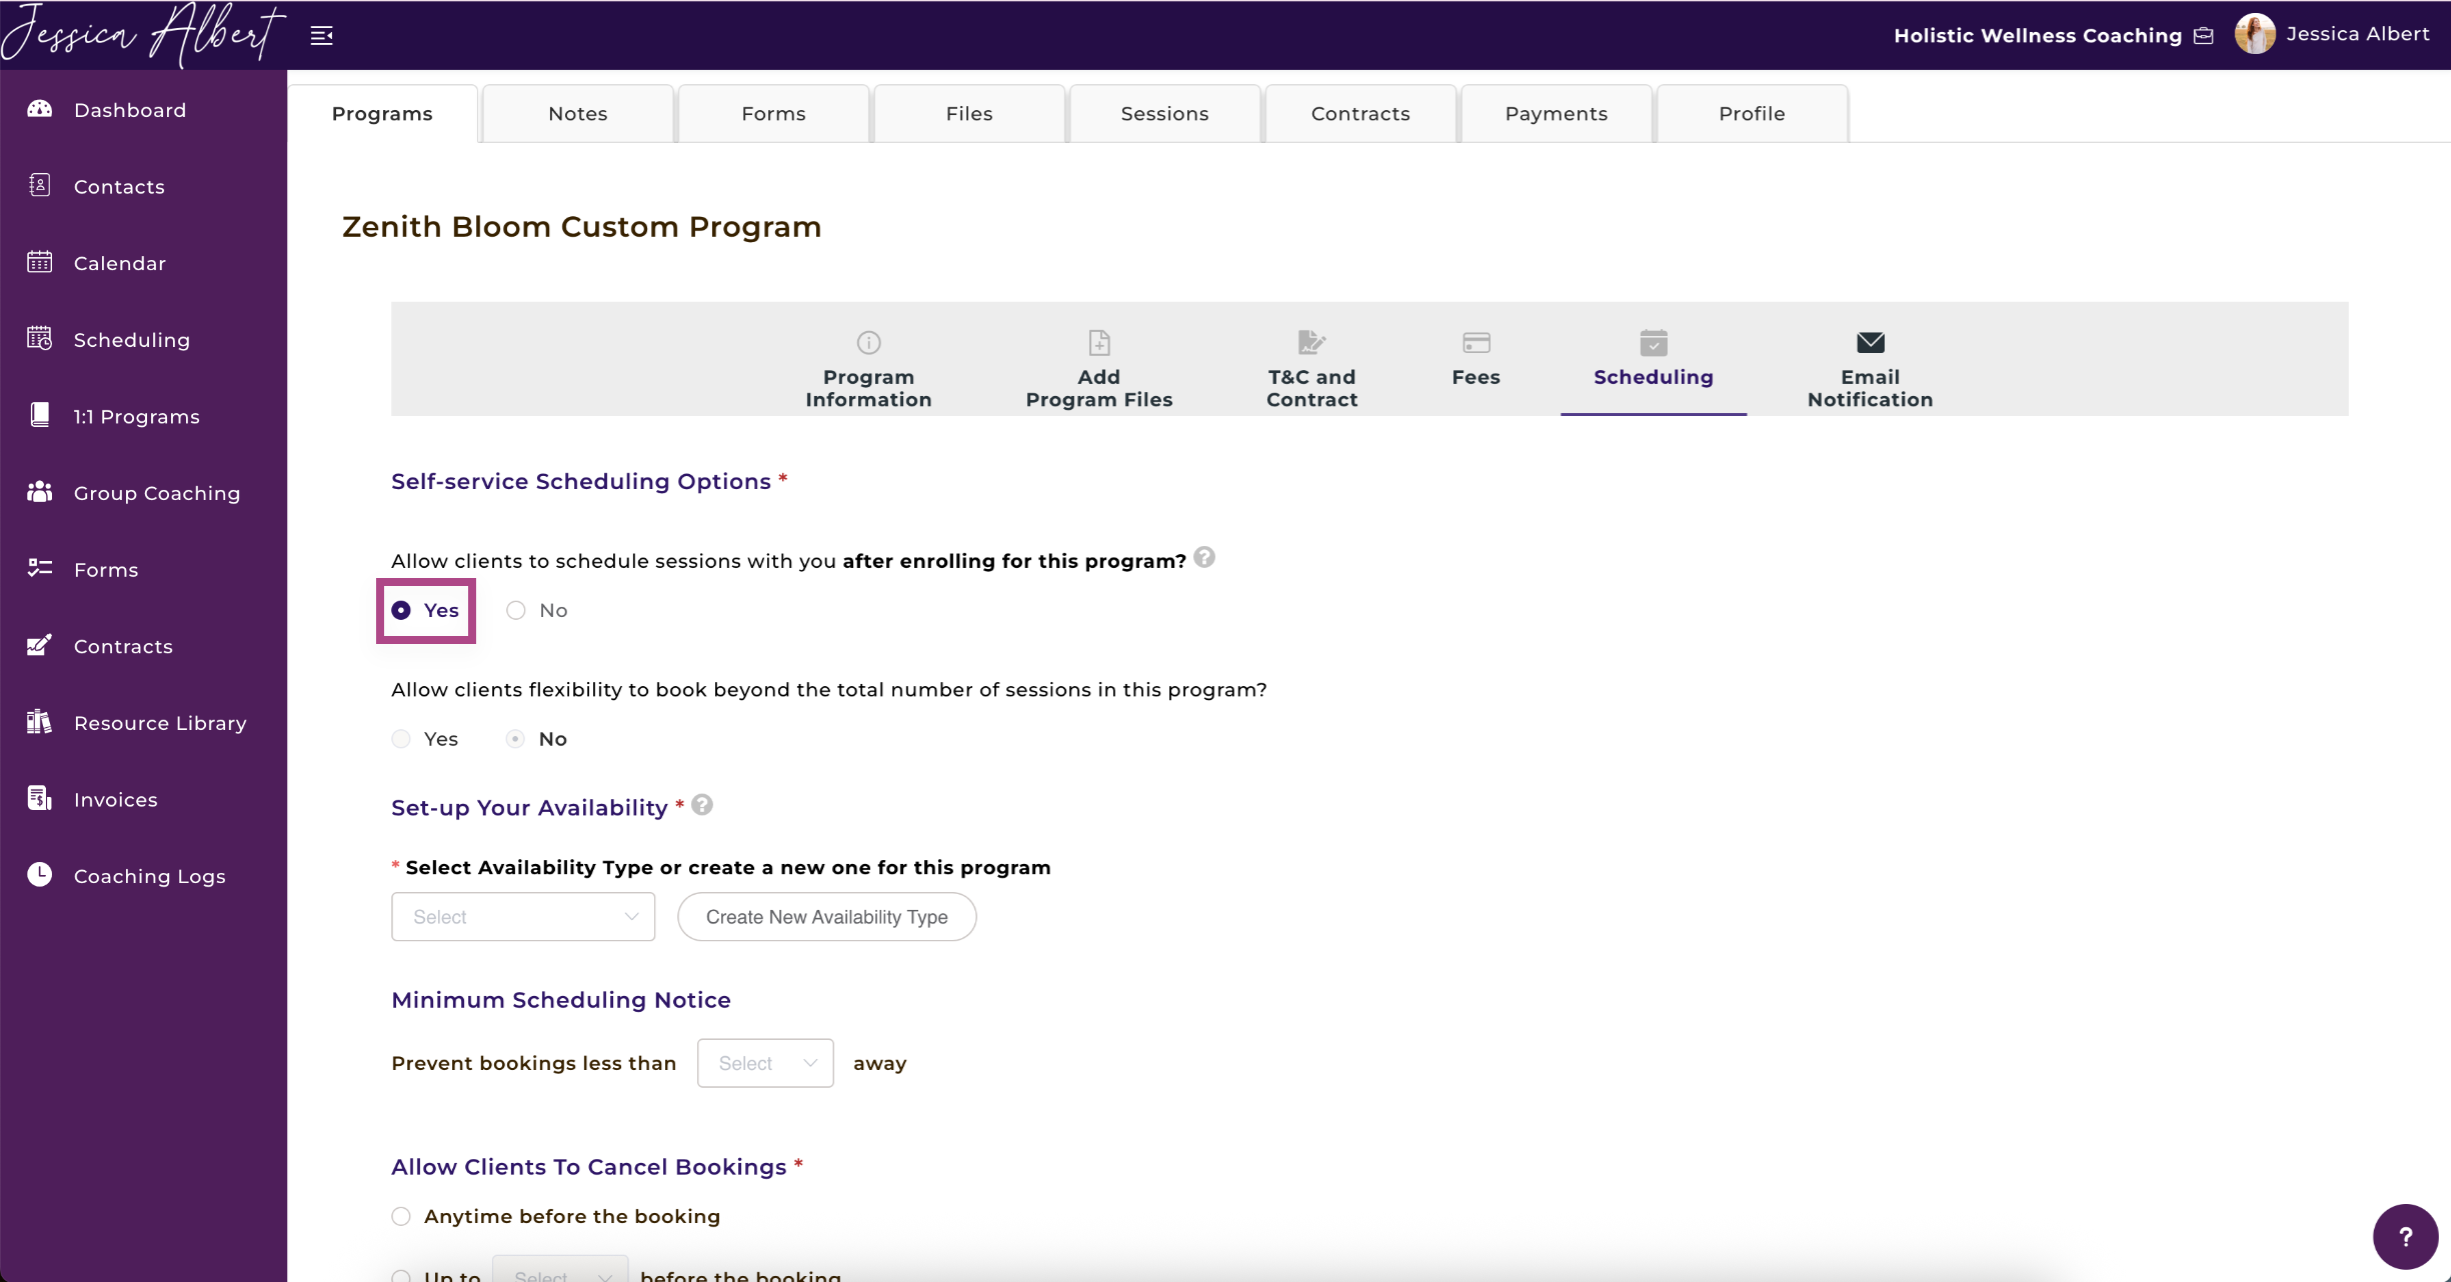
- Allow clients to schedule sessions with you after enrolling for this program.
If you allow clients to schedule sessions after they are enrolled, they will be able to self-book sessions from the Client Portal.
- Allow clients flexibility to book beyond the total number of sessions in this program.
Set-Up Your Availability
If you selected Yes to allow clients to Self-Service Schedule, you will be presented with the Set Up Your Availability step.
This is an important step as it defines your availability rules and time slots for this specific program.
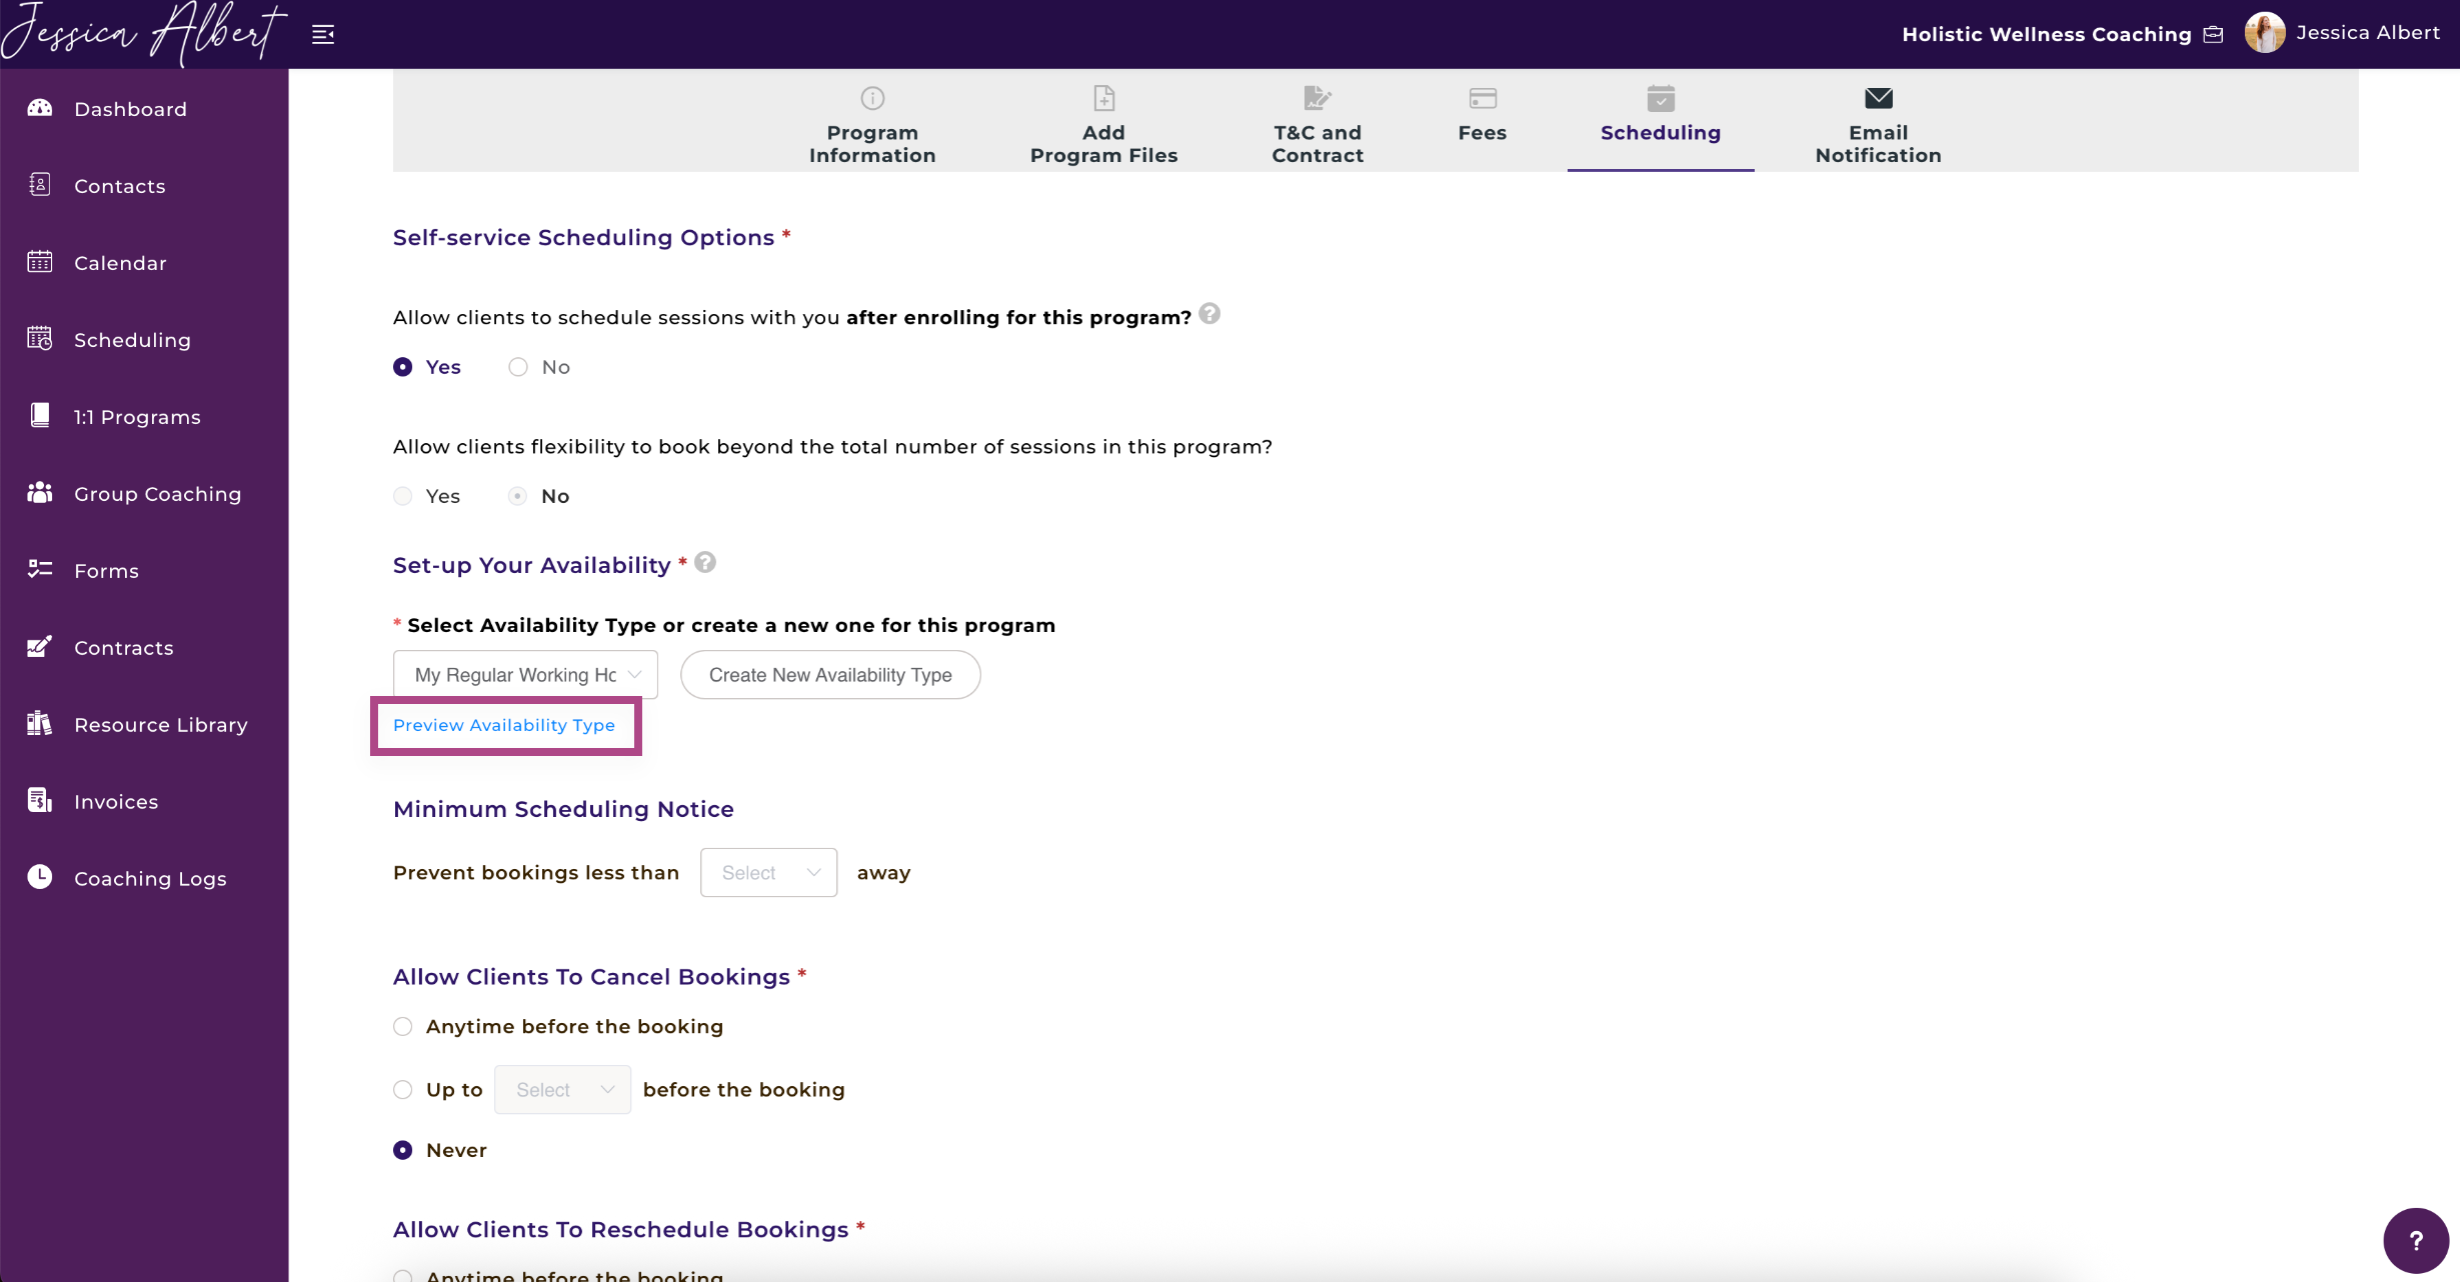
You will need to either:
- Select an Availability Type that you've already created, or
- Create a New Availability Type on the spot.
Refer to this article on Creating/Editing/Deleting Availability Types to understand more about creating an Availability Type.
You can Preview the Availability Type that you have selected by clicking on the Preview Availability Type text. A window will appear to let you preview your schedule of availabilities that you have configured:
Minimum Scheduling Notice
This setting lets you determine a minimum period of time when clients can make a booking.
You can prevent last-minute bookings by setting a minimum scheduling notice.
Use the drop-down selector to 'prevent bookings less than X mins/hours away'.
For example, if you need at least 24 hours of advance notice before your client can book a session (appointment) with you, then select '1 day' from the dropdown selector.
Allow Clients to Cancel Bookings
You can allow your clients the option to cancel a session (appointment). You can specify the time after which they may not be able to cancel the booking by using the drop-down selector.
Allow Clients to Reschedule Bookings
You can allow your clients the option to reschedule a session (appointment) from their client portal. You can specify the time after which they may not be able to reschedule the booking by using the drop-down selector.
Tip: Cancellation and Rescheduling policies are great if you wish to prevent last minute cancellations in accordance with your coaching agreement.
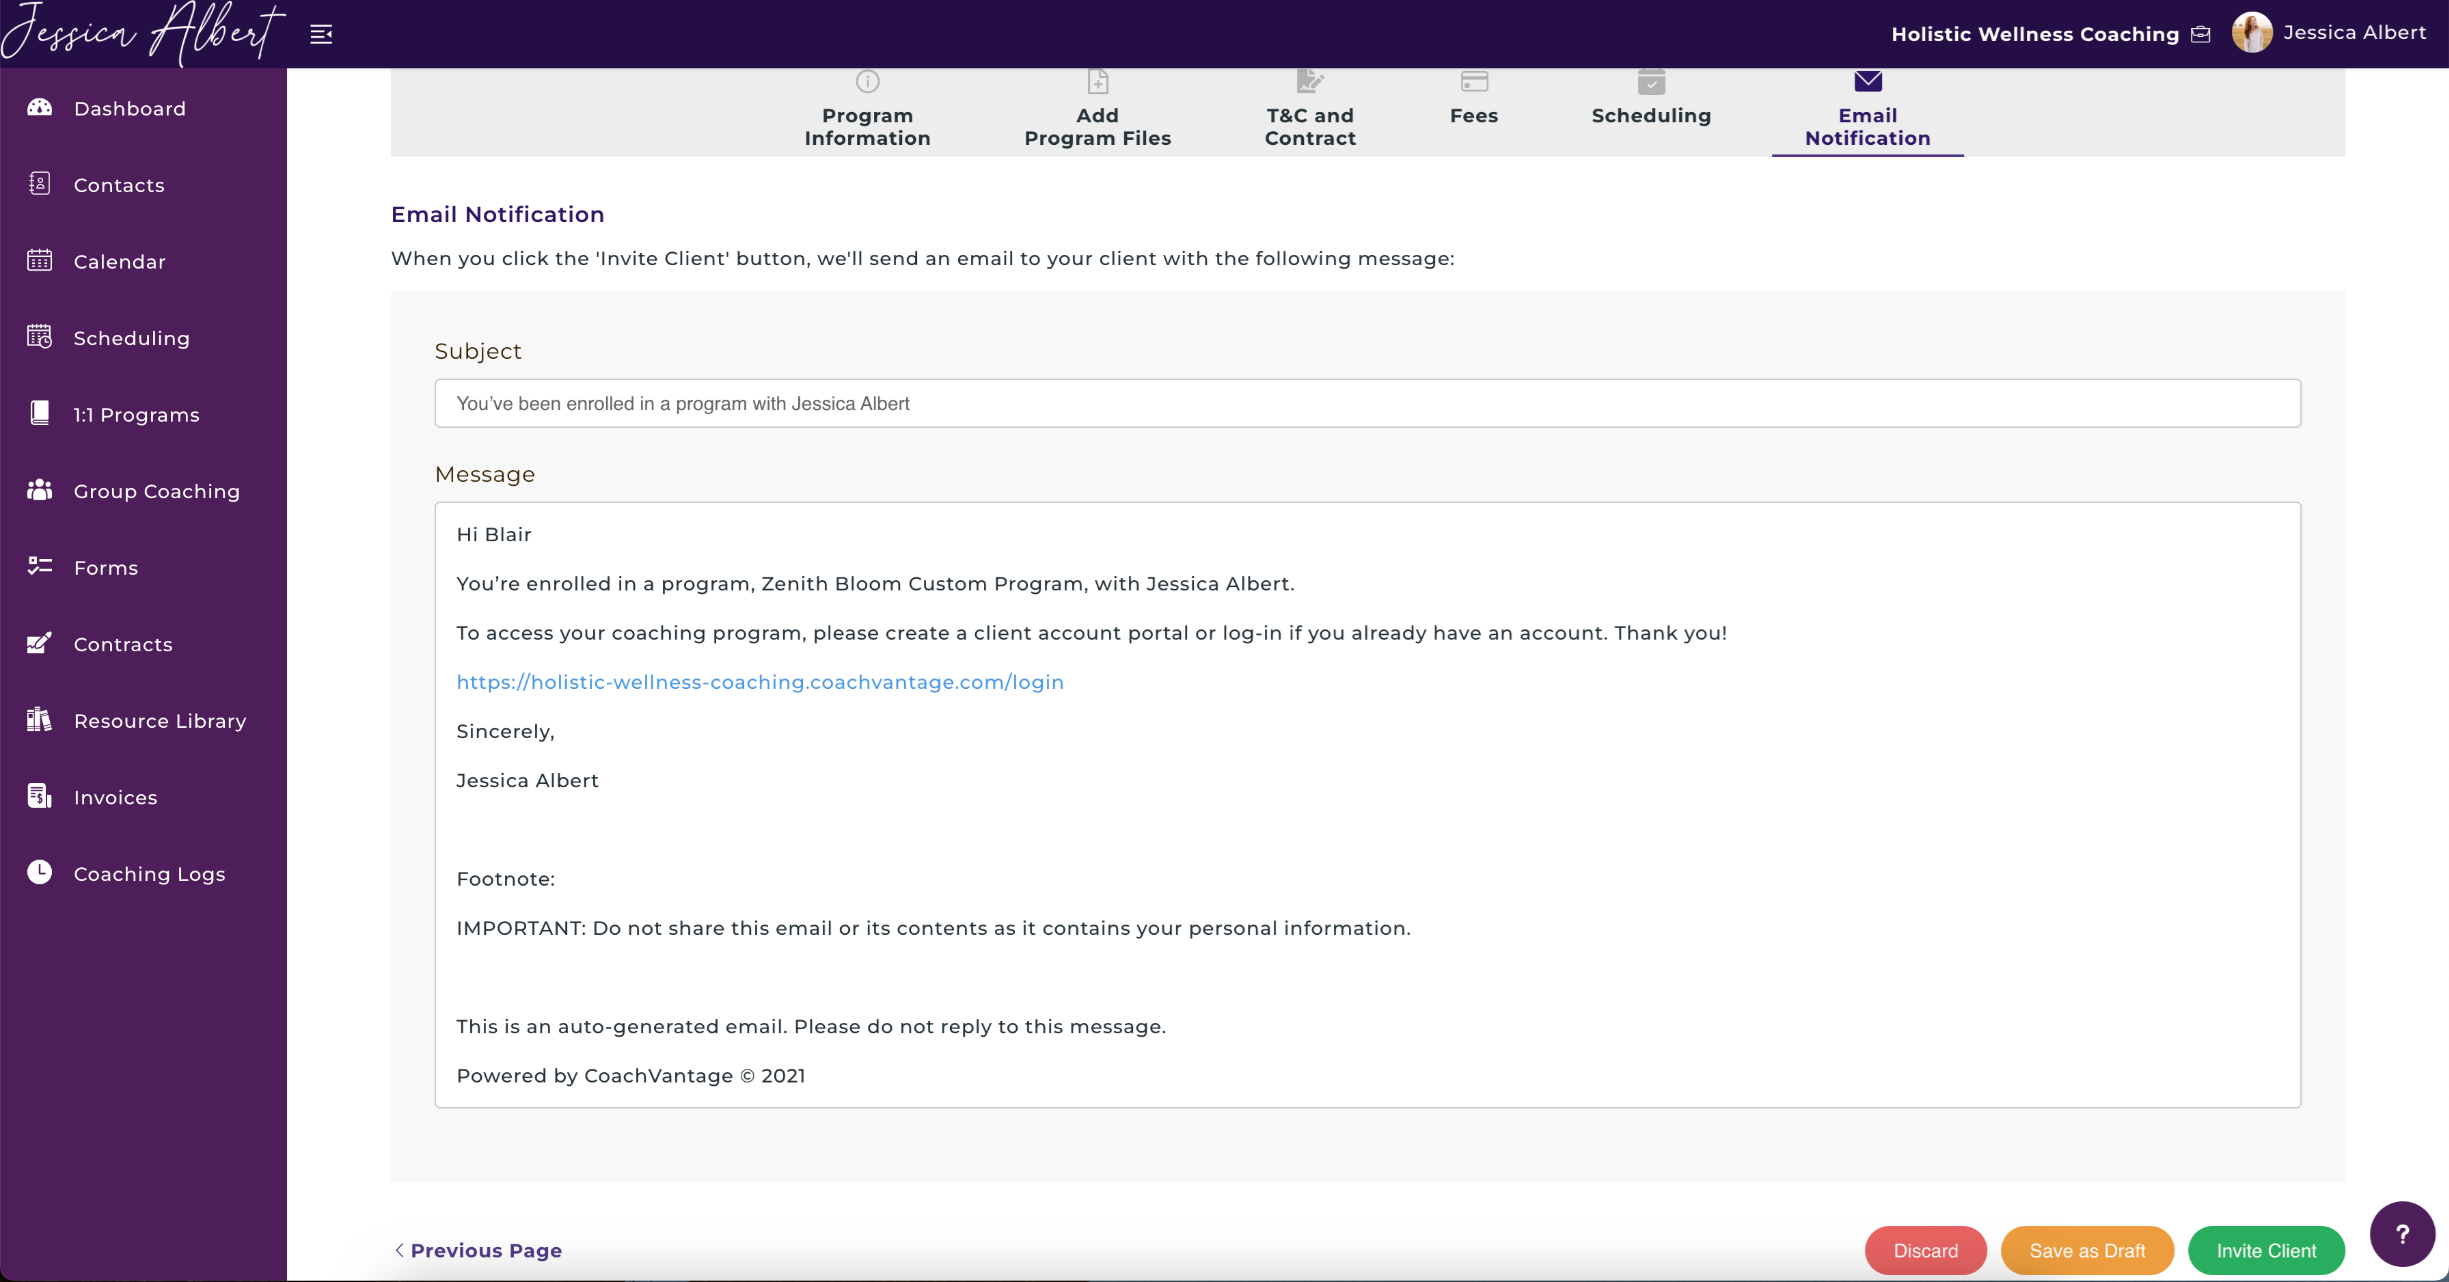
6. Email Notification 🔔
After creating the quick start program, the final step is a preview of what the email notification looks like.
When you click on the Invite Client button, CoachVantage will automatically send the email to your client to notify them that they have been enrolled into your program.
Note: The email notification cannot be customized. It is a canned notification message.
After creating a quick start program, a program card would immediately appear under your Programs Page in the Individual Contact Record page of the client you have enrolled.
Once your client logs in to their client portal, they will also see the program card in their portal, and they can access the program.
You can now commence the coaching engagement with your client. Refer to this article for more details: Managing a Coaching Program with Your Client.