
Forms on Individual Contact Record Page
Overview
Forms help you gather information from your clients, understand their needs, and support them throughout their coaching journey. You can use forms to collect intake information, encourage reflection, or gather feedback on their coaching experience.
From the Forms tab on an individual contact record page, you can send forms directly to that client, associate them with a program, set due dates, and track responses—all in one place. You can also review form details and archive forms that are no longer needed, keeping each client’s record organized and easy to manage.
Access a Contact’s Forms
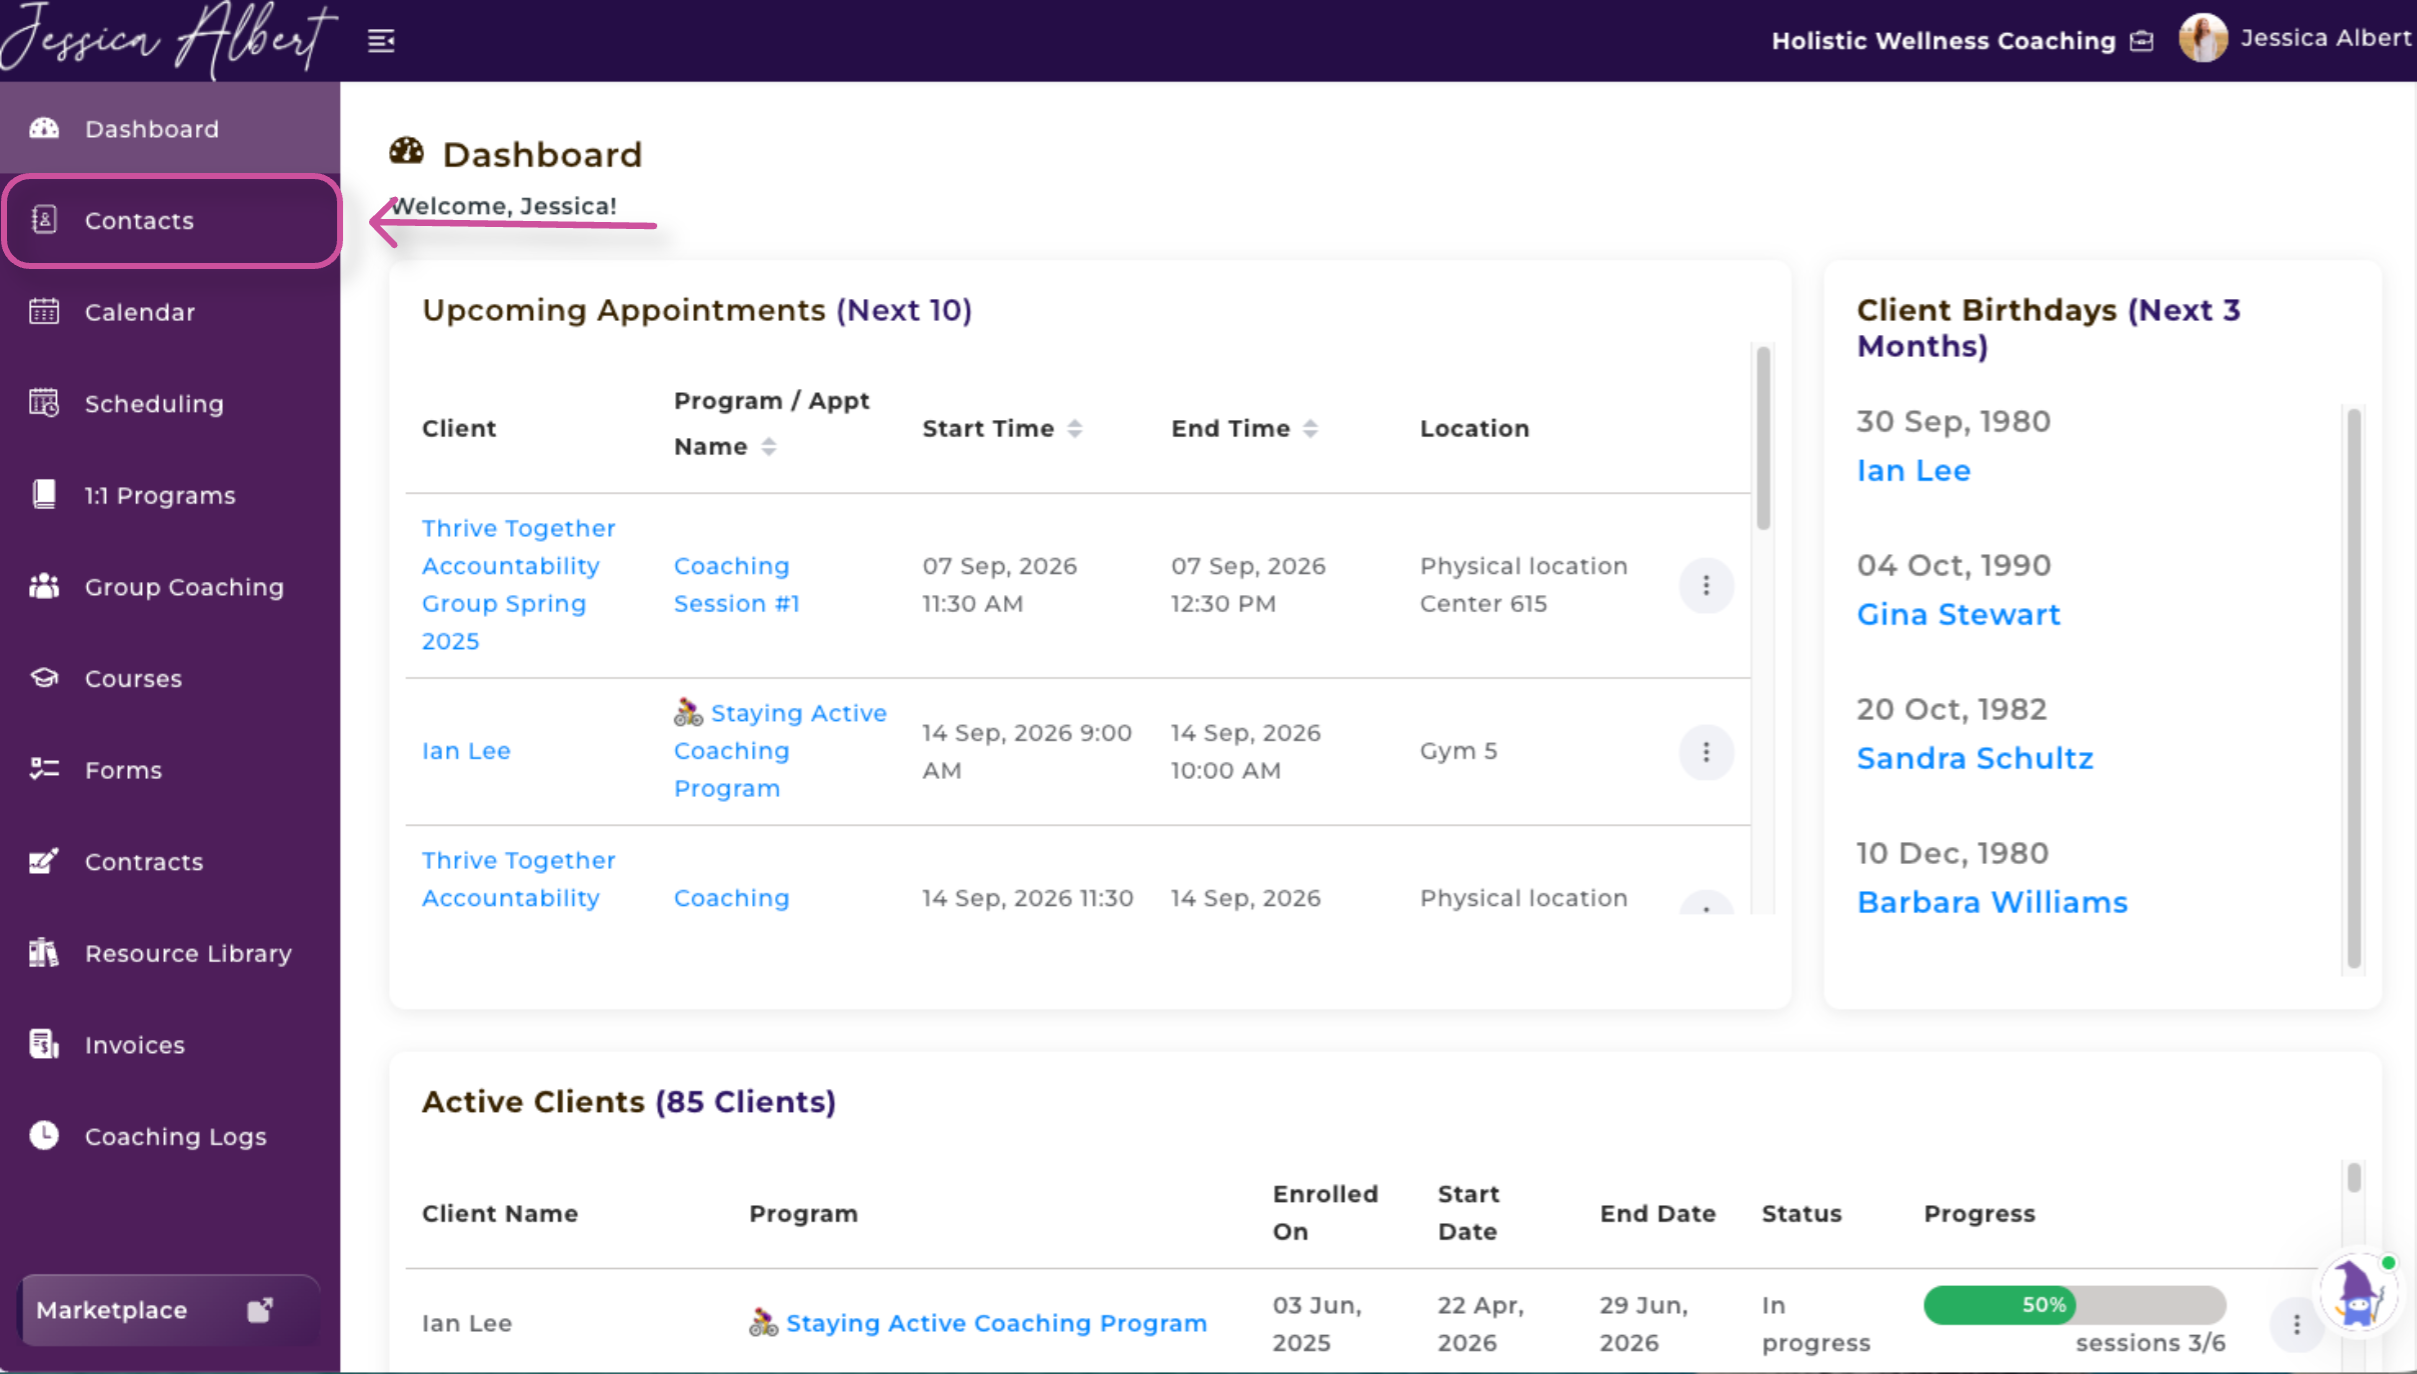
- Select Contacts from the left-hand menu.
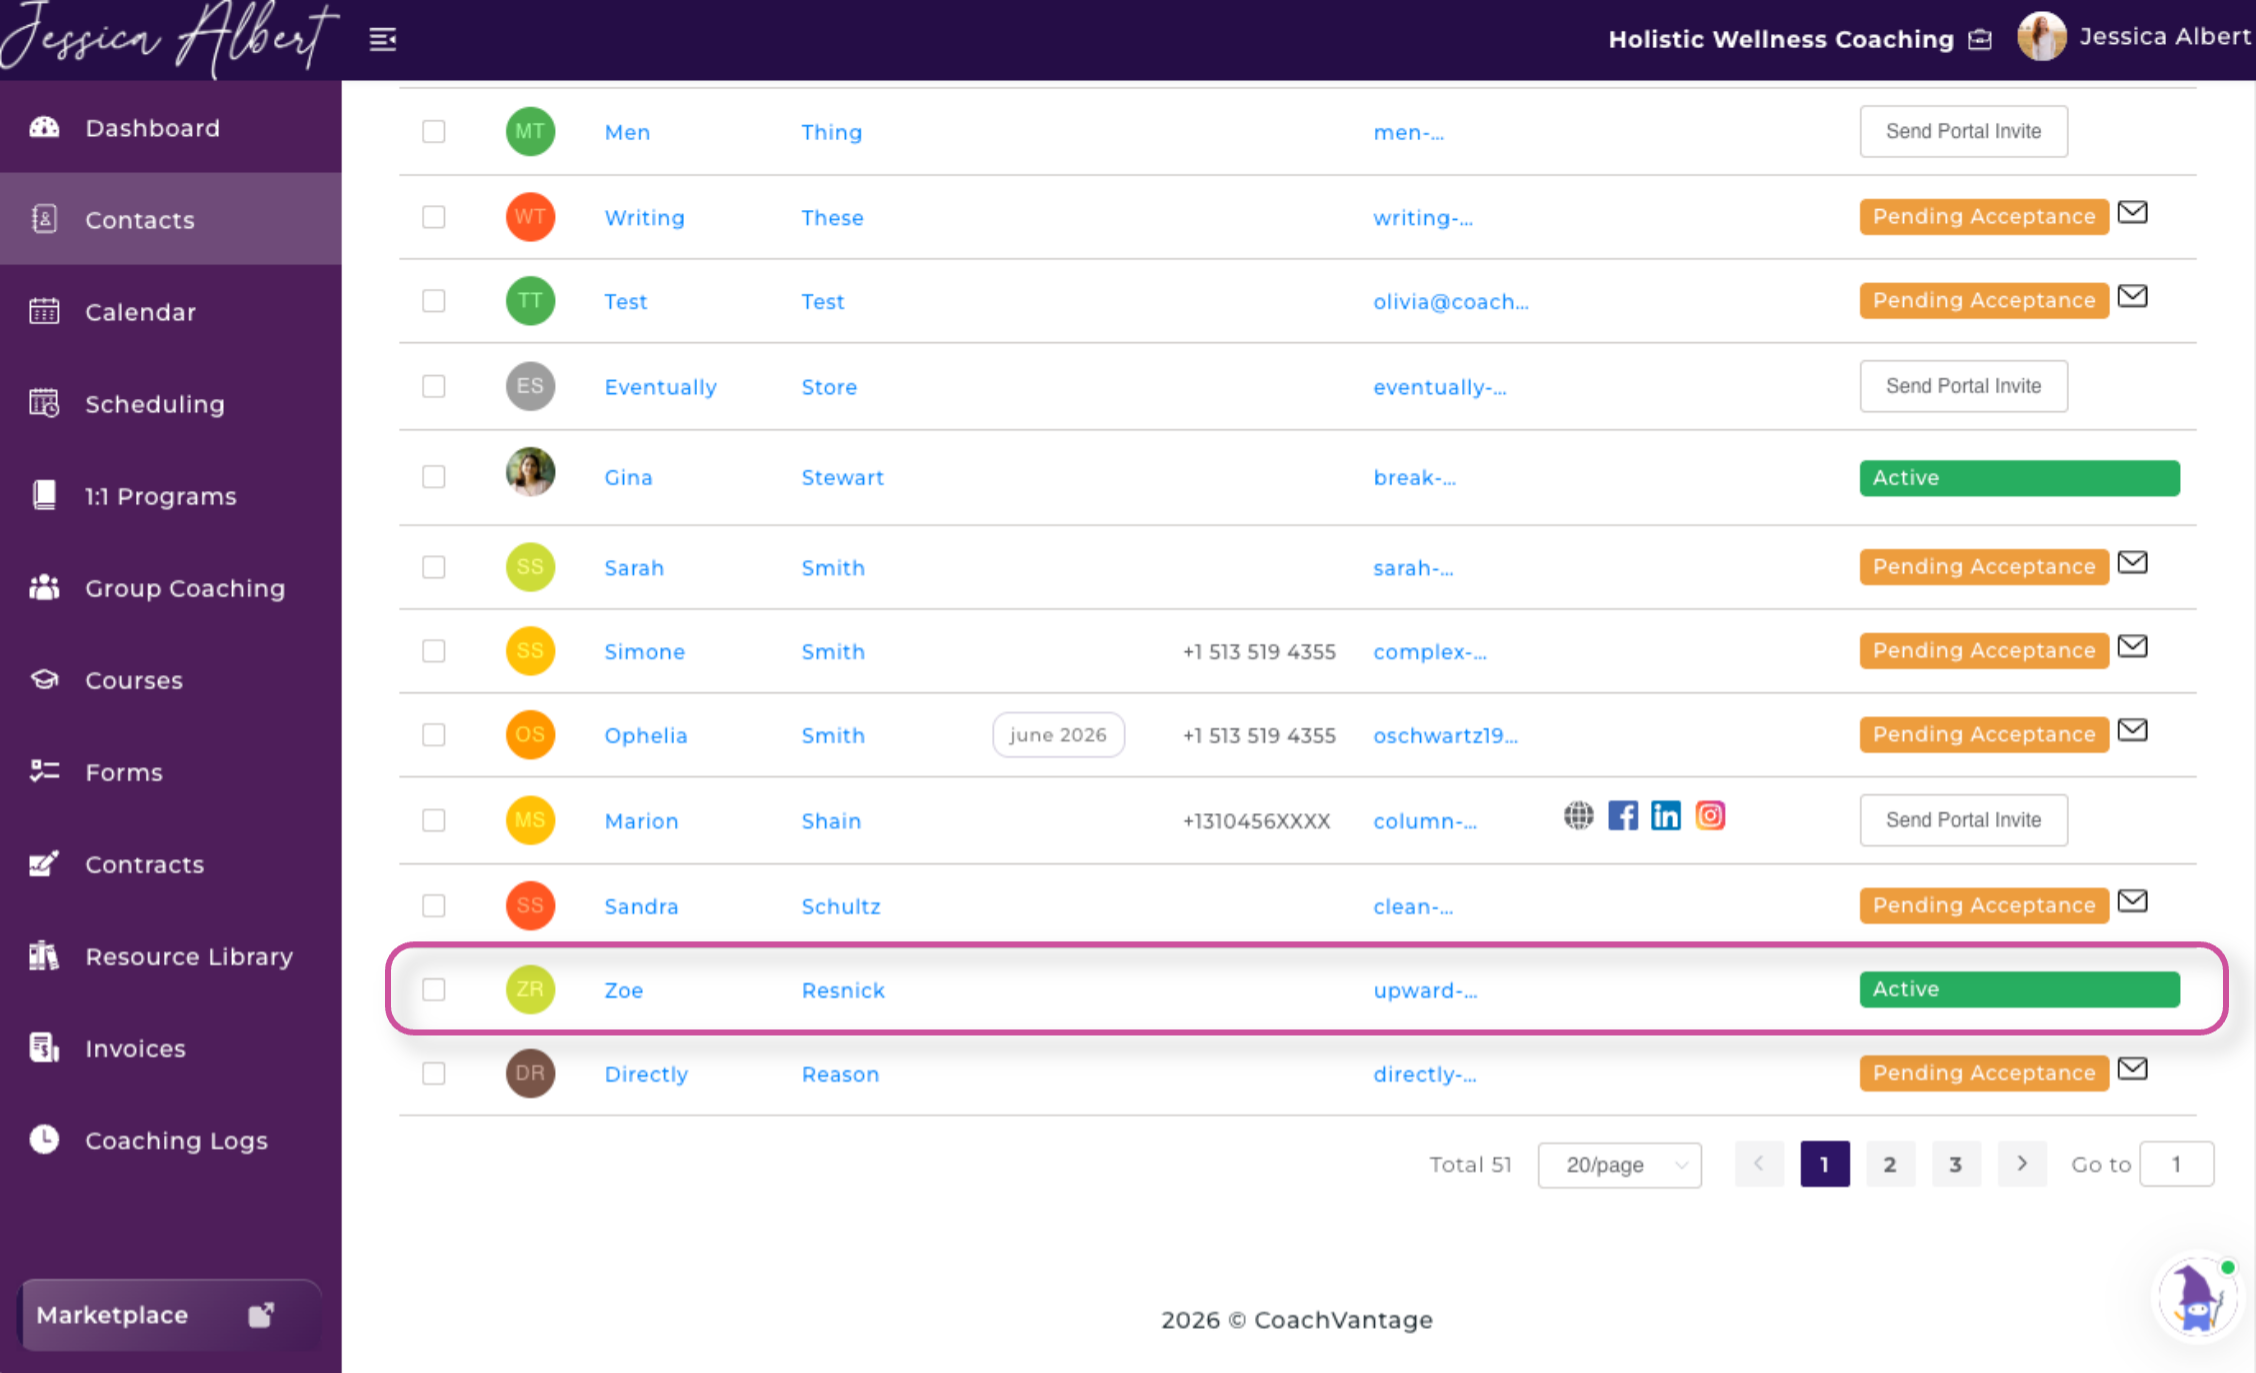
2. Select the contact to open their individual contact record page.
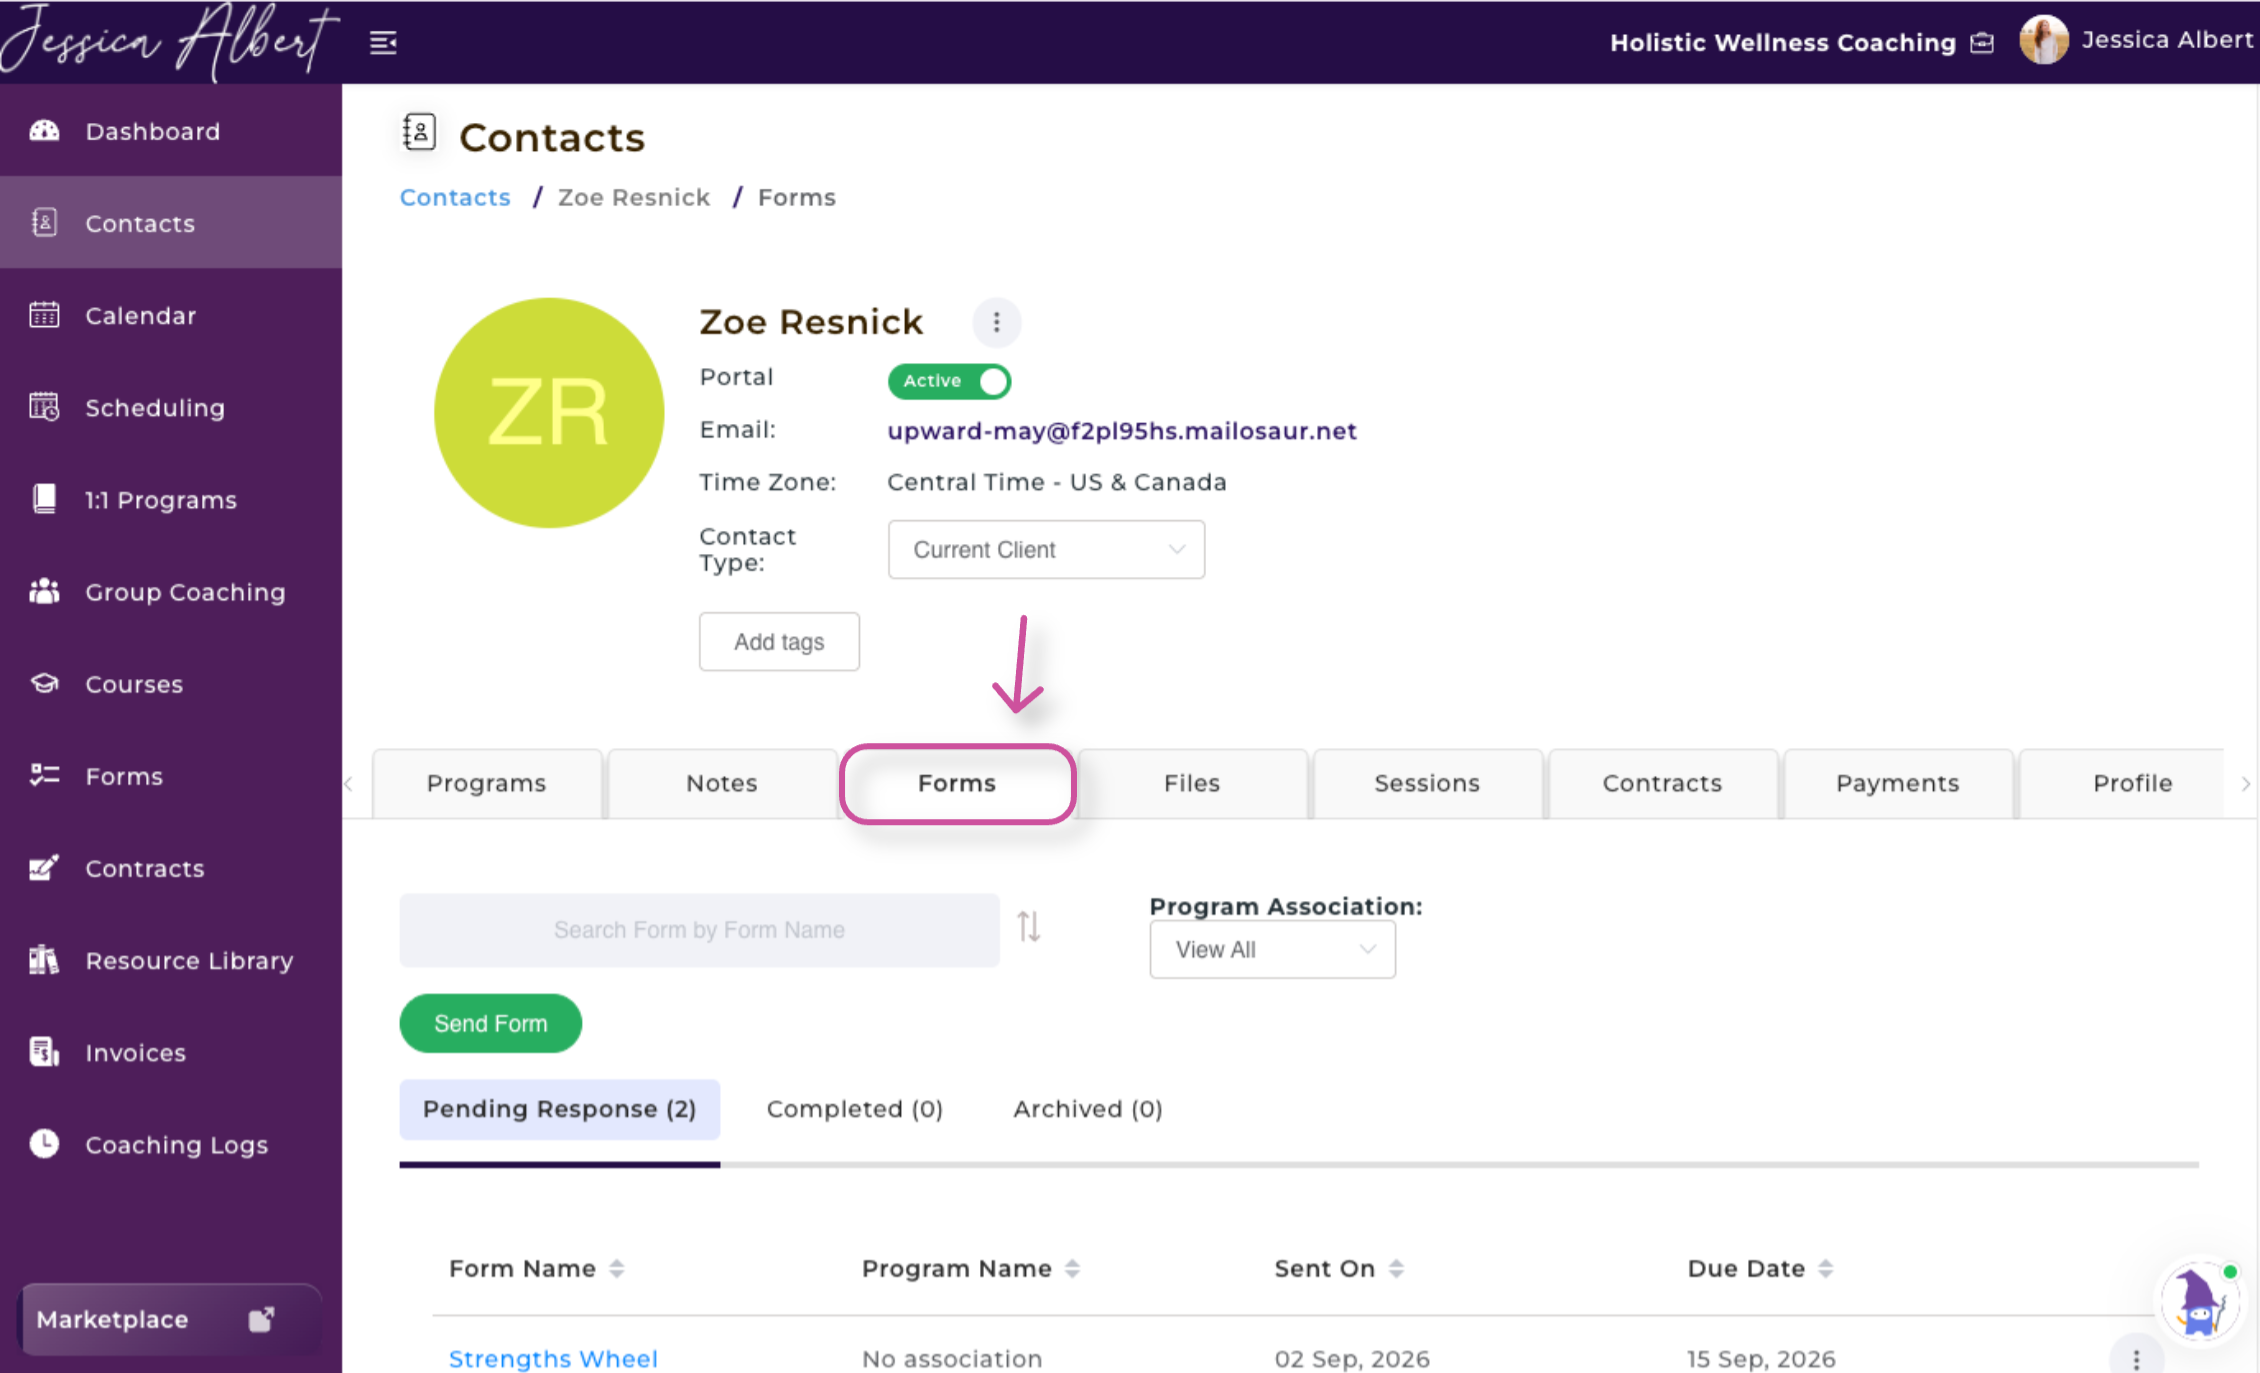
3. Select the Forms tab.
Navigate the Forms Tab
From here, you can search for a form by name or use Program Affiliation to find forms associated with a specific program.
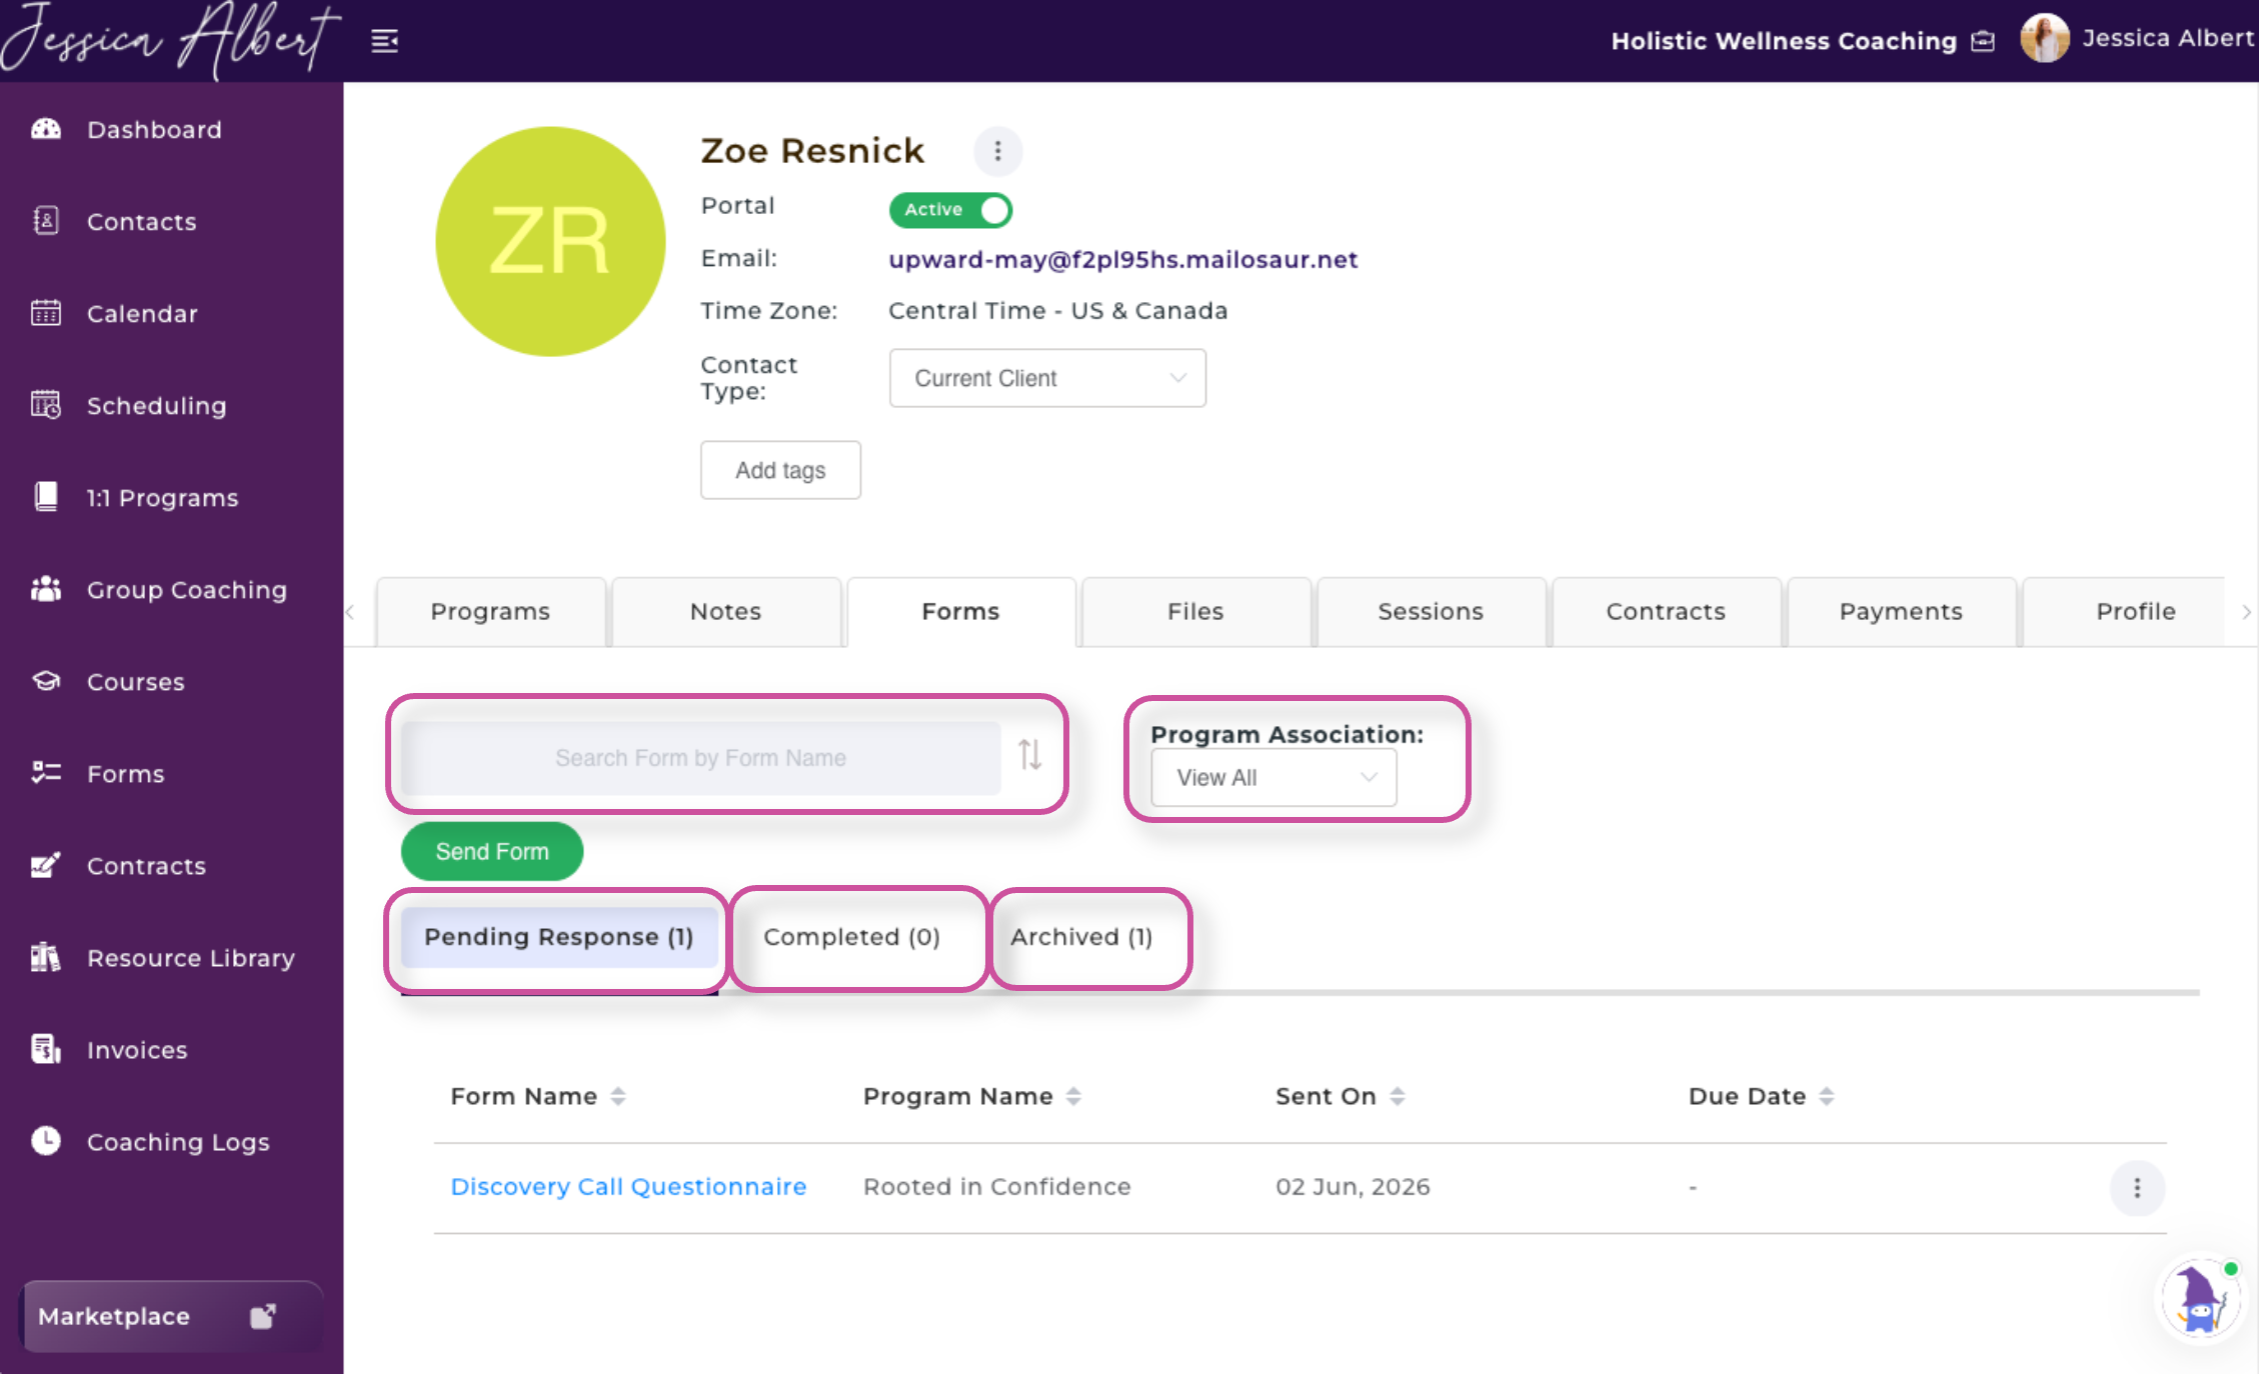
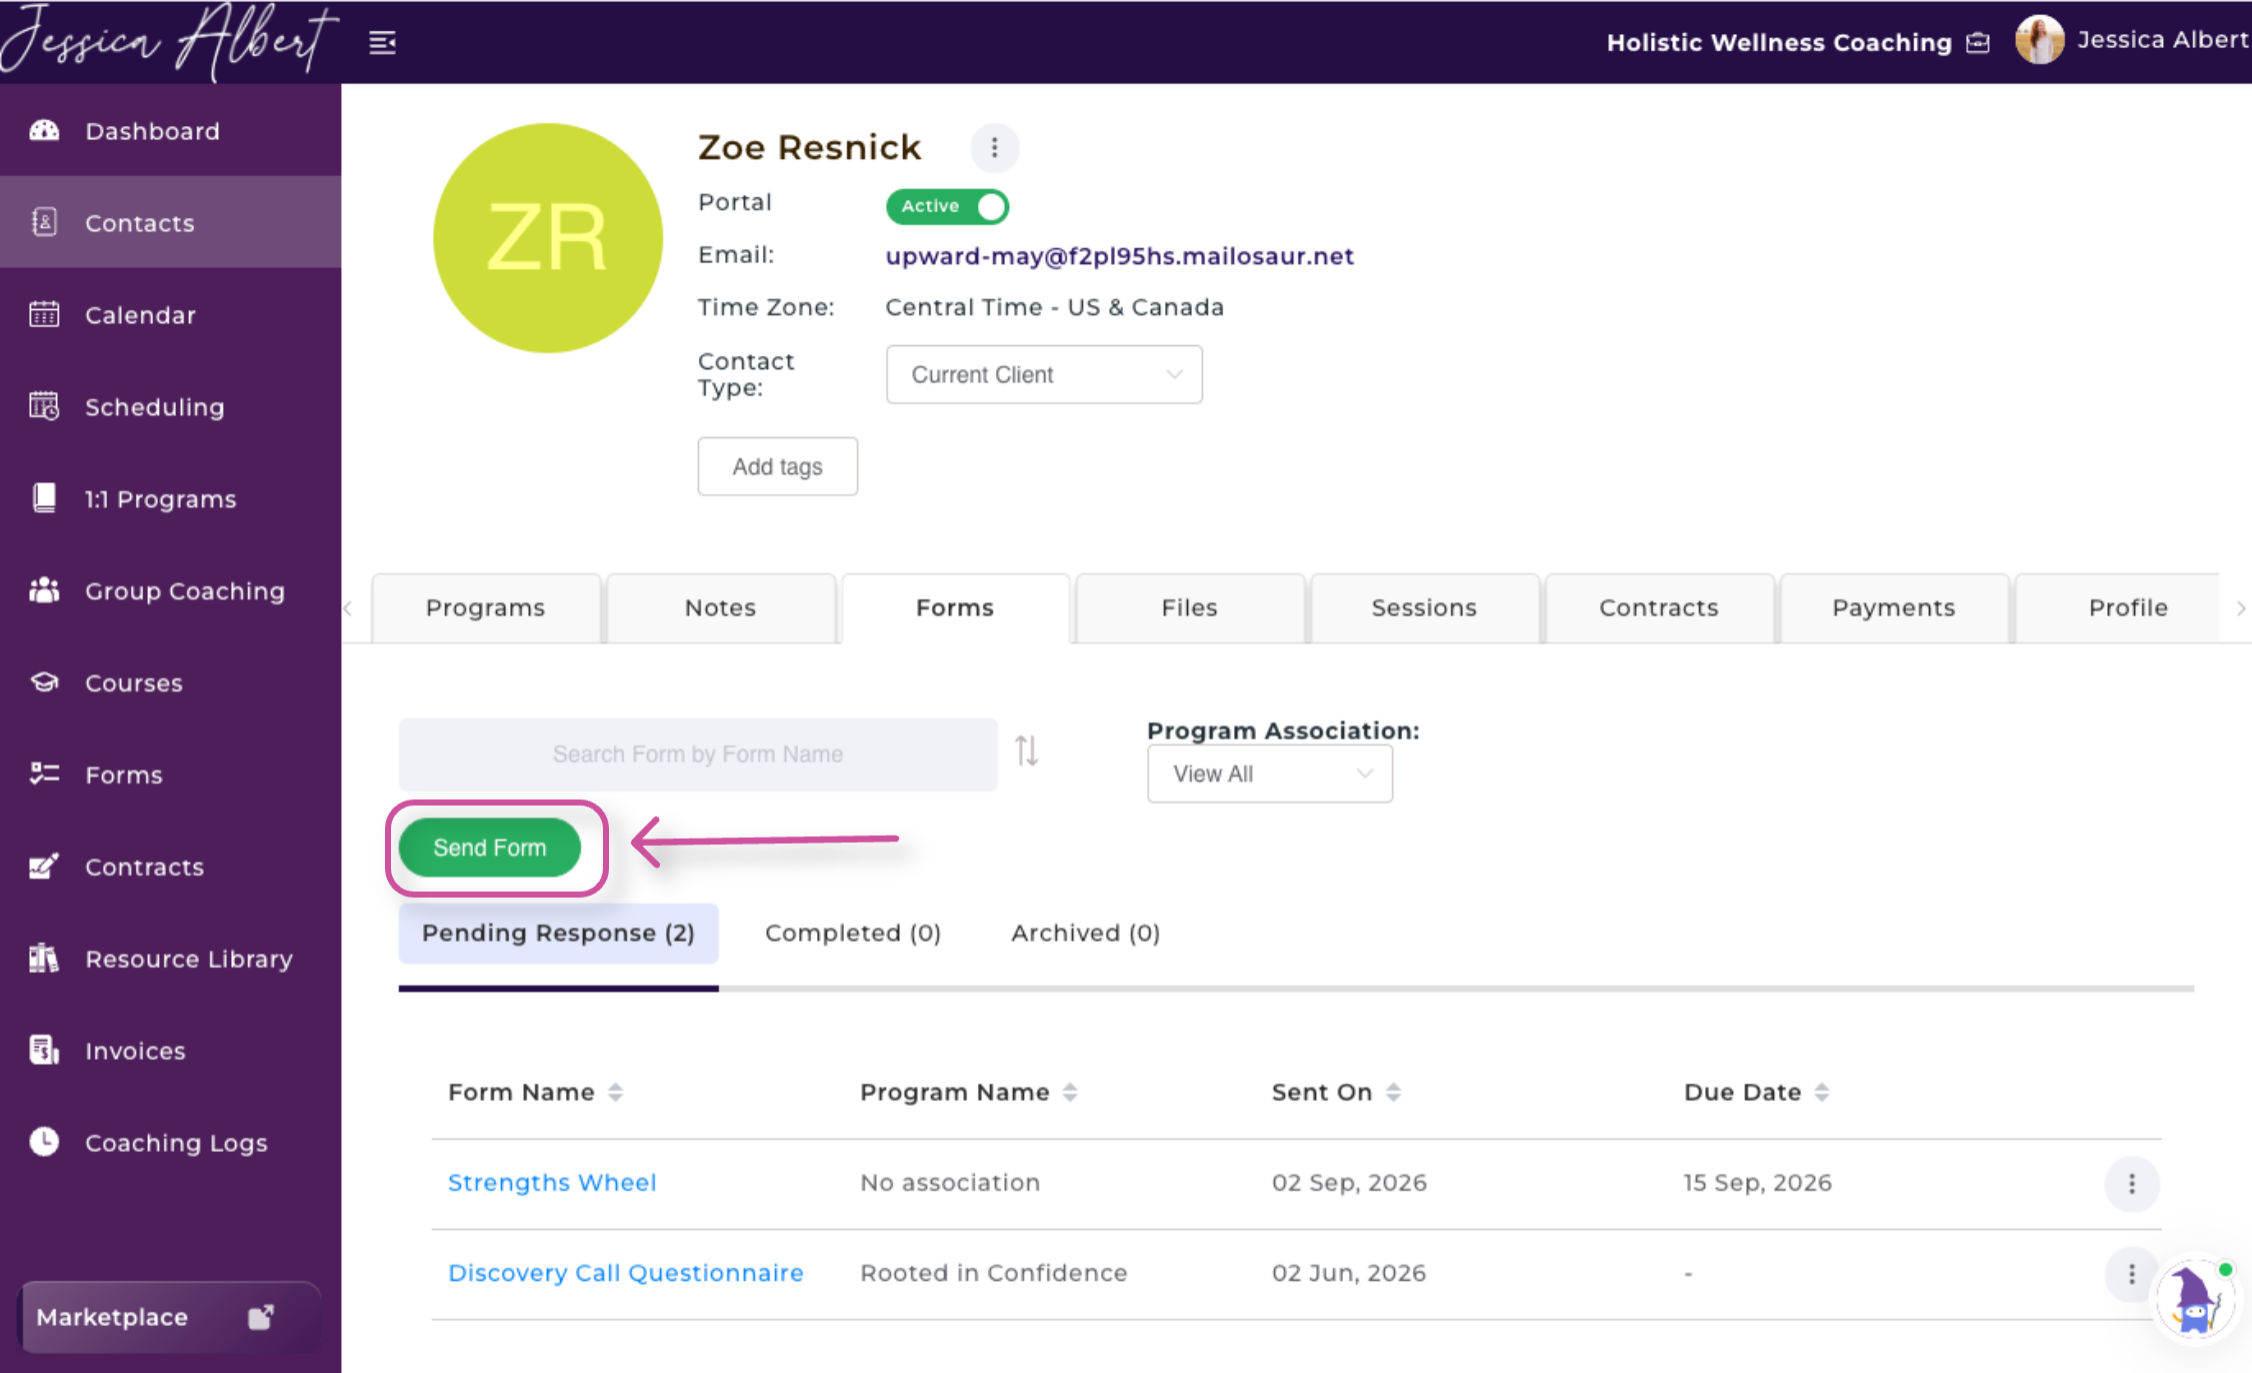
Forms are organized into three tabs:
- Pending Response: Forms that have been sent and are awaiting completion.
- Completed: Forms that the client has completed.
- Archived: Forms that you have marked as archived.
Send a Form
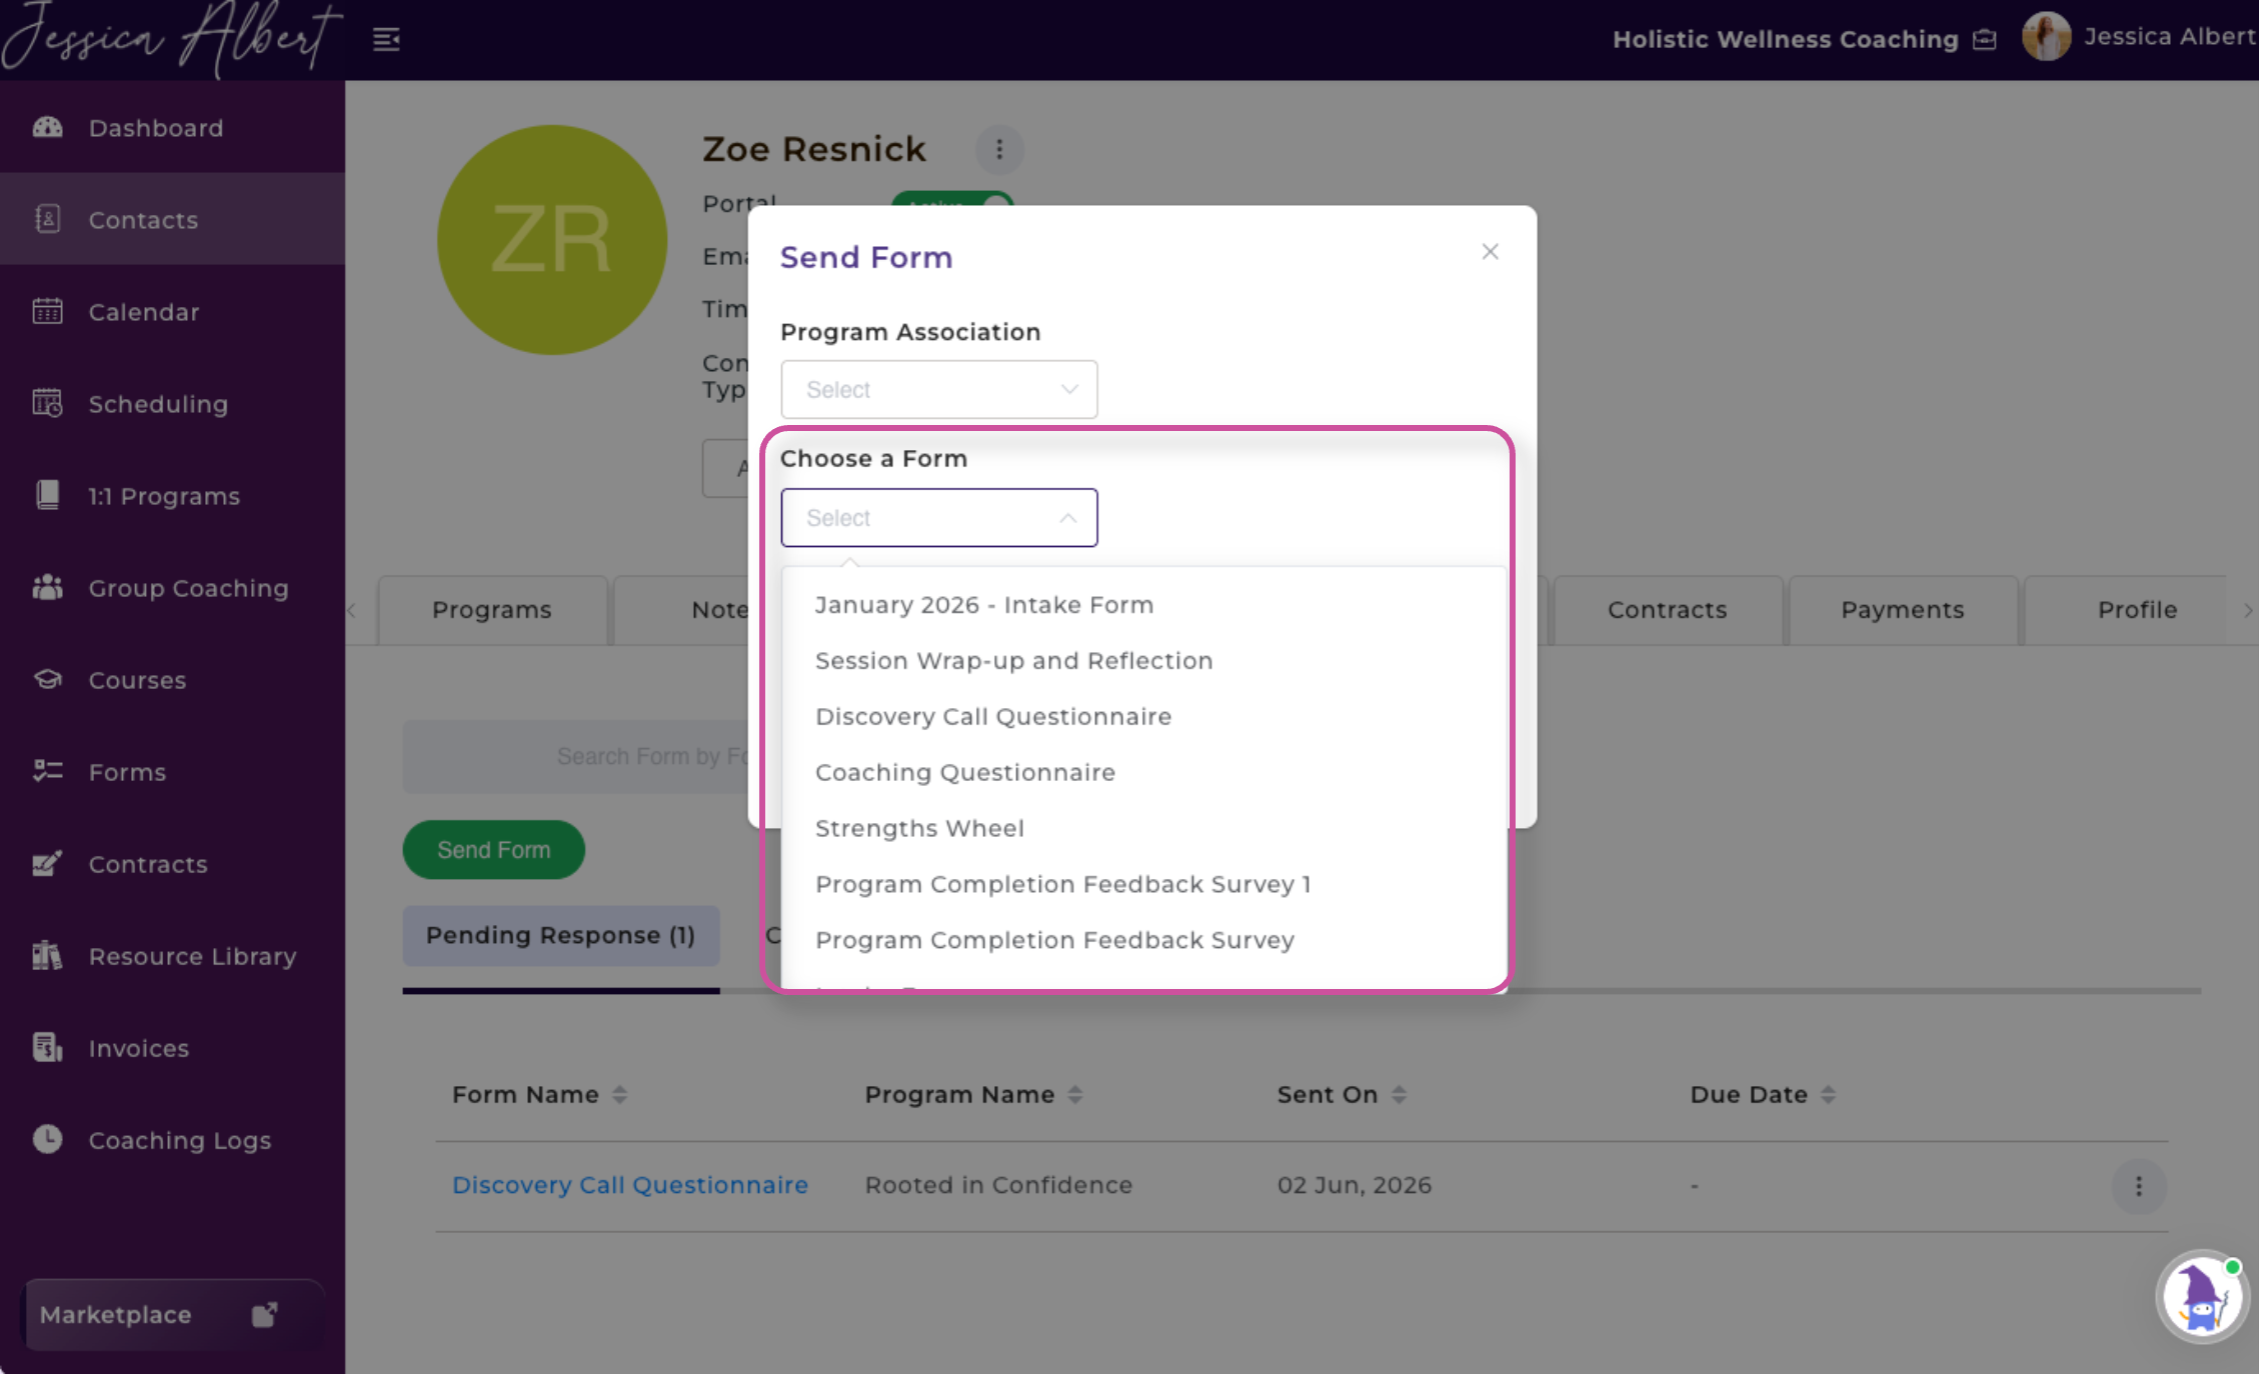
Before sending a form, make sure you have created it in the Forms section of CoachVantage. You can then select it when sending it to a contact.
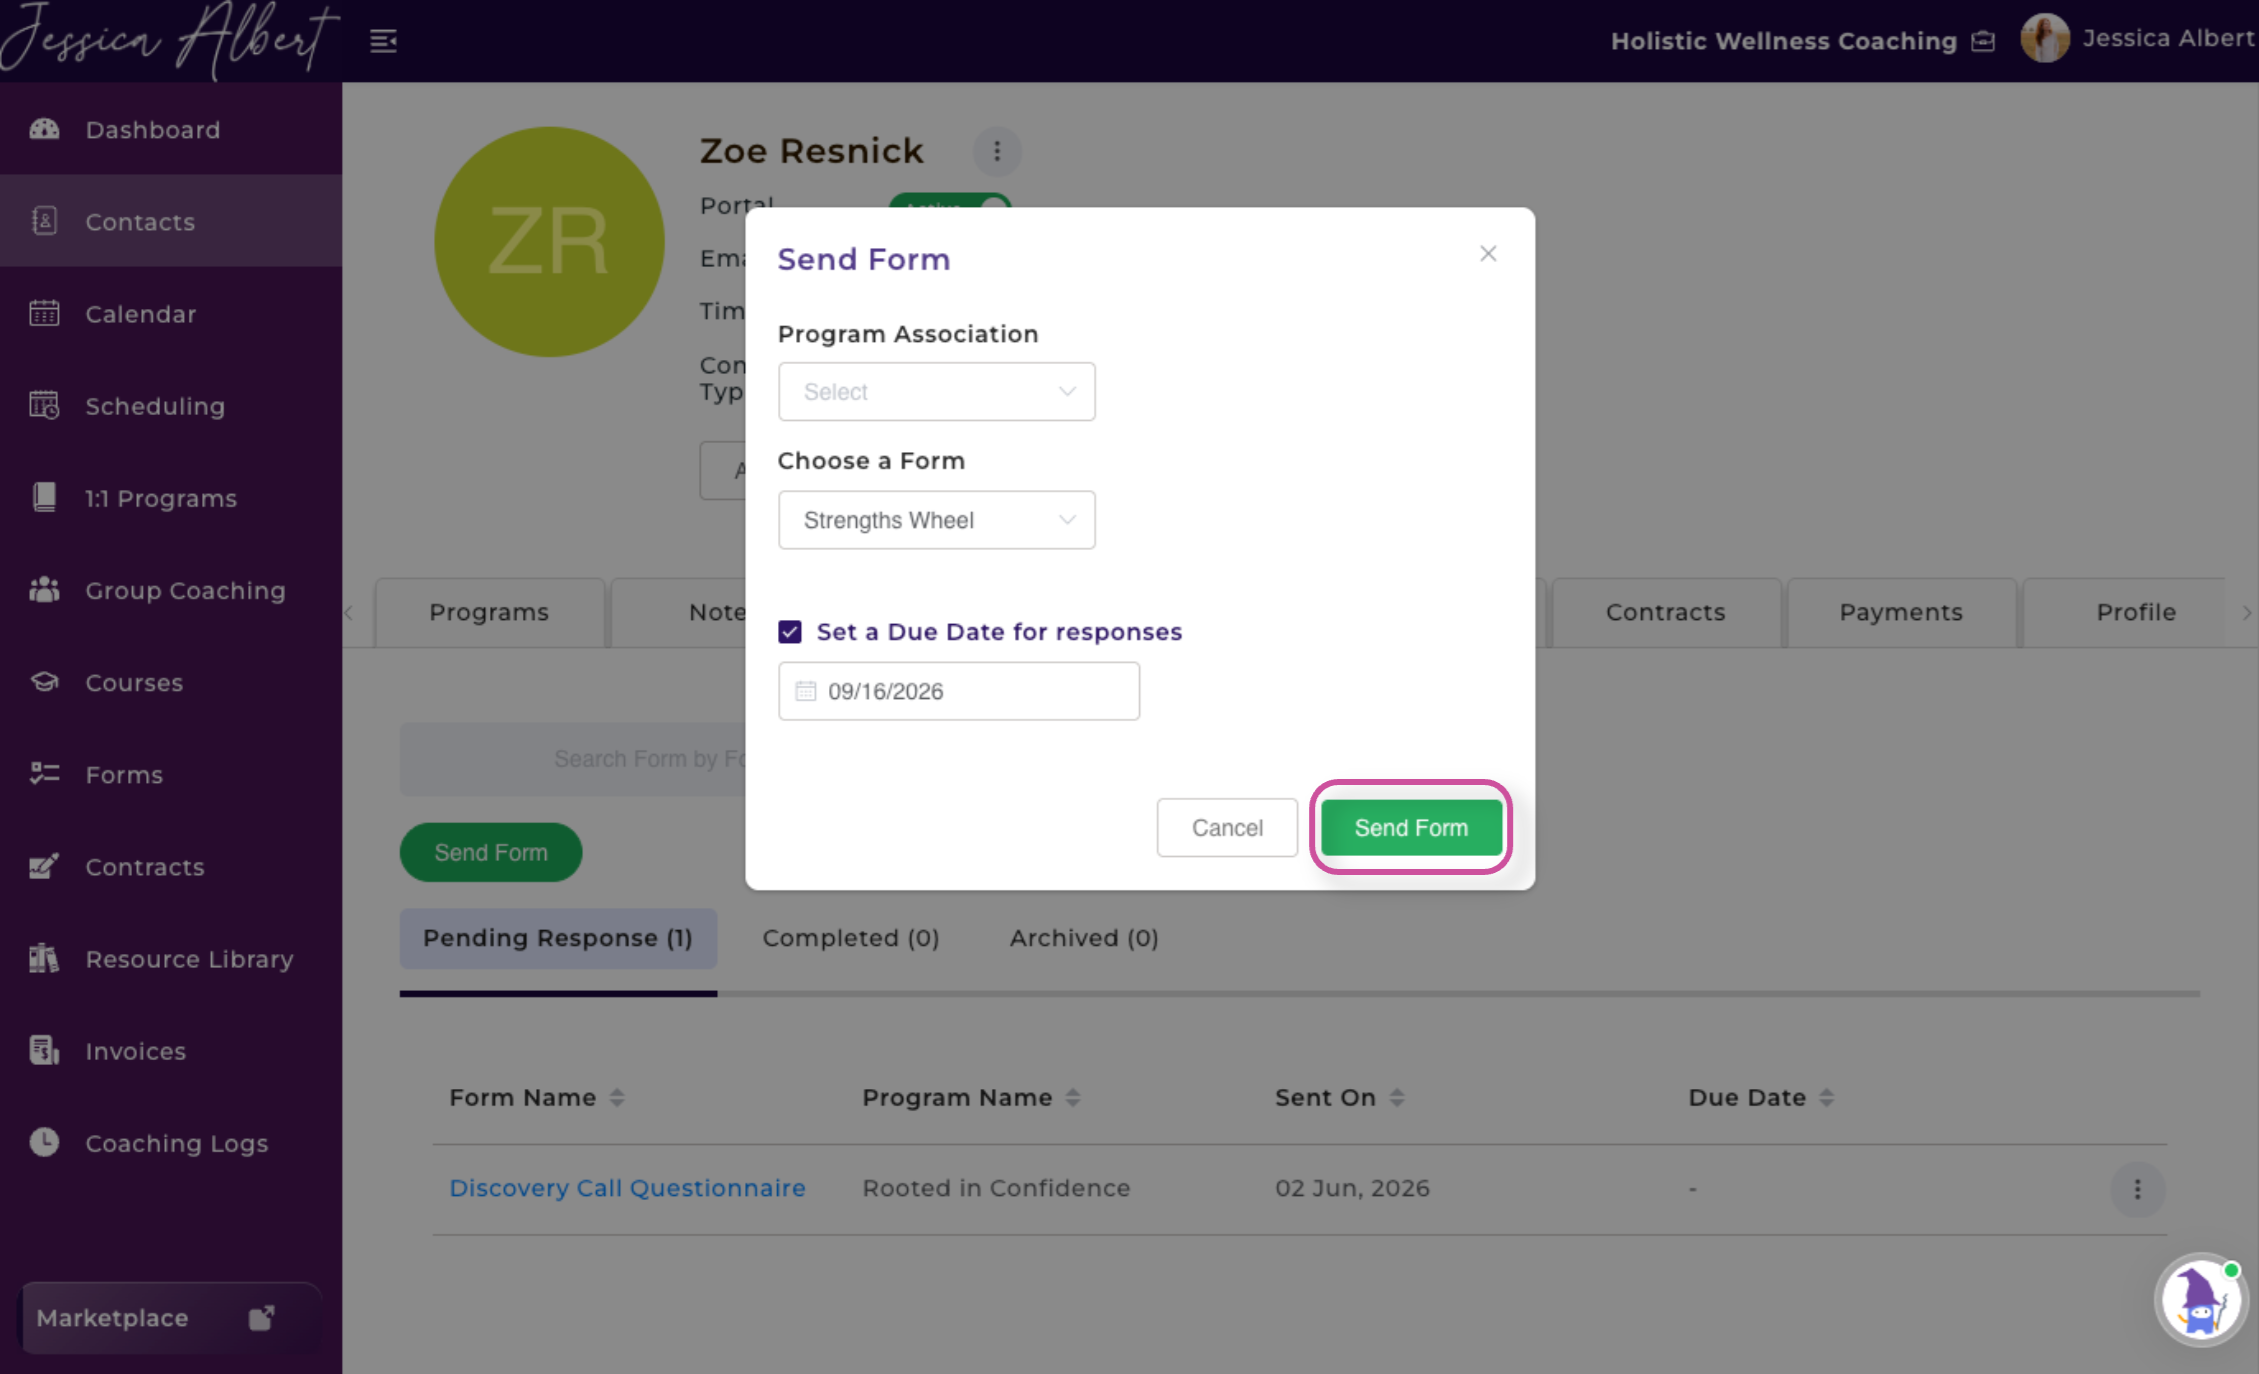
- On the contact’s Forms tab, select Send Form.
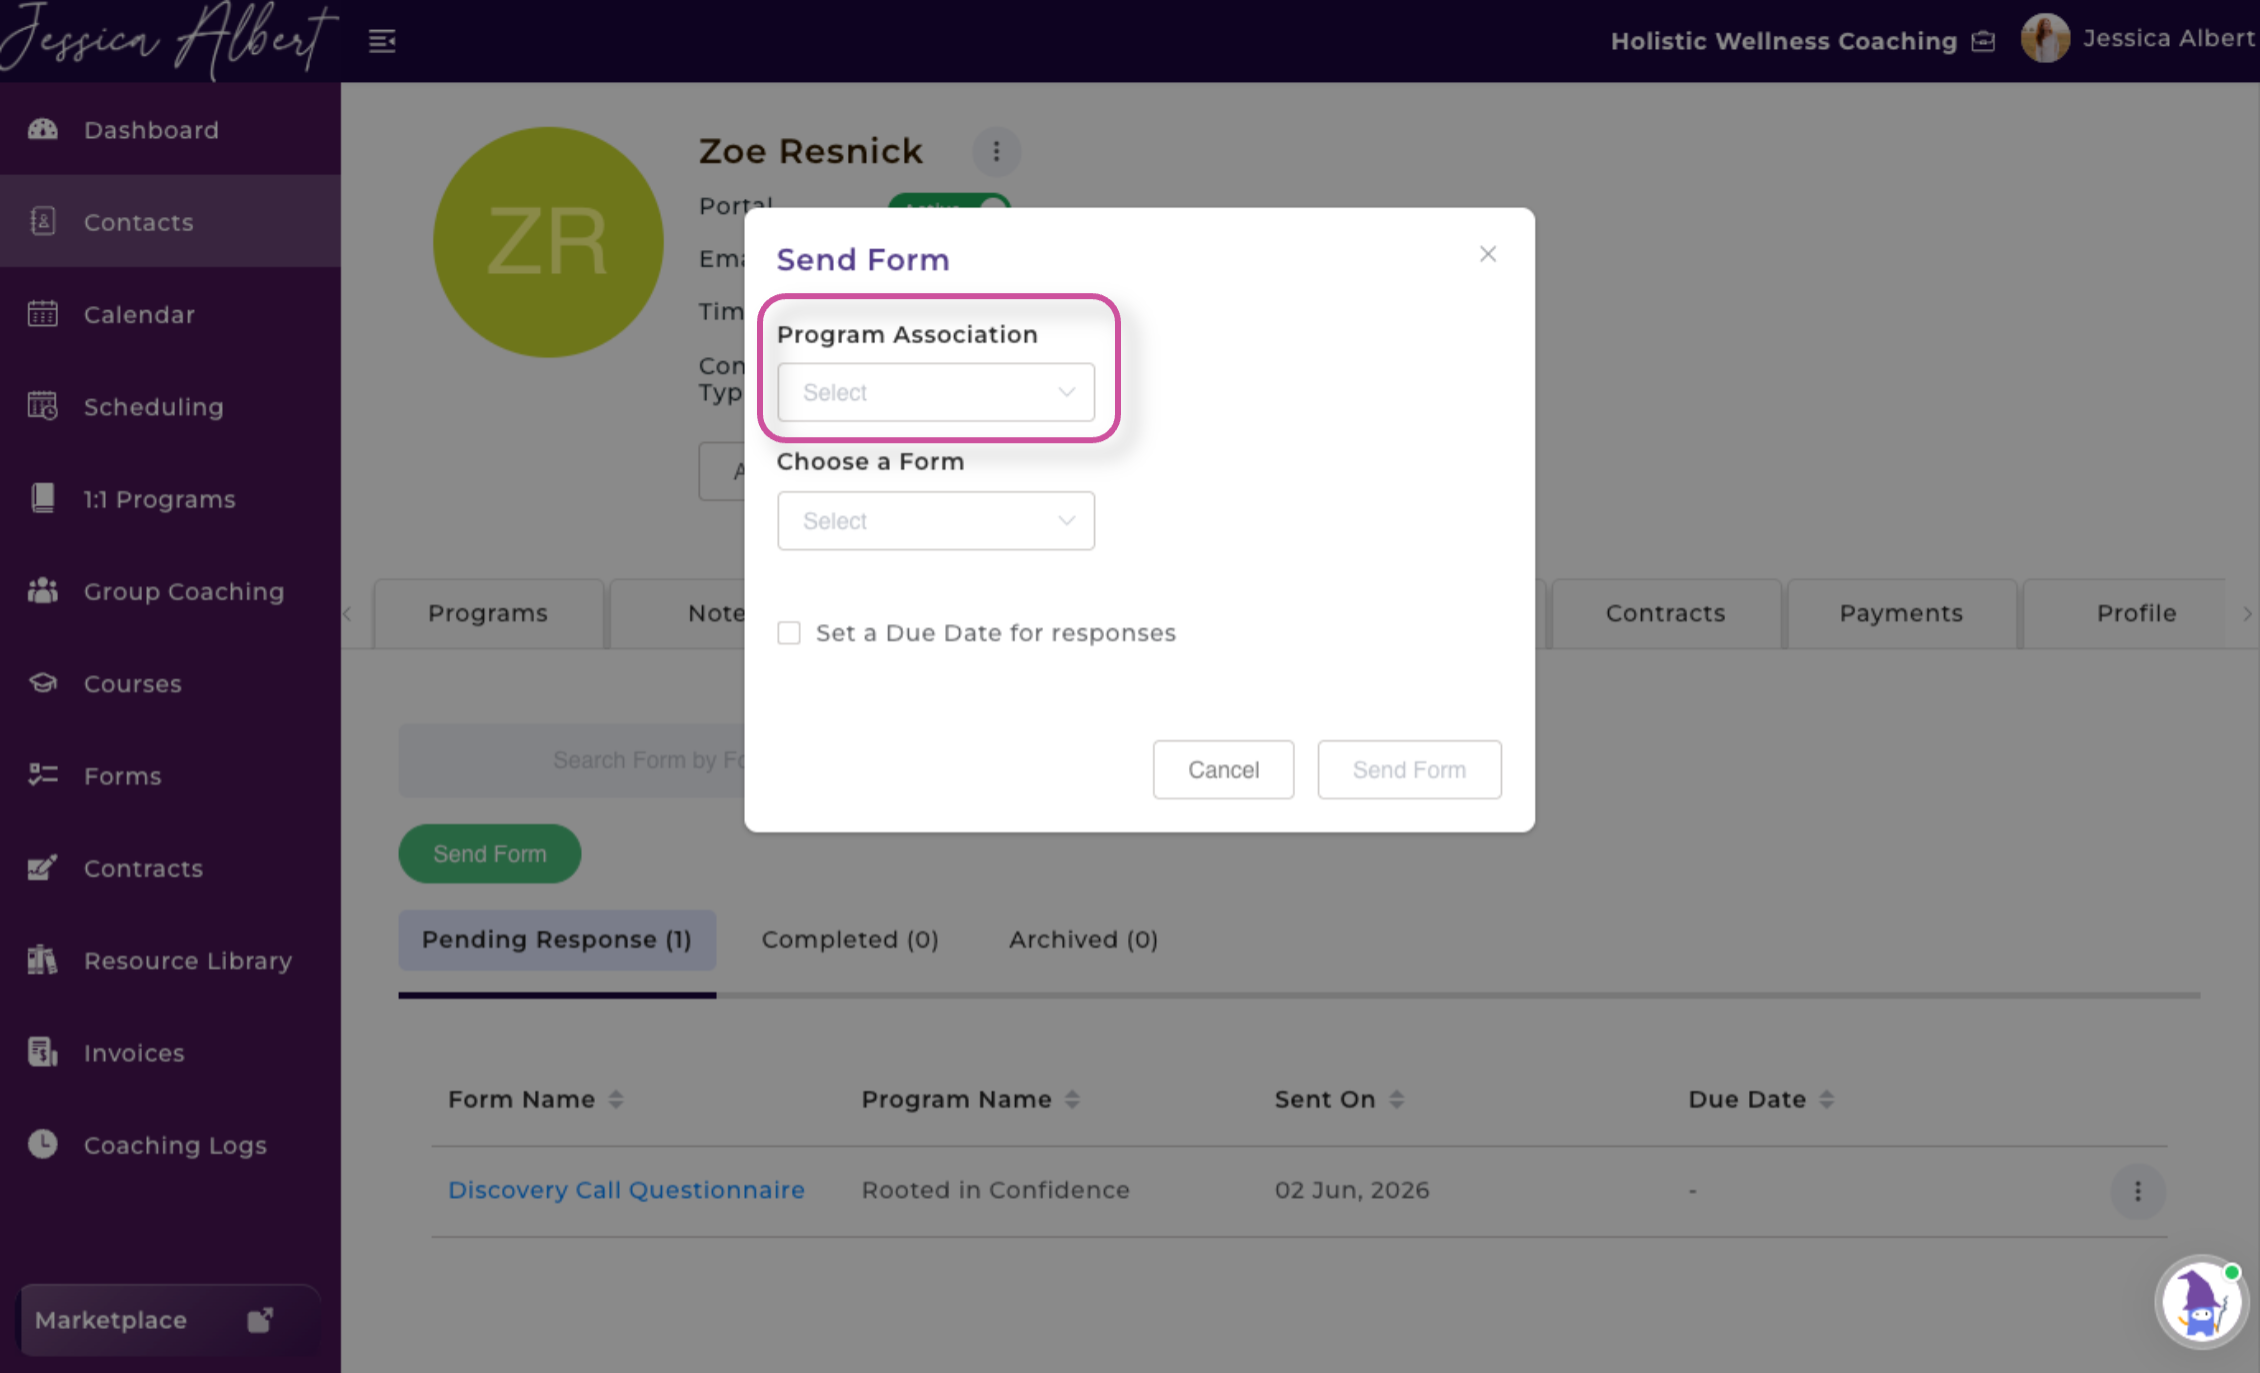
2. If you want to associate the form with a program, select the applicable program.
3. Choose the form you want to send, such as an intake form.
4. Set a due date.
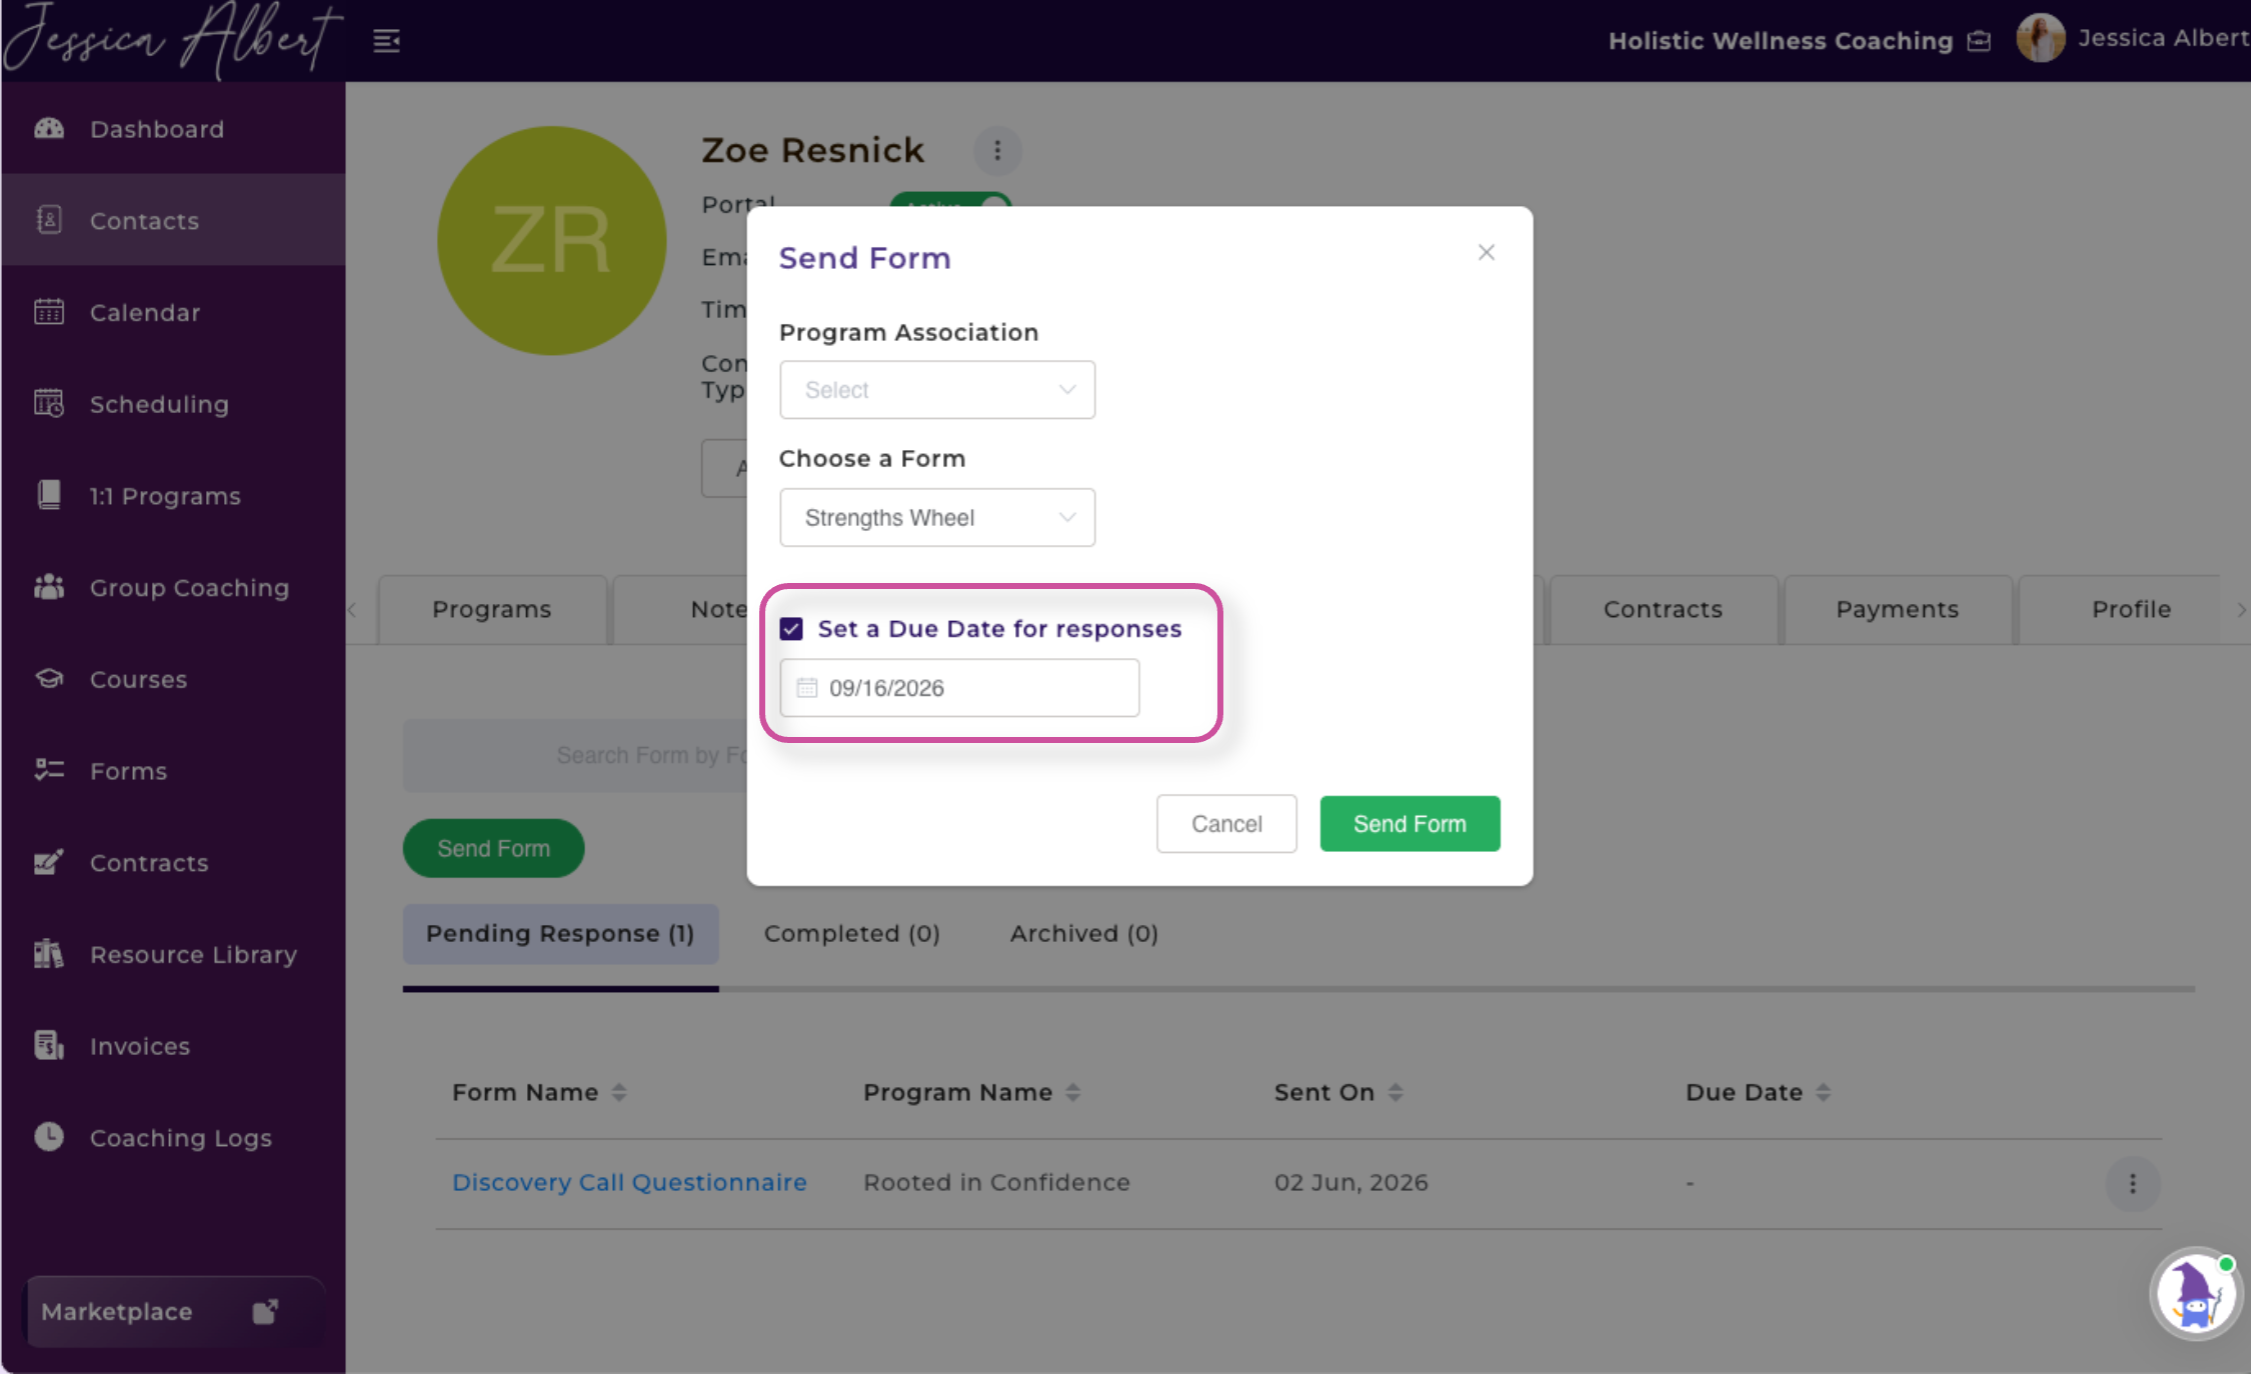
5. Select Send Form to confirm.
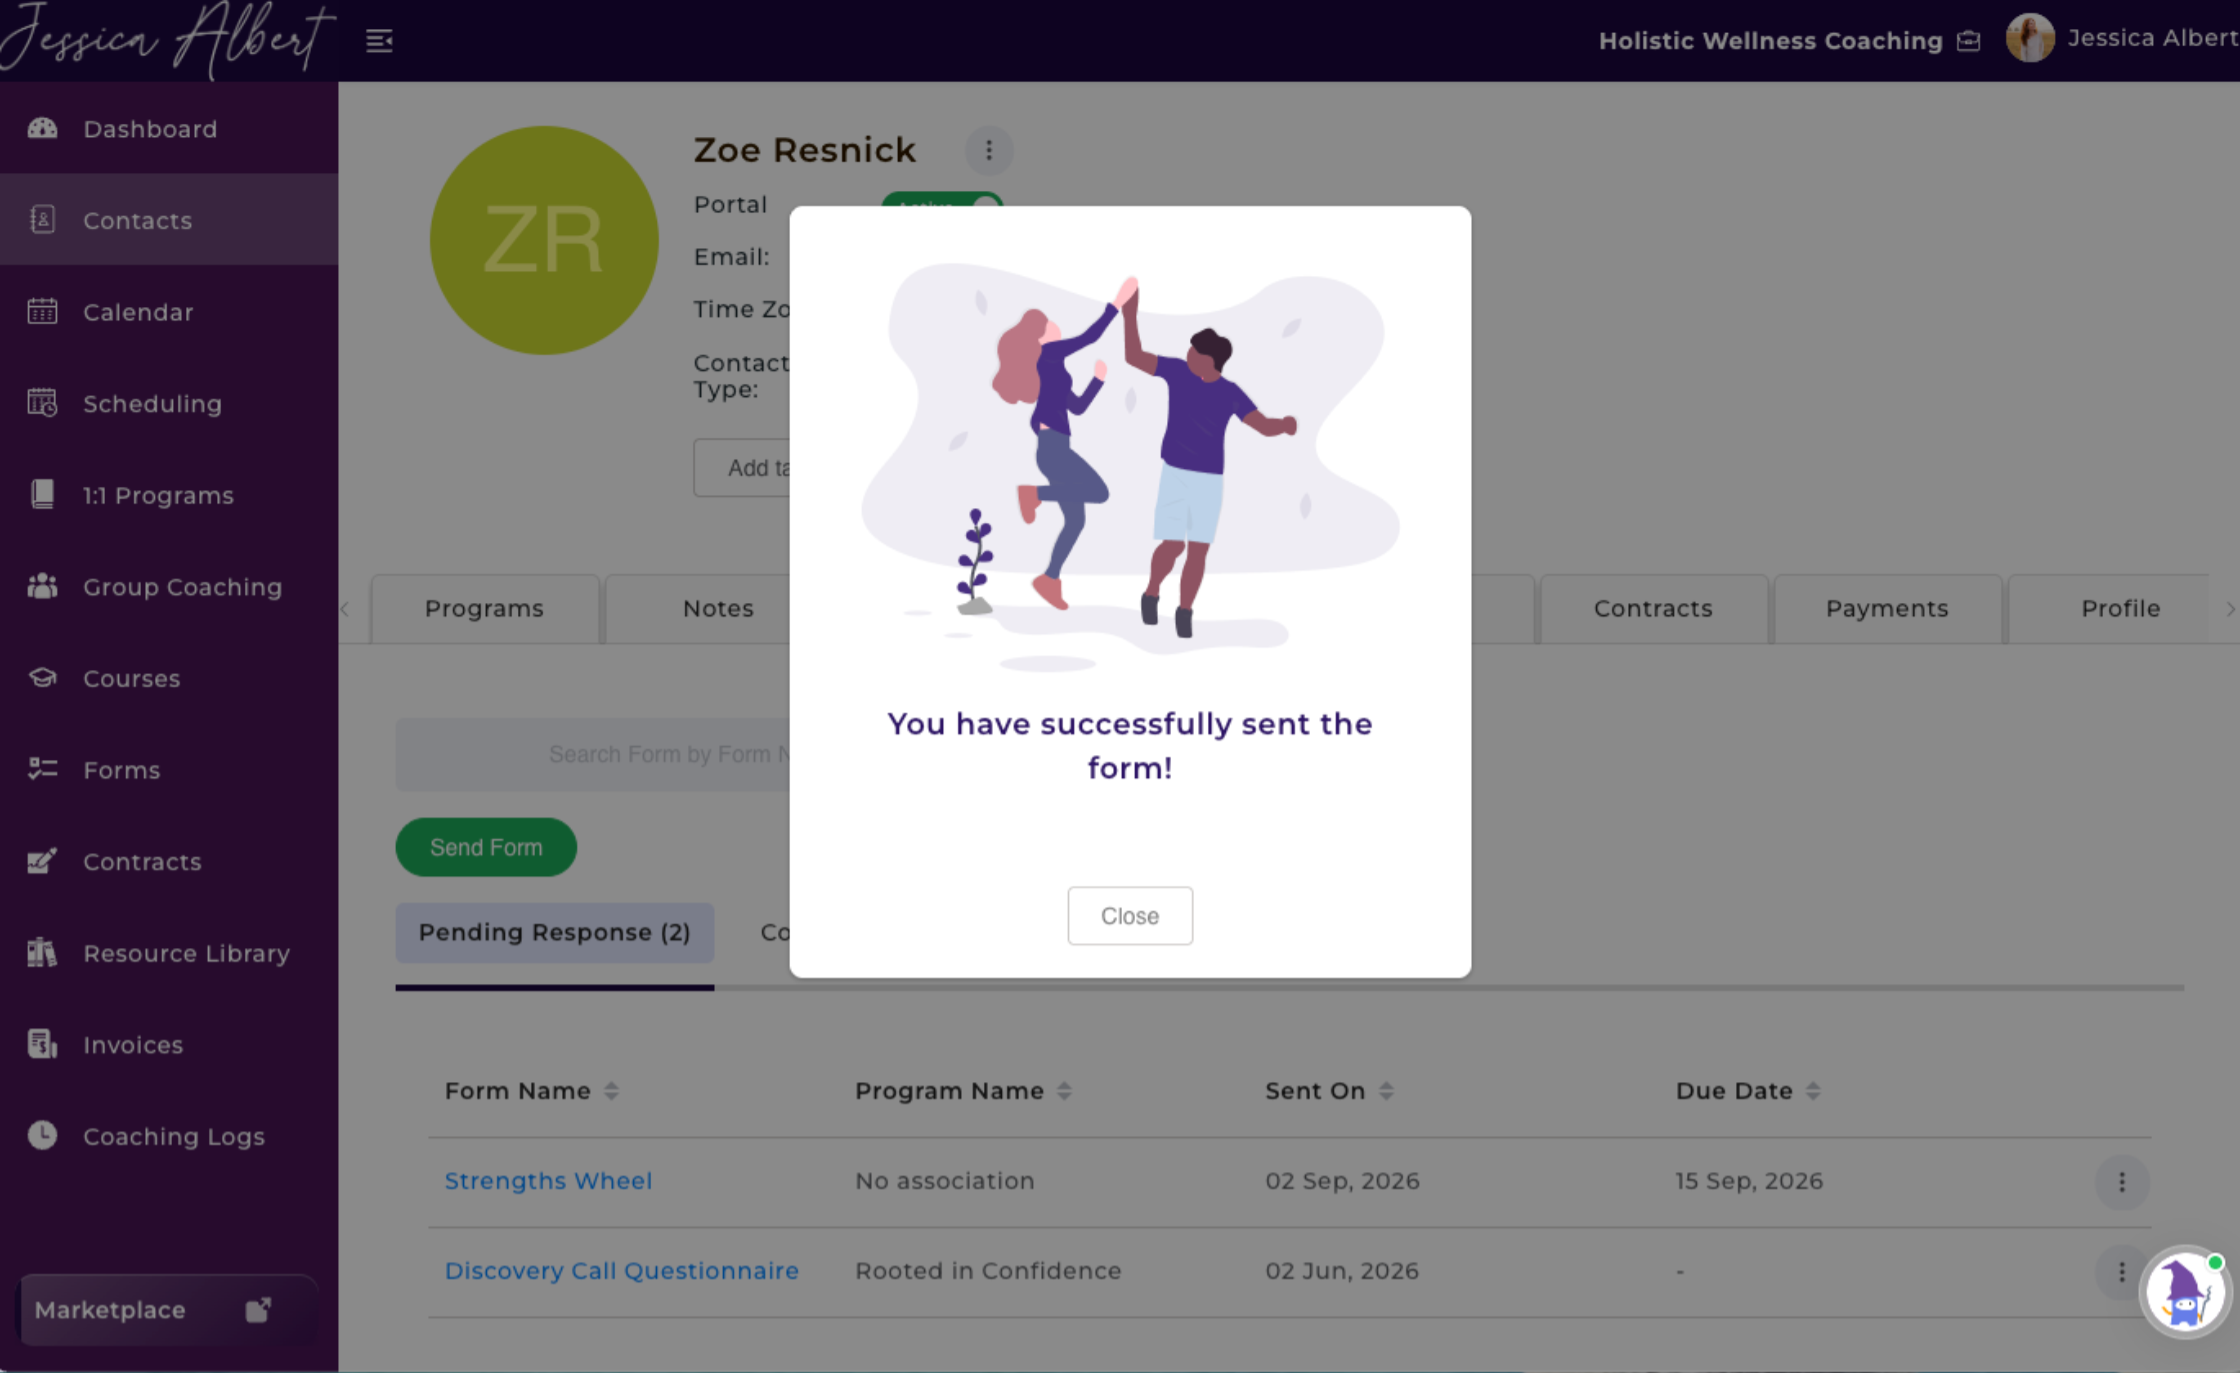
Your client will receive an email notification letting them know that you have sent them a form. The form will appear under Pending Response.
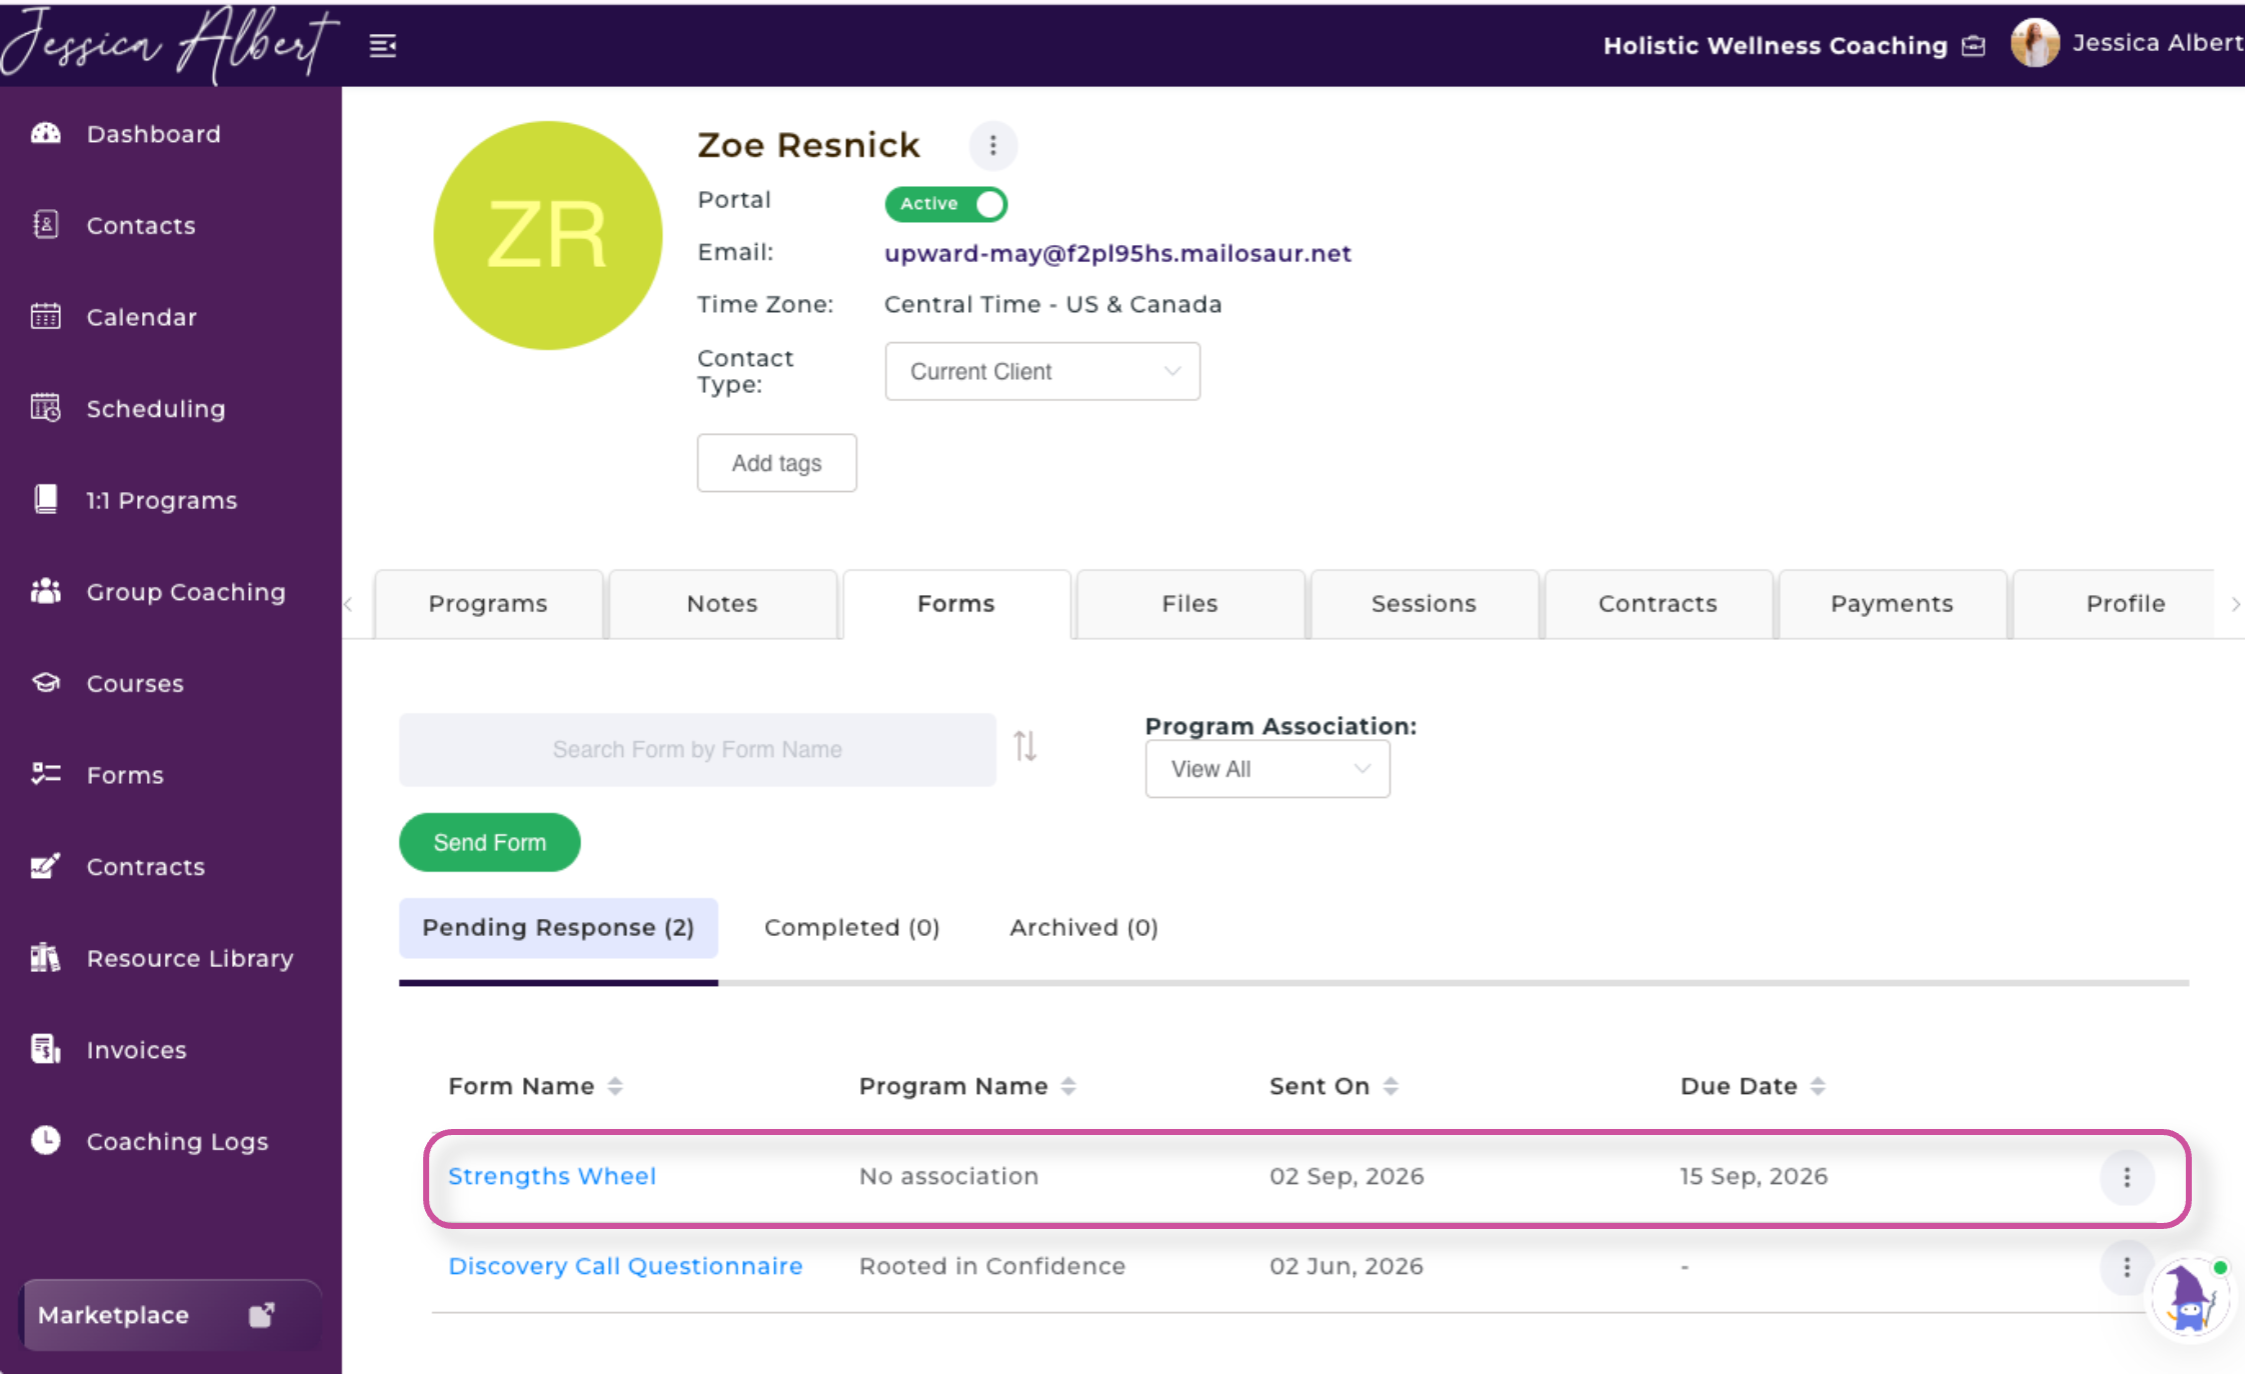
Once the client completes the form, it will move to the Completed tab.
View Form Details
To review a form you have sent to a contact:
- Find the form on the contact’s Forms tab.
- Select the three-dot menu next to the form.
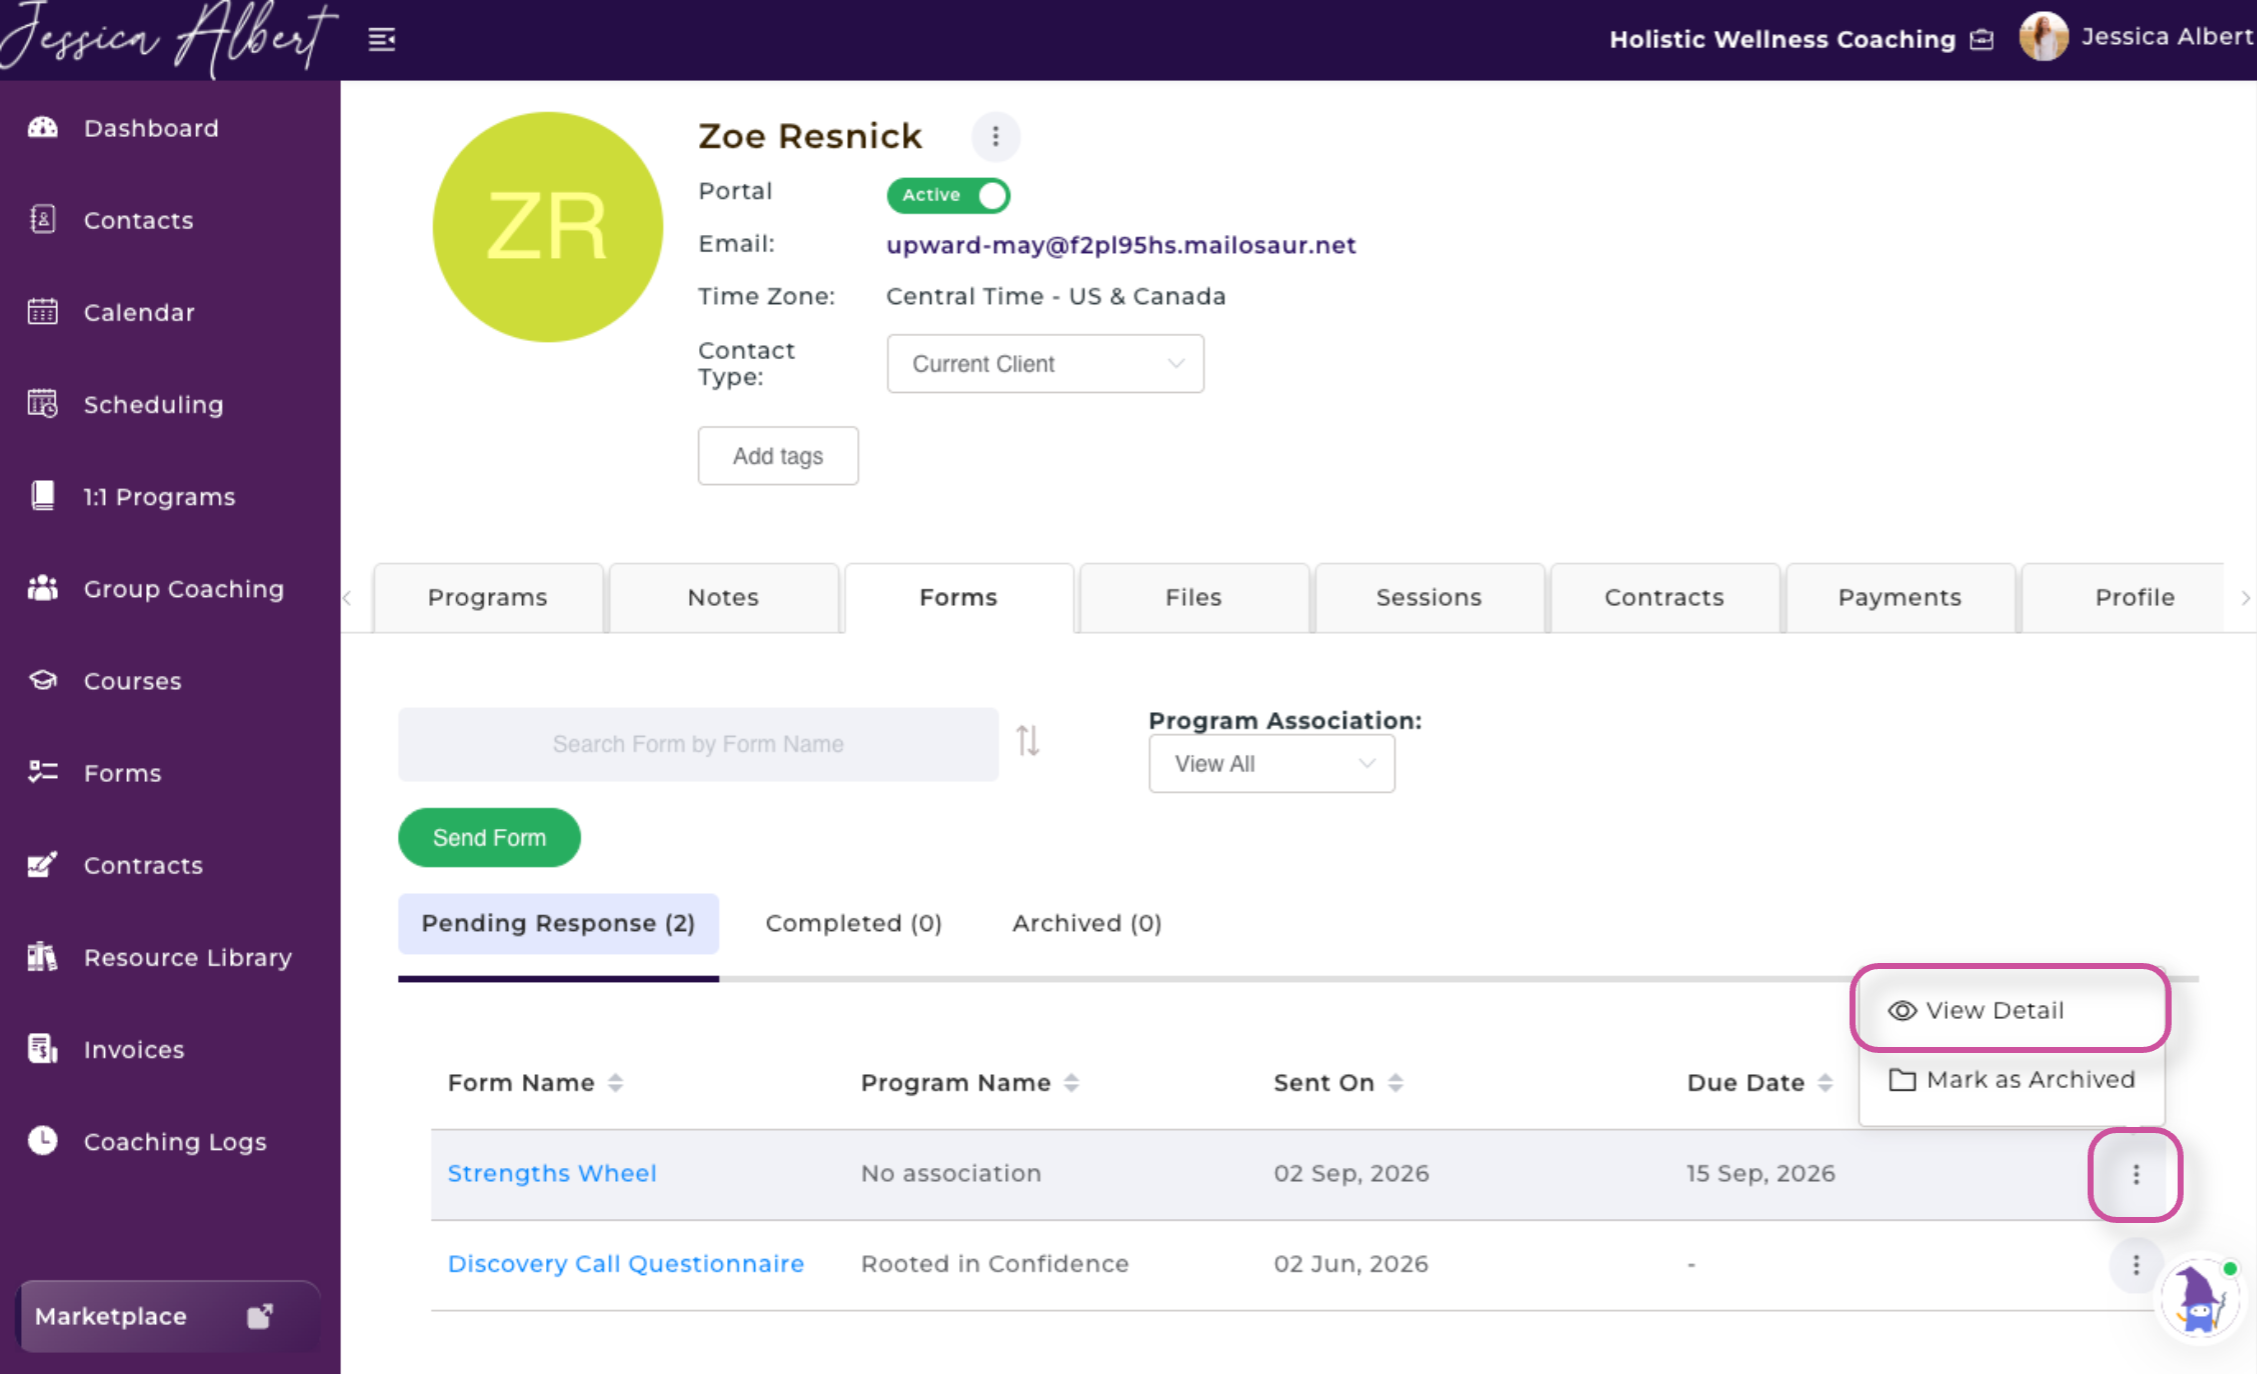
3. Select View Detail.
This opens the form so you can review its contents.
Archive a Form
If a form is no longer applicable, you can mark it as archived.
- Find the form you want to archive.
- Select the three-dot menu next to the form.
- Select Mark as Archived.
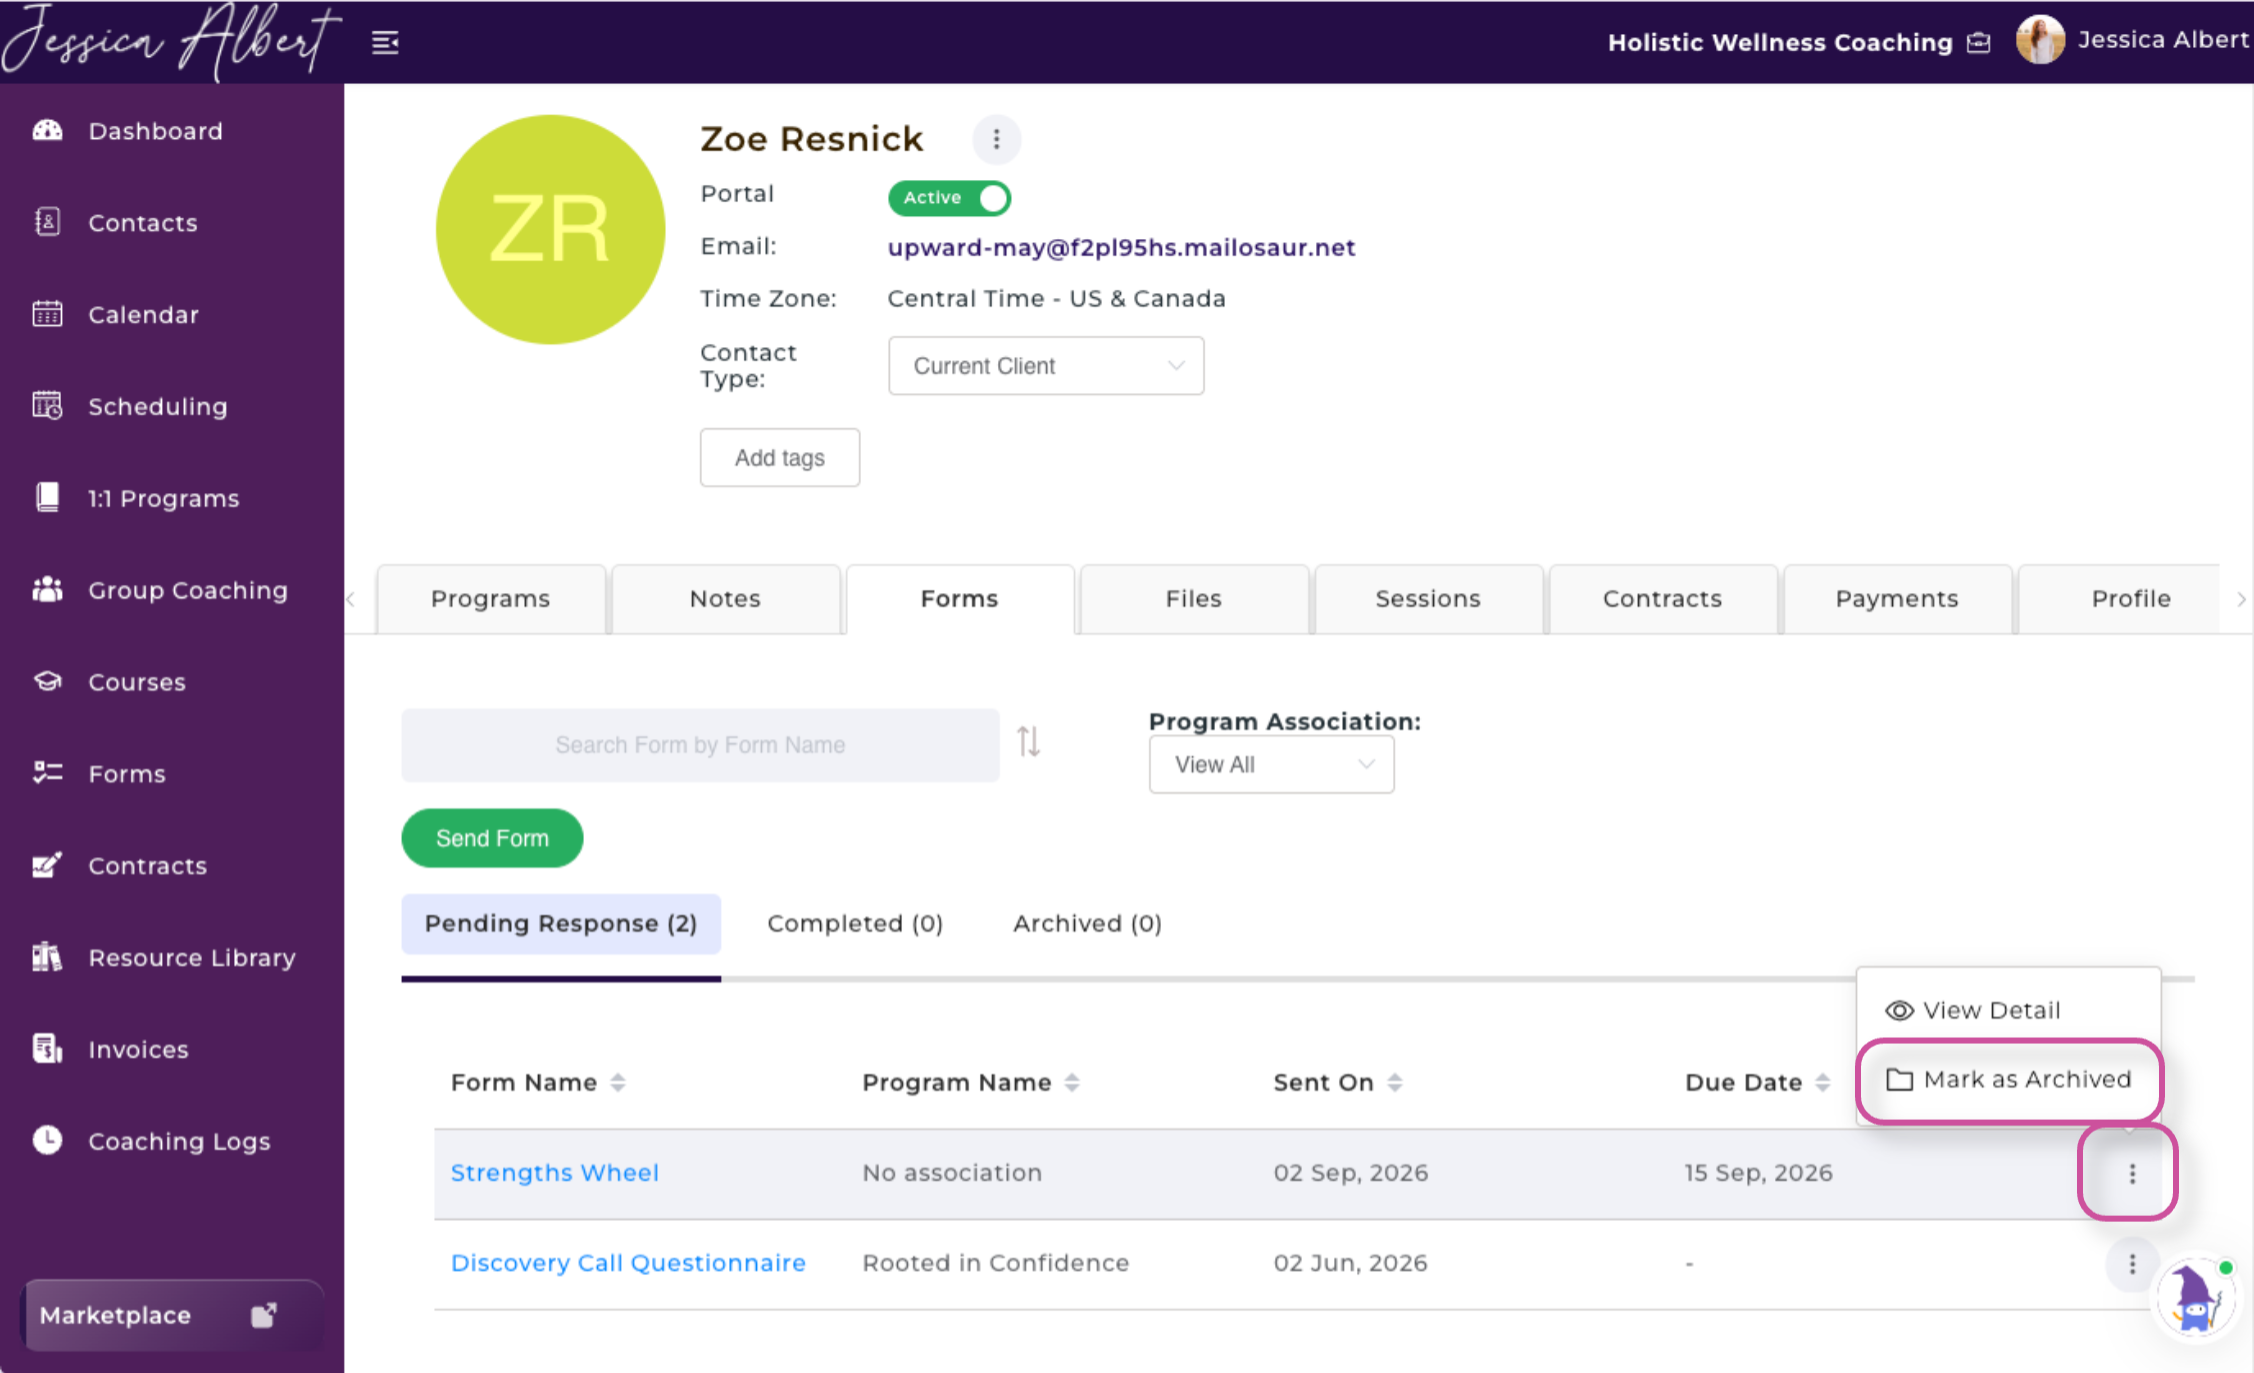
4. In the pop-up window, choose whether to notify your client:
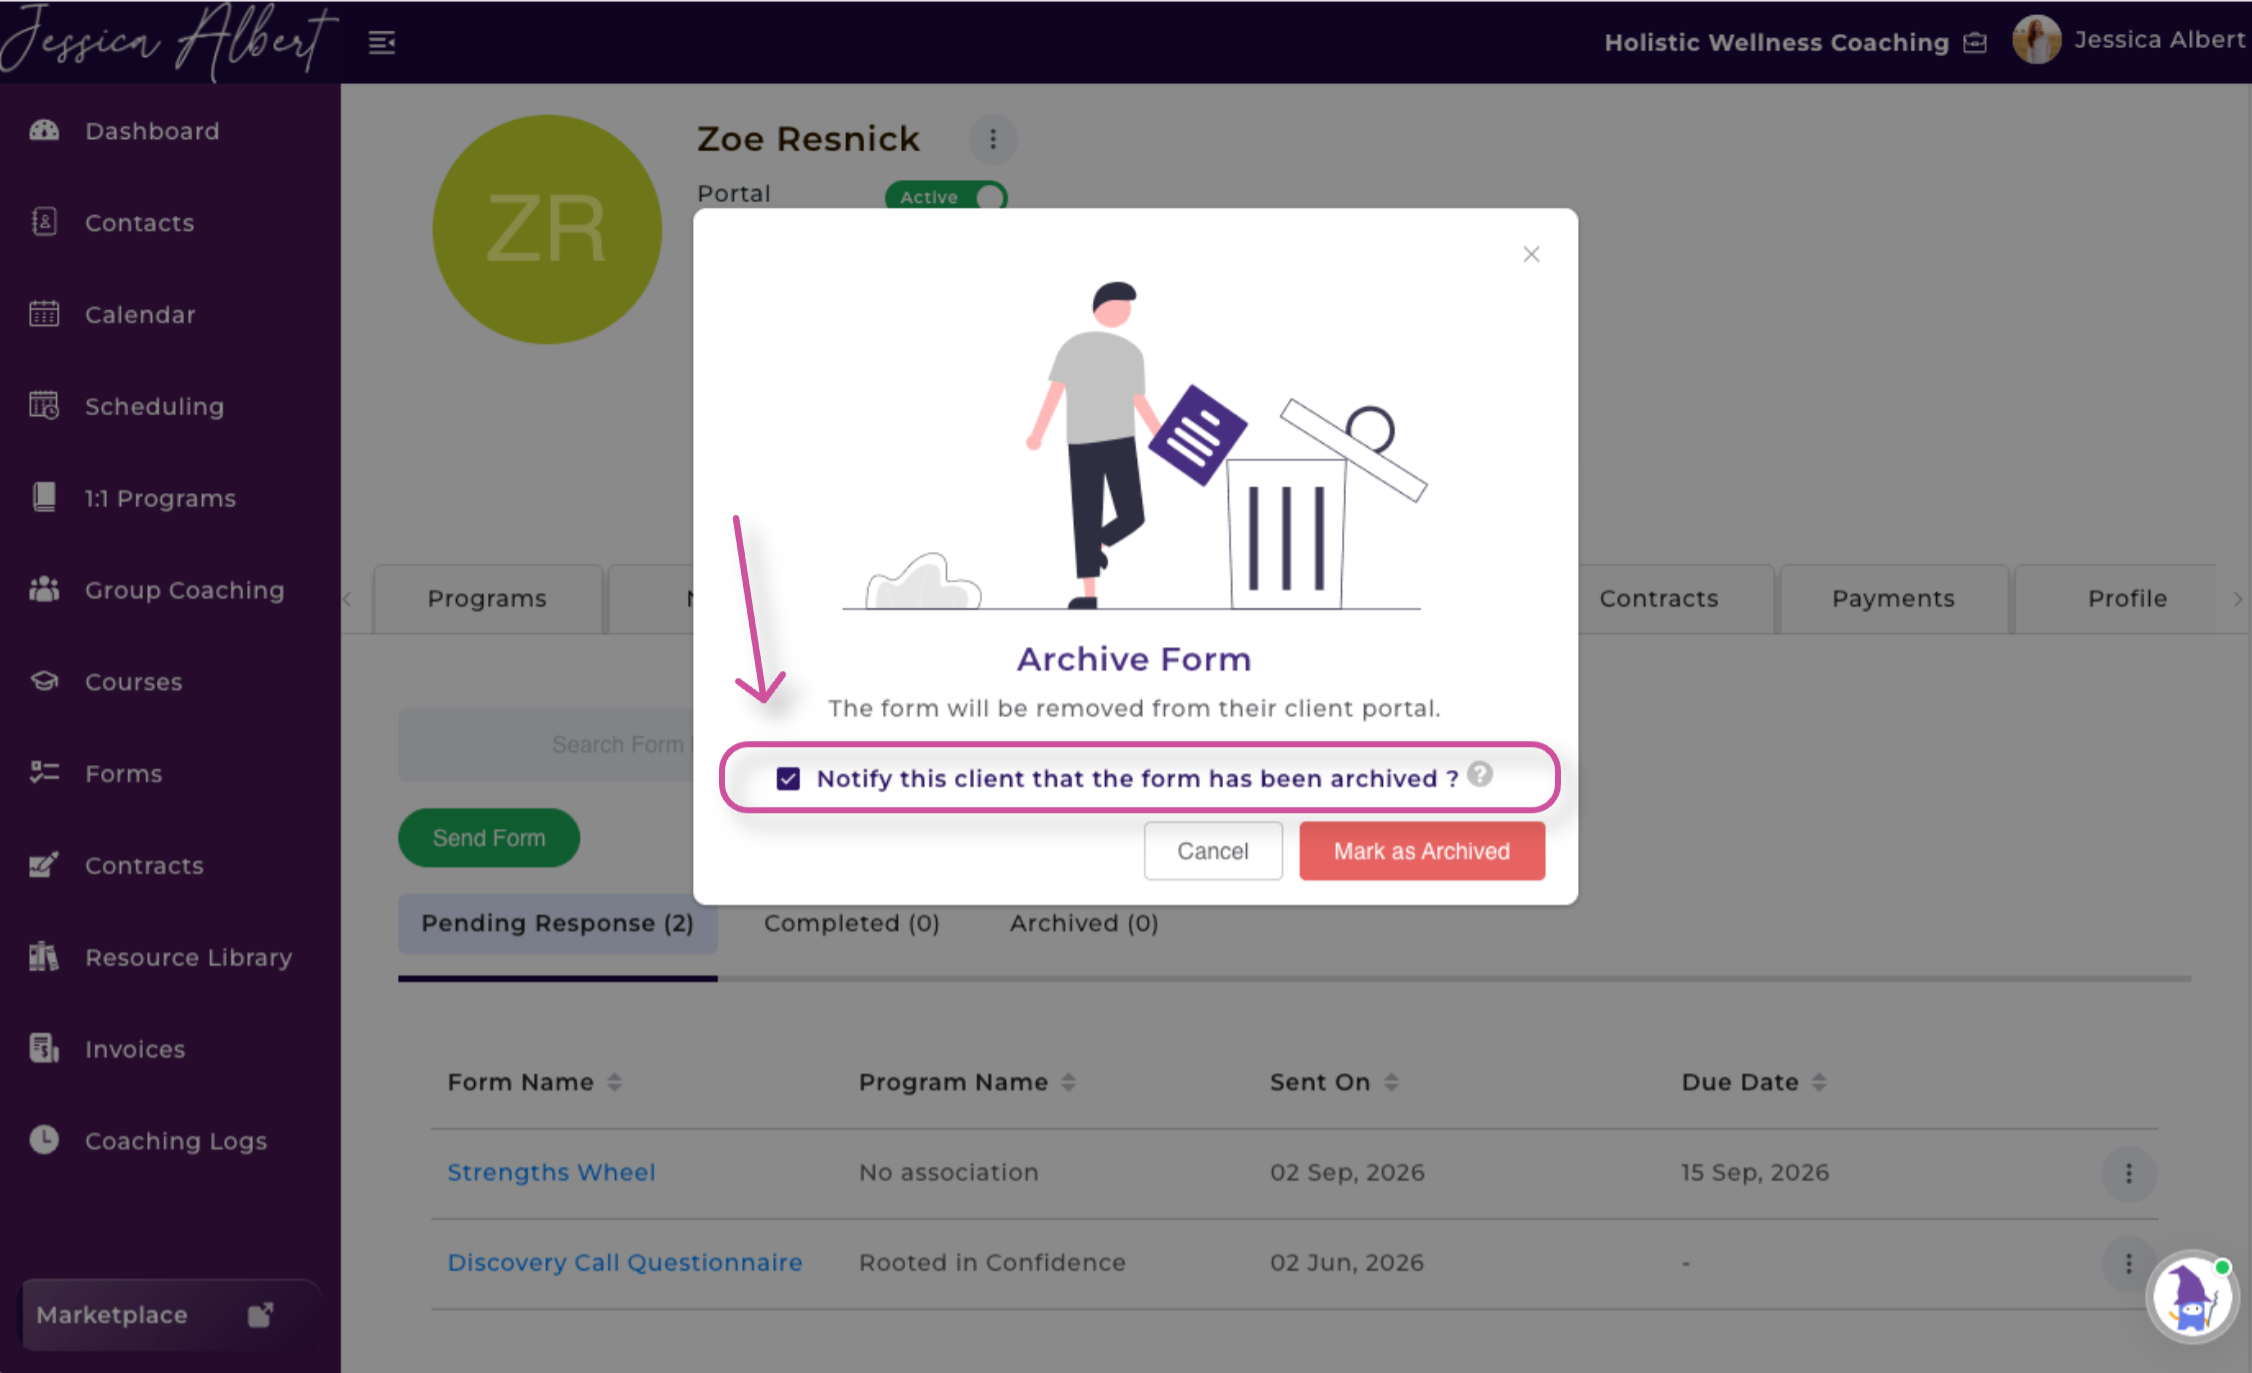
- Leave the notification checkbox selected to send the client an email about the form being archived.
- Clear the checkbox if you do not want to send an email.
5. Select the red Mark as Archived button to confirm.
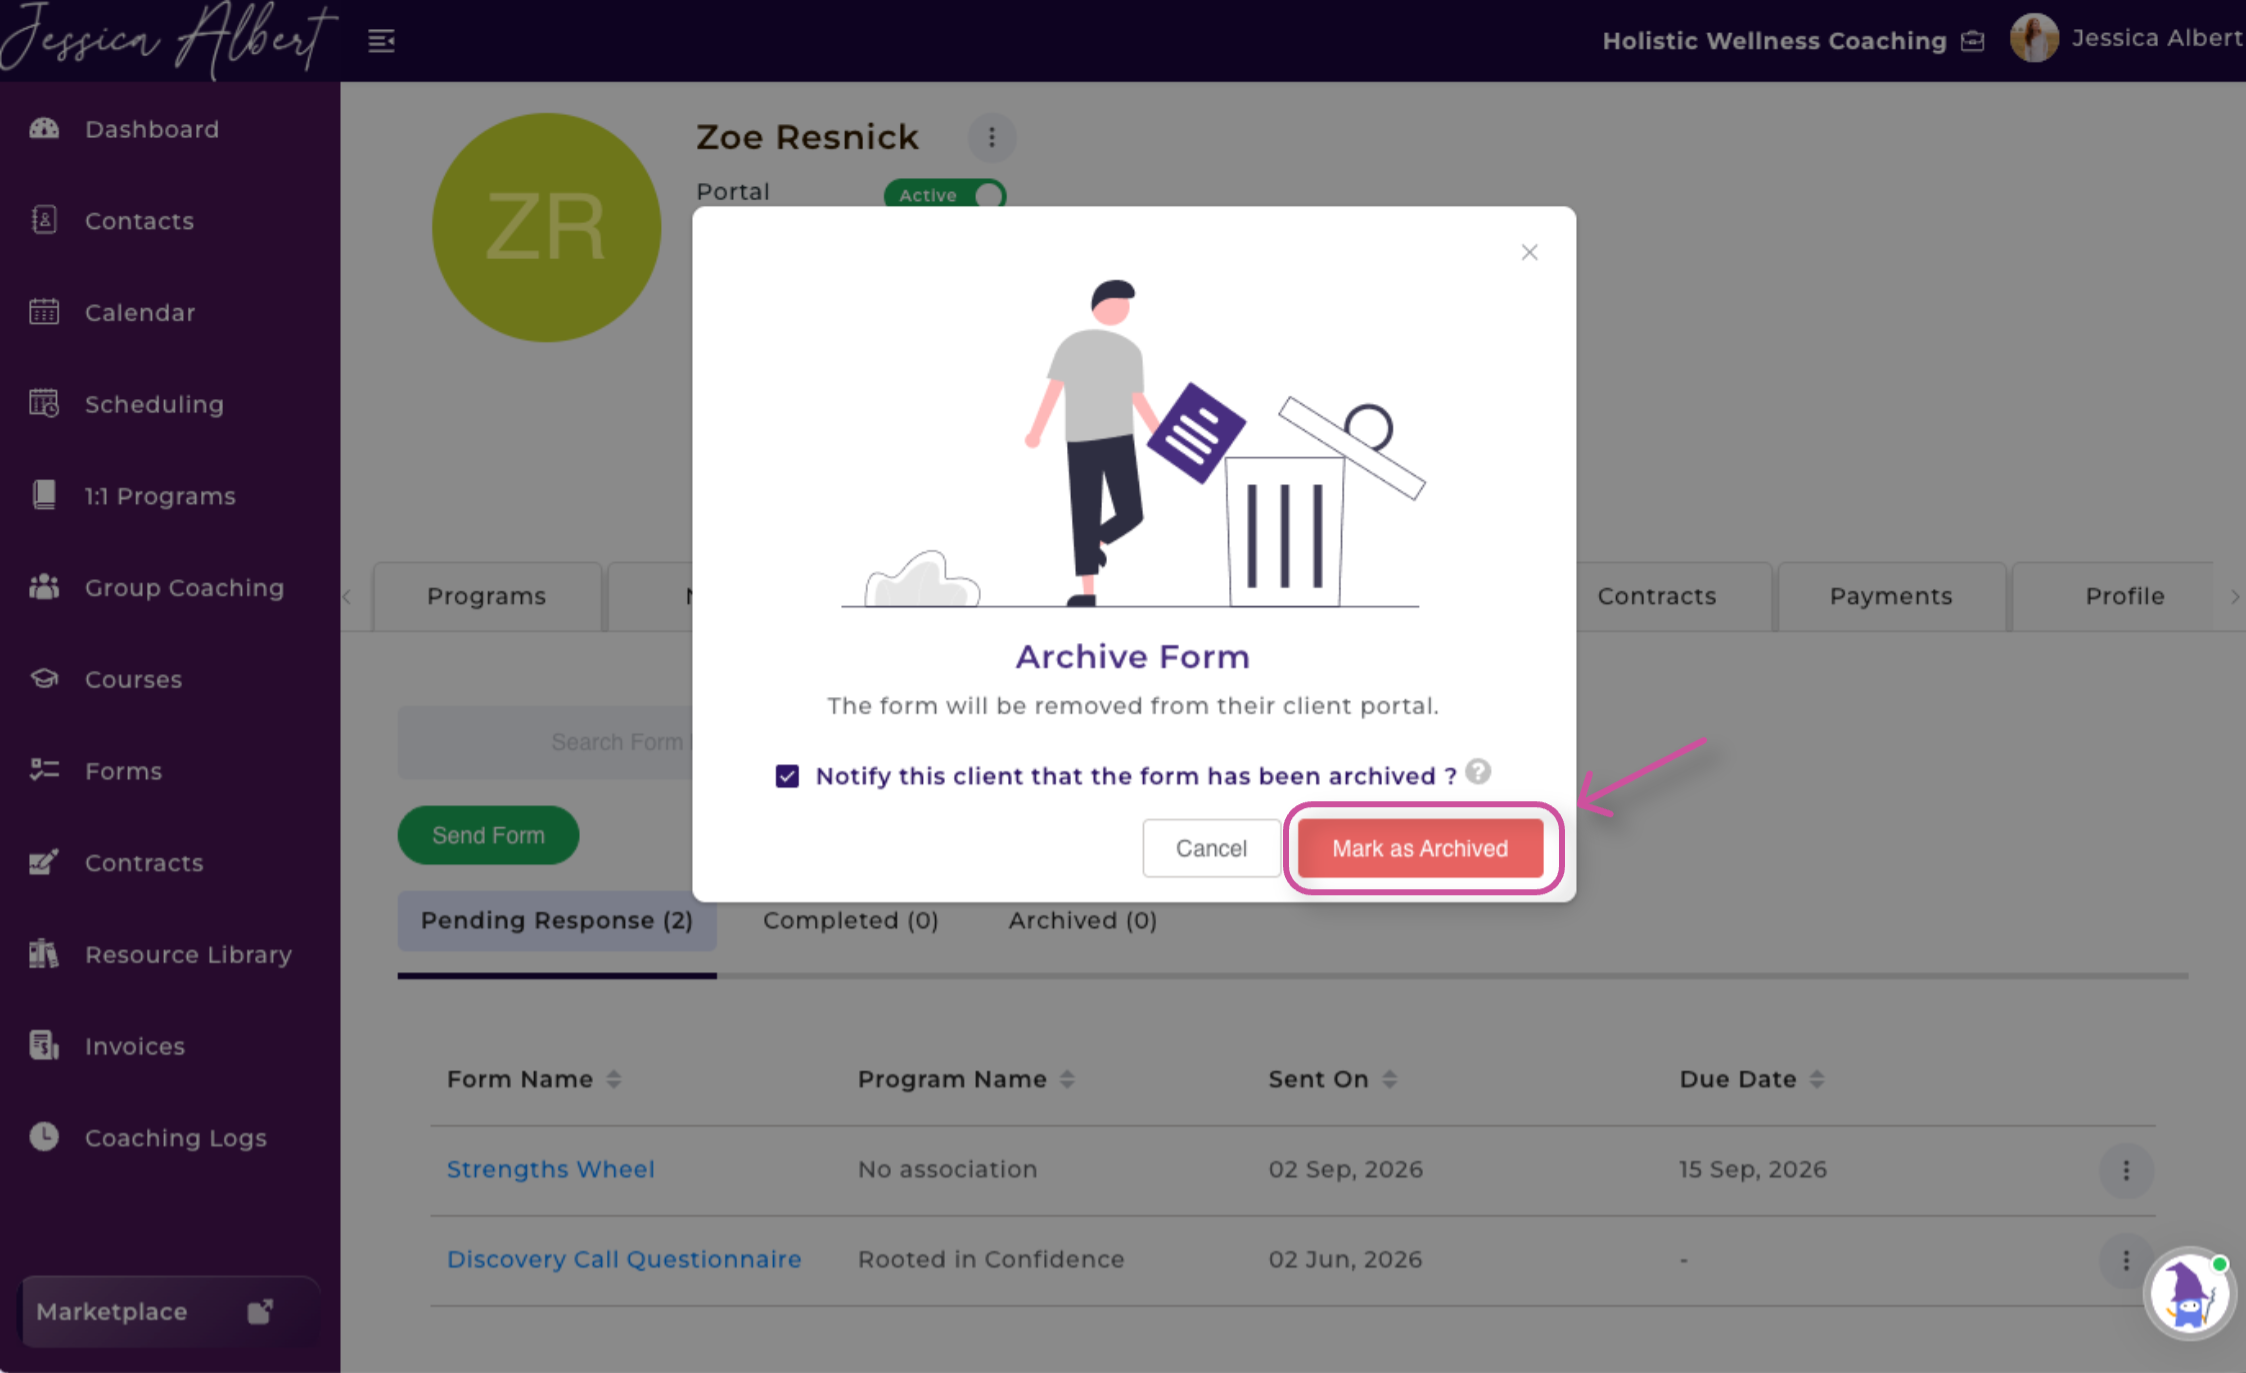
The form will move to the Archived tab.
Restore an Archived Form
If you need to make an archived form active again, you can restore it.
- Open the Archived tab.
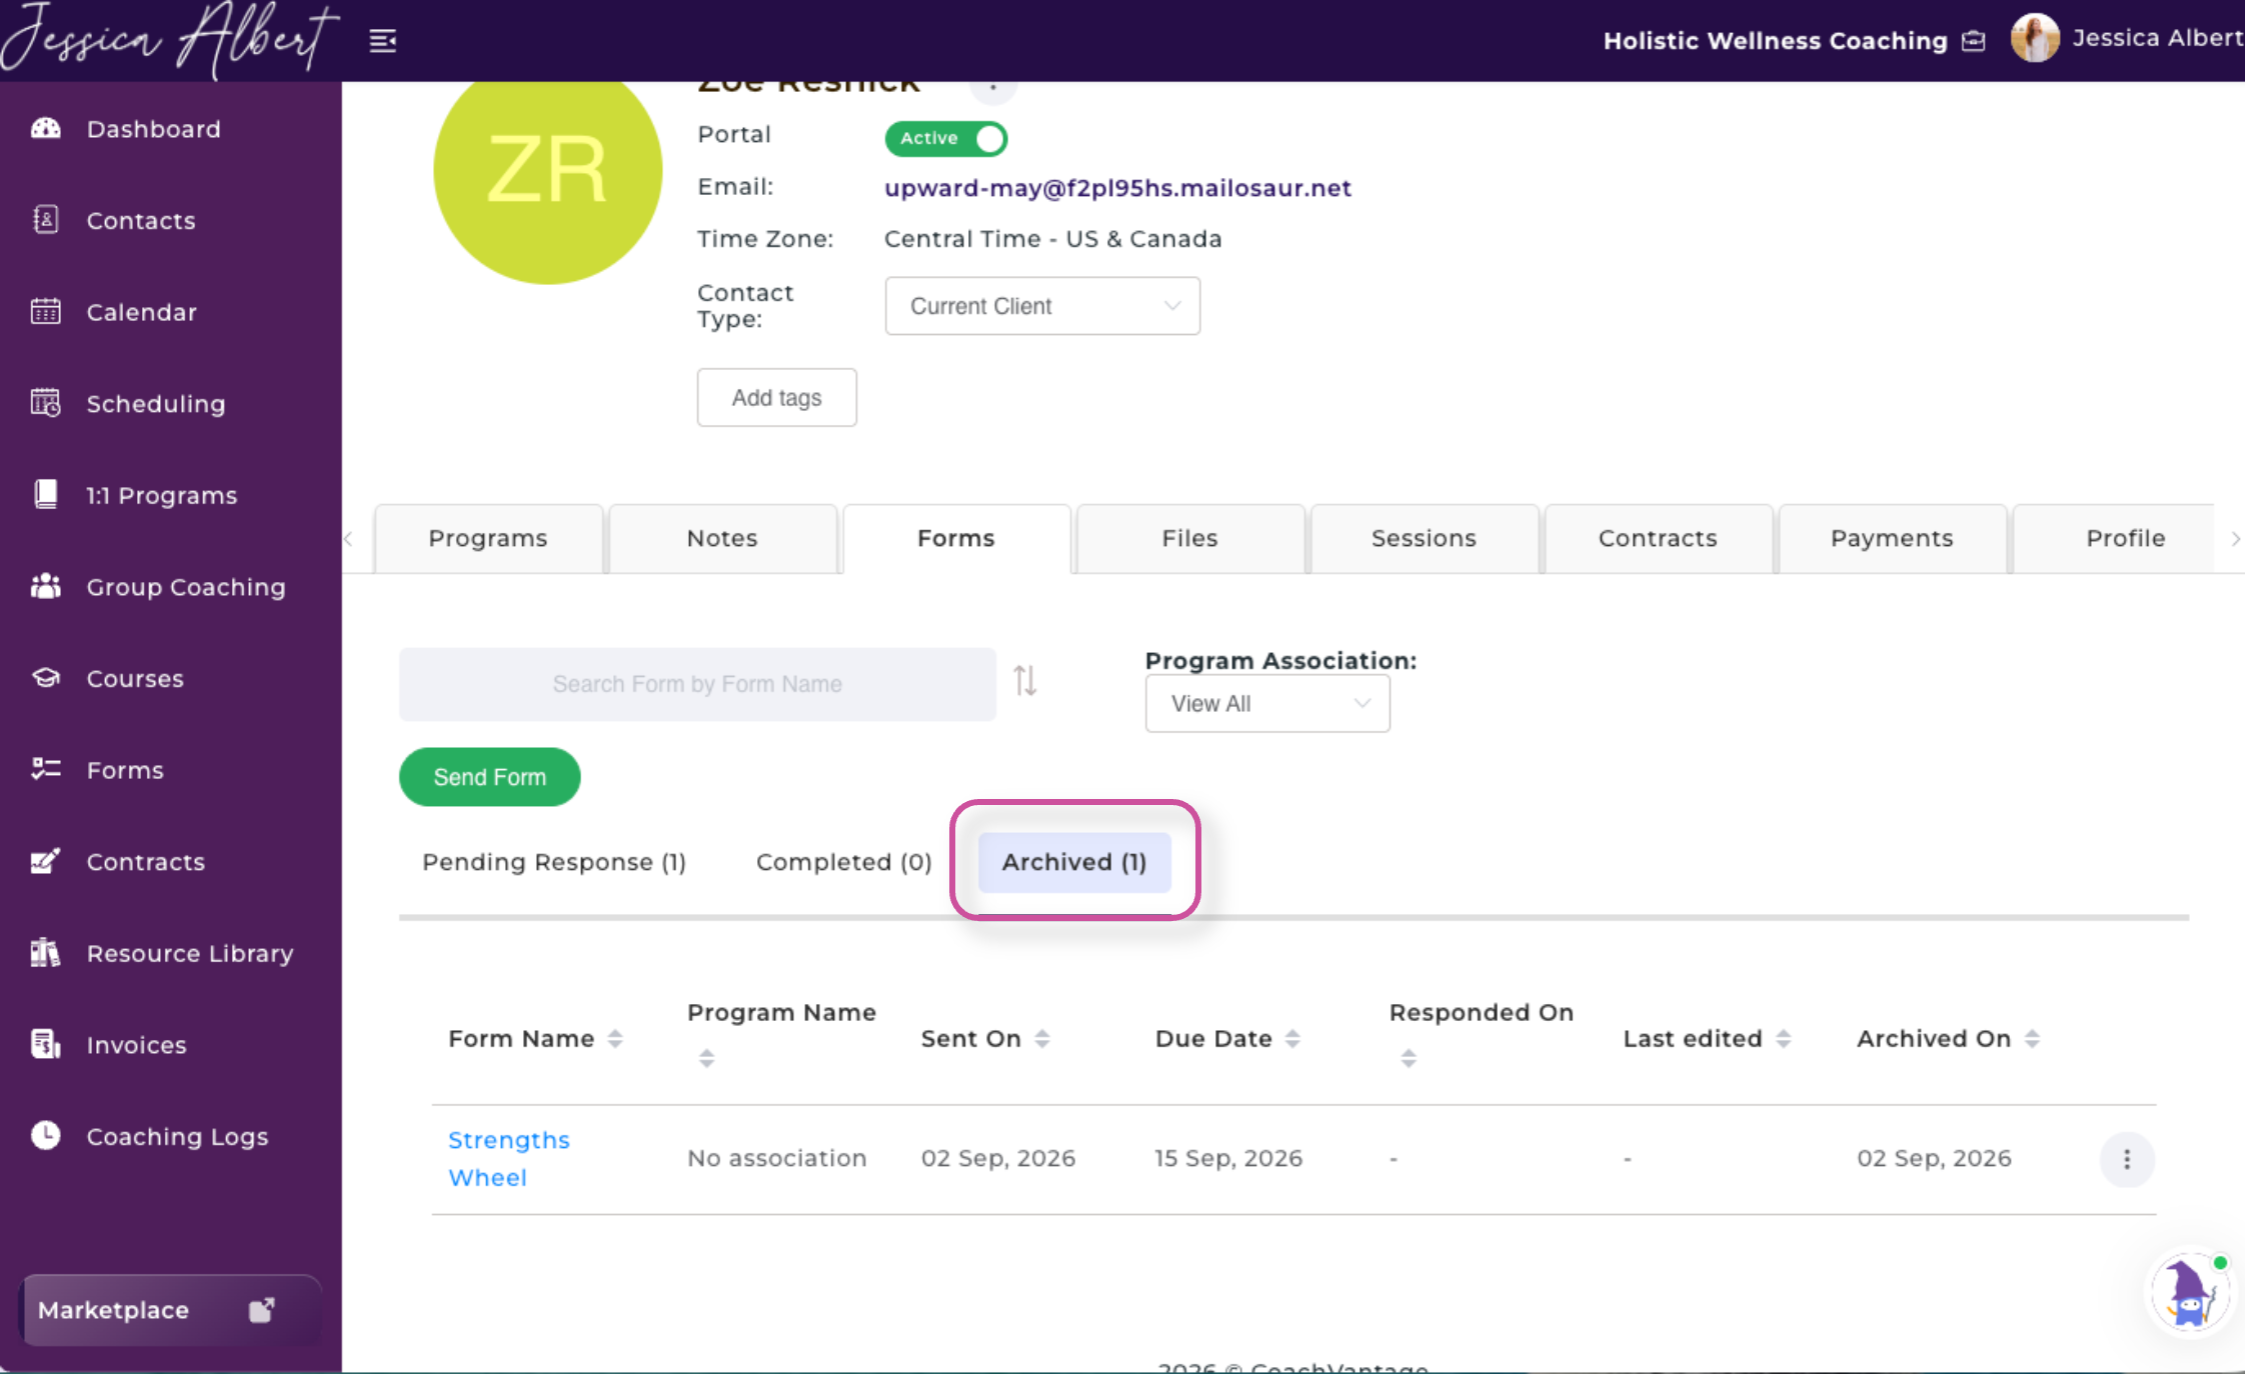
2. Find the form you want to restore.
3. Select the three-dot menu next to the form.
4. Select Restore.
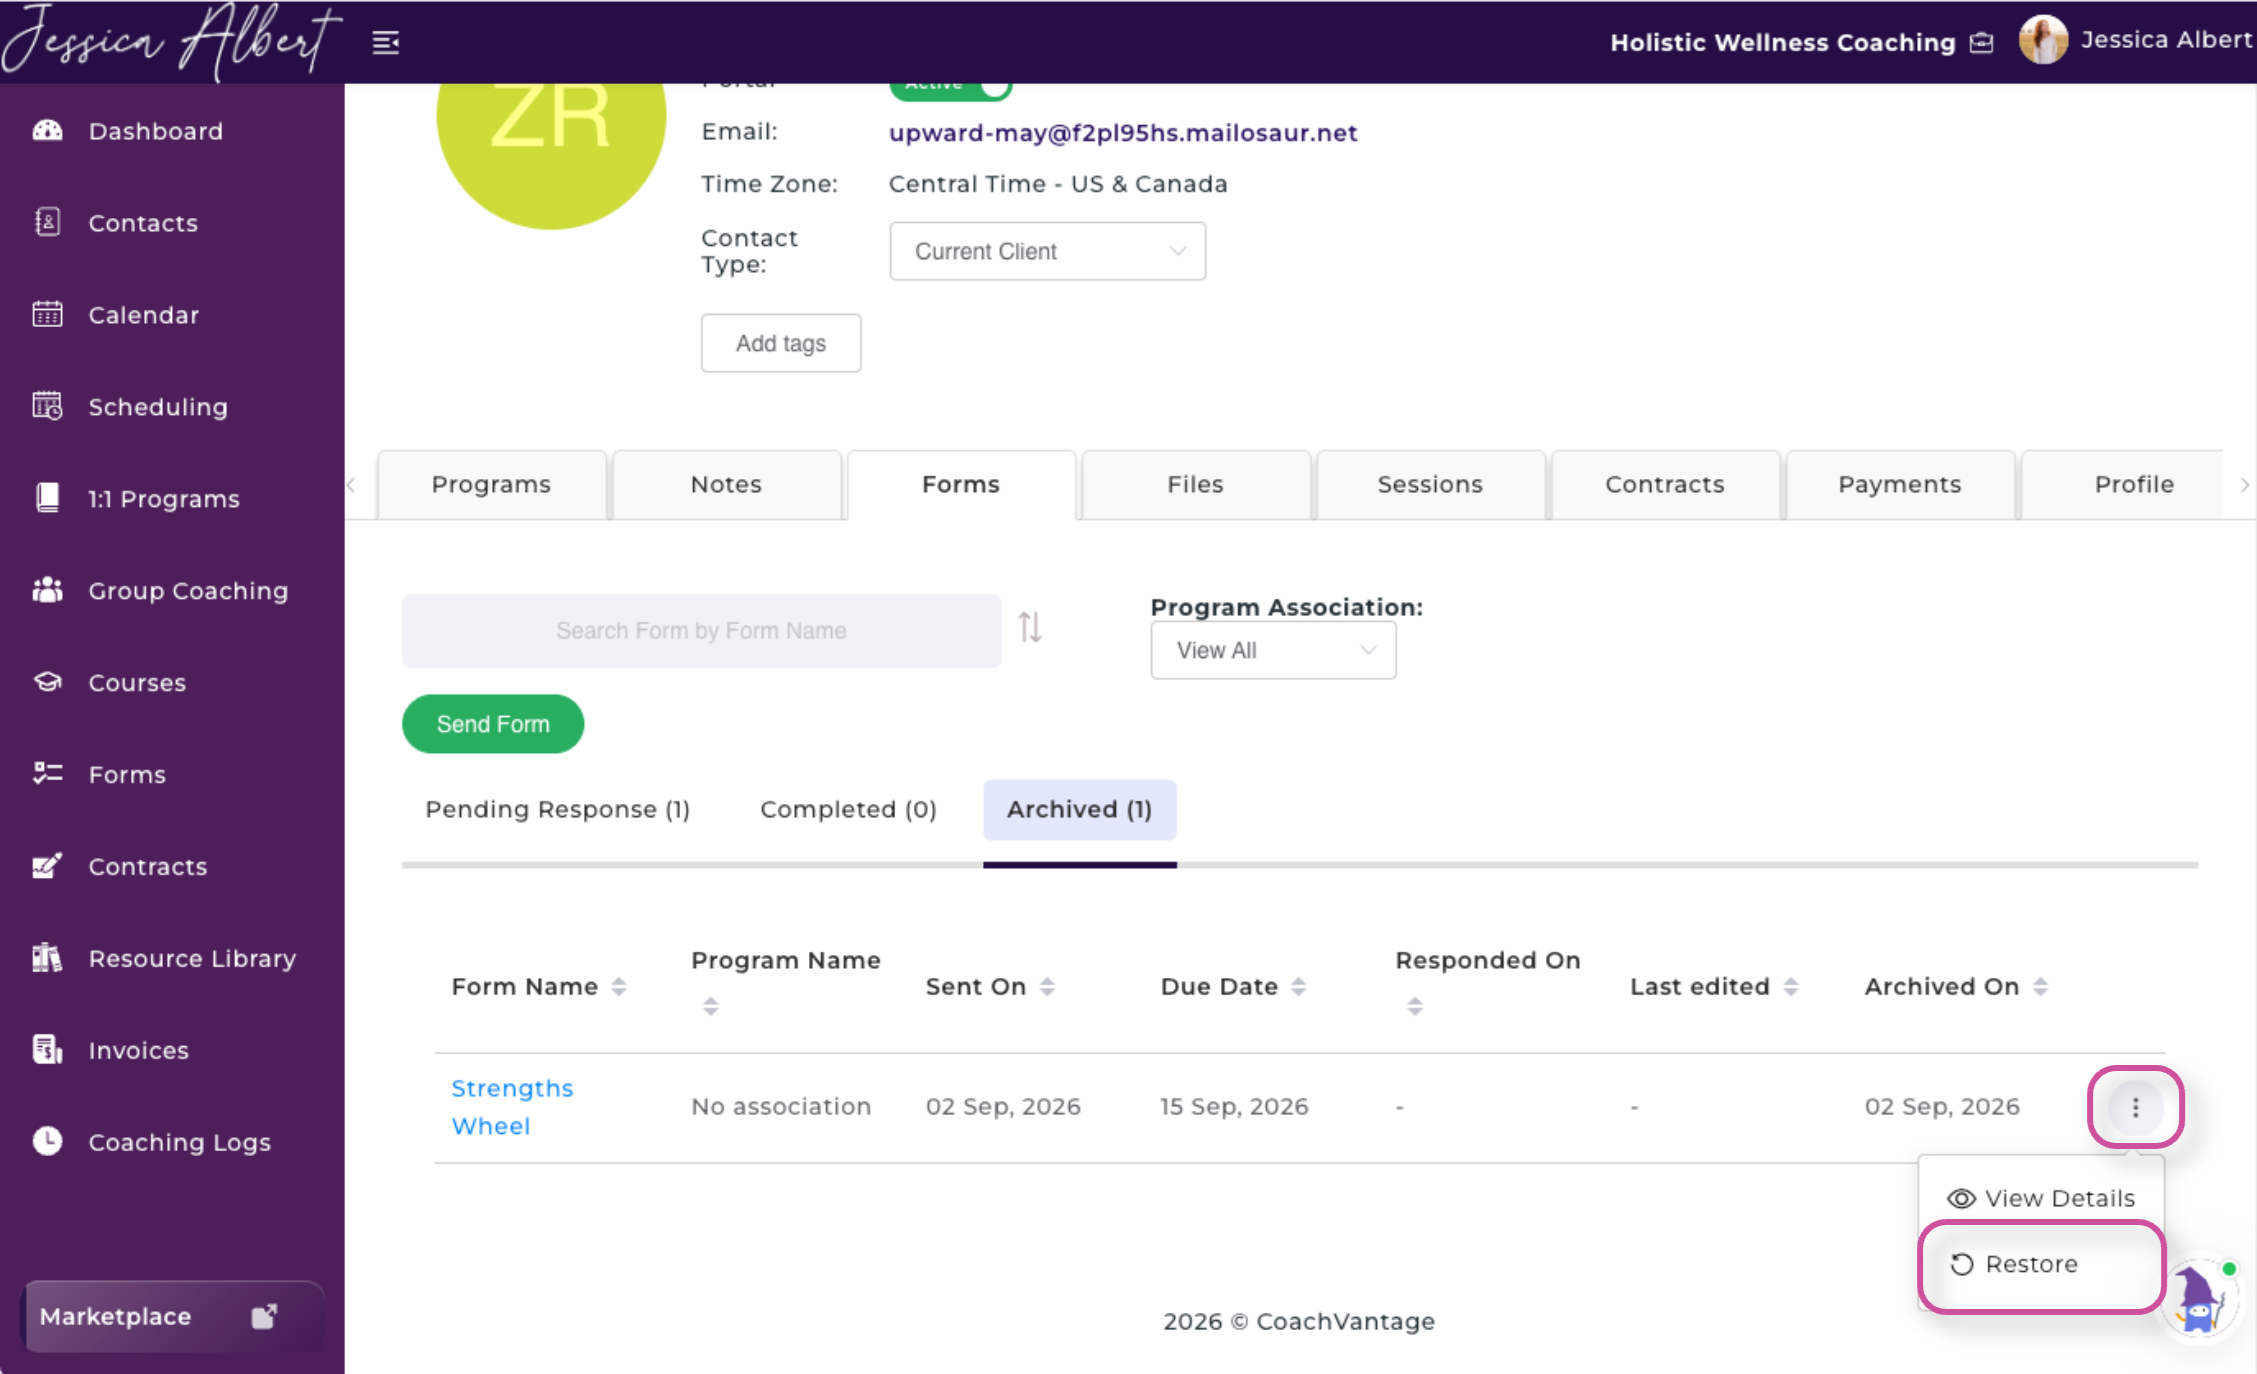
5. In the pop-up window, choose whether to notify your client:
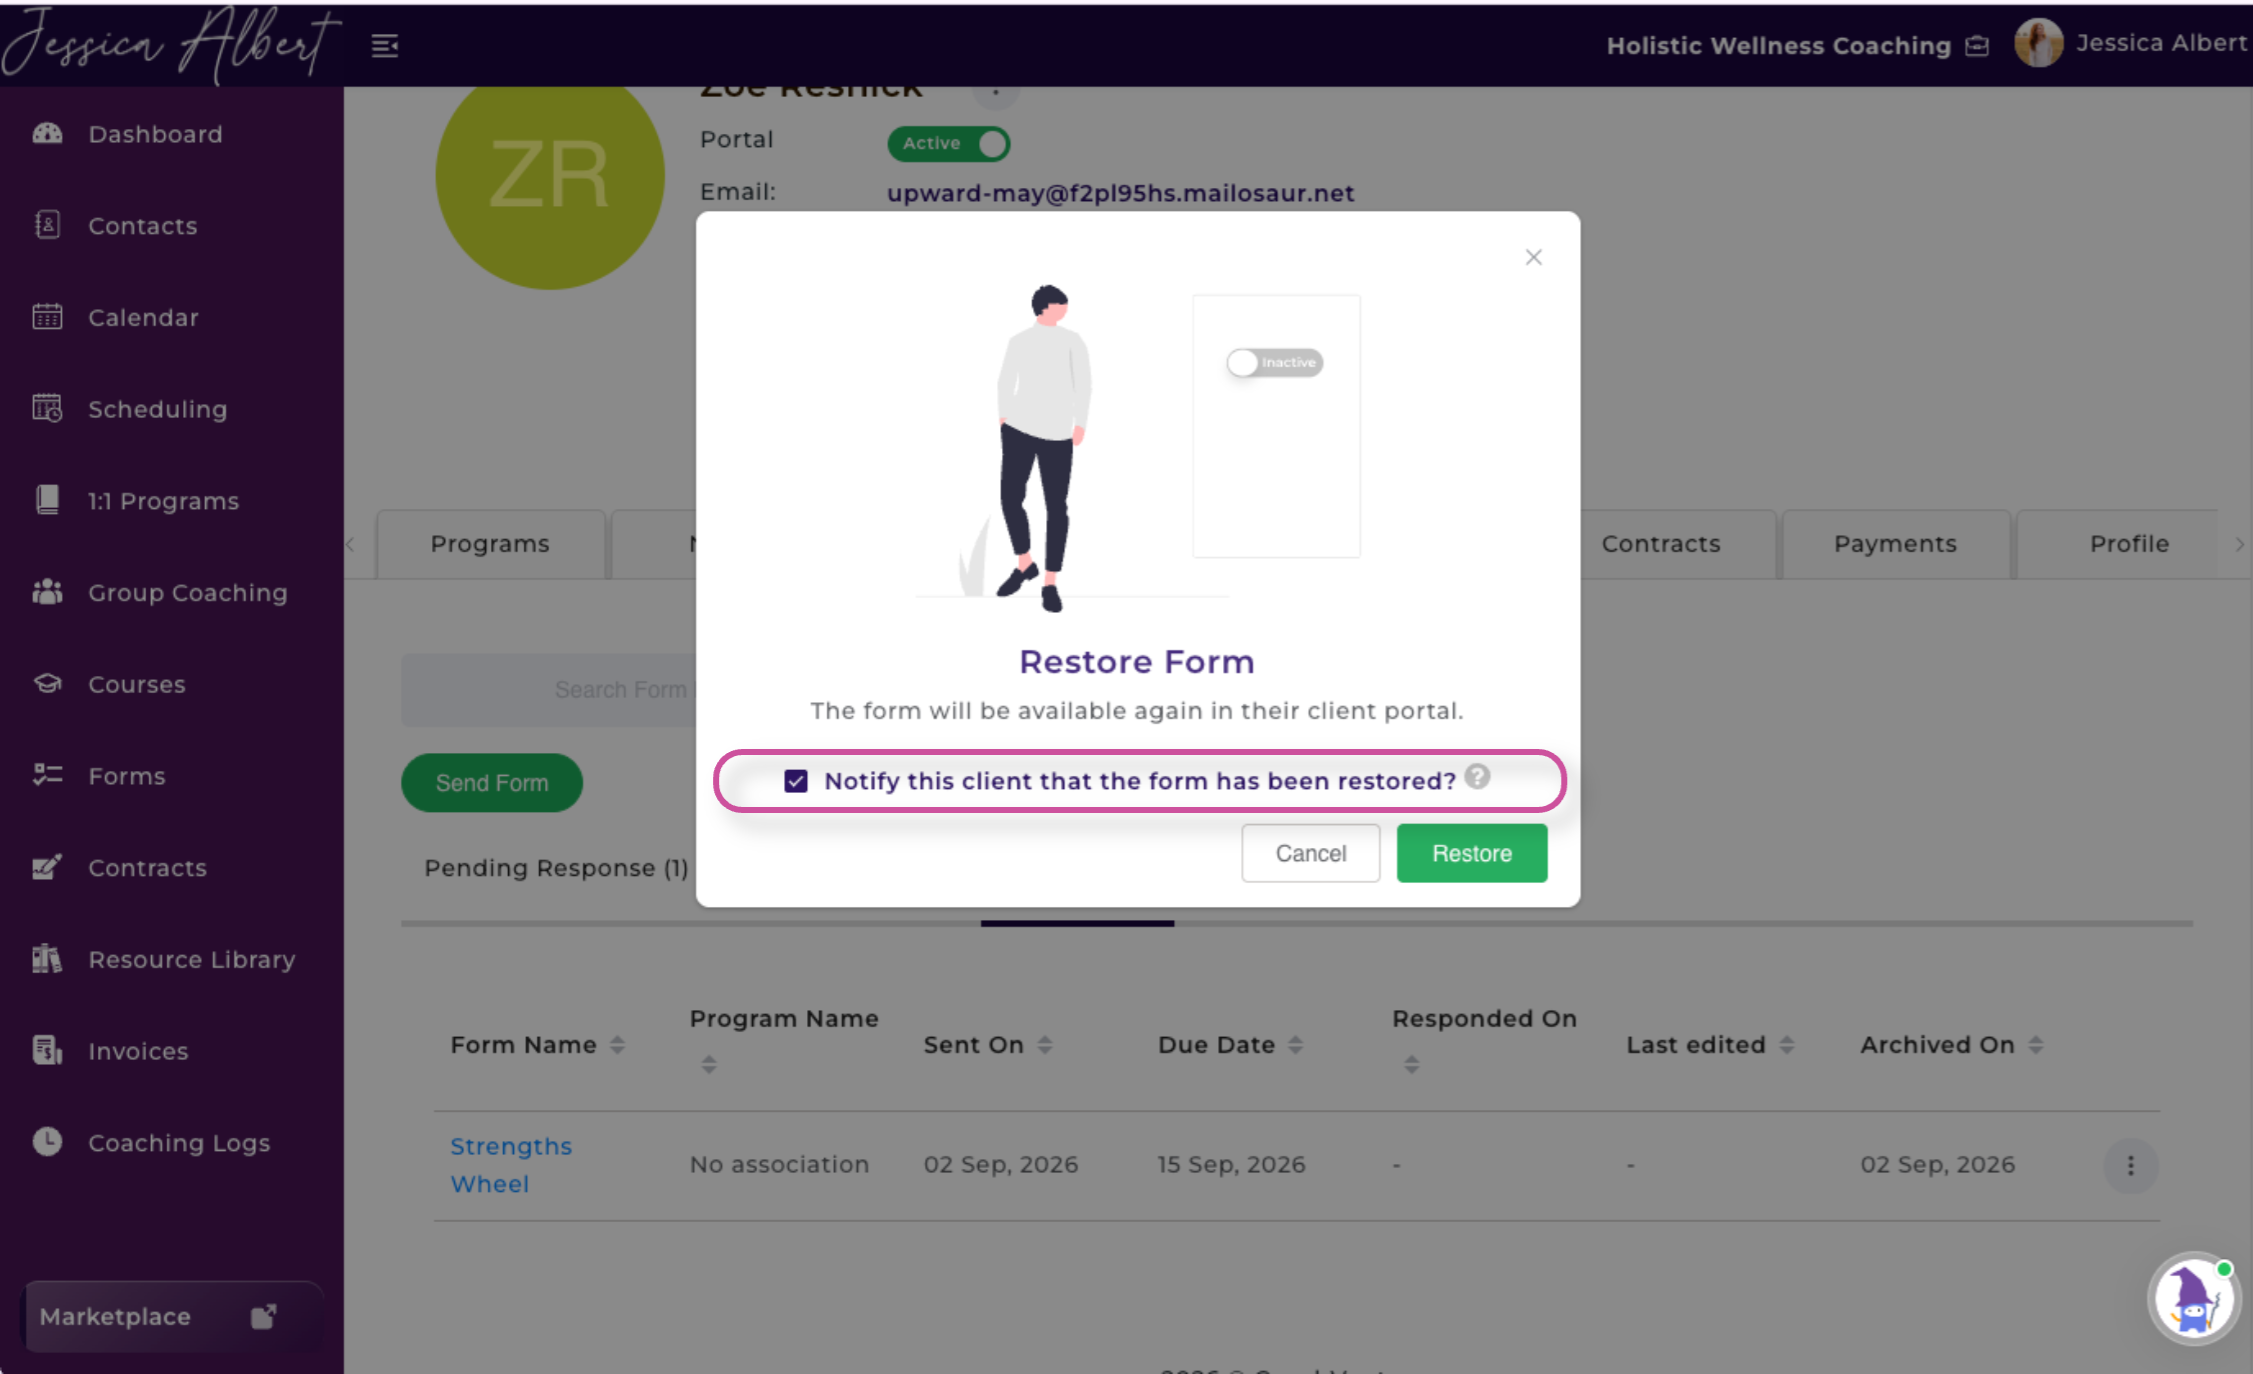
- Leave the notification checkbox selected to send the client an email about the form being restored.
- Clear the checkbox if you do not want to send an email.
6. Select Restore to confirm.
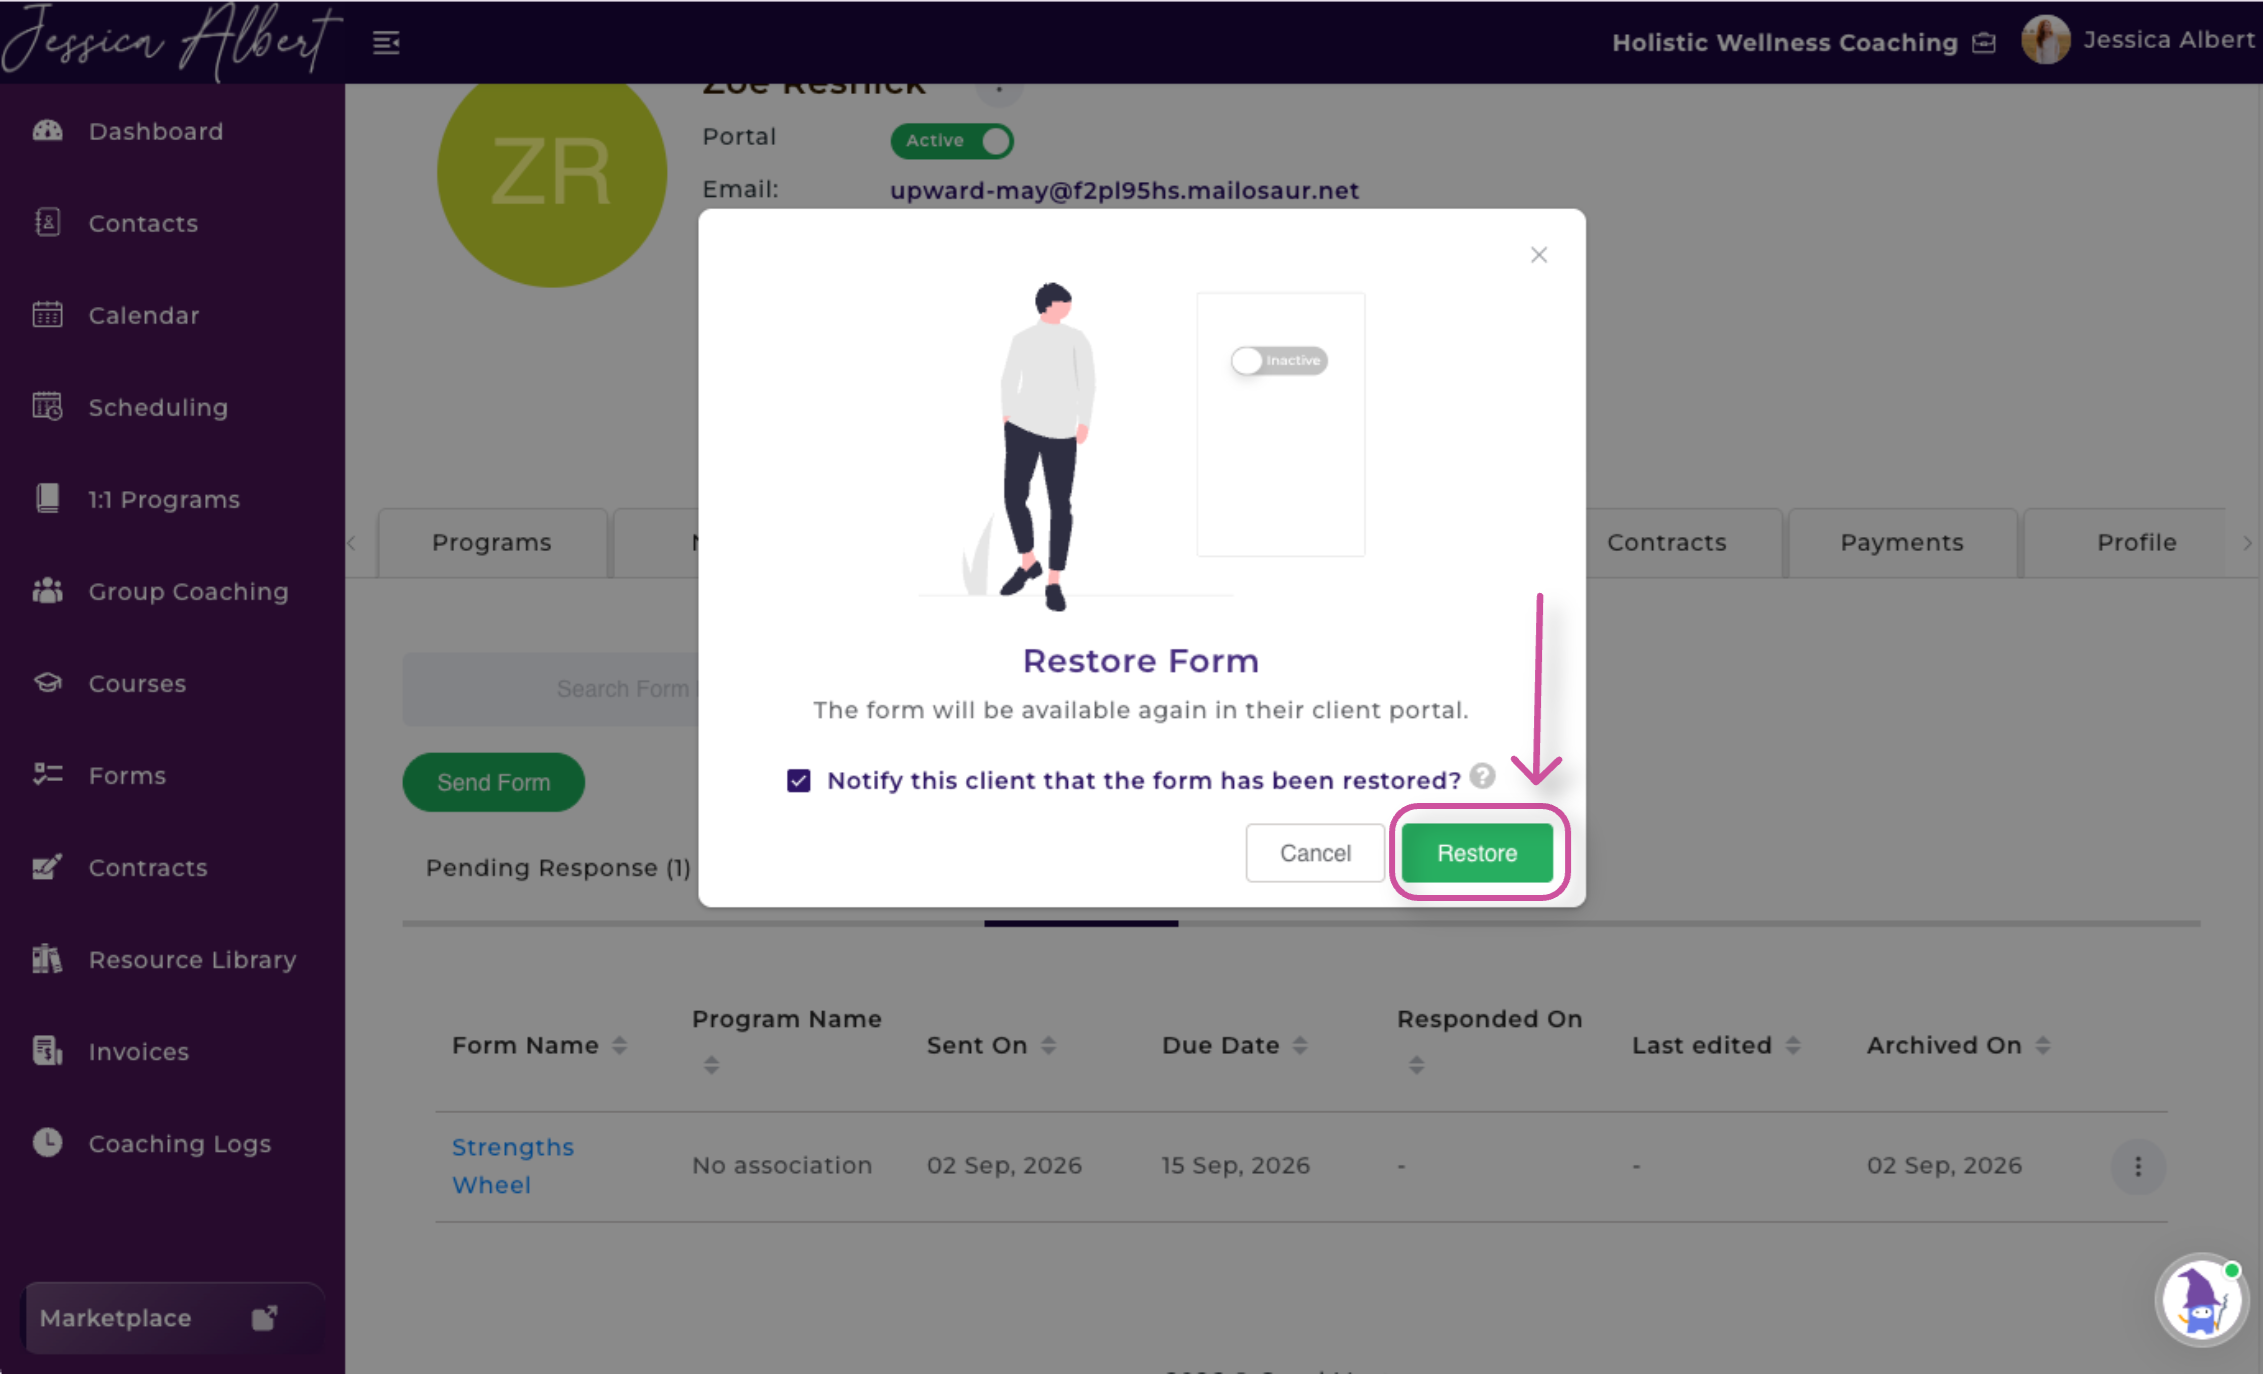
A form that was awaiting a response before it was archived will return to the Pending Response tab.