
Individual Contact Record Page
How to Access an Individual Contact's Record 🧑🦳
Start by clicking the Contacts tab on the left menu bar. This will bring up a list of all of your saved contacts.
- Click on the Name of the contact you'd like to access. This will open the Individual Contact's page (see section below).

General Overview of the Individual Contact Page
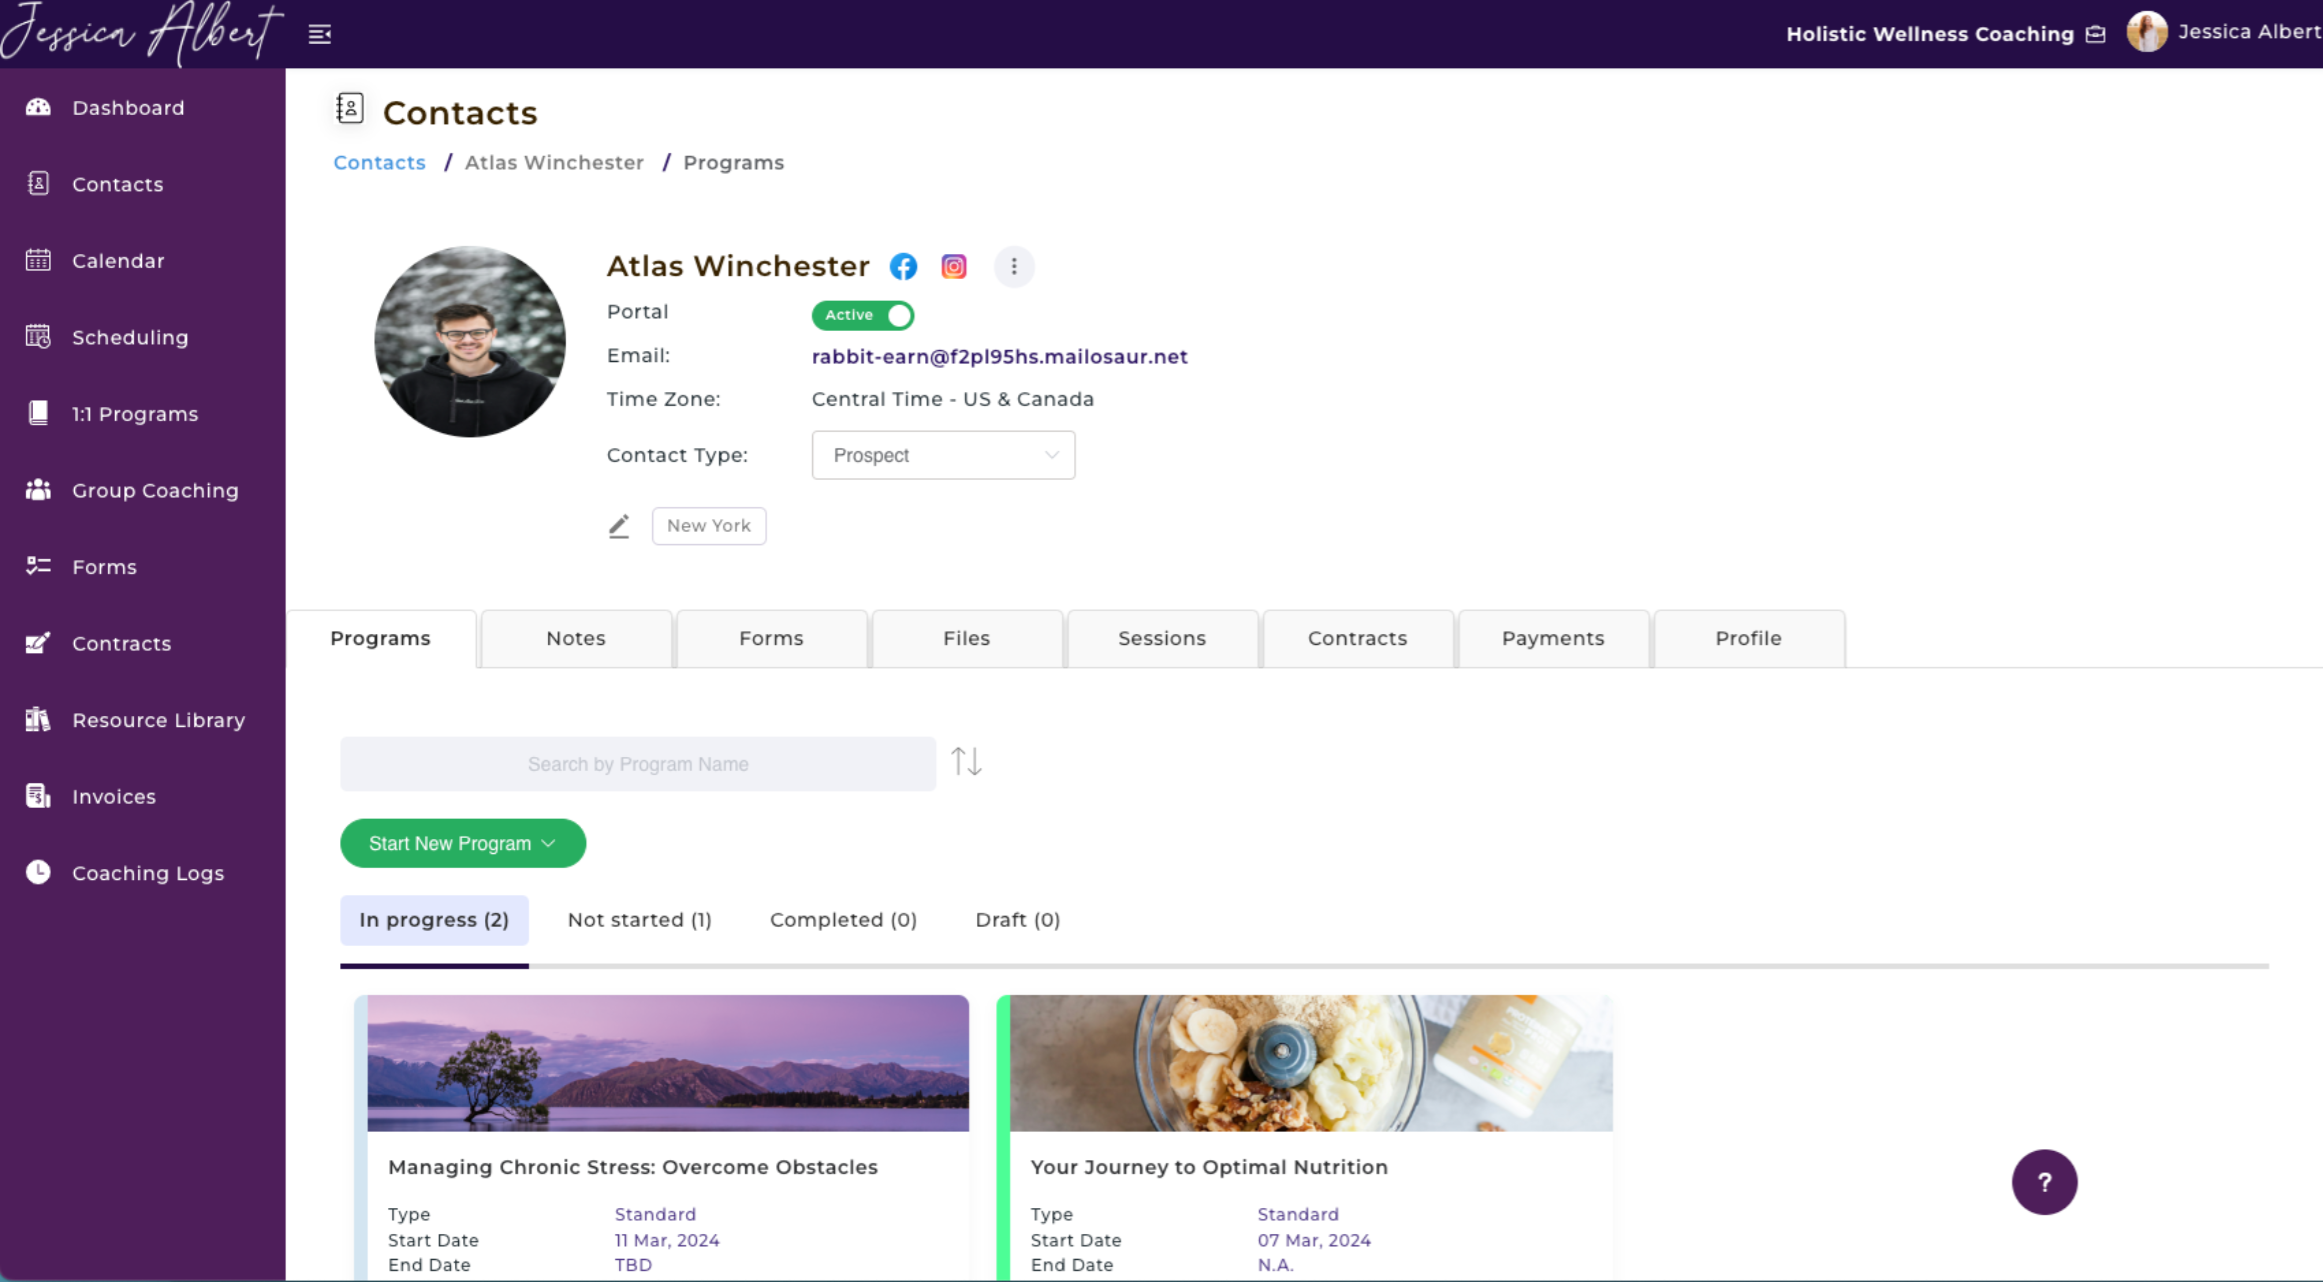
- Client Portal
- Email Address
- Time Zone
- Contact Type
- Add Tags
- Quick Access Icon
- 3-dot Button Menu
- Programs
- Notes
- Forms
- Files
- Sessions
- Contracts
- Invoices
- Profile
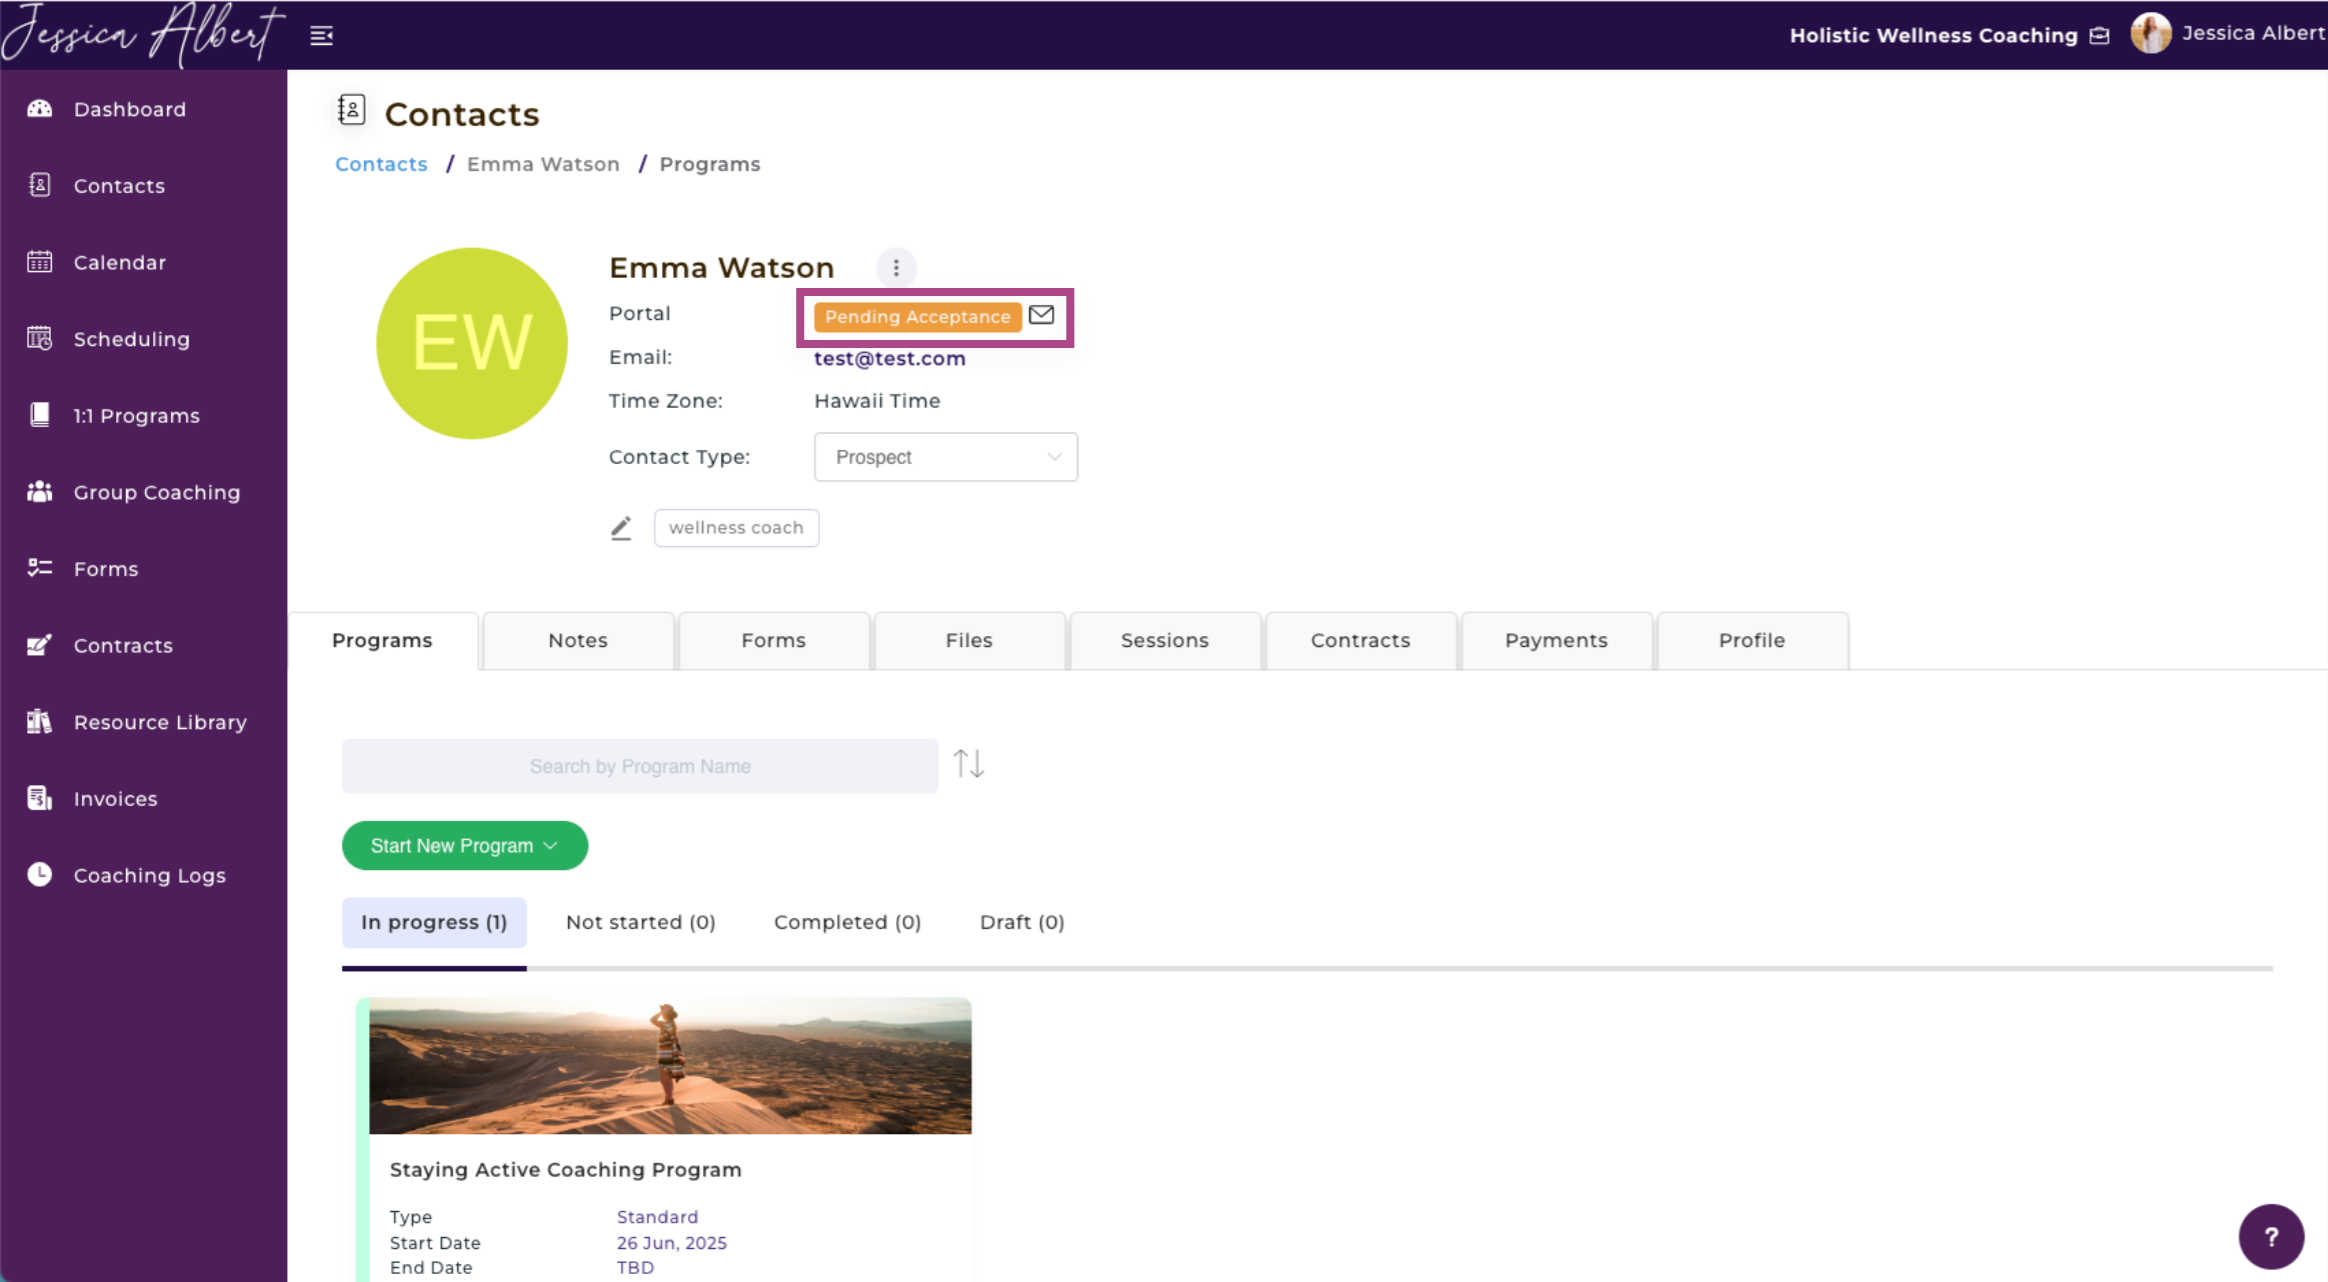
1. Client Portal
The Portal switch displays the status of a contact's Client Portal:
Send Portal Invite button is displayed if a contact has not yet been invited to create a Client Portal.
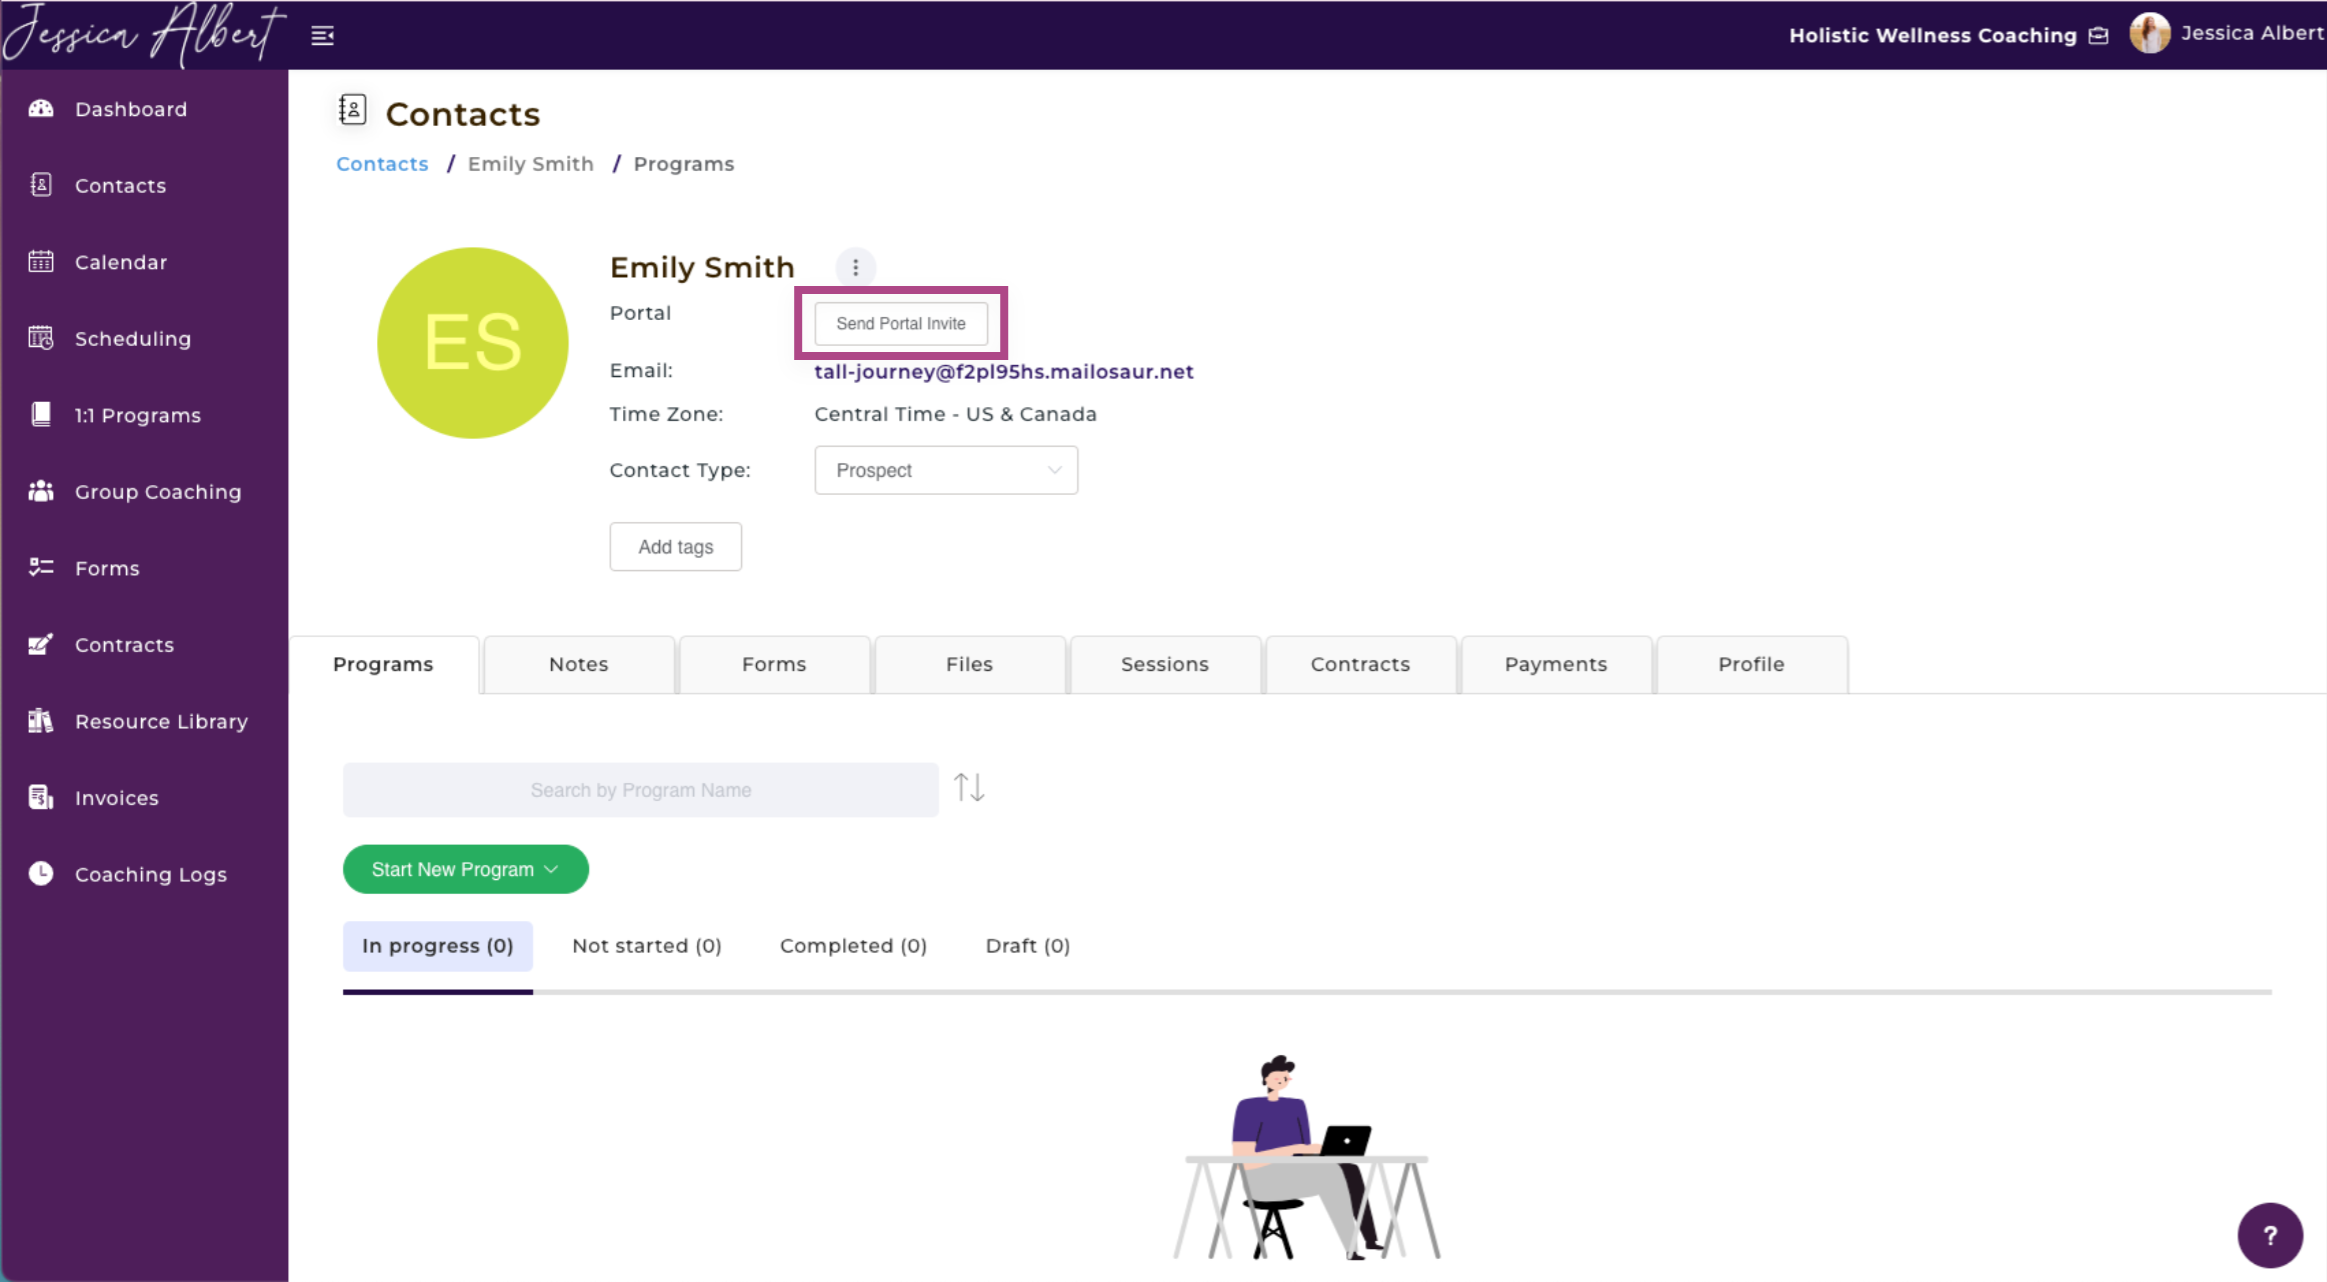
Refer to this article on Inviting Contacts To Create A Client Portal Account.
Pending Acceptance indicator is displayed if a contact has been invited to create a Client Portal but has yet to create a client portal account. An Envelope icon is displayed next to the status indicator. You can click this icon to resend the email to the contact to create their Client Portal account.
The toggle switch shows Active if a contact has created a client portal account and it is currently active (i.e. enabled).
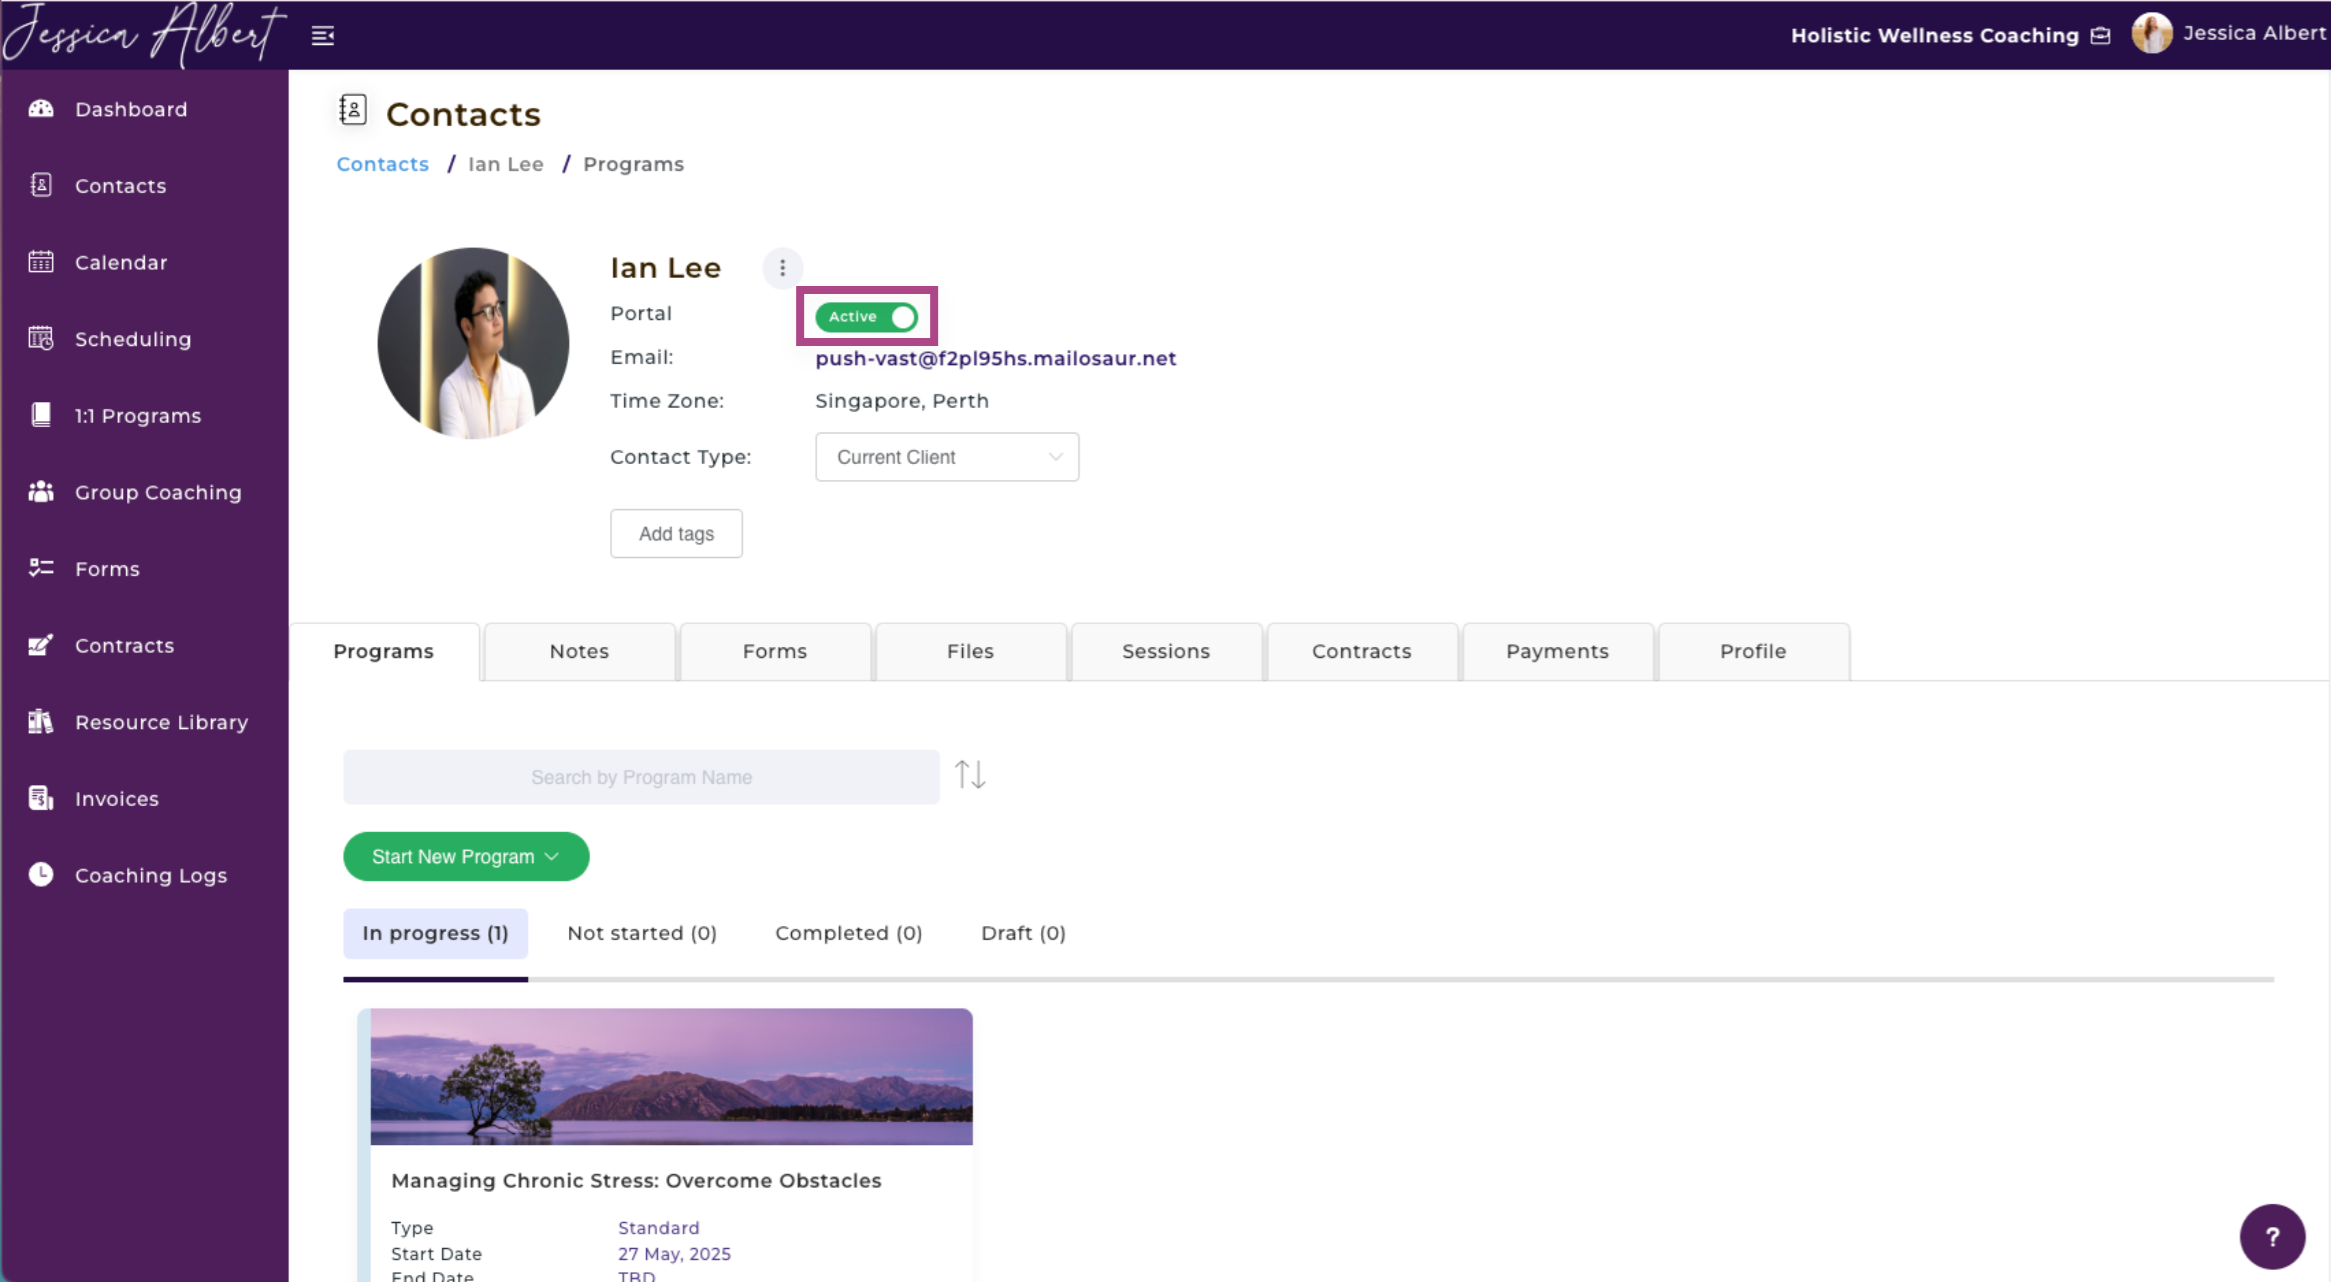
The toggle switch shows Inactive if a contact has created a client portal account but it is currently inactive (i.e. disabled). A contact will not be able to log in to their Client Portal account when it is in an Inactive status.
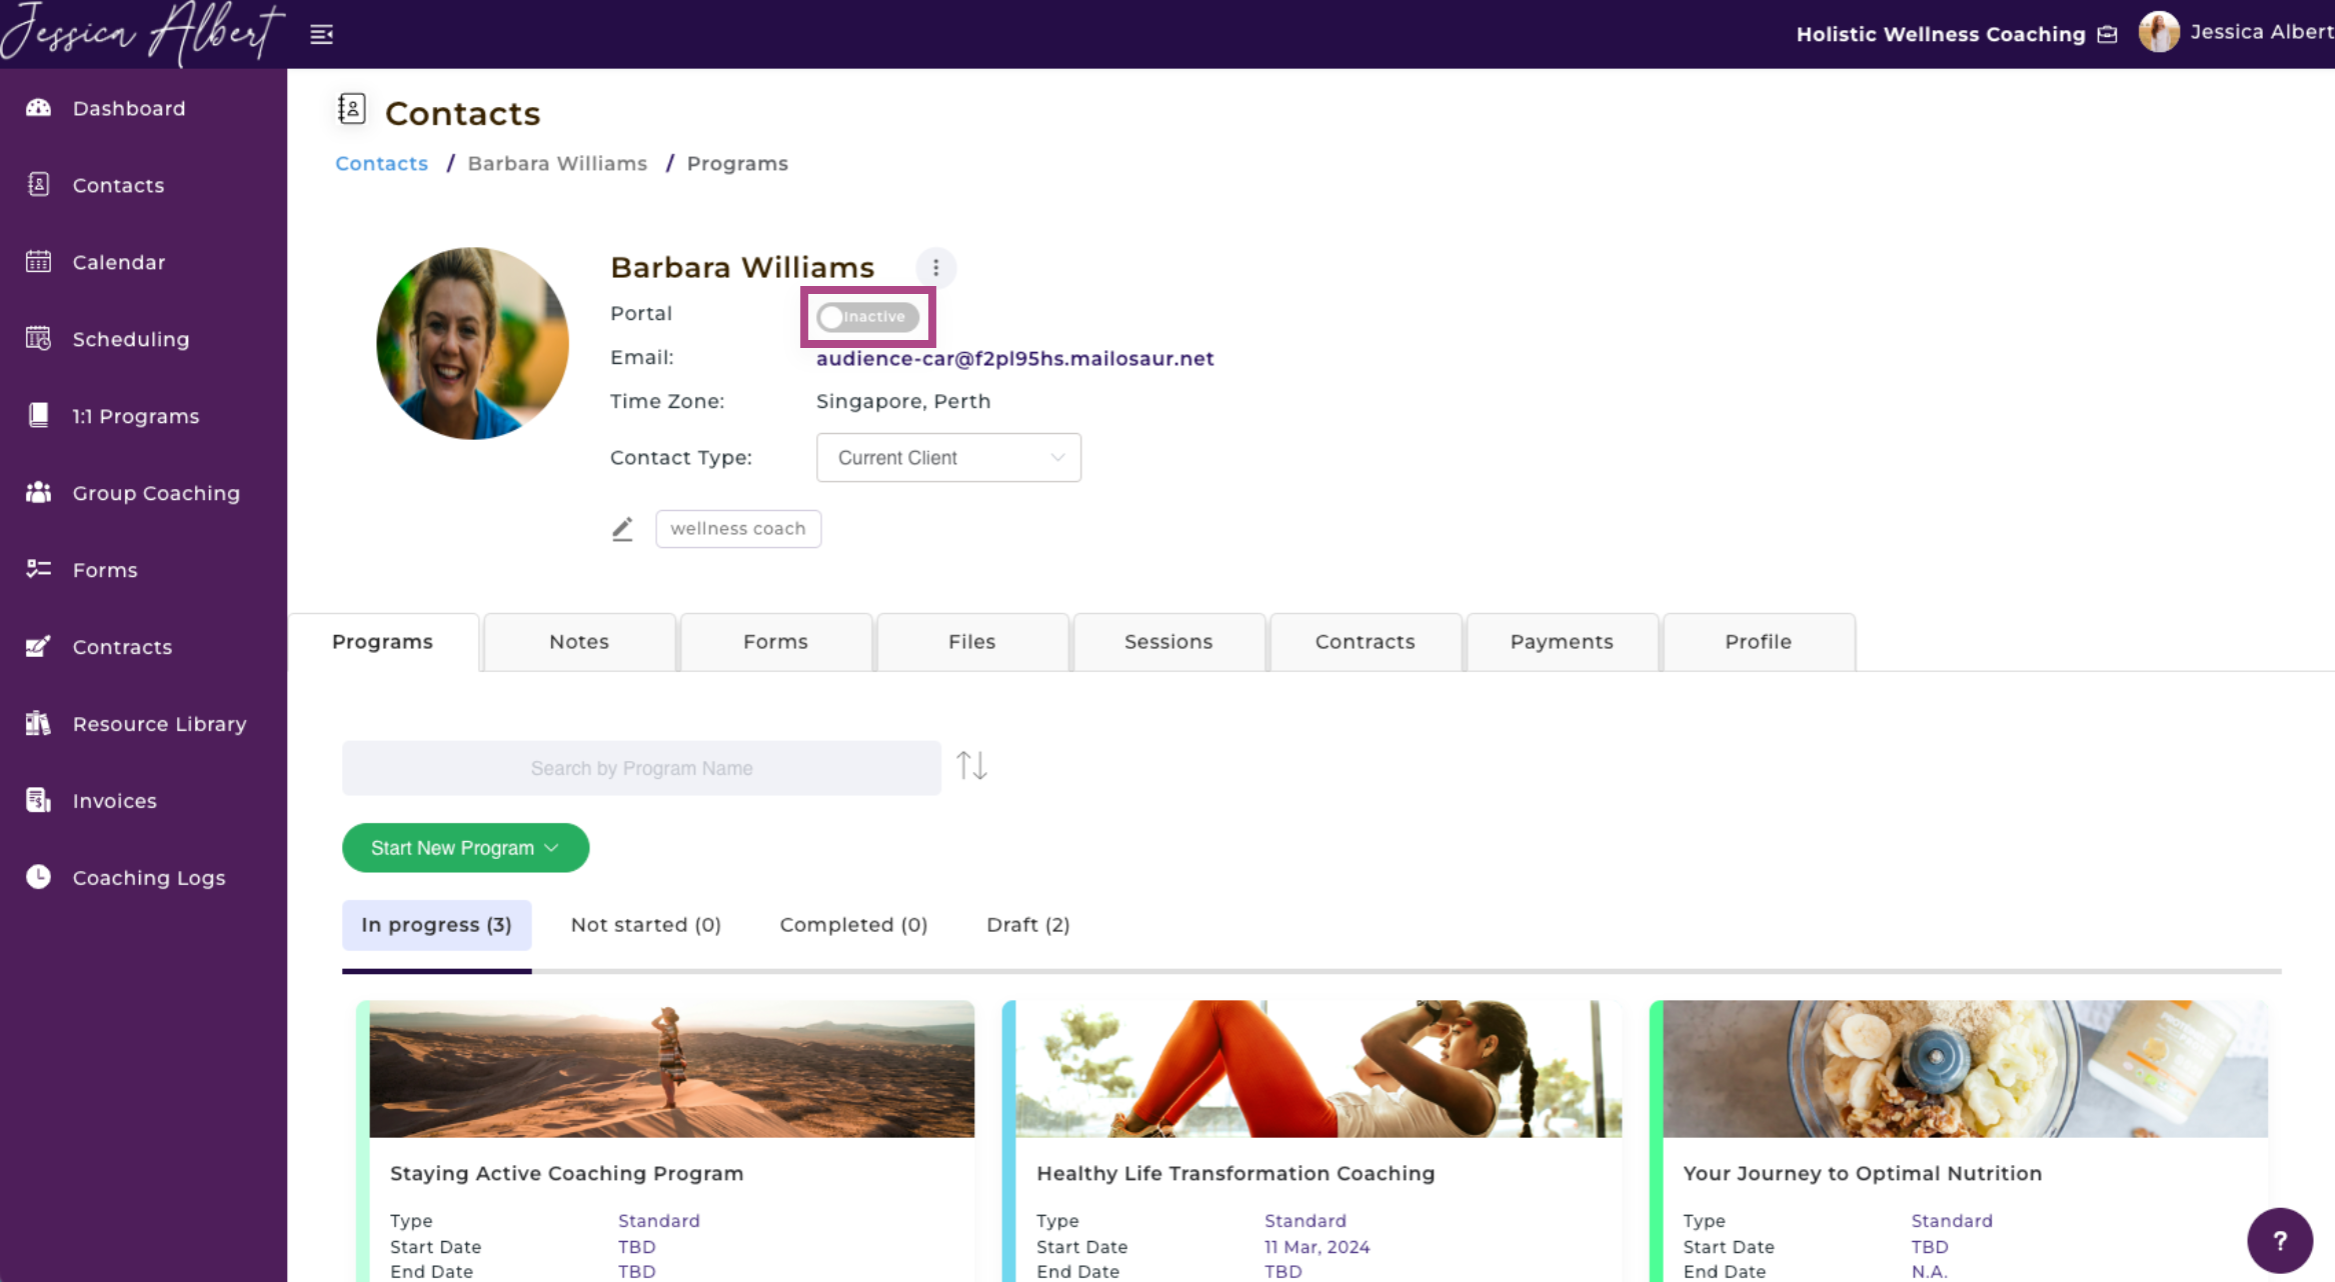
Note: You can control a contact's access to their Client Portal account by going into their contact record. Underneath their name, simply click on the Active/Inactive toggle switch to enable or disable a contact's access to their client portal account.
When you make a client portal active or inactive, your contact will be automatically notified by email.
IMPORTANT: When a client portal is disabled (inactive), the contact would not be able to log in to their Client Portal account. They will therefore not have access to all the features available in the client portal including any program engagements, resources, contracts, forms, invoices, etc that was previously shared or sent to them.
2. Email Address 📧
The Email field displays the email address of a contact.
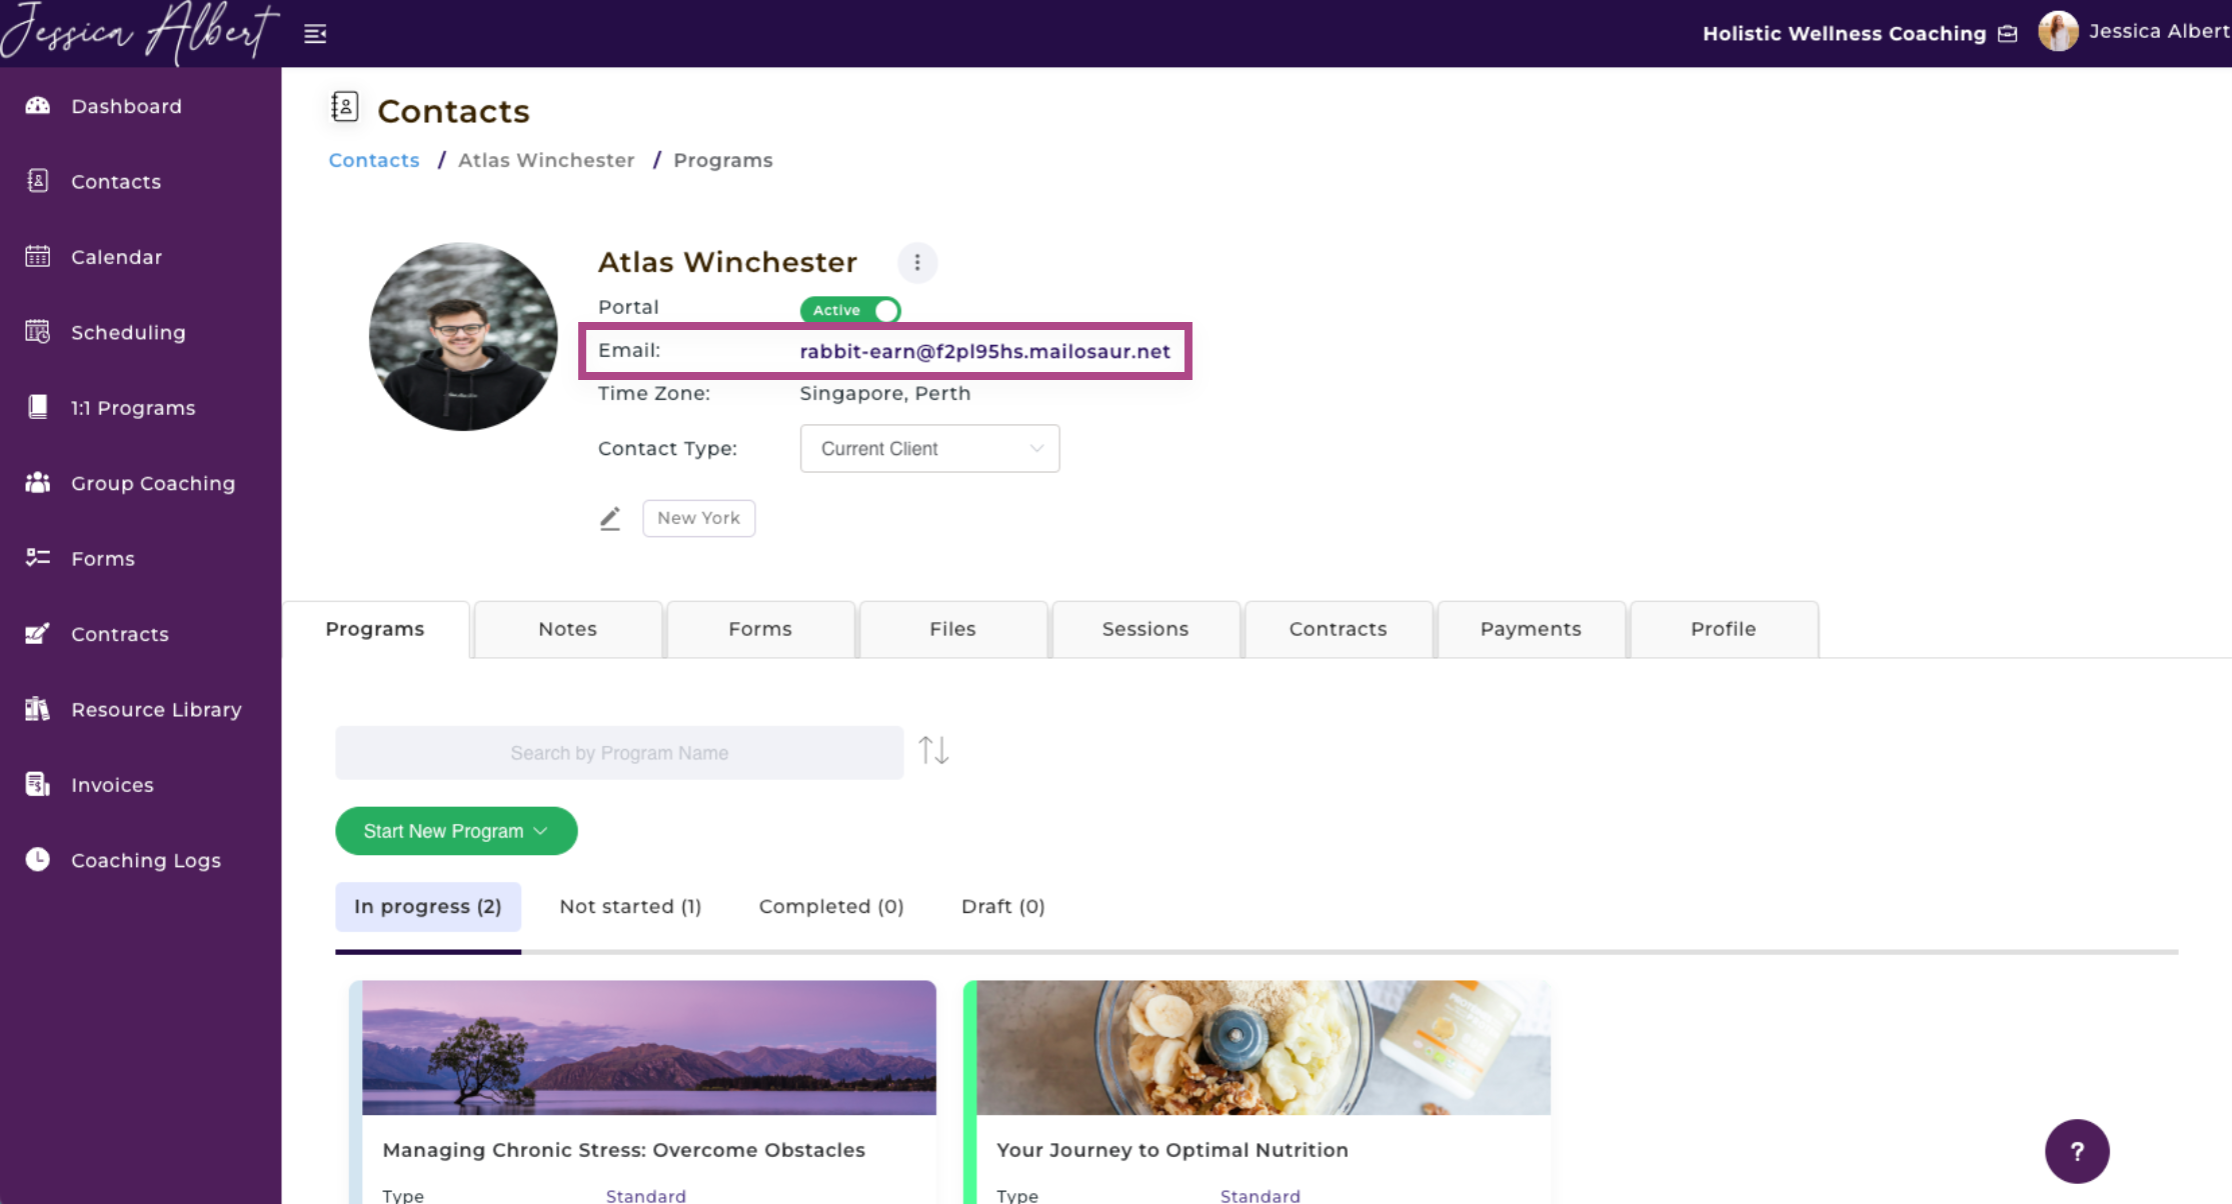
The email address can be edited on the contact's Profile page.
IMPORTANT: Be sure to check the accuracy of your contacts' email addresses. CoachVantage sends automated email notifications, emails invoices, emails contracts, etc to your contacts using this email address. If the email address is inaccurate or has typos, the email notifications will not be delivered to your contacts!
Note: You cannot create and send custom emails to contacts as CoachVantage does not currently support this. You will need to use a separate email application or platform (like GMail, Outlook, Mailchimp, ConvertKit, etc) to send custom emails or email marketing campaigns.
3. Time Zone 🕑
This displays the Time Zone of your contact.
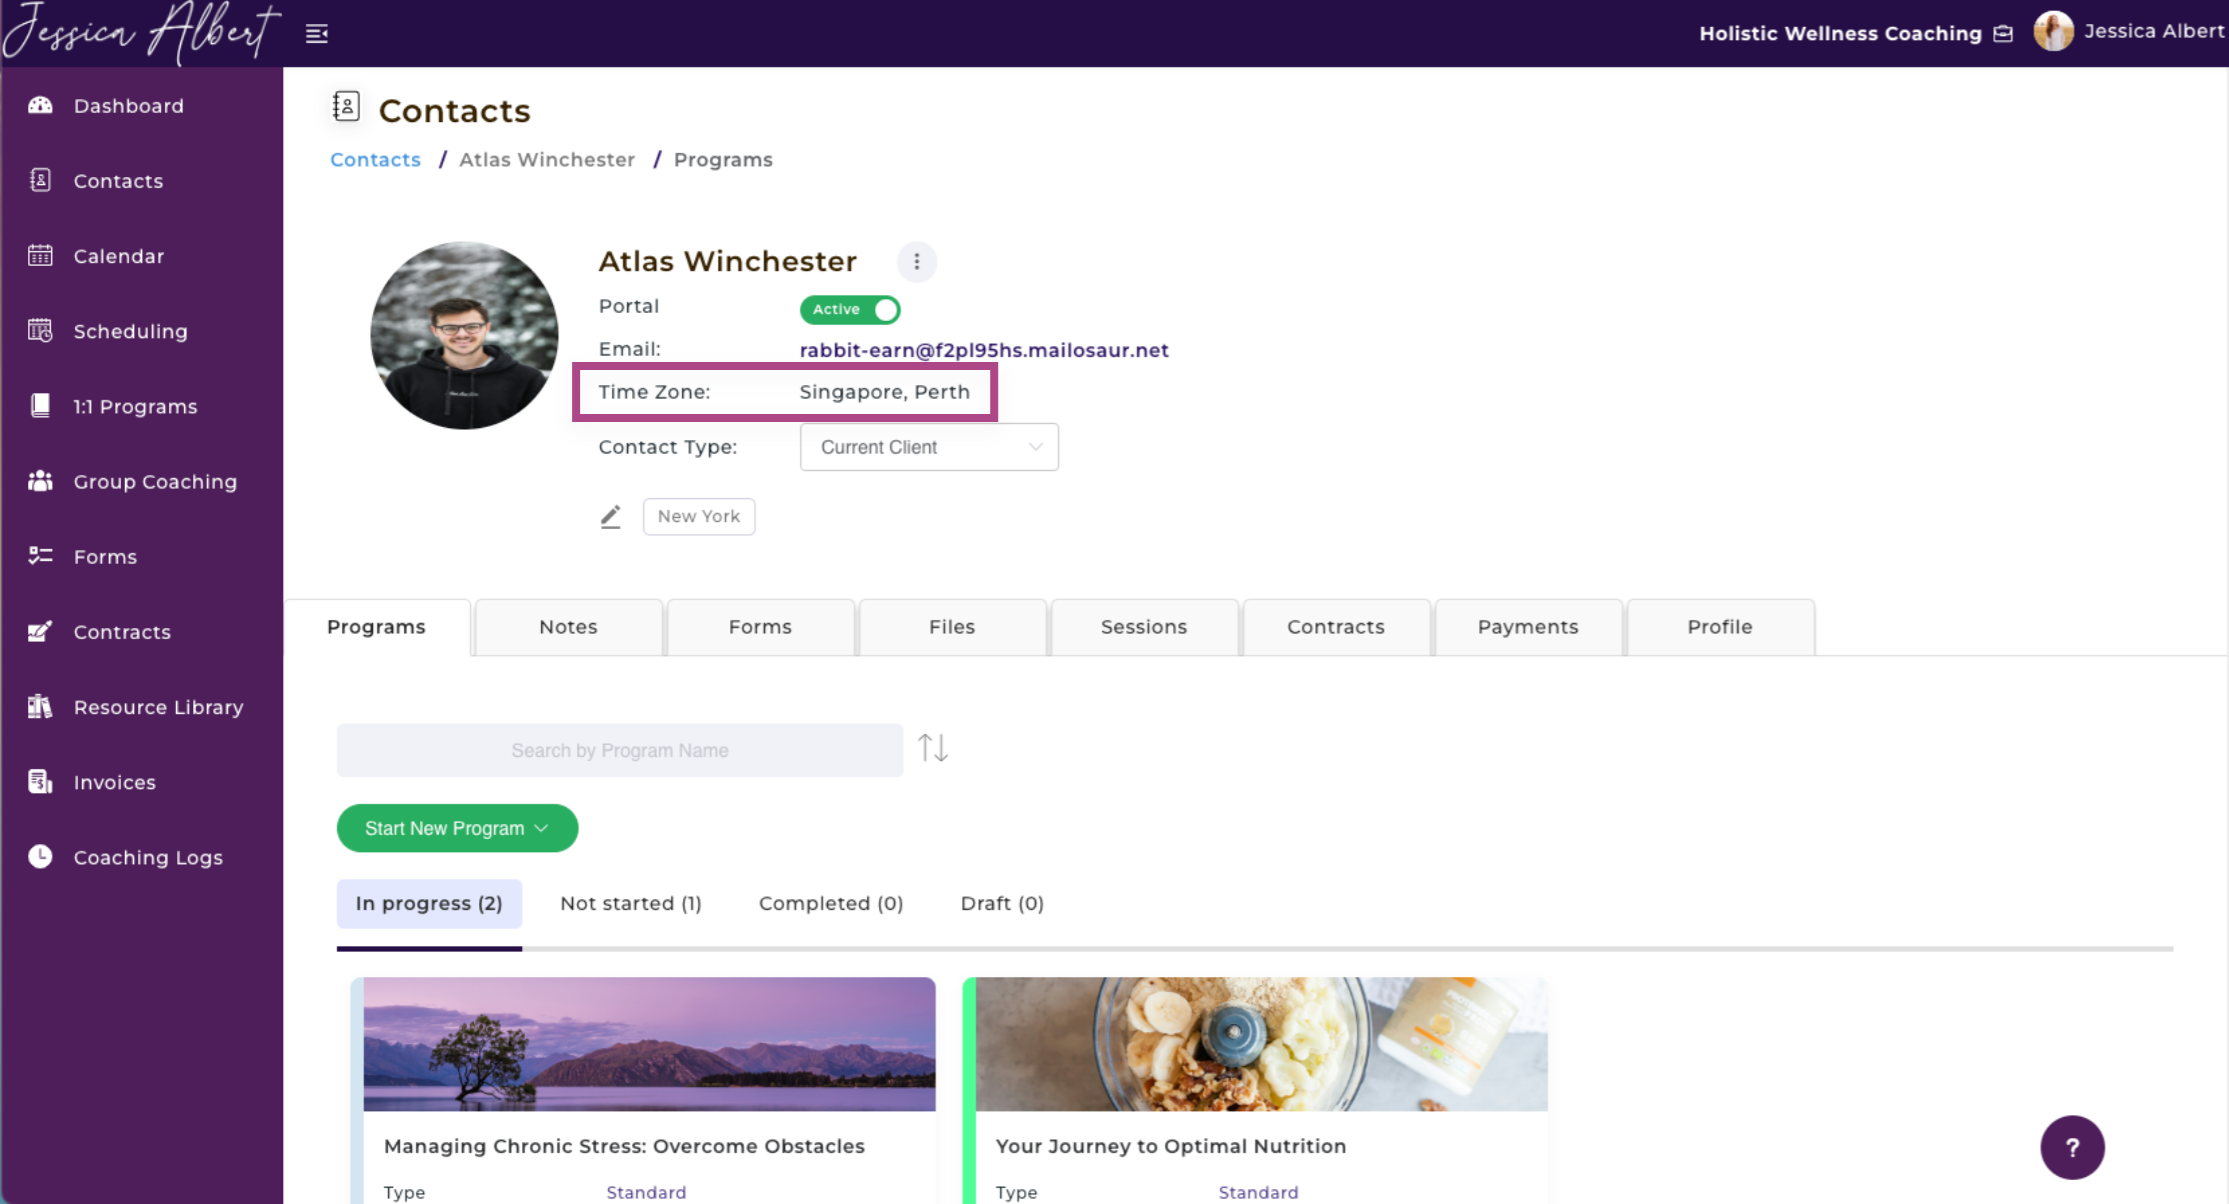
The time zone is automatically saved to the contact's Profile when they create their Client Portal account.
You can also input the time zone of your contact on the Profile Page.
Note: If your client has an active Client Portal account, they will also be able to update their time zone setting themselves in the client portal. In the client portal, any appointments that are created for a contact will be displayed in their time zone. CoachVantage manages the time zone conversion automatically.
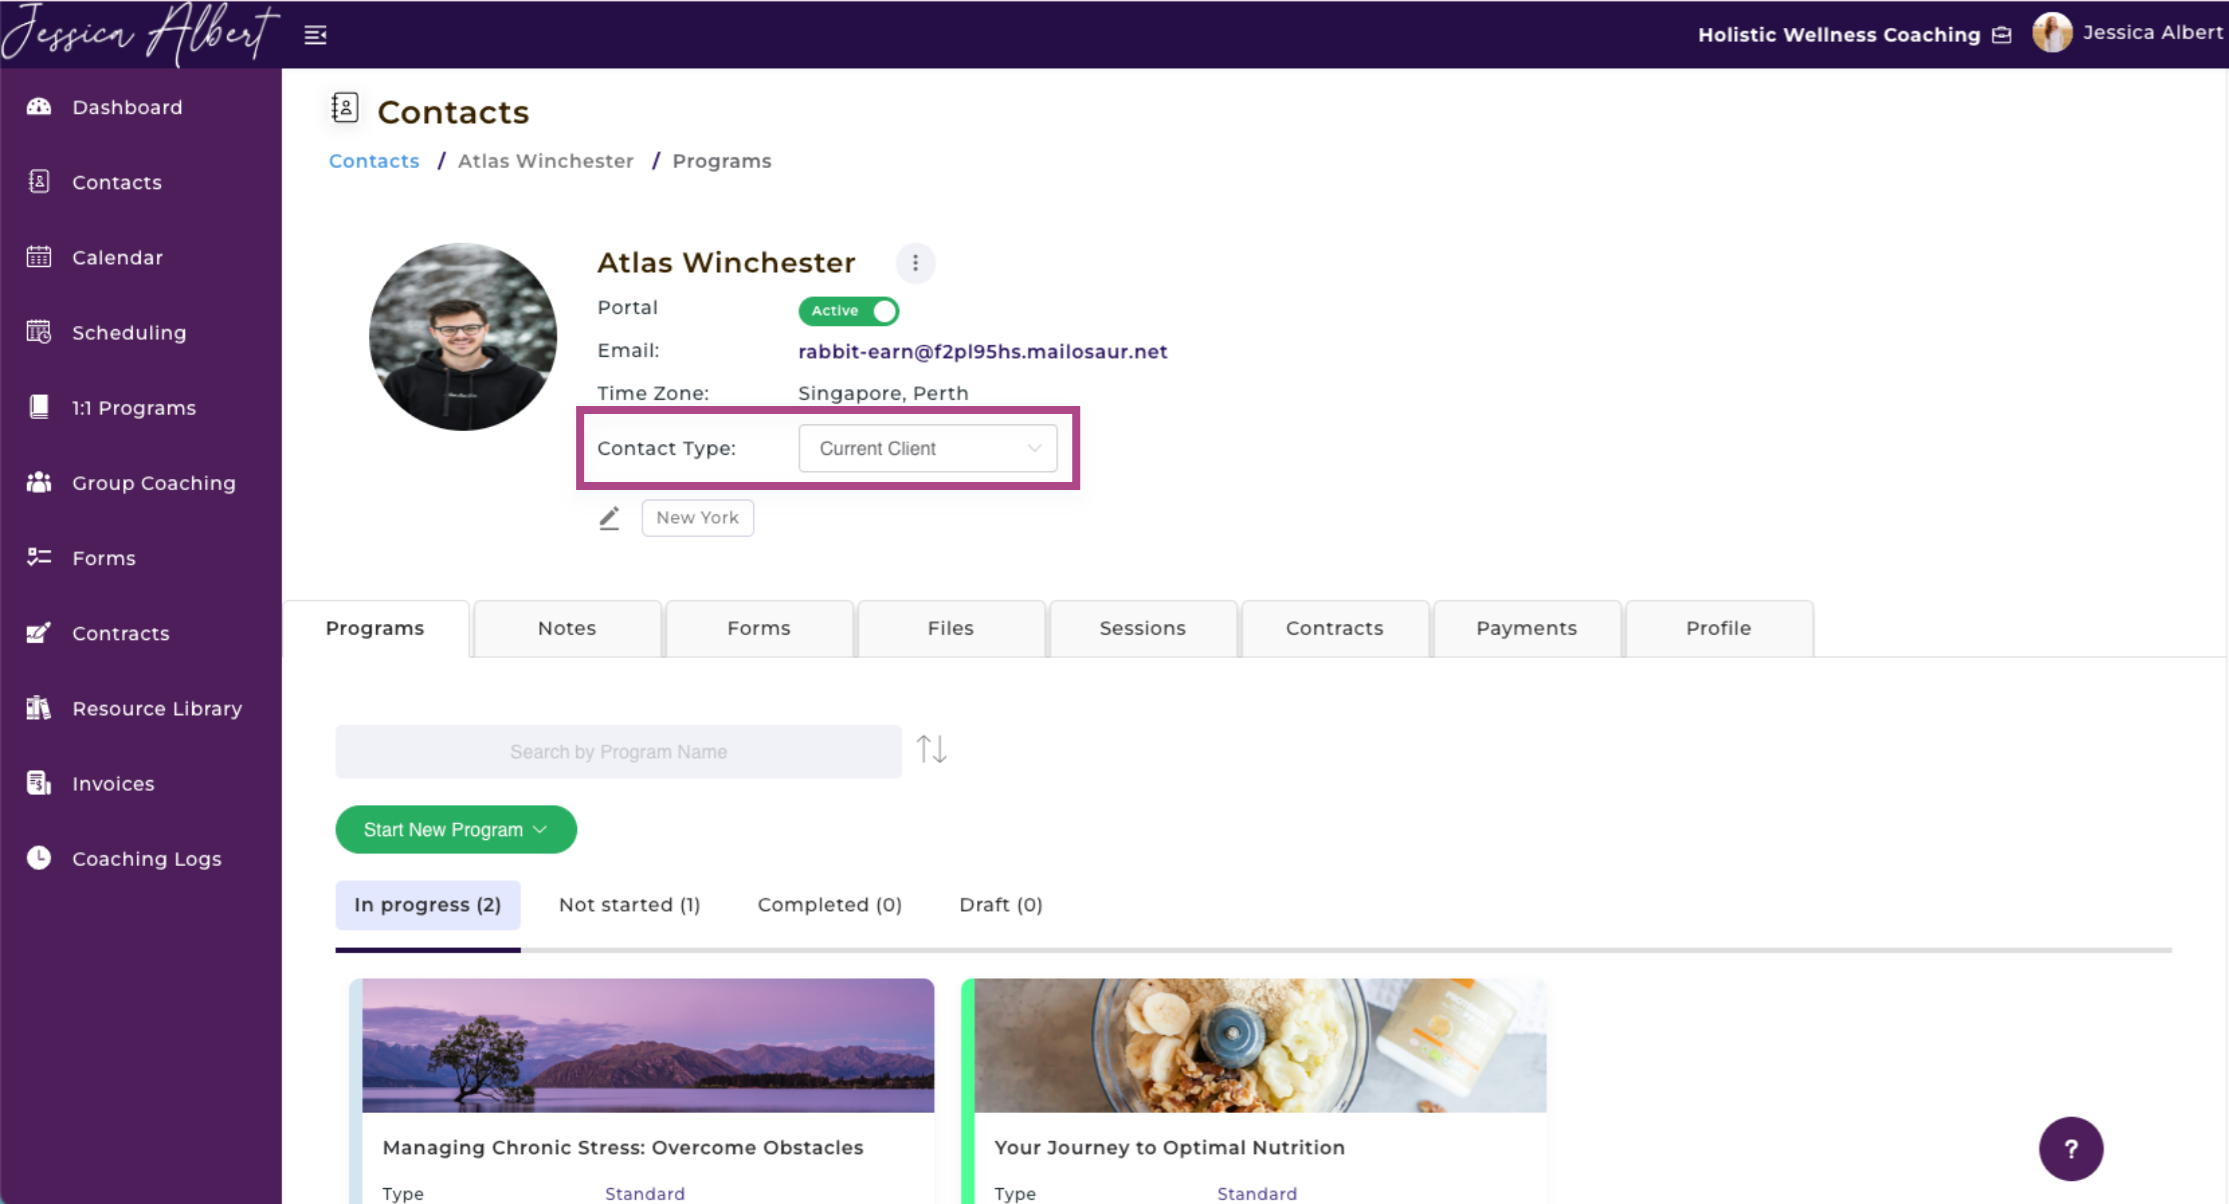
4. Contact Type
The drop down selector can be used to assign a Contact Type for a contact. There are 4 default Contact Types that you can select from: Current Client, Hot Lead, Prospect or Past Client.
Alternatively, you can also create a Custom Contact Type. Simply type in the custom contact type that you would like to create and then hit Enter on your keyboard to save it.
Note: Whenever you create a new custom contact type, it will be available subsequently for you to select it from the dropdown selector.
5. Add Tags 🏷️
You can add tags to a contact by clicking Add tags.
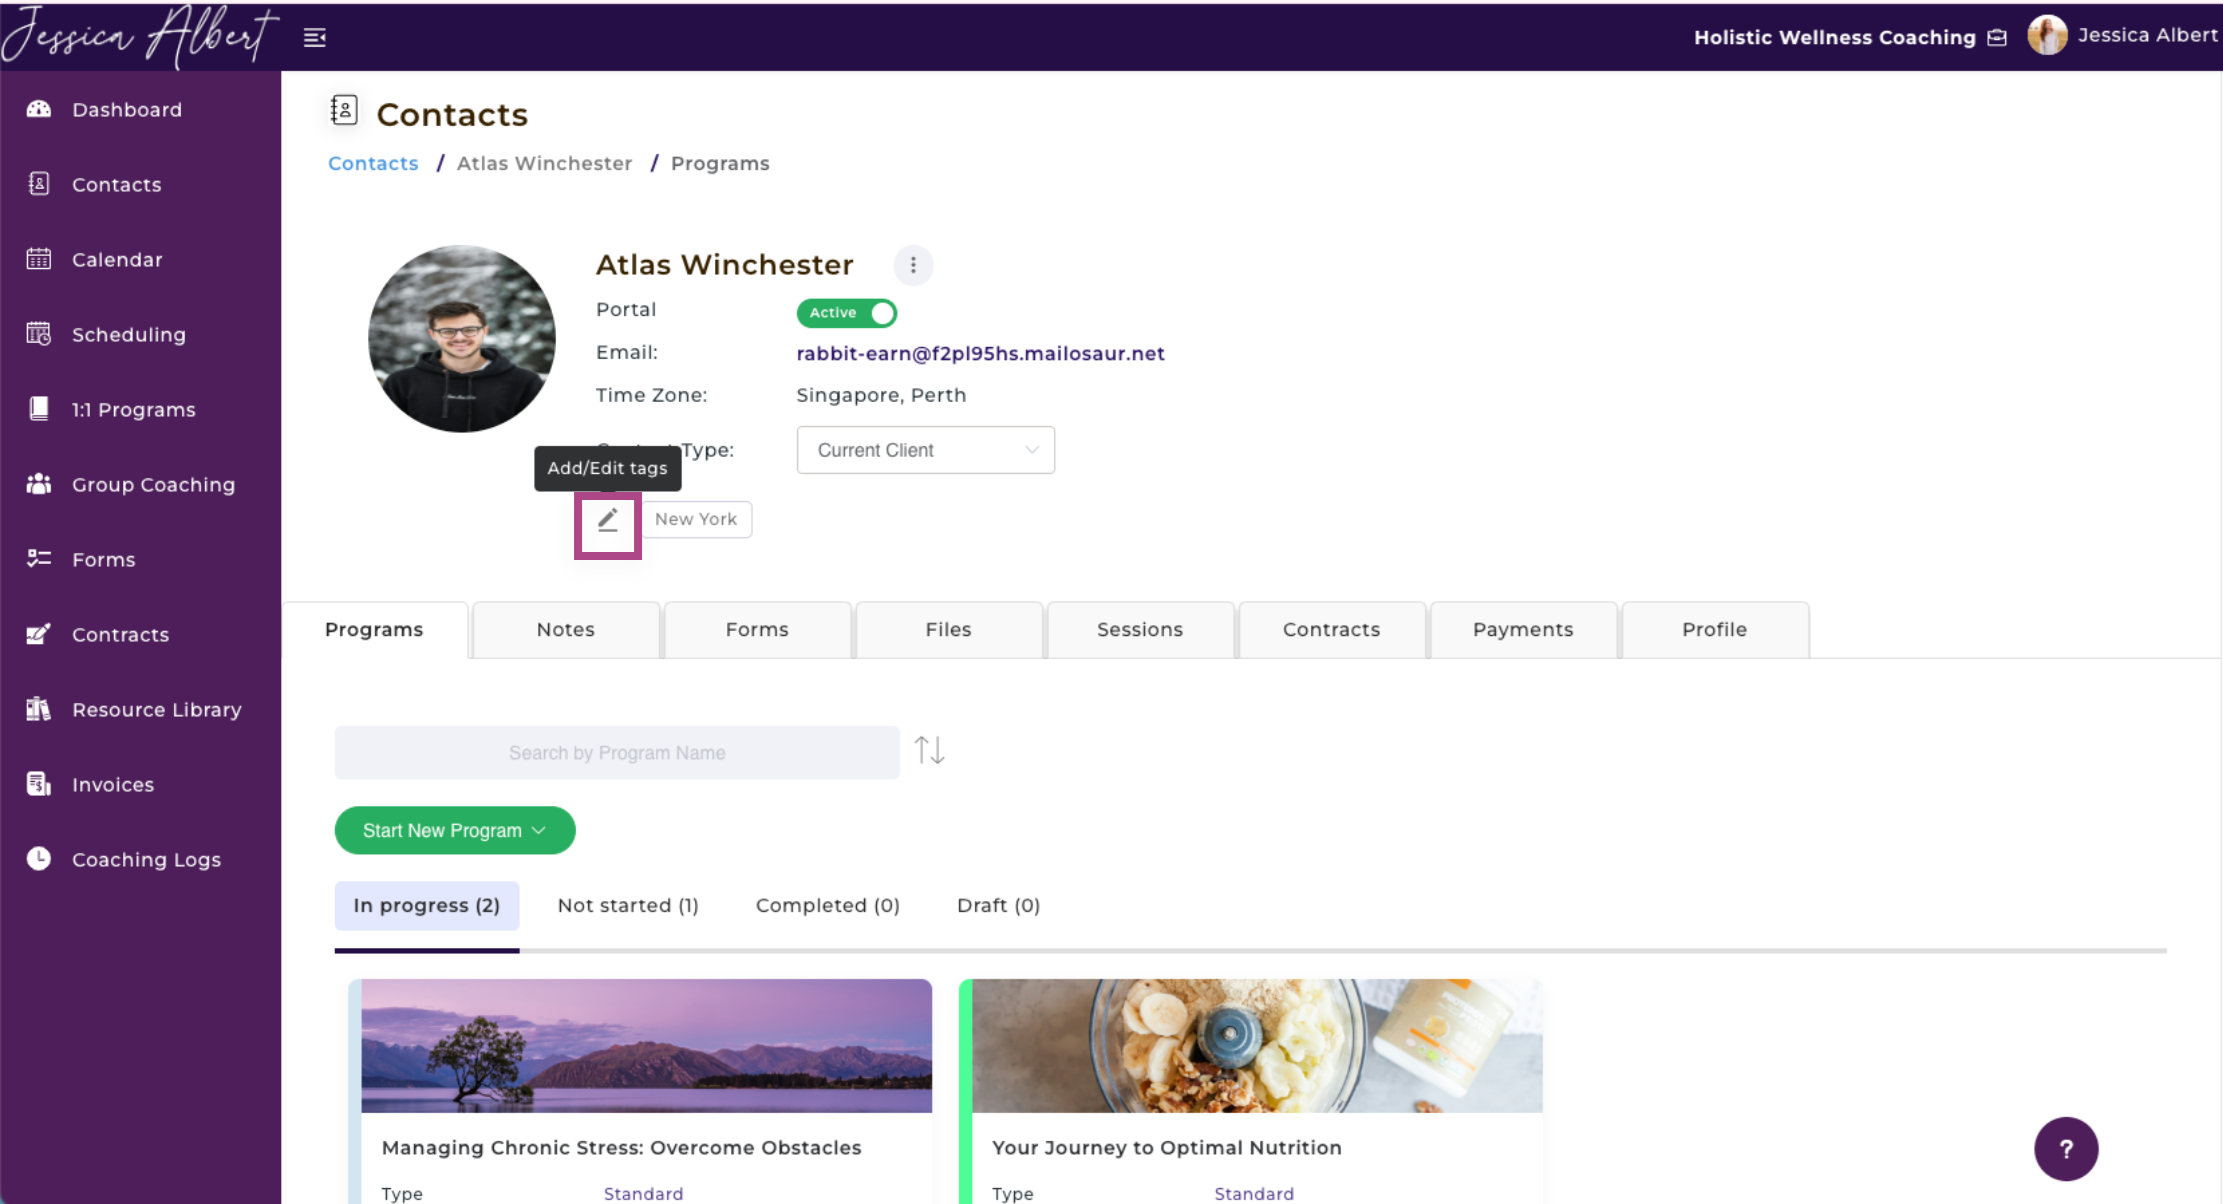
Refer to this article on how to add tags to your contacts.
6. Quick Access Icons
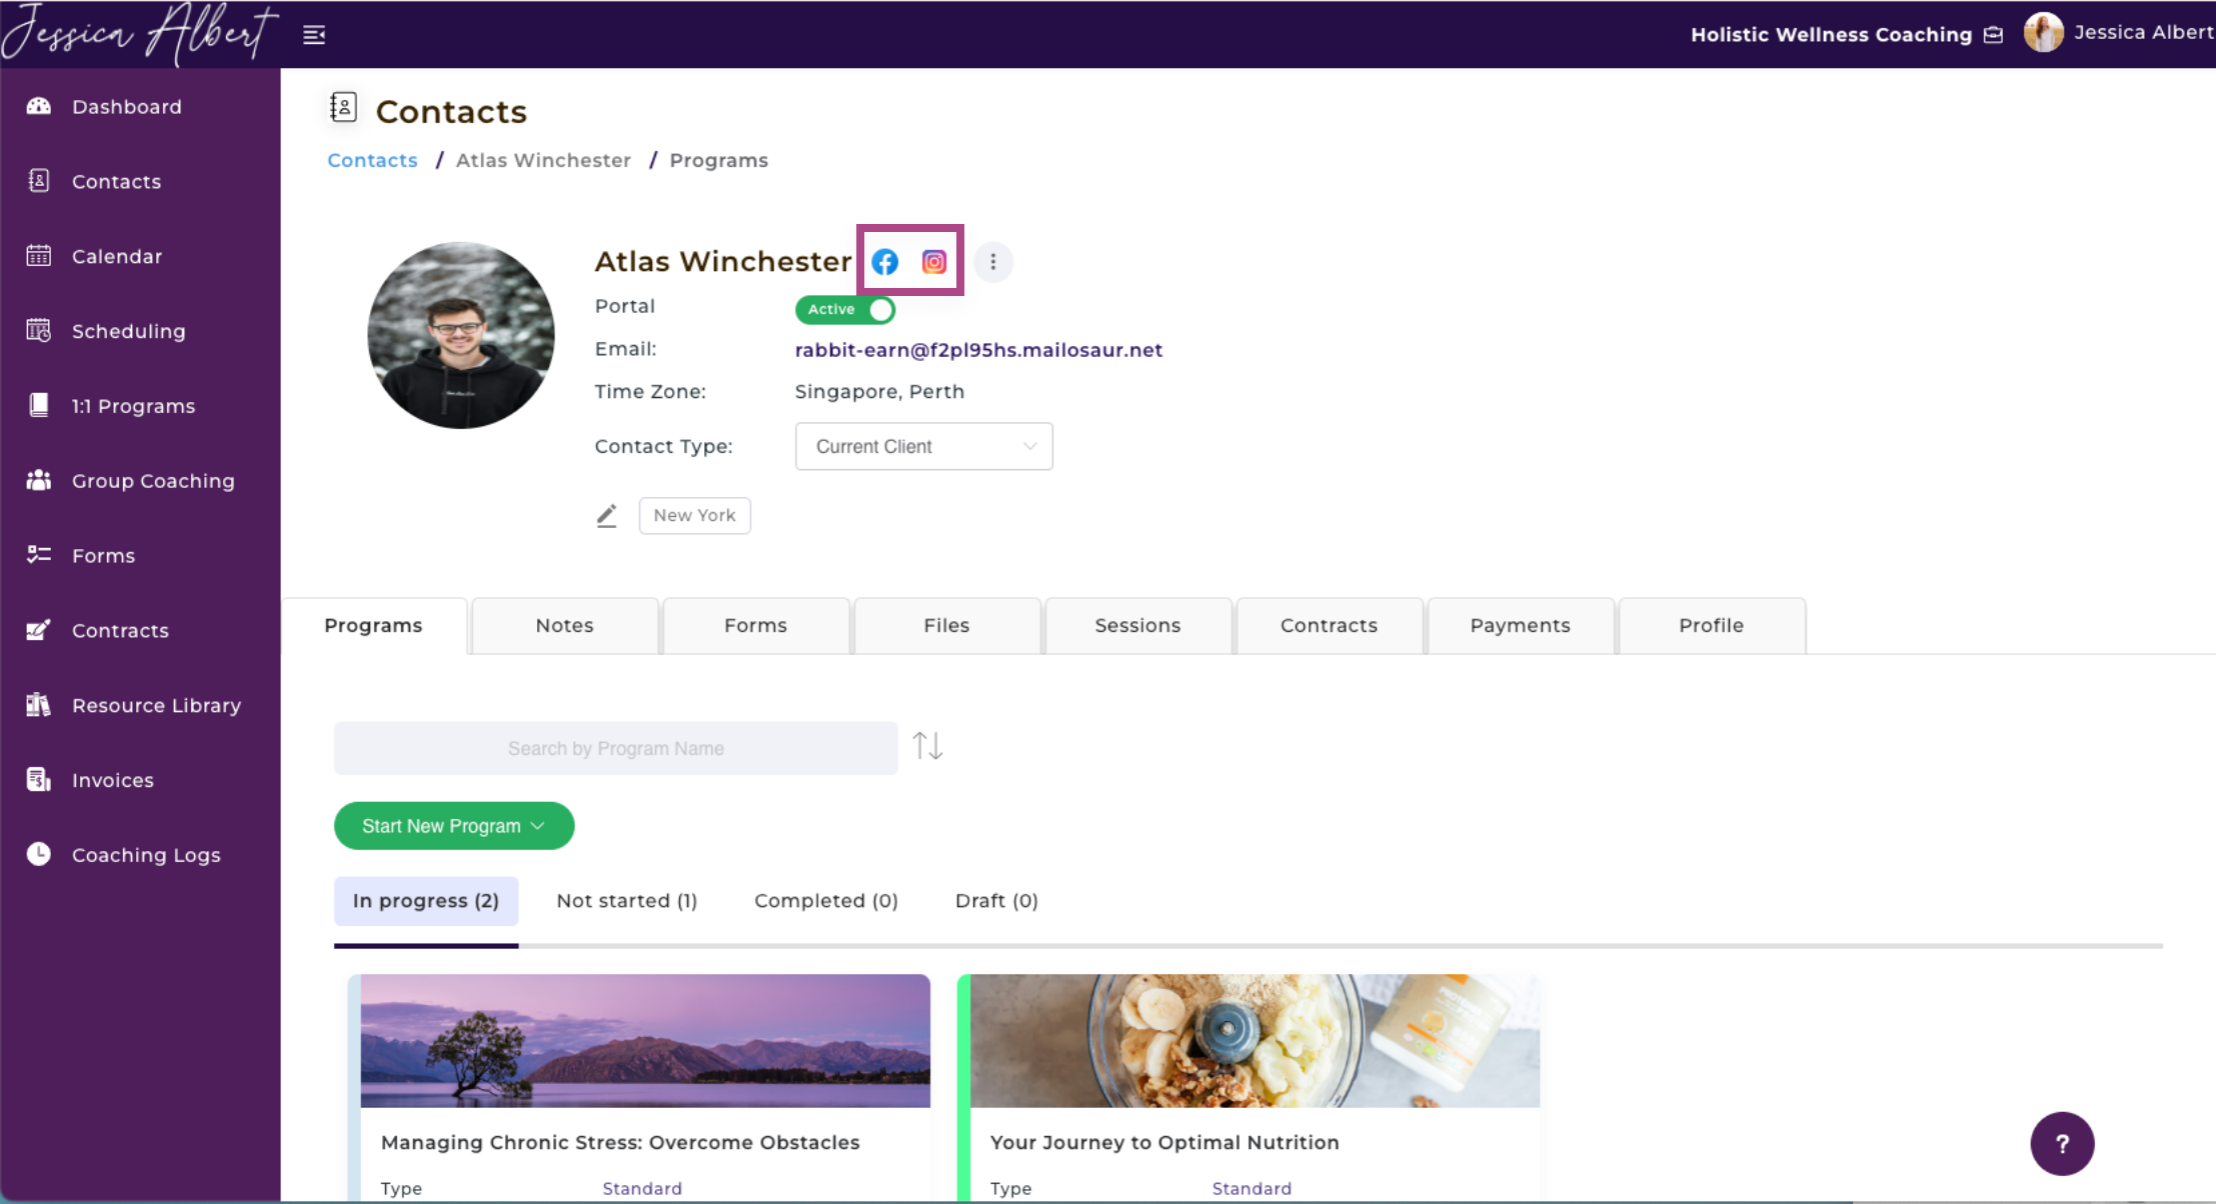
The Quick Access Icons are displayed when you have added social media URLs and/or website URL to the contact's Profile page.
When you click on a quick access icon, it will redirect you to the URL. This allows you to see what's going on in your contact's 'world', such as their website, their Facebook or LinkedIn page, etc.
Refer to the Profile Page article on how to add URLs.
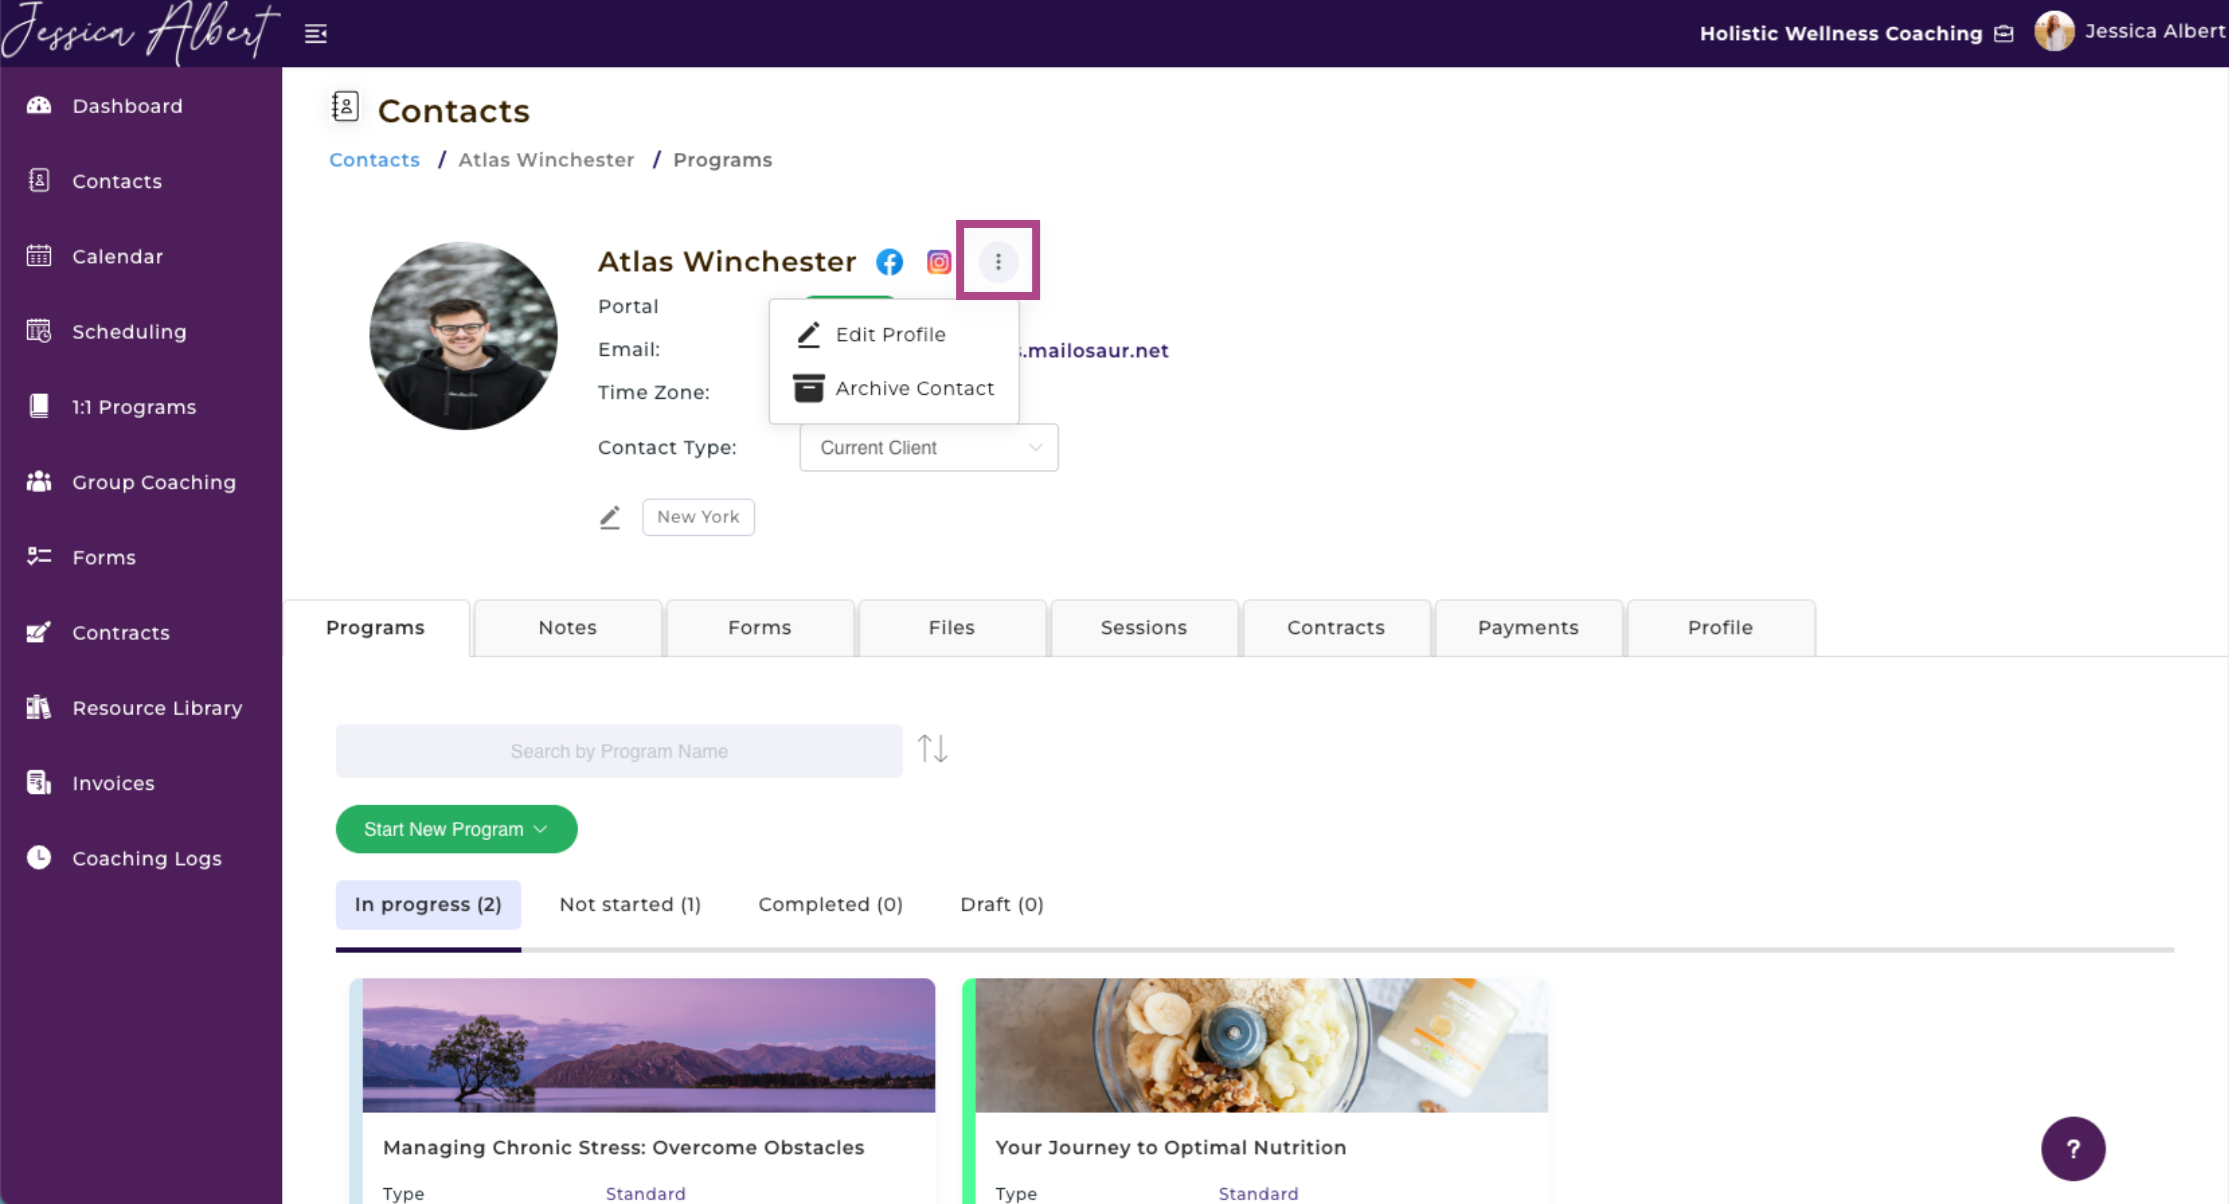
7. 3-Dot Button Menu
Click on the 3-dot button menu and you will see 2 options:
- Edit Profile - Click this to enter the Profile page where you can view the profile and details of your contact.
- Archive Contact - Click this to Archive a contact.
Refer to the Archiving Contacts article for more details.
8. Programs
The Programs tab is where you can invite a contact to a program and also where you will be able to manage the program engagement.
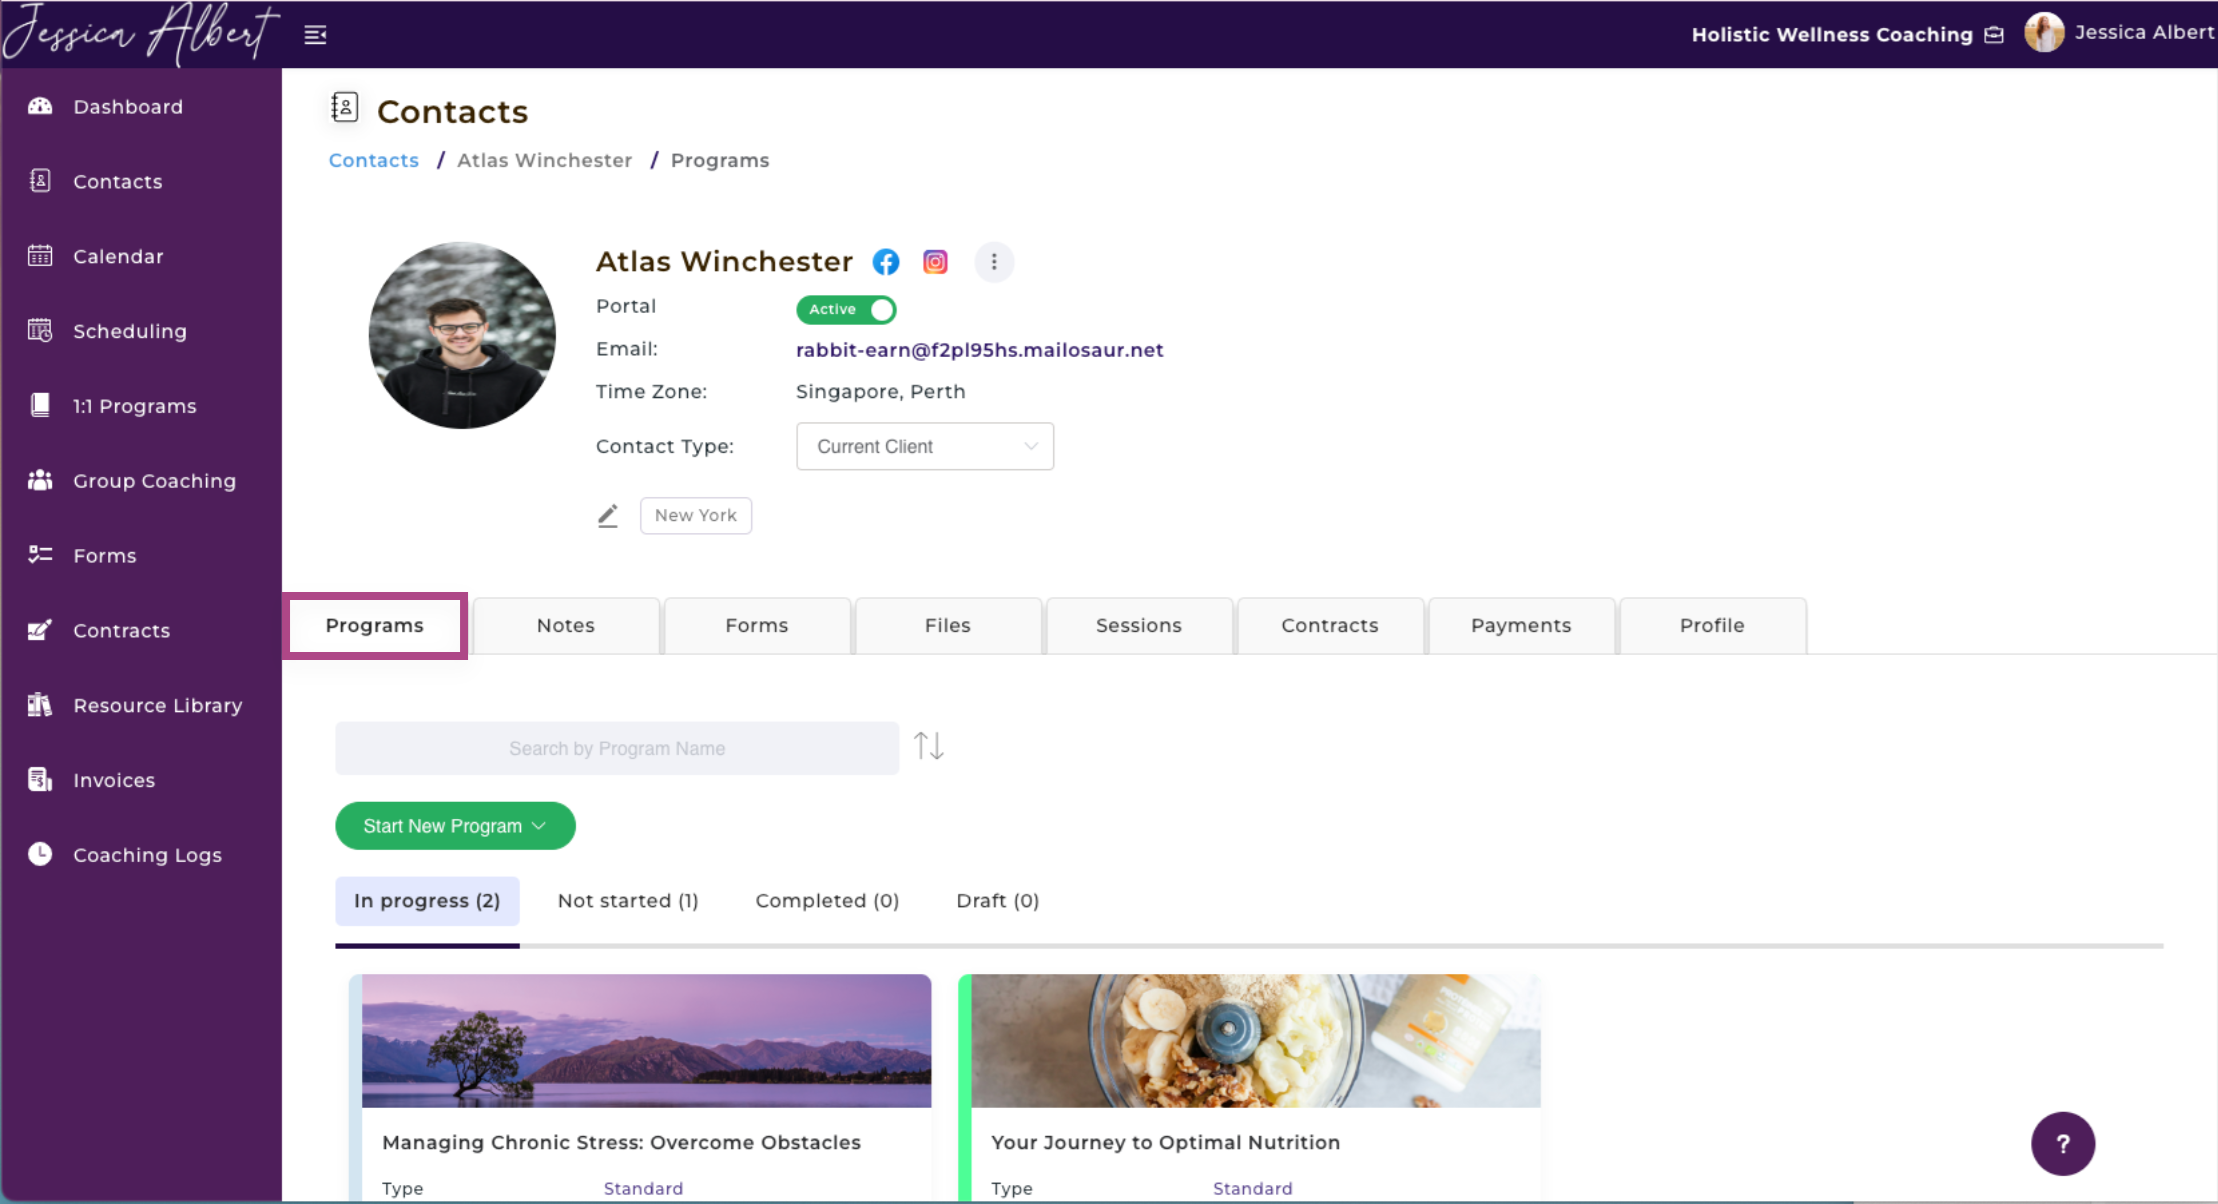
Refer to the article on Contact's Programs Page for more details.
9. Notes 🗒️
The Notes tab is where you can take private notes about this contact and also where you can view all notes for all program engagements with this contact.
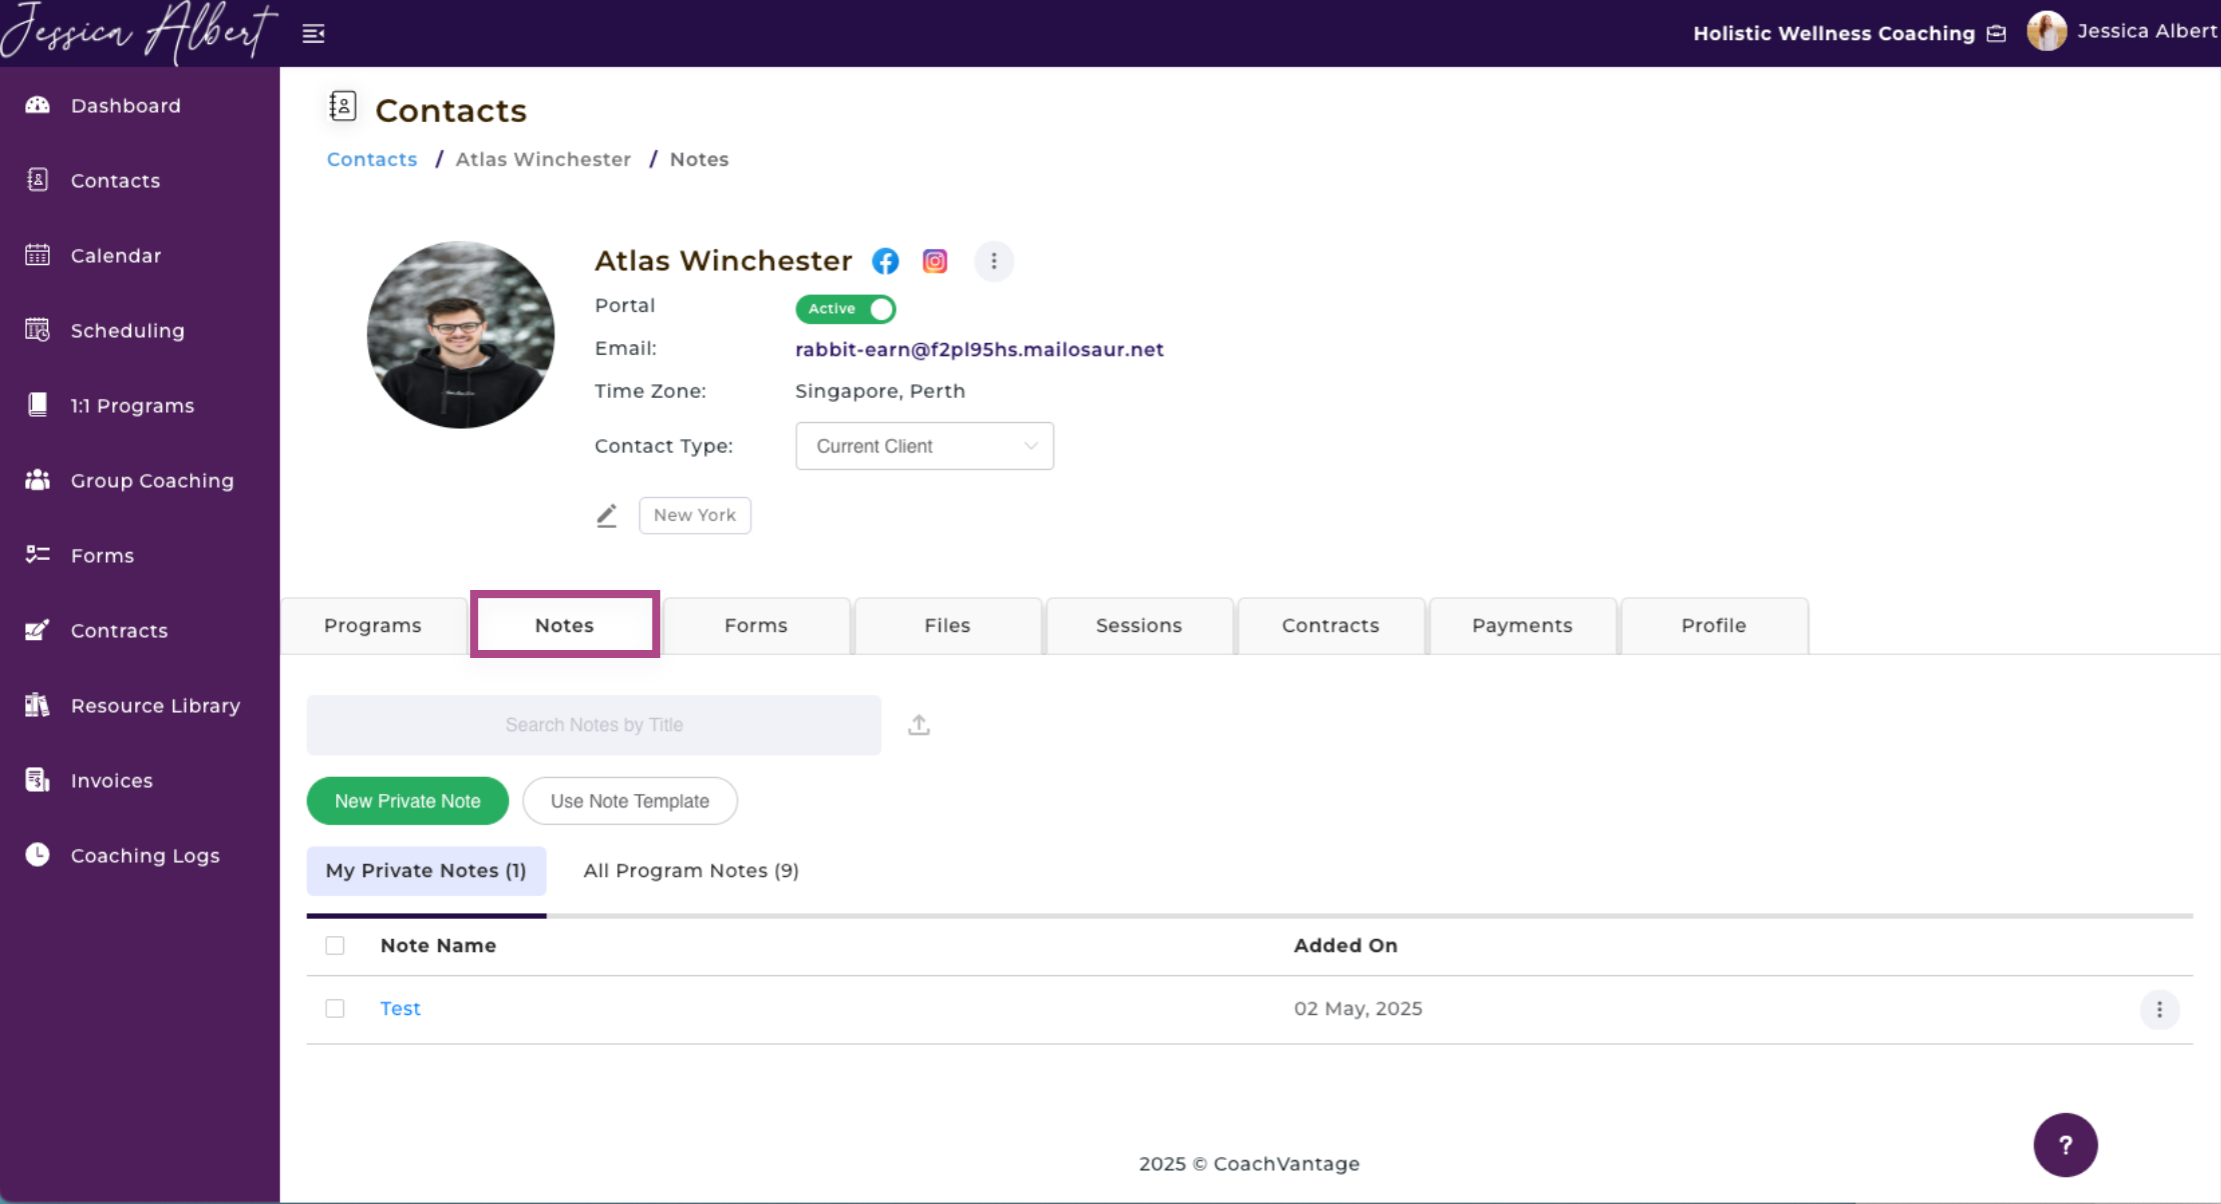
Refer to the article on Contact's Notes Page for more details.
10. Forms
The Forms tab is where you can view all forms that you have sent to this contact that are pending response and that have been responded.
You can also send a form to a contact.
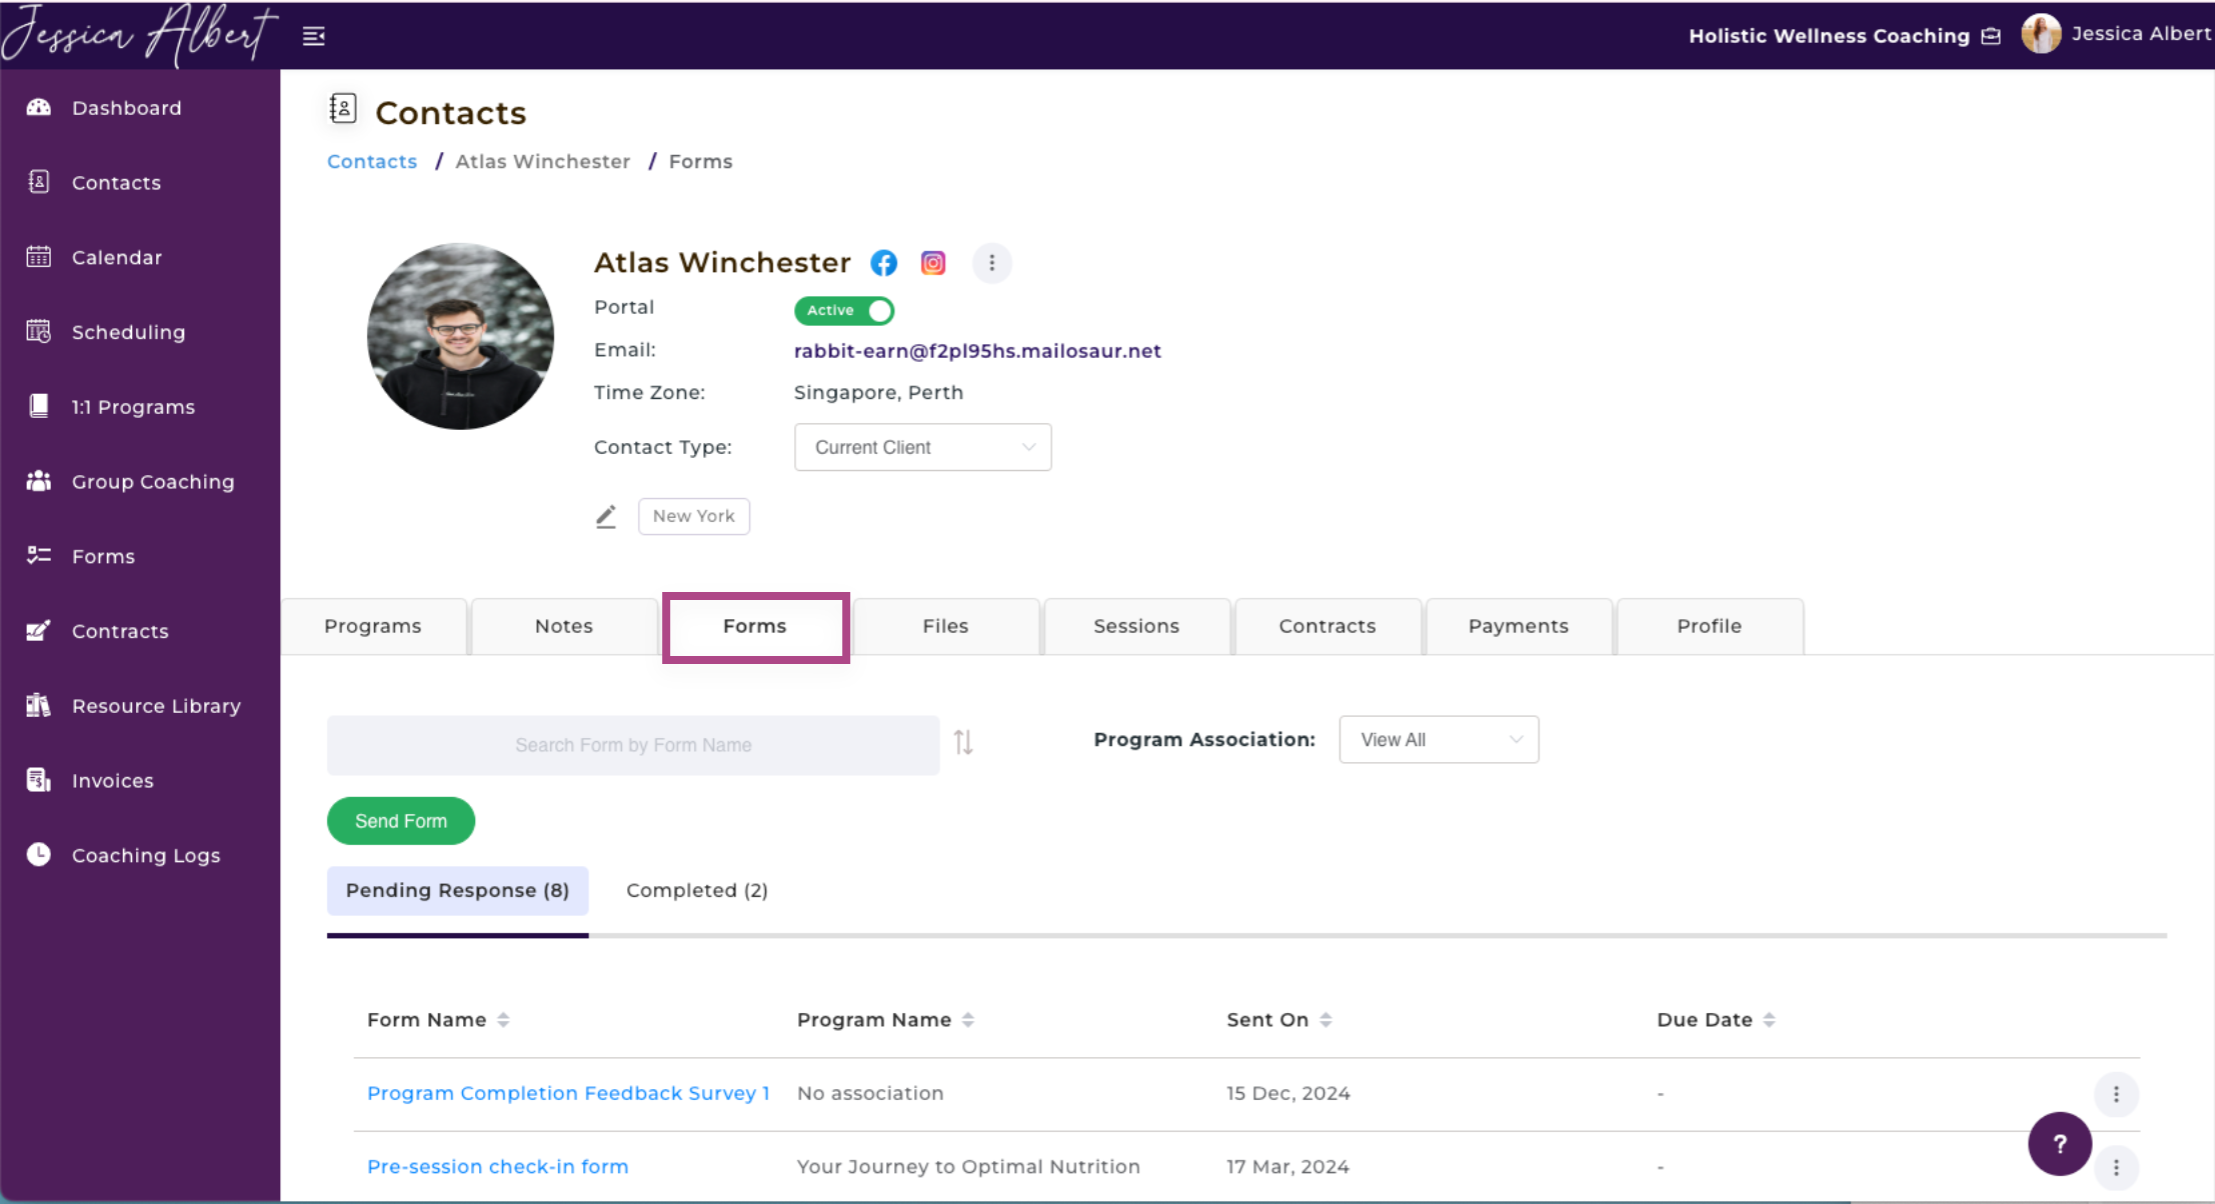
Refer to the article on Contact's Forms Page for more details.
11. Files 🗂️
The Files tab is where you can add private files (for your eyes only) that are related to a contact. You can also share files with a contact (as long as they have an active Client Portal) from the Files page.
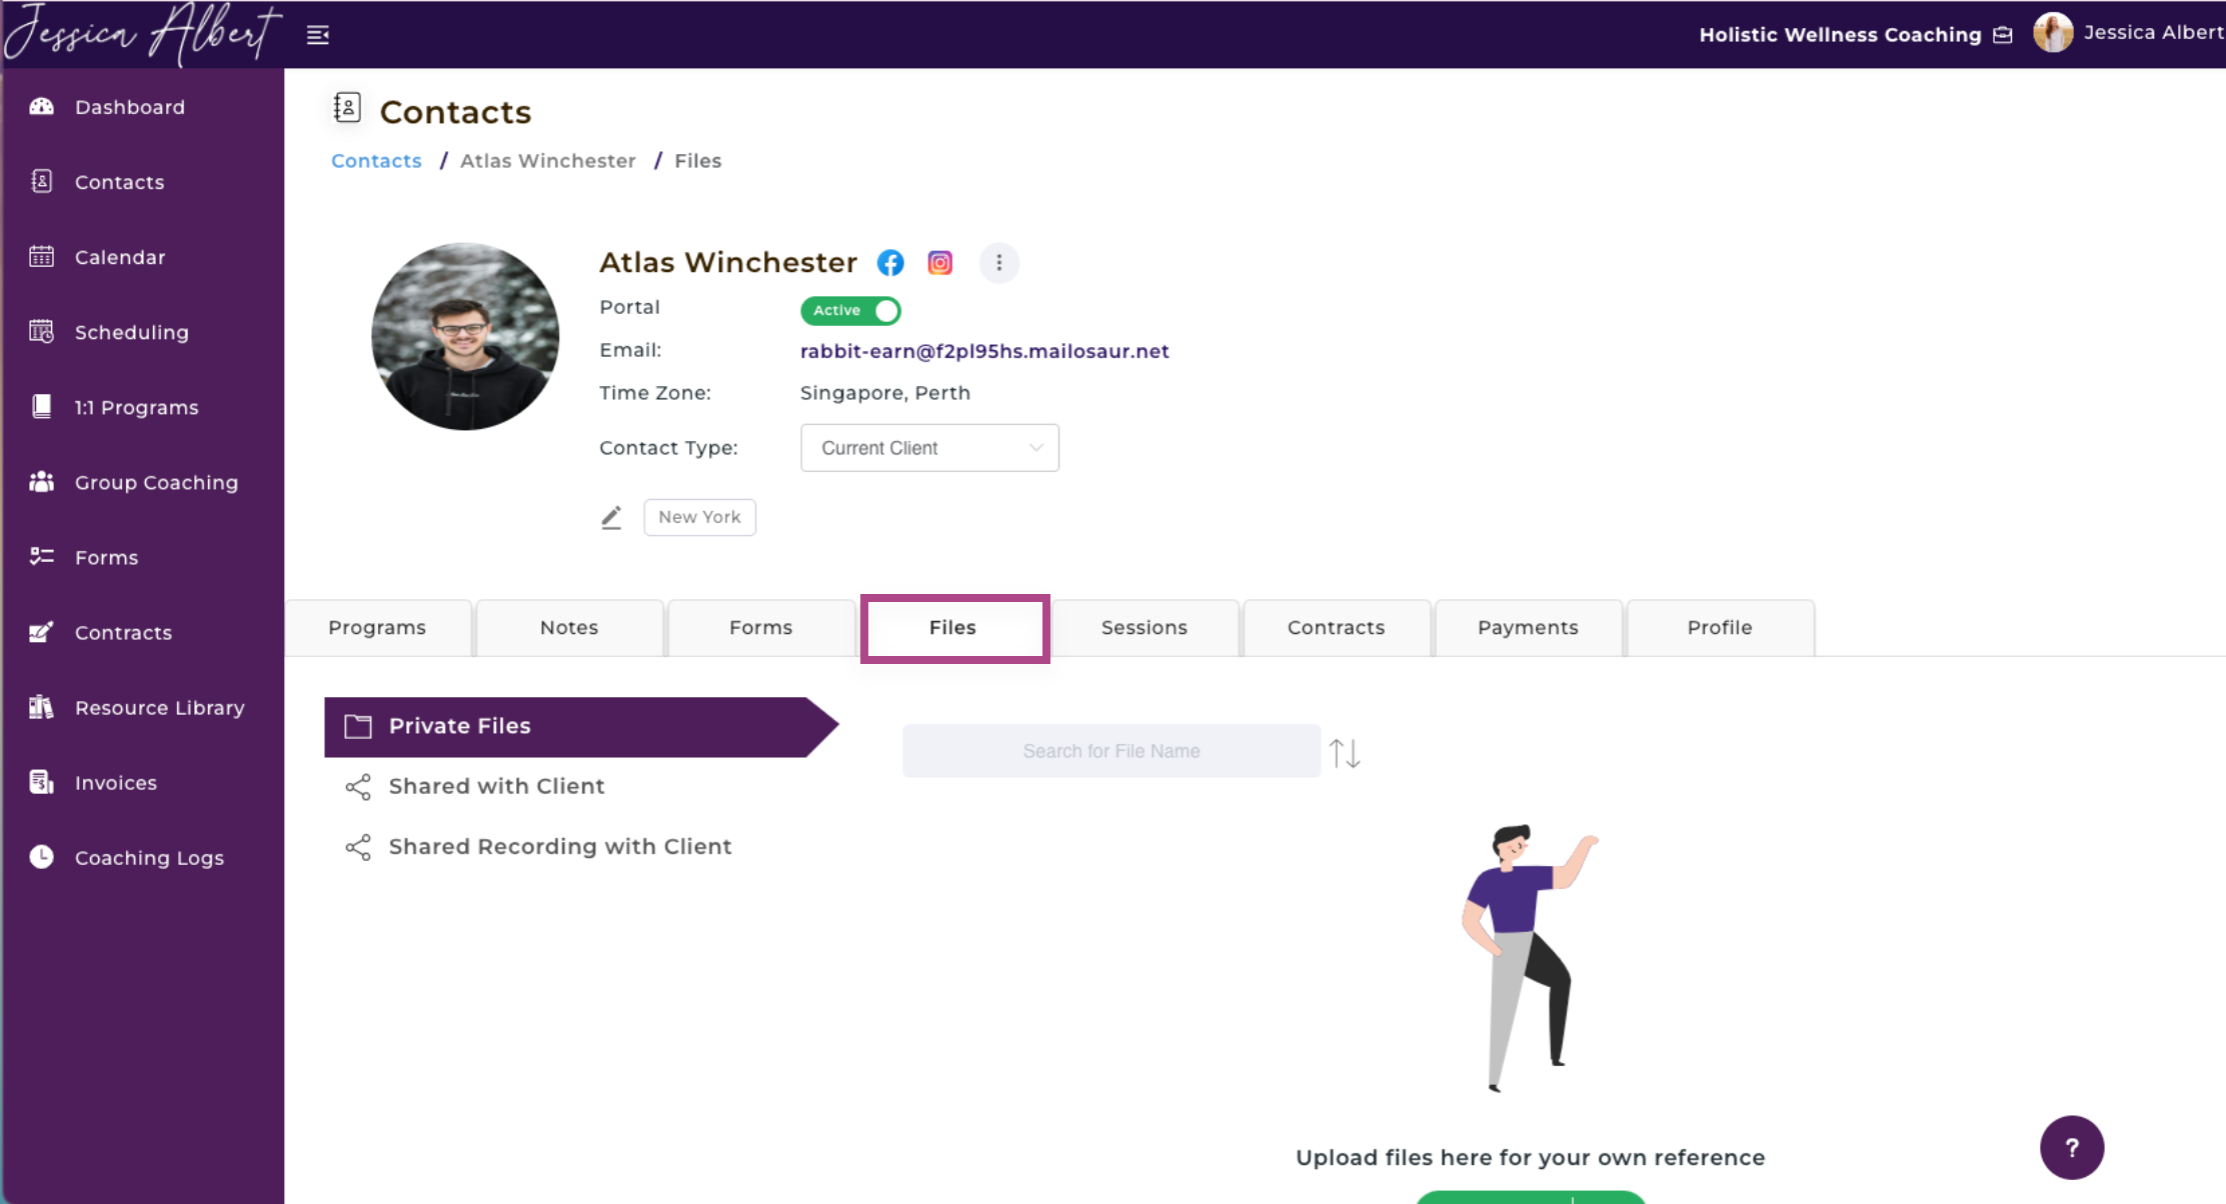
Refer to the article on Contact's Files Page for more details.
Note: The Files tab is where you can share files or documents with a contact even if they are not enrolled in a coaching program.
For example, you may be a Consultant who doesn't offer coaching programs, but you'd like to use CoachVantage to share files with your clients. This feature would be very useful for you!
IMPORTANT: If you would like to share files/documents with contacts as part of a coaching program engagement, then you should do so from the Program Management page. Refer to this article for more details on sharing files as part of a program engagement.
12. Sessions 📆
The Sessions tab is where you can add a new appointment for a contact and view all their upcoming and past sessions.
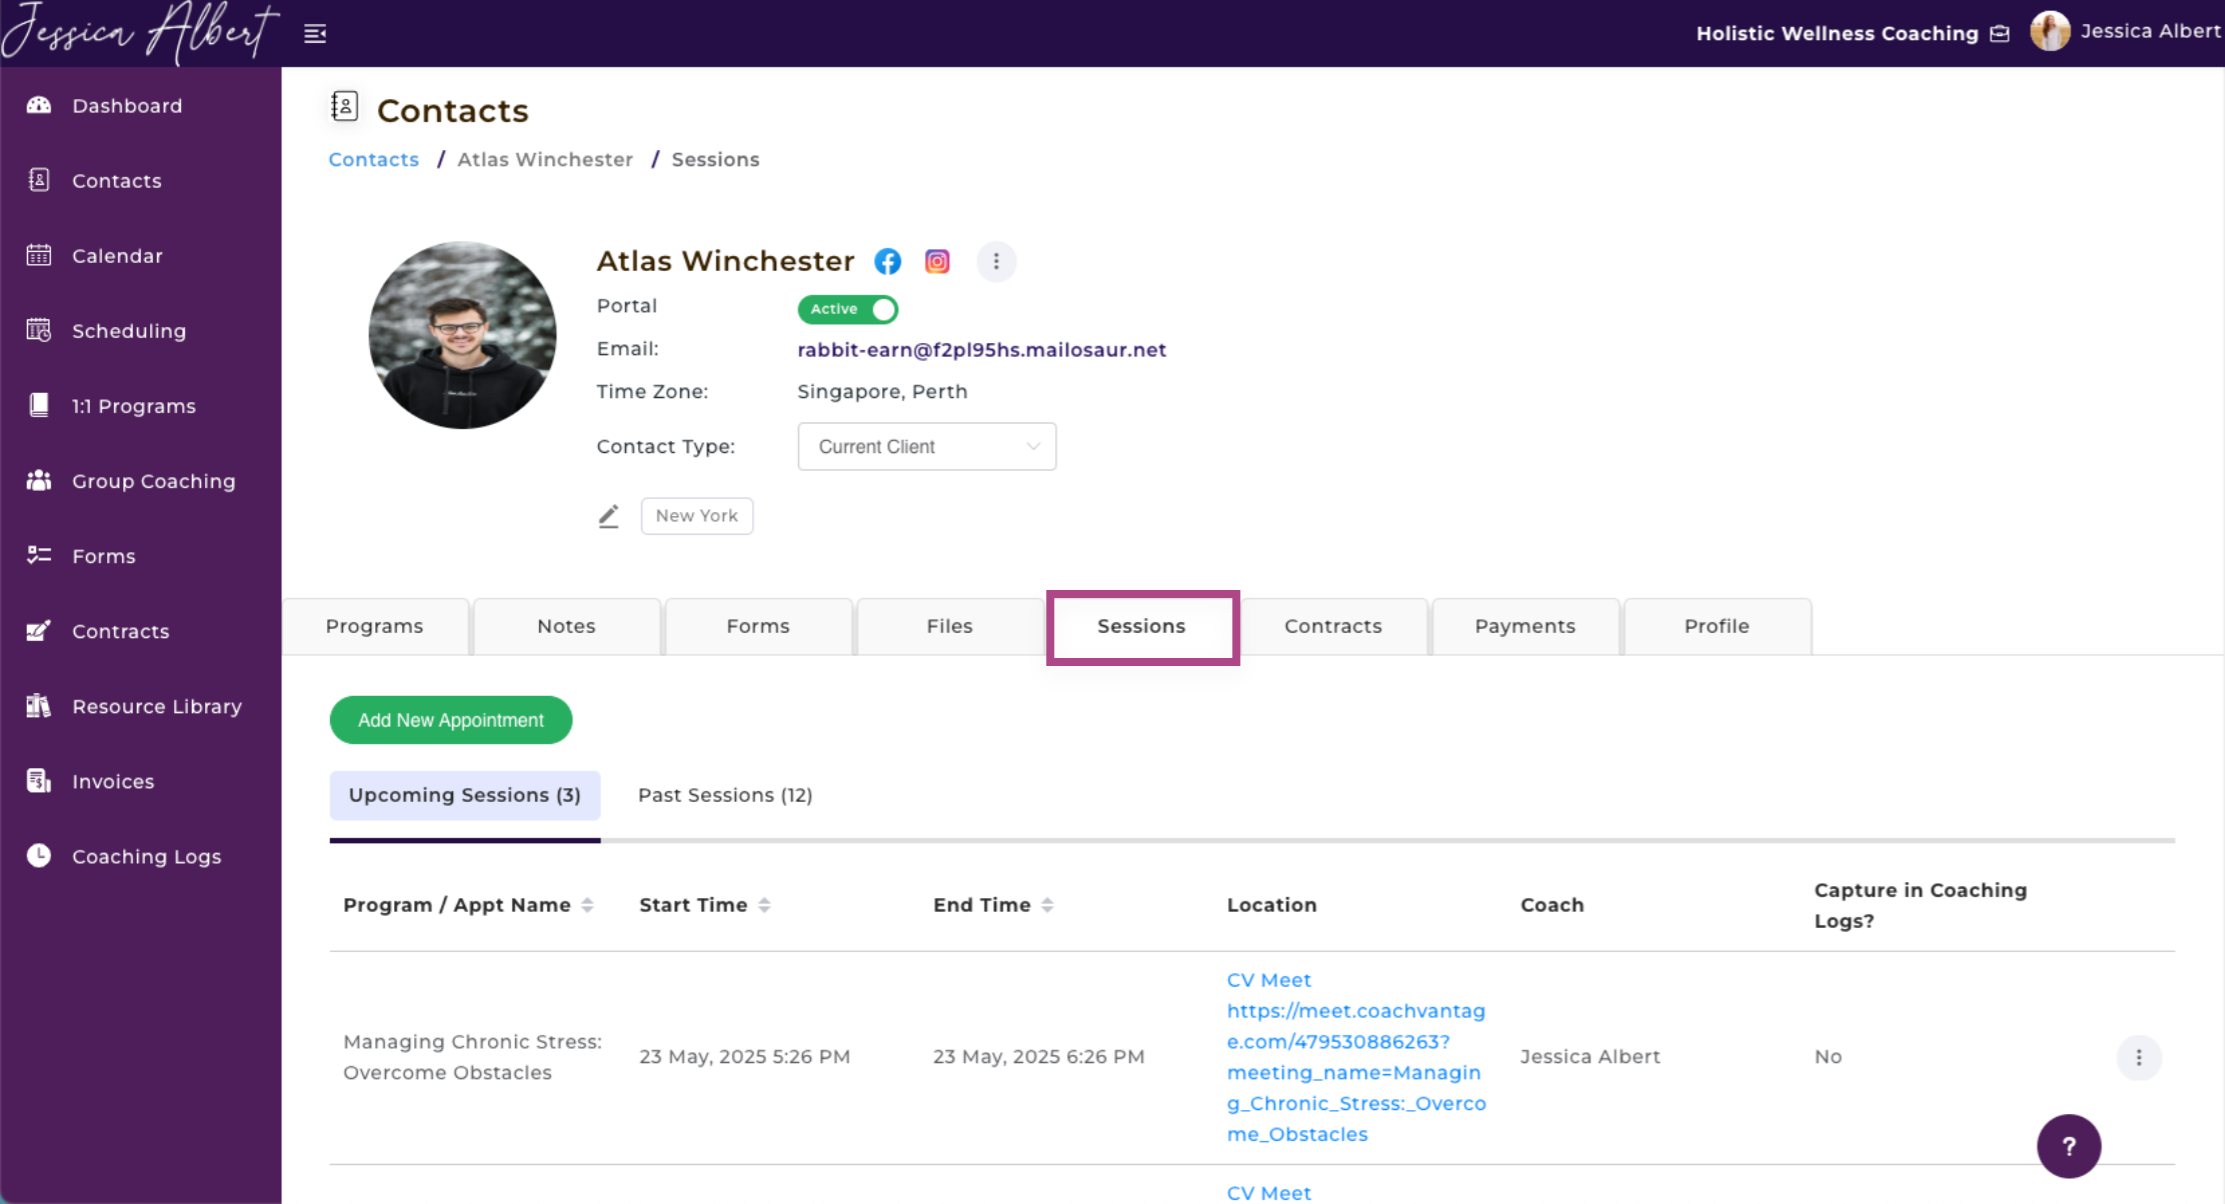
Refer to the article on Contact's Sessions Page for more details.
13. Contracts
The Contracts tab is where you can send a contract for e-signature as well as to view the status of all contracts (or documents) that you have sent to the contact for e-signature.
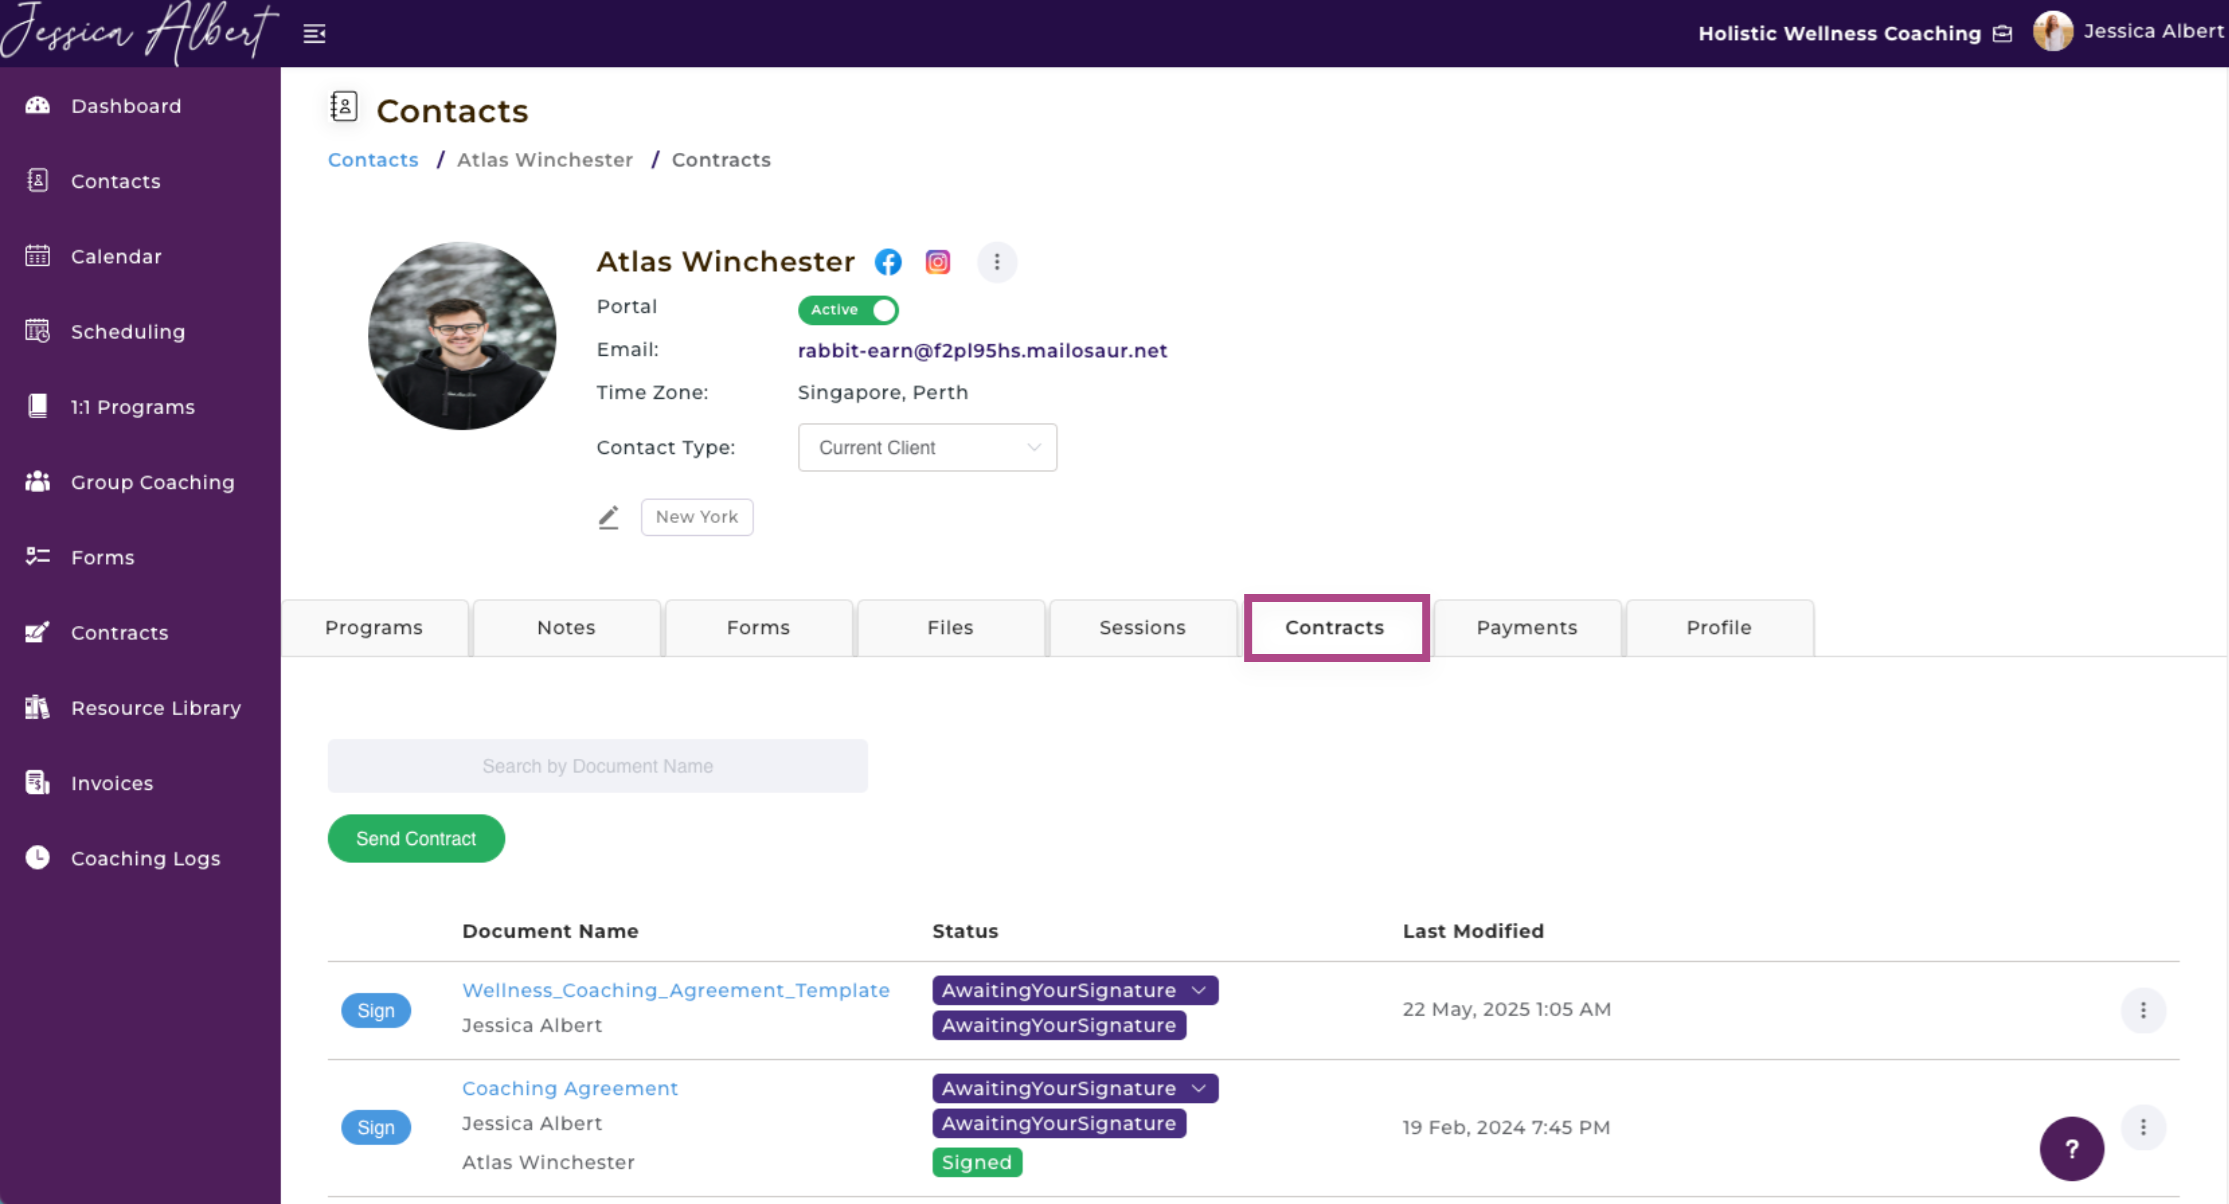
Refer to the article on Contact's Contracts Page for more details.
14. Invoices 💸
The Payments tab is where you can create invoices for a contact as well as to view the status of all invoices that you have sent to the contact for payment.
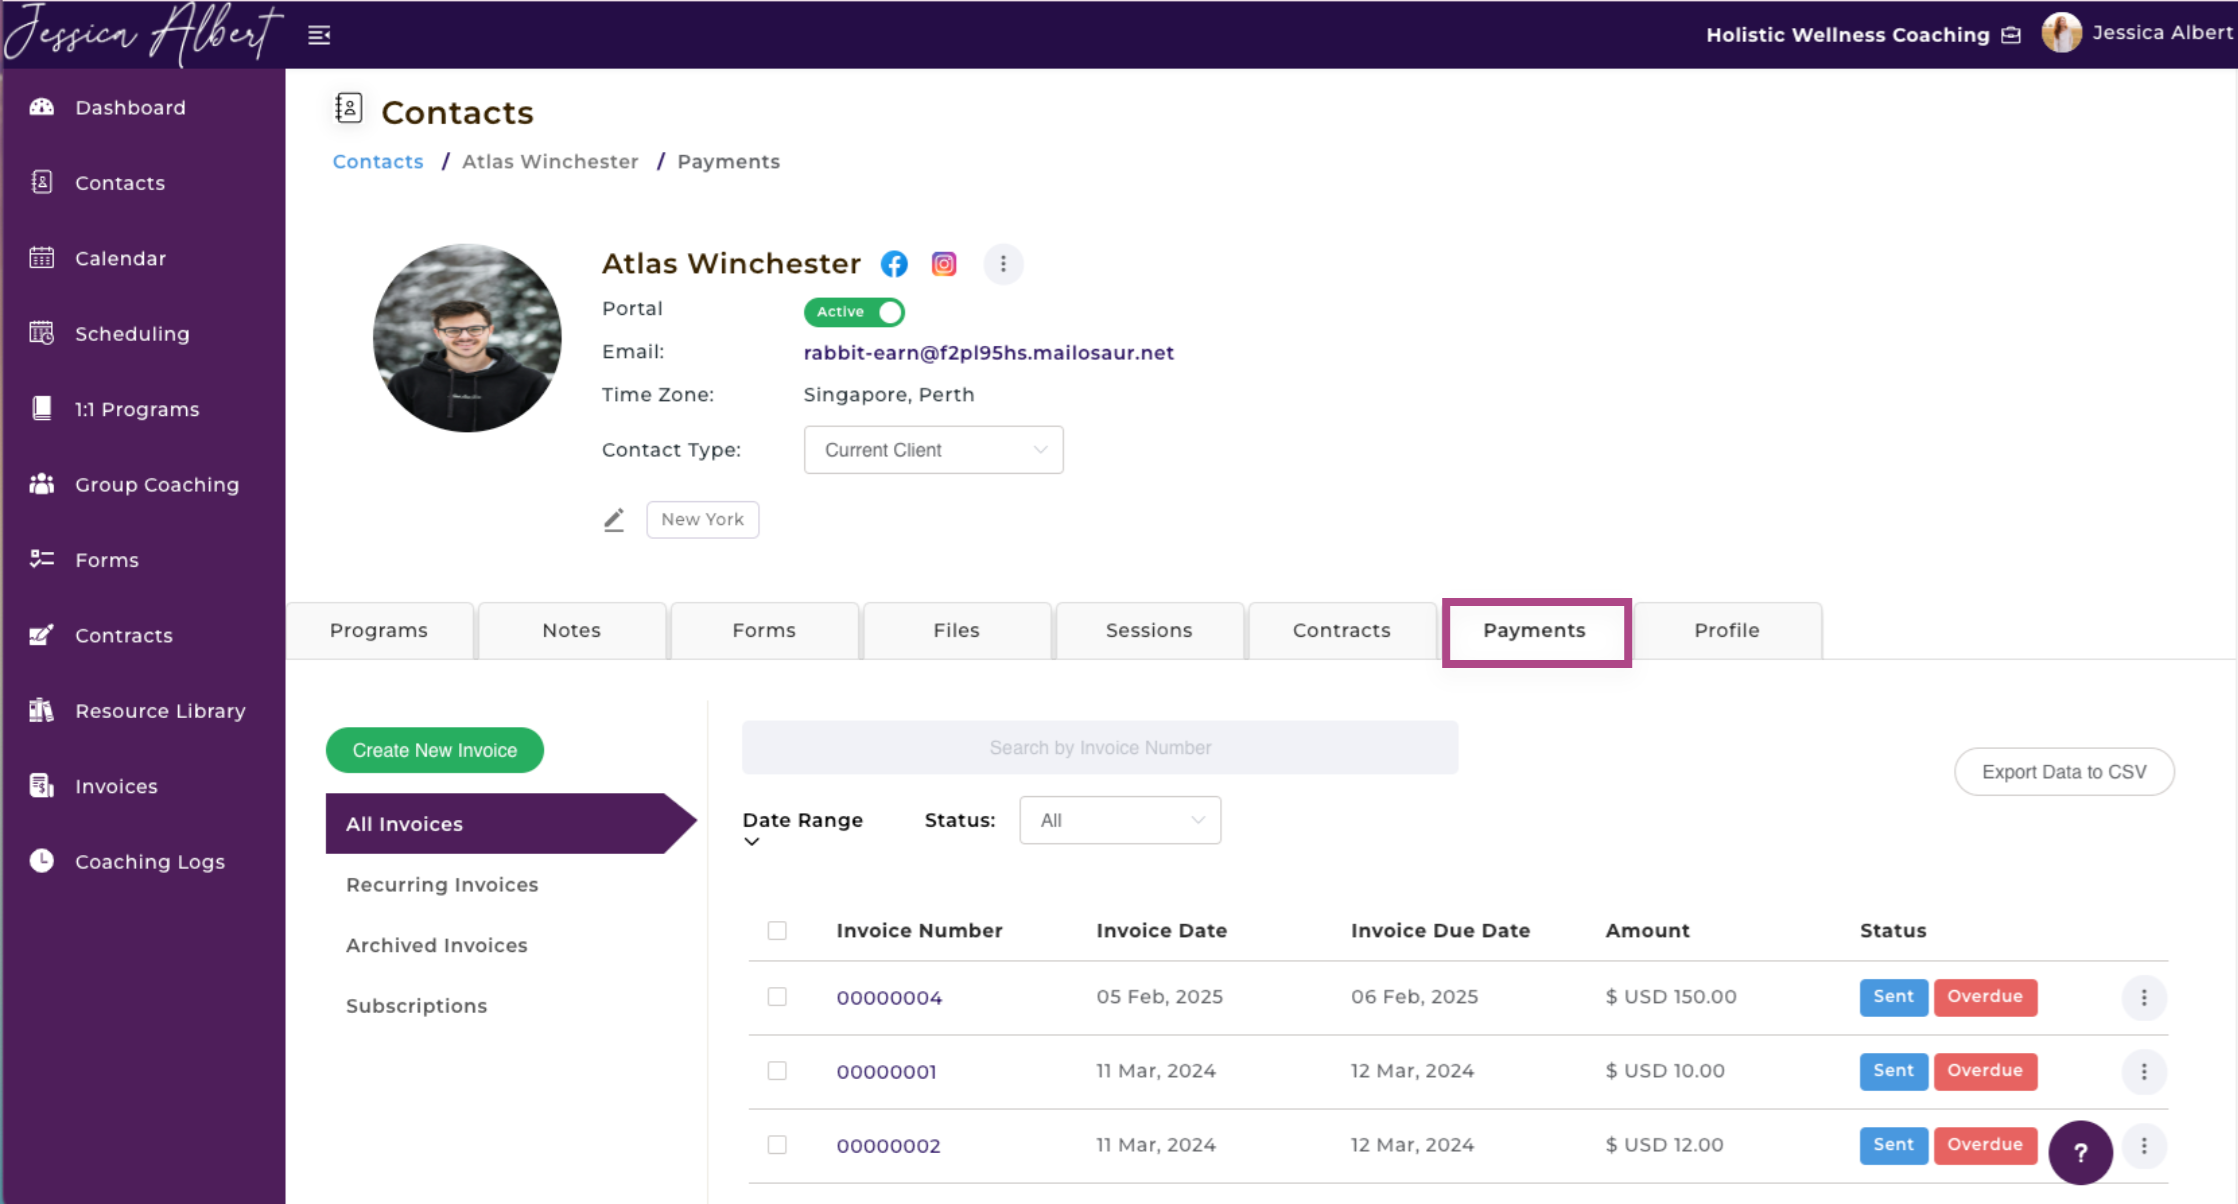
Refer to the article on Contact's Invoices Page for more details.
15. Profile 👩🦱
The Profile tab is where you can view and edit the personal details and other information about a contact.
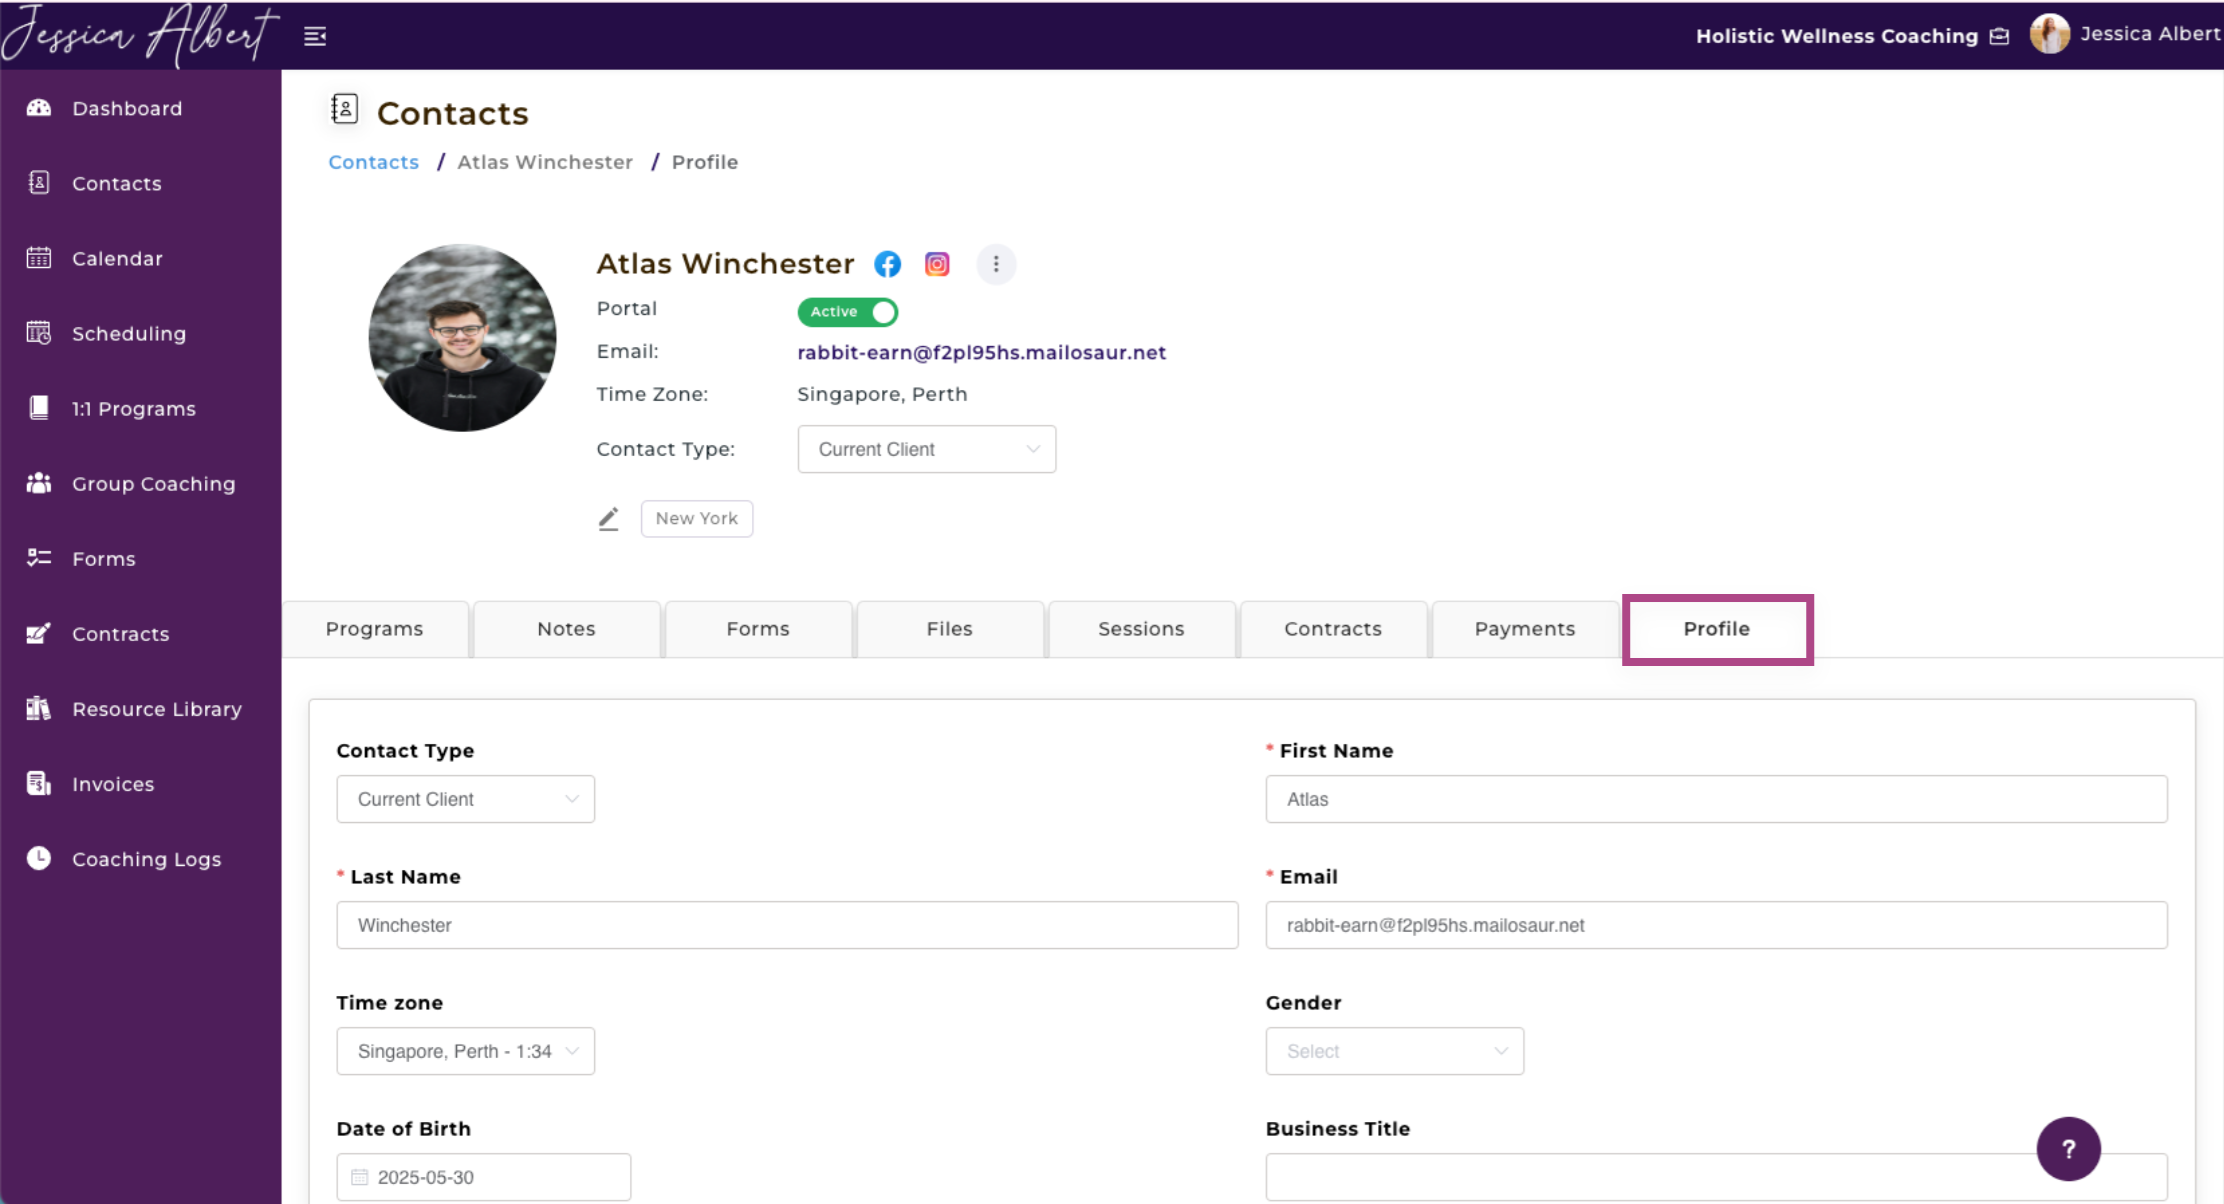
Refer to the article on Contact's Profile Page for more details.