How to Create One-off Invoices and Recurring Invoices
Overview
You can invoice clients using the Invoice feature in CoachVantage. There are no limits to how many invoices you can send.
In order for clients to pay your invoices online, you must first ensure that you have connected your Stripe or PayPal account to CoachVantage.
It's possible to send an invoice without connecting to Stripe or PayPal. However, in this situation, your clients will not be able to make the payment online and you will need to manually reconcile payments.
To learn more, refer to Connecting to Payment Gateways.
Create An Invoice 🧾
To create a new invoice:
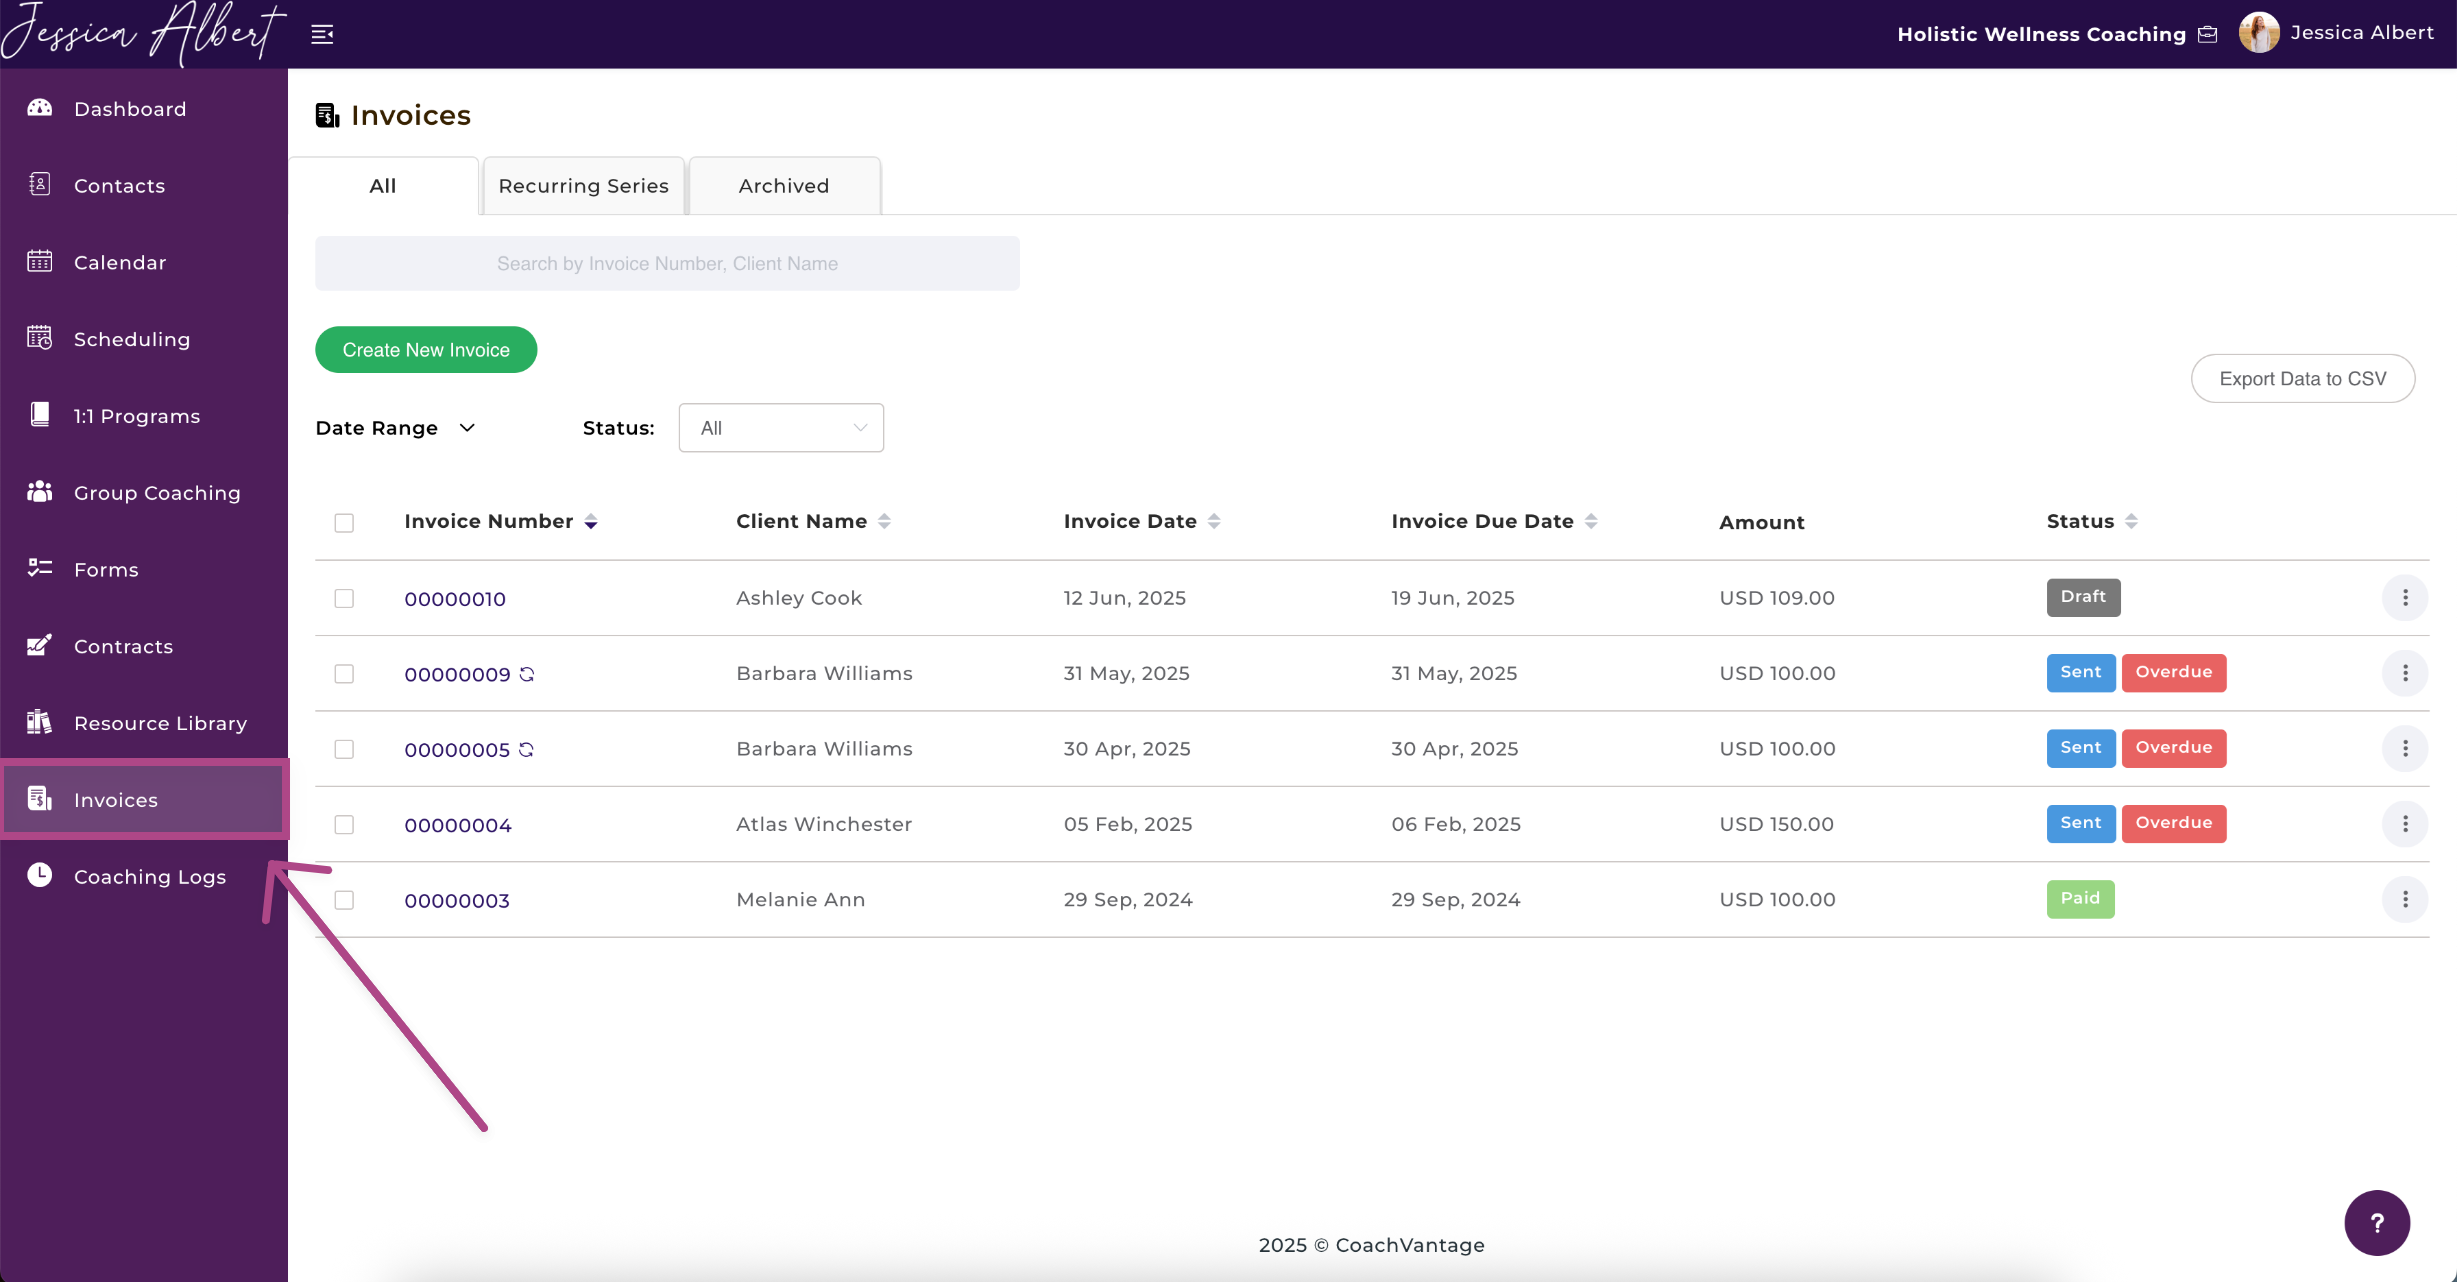
- Click Invoices on the left menu.
- Click Create New Invoice button.
- The Create New Invoice Page opens.
In this article, we'll be covering:
1. Bill To 💸
Existing Contact 👩🦱
Choose this option if the client you wish to bill is already in your contact list.
You may use the drop-down bar to search your contact list or type in the name of your contact.
Once you've selected the contact you wish to bill, the contact's email address is automatically populated in the Client Email field as shown below. CoachVantage will email the invoice to this email address.

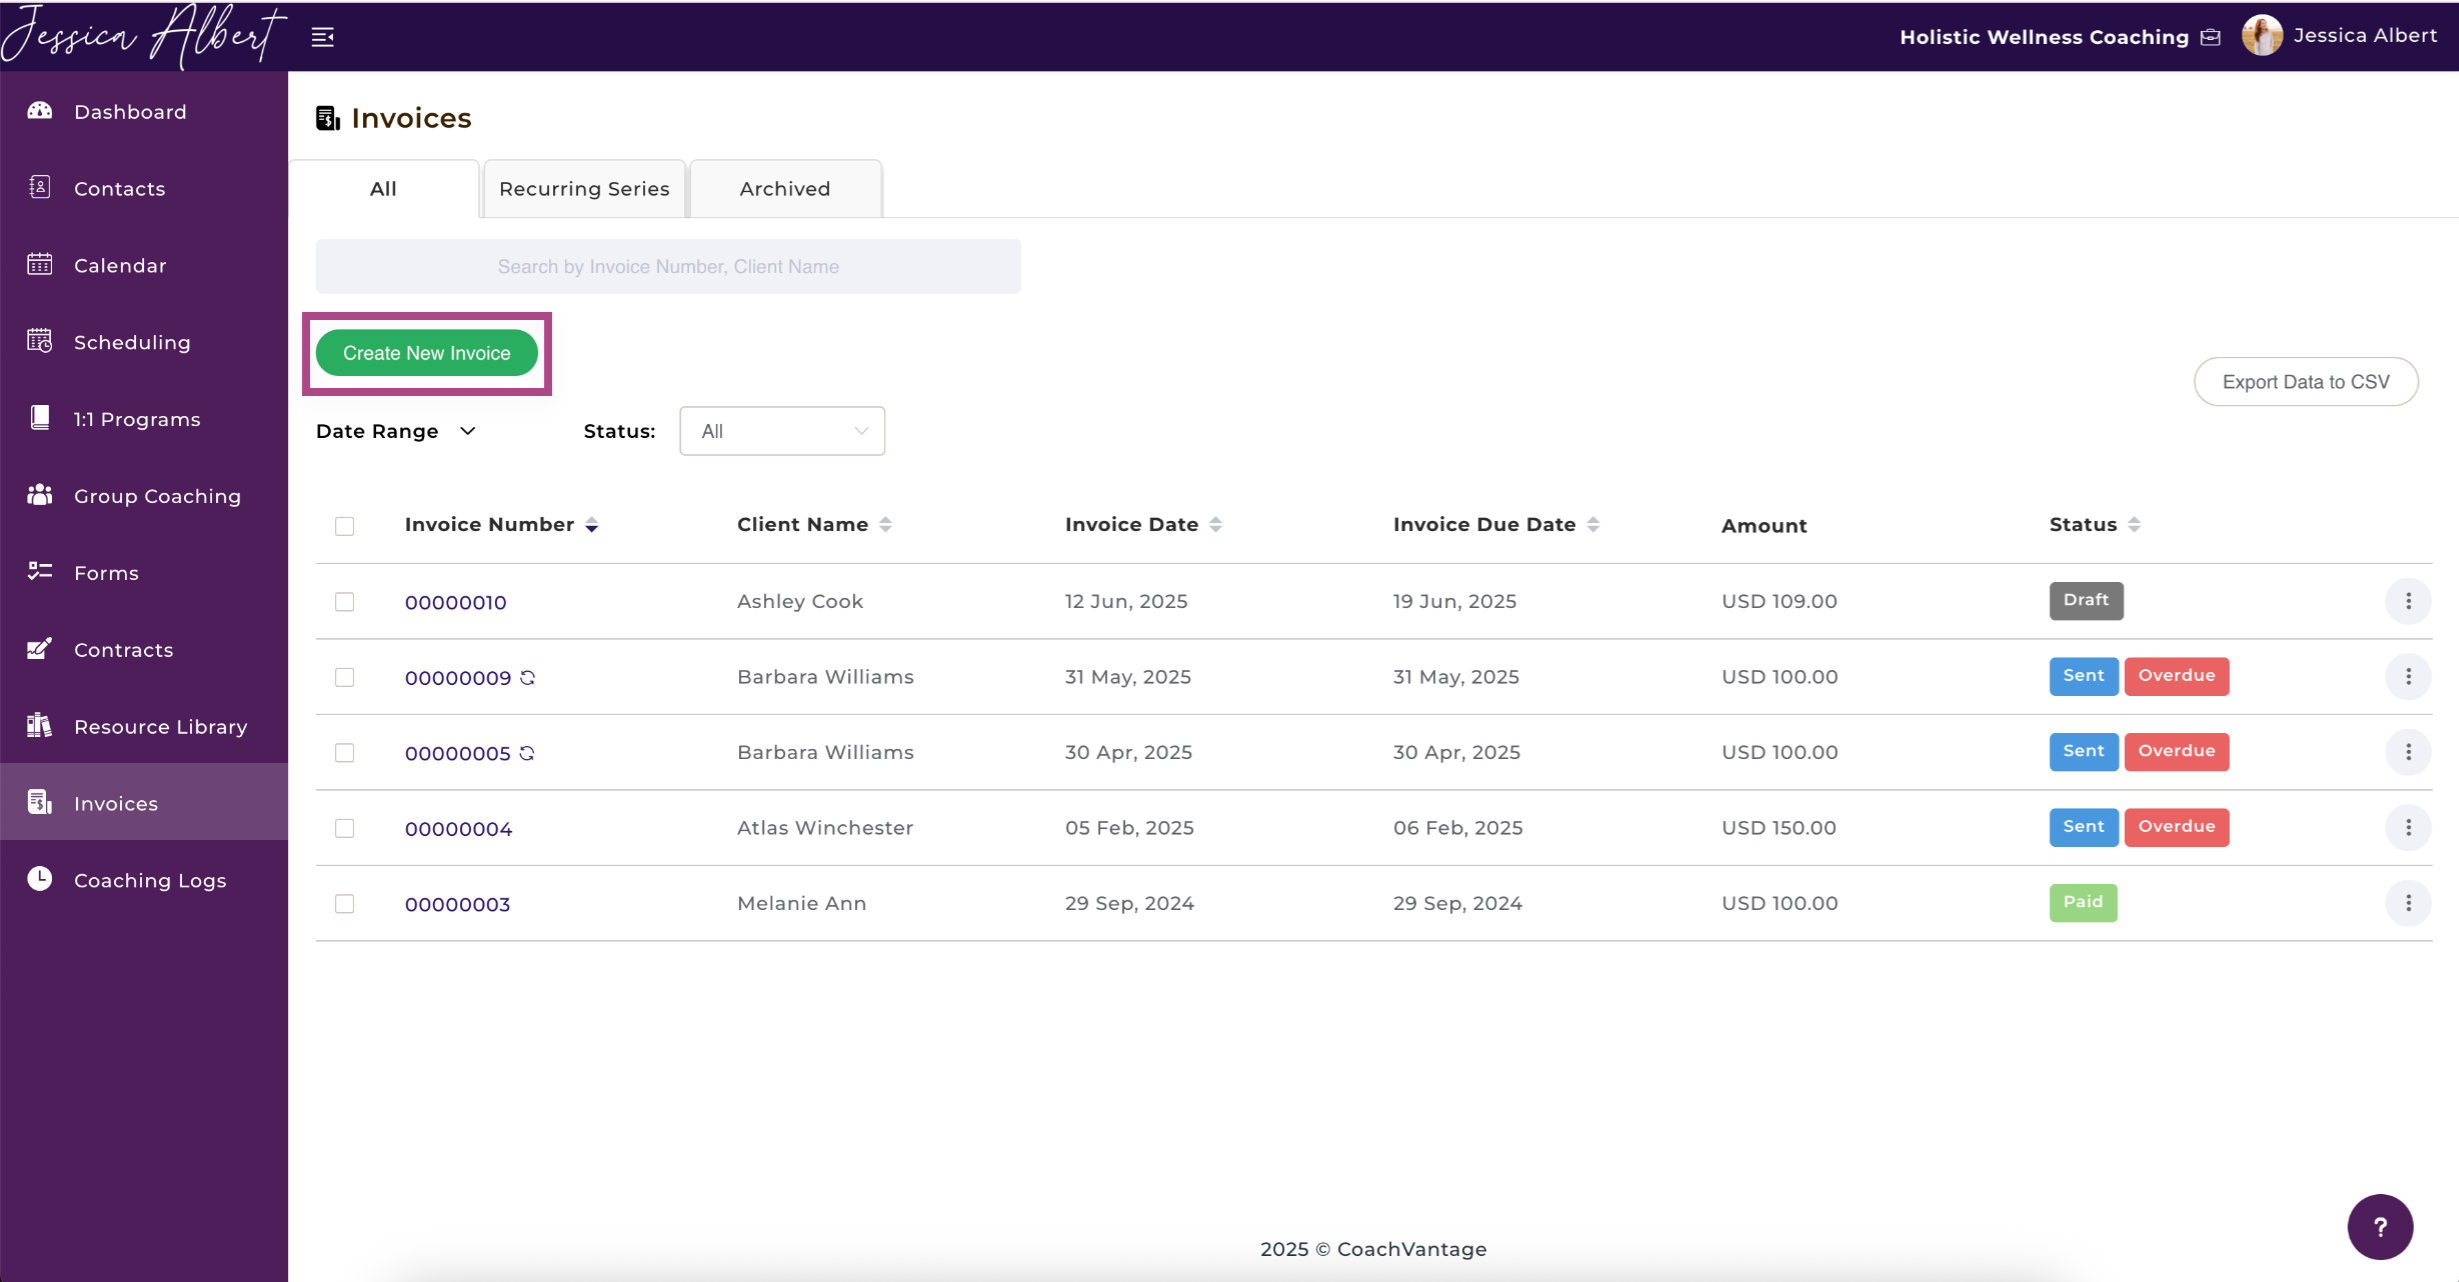
New Client 🧑🦳
Select New Client if you wish to invoice a client that's not currently saved in your Contacts.
Enter the First Name, Last Name and email address of the client and click Save As Contact.
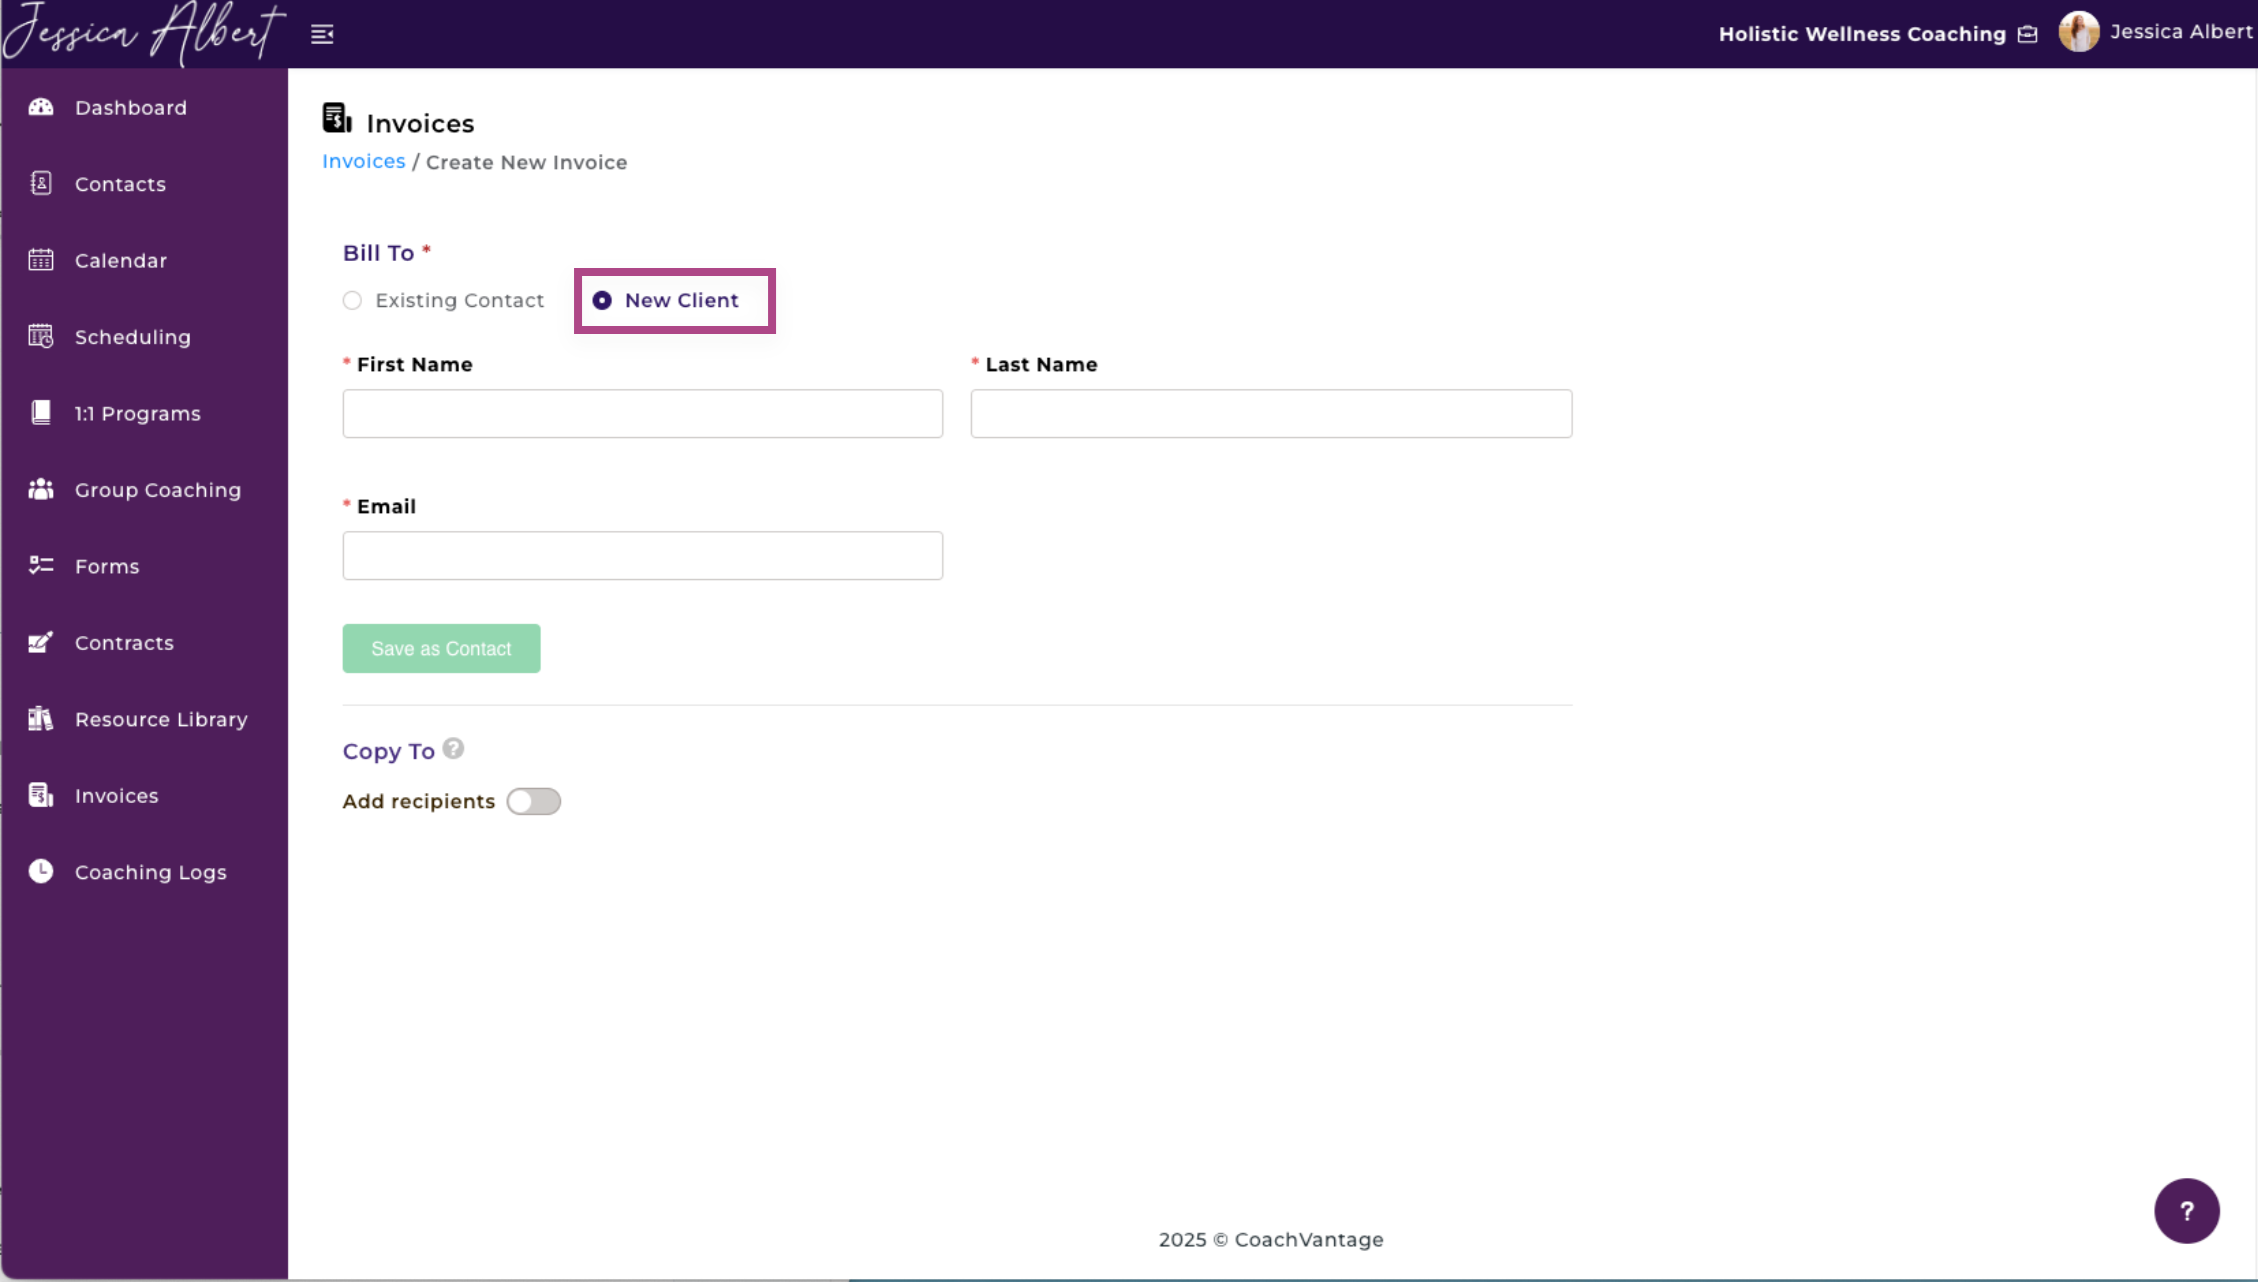
After clicking Save As Contact, this new client will be automatically saved and added to your Contacts. Learn more about Contacts.
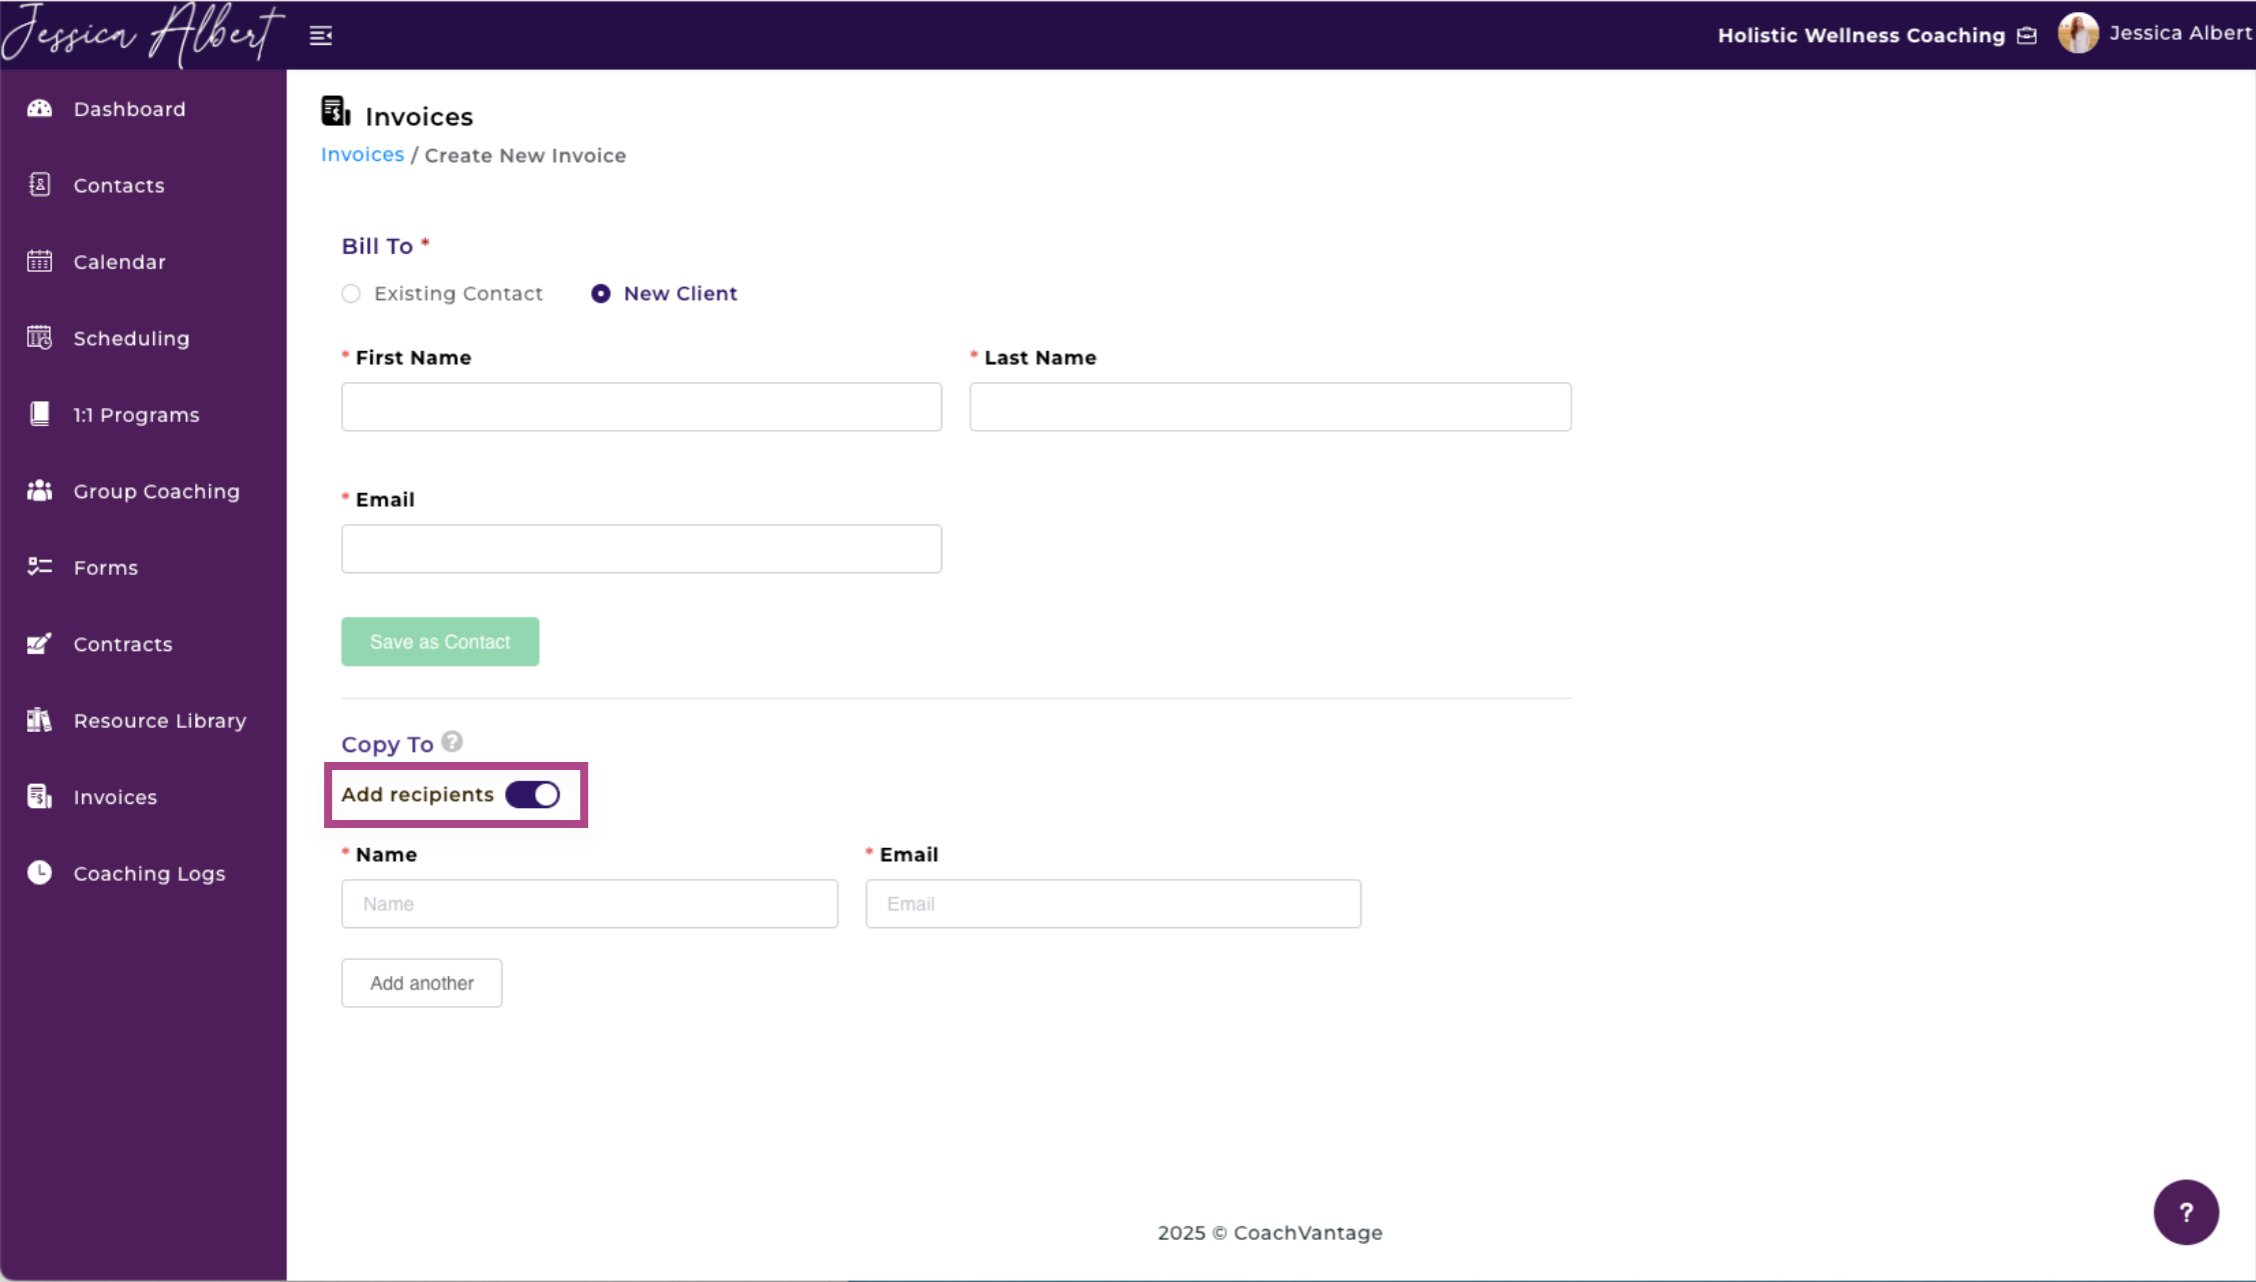
2. Copy To 📑
You can include recipients, other than the client, that need to receive the invoice in the Copy To section.
Recipients do not have to be in your contact list in order to receive the invoice.
Tip: This feature is useful if you would like to include stakeholders to receive an invoice. For example, you can add the client's HR Manager or Finance Manager who may need a copy of the invoice or who may be the persons that make payment for the invoice.
To include recipients, type in the name and email of recipient and select Add Recipients. You may add up to three recipients.
Note: Recipients that you add do not get saved as Contacts. They will only receive the invoice in their email.
3. Invoice Type
Nonrecurring Invoice
Select a Nonrecurring invoice if you wish to send a one-time invoice to your client.

1. Invoice Number - The invoice number is automatically generated by CoachVantage in sequential order. The very first invoice number starts at 00000001 and has 8 digits.
You may customize the invoice number if desired by typing in the invoice number you would like to use.
Note: If you customize an invoice number, the next invoice number that CoachVantage automatically generates will be incremented by '+1'. For example, if you have entered a custom number such as 8900023, CoachVantage will use 8900024 as the next invoice number.
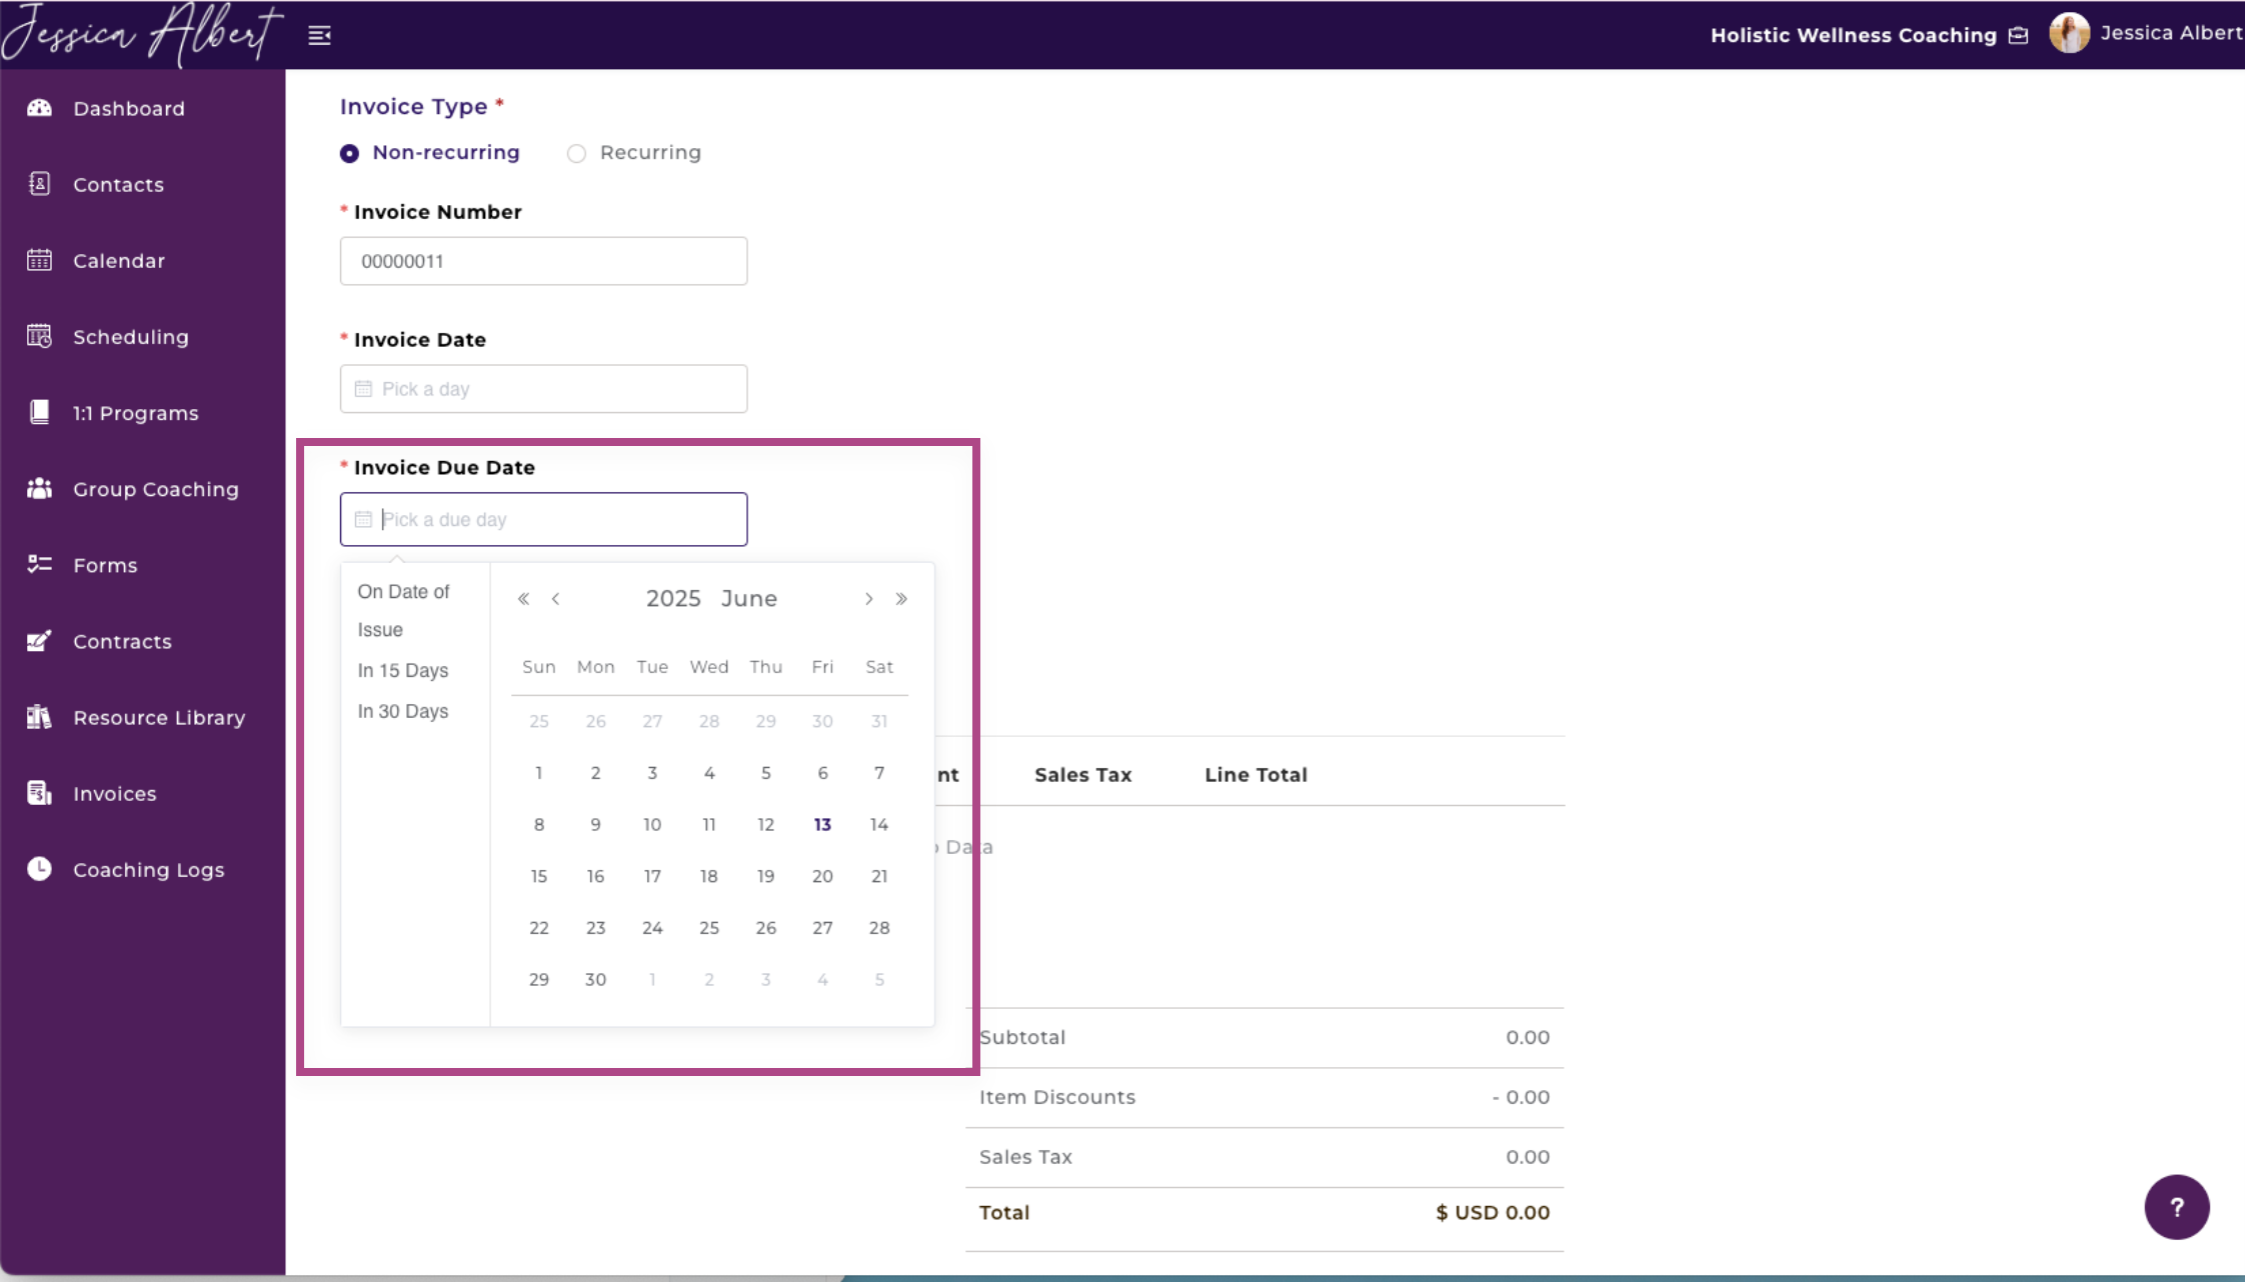
2. Invoice Date - Date of Issue. The invoice date would be the day your contacts receive the invoice via their email.
3. Invoice Due Date - The invoice due date would be the day your contacts should make payment by. You may choose a specific date using the calendar function or select a time duration from the date of issue.
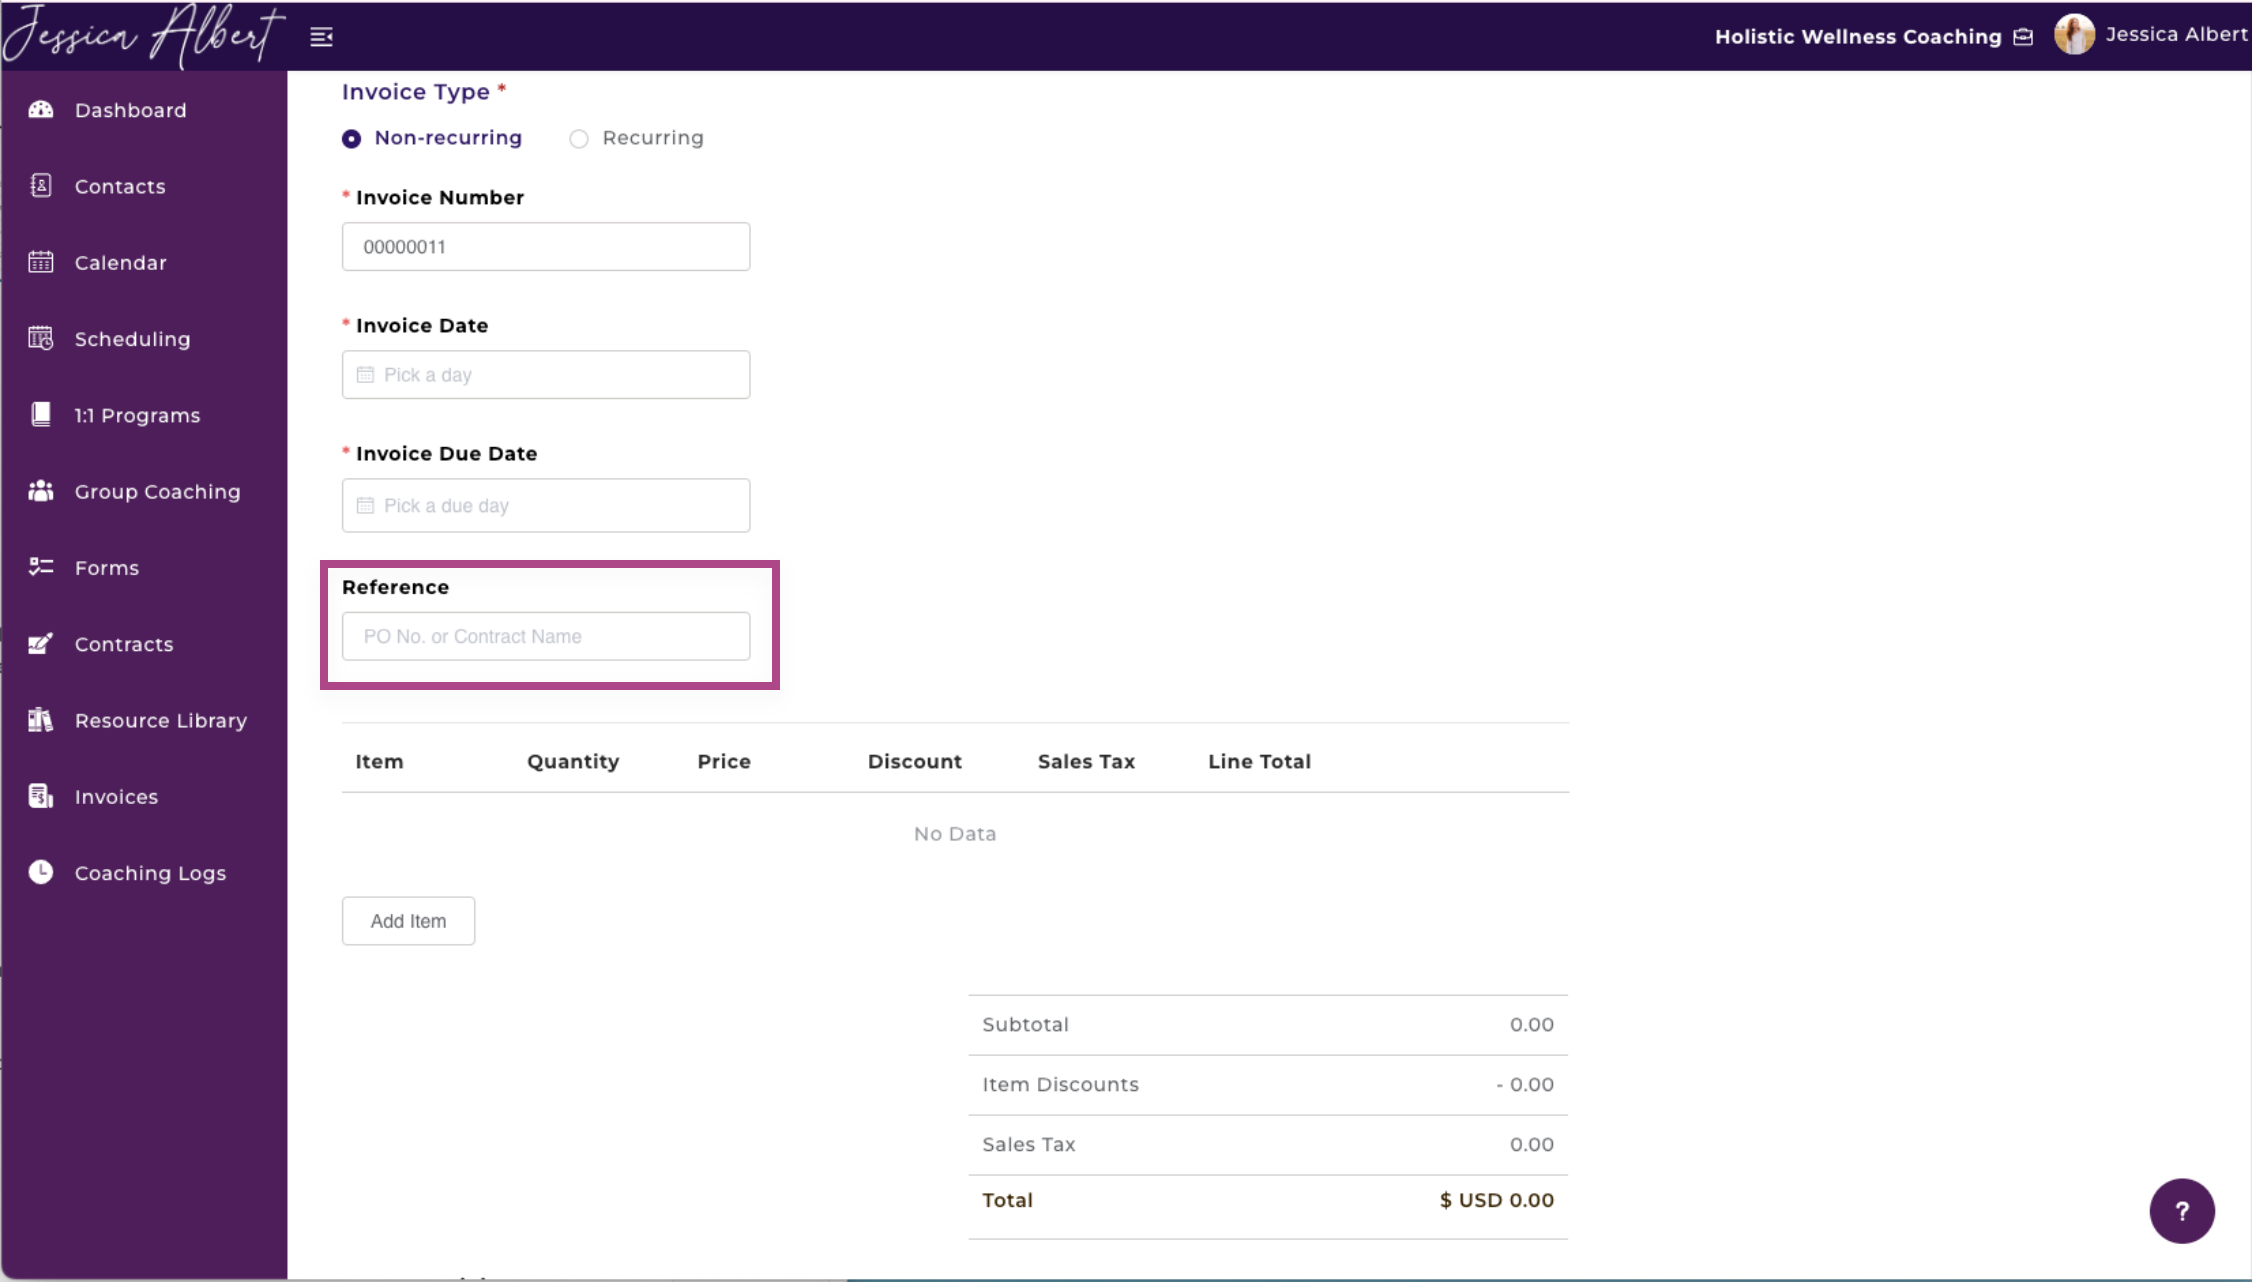
4. Reference (Optional) - You may enter a reference description for what this invoice is for, such as a Purchase Order Number or a Contract Name here.
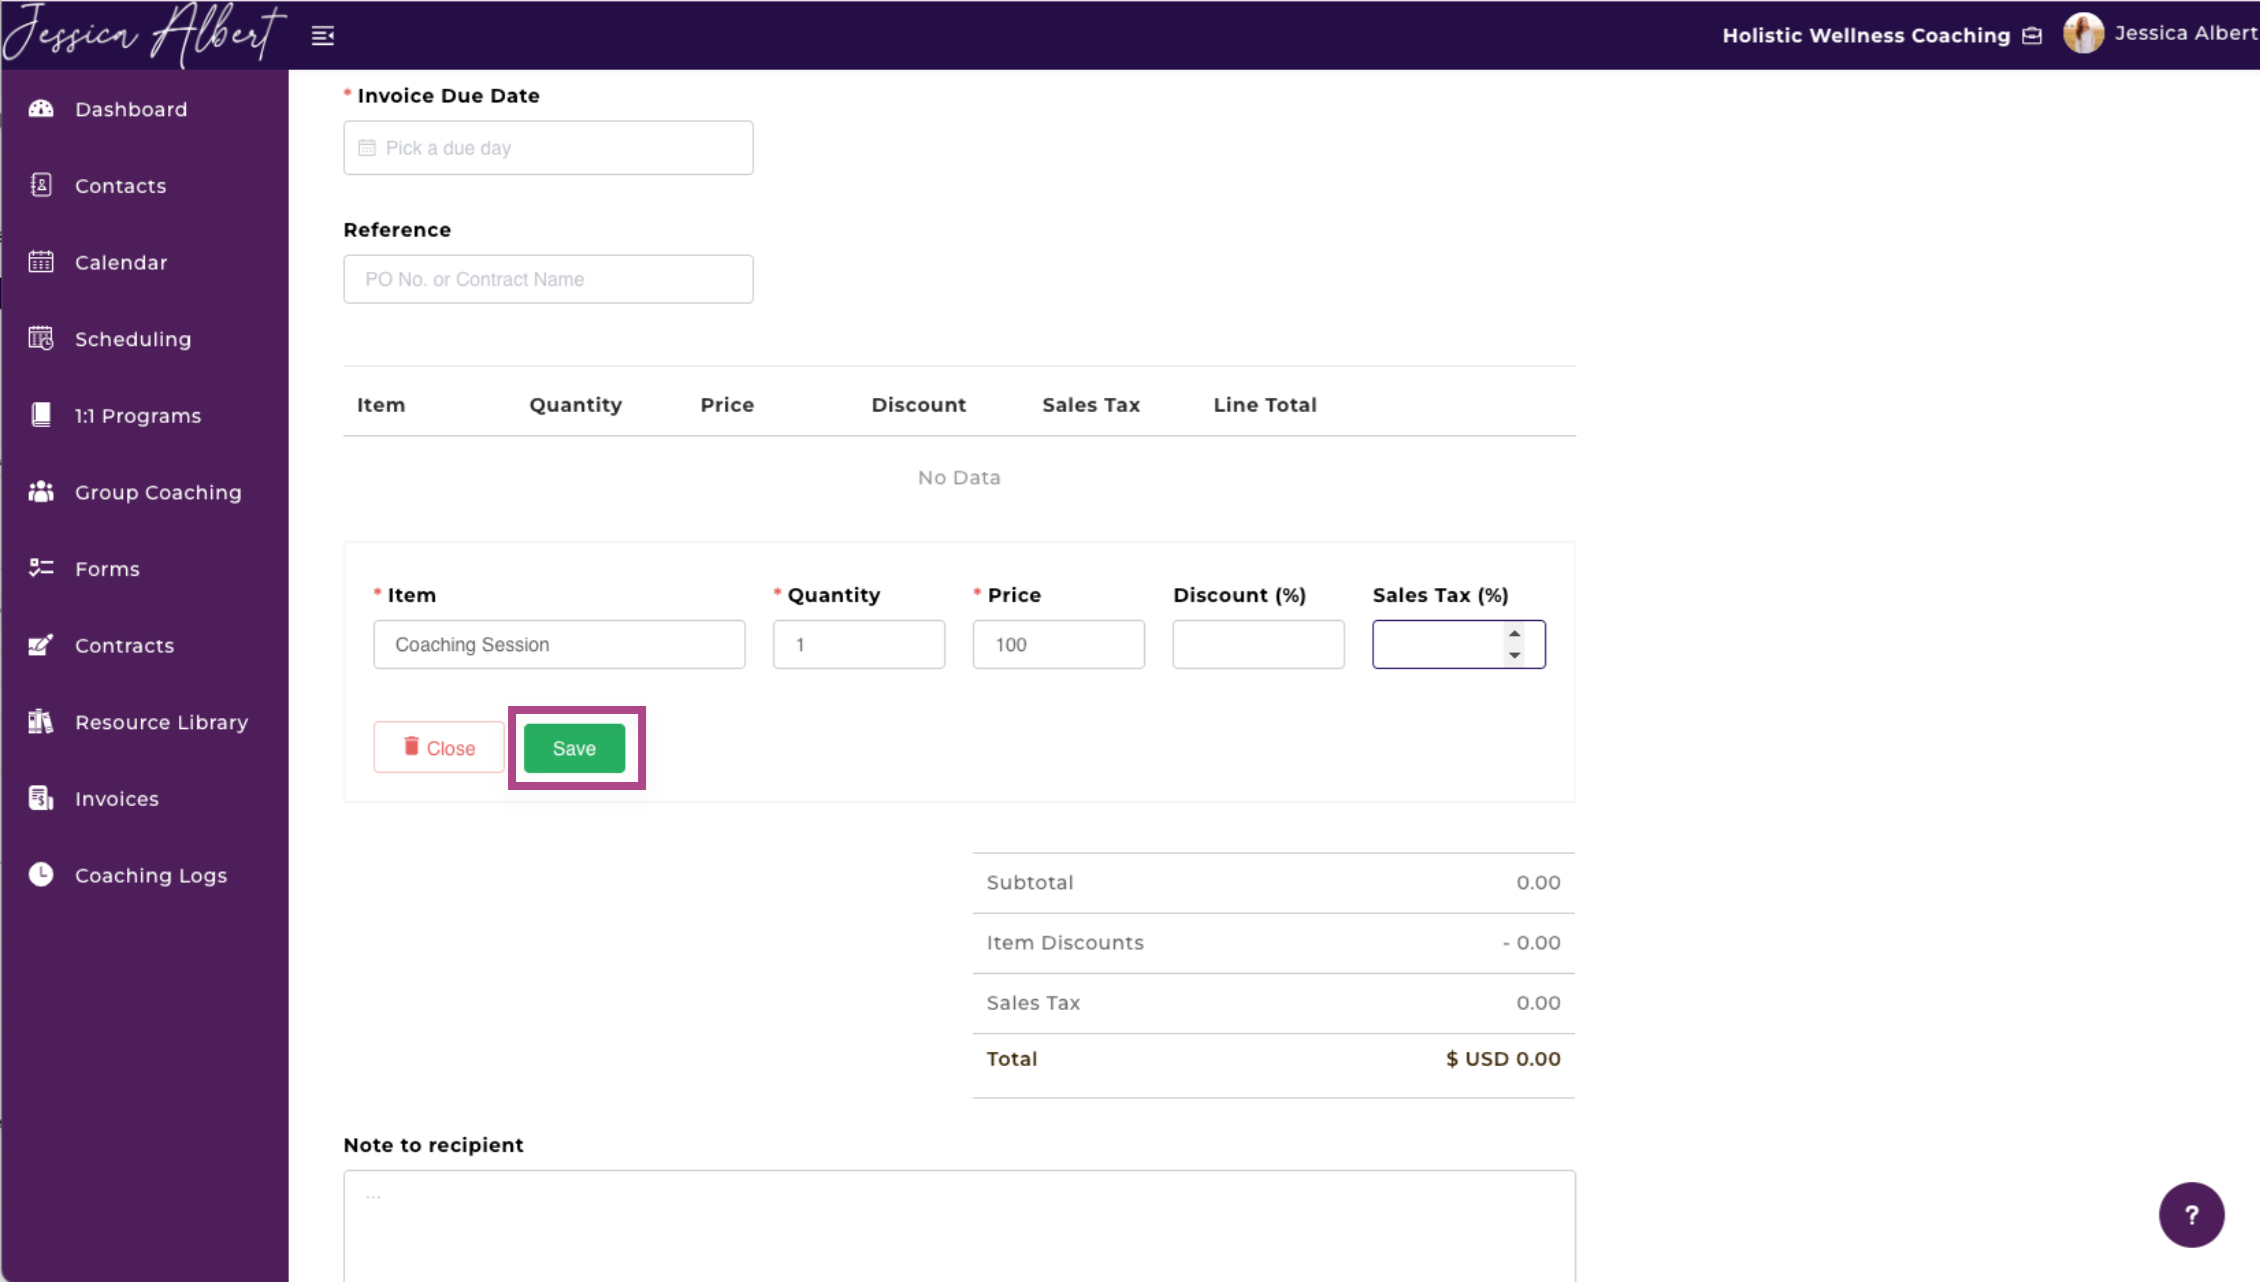
5. Add Item
Add the service, items, or program you are selling. The total amount due would be automatically calculated.
Select Add Item to add Item, Quality, Price, Discount, and Sales Tax.
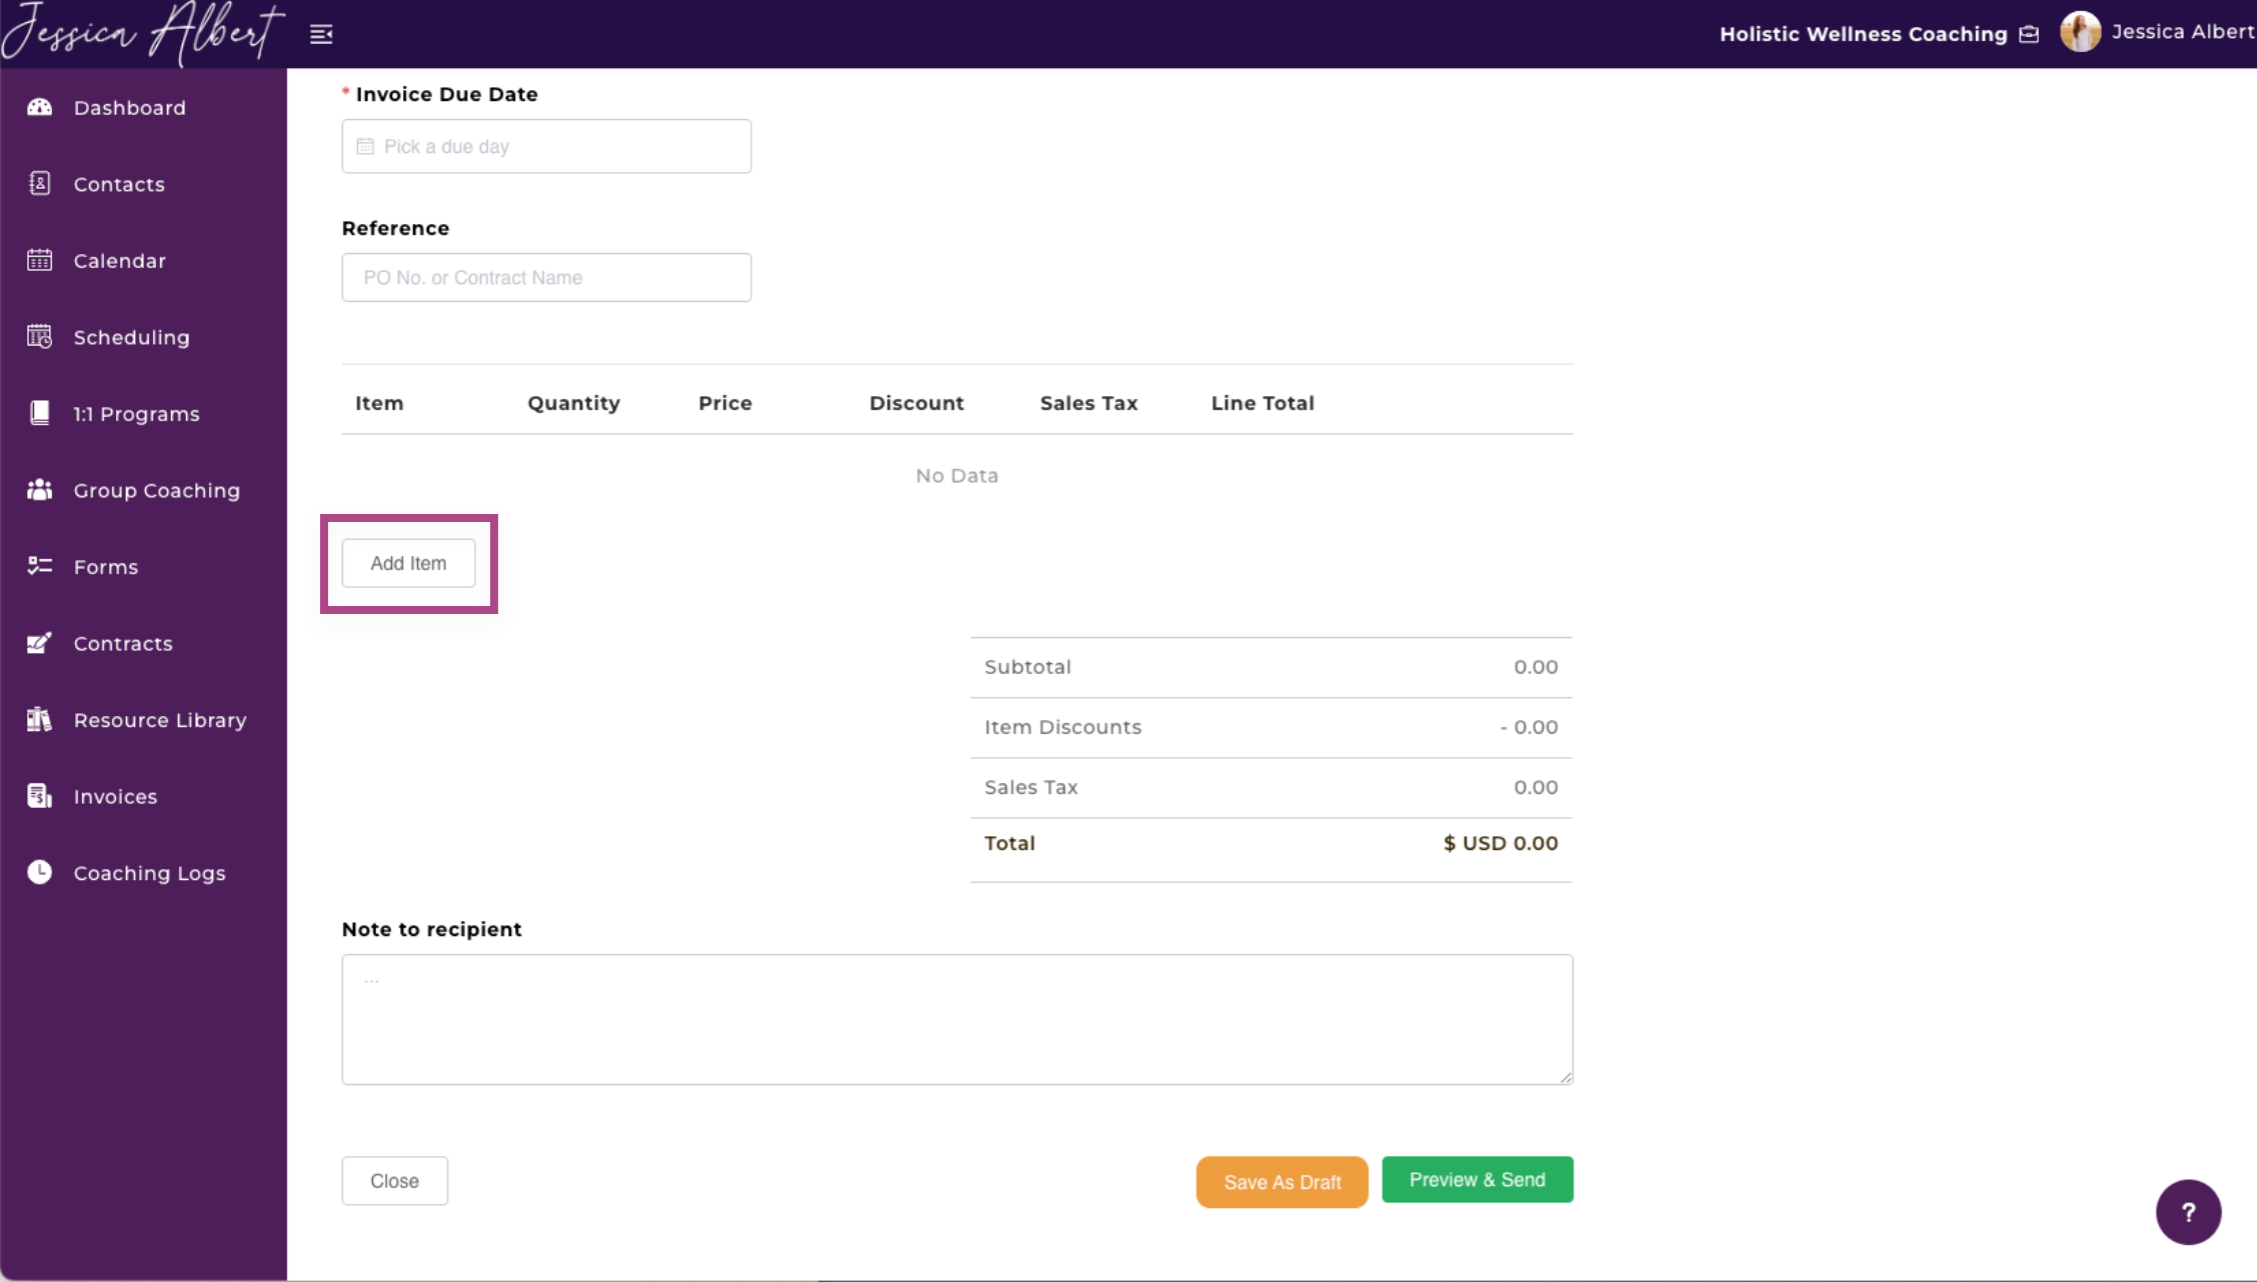
6. Note to Recipient
Lastly, if you have a note you'd like to include in the footer of the invoice, simply type it in the Note To Recipient field shown below.
Additionally, Note To Recipient would be automatically populated on your invoice if you have set this up in your Invoice & Payment Settings. You can edit the note if required when you create a new invoice. To learn more, check out Invoice & Payment Settings.
Tip: The note could indicate your contact details for any inquiries relating to the invoice, thus allowing your client to reach out if they have questions. It could also specify your bank details for clients to make direct bank transfers, etc.
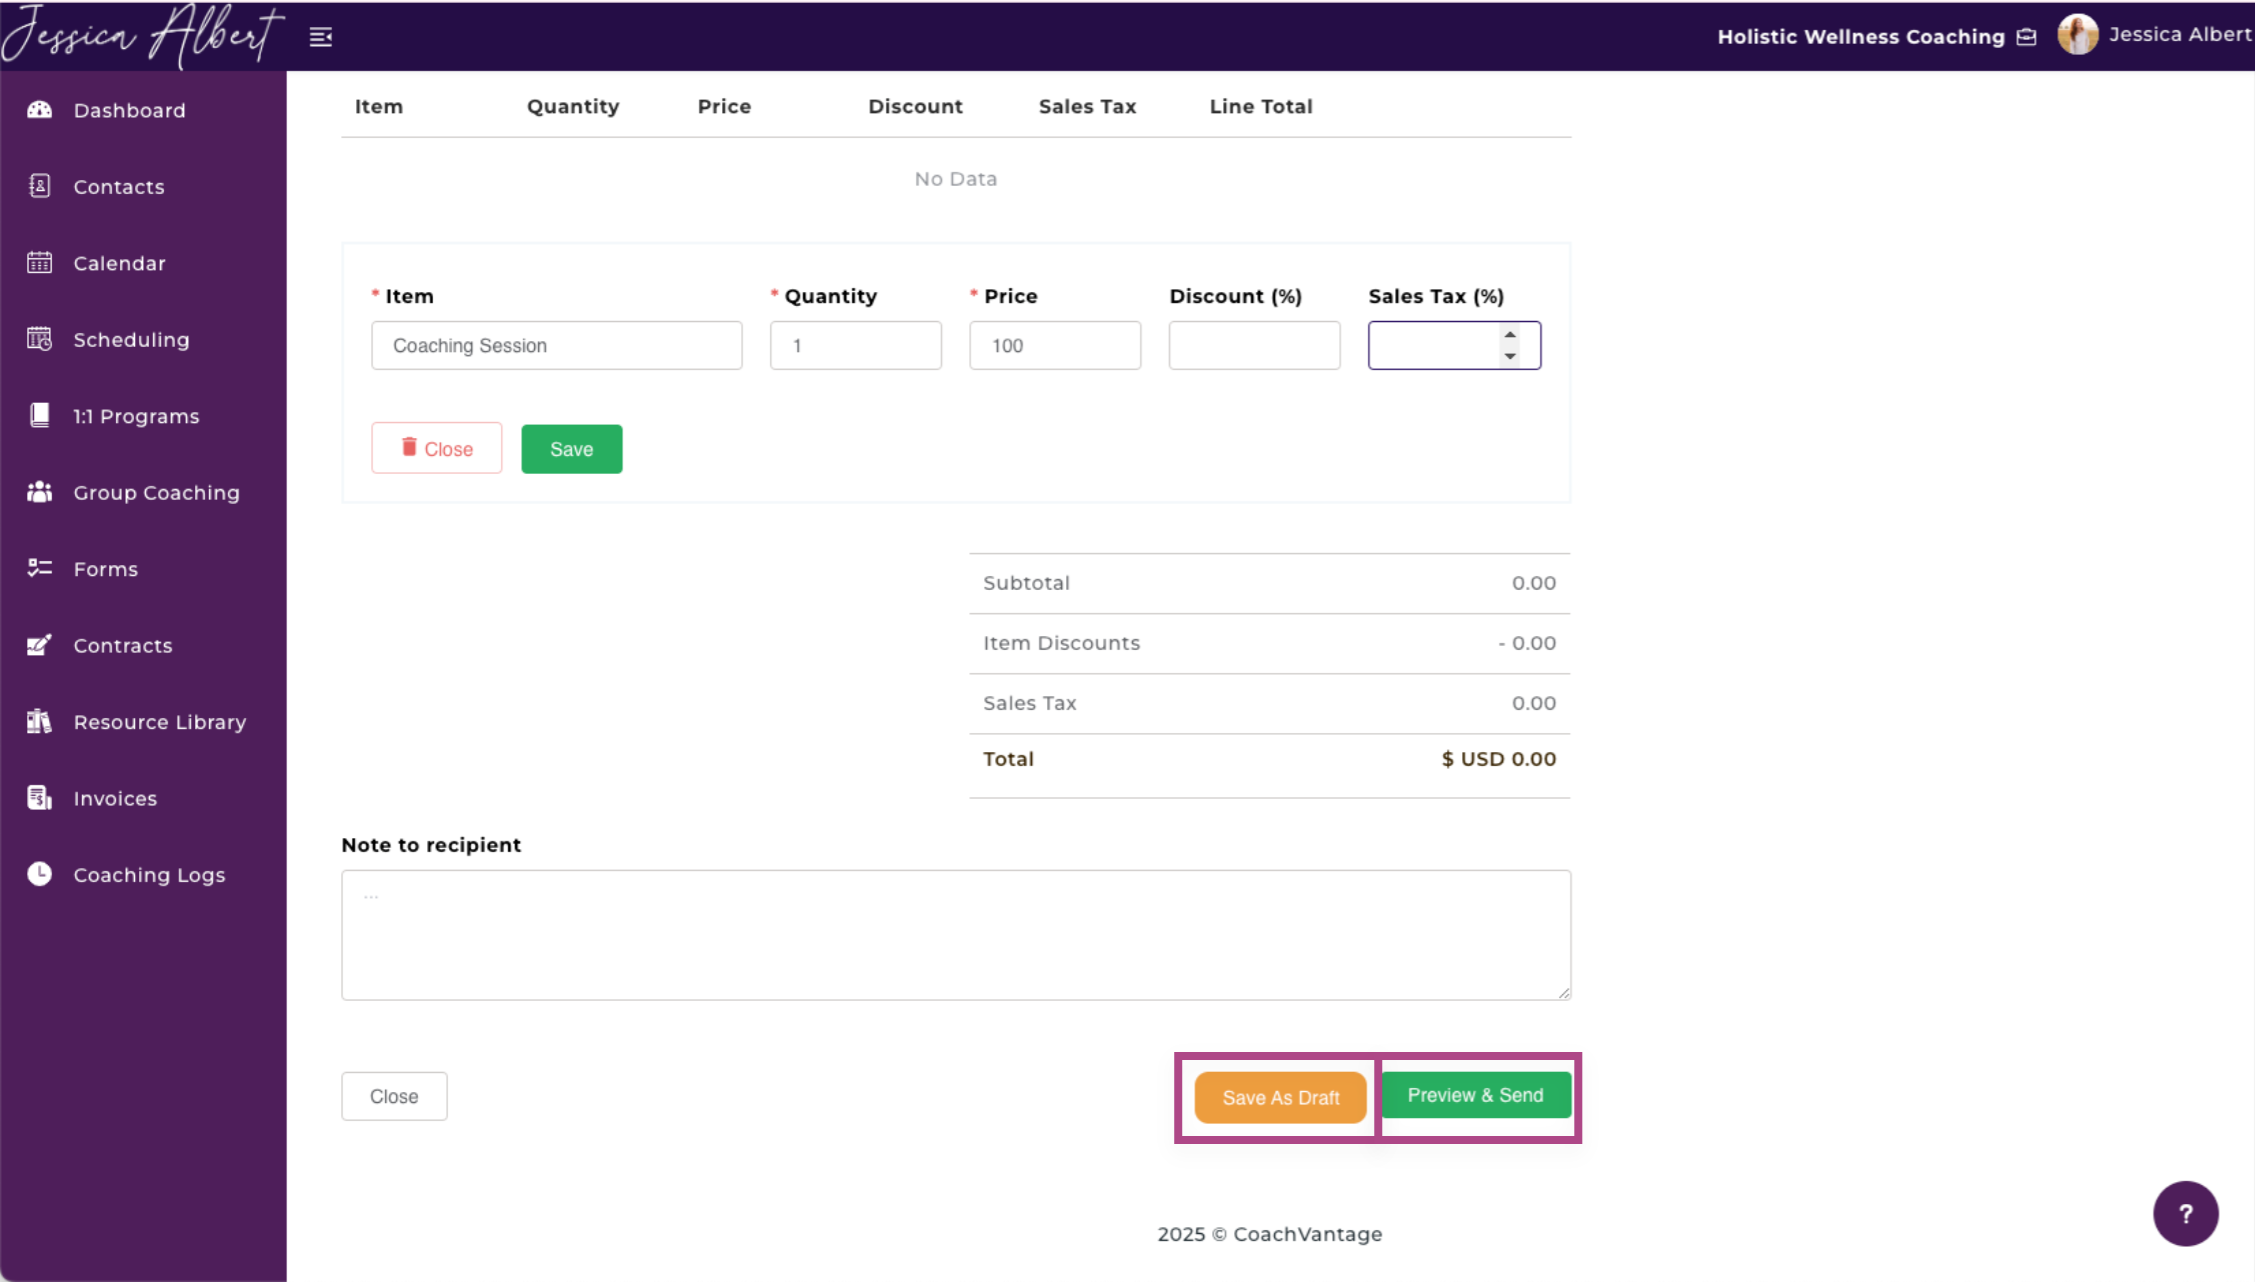
7. Select either Save As Draft or Preview & Send the Invoice.
- Save As Draft - If you wish to save the invoice as a draft.
- Preview & Send - A pop-up window of the preview invoice appears, allowing you to review your entries. Once you have confirmed that everything is in order, you click the Send Invoice button to send the invoice to clients.
The preview option looks like this:
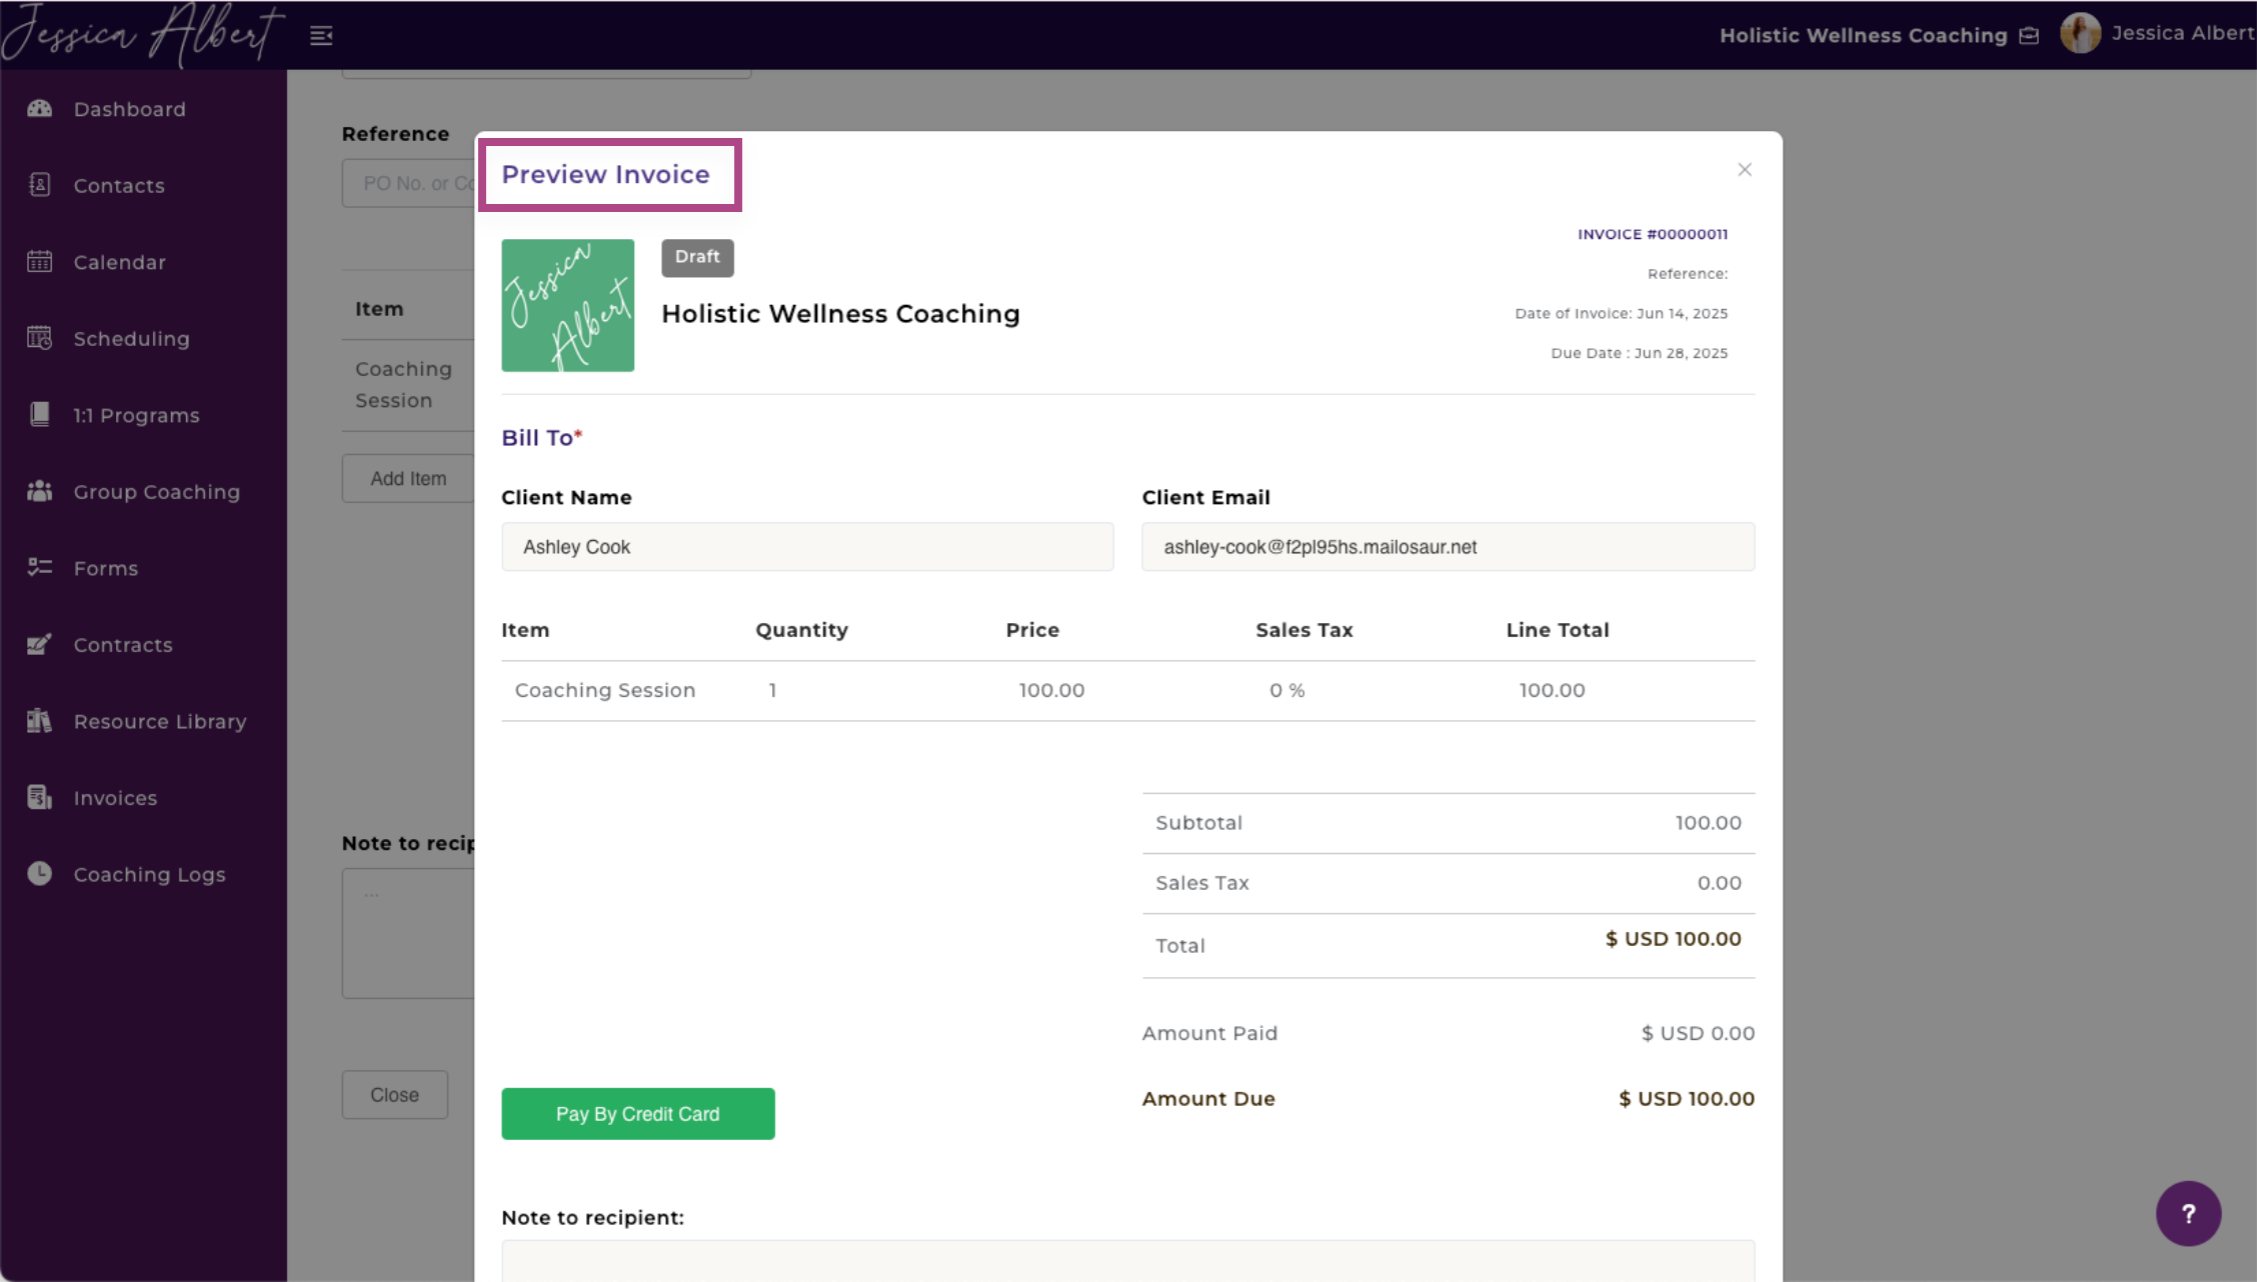
Tip: Payment methods available to your client would be dependent on whether you have connected to Stripe and PayPal. Clients can make payment by credit / debit card or PayPal, respectively.
Read the Setting Up Invoice & Payment article to learn how to do so.
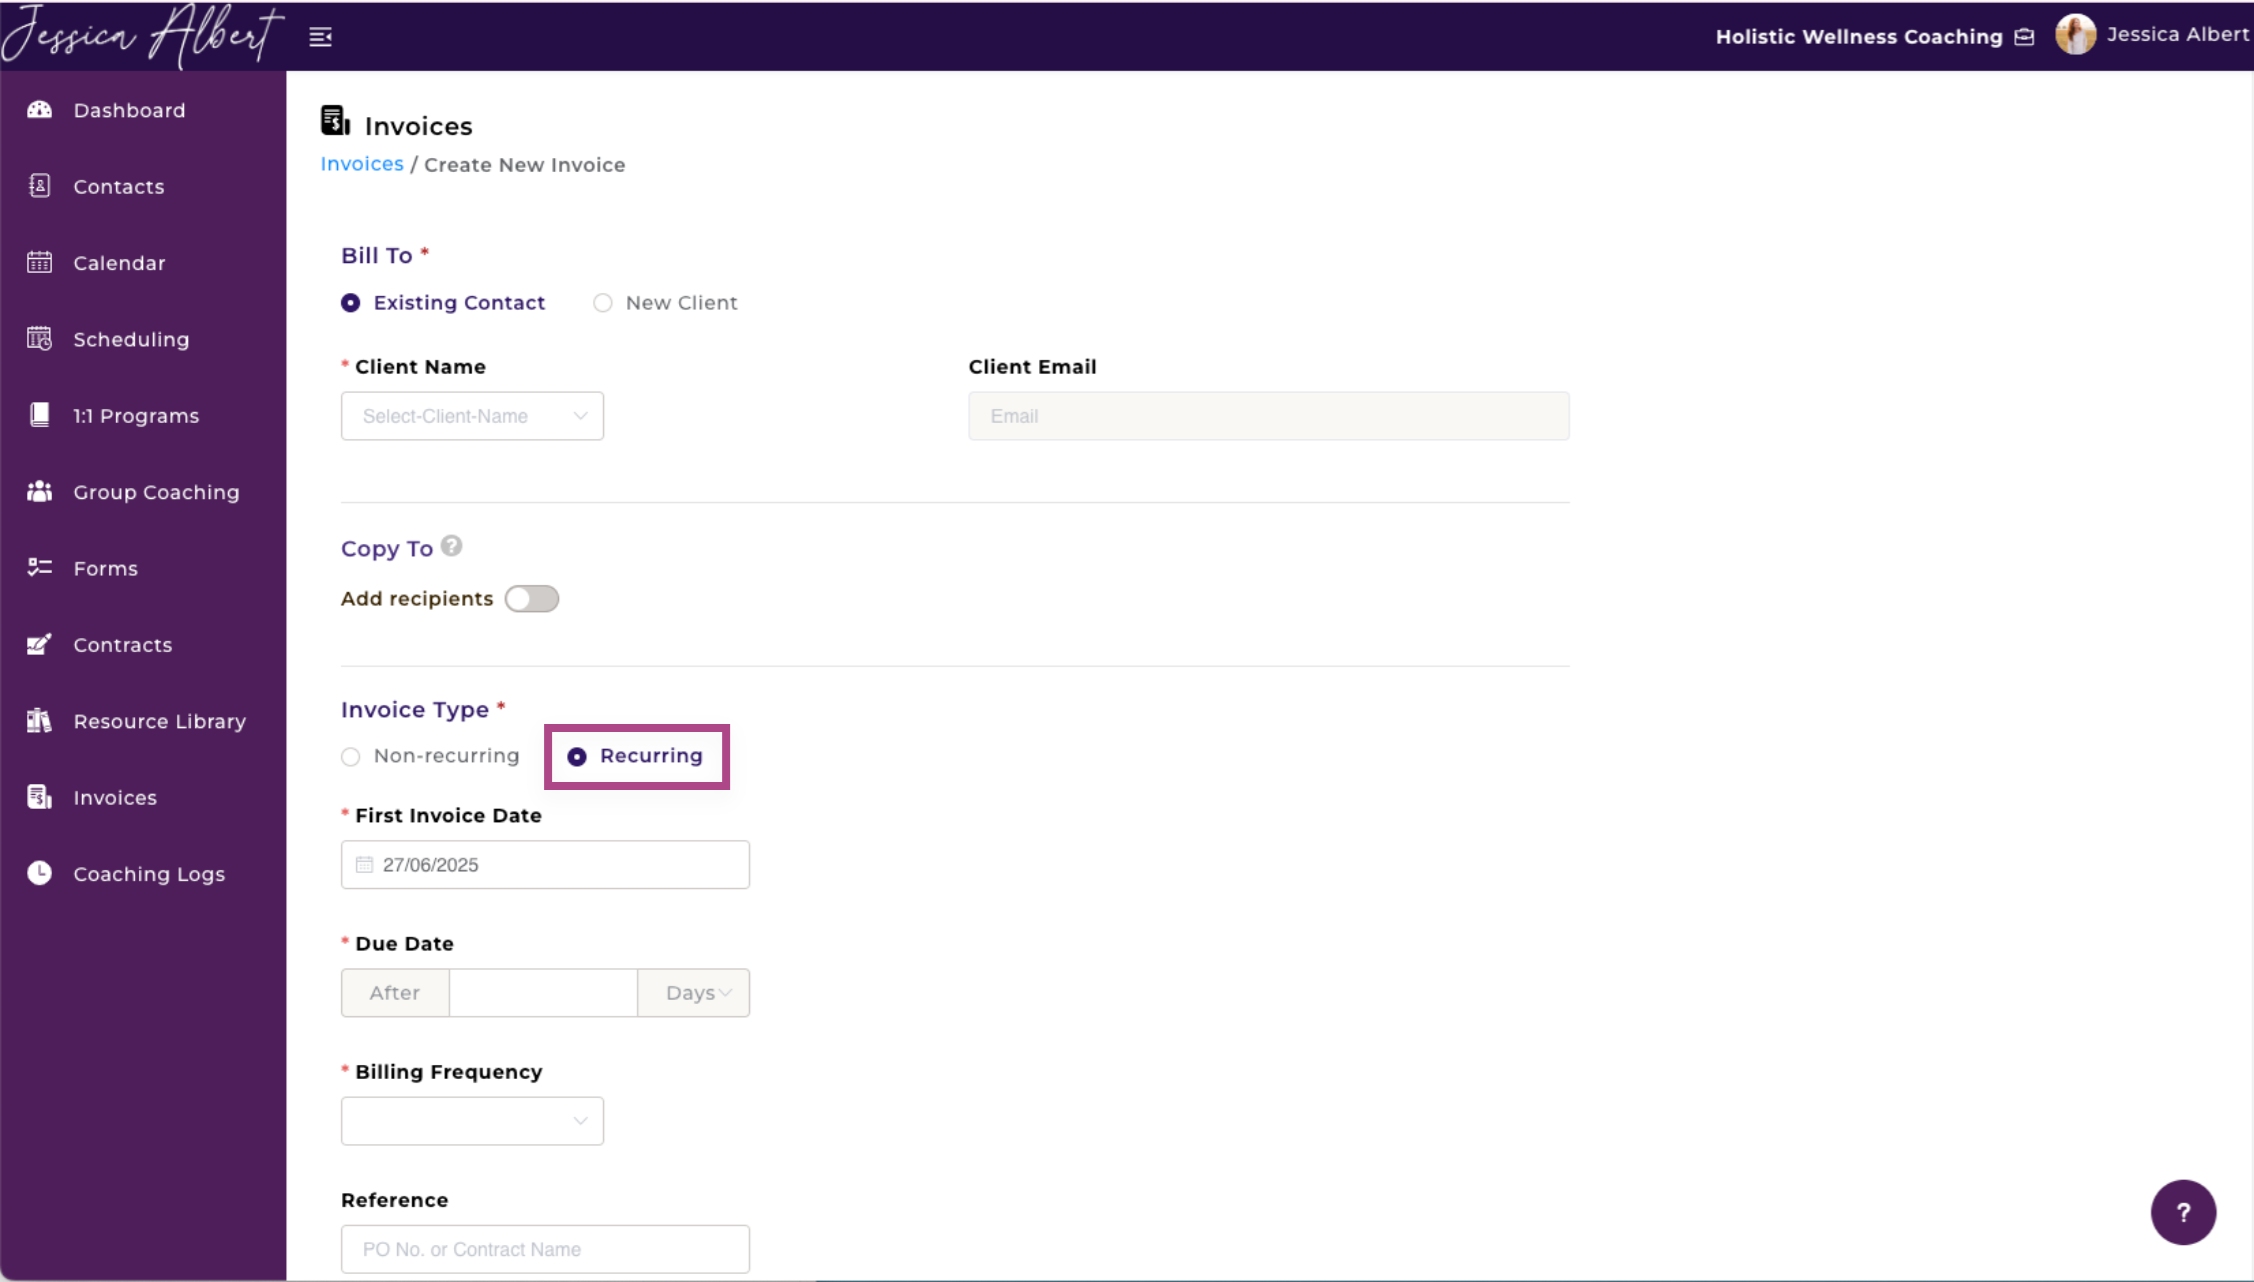
Recurring Invoice
Select Recurring invoice if you would like to create a Recurring Invoice Series. This feature is useful if you would like to invoice your clients automatically, based on a frequency that you define such as weekly, monthly, etc.
Once you have set up a Recurring Invoice series, CoachVantage will automatically send the invoices based on the billing frequency that you configure in the settings.
Note: You will not see any pre-populated invoice number when you set up a Recurring series (unlike in the Non-recurring Invoice setting which displays the invoice number). CoachVantage will automatically generate the invoice number when the scheduled invoice is sent out to your client.
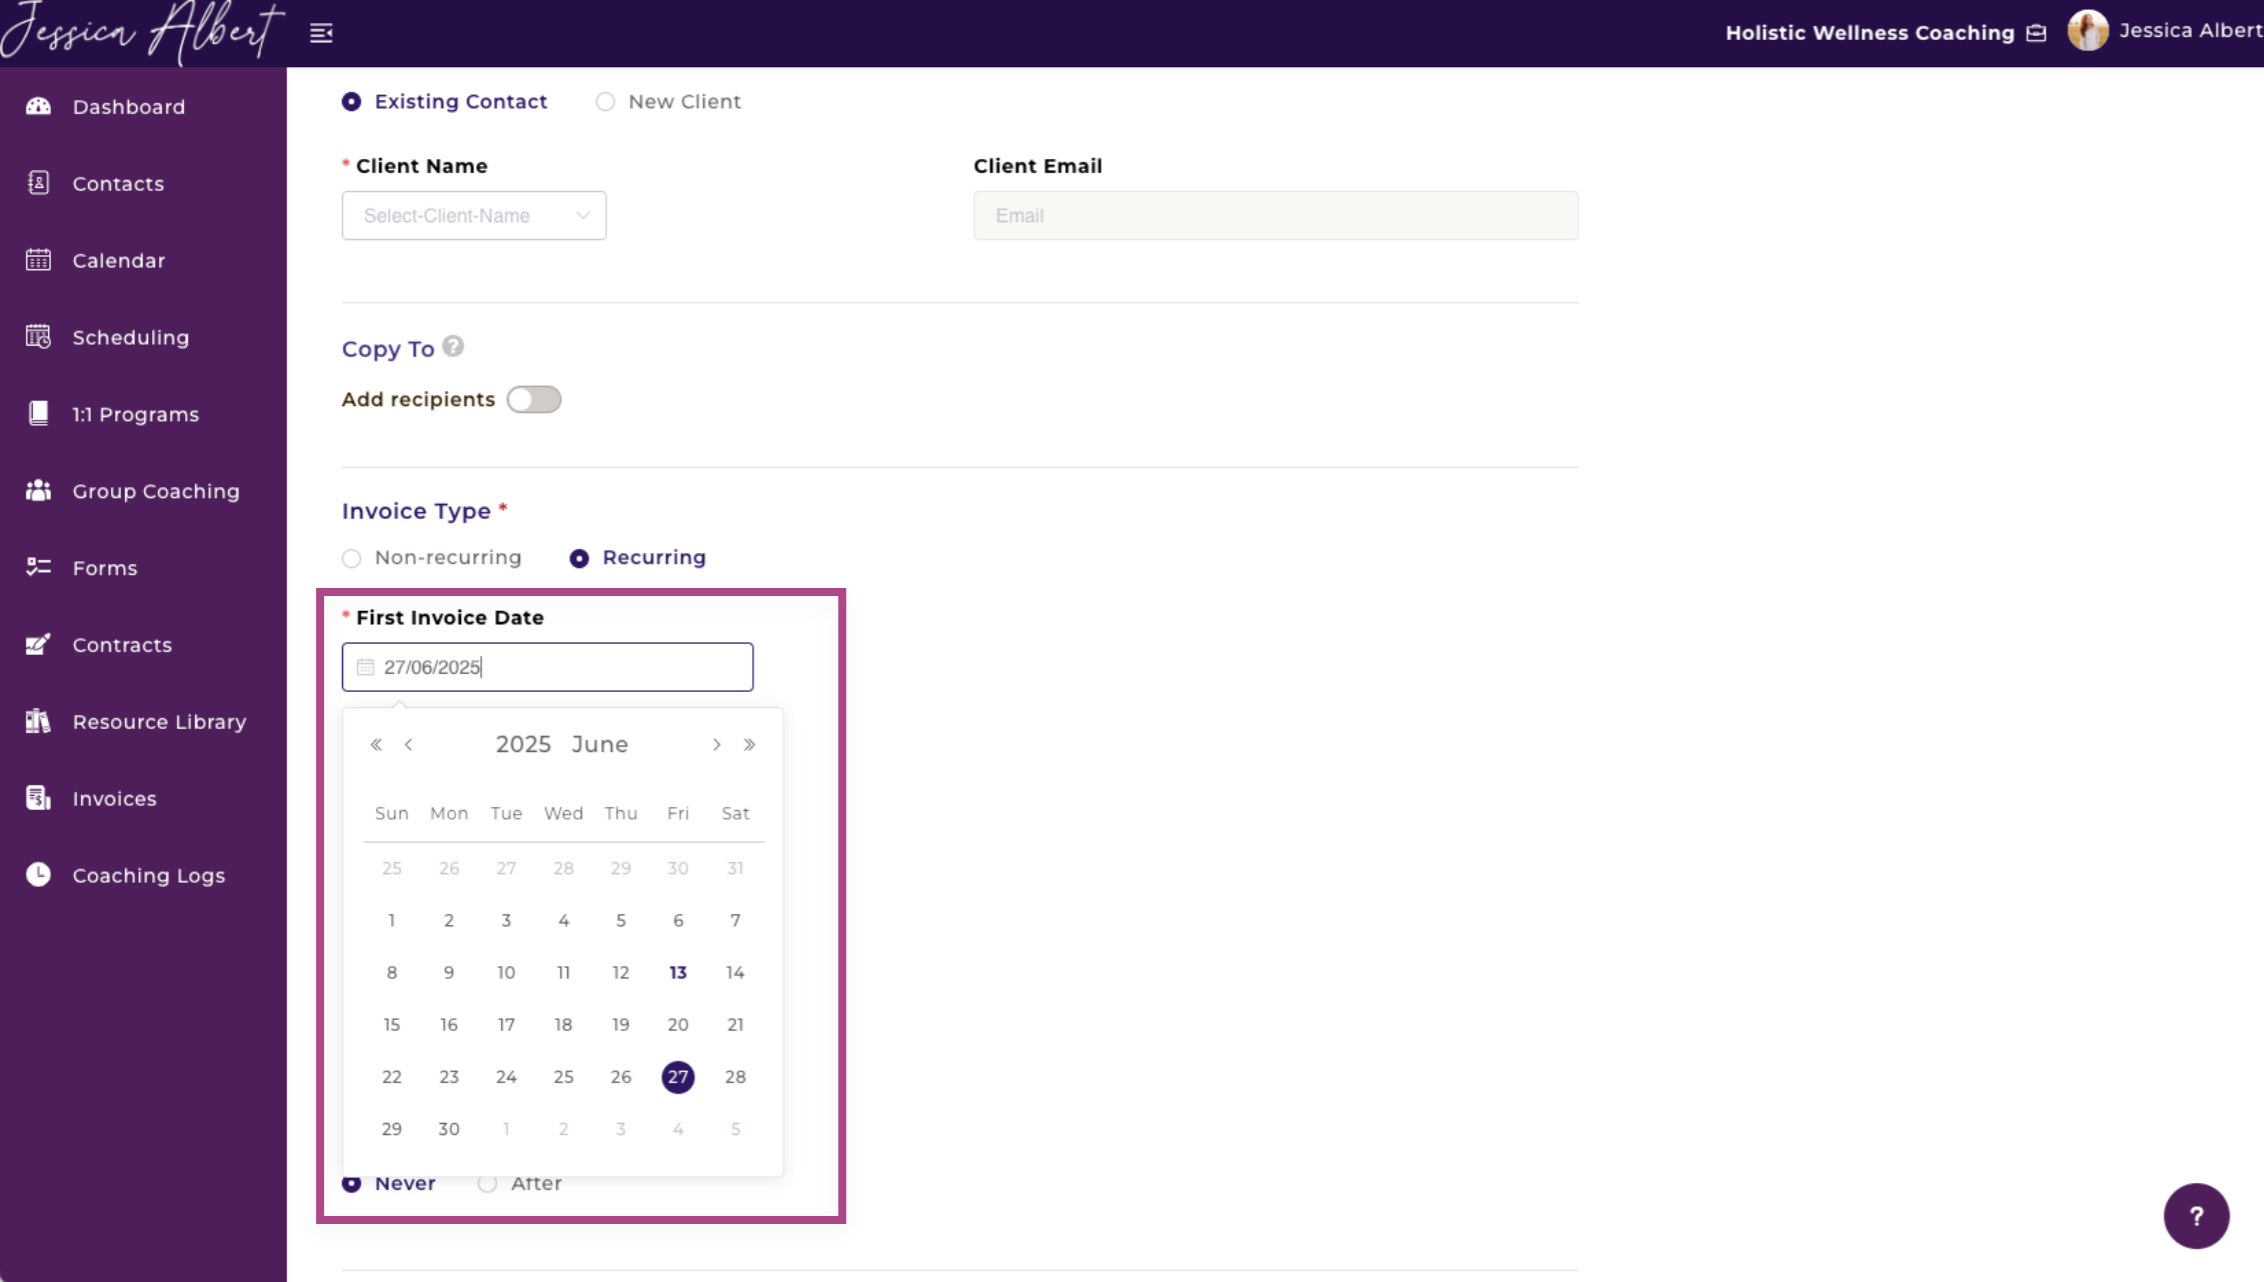
1. First Invoice Date - First Date of Issue. Select the date that you wish the very first invoice of this series to be sent to your contact.
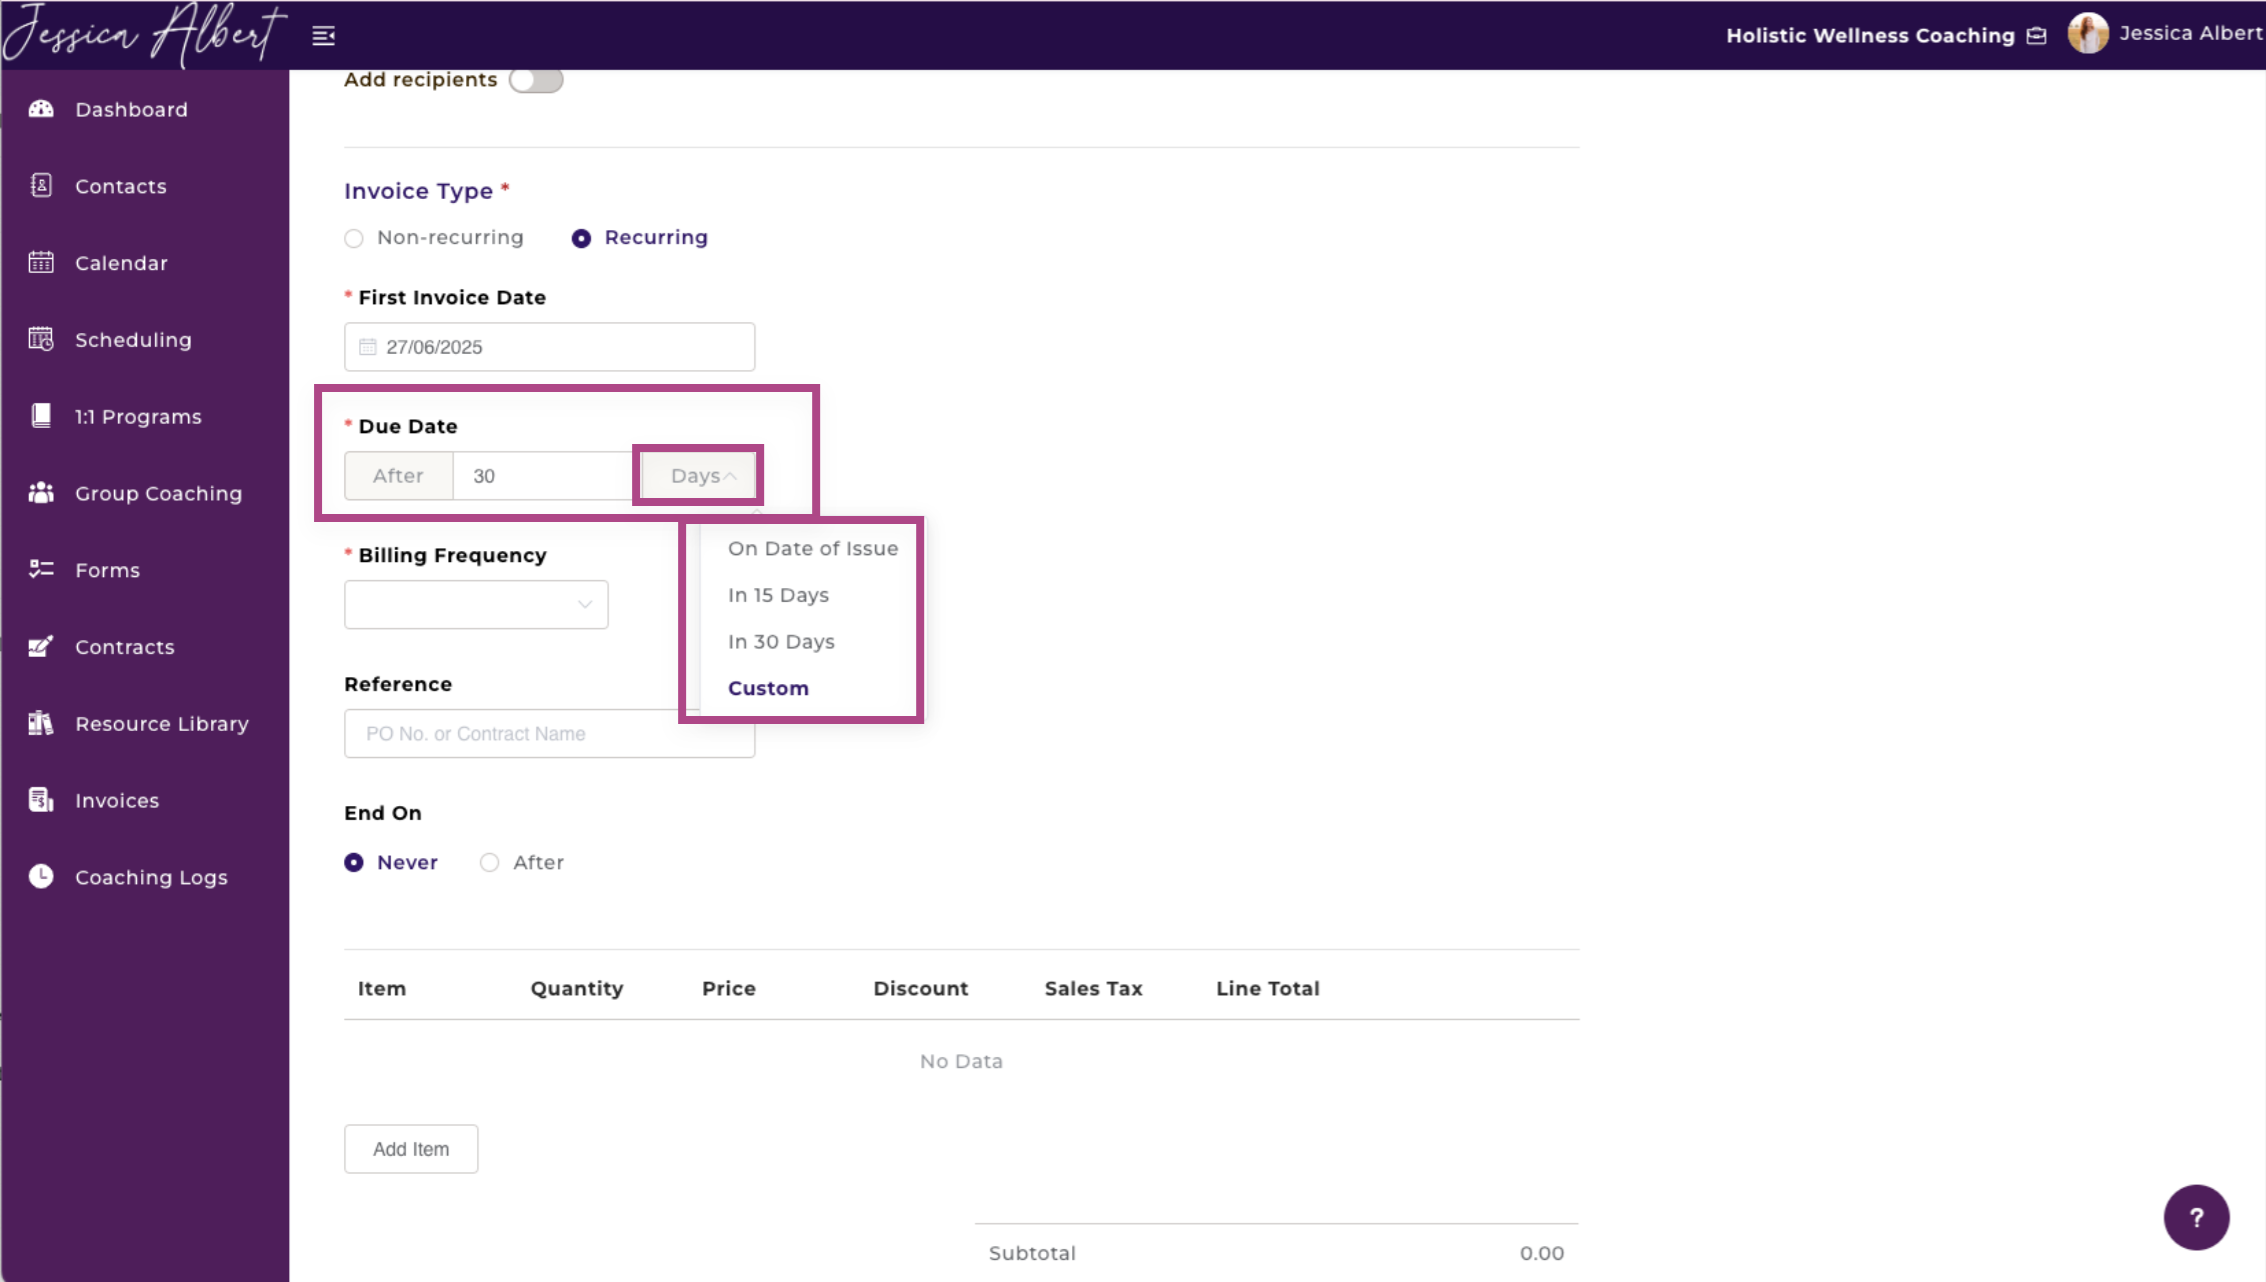
2. Due Date - Specify the amount of time when the invoice needs to be paid, from the date of issue. Use the drop-down selector or customize the due date by typing the number of days.
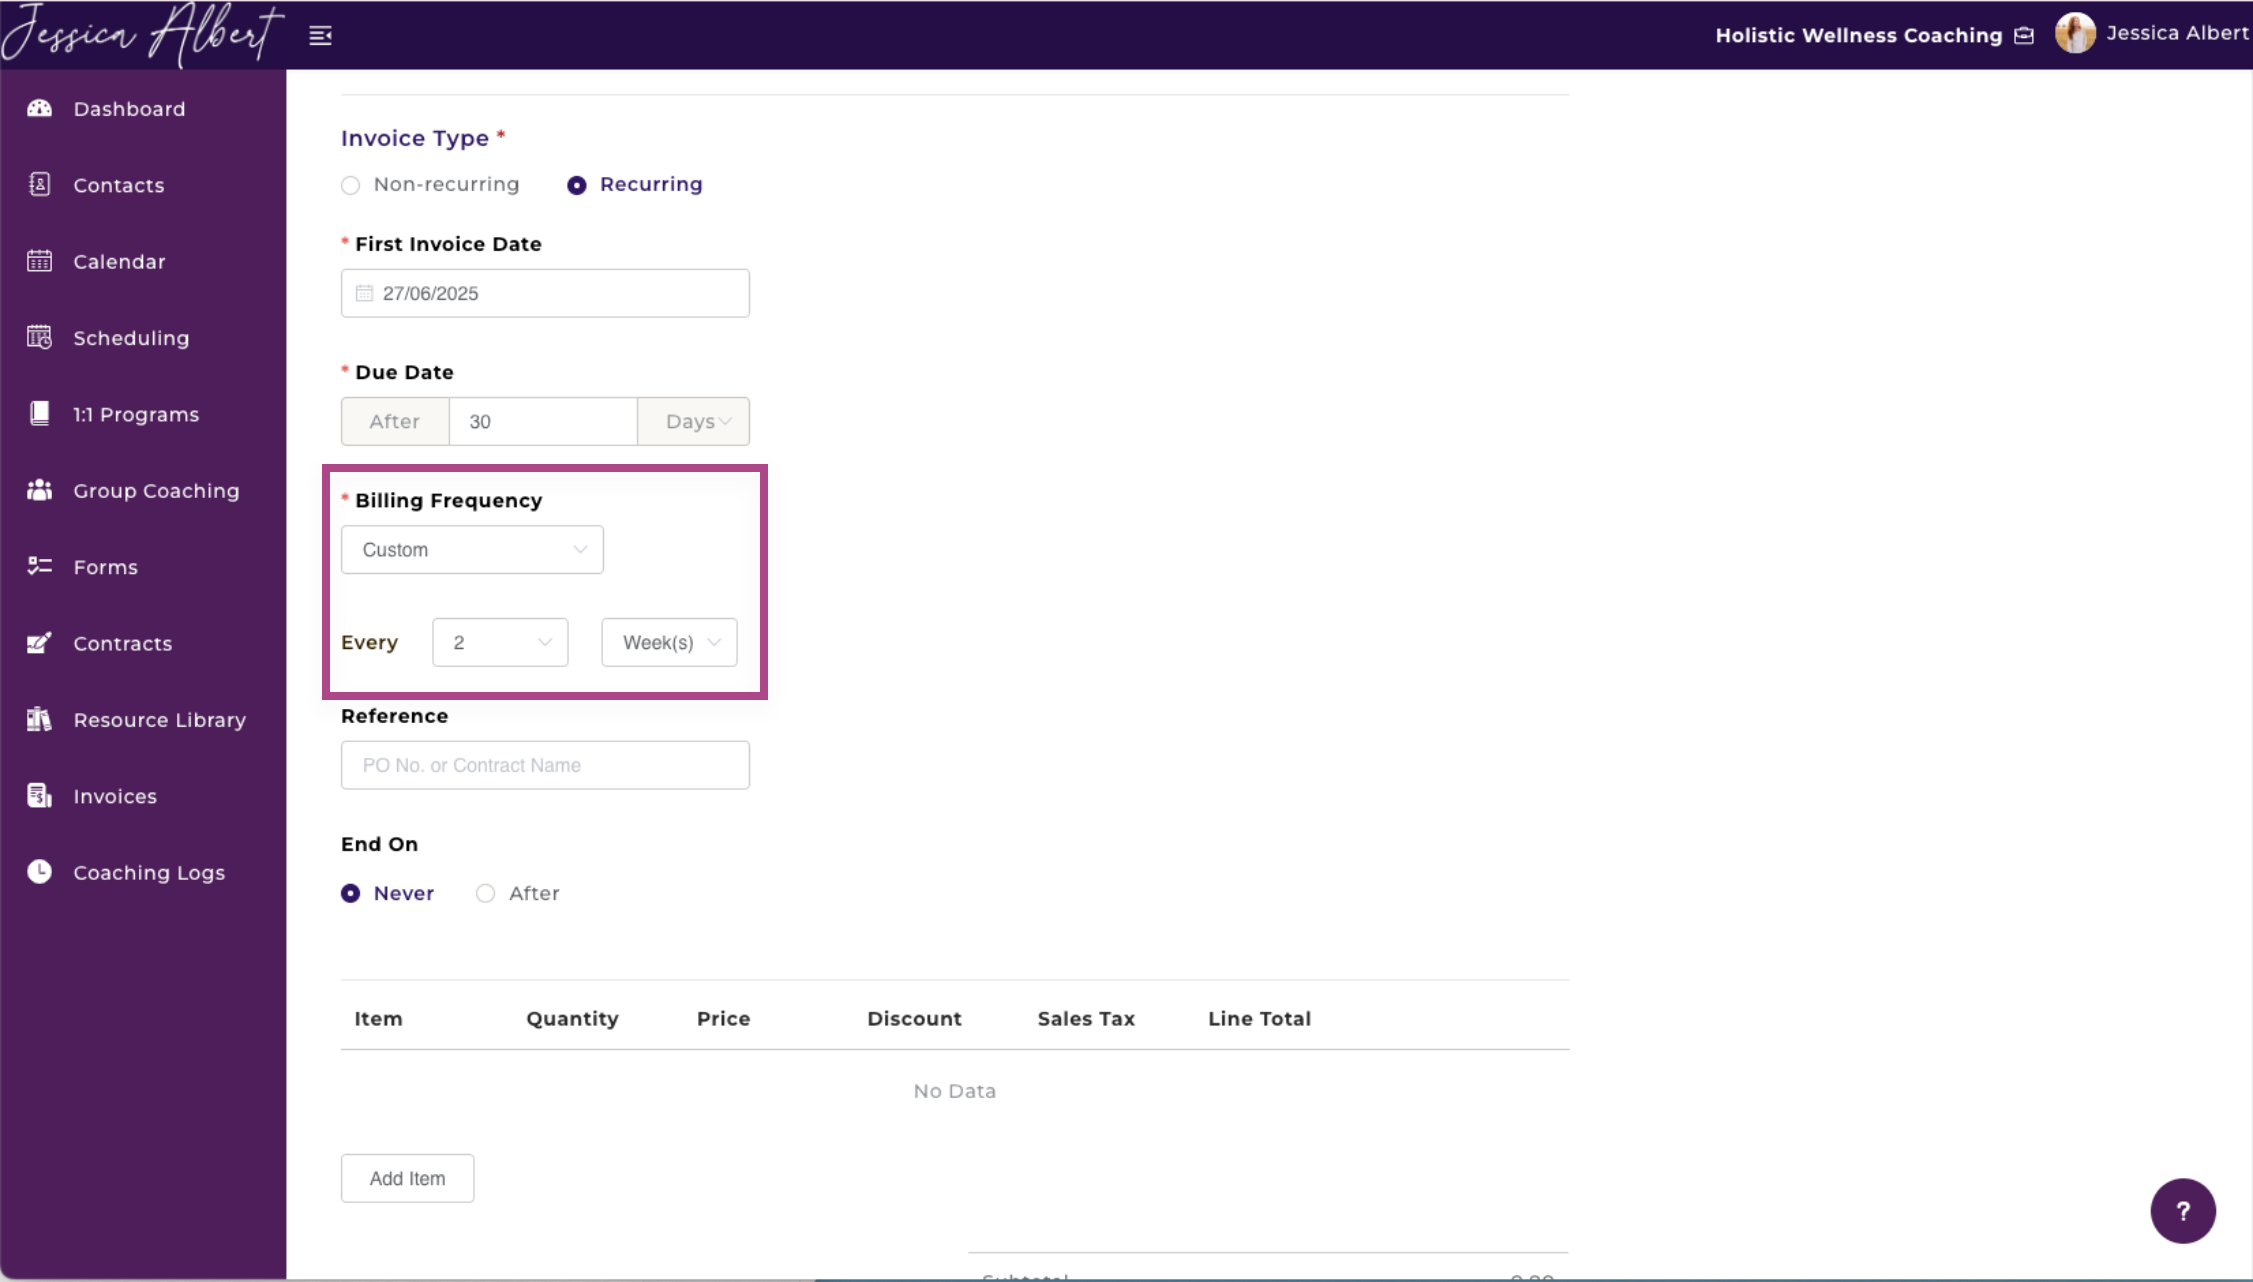
3. Billing Frequency - Select the invoicing frequency. This specifies the time intervals that CoachVantage should trigger the invoice to be sent.
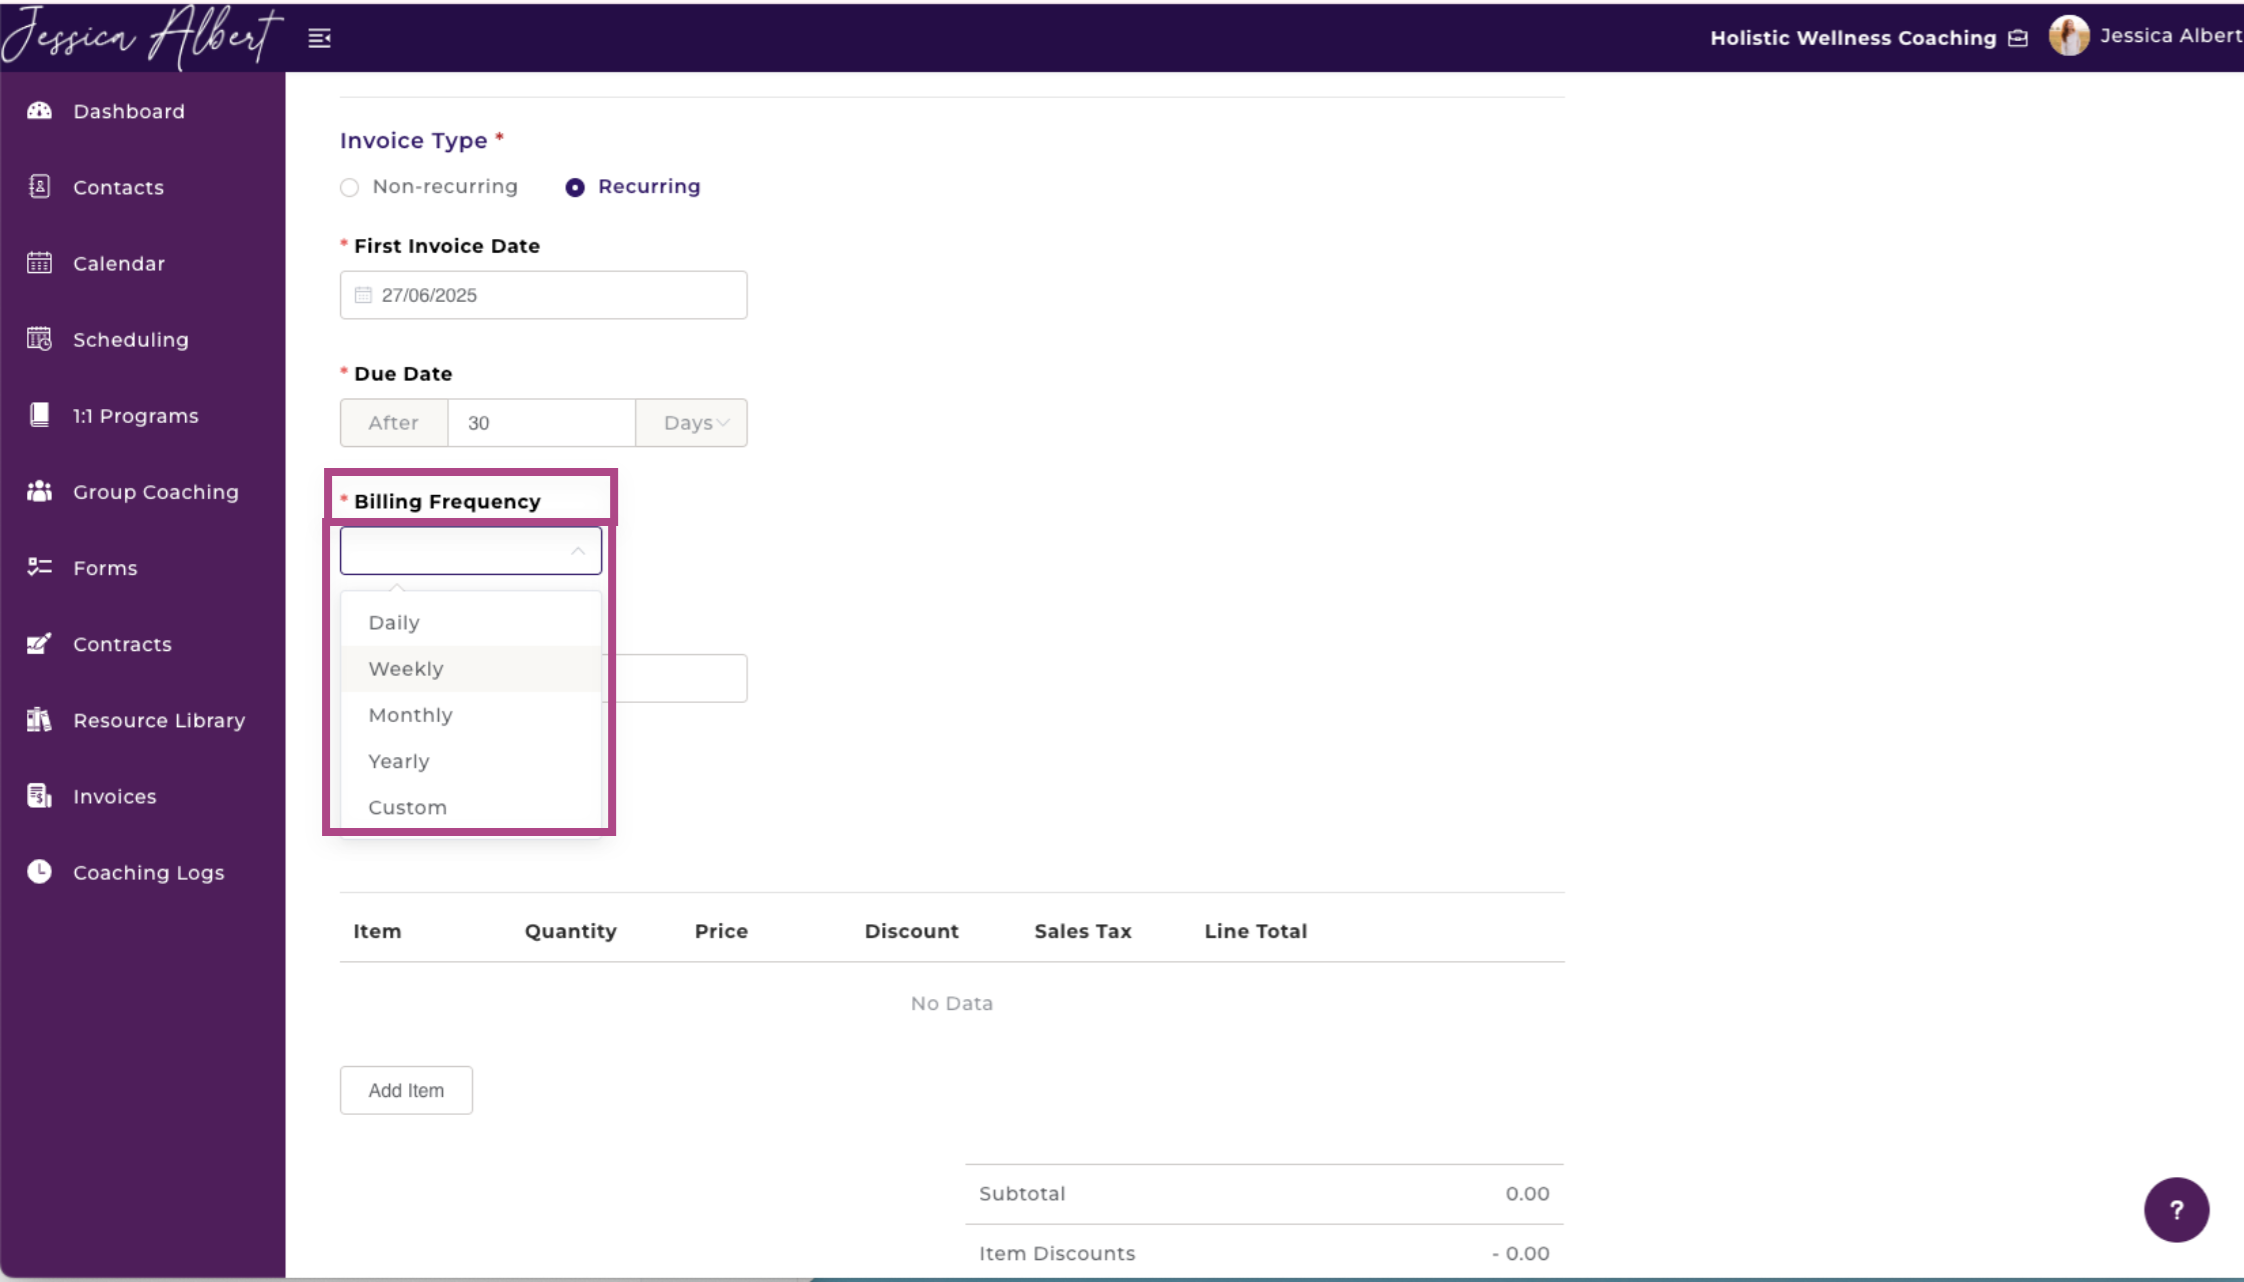
Note: CoachVantage will use the First Invoice Date as the first point of reference, and will automatically send subsequent invoices on the anniversary date of the first invoice date.
For example, if you wish the invoice to be sent out every 2 weeks, select Custom, type in 2 and select Week(s).
4. Reference (Optional) - You may enter a reference description for what this invoice is for, such as a Purchase Order Number or a Contract Name here.
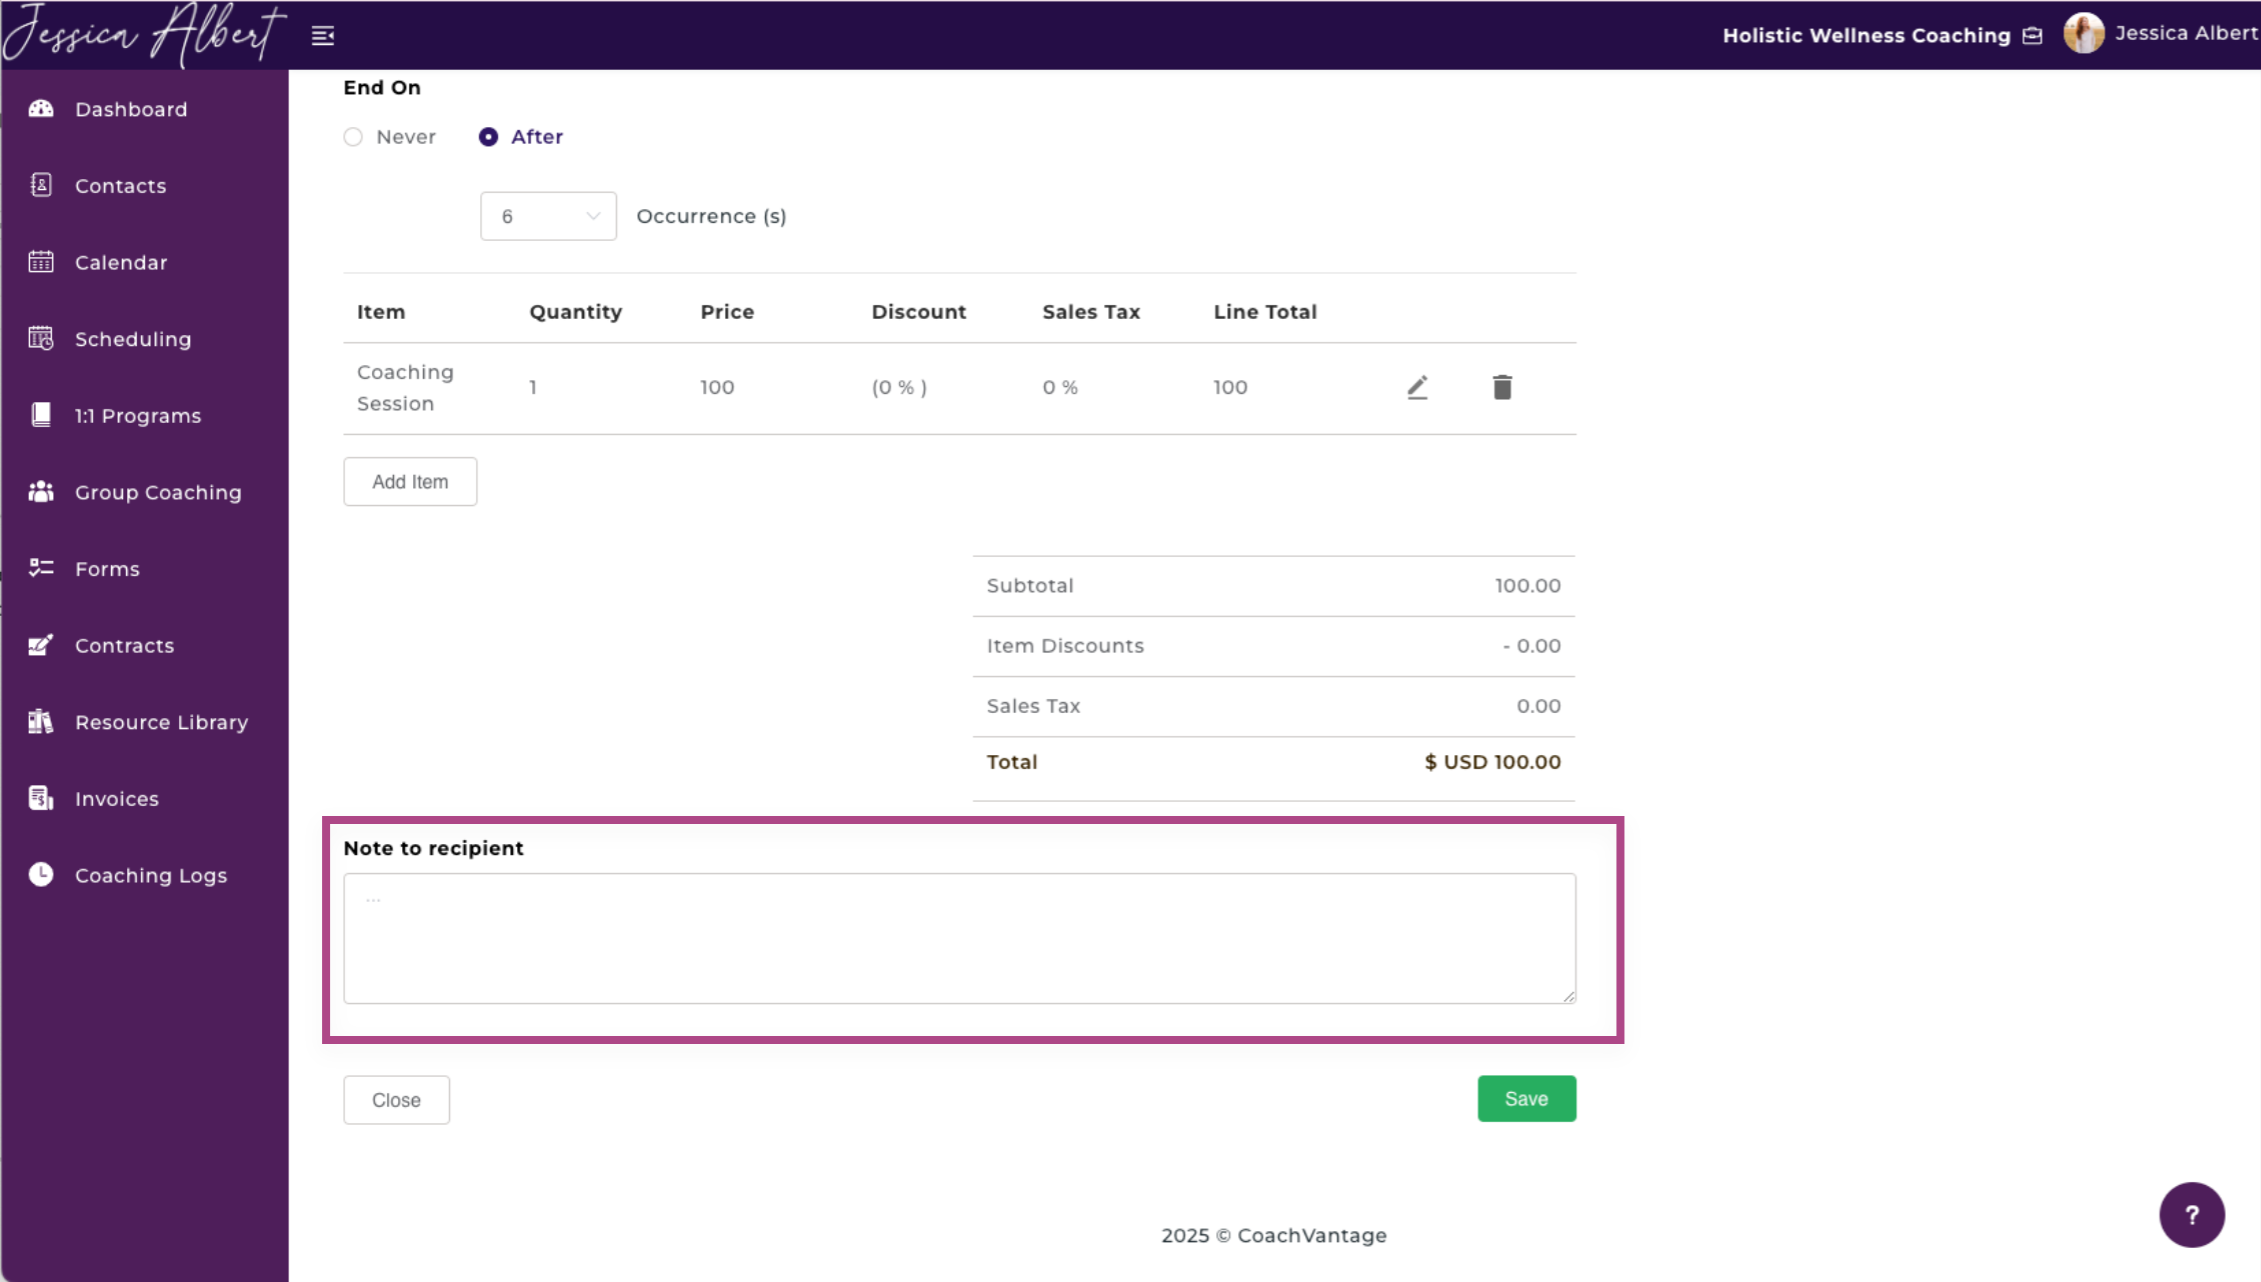
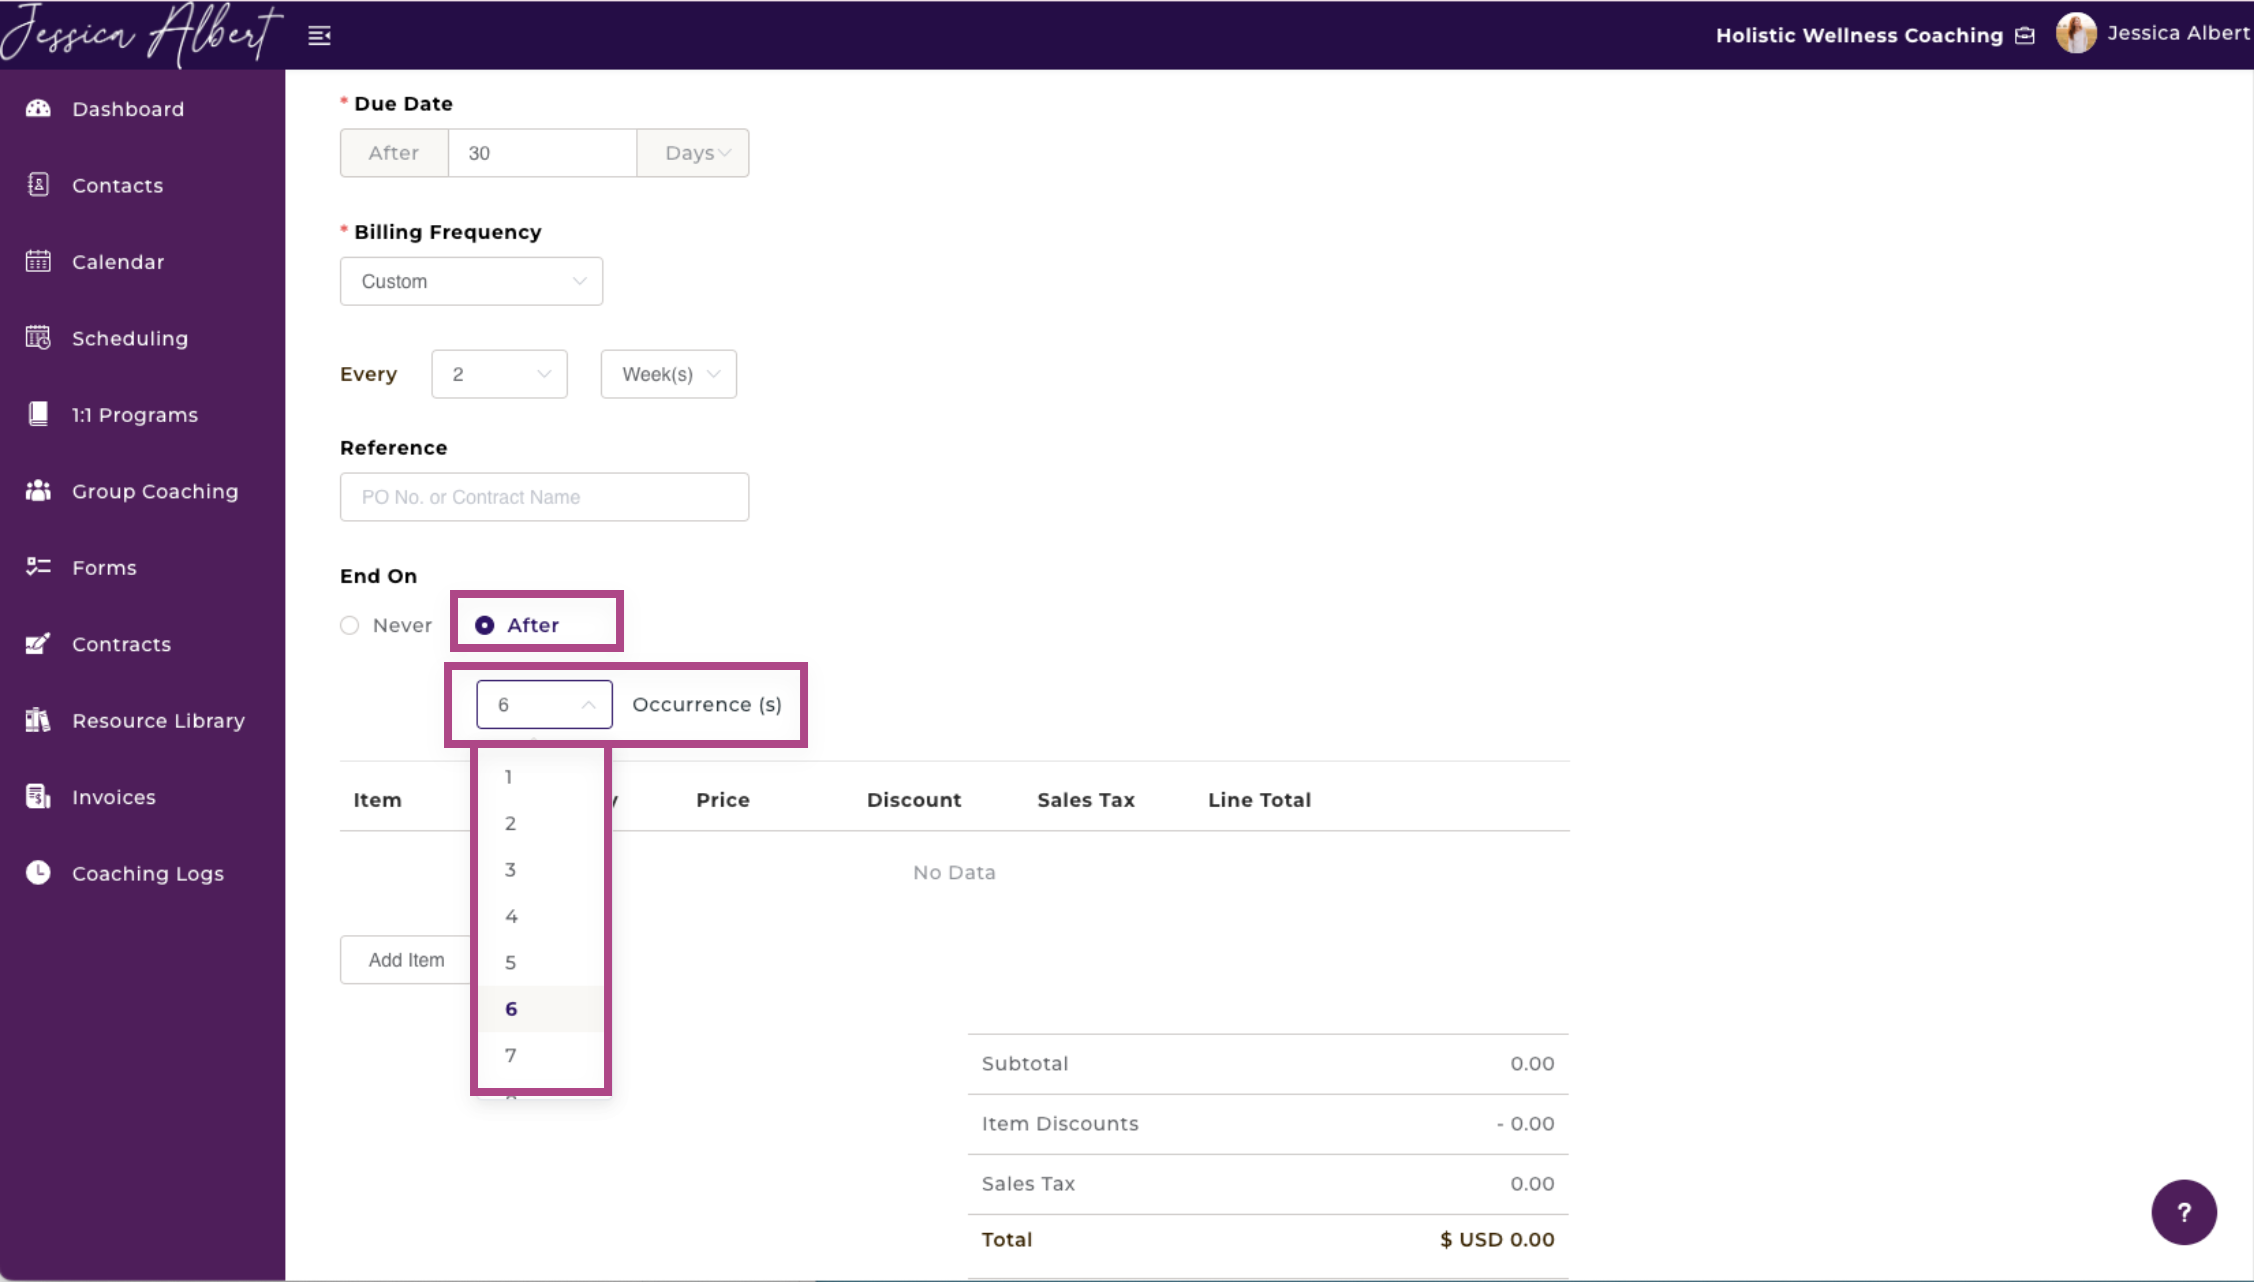
5. End On - Select Never if you want this invoice series to go on indefinitely, until you manually Cancel the recurring invoice series.
Select After a Number of Occurrences to specify how many invoices should be sent. For example, if you wish to invoice your client 6 times in this series, select 6.
The maximum number of occurrence is capped at 50.
6. Add Item
Add the service, items, or program you are selling. The total amount due would be automatically calculated.
Select Add Item to add Item, Quality, Price, Discount, and Sales Tax.
6. Note to Recipient
Lastly, if you have a note you'd like to include in the footer of the invoice, simply type it in the Note To Recipient field shown below.
Additionally, Note To Recipient would be automatically populated on your invoice if you have set this up in your Invoice & Payment Settings. You can edit the note if required when you create a new invoice. To learn more, check out Invoice & Payment Settings.
Tip: The note could indicate your contact details for any inquiries relating to the invoice, thus allowing your client to reach out if they have questions. It could also specify your bank details for clients to make direct bank transfers, etc.
7. Select either Save As Draft or Preview & Send the Invoice.
- Save As Draft - If you wish to save the invoice as a draft.
- Preview & Send - A pop-up window of the preview invoice appears, allowing you to review your entries. Once you have confirmed that everything is in order, you click the Send Invoice button to send the invoice to clients.
The preview option looks like this:
Tip: Payment methods available to your client would be dependent on whether you have connected to Stripe and PayPal. Clients can make payment by credit / debit card or PayPal, respectively.
Read the Setting Up Invoice & Payment article to learn how to do so.
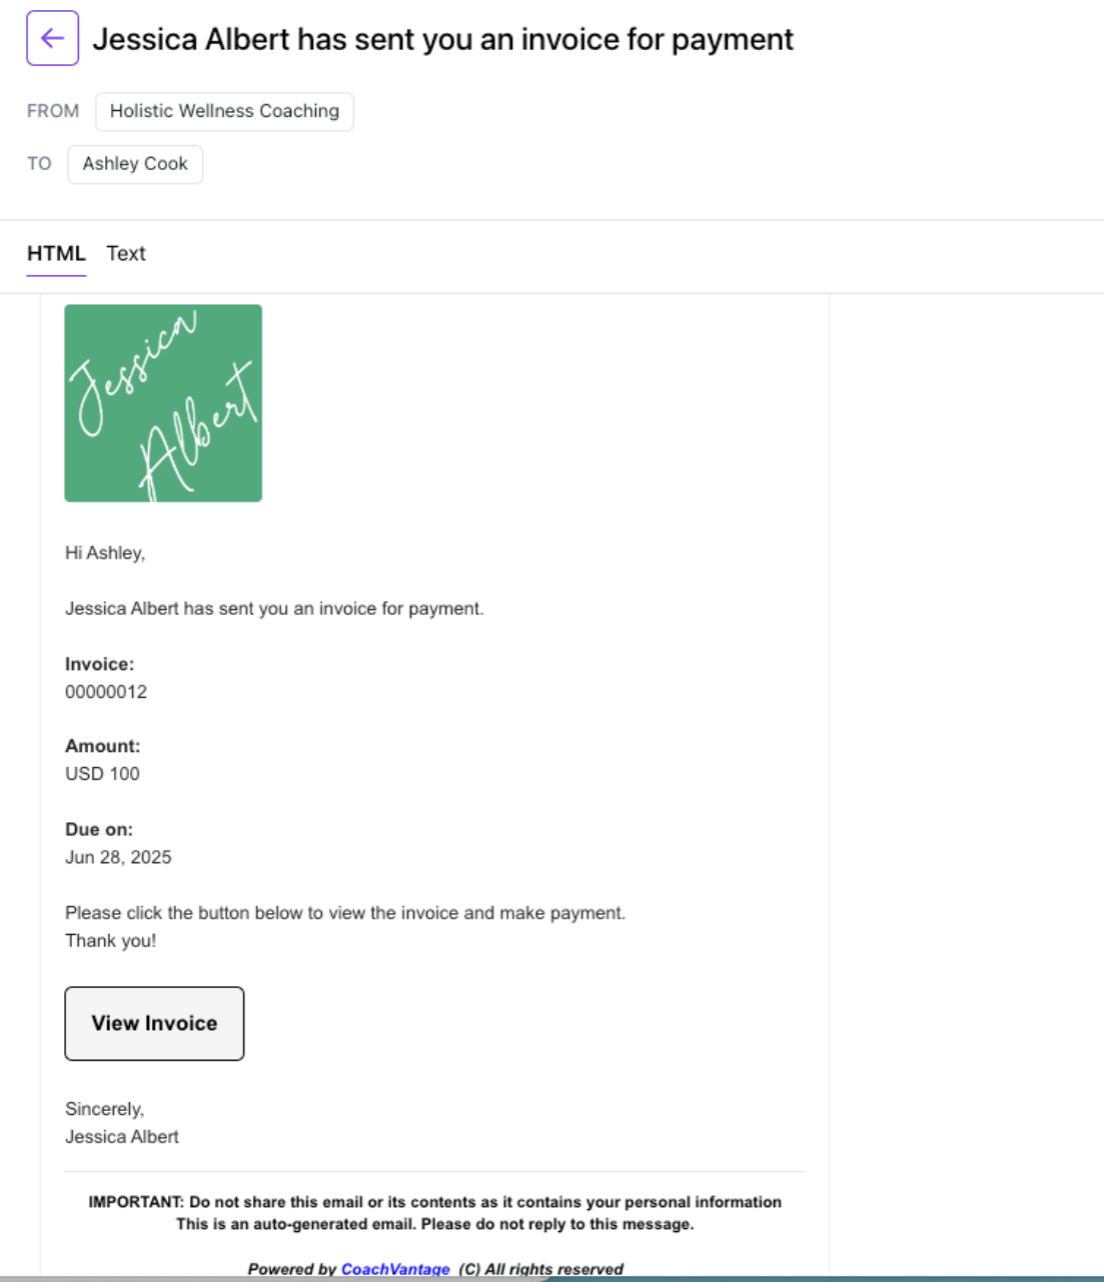
4. Invoice Email 📧
Below is an example of the email notification that your client would receive when you've sent an invoice: