
The Complete Guide on How to Get Started With CoachVantage
Overview
Thank you for signing up for CoachVantage! 🎉
We're so happy you're here. In this complete guide, we’ll walk you through the recommended steps to set yourself up for success and get the most out of your CoachVantage account.
Step 1 - Set Up Integrations 🔗
Once you log in to your CoachVantage account, click your name in the top right-hand corner and select My Settings. Then, click on the Integrations tab. From there, please connect the following items:

- Your Calendar
- Your Video Call Tool (Zoom and/or Google Meet)
- Your Payment Gateway (Stripe and/or PayPal)
Once these steps have been completed, next navigate to the Appointments and Calendar tab.
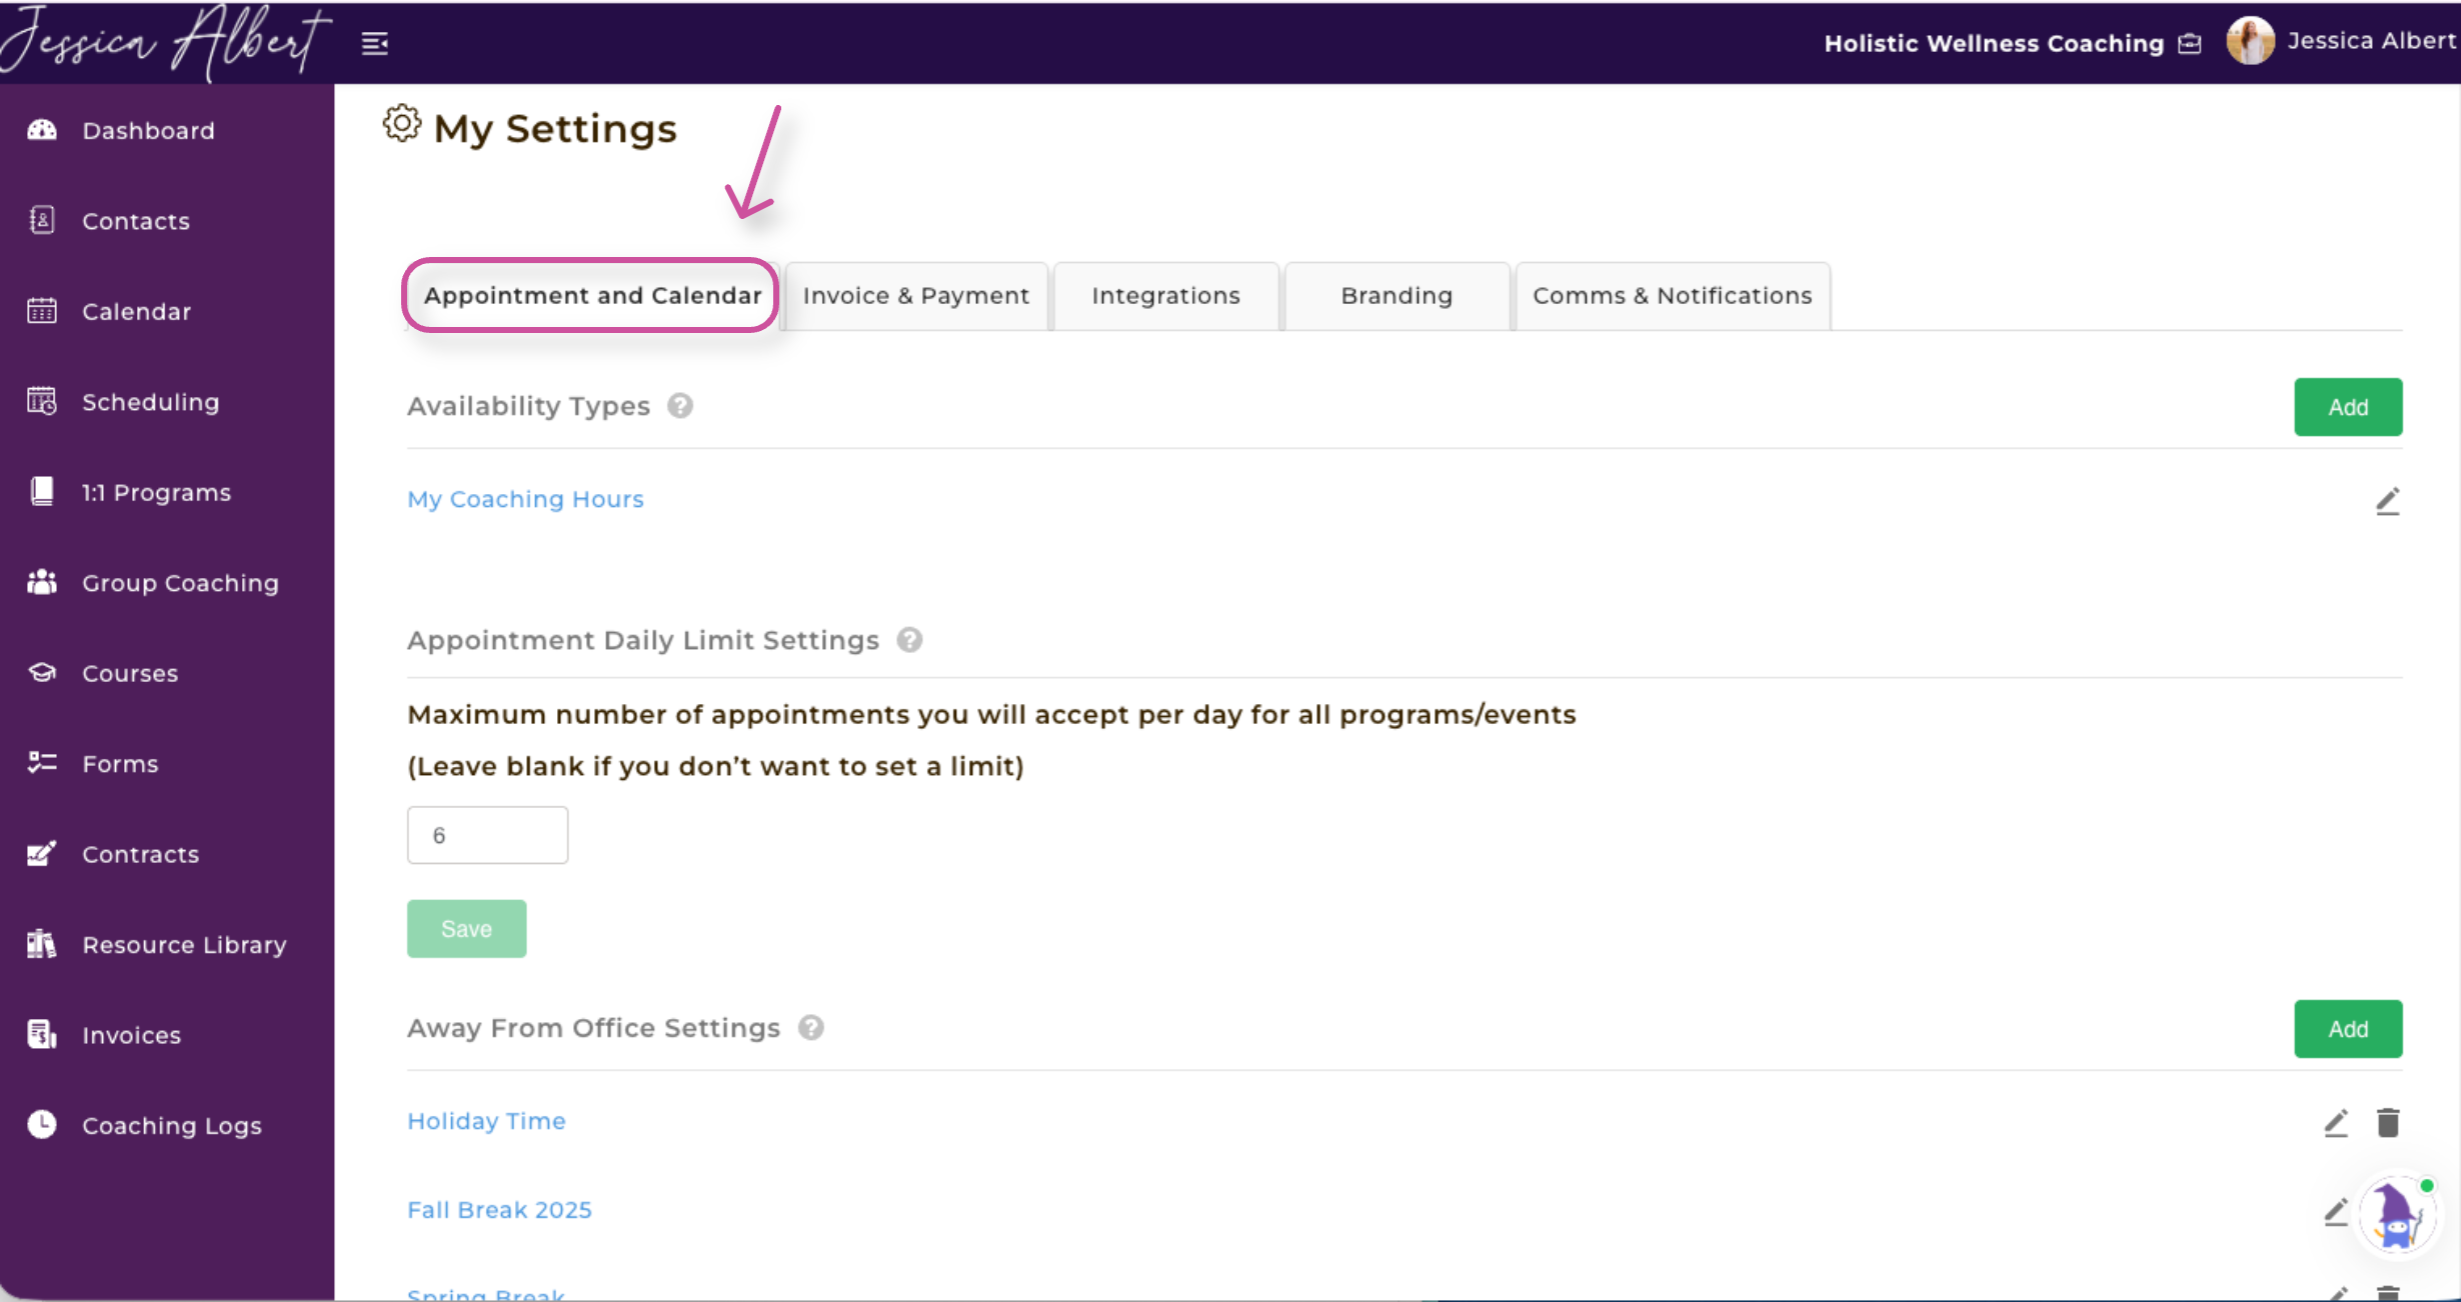
- Create an Availiability Type
- Select Your Time Zone (at the bottom of the page)
On this page, you may also set your Appointment Daily Limit Settings, Appointment Buffer, SMS Appointment Notifications, etc.
Step 2 - Edit Your Profile 👩
1) Edit Your Profile Settings
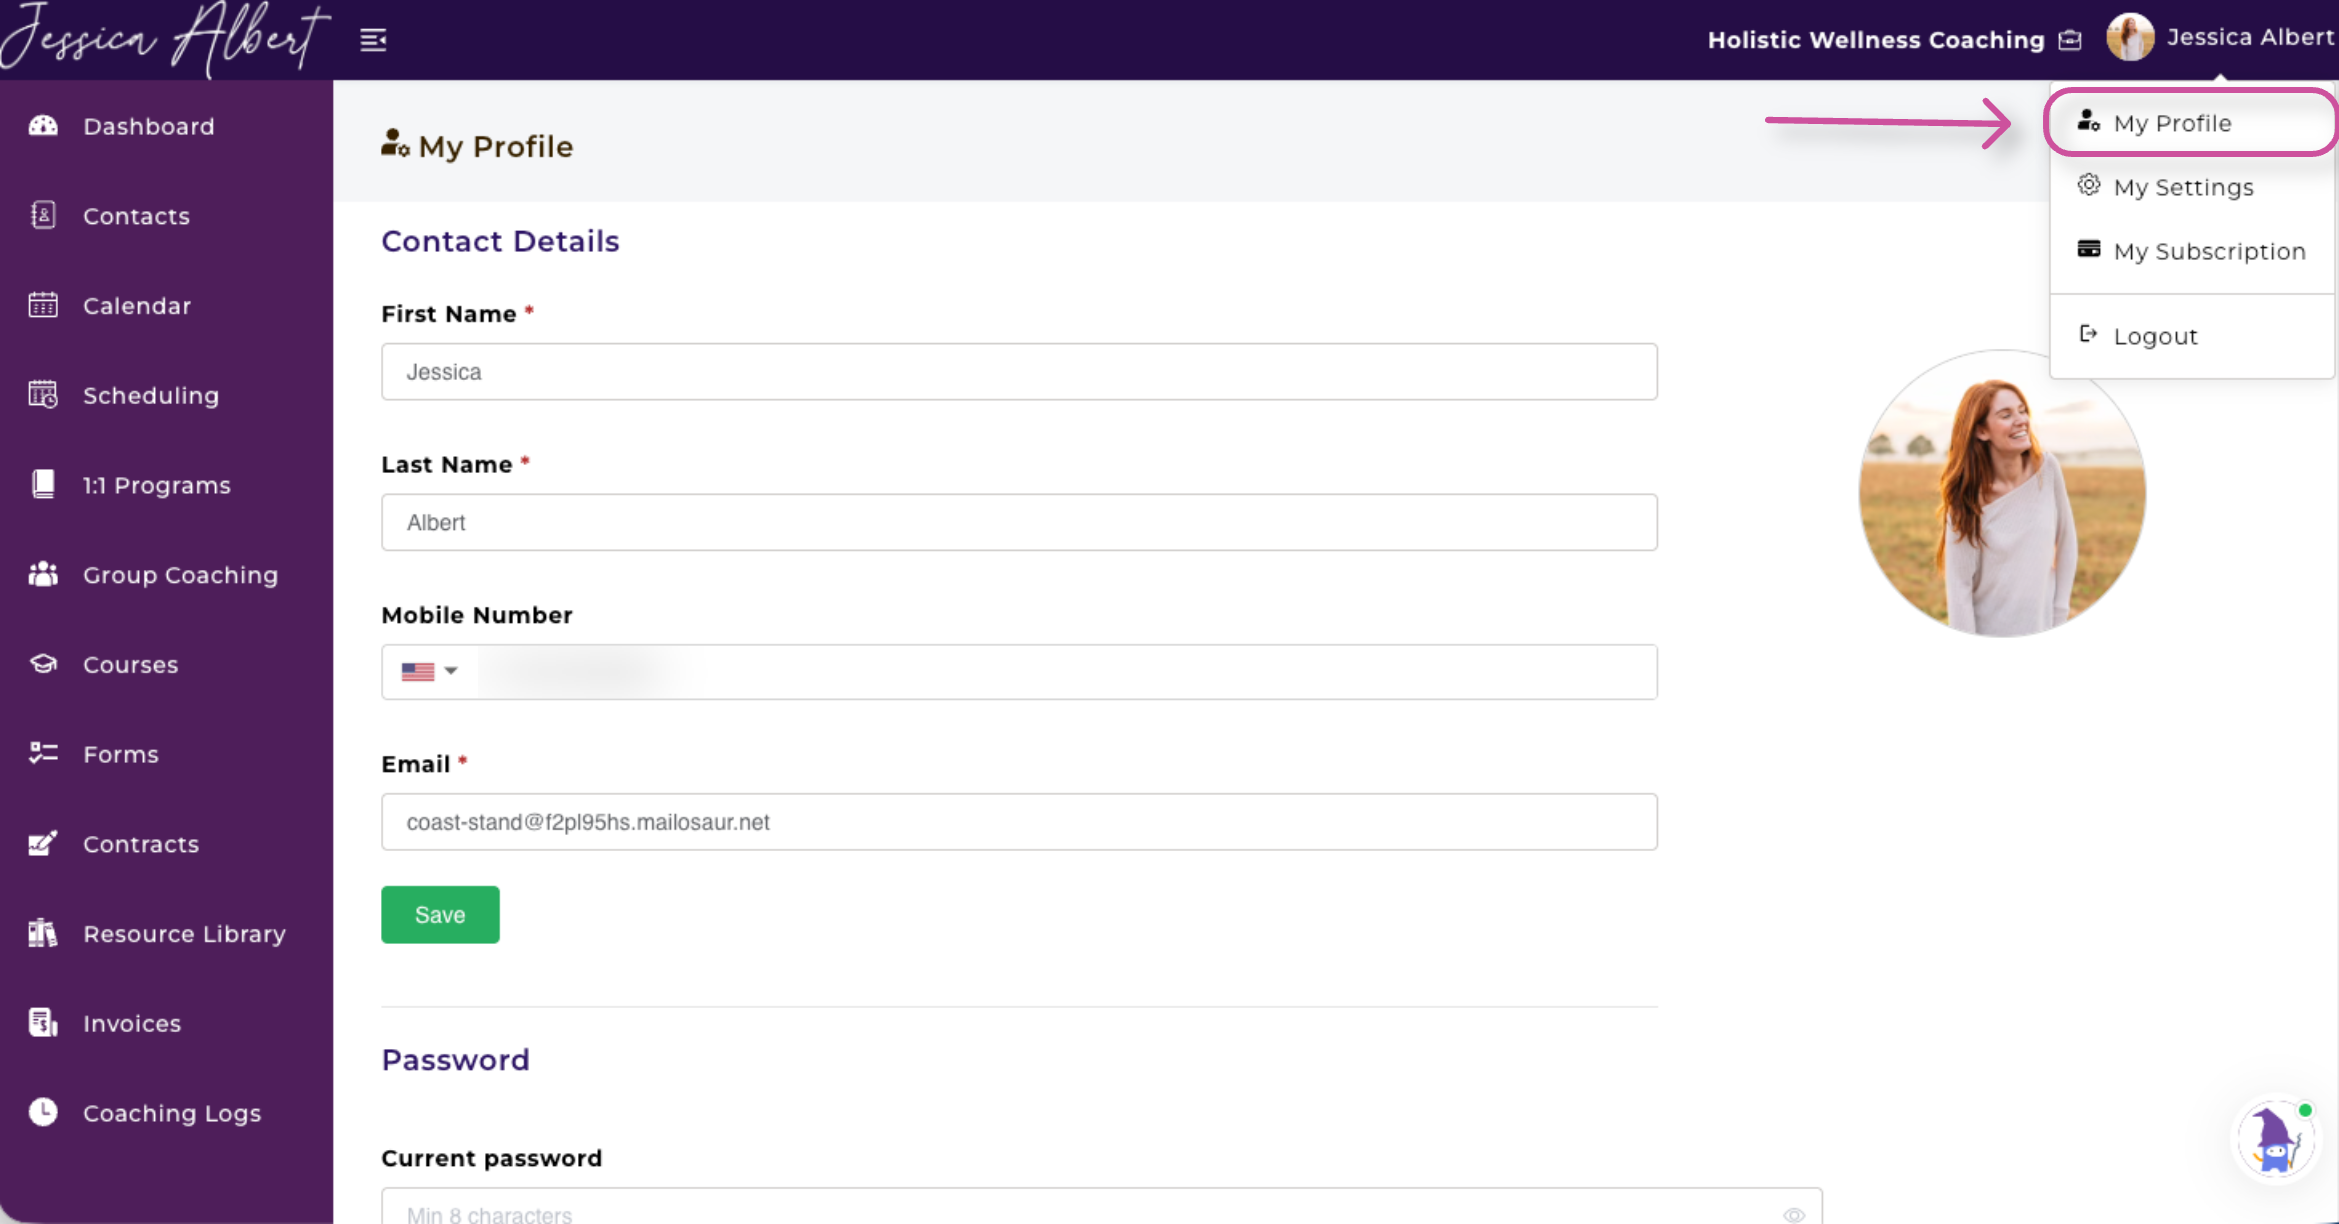
Your Profile Settings are the foundation of your CoachVantage account and determine how your name, brand, and business details appear to clients across the platform. To access them, click your name in the top-right corner of the menu bar and select My Profile.
From here, you can update your Contact Details, Profile Picture, Business Details, Social Media Links, Coach Profile, and view your Coach Profile Preview. Your name and email are used in automated client emails and in the Client Portal, so it’s important that these details are accurate. You can also upload your profile picture, which displays both inside your account and to clients.
This section is also where you customize your professional presence. Update your Business Name (used on invoices and booking pages) and review your subdomain URL, which is client-facing and used for program and event sign-up pages.
When you’re finished, use the Coach Profile Preview to see exactly how your profile will appear to clients in the Client Portal.
View the video tutorial on how to edit your Profile by referring to this article, "Your Profile Settings."
2) Add Your Branding
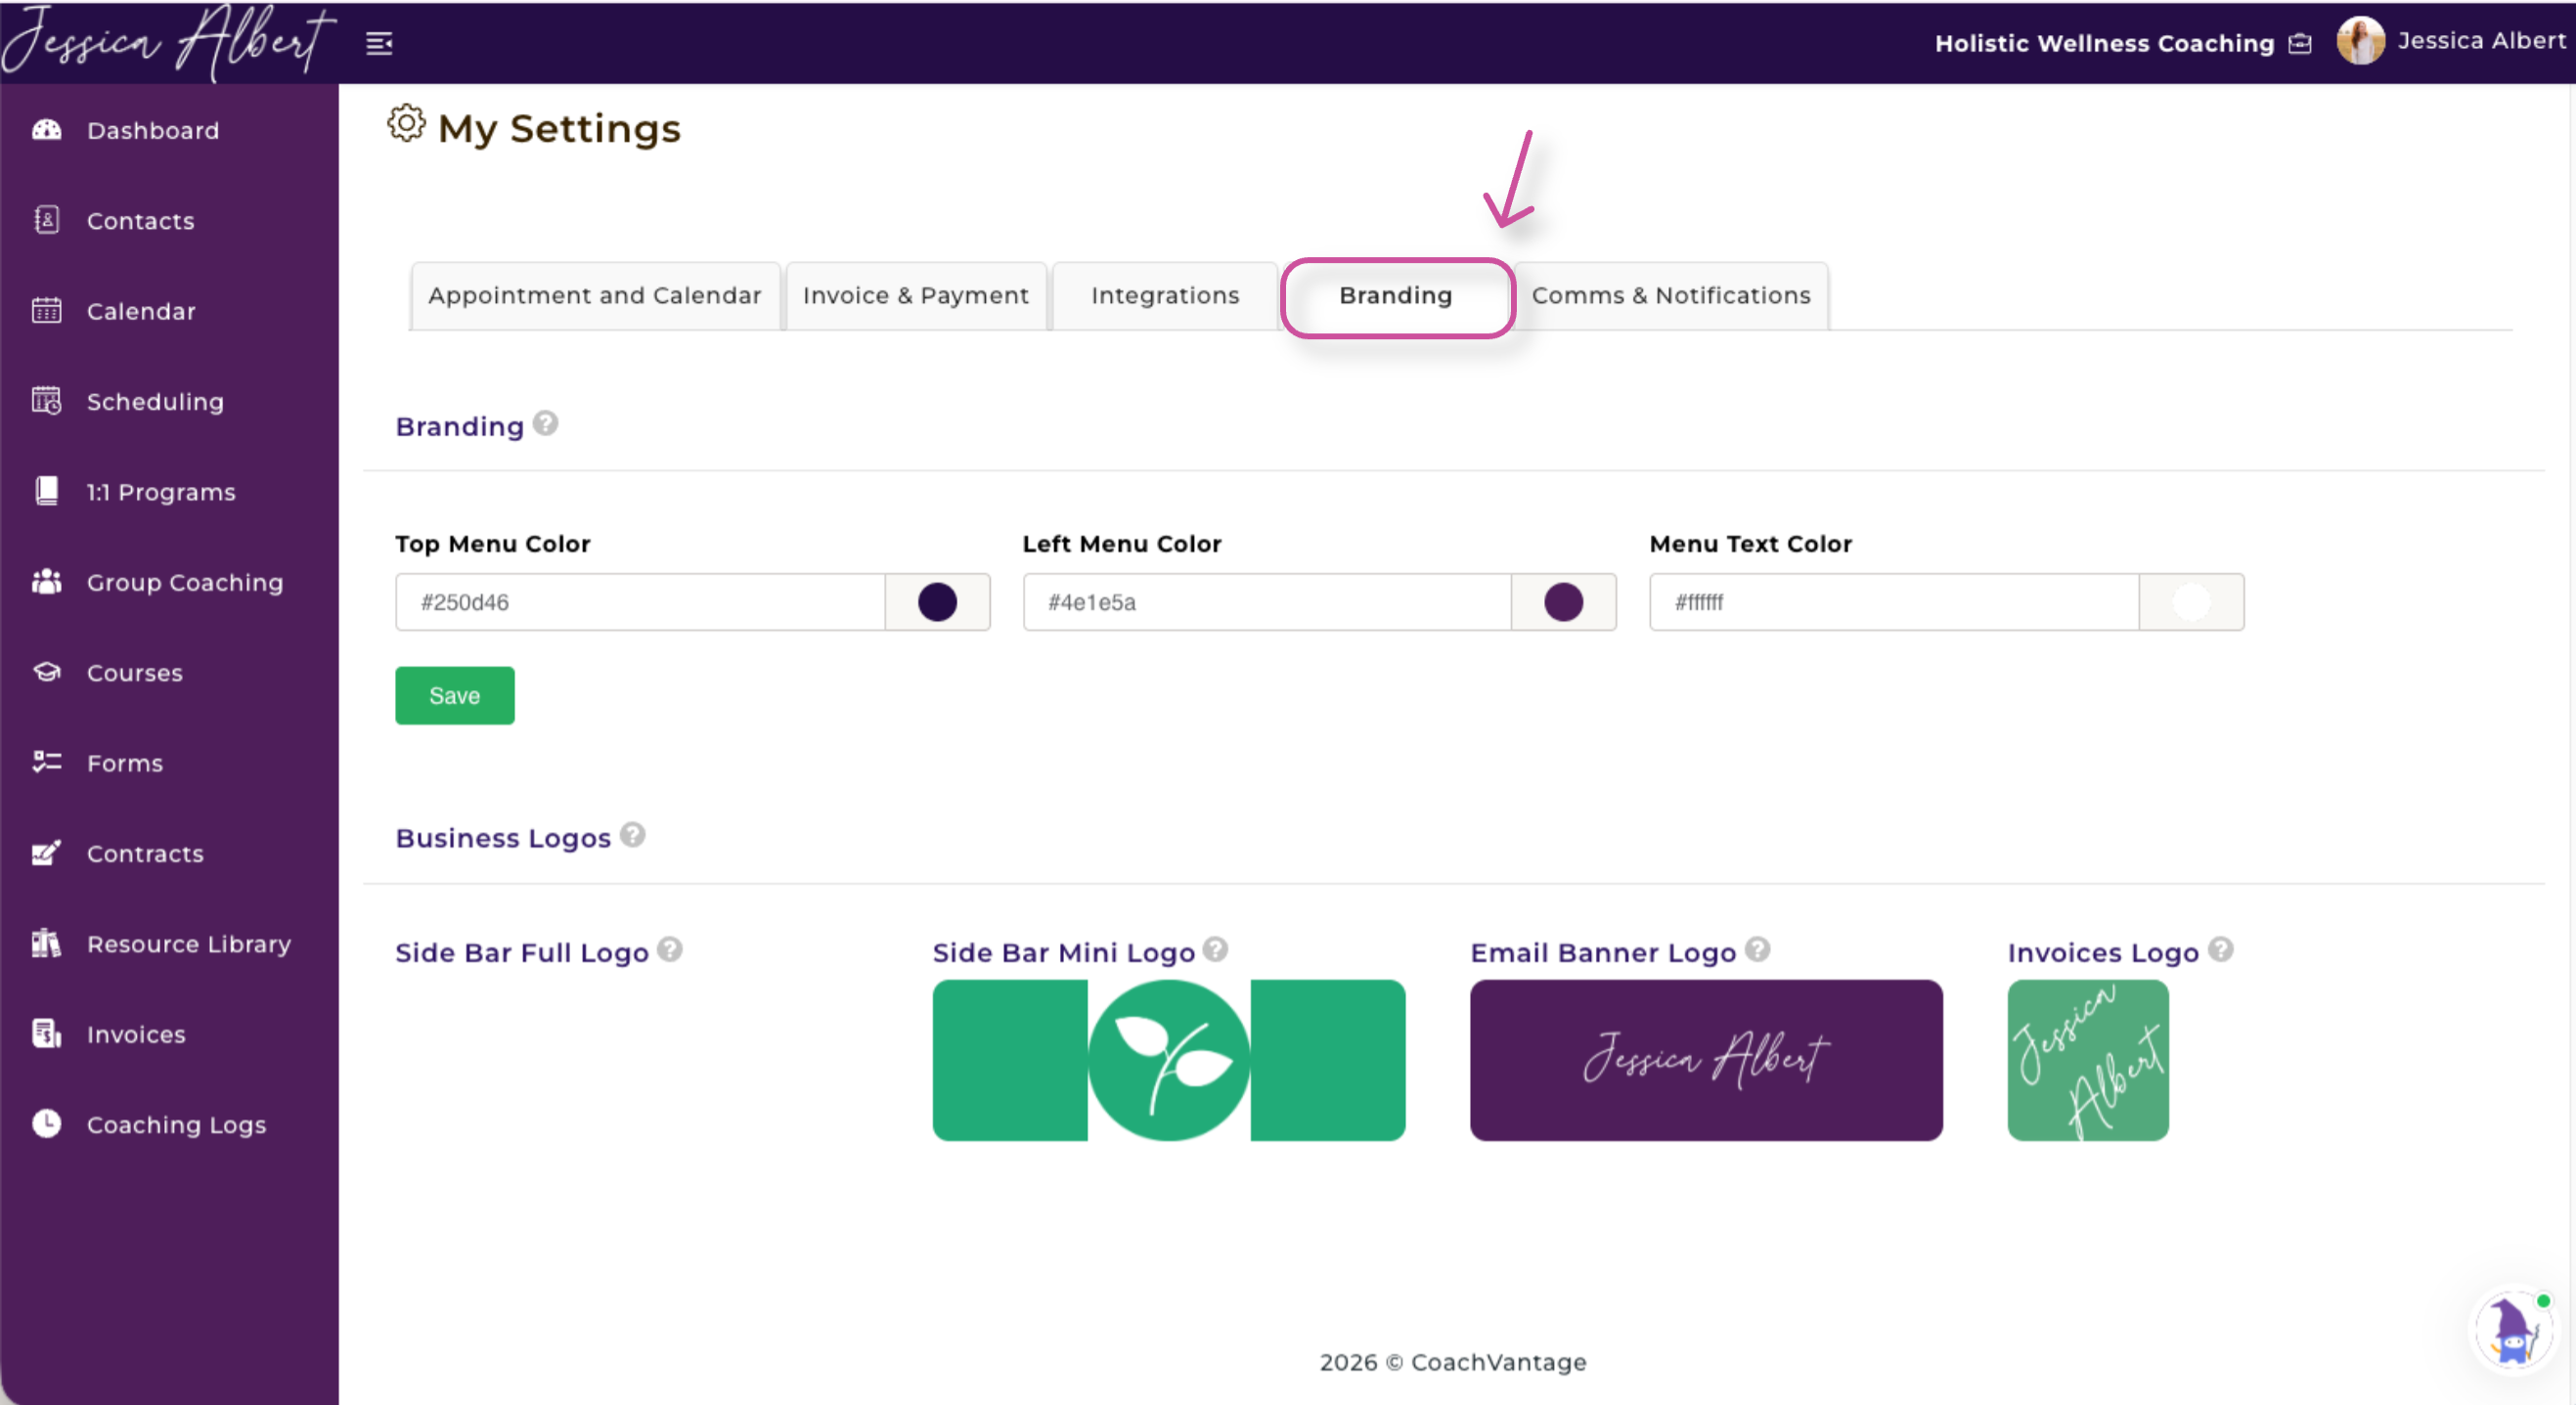
You can customize the look and feel of your CoachVantage account with your personal branding, colors and logos.
Your branding will also be displayed on the client portal so that your brand (not CoachVantage) is visible to your clients.
To start, click on your name on the top right corner of the top menu bar and select My Settings. Then, click the Branding tab to configure your brand settings.
For more information on this topic, please refer to this article, "Your Branding on CoachVantage."
Step 3 - Create a Contact 👥
In CoachVantage, it's easy to create a contact. This is because CoachVantage functions as a simplified CRM tool, allowing you to add contacts and to categorize or label them as leads, prospects, current clients, past clients, etc.
You can add as many contacts as you wish to your account!
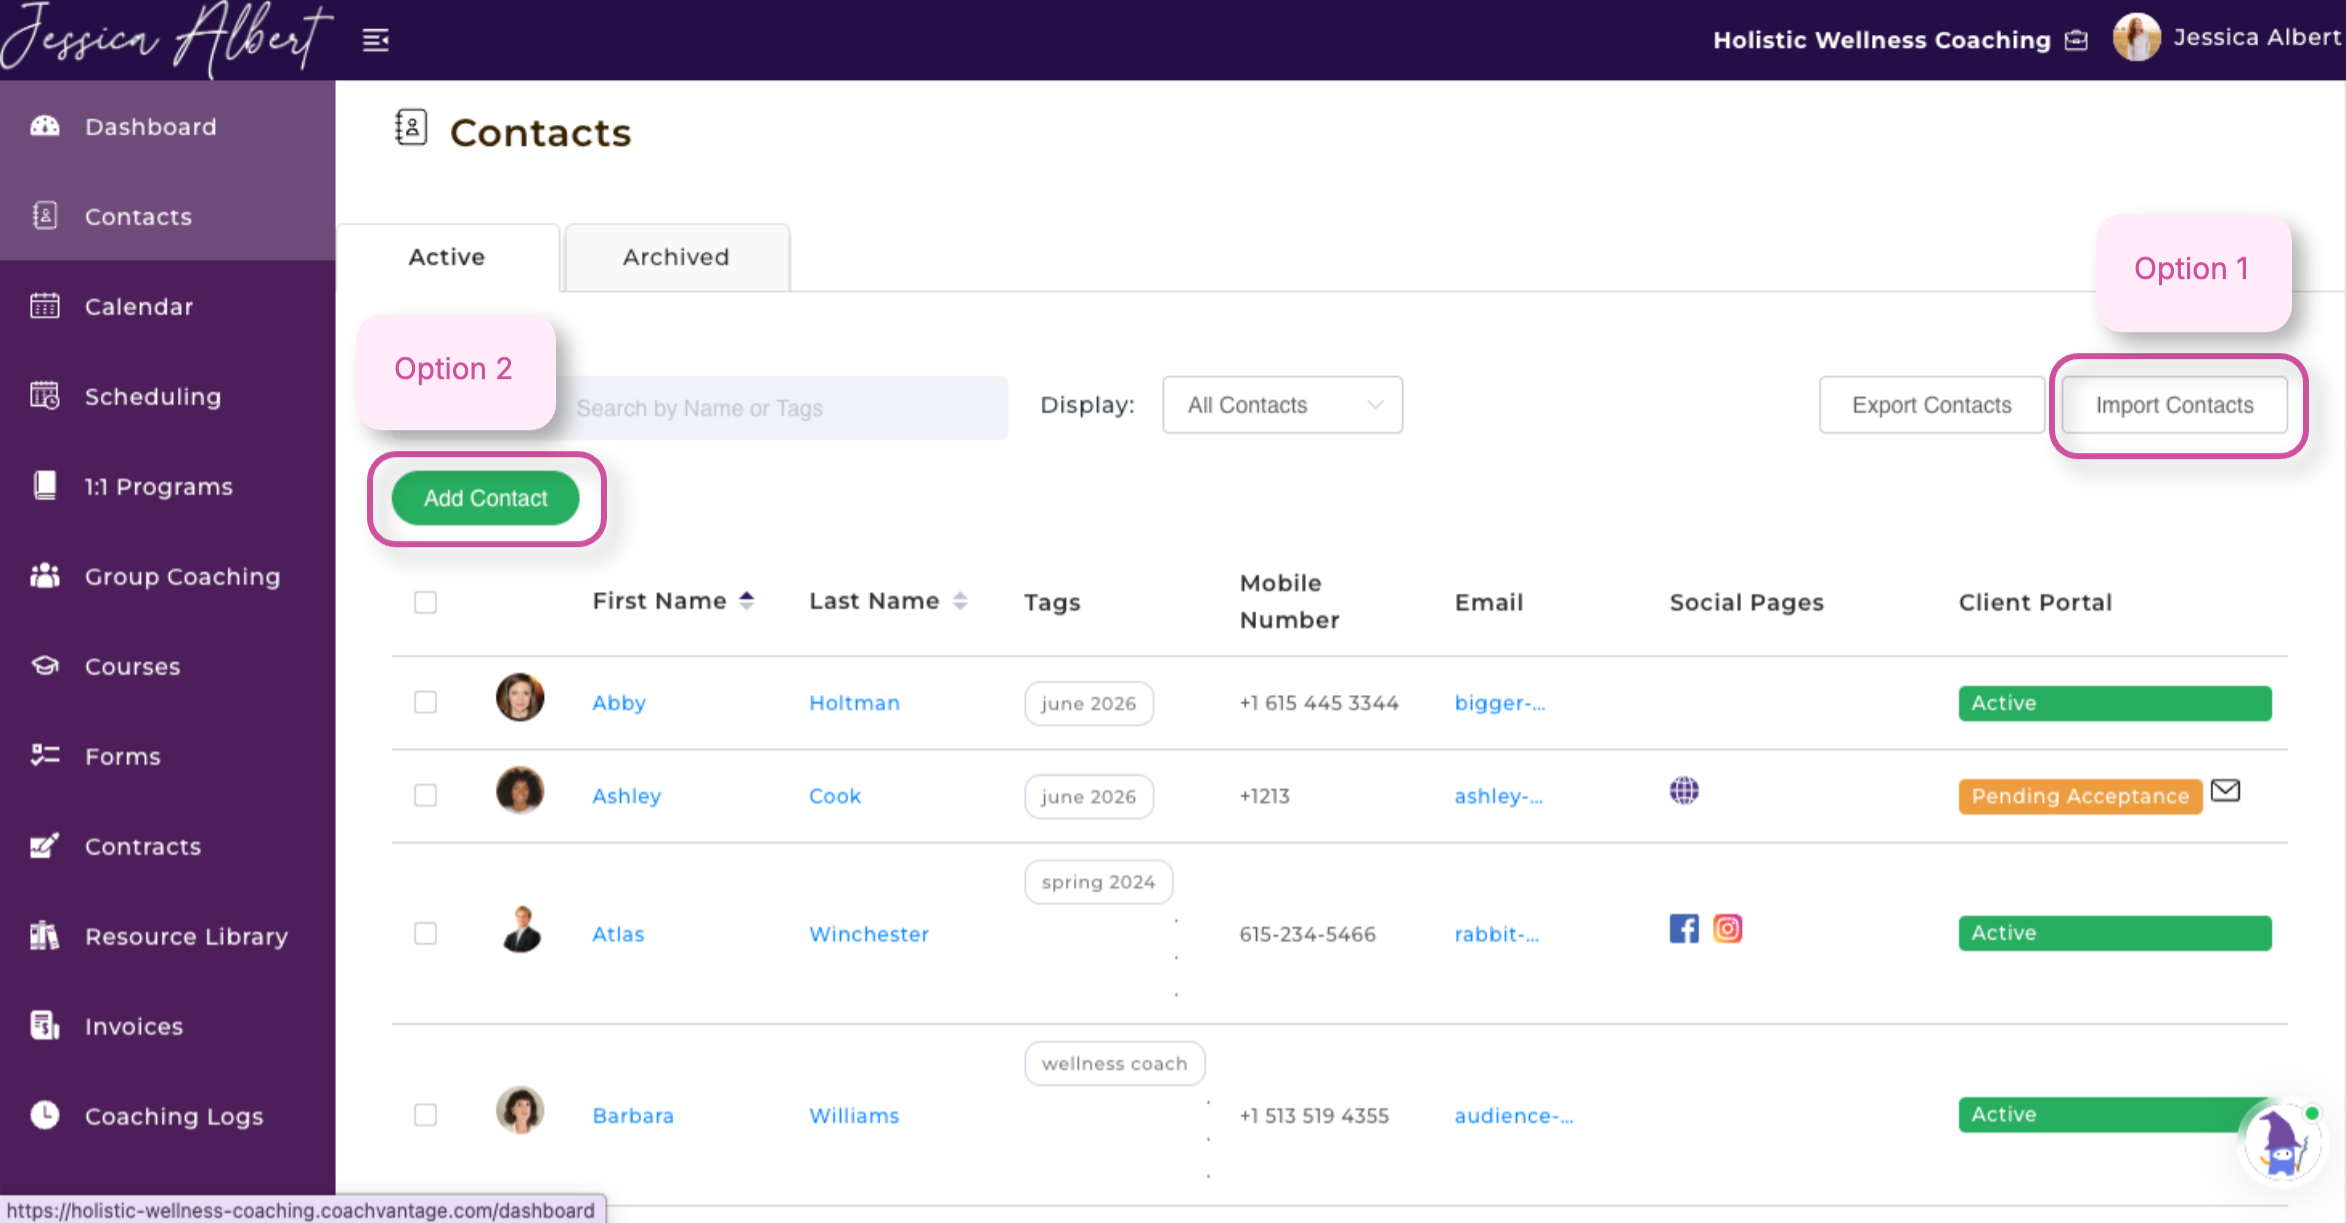
There are two ways to add contacts:
1) By importing contacts from a CSV file
2) By adding a contact manually
Client Portal
When adding a contact, you can choose to invite them to create a Client Portal either at the time of creation or later. While creating a portal isn’t required, it’s highly recommended for coaching engagements that involve interaction. Inviting clients to the Client Portal allows you to easily share Goals, Assignments, and Forms and make the most of CoachVantage’s features.
Note: We ask that you and your clients whitelist no-reply@coachvantage.com to ensure you receive all CoachVantage email notifications such as appointment confirmations, form requests, contracts, etc.
To learn more, please refer to this article, "Inviting Contacts To Create A Client Portal Account."
Step 4 - Create an Intake Form (Recommended) 🖊️
In CoachVantage, you can send forms to clients using our pre-made templates (which can be edited), or create intake forms that can be embedded into your program sign-up pages and event booking pages.
Forms can also be sent to clients as part of a coaching engagement. For example, you could send pre-session check-in forms, post-session forms, use forms as assignments for your clients, or even use forms to gather client feedback and testimonials.
Note: Forms can only be sent to clients with an active client portal. Clients can view and respond to forms in the client portal only.
To learn more, please refer to this article, "How to Create a Form."
Step 5 - Import a Contract Template (Recommended) 📝
The Contracts feature in CoachVantage makes it easy to send professional agreements to your clients for e-signature and keep everything organized in one place. You can upload your own contract documents (created by you or your legal advisor), save them as reusable templates, and send them directly to clients for signature—no external tools needed.
Once sent, you can track each contract’s status (e.g., out for signature, completed), send reminder emails, and view a full audit trail with timestamps for added transparency. For an even smoother experience, contracts can also be embedded into your program sign-up pages so clients can review and sign during enrollment.
Note: Since every coach’s contract is unique, CoachVantage does not provide pre-made templates. Instead, you can upload and use your own.
To learn more, please refer to this article, "Contracts Feature Overview."
Step 6 - Create an Event 📅
With CoachVantage’s Scheduling feature, you can create Events that allow prospects and clients to self-book appointments through an online booking page.
We often recommend that the first Event you create is a Discovery Call, giving prospective clients an opportunity to meet with you and learn about your coaching.
Other common examples of one-off virtual or in-person events include:
- Breakthrough Session
- Wellness Assessment
- Progress Check-In
To create your first Event, please refer to the article “How to Create an Event.”
Please note:
- It is important that you have already set your Availability Type before you create an Event so that prospective clients can book a time on your calendar based on your availability.
- You will have the option to create an Intake Form as part of the sign-up flow for your Event. You can create one from scratch or use our Form Templates.
Step 7 - Create a 1:1 Program ✨
CoachVantage makes it simple to create and publish coaching 1:1 programs online—even without a website. Easily configure your program details, files, fees, and scheduling rules.
Each program automatically generates a hosted landing page where clients can sign up, complete forms, e-sign your agreement, make payments, and schedule sessions—all in one seamless, automated process.
To get started, please refer to this article titled, "How to Create a 1:1 Coaching Program."
Step 8 - Embed CoachVantage into Your Website 💻
To streamline your workflow and create a seamless client experience, it’s important to embed your Events, 1:1 Programs, and Group Coaching Programs directly onto your website. This allows clients to easily view offerings and register without leaving your site.
Learn how to embed CoachVantage into your website by referring to these articles:
- How to Embed Your Event Sign-Up Page to Your Website
- How to Embed Your Coaching Program Sign-Up Page to Your Website
Step 9 - Add Files to Your Resource Library 📚
The Resource Library is your one-stop-shop where all frequently used files, folders, videos, images, etc, for your business and coaching engagements can be uploaded and stored.
The Resource Library helps you to manage your coaching business files and documents in one place - CoachVantage - instead of searching through a stack of files on your PC or cloud storage tools.
Learn how to Add Files to your Resource Library by referring to this article, "Resource Library - Files & Templates."
You’re Set Up for Success! 🚀
You’re all set to start using CoachVantage and building your coaching business with ease.
Once these steps are complete, you’ll have everything you need to begin working with clients—booking sessions, sending forms and contracts, and delivering a seamless coaching experience from one platform.
From here, you can continue customizing your account and exploring additional features to support your unique coaching style and workflow.
We also encourage you to explore our CoachVantage FAQs and Knowledge Base for tips, tutorials, and best practices as you get started.
Optional - Additional Steps
- Invite Contacts to Create a Client Portal
- Resource Library - Files & Templates
- Create Note Templates
- Create Programs and Promo Codes Using Stripe
- Create a Group Coaching Program