
How to Create a Course
Overview
Creating a course in CoachVantage is designed to be simple and flexible, whether you're building your first online course or expanding your existing coaching offerings.
This guide walks you through each step of the course creation process—from generating your course with AI to organizing your curriculum, adding lesson content, configuring pricing, customizing your course landing page, and setting up automated emails. By the end, you'll have a polished course that's ready for enrollment and provides a seamless learning experience for your clients.
Whether you're creating a free lead-generation course, a paid self-paced program, or a companion course for your coaching services, CoachVantage gives you everything you need to build and launch your course from one platform.
Before You Begin
With CoachVantage's Course Builder, you don't even need a fully developed course before getting started. If you're using the AI Course Builder, having a general idea of your course topic, target audience, and the outcome you want learners to achieve is enough to generate a strong starting point.
We recommend thinking about:
- Your course topic
- Your target audience
- The key learning outcomes
- An approximate number of modules and lessons
You can refine and customize your course structure, lesson content, pricing, and branding at any time after it's generated.
Tip: The AI Course Builder creates your course structure, module organization, and lesson descriptions—but your unique coaching expertise, videos, and resources are what bring your course to life.
Creating a New Course
To create a course:
- Navigate to Courses.
- Select Create New Course.
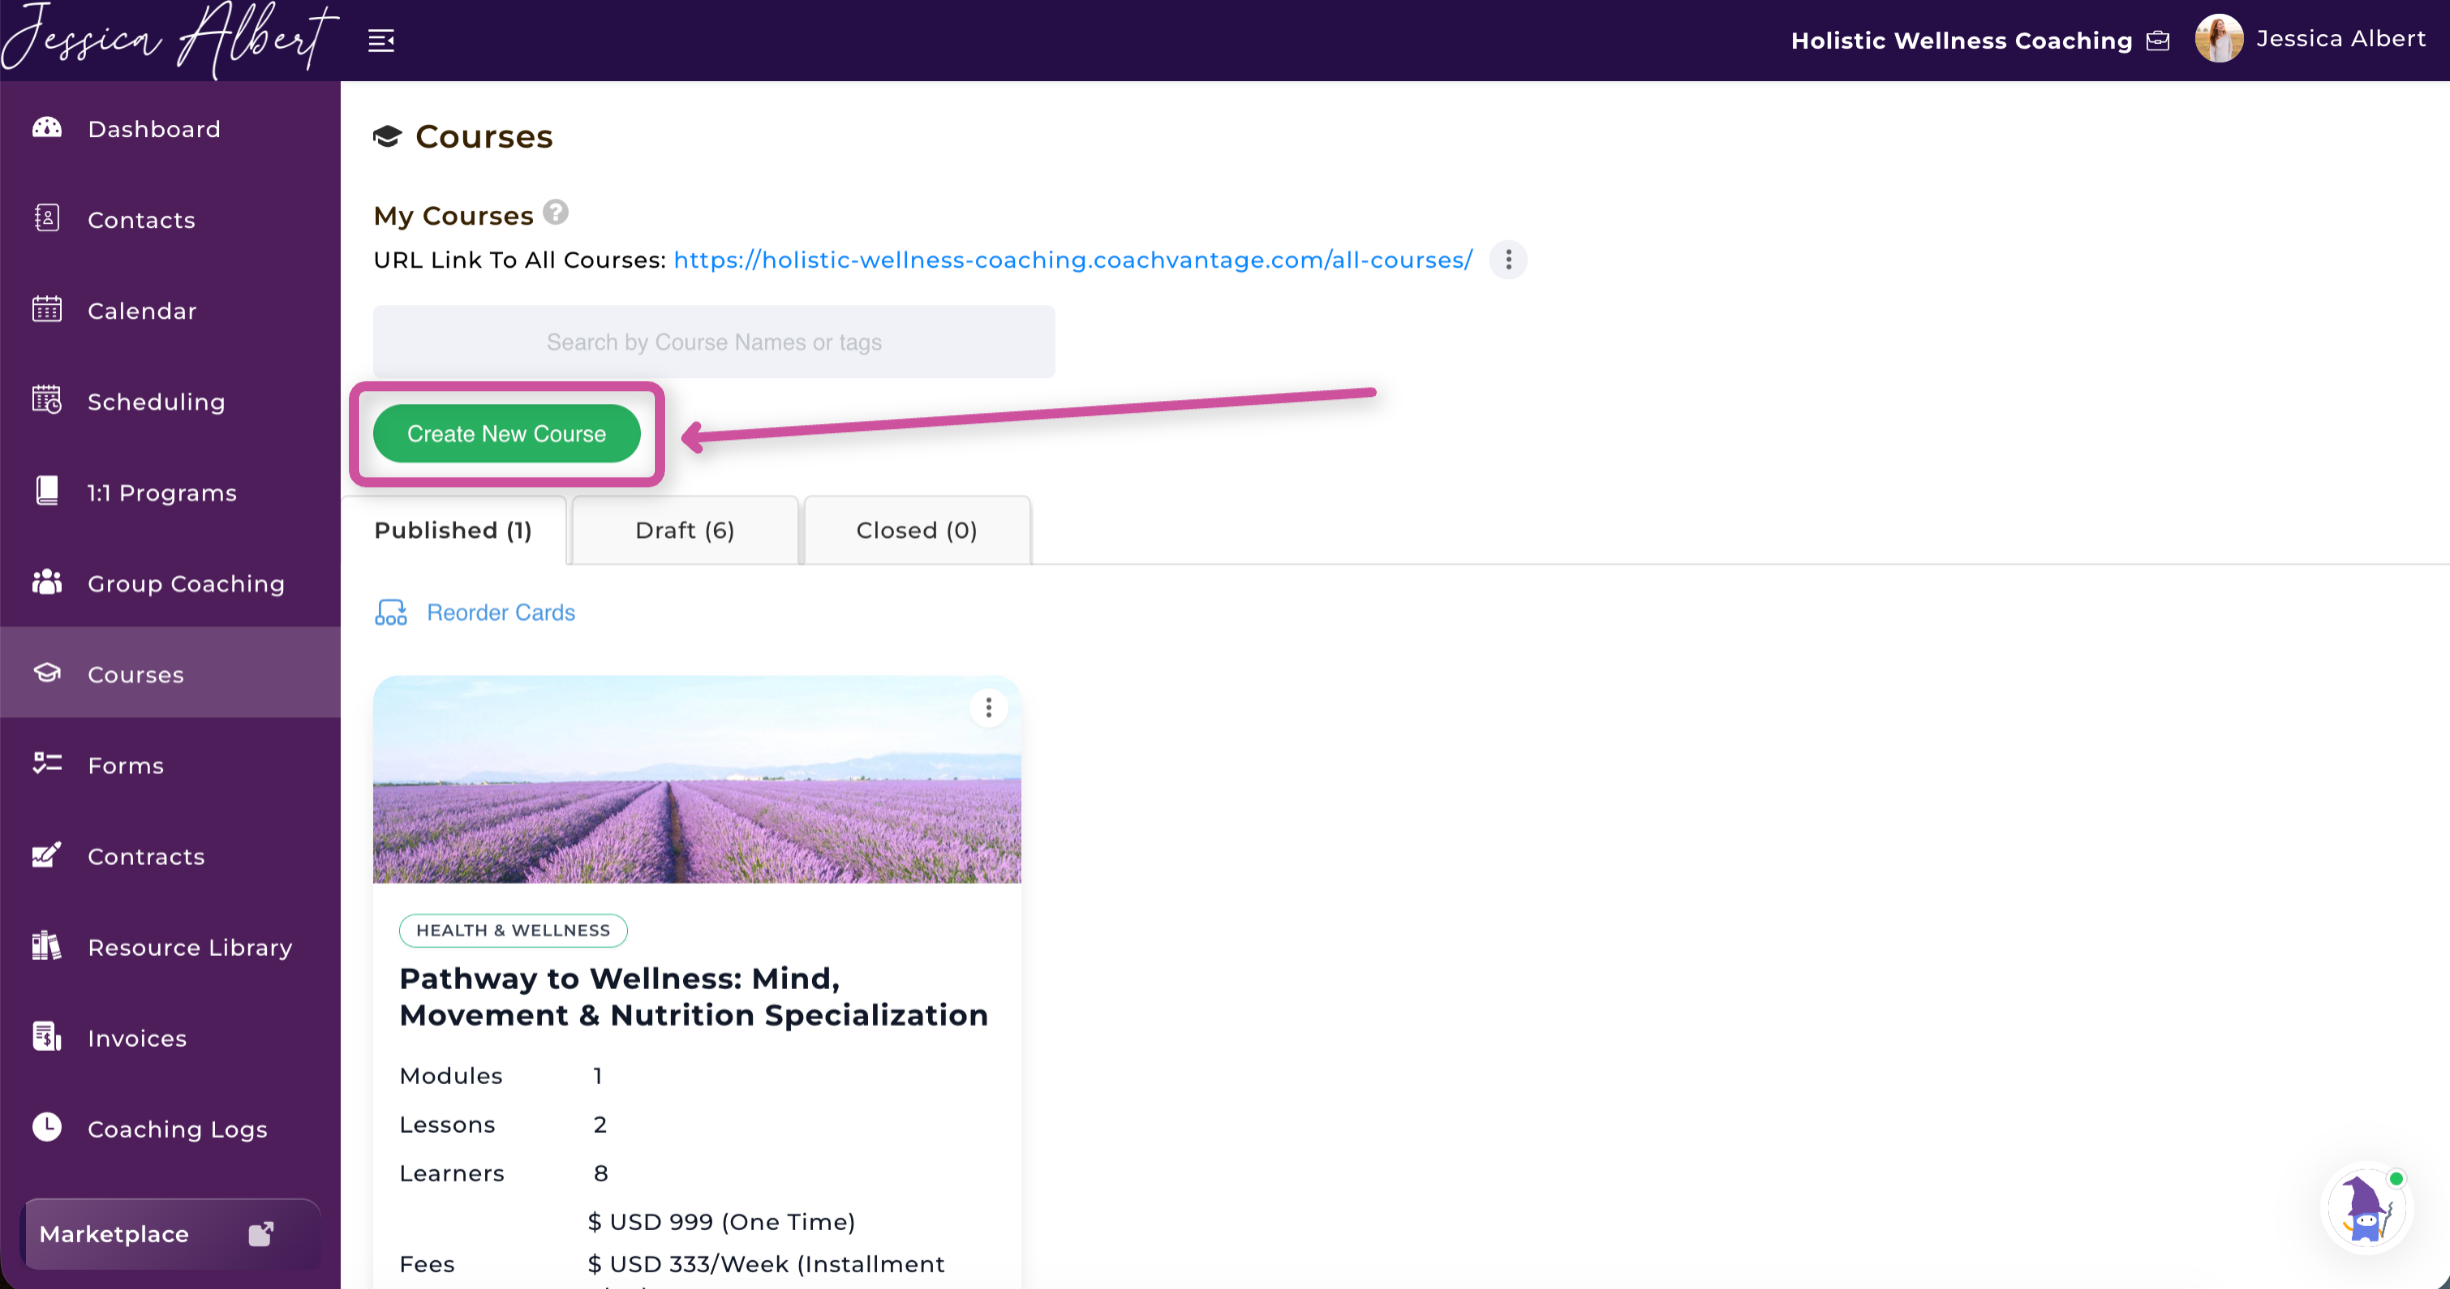
3. Choose one of the following:
- Generate with AI
- Create Manually
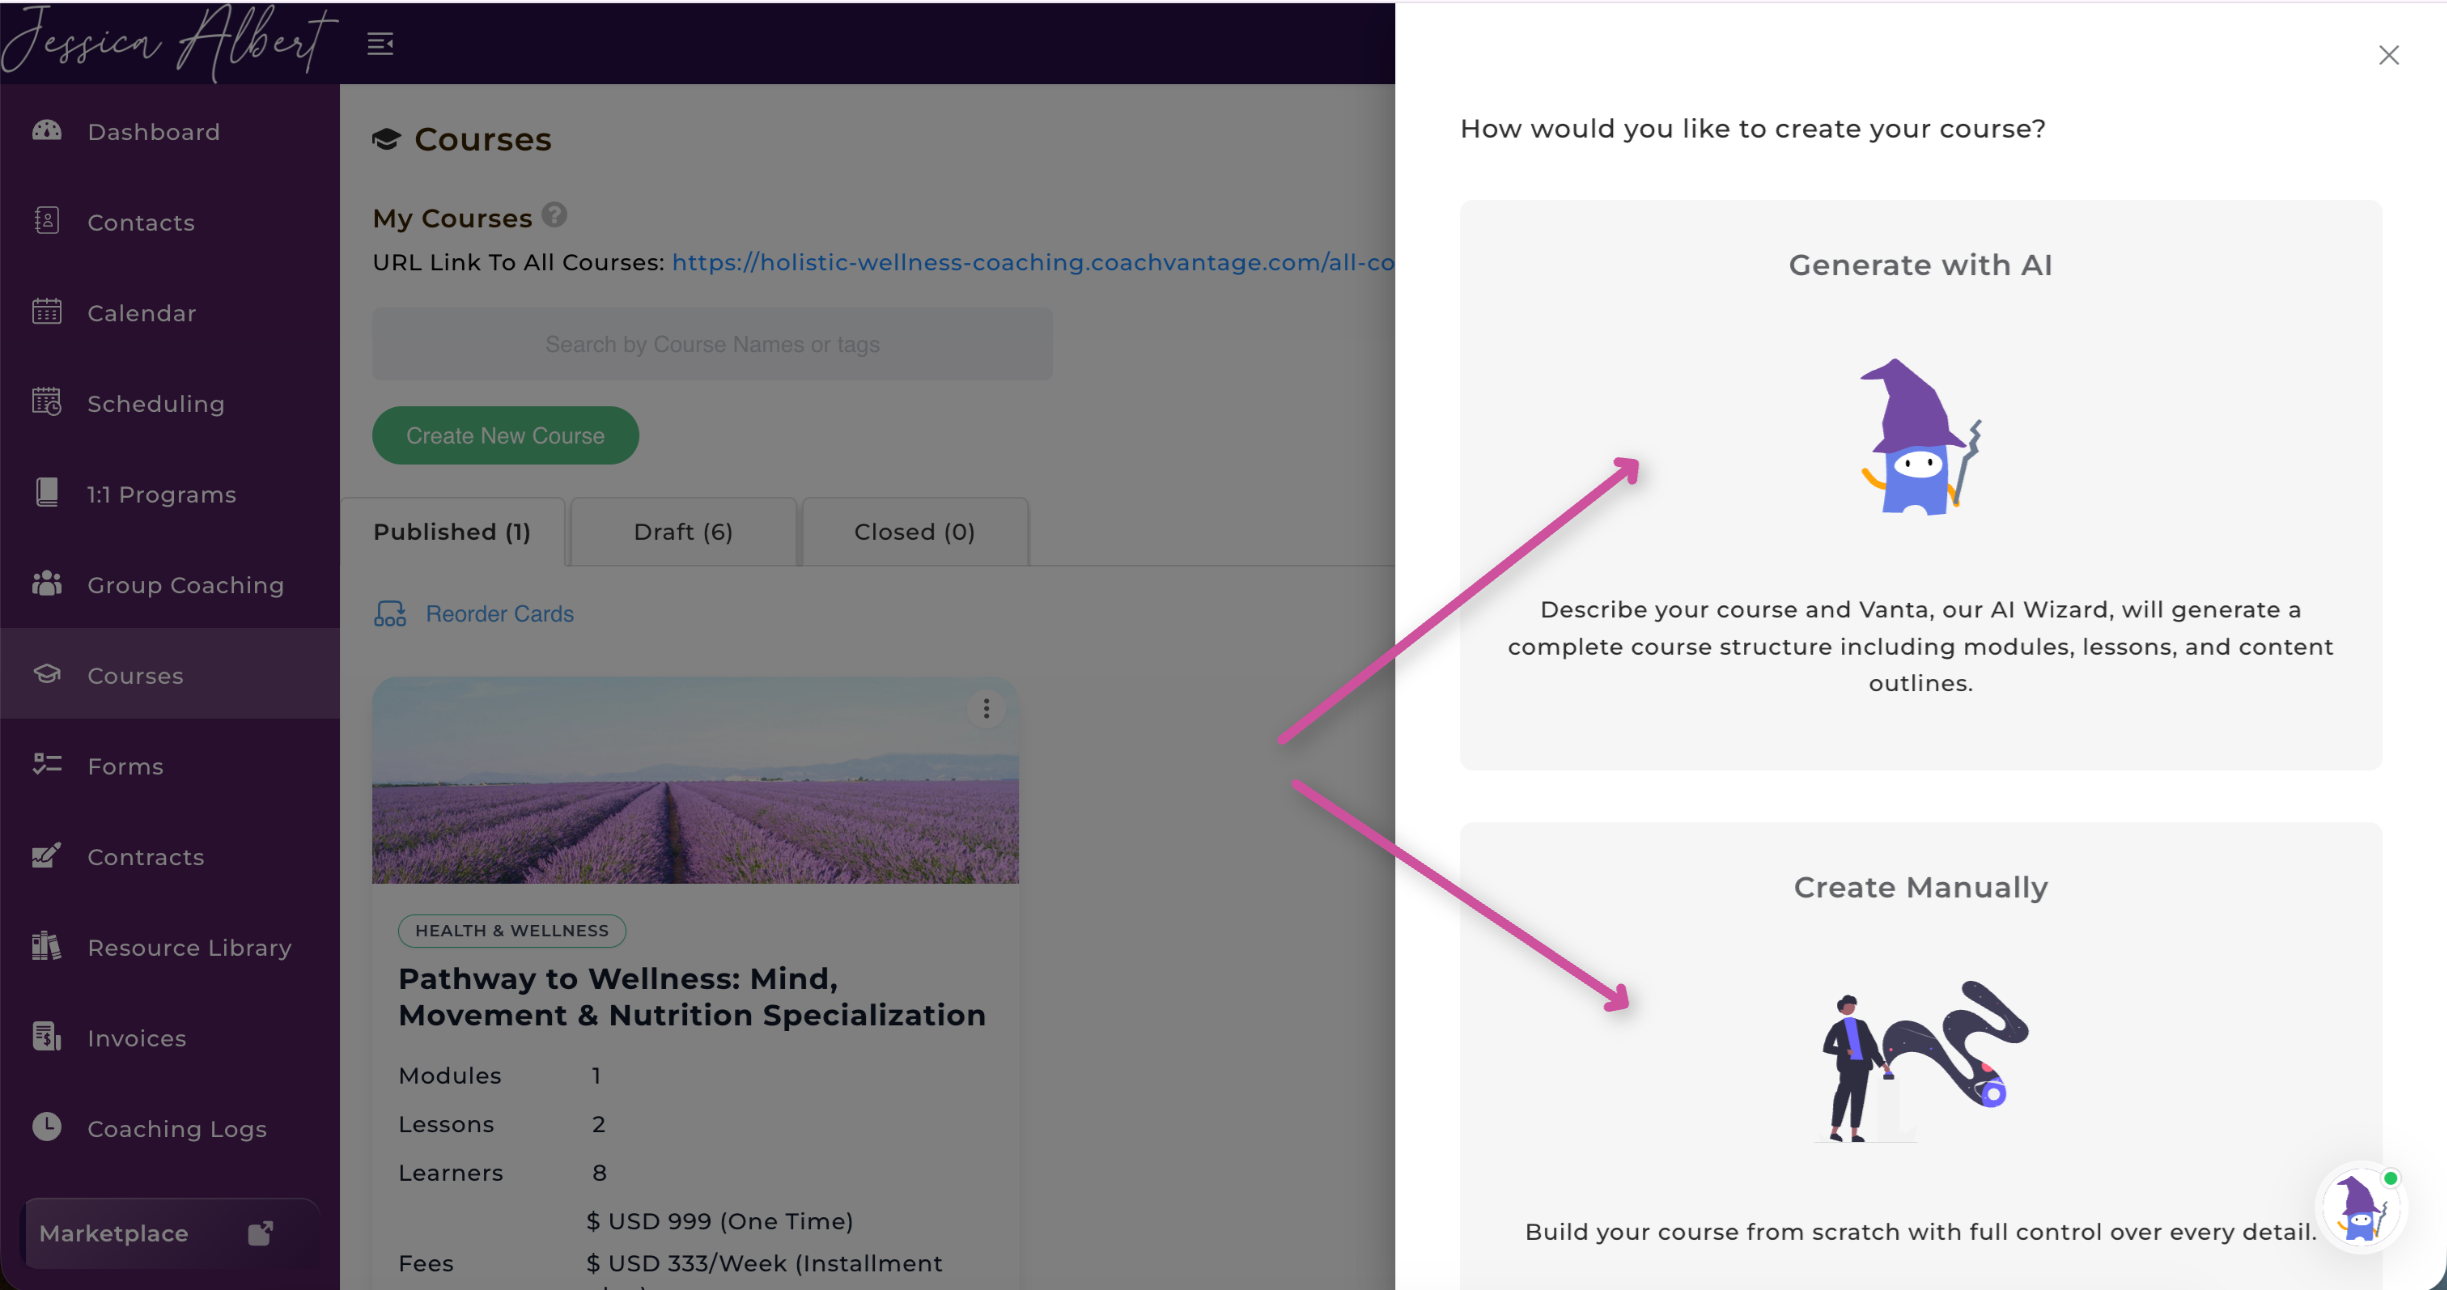
If you're creating your first course, we recommend using the AI Course Builder to quickly generate the framework of your course.
If You Choose: Generate with AI
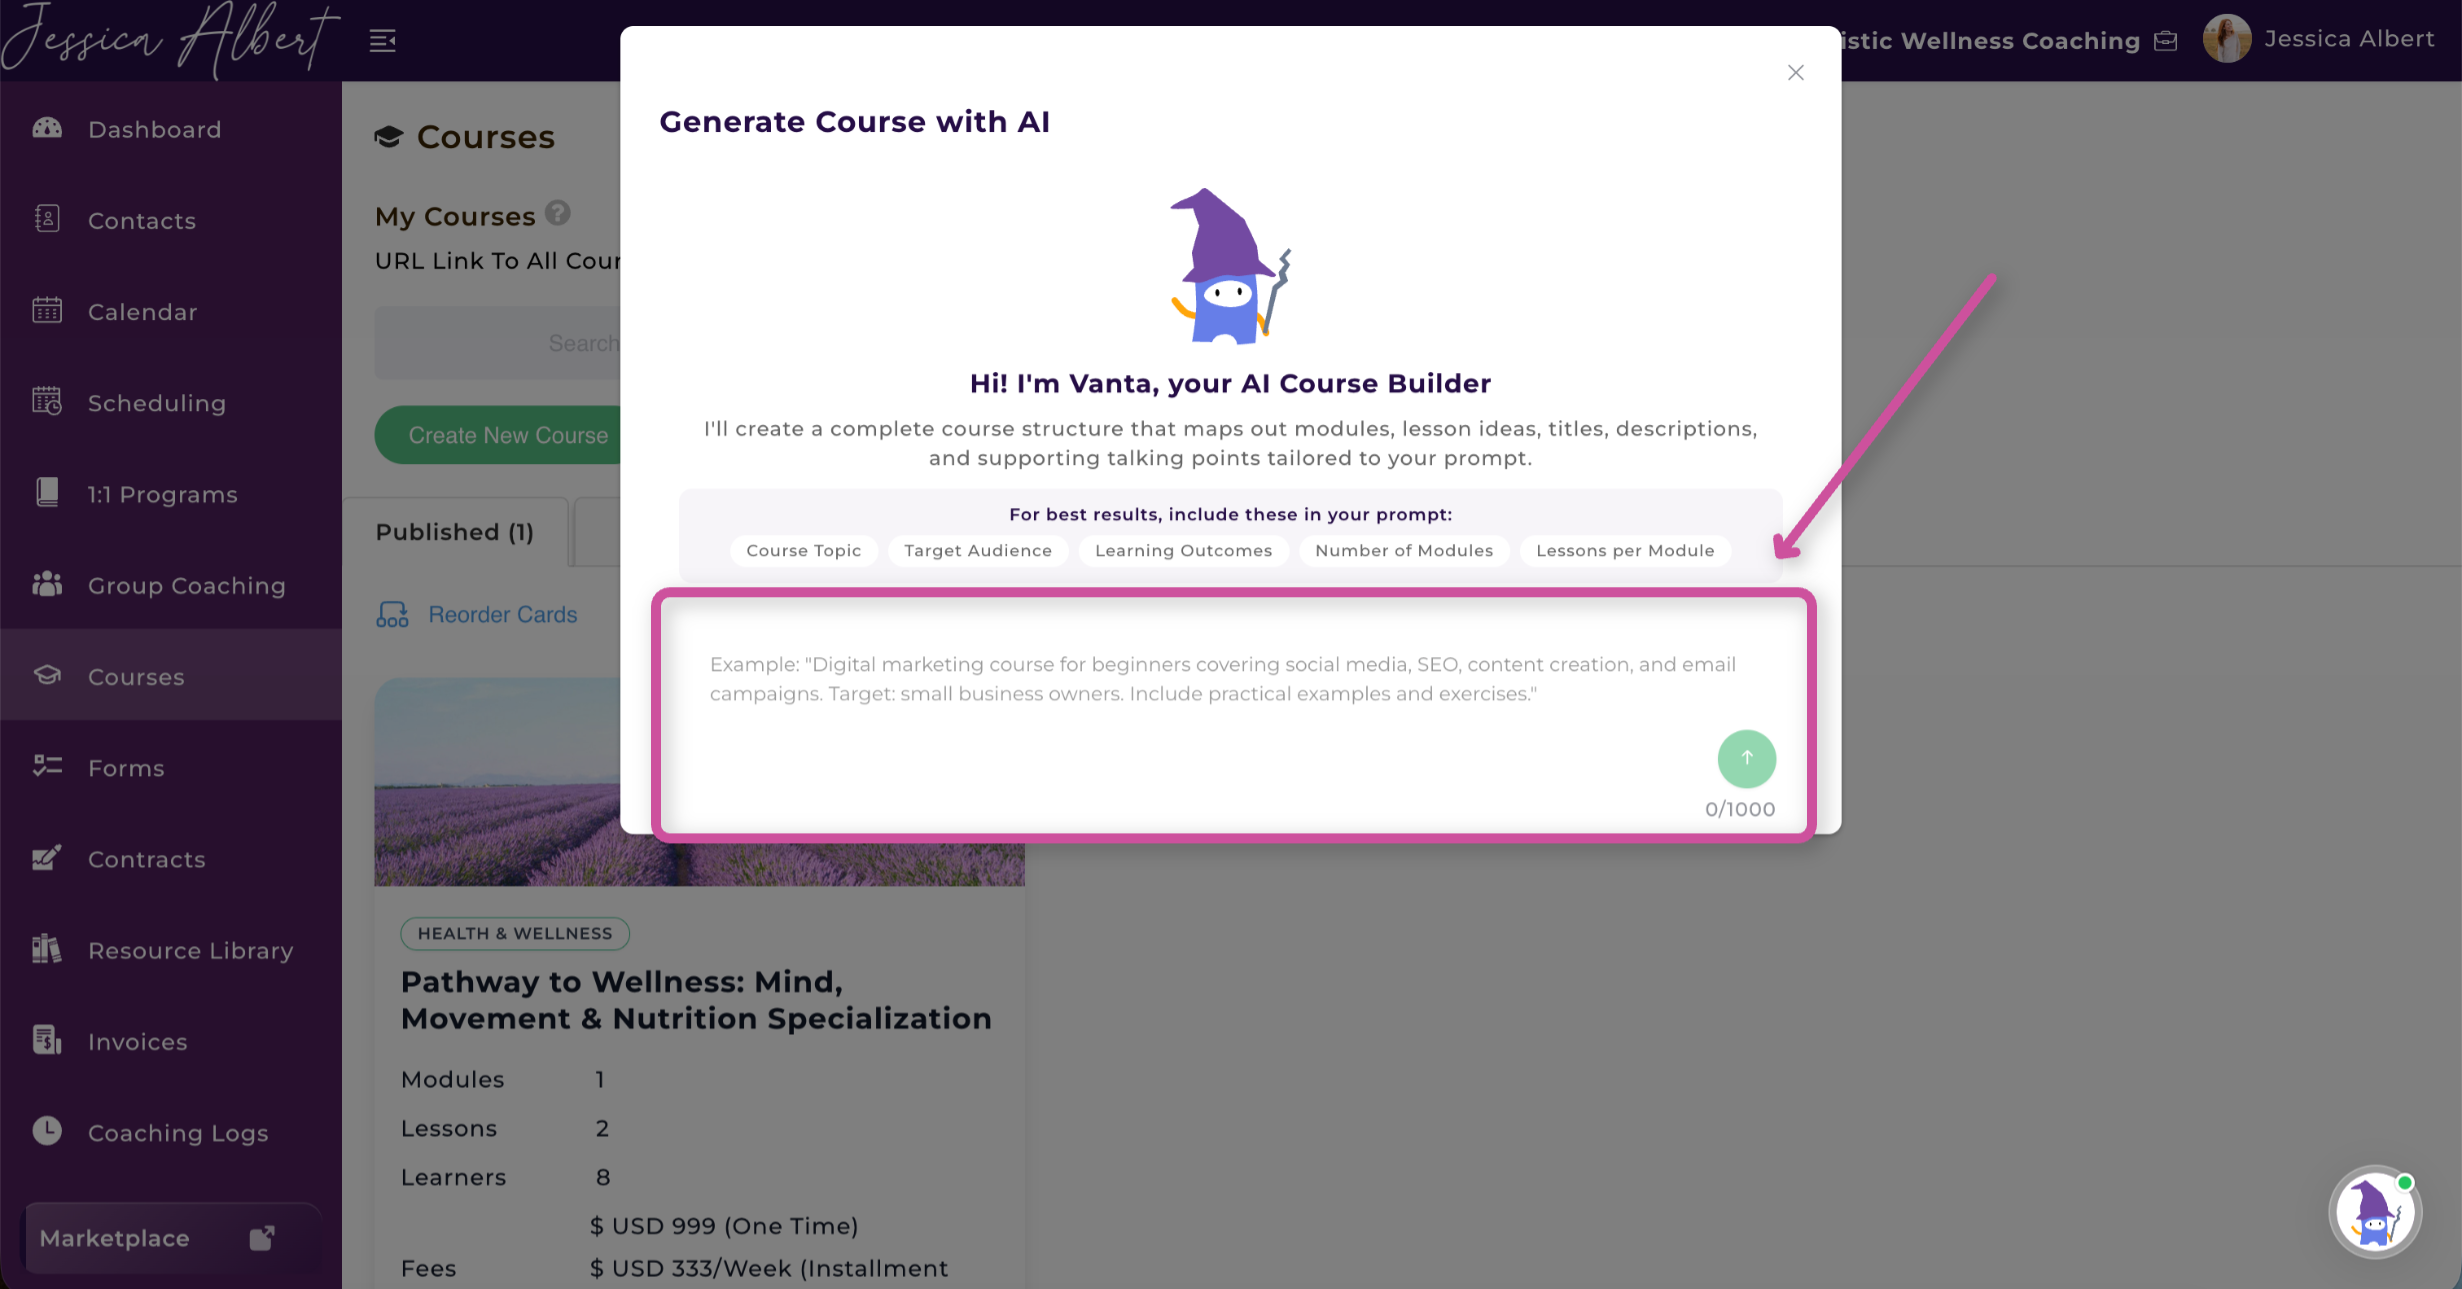
CoachVantage includes an AI Course Builder that creates the organizational structure of your course in seconds.
For the best results, include:
- Course topic
- Target audience
- Desired learning outcomes
- Number of modules
- Number of lessons per module
Once you've created your prompt, press the green up arrow and AI will generate your course.
Example Prompt: Create a course titled "From Burnout to Balance" for busy professionals experiencing burnout. Learners should develop healthier work habits and reduce stress. Create 3 modules with 3 lessons in each module.
What AI Creates
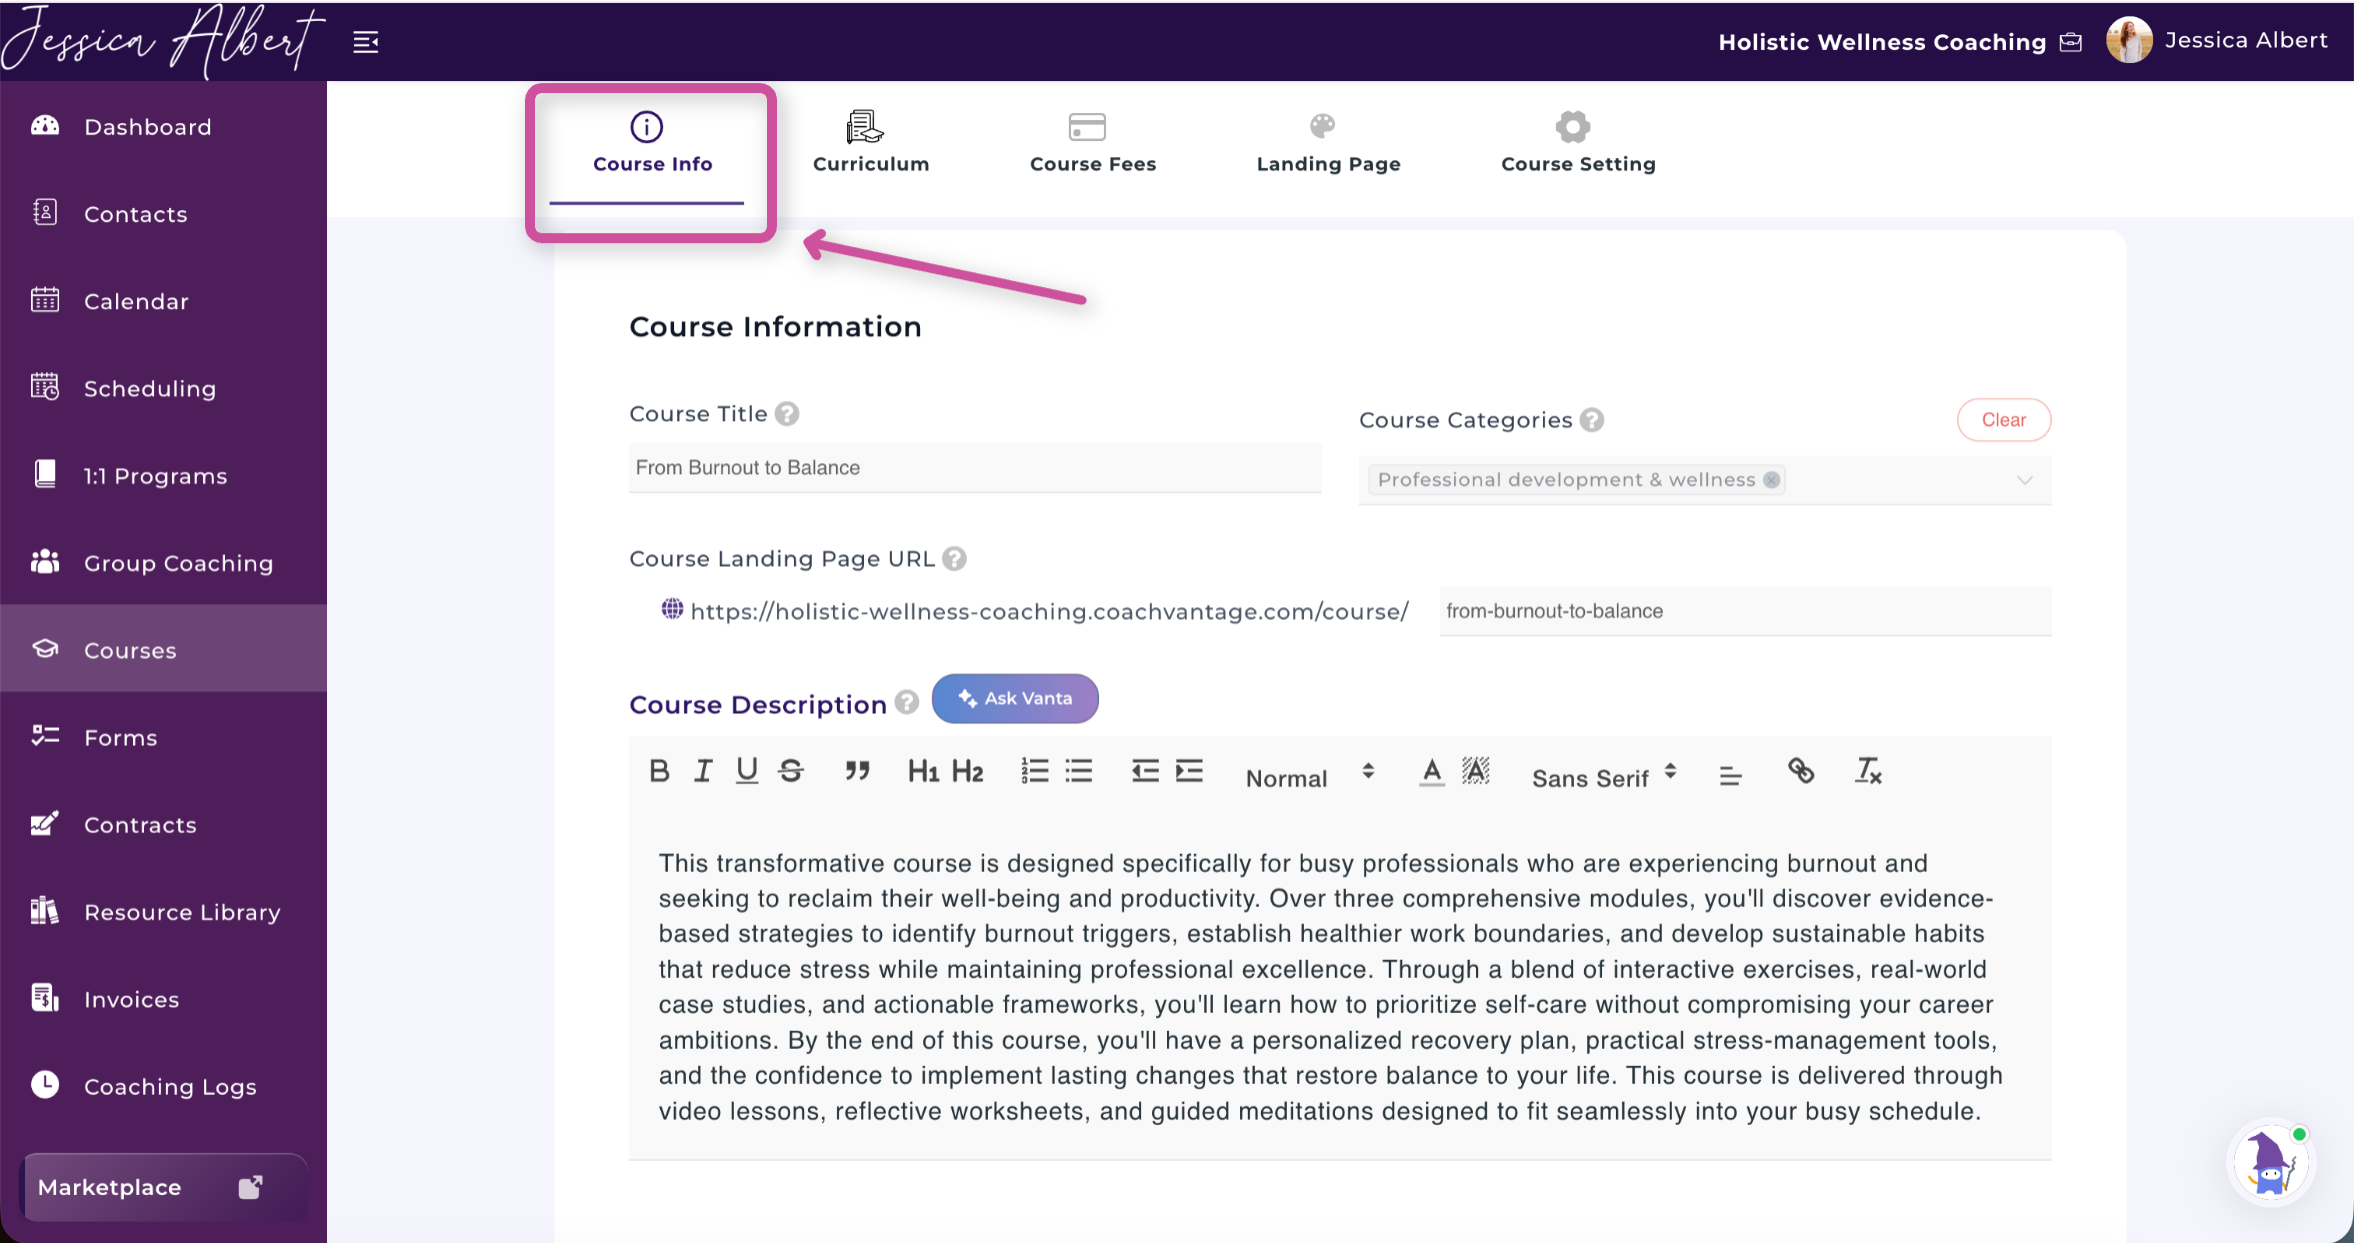
The AI automatically generates:
- Course title (even if you don't have one at the start)
- Course category
- Landing page URL
- Course description
- Course structure
- Module titles
- Lesson titles
- Lesson overviews
- Initial marketing copy
What You Will Still Need to Create
The AI does not generate:
- Proprietary coaching frameworks
- Scripts
- The main video, audio, or document tied to each lesson
- Intellectual property
You'll still add your own expertise by uploading videos, documents, worksheets, and lesson content.
If Your Choose: Create Manually
If you prefer to build your course from scratch, select Create Manually. This option gives you complete control over your course structure and content from the very beginning.
You'll create and configure each part of your course yourself, including: the course description, modules descriptions, lesson overviews, etc.
Once your course has been created, you can continue customizing it by adding your lesson content, uploading videos or documents, configuring pricing, personalizing your landing page, and setting up your course email templates.
Tip: Creating your course manually is a great option if you already have your curriculum planned out or prefer to build each module and lesson yourself instead of using AI.
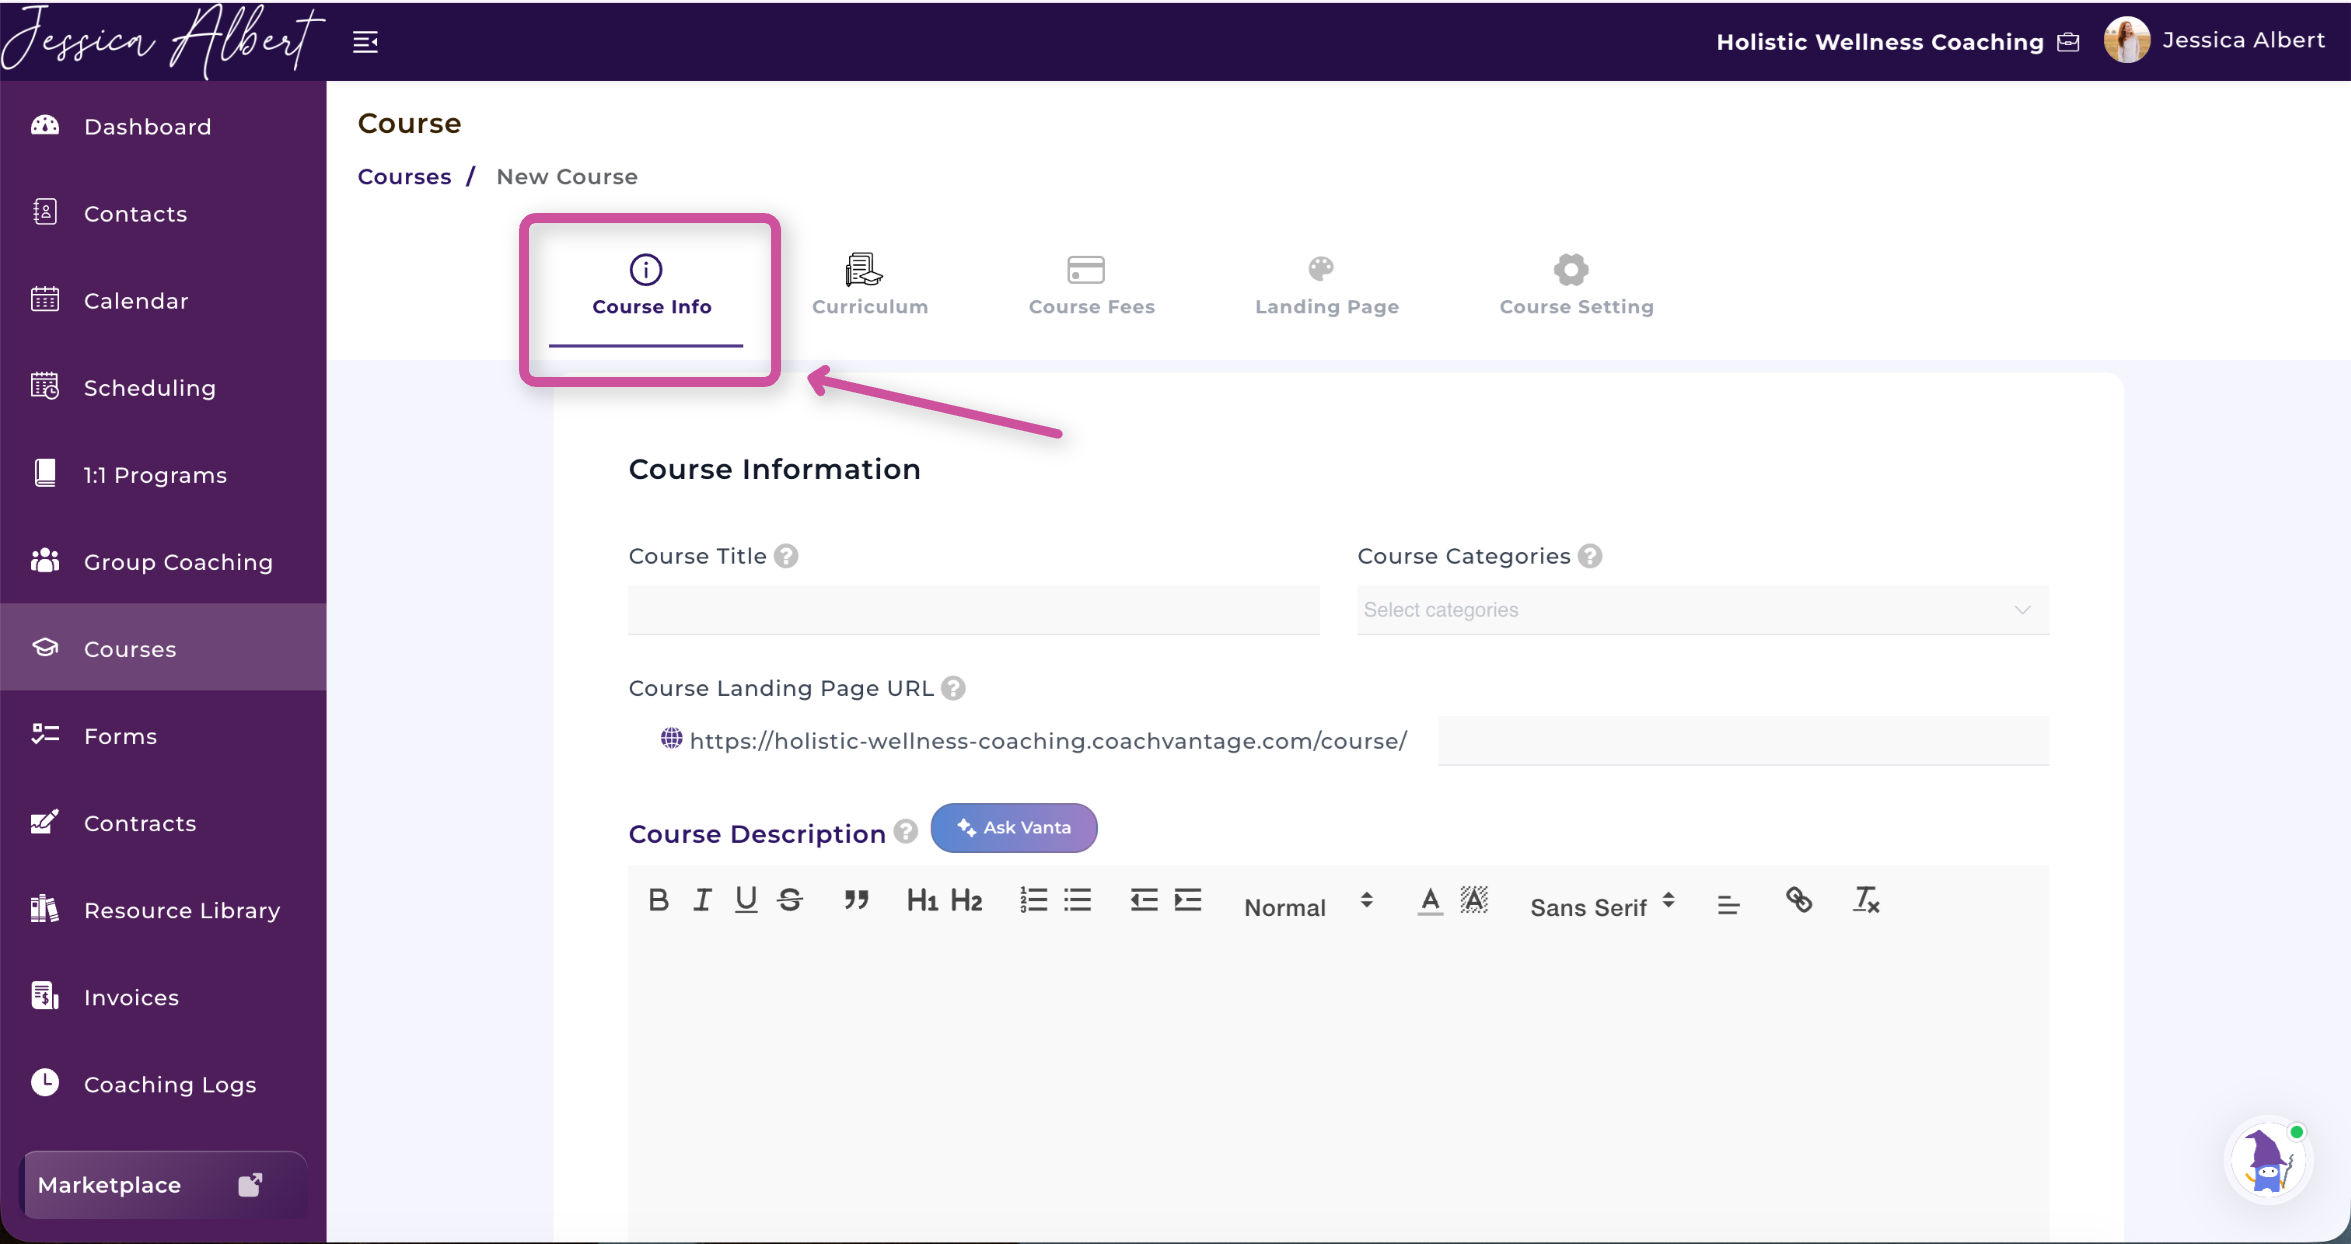
Course Information ℹ️
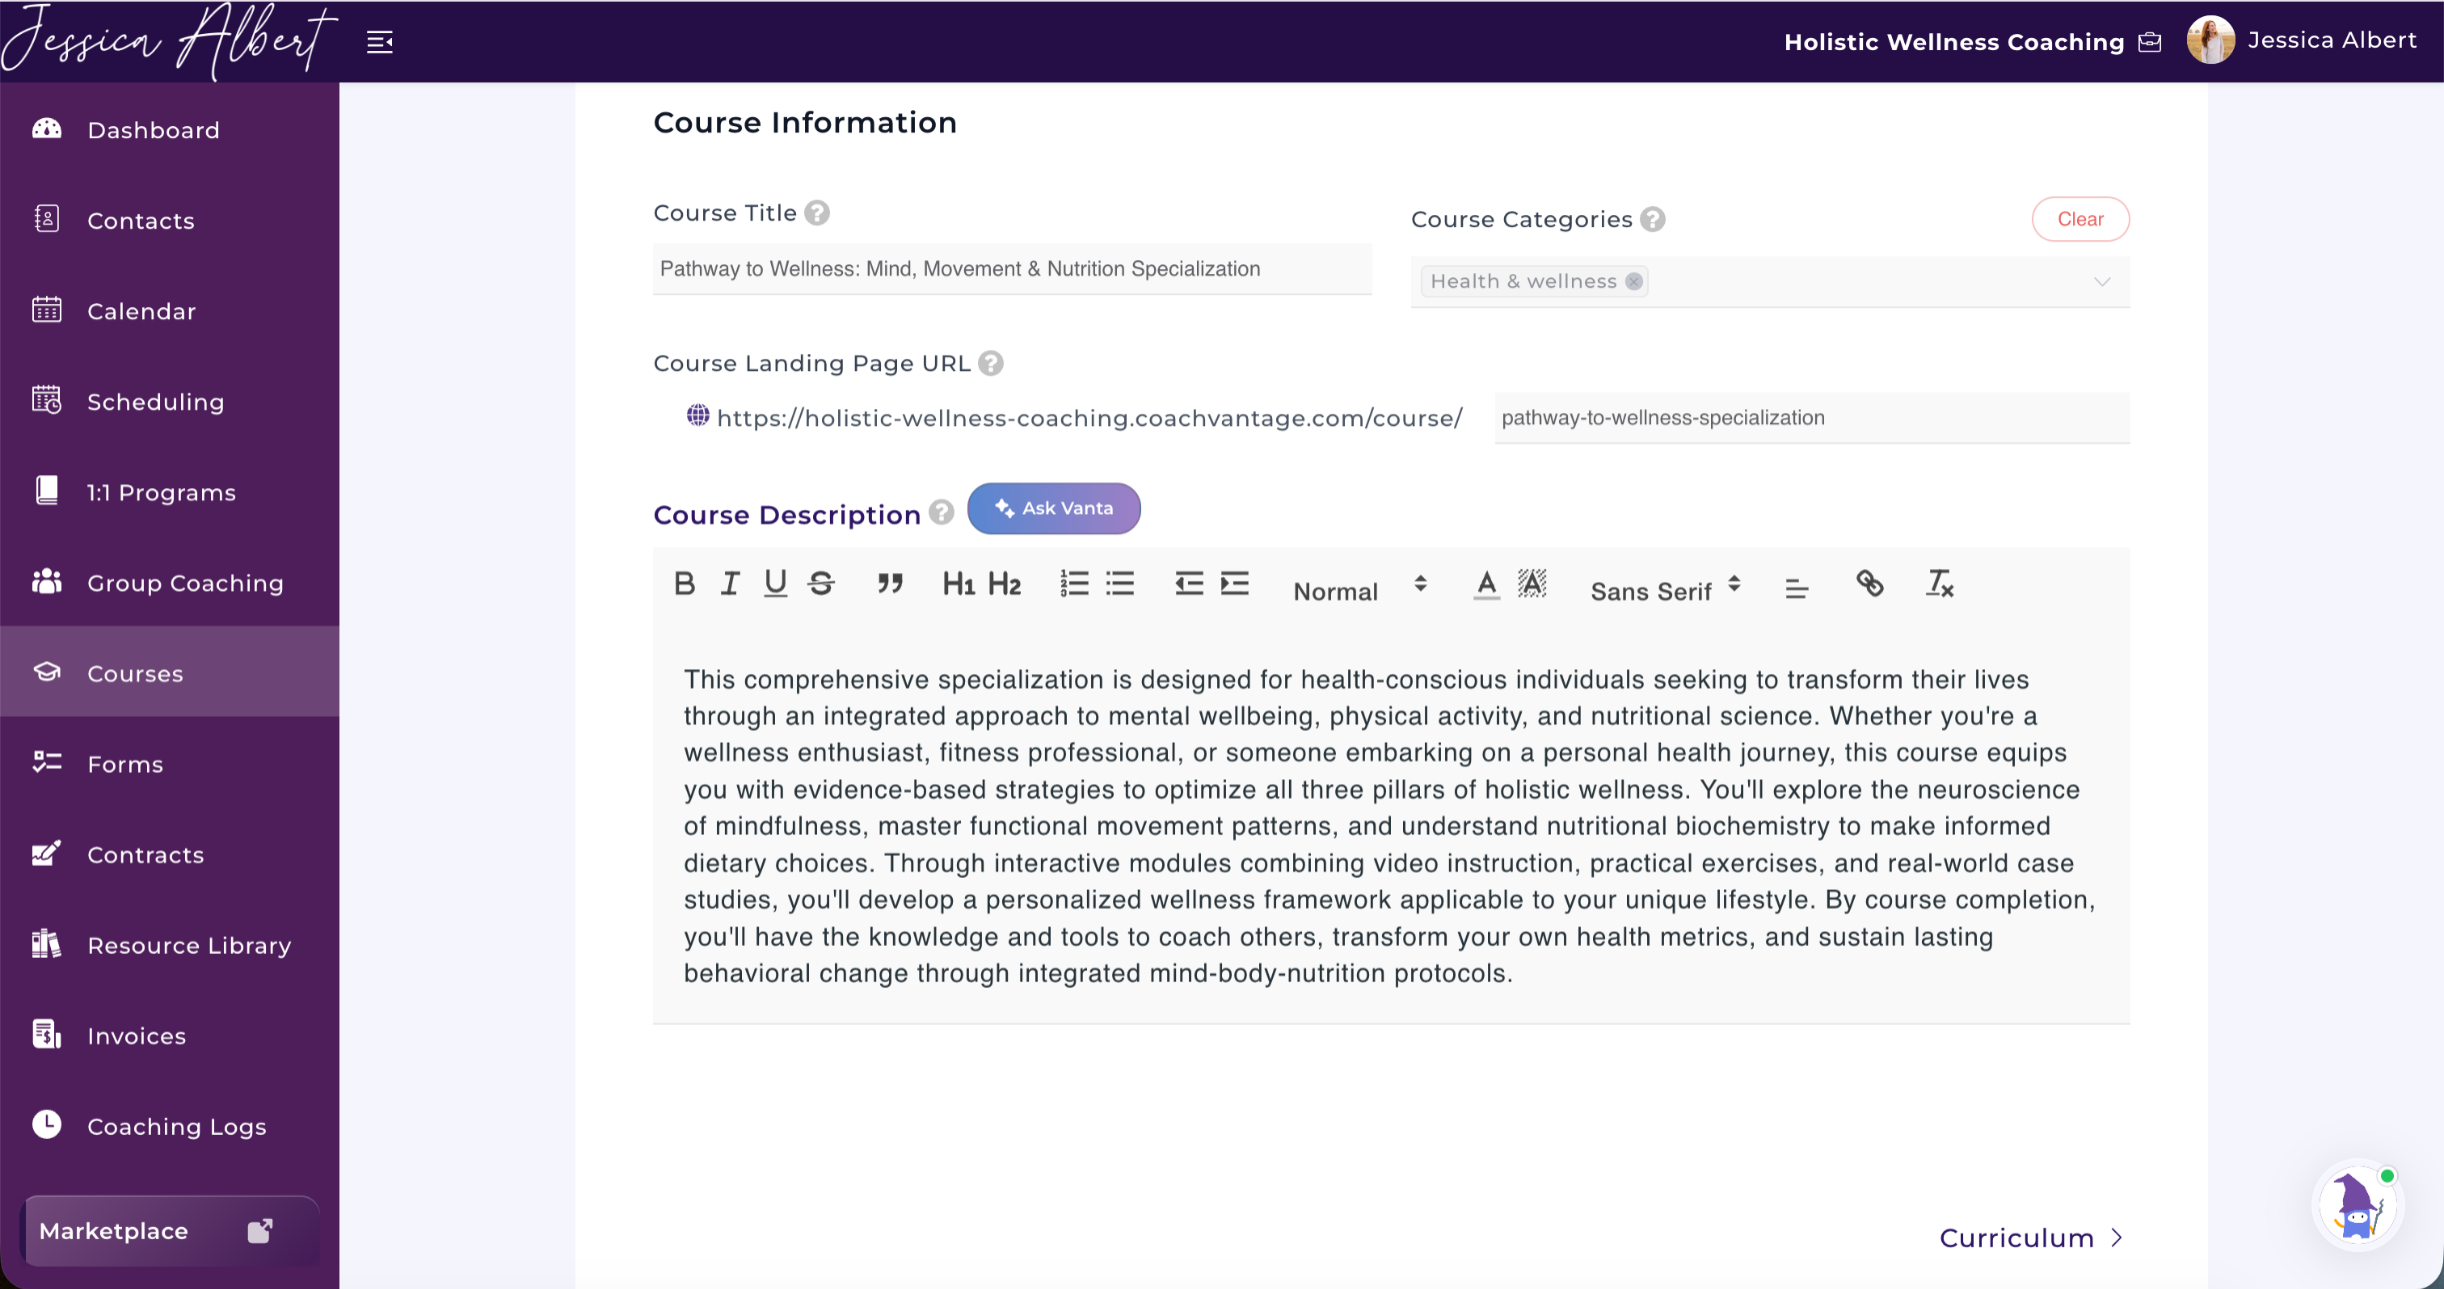
After your course has been generated, complete the Course Information section.
You can configure:
- Course Title
- Course Category
- Course Landing Page URL
- Course Description (Note: You can select Ask Vanta to use AI to create your description)
Everything generated by AI is fully editable.
The rich text editor also allows formatting such as:
- Bold text
- Hyperlinks
- Lists
- Additional formatting
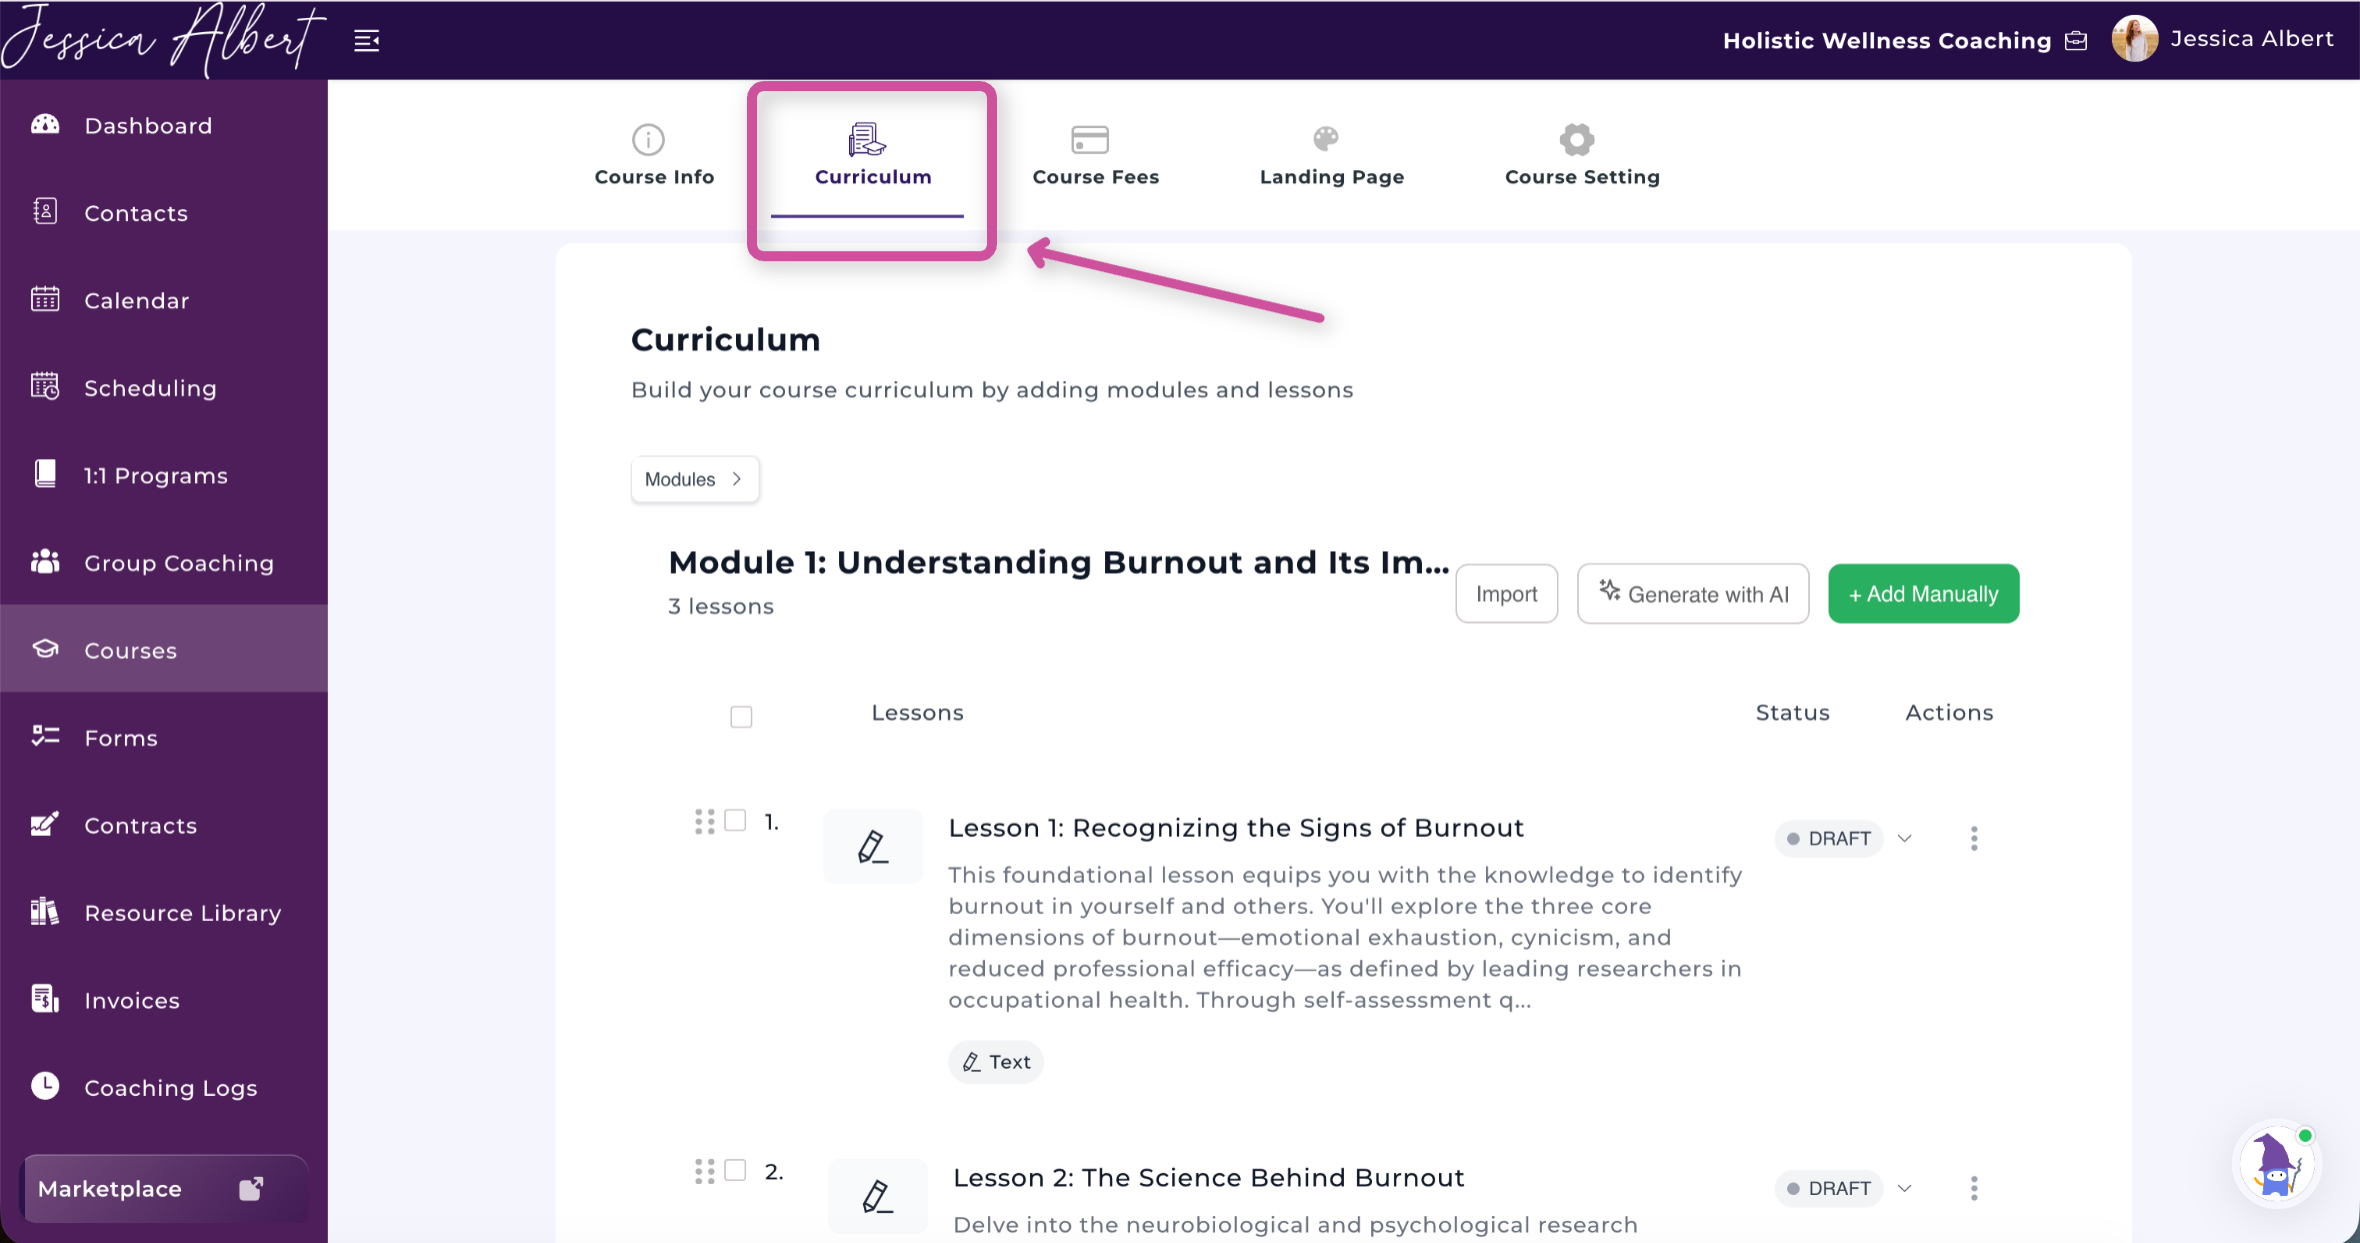
Building Your Curriculum 🍎
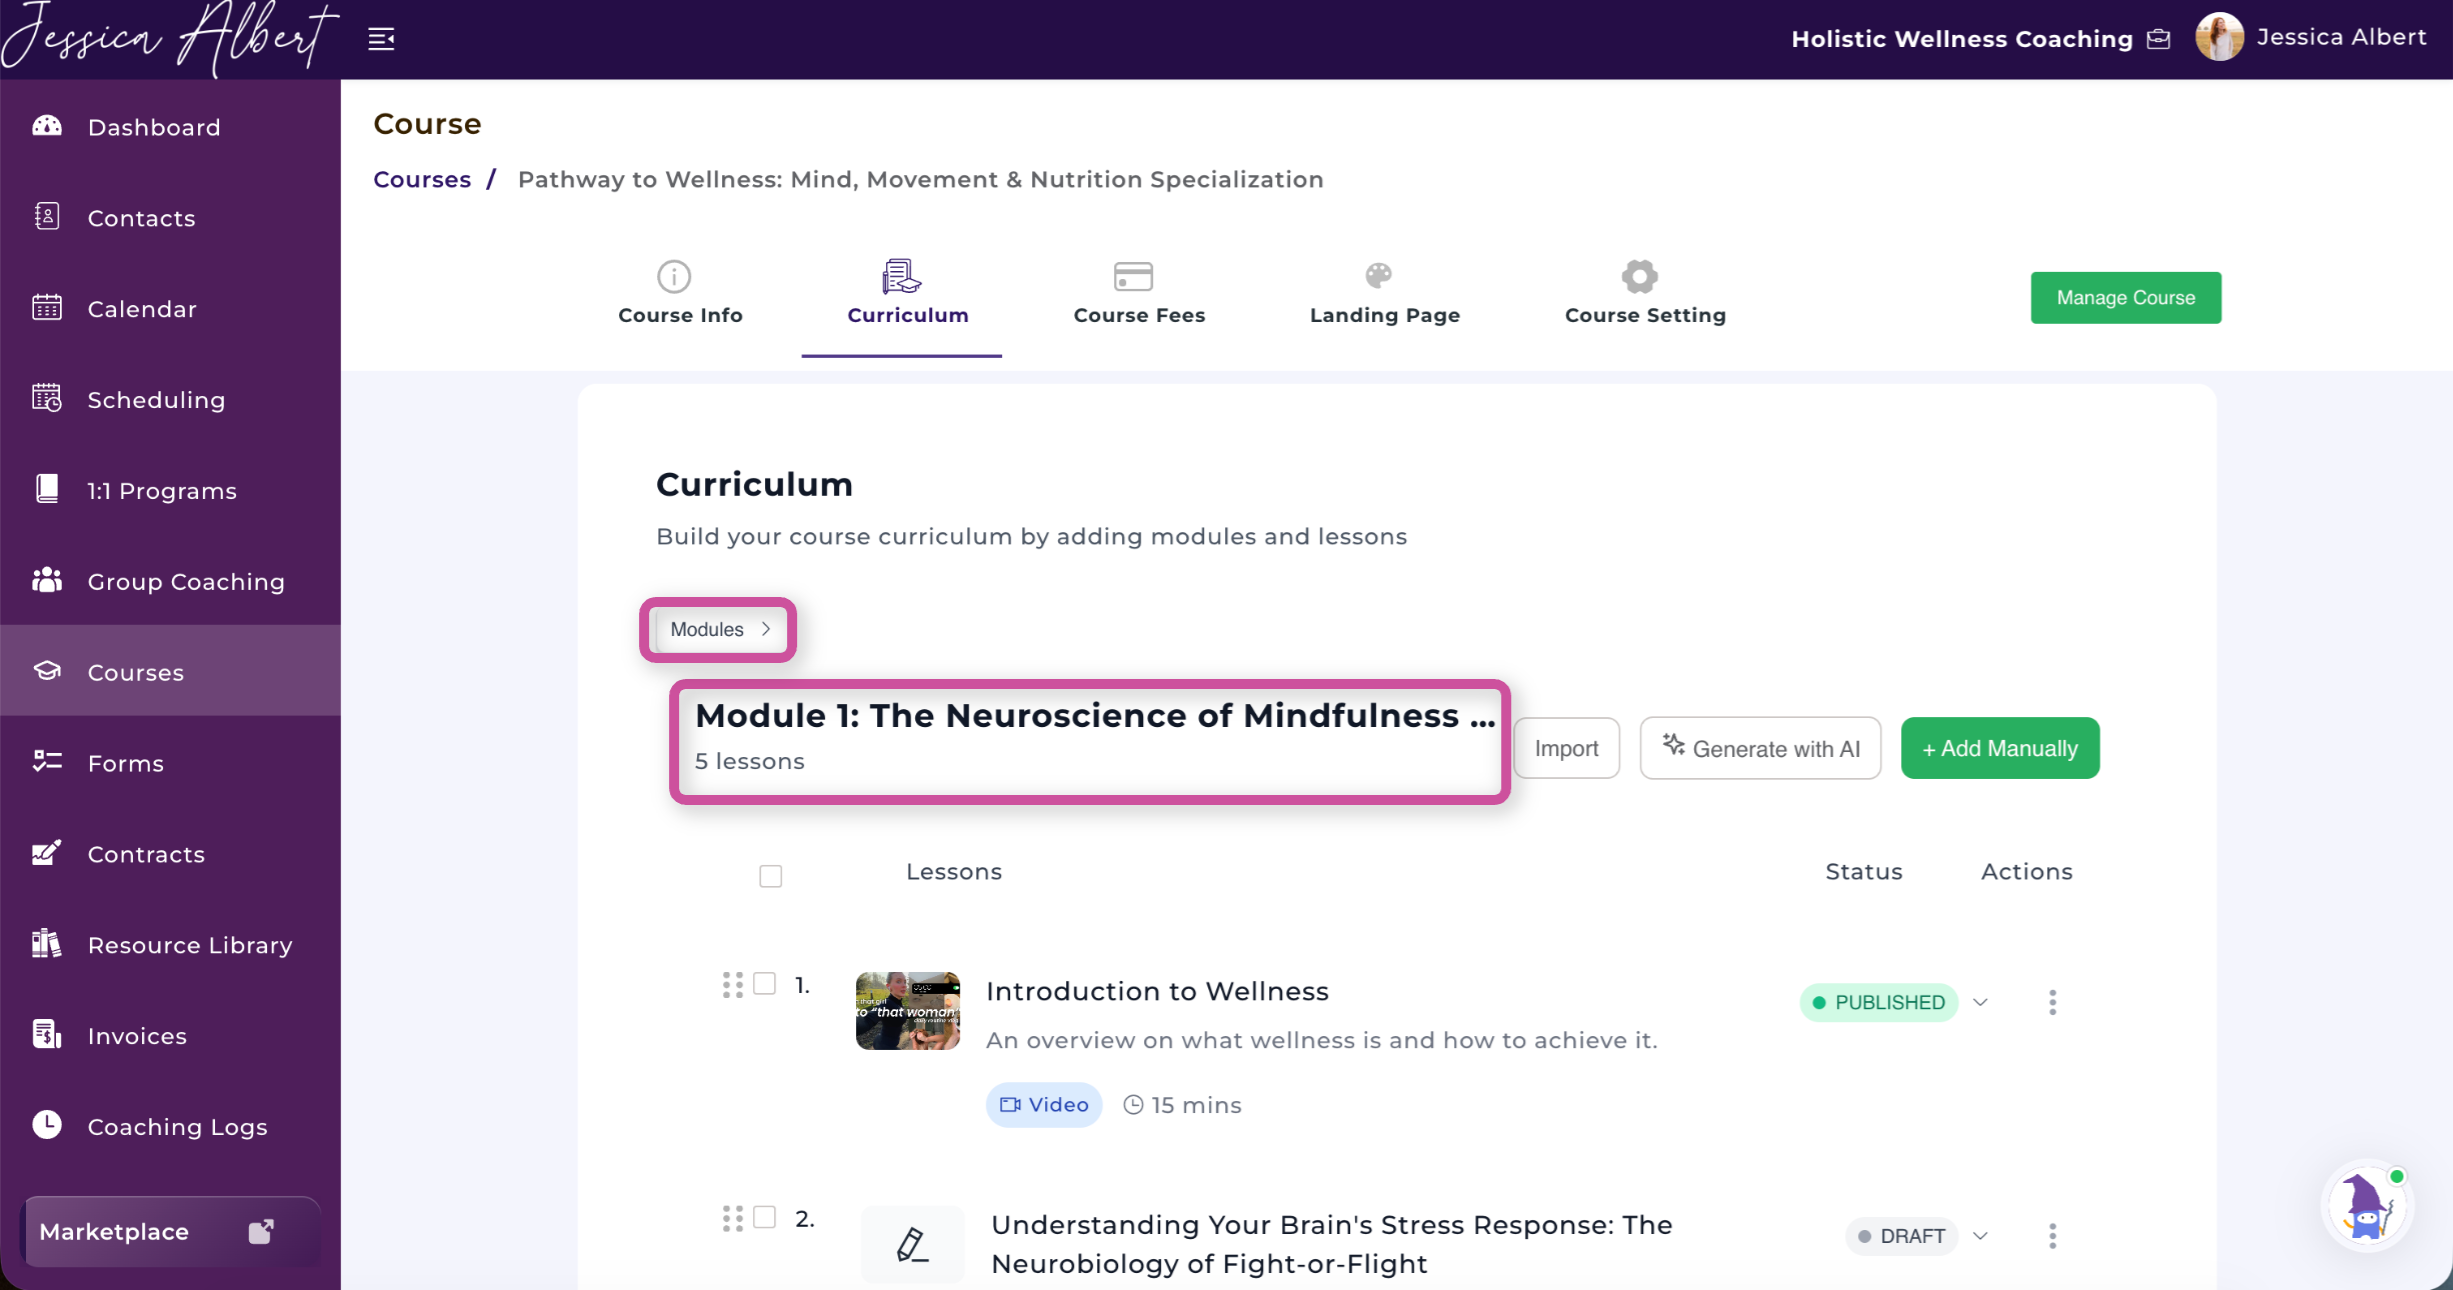
Your course is organized into:
- Modules
- Lessons
Each module can contain as many lessons as you'd like.
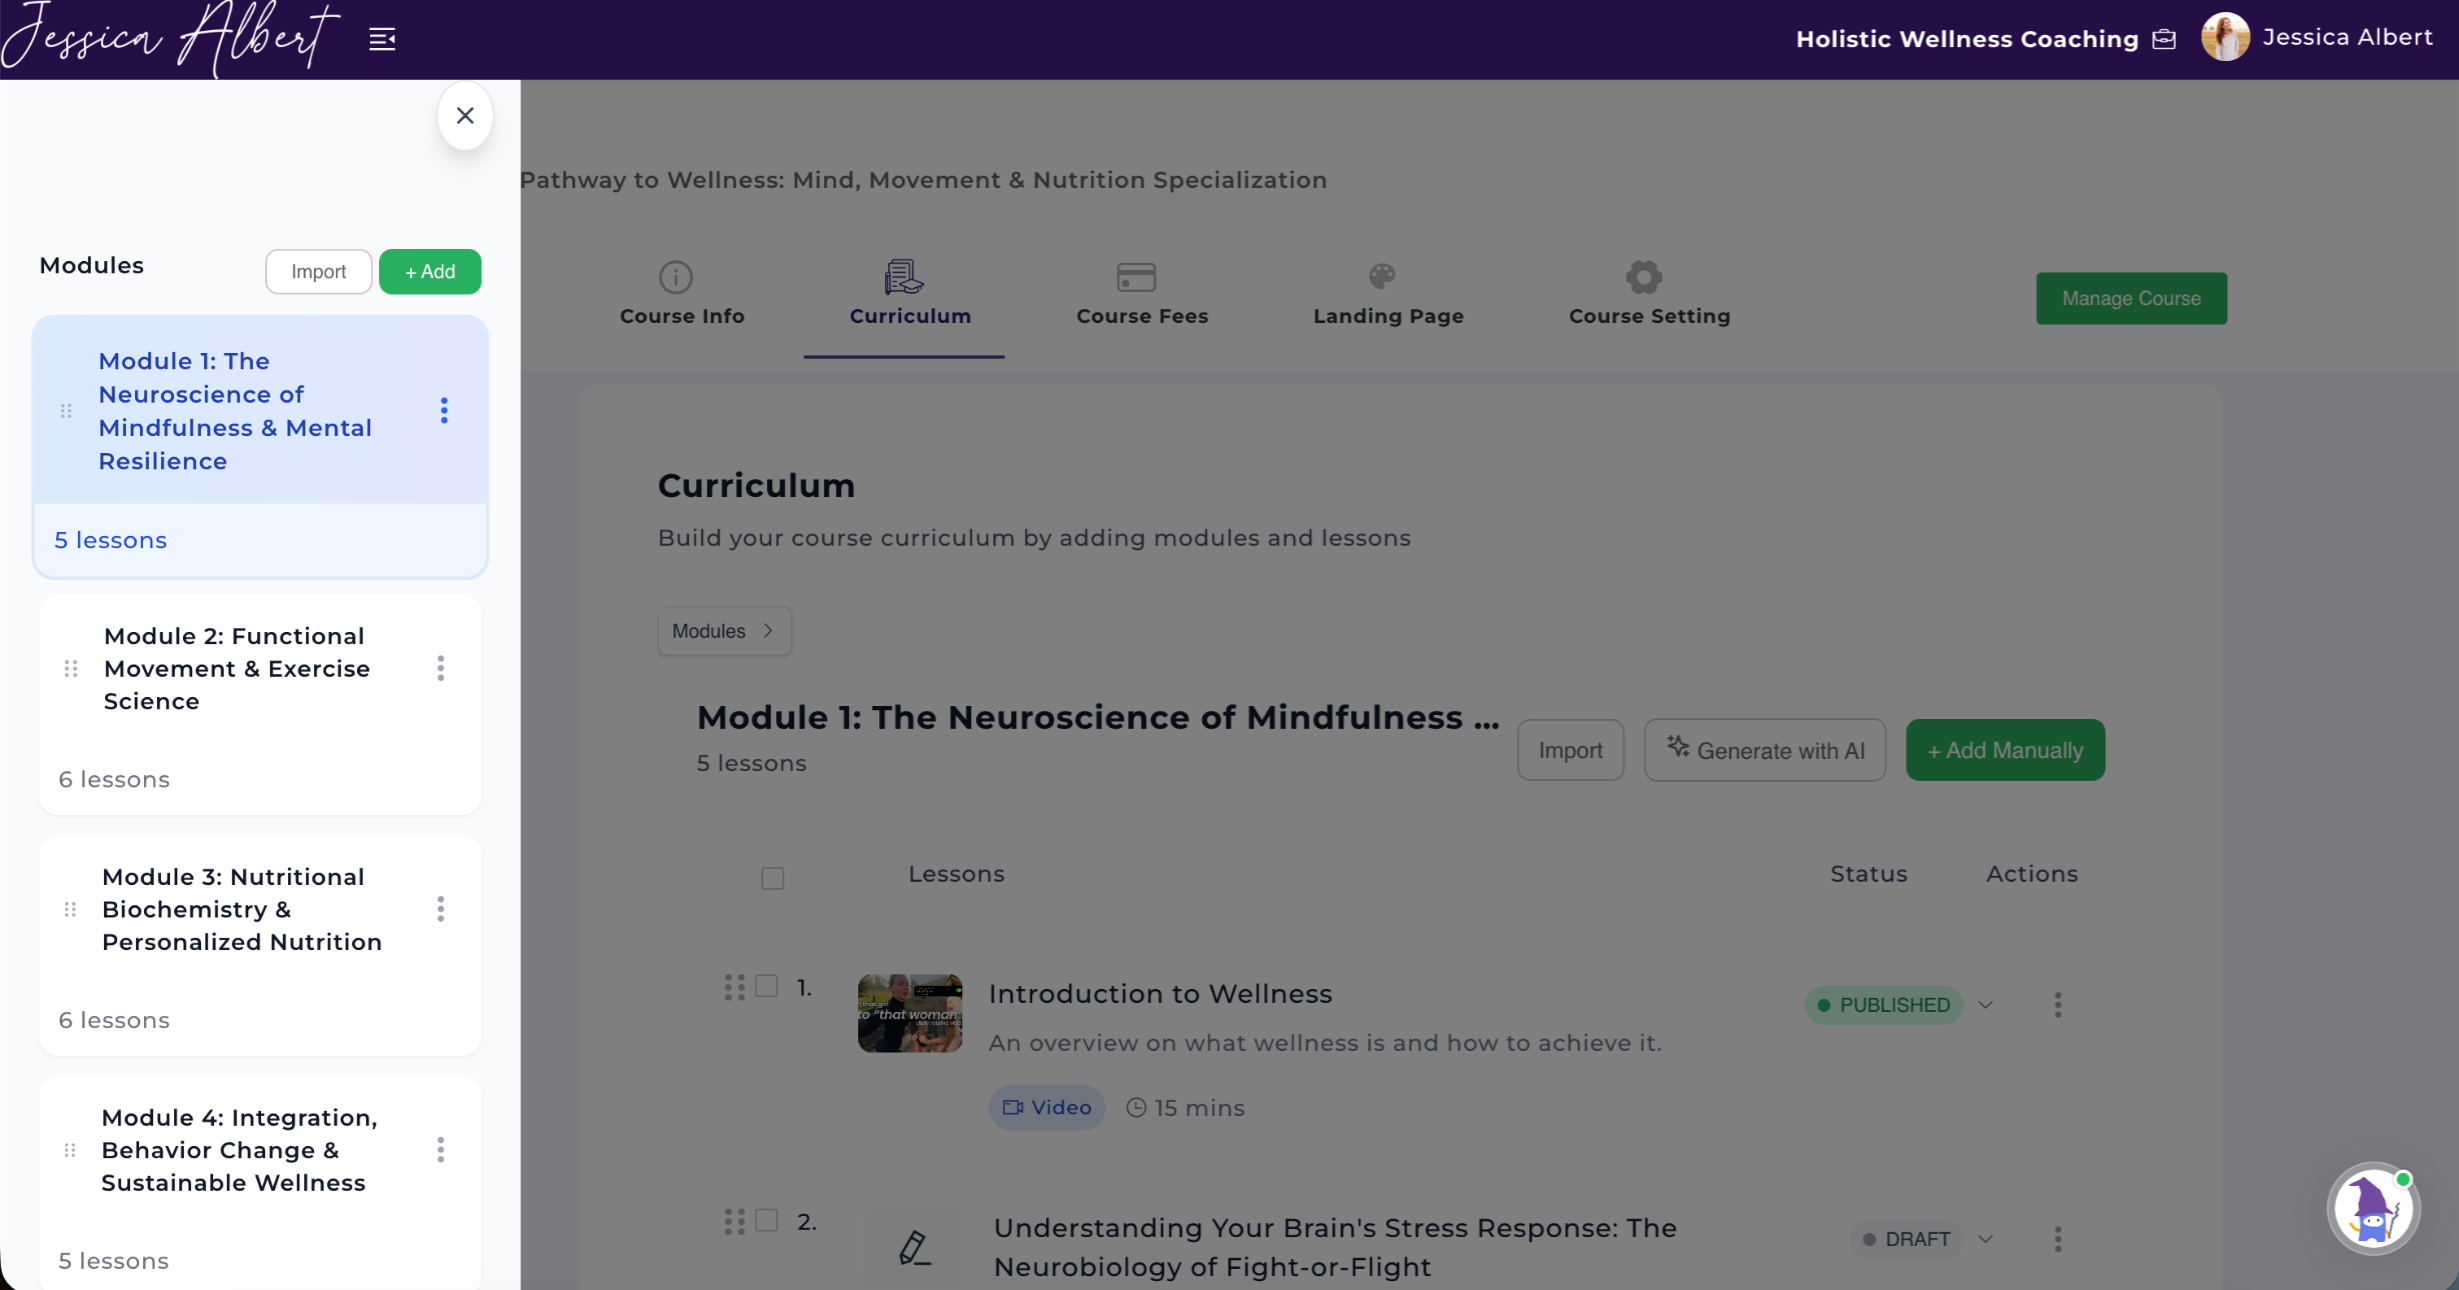
The AI automatically creates an initial curriculum, which you can customize by:
- Renaming modules
- Editing lesson titles
- Updating descriptions
- Adding additional lessons
- Reordering content
Since the AI handles much of the initial organization, you can spend less time creating structure and more time focusing on your coaching content.
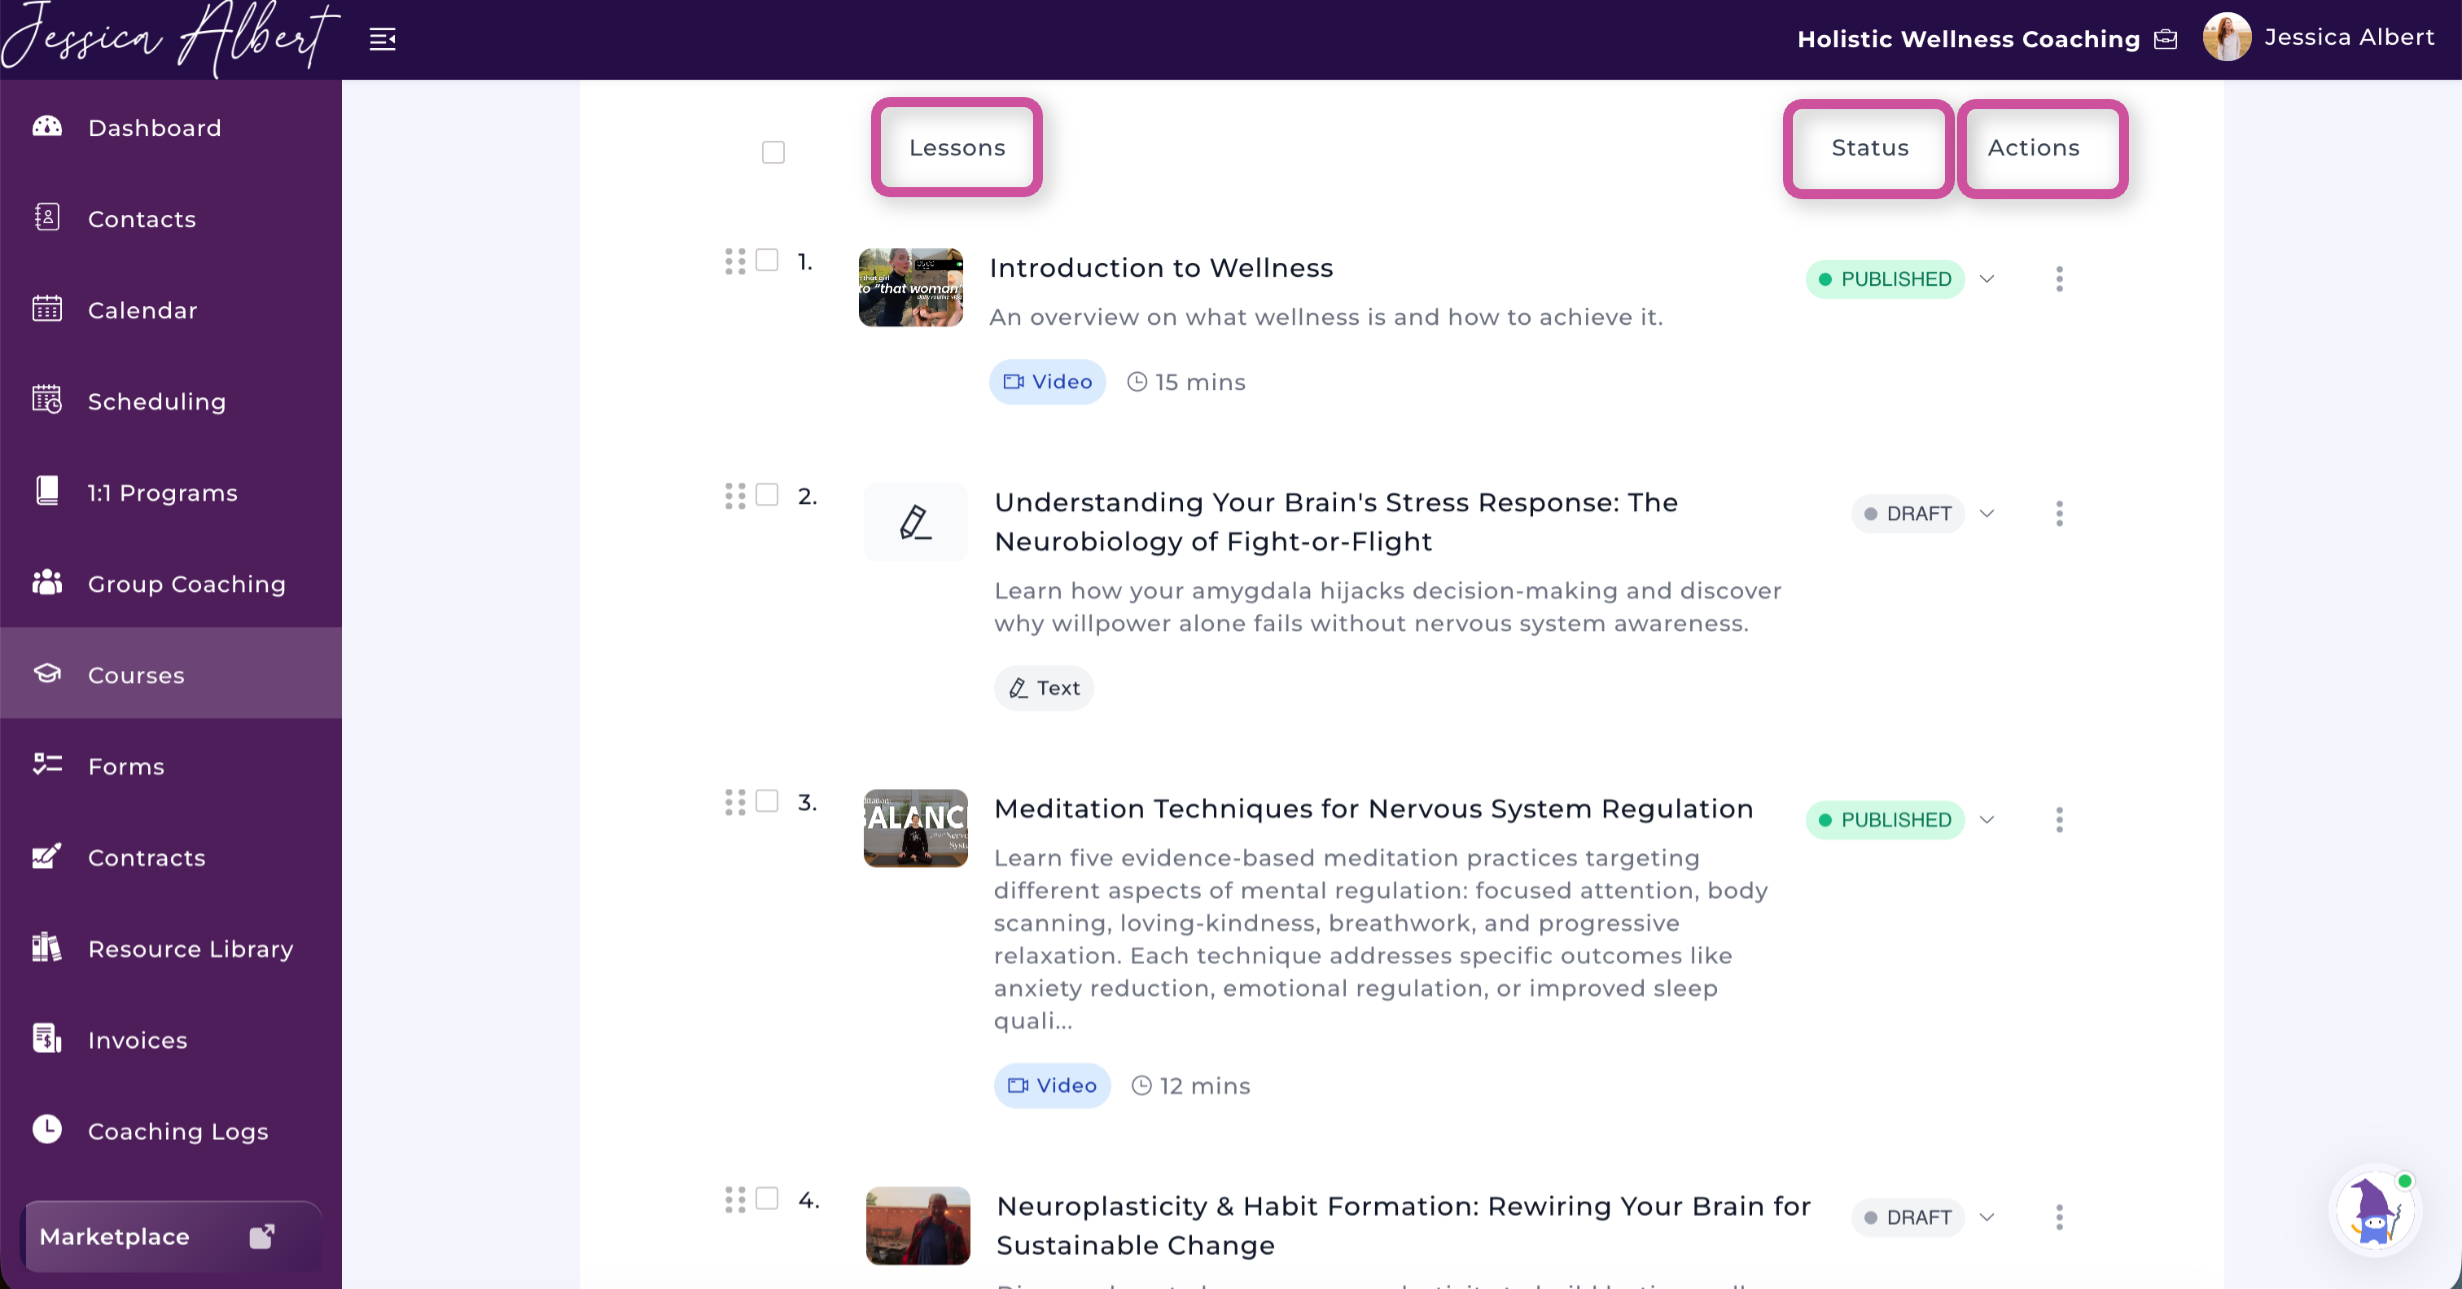
Adding Lesson Content
Each lesson includes several configurable sections.
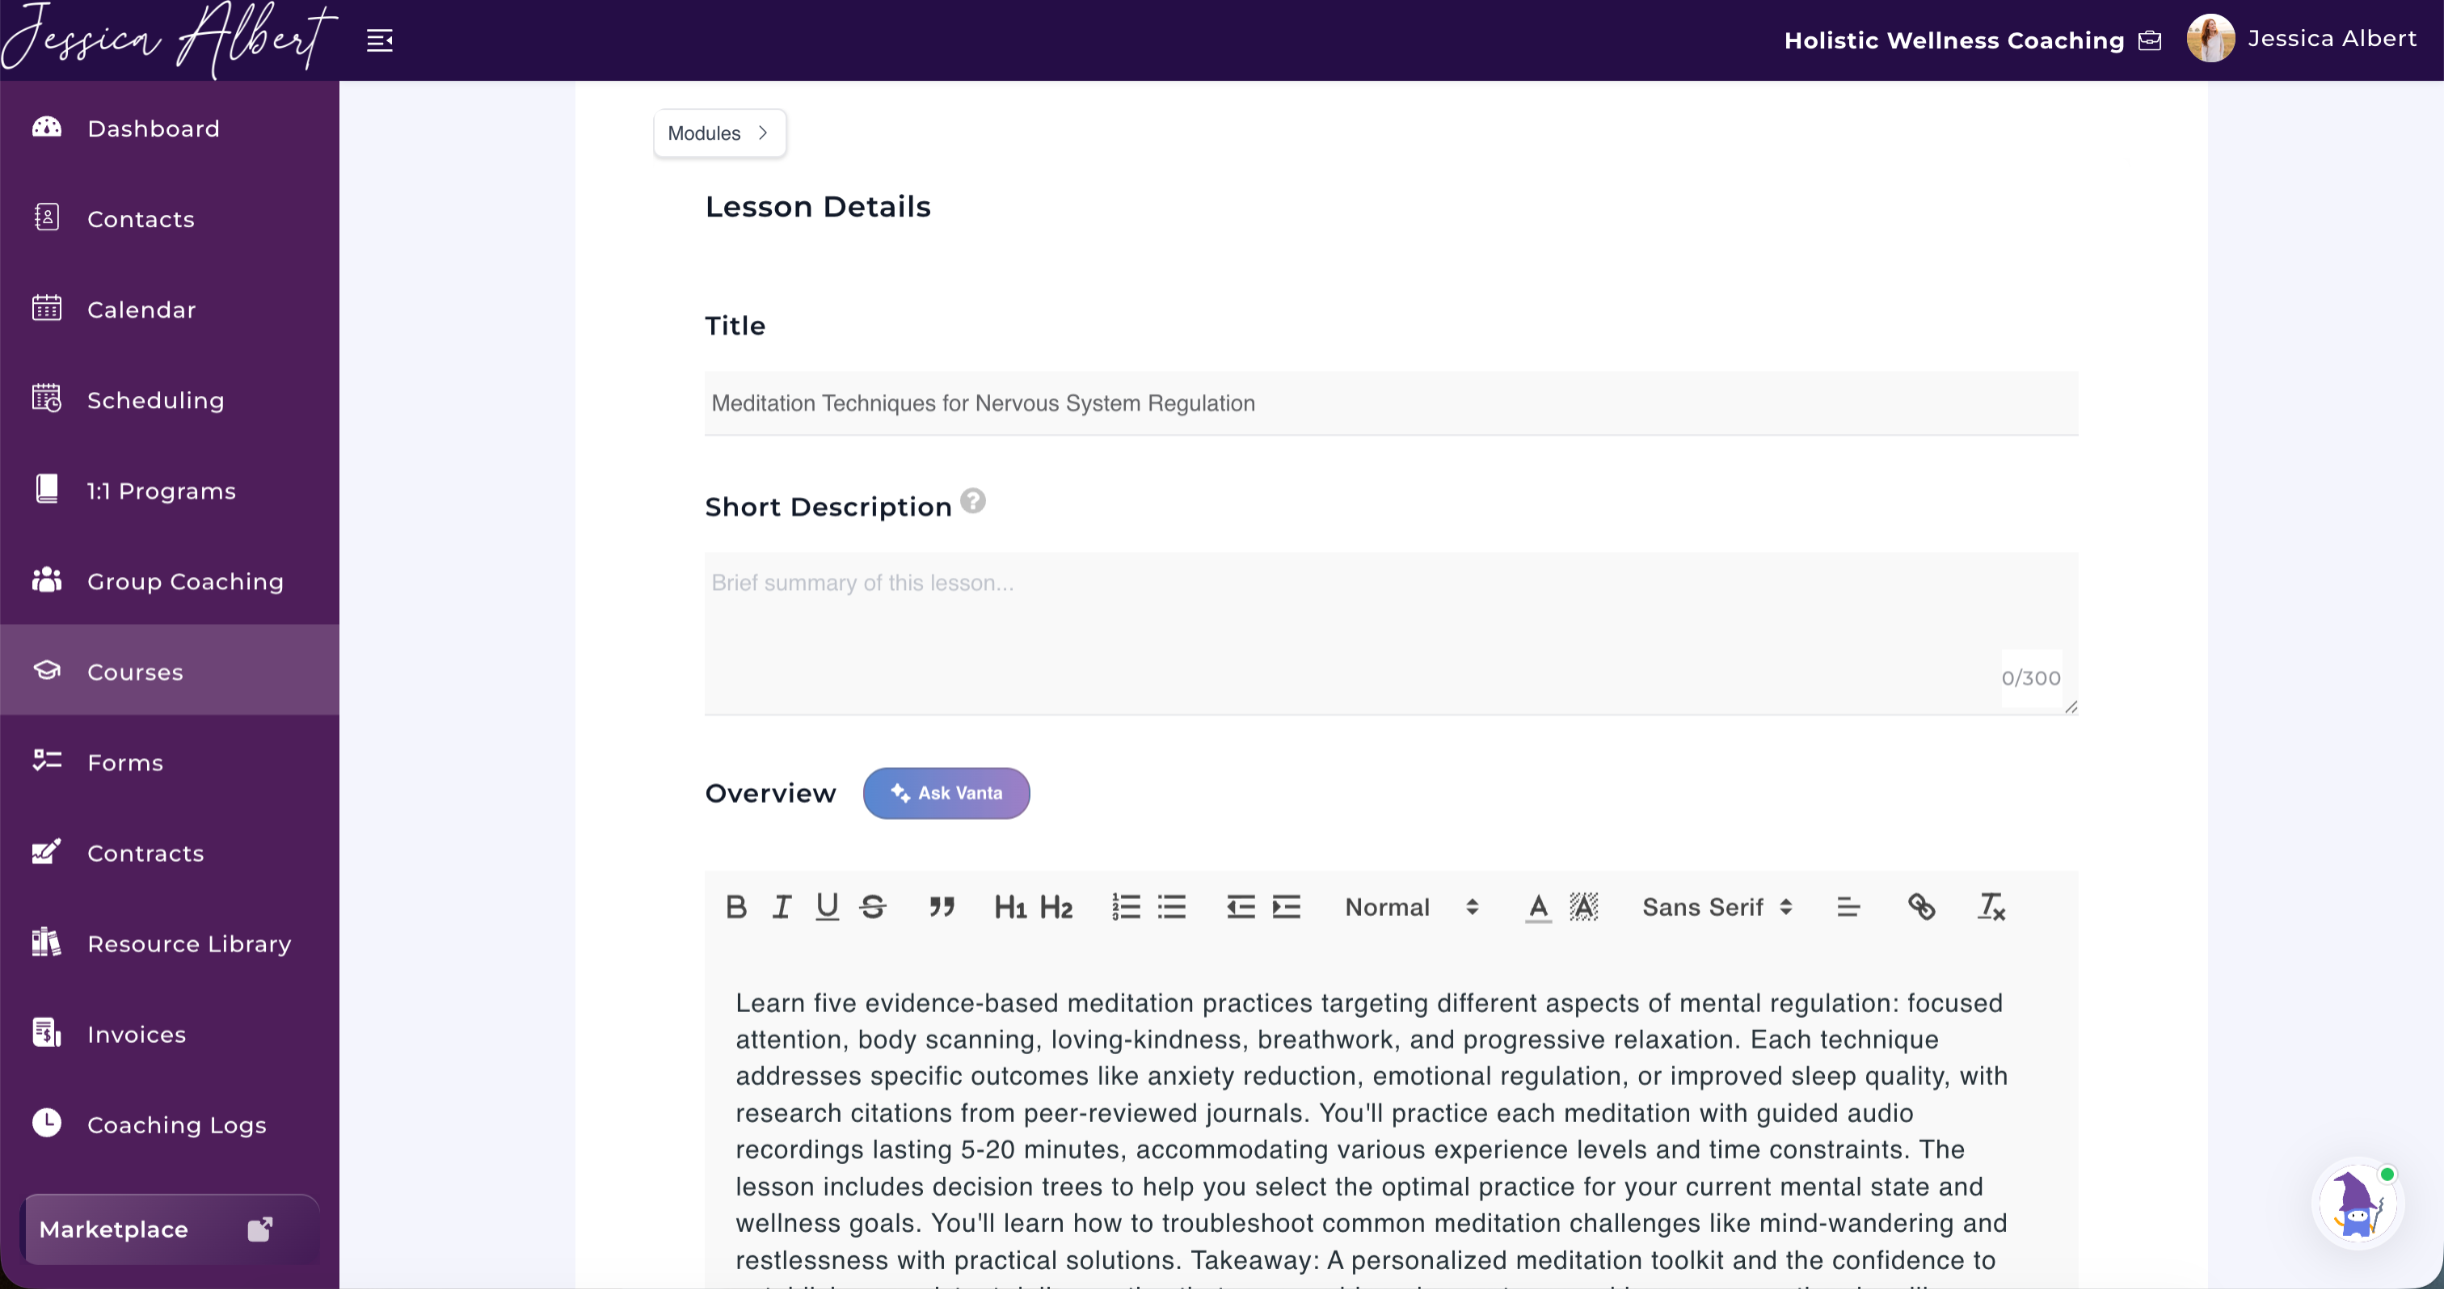
Lesson Details
Every lesson contains:
- Lesson title
- Short description
- Lesson overview
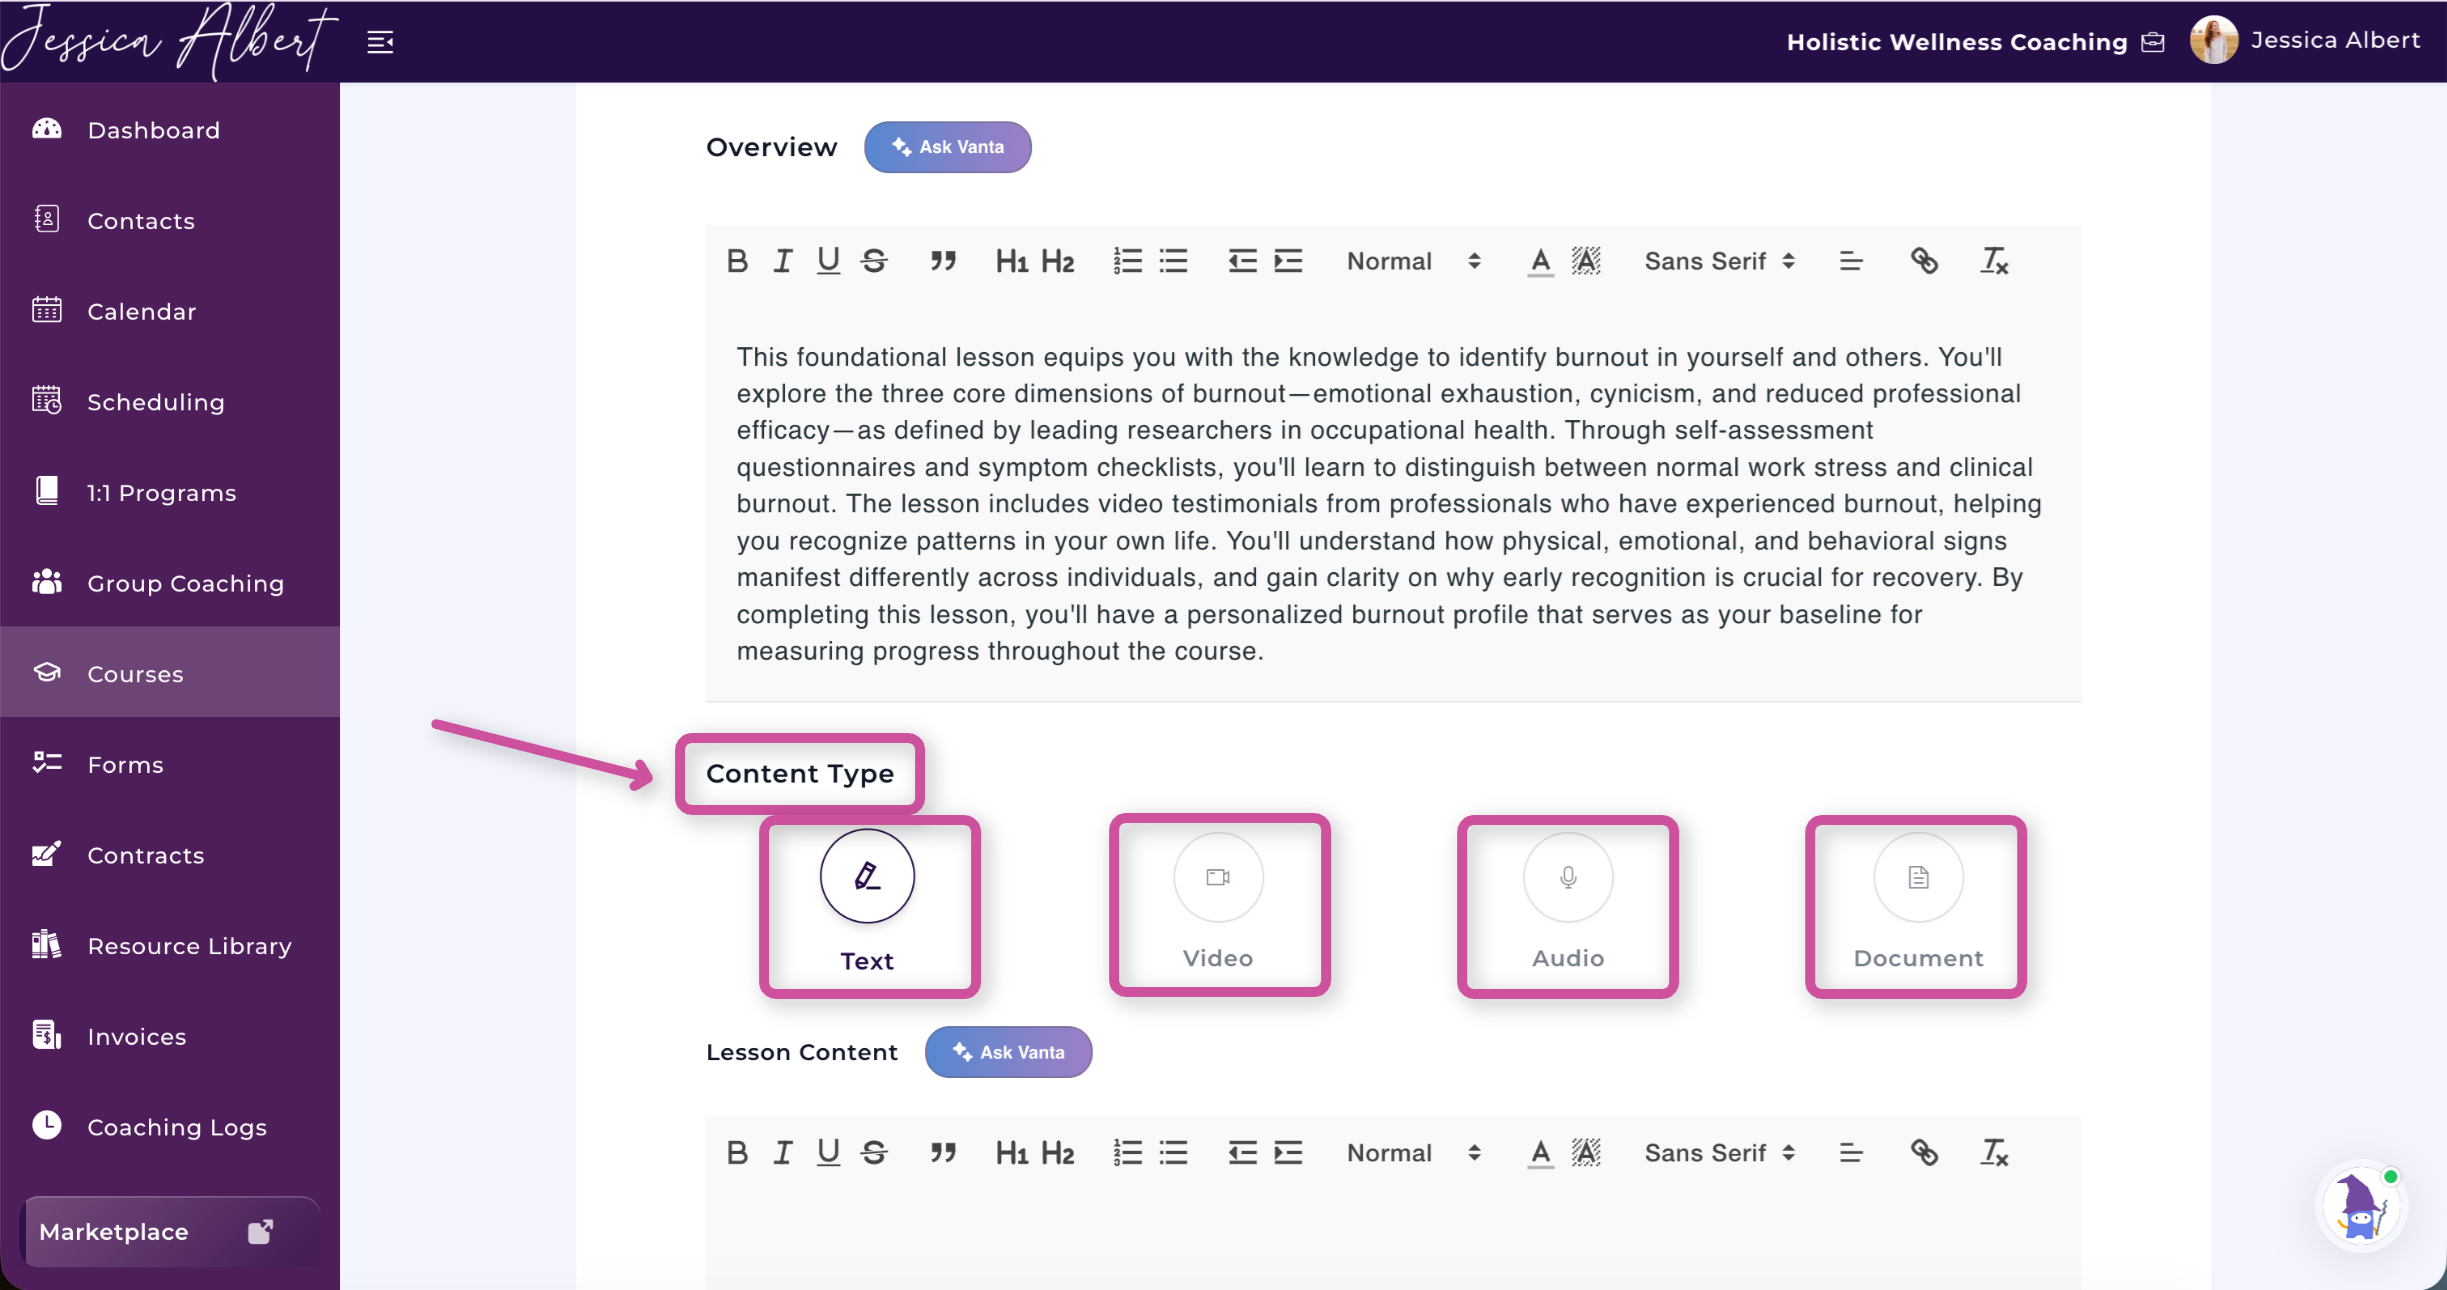
Primary Content Type
Choose one primary lesson format:
- Text
- Video
- Audio
- Document
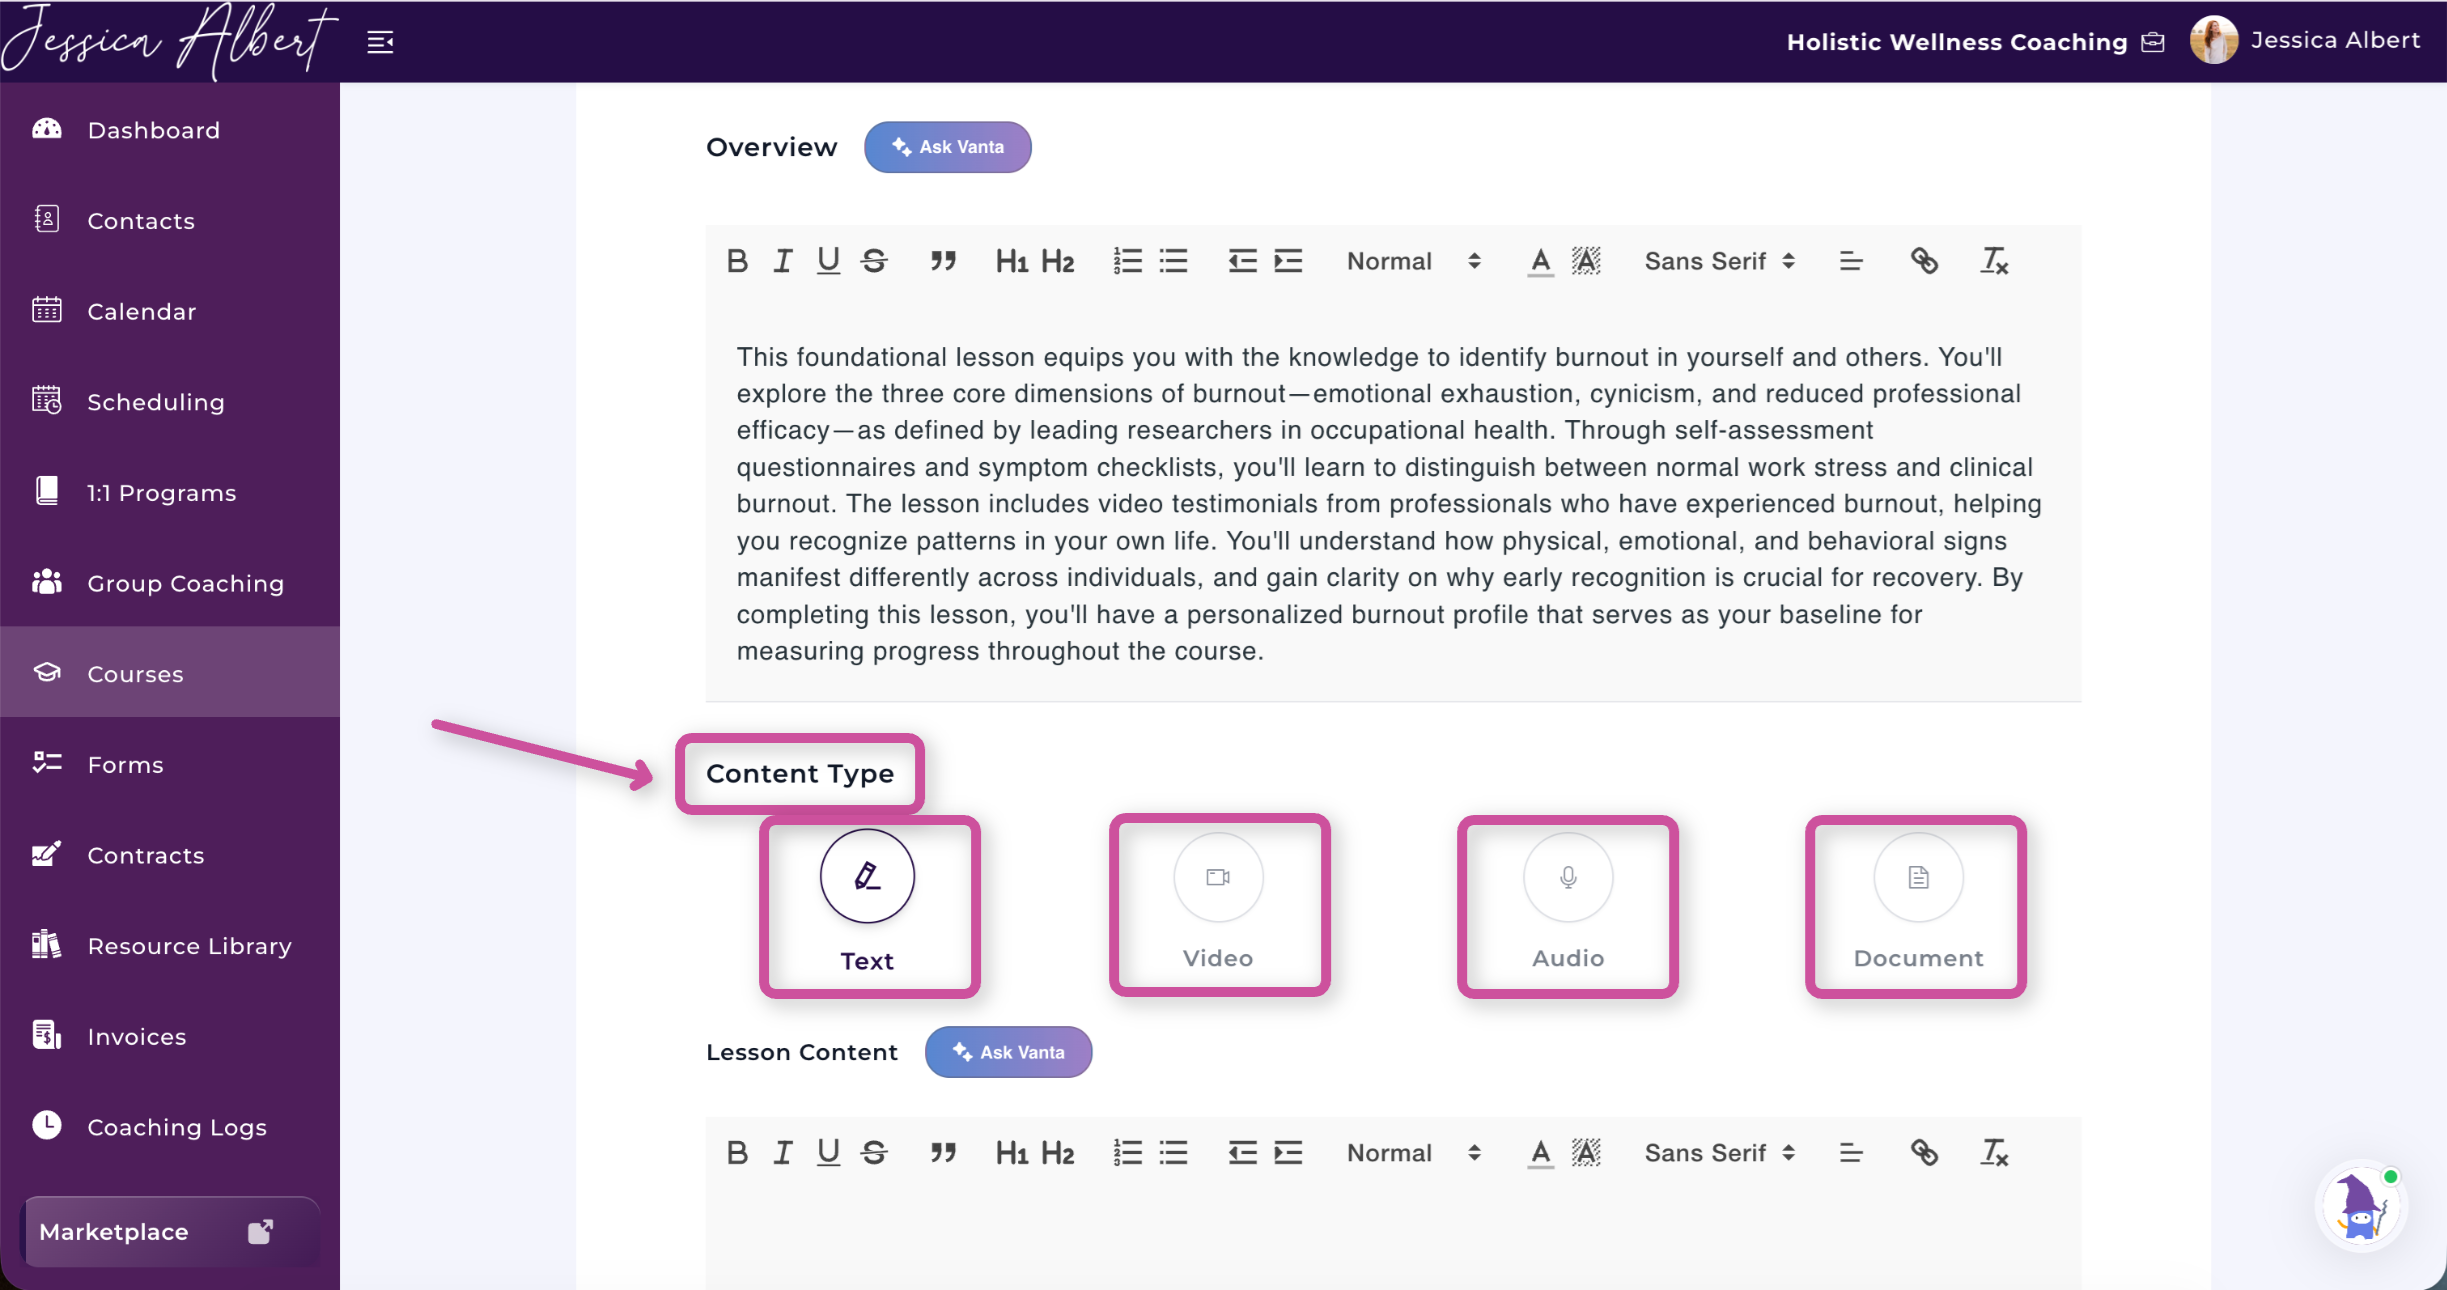
Depending on your teaching style, you might:
- Embed a YouTube video
- Upload an MP4
- Share an audio lesson
- Provide written instruction
Lesson Content
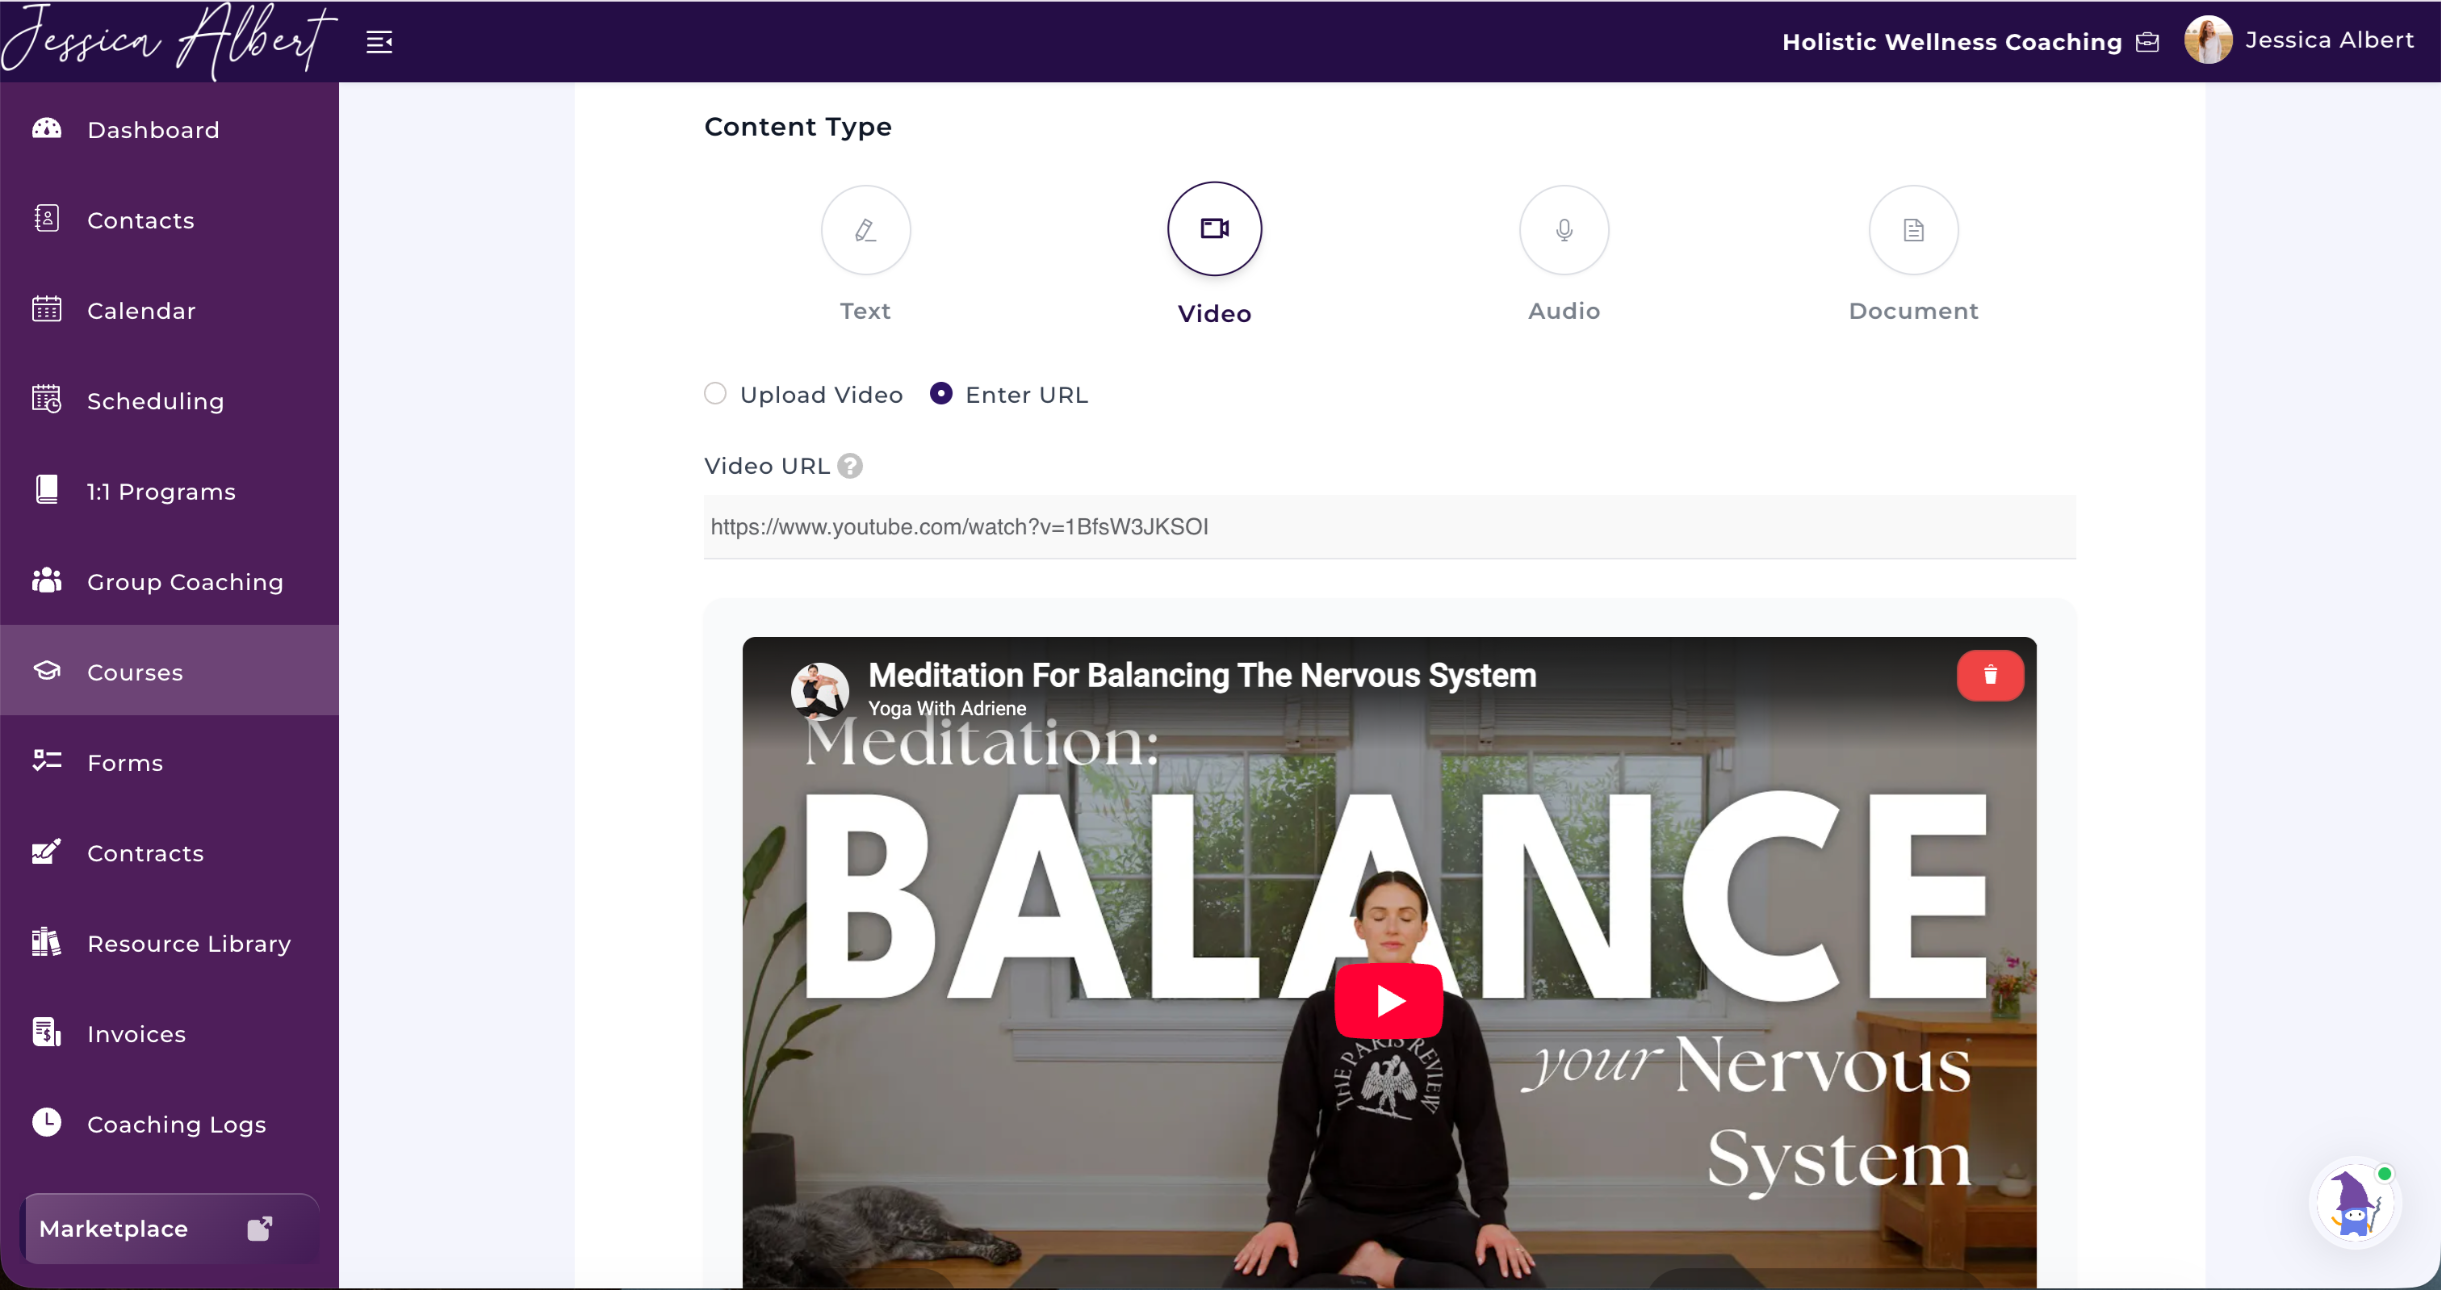
Add your instructional content directly into the lesson.
Example: A YouTube video might be the selected content type for a lesson.
Estimated Duration 🕰️
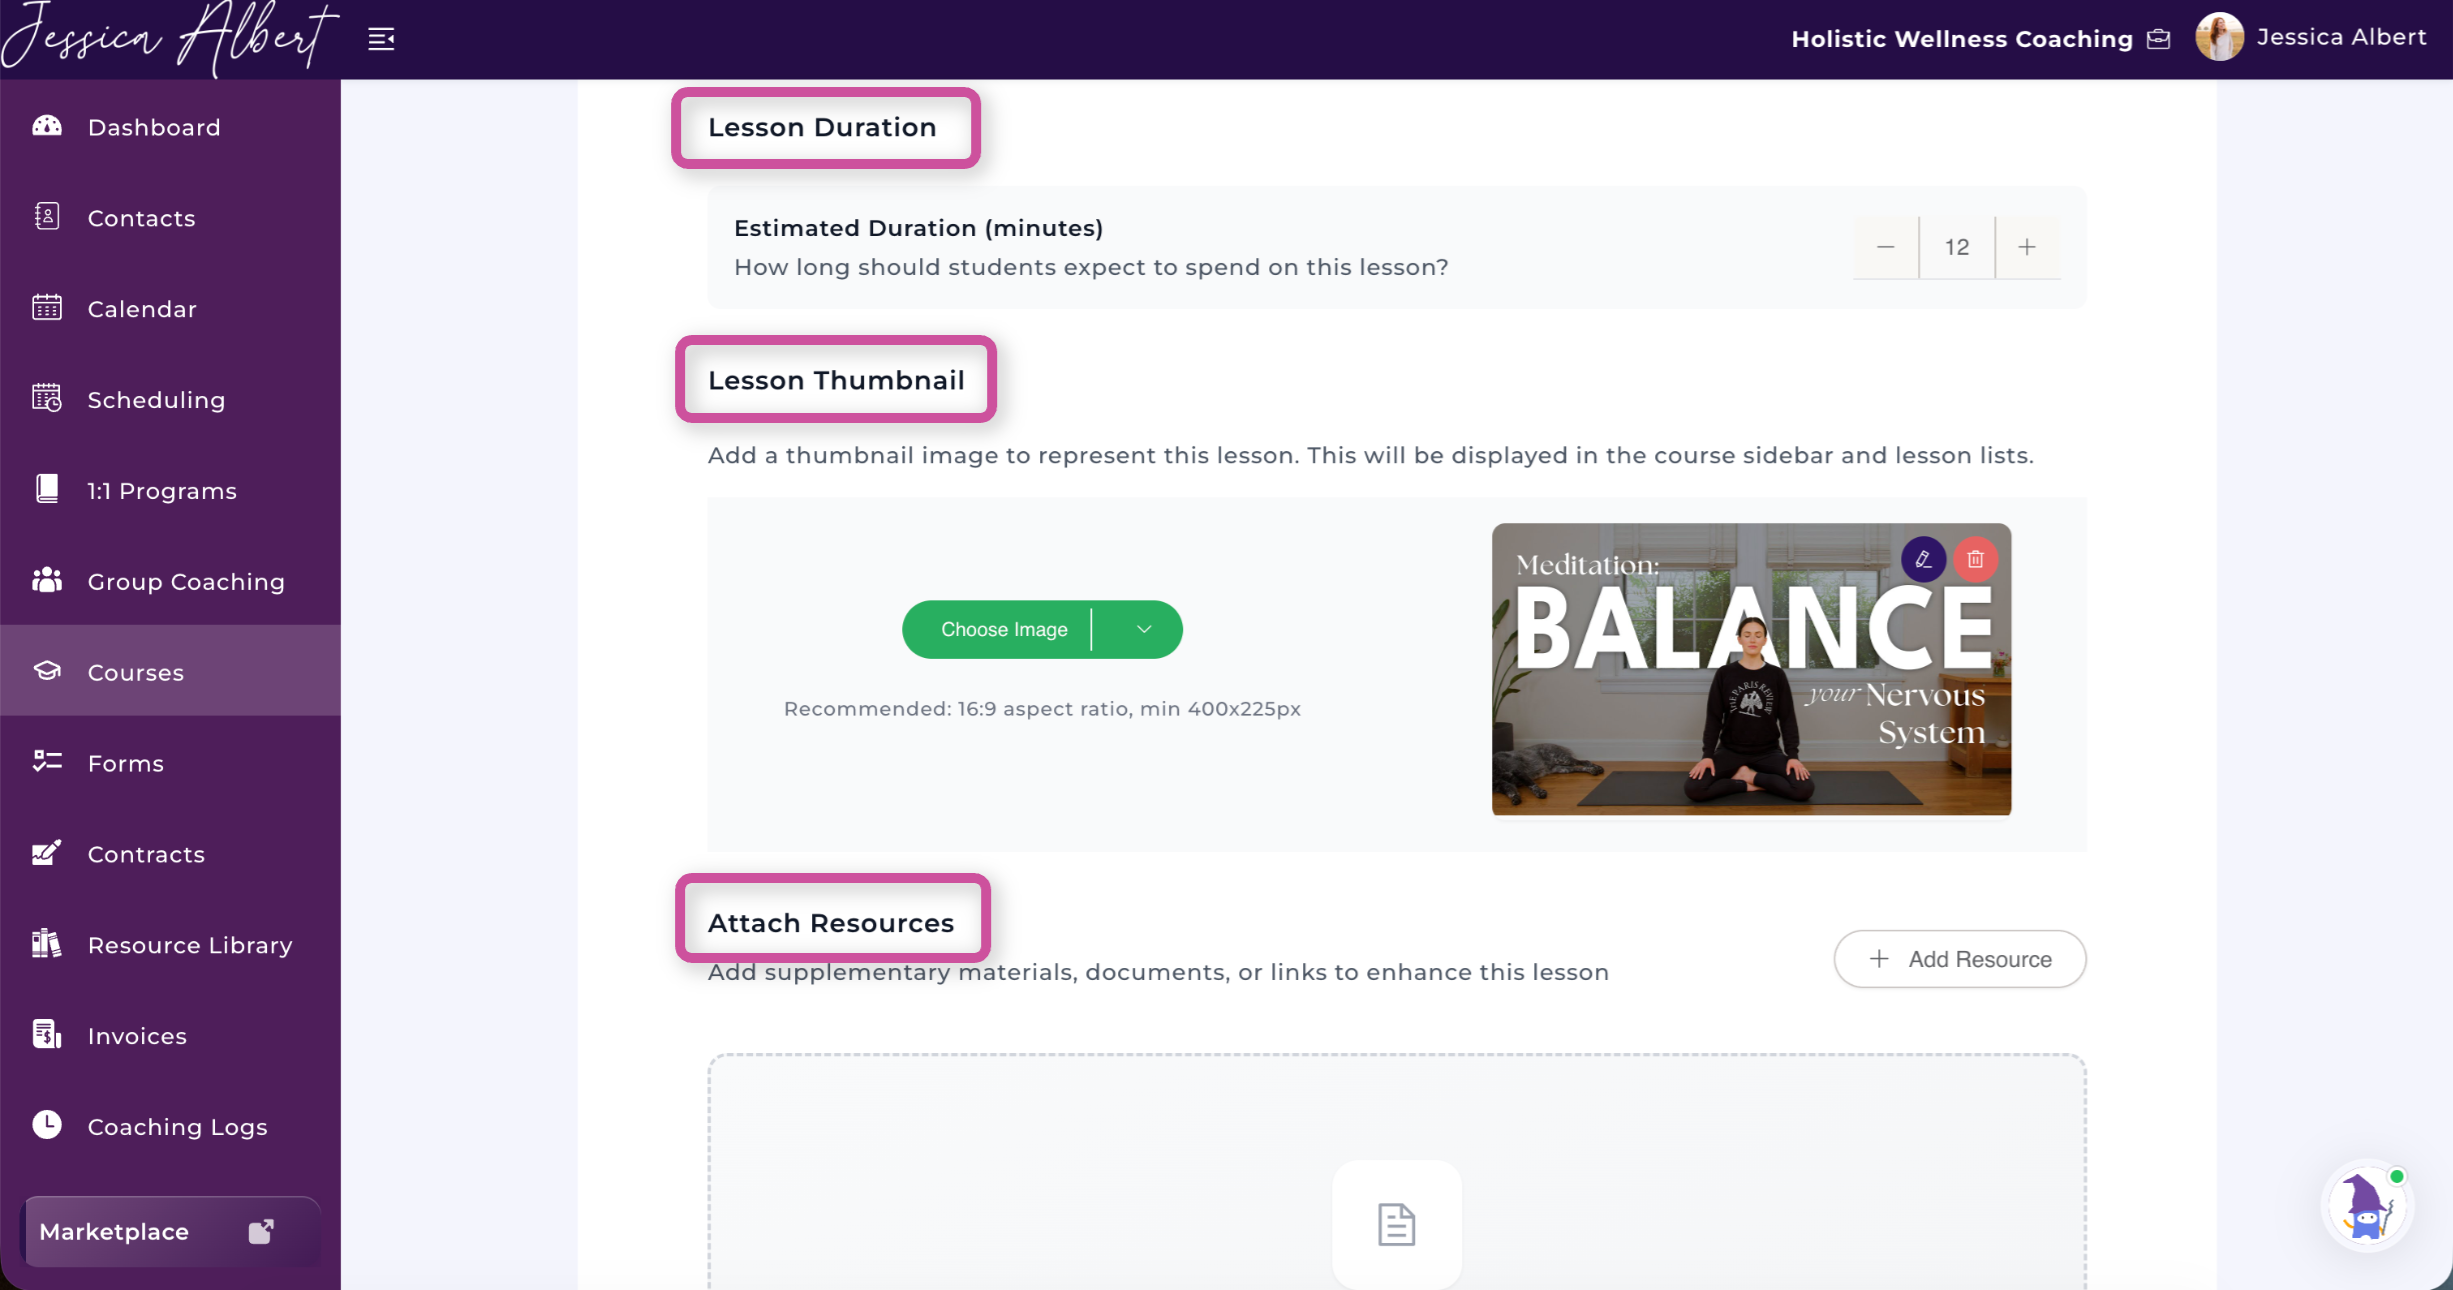
Help learners manage their time by providing an estimated completion time.
Example: 45 minutes
Lesson Thumbnail
Upload a custom image that represents the lesson.
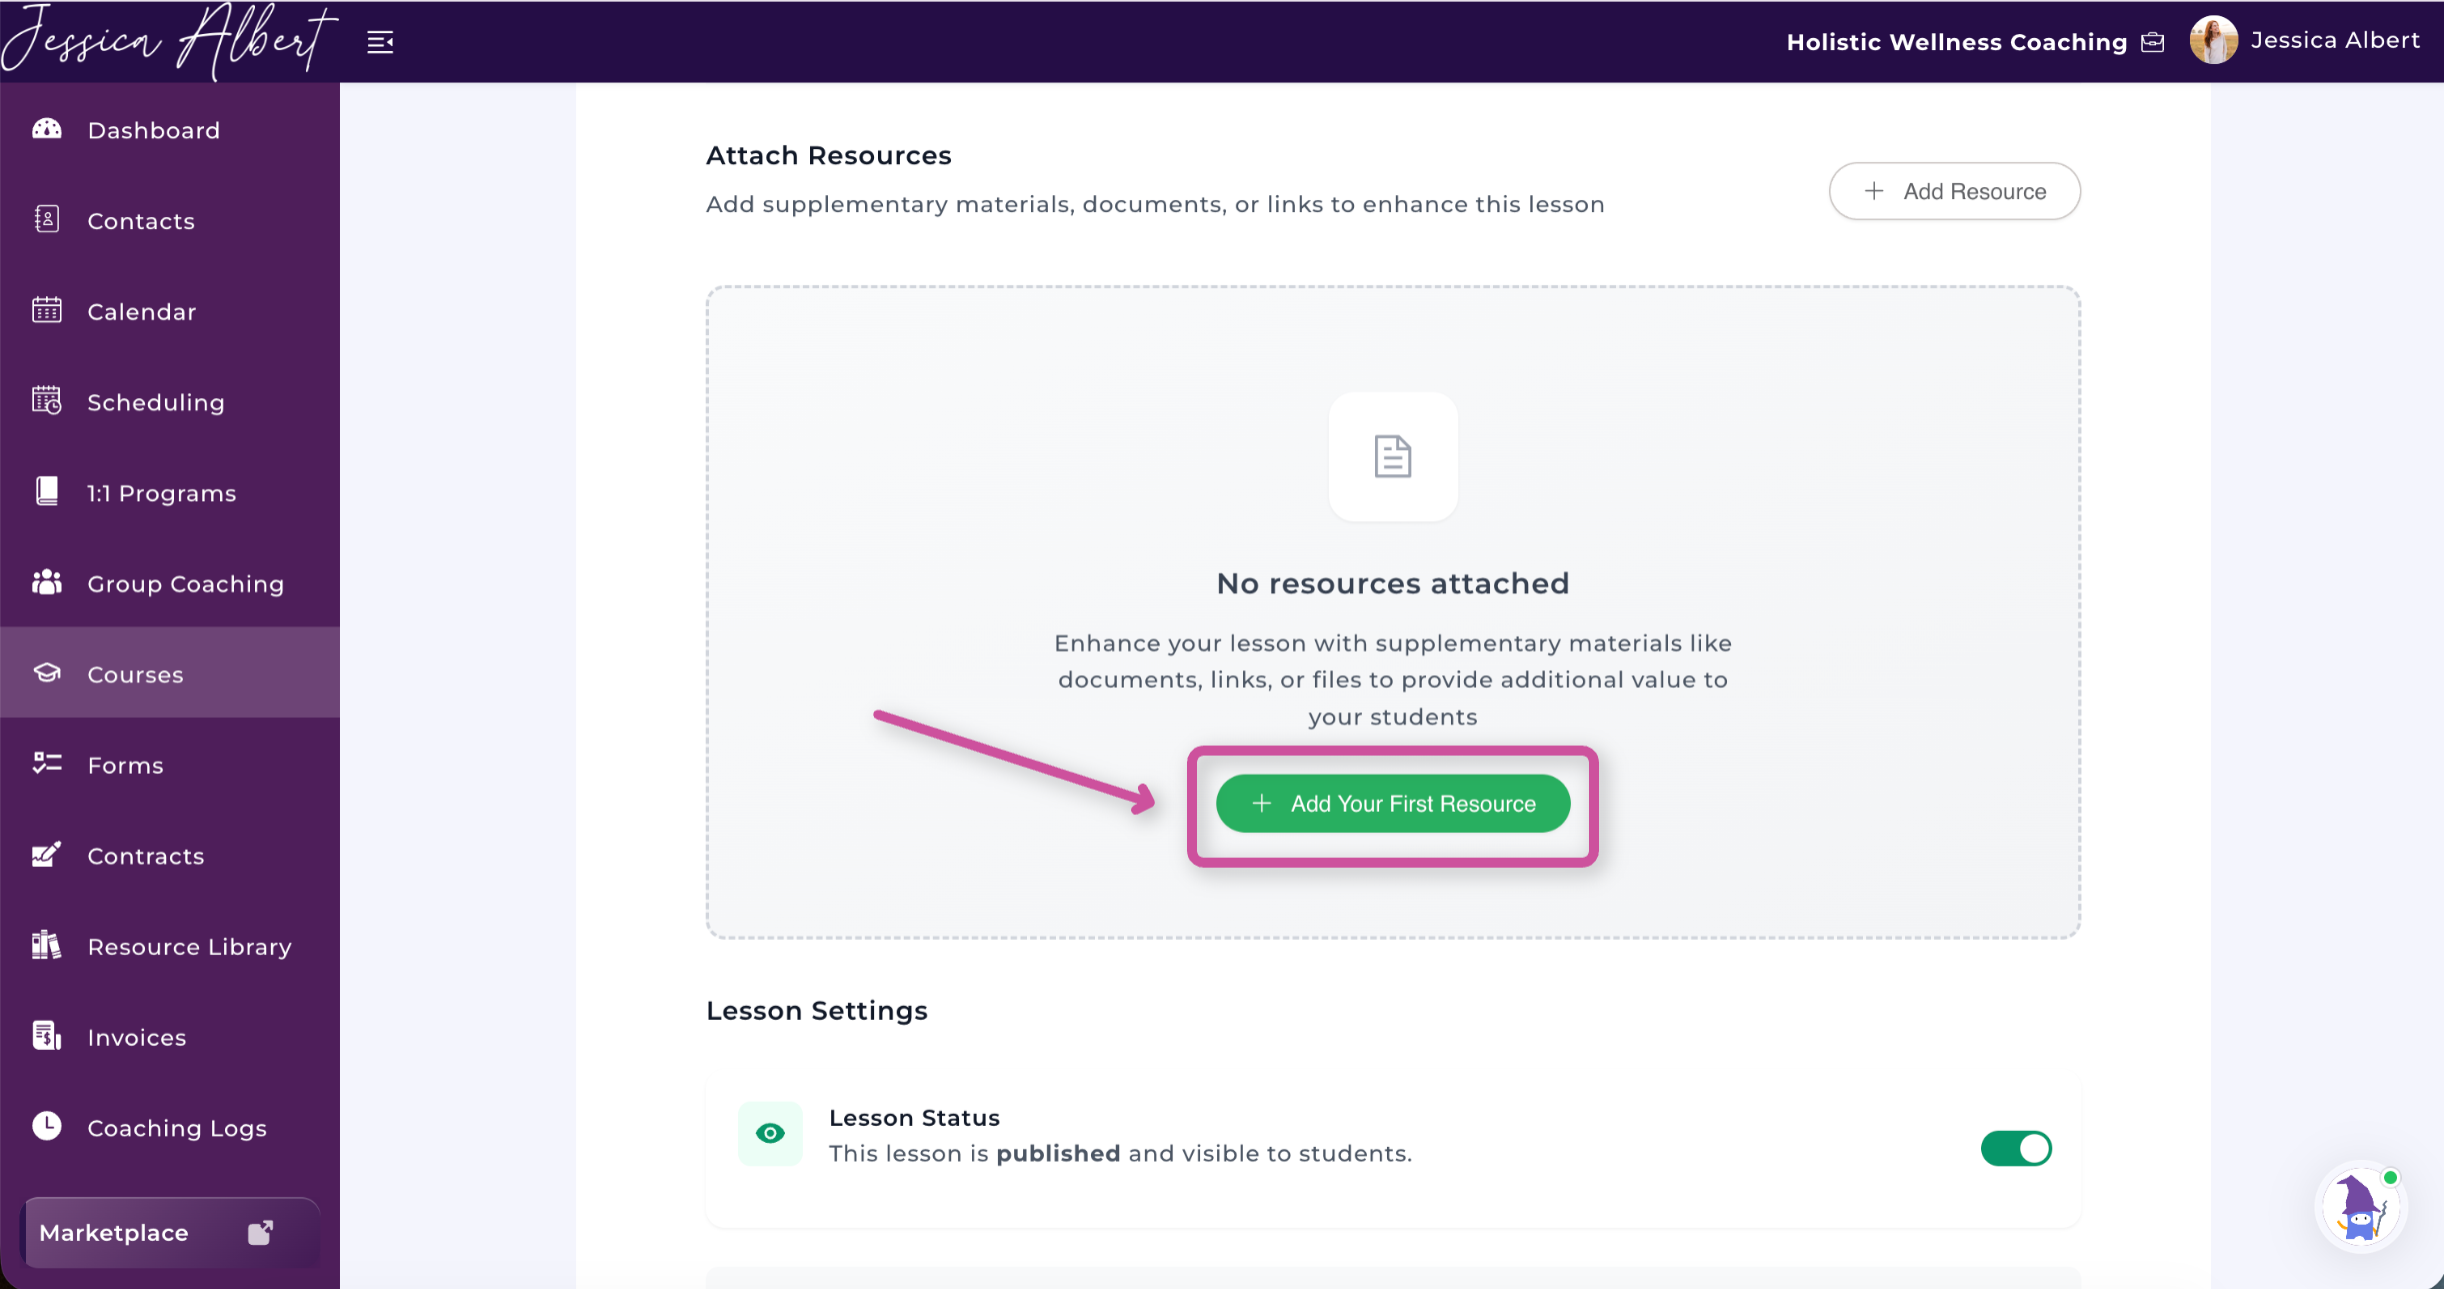
Supplementary Materials
Attach additional resources such as:
- PDFs
- Worksheets
- Templates
- MP3s
- External links
Lesson Settings ⚙️
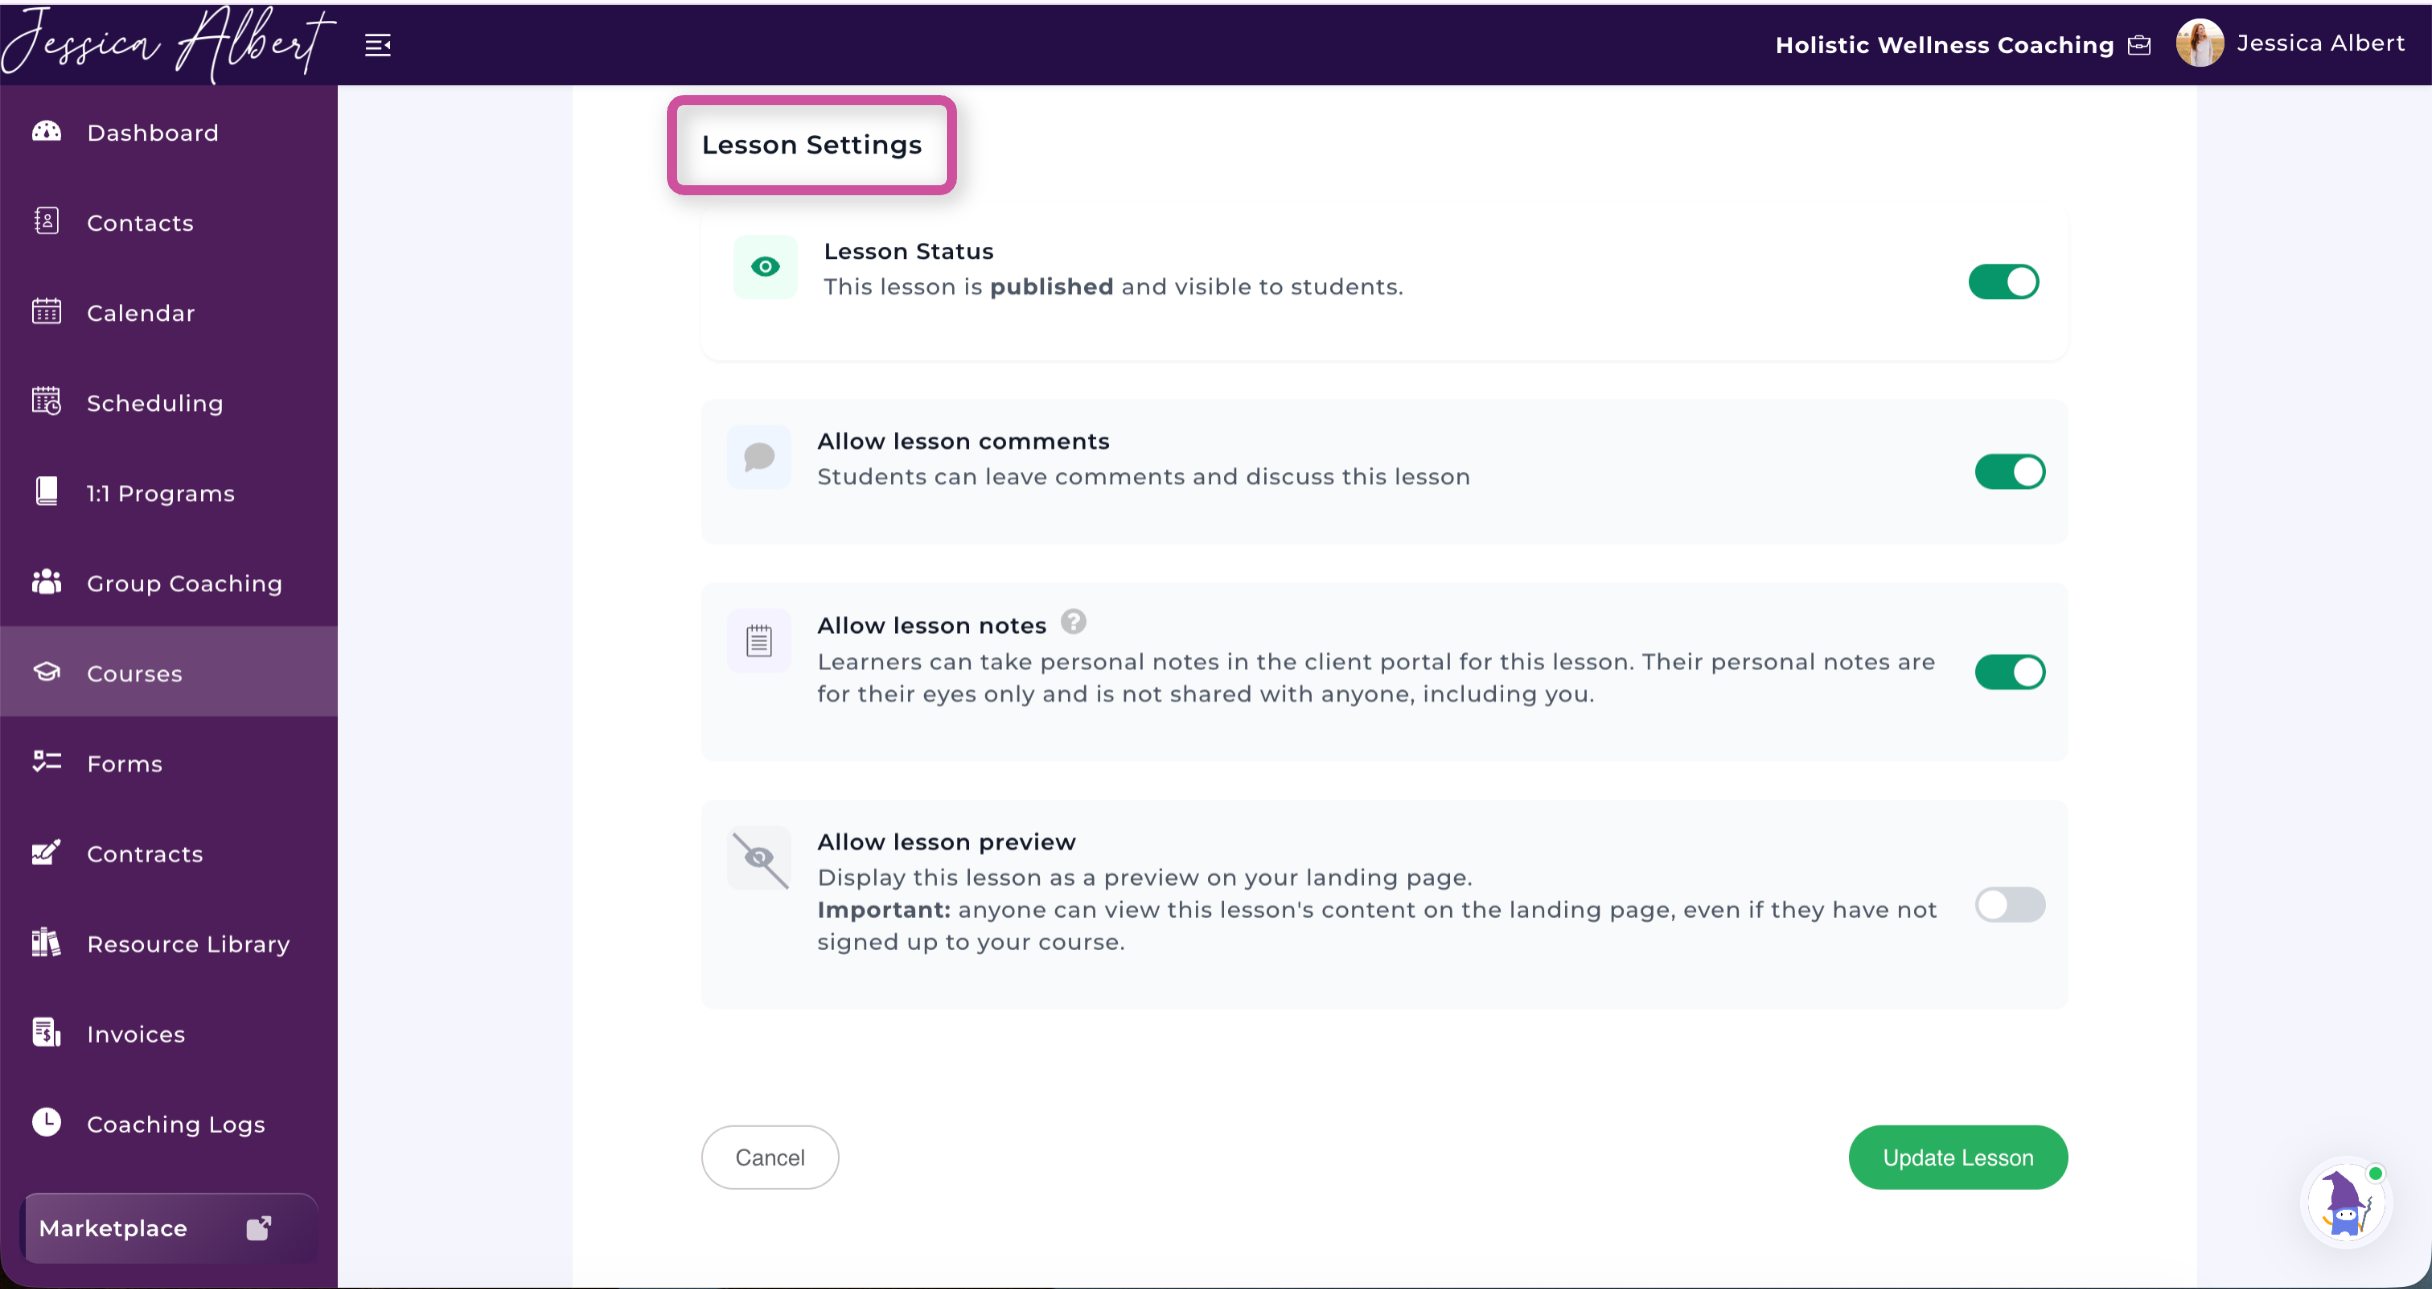
Each lesson can also be configured using Lesson Settings.
Options include:
- Draft or Published (Note: If published, the lesson will display on the Course Landing Page)
- Allow Lesson Comments
- Allow Lesson Notes
- Allow Lesson Preview
Note: Draft lessons remain hidden from learners until you're ready to publish them.
Course Fees 💸
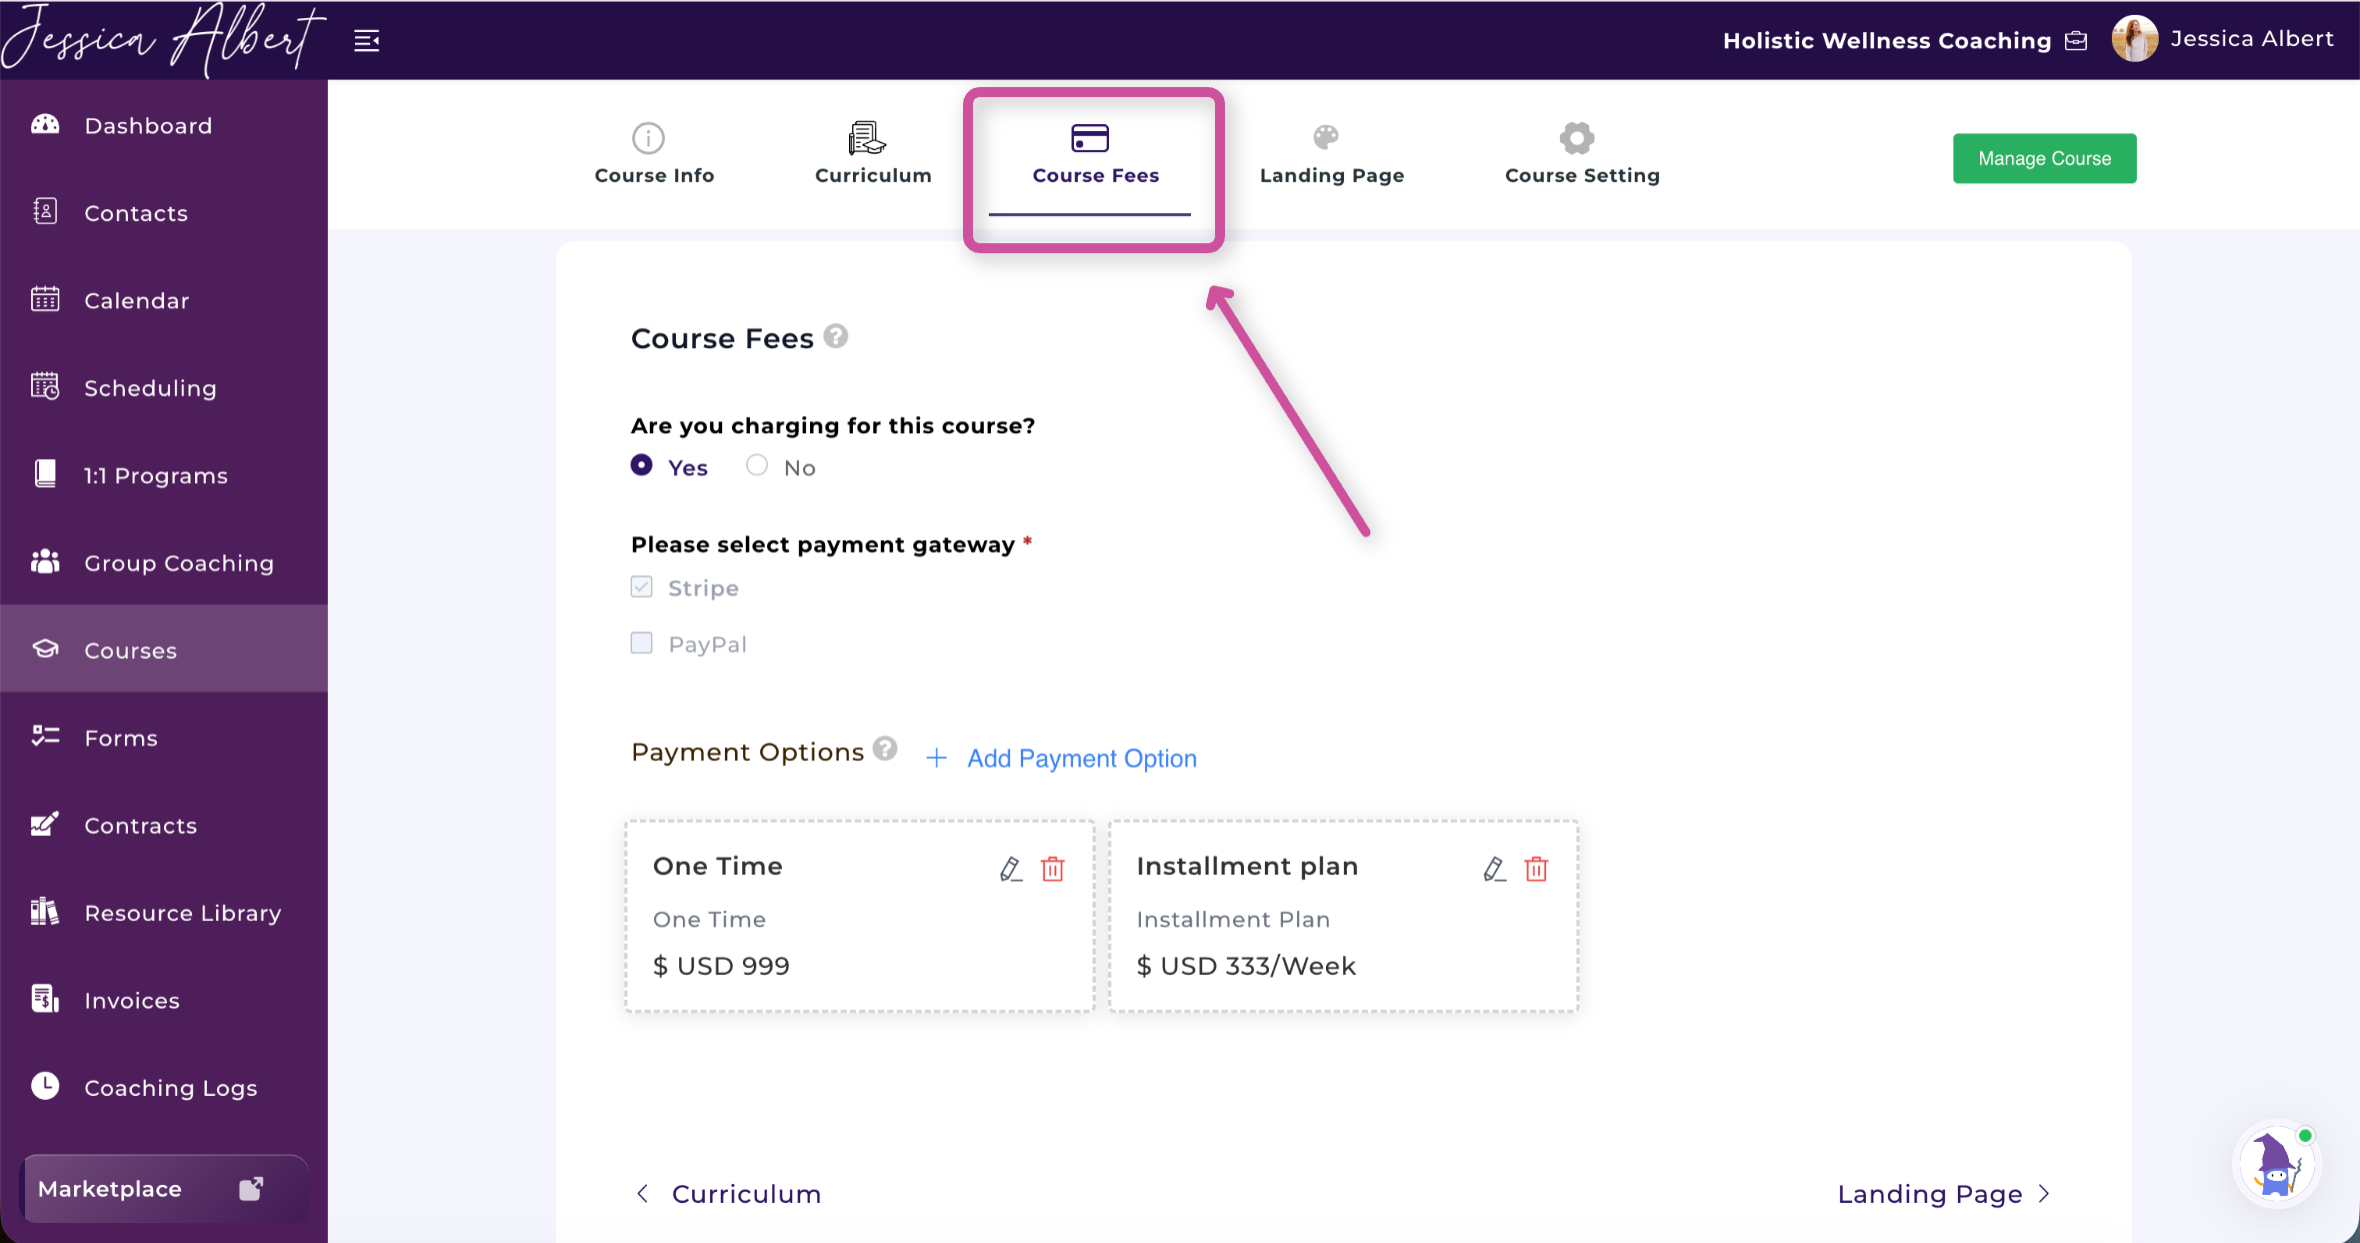
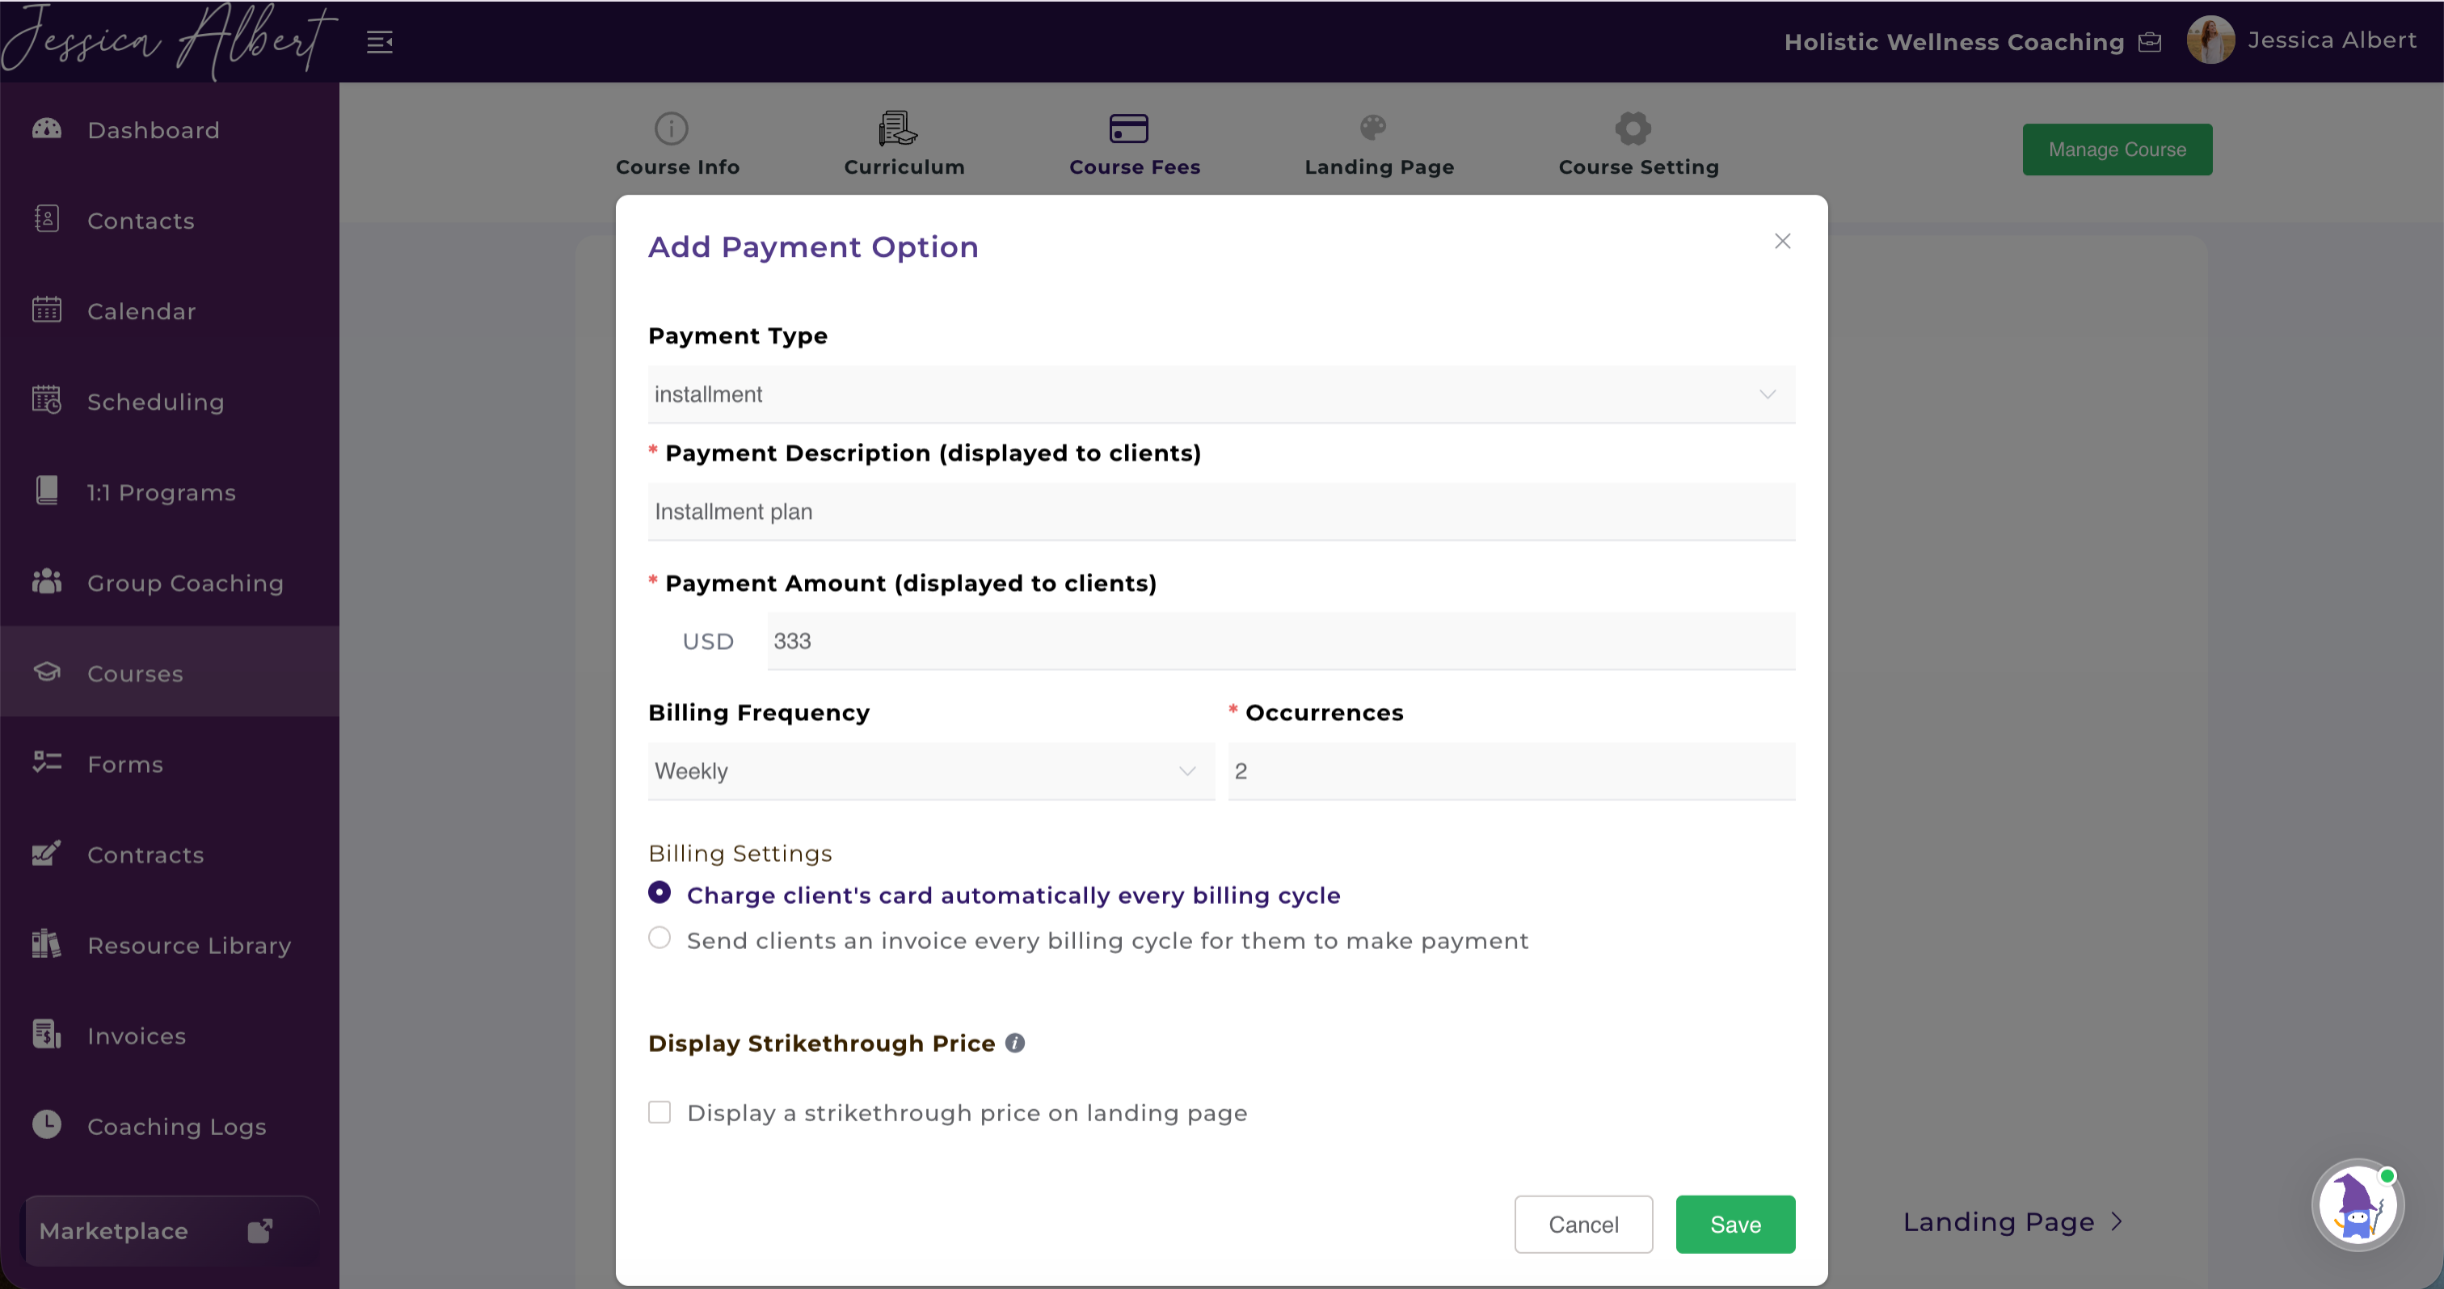
Courses support multiple pricing options.
You can offer:
One-Time Payment
- Perfect for self-paced courses.
Installment Plans
- Split payments into multiple installments.
Promotional Pricing
- Display a strikethrough price to highlight discounted offers.
- Payments are processed through Stripe or PayPal.
Note: To learn how to setup your Stripe or PayPal to CoachVantage, please refer to this article titled, "Connecting to Payment Gateways."
Customizing Your Landing Page
1) Customise Landing Page
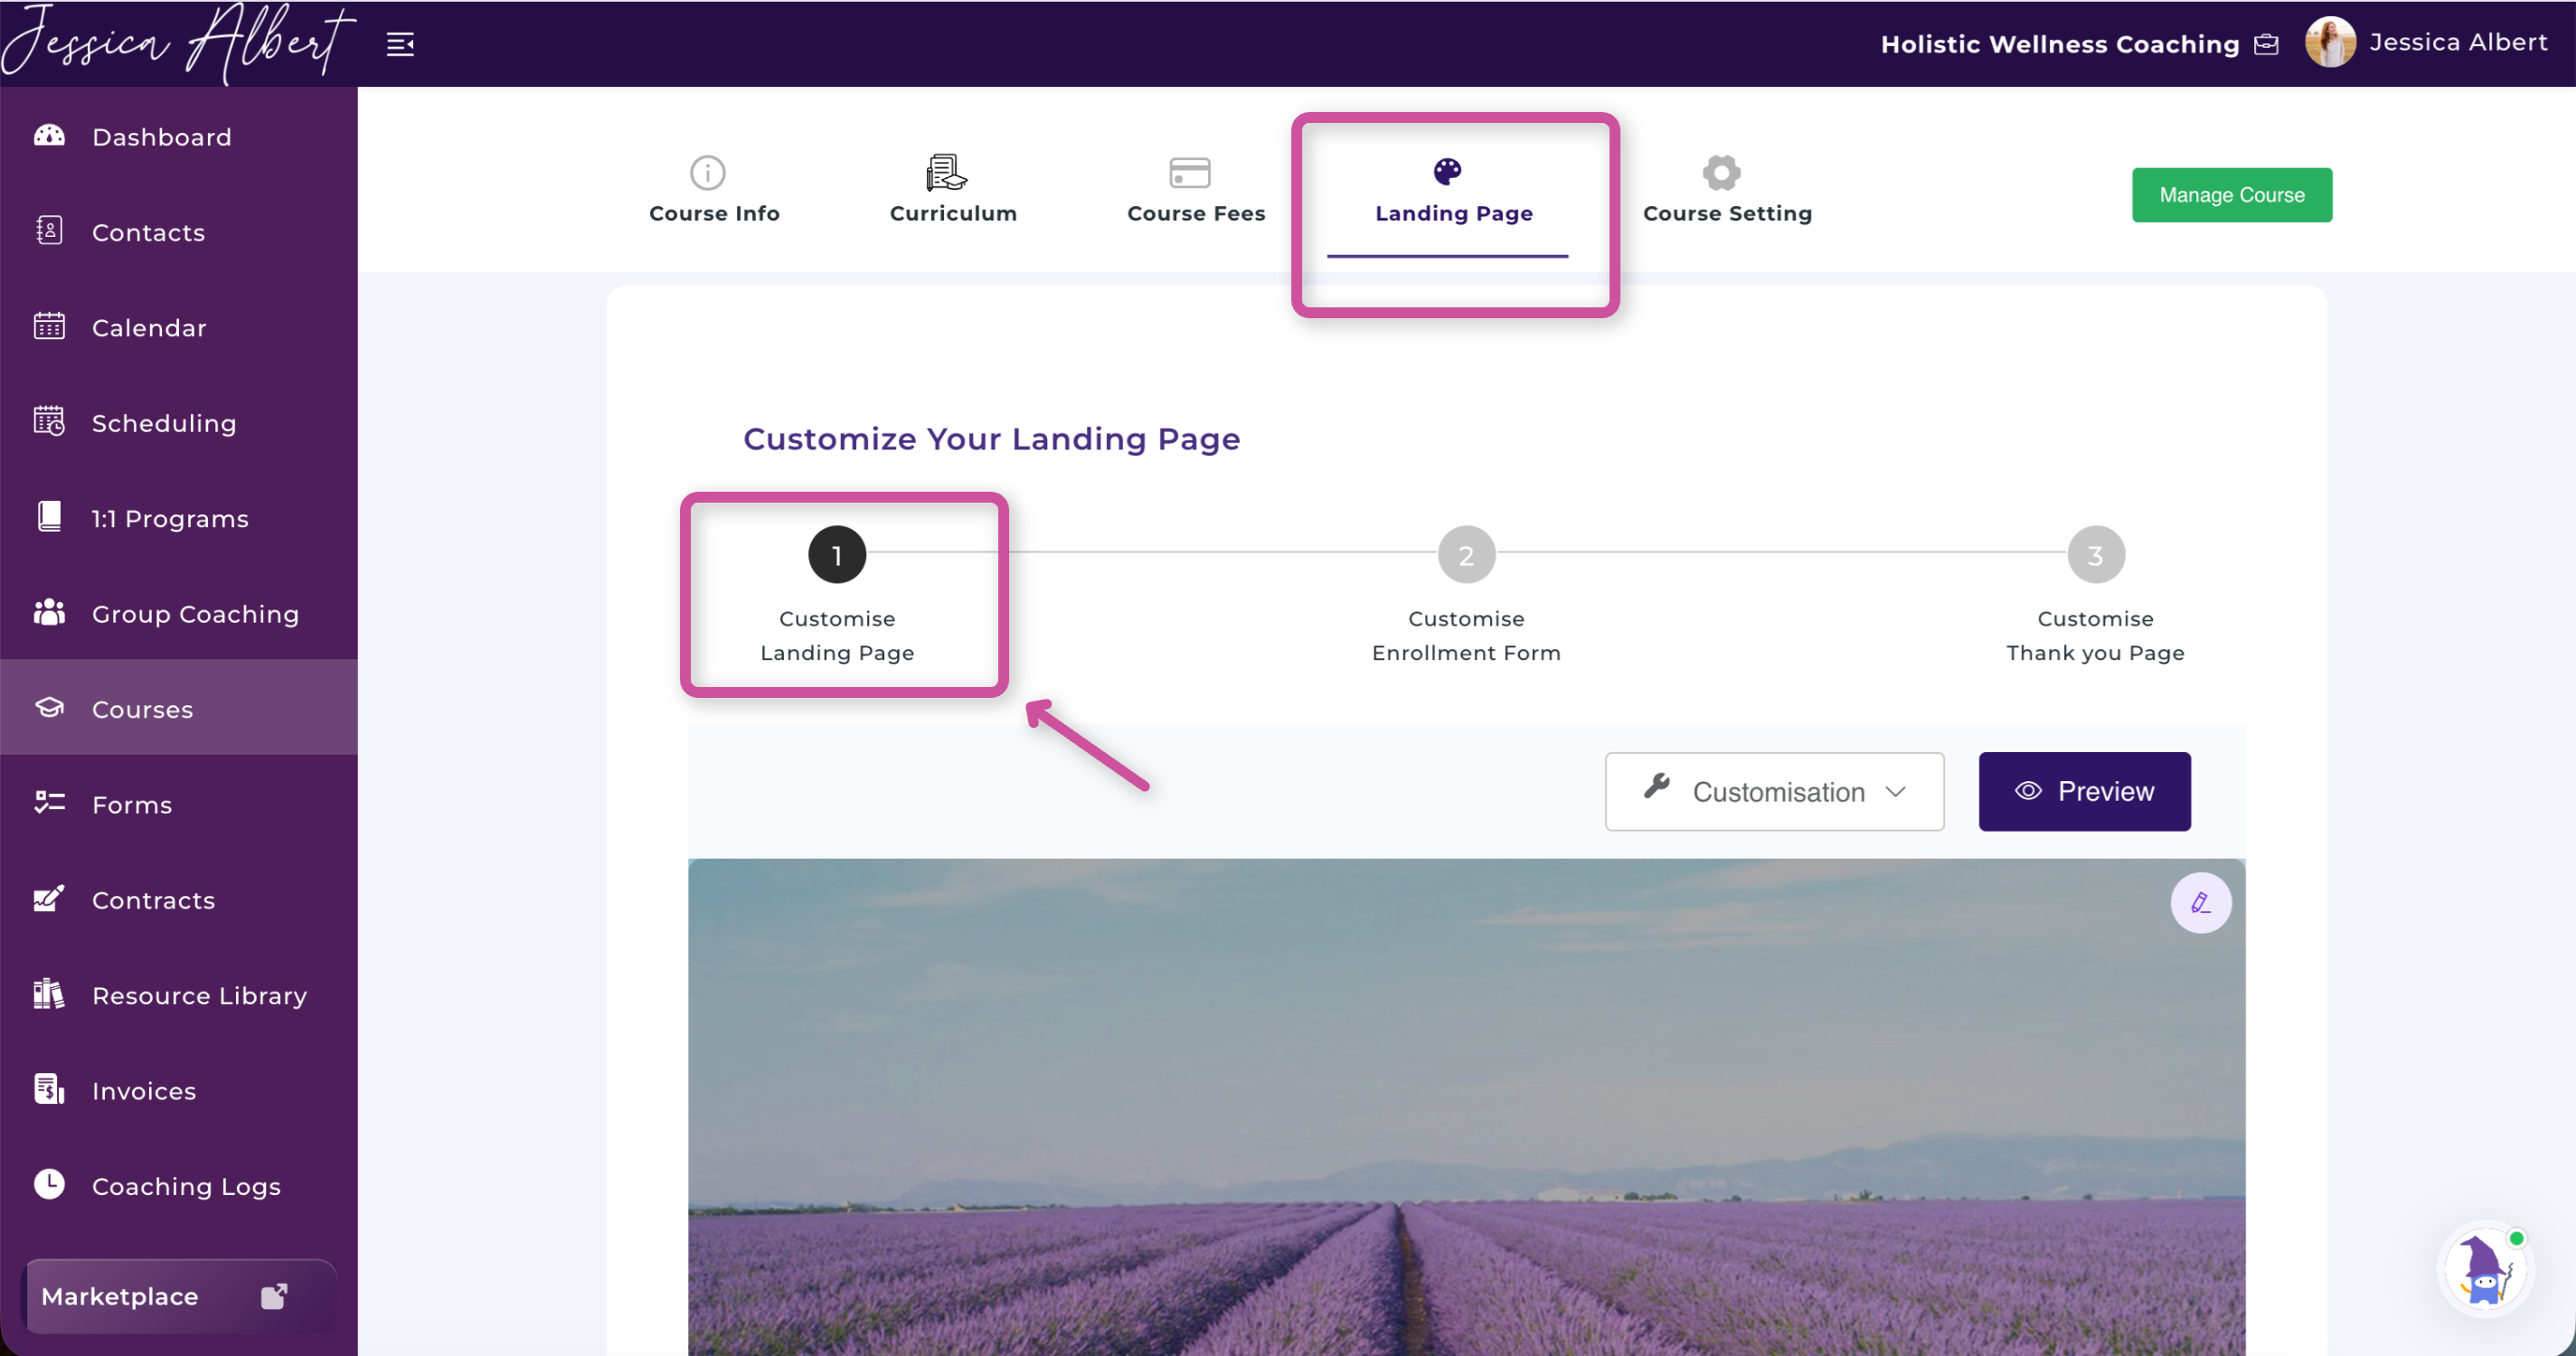
Every course includes a fully customizable sales page.
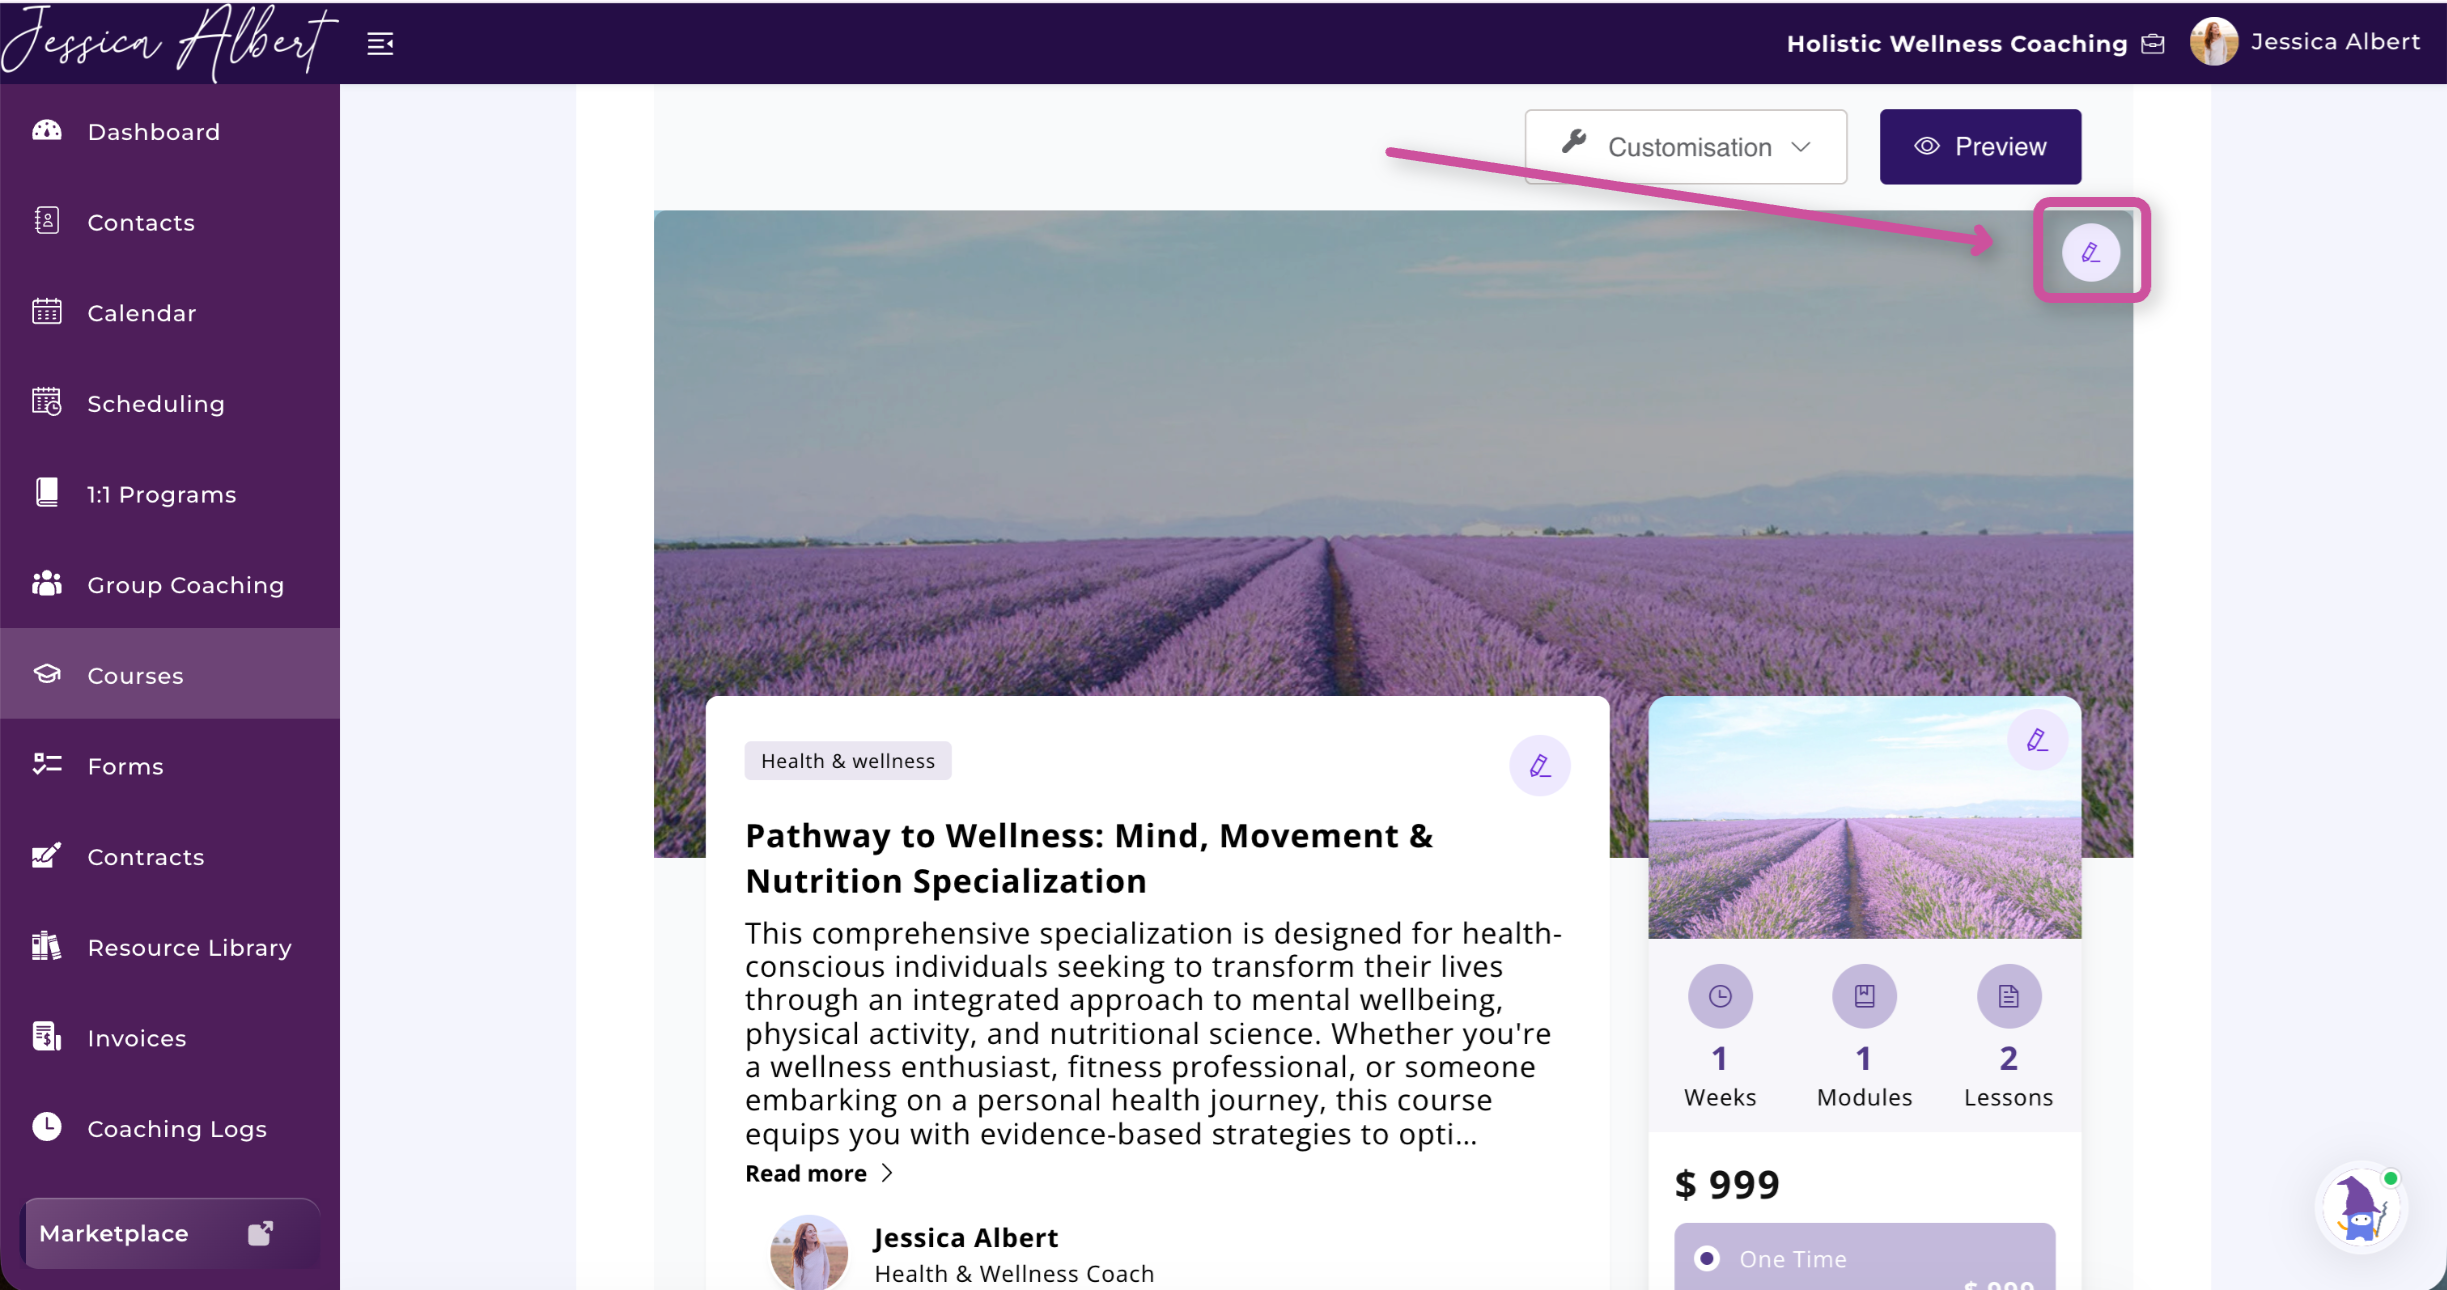
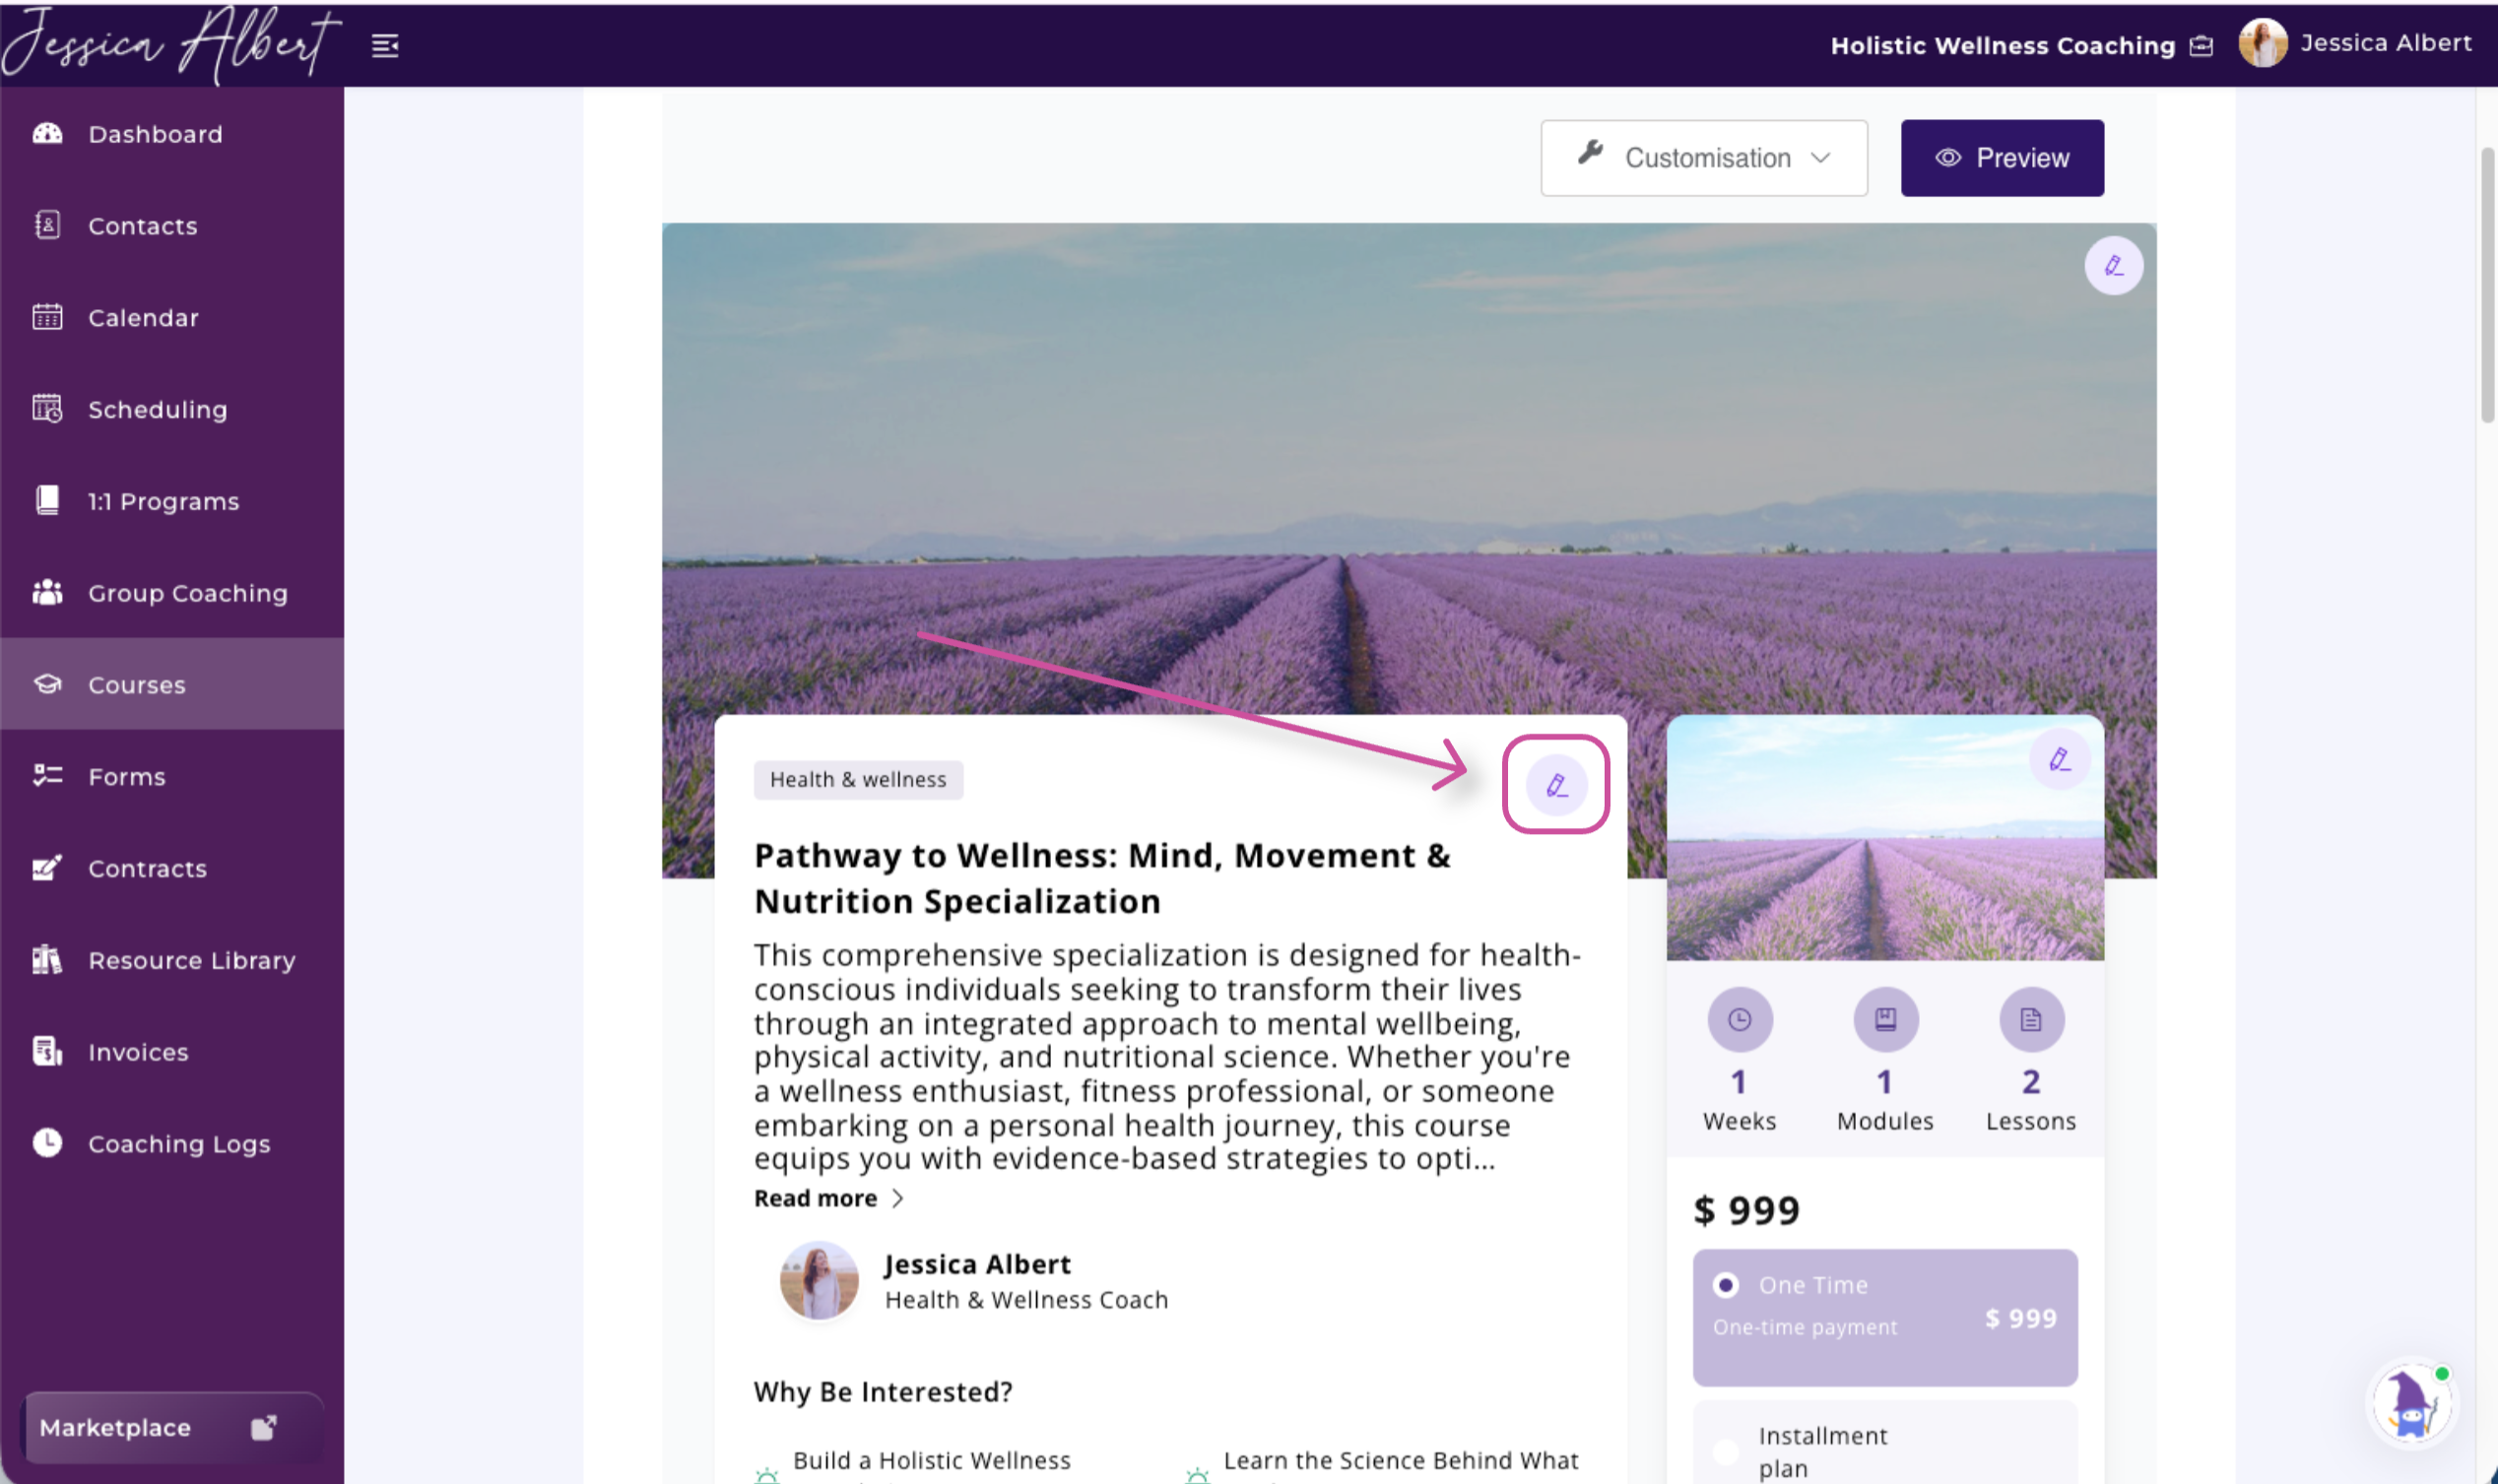
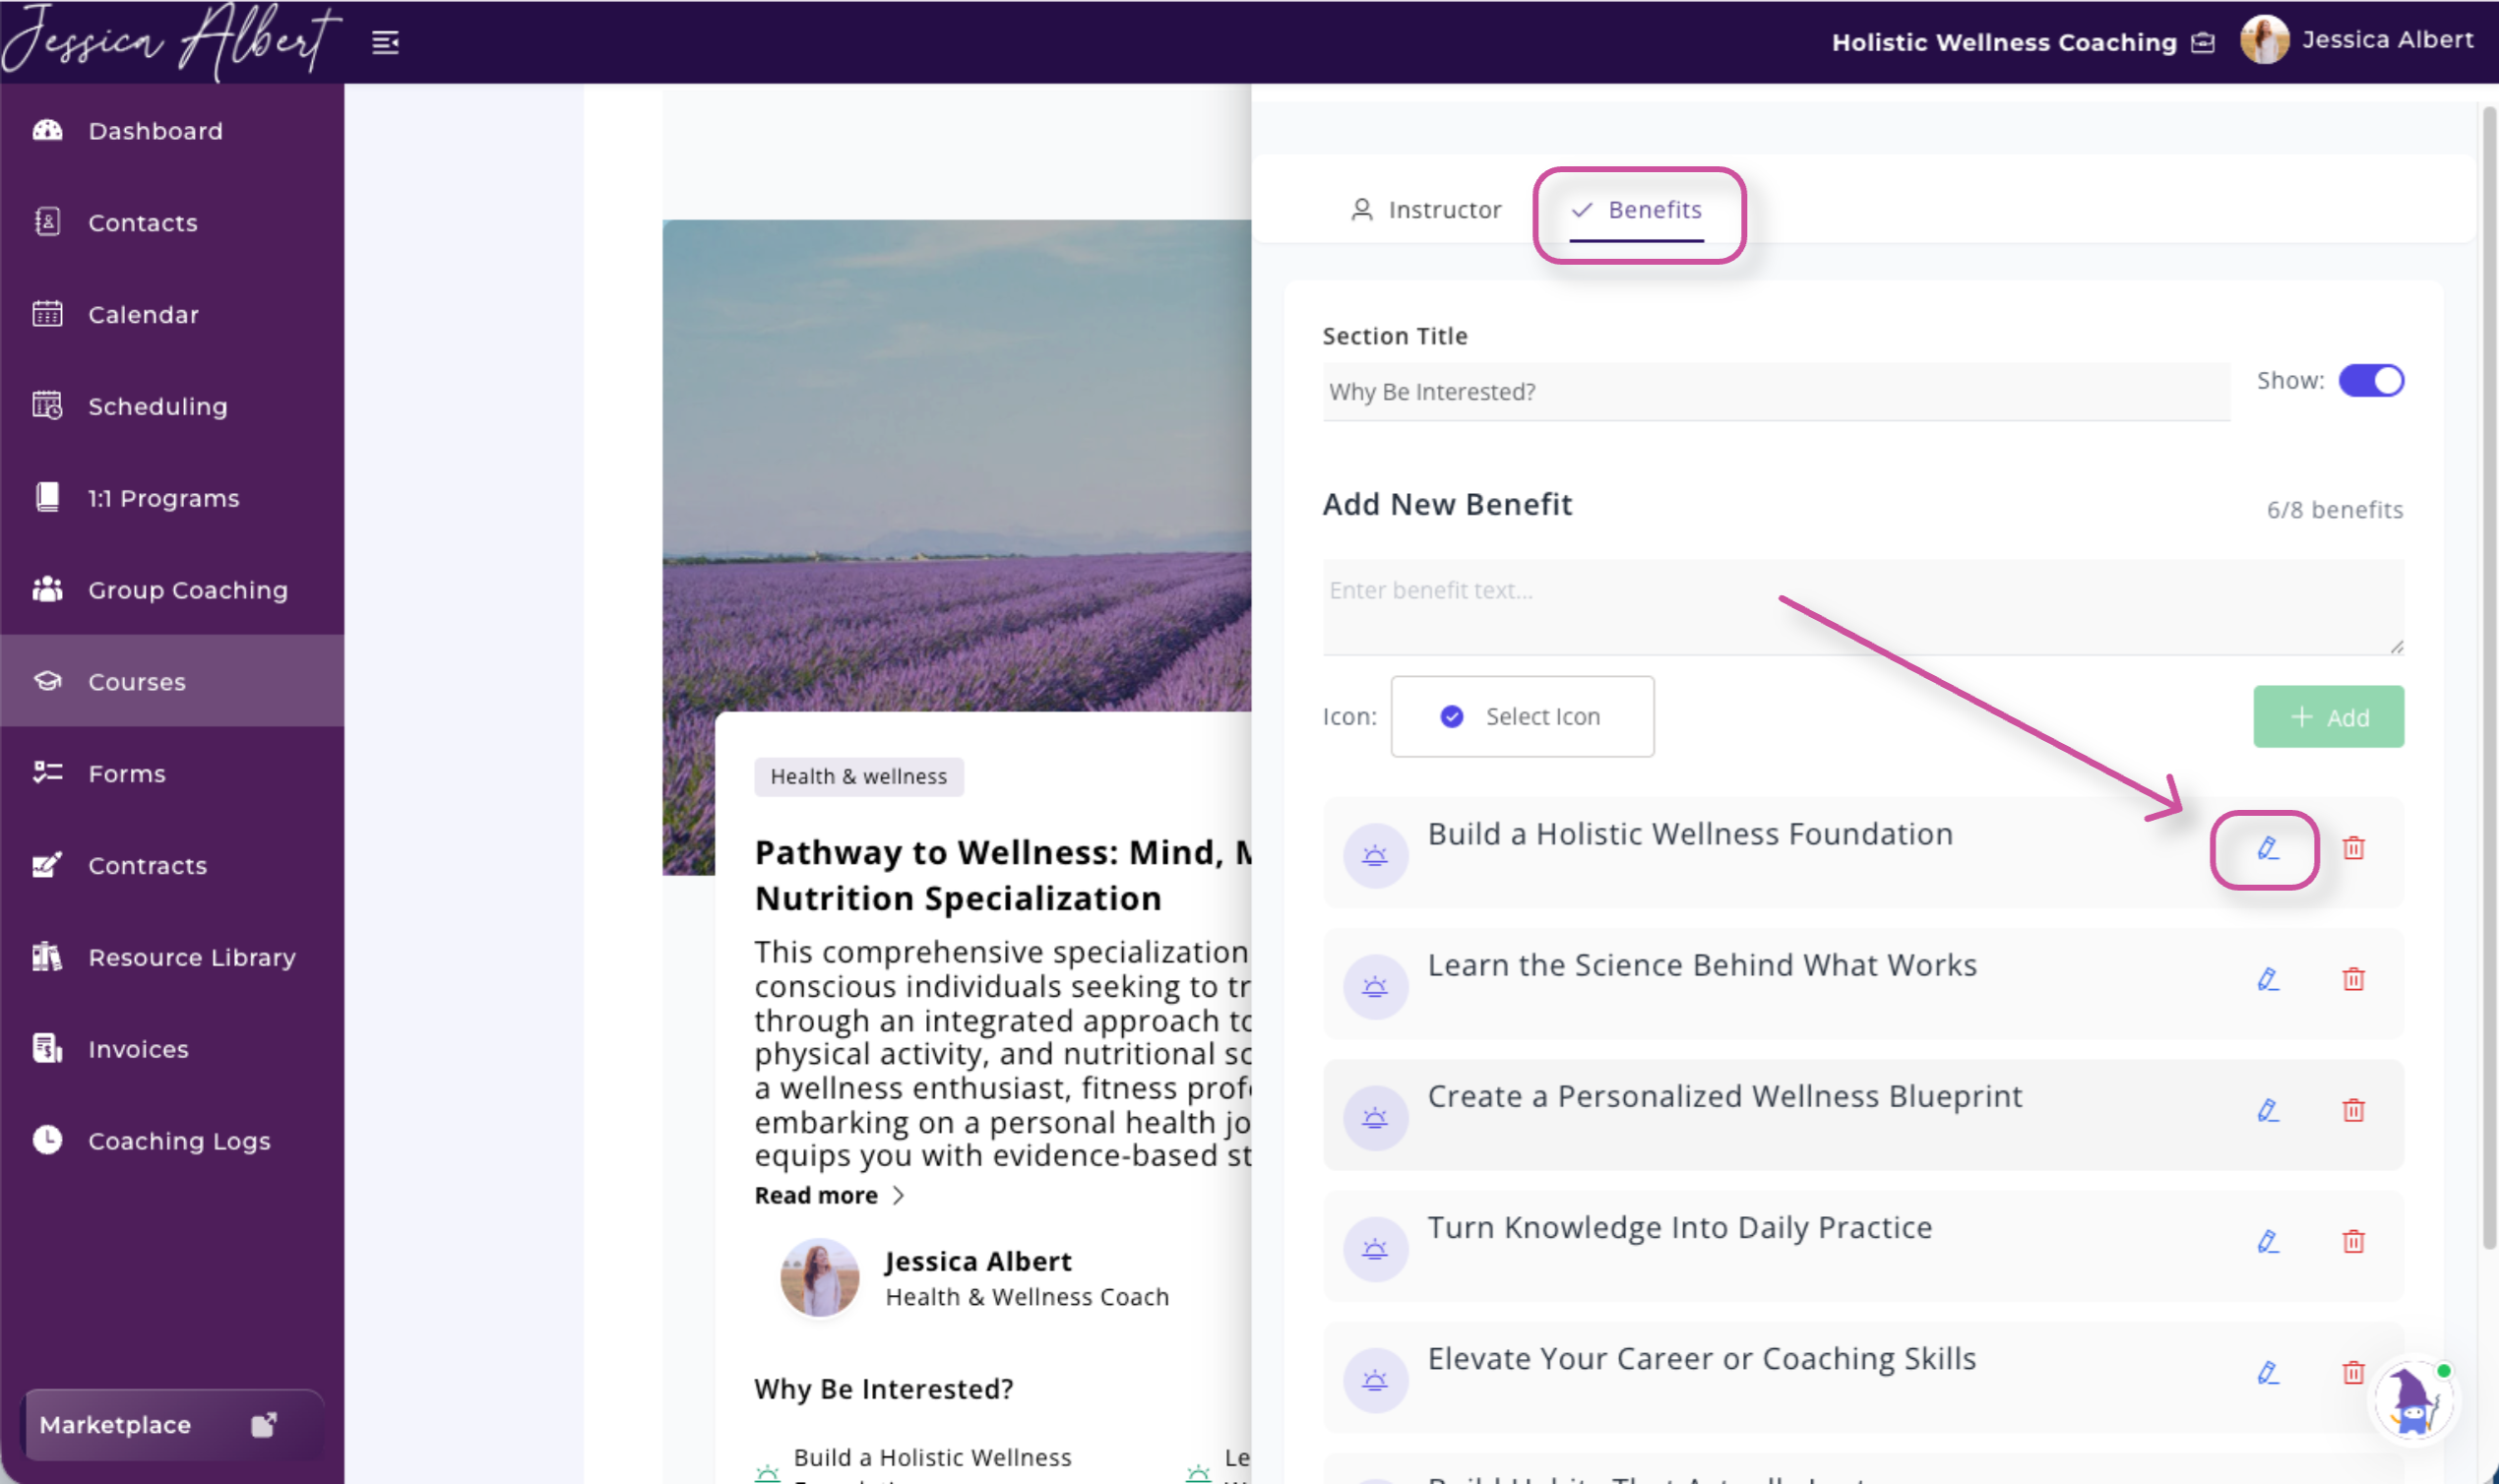
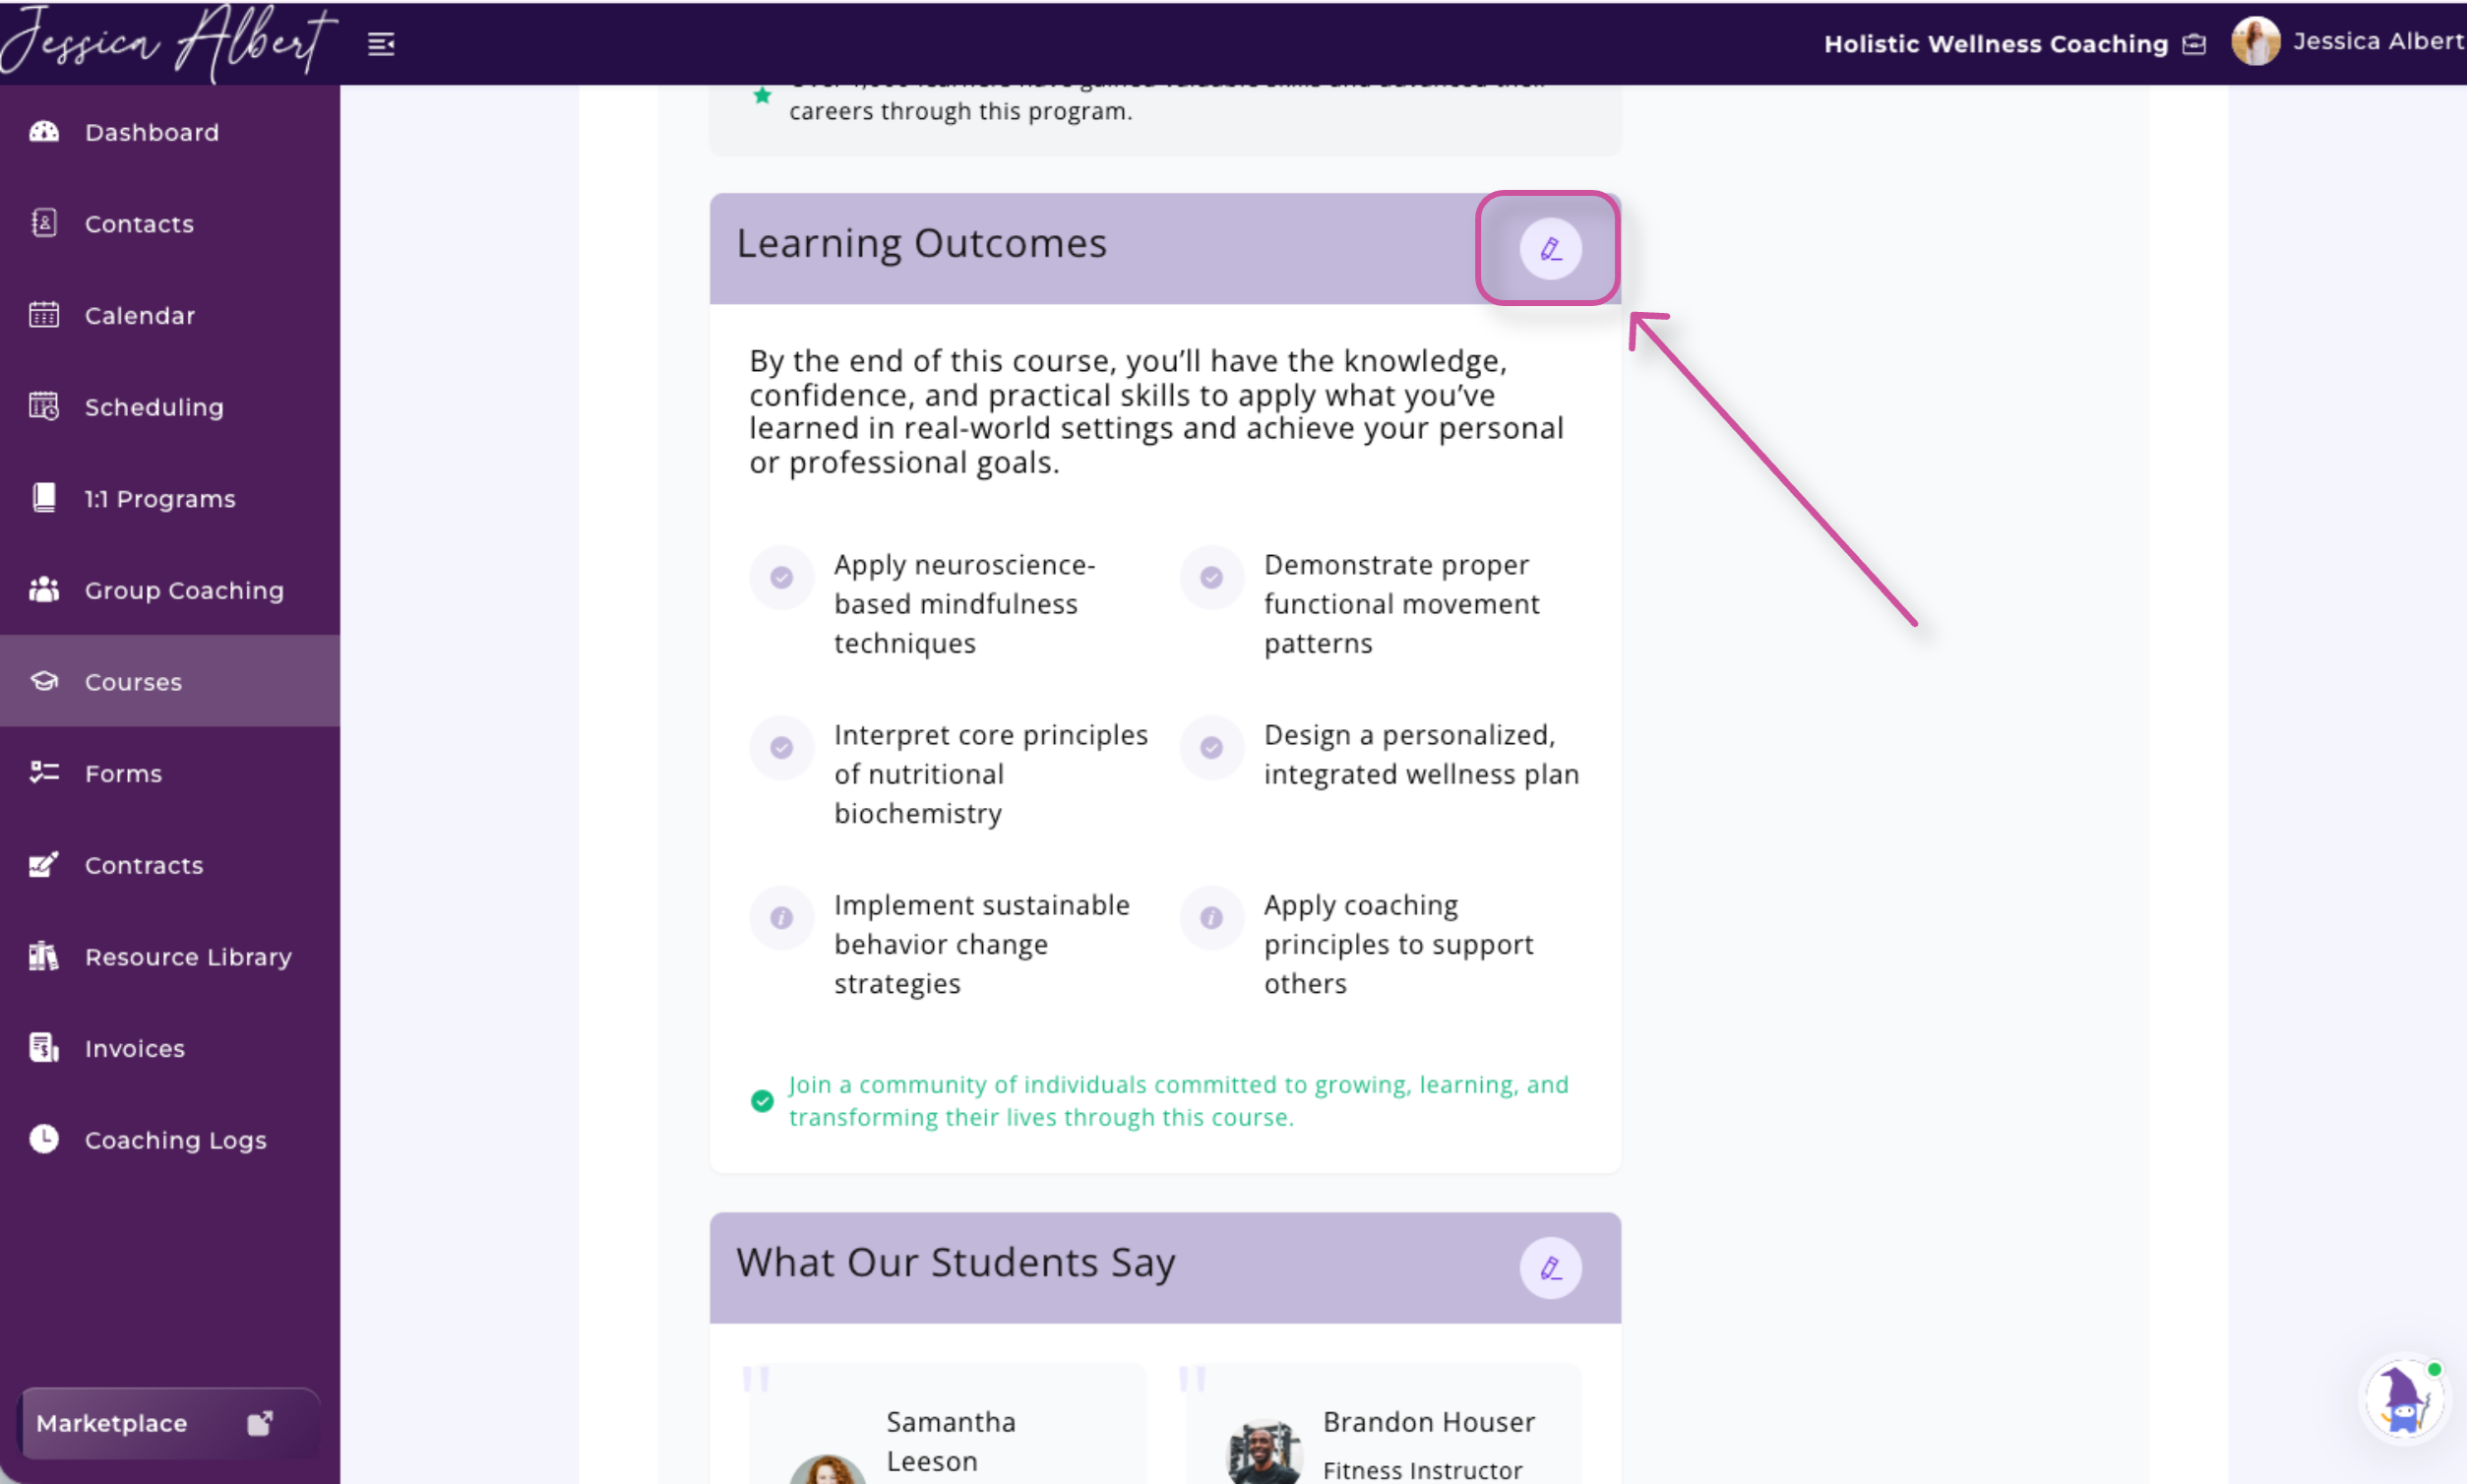
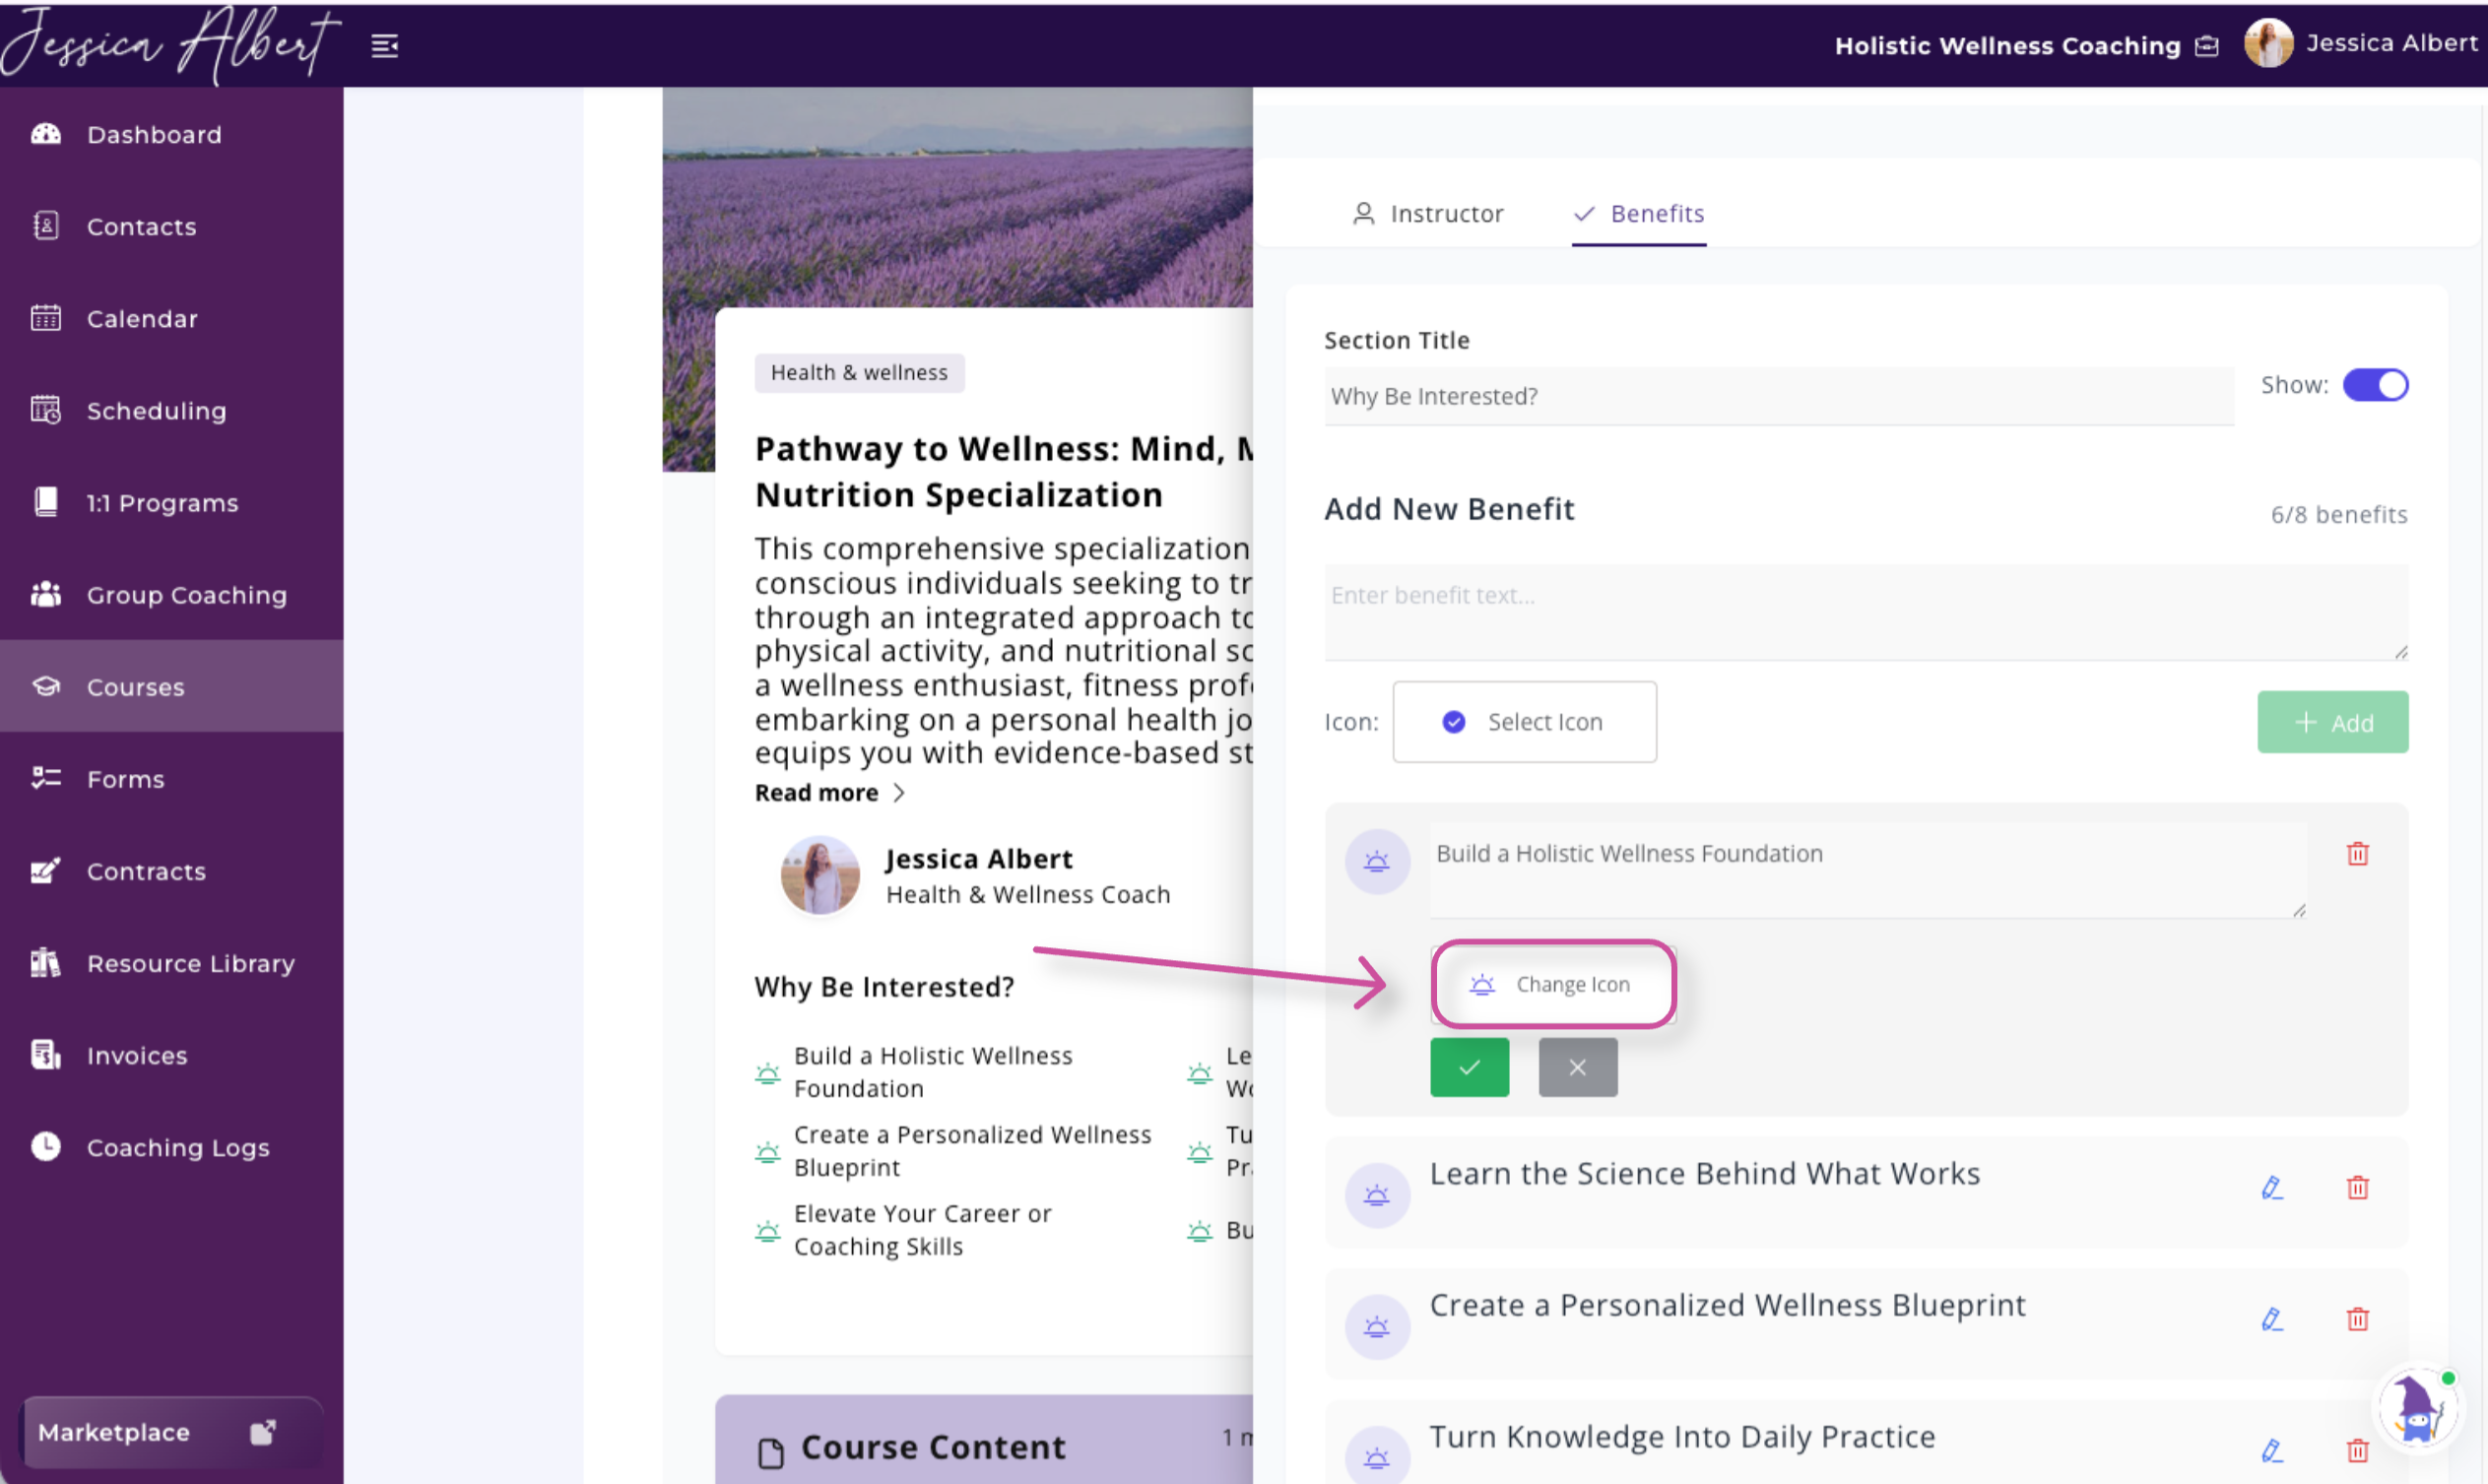
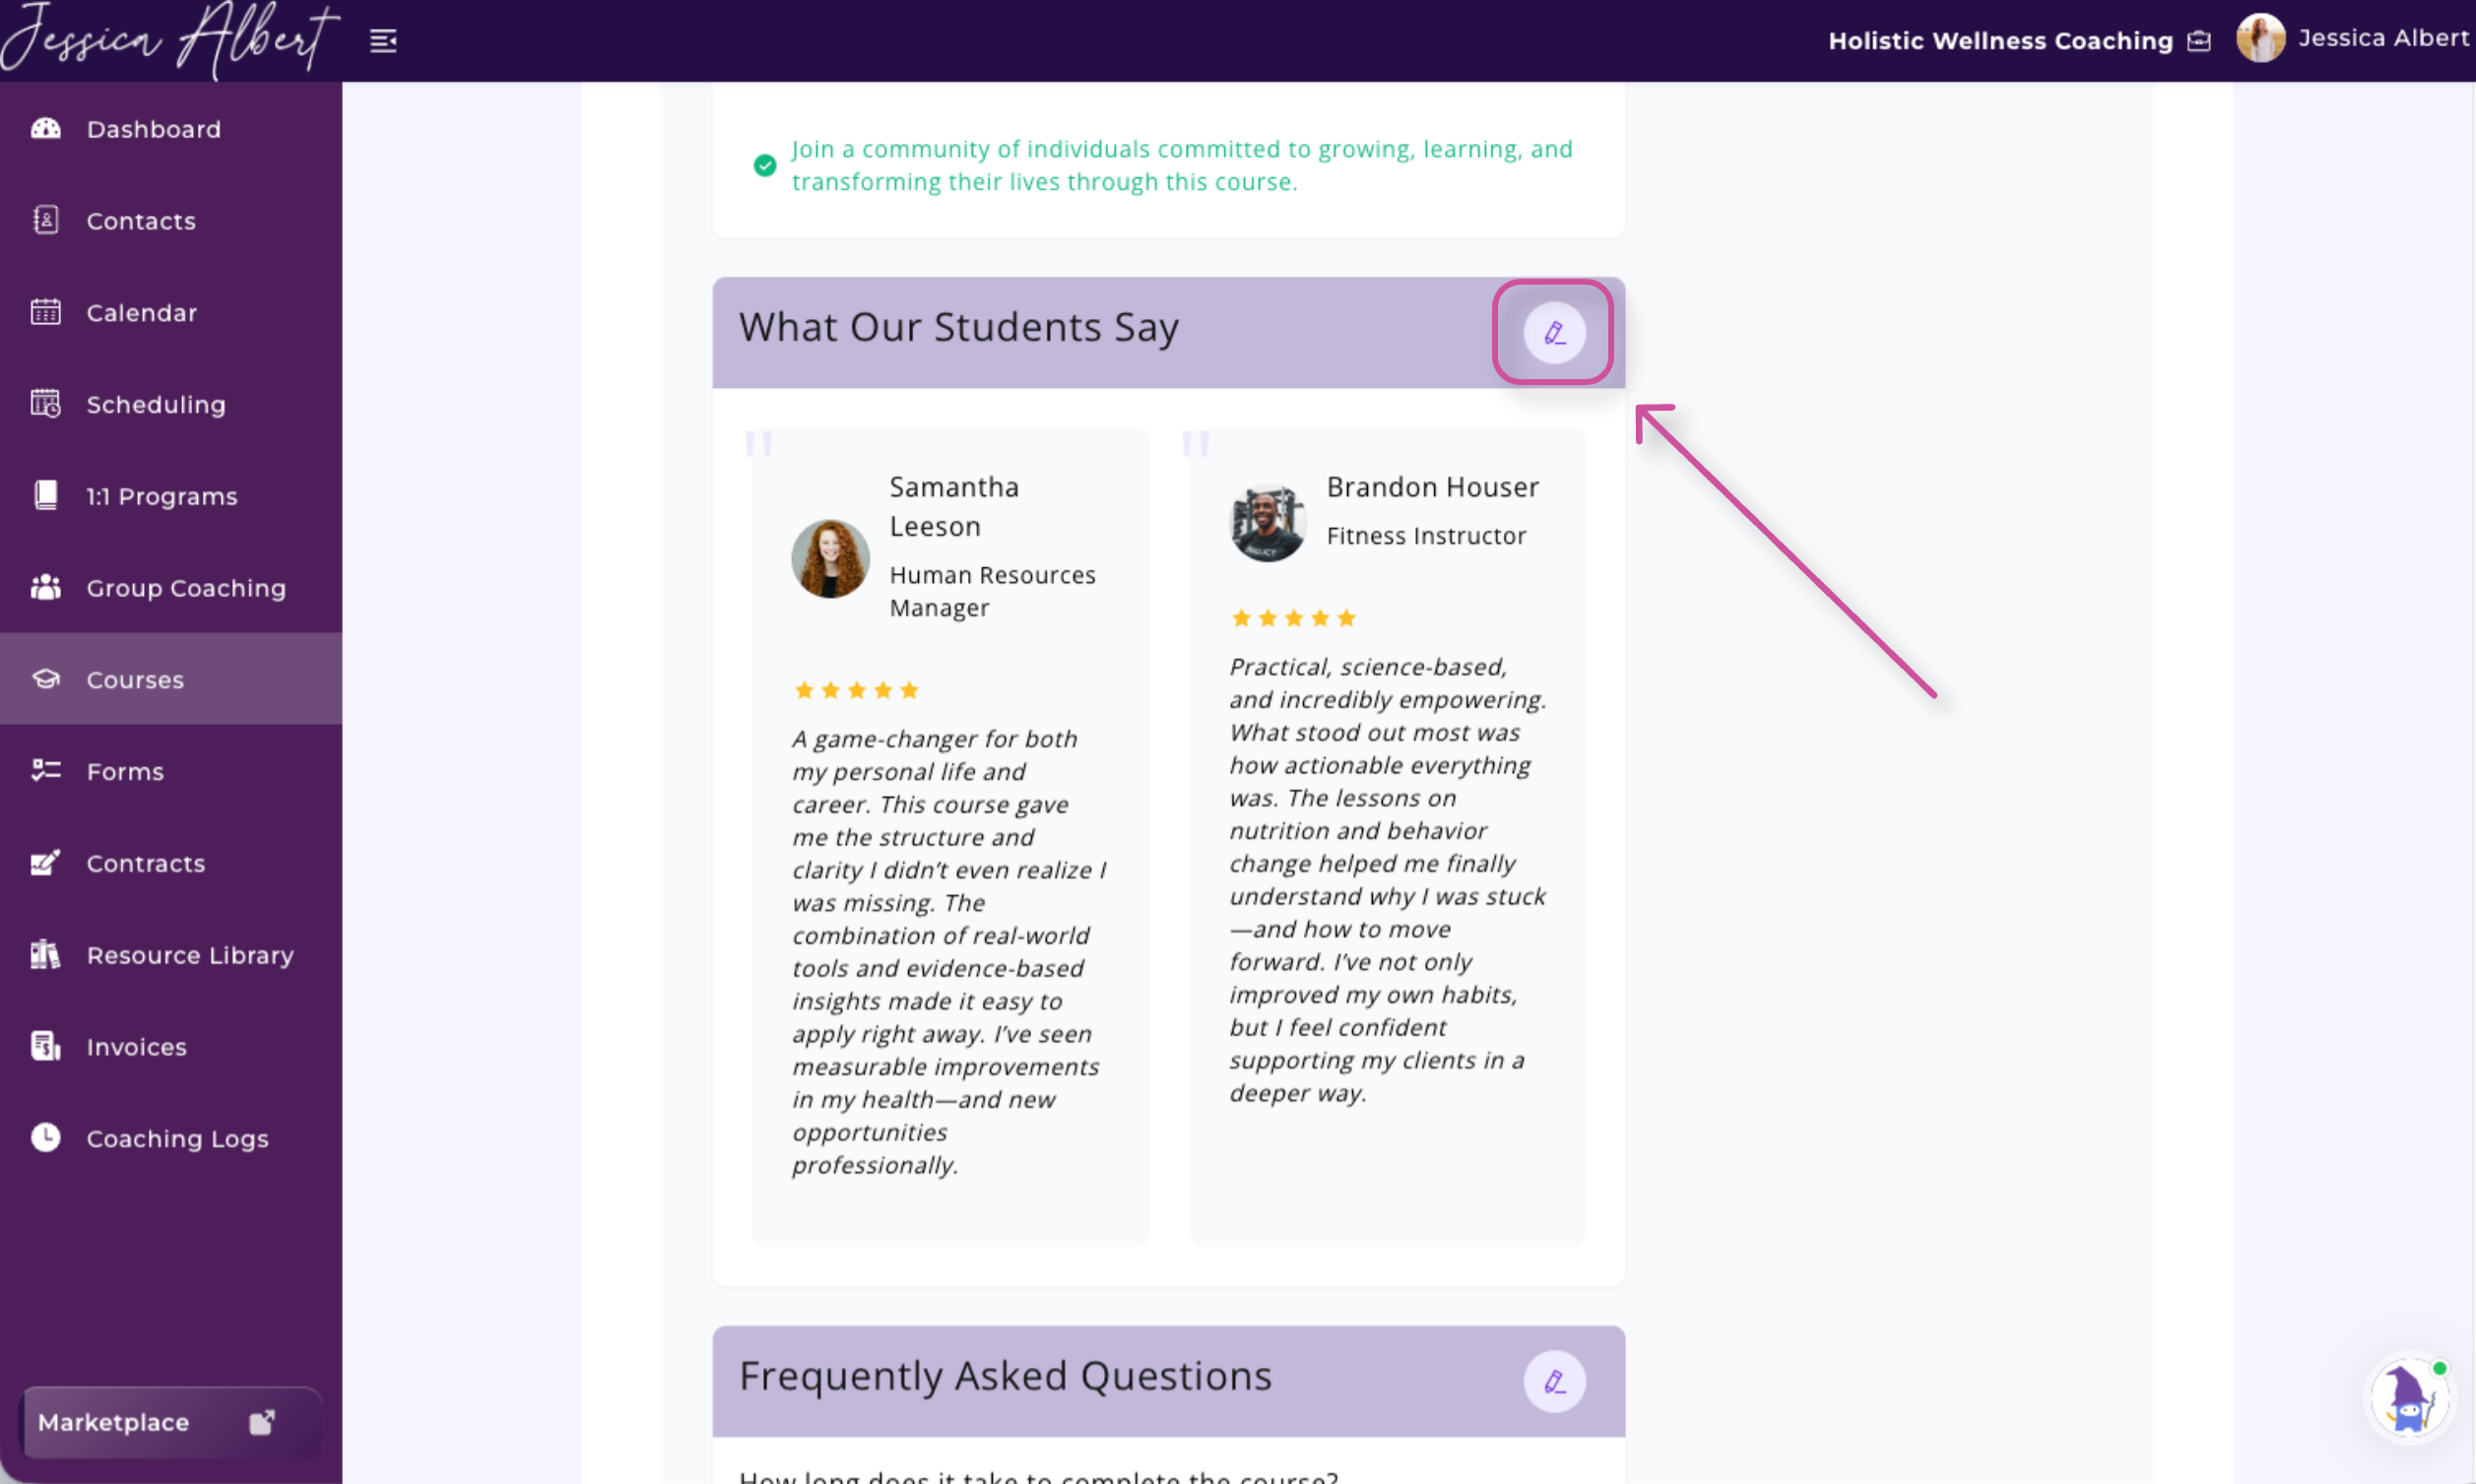
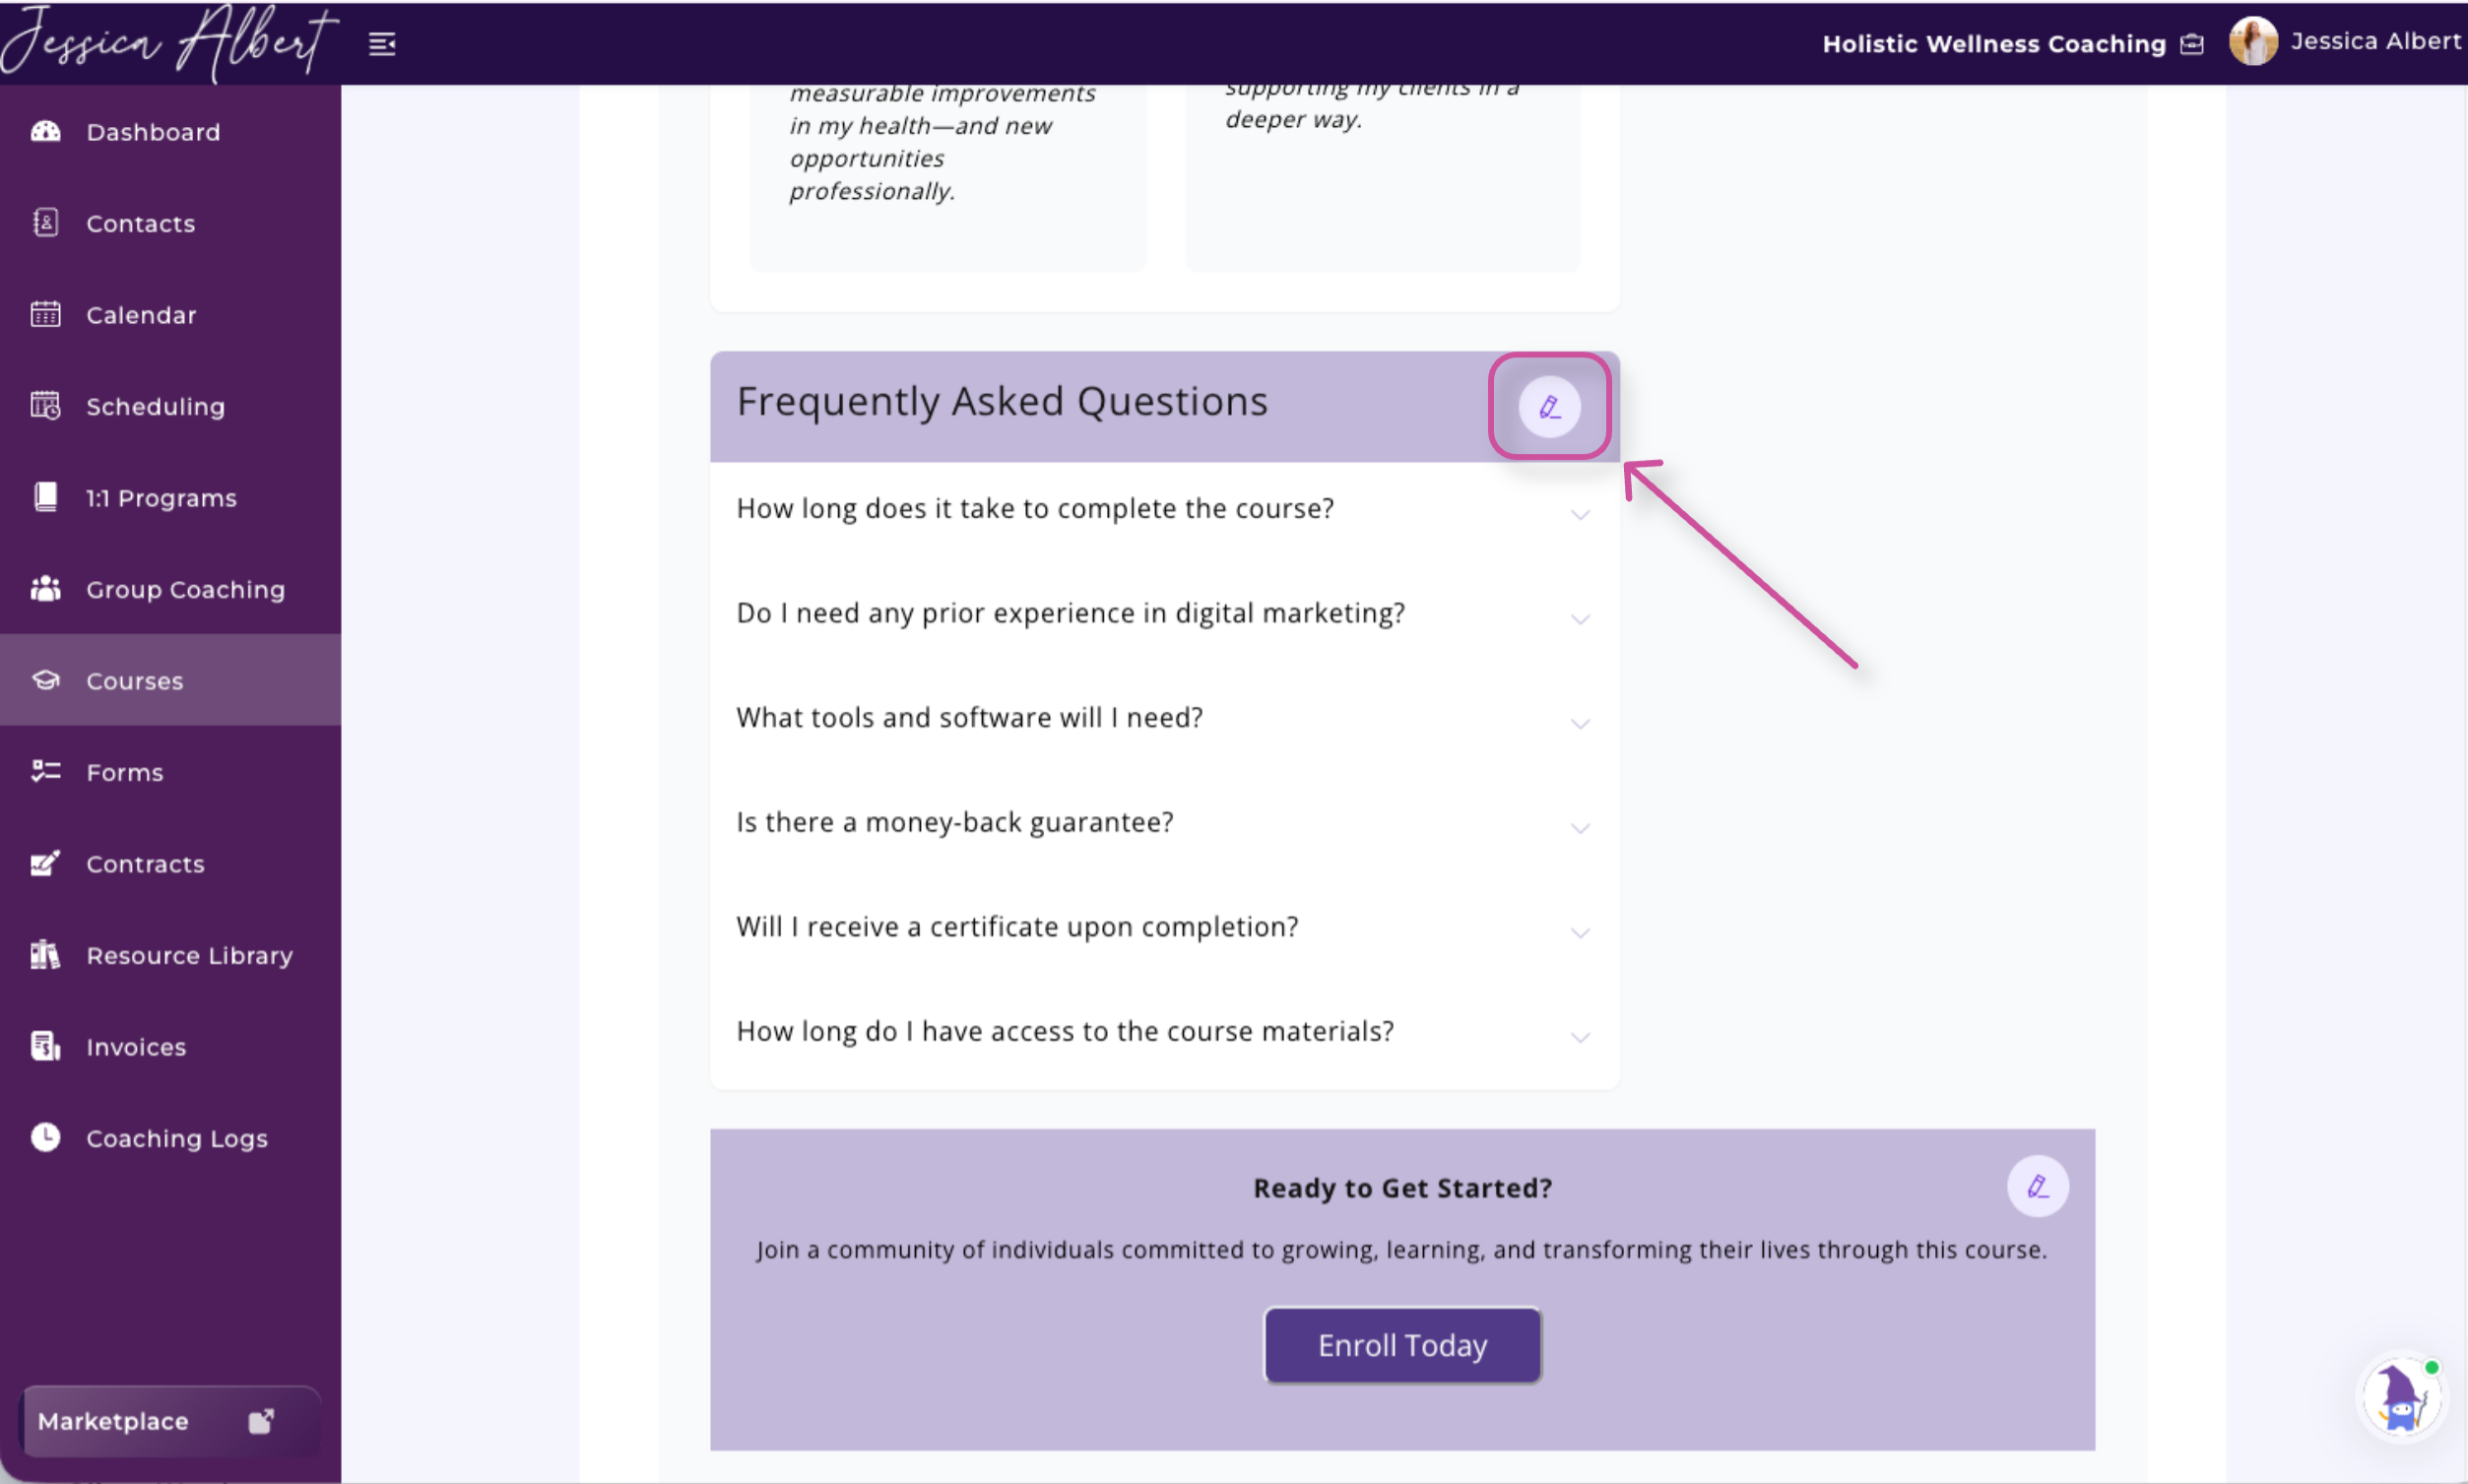
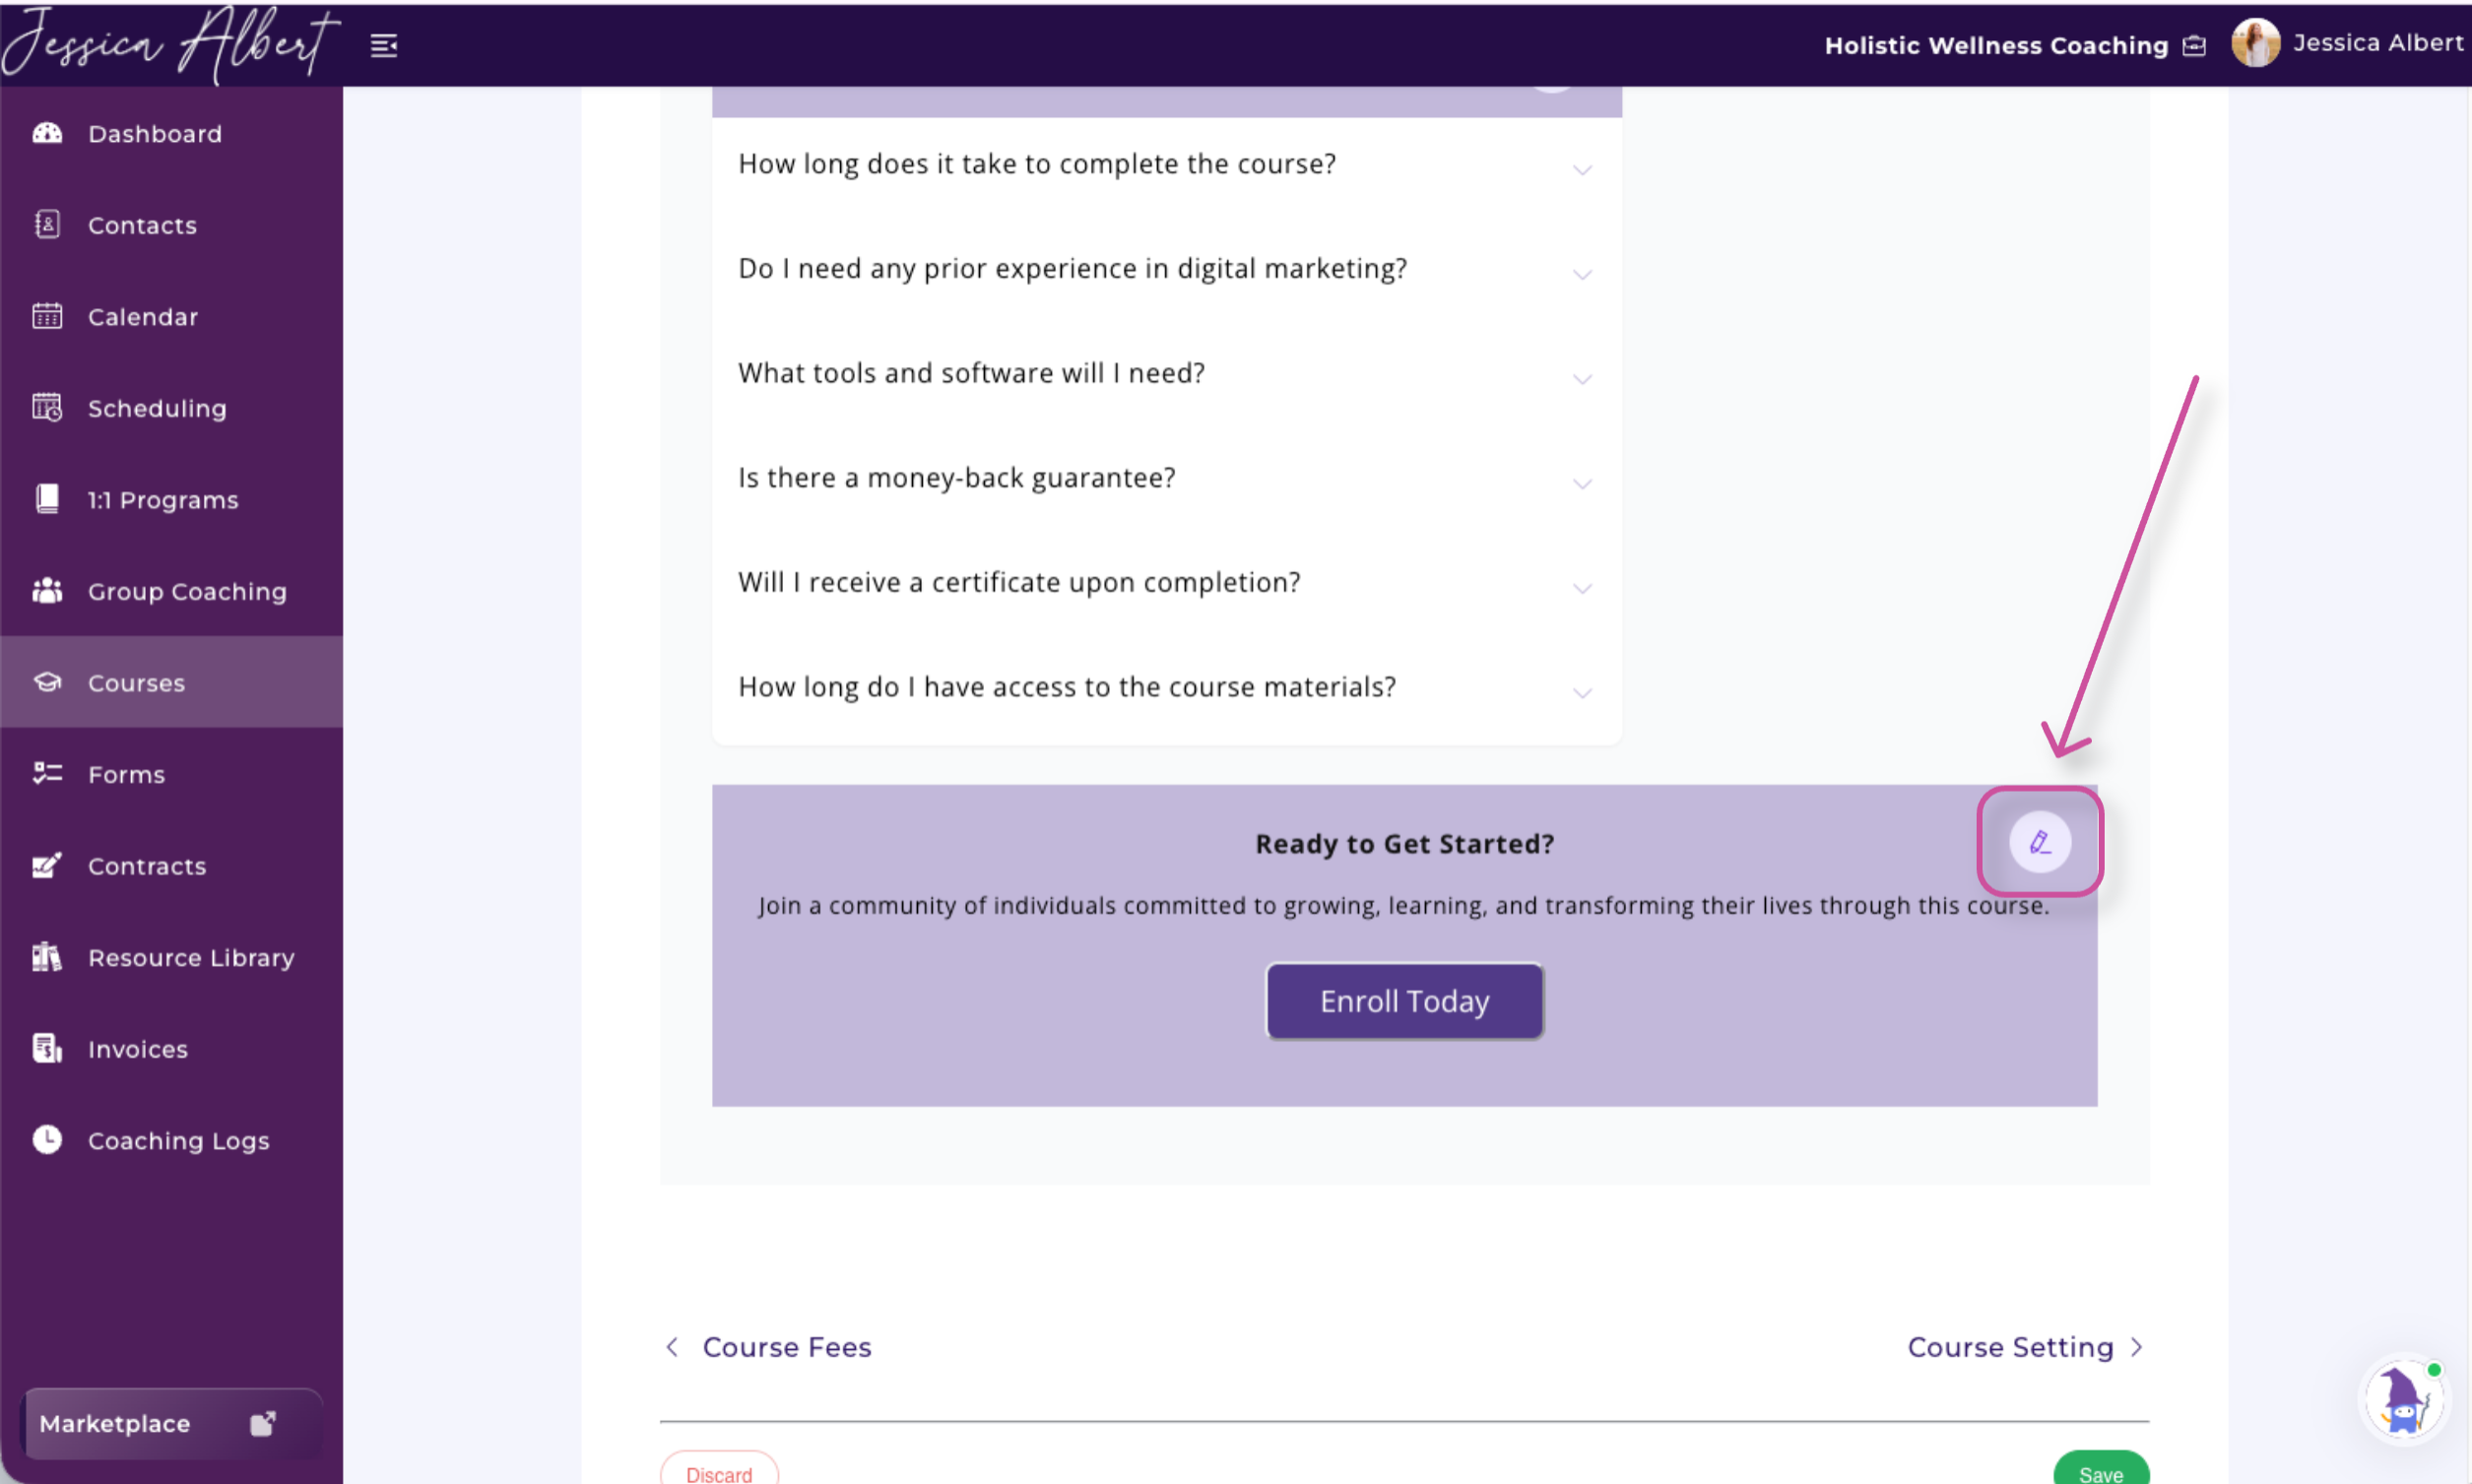
Most sections can be edited by selecting the corresponding pencil icon.
You can edit:
- Banner image
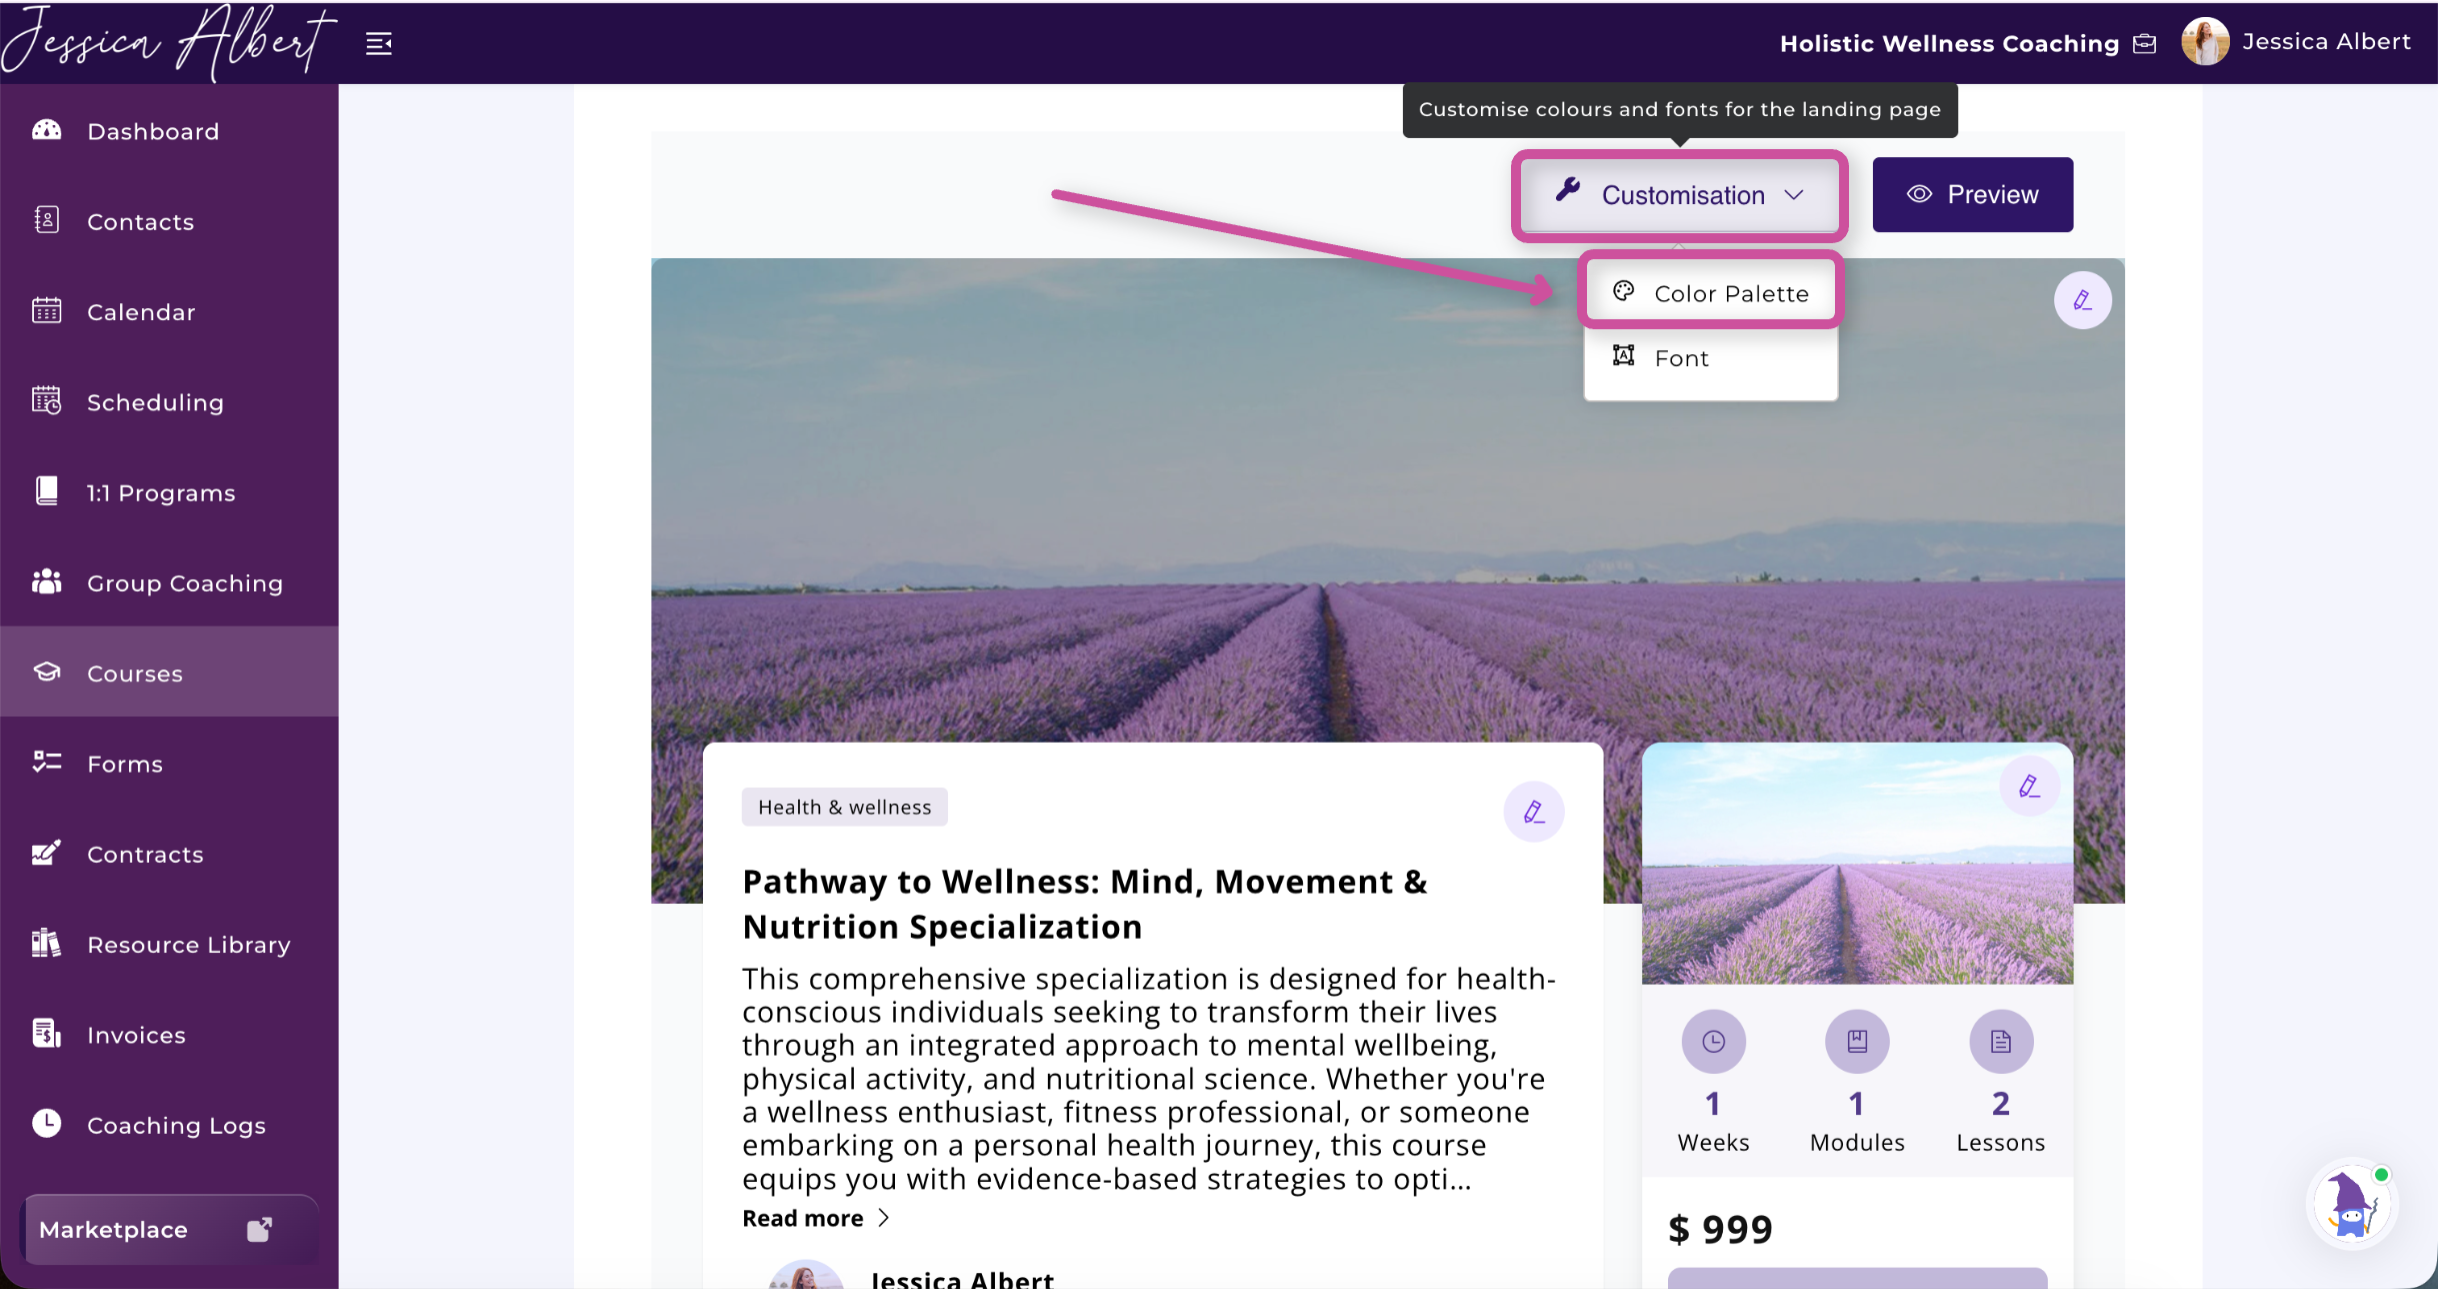
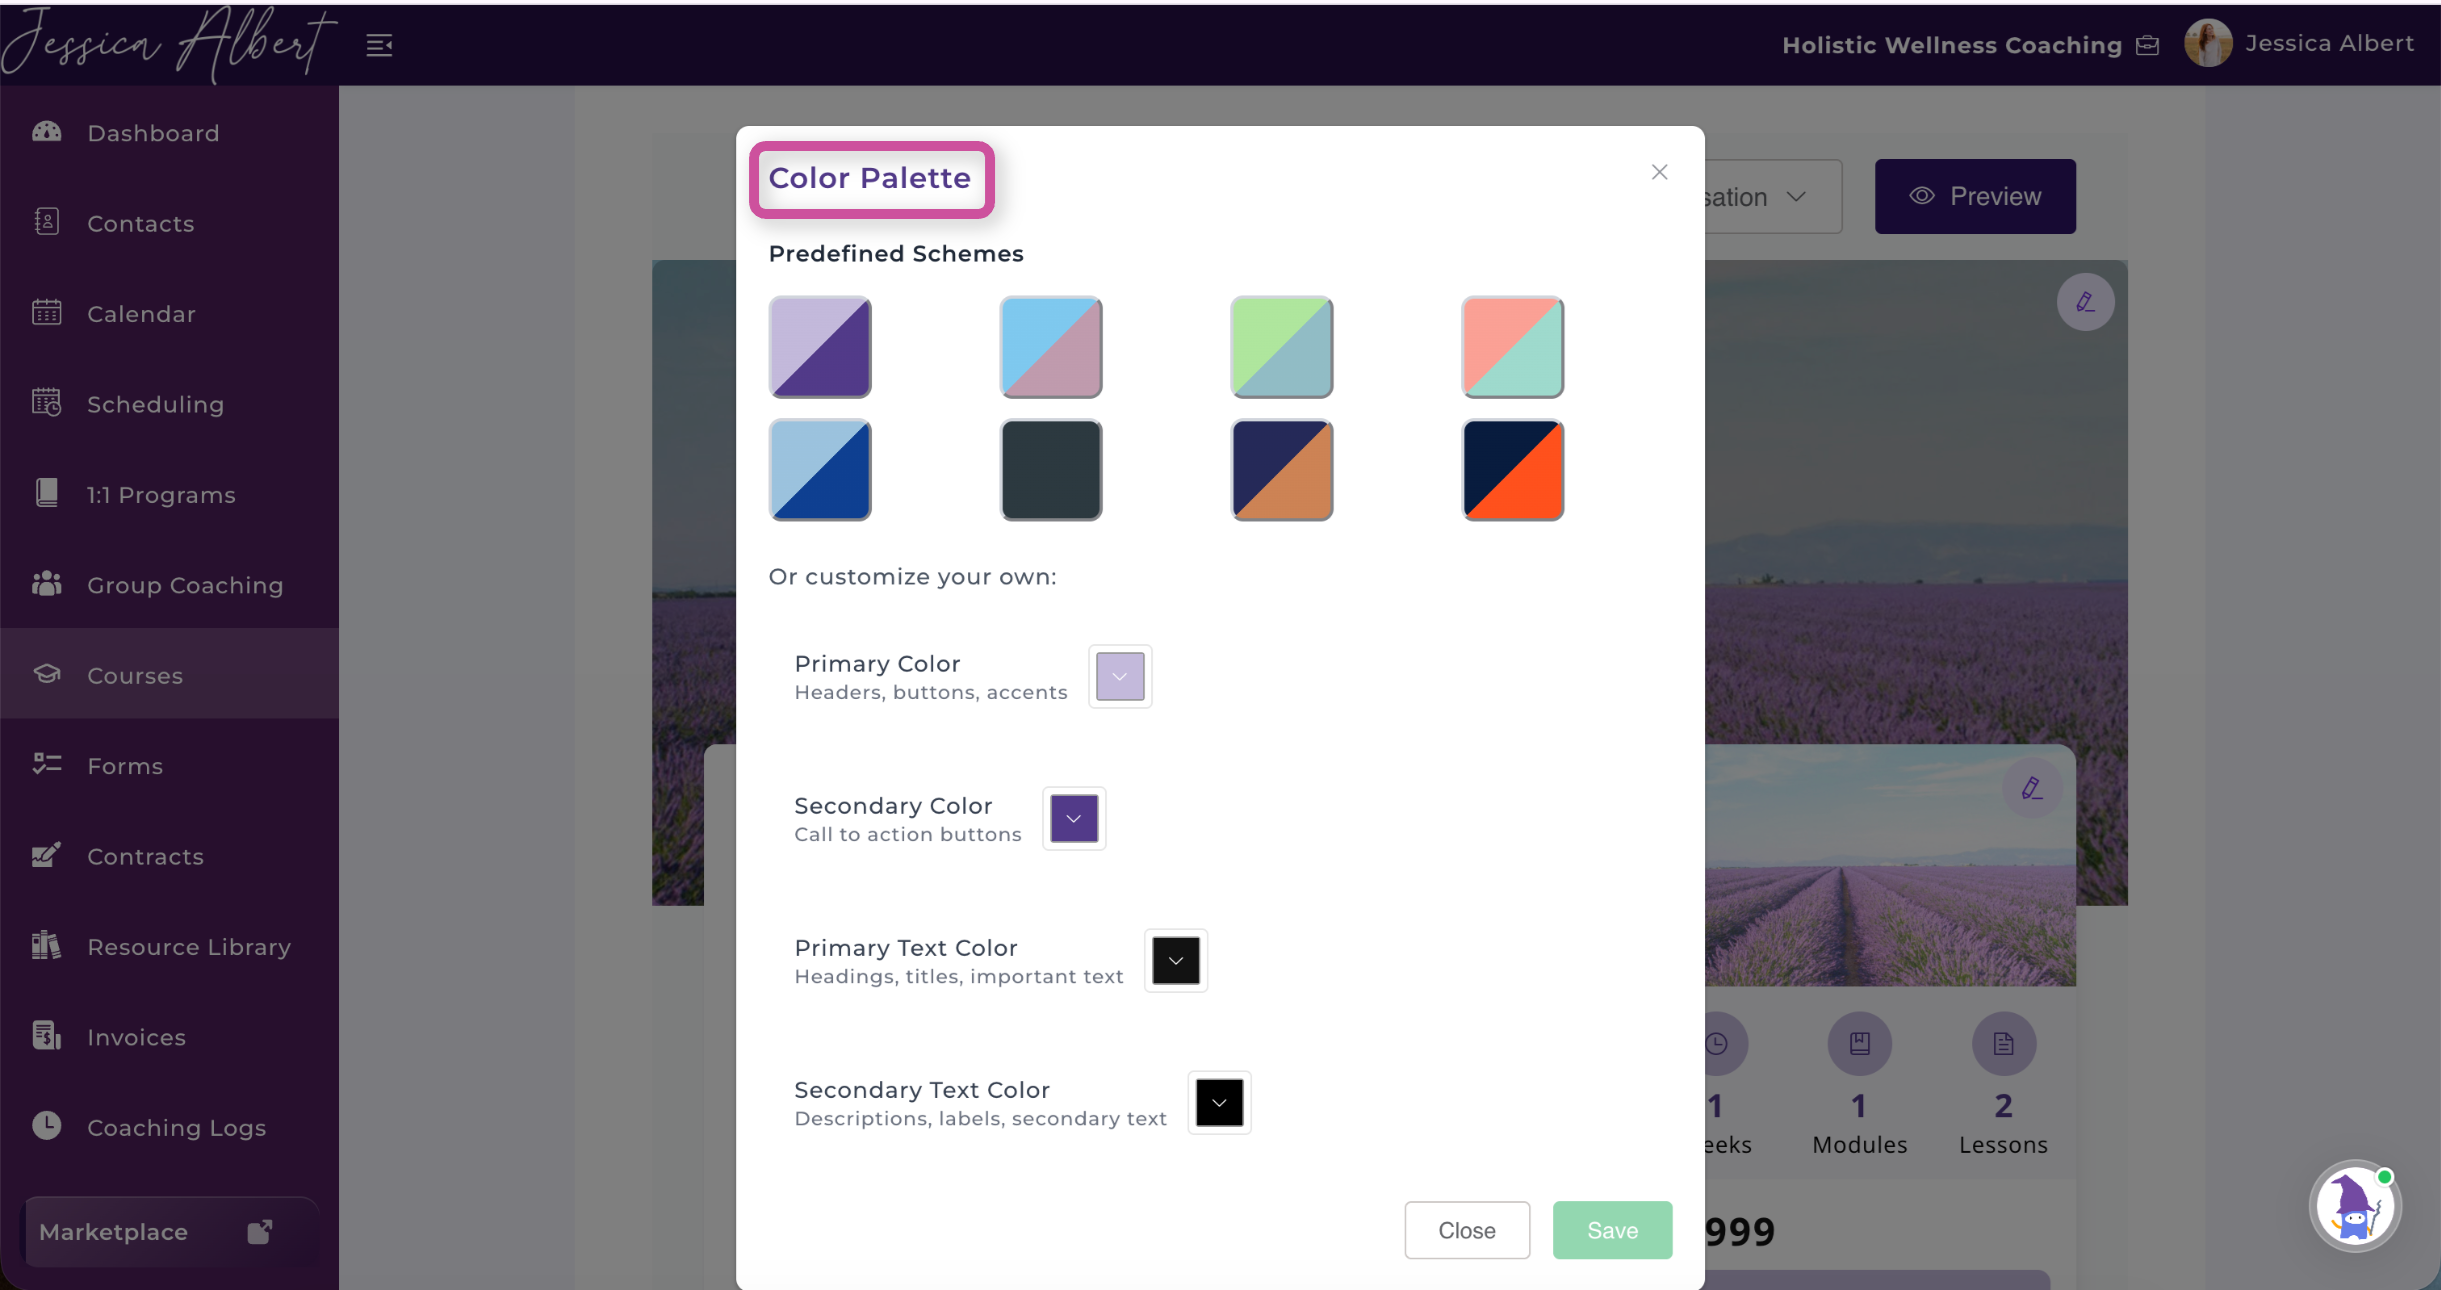
- Colors
- Benefits
- Learning outcomes
- Feature icons
- Testimonials
- Frequently Asked Questions
- Enrollment button
Once you've edited the page accordingly, you can Preview the page. This will show you what the page will look like to clients signing up for your course.
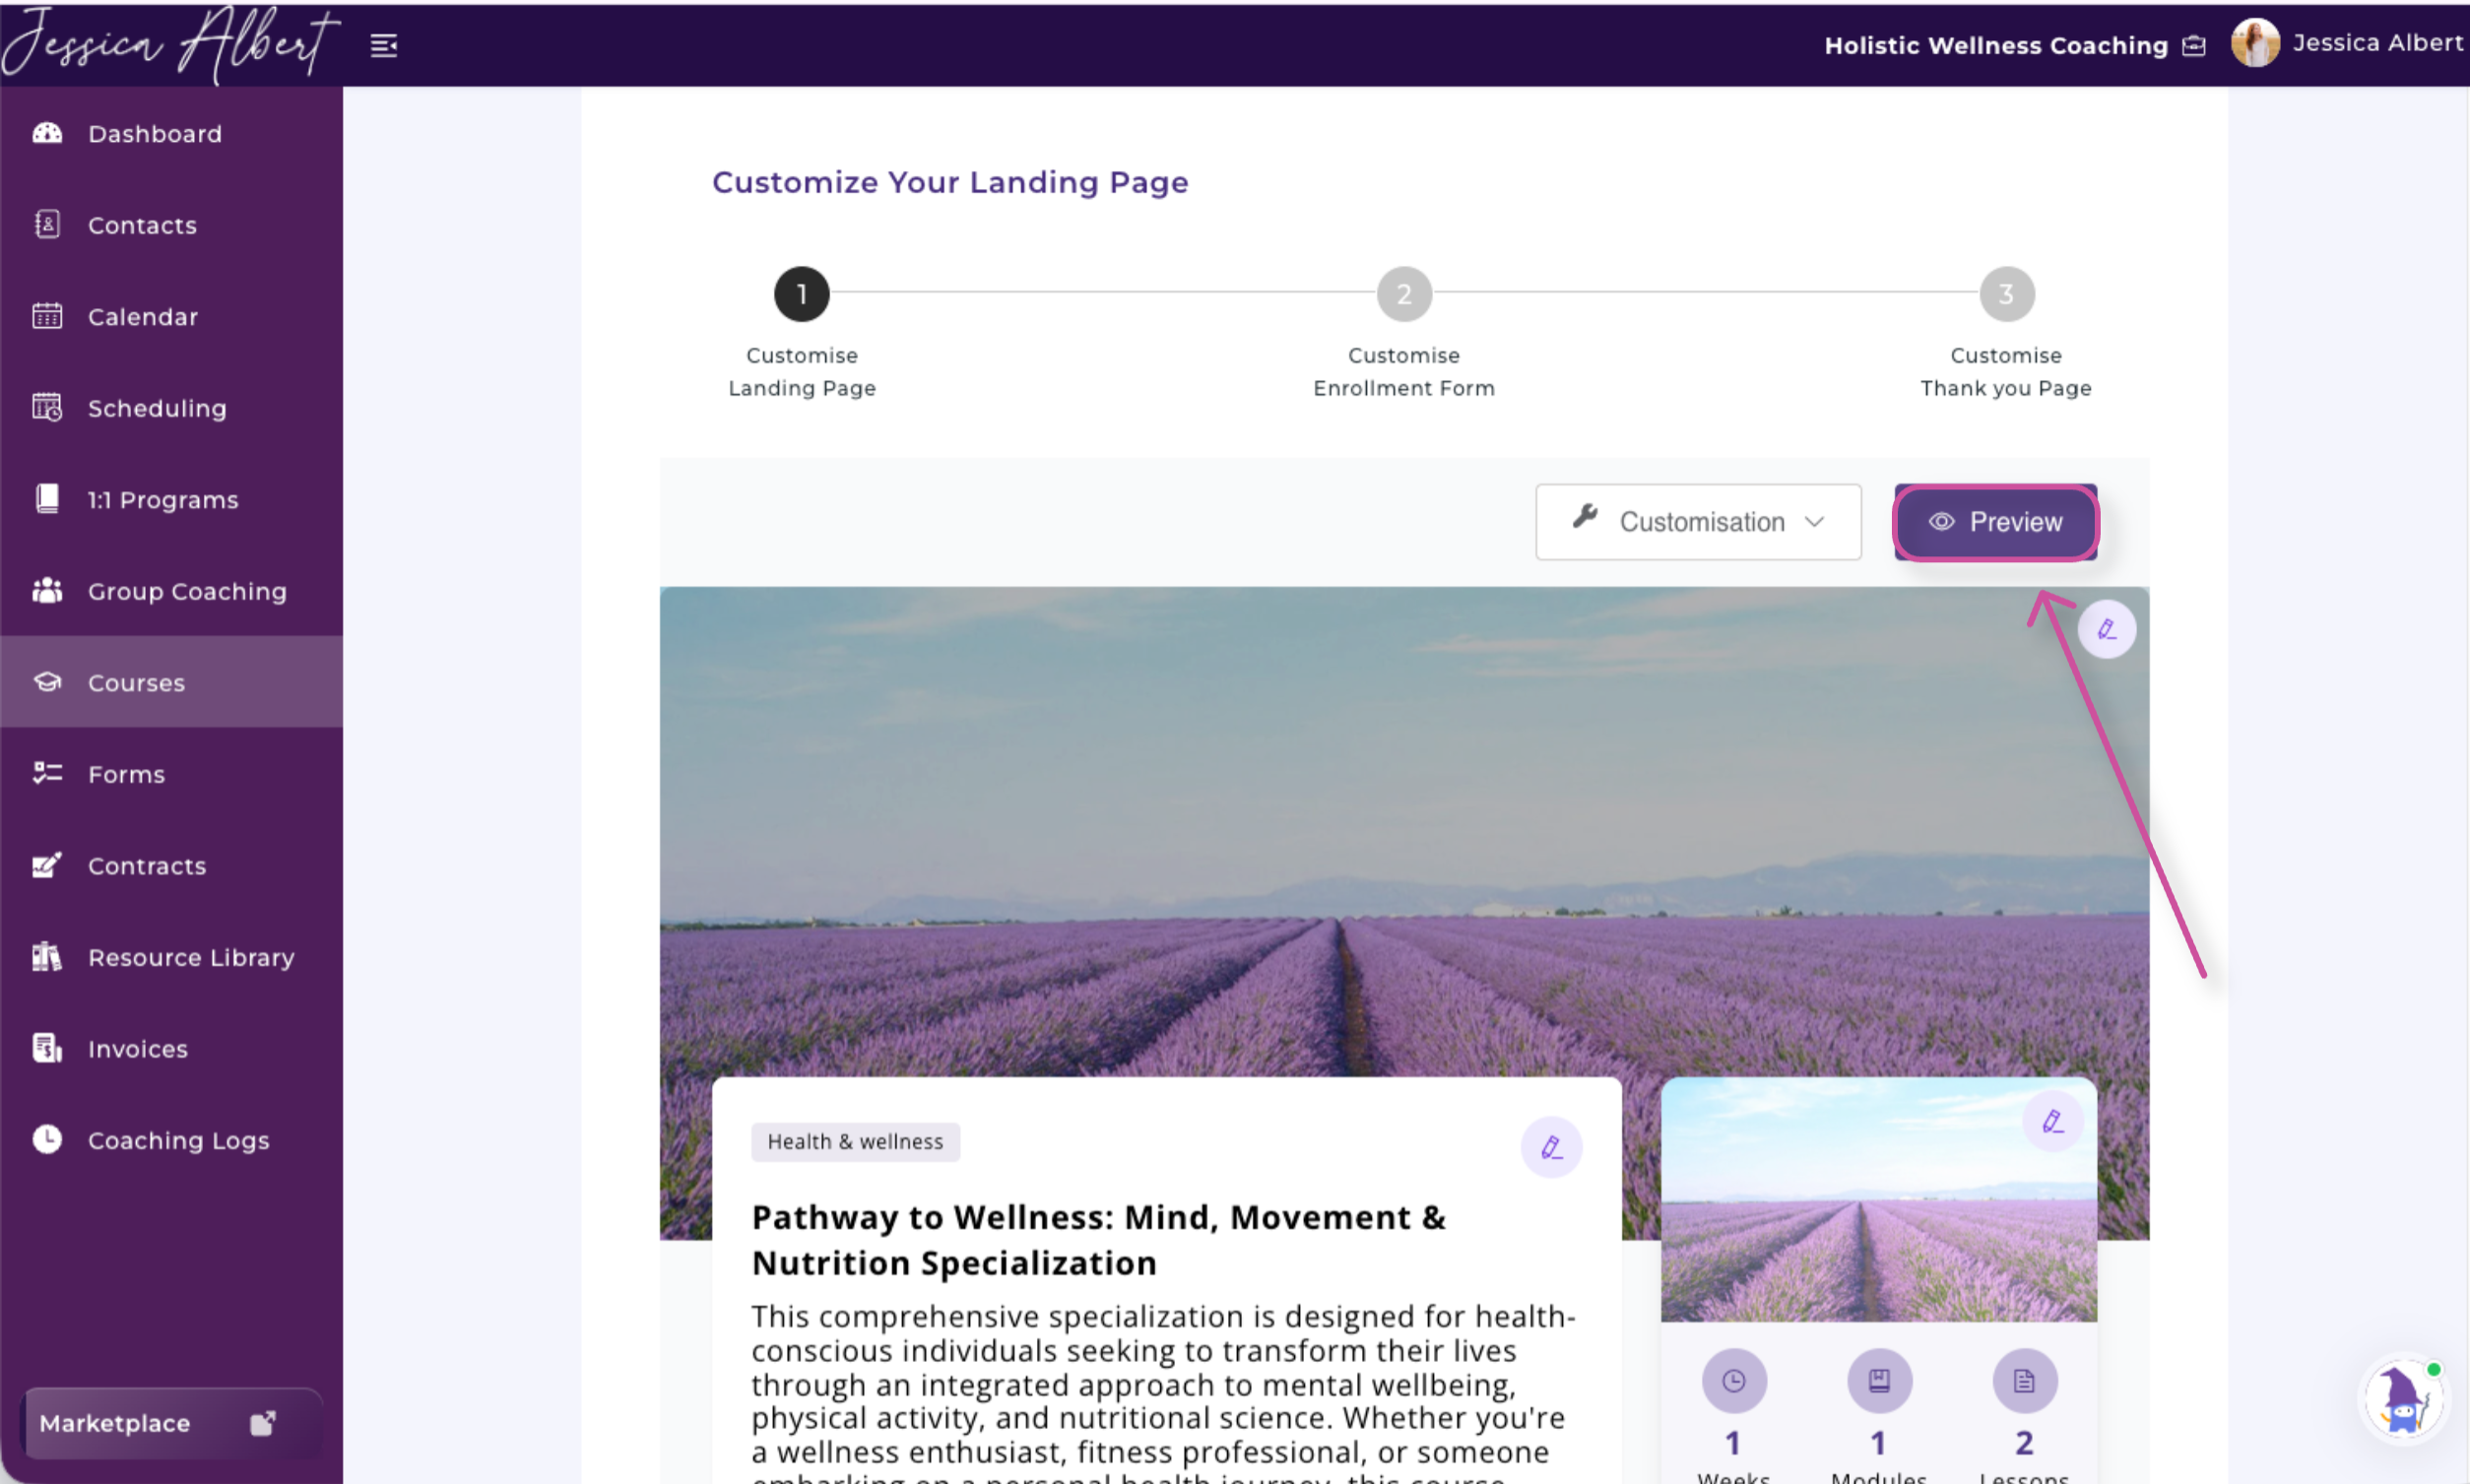
The landing page comes pre-built, helping you launch courses more quickly while still matching your brand.
2) Customise Enrollment Form
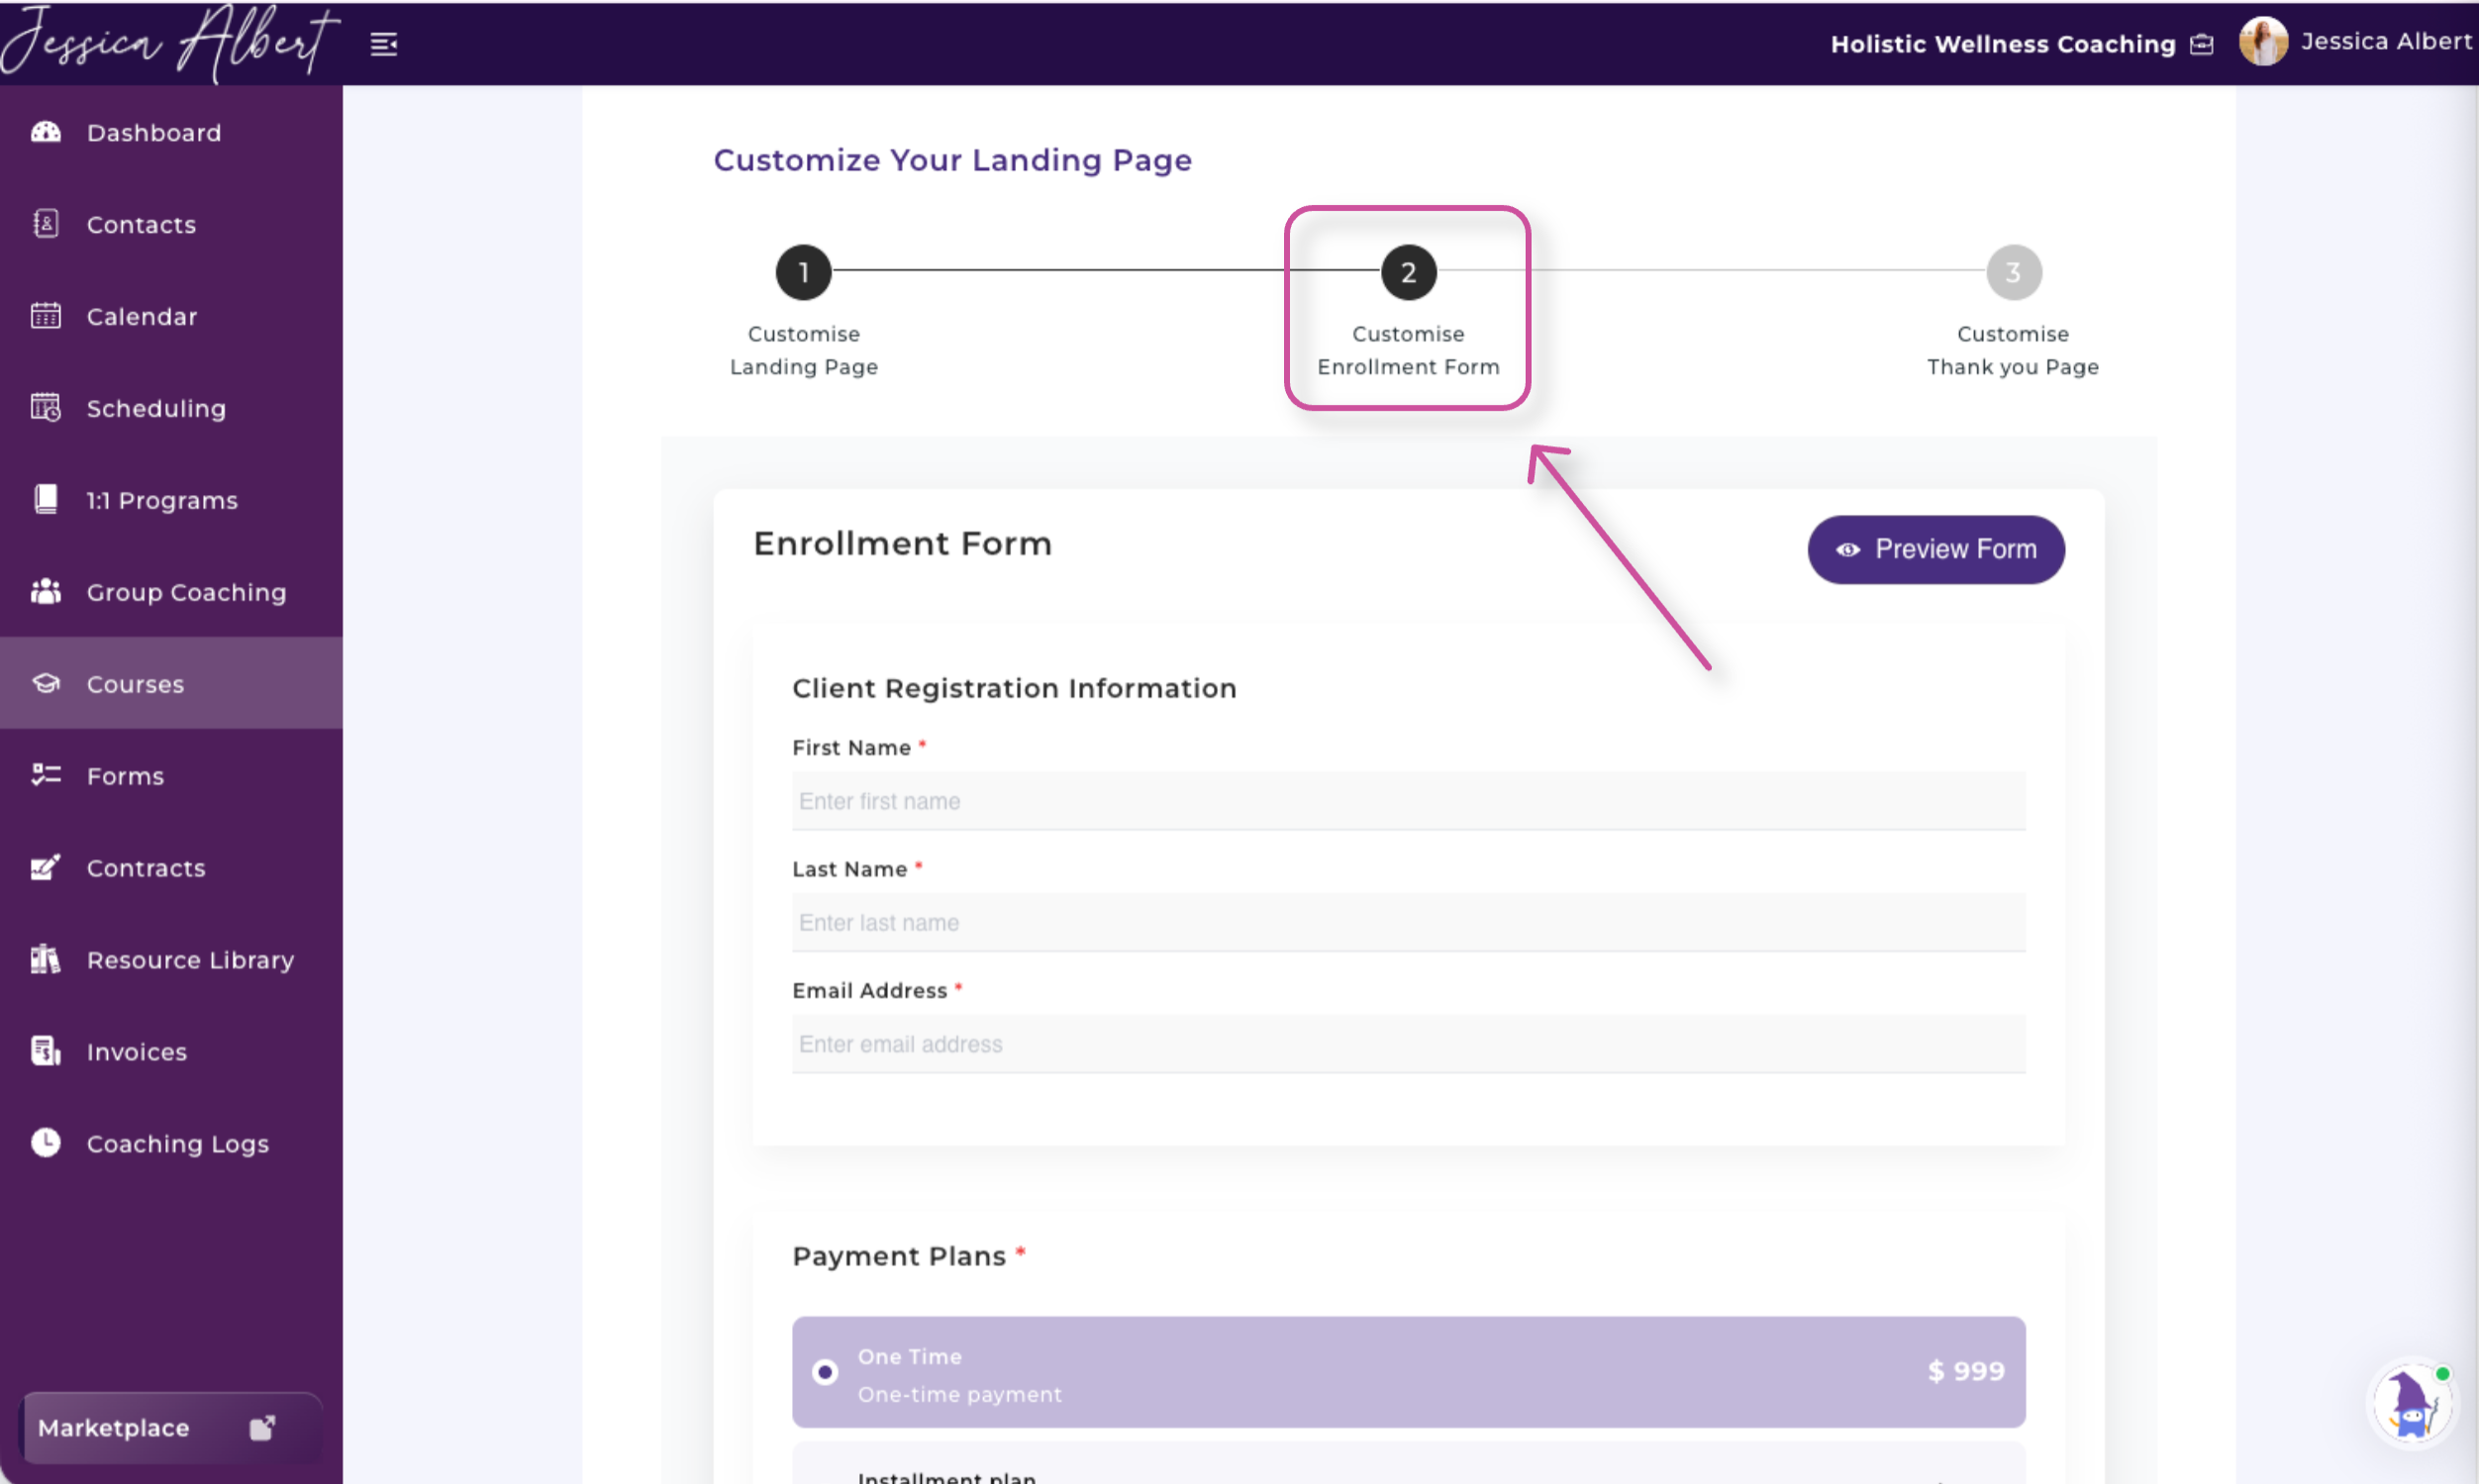
On this page, you can edit the Enrollment Form.
This shows the
- Client Registration Information
- Payment Plans
- And you have the option to Add Terms and Conditions.
Plus, can edit your Call-to-Action Button Settings.
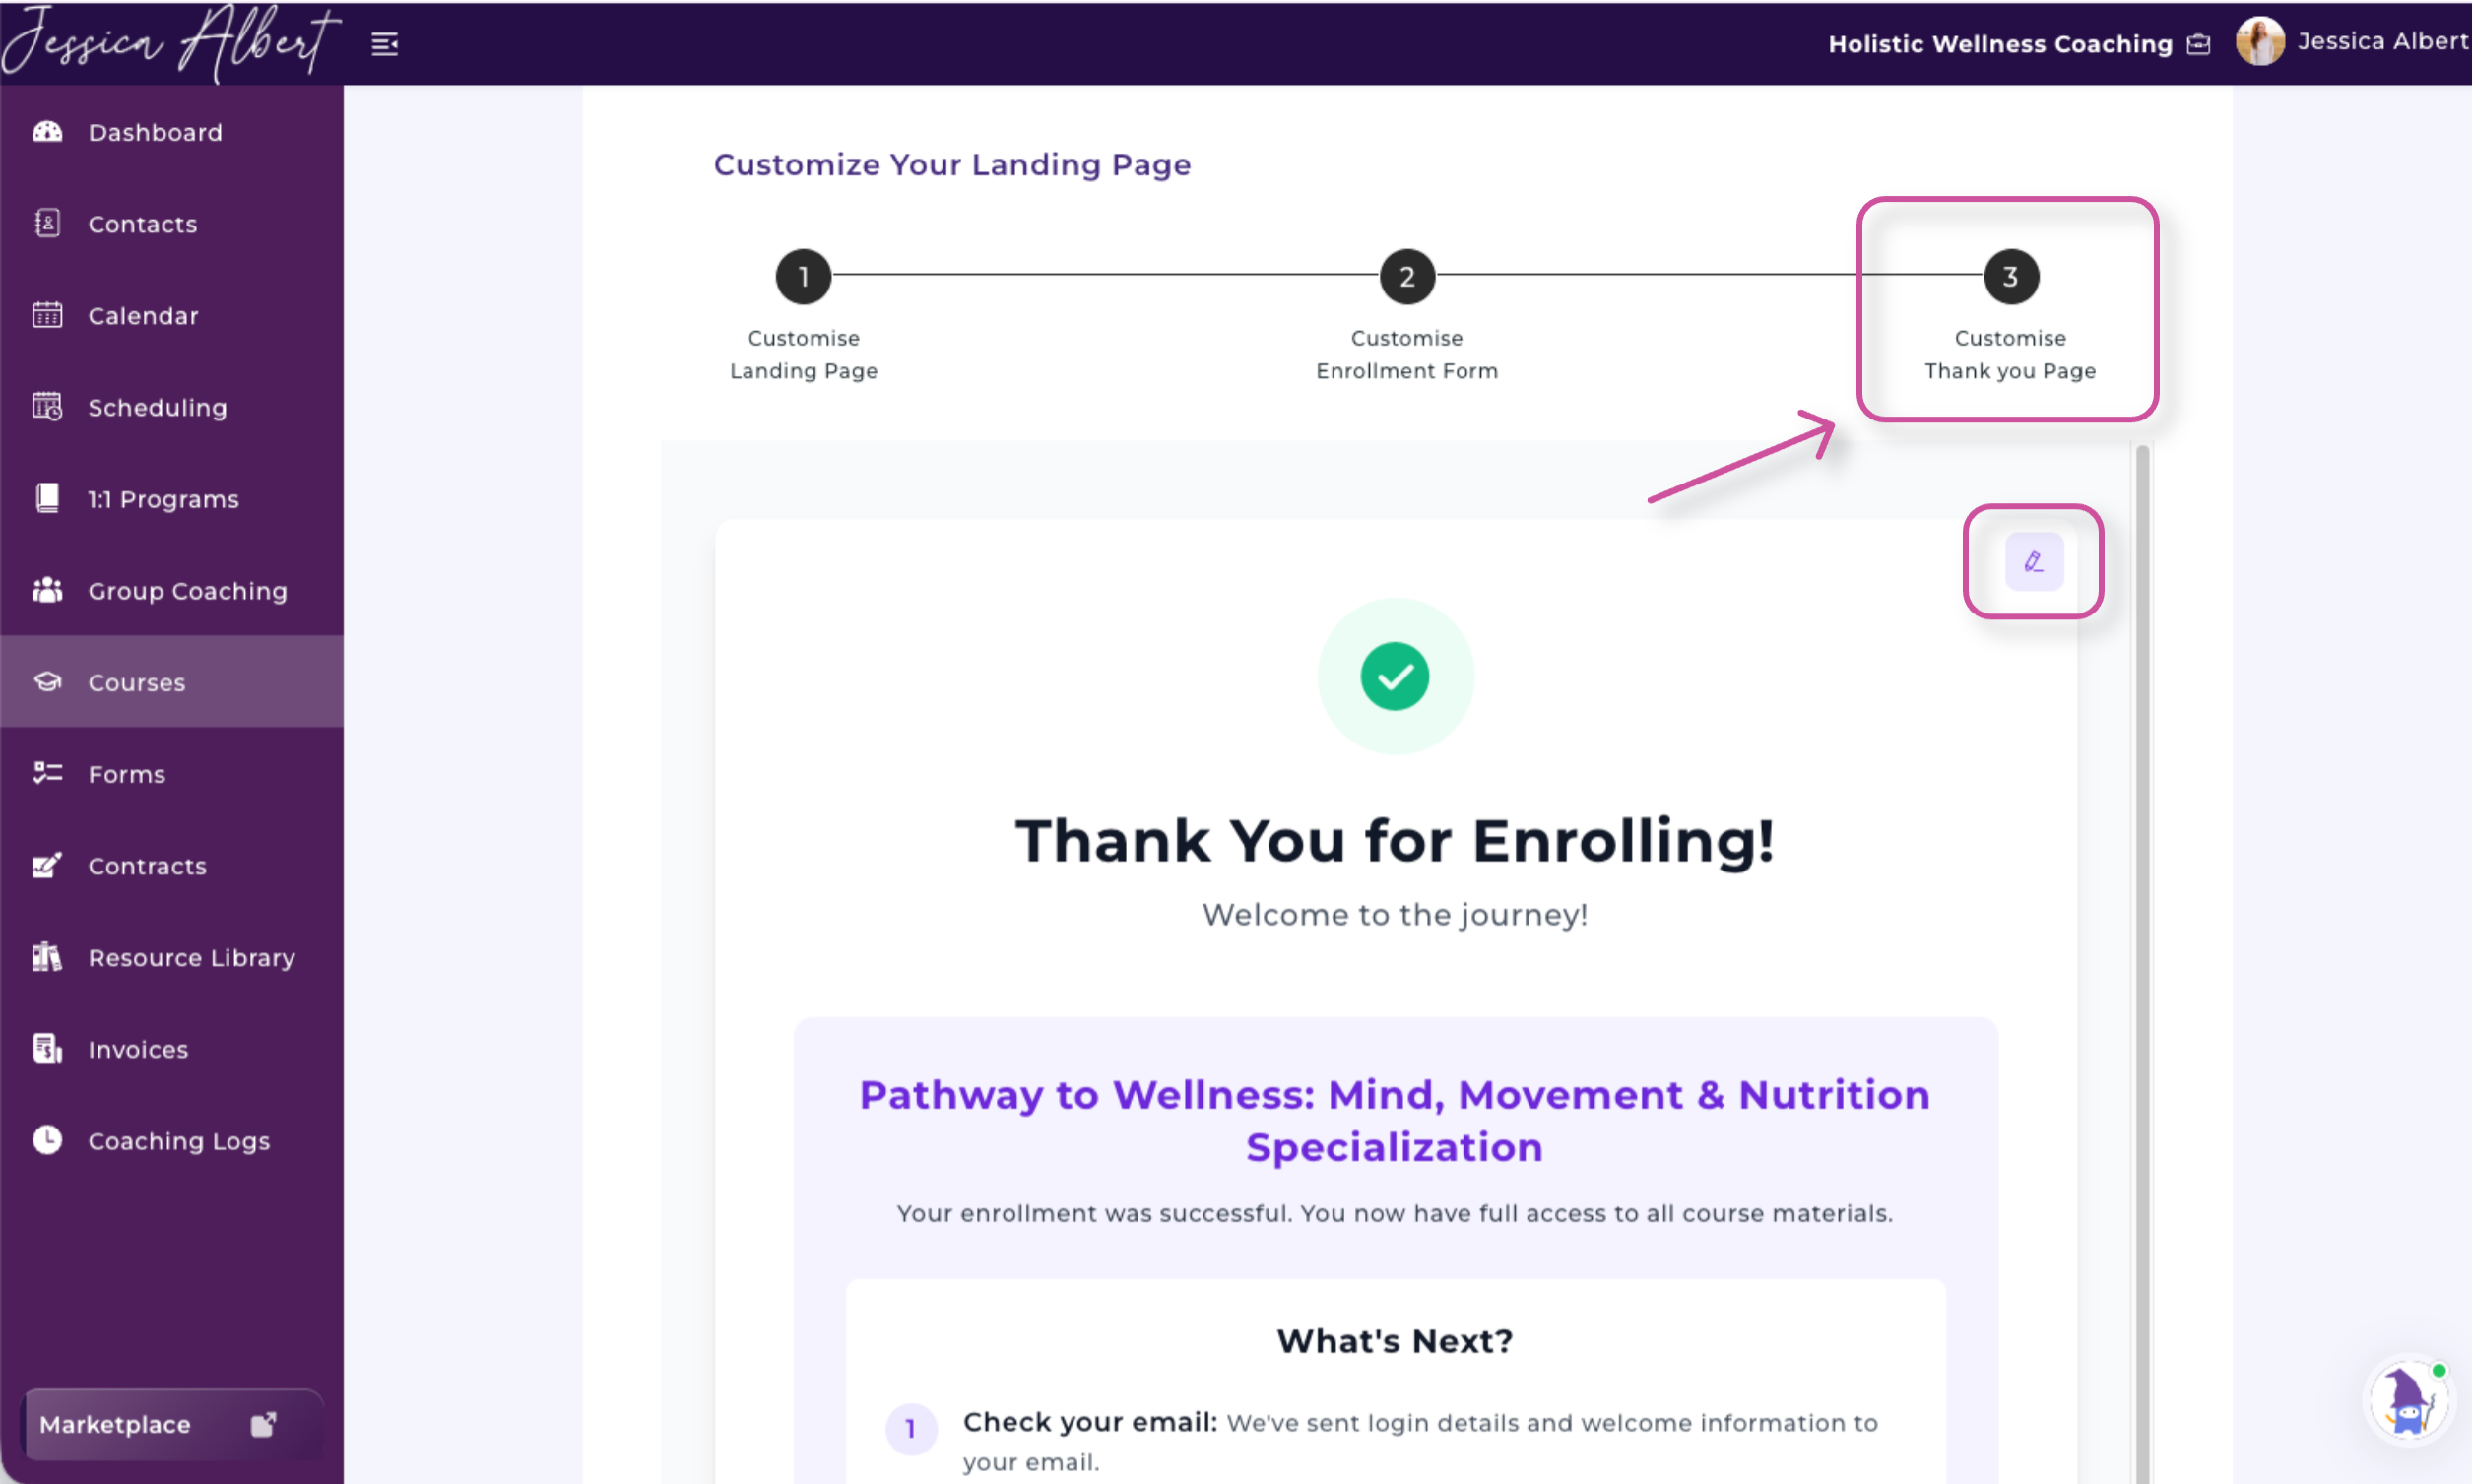
3) Customise Thank You Page
This is where you can edit what the thank you page / check out page looks like after a client signs up for your course.
Course Setting
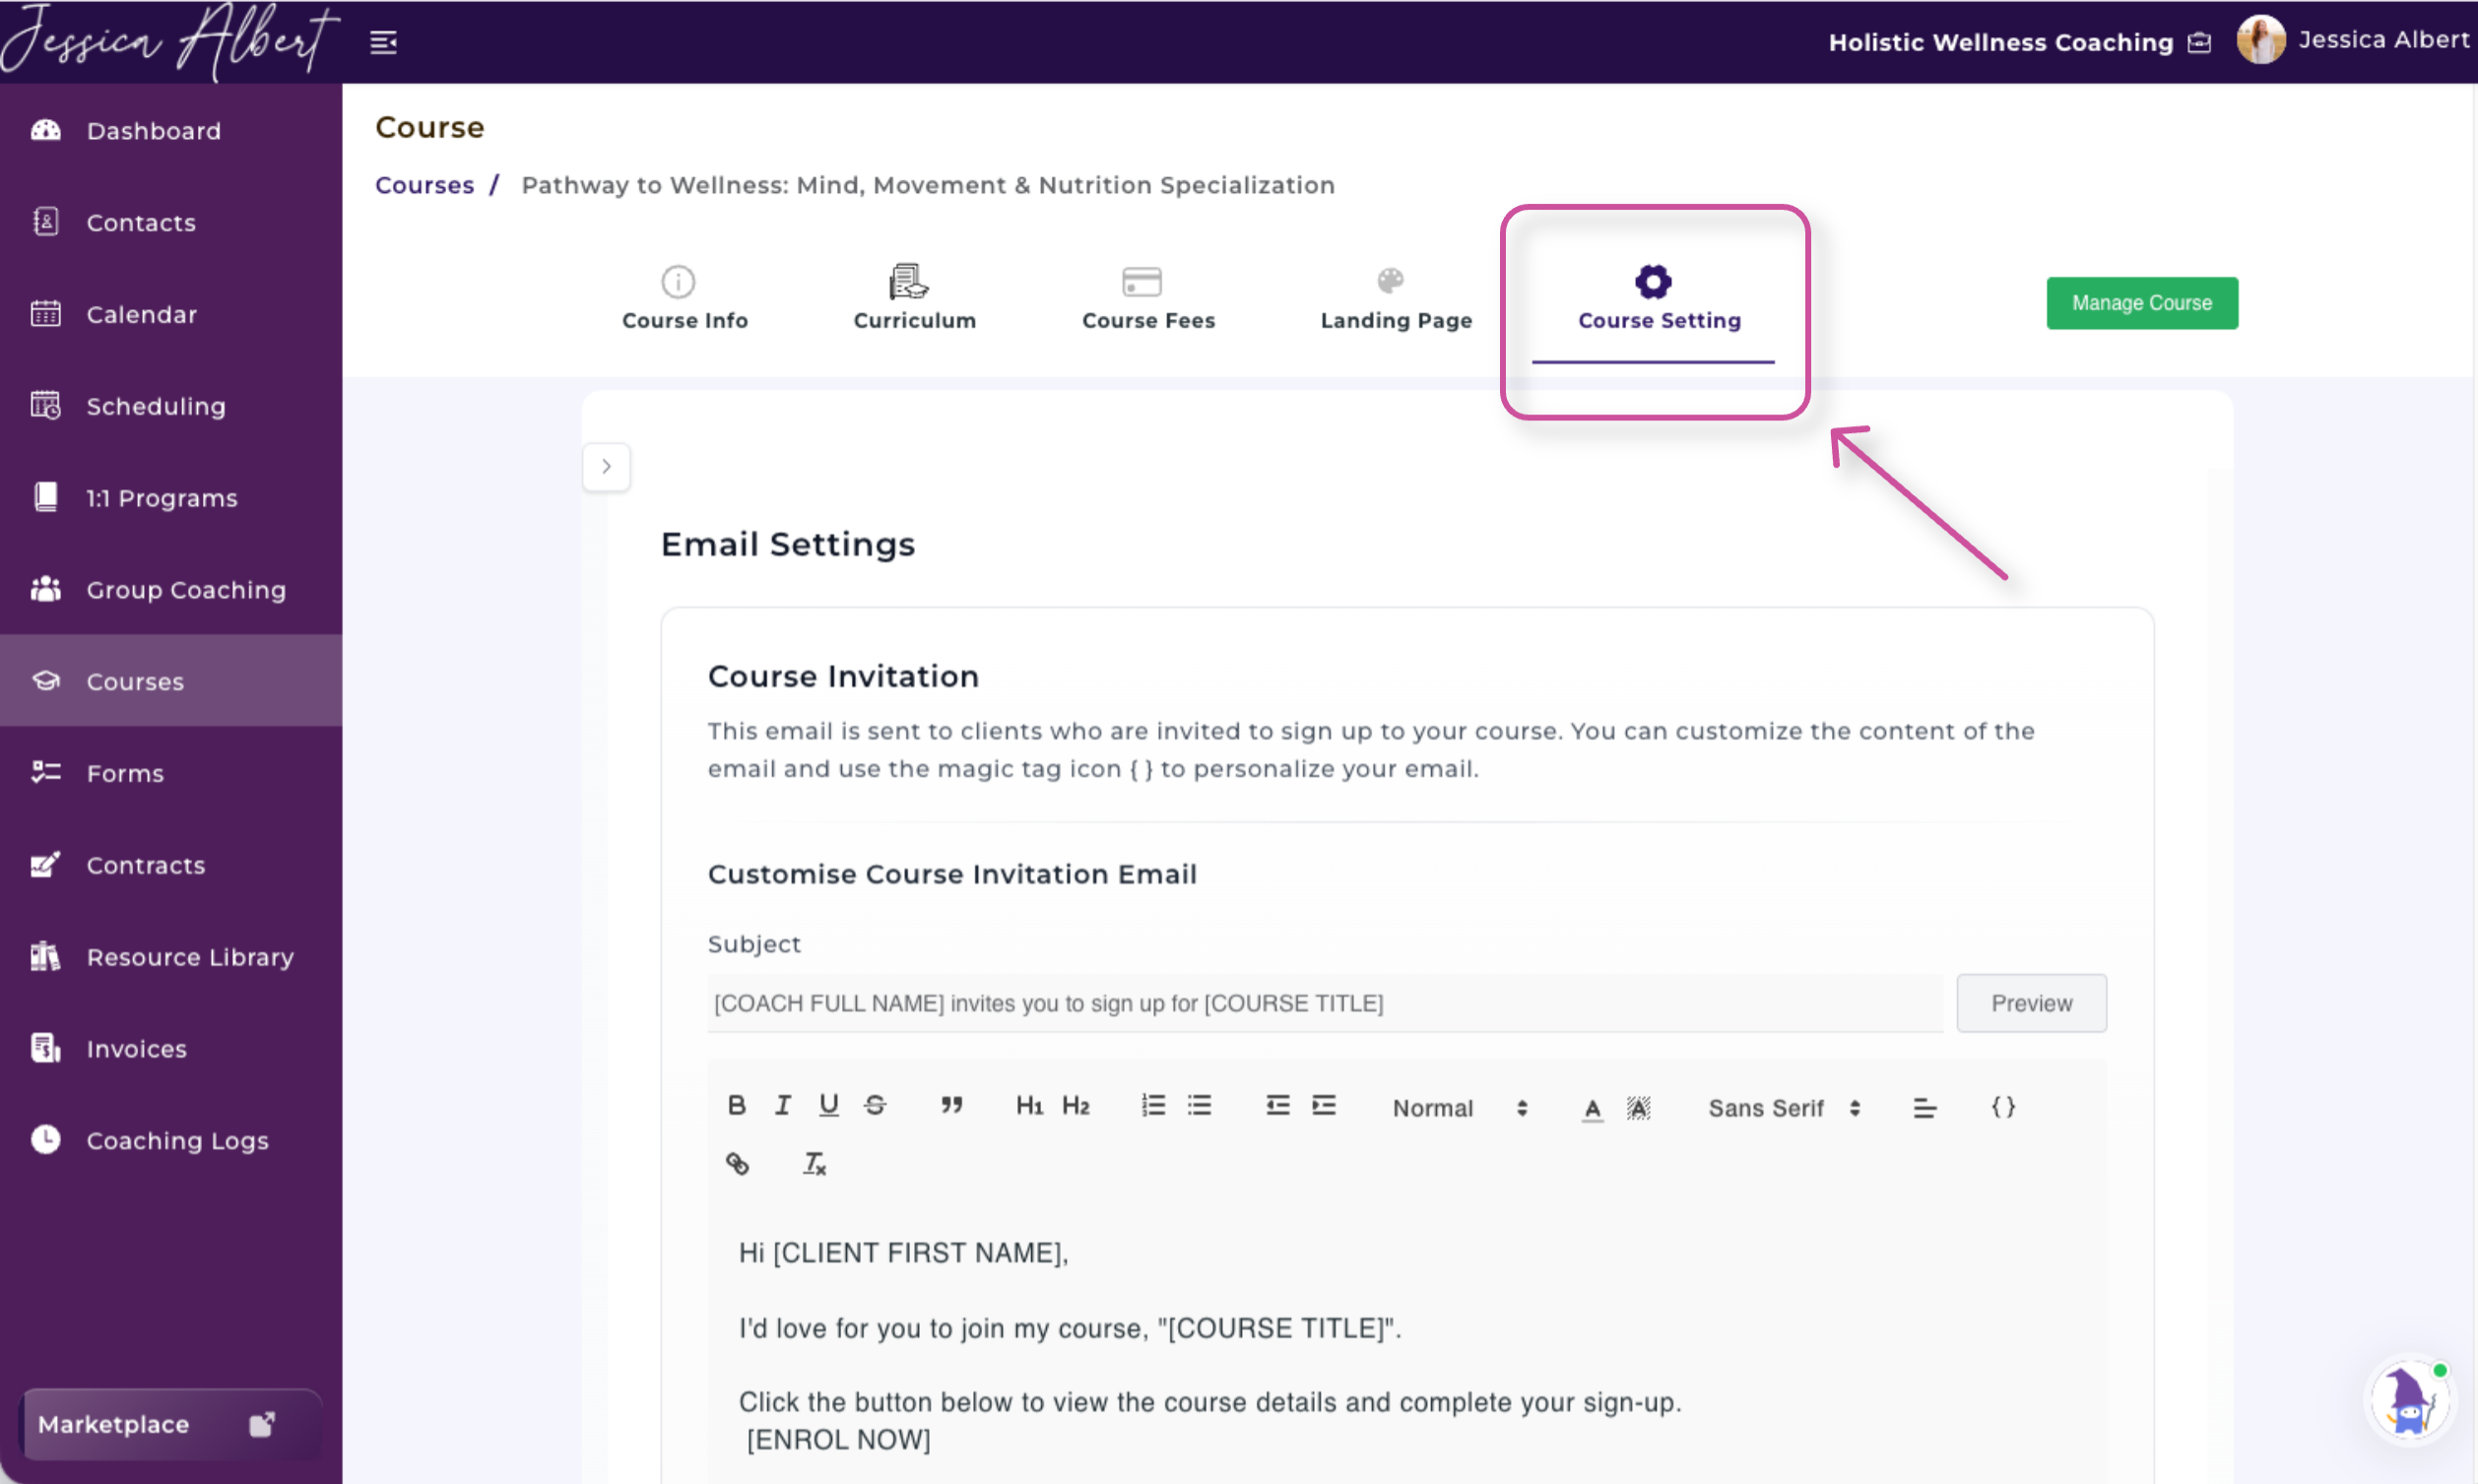
Email Templates
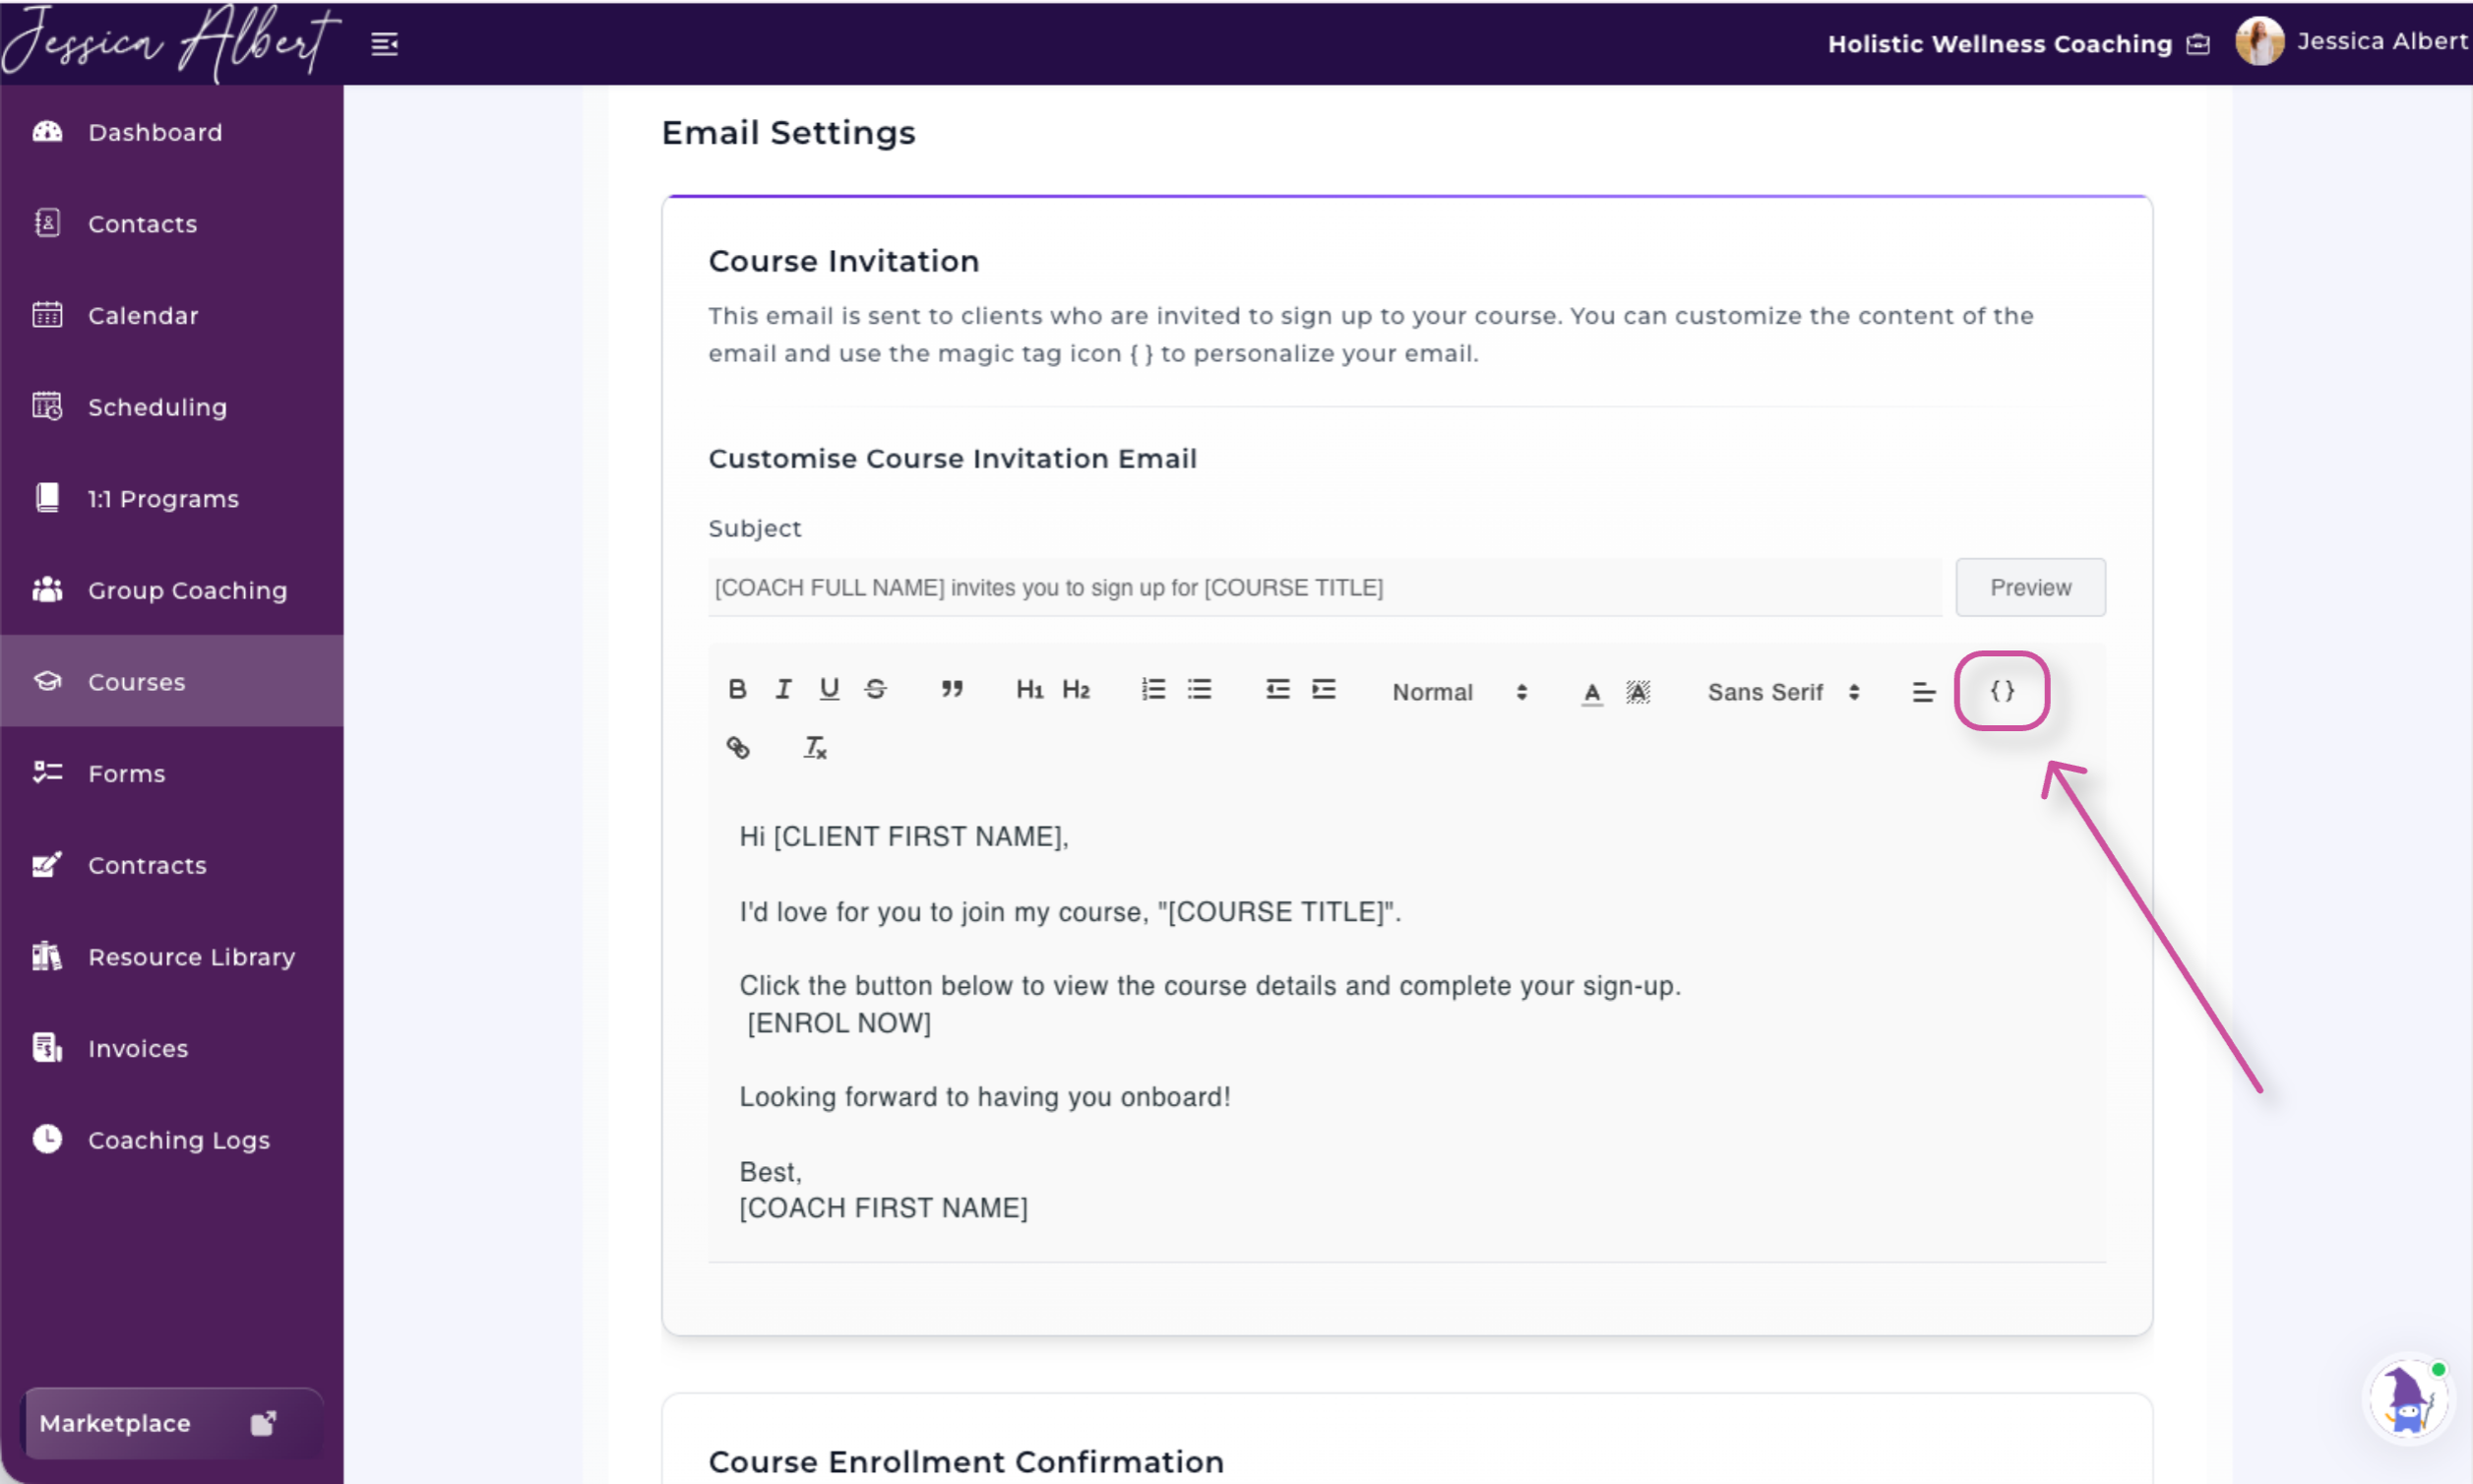
CoachVantage automatically includes several email templates. You can customize the content of the email and use the magic tag icon { } to personalize your email.
You can either scroll down to view the templates or skip a template to edit by opening the Side Bar.
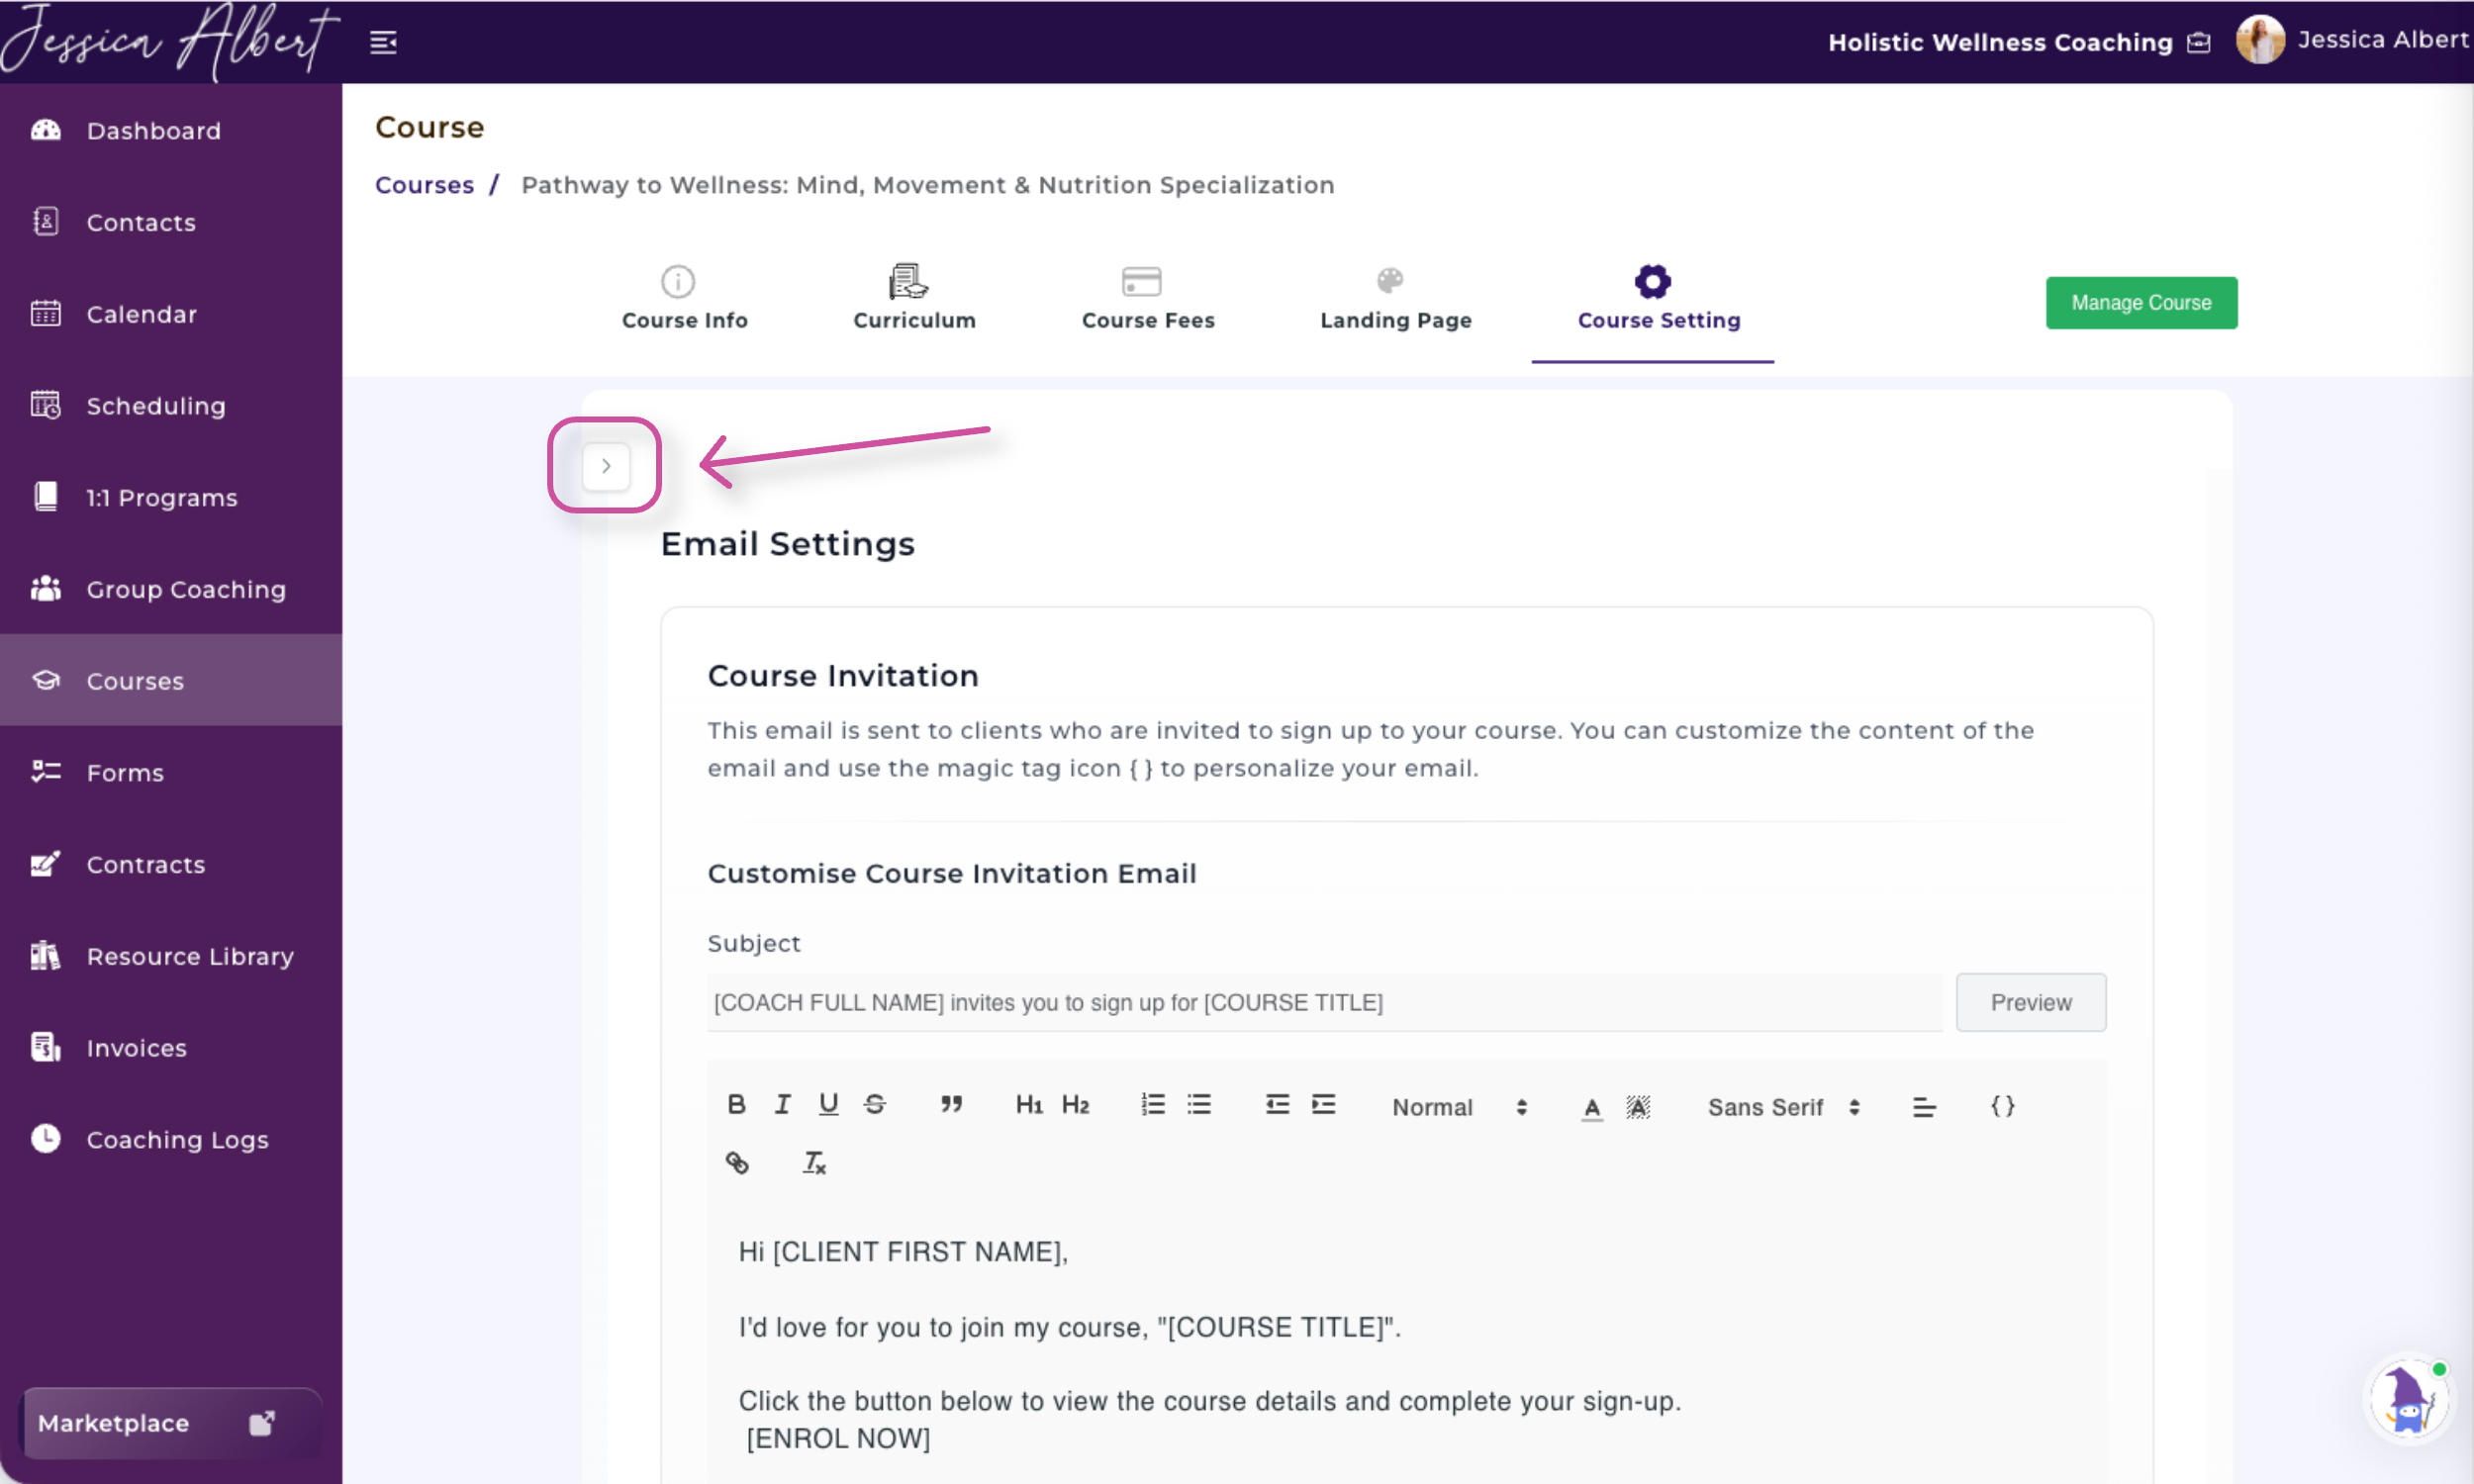
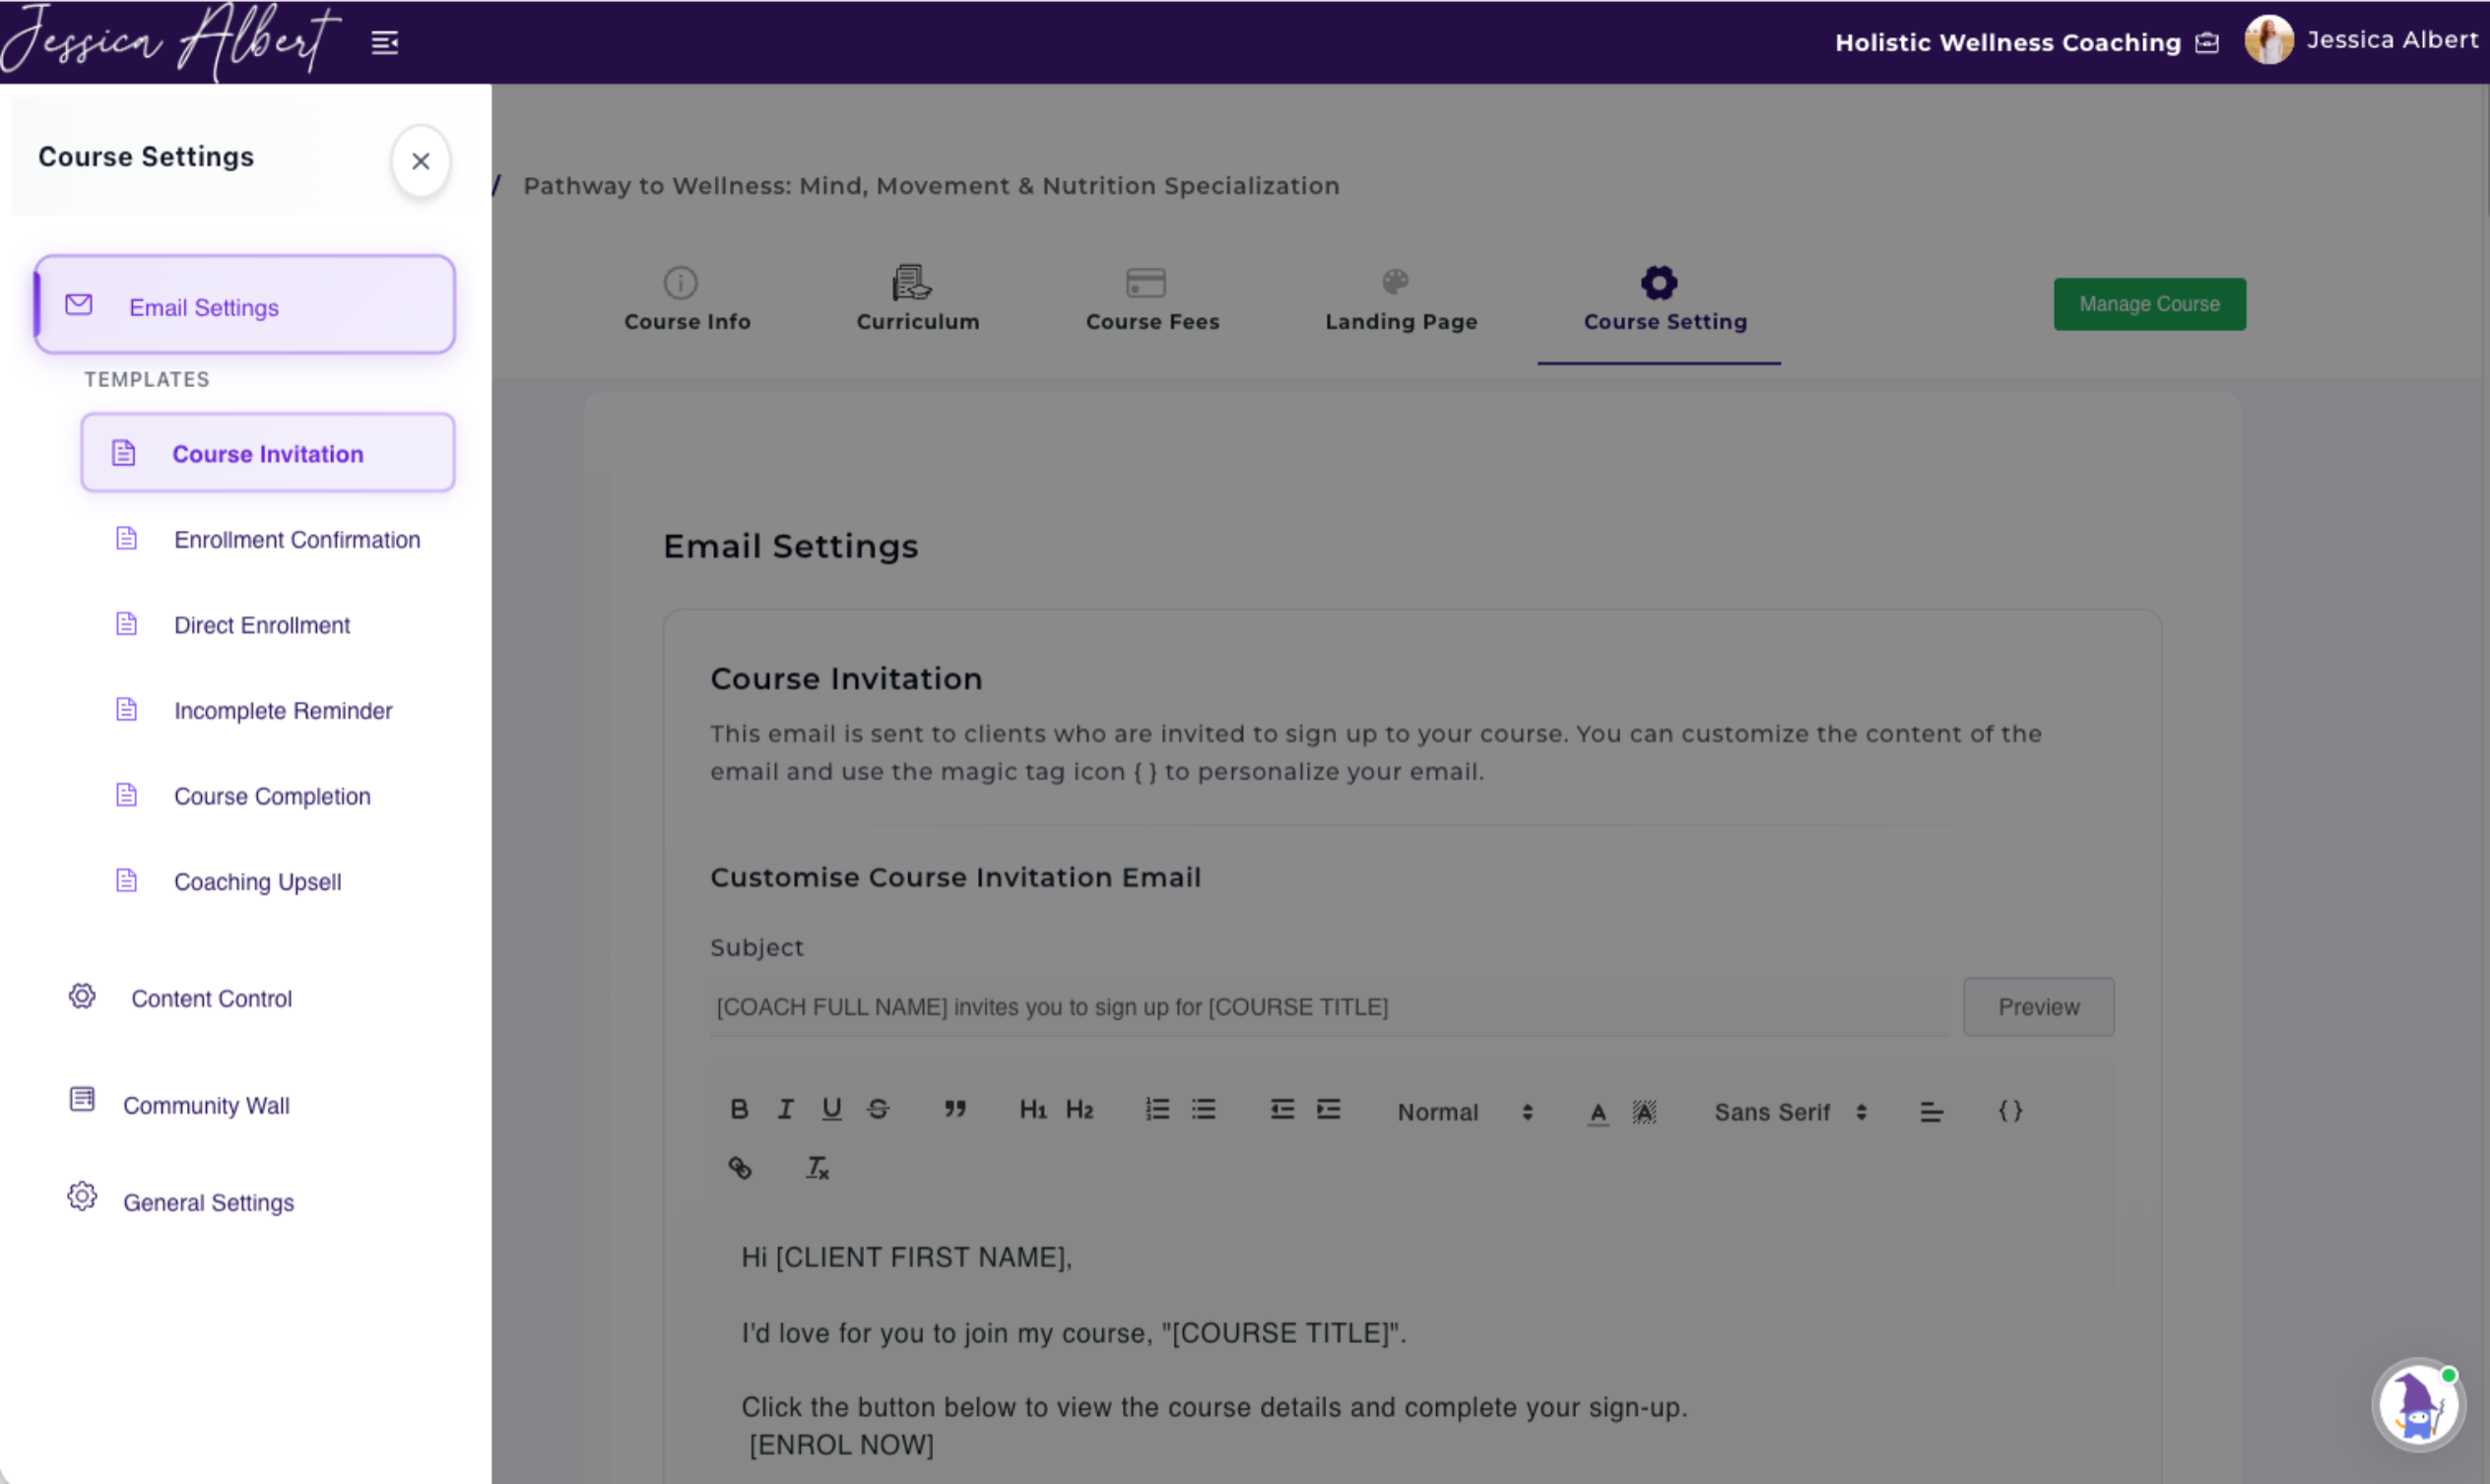
Available templates include:
- Course Invitation
- Enrollment Confirmation
- Direct Enrollment
- Incomplete Reminder
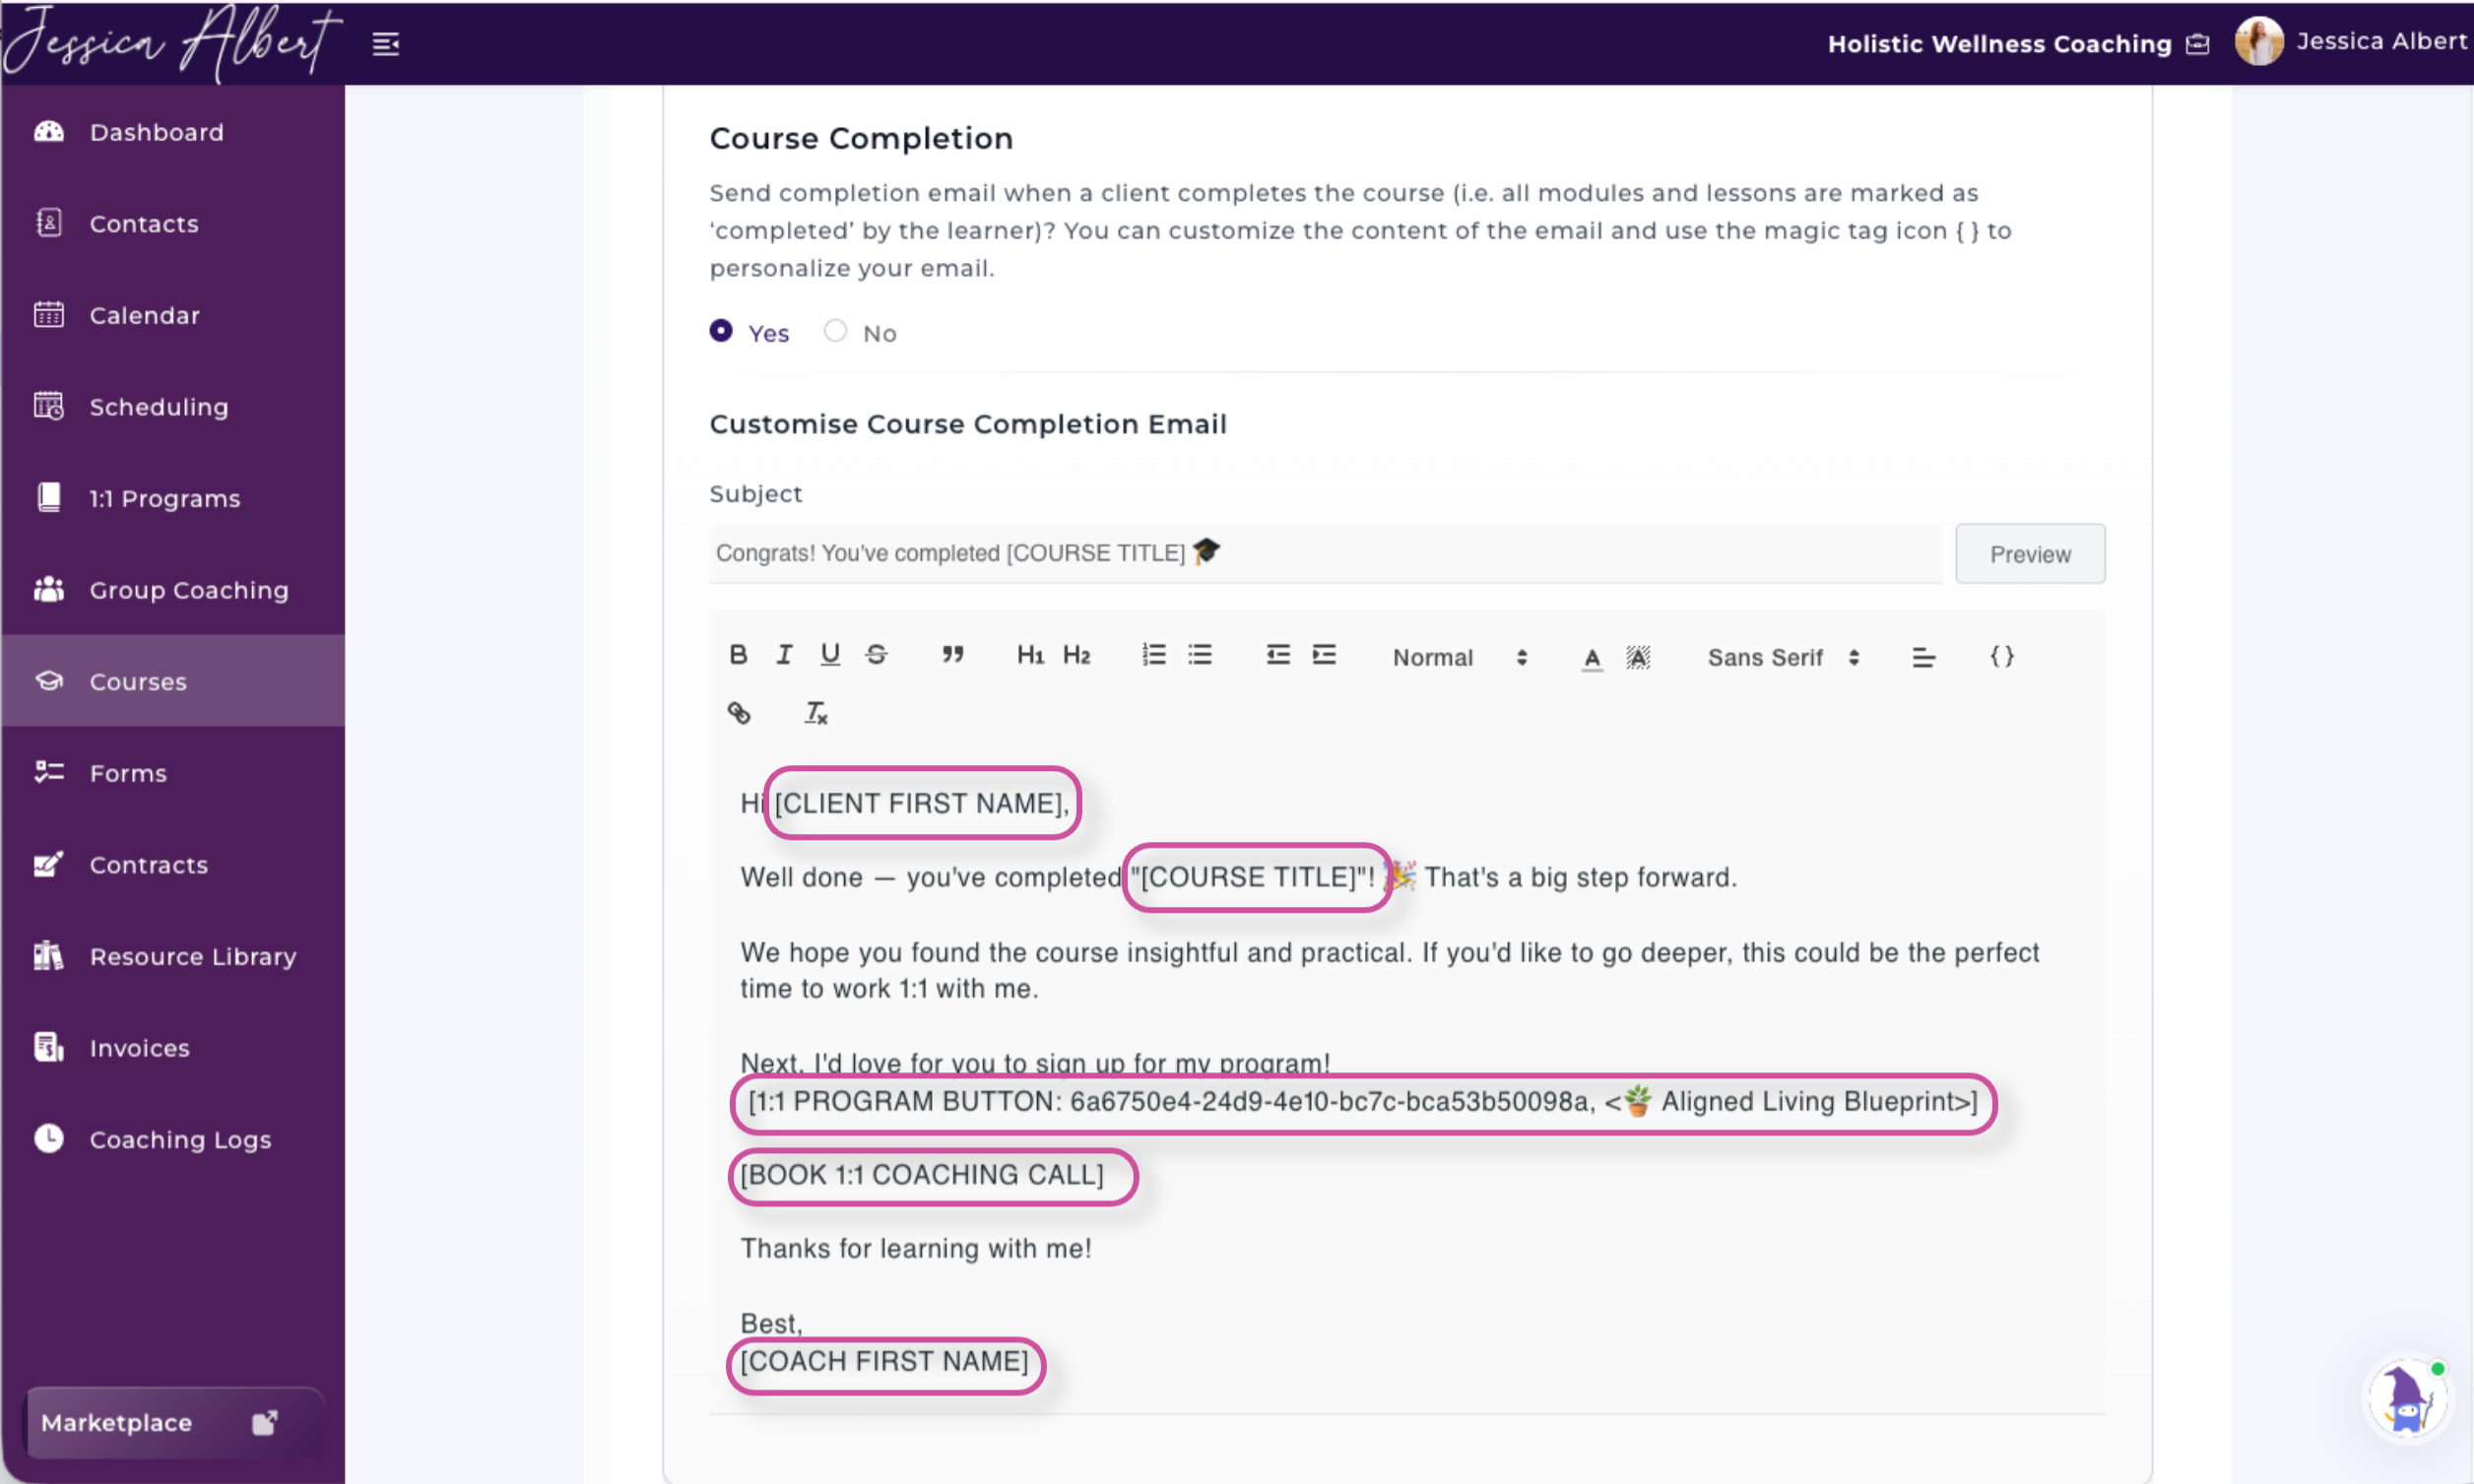
- Course Completion
- Coaching Upsell
Each template can be customized to match your tone and branding.
Using Magic Tags
Magic Tags automatically insert personalized information into your emails.
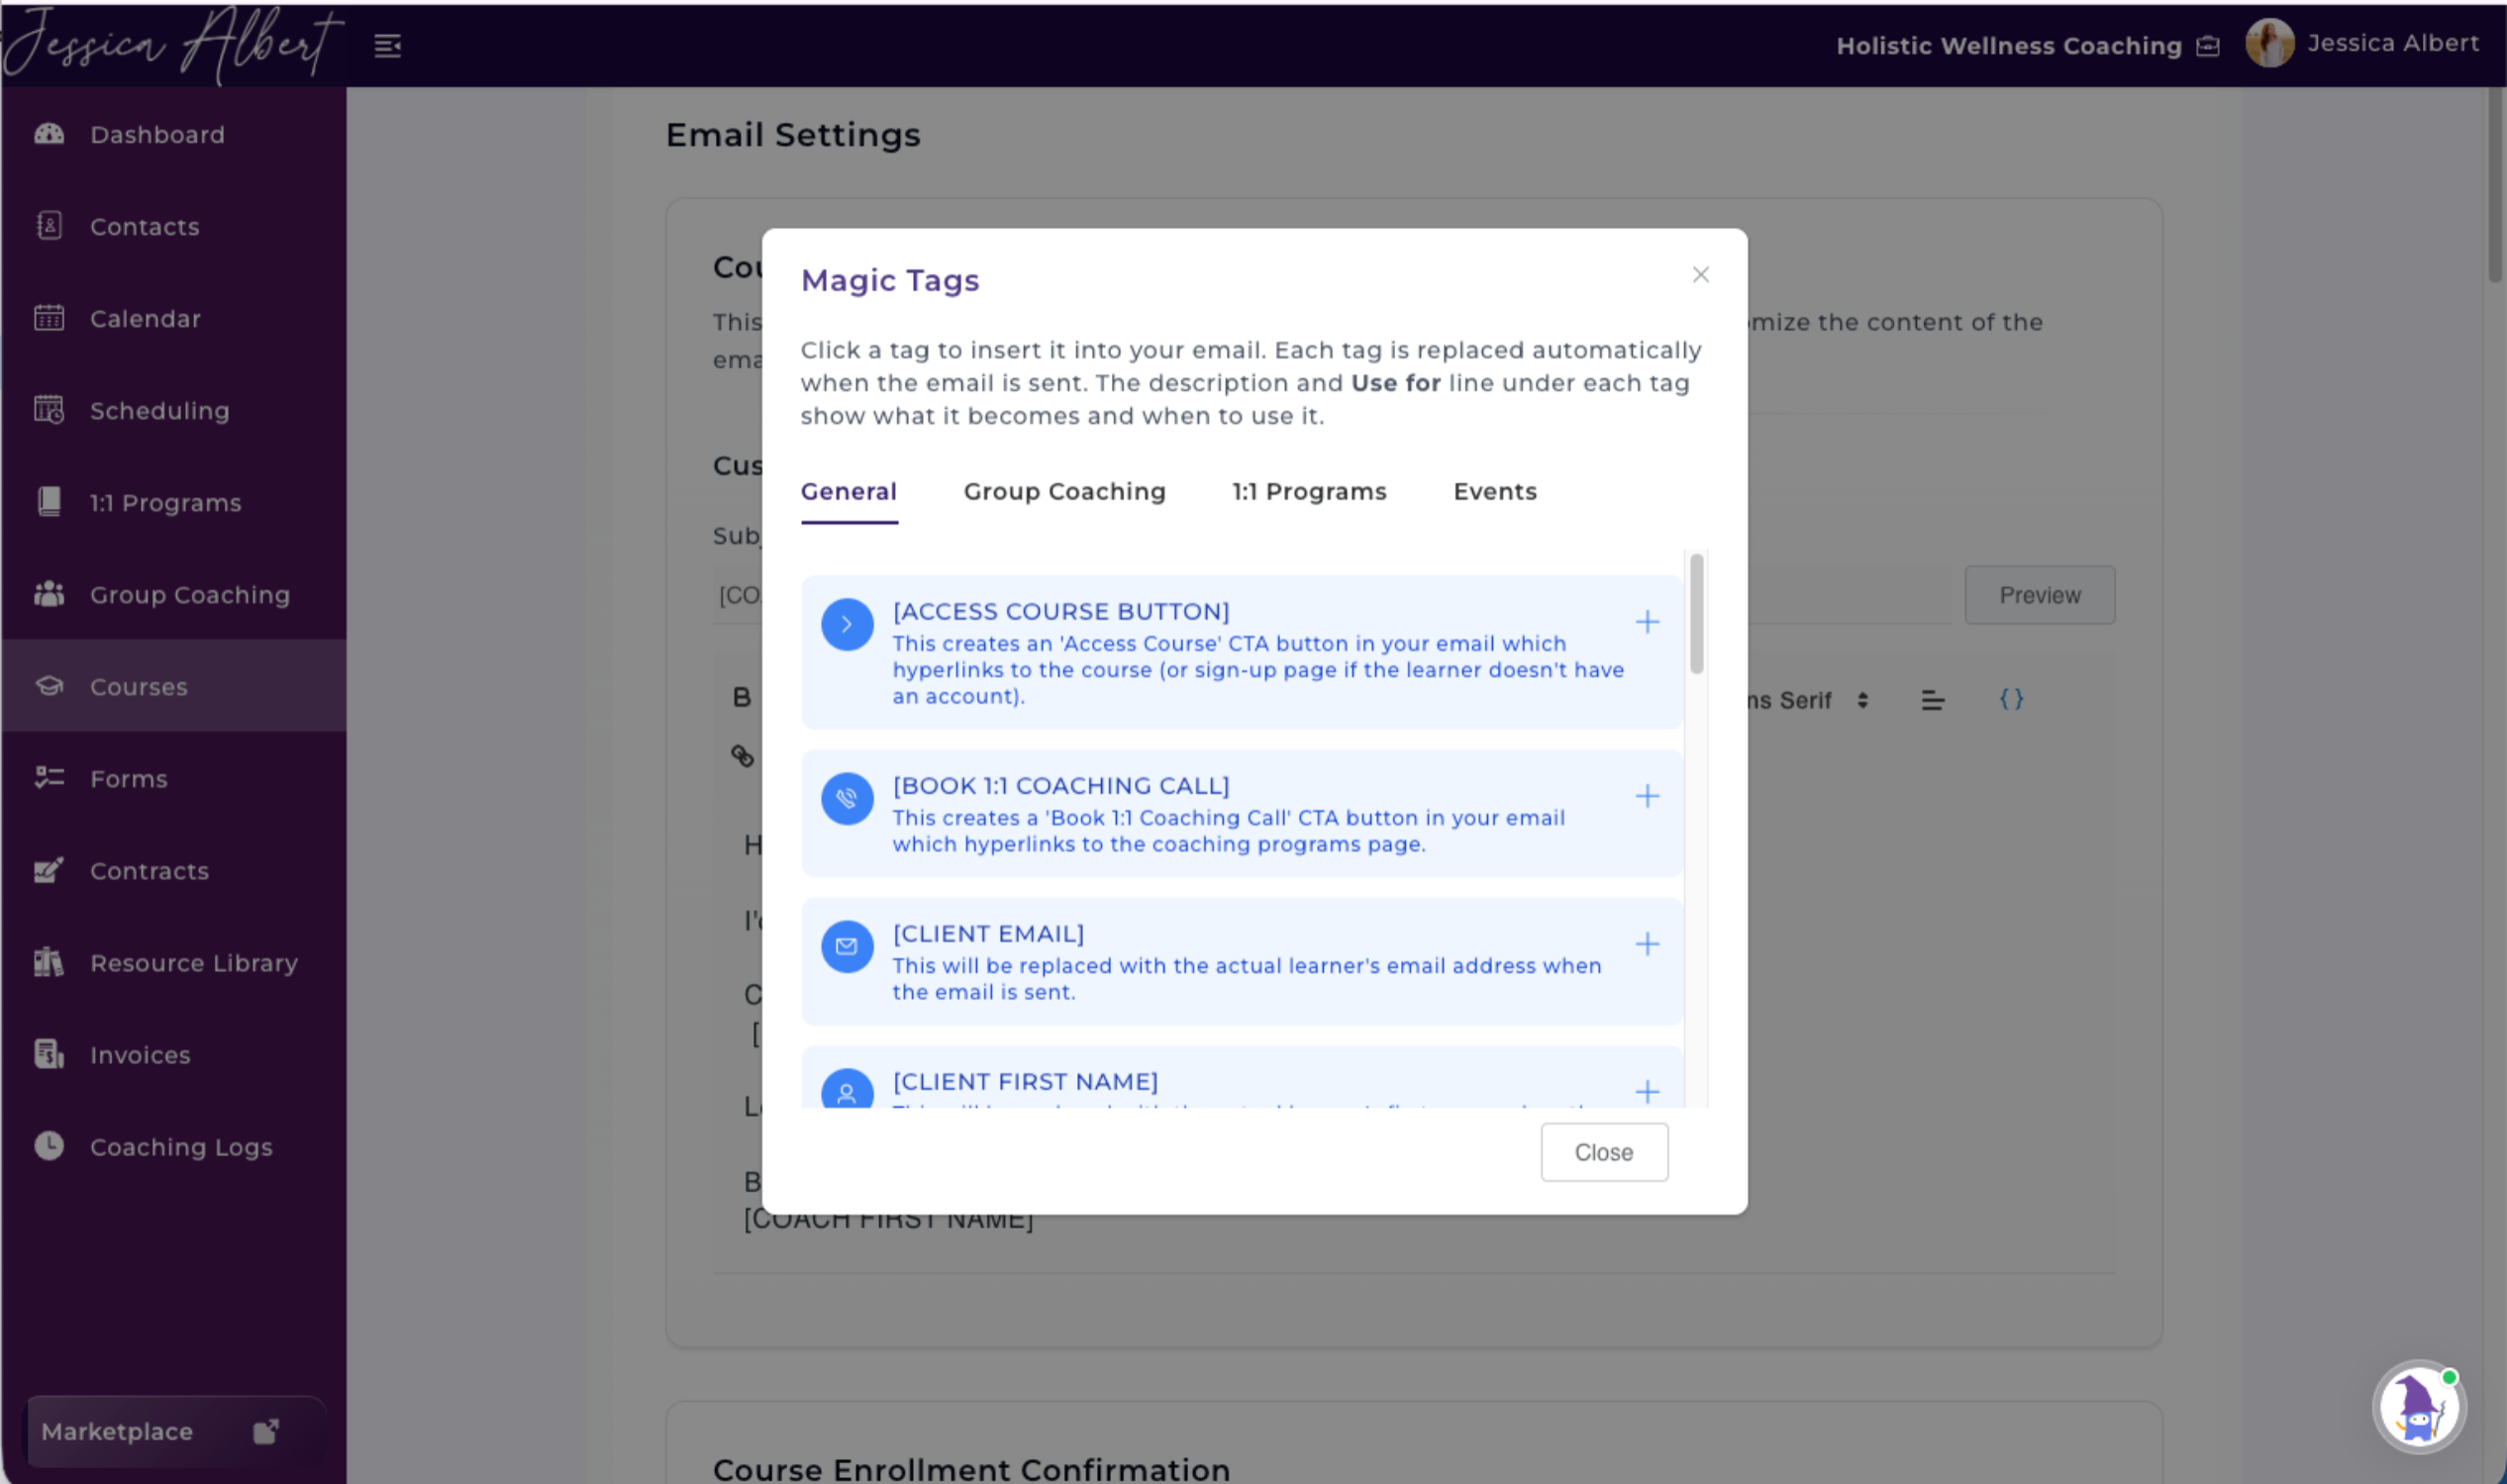
Examples include:
- Learner First Name
- Learner Email
- Course Name
- Program Links
Magic Tags can also promote your:
- One-on-One Programs
- Group Coaching Programs
This makes it easy to encourage learners to continue working with you after completing your course.
Content Control
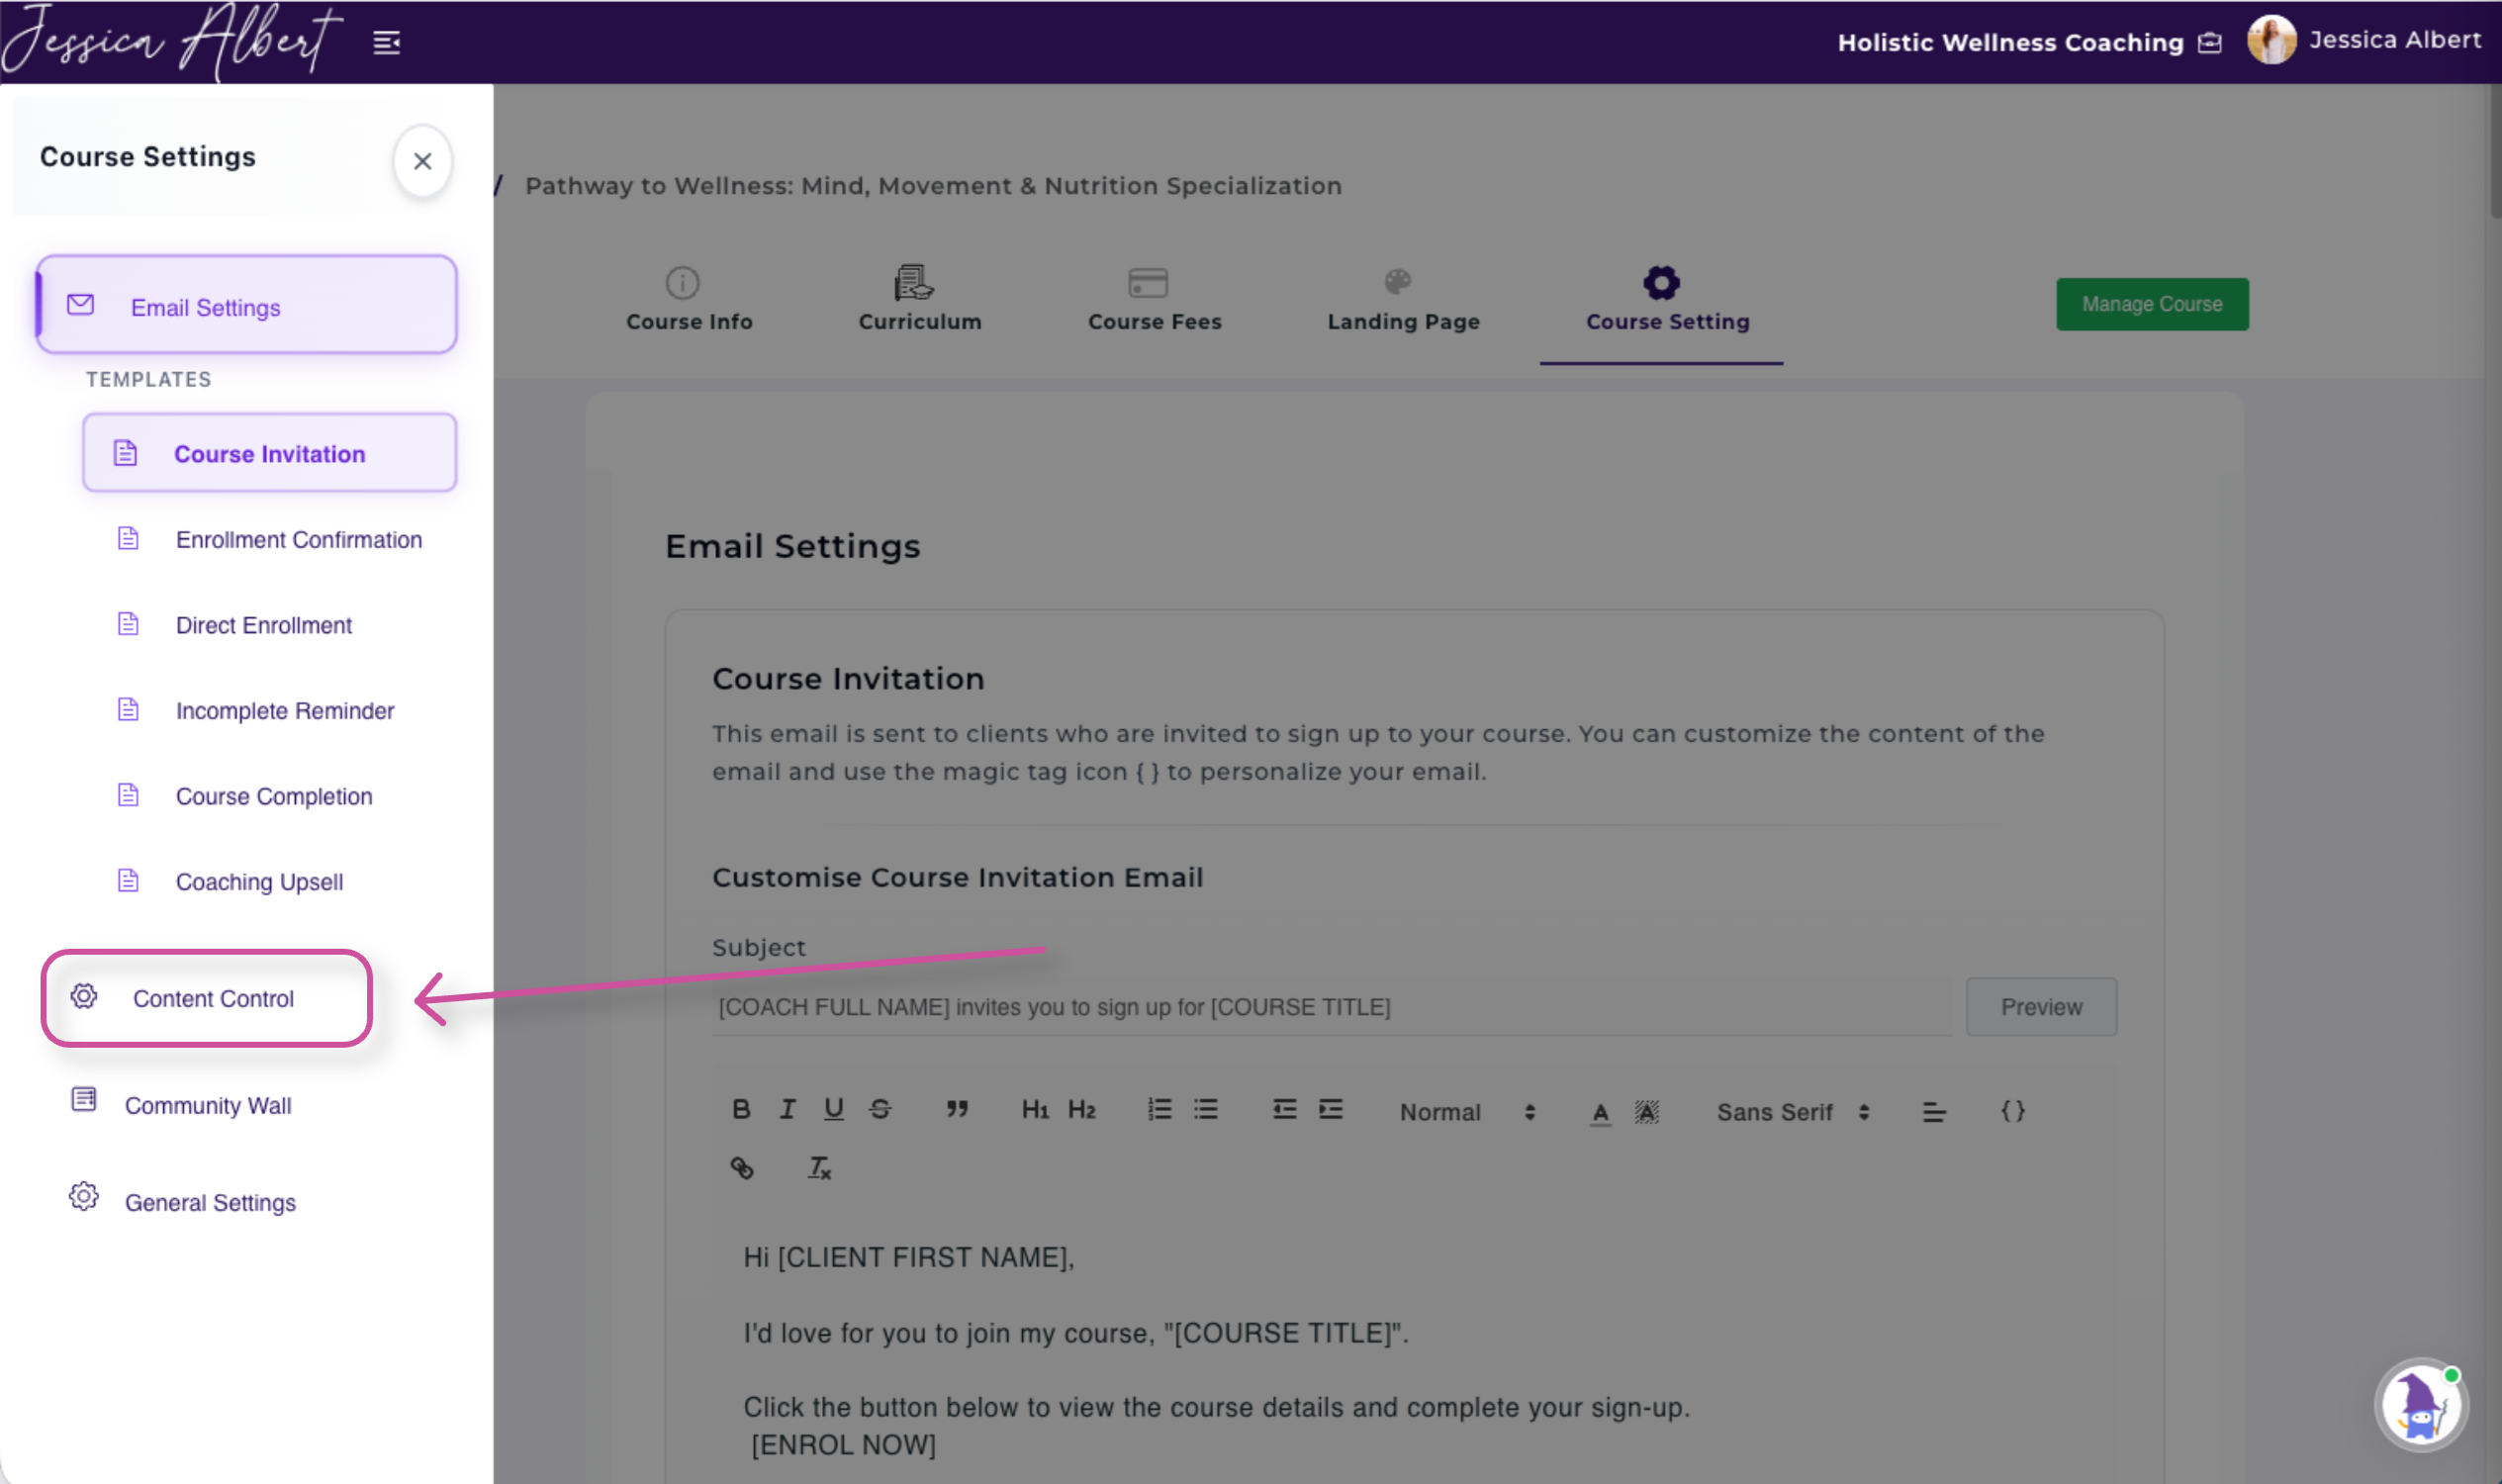
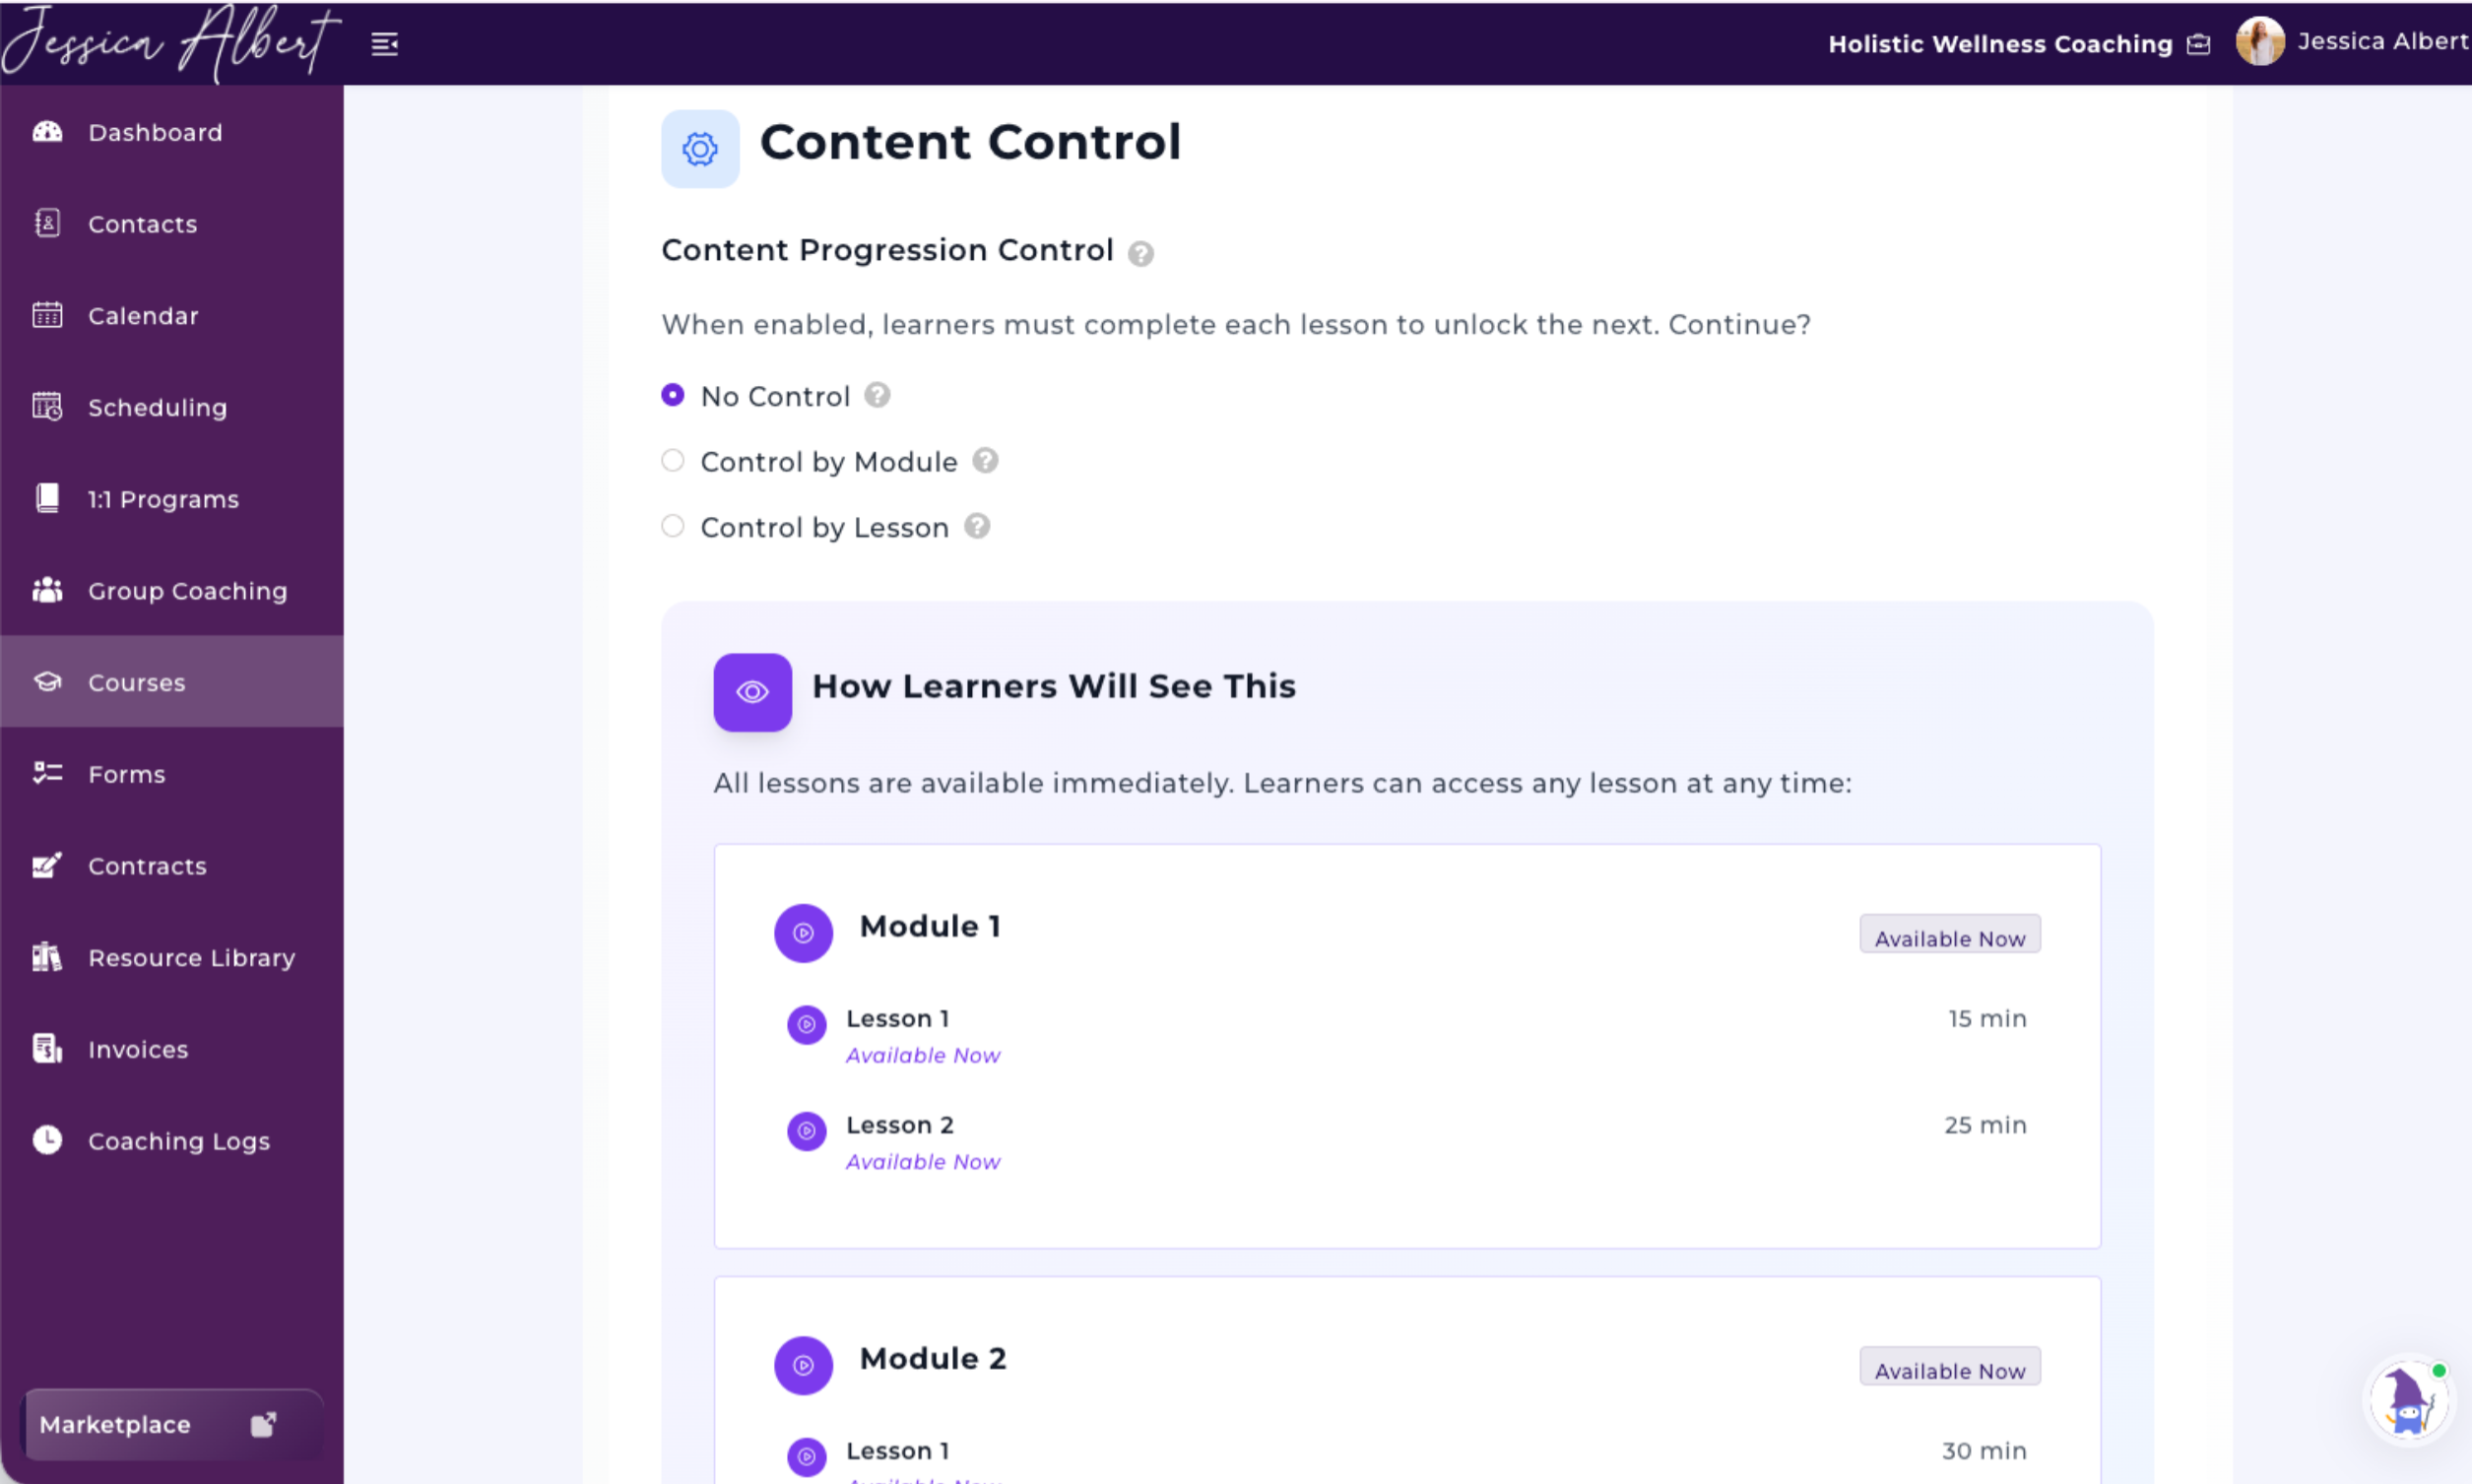
This is where you can edit the Content Progression Control meaning, you can control how learners access lessons in your course. Choose between no restrictions, module-level control, or lesson-by-lesson unlocking.
Community Wall
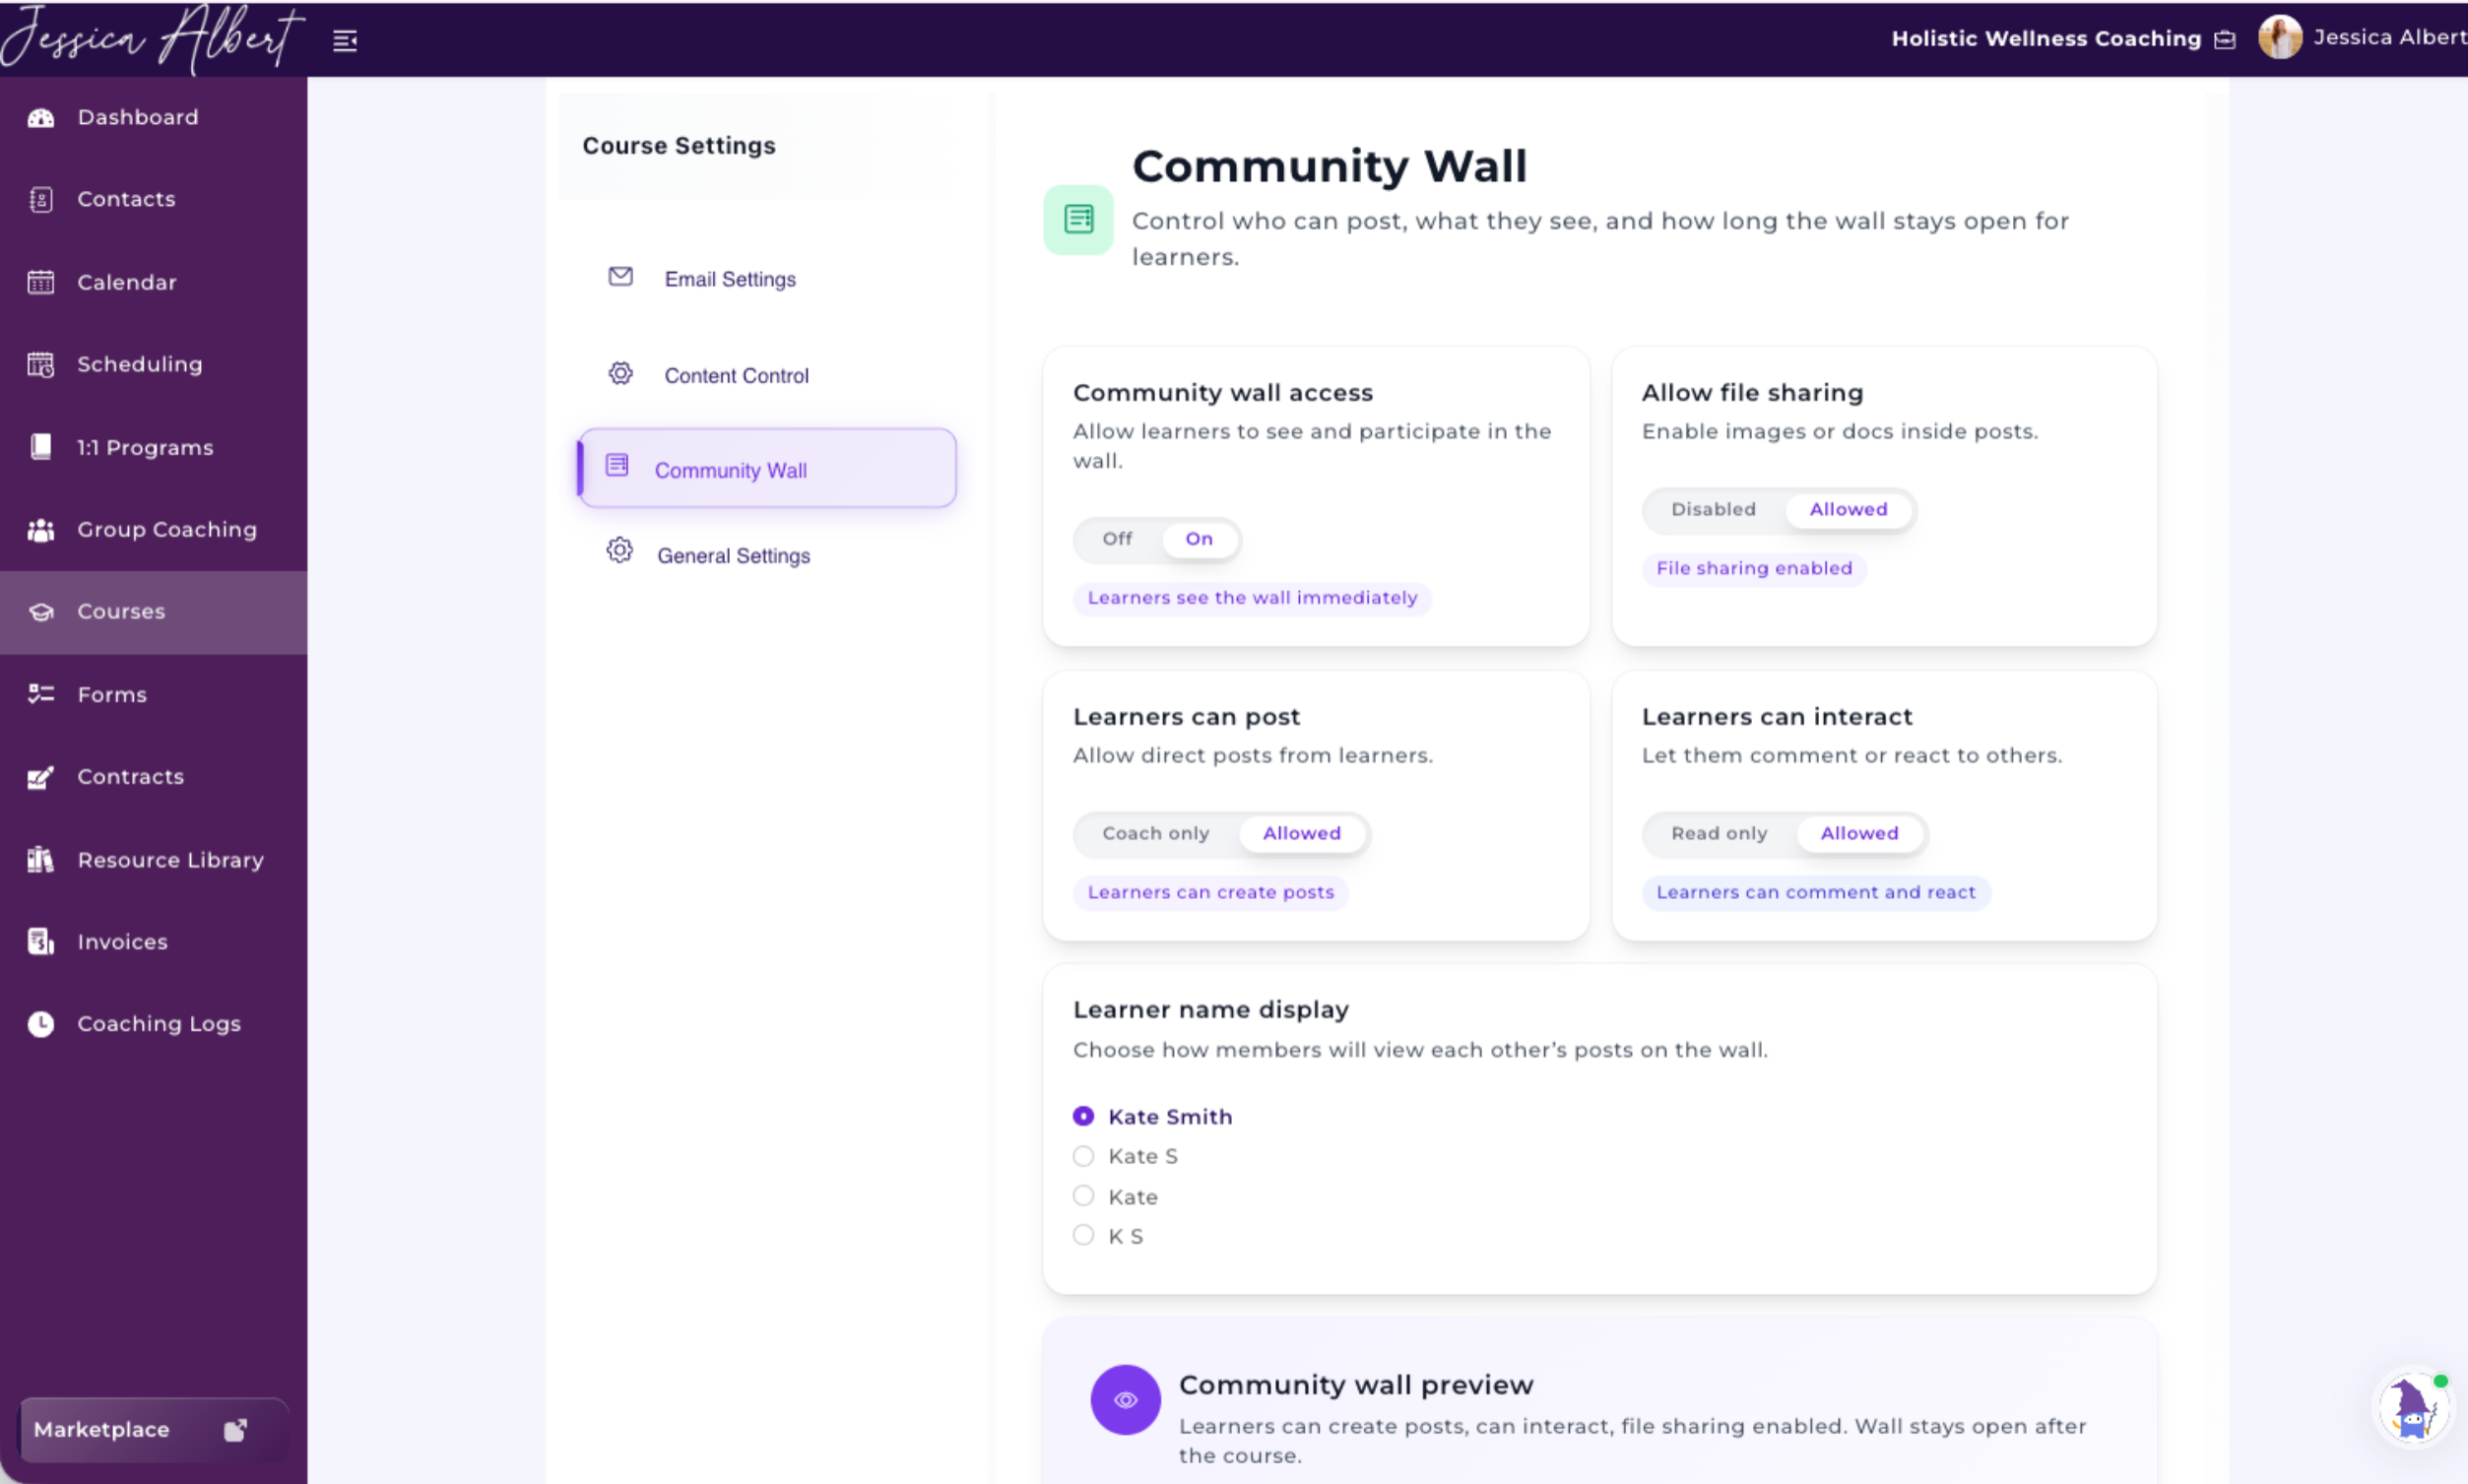
The Community Wall allows you to create an engaging space where learners can connect, ask questions, share insights, and interact throughout your course. You have full control over how the Community Wall functions and what learners are able to do.
Within the Community Wall settings, you can configure:
- Community Wall Access – Enable or disable the Community Wall for your course.
- File Sharing – Allow learners to upload images and documents within their posts.
- Learners Can Post – Choose whether only coaches can create posts or if learners can create their own discussions.
- Learners Can Interact – Control whether learners can comment on and react to posts or have read-only access.
- Learner Name Display – Select how learner names appear to others in the Community Wall, such as displaying their full name, first name only, or initials for added privacy.
Tip: The Community Wall is a great way to encourage accountability, foster discussion, and build a stronger sense of community among your learners throughout their course.
General Settings
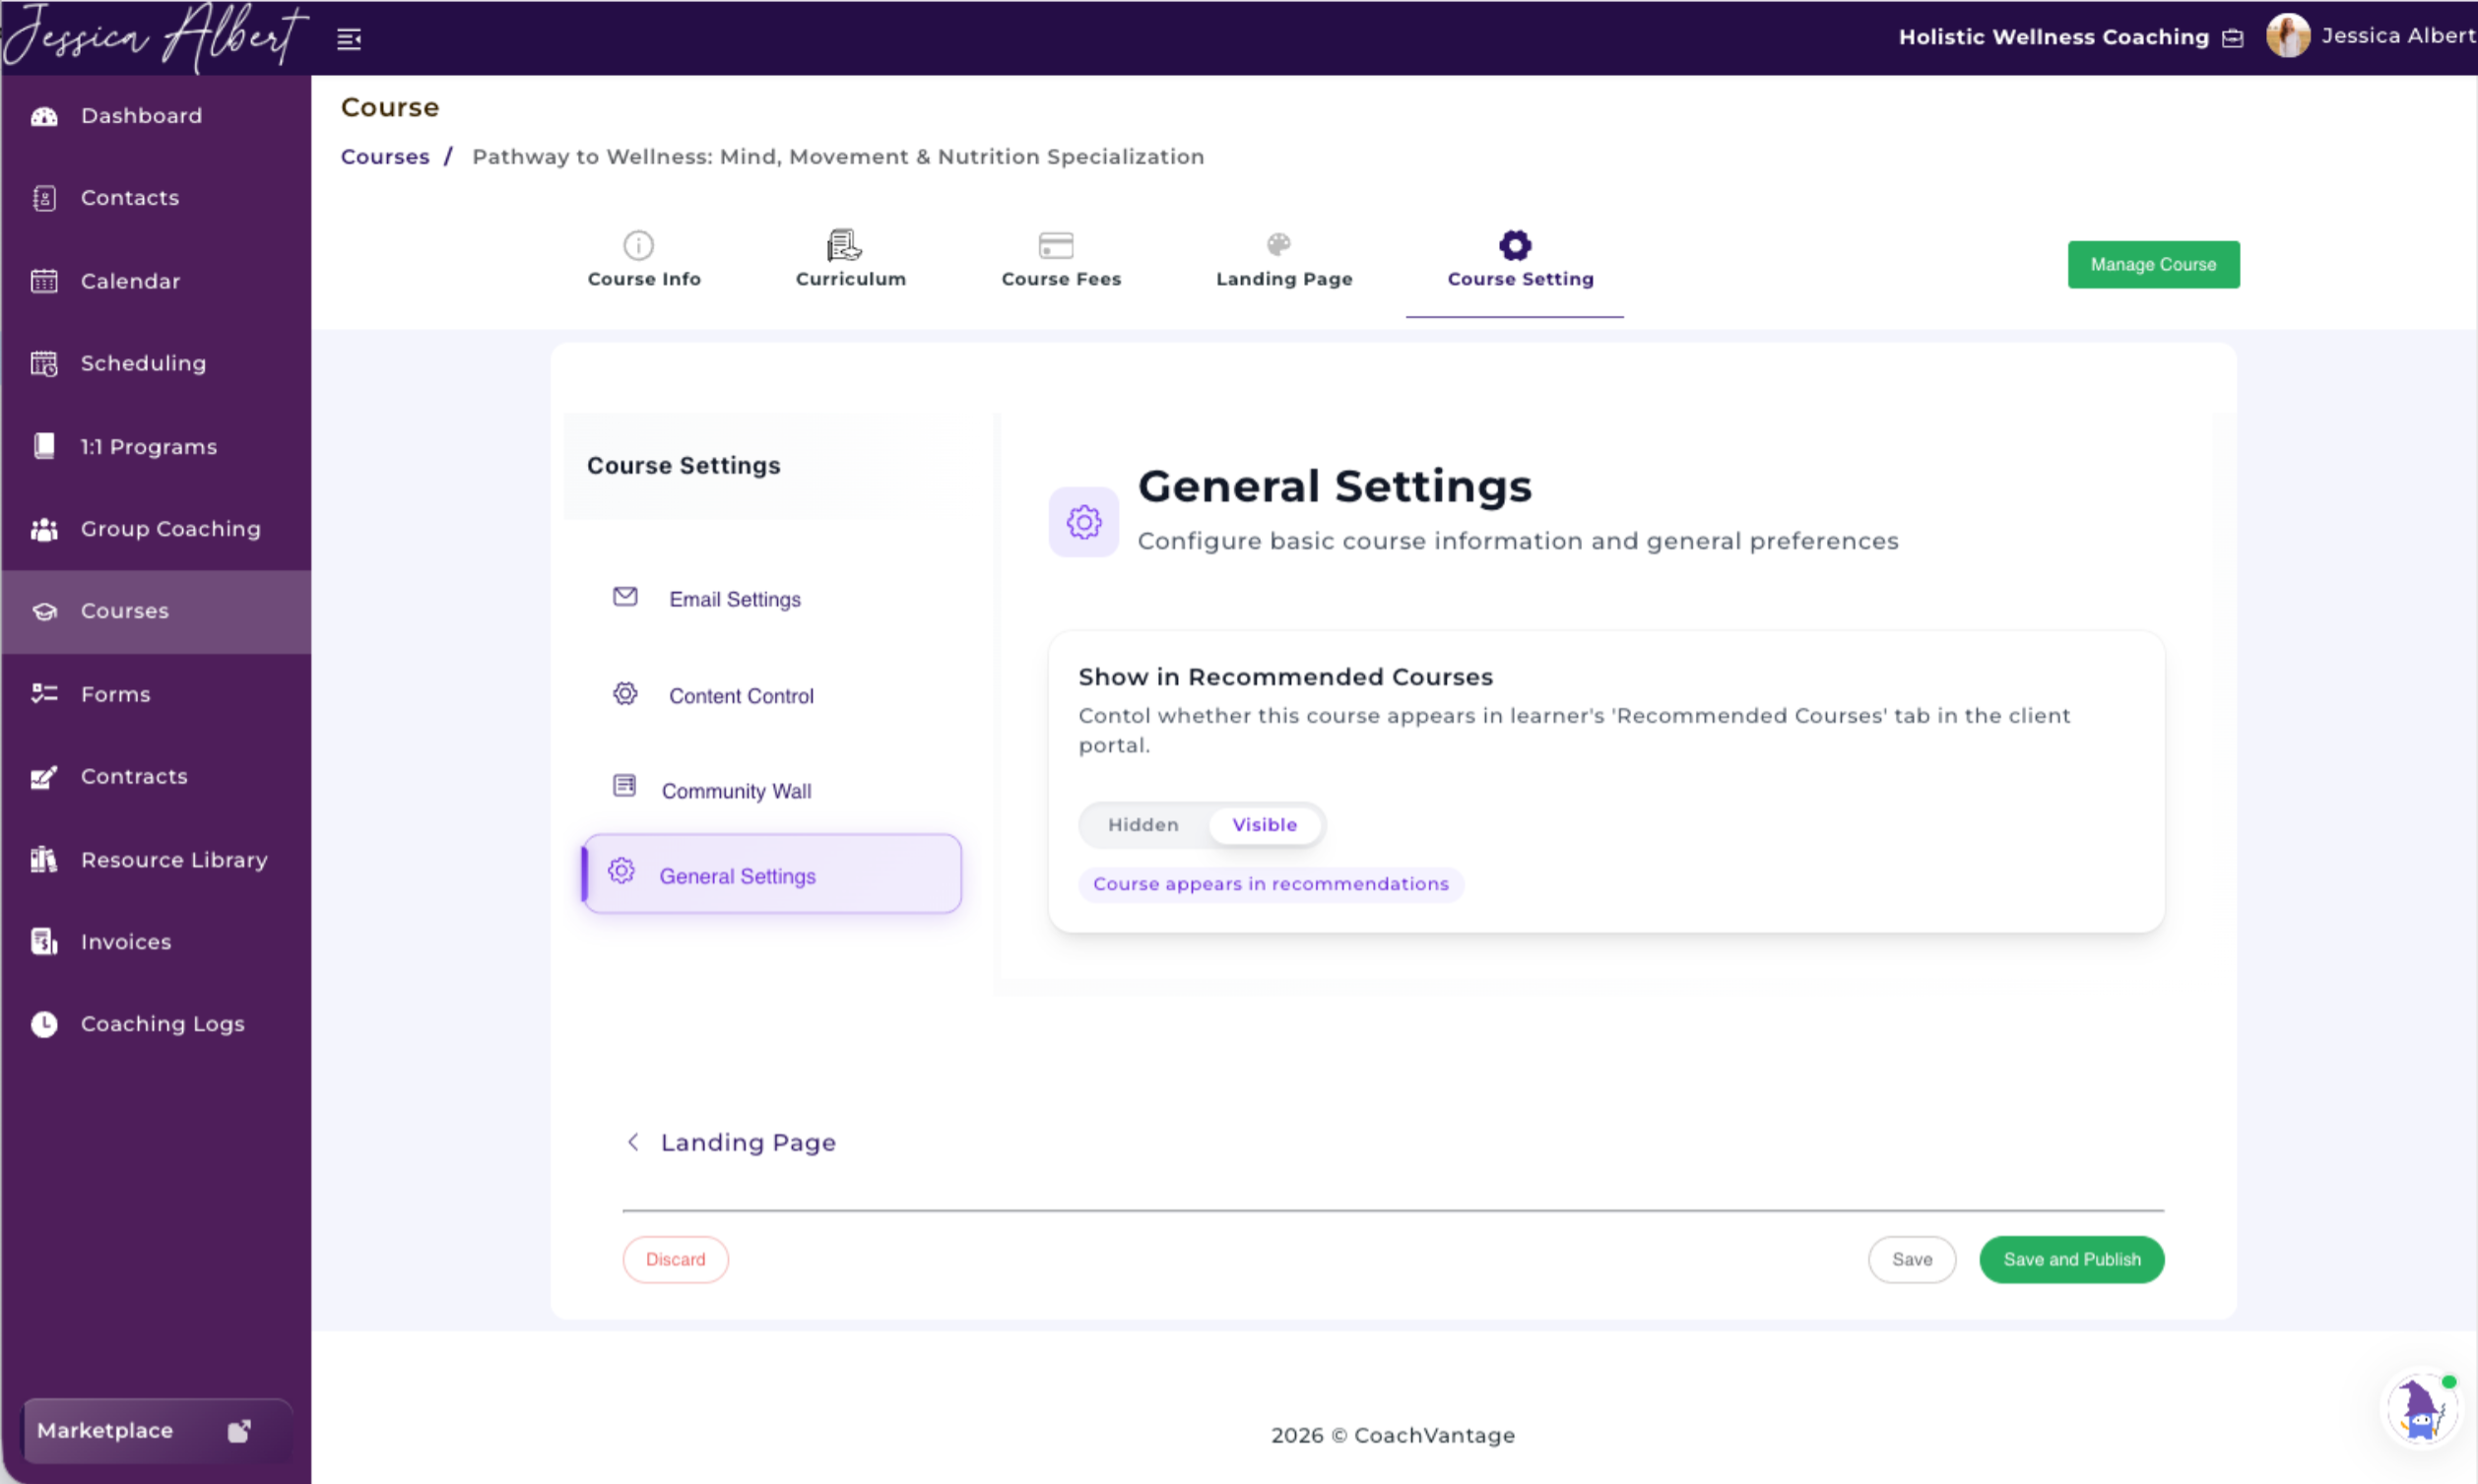
The General Settings section allows you to control whether your course appears in the Recommended Courses section of the Client Portal.
When Visible is selected, learners will see your course listed under Recommended Courses, making it easier for them to discover additional learning opportunities. If you prefer to keep the course hidden from recommendations, simply select Hidden.
Note: Hiding a course from Recommended Courses does not unpublish the course or remove access for enrolled learners. It only controls whether the course appears as a recommendation in the Client Portal.