
Part 2: How to Create a 1:1 Program—Building Your Landing Page
Overview
In Part 1, "How to Create a 1:1 Program—Part 1: Program Set-Up" you built the foundation of your 1:1 program by configuring its program information, fees, scheduling settings, and automation rules.
In Part 2, you will create the client-facing experience for your program. This includes customizing your landing page, configuring the enrollment form, and editing the confirmation page clients see after signing up.
Think of Part 1 as building the program’s behind-the-scenes structure. Part 2 focuses on what prospective clients will see and complete when they view and enroll in your program.
In this guide, you will learn how to:
- Choose between a landing page and an enrollment form
- Customize the content displayed on your landing page
- Add or hide individual landing-page sections
- Add client testimonials
- Preview your landing page
- Select the information collected during enrollment
- Add an intake form
- Add terms and conditions or a contract
- Customize the confirmation page
- Save and publish your program
Access the Landing Page Builder
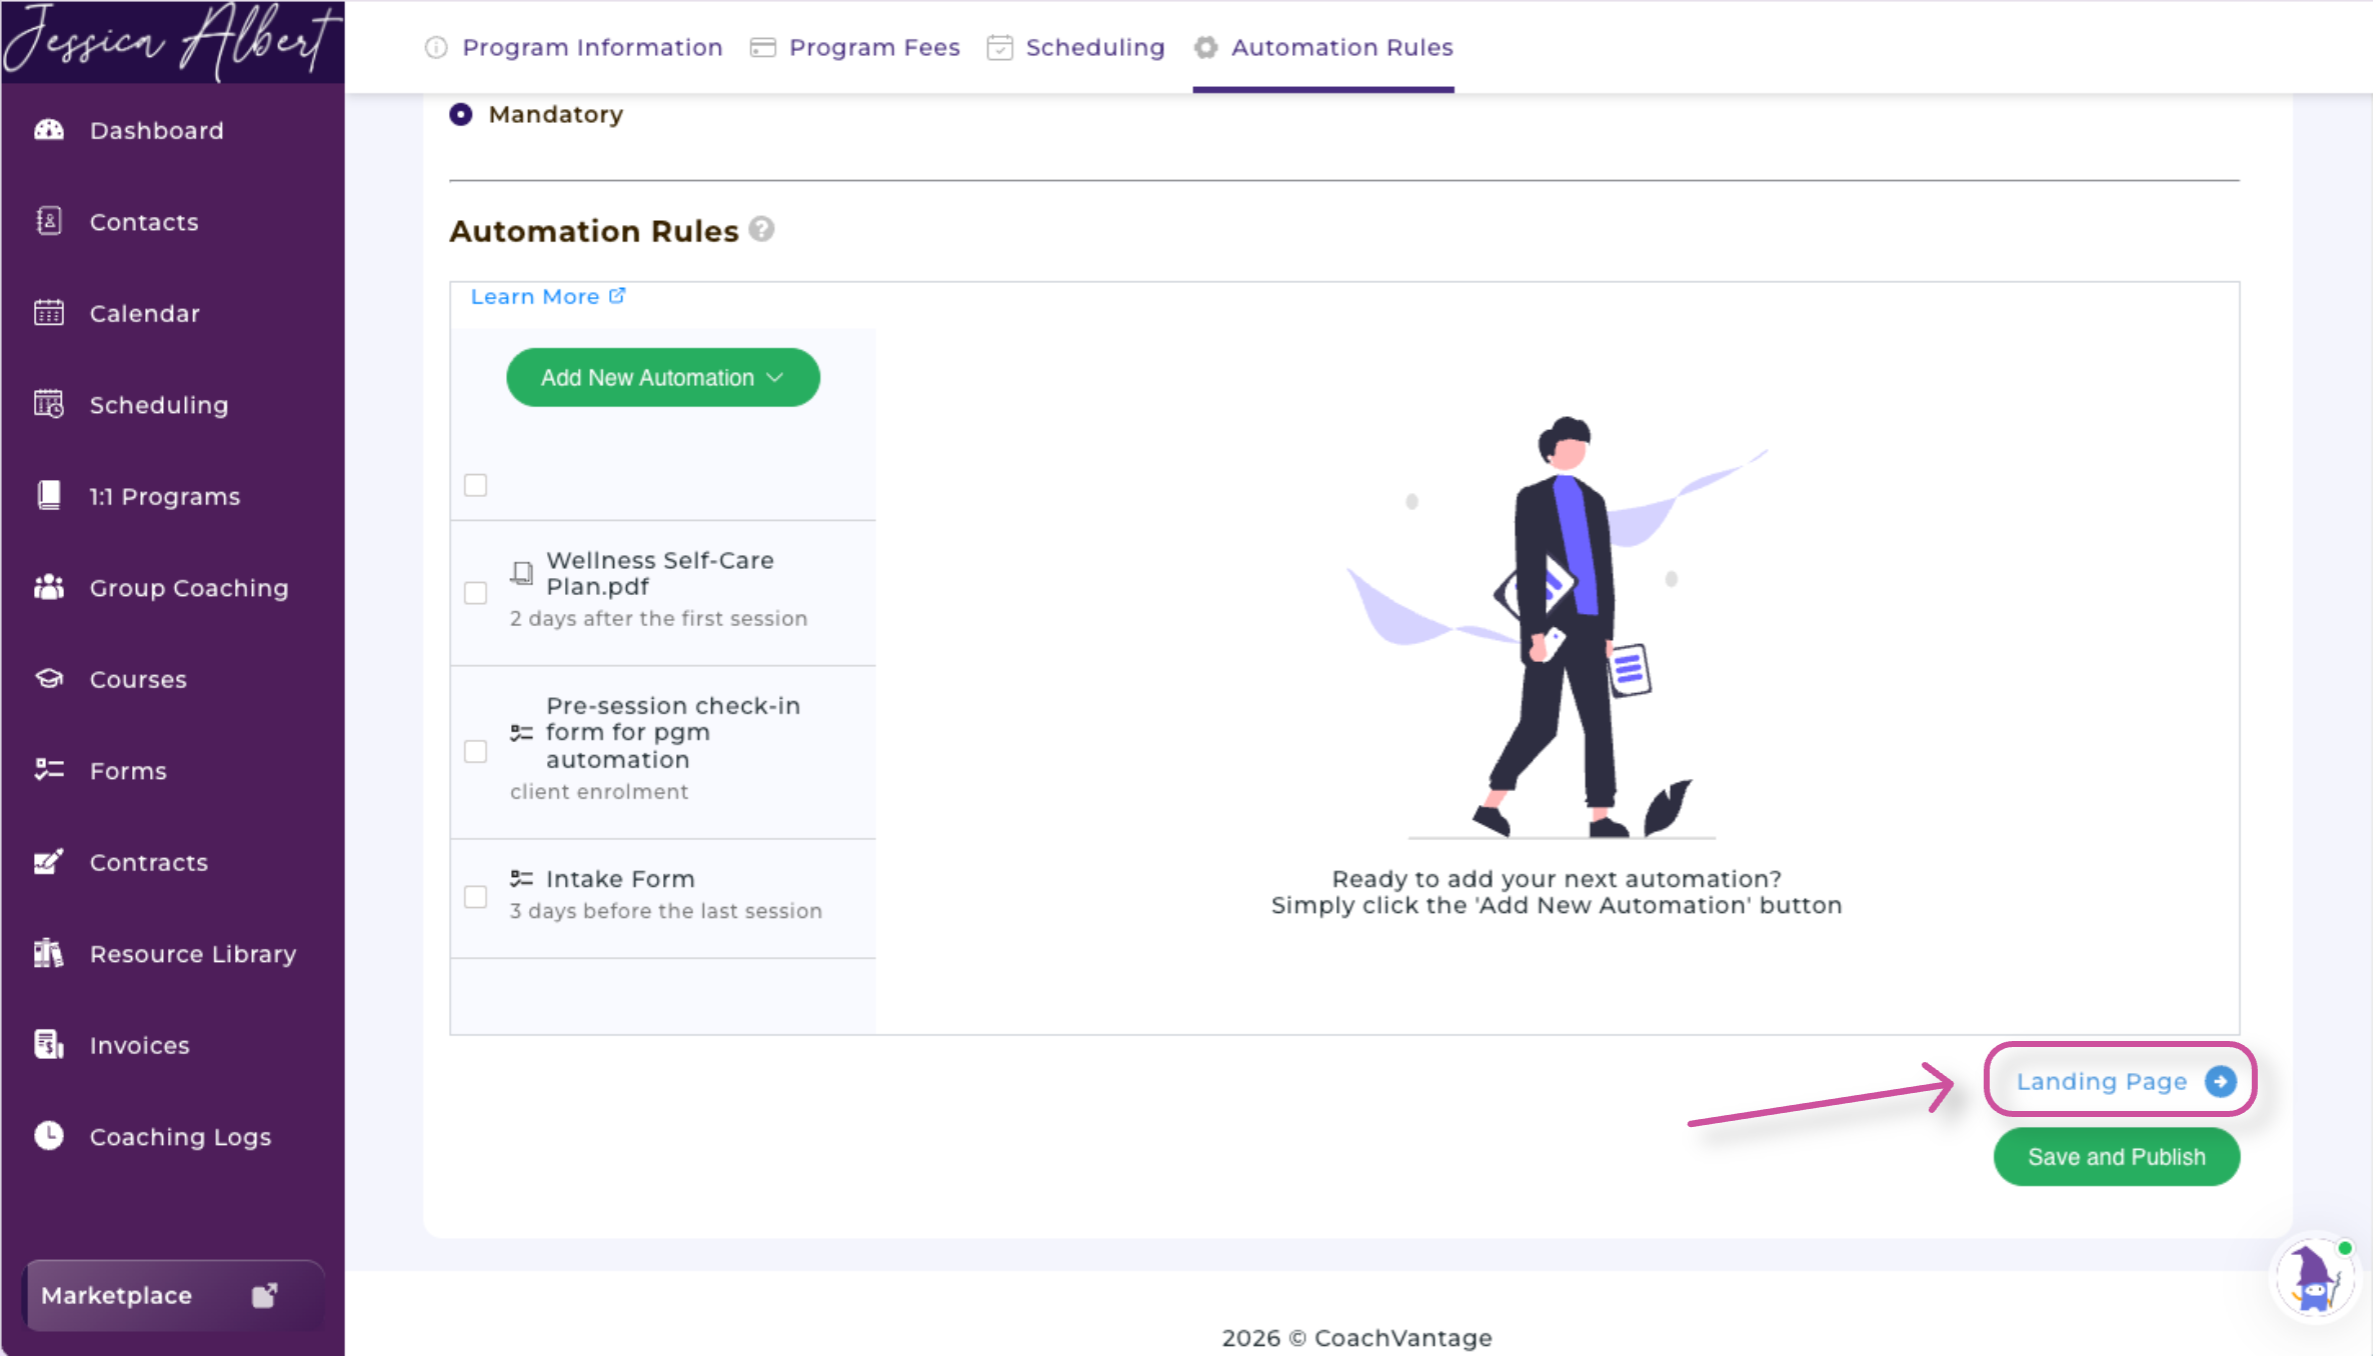
After you finish configuring your program’s automation rules, select the blue Landing Page text at the top or bottom of the screen.
This will open the Landing Page Builder.
Choose a Landing Page or Enrollment Form
Before customizing your program’s signup experience, choose whether you want to build a complete landing page or use only an enrollment form.
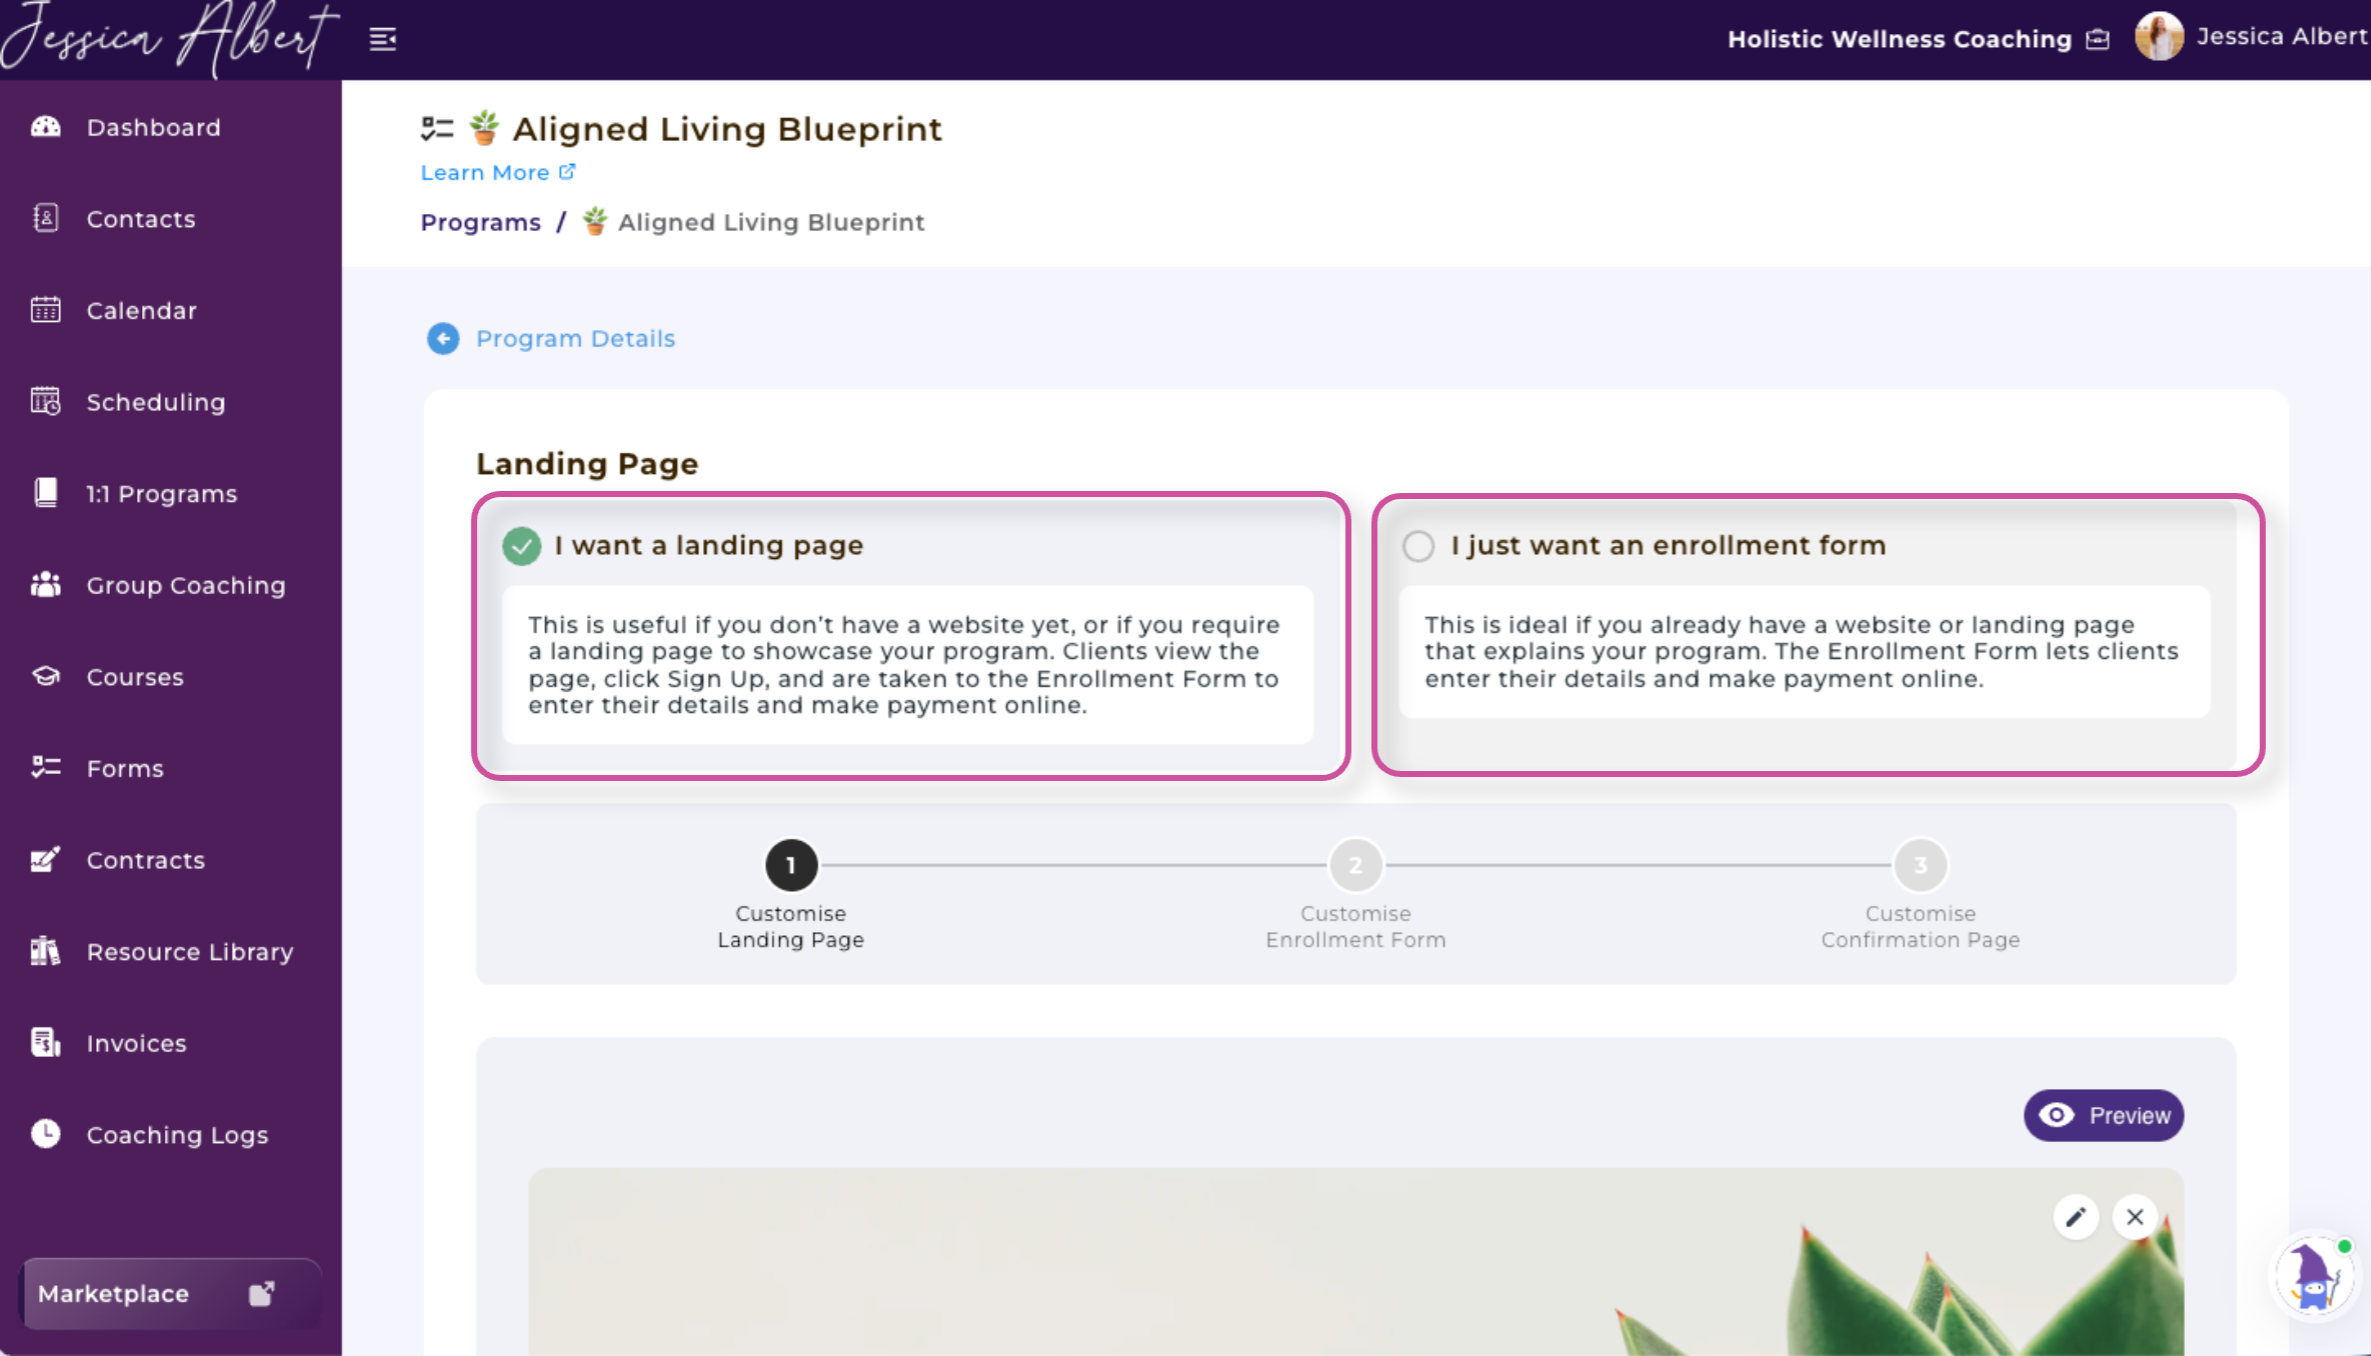
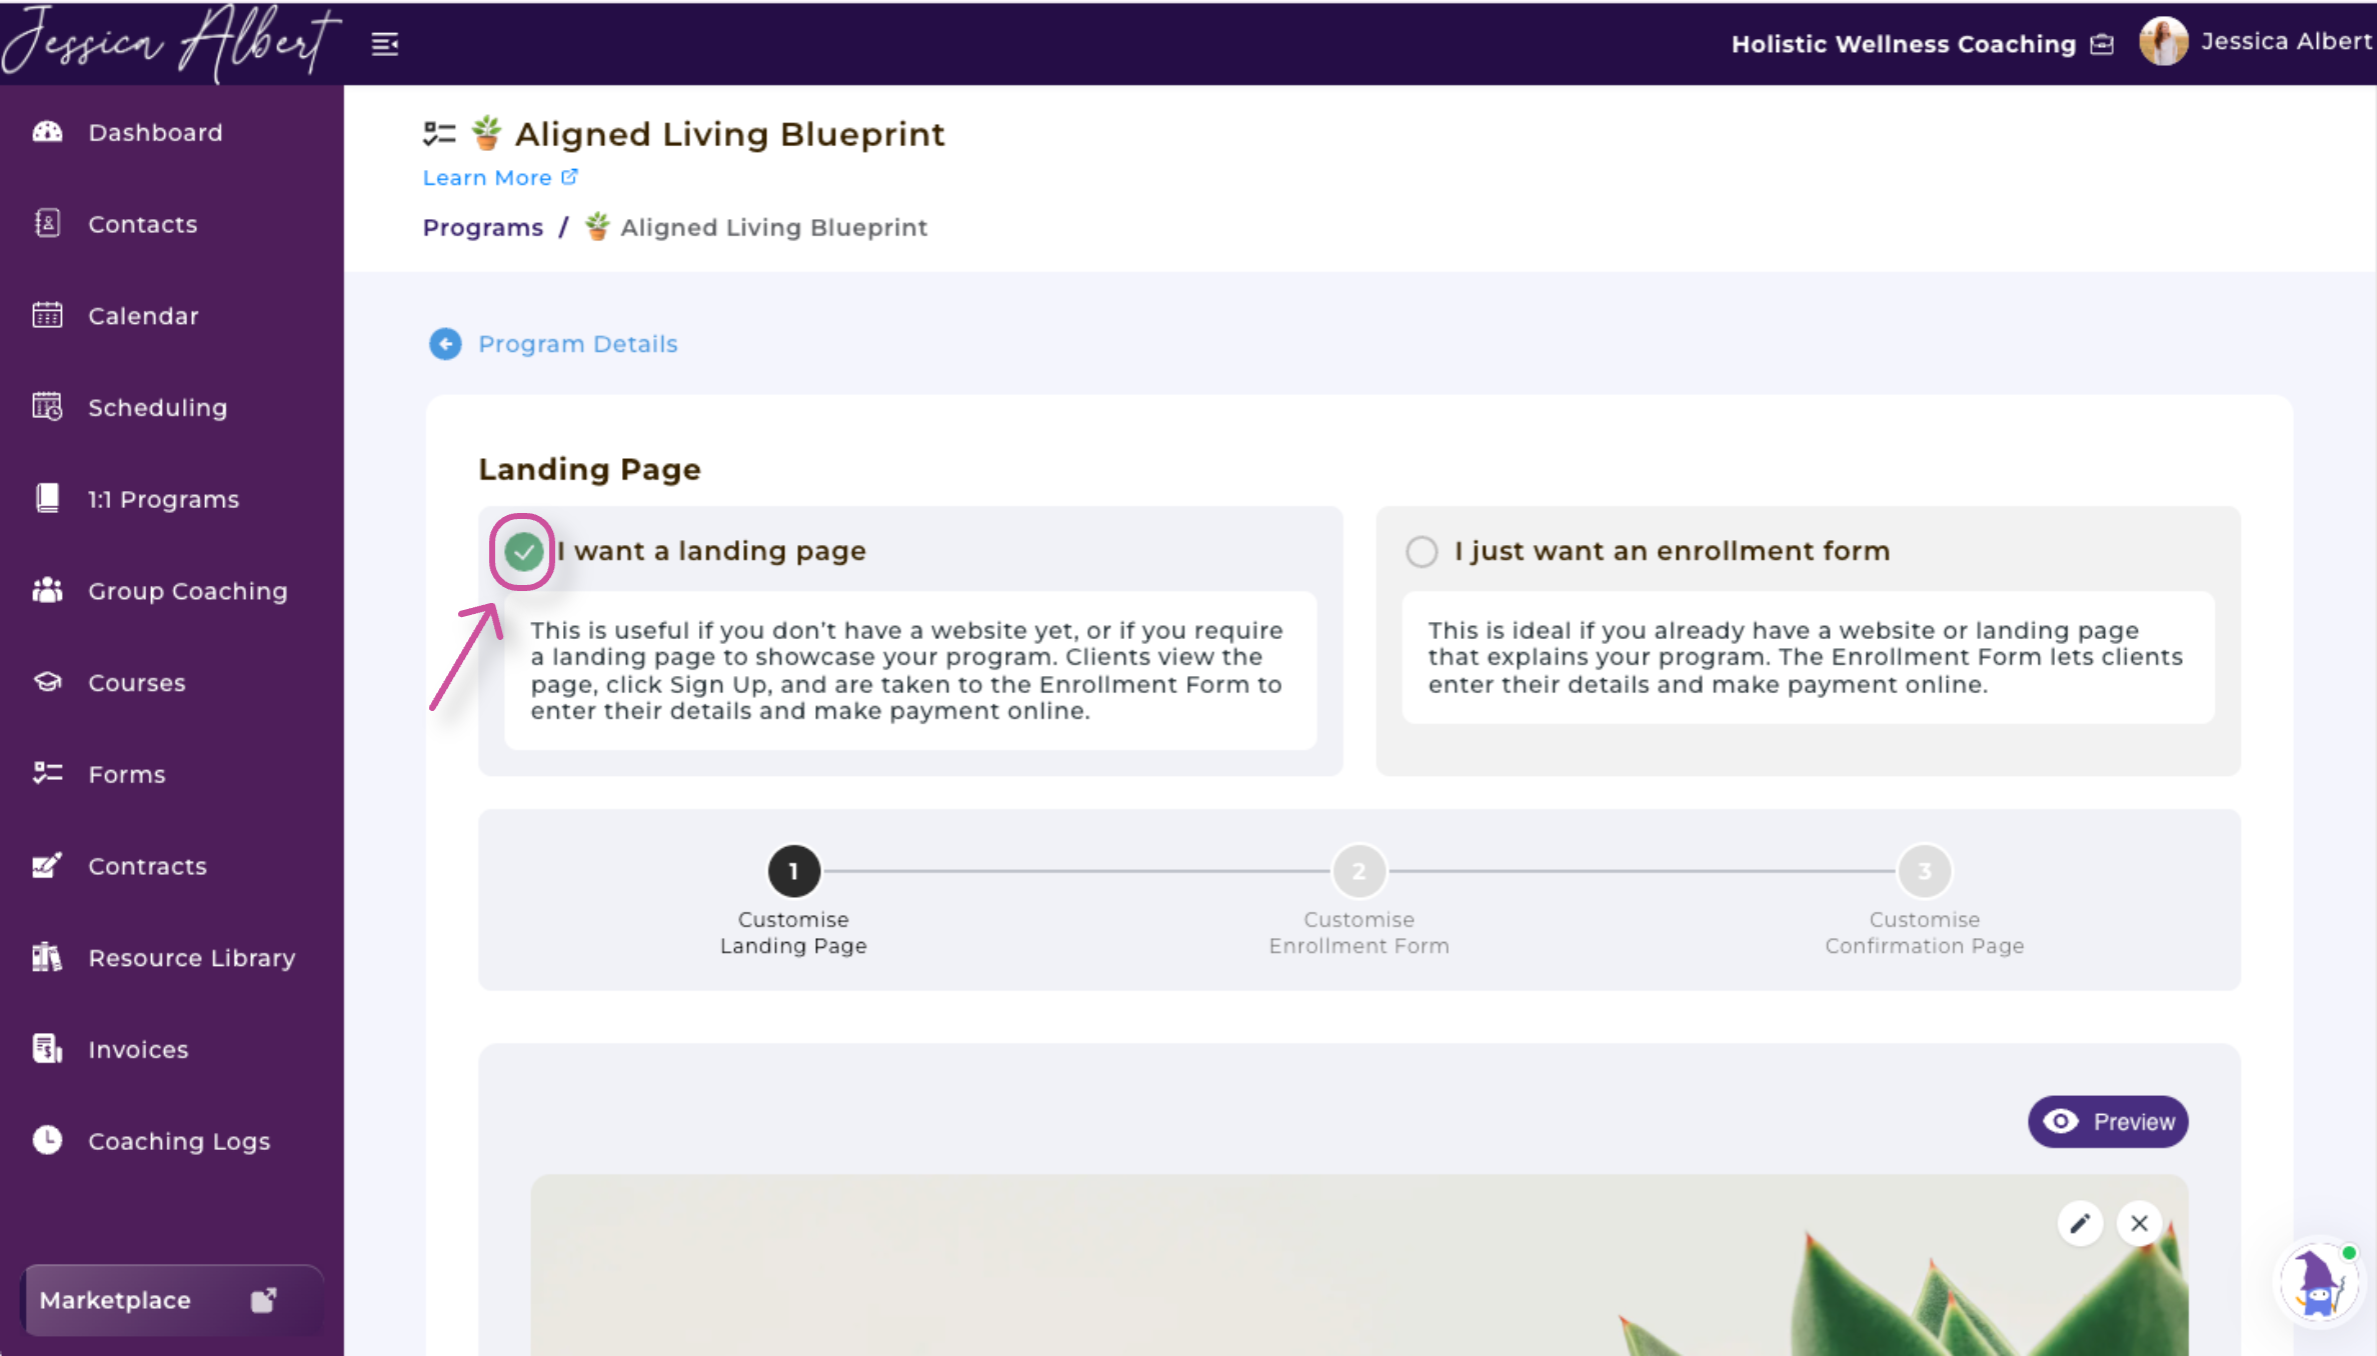
Build a Landing Page
Choose this option if you do not have an existing website or need a dedicated page to showcase your program.
The landing page allows prospective clients to learn about your program before signing up. When a client selects the signup button, they will be taken to the enrollment form.
Depending on your program settings, clients may use the enrollment form to:
- Enter their registration information
- Complete an intake form
- Review and e-sign a contract
- Submit payment
- Schedule a coaching session
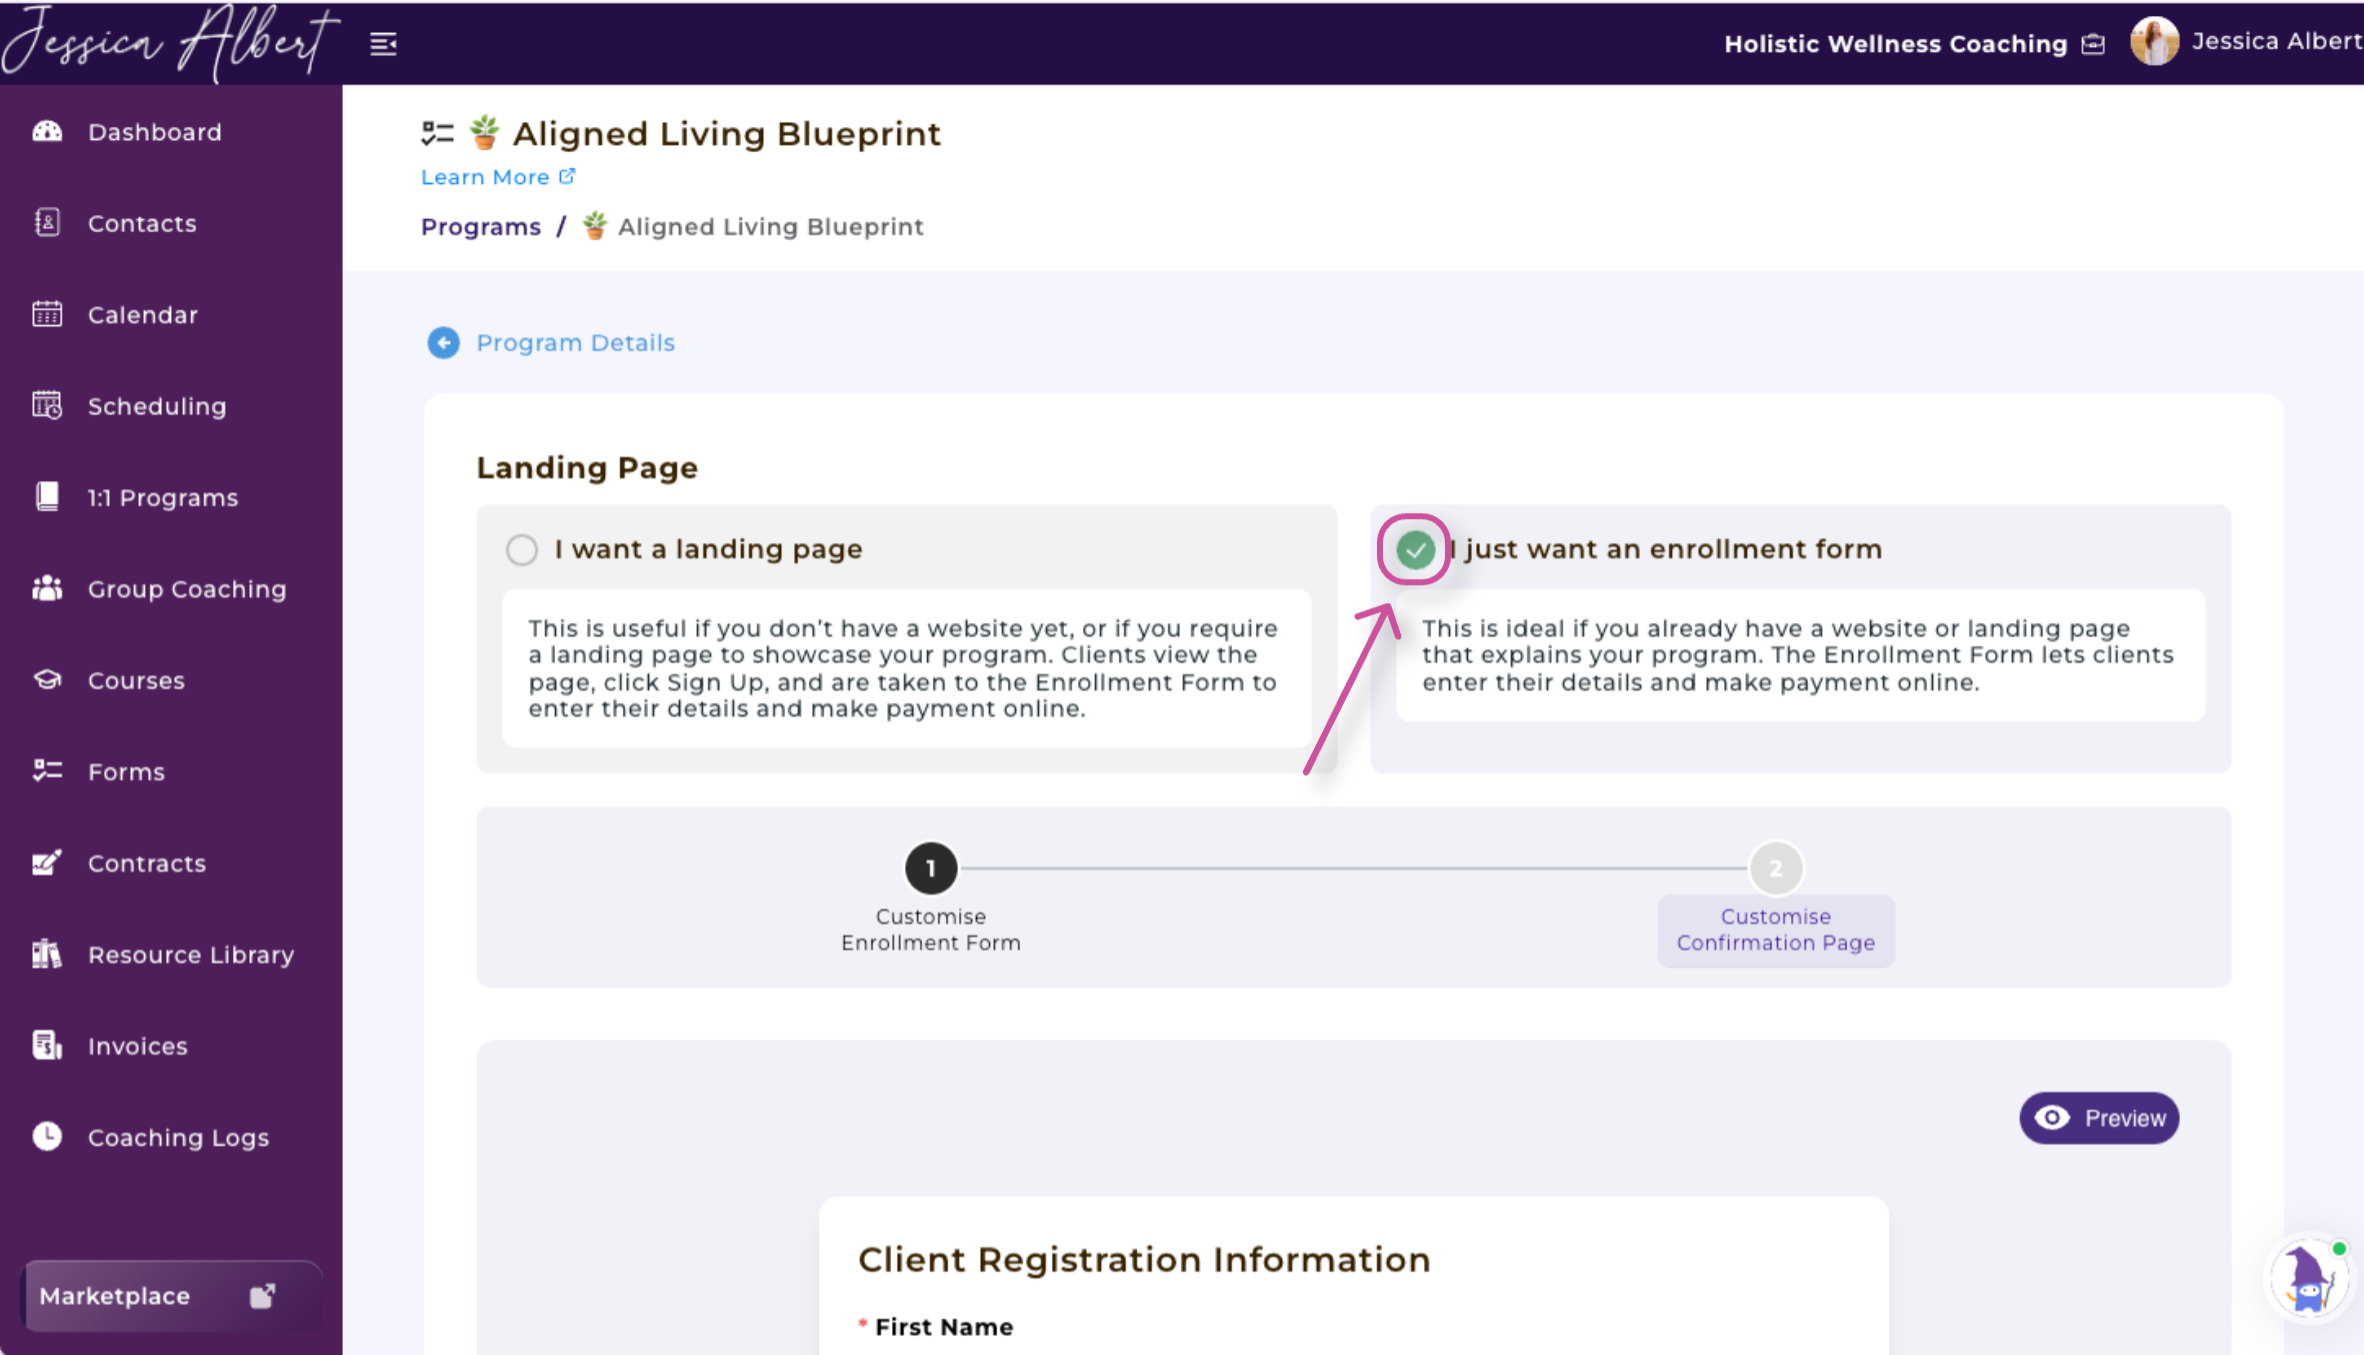
Use Only an Enrollment Form
Select I Just Want an Enrollment Form if you already have a website or another landing page that explains your program.
You can link clients directly to the CoachVantage enrollment form, where they can enter their information, complete the necessary enrollment steps, and submit payment online.
Understand the Three Setup Steps
Building the client-facing portion of your program includes three steps:
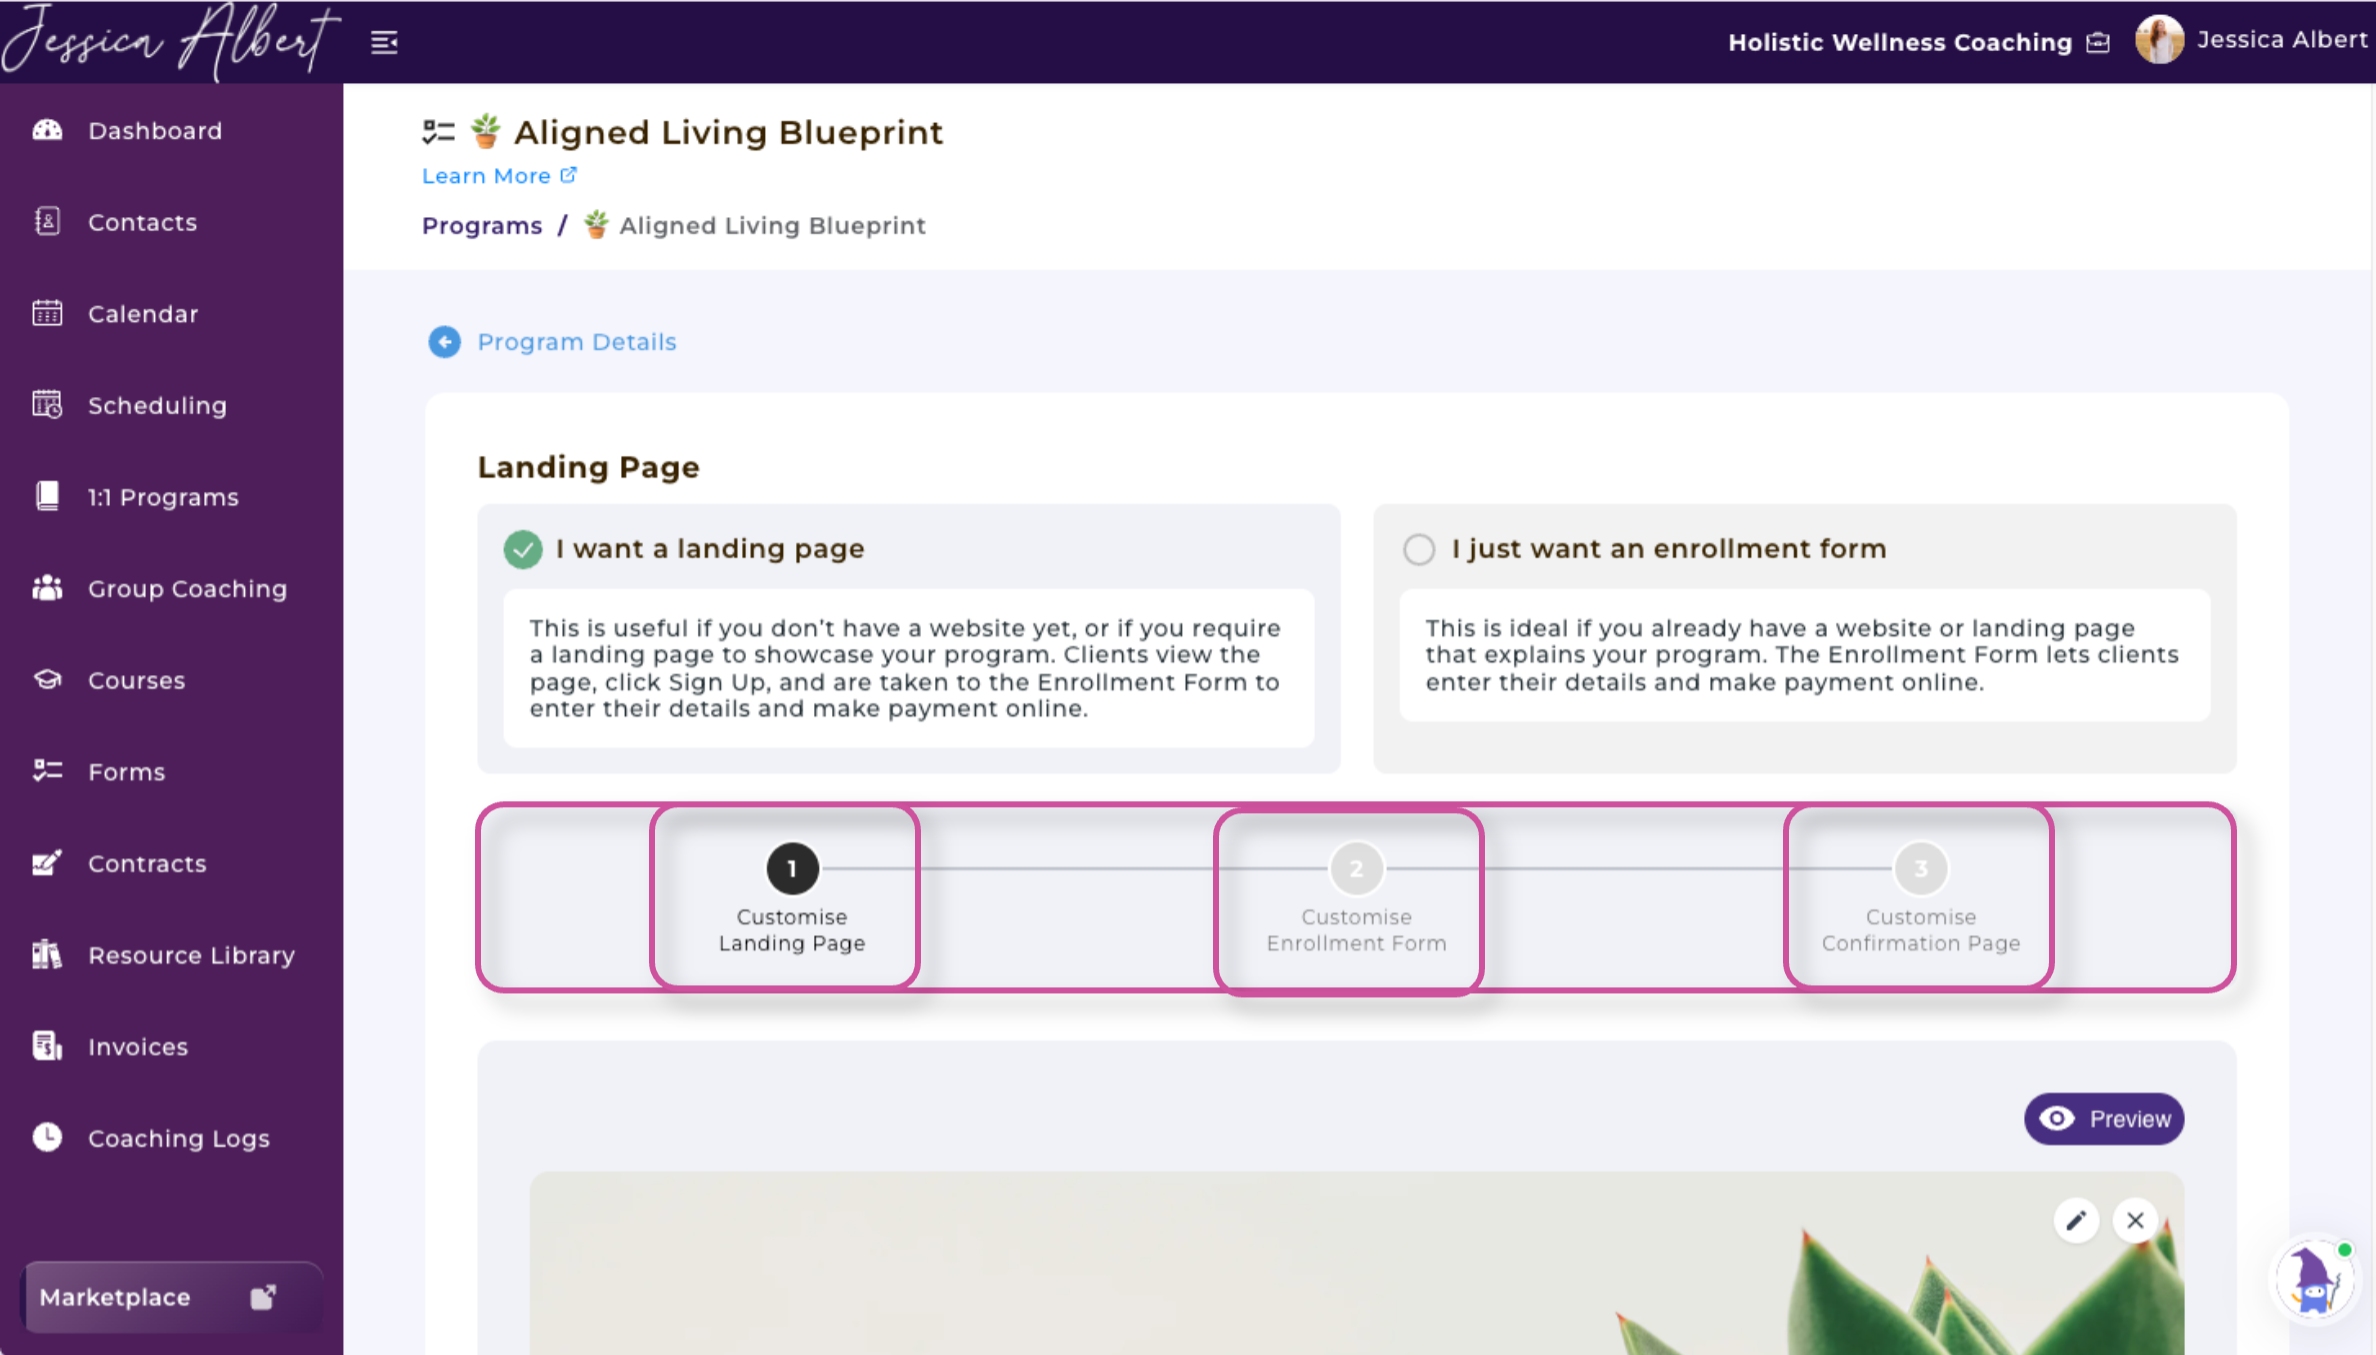
- Customize the Landing Page
- Customize the Enrollment Form
- Customize the Confirmation Page
Step 1: Customize Your Landing Page
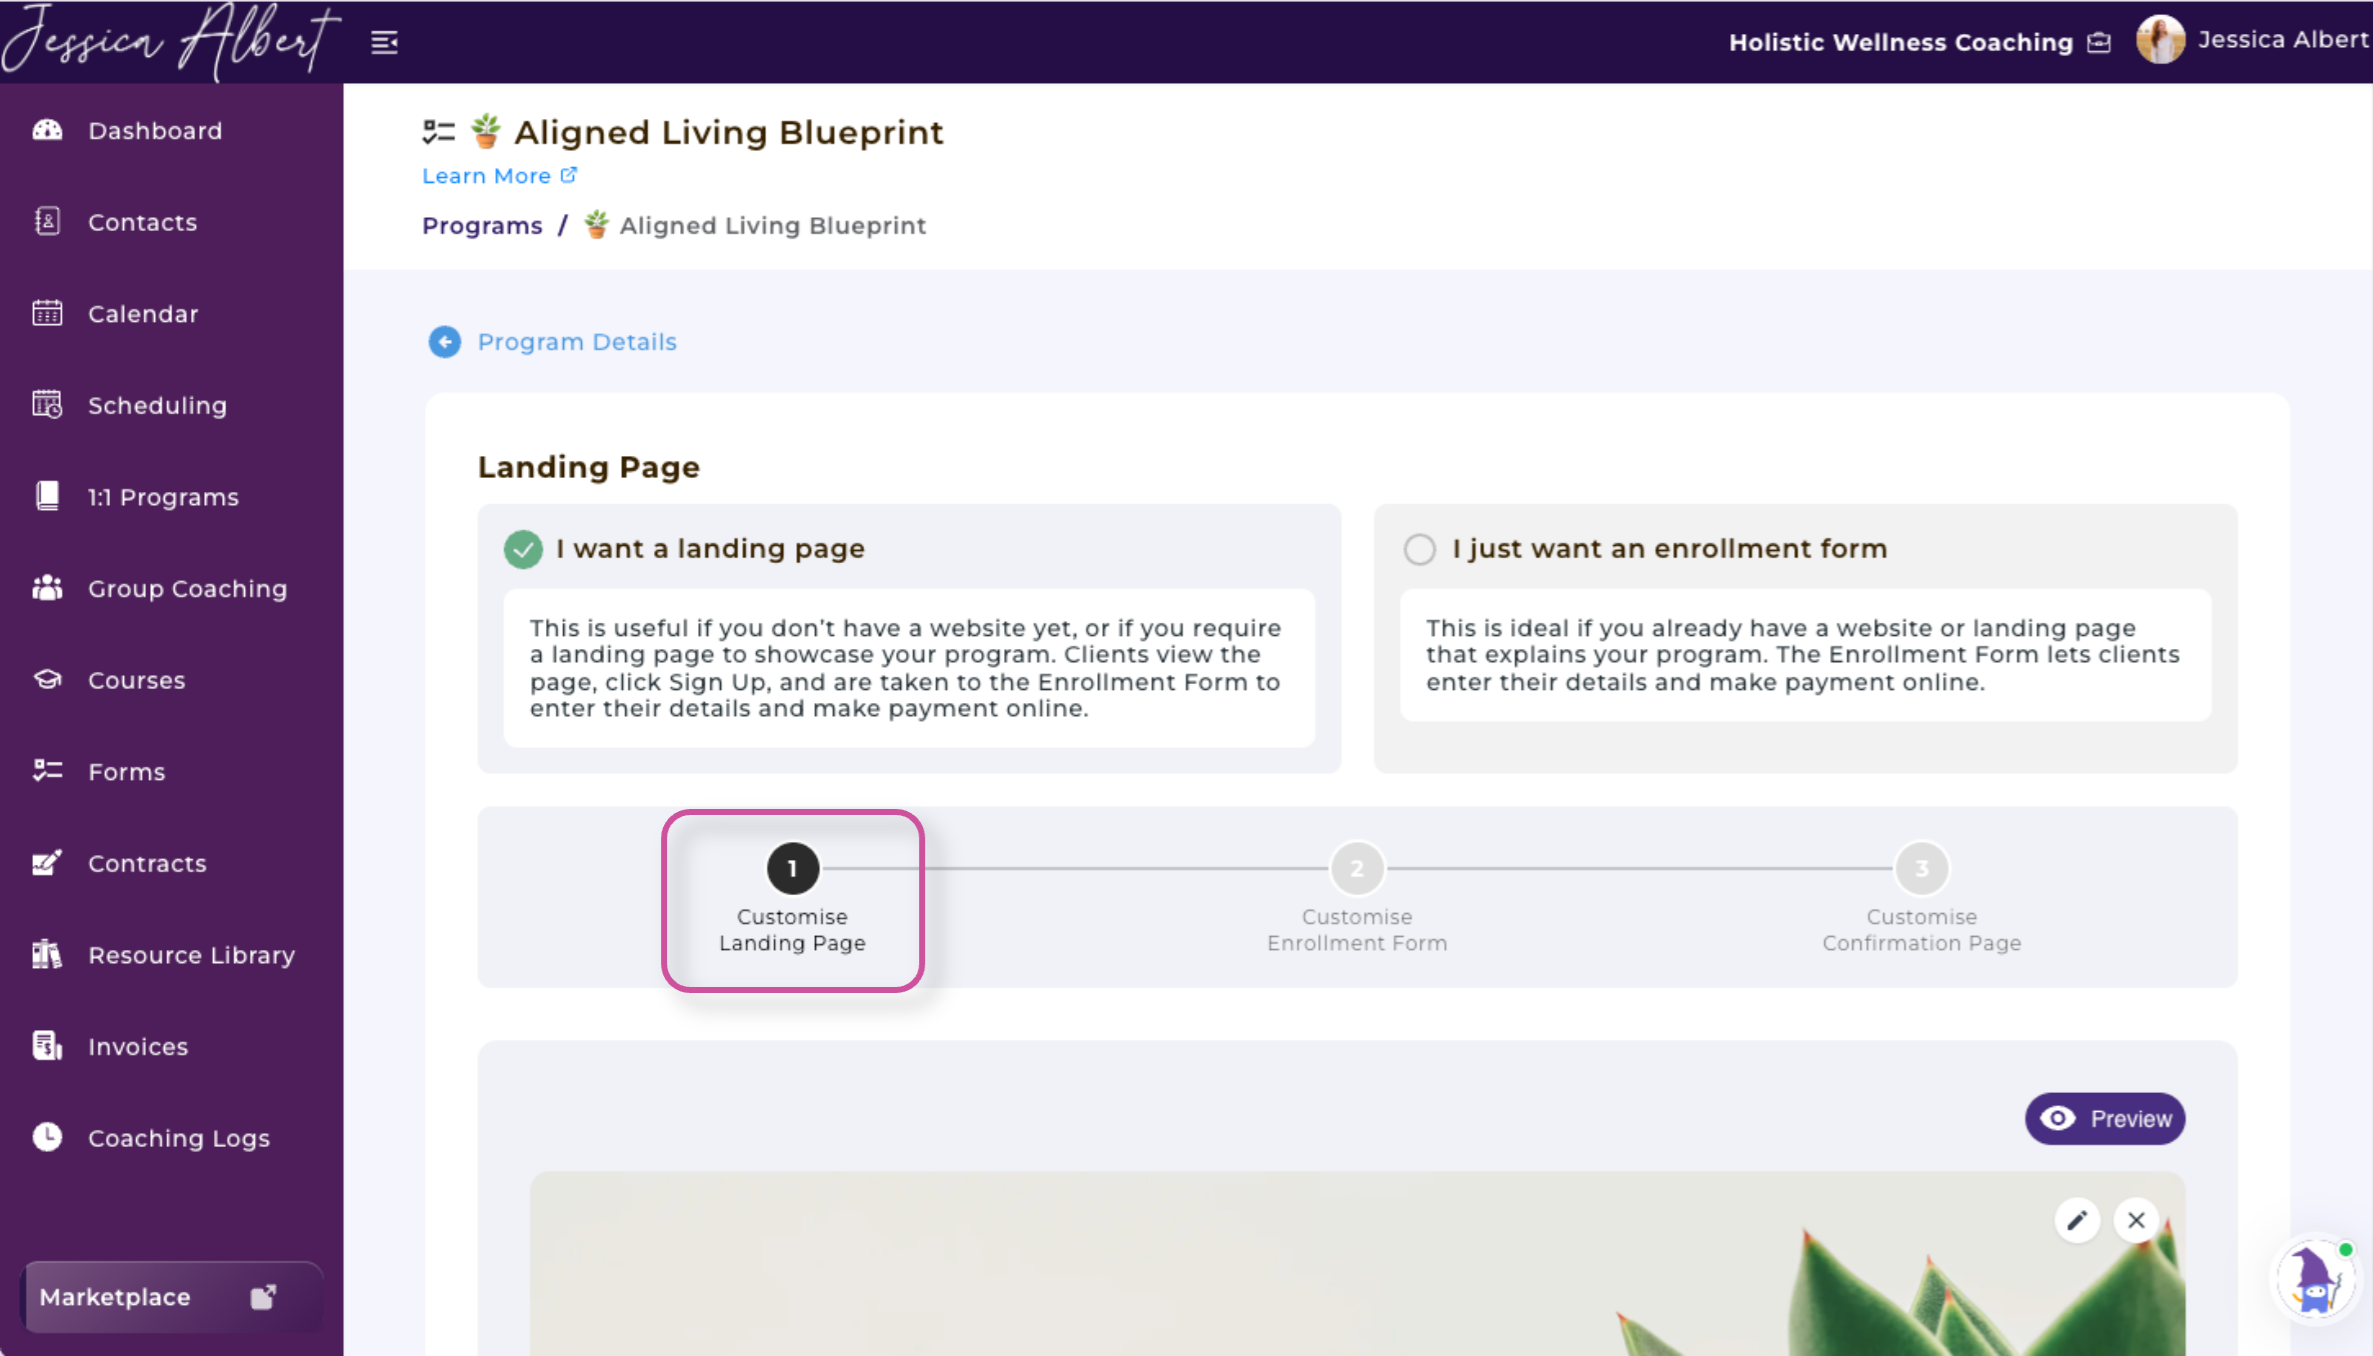
Your landing page introduces your program to prospective clients and helps them decide whether it is the right fit for them.
The available landing-page components include:
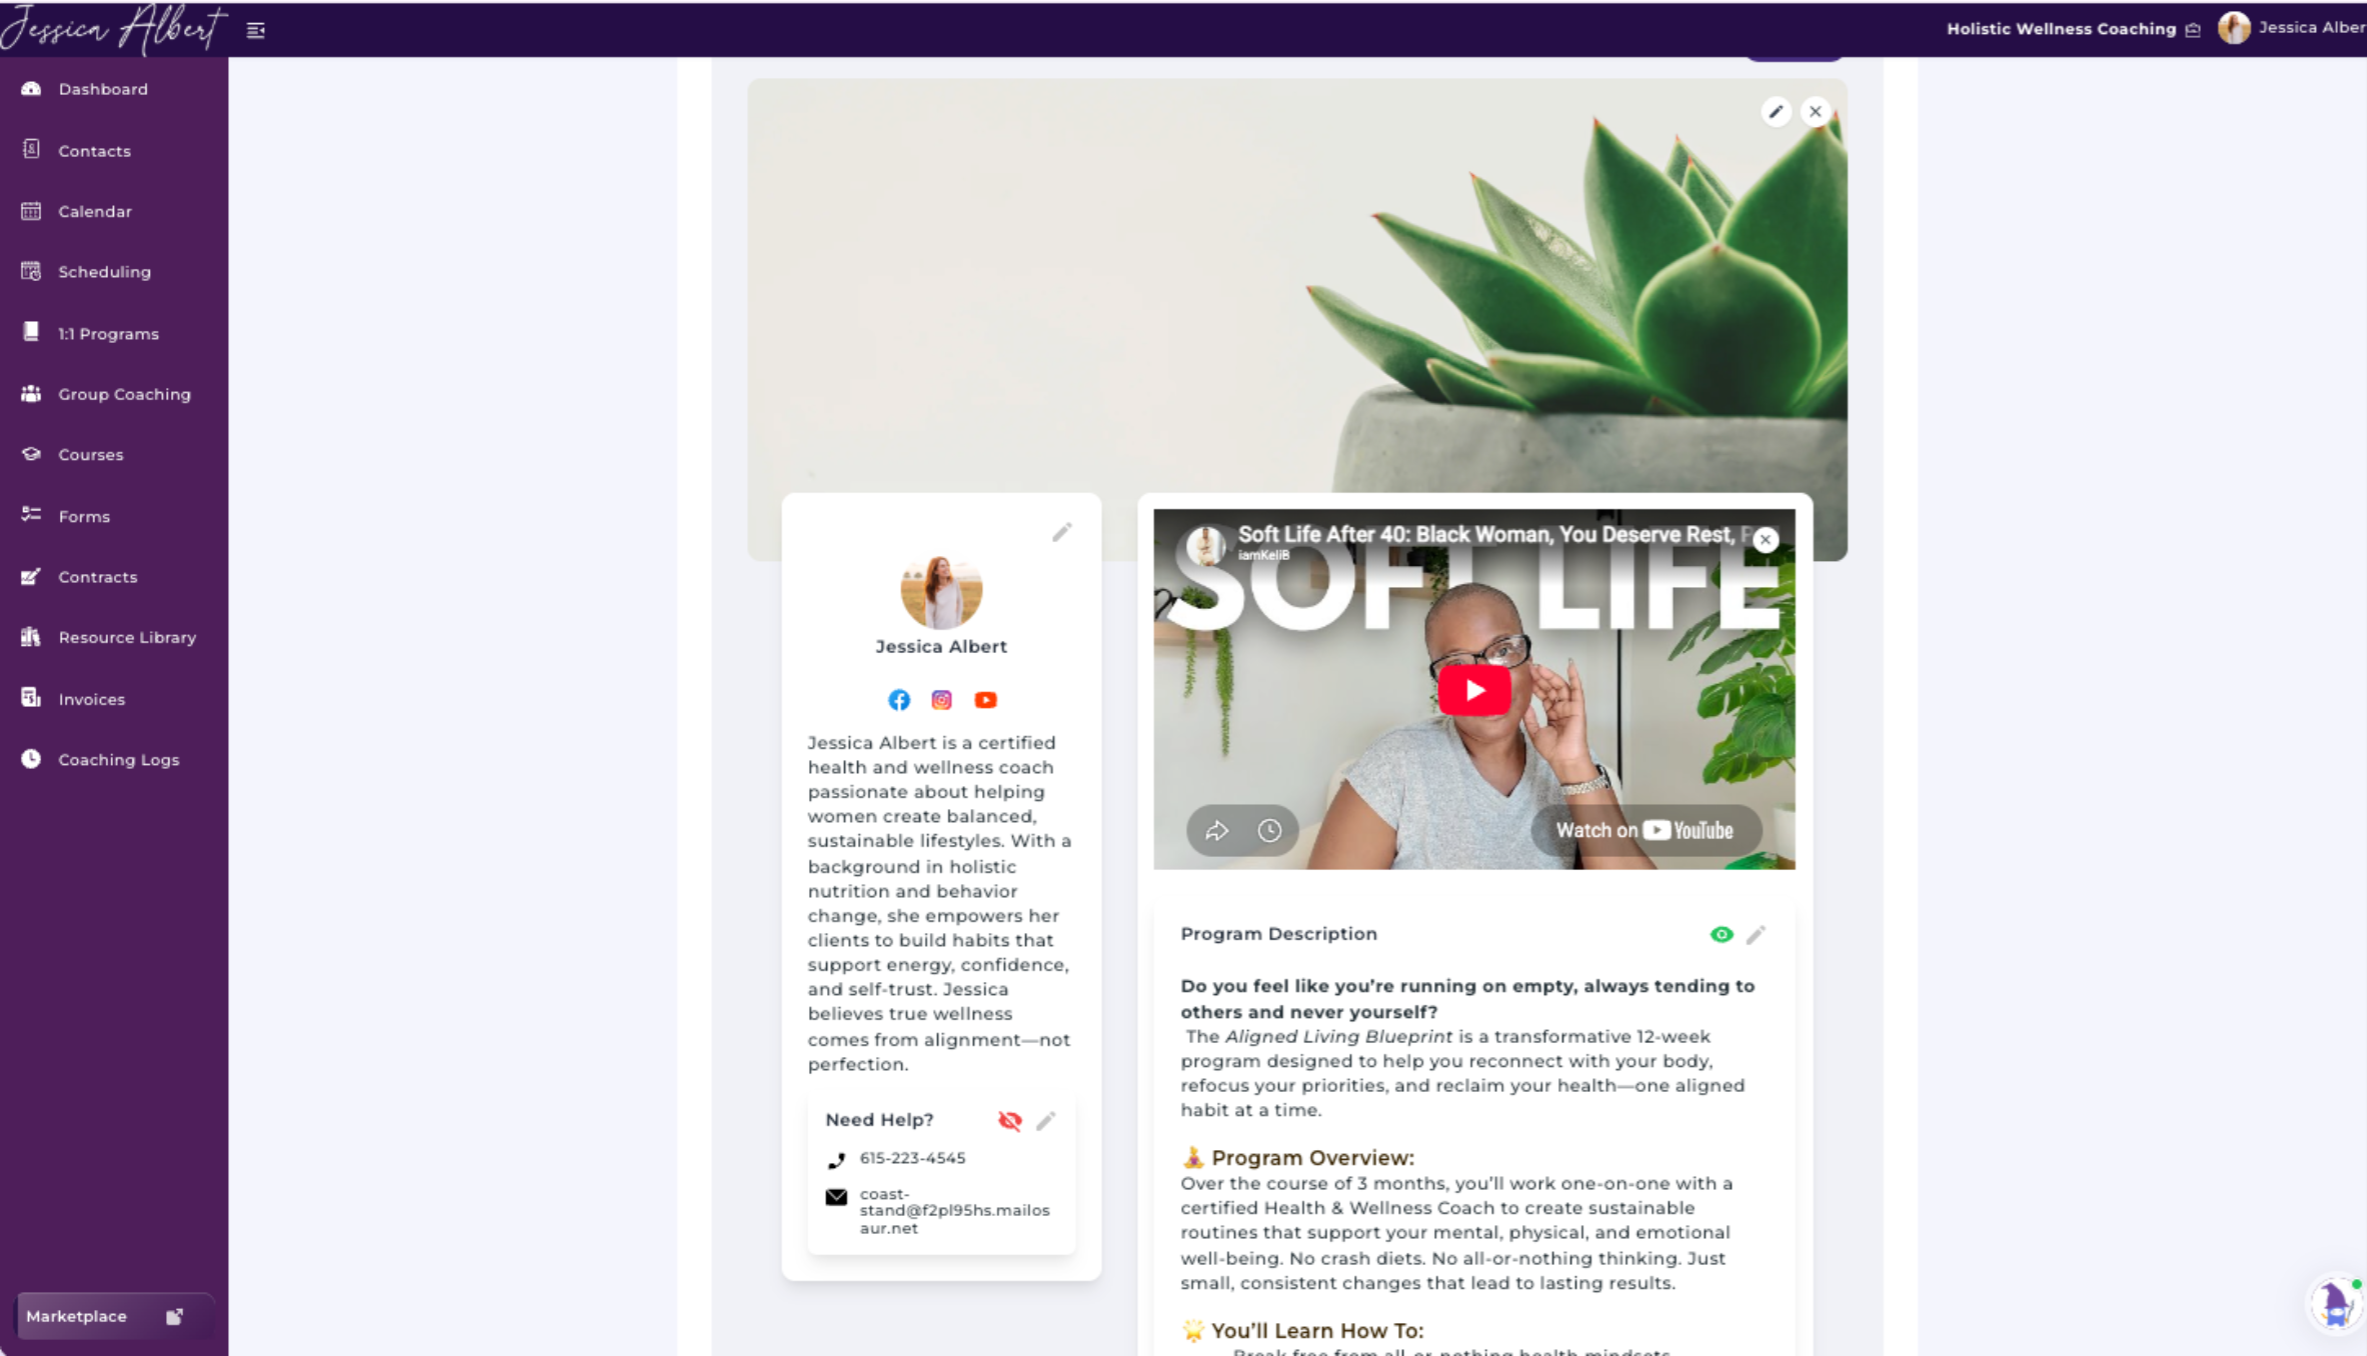
- Program banner
- Video
- Program description
- Program structure
- Client testimonials
- Program signup button
The left side of the landing page may also display:
- Your profile photo
- Social media icons
- Your professional bio
- A Need Help section
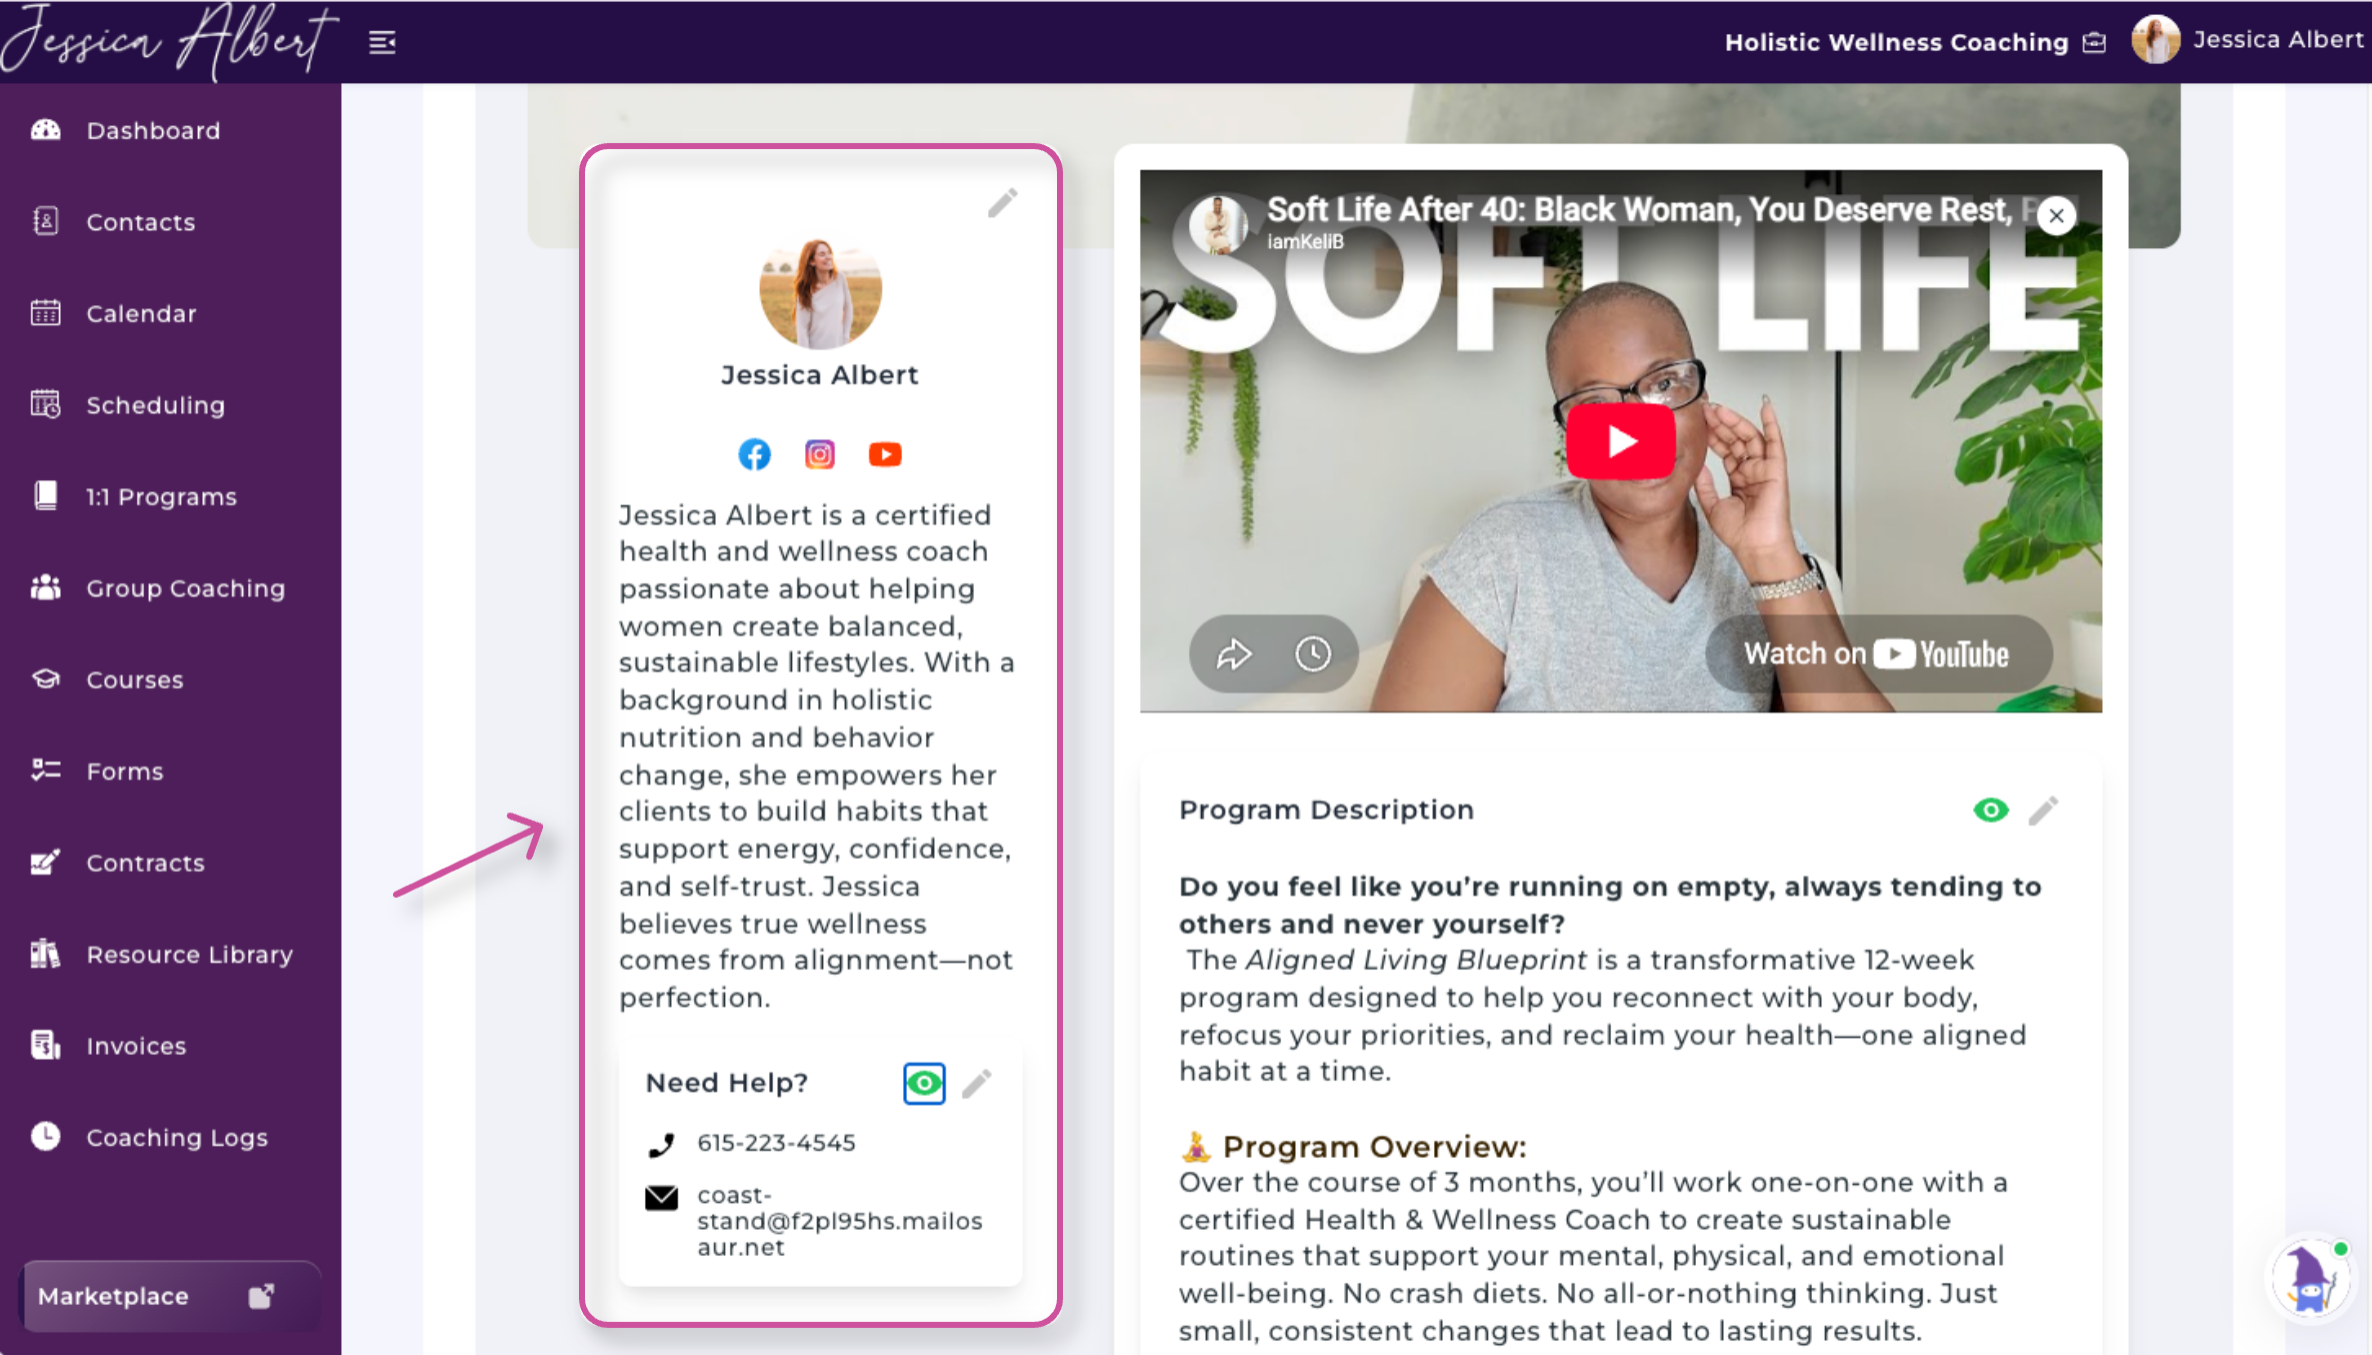
Manage Your Landing Page Sections
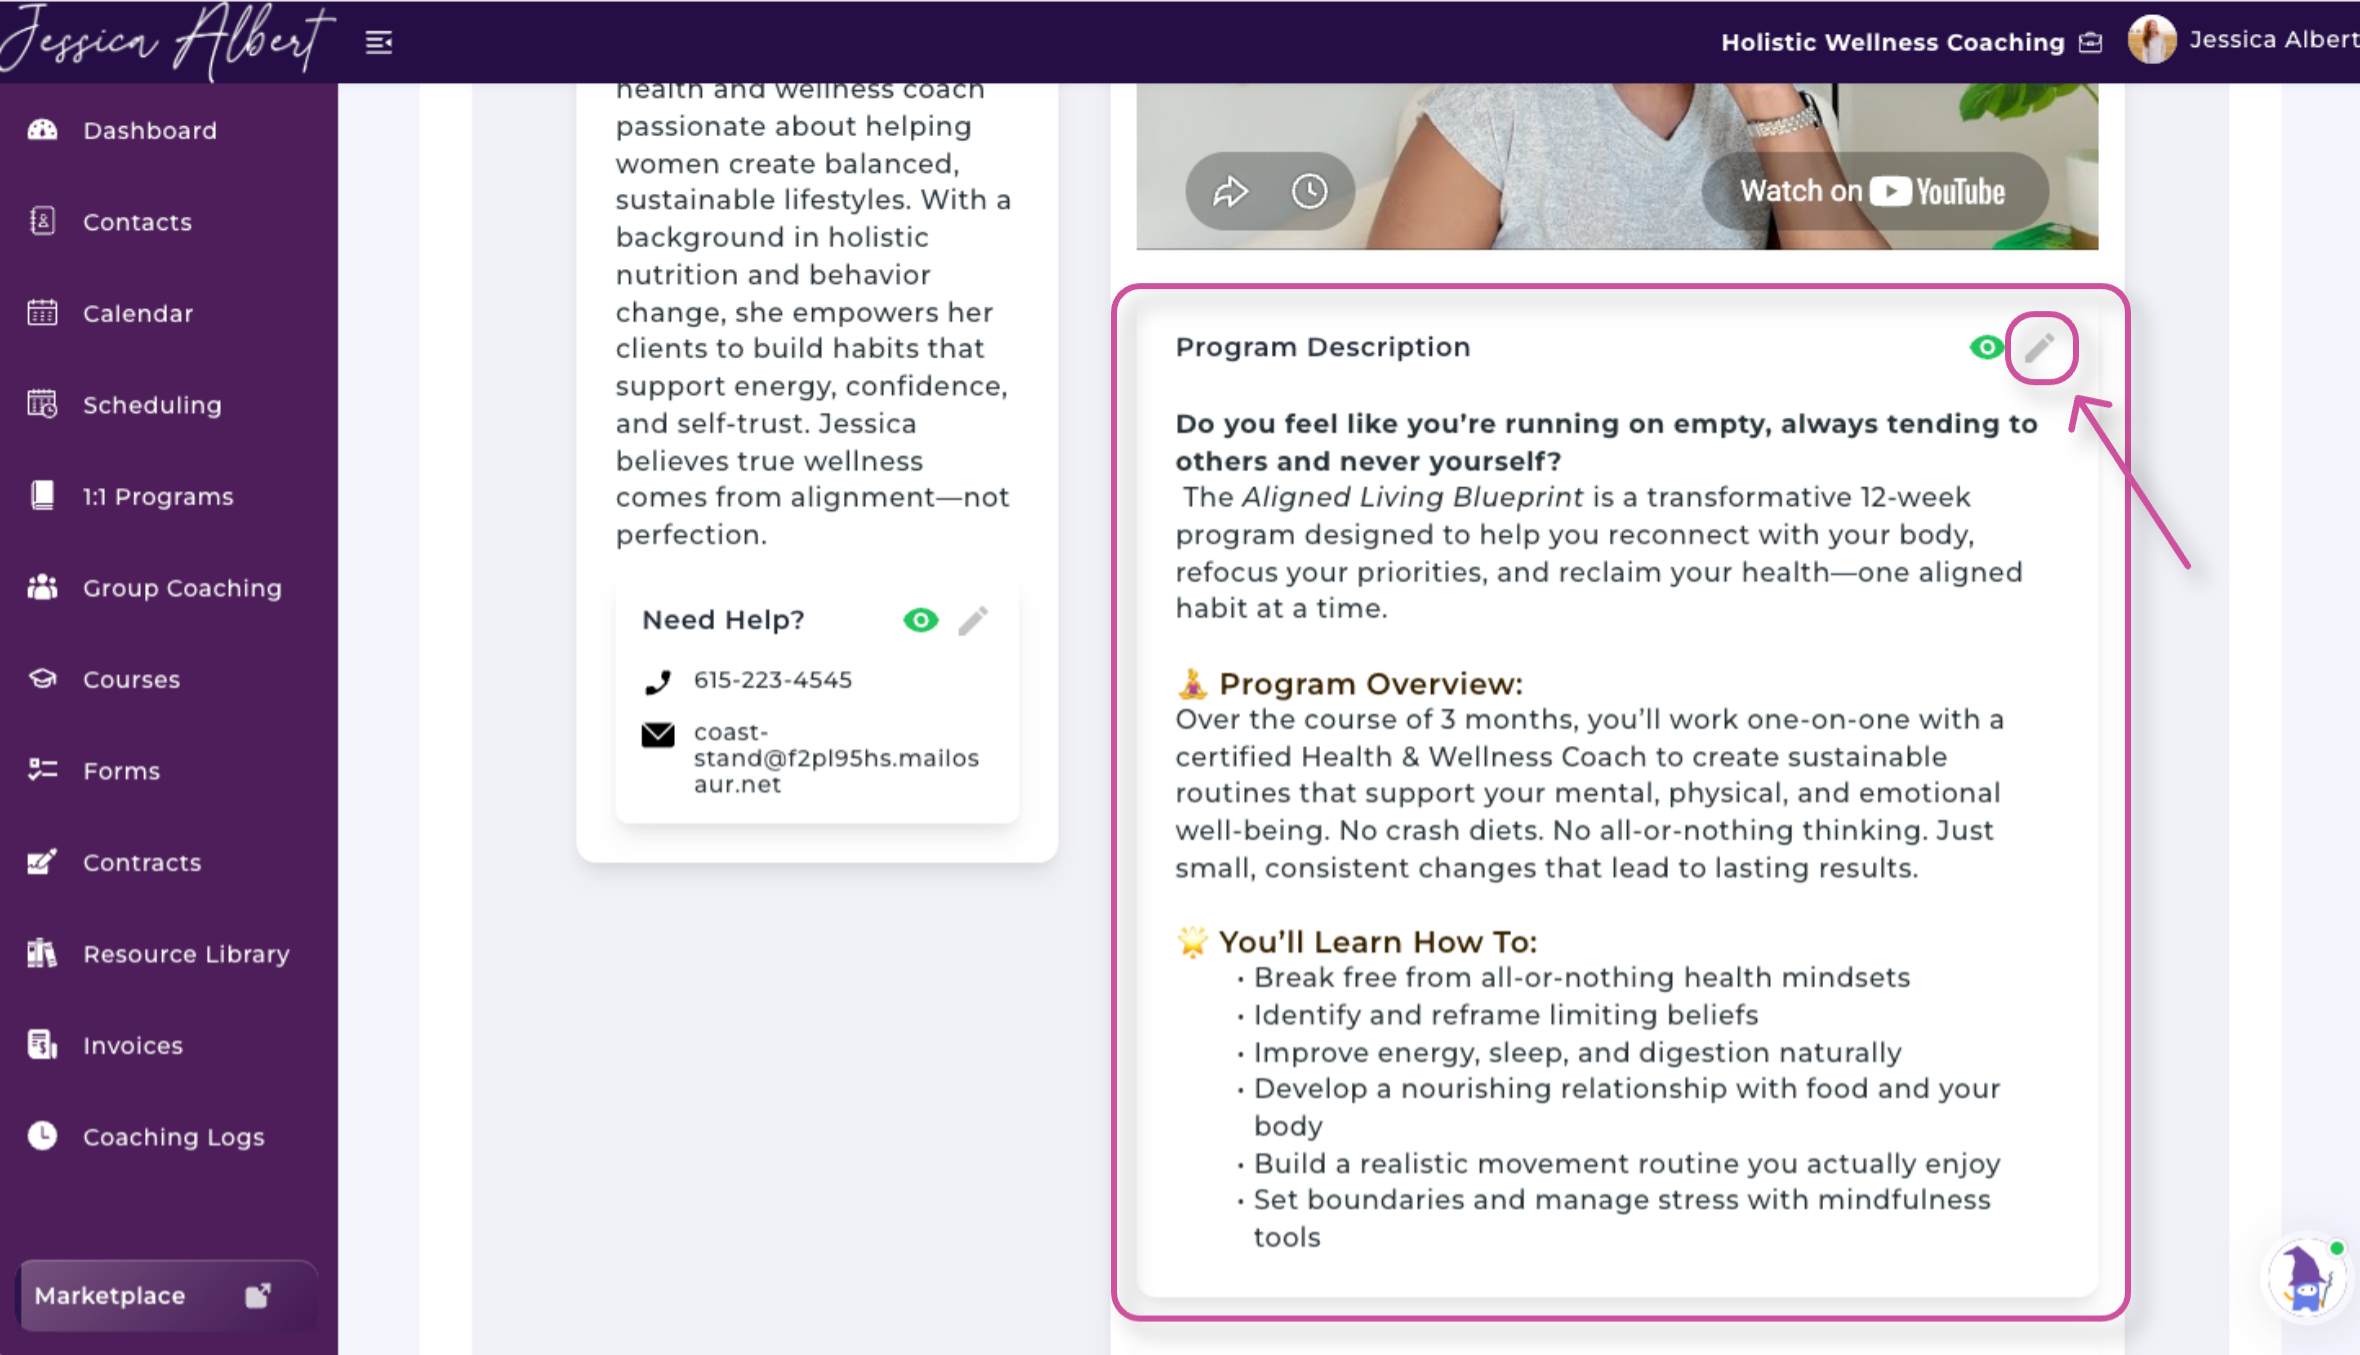
Select the pencil icon next to a section to edit its content.
For example, to update your program description:
- Locate the Program Description section.
- Select the pencil icon.
- Edit the description.
- Save your changes.
Use the same process to edit other customizable sections on the page.
Add Client Testimonials
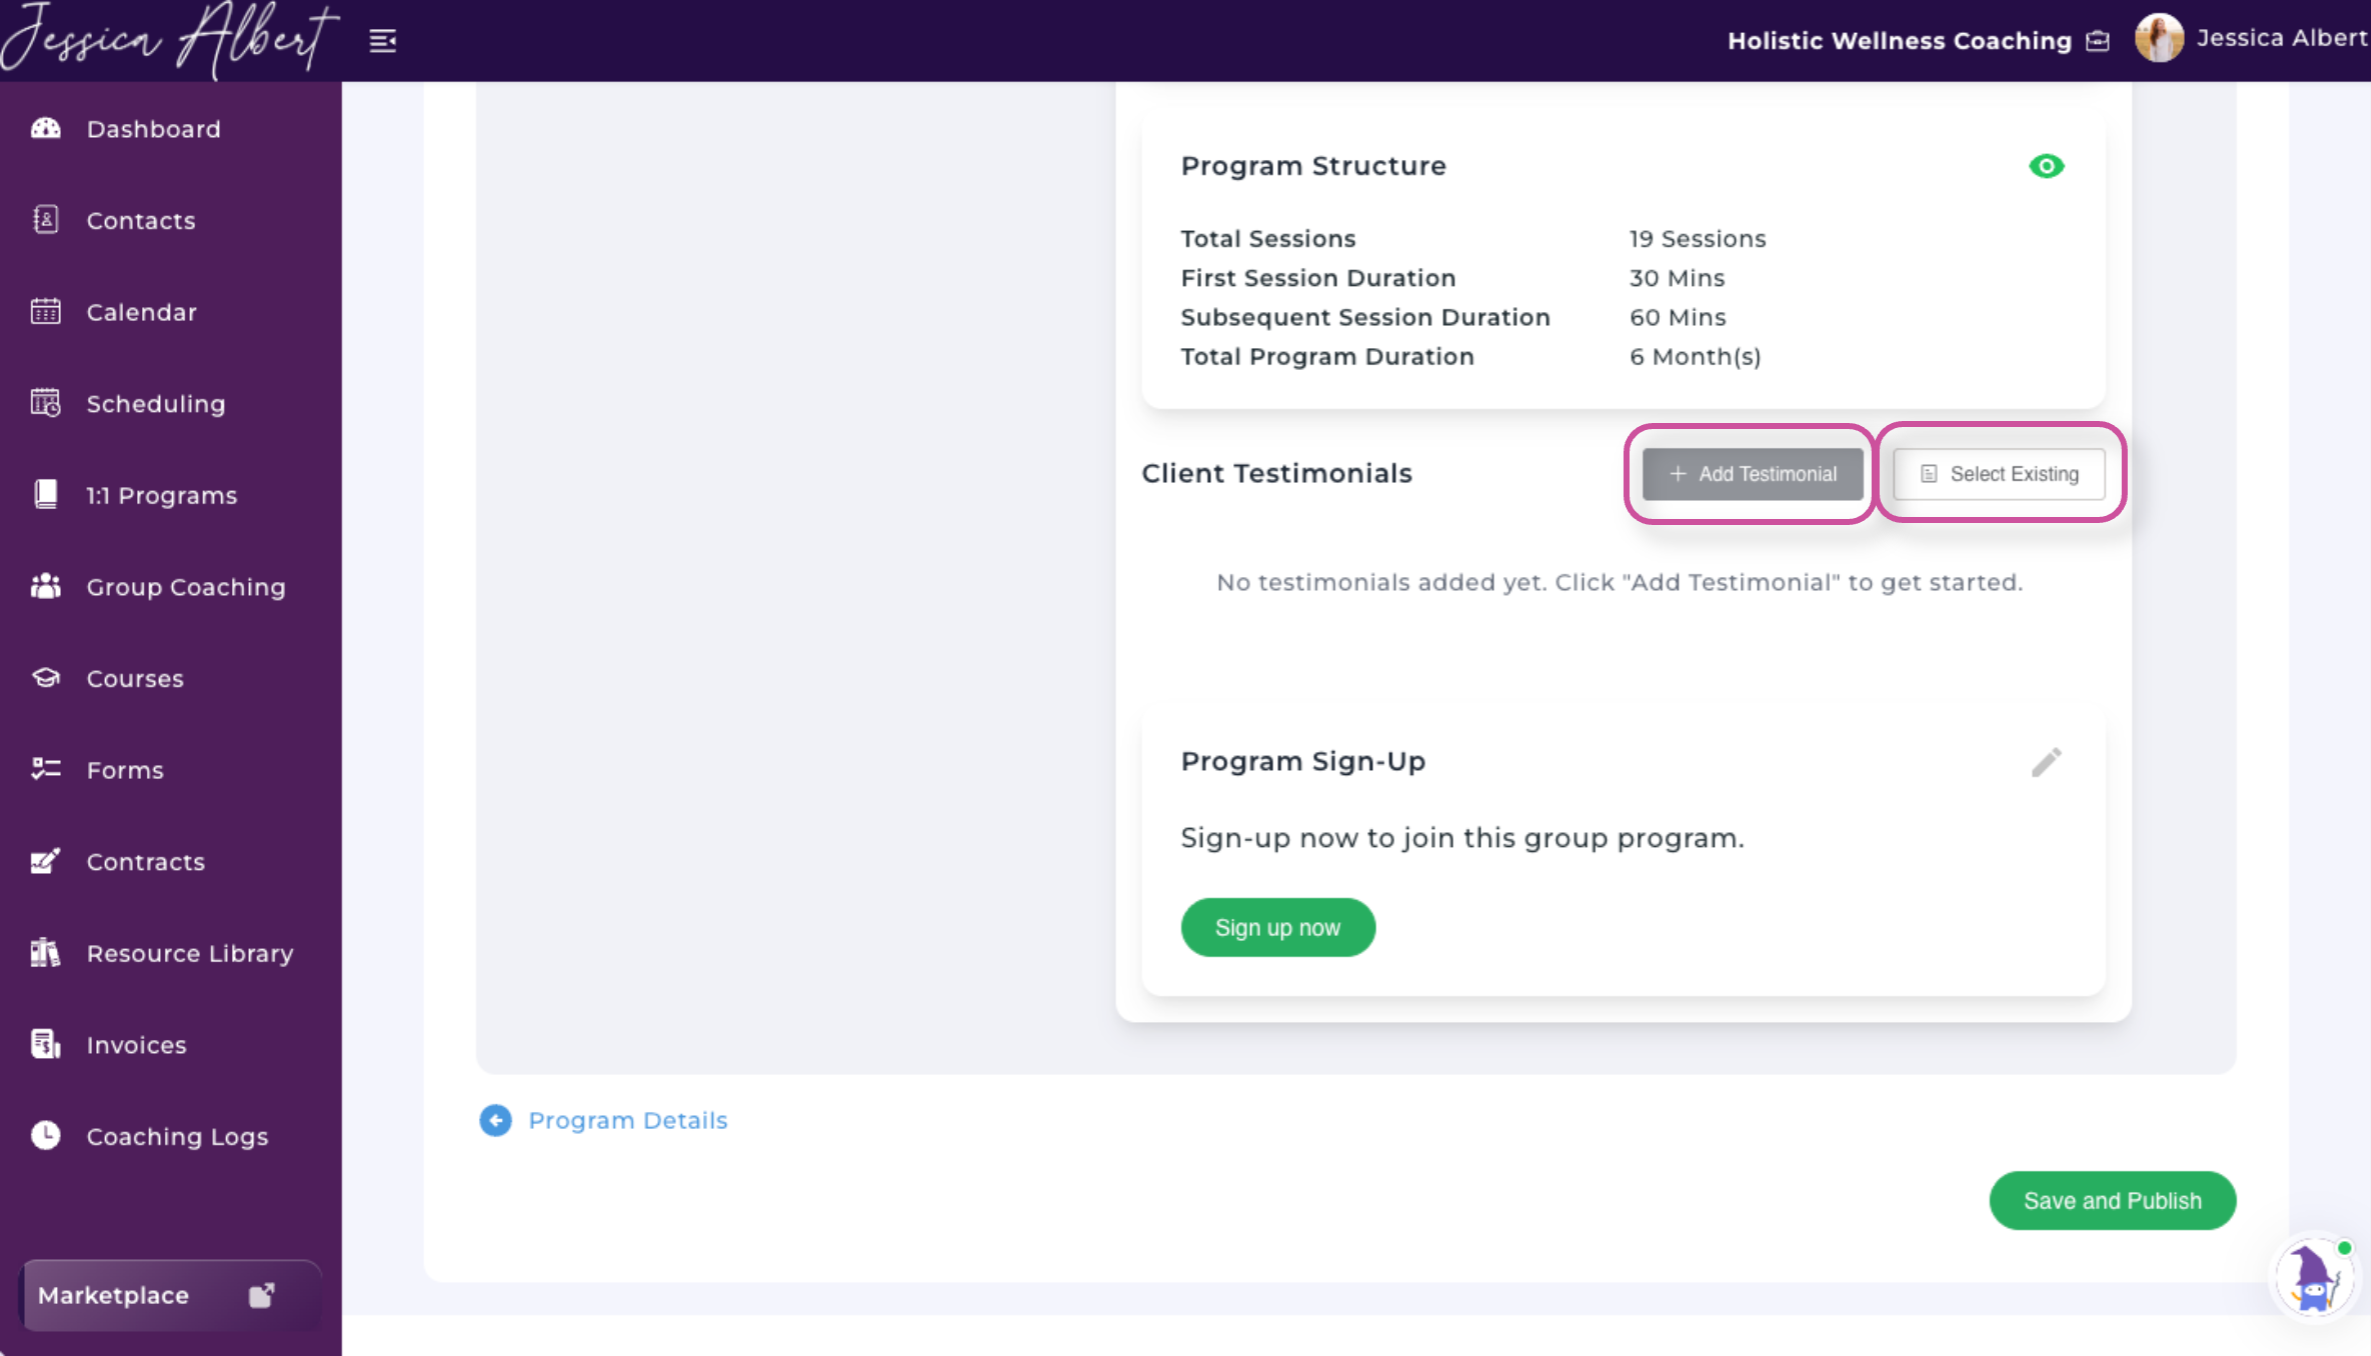
Client testimonials can provide helpful social proof and give prospective clients a better understanding of the experience you offer.
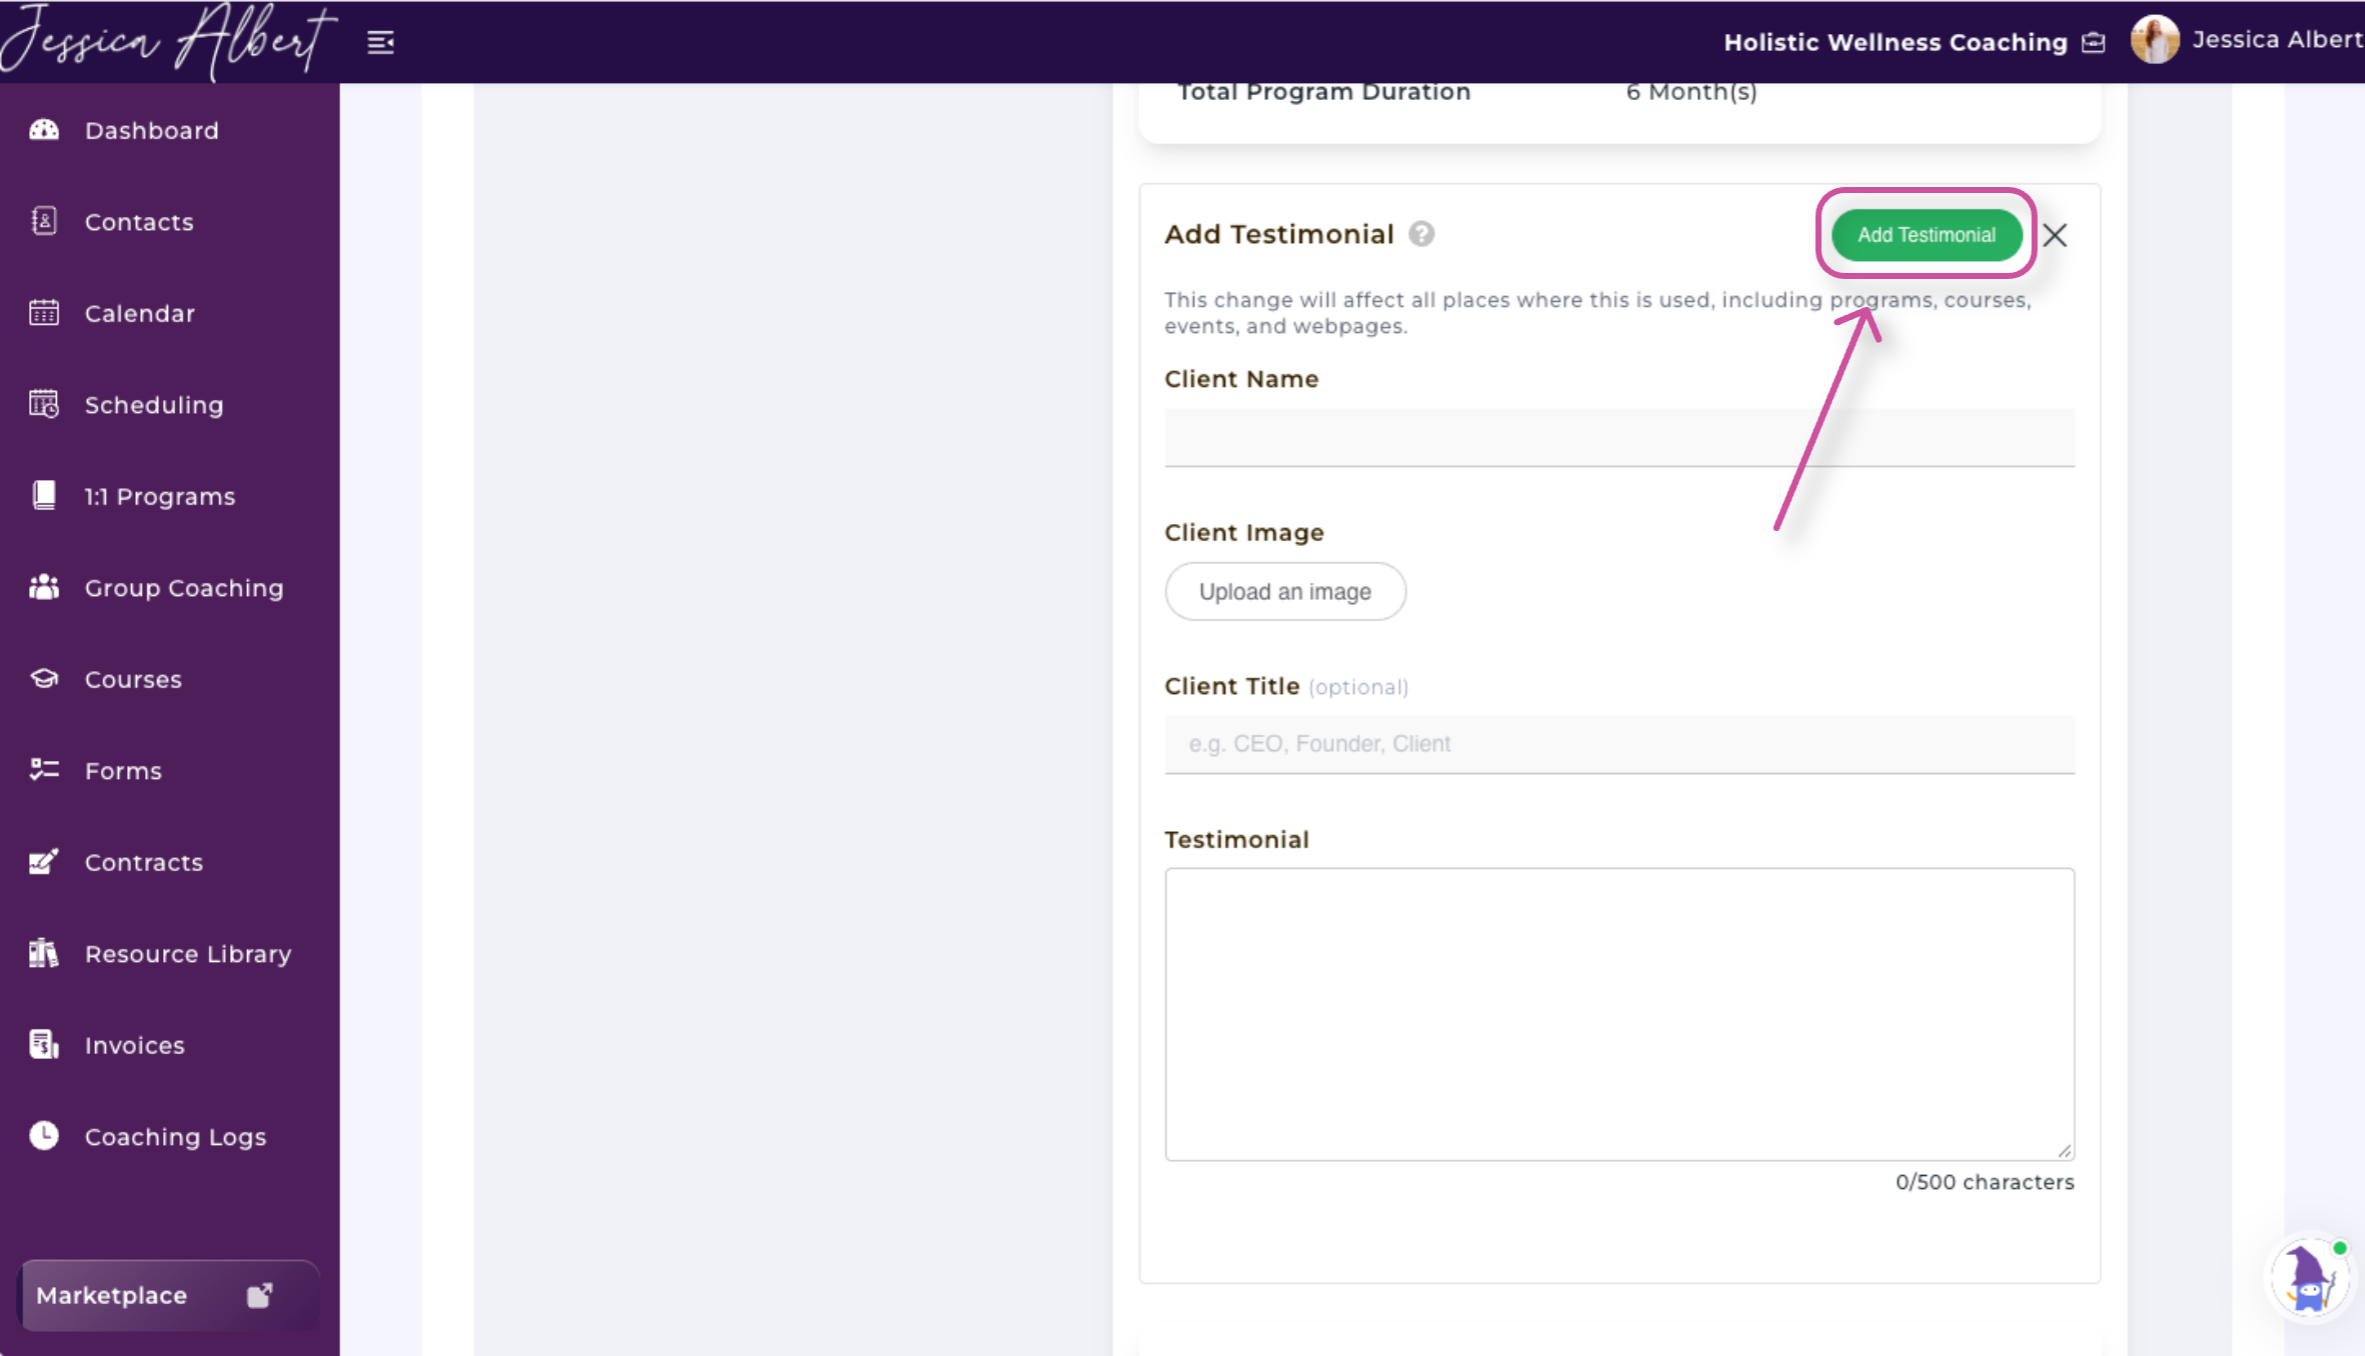
You can add a new testimonial or reuse one you previously added to CoachVantage.
To add an existing testimonial:
- Locate the Client Testimonials section.
- Select Add Testimonial or Select Existing.
- Write the testimonial or choose ones you would like to display.
- Save your changes.
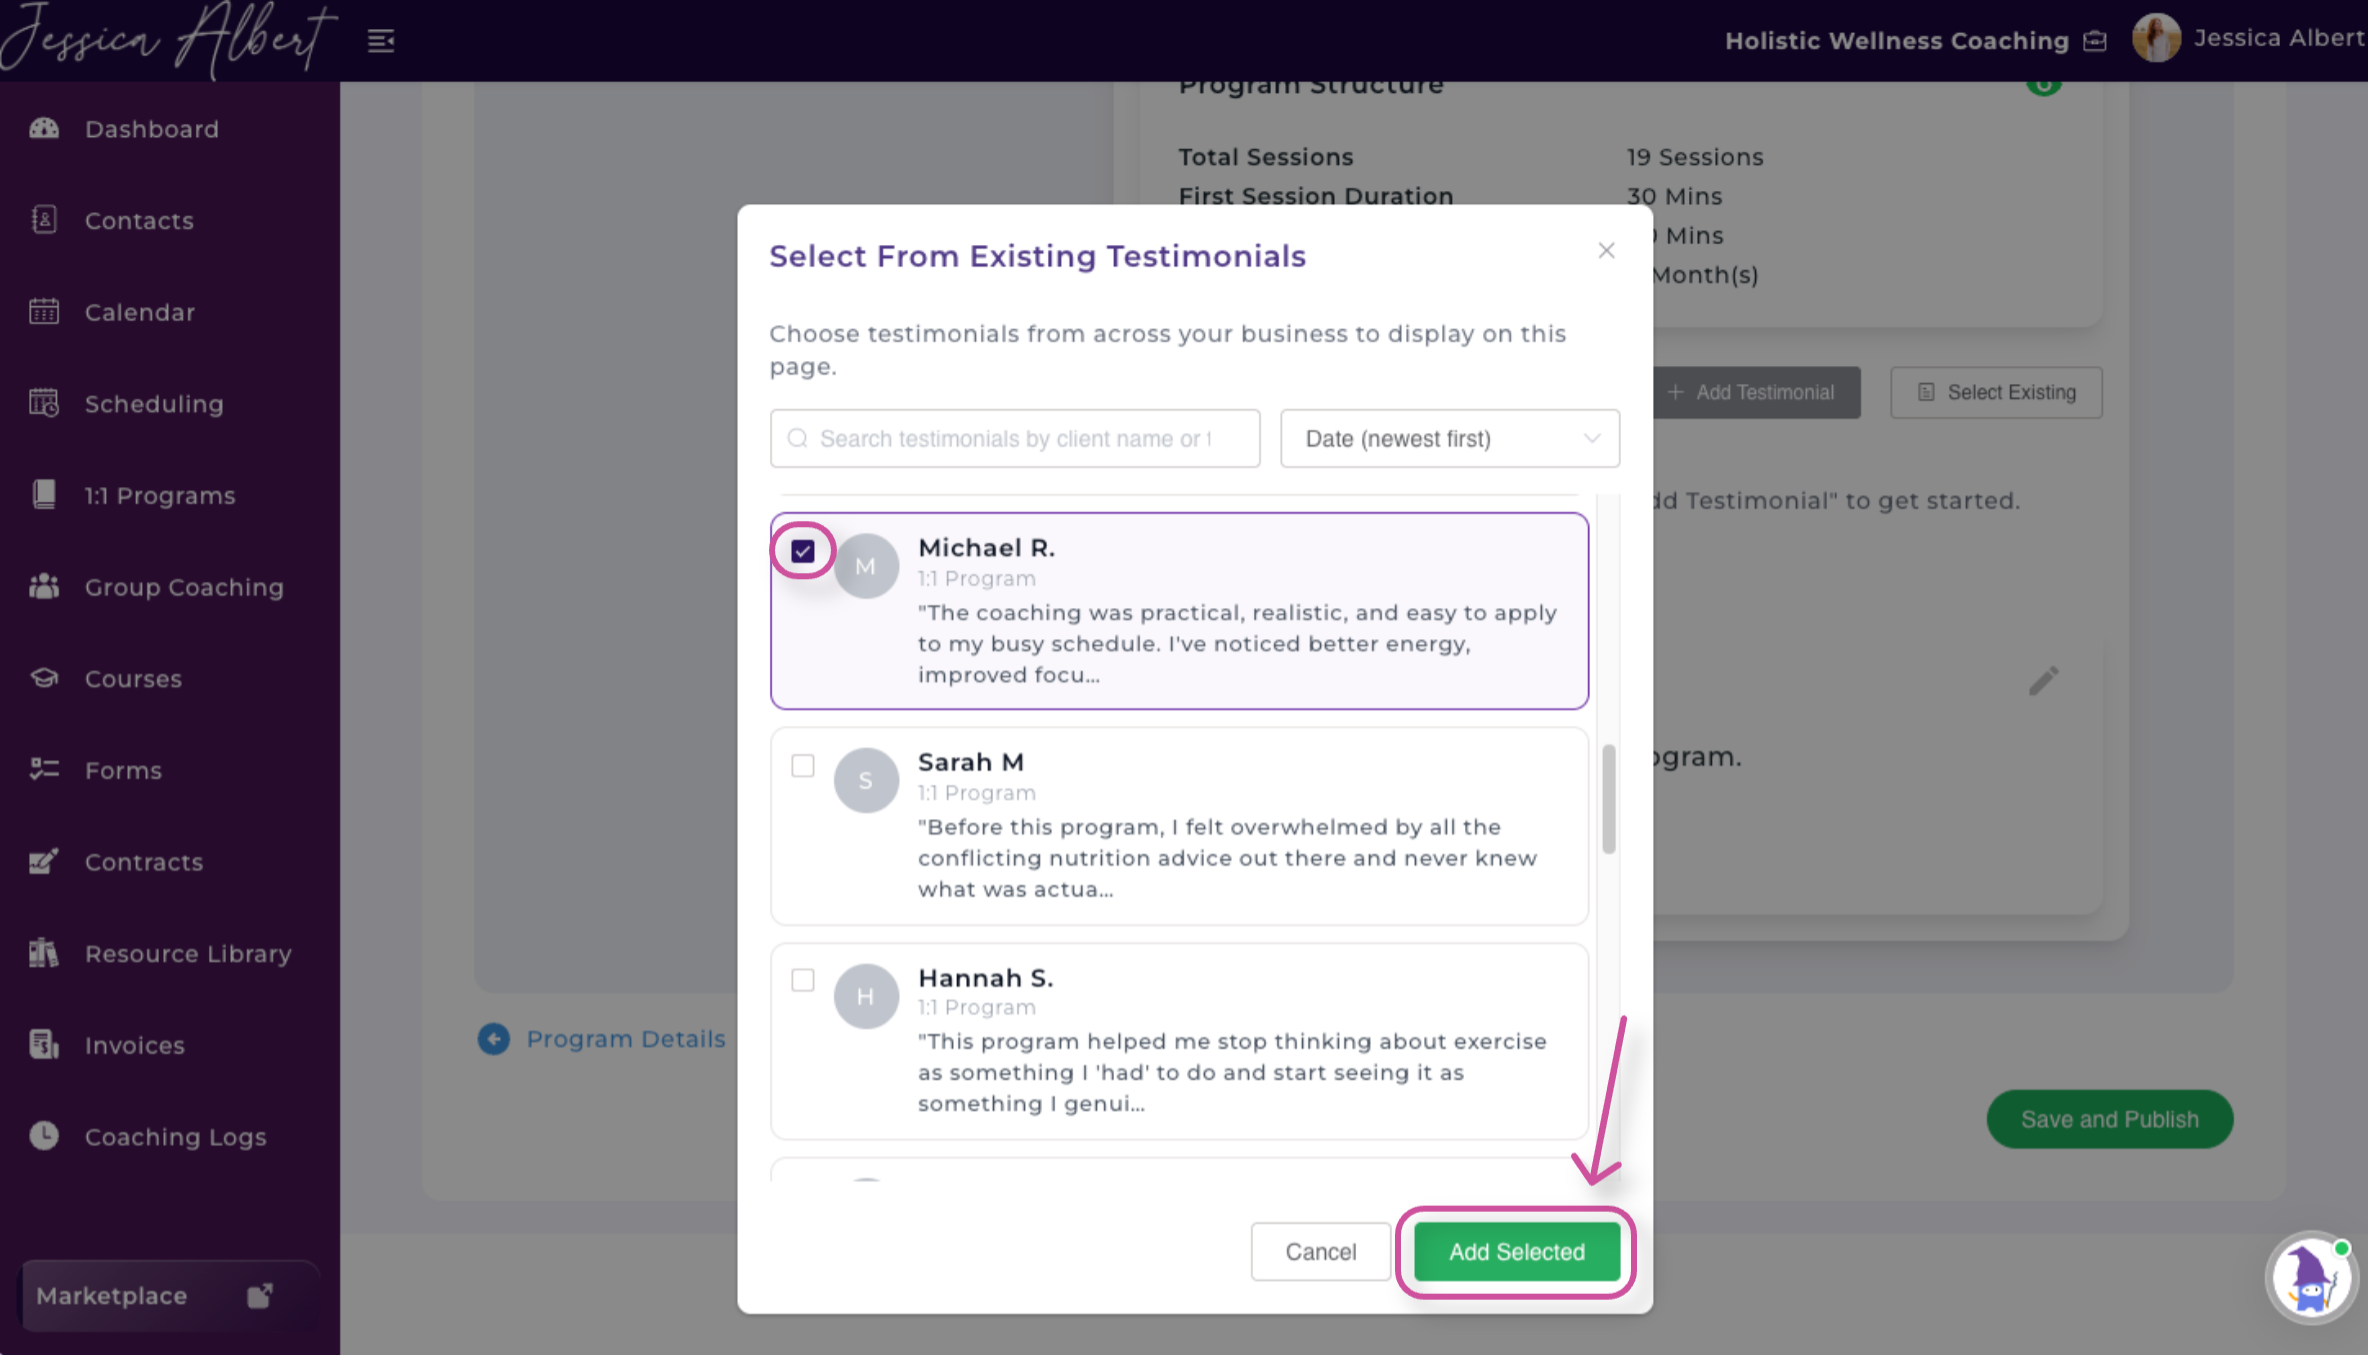
Reusing an existing testimonial prevents you from having to enter the same information separately for each program.
To remove a testimonial from the program, select the trash can icon next to it.
Show or Hide Landing Page Sections
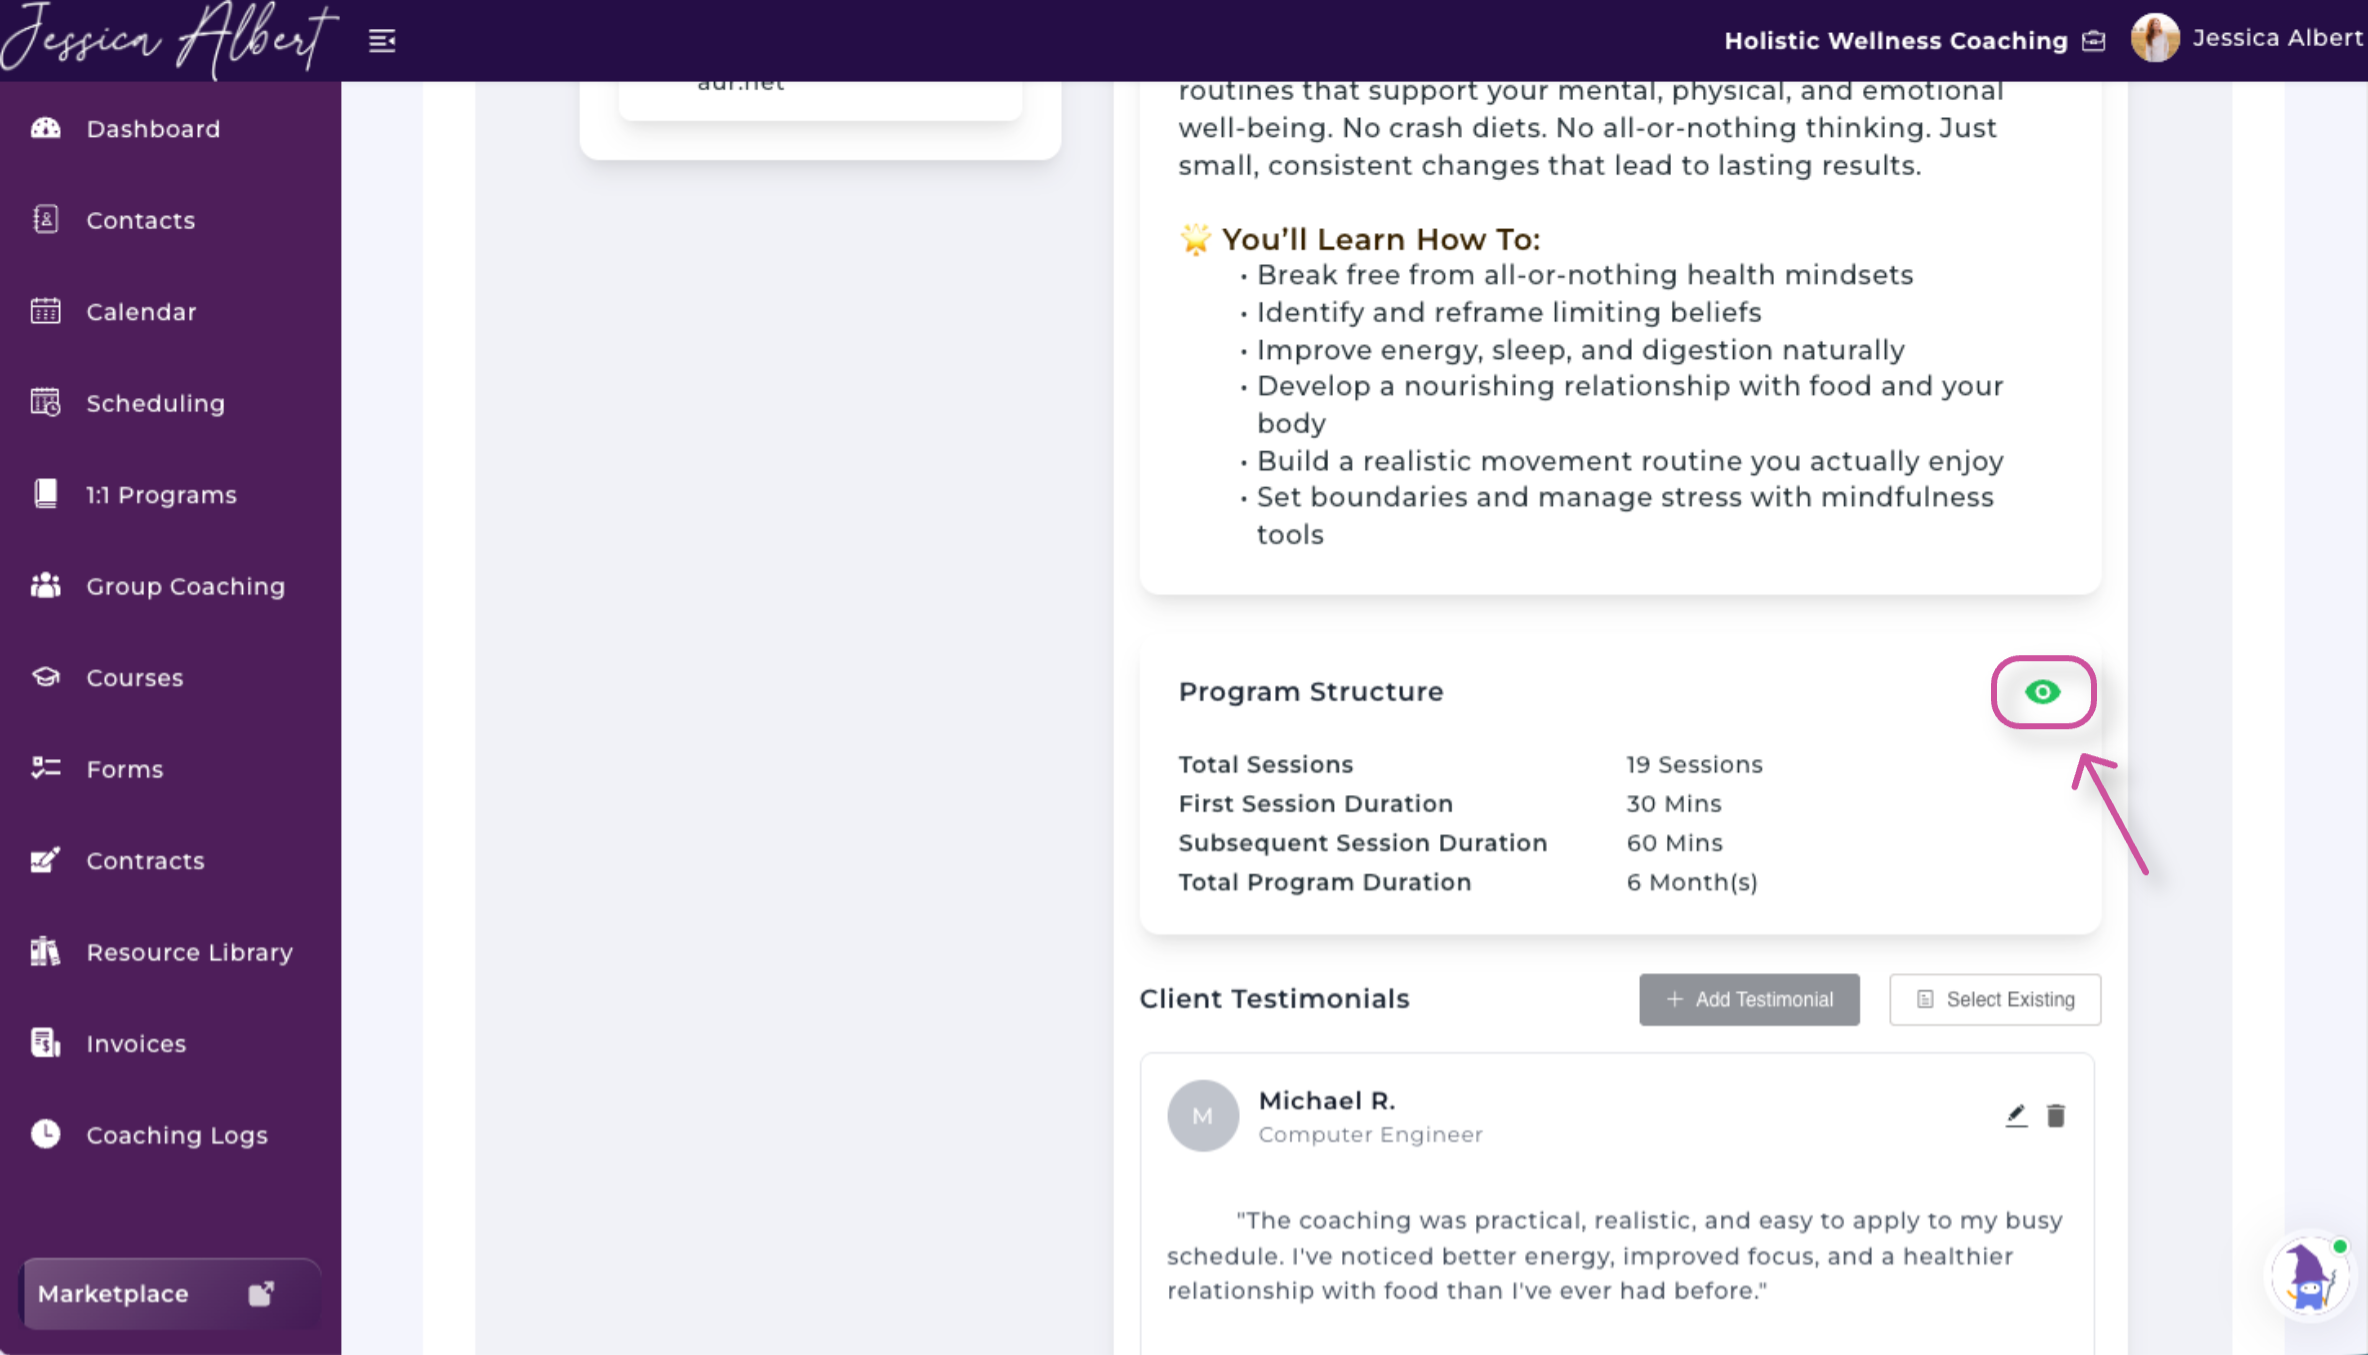
Each landing-page section includes an eye icon that controls its visibility.
- A green eye icon means the section will be displayed to clients.
- A red eye icon with a line through it means the section will be hidden.
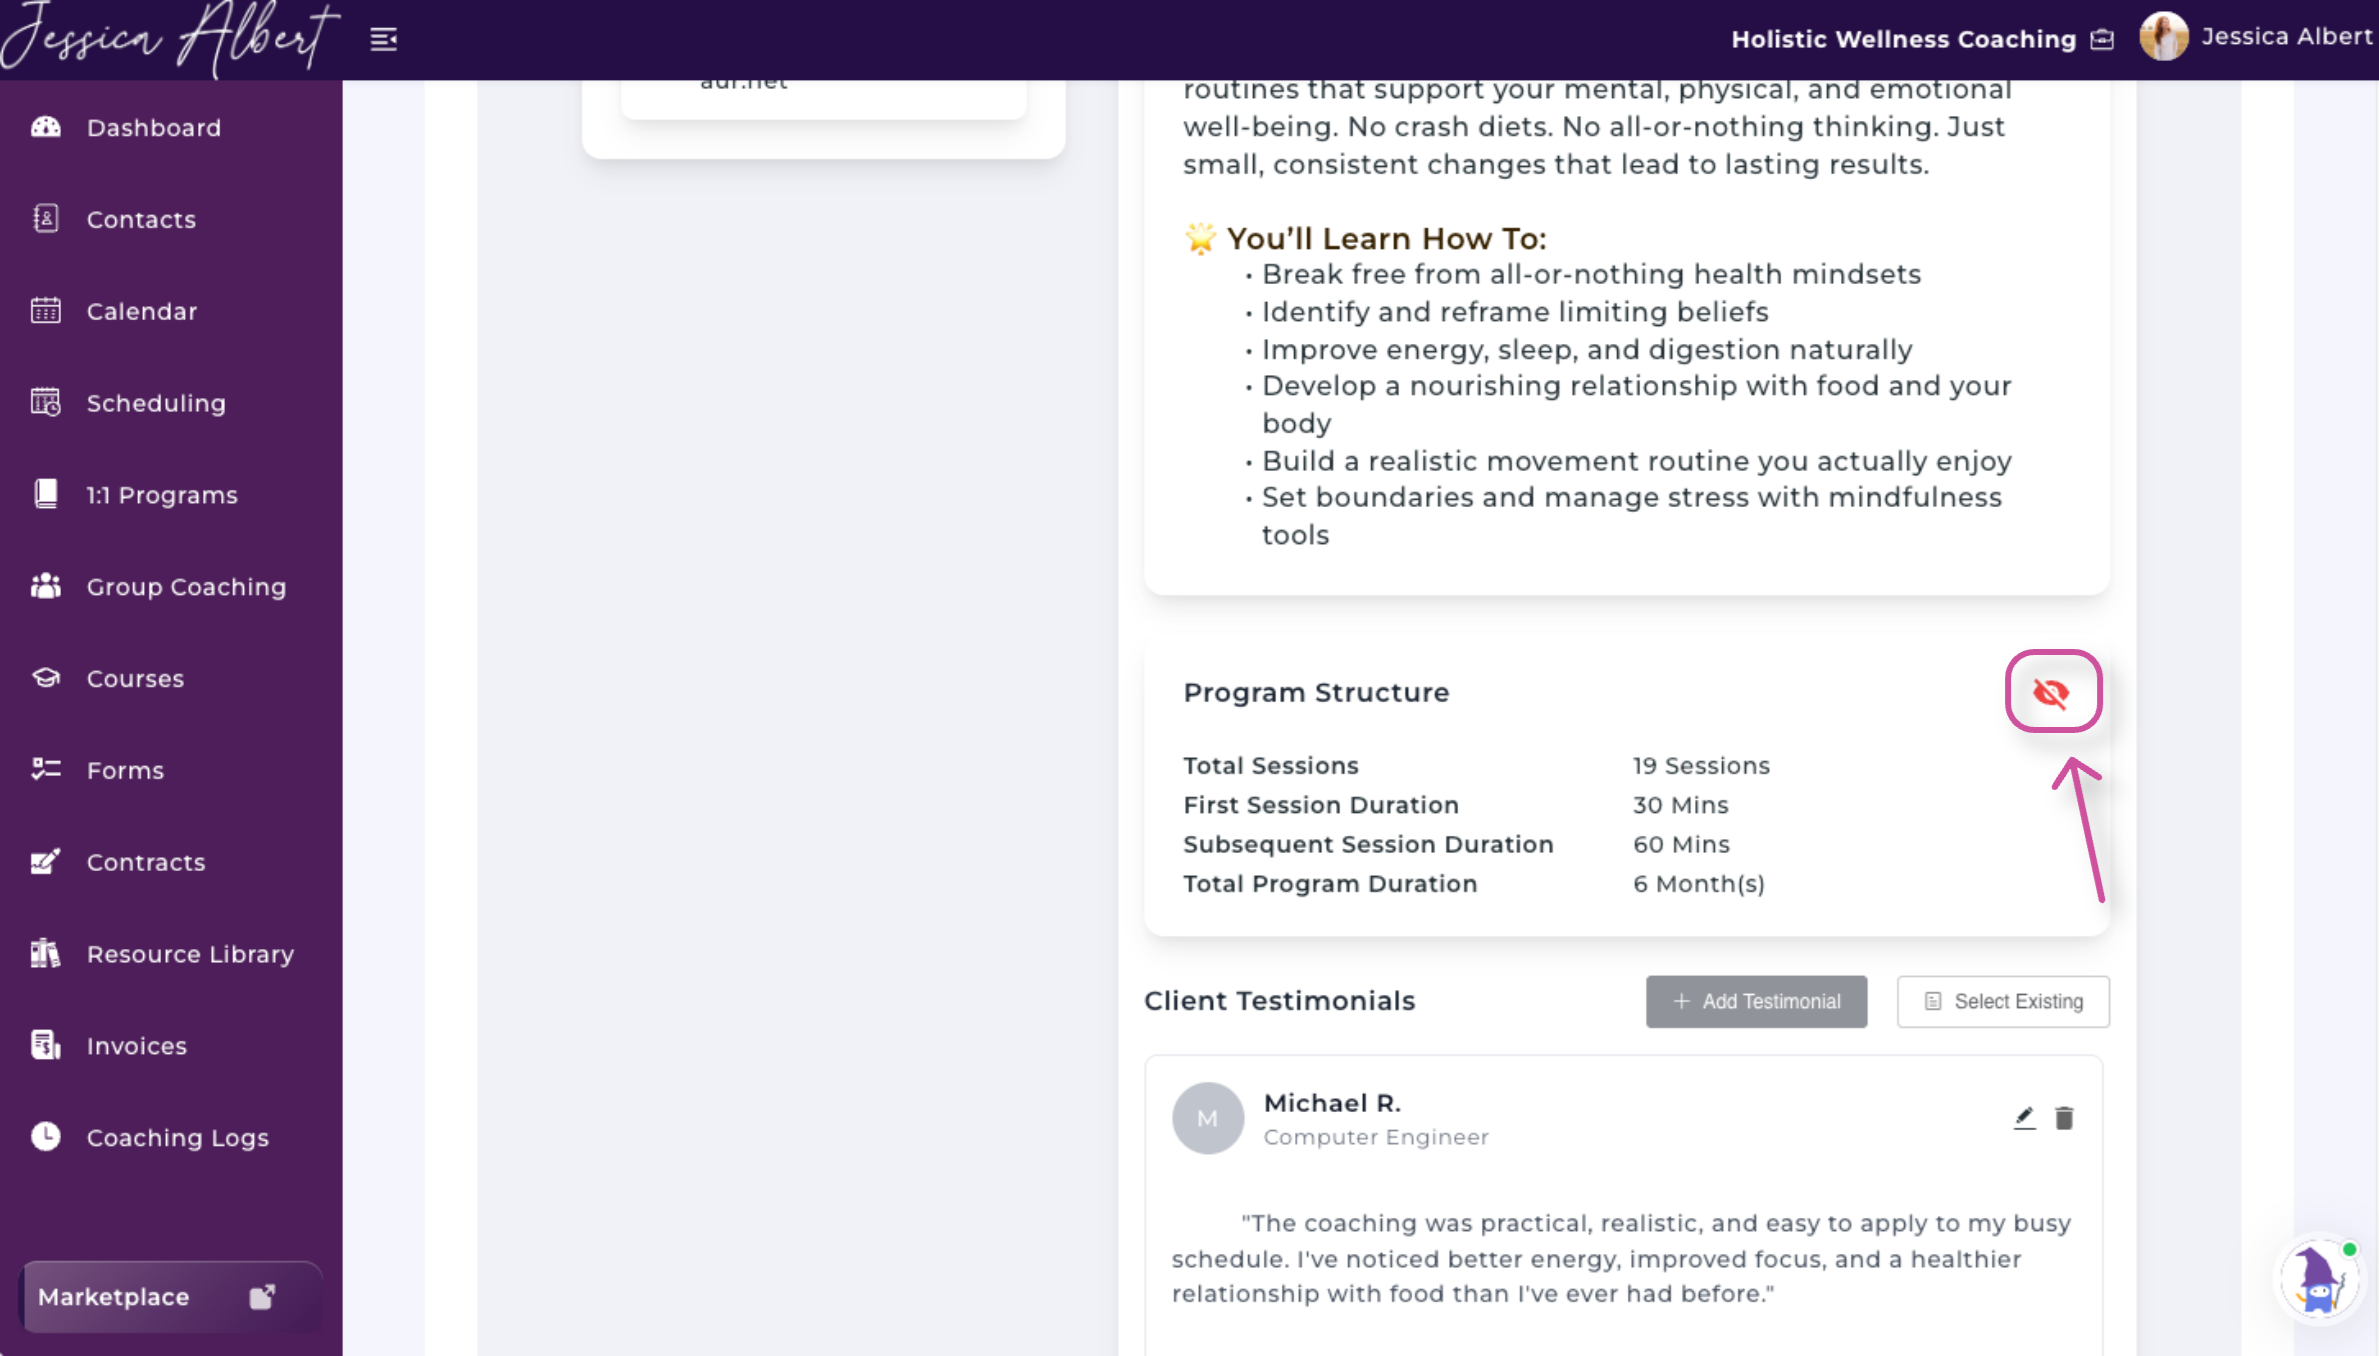
To hide a section, select its green eye icon. The icon will turn red, confirming that clients will not see that section.
Select the icon again if you want to make the section visible.
This allows you to customize the page so that it includes only the content relevant to your program.
Customize Your Profile and Social Media Information
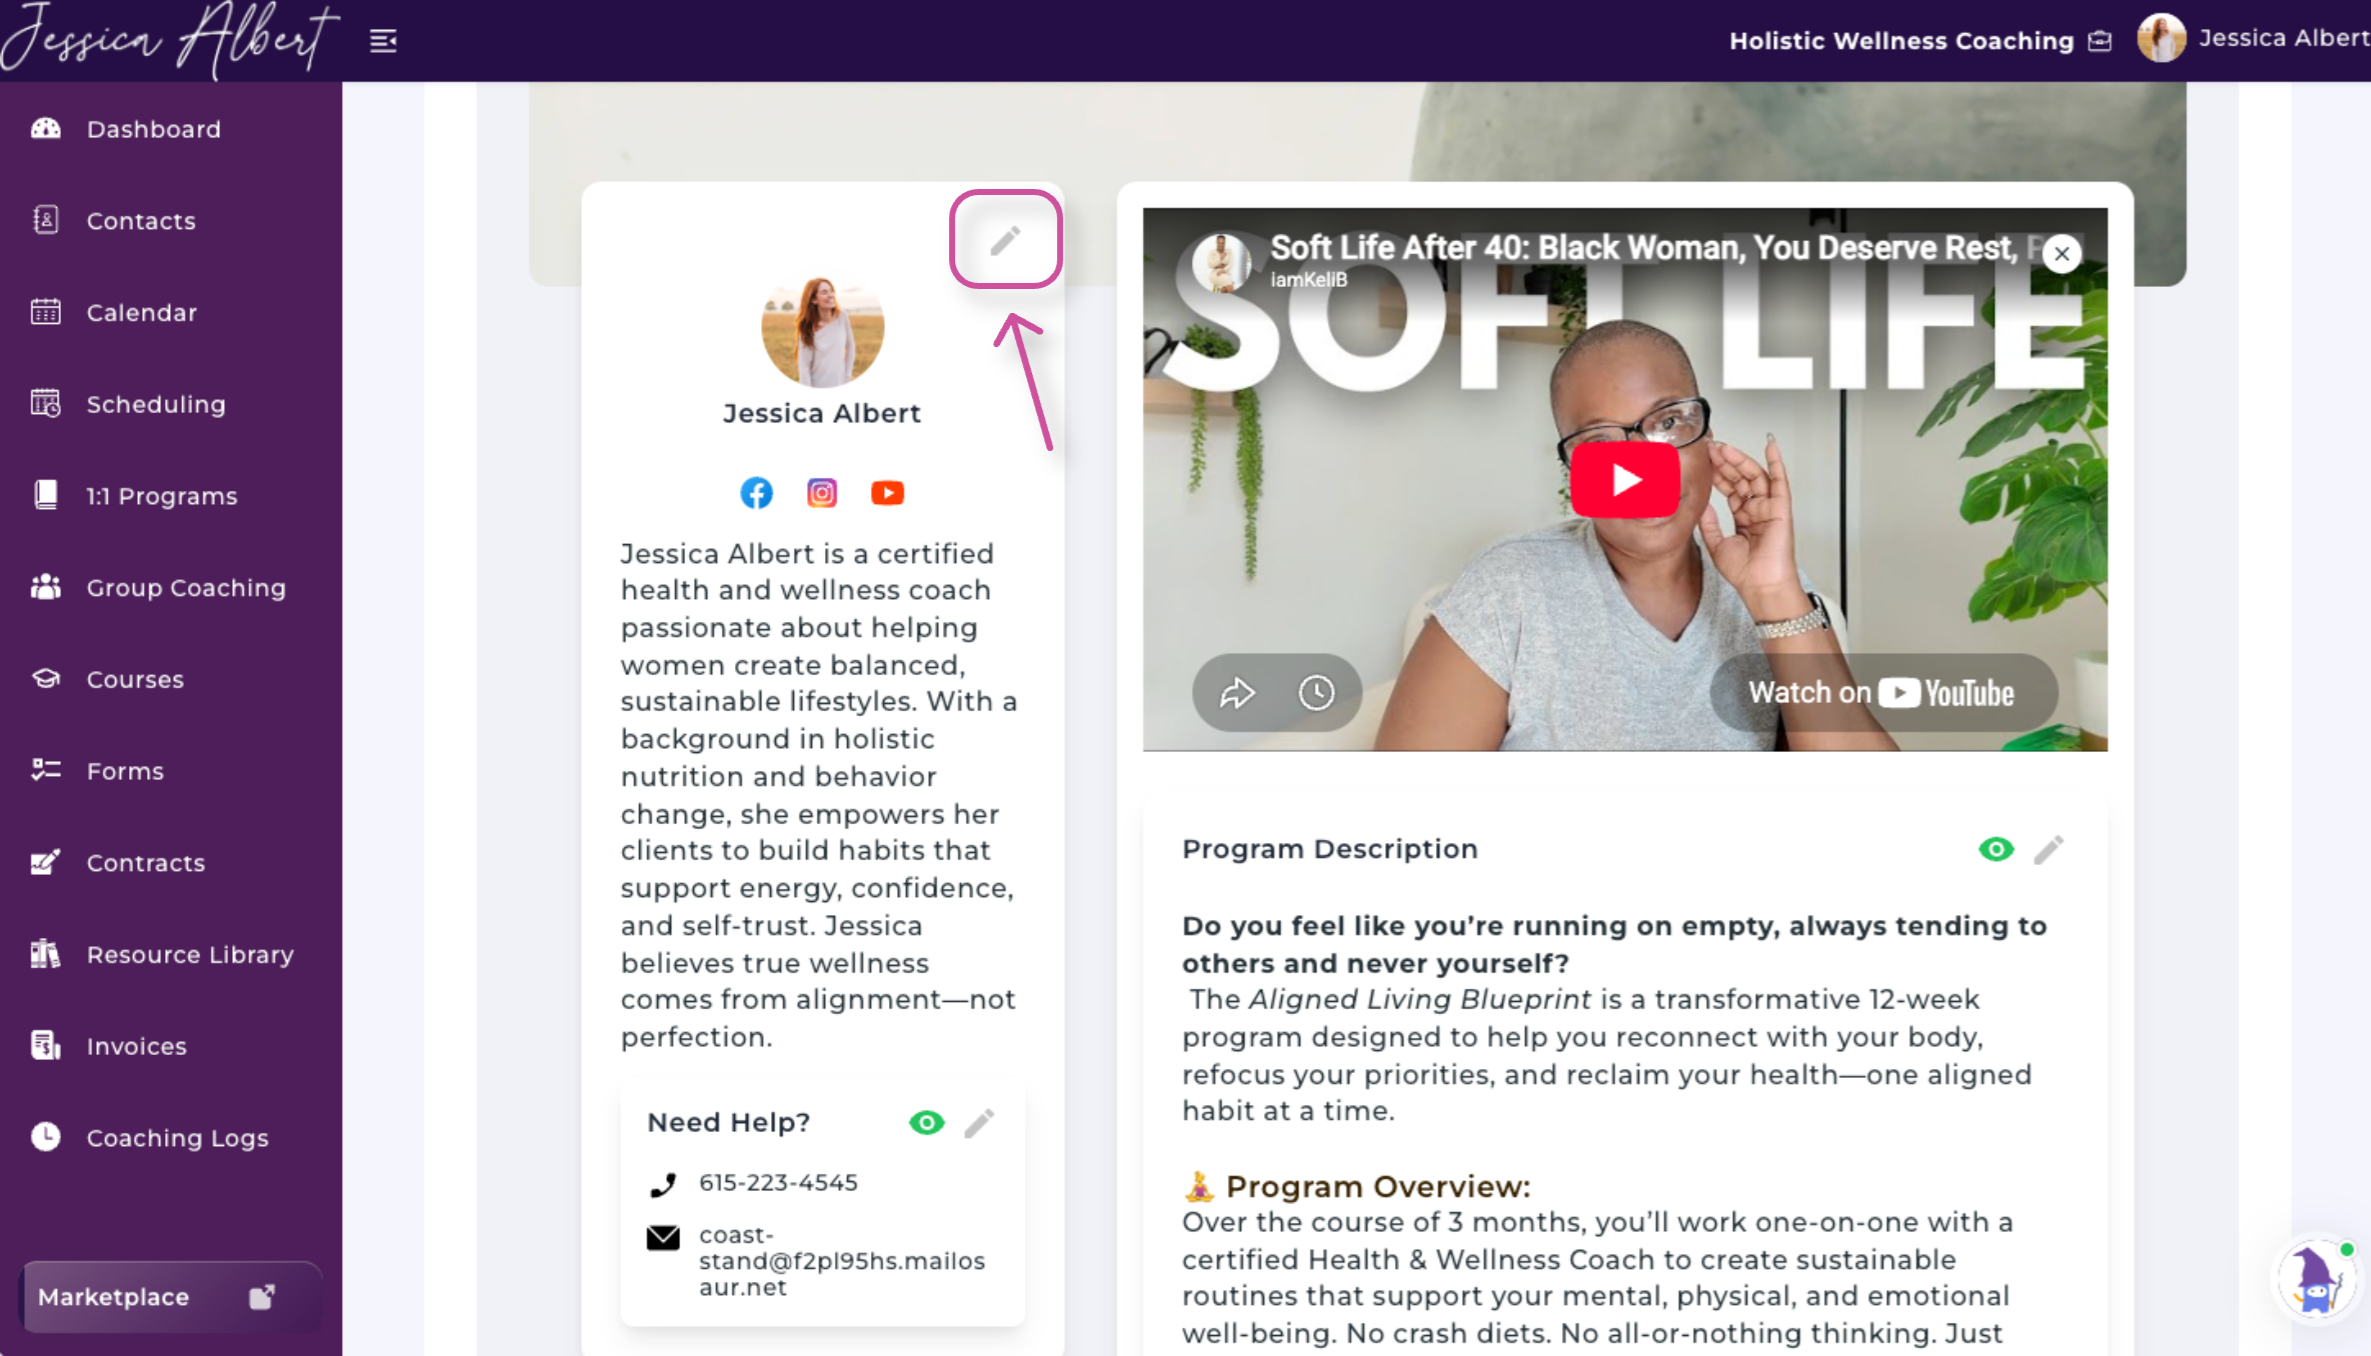
From the left side of the Landing Page Builder, you can manage the information displayed about you as the coach.
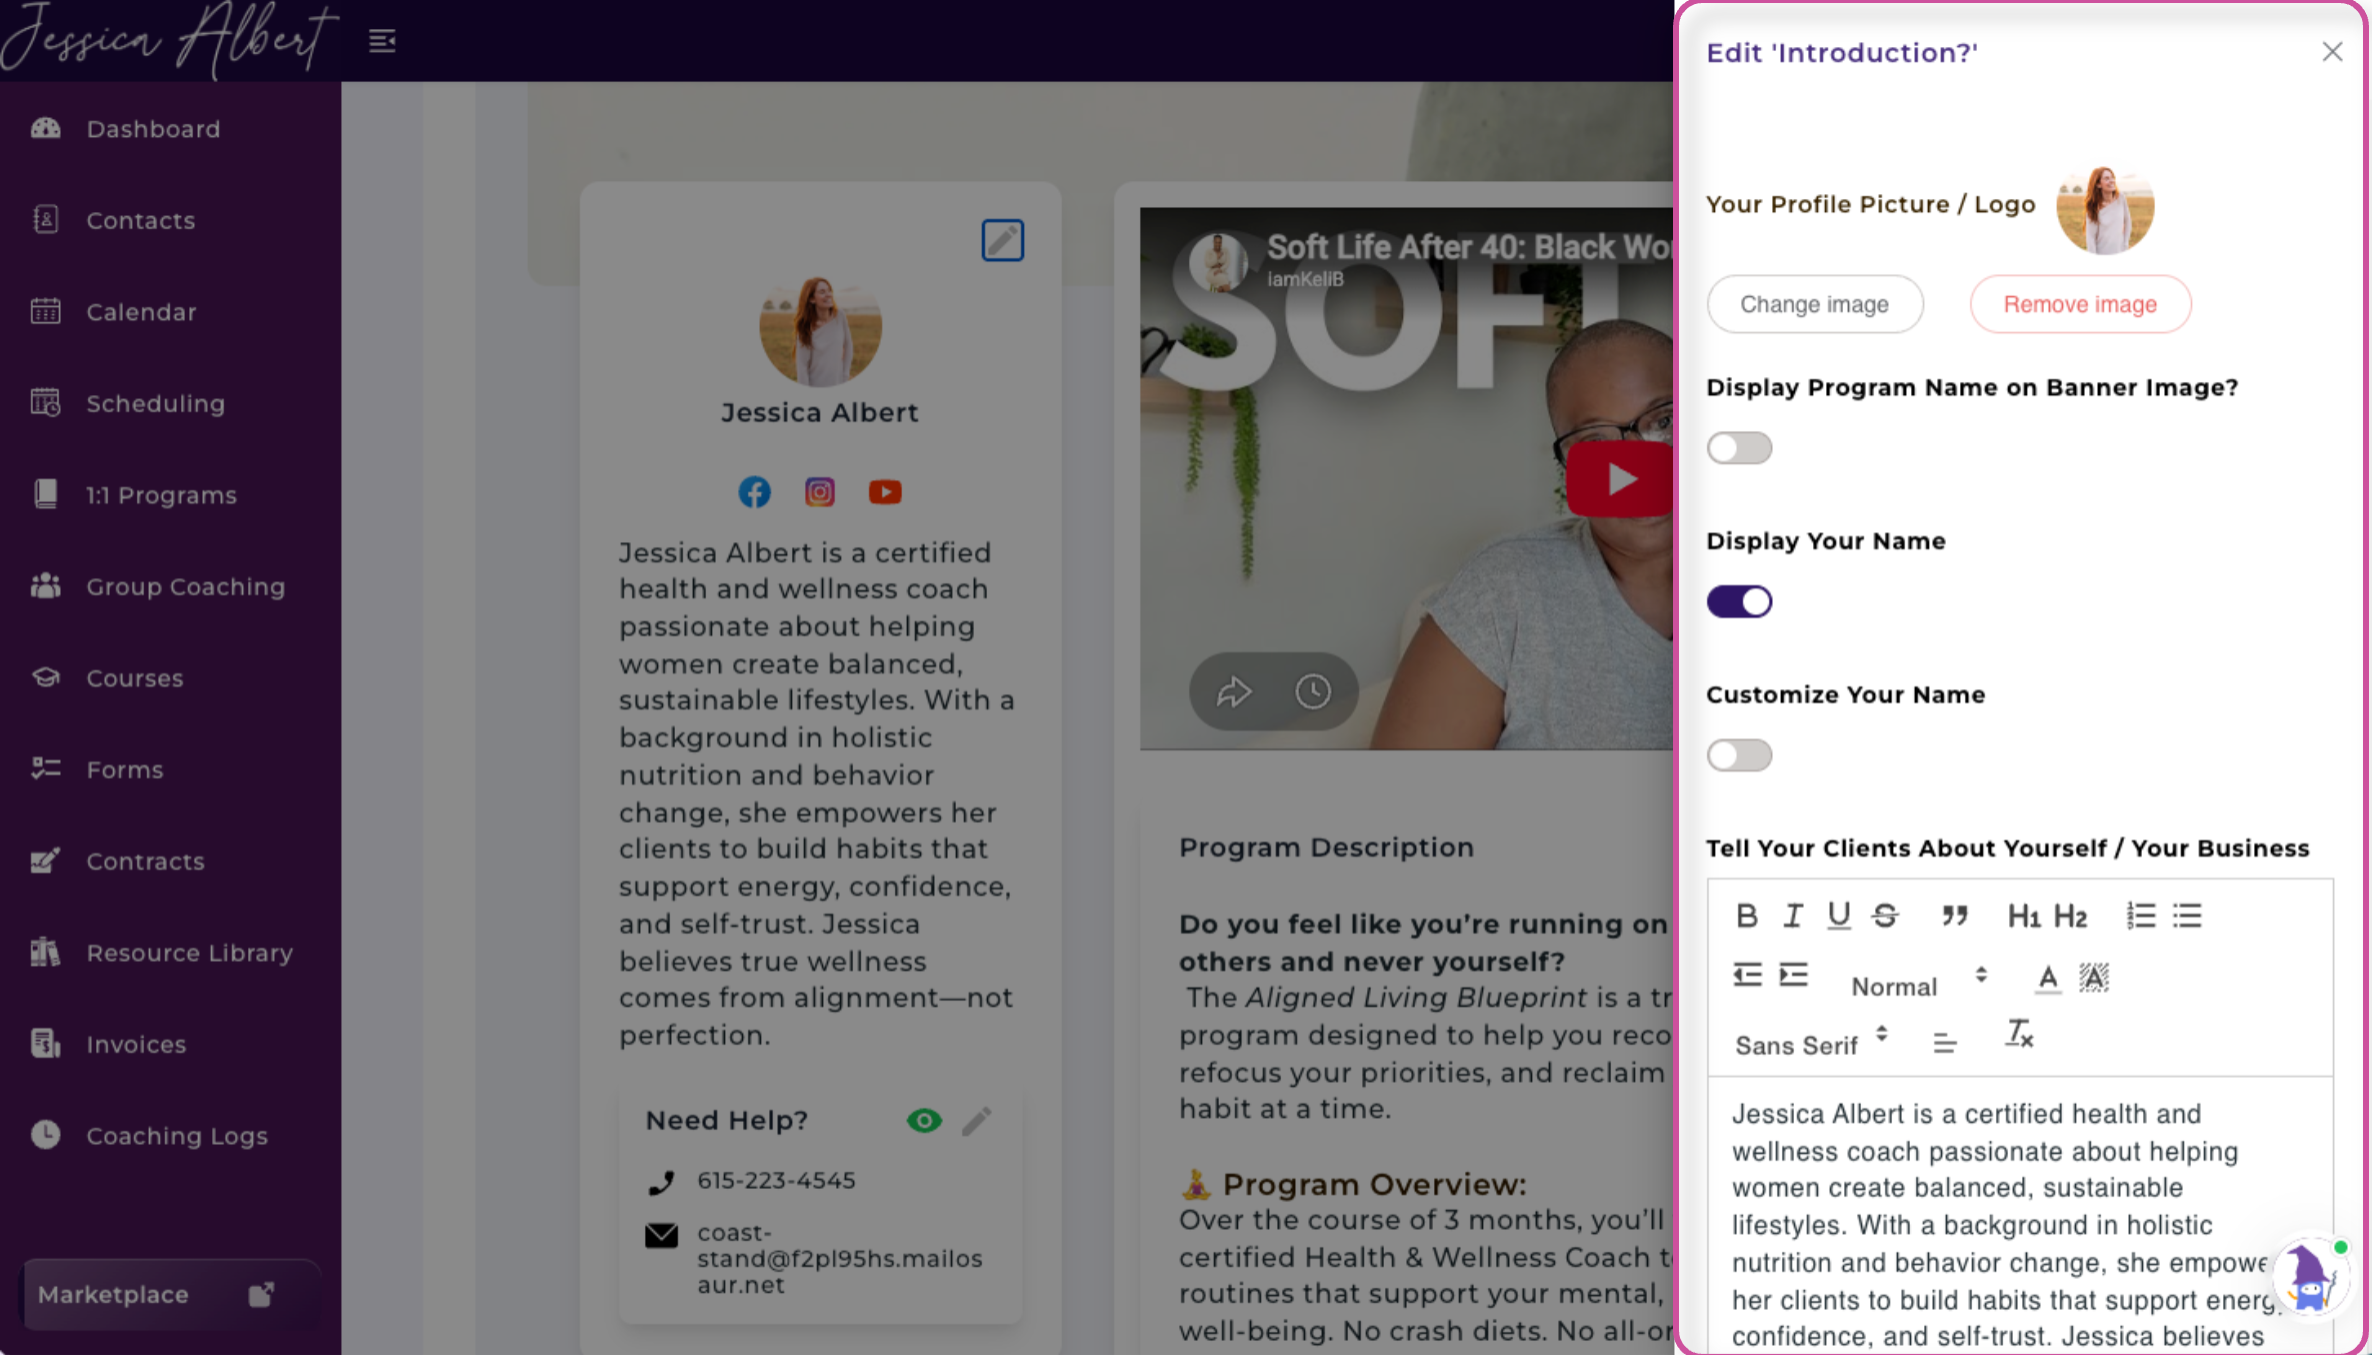
Depending on your preferences, you can:
- Add or update your profile photo
- Edit your professional bio
- Add or edit your social media links
- Choose whether your social media icons are displayed
To learn more about how to edit your Profile Settings including your social media links and About Me section, please refer to the article, "Your Profile Settings."
Customize the Need Help Section
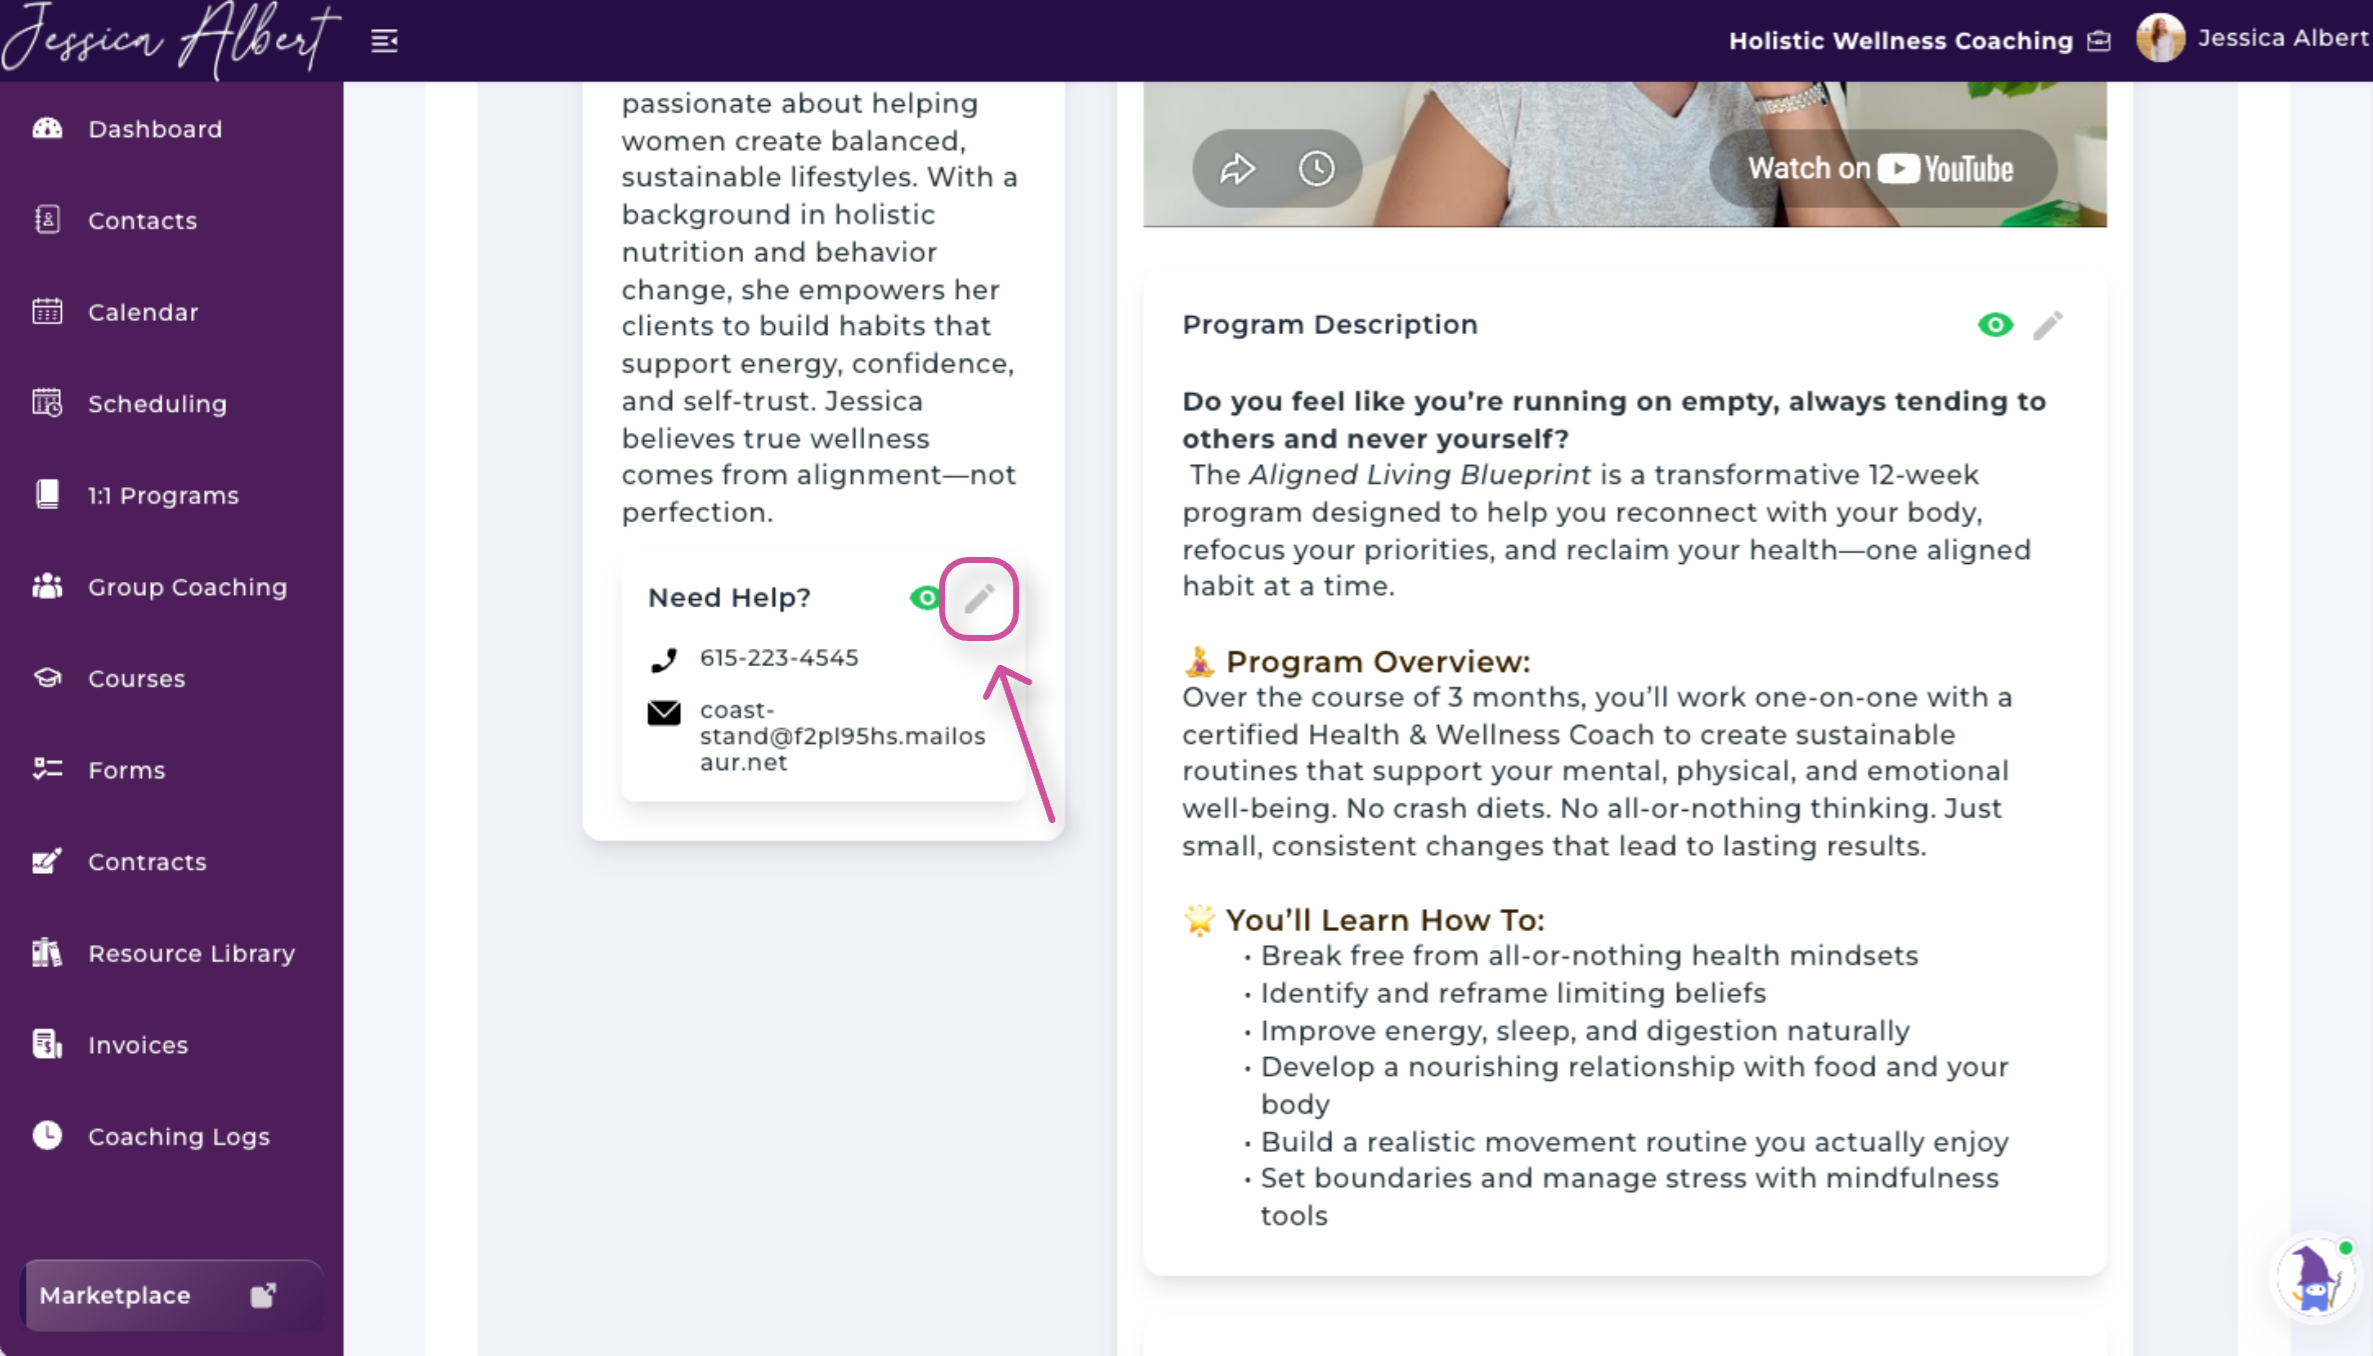
The Need Help section gives prospective clients a way to contact you if they have questions about the program or enrollment process.
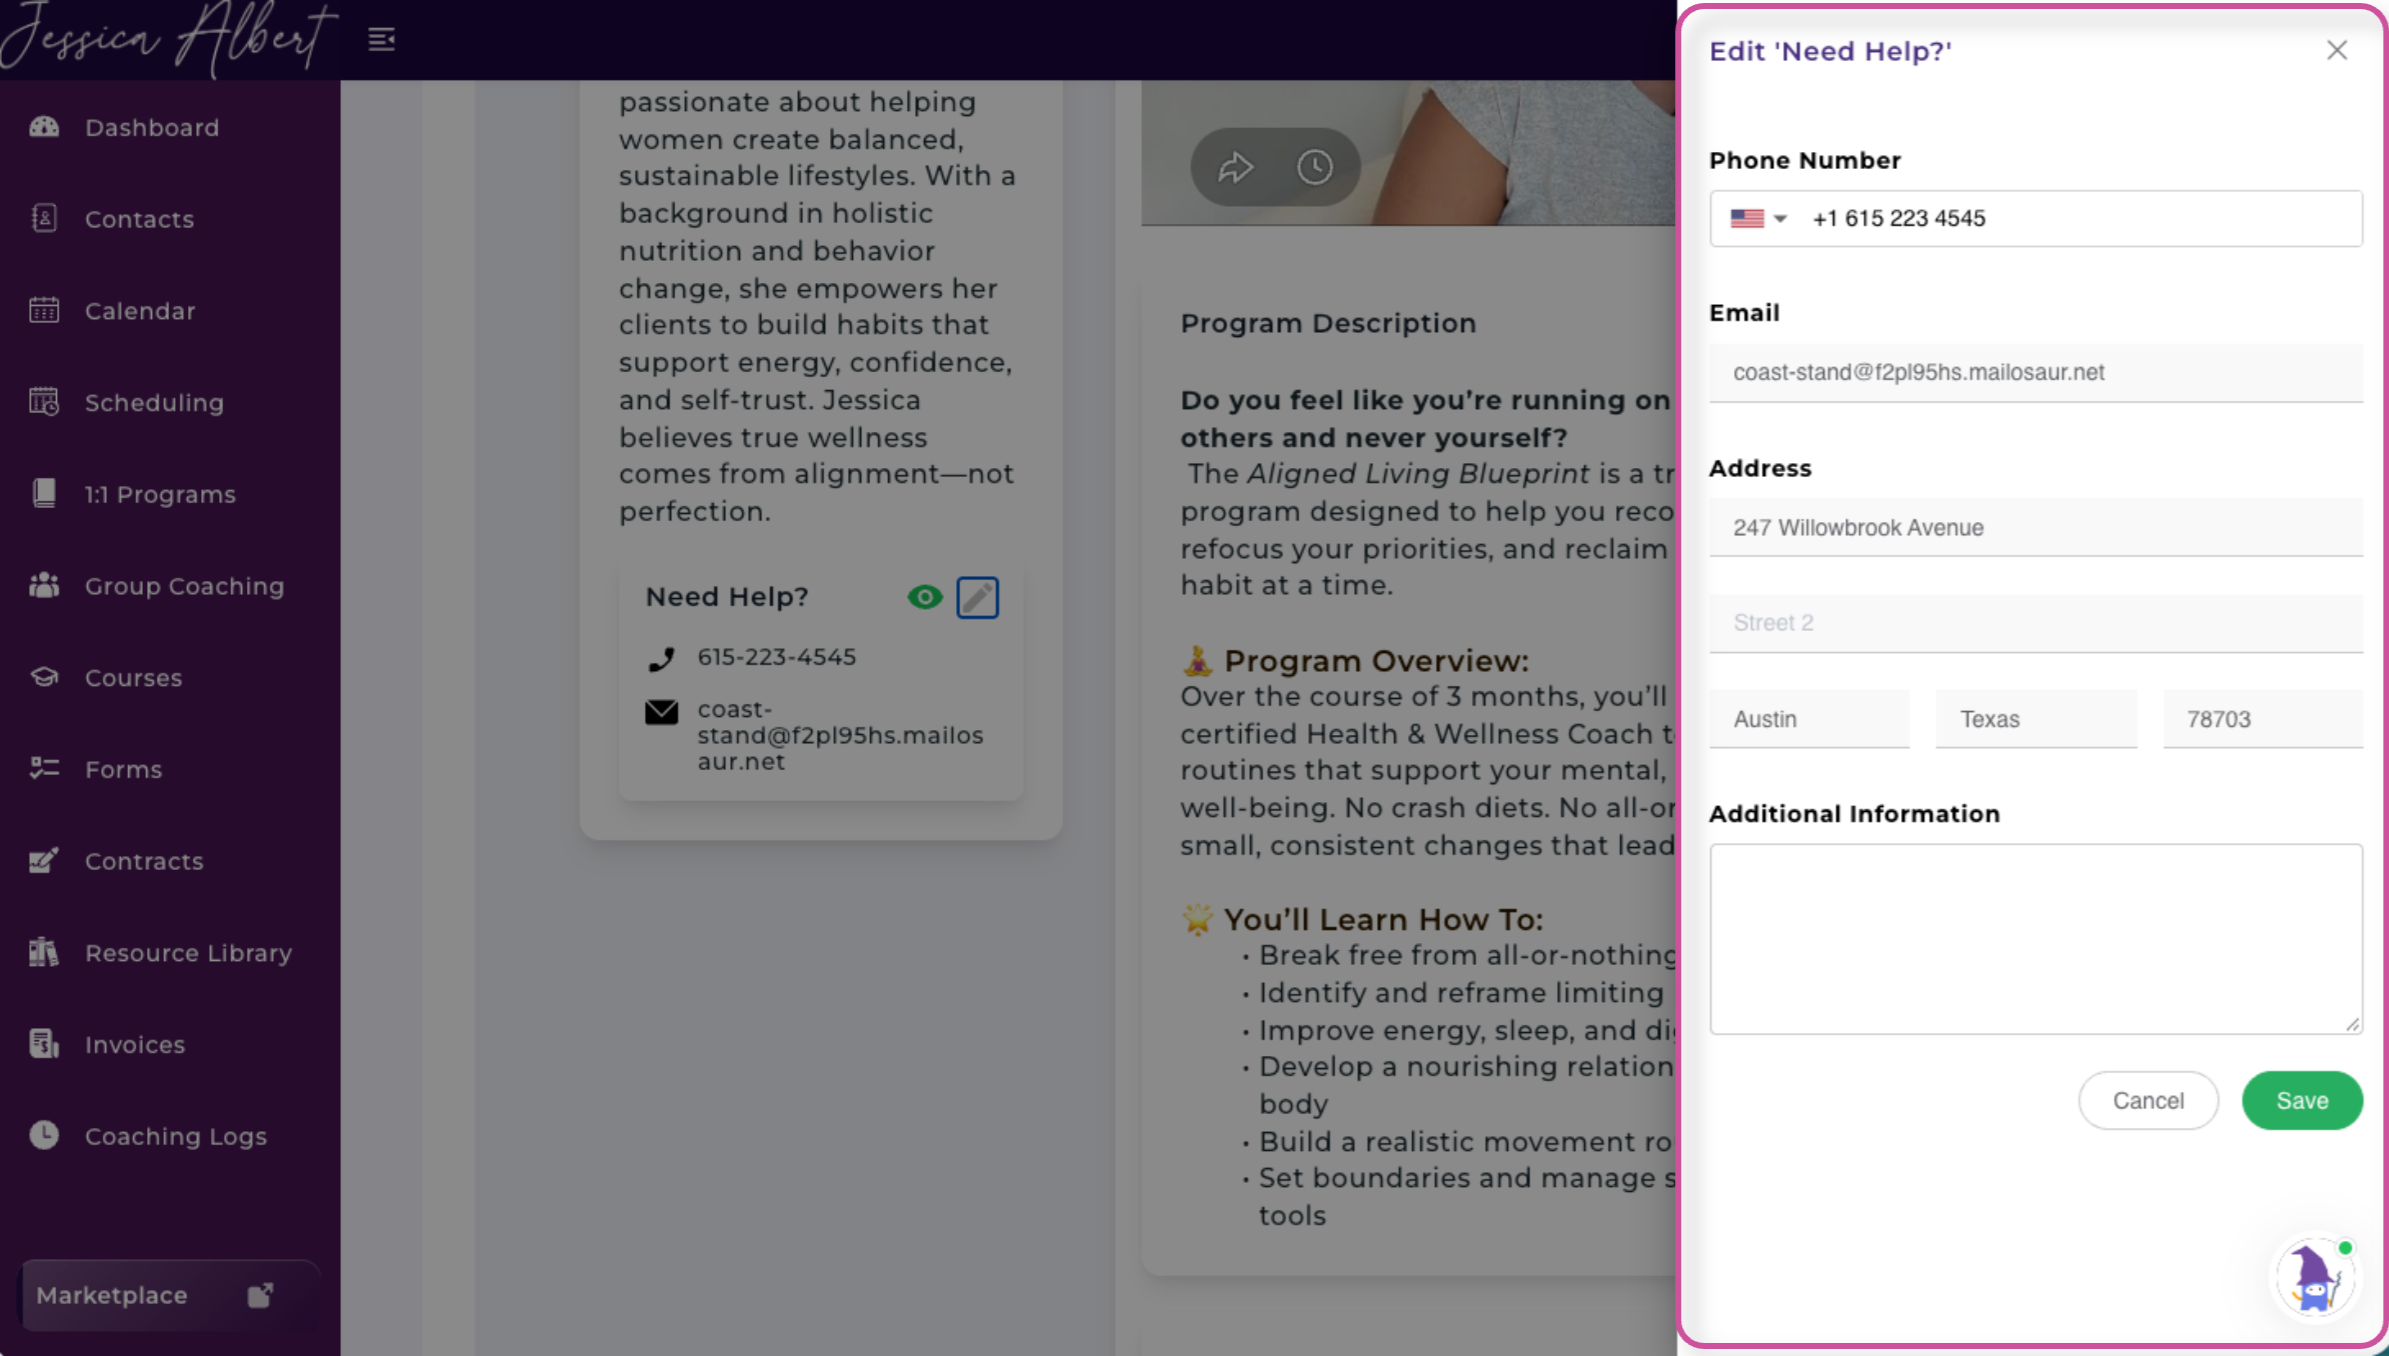
To customize this section:
- Locate the Need Help section.
- Select the pencil icon.
- Add the contact information you want to display.
- Save your changes.
You can include:
- Phone number
- Email address
- Physical or business address
- Additional contact information or instructions
Preview Your Landing Page
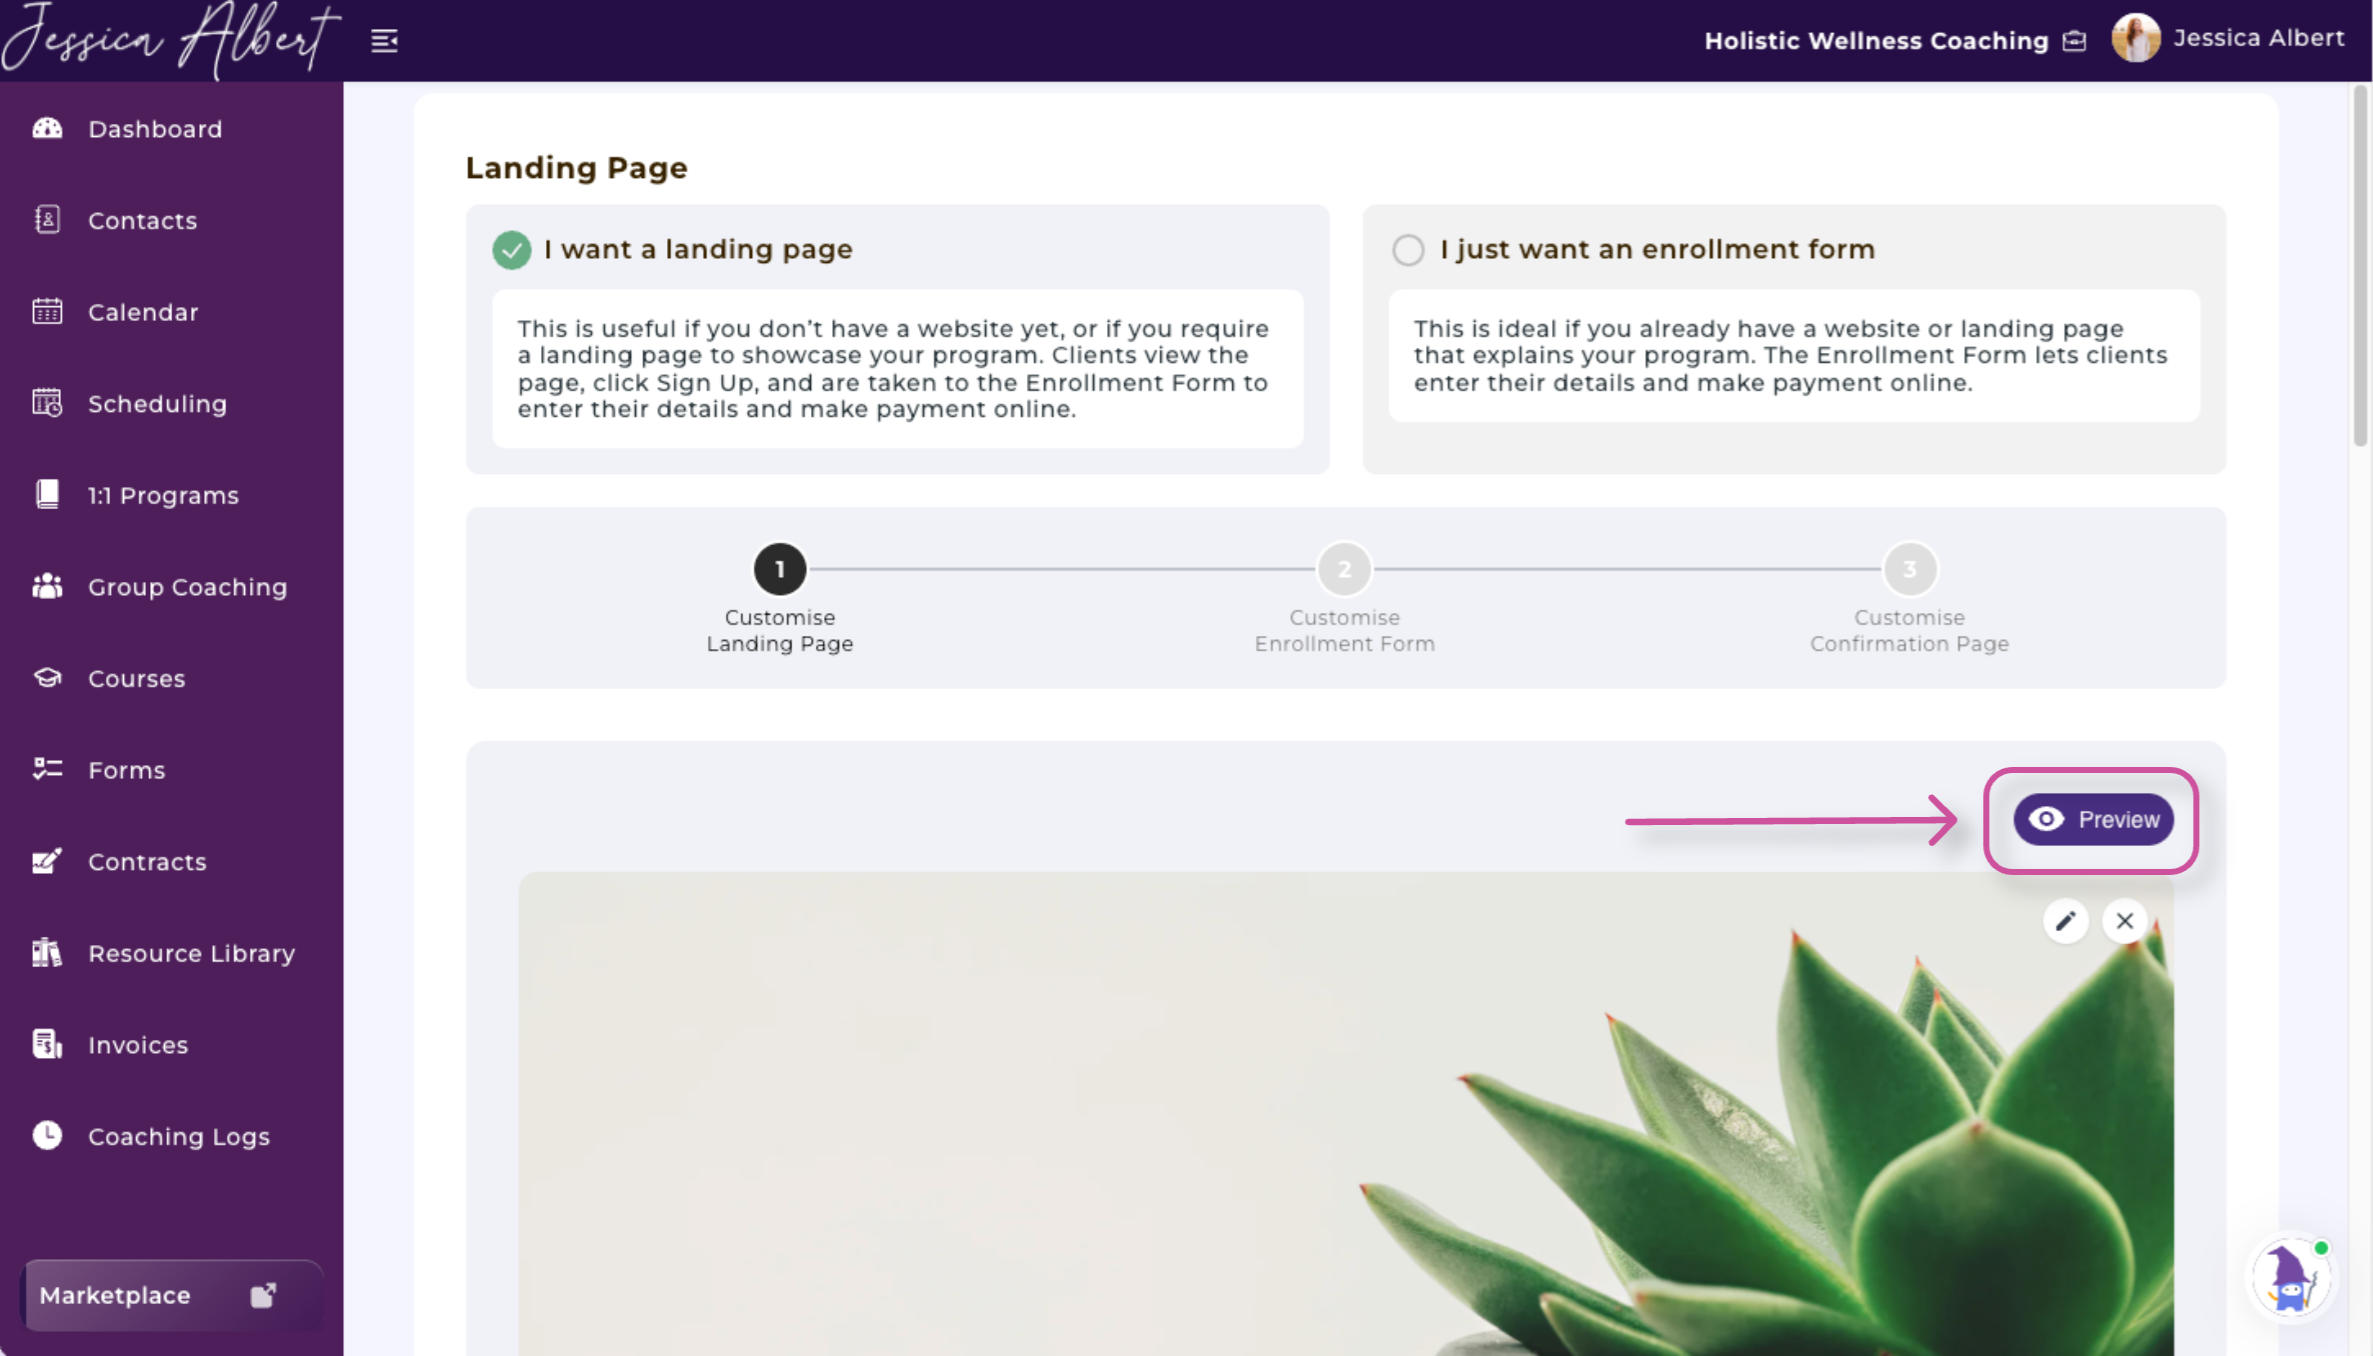
Select Preview at the top of the page to see how your landing page will appear to prospective clients.
You can toggle the preview on and off as you work. This makes it easy to review your changes and return to the editor if you notice anything you would like to adjust.
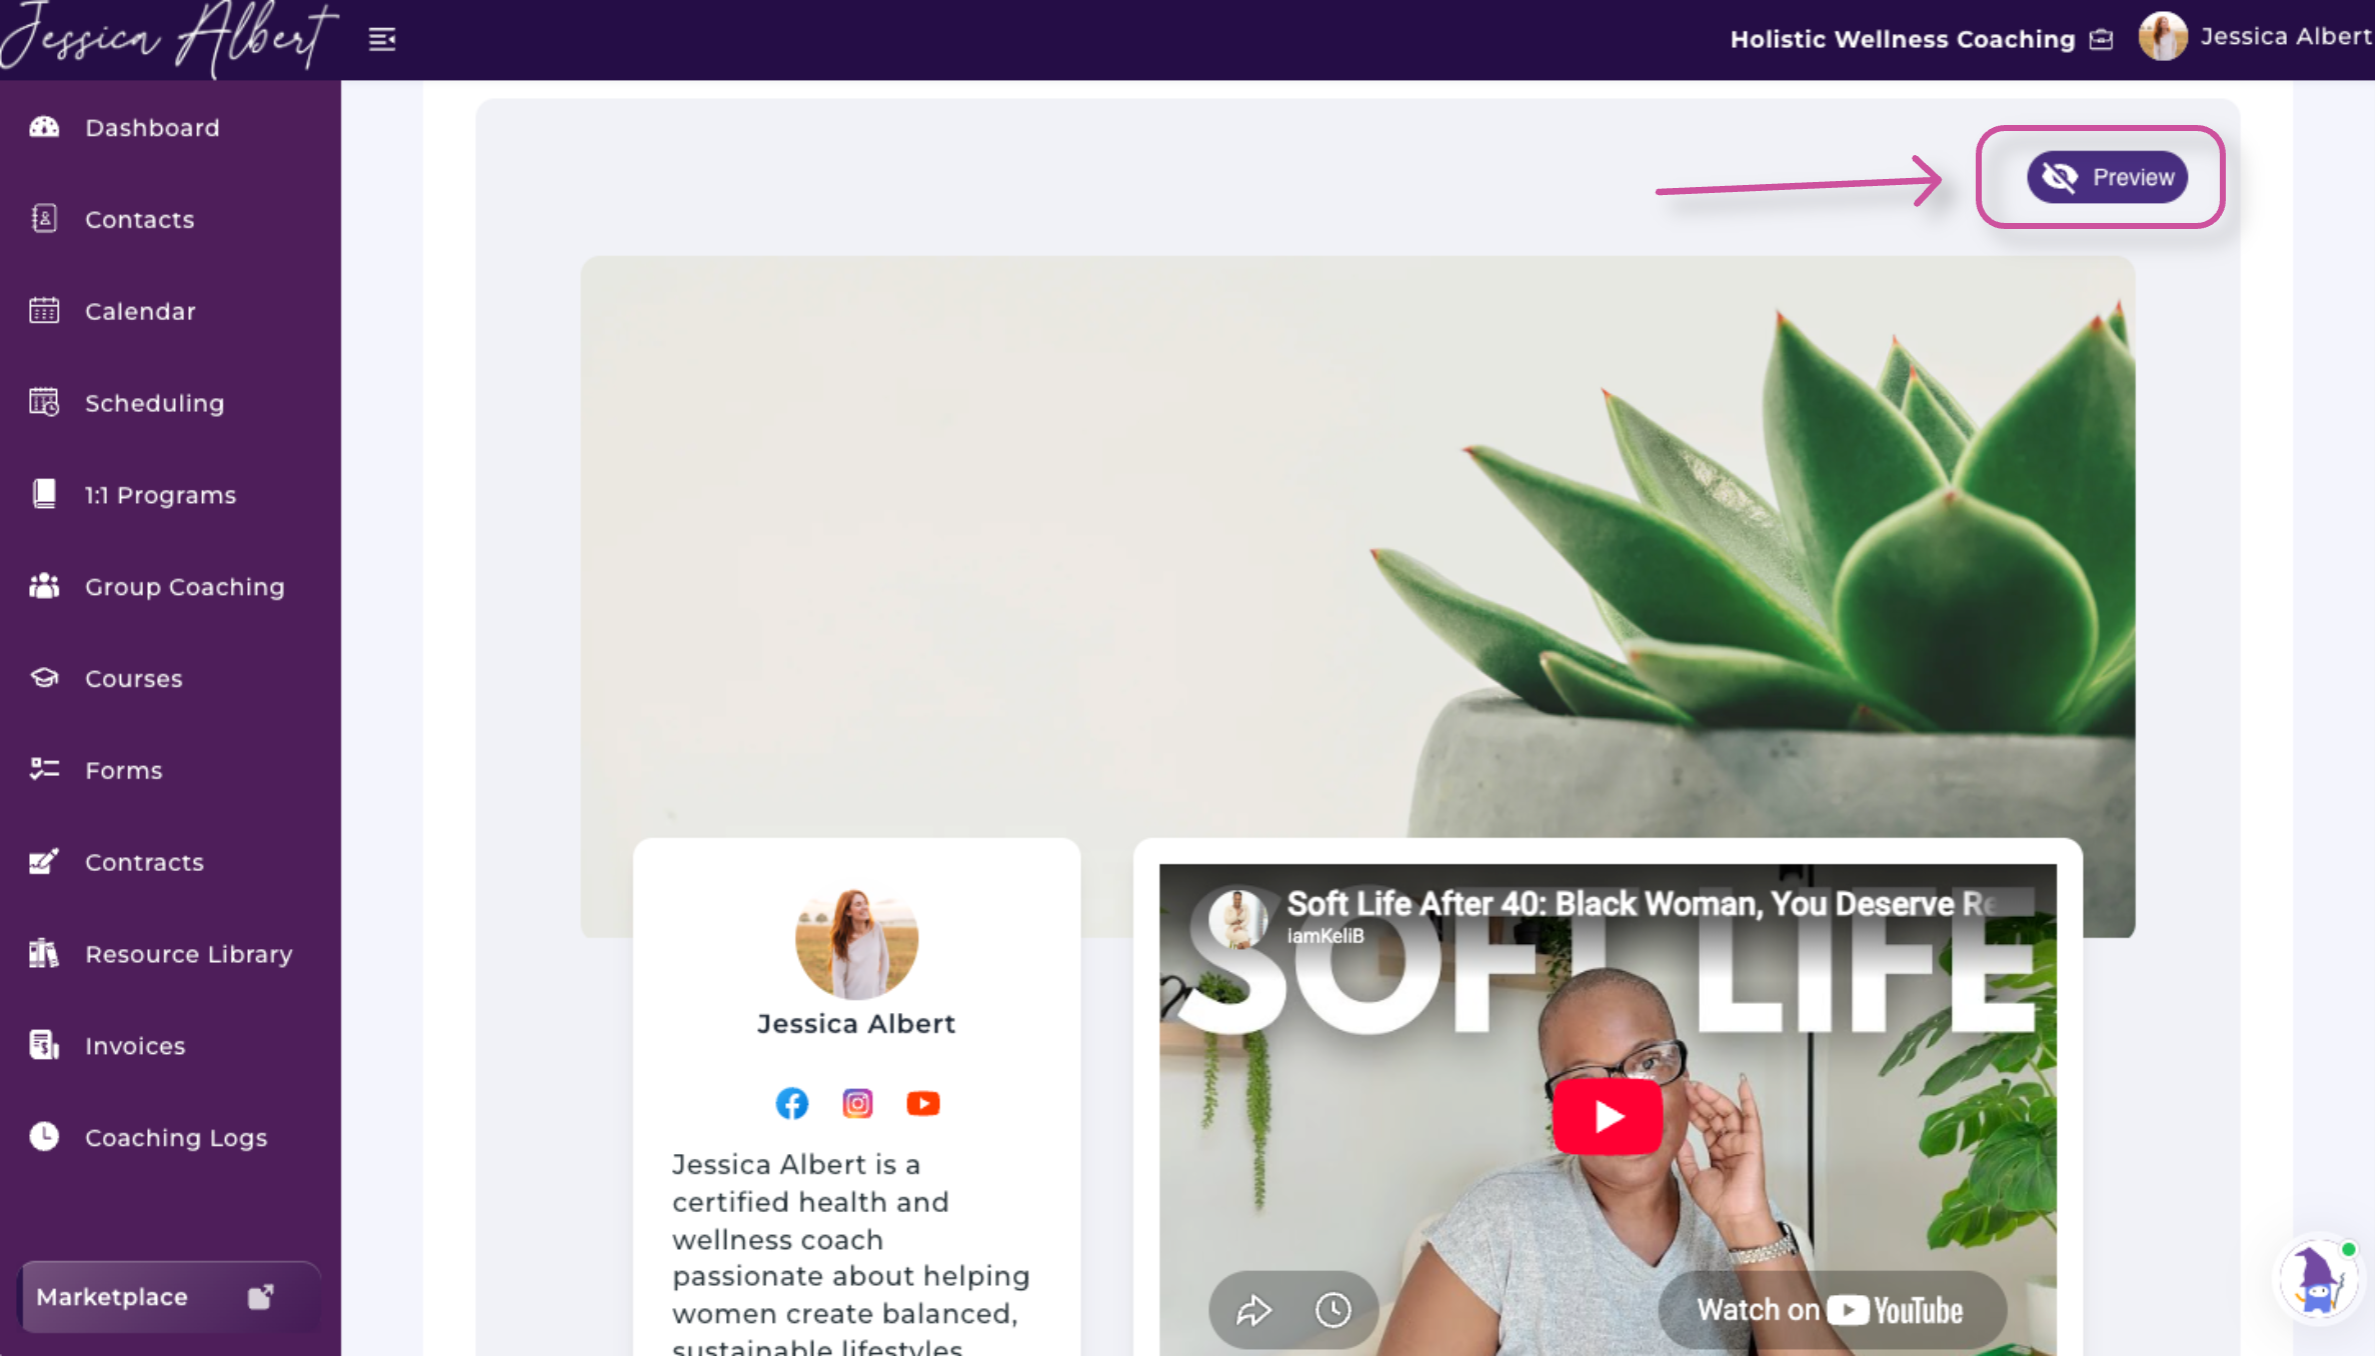
Before moving on, confirm that:
- Your banner and images display correctly
- Your program description is clear
- Your program structure is accurate
- Your testimonials are relevant
- Only the sections you want clients to see are visible
Step 2: Customize the Enrollment Form
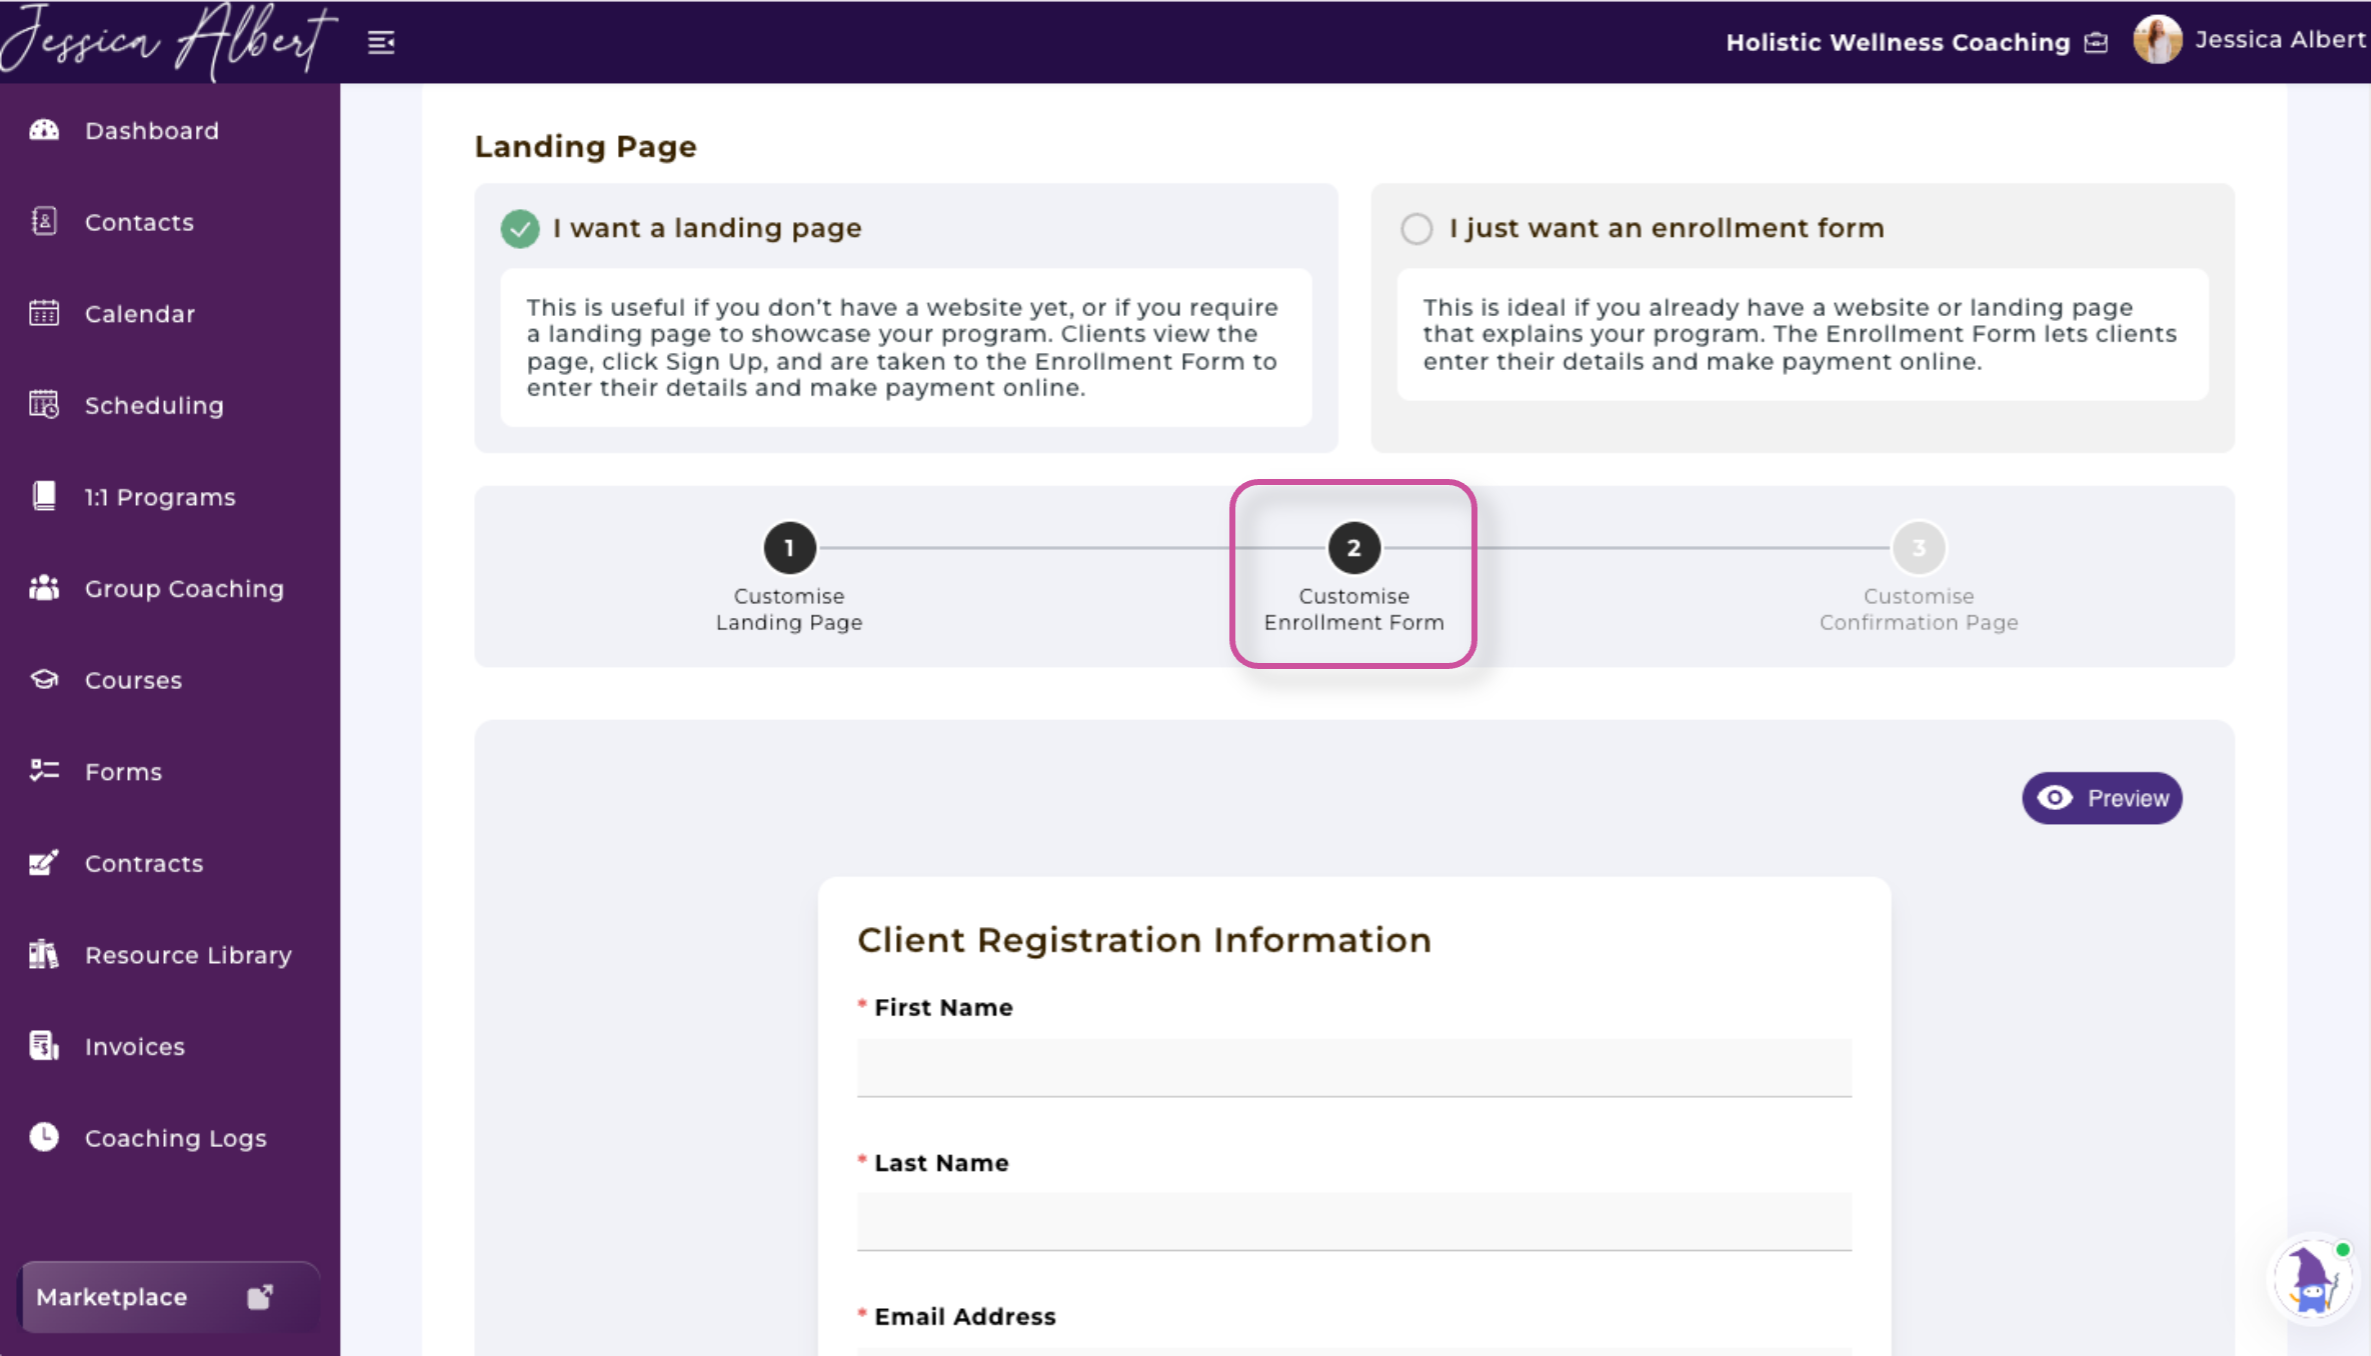
The enrollment form collects the information clients need to provide when signing up for your program.
This step allows you to:
- Select client registration fields
- Add an intake form
- Display terms and conditions
- Embed or automatically send a contract
Select Client Registration Fields
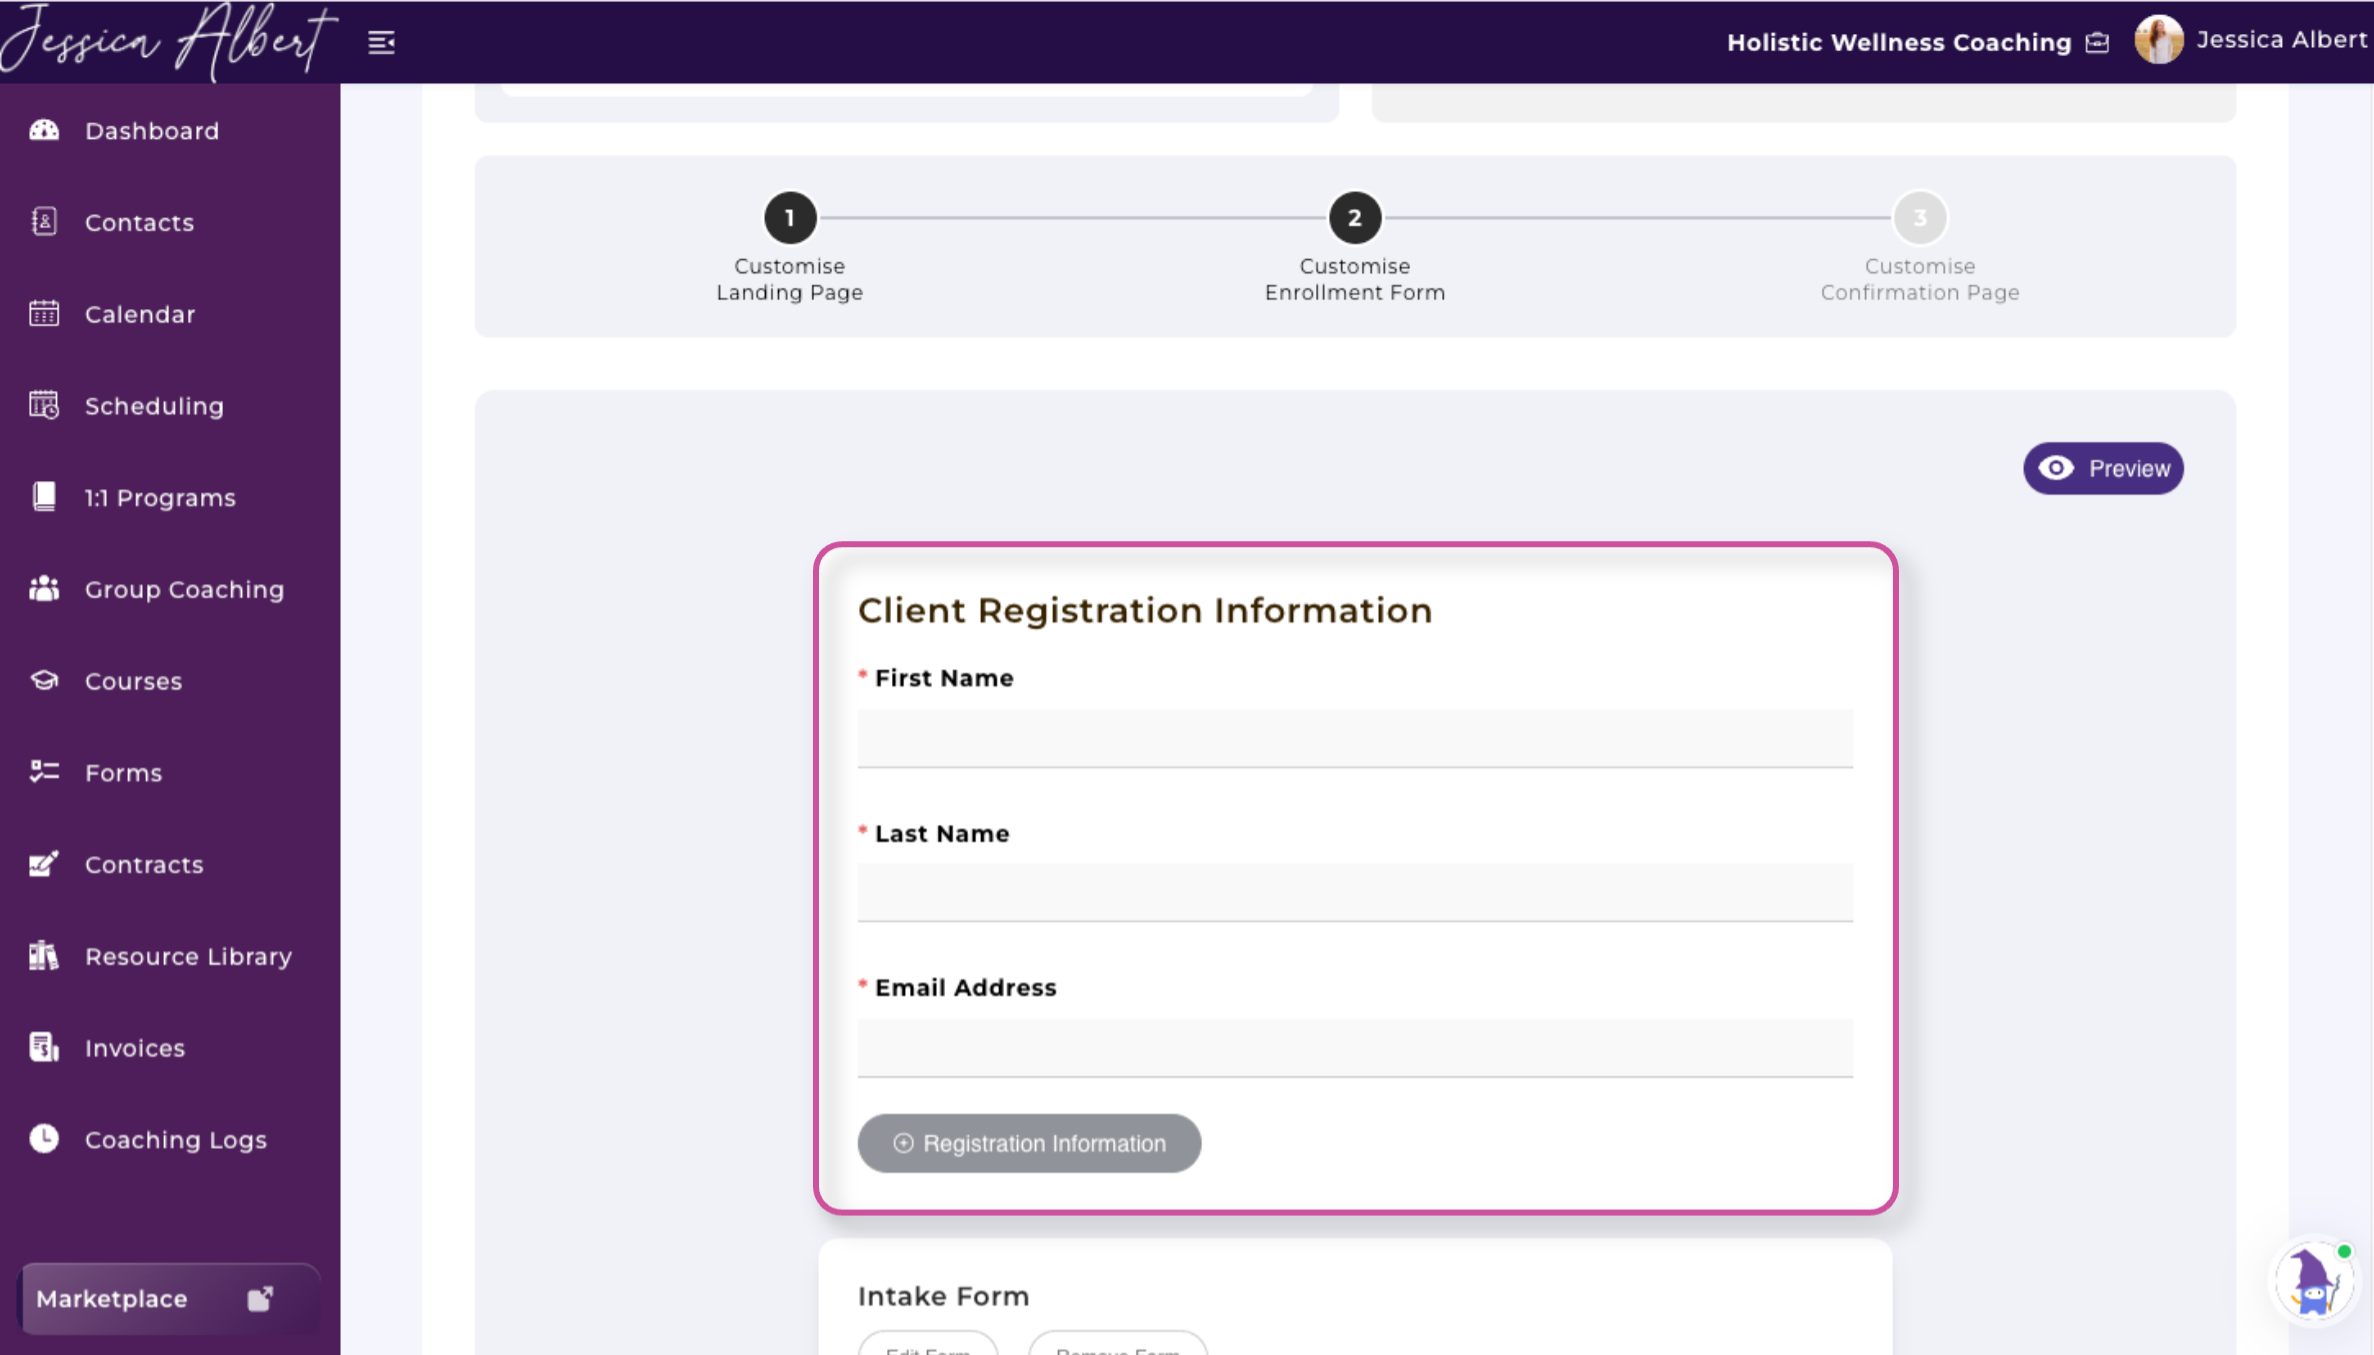
CoachVantage automatically collects the following information from every client:
- First name
- Last name
- Email address
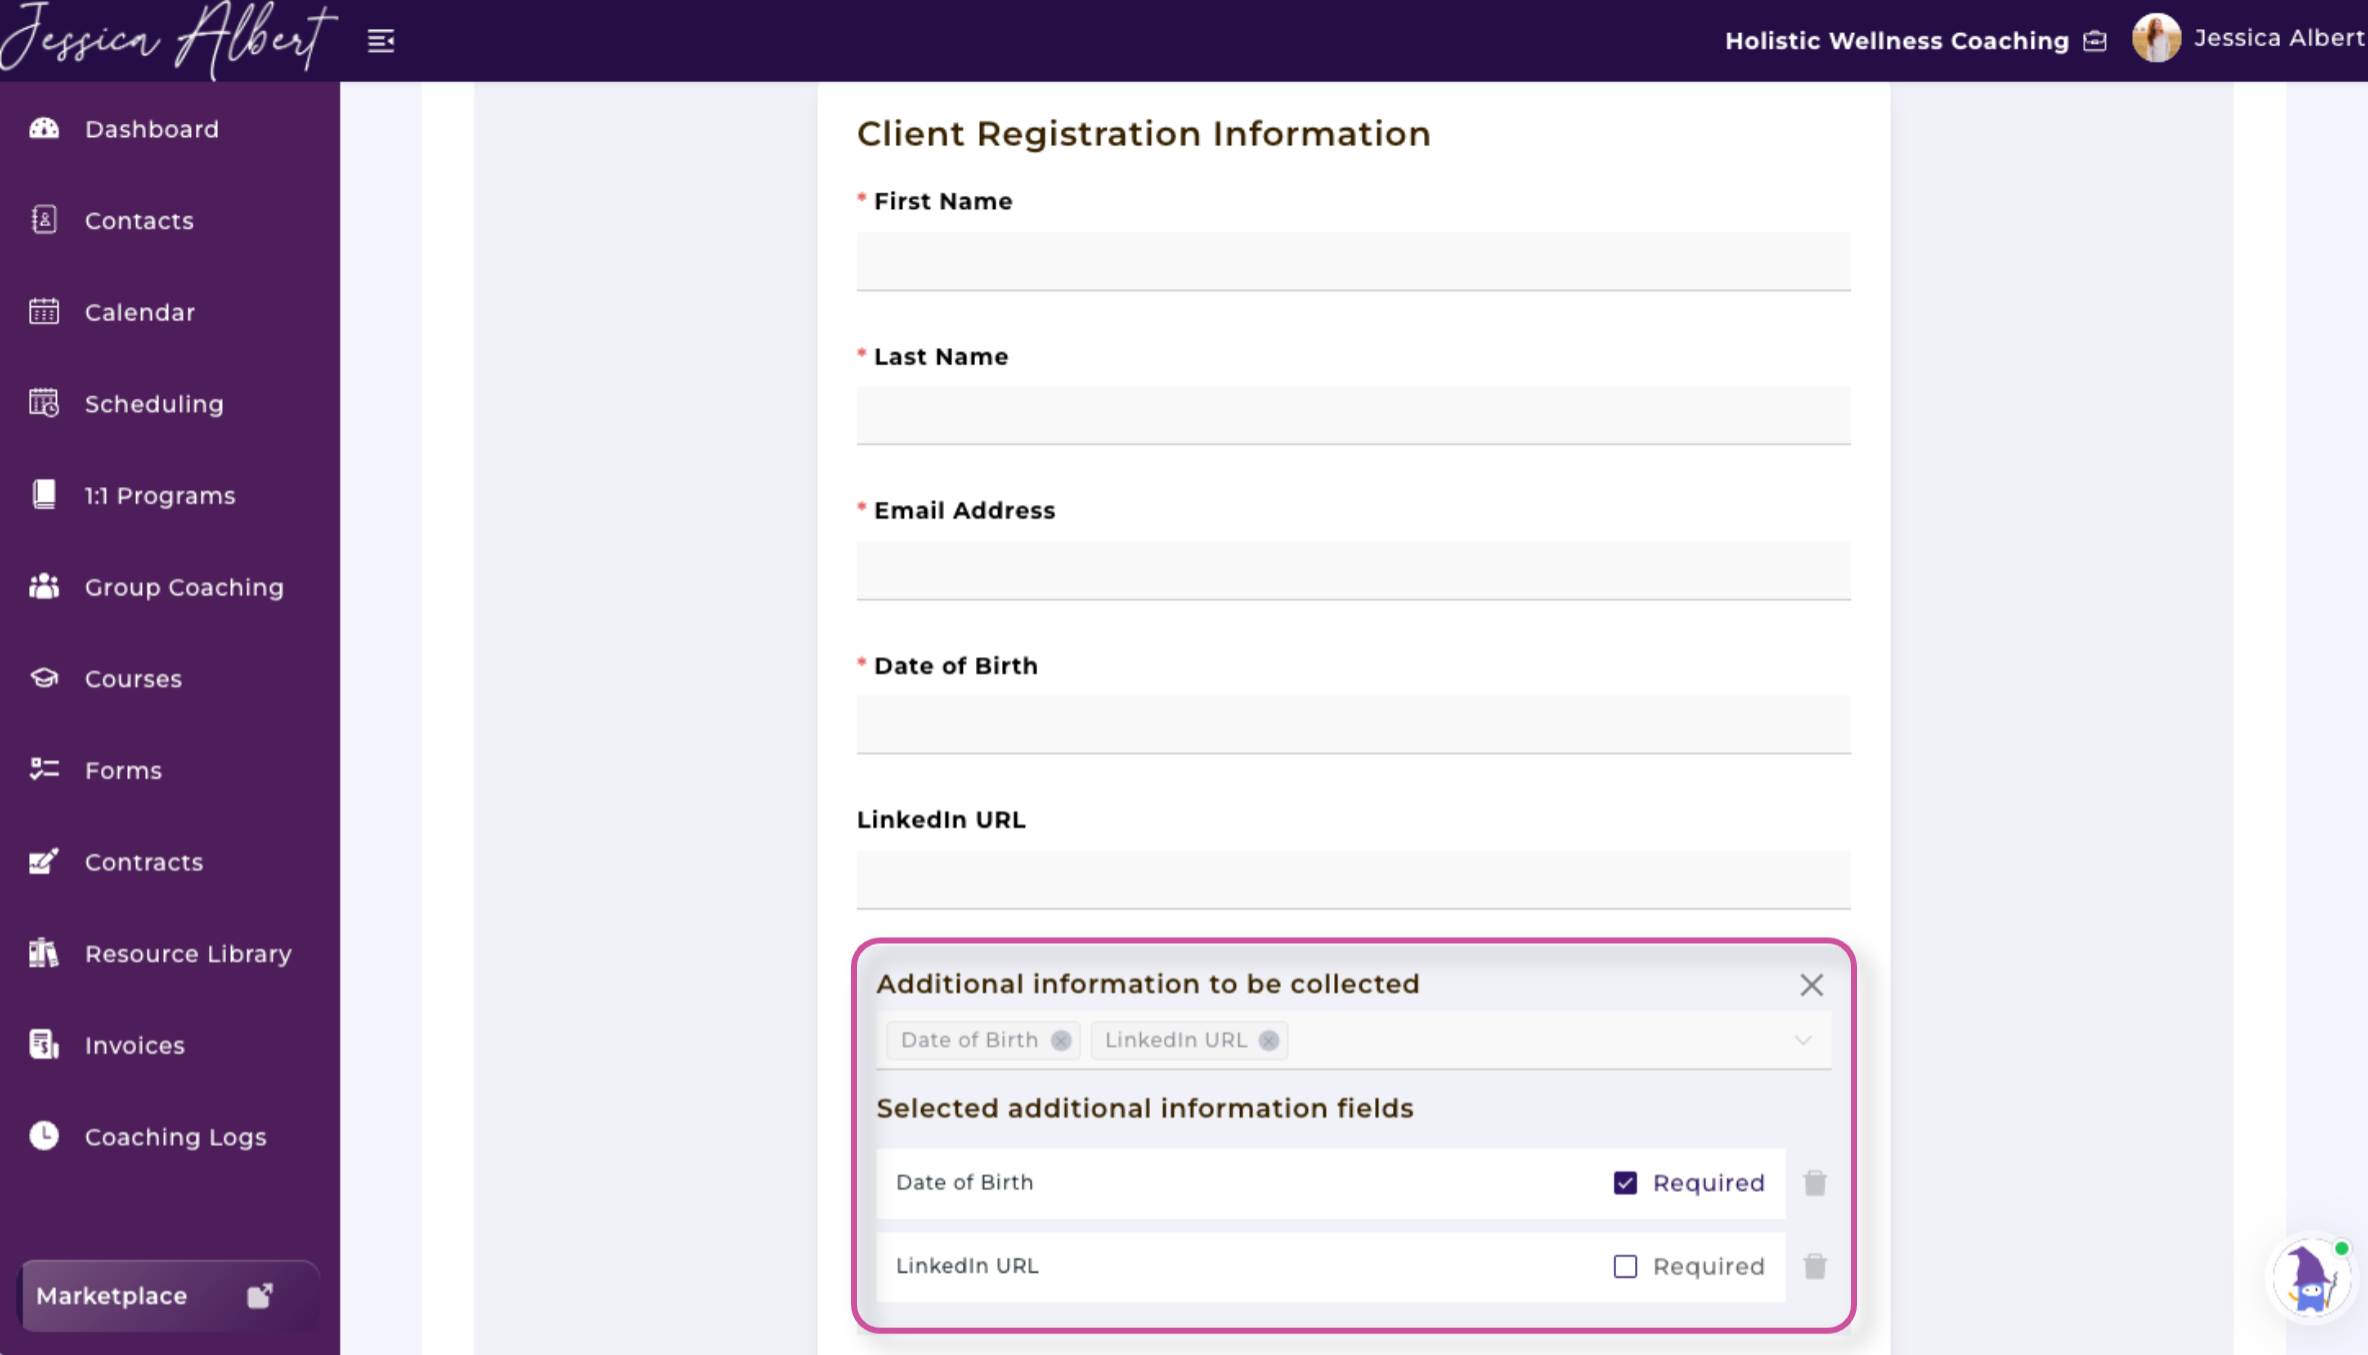
You can collect additional information by using the Additional Information to Be Collected dropdown menu.
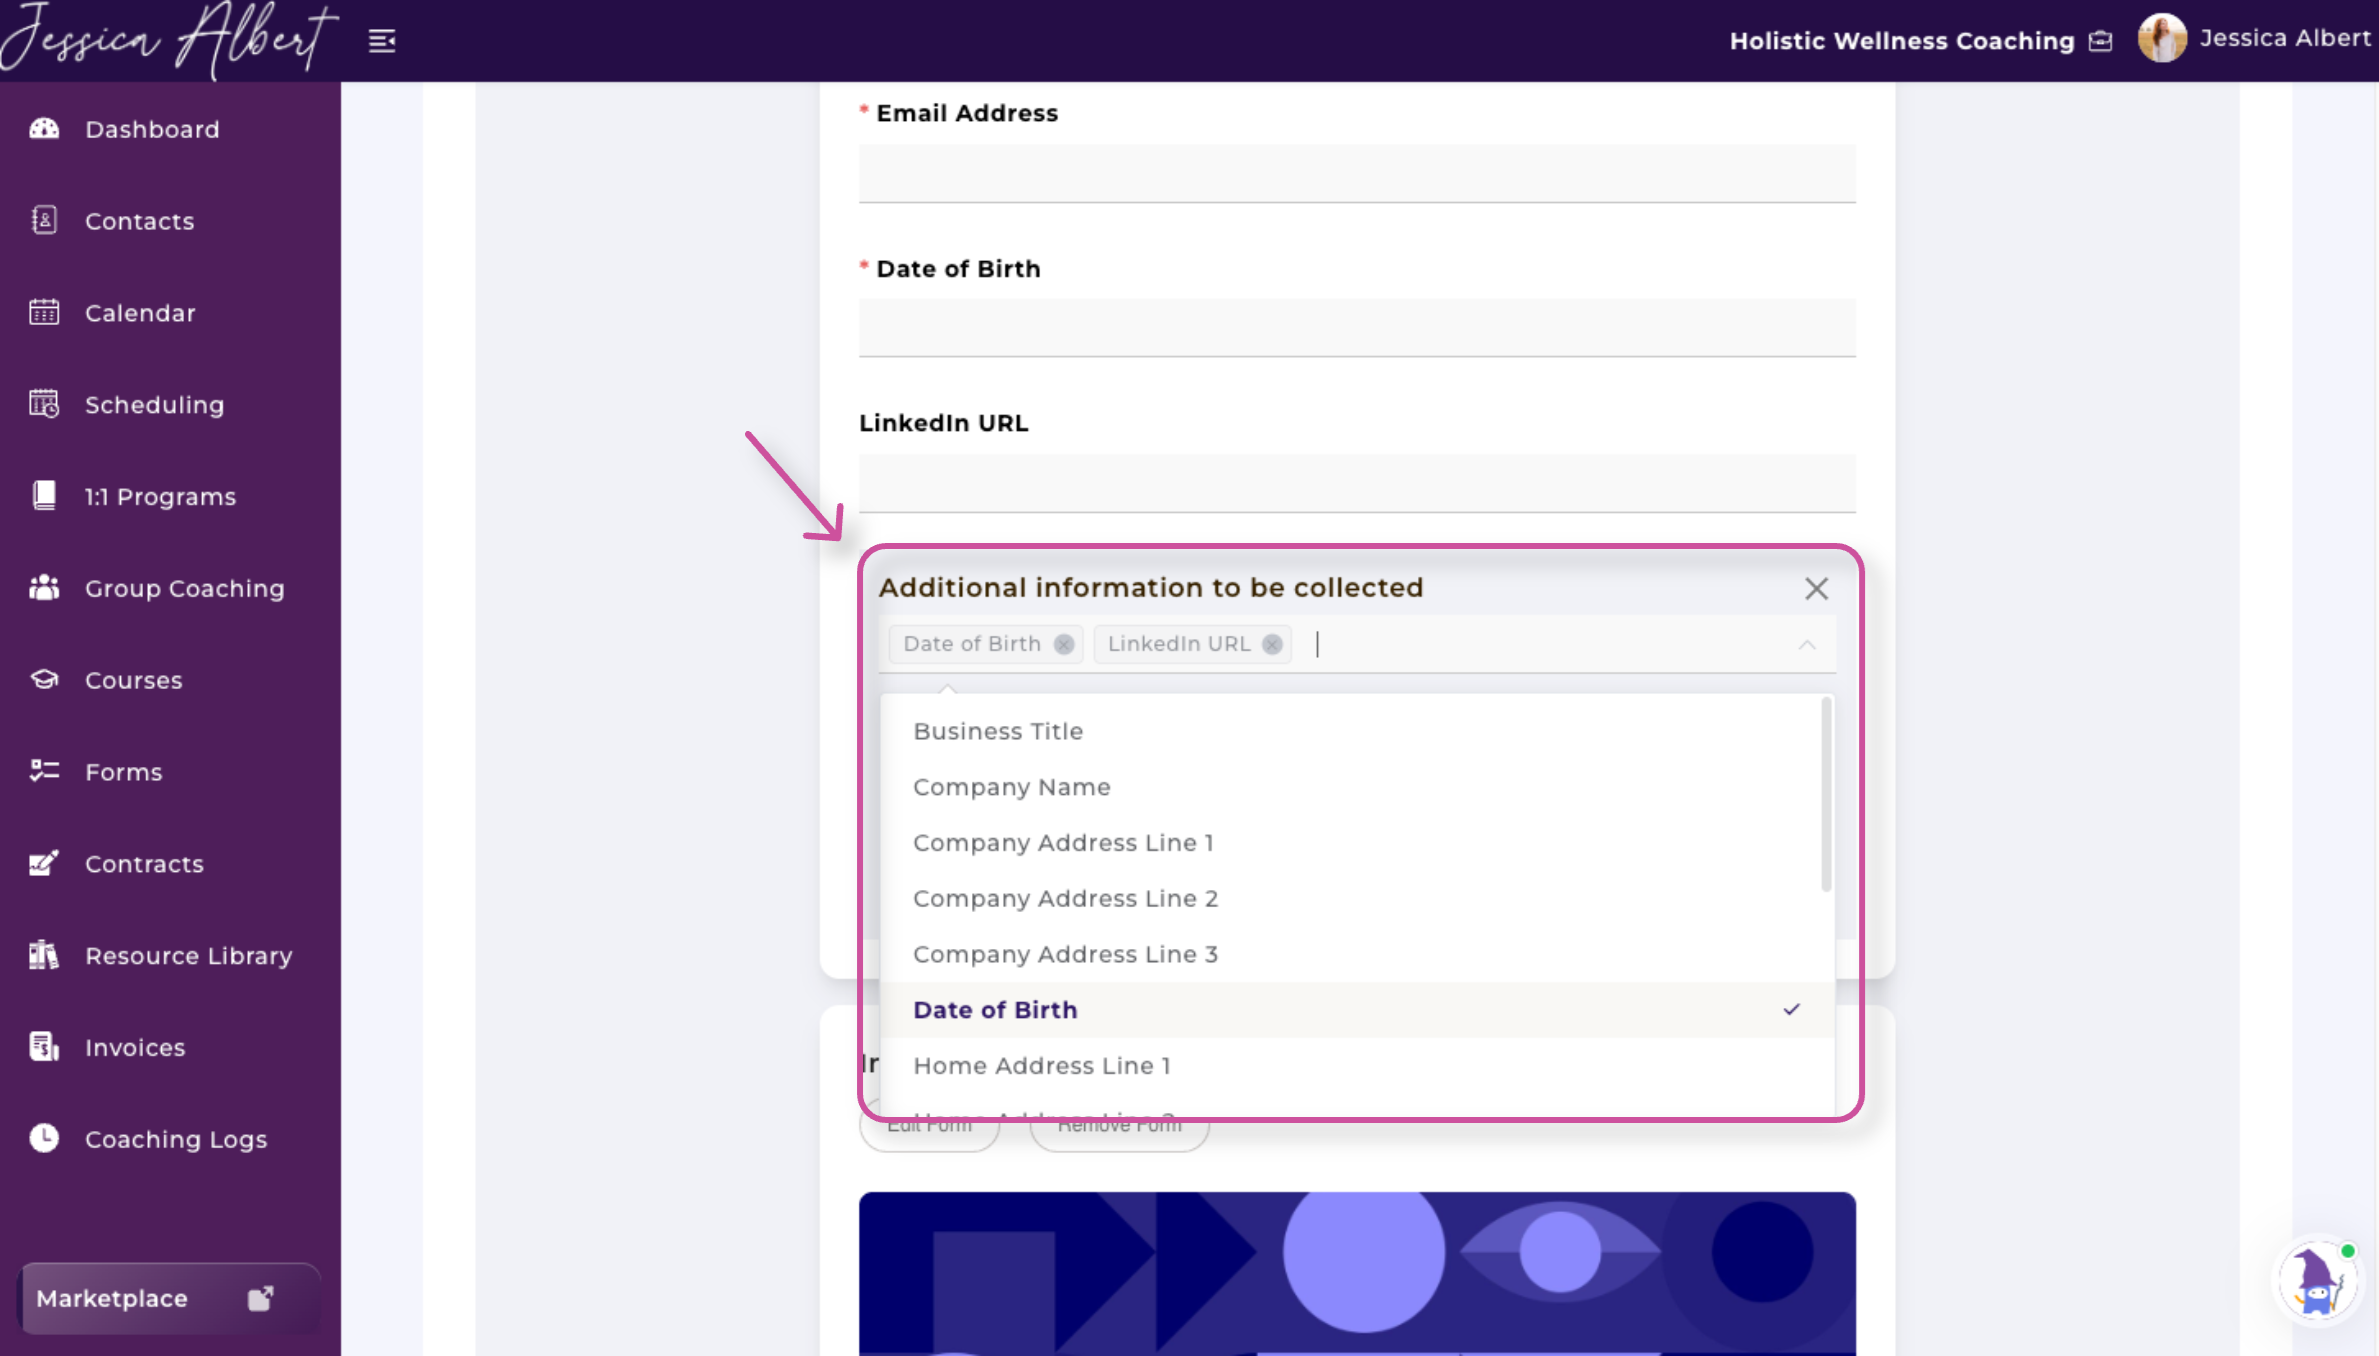
Available fields may include:
- Business title
- Company name
- Company address
- Date of birth
- Home address
- Mobile phone number
- Company phone number
- Facebook URL
- Instagram URL
- LinkedIn URL
- Website URL
To add an additional field:
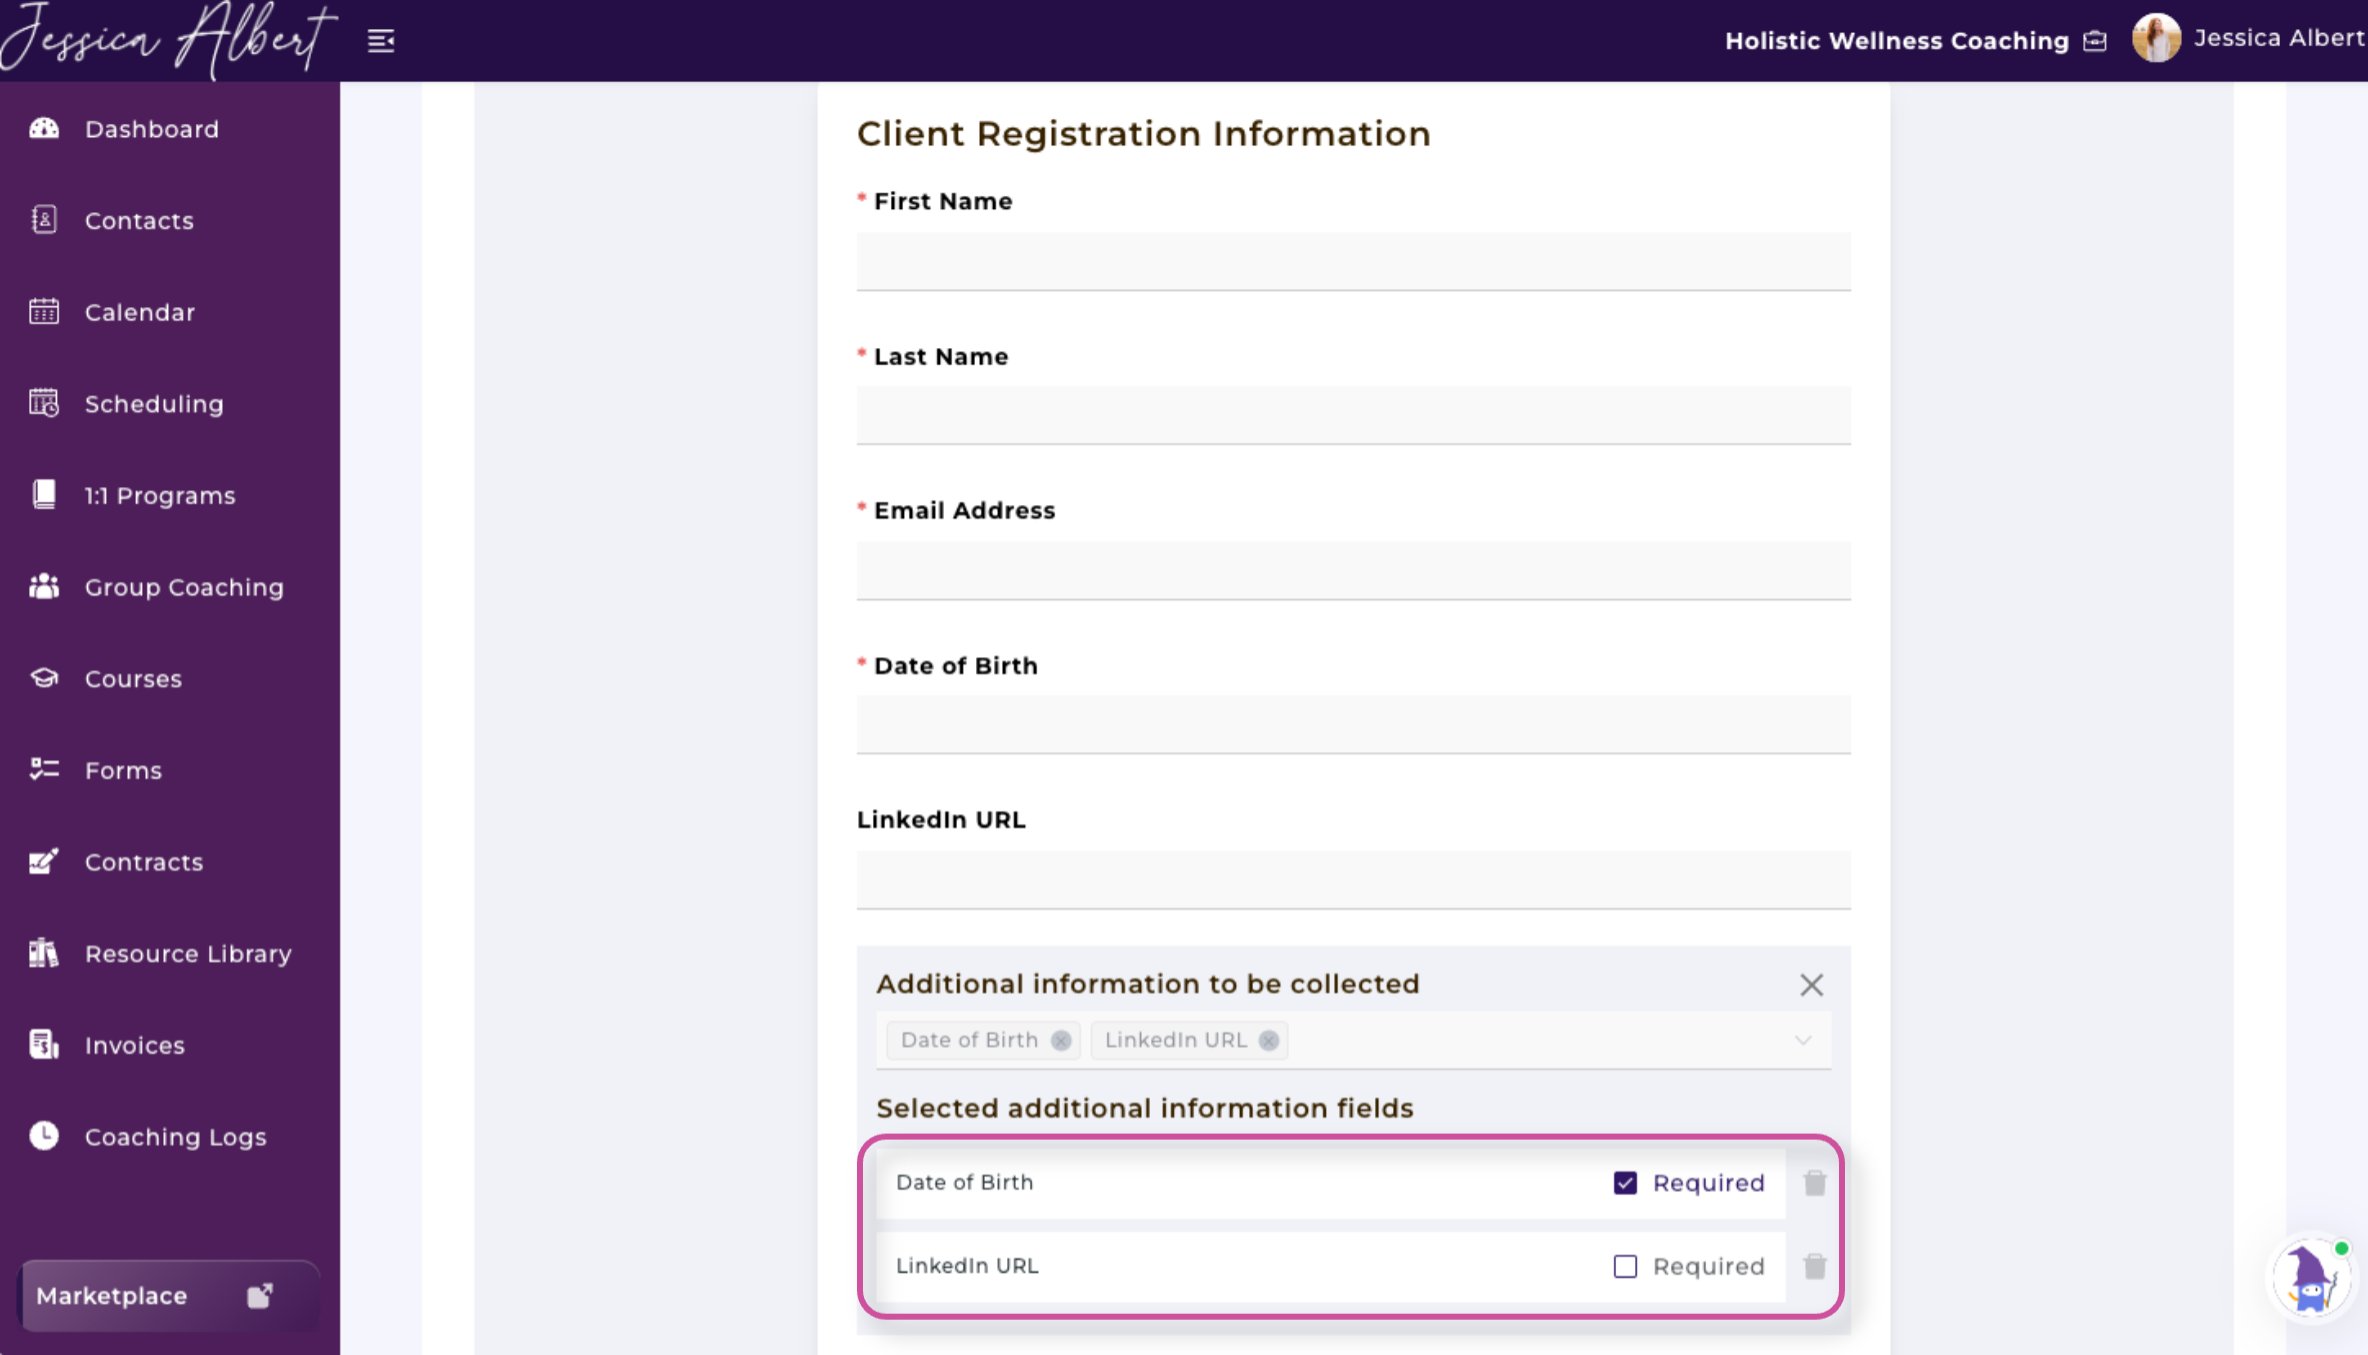
- Open the Additional Information to Be Collected dropdown menu.
- Select the information you want to collect.
- Decide whether the field should be required.
If clients must complete a field to enroll, select the Required checkbox next to it.
To remove a field, select the trash can icon on the right side of that field.
Add an Intake Form
You can include an intake form as part of the program’s signup process.
To add an intake form:
- Select the grey + Intake Form button.
2. Choose whether you'd like to Create a New Form or Import from Forms.
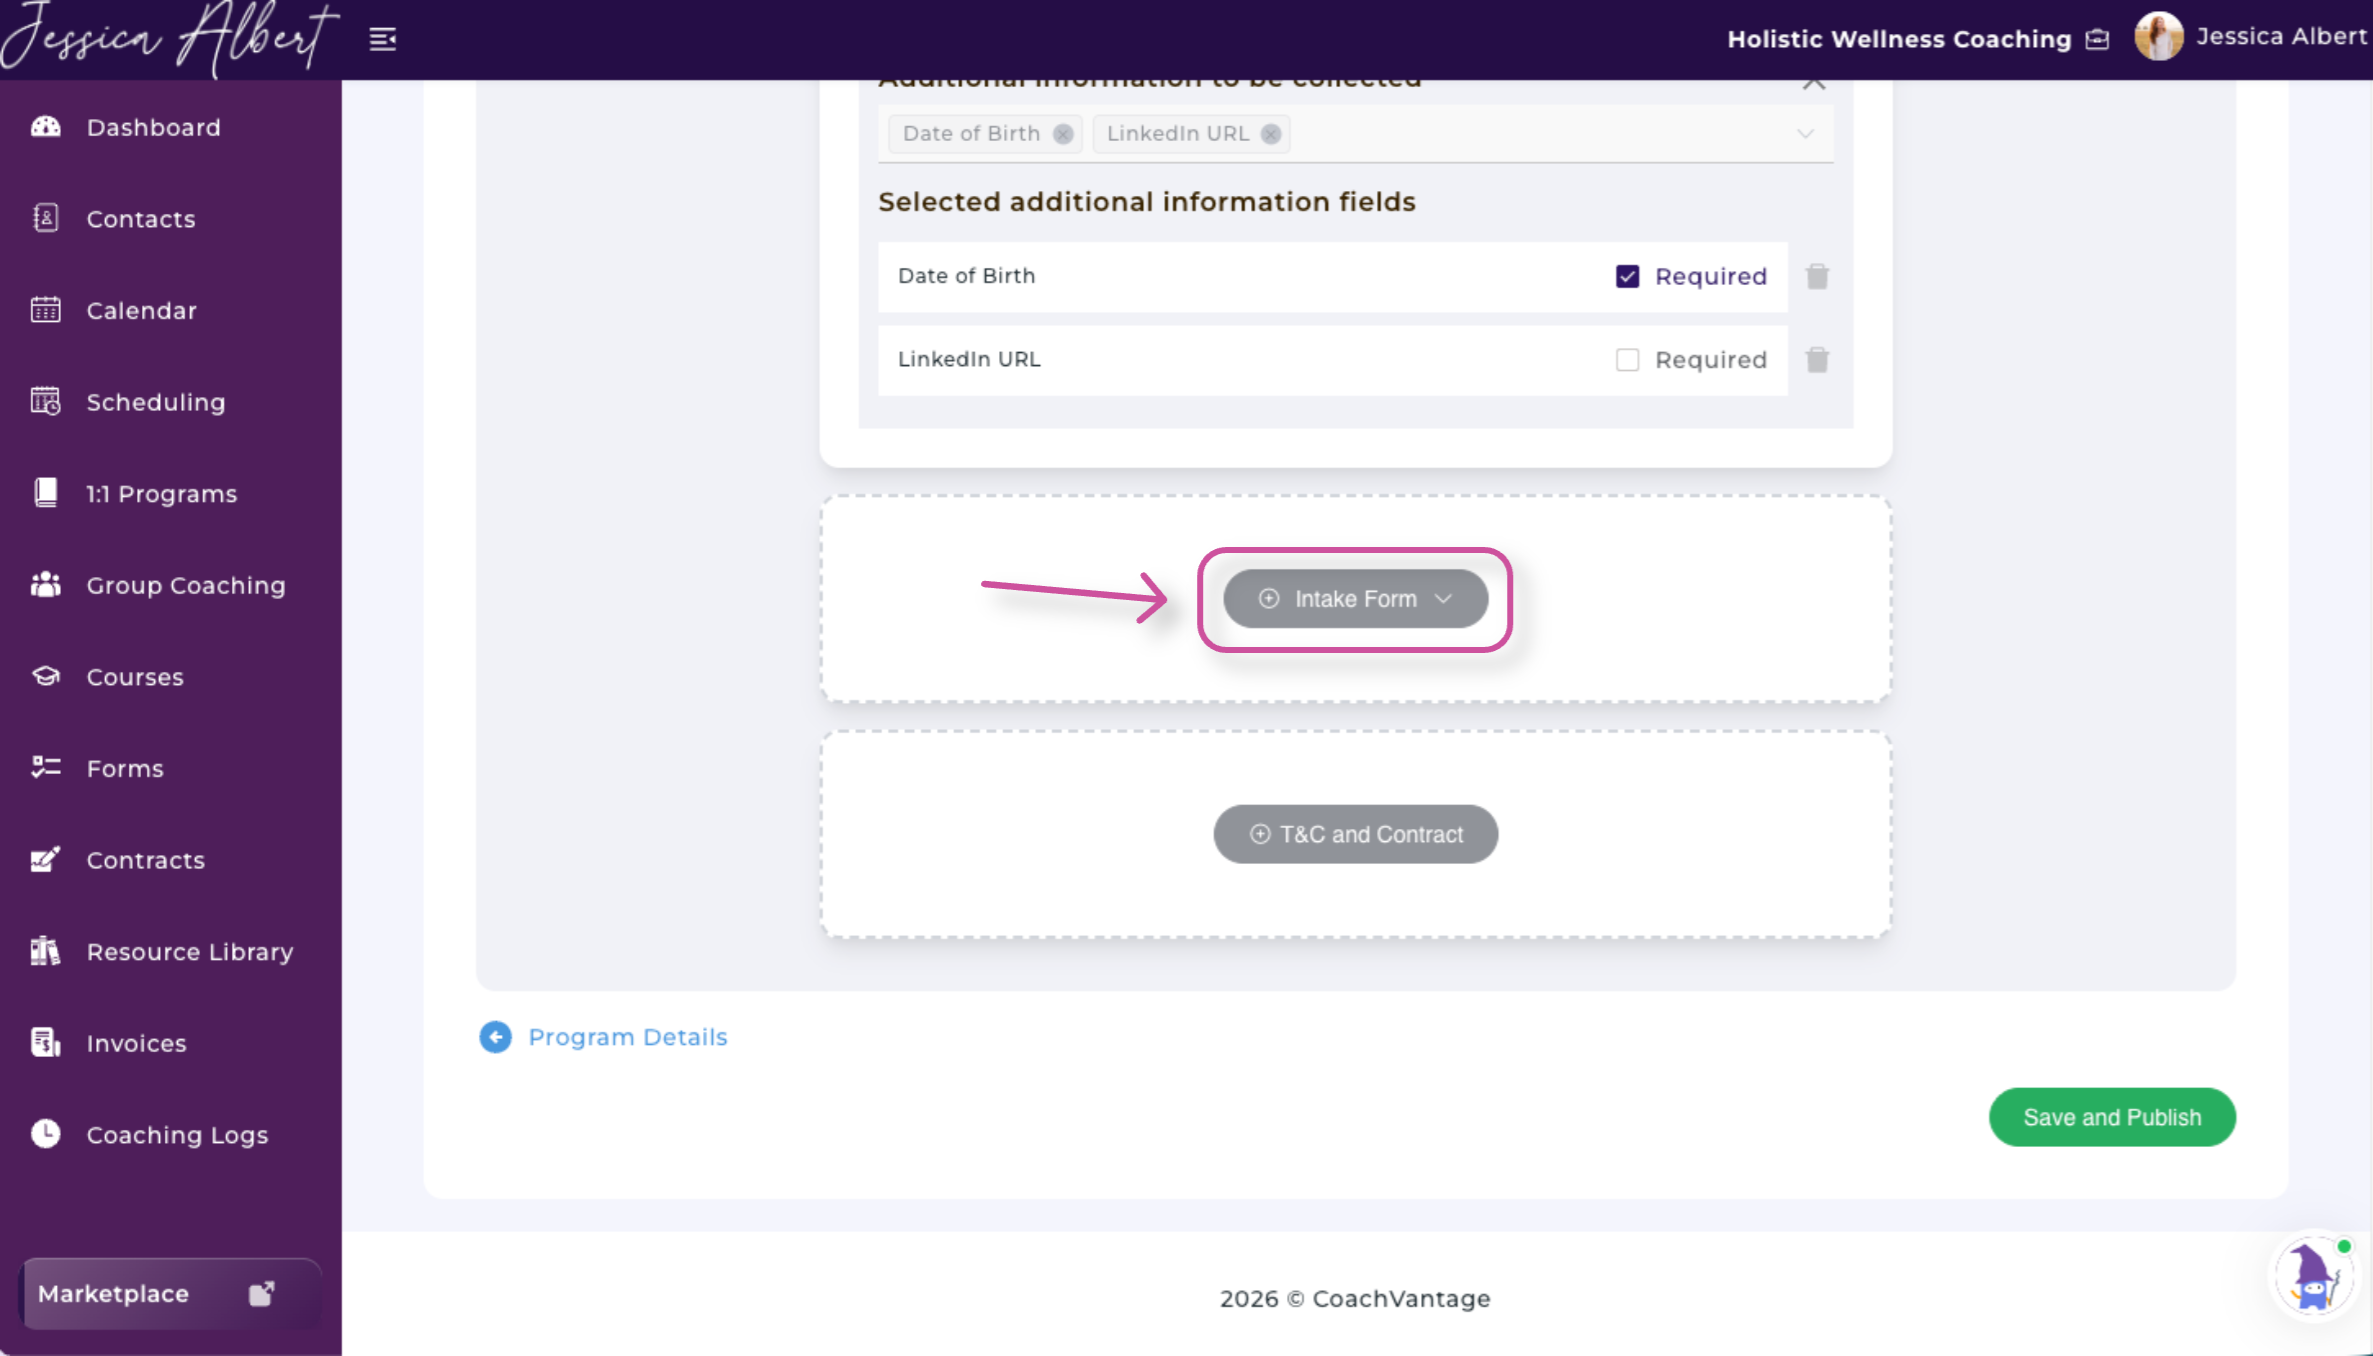
3. Select or build the form you want clients to complete.
4. Select Save.
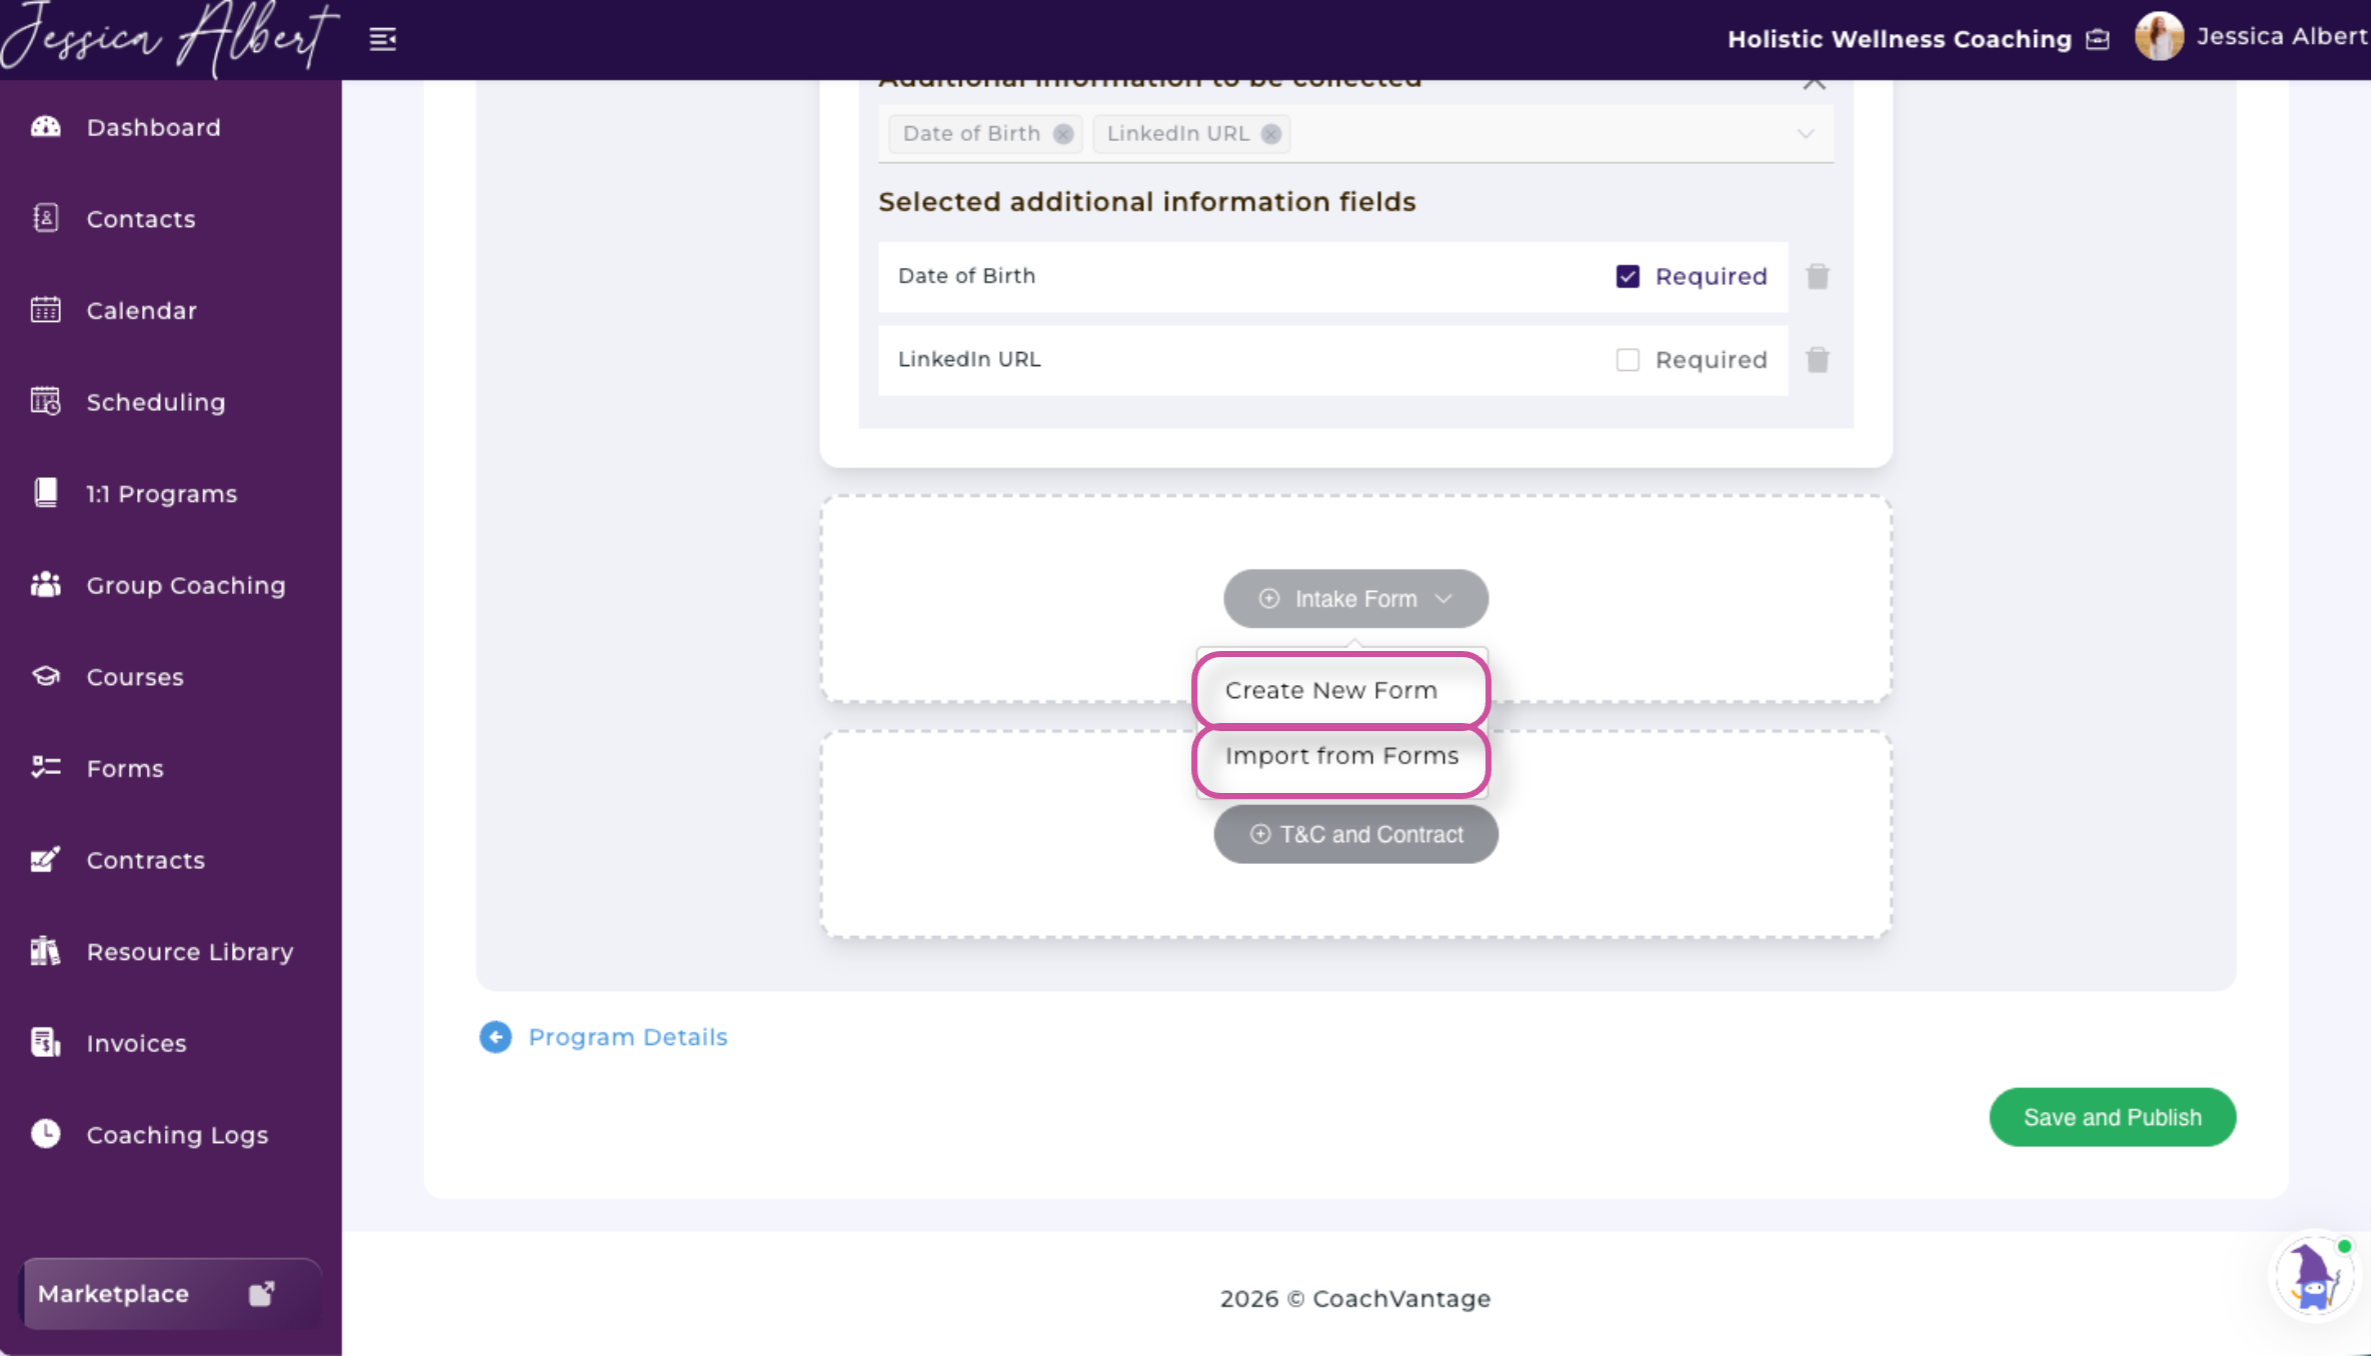
Import an Existing Form
We recommend creating forms in the main Forms section of CoachVantage and then importing them into your program. This can make forms easier to create, organize, and reuse.
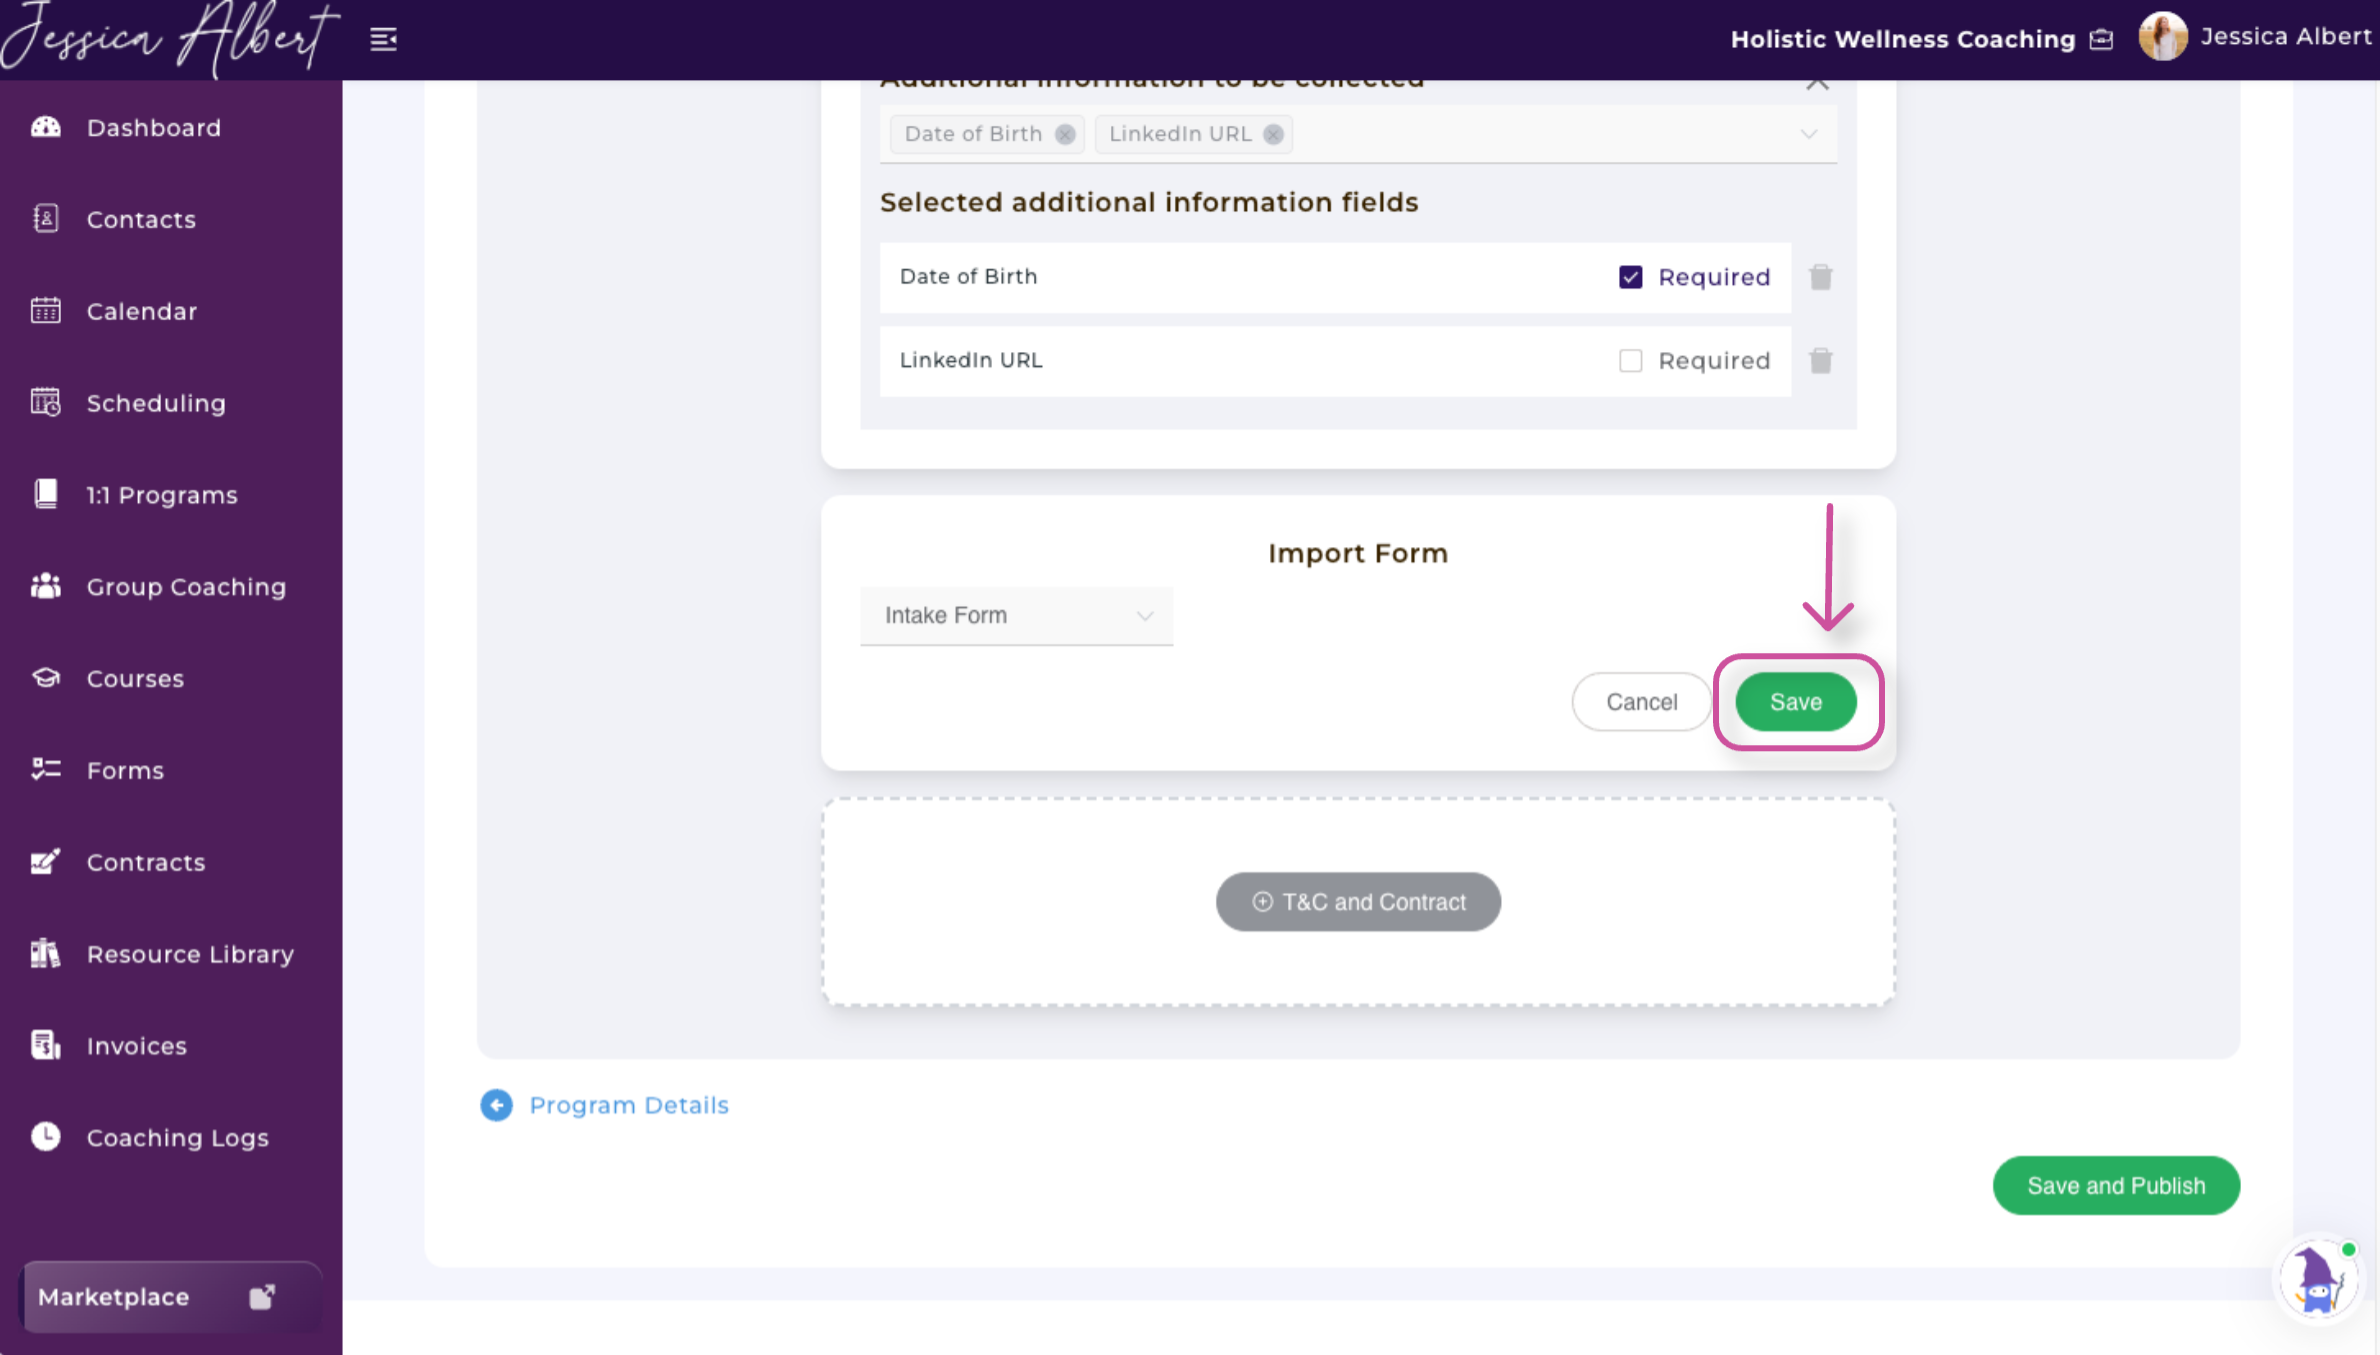
To import a form:
- Select Import From Form.
- Choose the form you want to use.
3. Select Save.
For additional guidance, refer to this article, How to Build a Form.
Create a New Form
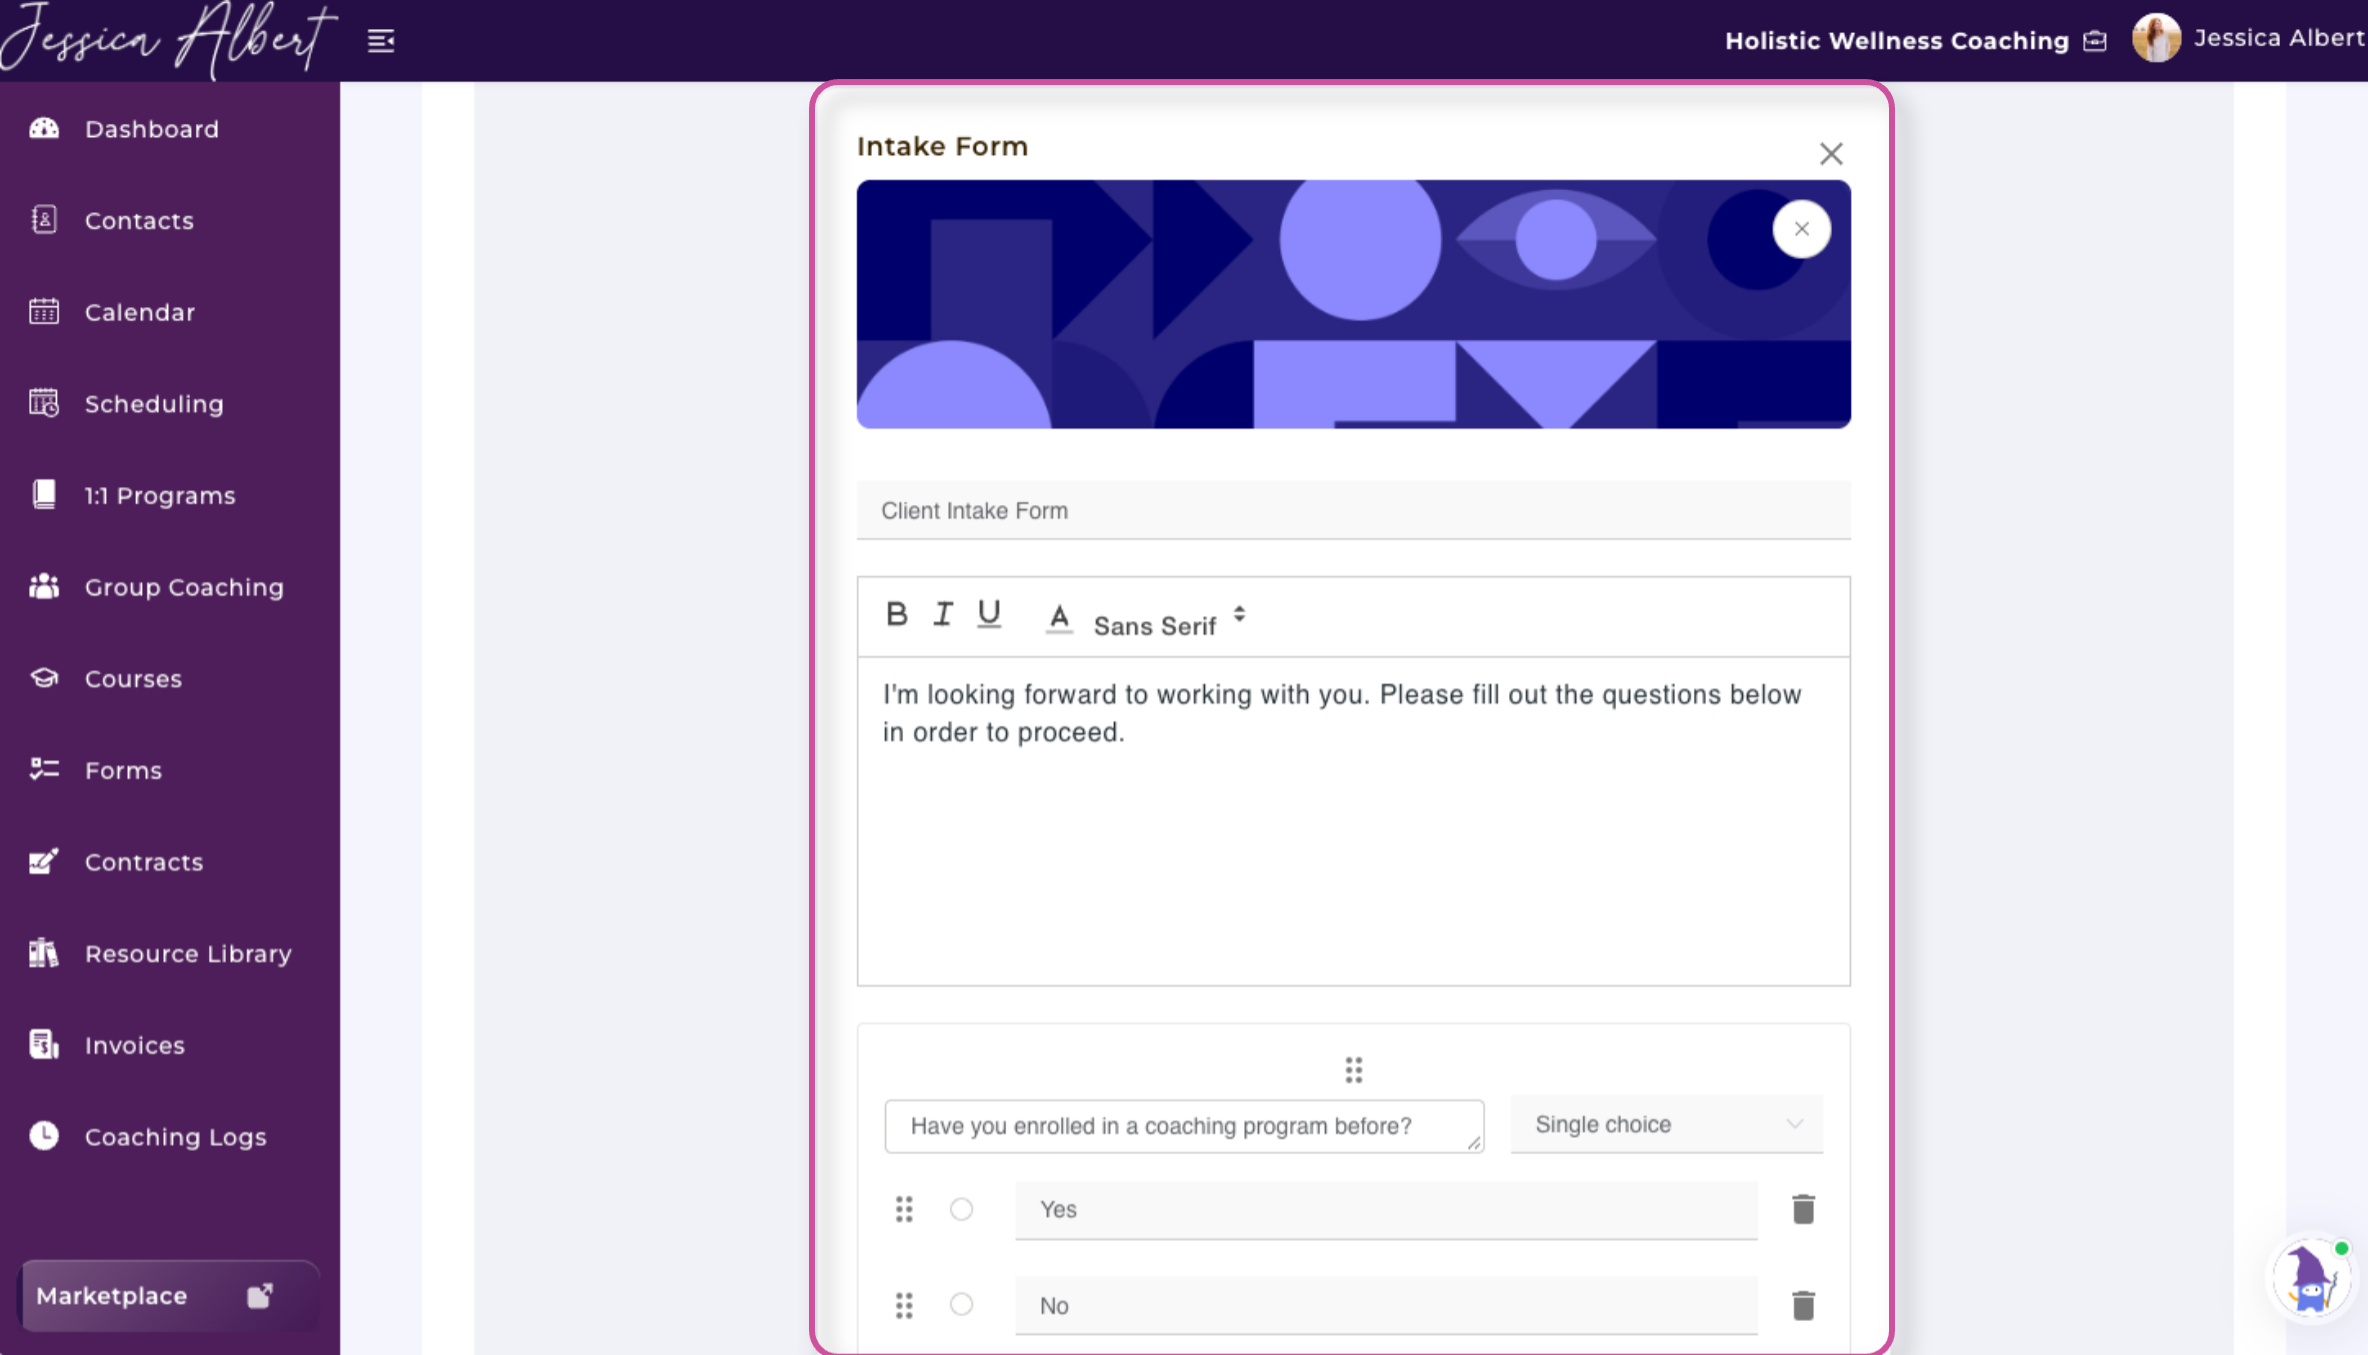
You can also build a new intake form directly from the enrollment-form setup page.
Use your intake form to gather information that will help you understand the client’s background, goals, expectations, or coaching needs before you begin working together.
Add Terms and Conditions or a Contract
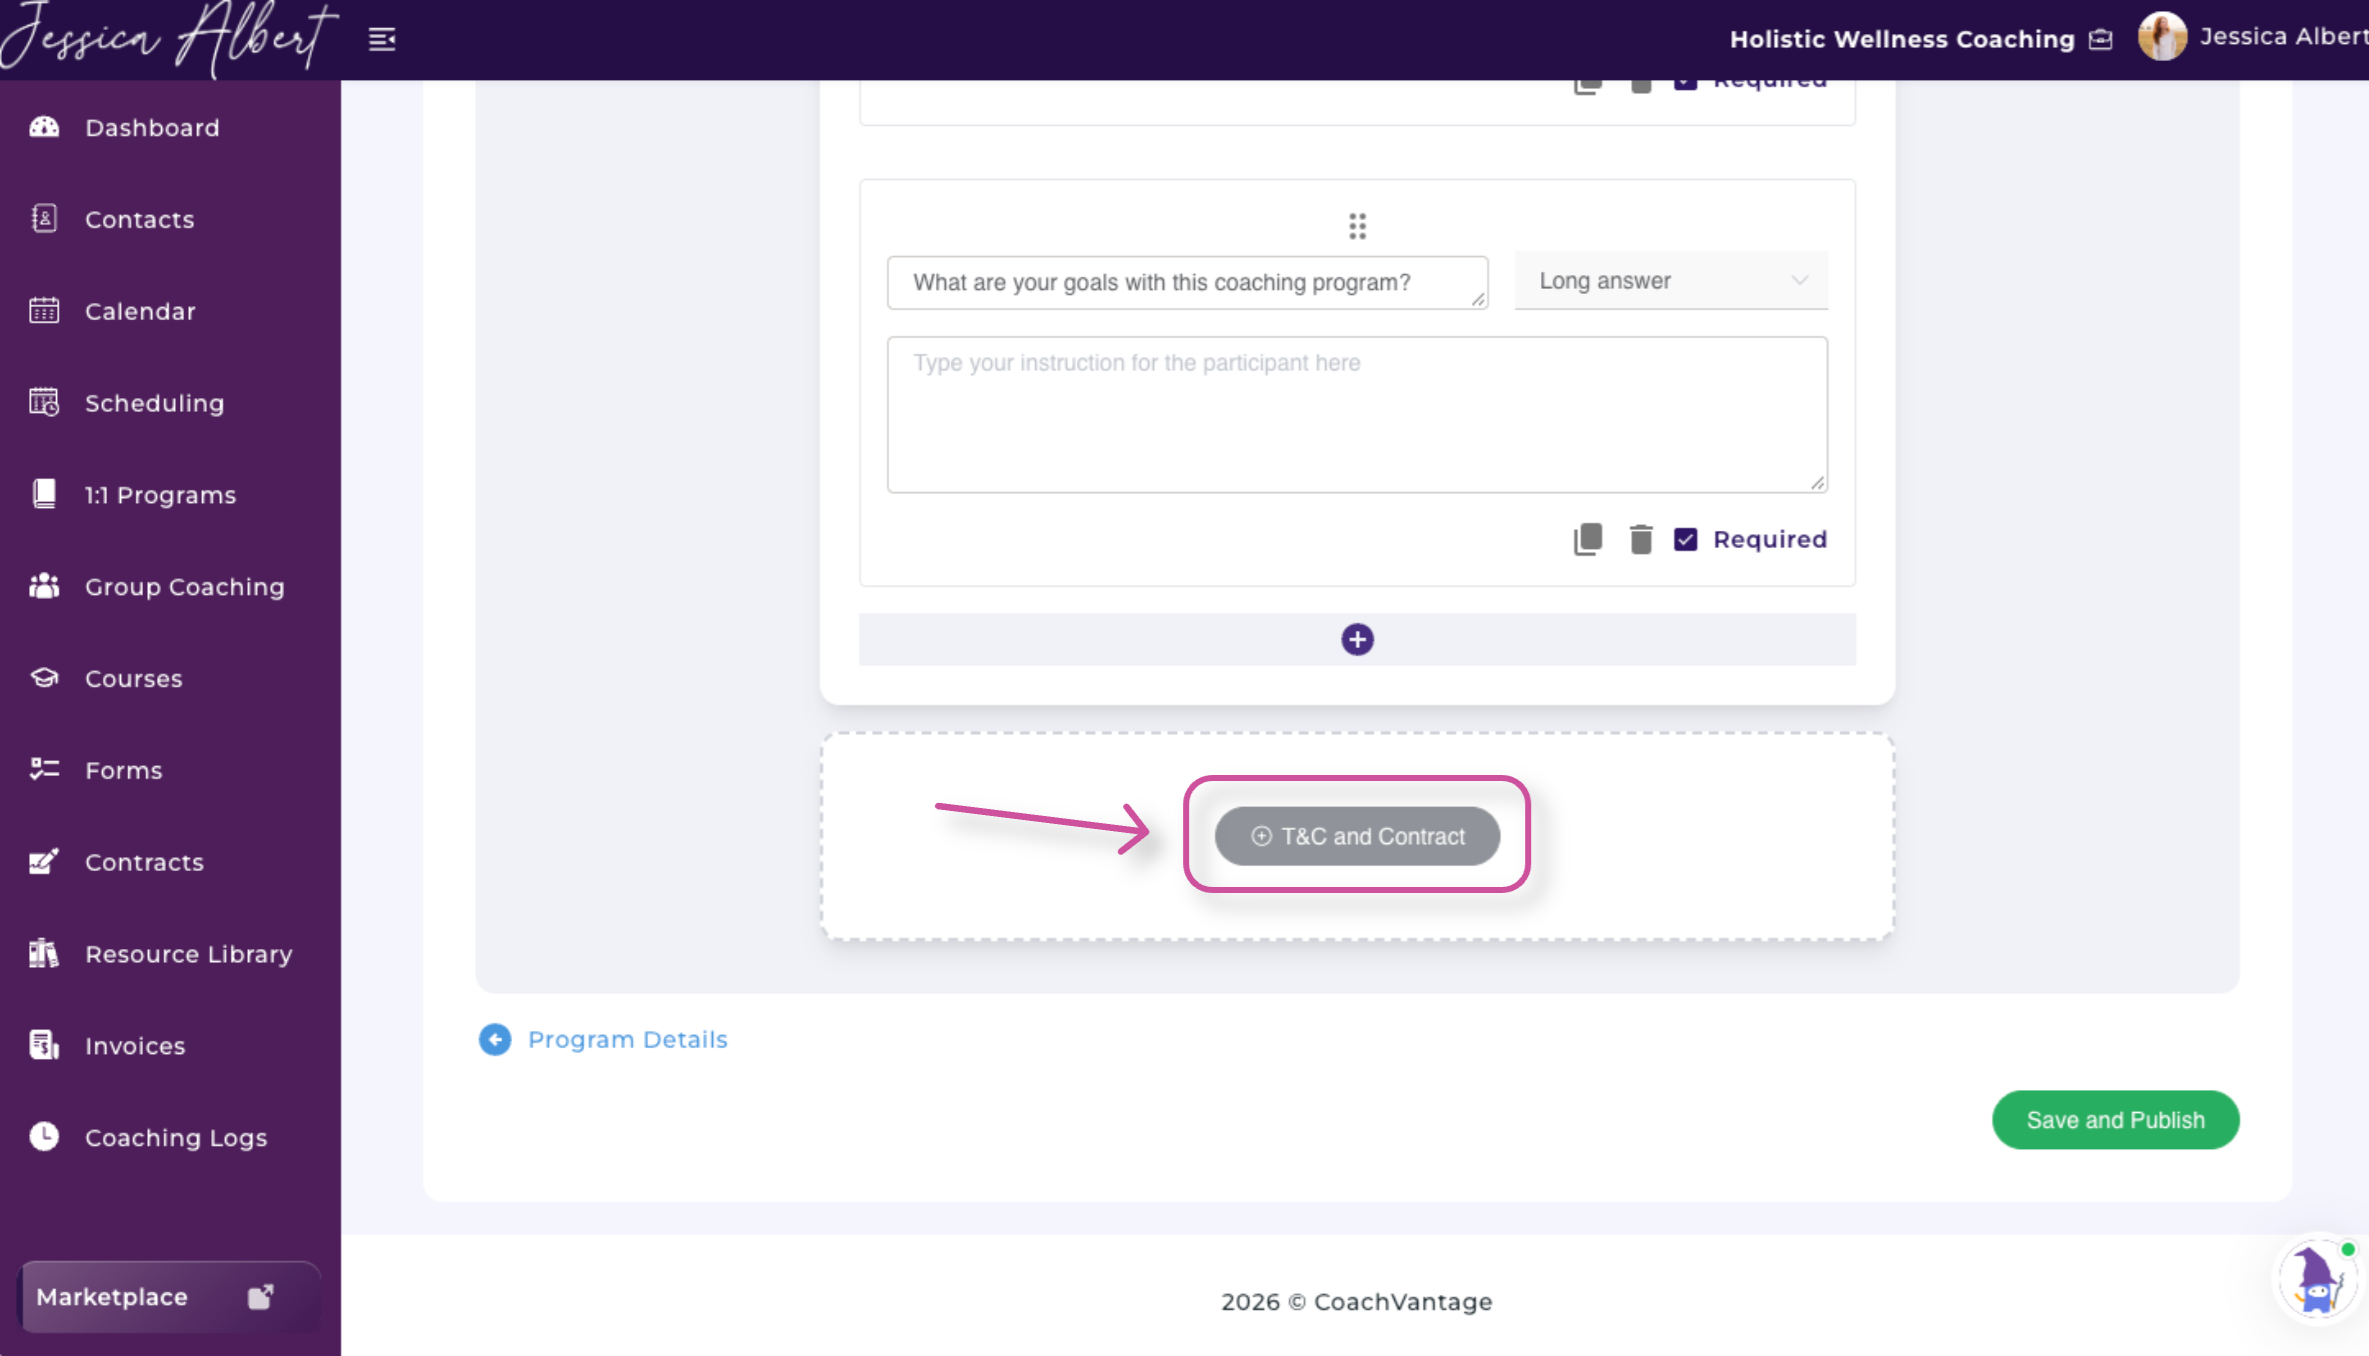
The T&C and Contract section allows you to add terms and conditions to the enrollment process.
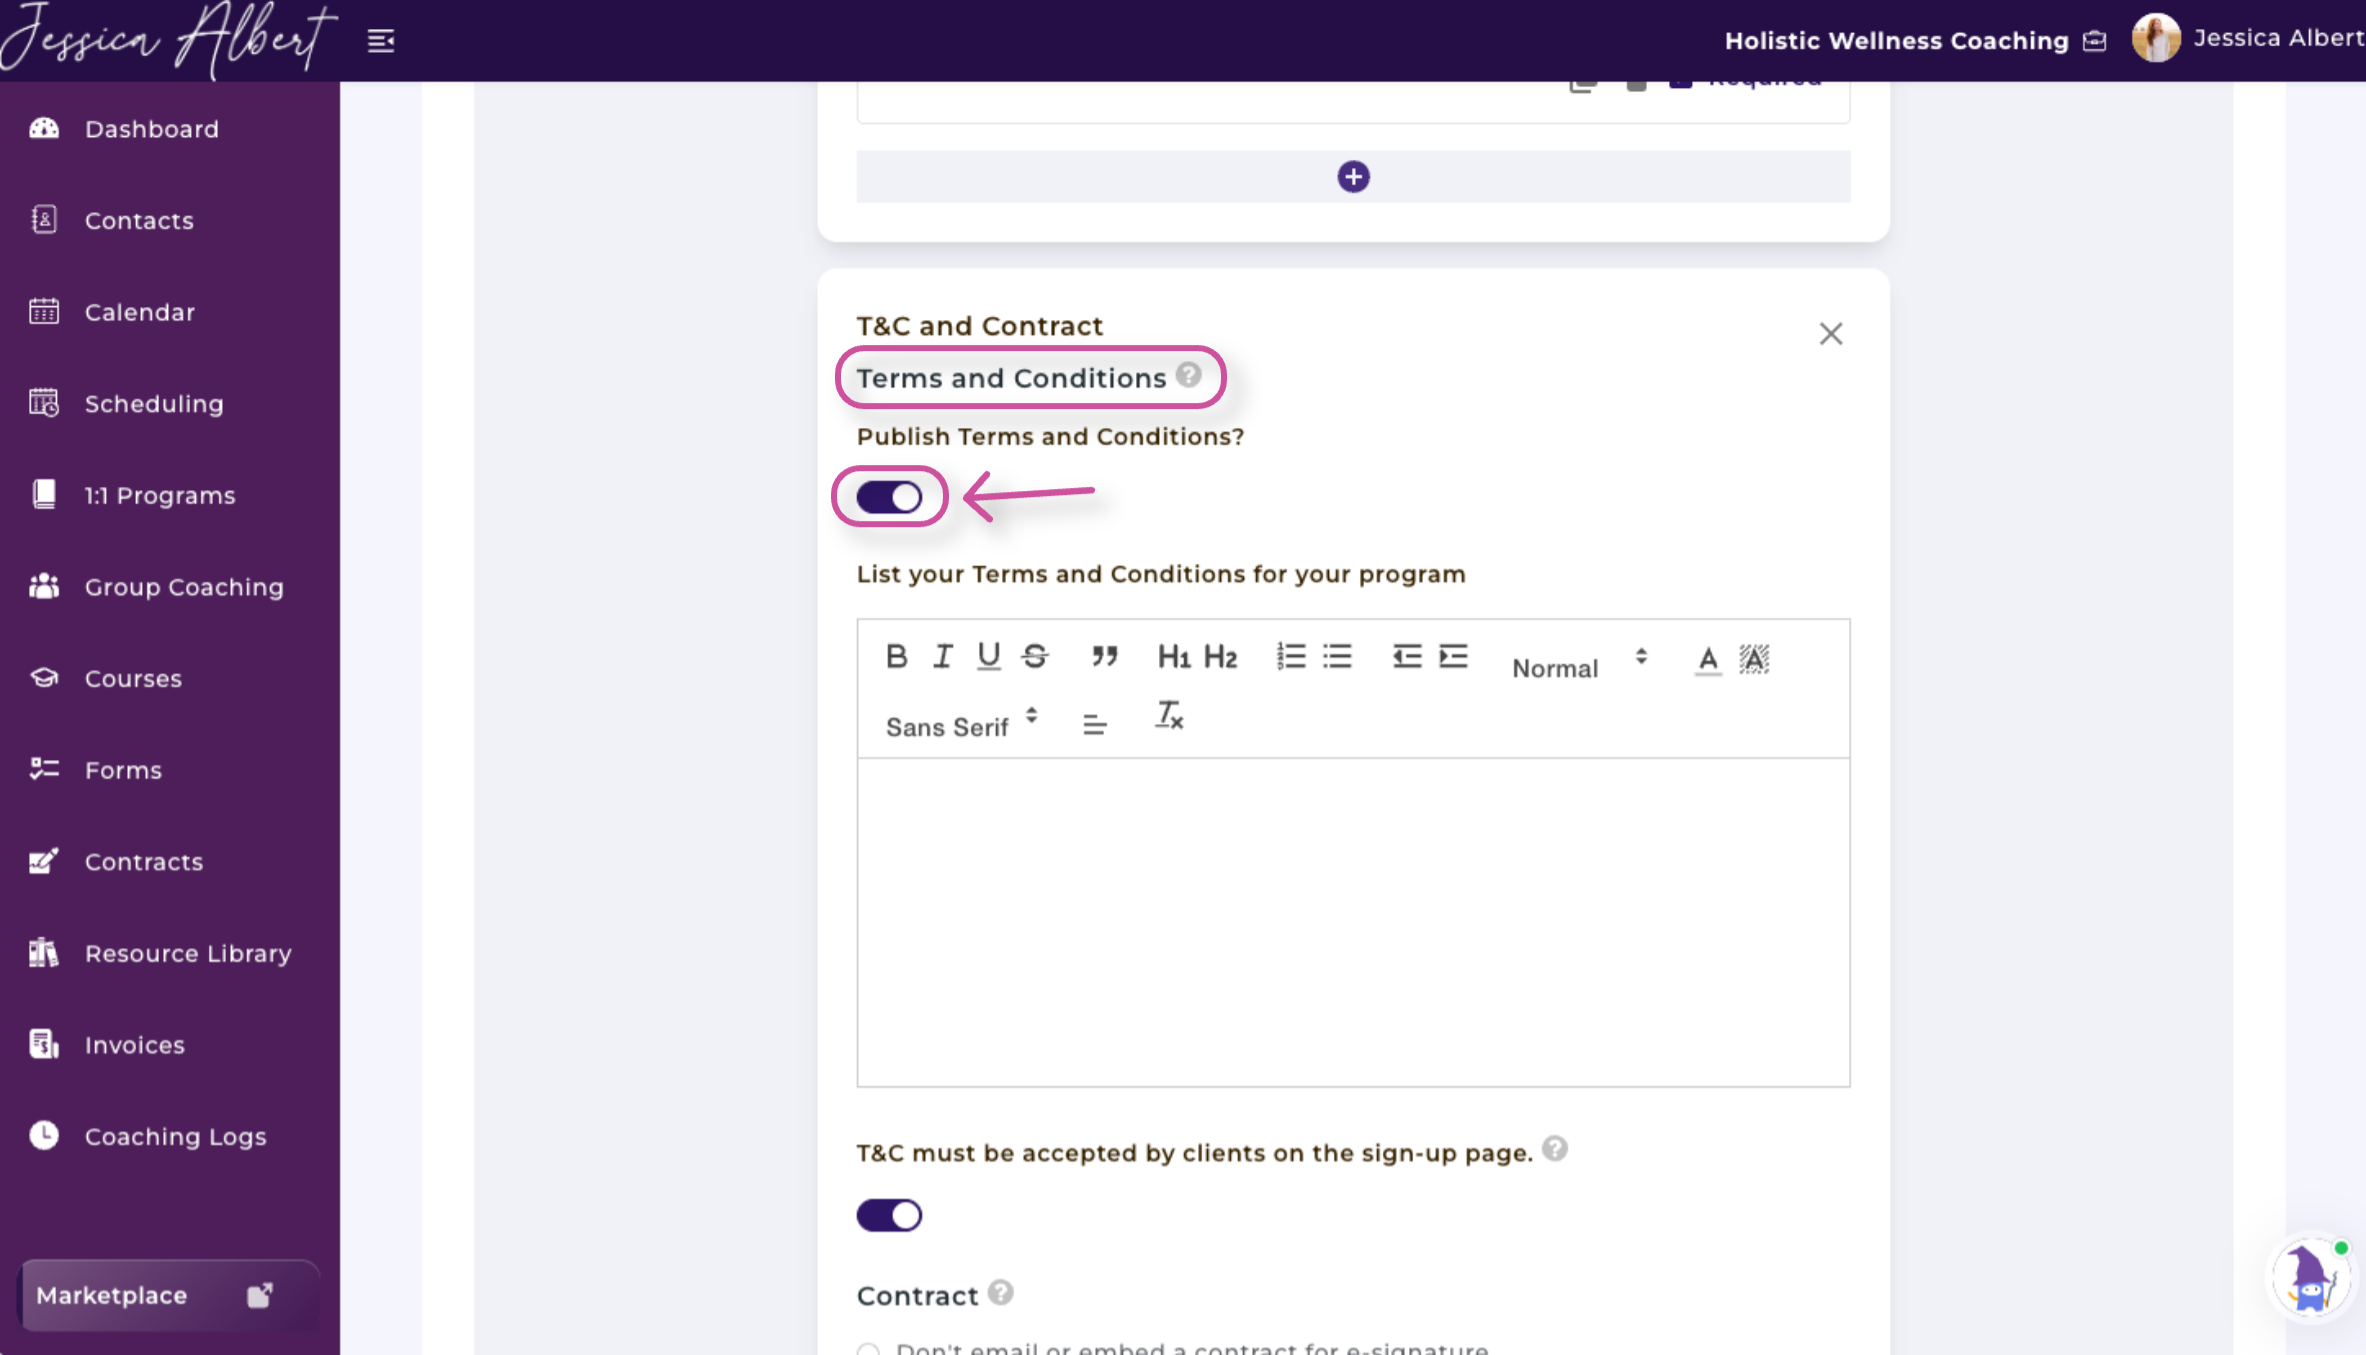
You can then select if you would like for your Terms and Conditions to be accepted by clients on the sign-up page.
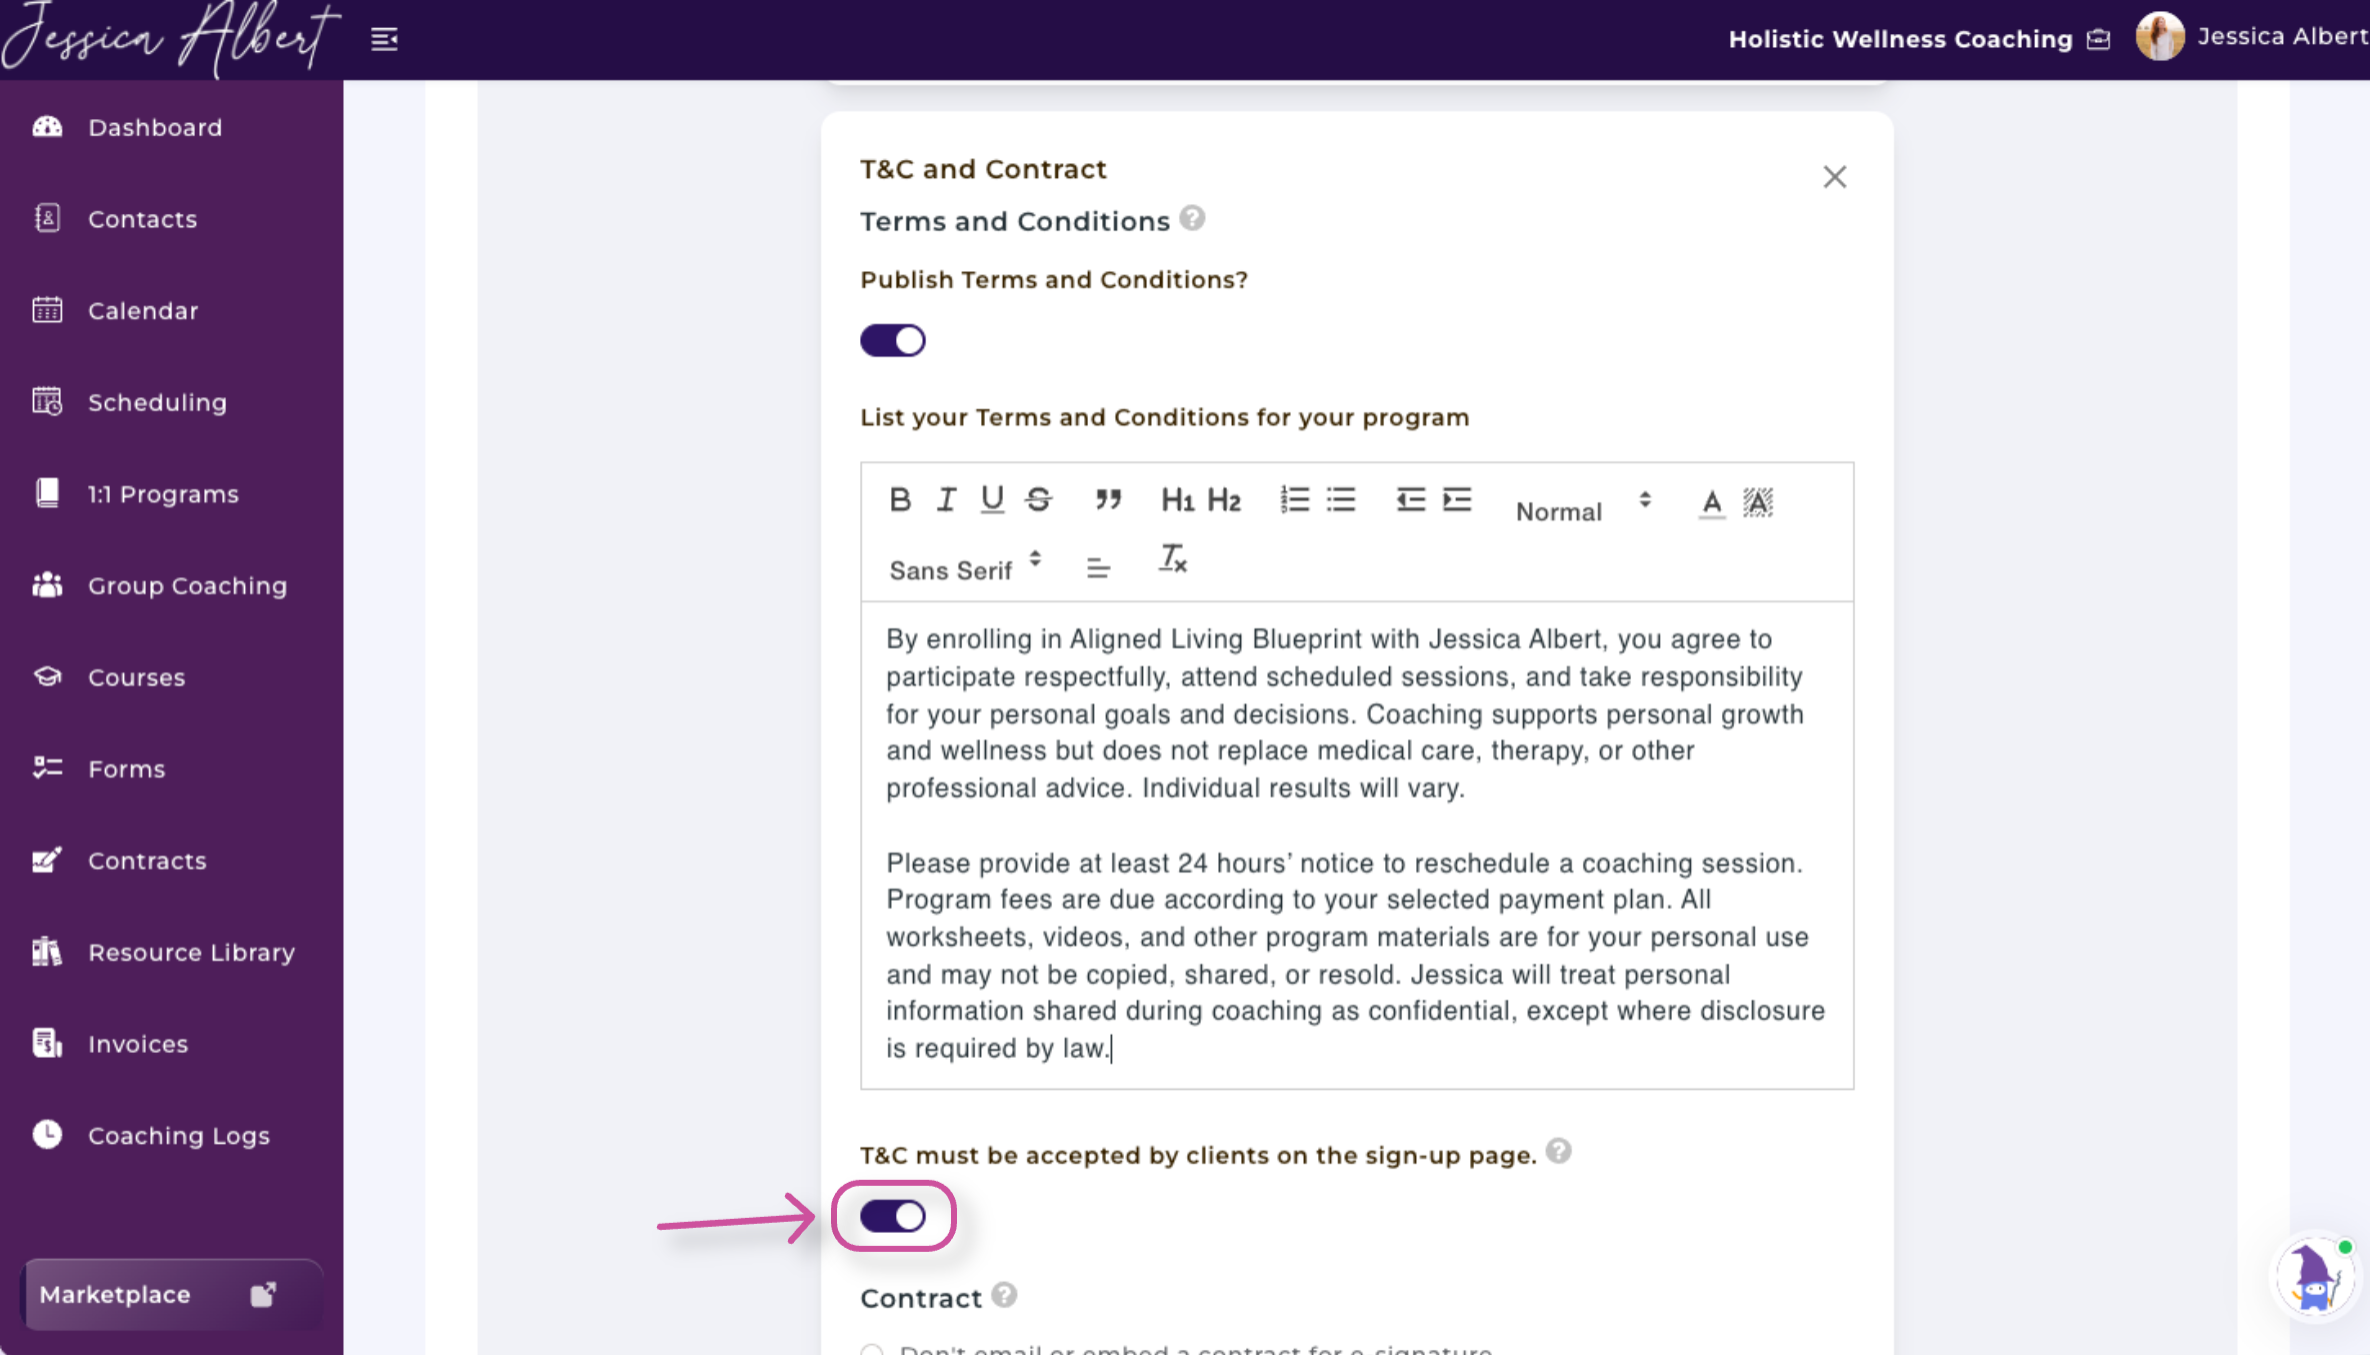
Coaches subscribed to an AHA plan can also choose to:
- Embed a contract within the enrollment form, or
- Automatically email a contract to the client after enrollment
Embed a Contract
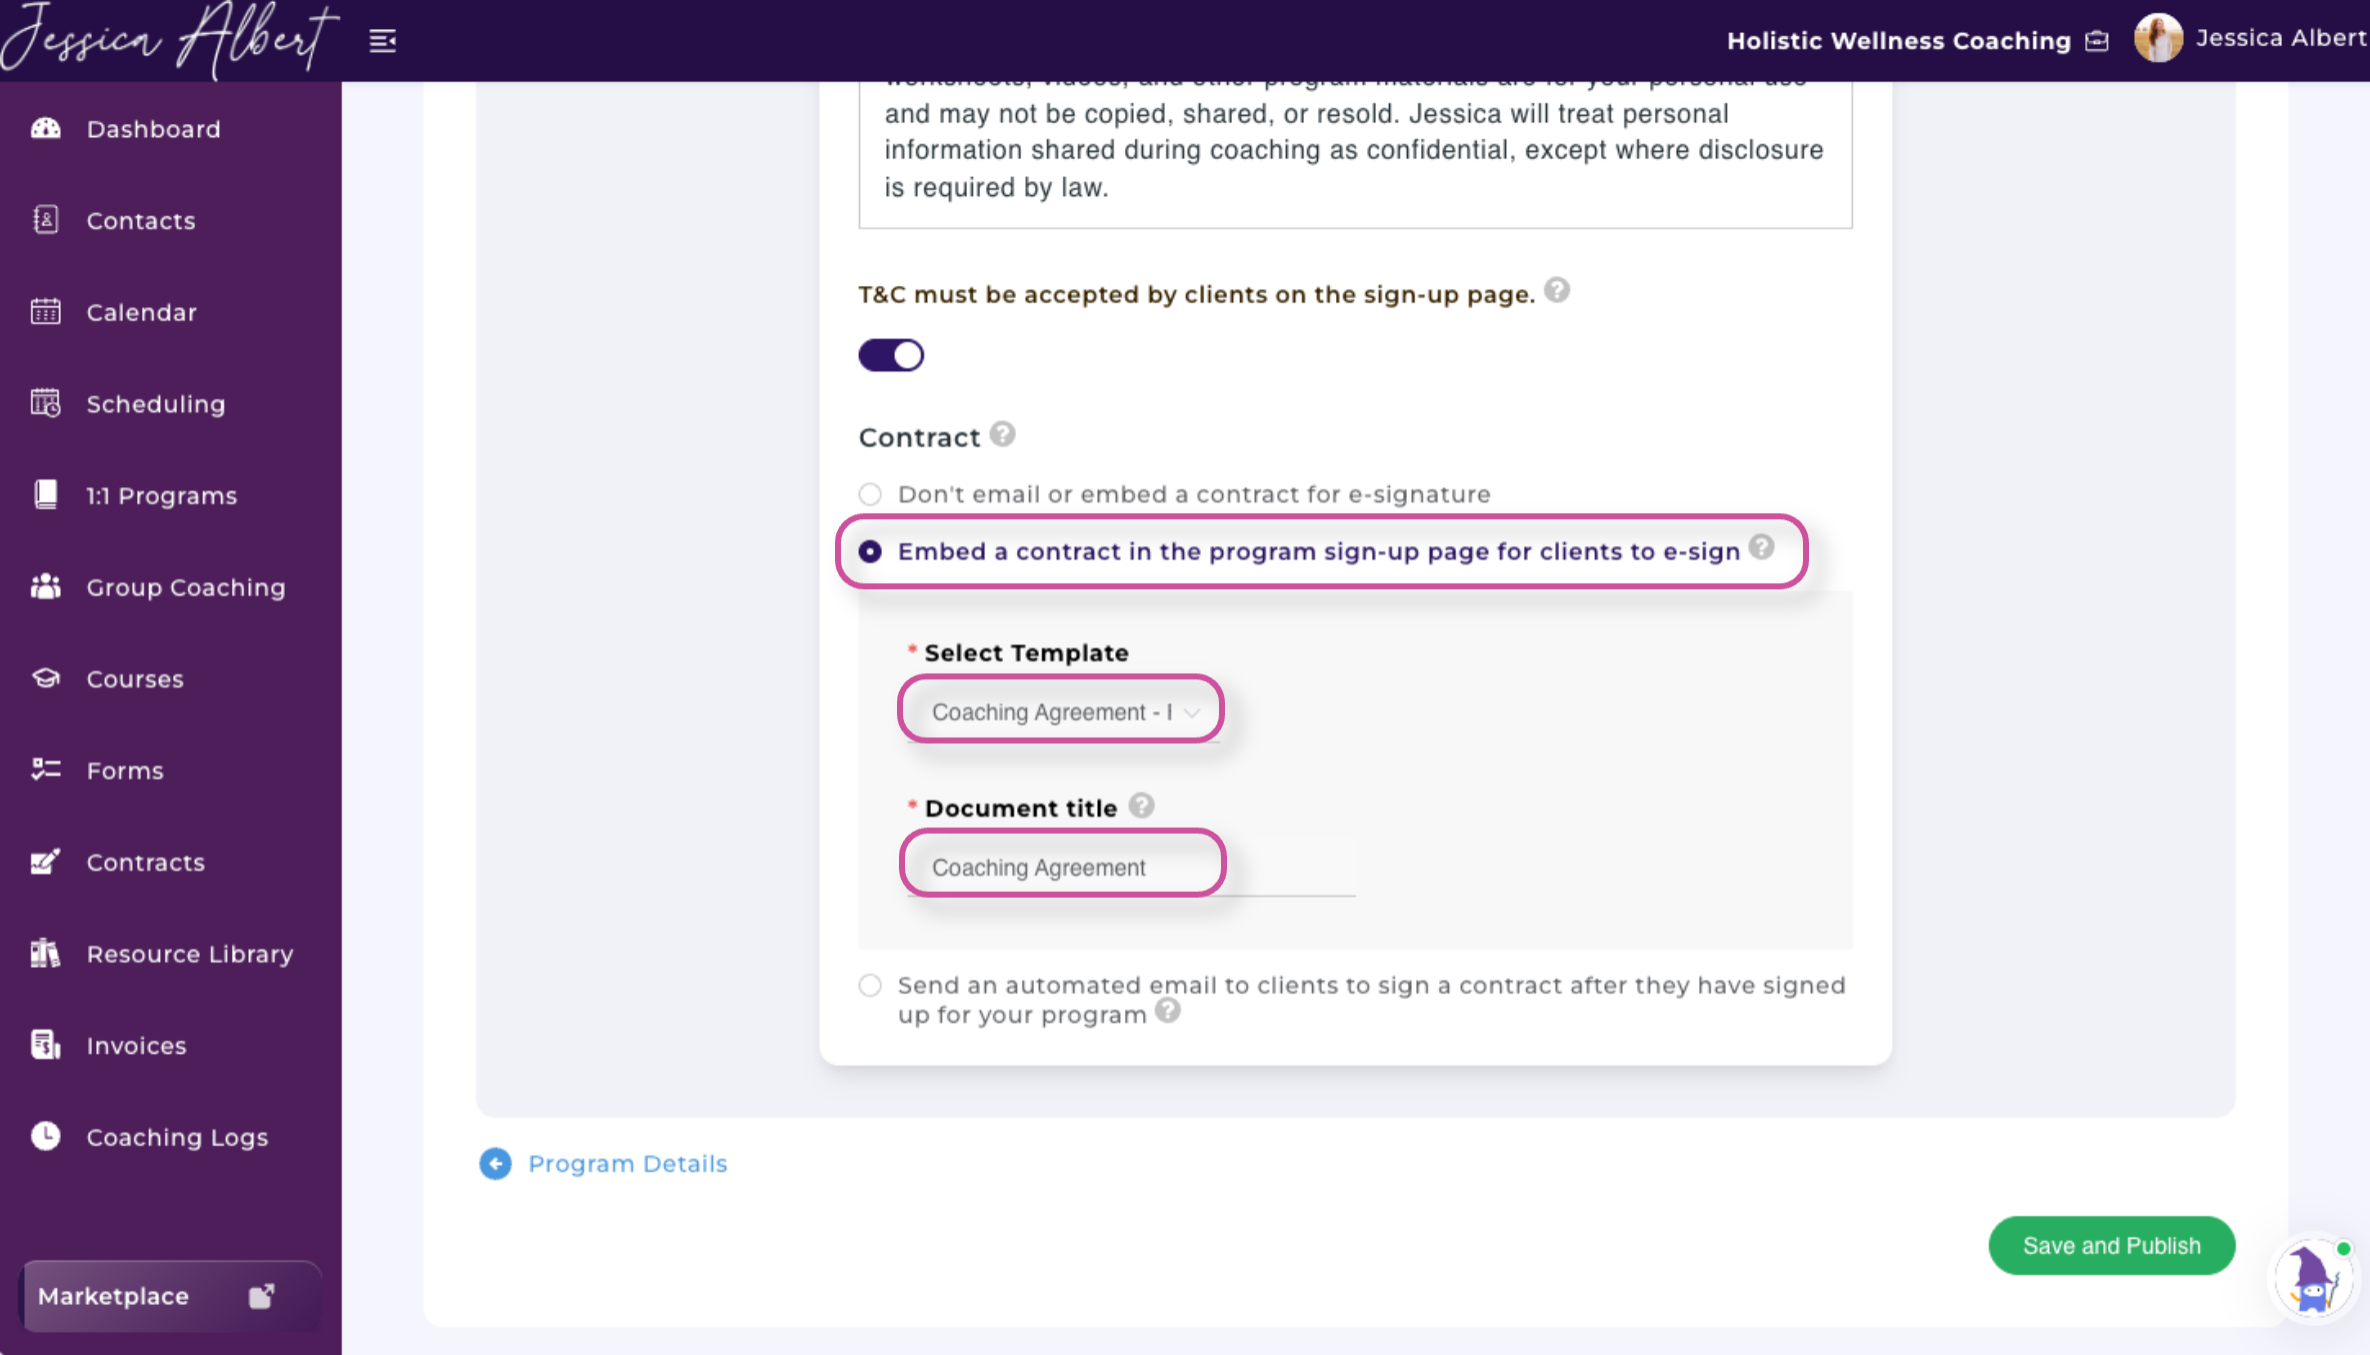
When a contract is embedded, it appears directly within the signup process.
The client must review and e-sign the contract before proceeding to the payment step when payment is required for the program.
This option keeps the contract, payment, and other enrollment steps together within one signup flow.
Automatically Email a Contract
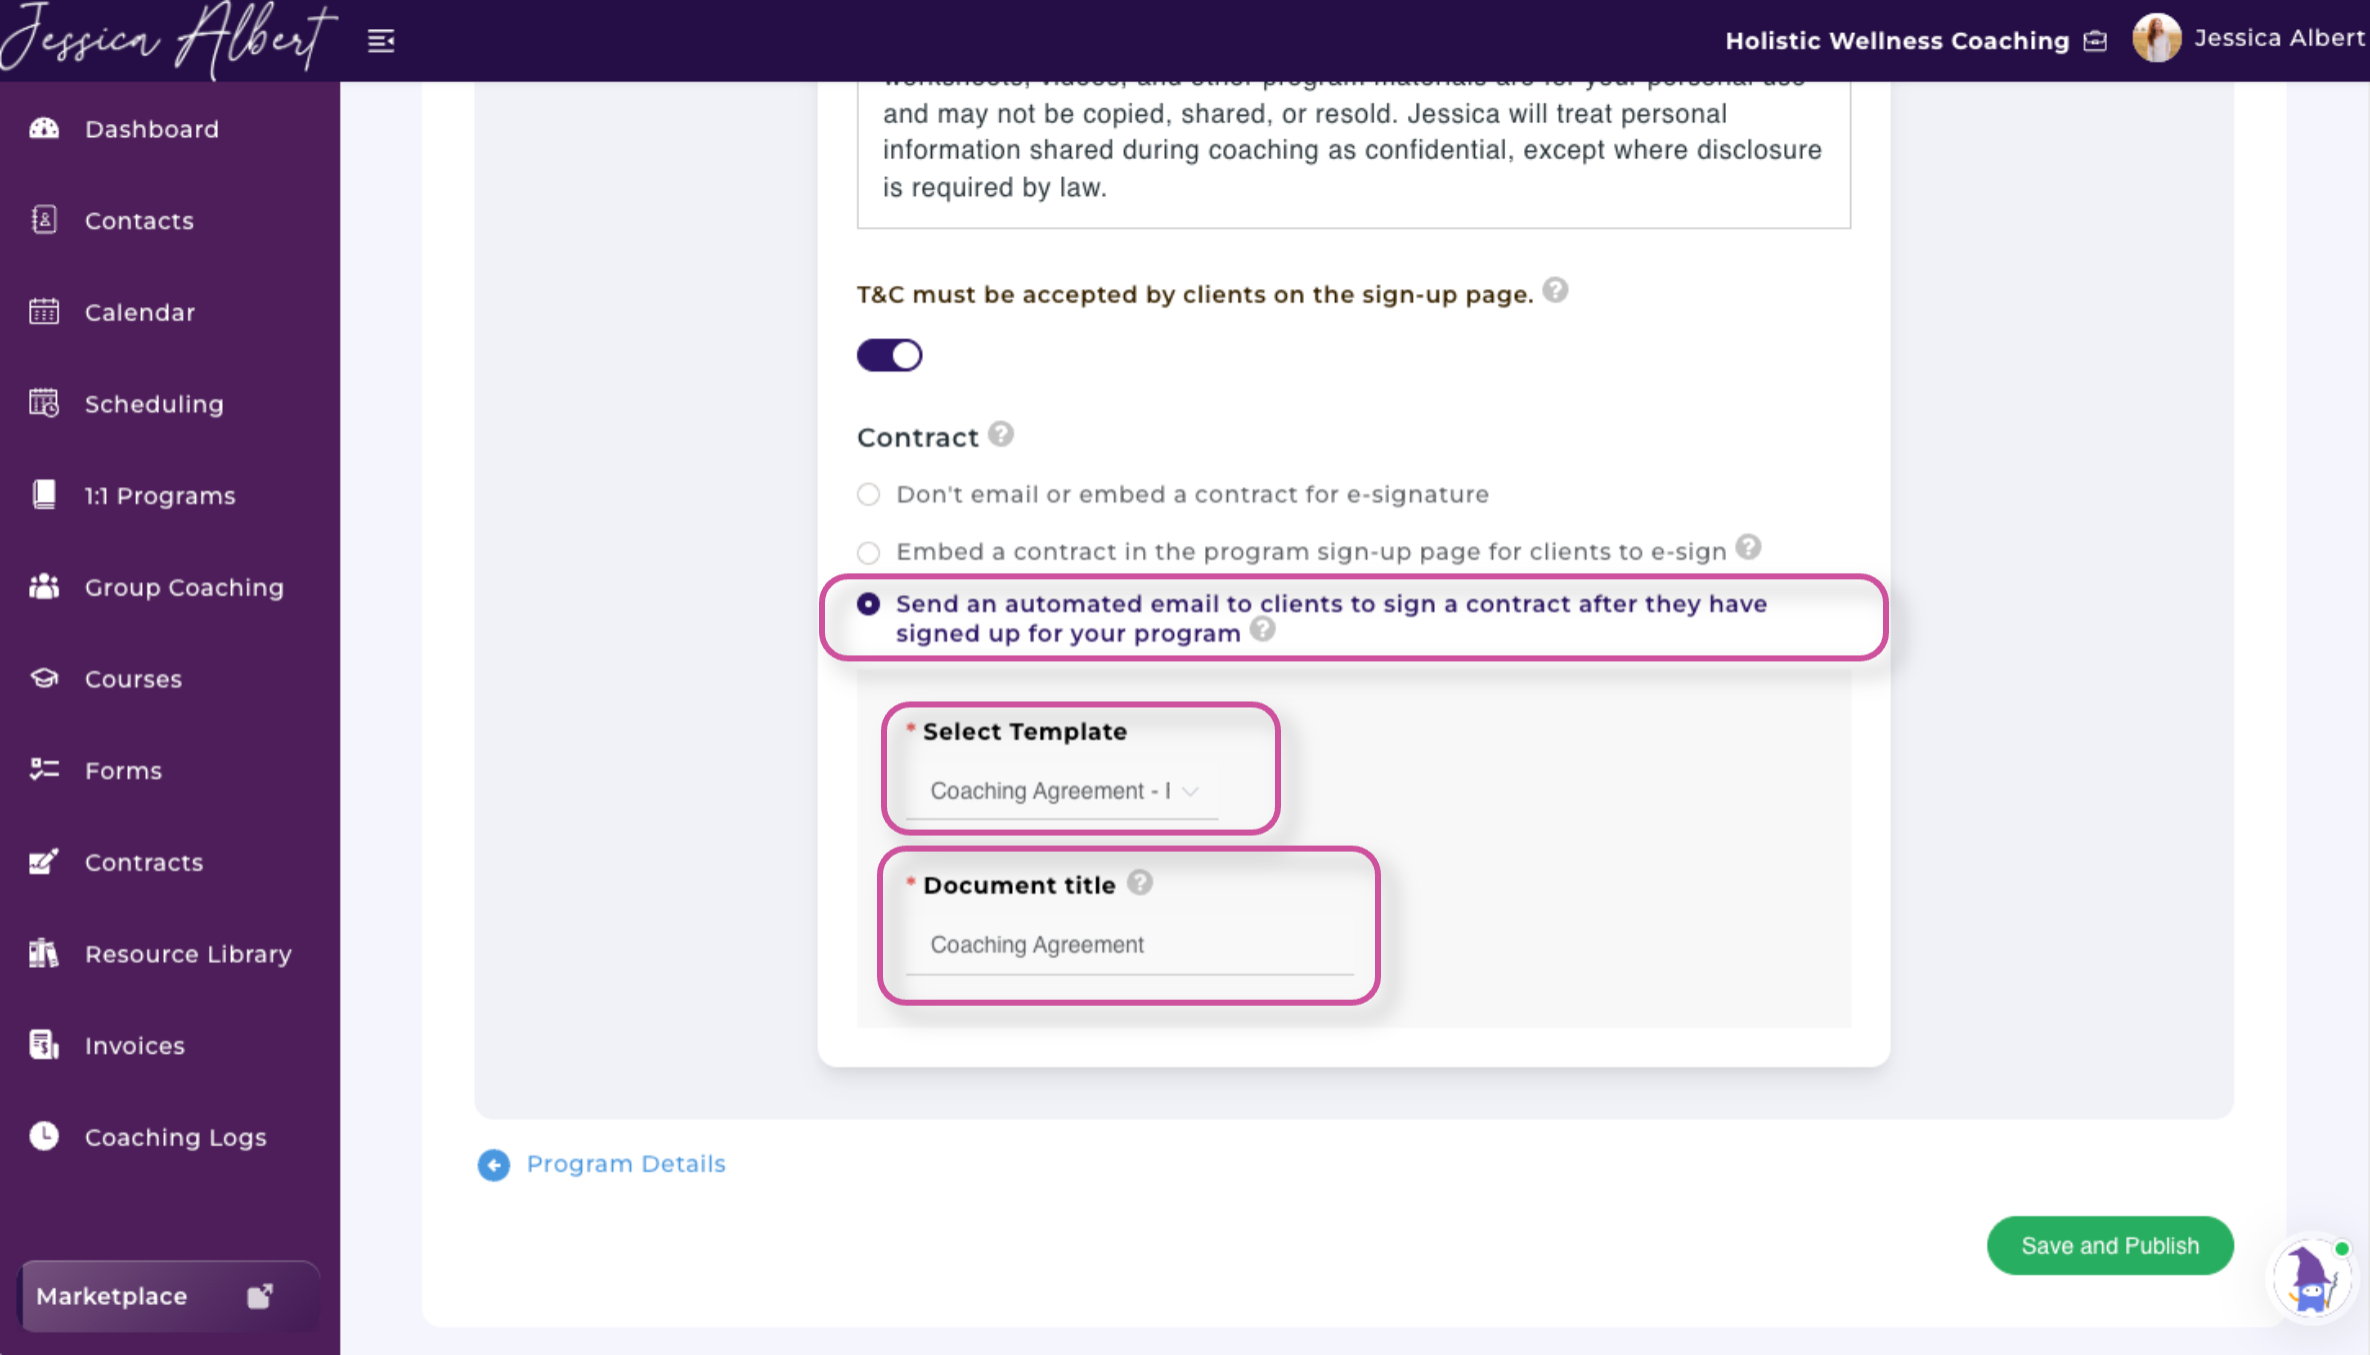
You can also have CoachVantage automatically email the contract after a client successfully enrolls in the program.
The client will receive an email containing a link that allows them to review and e-sign the contract.
Note: The option to embed or automatically send a contract is available only on AHA plans.
Step 3: Customize the Confirmation Page
The confirmation page is displayed after a client completes the enrollment process.
Use this page to thank the client and explain what they should expect next.
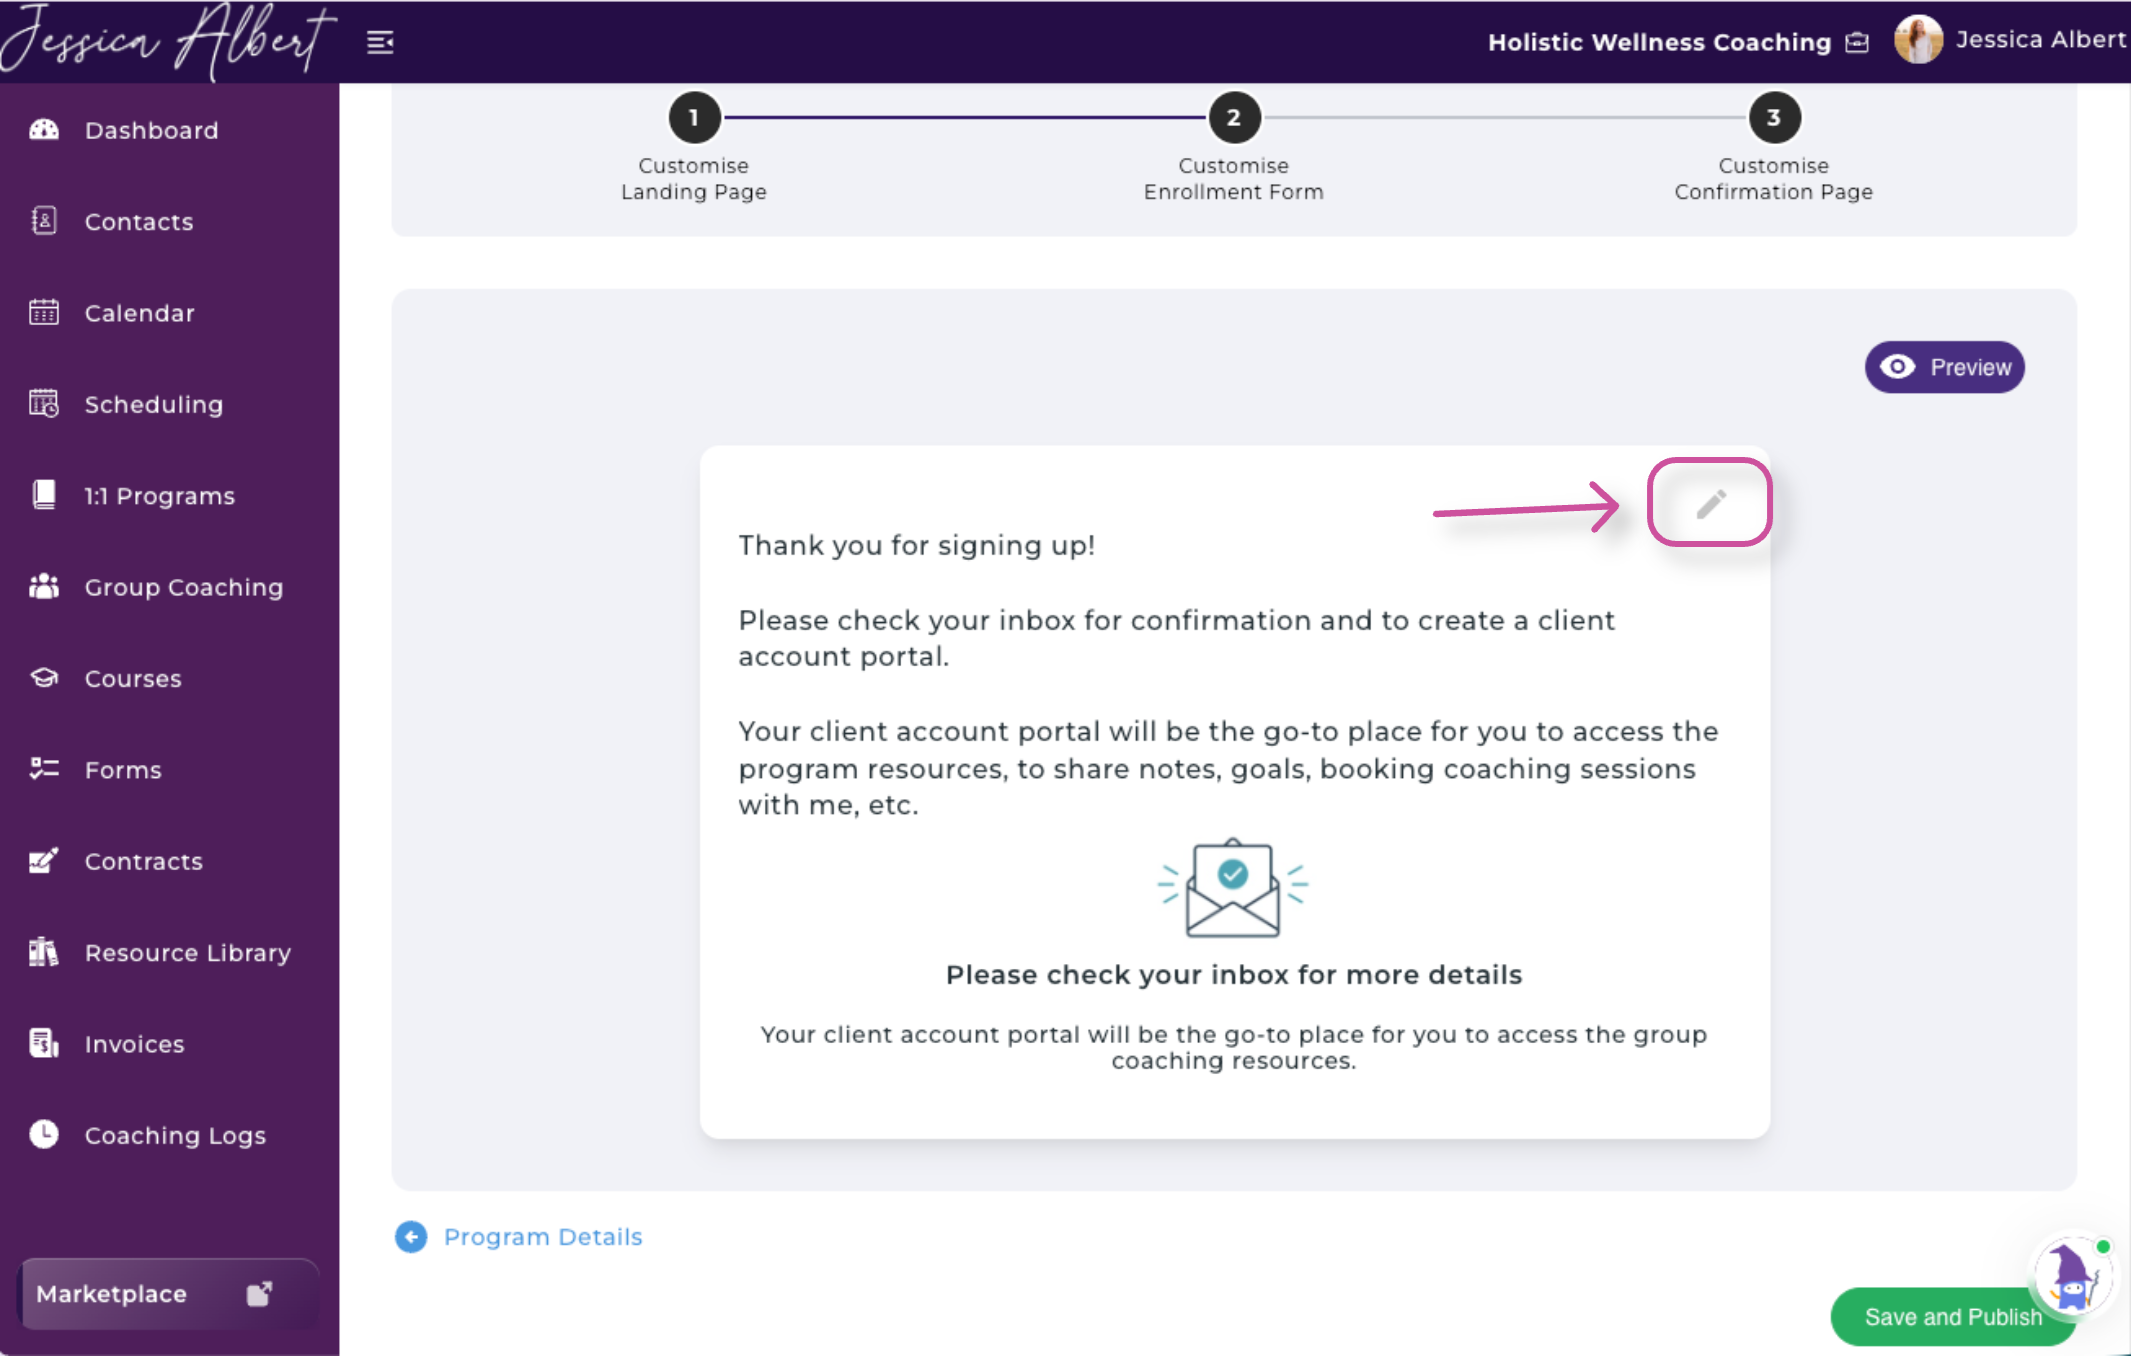
To customize the confirmation page:
- Navigate to the Confirmation Page step.
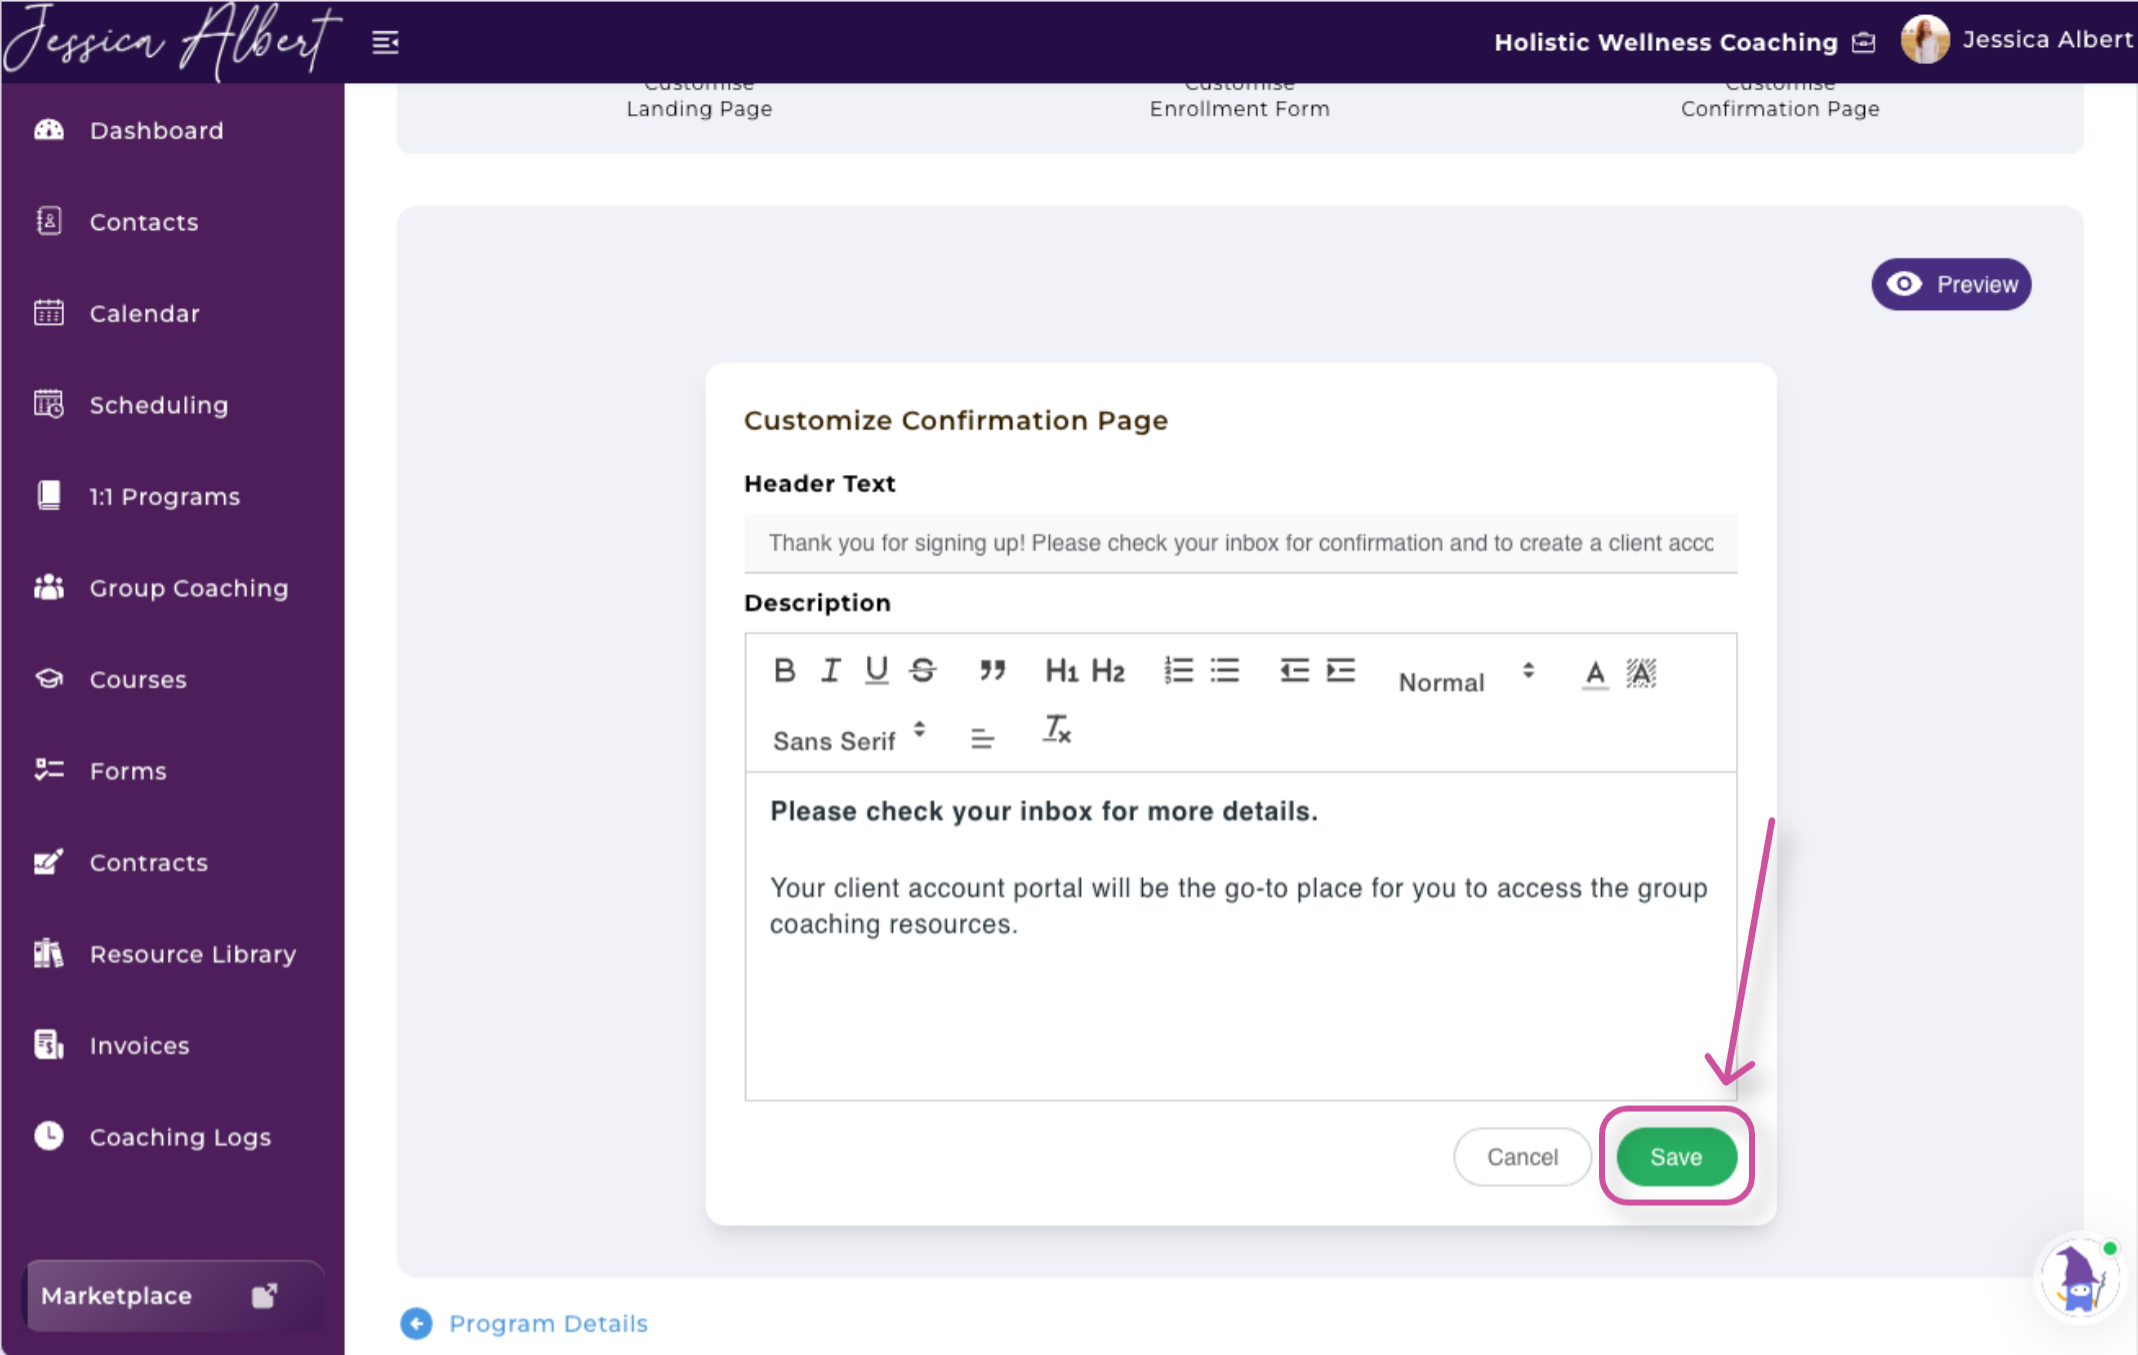
- Select the pencil icon in the top-right corner to edit the section.
3. Edit the thank-you note accordingly.
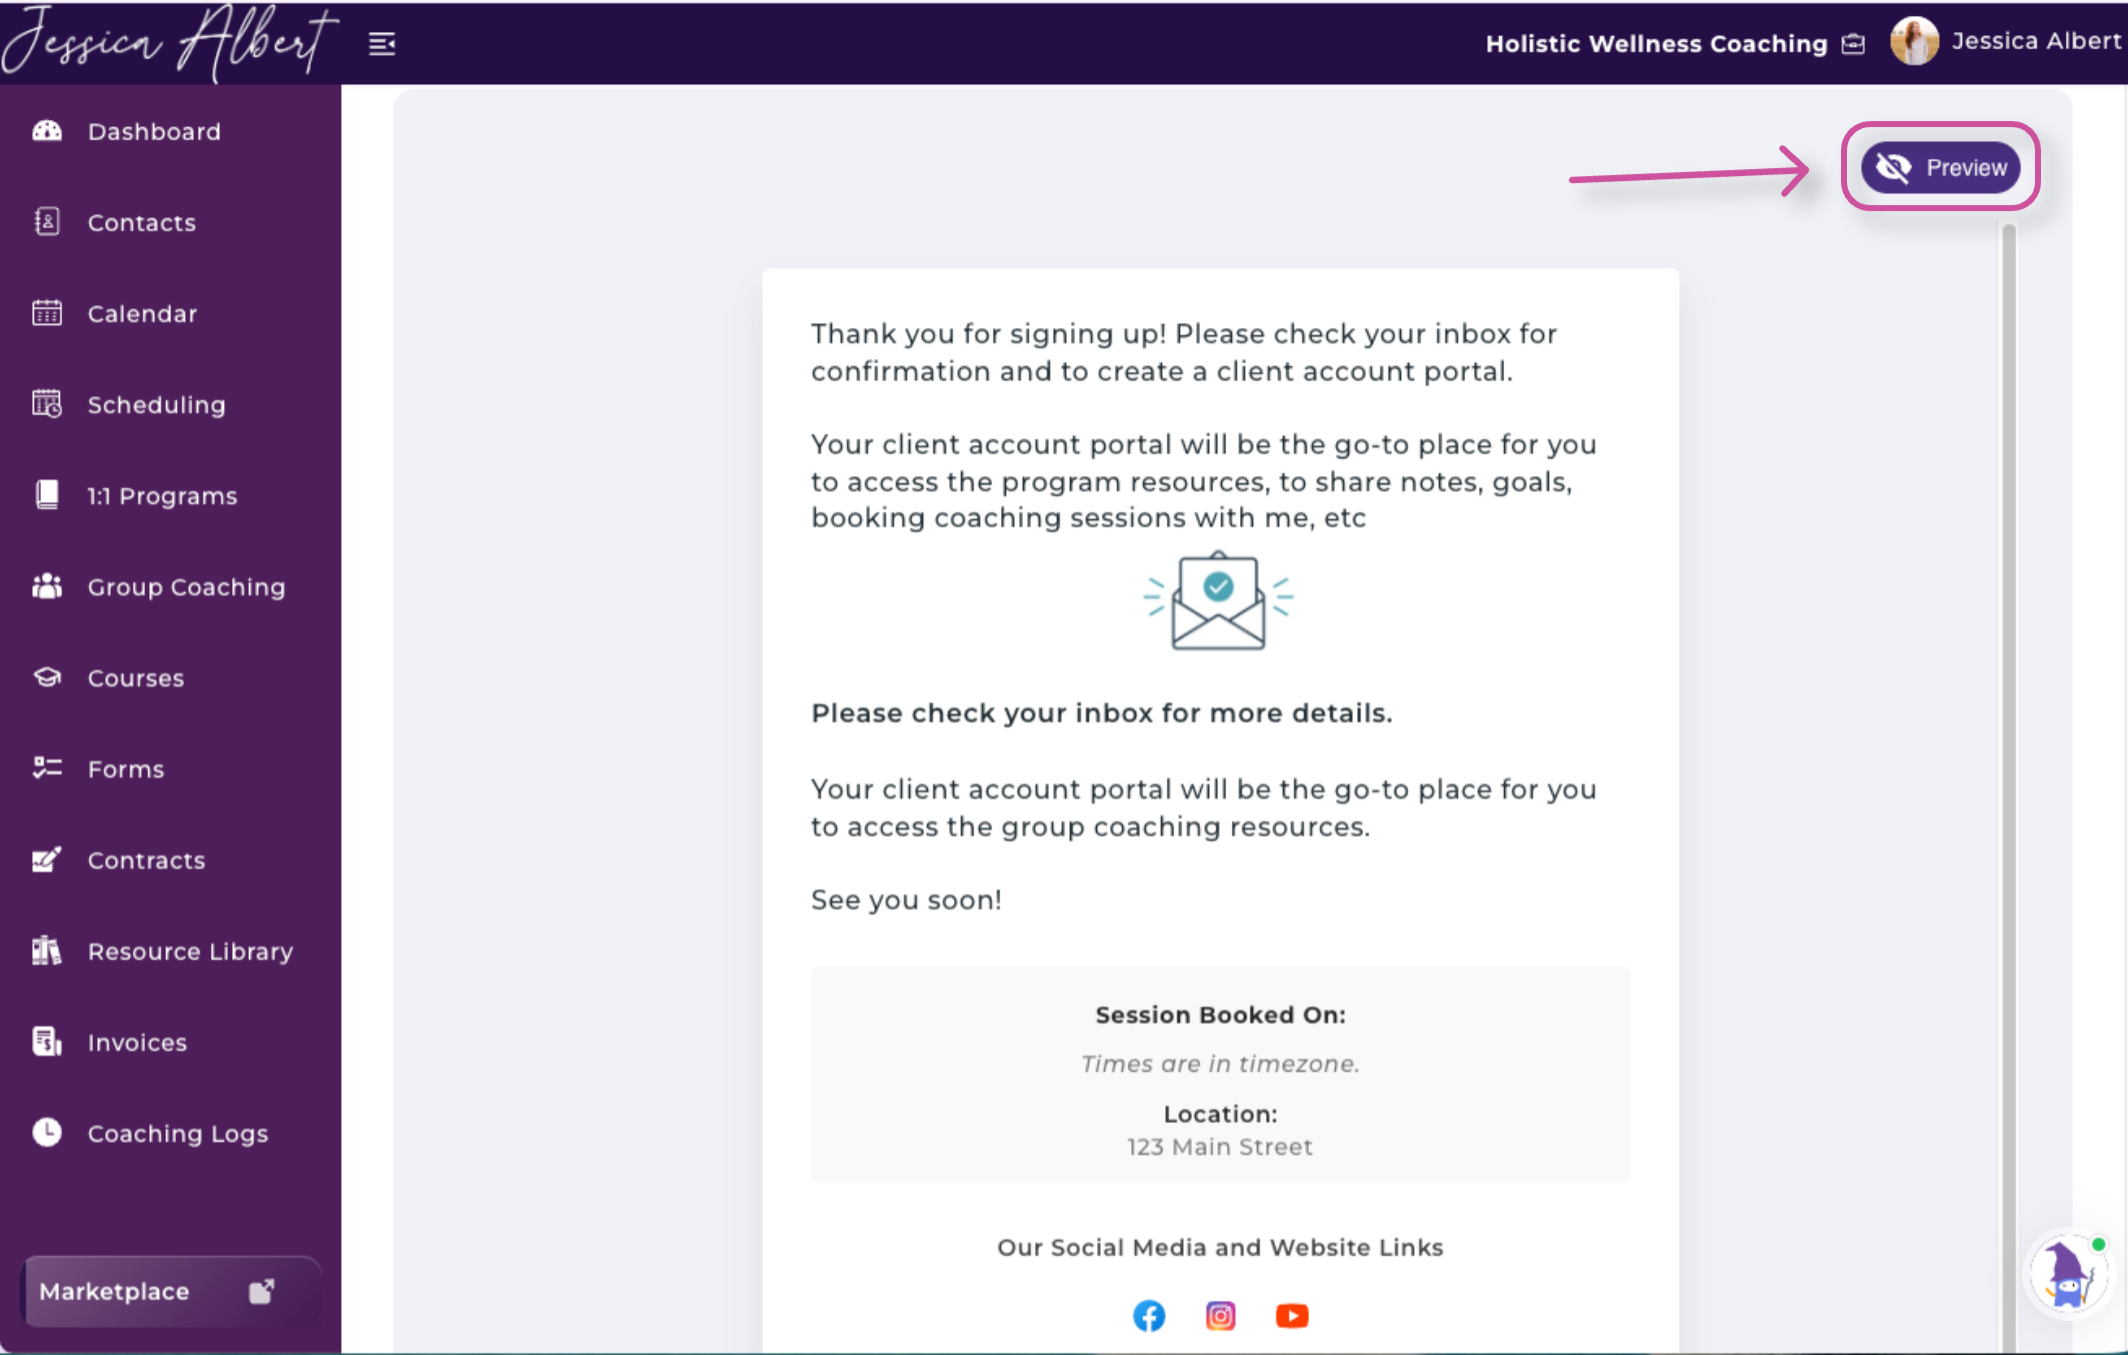
4. Select Preview to review the page from the client’s perspective.
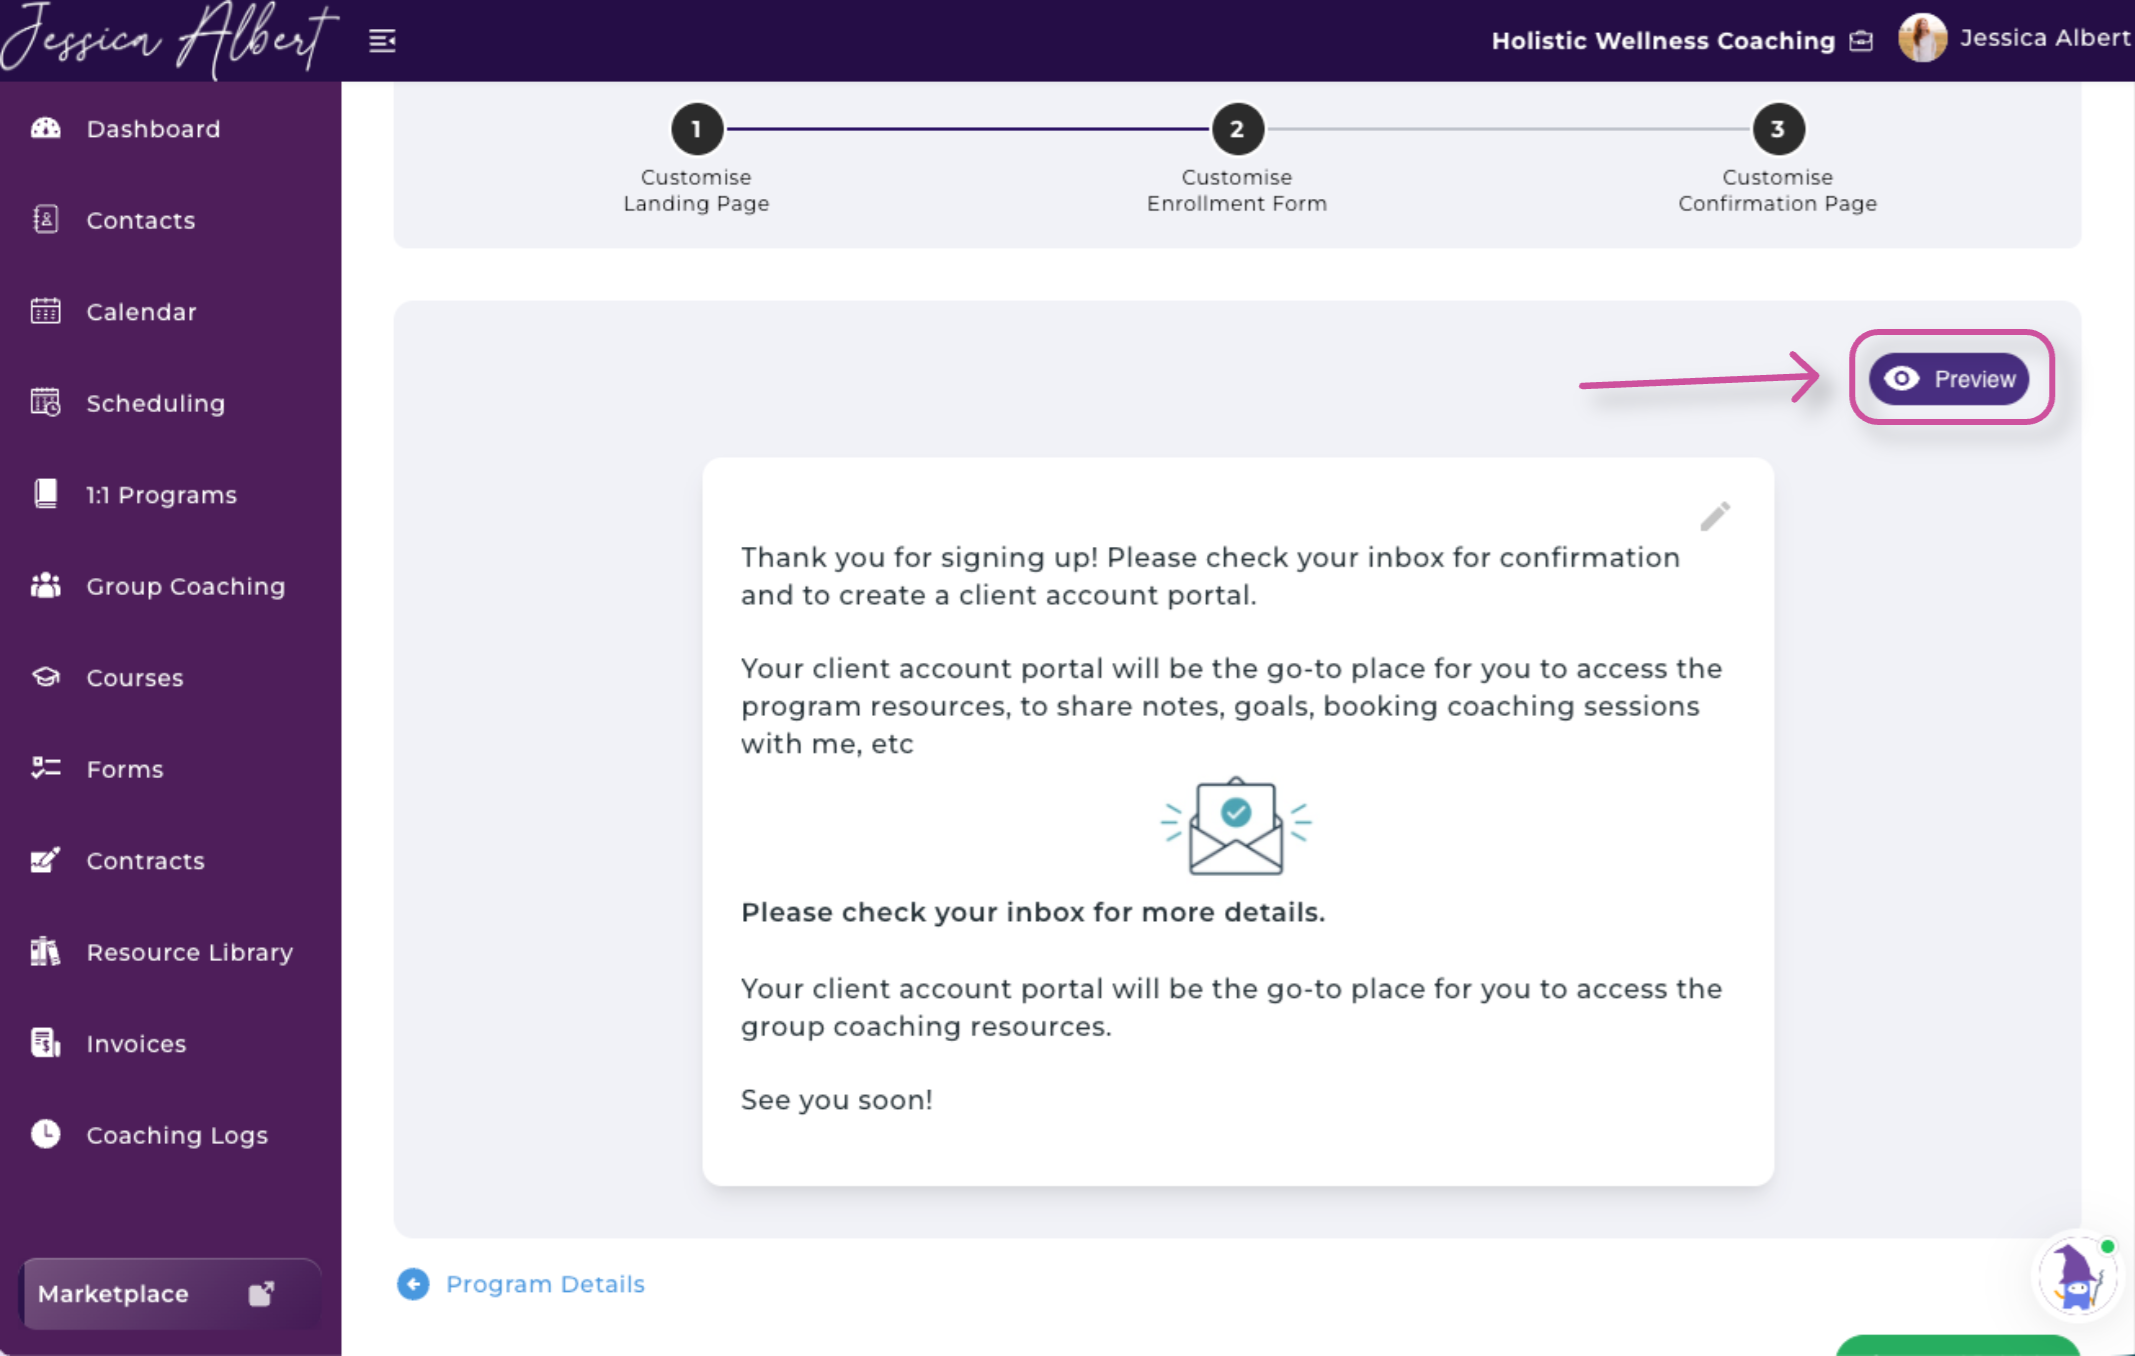
5. Make any necessary changes.
6. Press Save.
Your thank-you note may include:
- A warm welcome to the program
- Confirmation that enrollment was successful
- A reminder to check their email
- Details about forms, contracts, or resources they still need to complete
- Your contact information in case they need assistance
Save and Publish Your Program
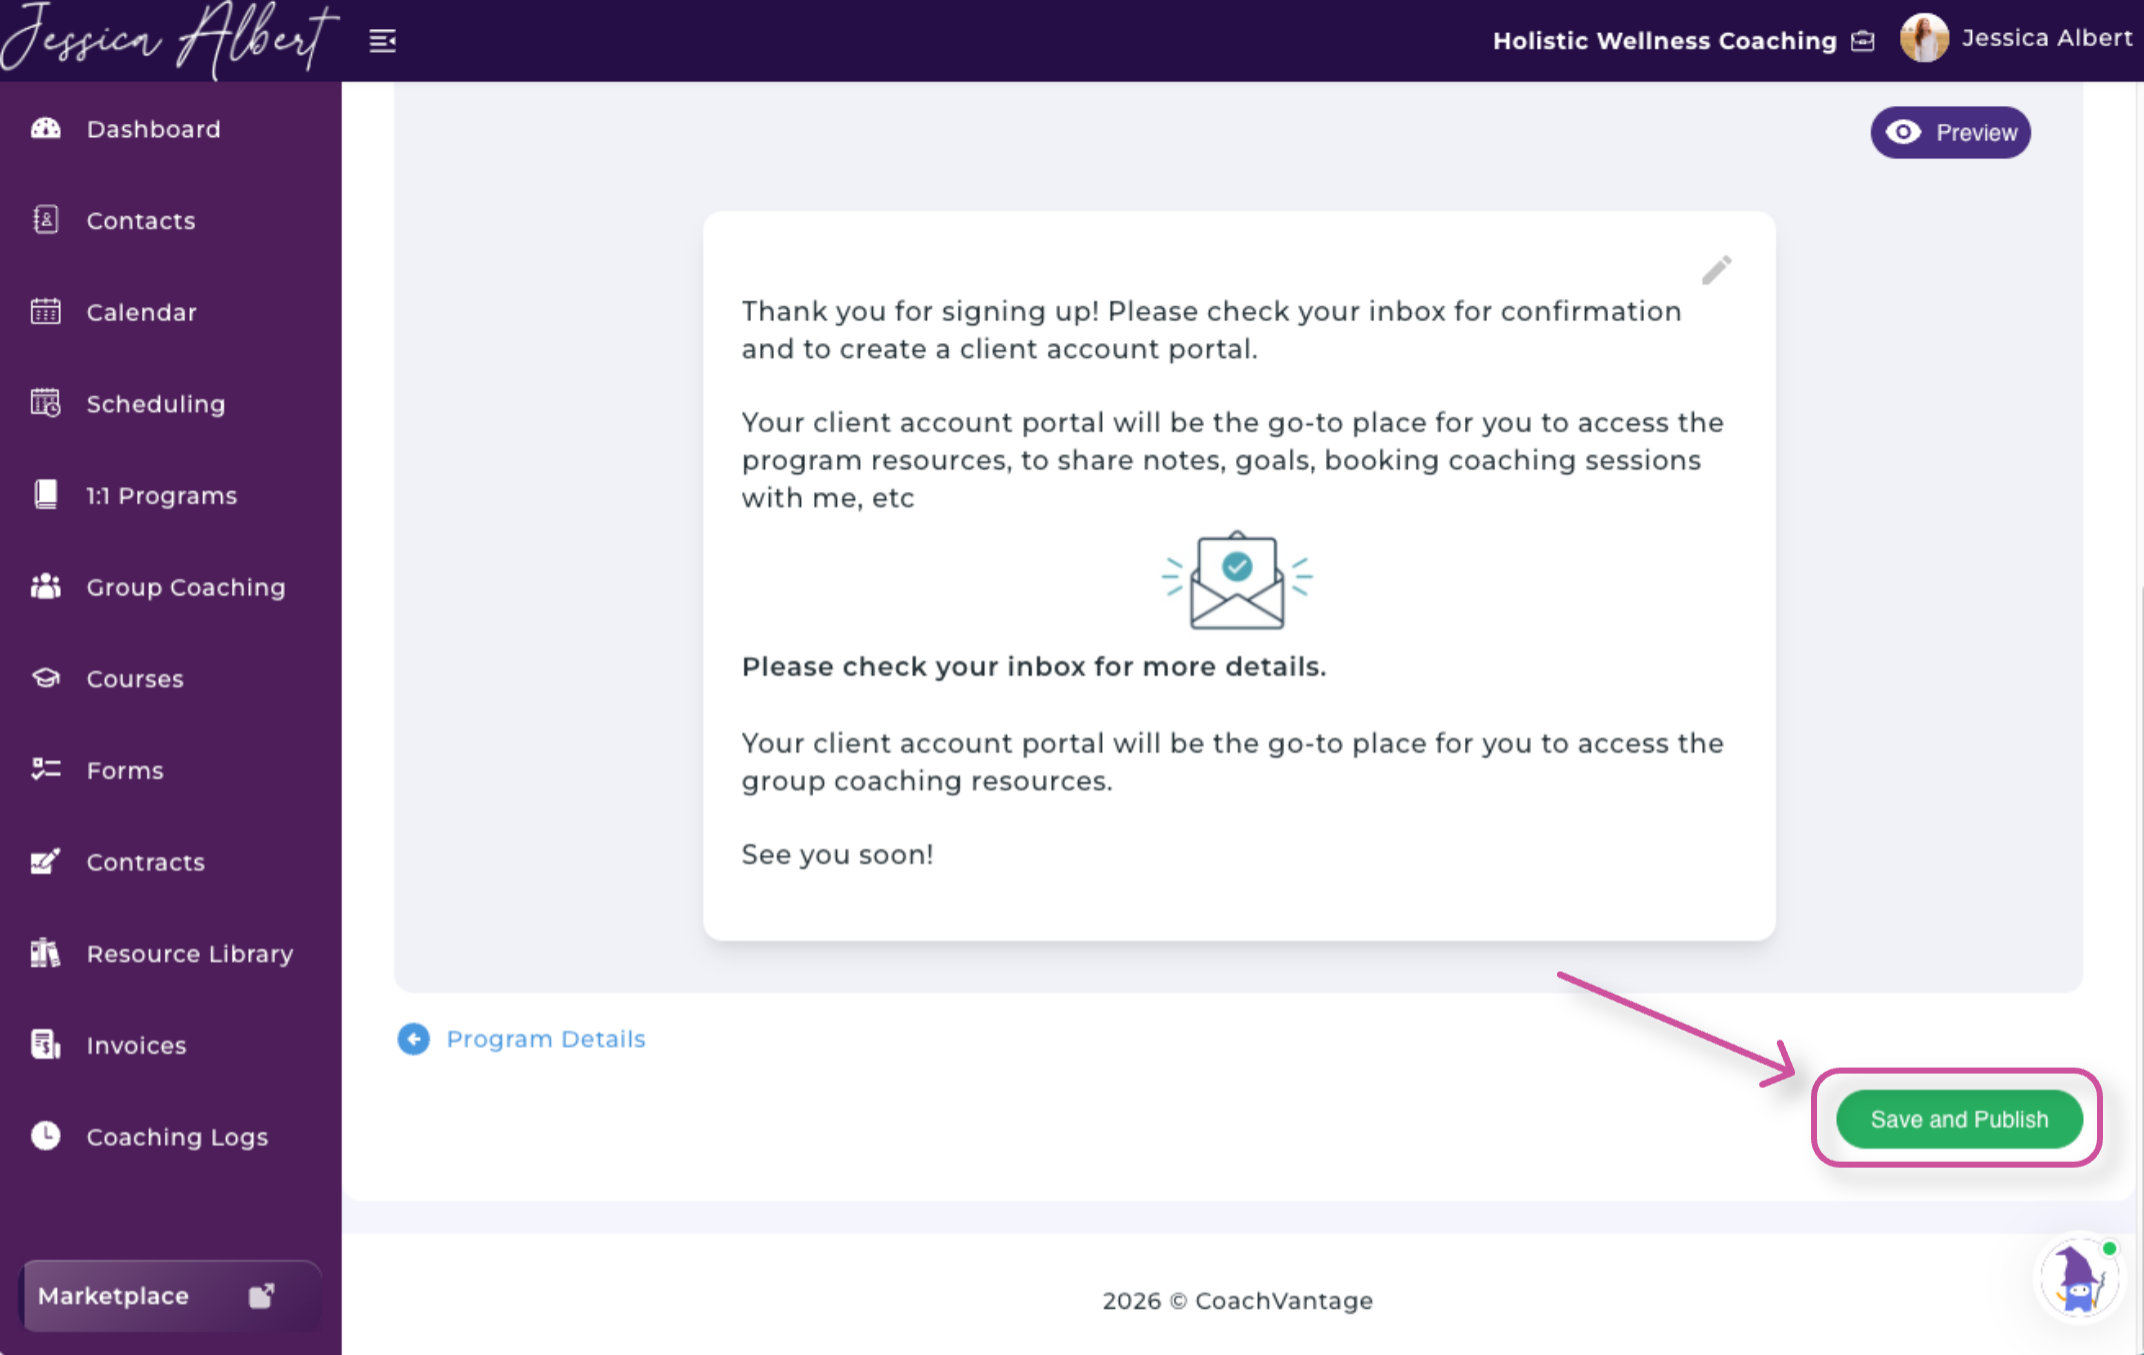
Once you have customized your landing page, configured the enrollment form, and edited the confirmation page, review each section to ensure everything is accurate and ready for prospective clients.
When you are ready to launch, select Save and Publish.
Congratulations—your 1:1 program is officially ready to share! CoachVantage’s 1:1 Programs feature makes it easy to seamlessly create, organize, and publish professional coaching programs—all in one place.
As your business grows, you can create multiple 1:1 program offerings tailored to different client needs, goals, or stages of their journey. Offering clients more ways to work with you can help you showcase the full range of your expertise, reach a broader audience, and create new opportunities to grow your coaching business.